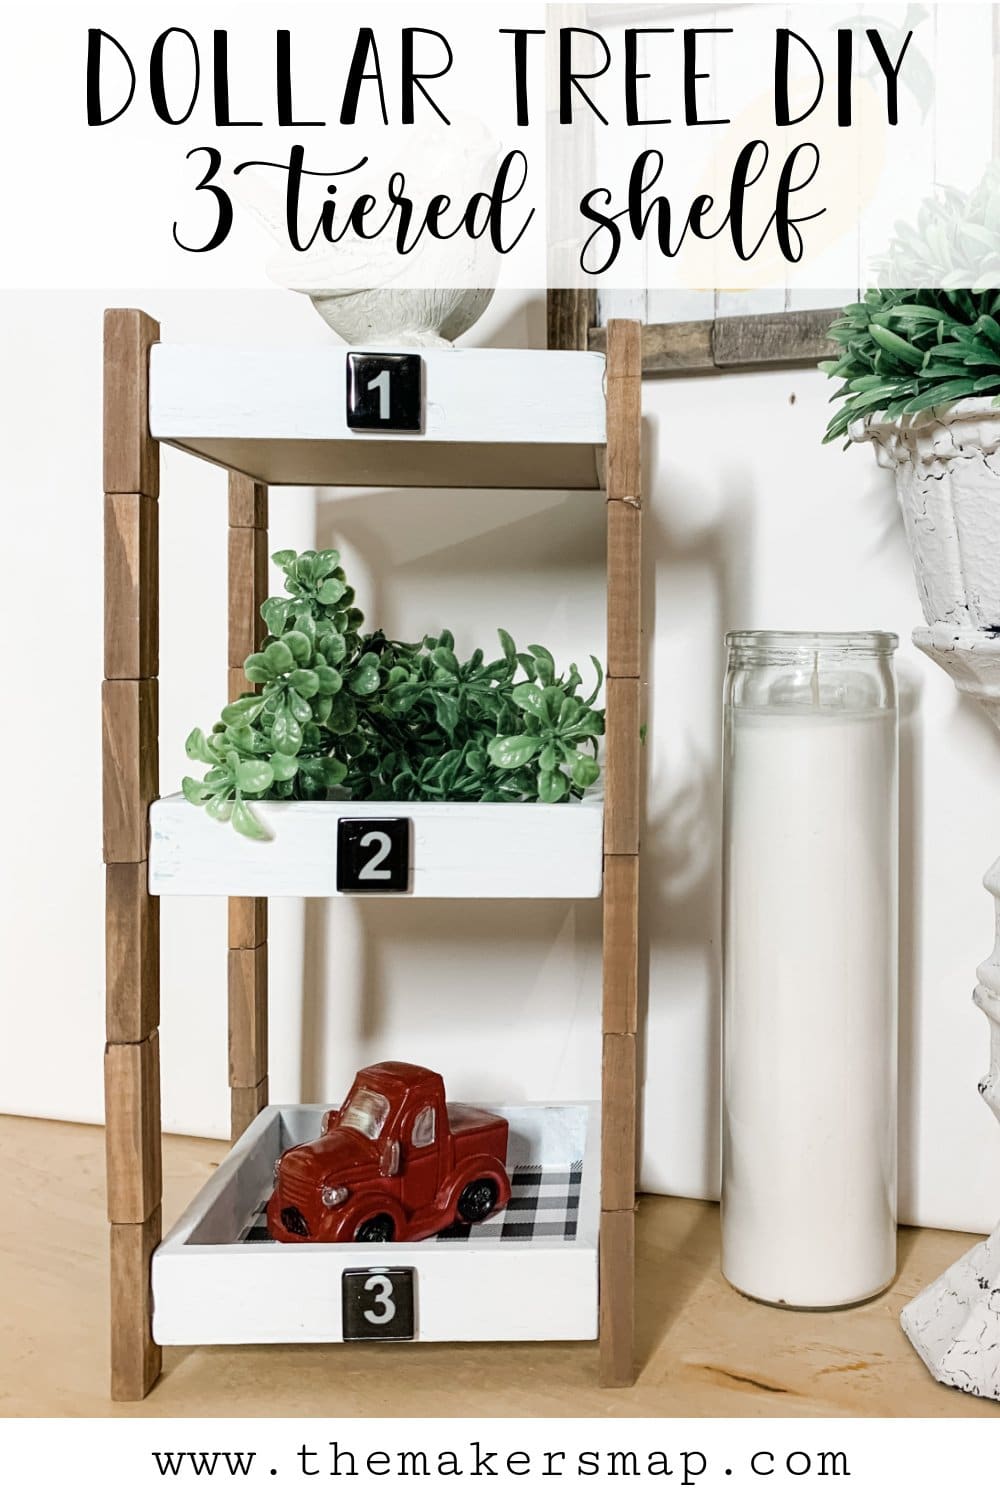
How to Make a Rustic Dollar Tree DIY 3 Tiered Shelf
Have you ever made something that turned out so amazing that you just had to make it again? That’s what happened with this Rustic Dollar Tree DIY 3 Tiered Shelf I made!
I am in love with this easy and adorable functional DIY, and I can’t wait to show you how to make a Rustic Dollar Tree DIY 3 Tiered Shelf!
I hope you enjoy this DIY tutorial and are inspired to start crafting!
If you want to see the full supply list or video tutorial, just scroll to the bottom of this page!
Let’s get started
The sign boxes that I used for this DIY Dollar Tree shelf had little inserts that I had to remove. This was an easy step, and all I had to do was pull the inserts out.
There were little blocks underneath the inserts, and I couldn’t just use my hands to pull them off. Instead, I used a pair of pliers and a paint scraper to remove them from the Dollar Tree sign boxes.
Next, you need to get them all a solid color. I used a chippy paintbrush and Folkart Java Chalk Paint to paint the face and sides of the sign boxes.
You don’t have to paint the inside of the sign boxes because we are going to decoupage scrapbook paper inside.
Allow the brown paint to dry before moving on. I like to use my heat gun to speed up the drying process, but I know not everyone has one. If you don’t you can also use a hairdryer on the low cool setting to dry the paint quickly.
If you want to see the full supply list or video tutorial, just scroll to the bottom of this page!
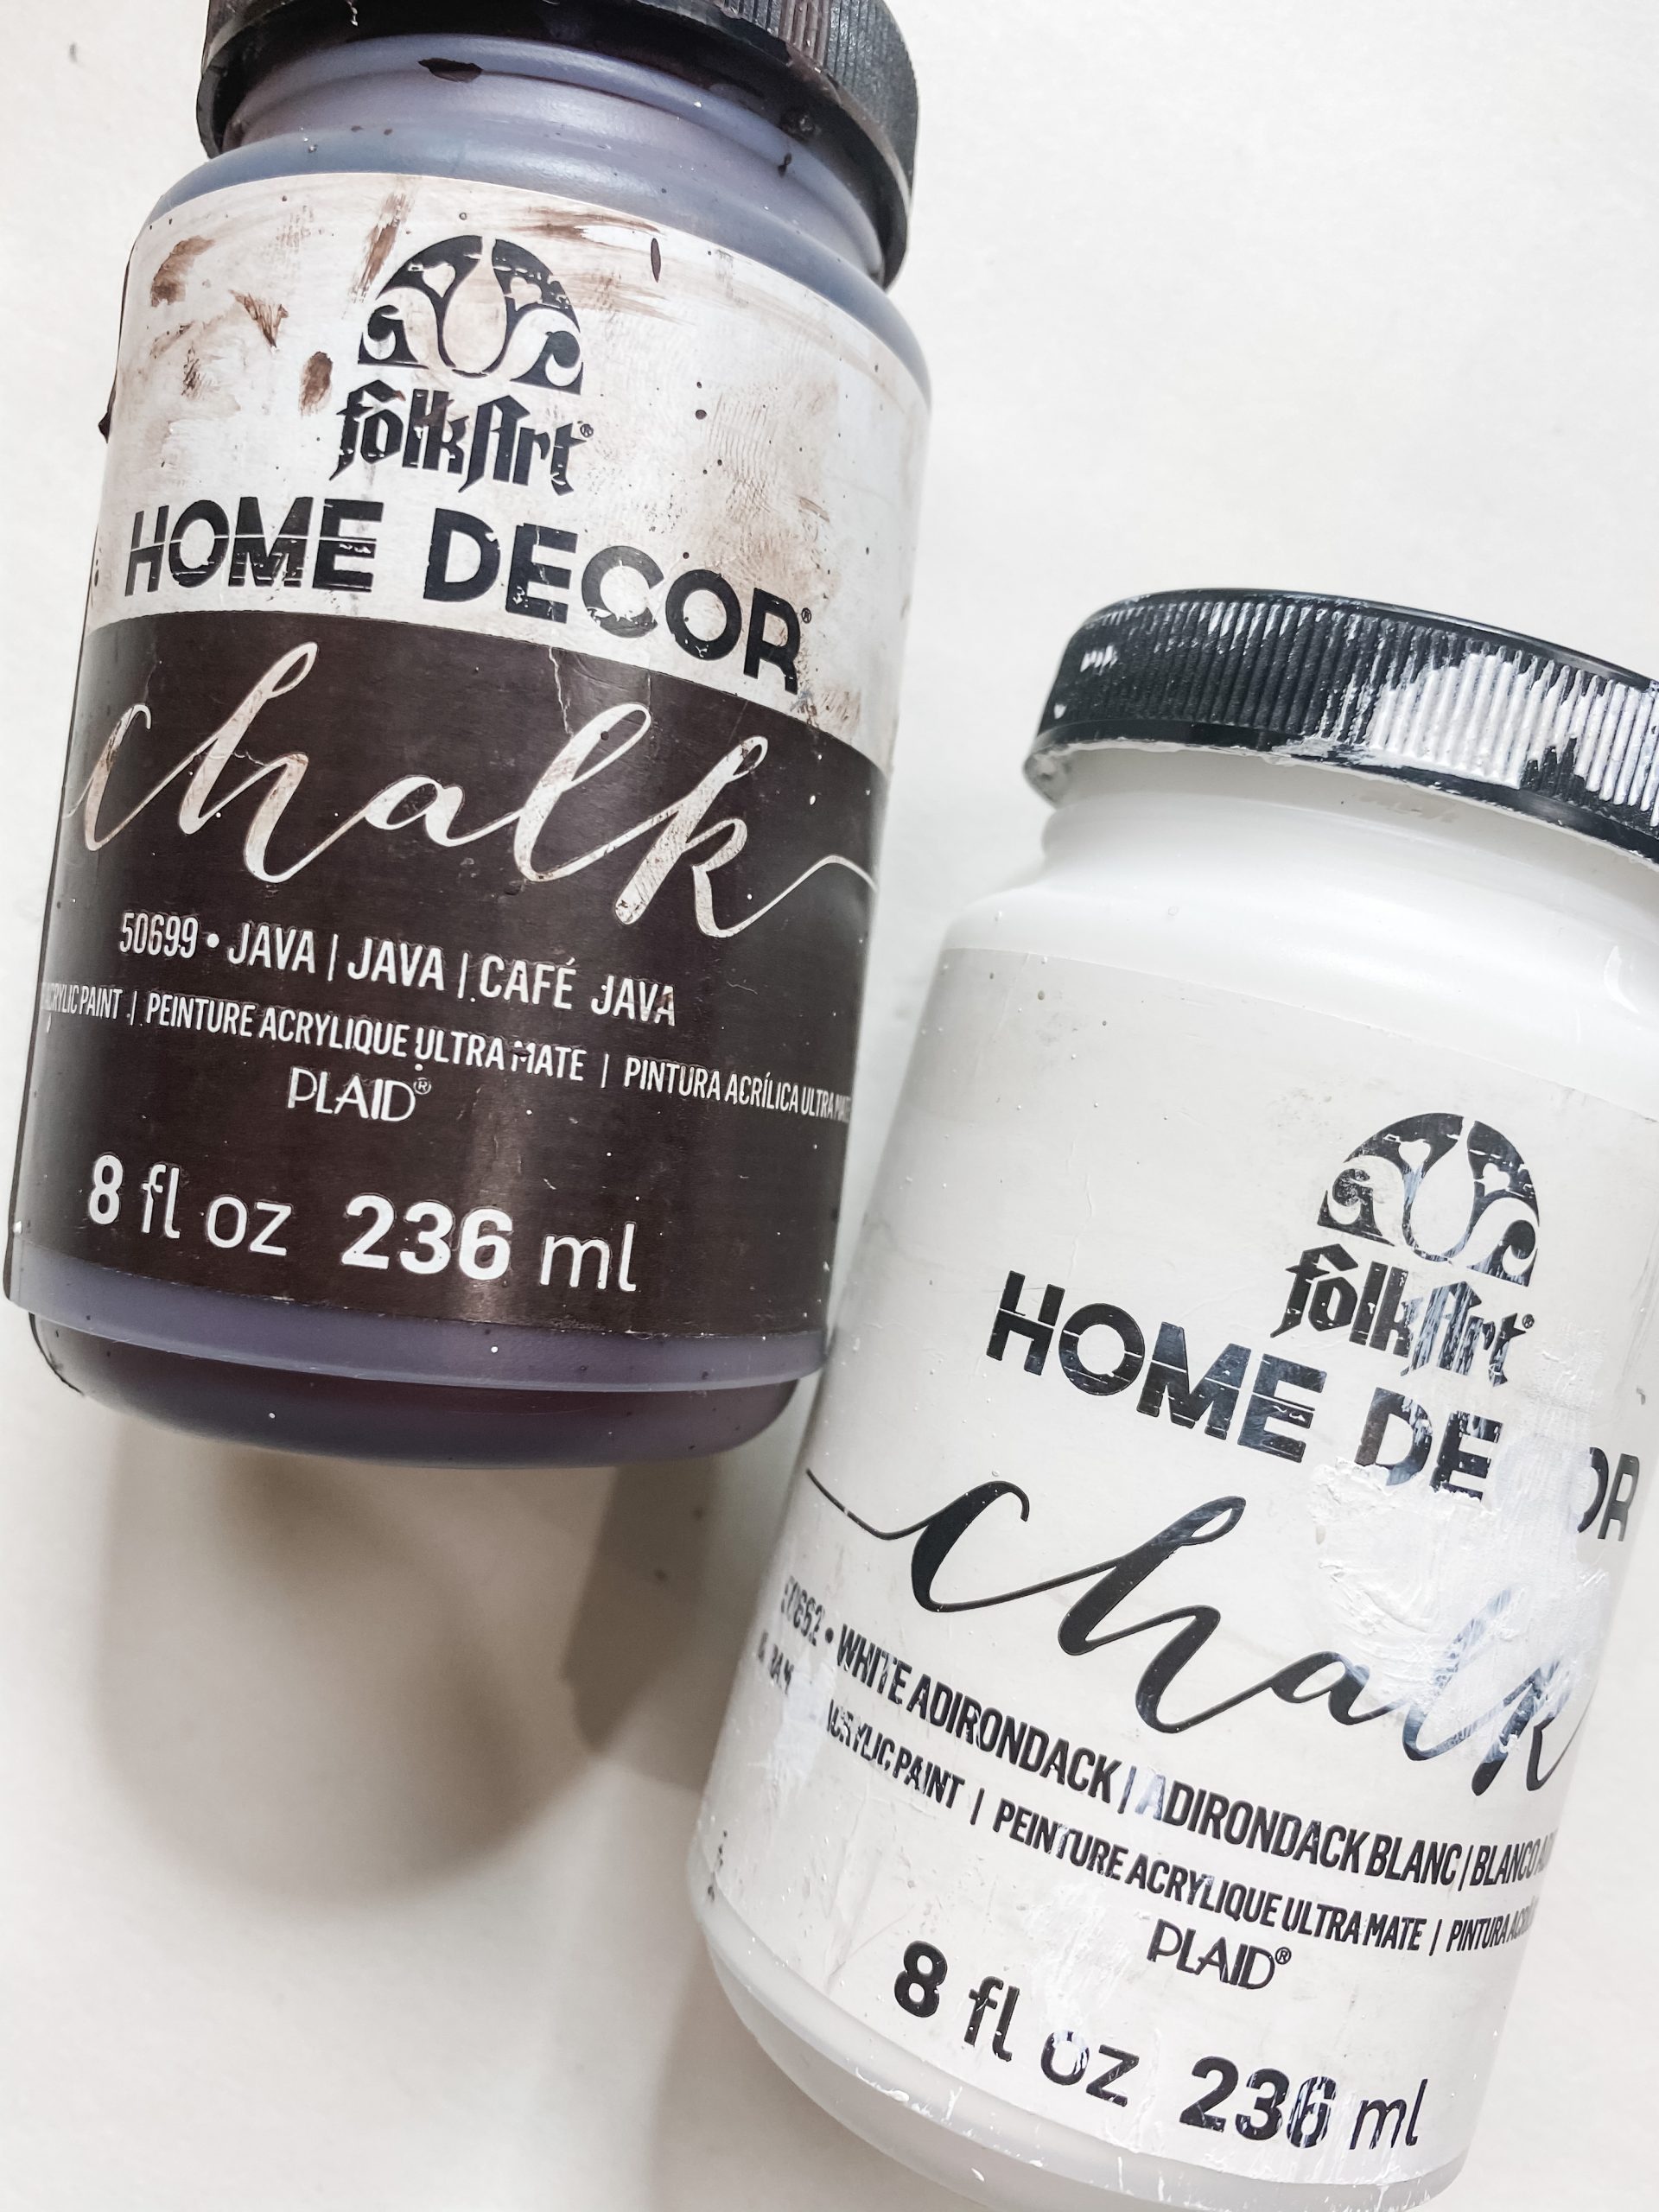
Once the brown paint was dry, I used a clean, dry chippy paintbrush and Folkart White Chalk Paint to lightly paint over the brown coat of paint. If you keep a light hand, you’ll get an effortless distressed look!
If you go in with too heavy of a hand, you can always go back over the white paint with a sanding sponge to get the distressed finish you’re looking for!
How to decoupage
Once your white paint is dry, you’re ready to decoupage the inside of your Dollar Tree sign boxes! I’ve made this DIY shelf twice, so I’m going to tell you what I’ve used for each of them.
Feel free to customize and personalize this DIY any way you want! Get creative!
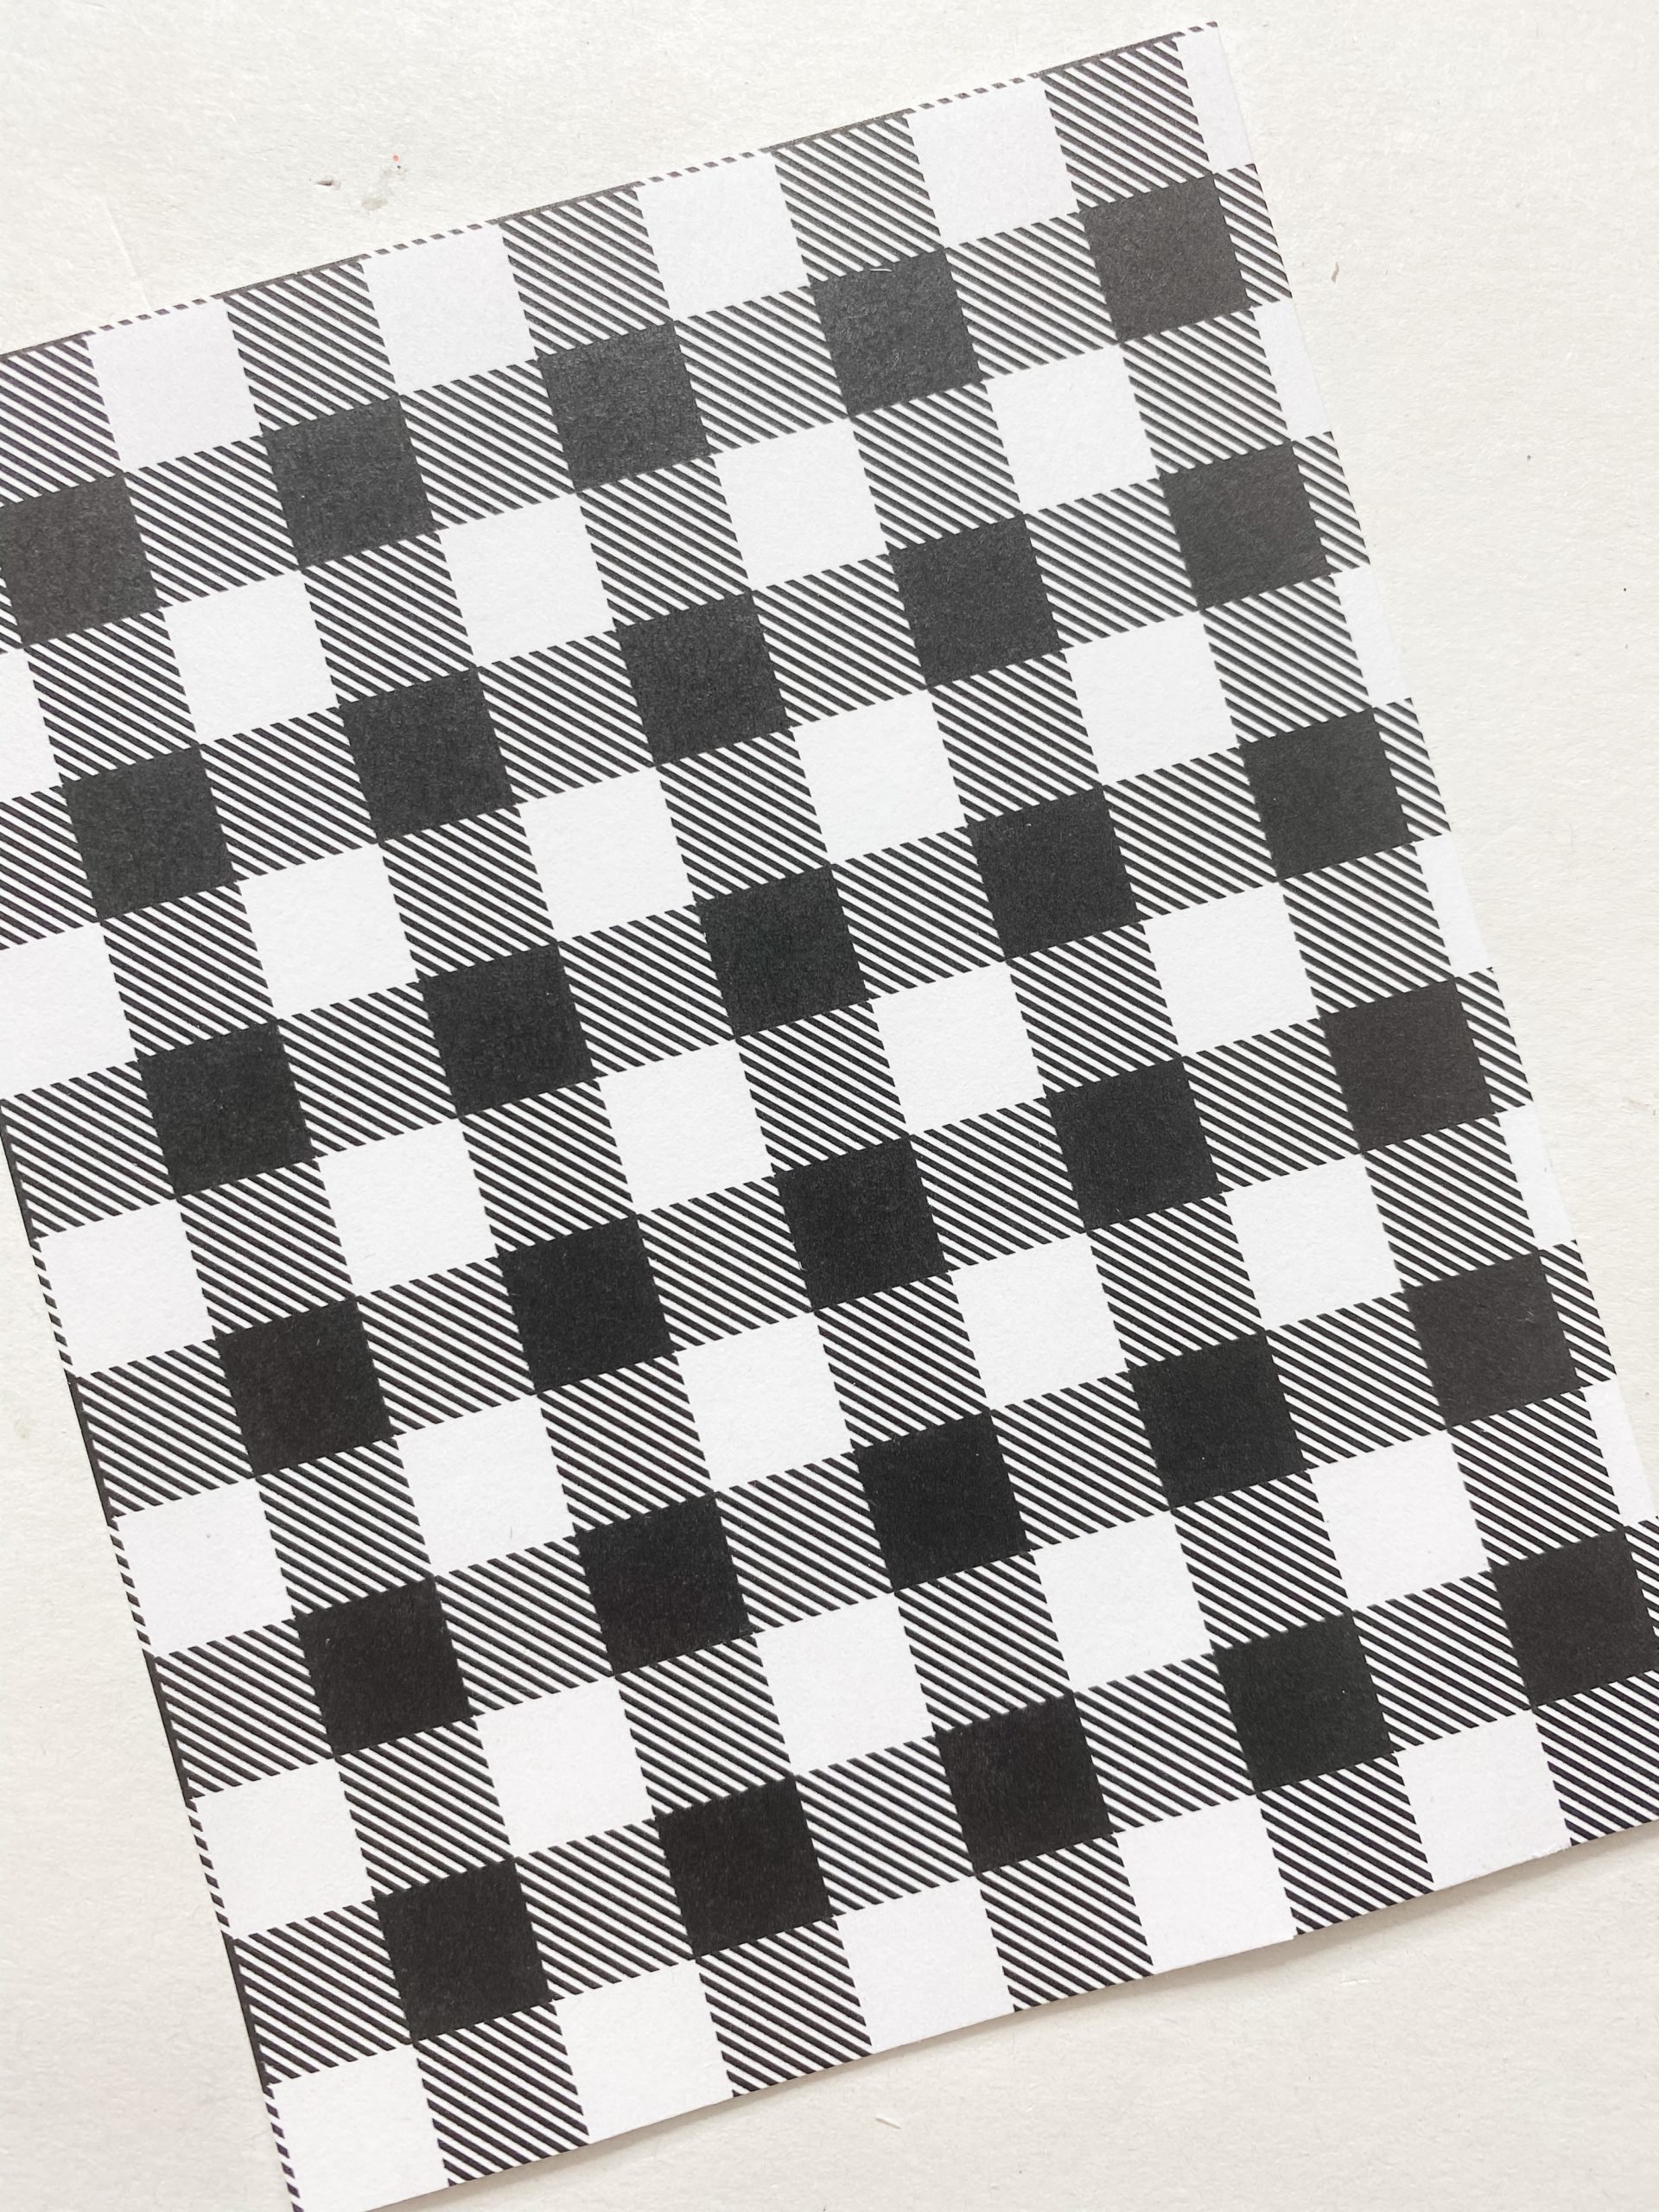
I’ve used both buffalo check scrapbook paper and white polka dot scrapbook paper for my shelves. Choose your scrapbook paper pattern, and cut out a square to fit inside each of the sign boxes.
If you want to see the full supply list or video tutorial, just scroll to the bottom of this page!
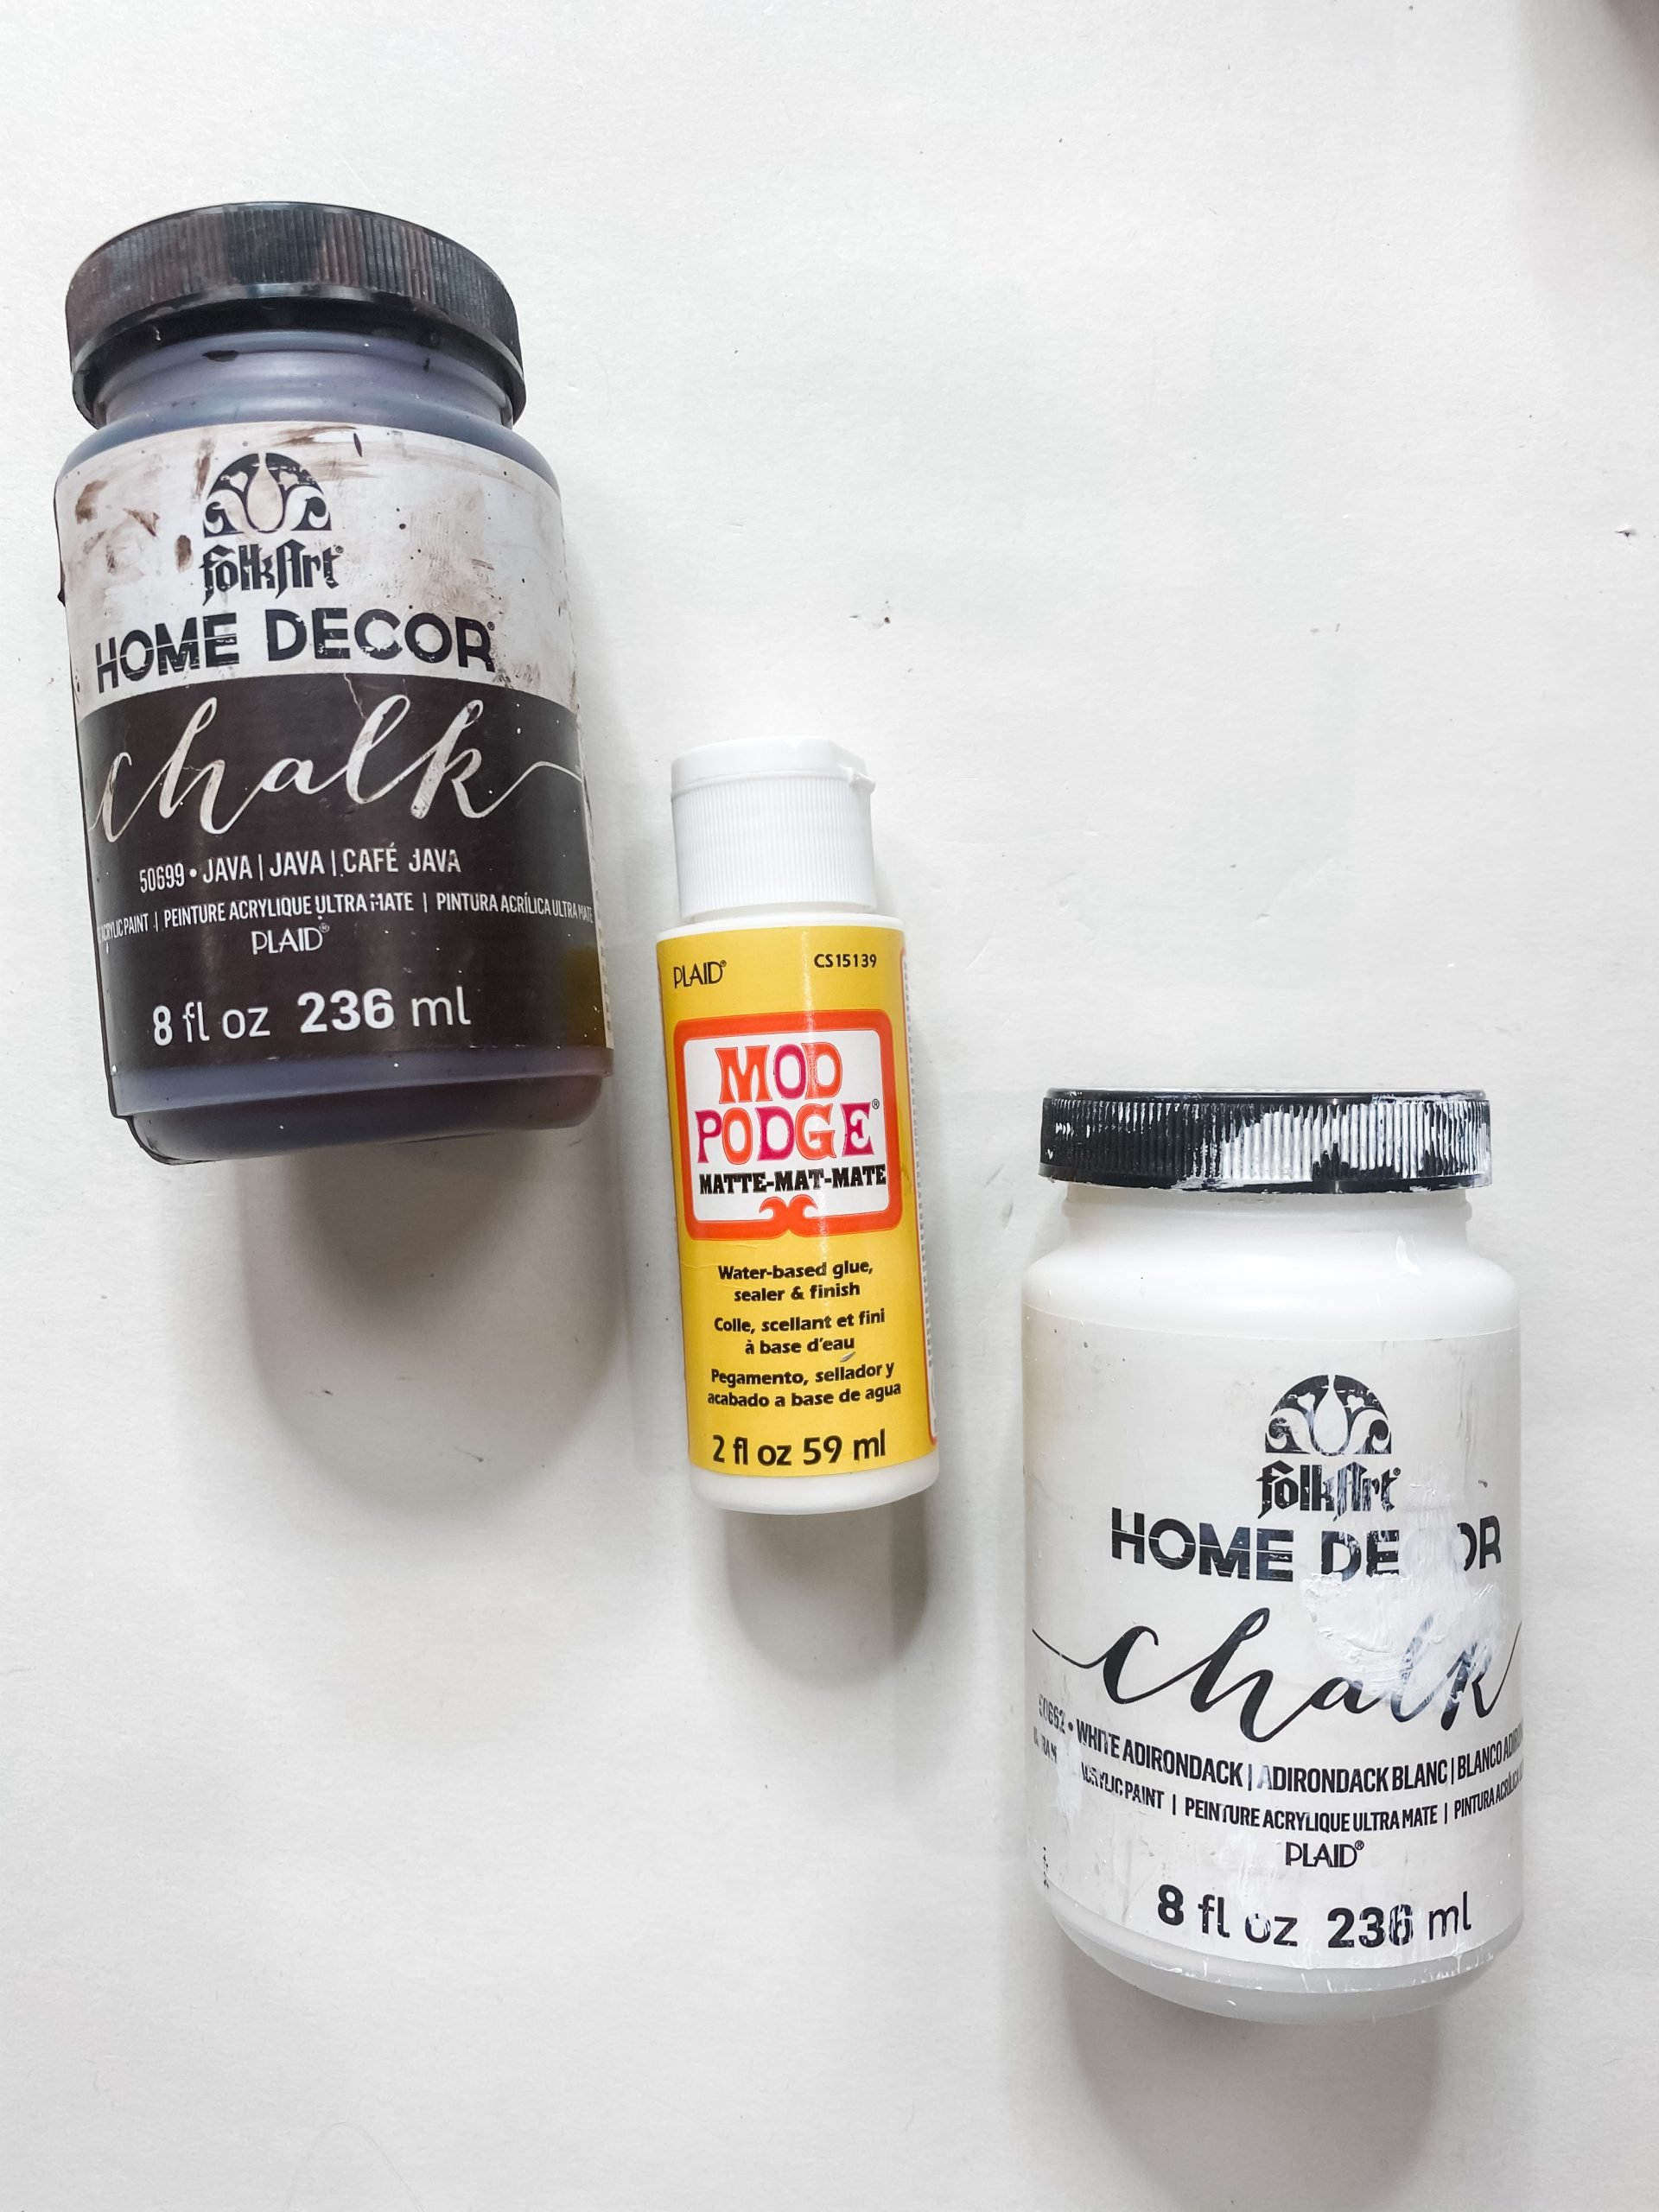
To decoupage the scrapbook paper inside the Dollar Tree sign boxes, you’re going to need some Mod Podge.
Apply a coat of Mod Podge to the inside of each sign box, and carefully place the scrapbook paper cutouts into the sign boxes.
Try your best to avoid forming any wrinkles or creases. If you see any after you place the scrapbook paper, you can take a piece of plastic saran wrap, wrap it around your fingers, and use your hands to smooth out the imperfections.
If you want to see the full supply list or video tutorial, just scroll to the bottom of this page!
How to stain wood
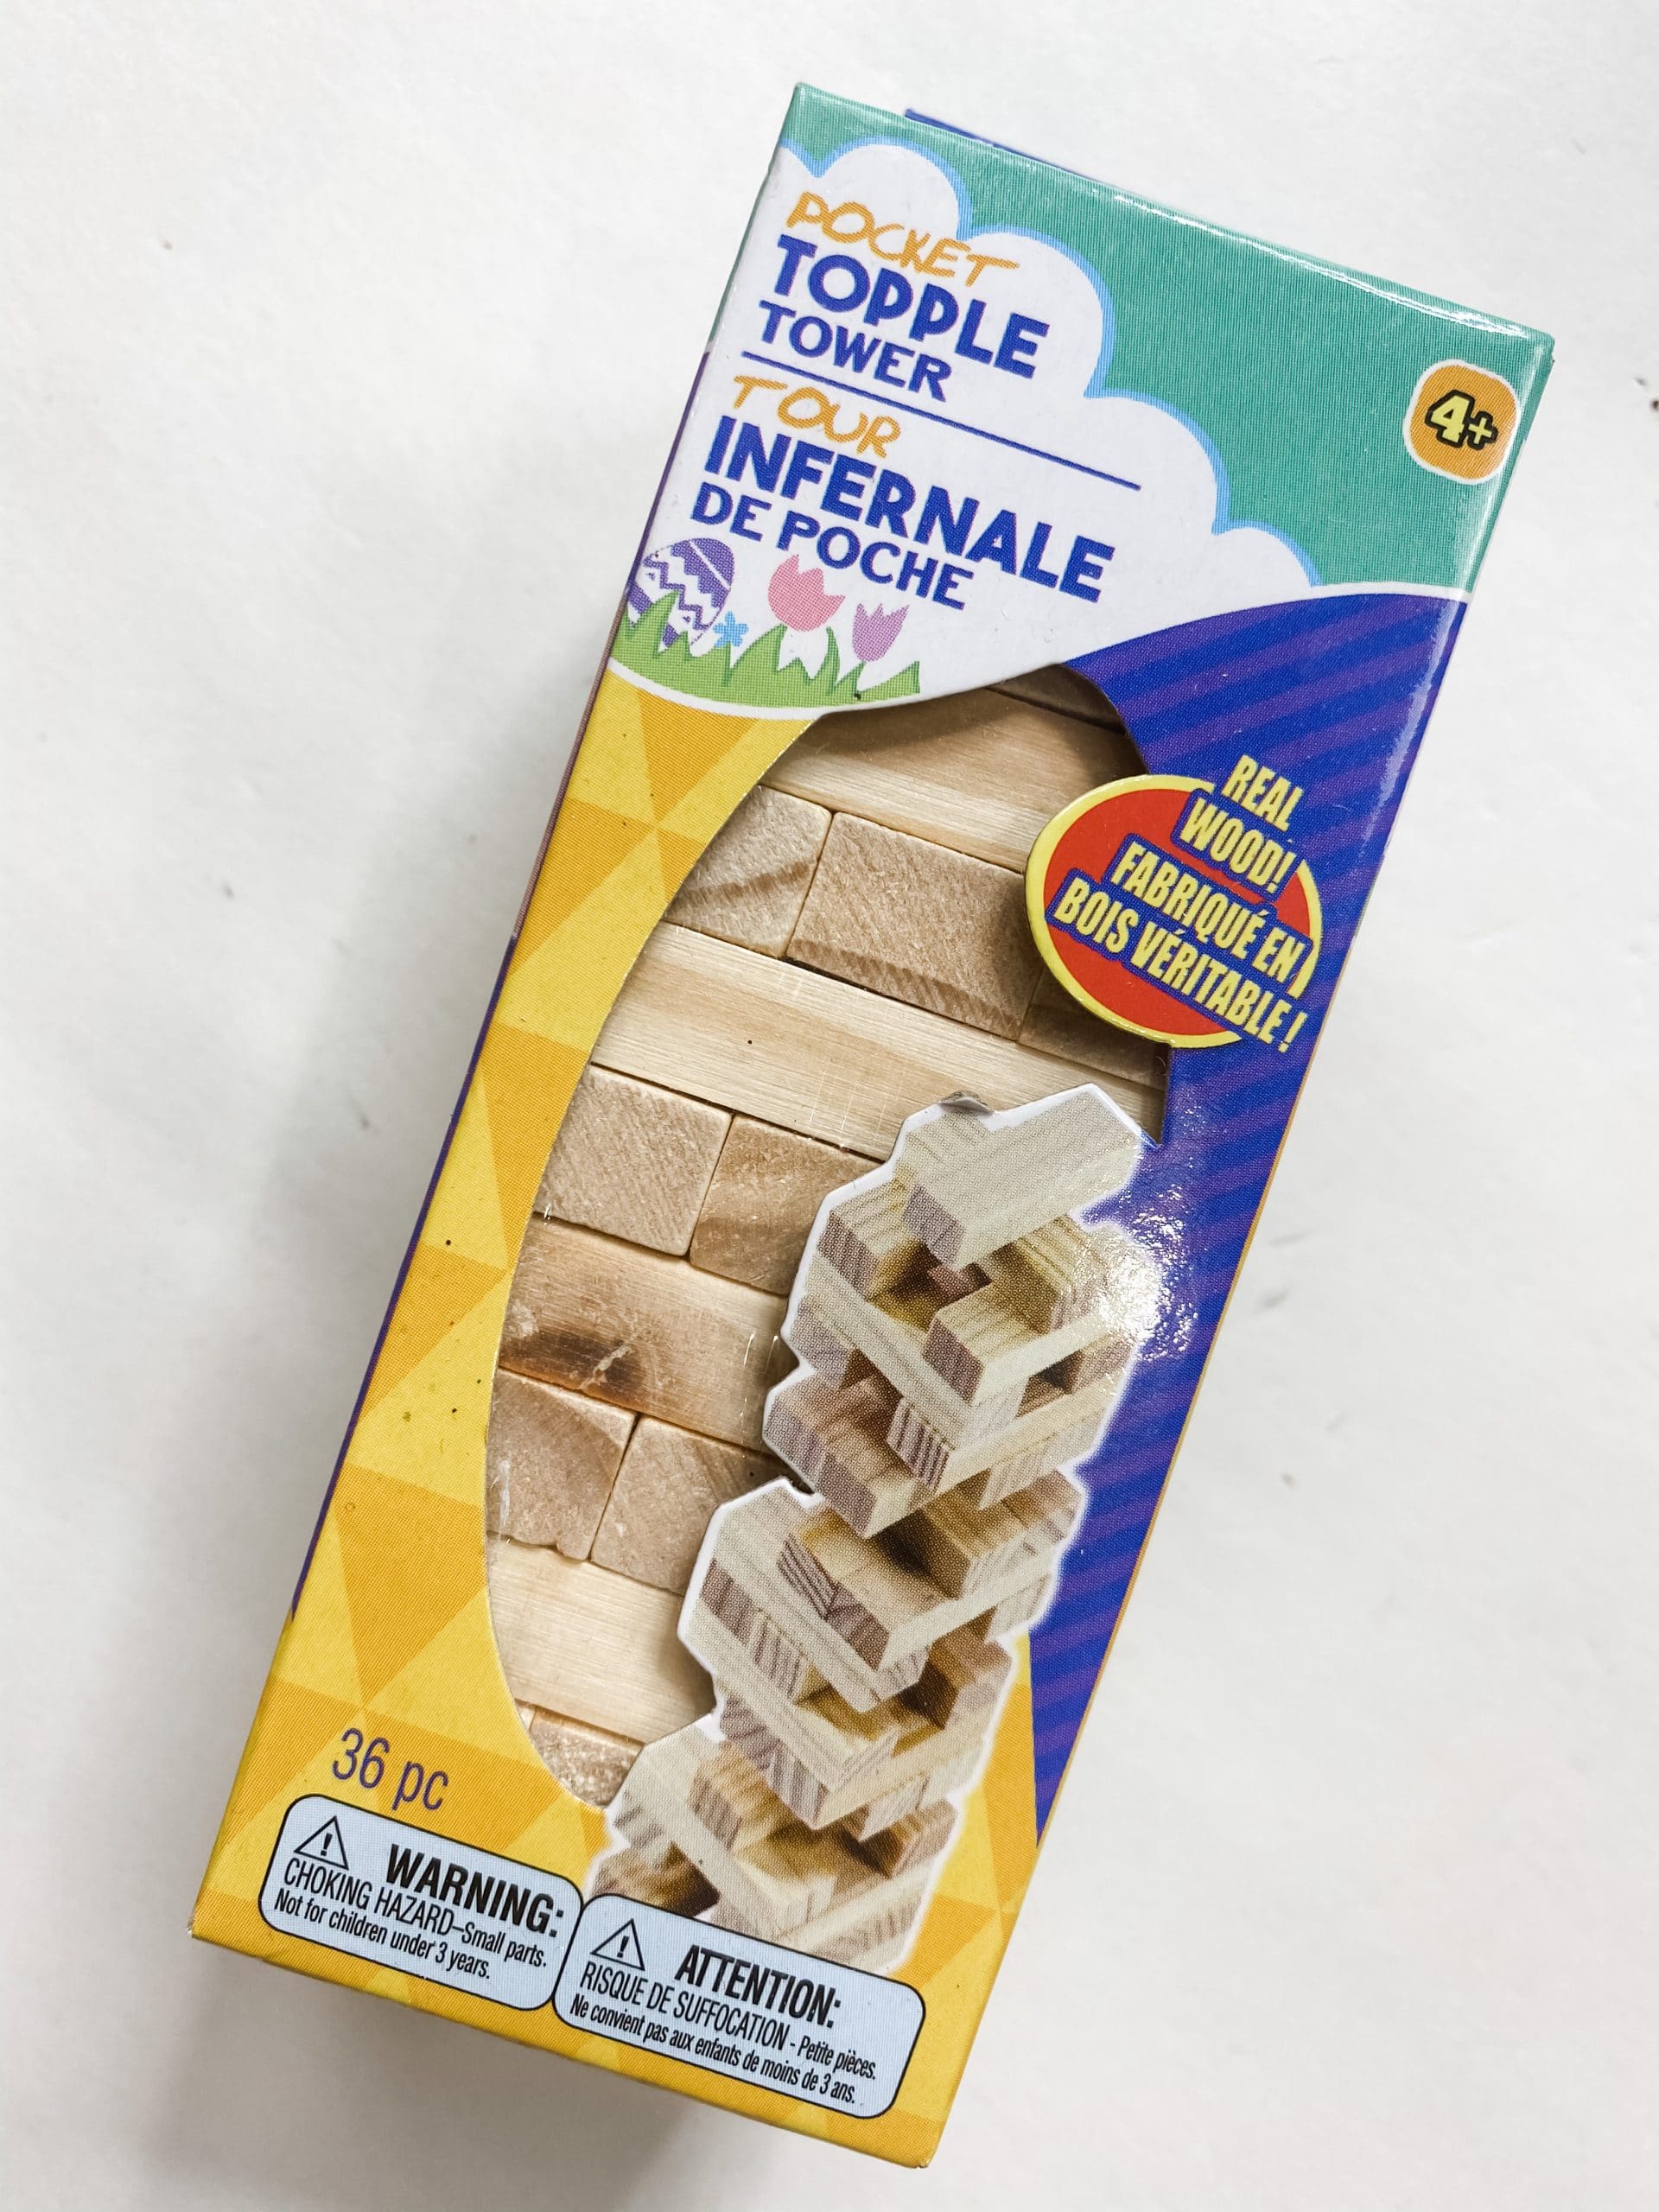
The next step to making this adorable DIY functional tiered shelf is to make the posts. I used Dollar Tree Tumbling Tower blocks for mine. Start by getting 24 blocks (6 for each post) and hot gluing them together in strips of 6.
I used an angle ruler to make sure they were glued together evenly. You can use any straight surface to keep your wood blocks in a straight line. You want the Tumbling Tower blocks to look like they were always together.

Once you have all the blocks glued together, it is time to stain them. I like to use paint to stain my wood because it is much affordable than wood stain, but there is a technique to getting a stained finish rather than a painted look when using paint to stain wood.
Start by wetting your wood. I use a spray bottle to spray the wood. This helps the wood absorb the paint and get the stained finish.
Then, pour the paint directly onto the strips of wood blocks, and spread it over the entire surface with a wet wipe.
If you want to see the full supply list or video tutorial, just scroll to the bottom of this page!
The finishing touches
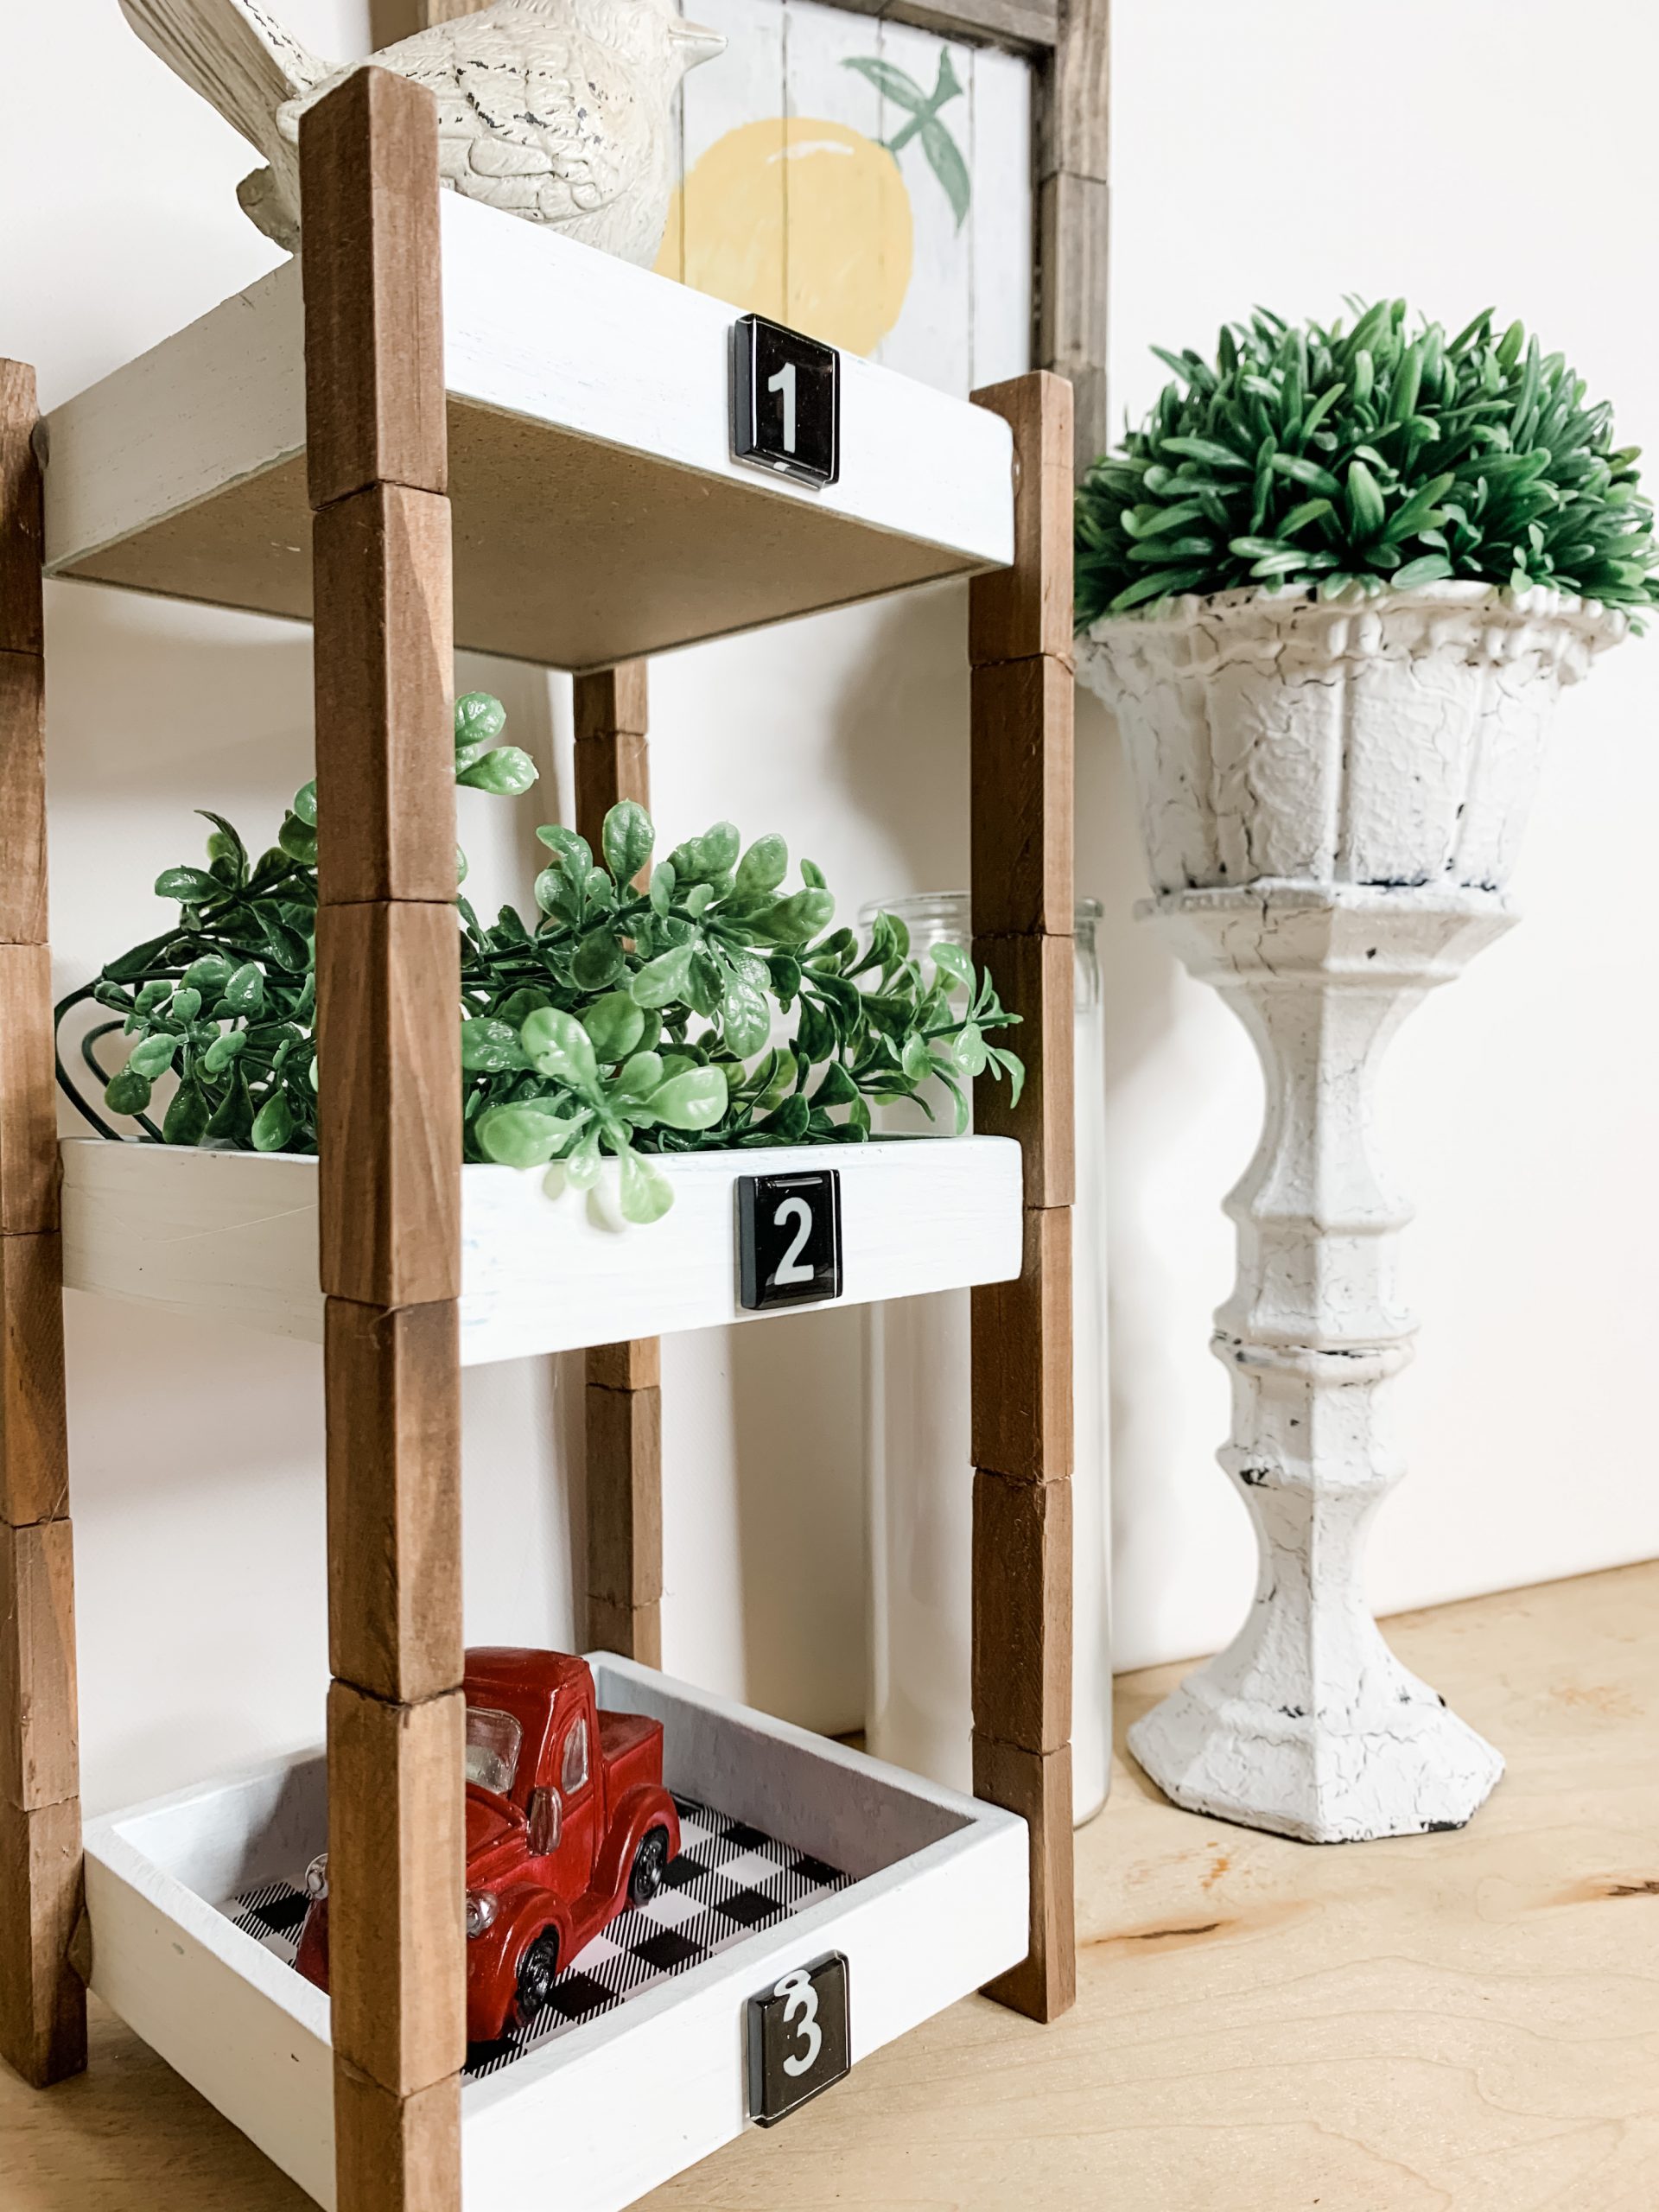
Once the stain is dry, it’s time to attach the posts to the Dollar Tree sign boxes. Lay two of the posts down and hot glue each of the sign boxes to those two posts first.
Then, hot glue the final two posts in place on the other side of the sign boxes. Get them as level as possible.
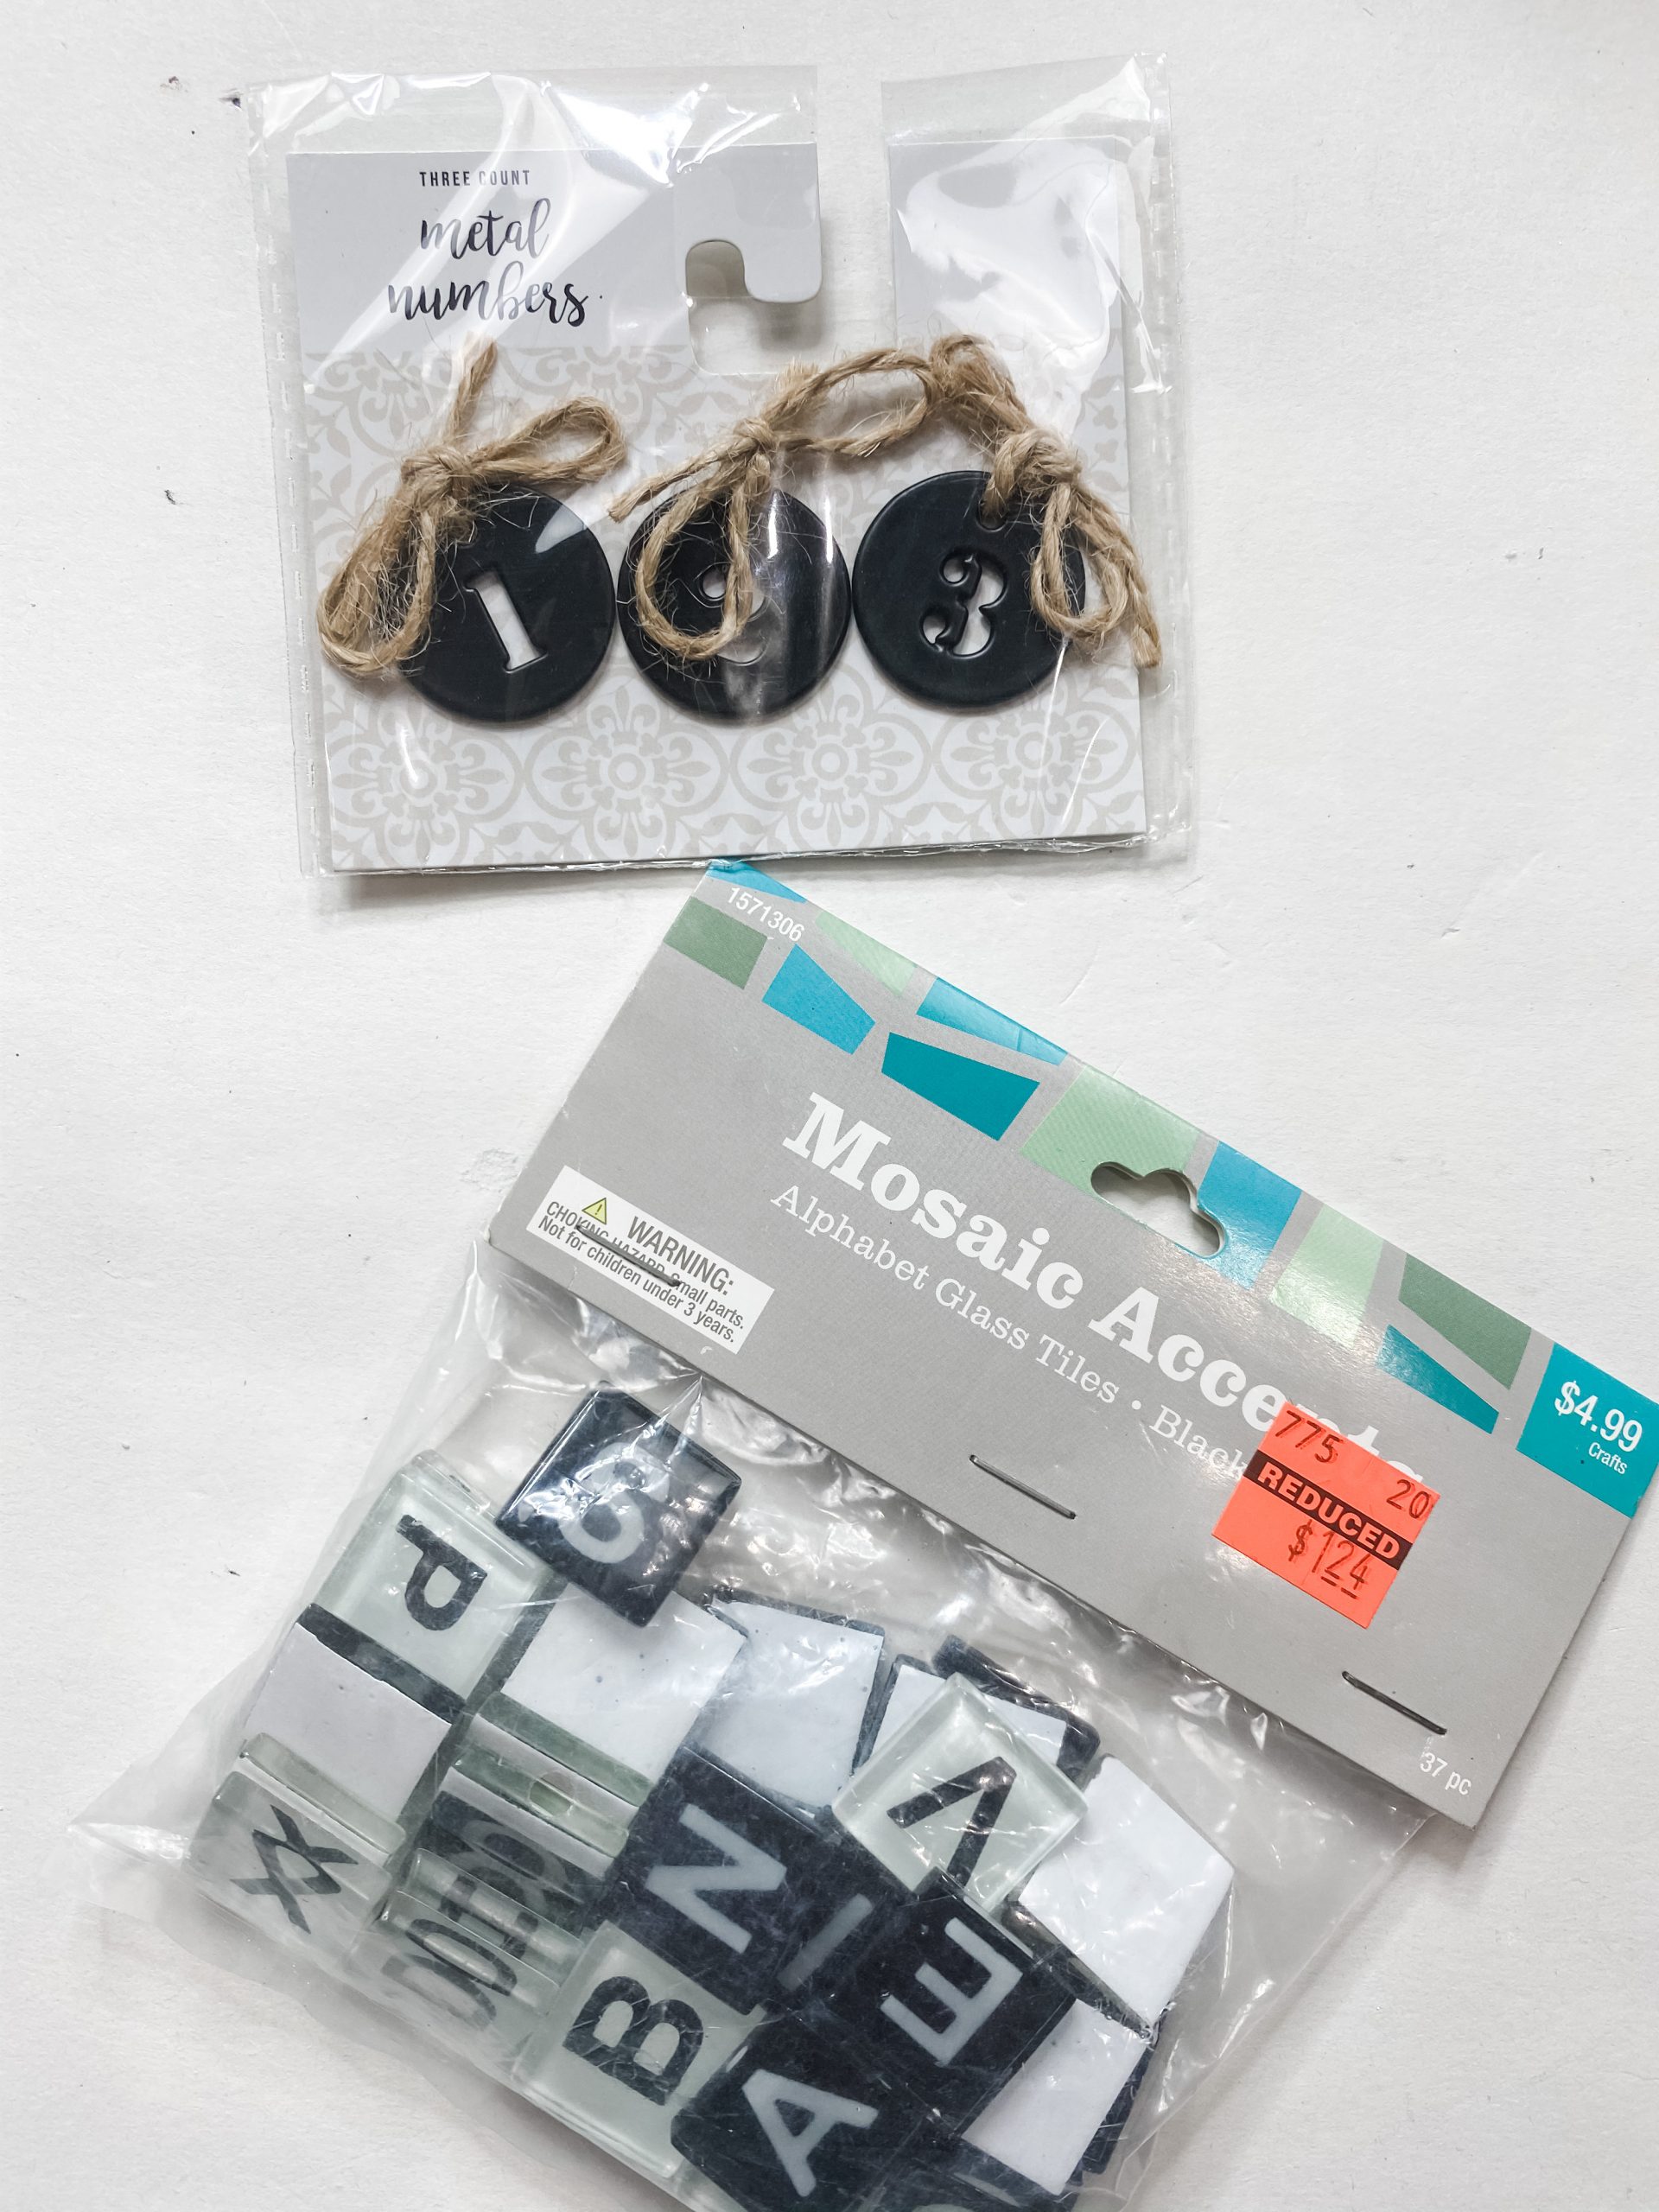
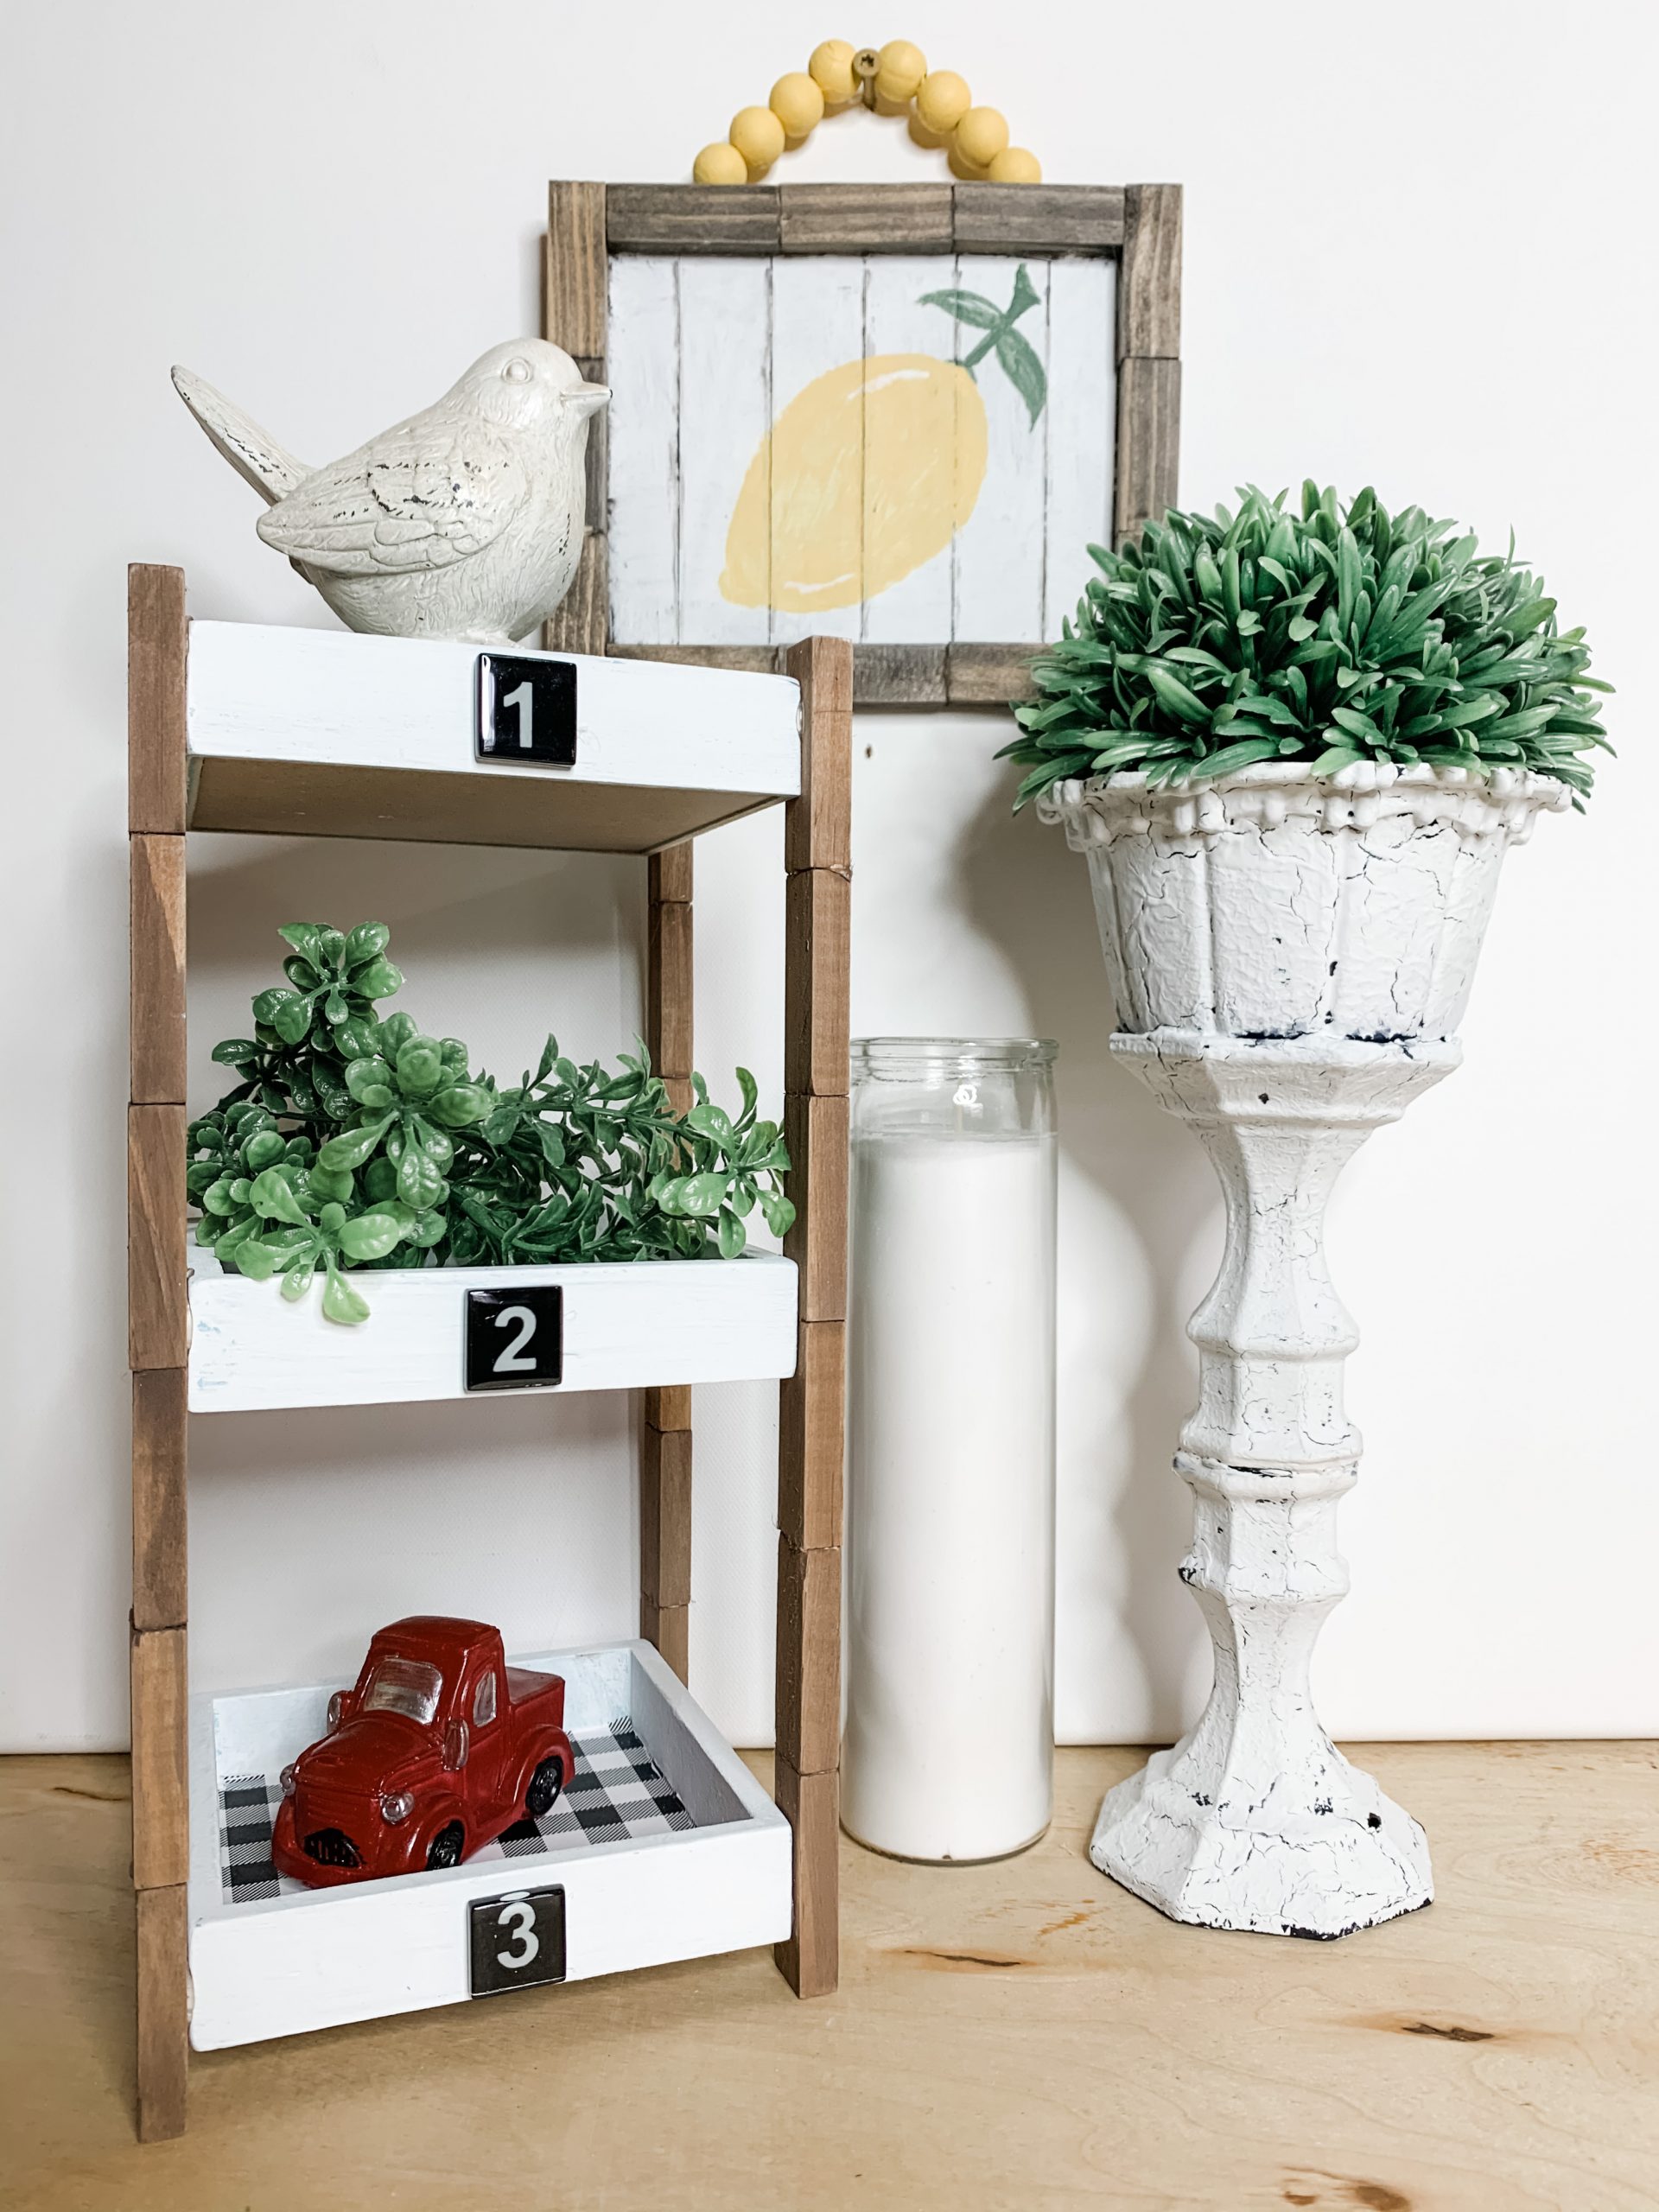
I’ve already told you that I’ve made two of these adorable DIY shelves. For one, I used the cute Dollar Tree metal numbers, and for the other, I used Dollar Tree Mosaic Accents. You could also use scrabble tiles if you wanted!
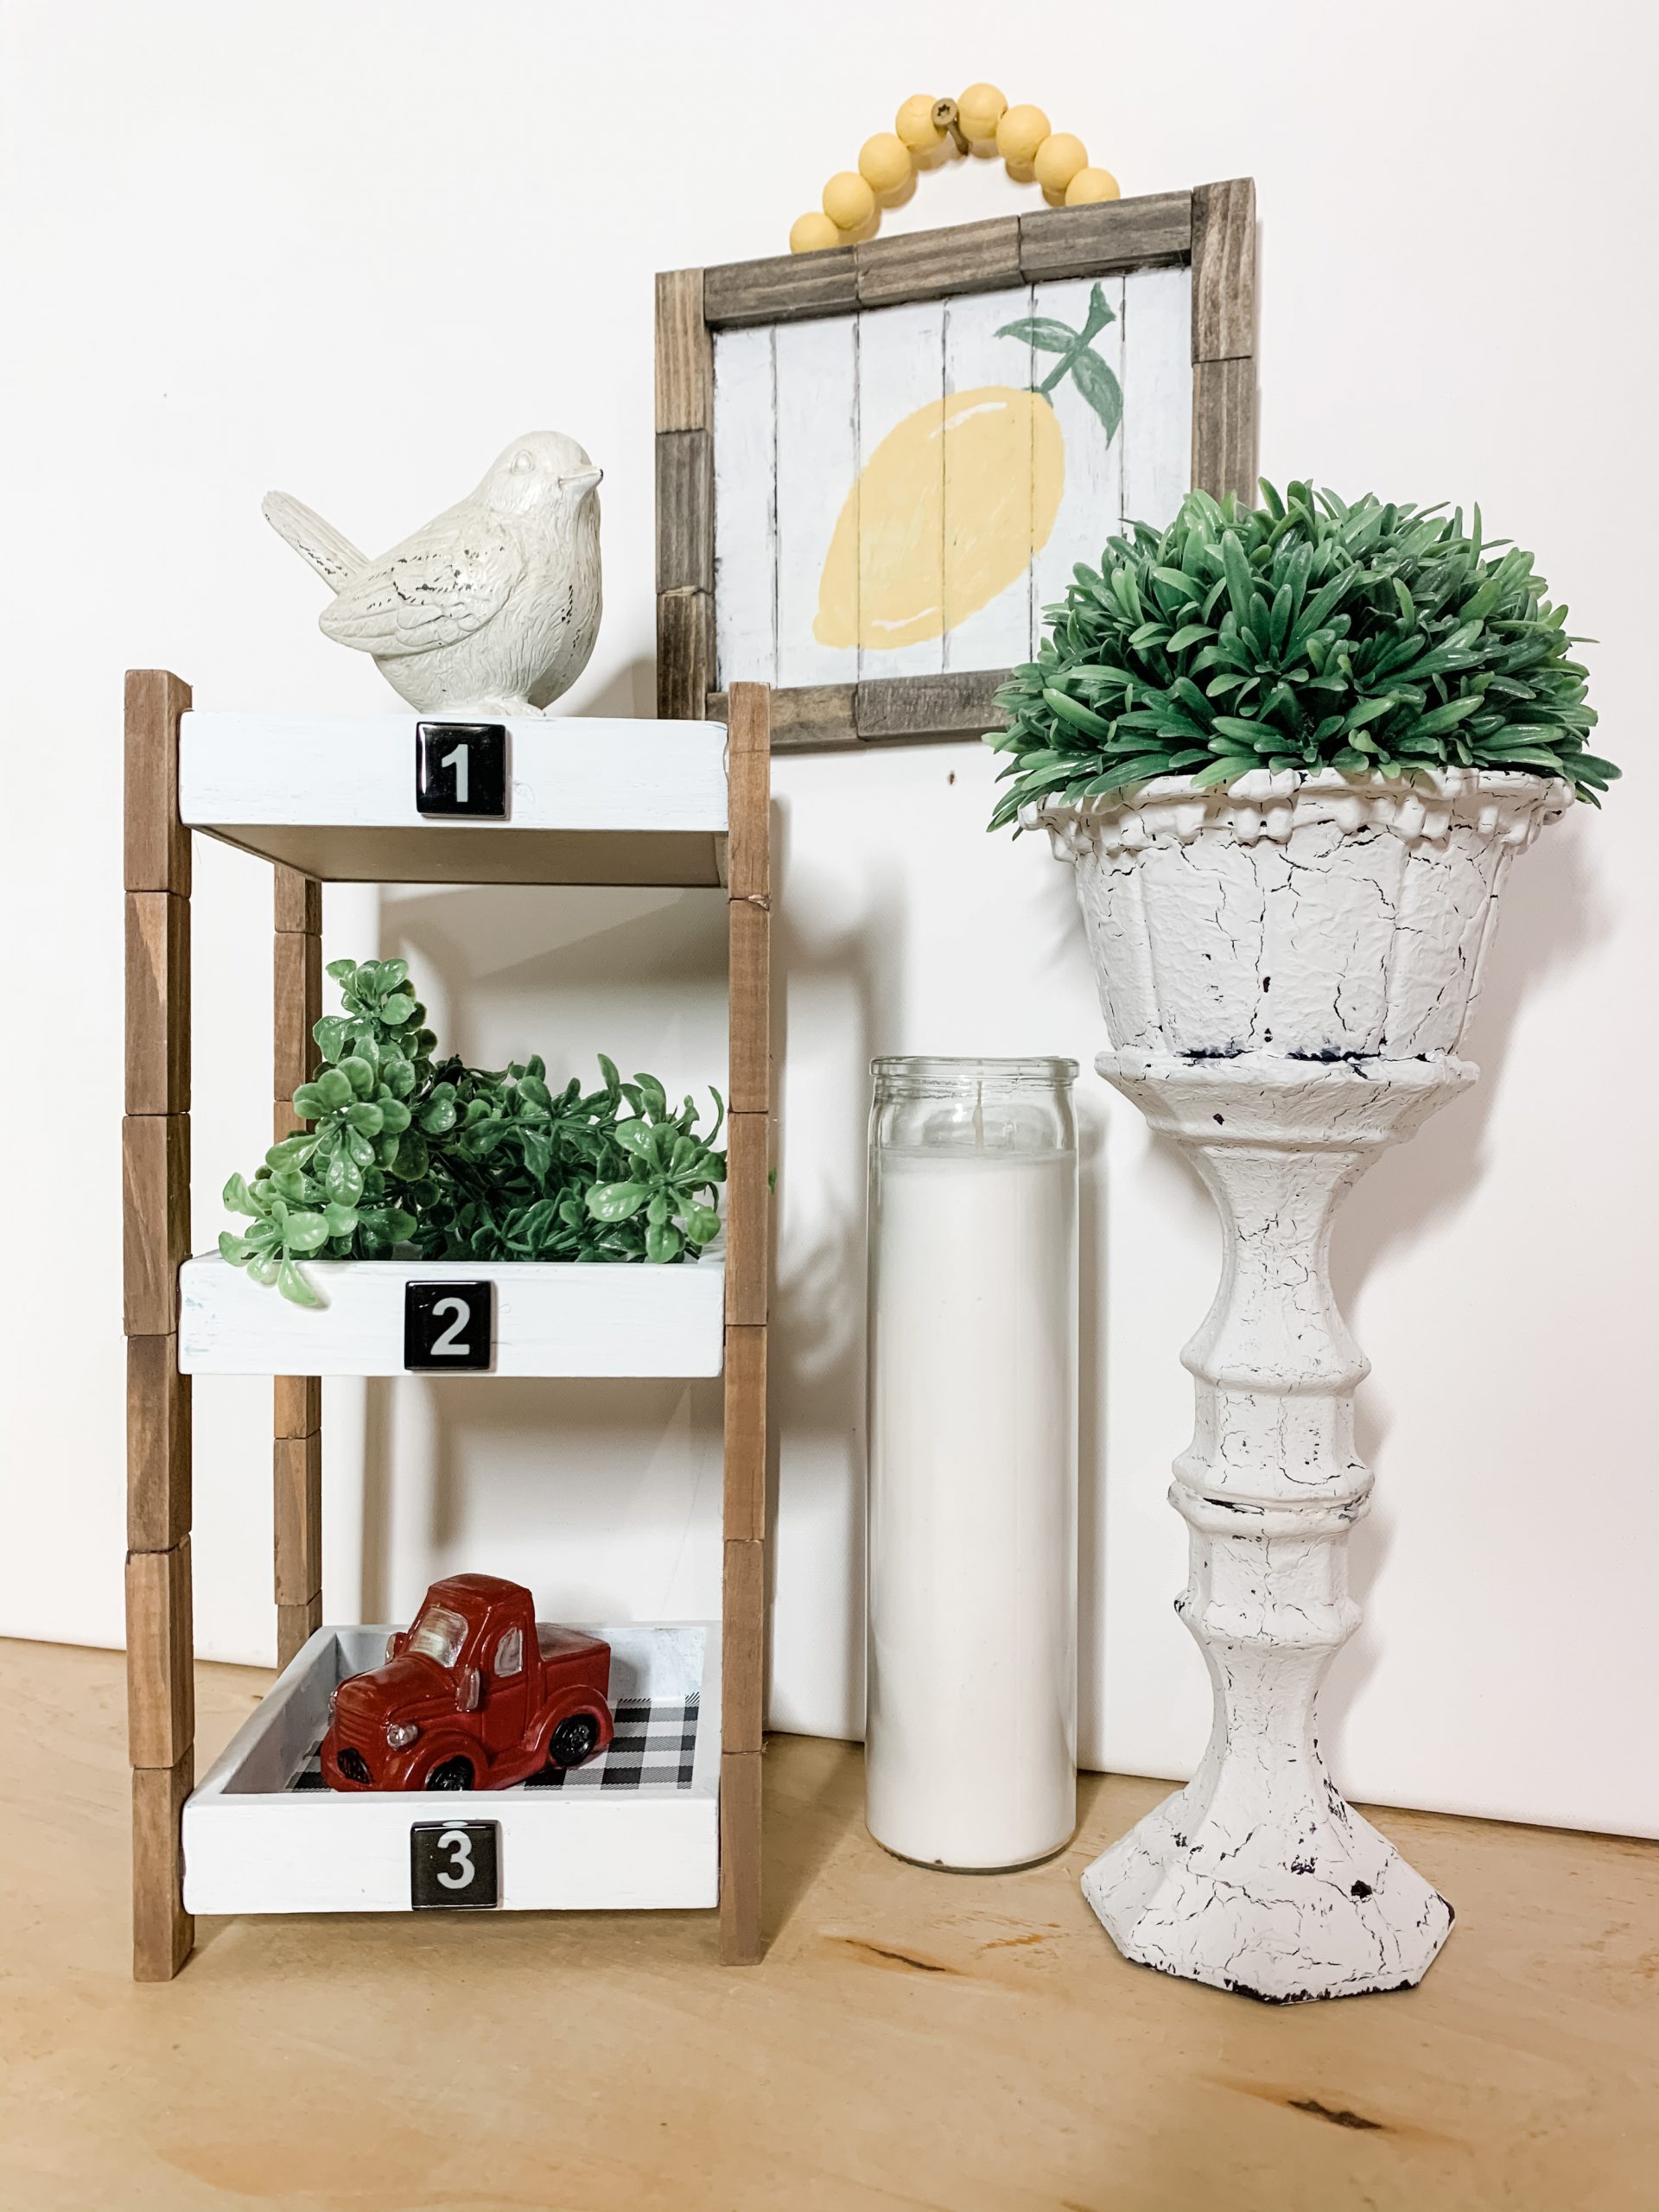
Whatever you decide to use, hot glue one in place in the center of the front side of each Dollar Tree sign box. Once the glue dries, you have a functional DIY 3 tiered shelf!
If you want to see the full supply list or video tutorial, just scroll to the bottom of this page!
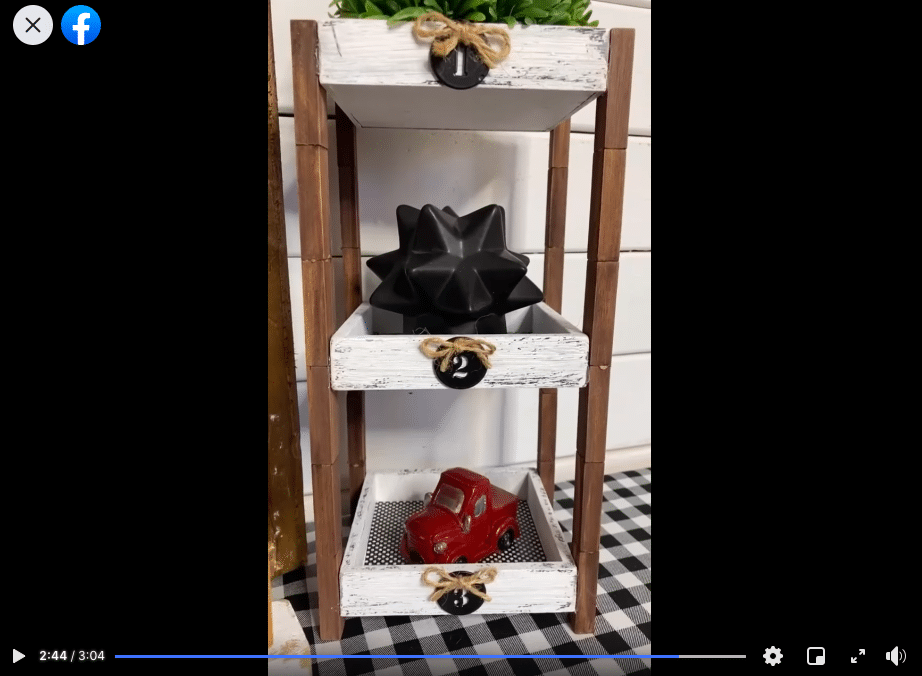
Watch the tutorial
Notice how it doesn’t say replay? I put together a very quick 3-minute DIY tutorial for you! This Dollar Tree DIY is incredibly easy to make, but sometimes you can benefit from visual instructions.
If that’s you, I think this 3-minute video tutorial could be a great resource. The image below will take you to the DIY tutorial video for this Rustic Dollar Tree DIY 3 Tiered Shelf
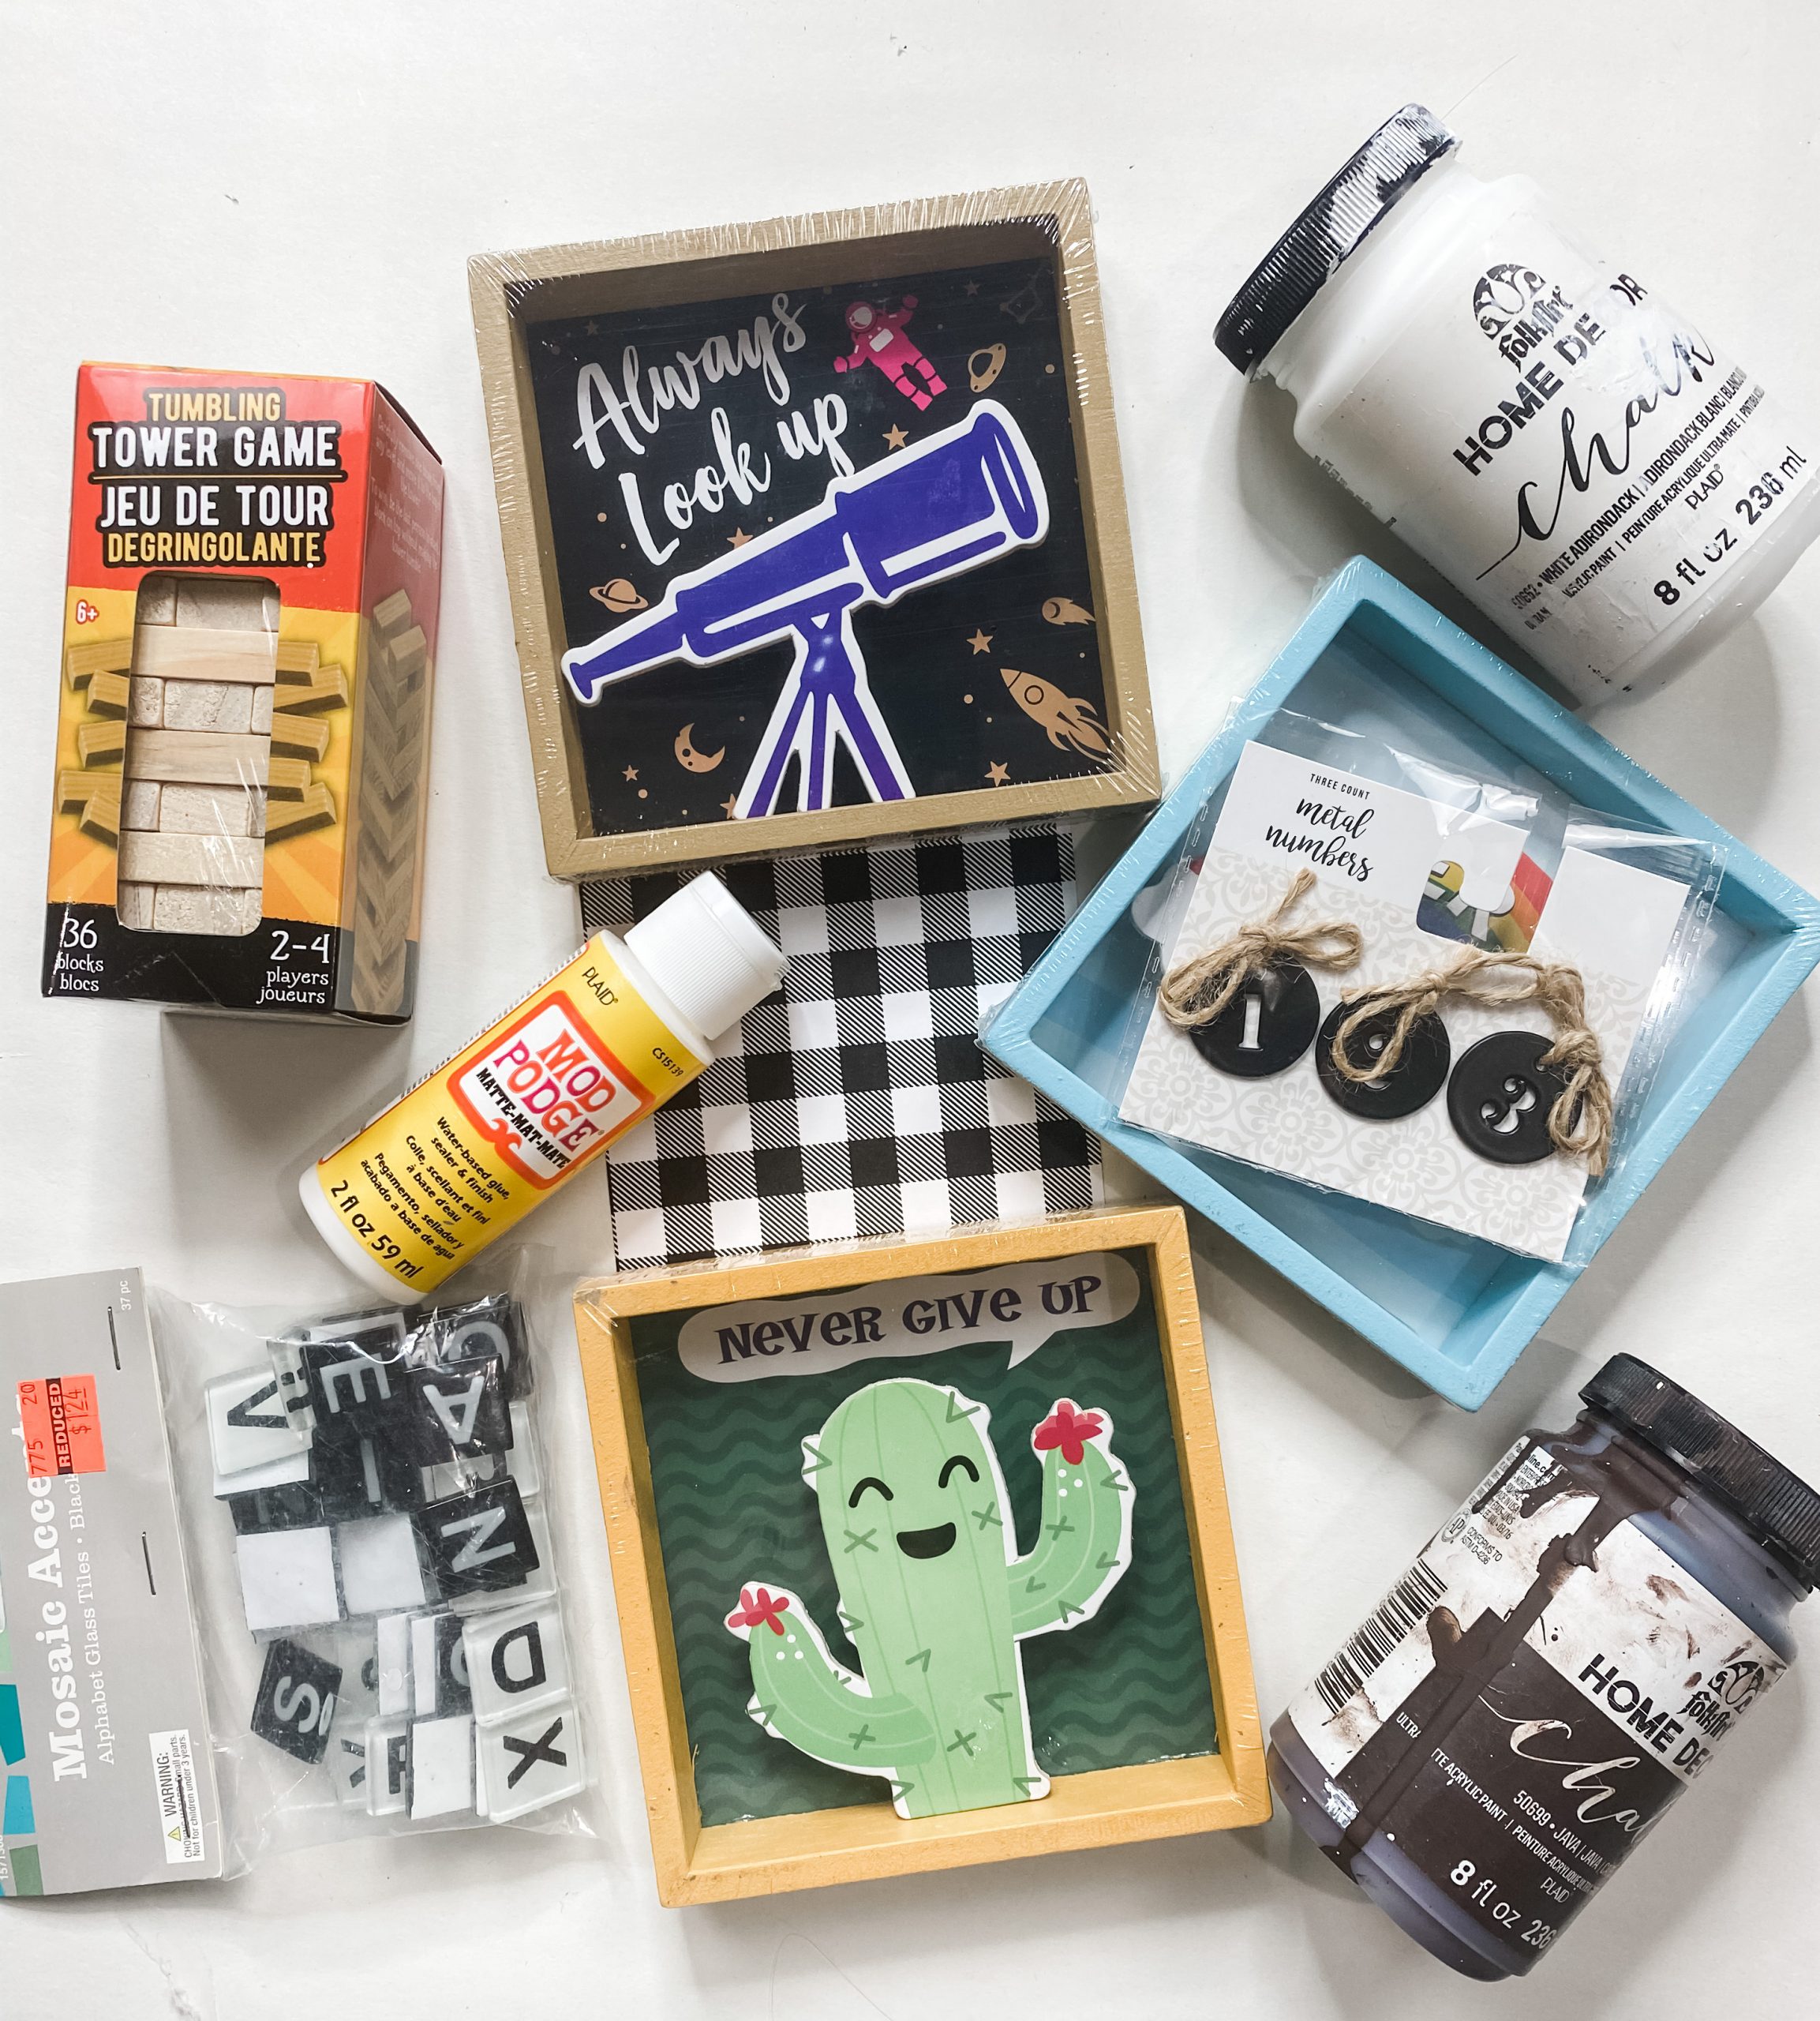
For this project, I will be using these items but you can substitute where you want.
“As an Amazon Associate, I earn from qualifying purchases.”
- Dollar Tree Sign Boxes (x3)
- Dollar Tree Tumbling Tower Blocks
- Folkart White Chalk Paint
- Folkart Java Chalk Paint
- Dollar Tree Mosaic Tiles (OR Dollar Tree Metal Numbers)
- Dollar Tree Buffalo Check Scrapbook Paper (OR Dollar Tree Black polka dot Scrapbook Paper)
- Mod Podge
- Chippy Paintbrush
- Wet wipes
- Hot glue gun and glue sticks
- Heat Gun
I hope you enjoyed this Rustic Dollar Tree DIY 3 Tiered Shelf as much as I did and decide to make one for yourself! I would love to see how yours turns out!
You should totally join my FREE Facebook group called On A Budget Crafts! It is a judgment-free community for DIY crafters to show off their projects and ideas.
If you loved this DIY you might also like this DIY Dollar Tree Distressed Farmhouse Decor!
Thanks for stopping by! XOXO Amber
You can also shop my ENTIRE AMAZON Favorites shop just click here! It’s packed full of all the things I use and love. Here is the supply list I highly recommend every creative have on hand!!
Would you also pin my blog for later and get on my newsletter alerts? I would love to have you join my #craftycrew.
Inspired? Leave me a comment below! I love hearing from my readers!

Join my free “ON A BUDGET CRAFTS” Facebook group!

Nice addition to any space, love it
Great idea for a craft room too
Really like this “shelf”. Have 4 draws I saved from an old water bed. Am going to try to make a shelf similar to this.