Pizza Pan Christmas Decor Dollar Tree DIY
Hey, y’all! I’m back with another Pizza Pan Christmas Decor Dollar Tree DIY! You all loved my last Pizza Pan Christmas Decor so much, that I auctioned it off during our Crafty Crew Christmas Angel Program Auction.
I decided to make another one that is not only perfect for Christmas but can be easily customized for any time of year!
I hope you’re ready to learn how to make a Pizza Pan Christmas Decor Dollar Tree DIY because I am so excited to show you! This will be one of your favorite pizza pan crafts!
Watch the tutorial
This is a super easy DIY, and because I am actually recreating a previous DIY craft, I didn’t do it during a LIVE video like usual.
Instead, I recorded this Pizza Pan DIY for Christmas that is less than 4 minutes long and went viral on Facebook! OVER 81 MILLION VIEWS! OH MY GOSH!
If you want to see the step-by-step process of how to make this easy Pizza Pan Christmas Decor Dollar Tree DIY, just watch the viral DIY video below!

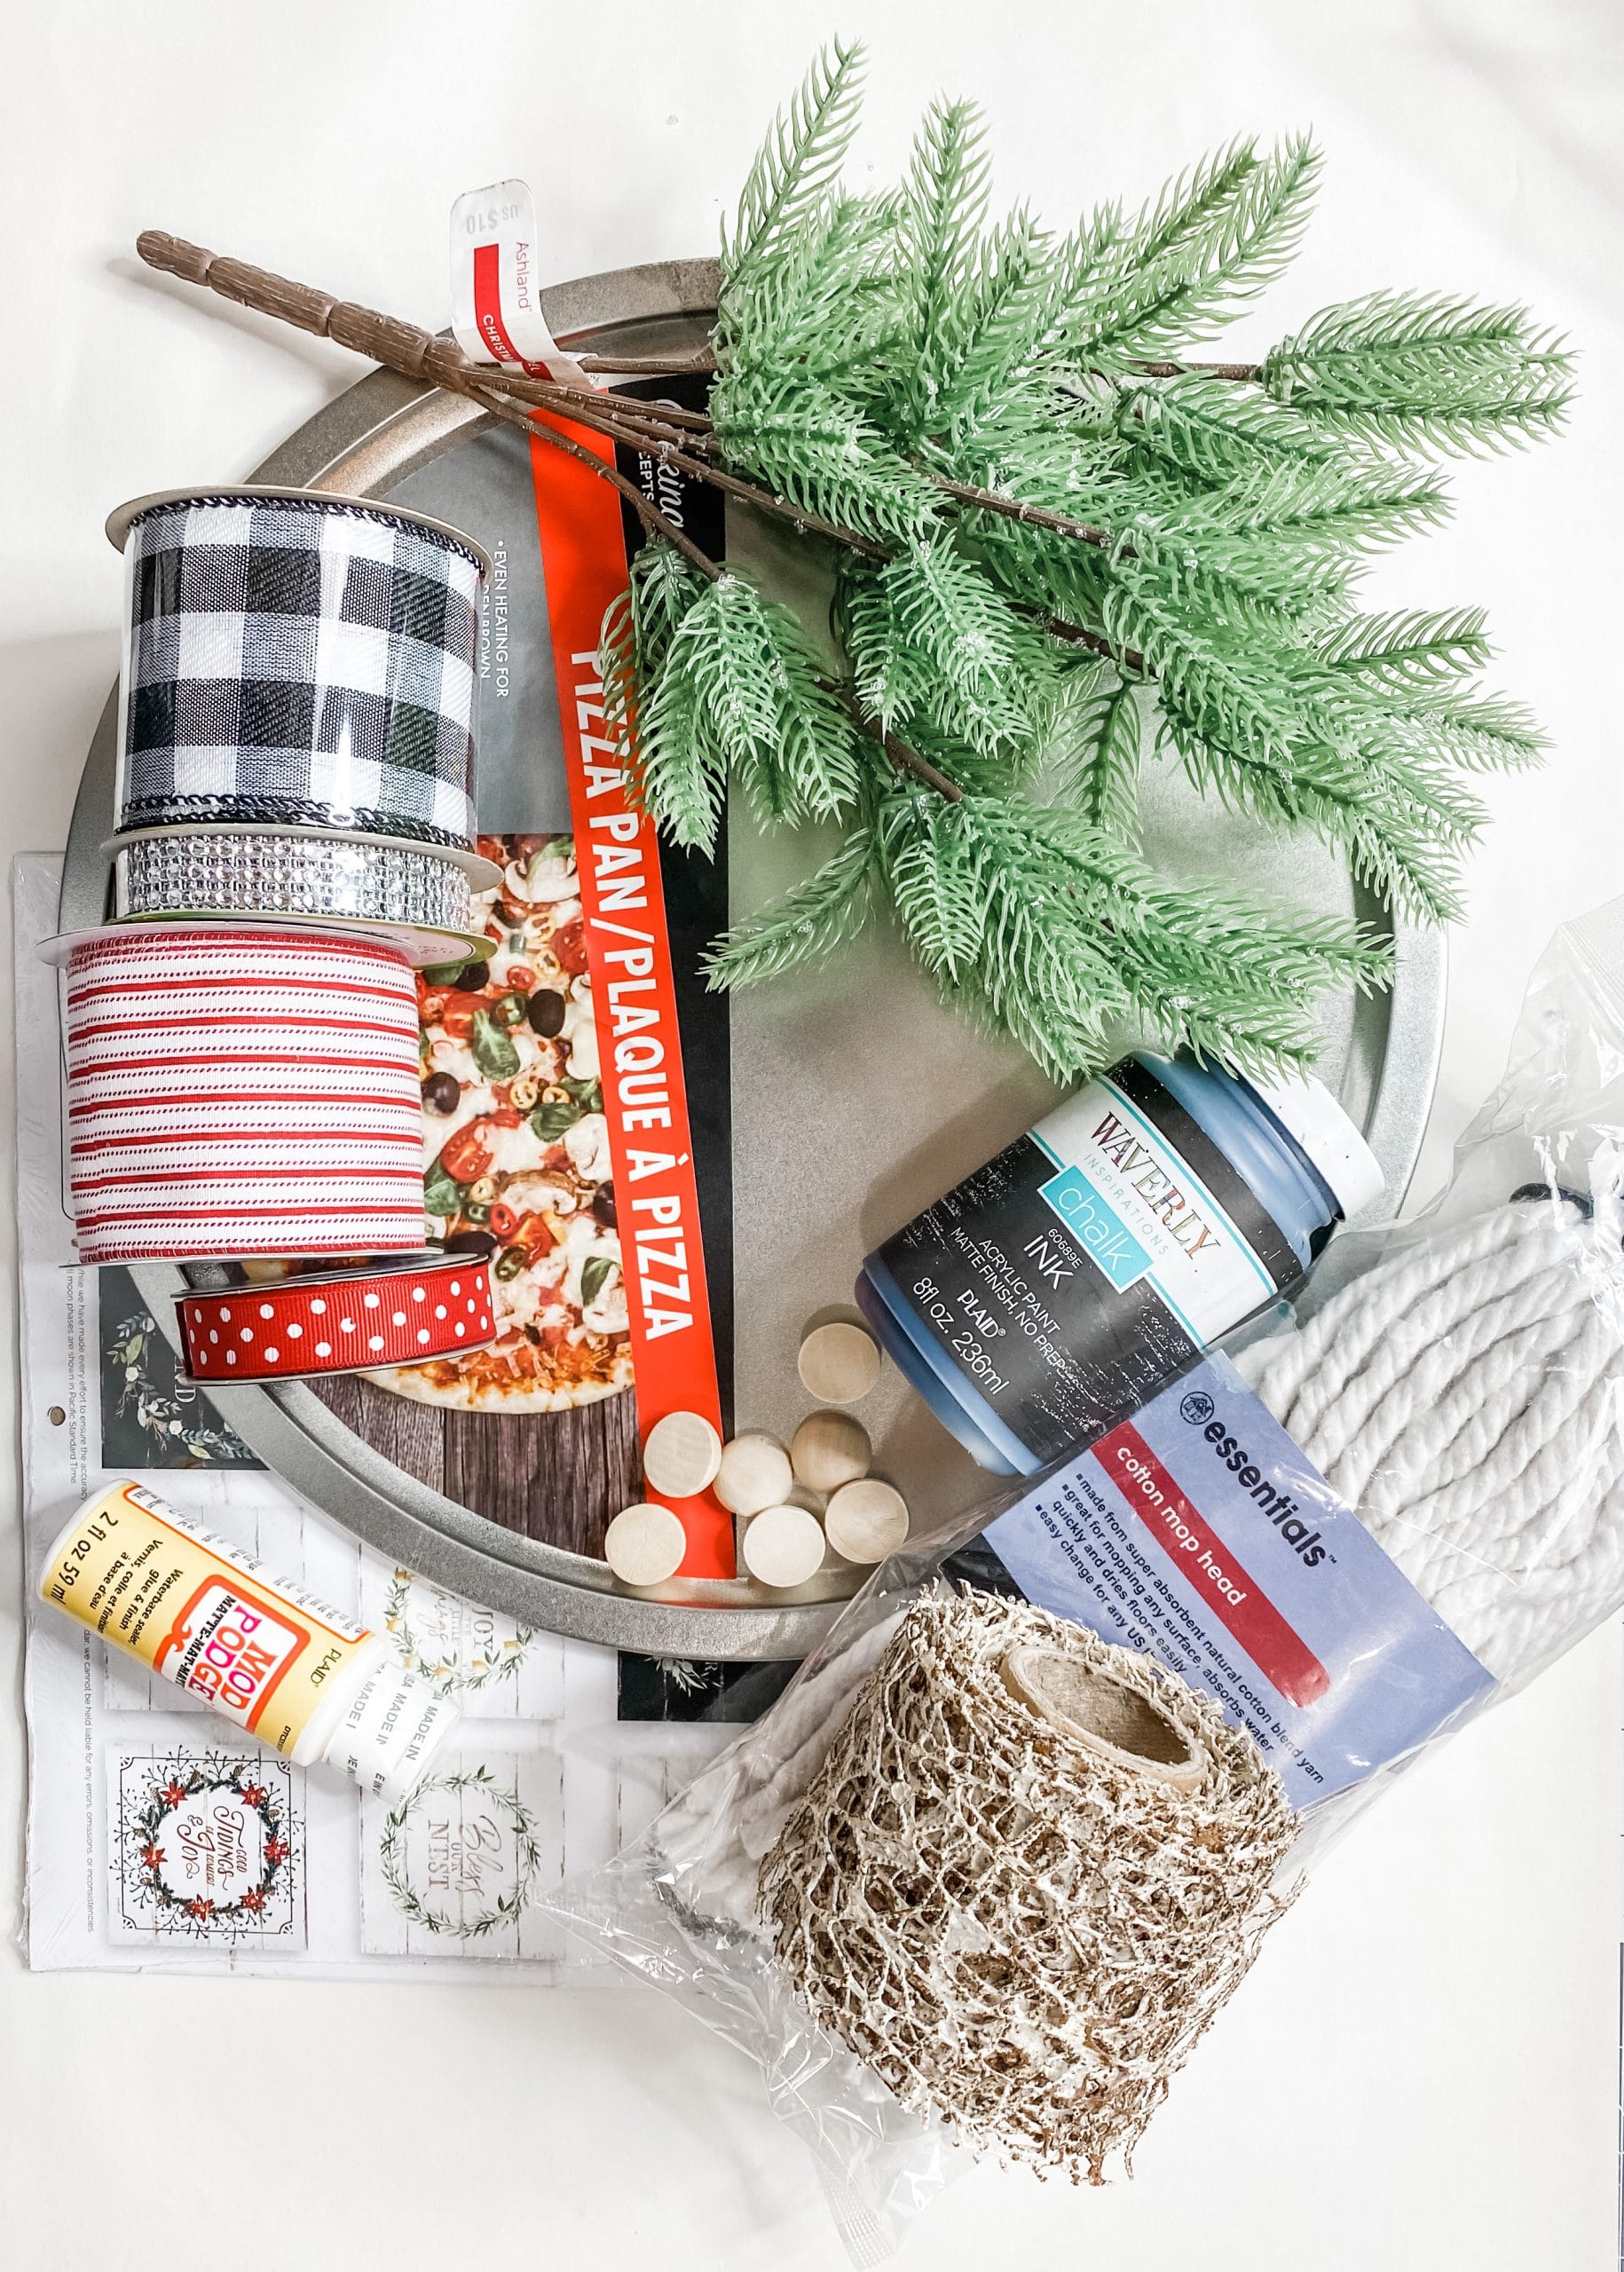
For this project, I will be using these items but you can substitute where you want.
“As an Amazon Associate, I earn from qualifying purchases.”
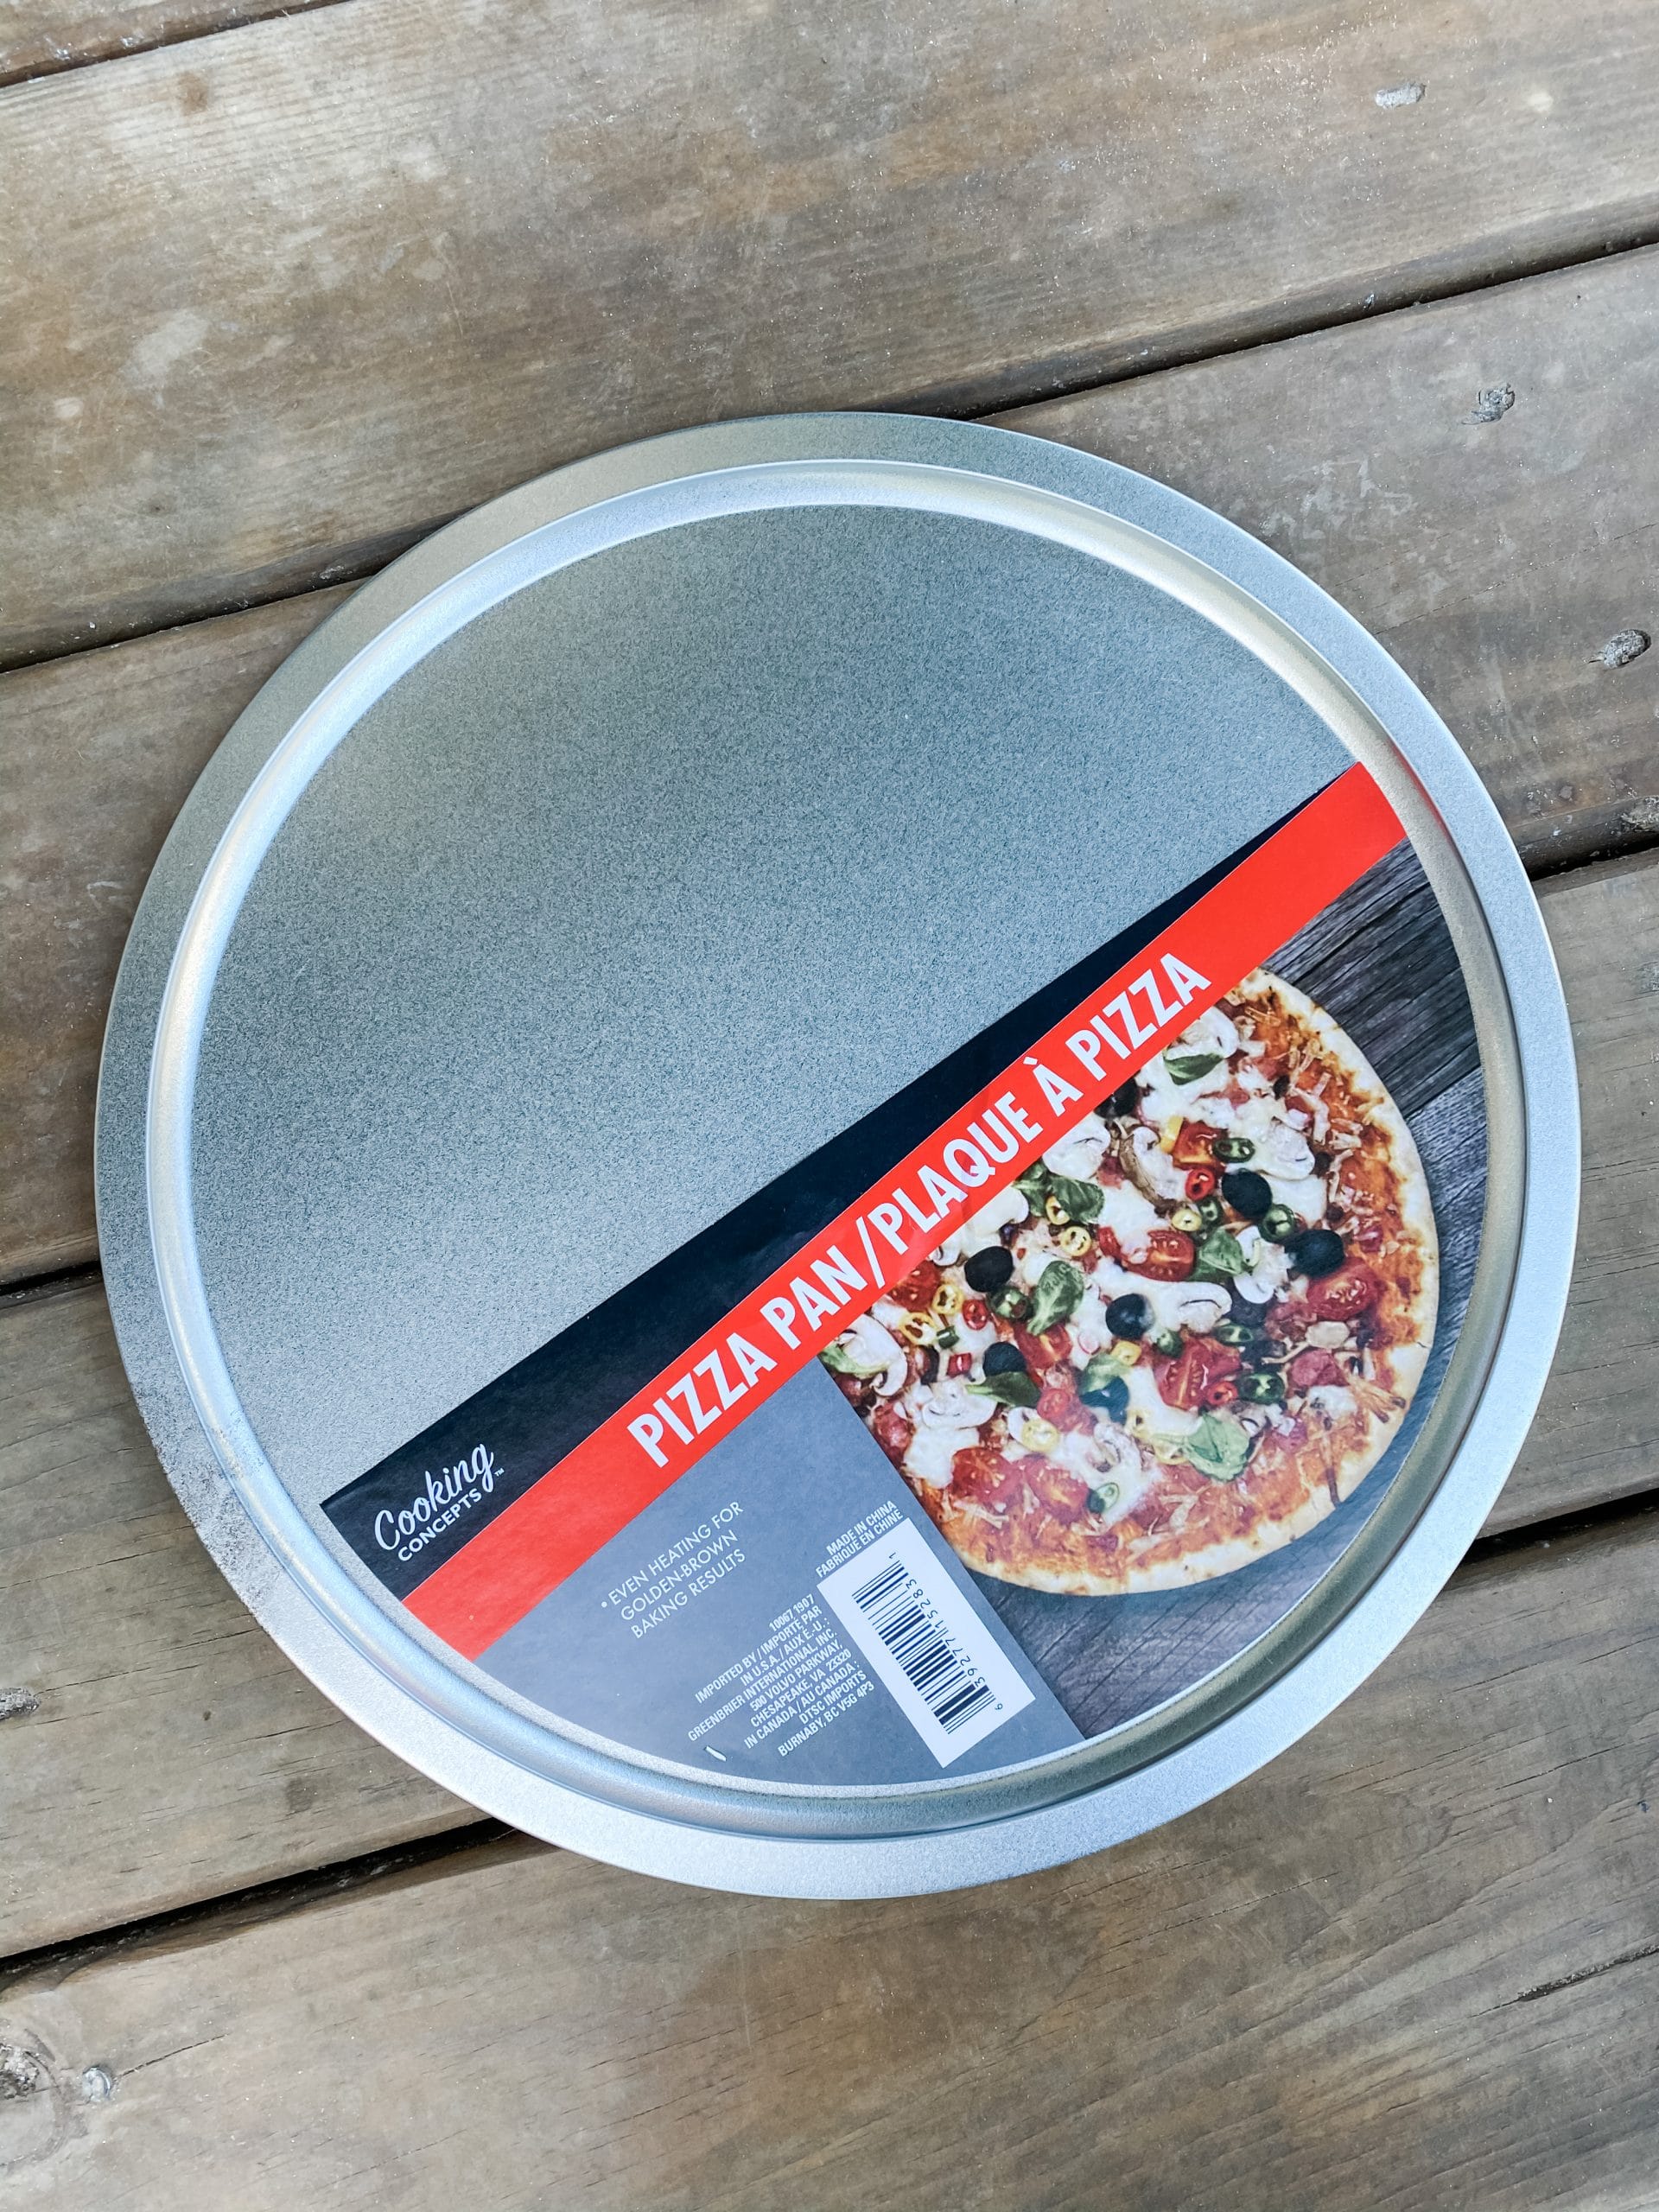
- Dollar Tree Pizza Pan
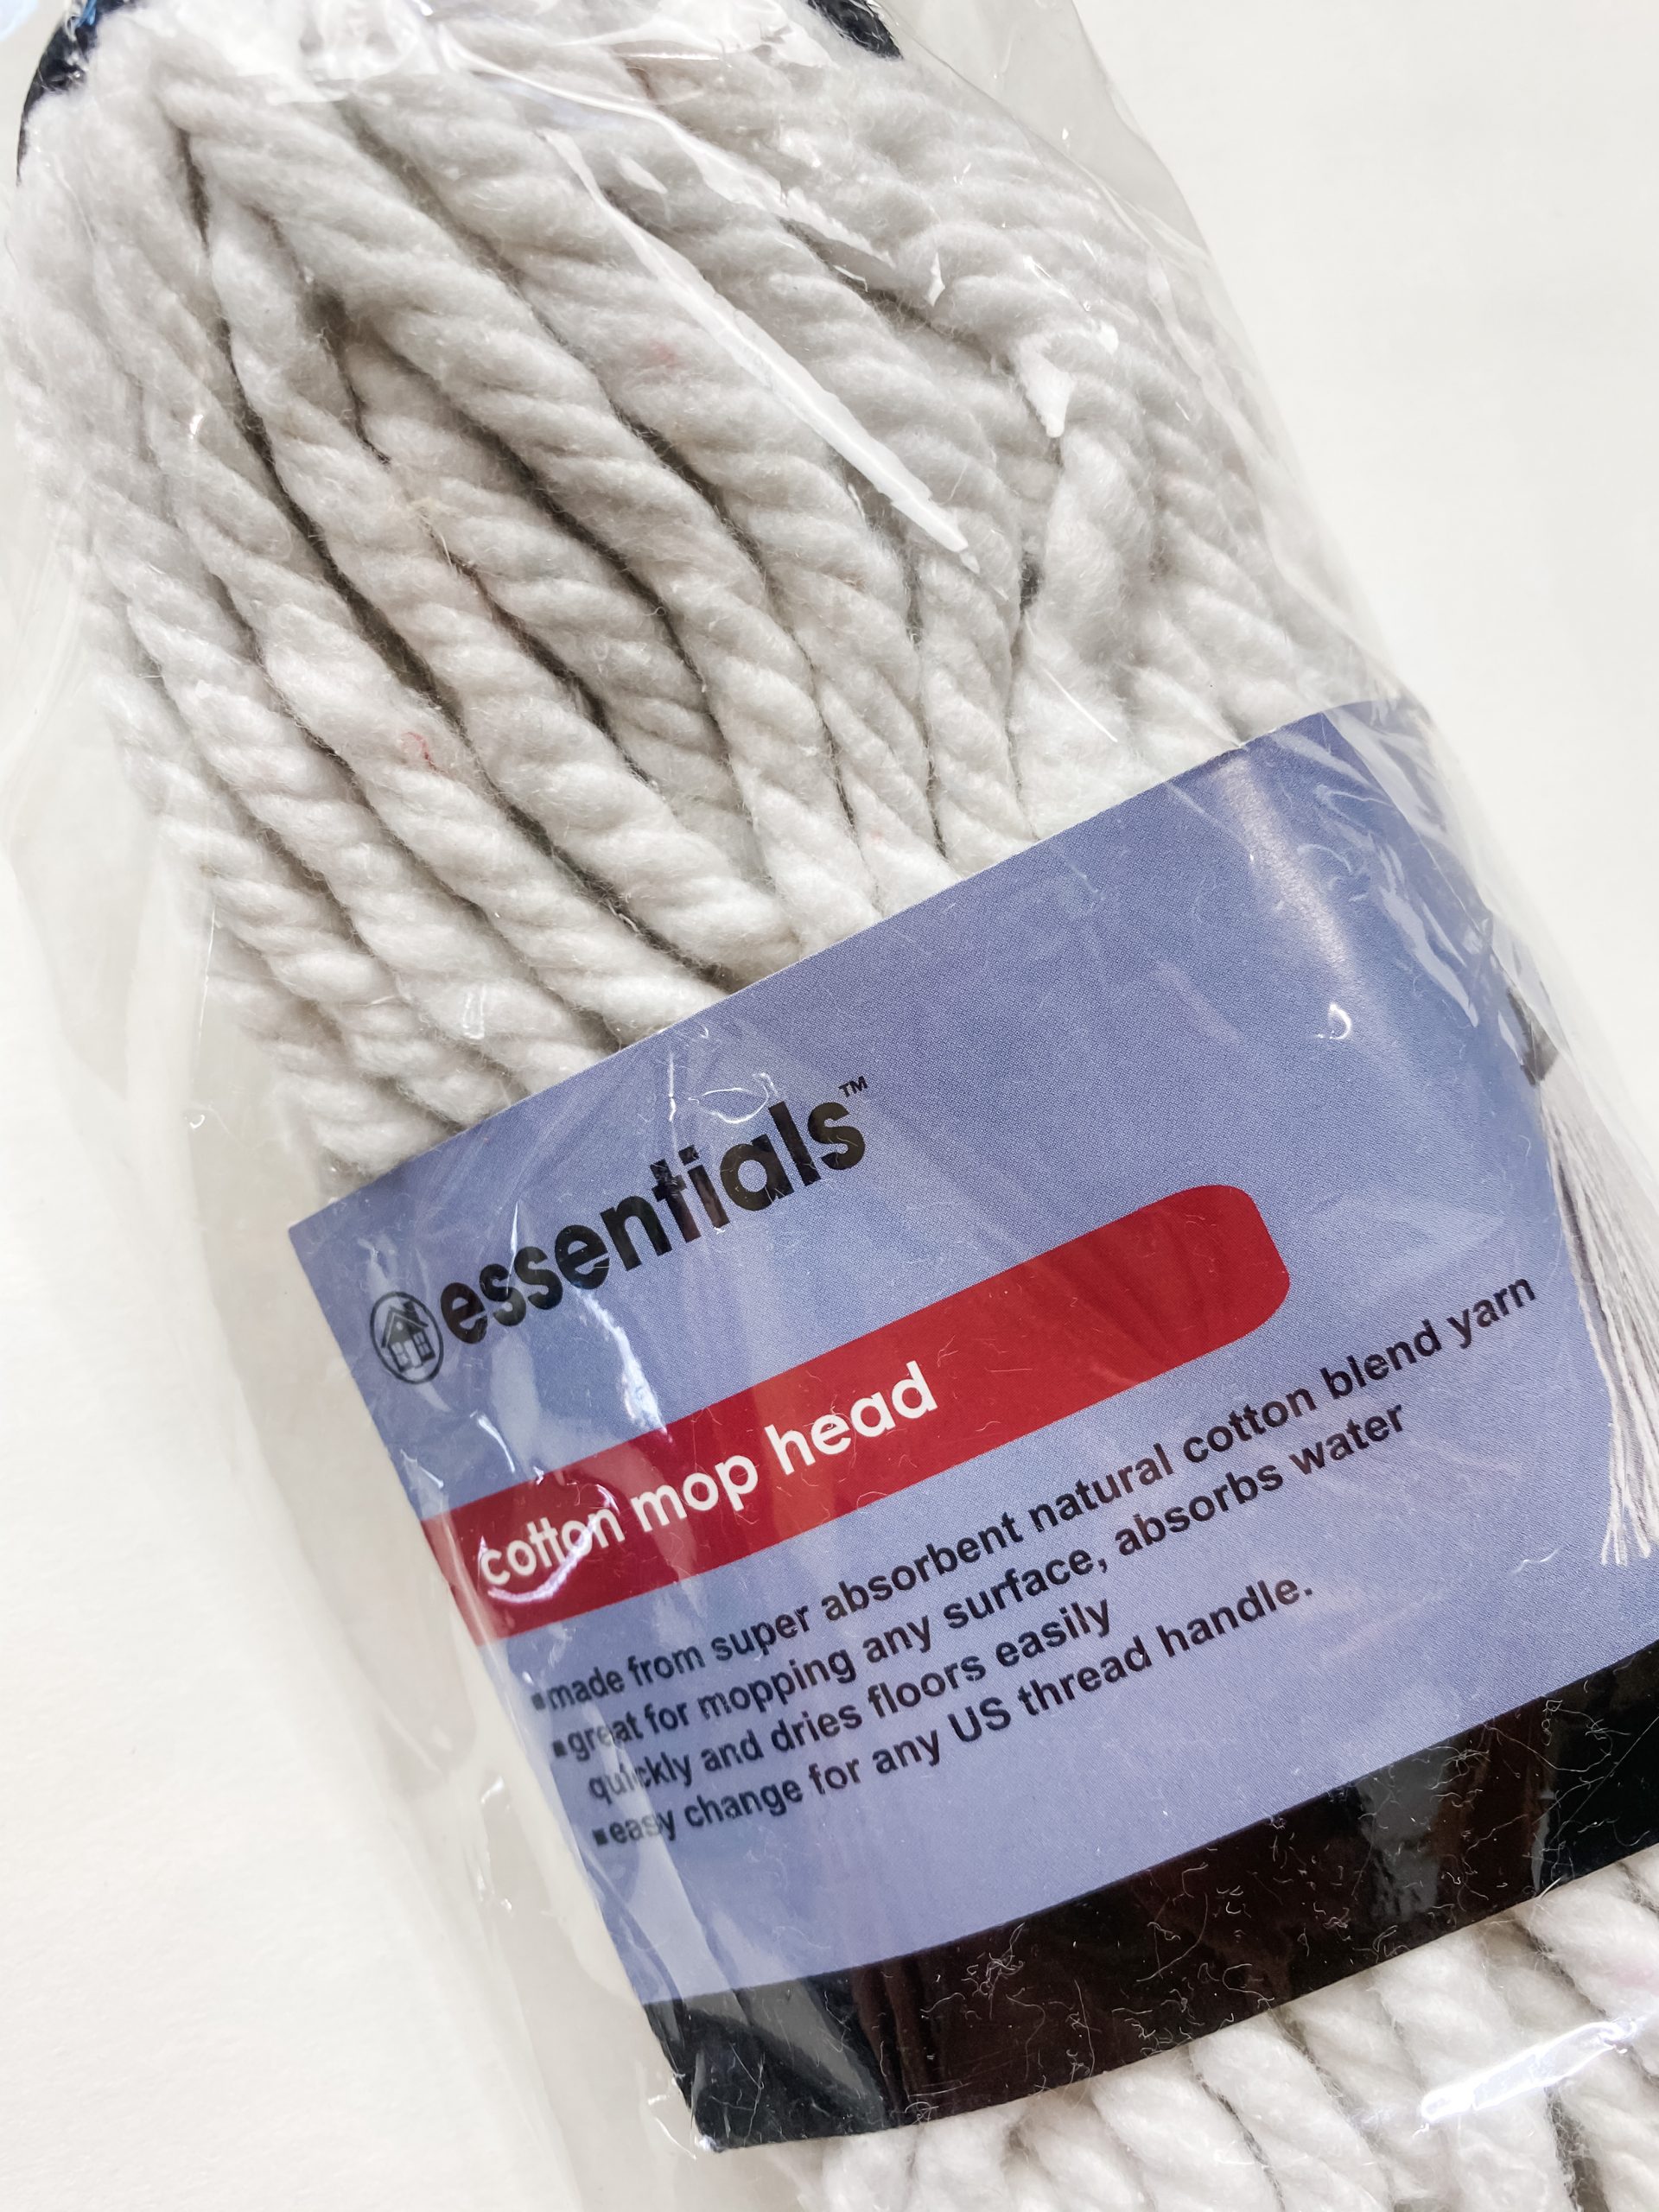
- Dollar Tree Mop Head
- Red/White Striped Ribbon
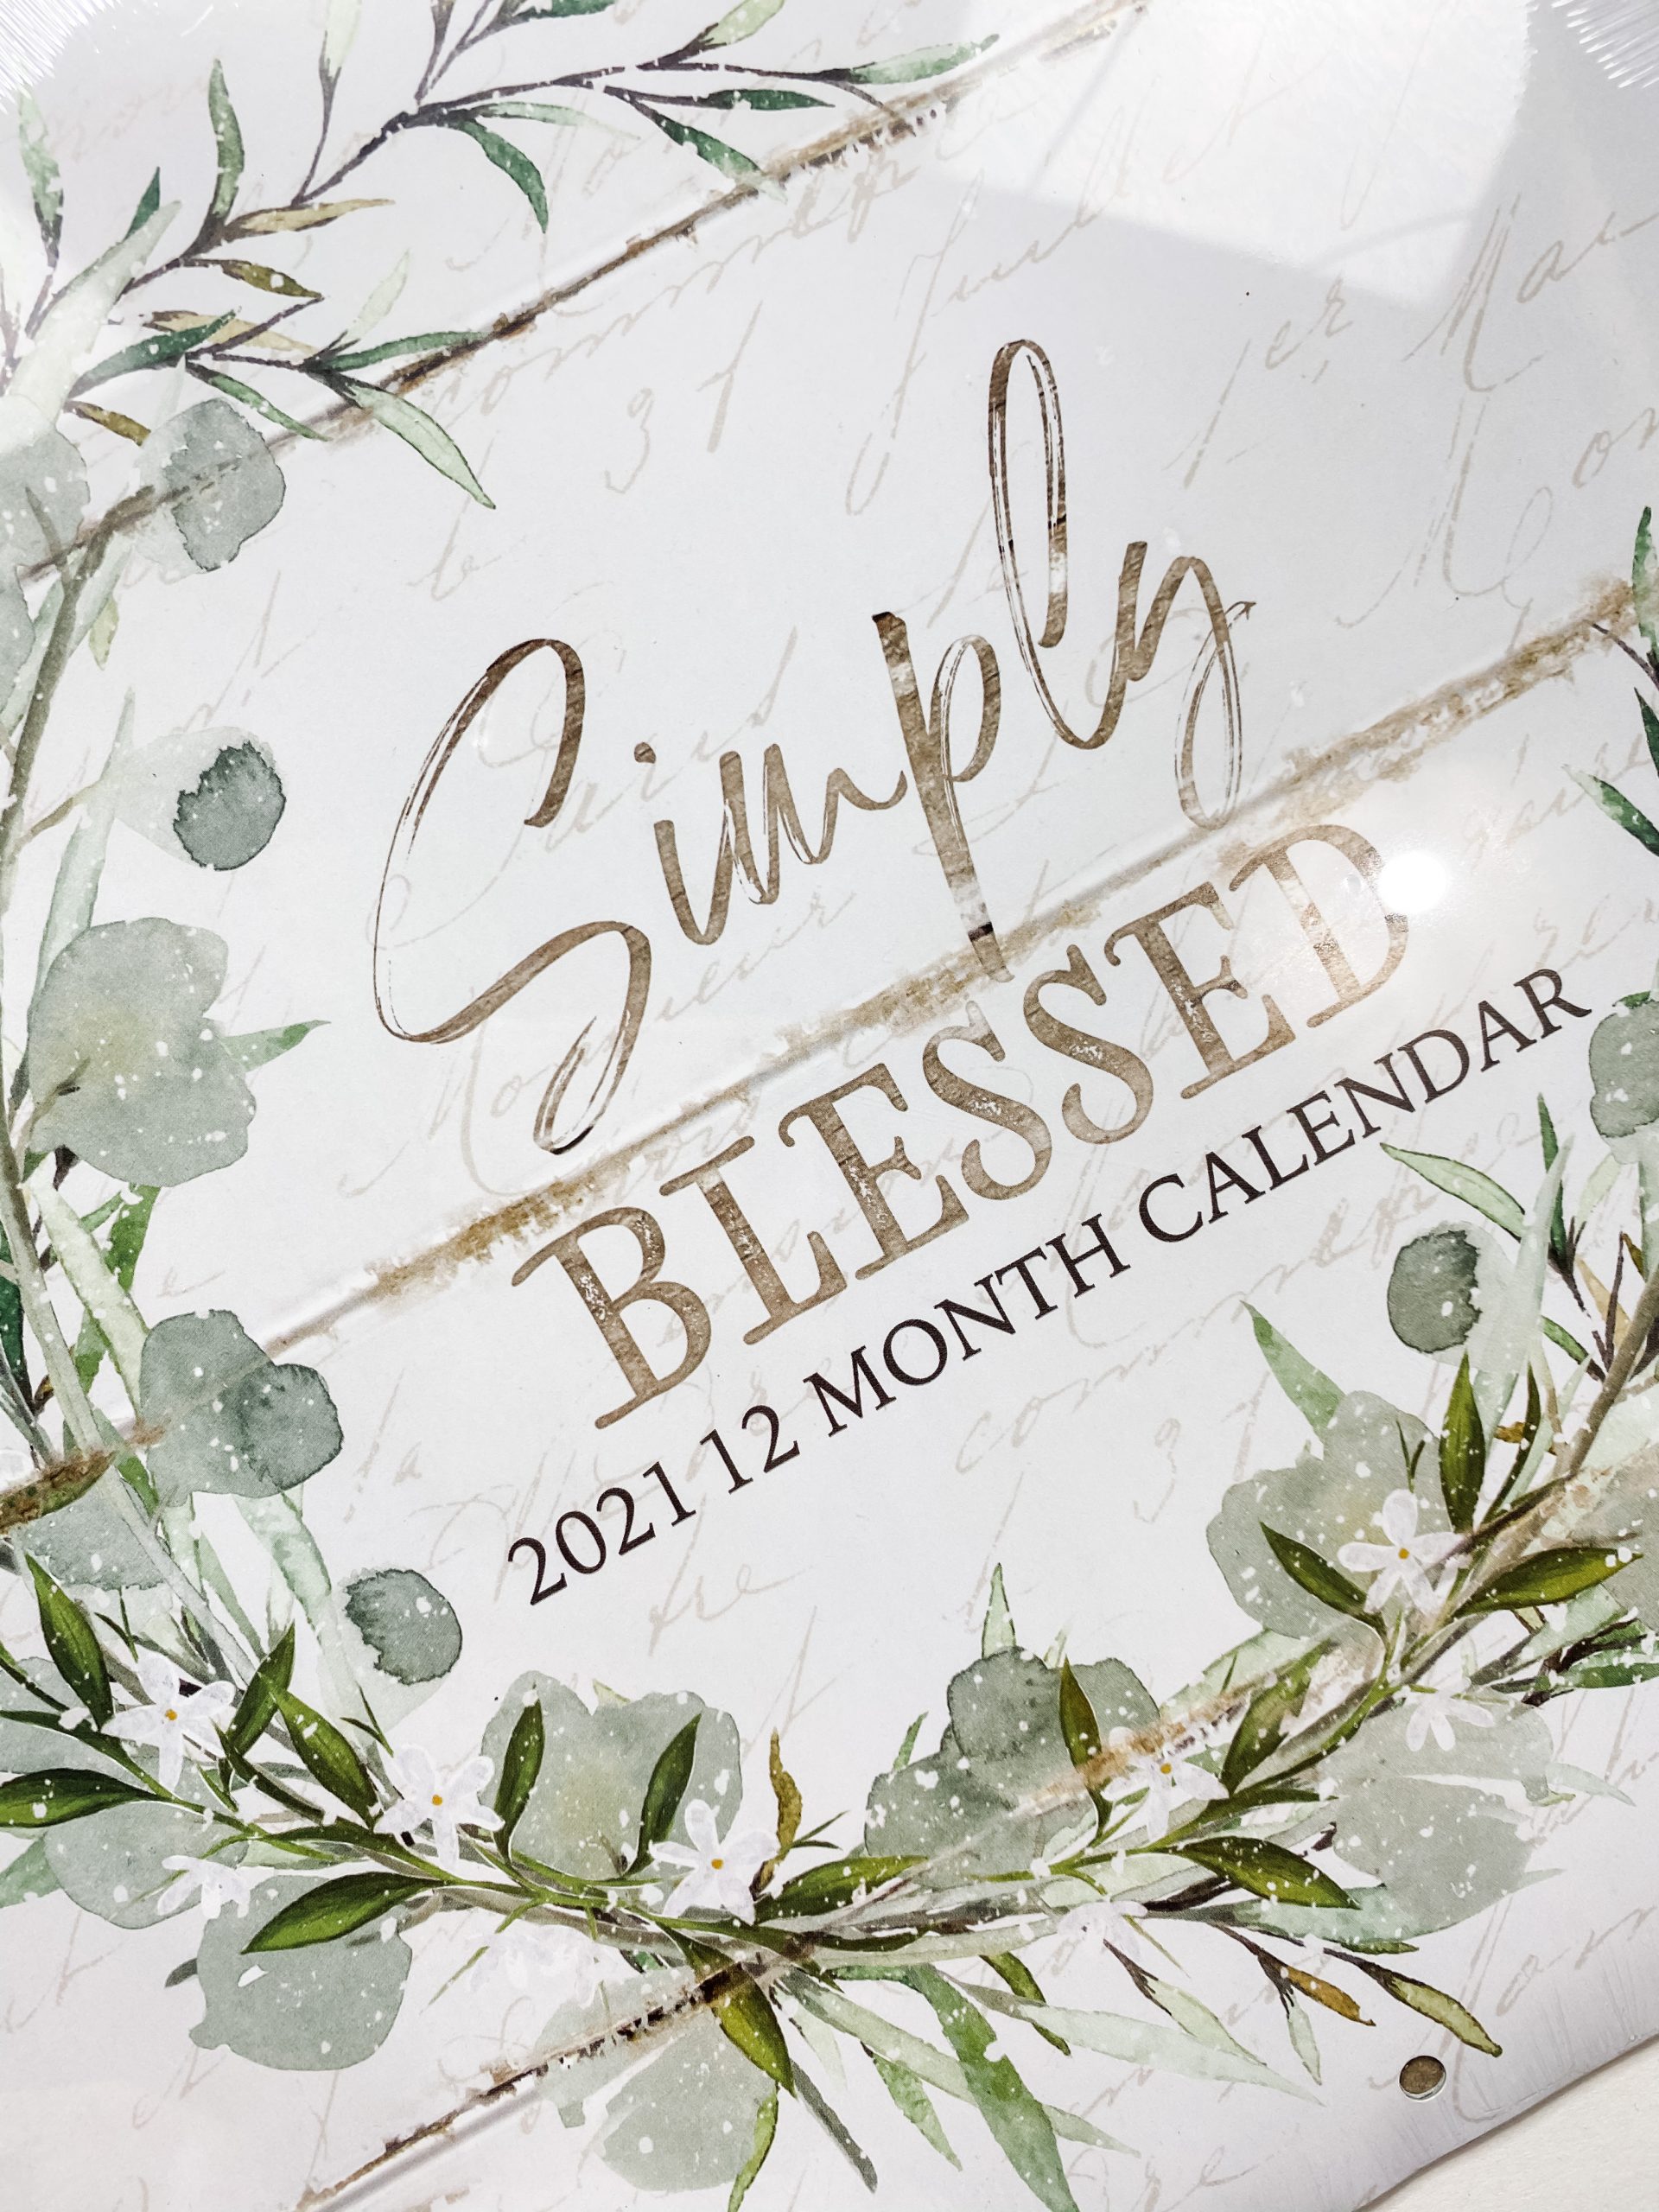
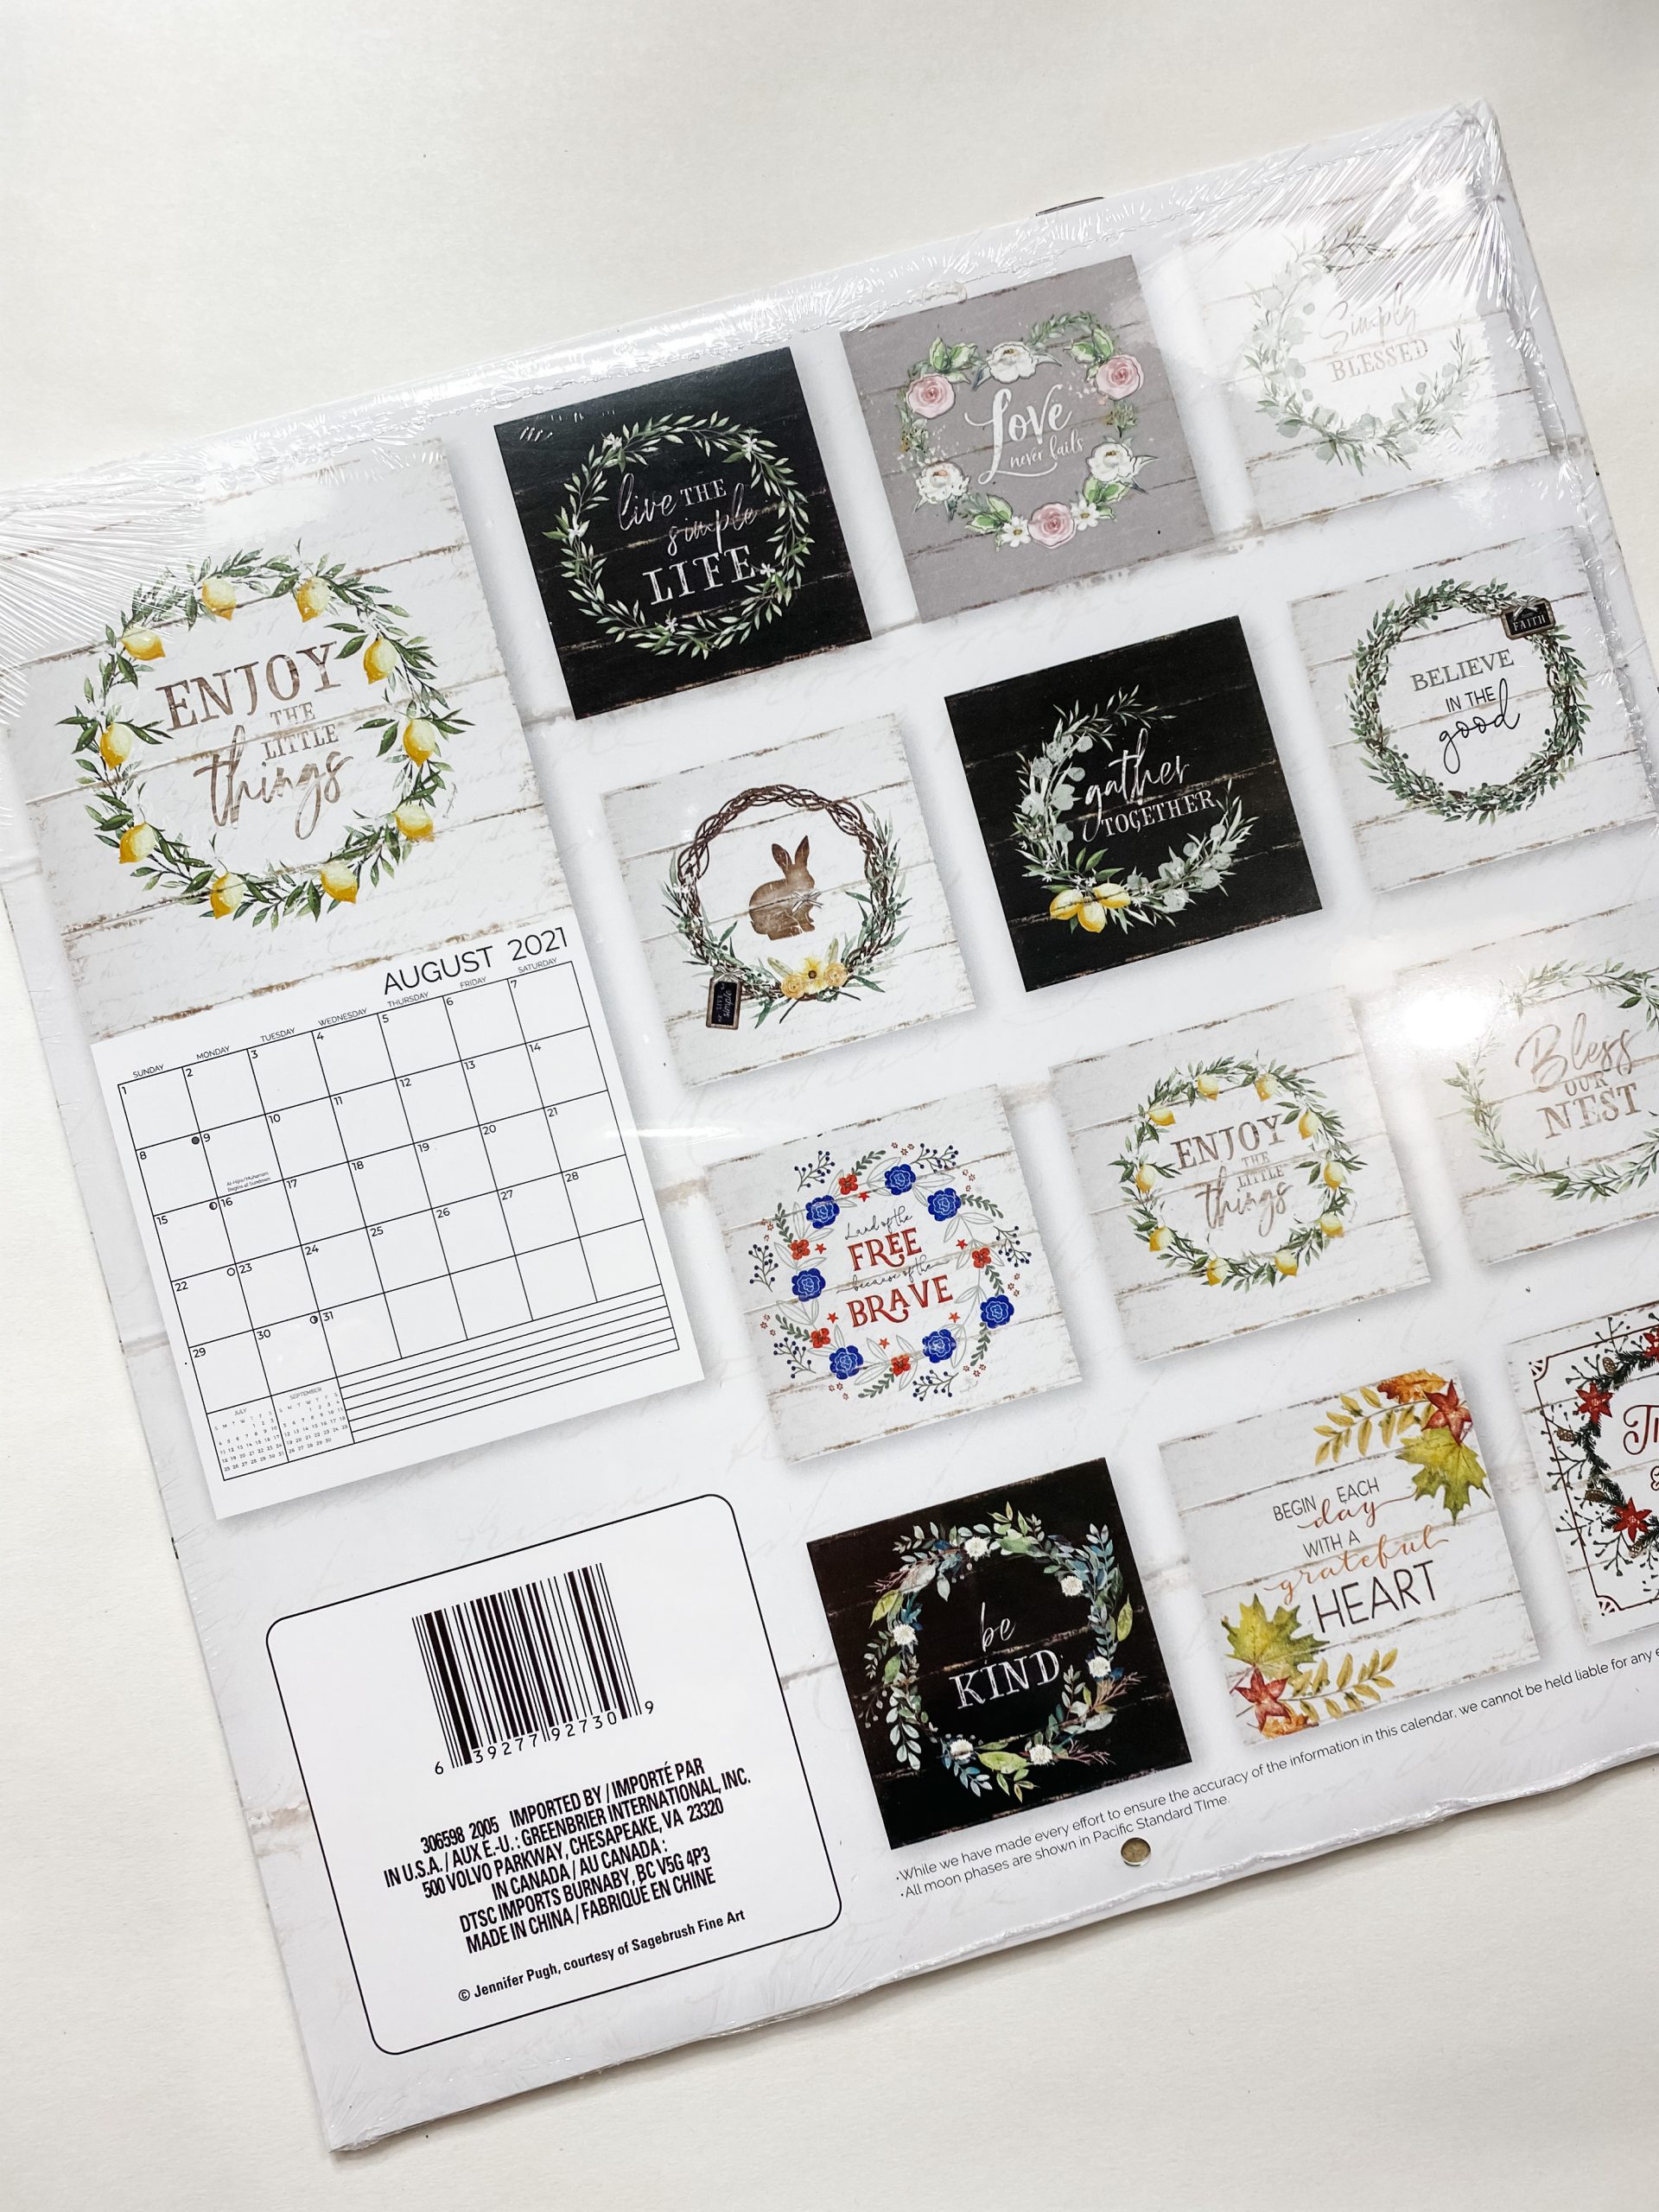
- Dollar Tree 2021 Simply Blessed Calendar
- Dollar Tree Buttons
- Red polka dot ribbon
- Dollar Tree Christmas greenery
- Black Chalk Paint
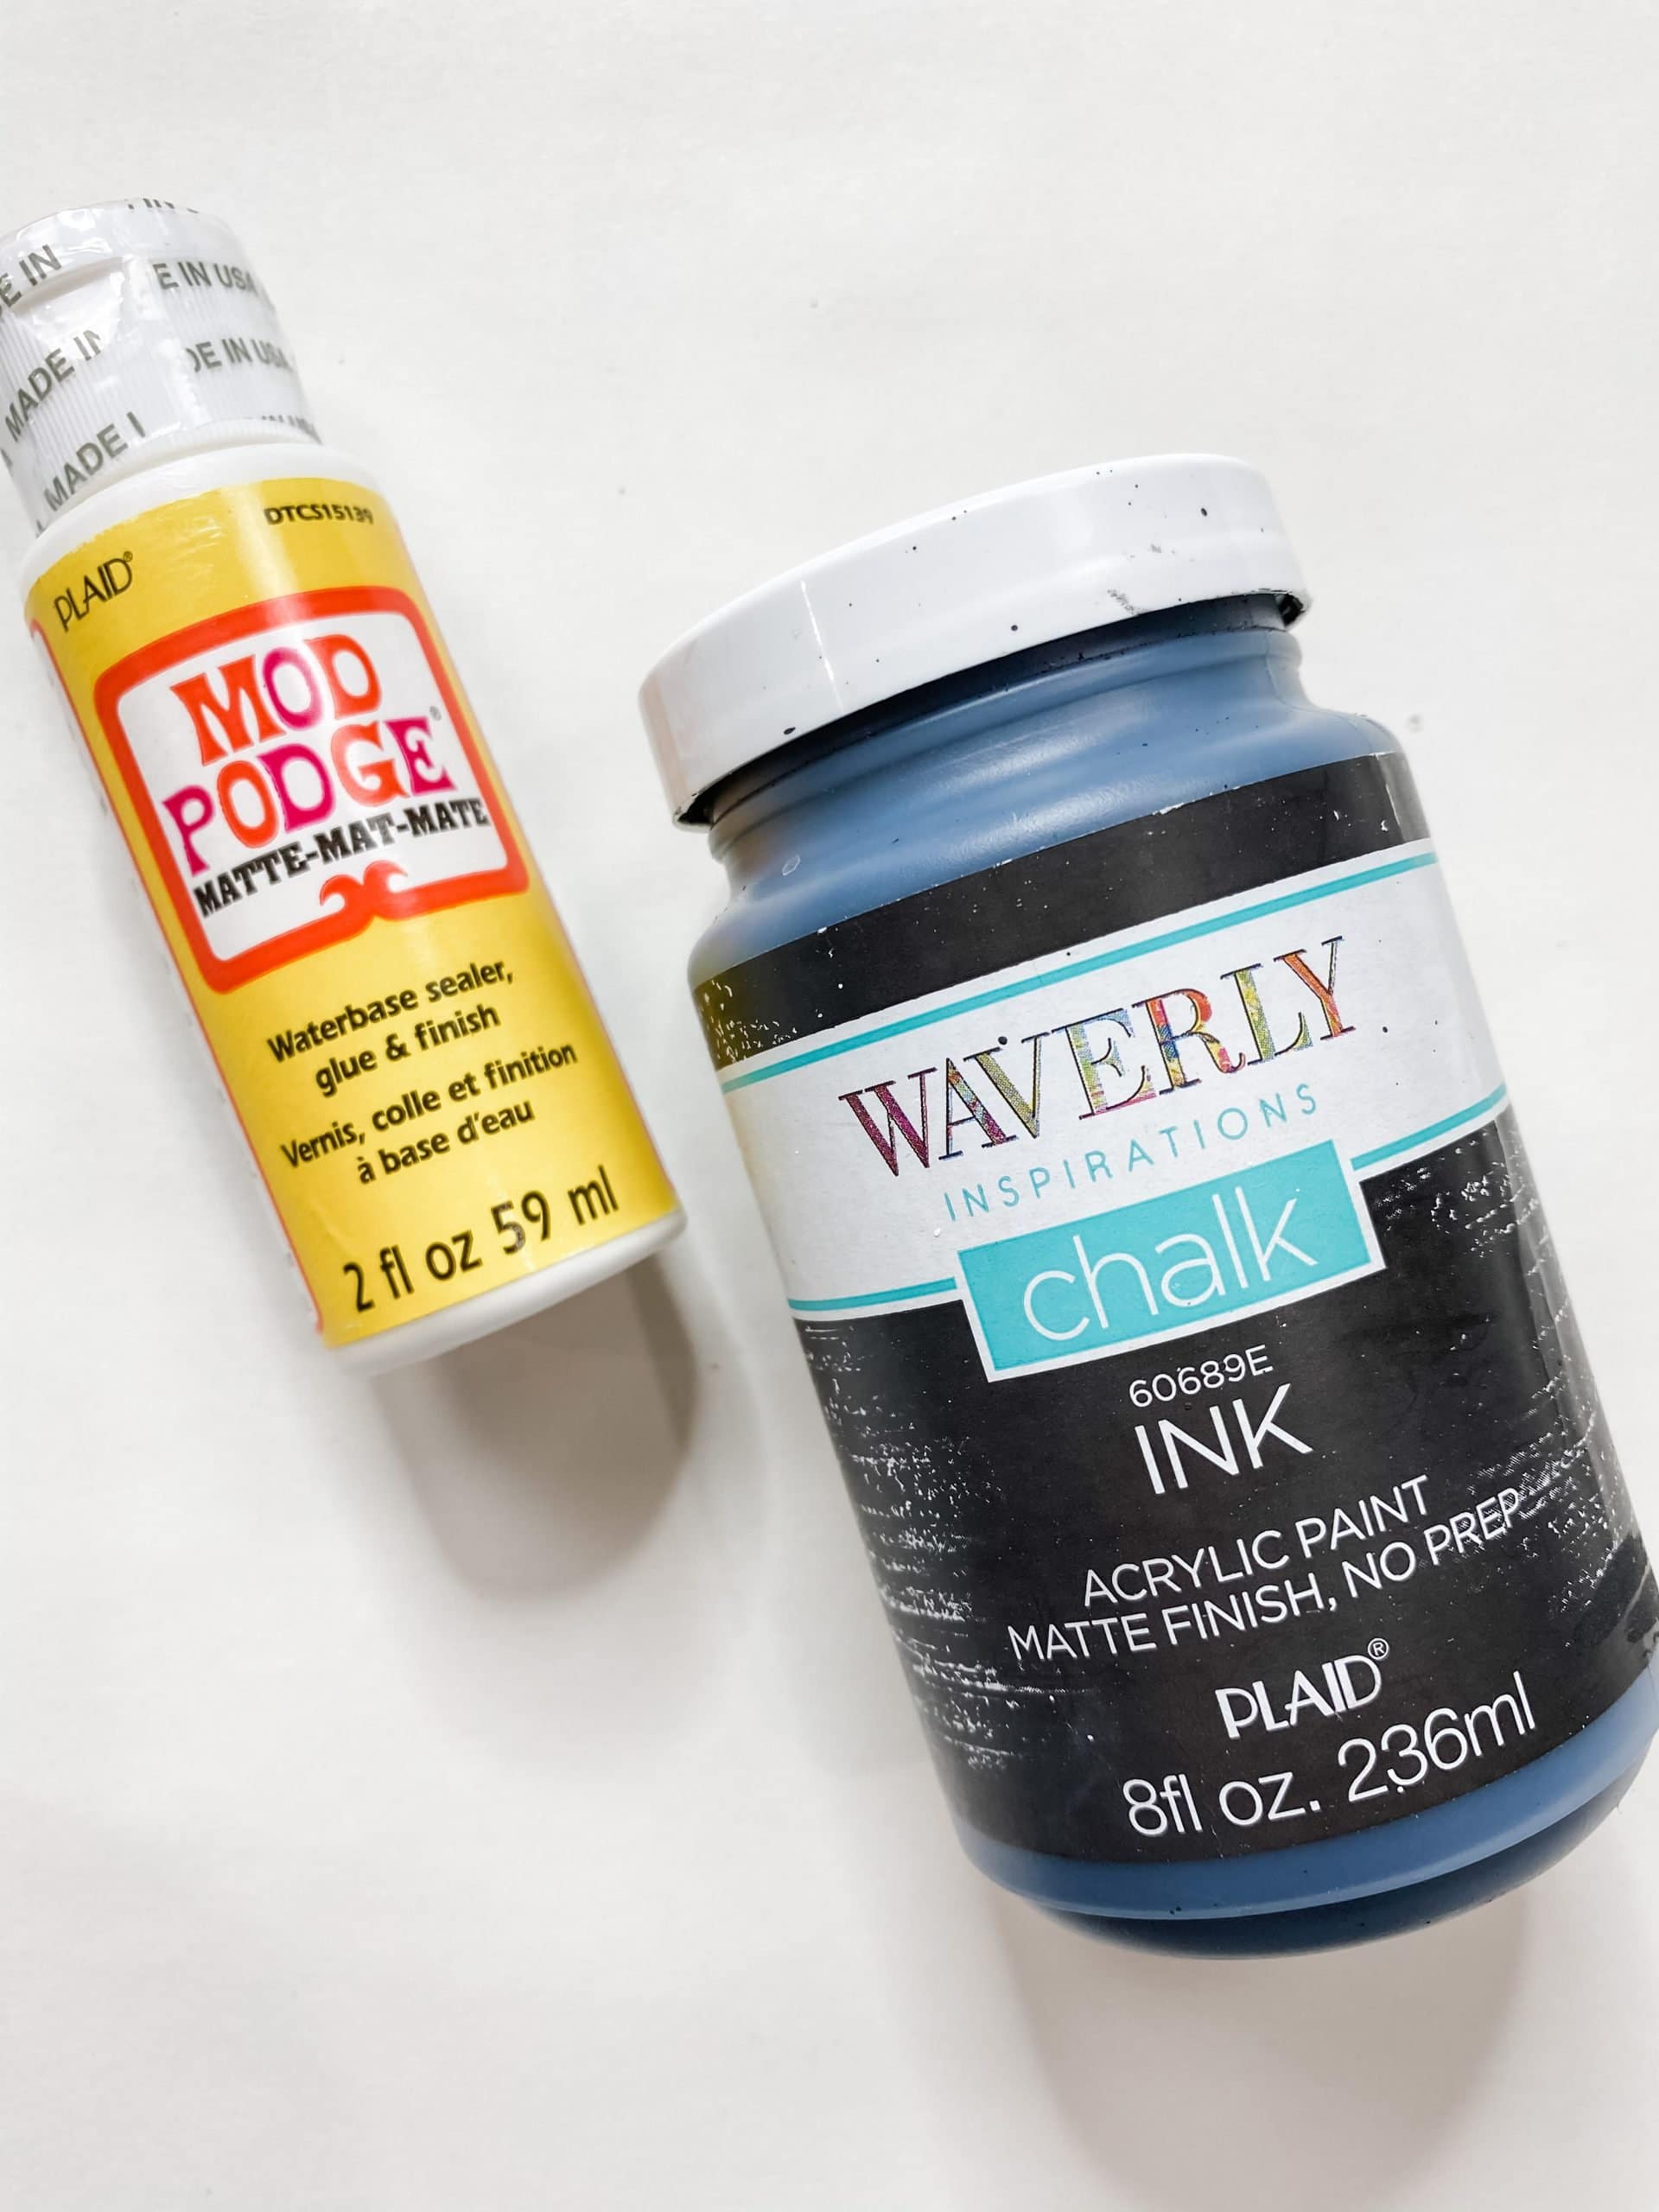
- Dollar Tree Mod Podge
- Dollar Tree Buffalo Check Ribbon
- Half Wood beads the size is 20mm
- Dollar Tree Diamond Wrap ribbon
- Rustic Mesh Ribbon
- Fiskar Fabric Scissors
- Glue Gun and Glue Sticks
- Zip tie
- (OPTIONAL) You can get yours at my link for Totally Dazzled
Let’s get started!
Alright, if you saw the first Dollar Tree Pizza Pan DIY, then you might recognize a lot of these steps. It is a VERY similar Dollar Tere DIY because I recreated the first Pizza Pan Christmas DIY.
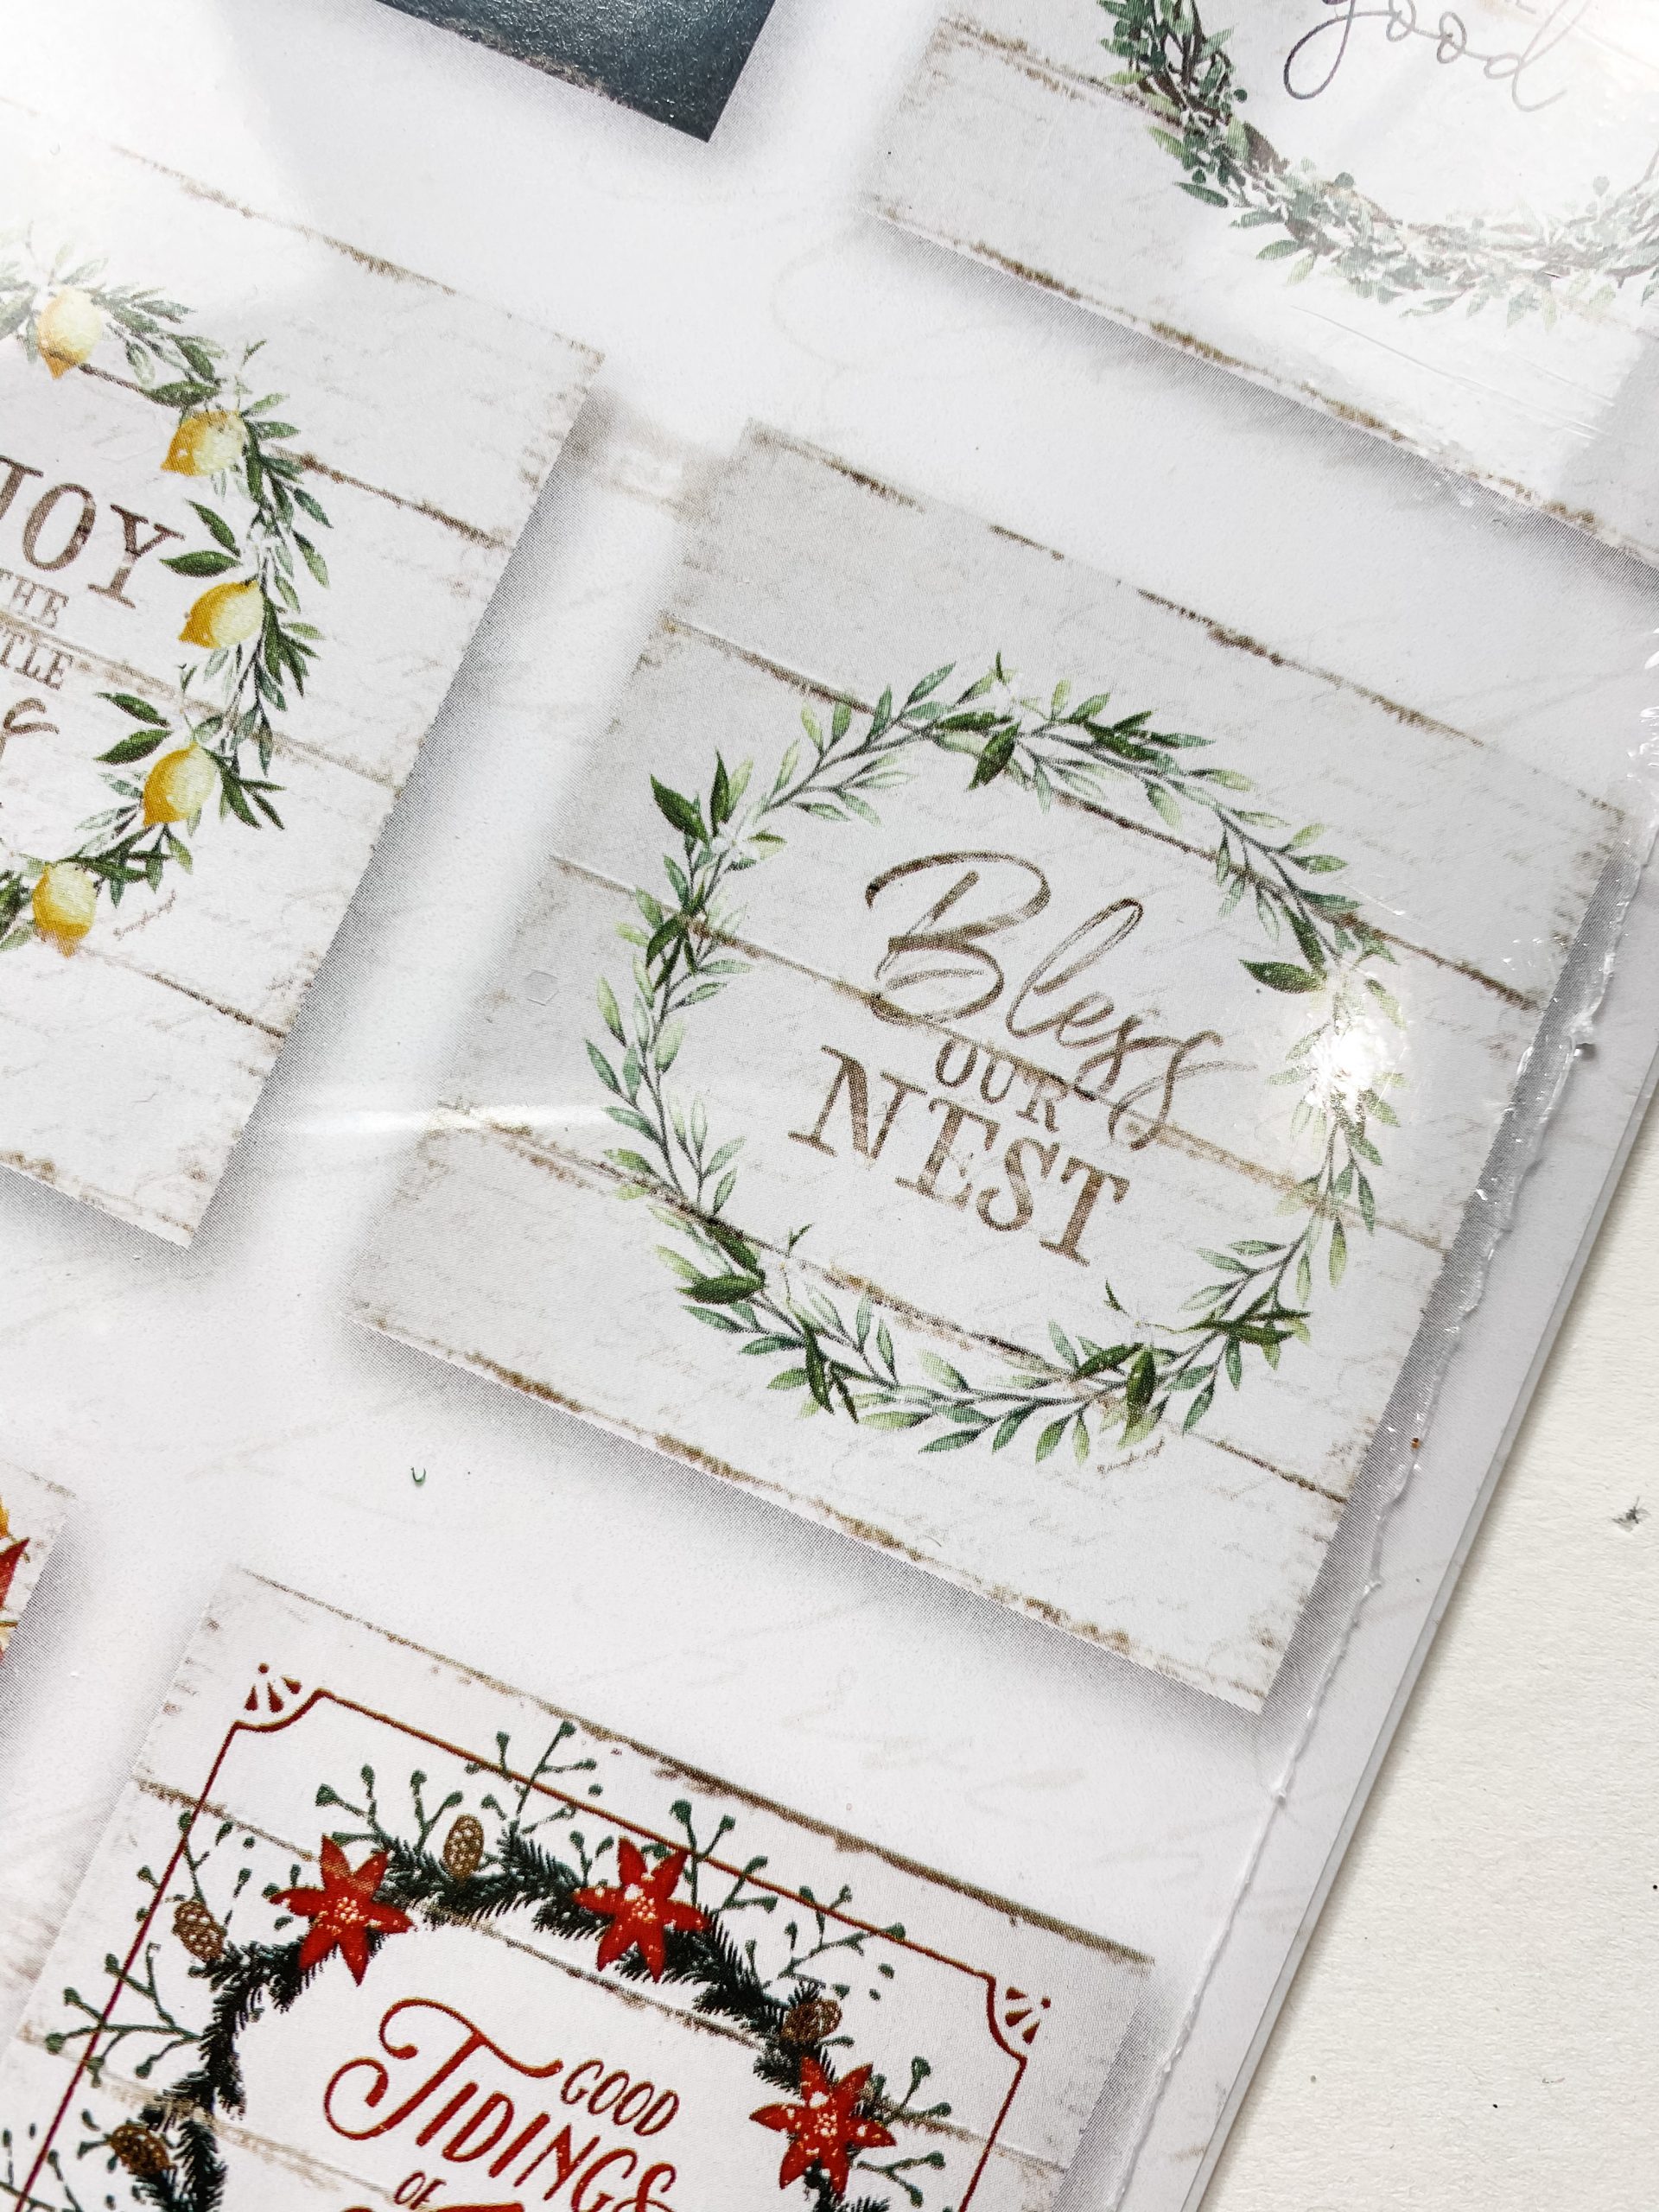
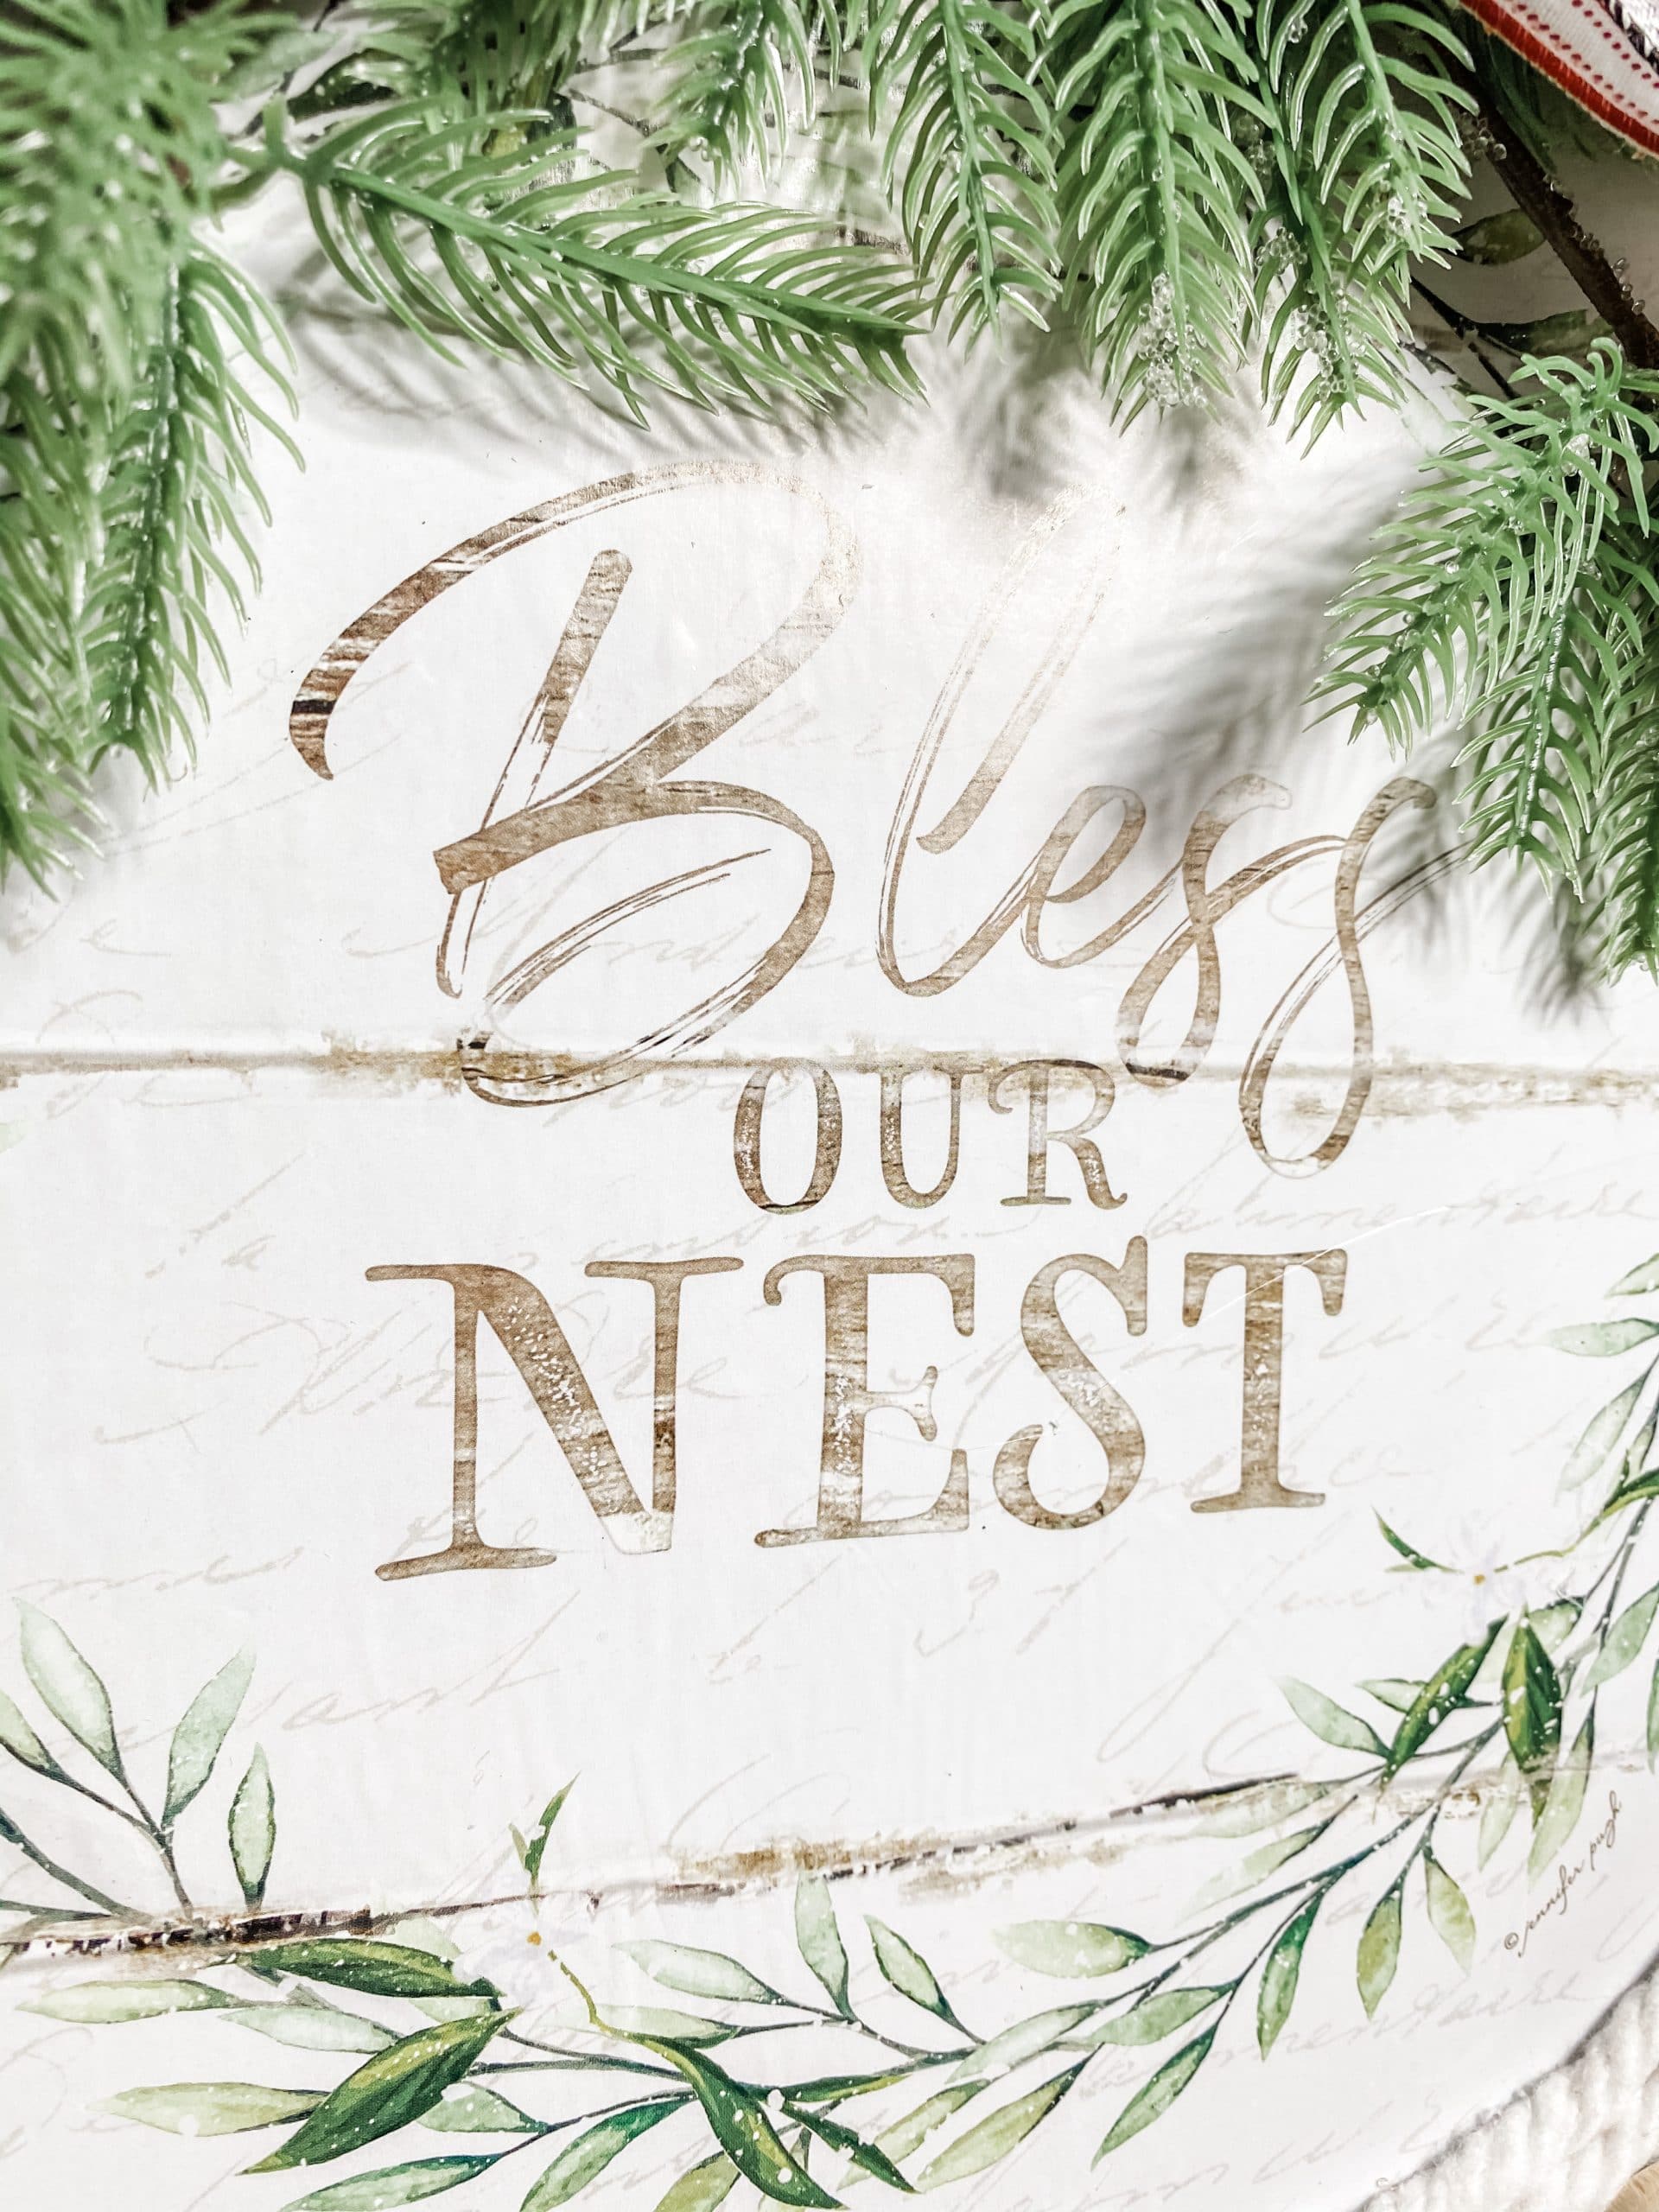
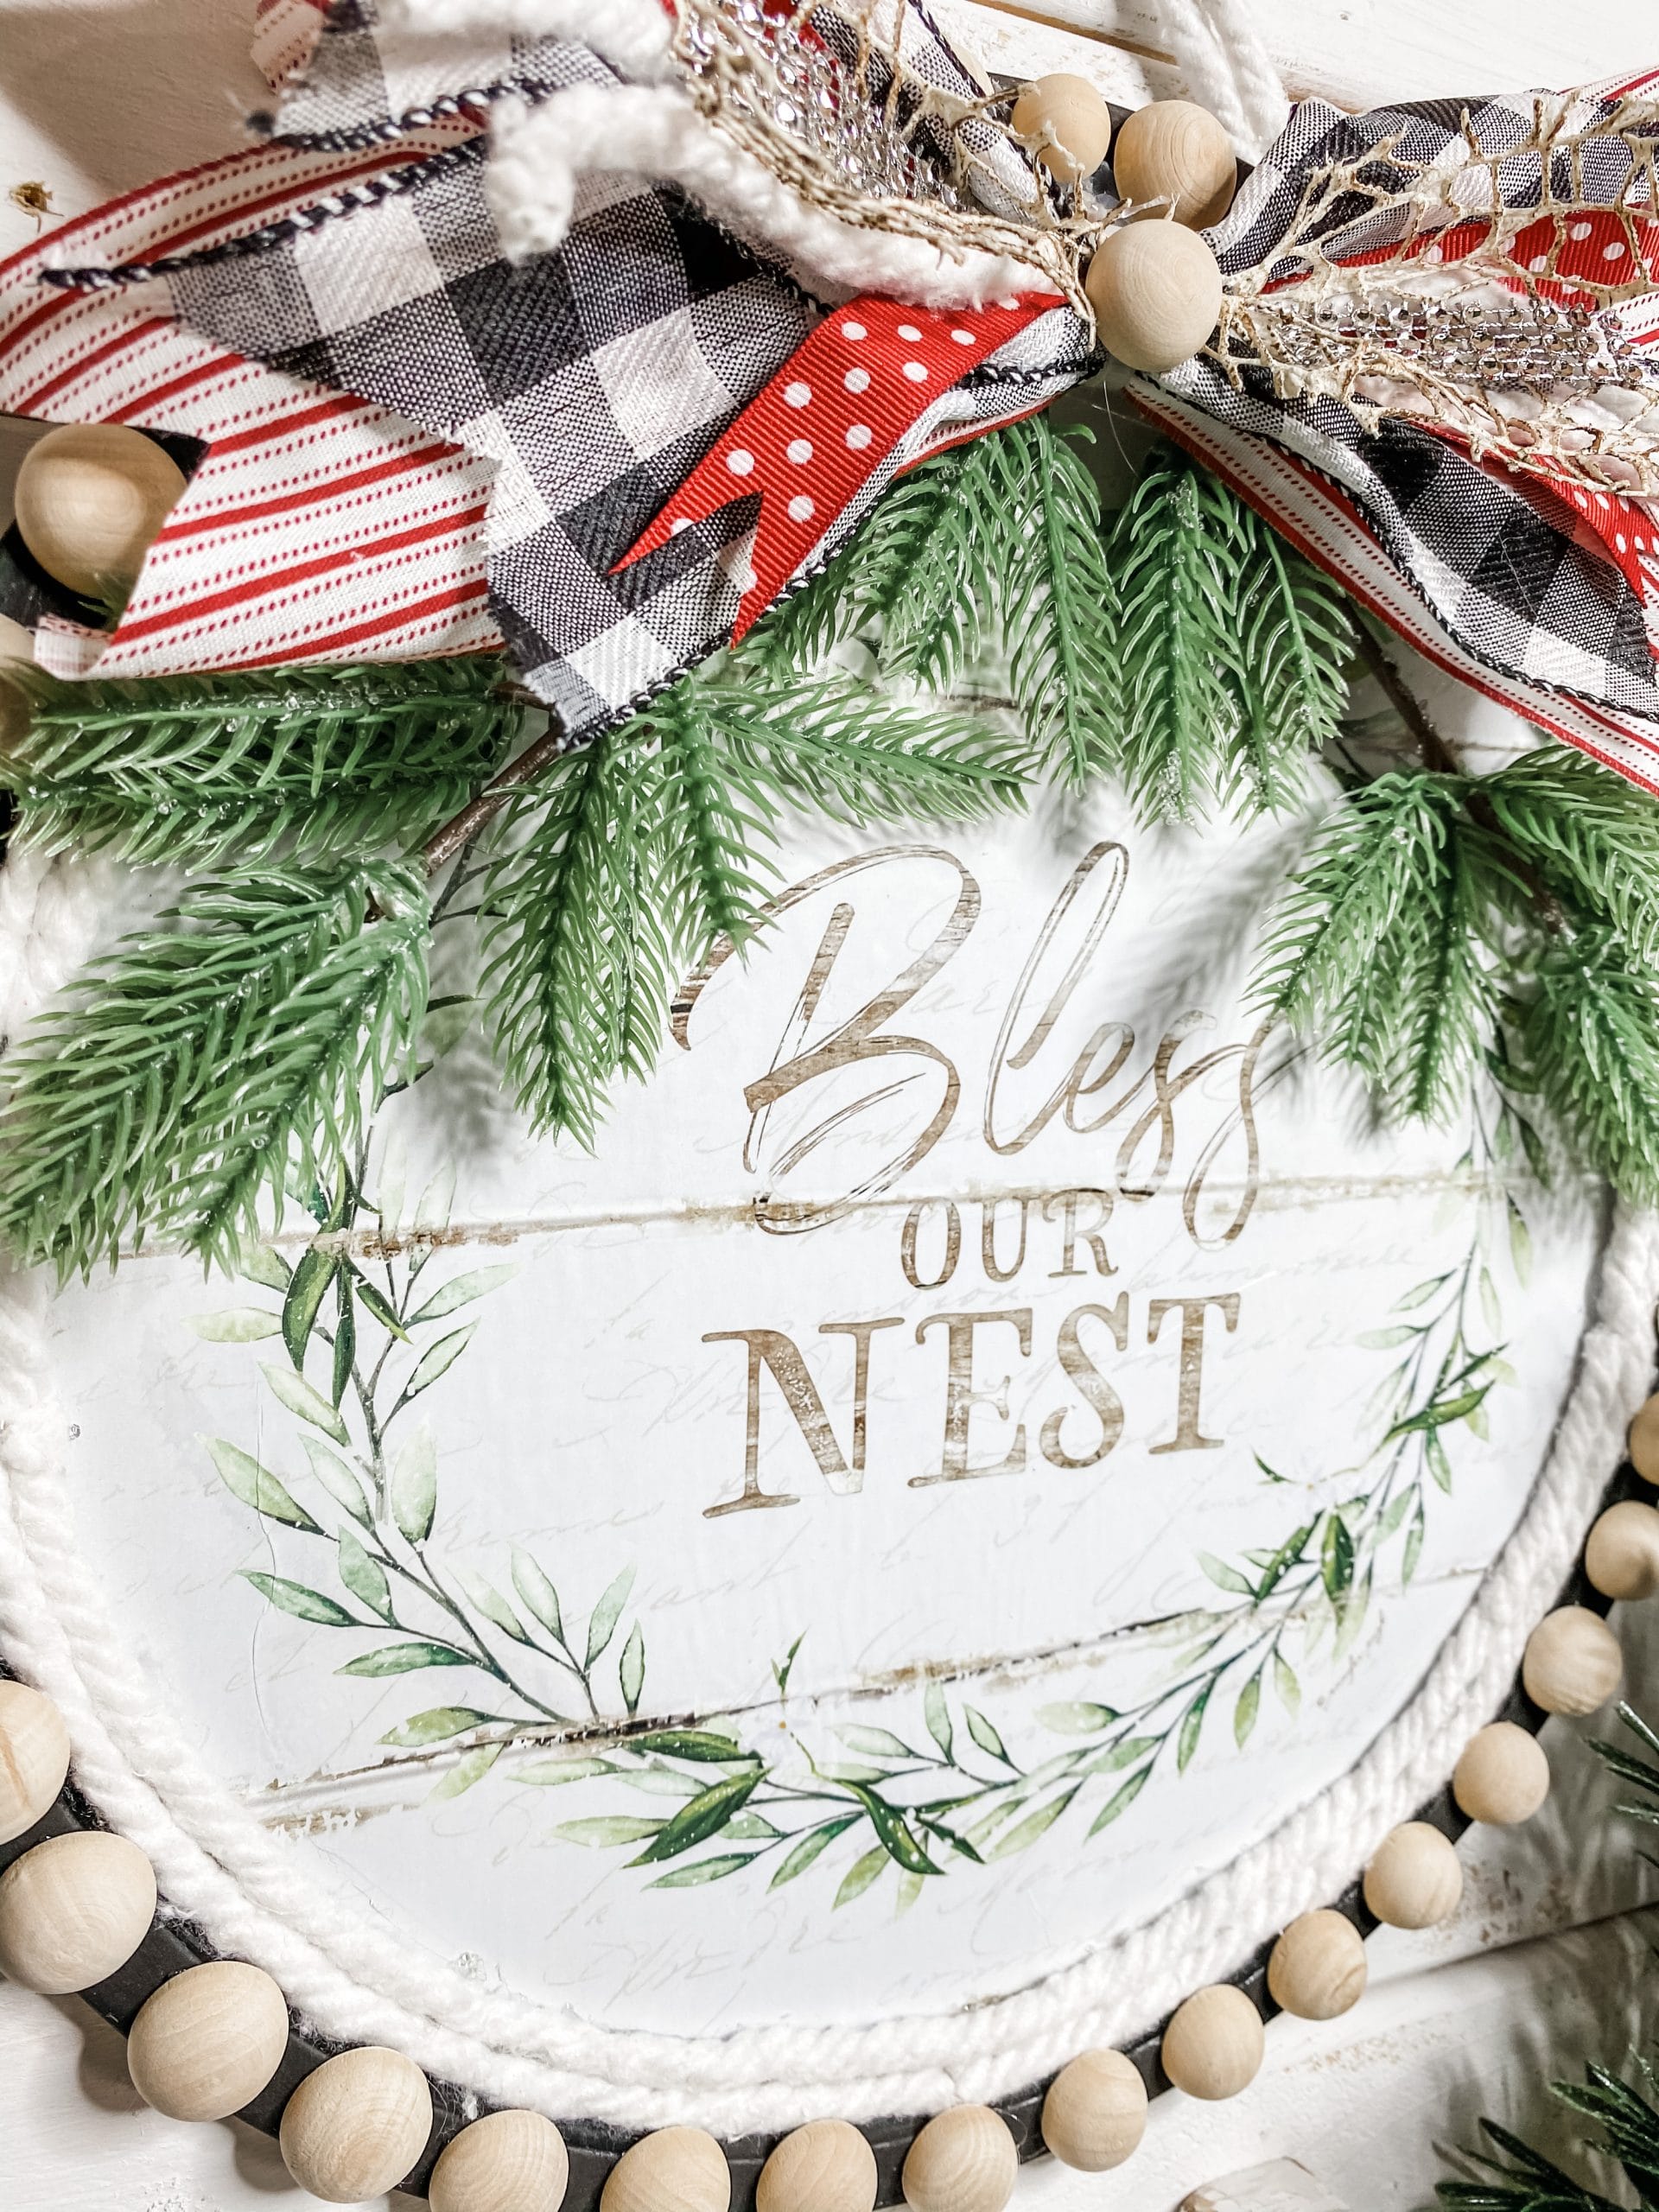
Step one is to choose the picture that you want to decoupage onto the pizza pan. I picked the Bless this Nest picture from the Dollar Tree 2021 Simply Blessed Calendar!
You could also choose from my free printables if you don’t have the calendar. (See the FREE Printables)
Tear the Bless Our Nest calendar print out of the calendar and place it on the Dollar Tree pizza pan. Lightly trace where you are going to trim the picture, and cut the excess off with scissors.
Don’t worry about the edges being perfect because we are going to cover the border with Dollar Tree mop strings.
Set the cut-out picture to the side and grab the black chalk paint.
Paint the pan
I used Waverly Ink Chalk Paint for this next step. Paint an even coat of black paint across the entire front of the Dollar Tree pizza pan. You could also use white chalk paint if you wanted.
I’m using the chalk paint to create a base color because the Dollar Tree Calendar print is so thin that the print on the back of the calendar shows through without a dark background. This is a technique that I use a lot when I teach people how to decoupage on metal.
Let the paint dry before moving to the next step. I like to use my adjustable temperature heat gun on the cool setting to speed up the drying process. Make sure you use a cool setting so that your paint doesn’t bubble up.
How to decoupage
Once the coat of paint is completely dry, apply a coat of Dollar Tree Mod Podge to the surface of the Dollar Tree pizza pan.
This is how you’re going to decoupage the print from the Simply Blessed Dollar Tree 2021 Calendar onto the Dollar Tree pizza pan.
I applied Mod Podge to a larger surface than the picture would cover because I would rather have excess Mod Podge around the edges of the picture than the paper, not decoupage completely.
DOLLAR TREE PIZZA PAN DIY
Press the Simply Blessed Calendar picture onto the coat of Mod Podge gently. To smooth out any wrinkles or creases, lay a piece of plastic saran wrap over the pizza pan and use your hands or a rolling pin to smooth out any imperfections.
The plastic wrap protects the paper from tearing or ripping and prevents the paper from sticking to your hands. This is a great trick for when you’re learning how to decoupage.
Embellish it!
I love using Dollar Tree mop strings in my DIY crafts because it really gives it a boho feel. To use a Dollar Tree mophead, you’re going to have to remove the plastic piece at the top of the mophead.
I just use aviation snips to break the plastic and release the mophead strings.
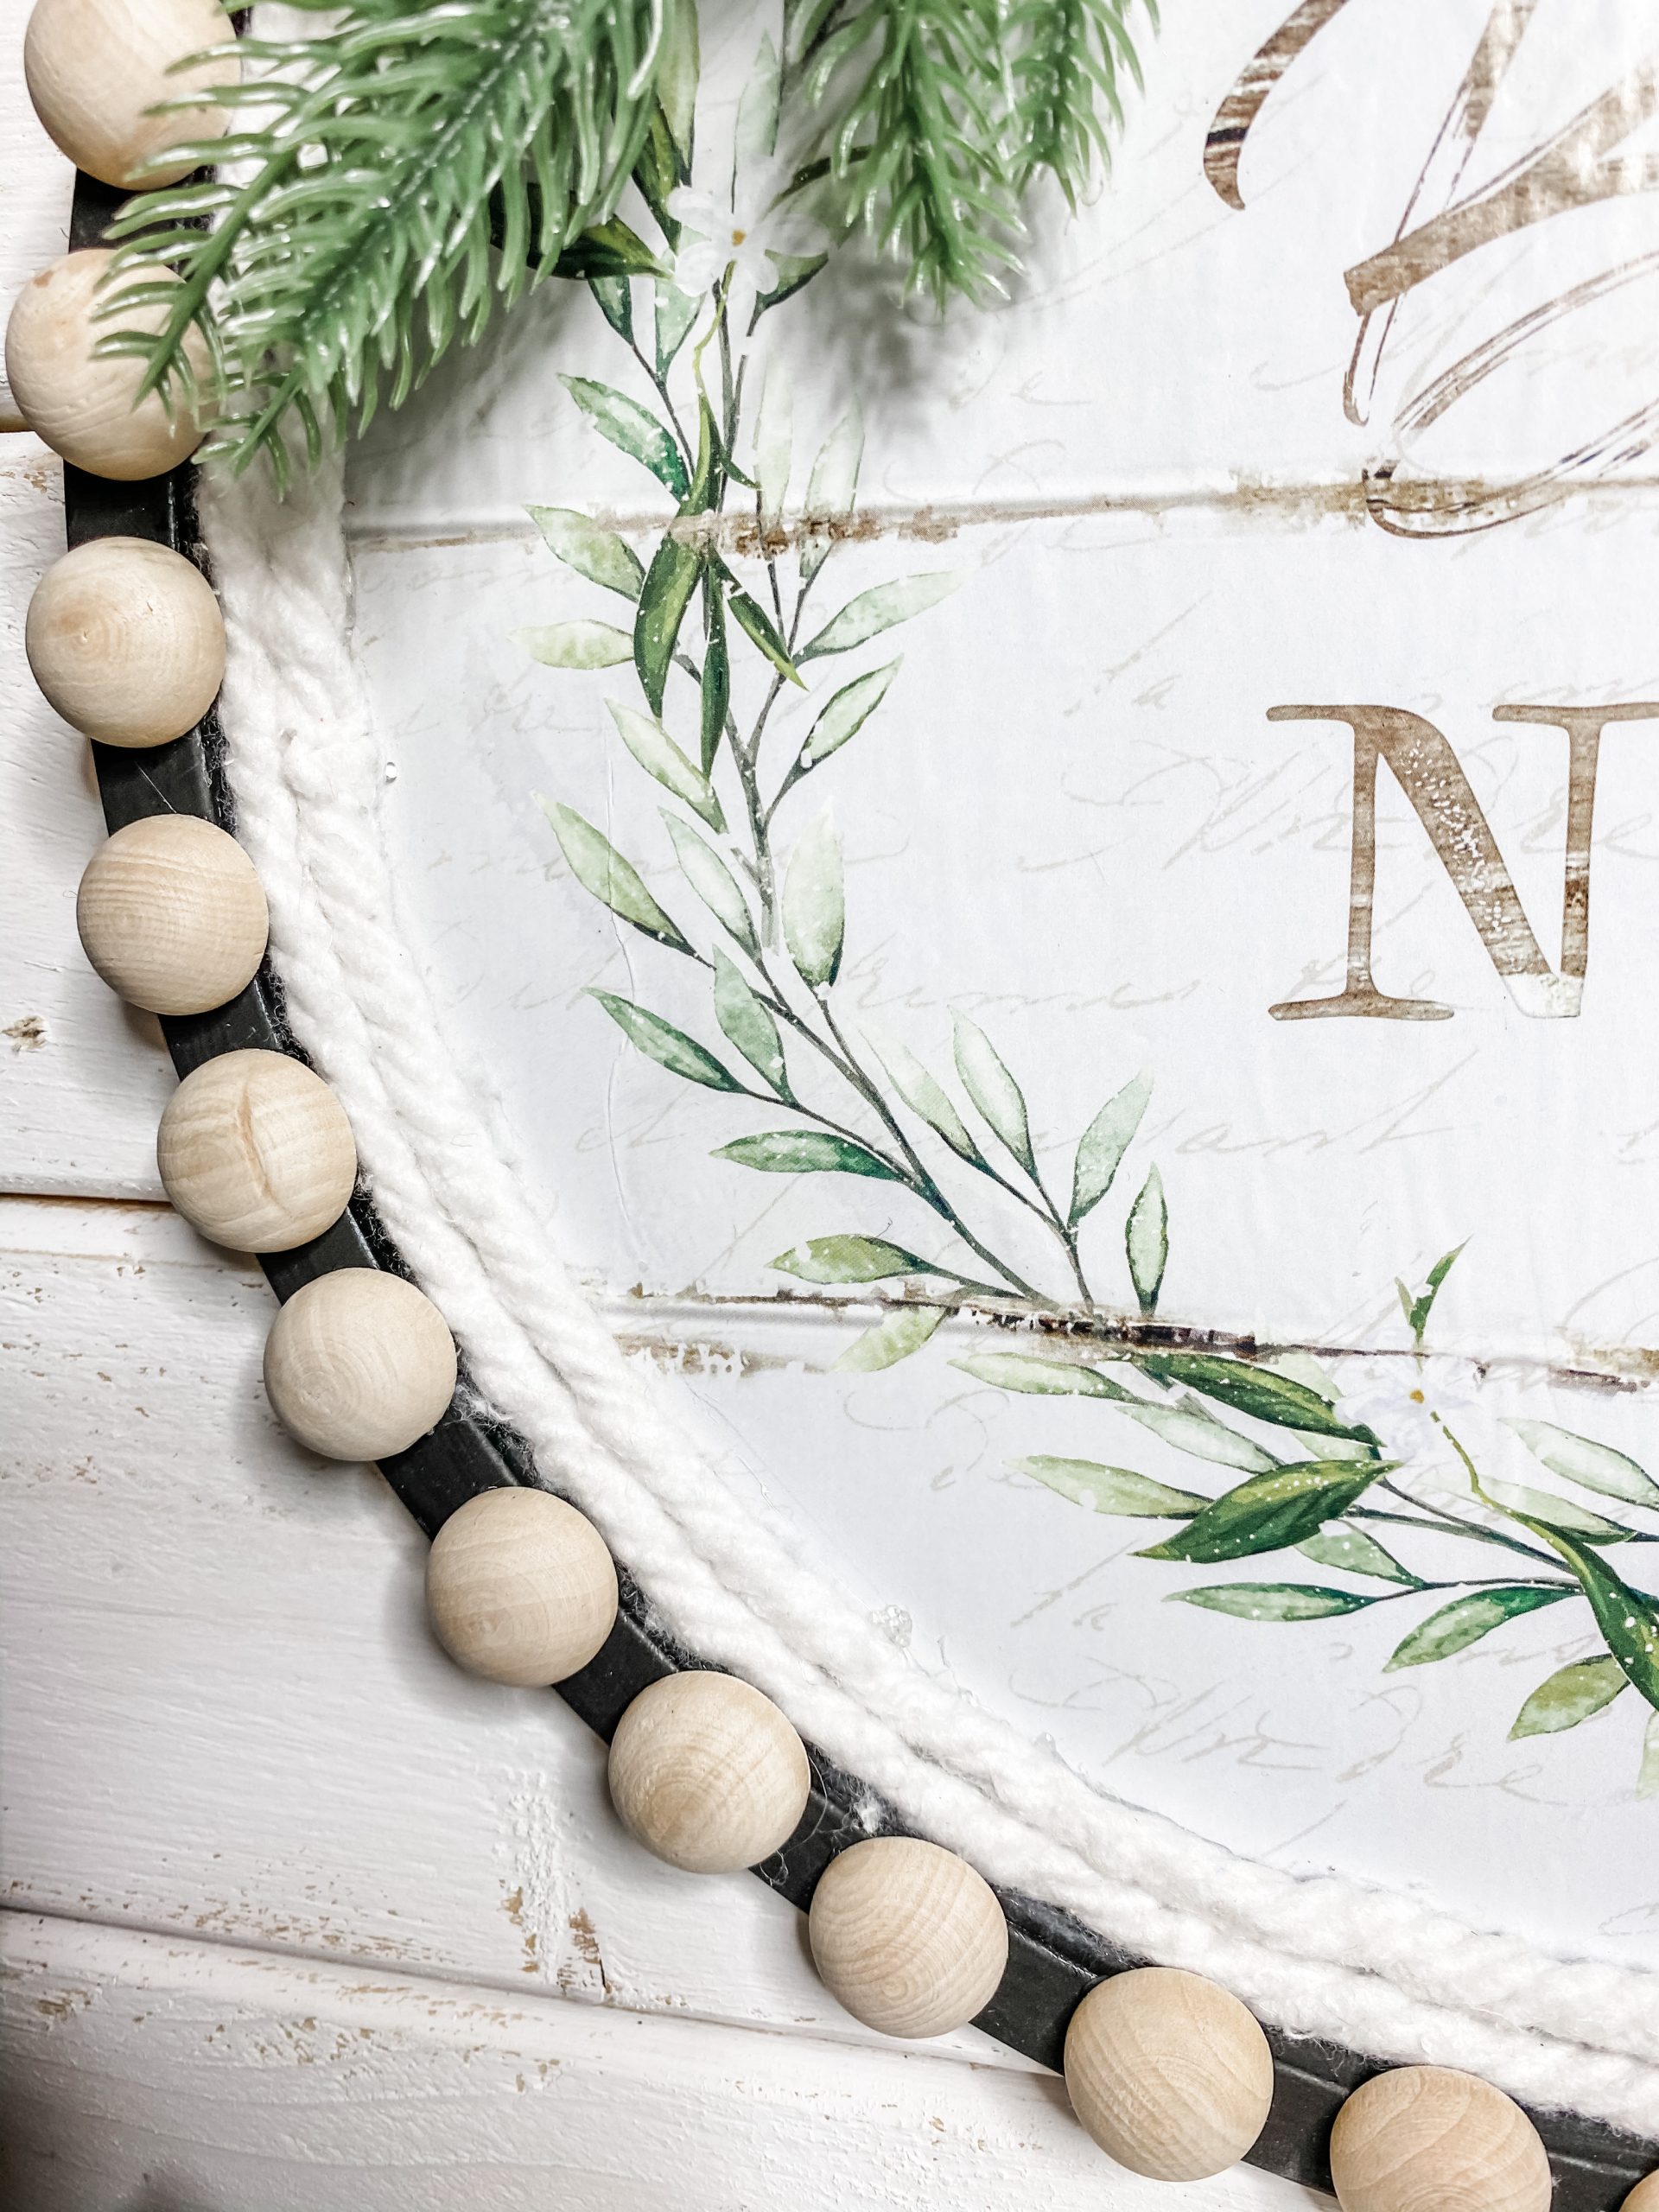
I hot glued two circles of Dollar Tree mophead strings around the inside edges of the Dollar Tree pizza pan. This covers up any space of the pizza pan that wasn’t covered by the decoupaged calendar print.
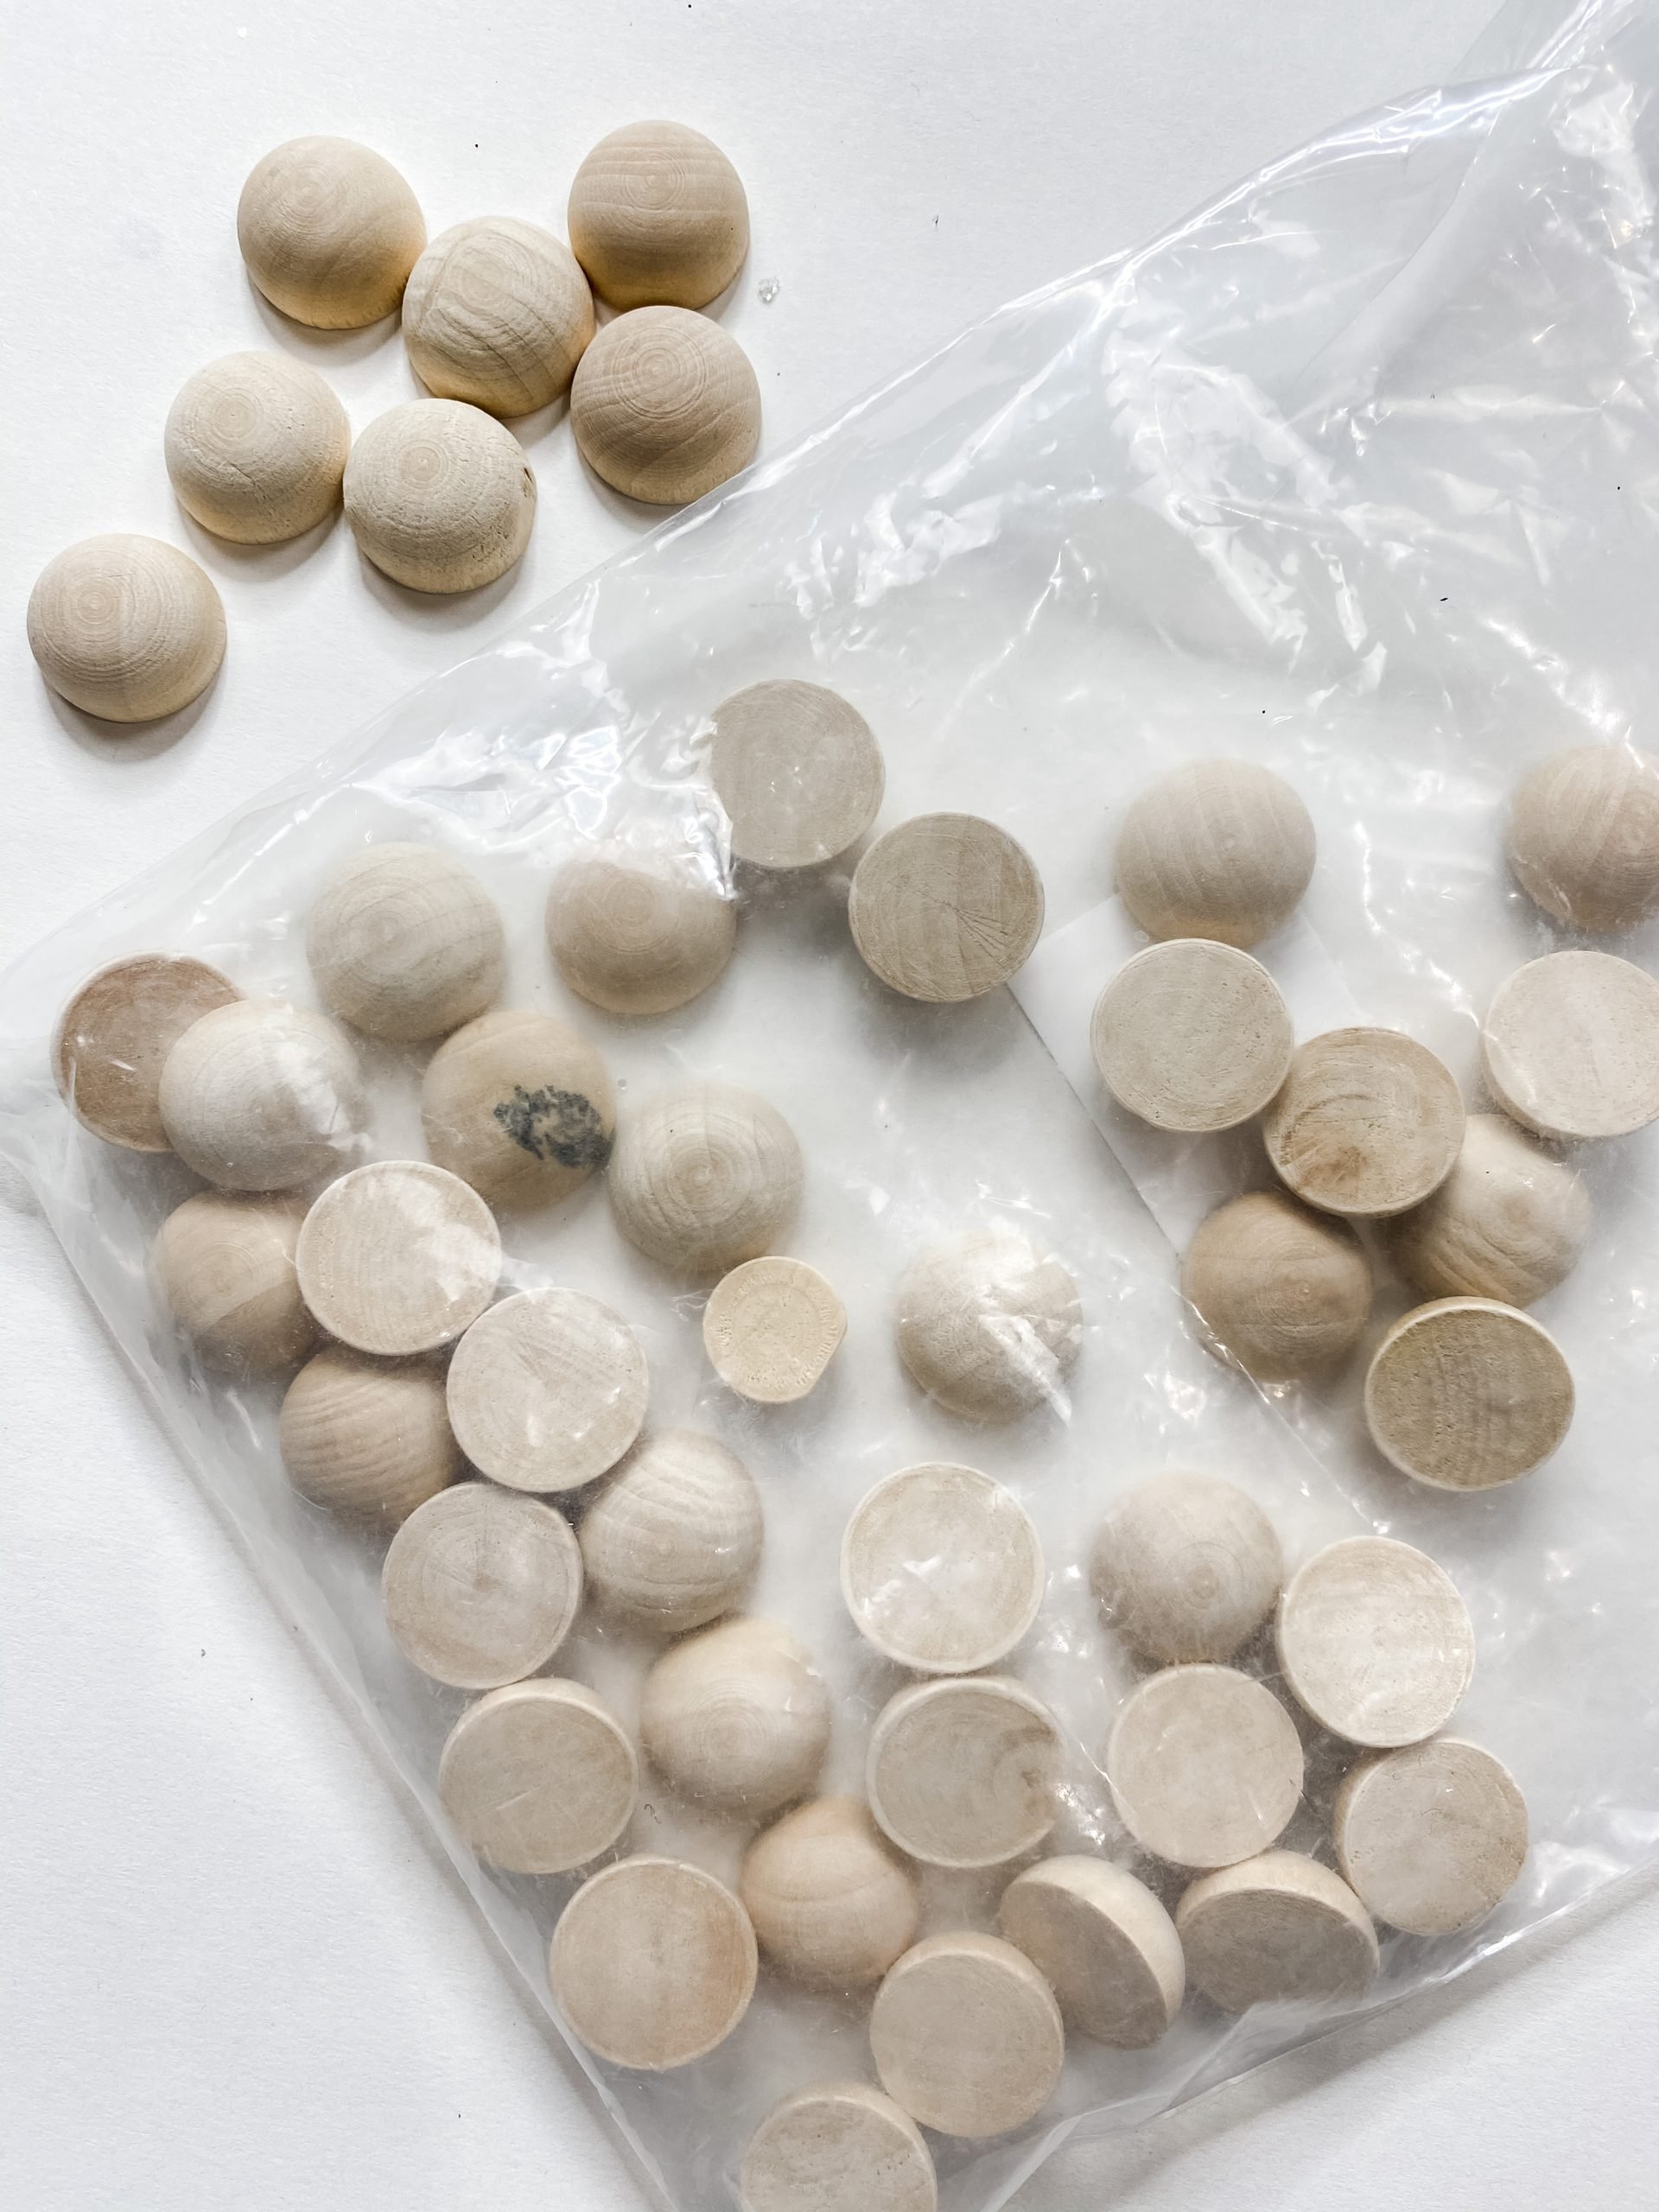
Just like the first Dollar Tree Pizza Pan Christmas DIY, I hot glued half wood beads around the outer edge of the Dollar Tree pizza pan DIY.
I chose not to stain these wood beads because I wanted you to be able to swap out the messy bow to make this DIY decor perfect for any season, but I think it would be super cute if you stained the wood beads red.
It’s beginning to look a lot like Christmas!
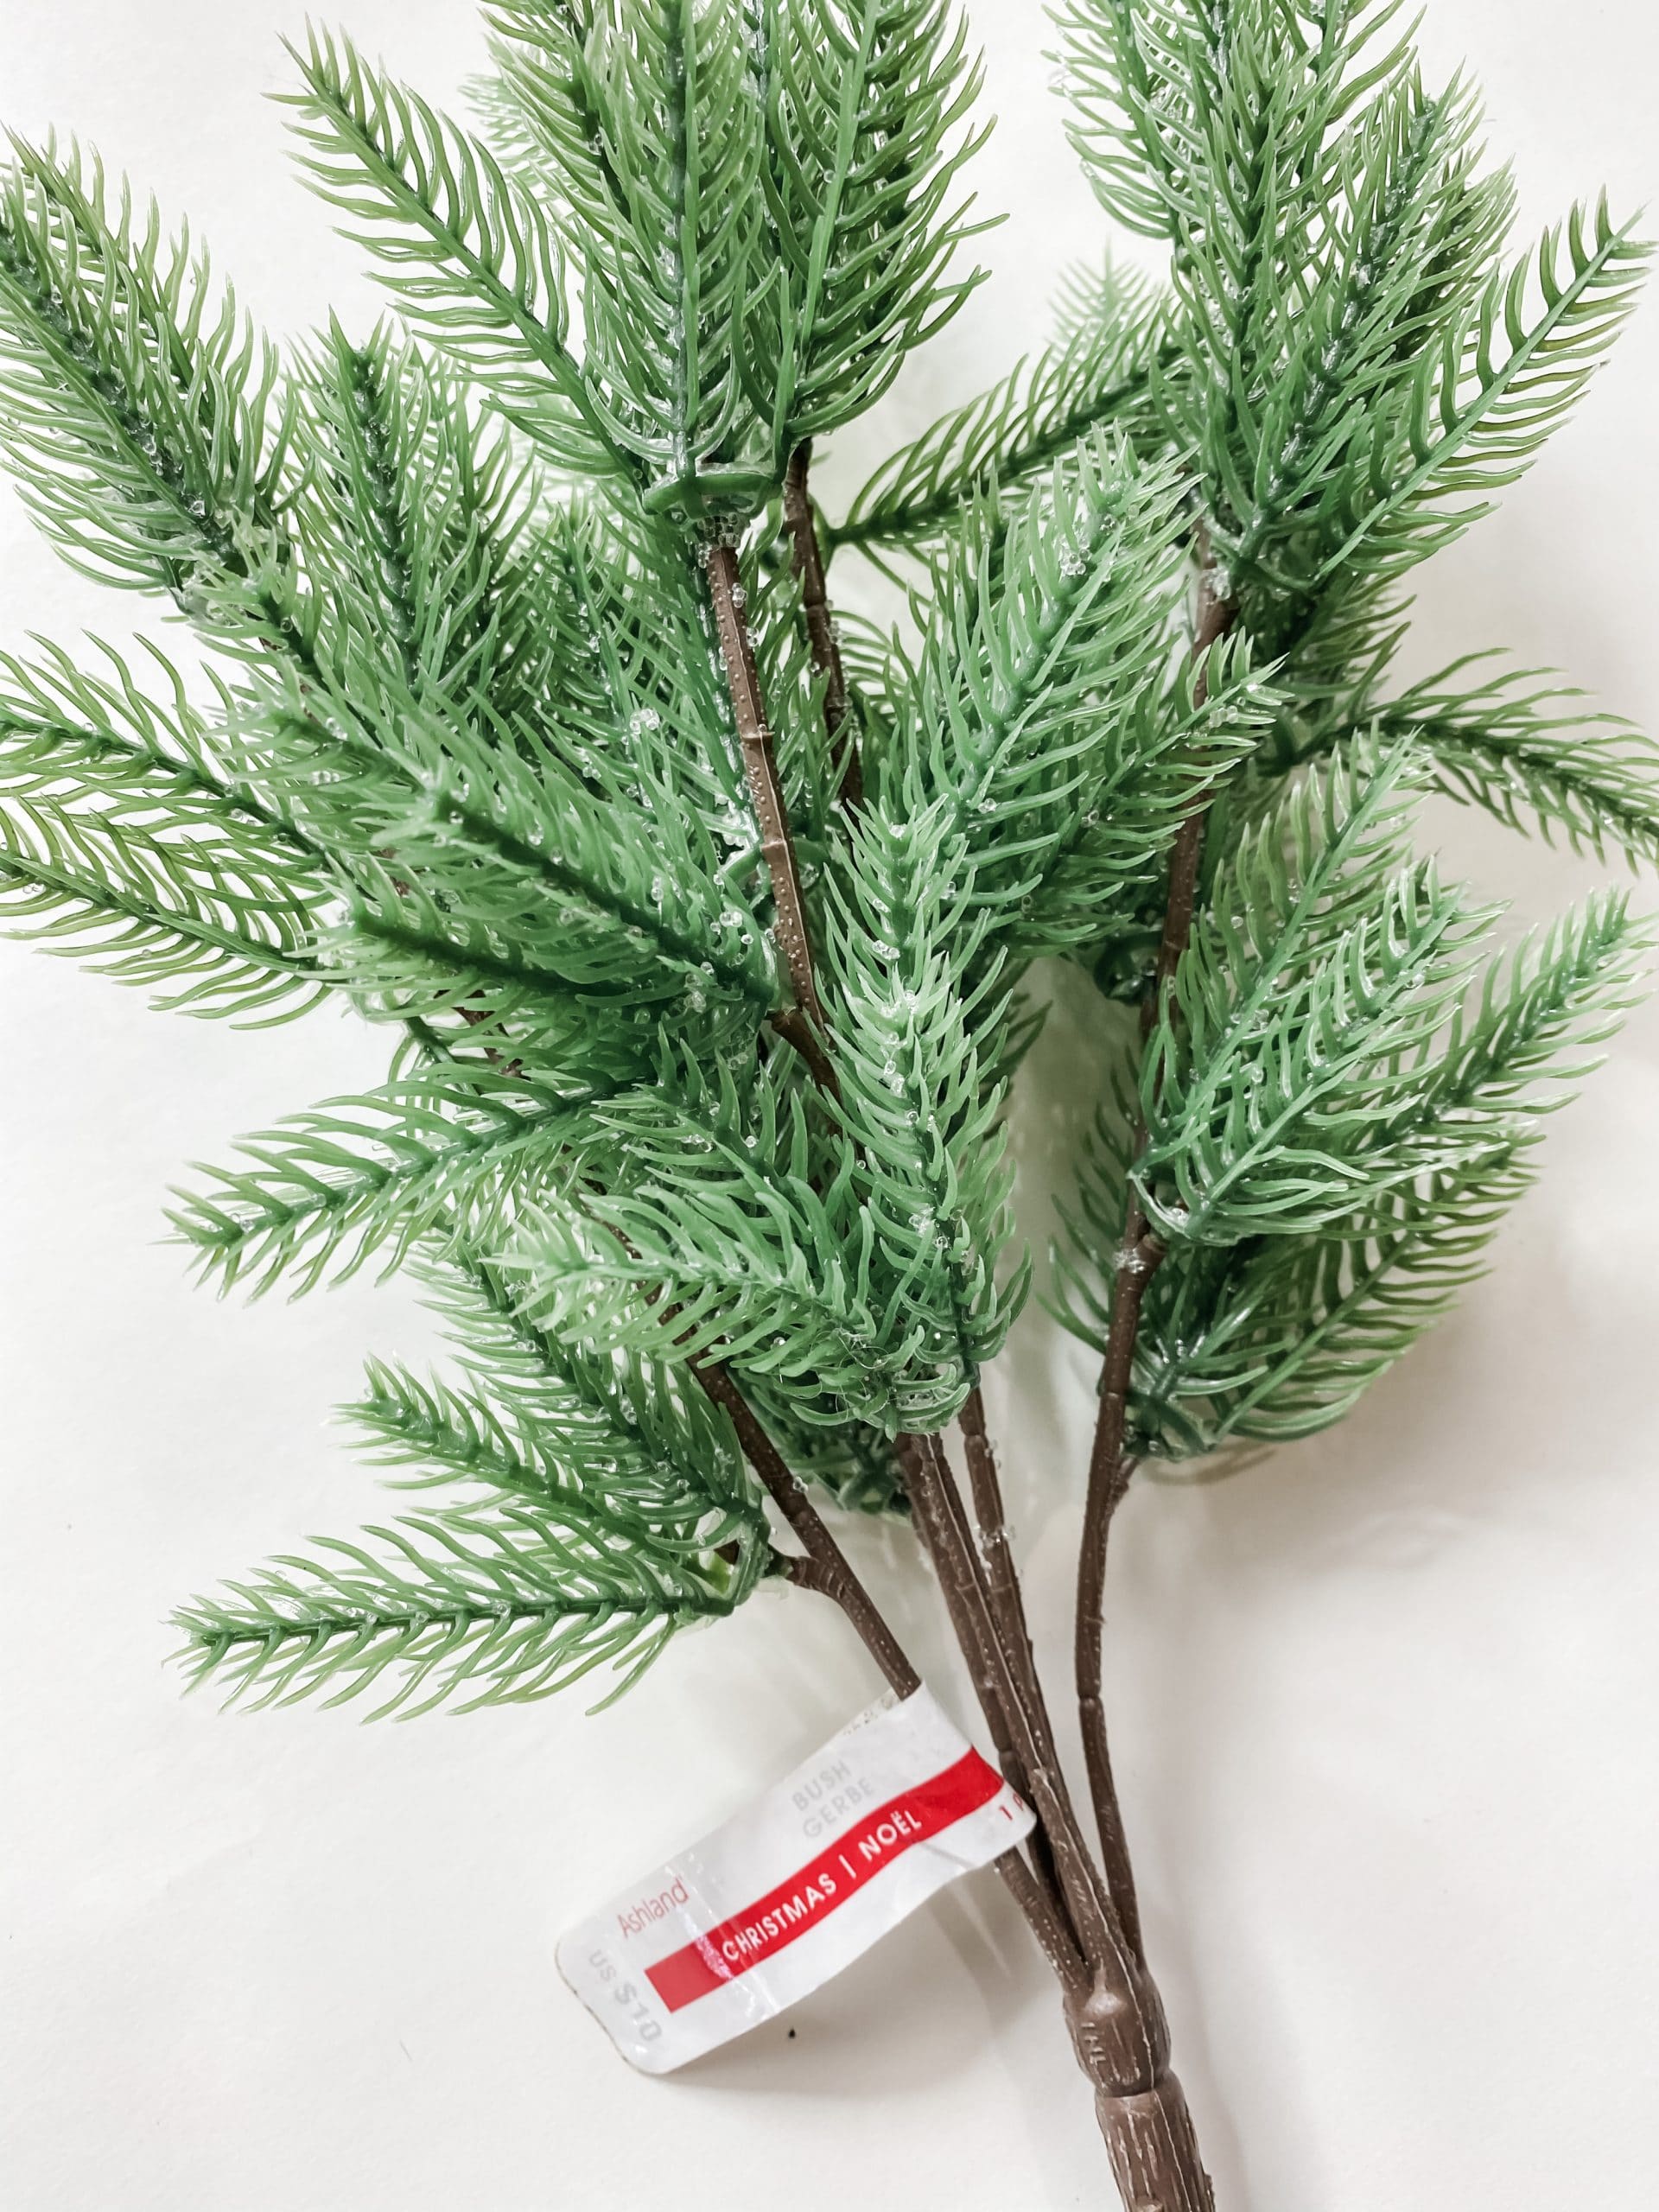
The Christmas greenery spray that I used for this Christmas pizza pan DIY came from Michael’s. I bought it last year when it was 90% off! That’s one thing I love about Michael’s and Hobby Lobby – they always have amazing sales!
If their items are not on sale, be sure to use a Hobby Lobby 40% off coupon, and if you shop online with Michael’s they always have an online coupon that you can apply.
I used one greenery spray and trimmed pieces off of it. Then, I hot-glued them to the top center of the pizza pan. Don’t worry, we are going to cover the stems with a messy bow!
How to make a bow
I love teaching people how to make a bow with ribbon just like the one on this Dollar Tree pizza pan DIY. You may have seen several other crafters making bows similar to this.
People refer to a ribbon bow very similar to this as the Refabbed Bow. Be sure to also check out my Napkin Bow DIY here!
Today, I am going to show you how to make a quick and easy Christmas bow with ribbon. This x bow is perfect for year-round as well because you can switch out the ribbon patterns for any season or your home decor style.
This x pattern is different than the typical messy bow that I usually make for my DIY decor, but you can use any style of bow that you like.
Here are some cute messy bows that I have made for other DIY projects: Dollar Tree Cutting Board Christmas Sign, Dollar Tree Shabby Farmhouse Christmas Sign DIY, Jolly Farmhouse Printable Christmas Decor DIY.
Make the Bow
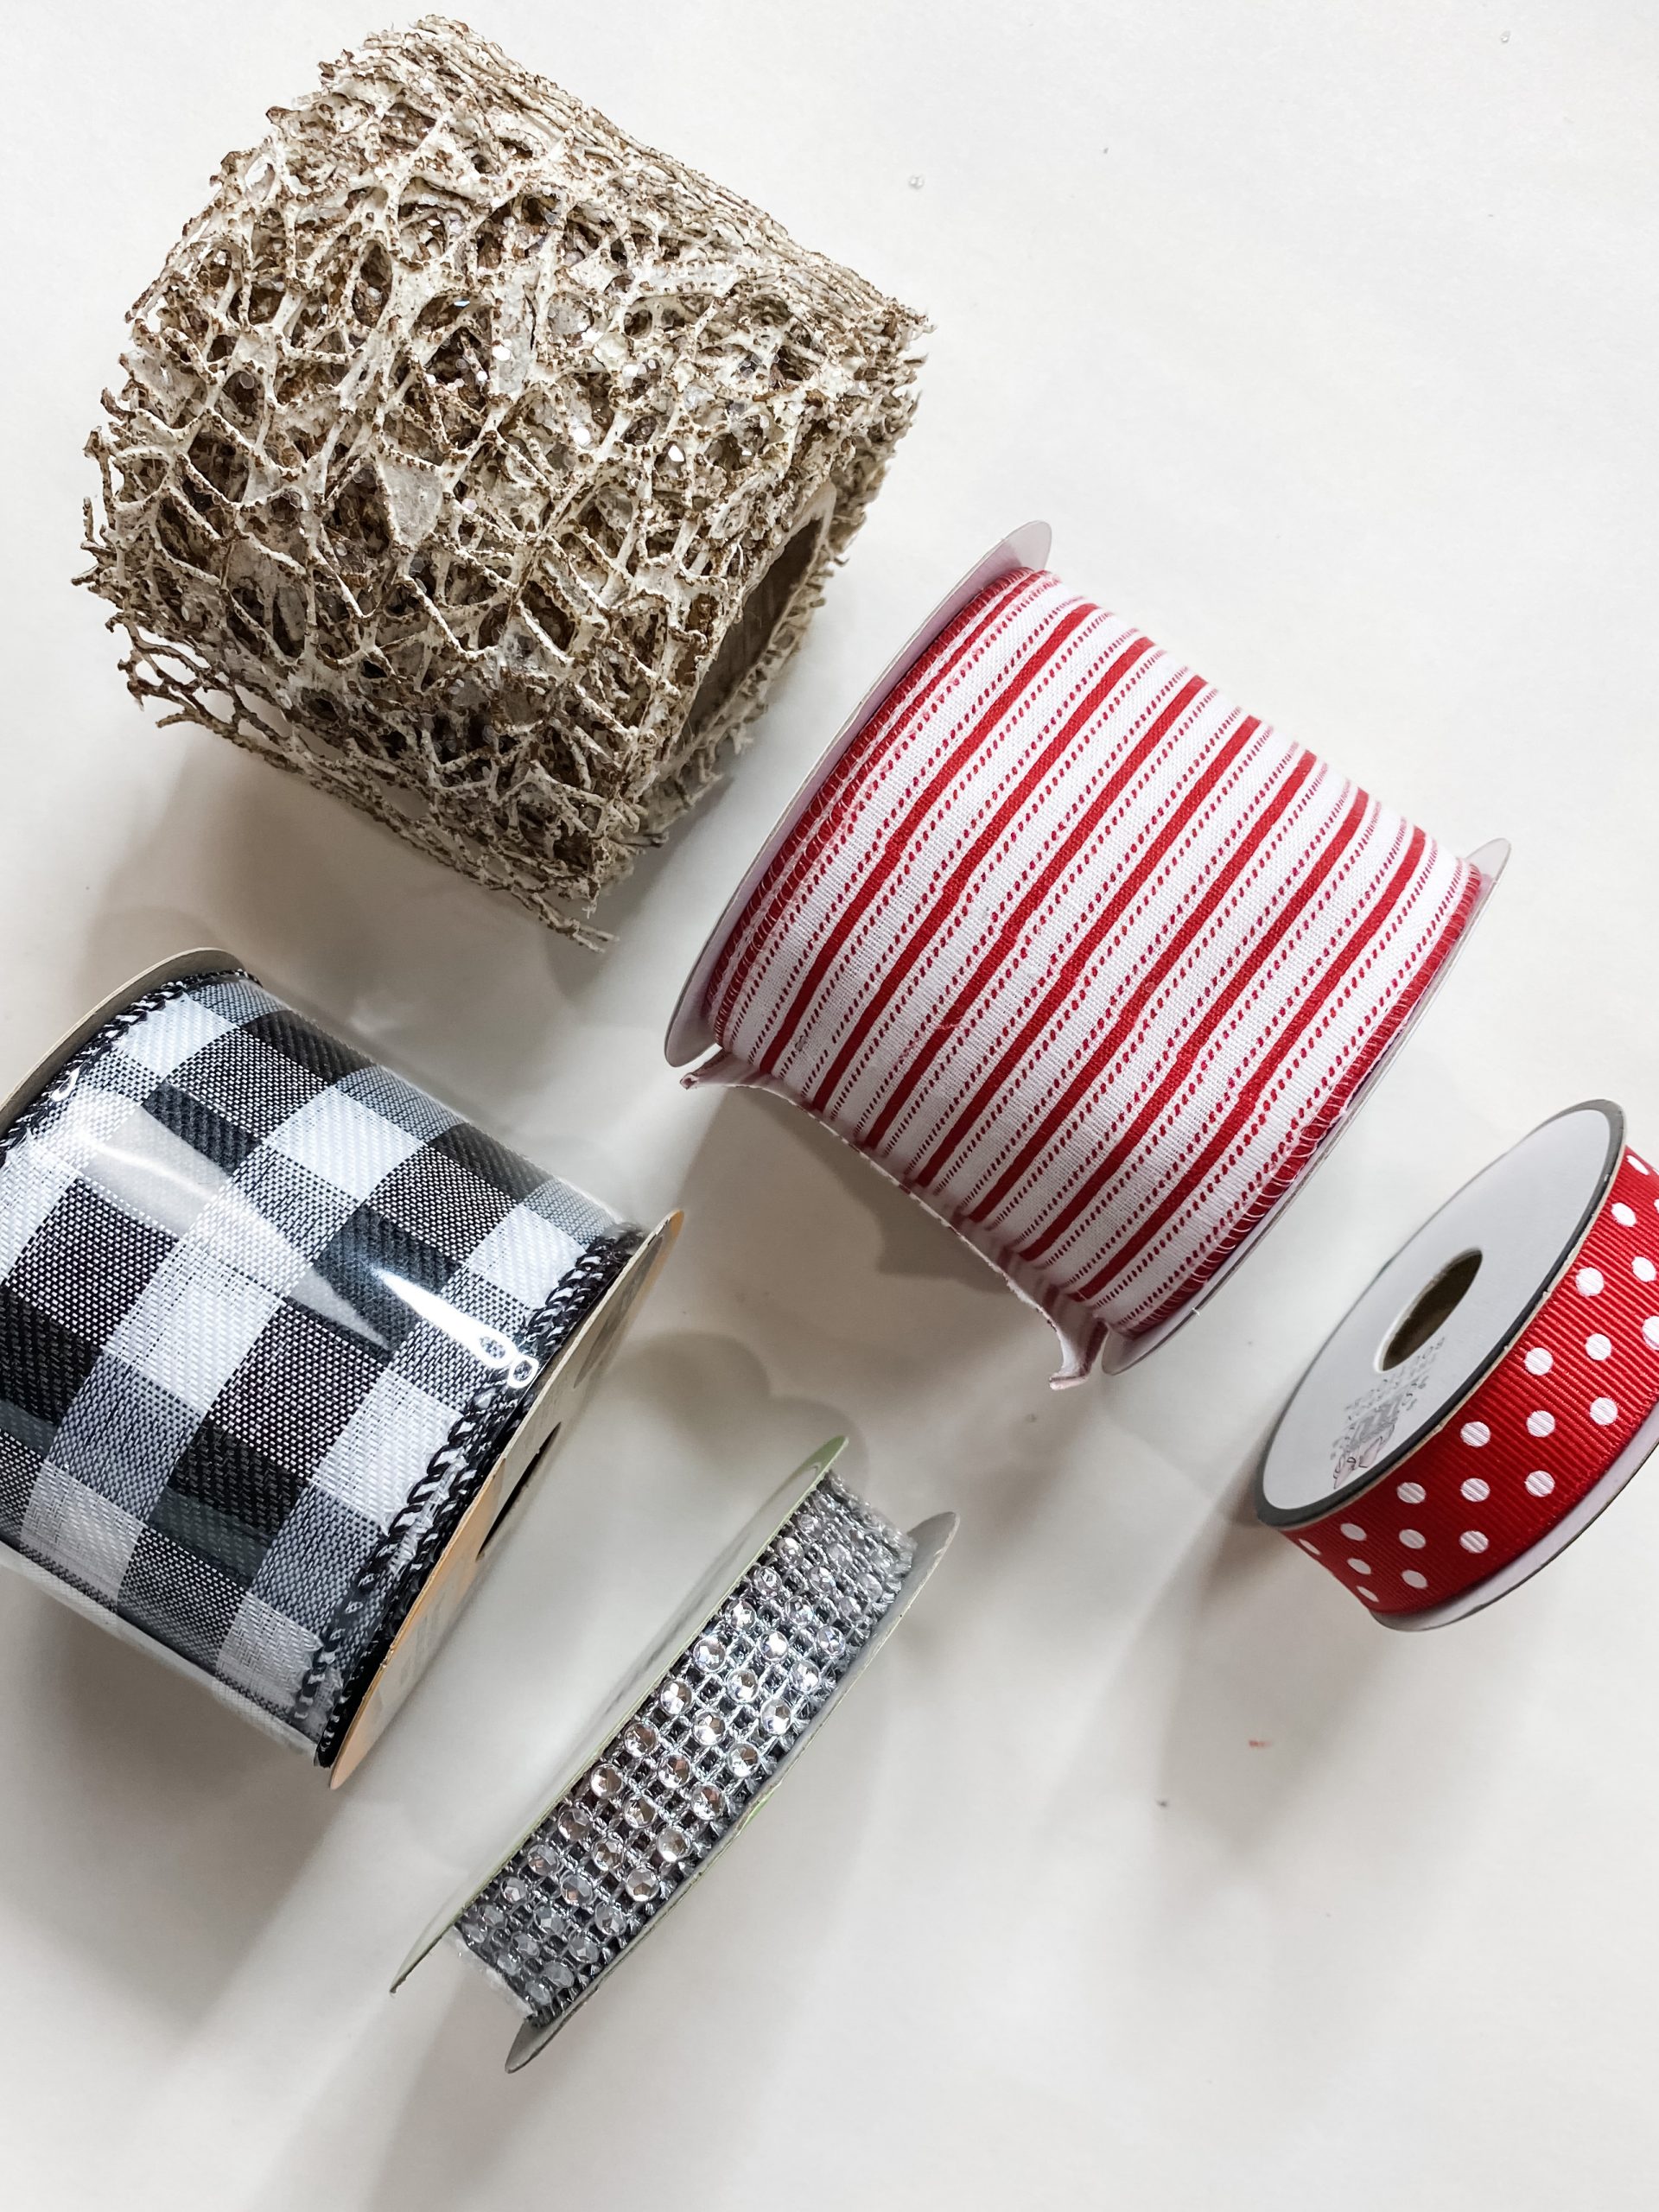
I started making this DIY ribbon bow by cutting 2 strips of the buffalo check ribbon, striped ribbon, polka dot ribbon, mop strings, and one strip of the rustic mesh ribbon and diamond wrap ribbon.
I cut the ribbons in varying lengths of 6, 8, and 11 inches long. The longest strips will go at the back of the bow with the shortest strips at the very front.
Next, I folded the striped ribbon and buffalo check ribbon in half longways and snipped the ends to create a dovetail.
How to make an X Bow
I laid the ribbon strips down in an x pattern starting with the red striped ribbon, then buffalo check, then polka dot, and then the Dollar mophead strings.
Place the Hobby Lobby rustic mesh ribbon perpendicular across the x and put the Dollar Tree diamond wrap strip on the very top.
Tie your bow in the center with a zip tie or twine, and hot glue it over the stems of the Christmas greenery.
I hot glued a half wood bead over the center of the stacked ribbon bow to cover the zip tie, but you could also add a bit of bling from Totally Dazzled!
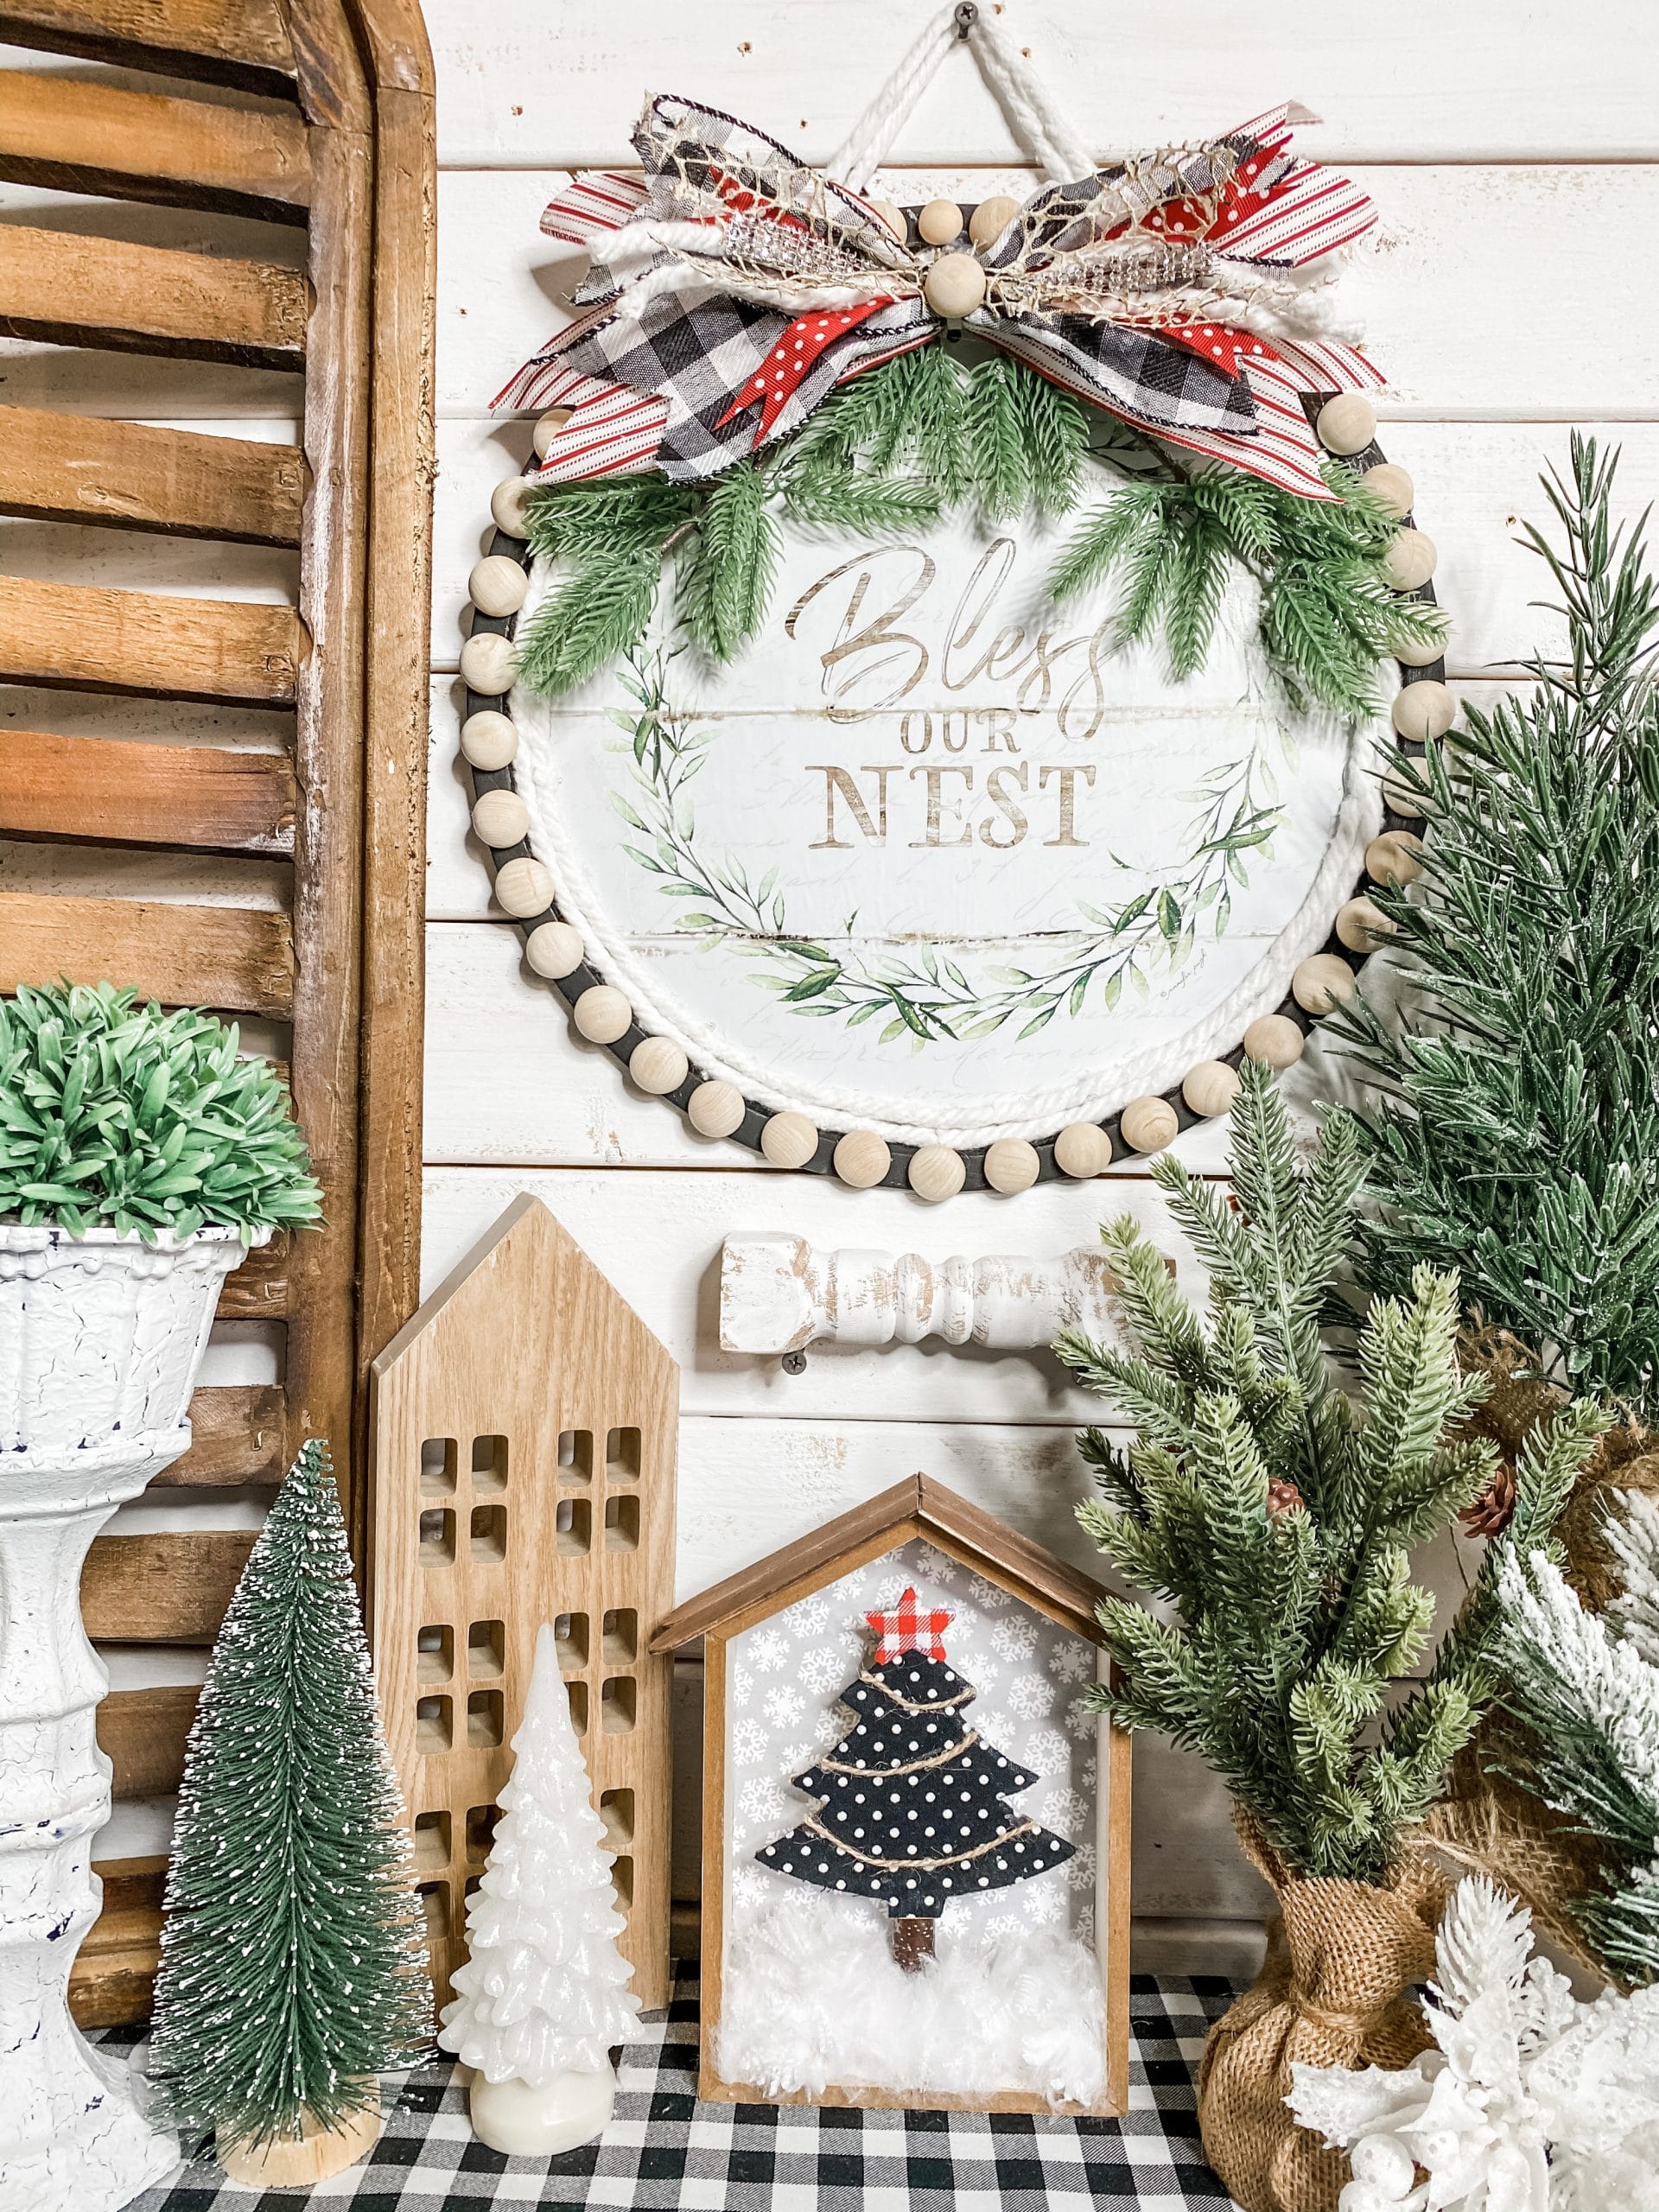
How to make a door hanger
All that is left to add is your hanger! I used some more Dollar Tree mophead strings and 2 pieces of ribbon to make the hanger for this adorable DIY Christmas decor!
I plan to hang this Christmas Pizza Pan DIY in my home, however, you could also use this as a door hanger.
To make this hang inside or possibly on your front door, put two pieces of mophead strings side by side and hot glue the ends to the back of the Dollar Tree pizza pan.
Next, hot glue a piece of ribbon over each end of the mophead strings to secure the hanger just a little more. Now you’re ready to hang this easy Christmas decor anywhere in your home!
Watch the VIRAL VIDEO with over 51 million views here!
I hope you’ve enjoyed learning how to recreate this easy Pizza Pan Christmas Decor Dollar Tree DIY as much as I have and decide to make one for yourself!
I would love to see how yours turns out! You should totally join my FREE Facebook group called On A Budget Crafts! It is a judgment-free community for DIY crafters to show off their projects and ideas.
If you loved this DIY you might also like this Dollar Tree Christmas Gift Bag DIY!
Thanks for stopping by! XOXO Amber

You can also shop my ENTIRE AMAZON Favorites shop just click here! It’s packed full of all the things I use and love.
Here is the supply list I highly recommend every creative have on hand!! Would you also pin my blog for later and get on my newsletter alerts? I would love to have you join my #craftycrew.
Inspired? Leave me a comment below! I love hearing from my readers!
Join my free “ON A BUDGET CRAFTS” Facebook group!
Check out these Pizza Pan Craft Ideas from some of my Favorite DIY blogs
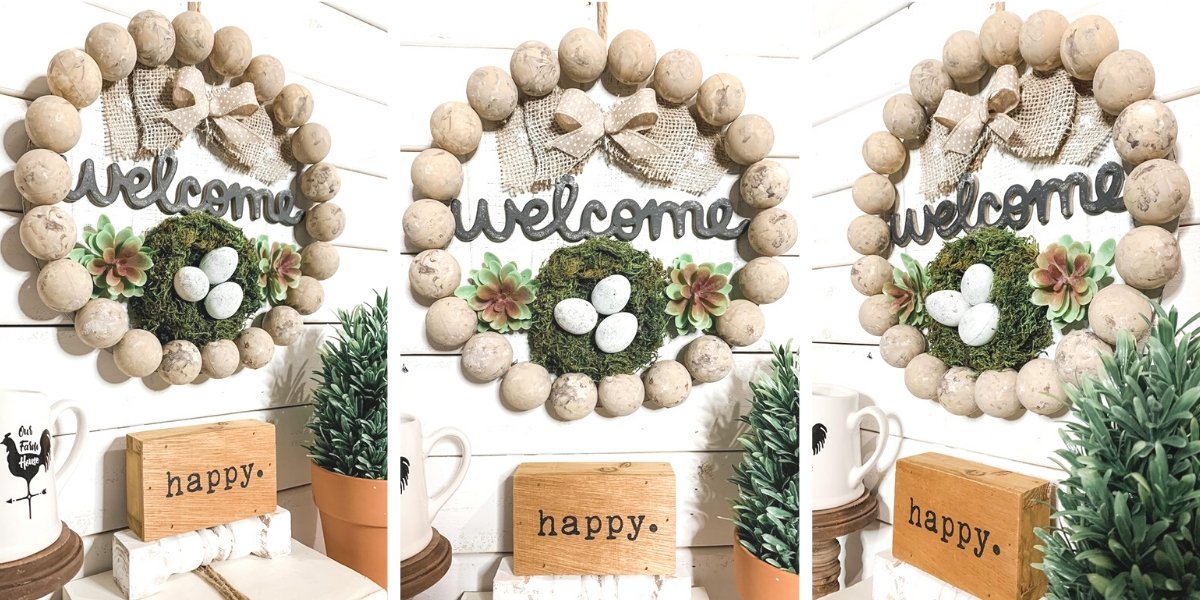
DIY Beautify – PIZZA PAN WREATH WALL DECOR (WITH WOOD BEADS)
Daily DIY Life – DOLLAR TREE PIZZA PAN FALL WELCOME SIGN
PIN THIS POST FOR LATER!


I love your crafts! Thank you! Even I can do it!