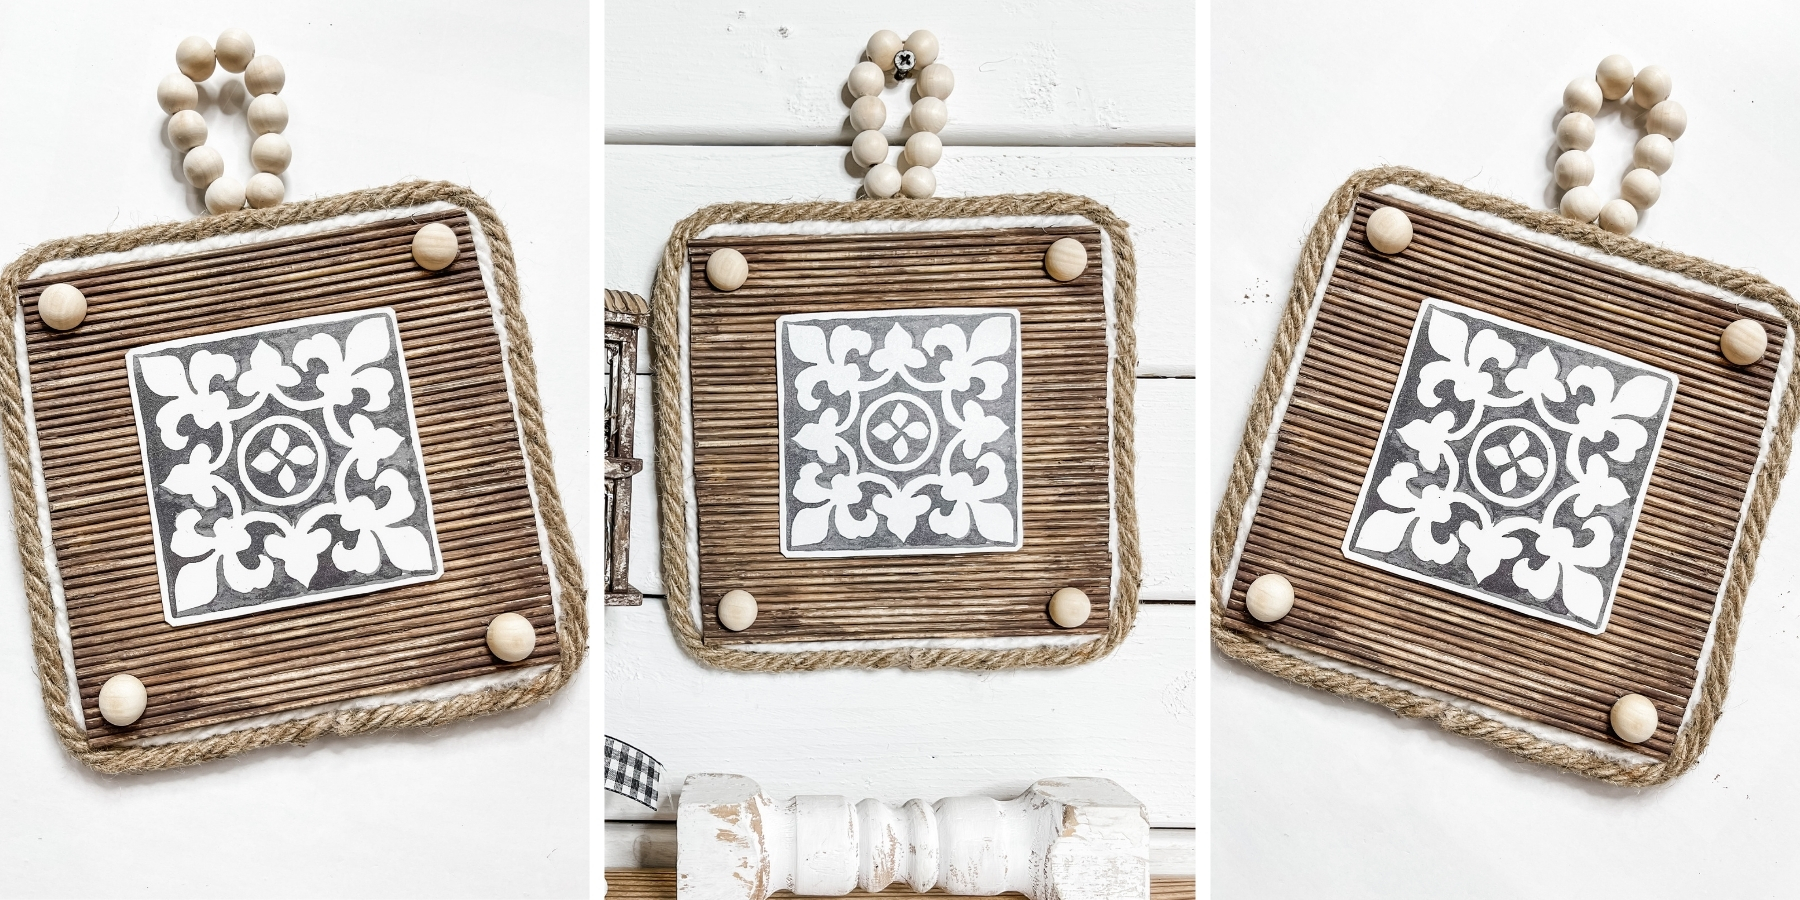
Dollar Tree DIY Farmhouse Christmas Sign
I love Christmas time! If you love it too then this Dollar Tree DIY Farmhouse Christmas Sign just might be on your next “I’m making that” list.
I’ll be honest, I love to sift through my craft stash looking for anything and everything that I can turn into something Christmas-y!
I also like to make things that I can substitute out that could give it an everyday feel. This Dollar Tree Christmas DIY will be one of those things you can totally do that with.
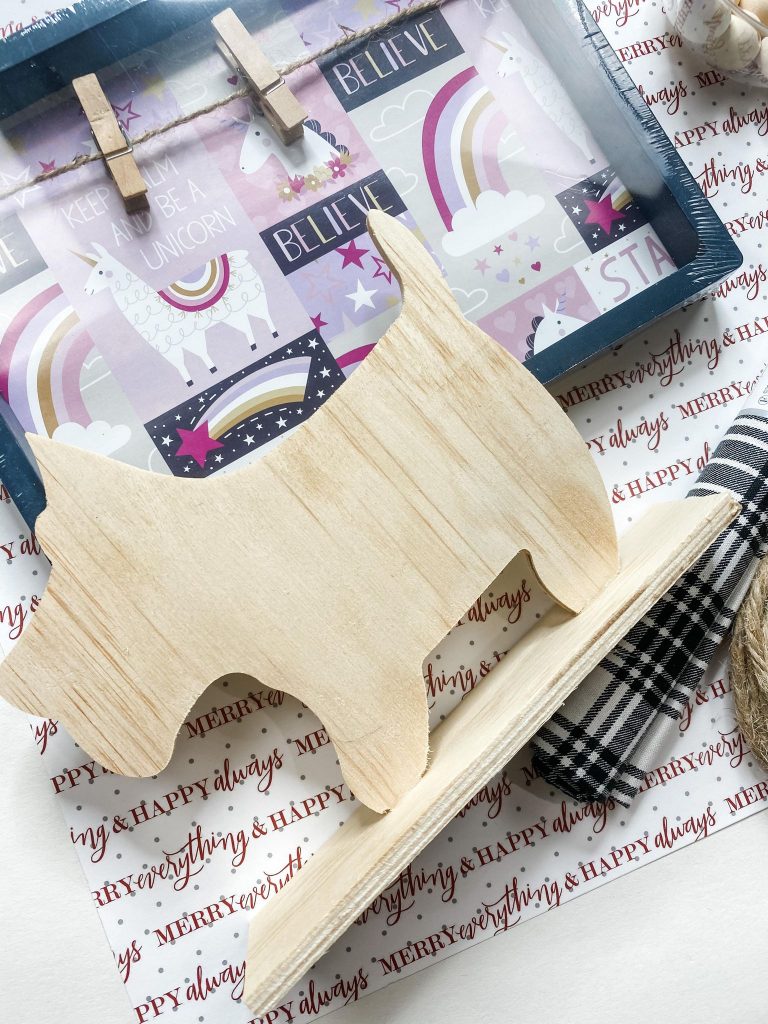
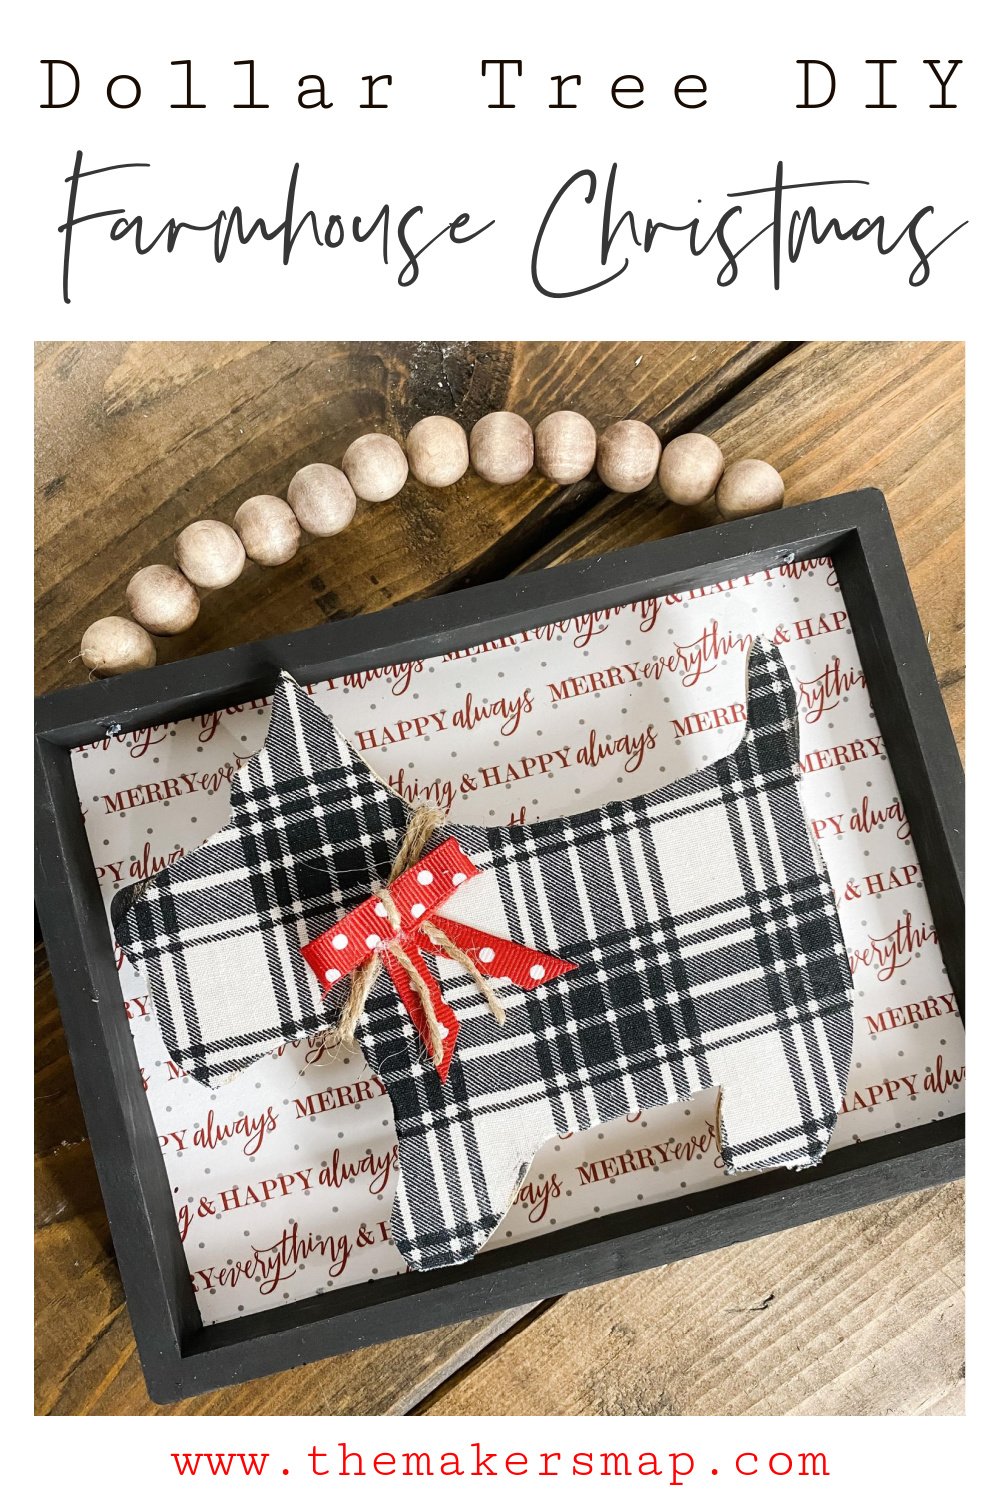
The cutest dog ever!
I frequently visit the Dollar Tree’s in my area, and I always stop by the Crafter’s Square section and rummage through the different things on the shelves.
This little dog wood cut out on a base always caught my eye but it never seemed to make it to my cart.
That was until here recently when I had this idea to use it in a Christmas craft project. So, during one of my recent Dollar Tree runs I put one in my cart, brought it home, and made my plans to turn it into something super cute.
I did do this project on my Facebook page on a LIVE video. You can watch that replay right here!
Let’s get started on this DIY.
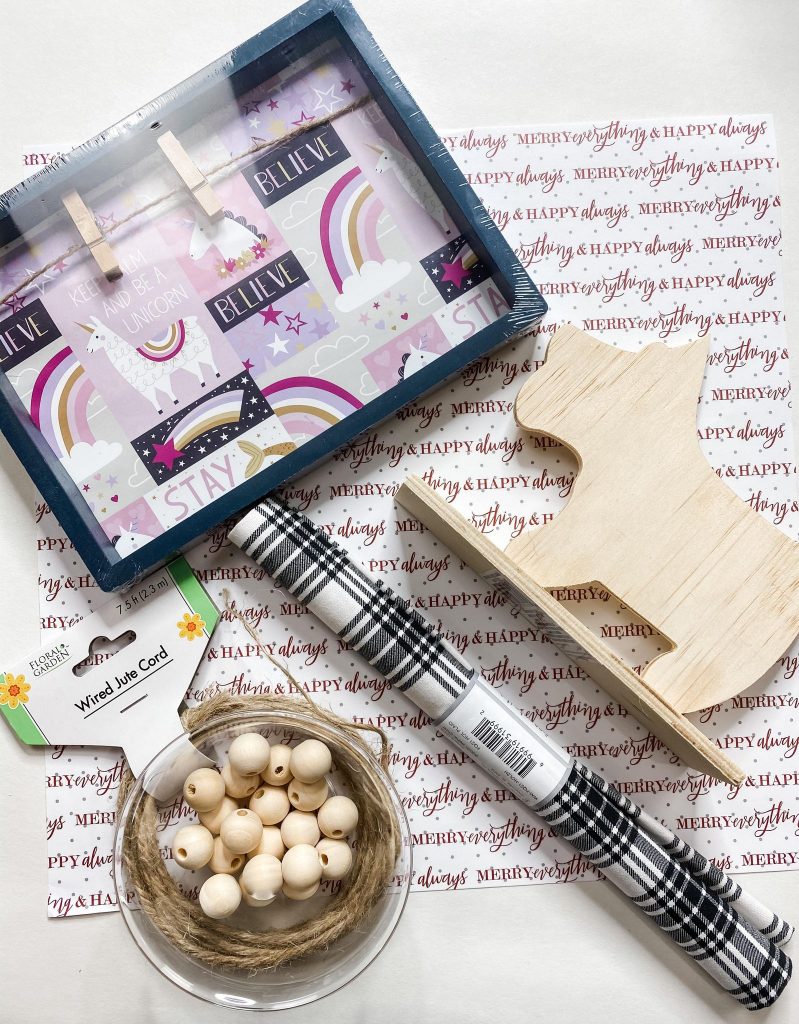
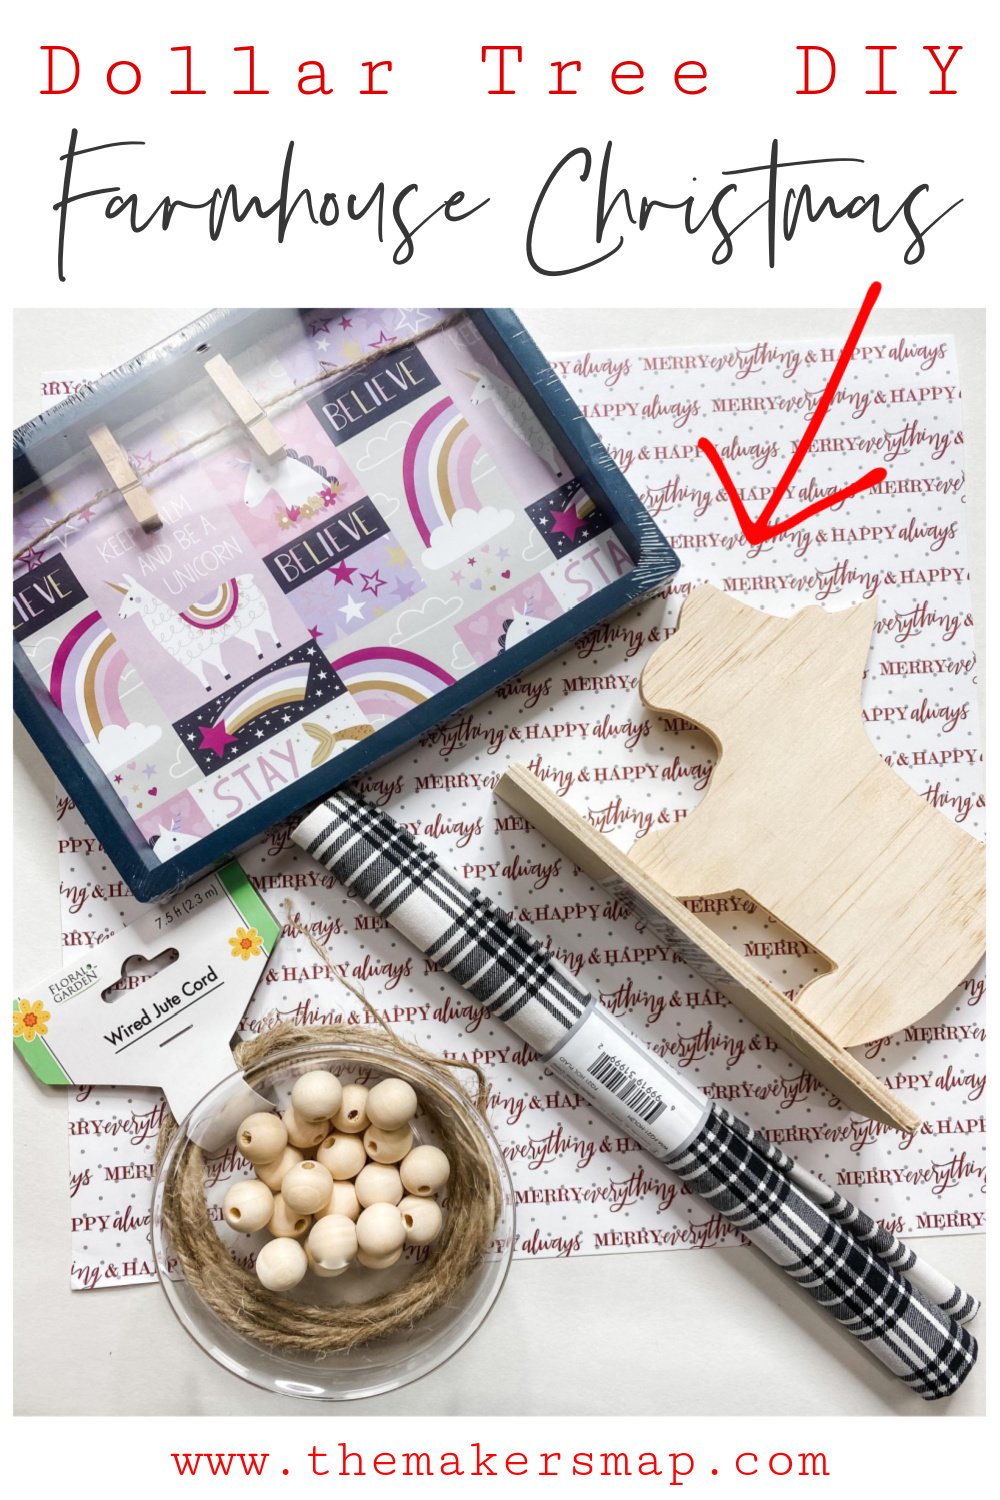
We will be using Dollar Tree, Hobby Lobby, and Walmart for this Dollar Tree Farmhouse Christmas Sign.
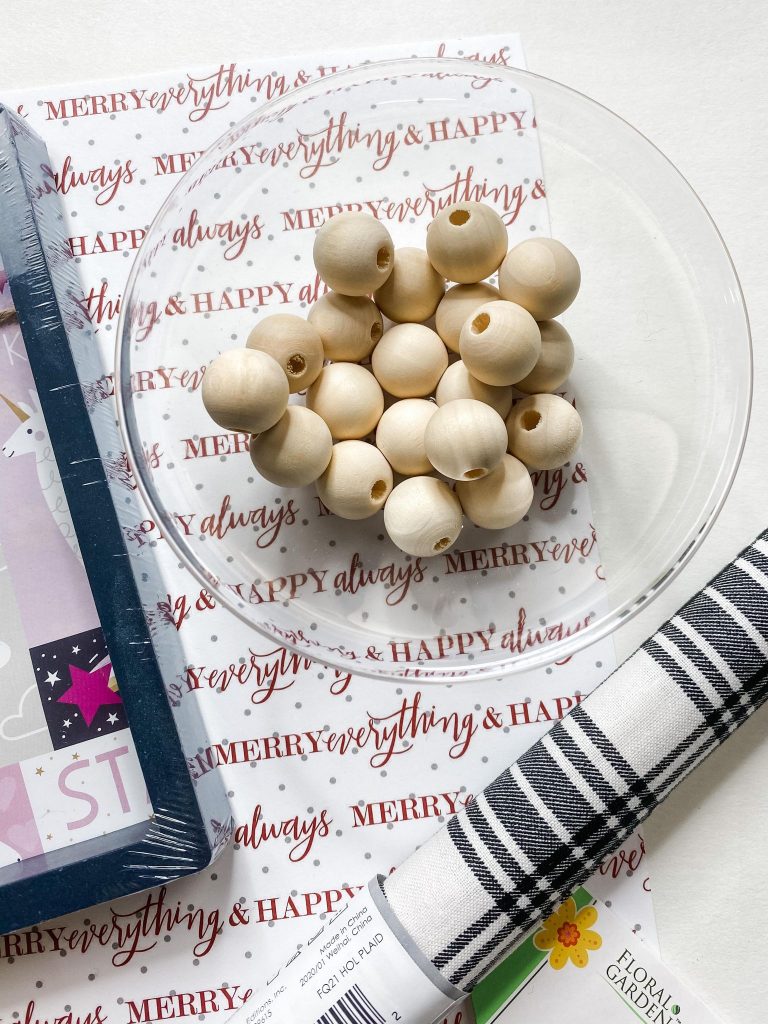
I am a total wood bead lover!
I absolutely love using wood beads in my DIY decor projects. If you have never used them, let me warn you now… You will love them.

I could not find my floral wire so I grabbed my wired jute cord from Dollar Tree as a substitute. It is really easy to unravel and cut.
For this project, I will be using these items but you can substitute where you want.
“As an Amazon Associate, I earn from qualifying purchases.”
- Dollar Tree Wood Dog Cut out
- Dollar Tree wired jute twine
- 1 in chip brushes I do buy mine in bulk
- Dollar Tree Framed sign
- Fat Quarter fabric square from Walmart
- Black Chalk Paint
- Brown Paint – I used Apple Barrel
- Dollar Tree Crafter Square wood cubes
- Ryobi Drill
- Black and Decker Drill Bits
- Merry Everything and Happy Always Scrapbook paper from Hobby Lobby
- Modpodge
- Ribbon of your choice
- Full Wood beads you can use the 16 or 20 mm like these
- Fiskar Fabric Scissors
- Glue Gun and Glue Sticks
- I also do my crafts on this CRAFTER MAT! I get a ton of questions about this mat! This is it and I love it!
I promise you are gonna want to make this DIY!
First, I started by painting the Dollar Tree Sign black to make this Dollar Tree DIY Farmhouse Christmas Sign. I used chalk paint for this, then allowed it to dry fully. Pro tip: I used my heat gun to speed the drying process I use a Kobalt heat gun.
The heat gun I have has been discontinued but you can get his alternative instead, it is just as good. Once dry, set it aside. We will work on adding the scrapbook paper to the back of that sign next.
Basically, trace the back of the sign on the scrapbook paper and then cut it out and Modpodge it on. Use your heat gun to speed the drying time.
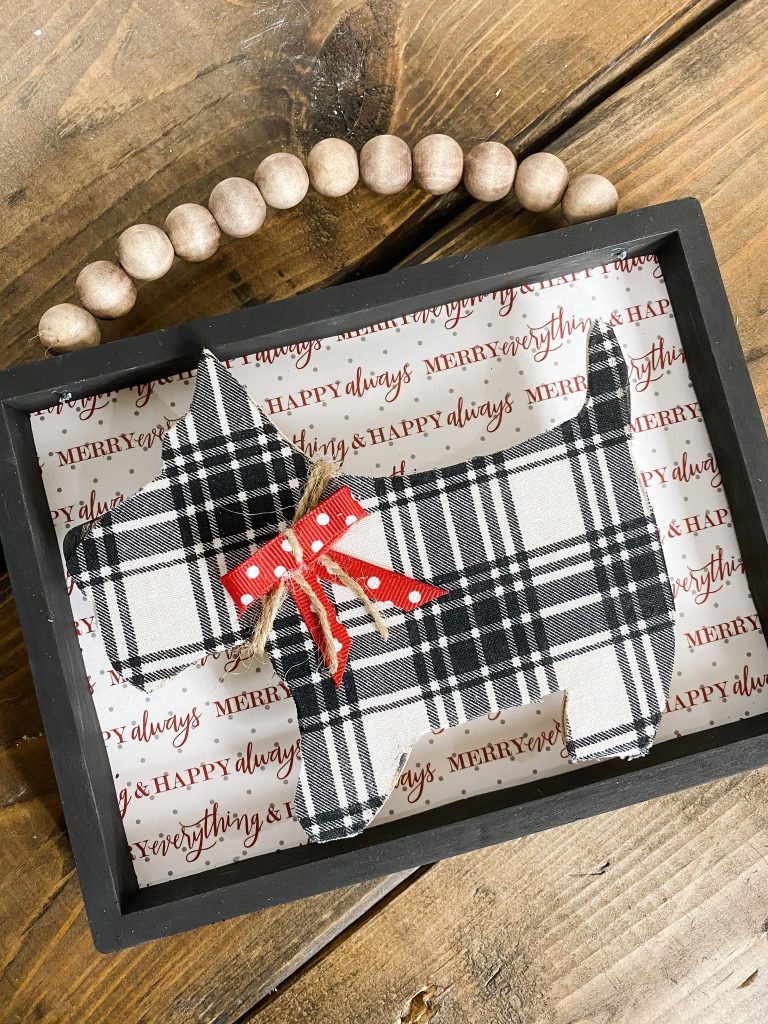
The next step of making this Dollar Tree DIY Farmhouse Christmas Sign is pretty simple. I traced the dog cutout on the fabric I got at Walmart. I used a pencil, you can use a pen or marker if you like.
After that, cut out the fabric and we are going to glue it to the dog wood cut out with our Modpodge.
You may need to trim the edges. I know I had to. Once you have your dog finished. You can add a collar, I used jute twine and some ribbon to piece together a cute collar for our dog.
I will be honest I am not that good at bows so I tend to piece mine together with hot glue.
The final touches!
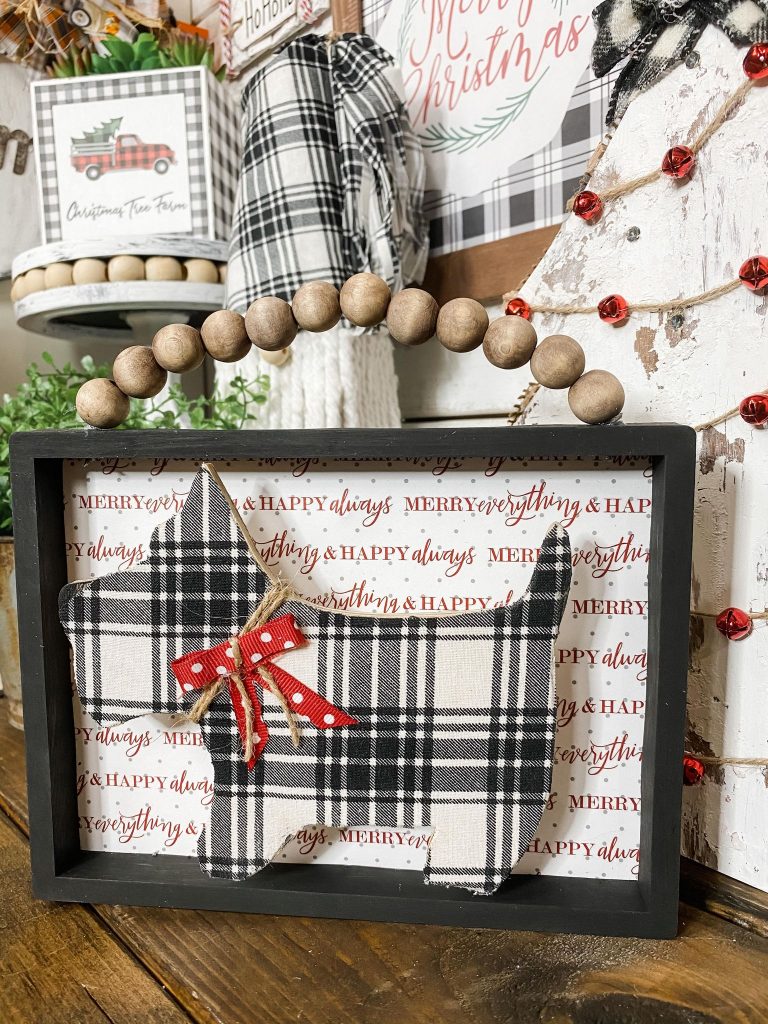
Now it is time to assemble our Dollar Tree DIY Farmhouse Christmas Sign and add our hanger. Put the back of the sign back in the frame and secure it.
Now for this project, I wanted to raise this off the back so I use the Dollar Tree wood cubes from the Dollar Tree Crafter’s Square to do that. It is easy.
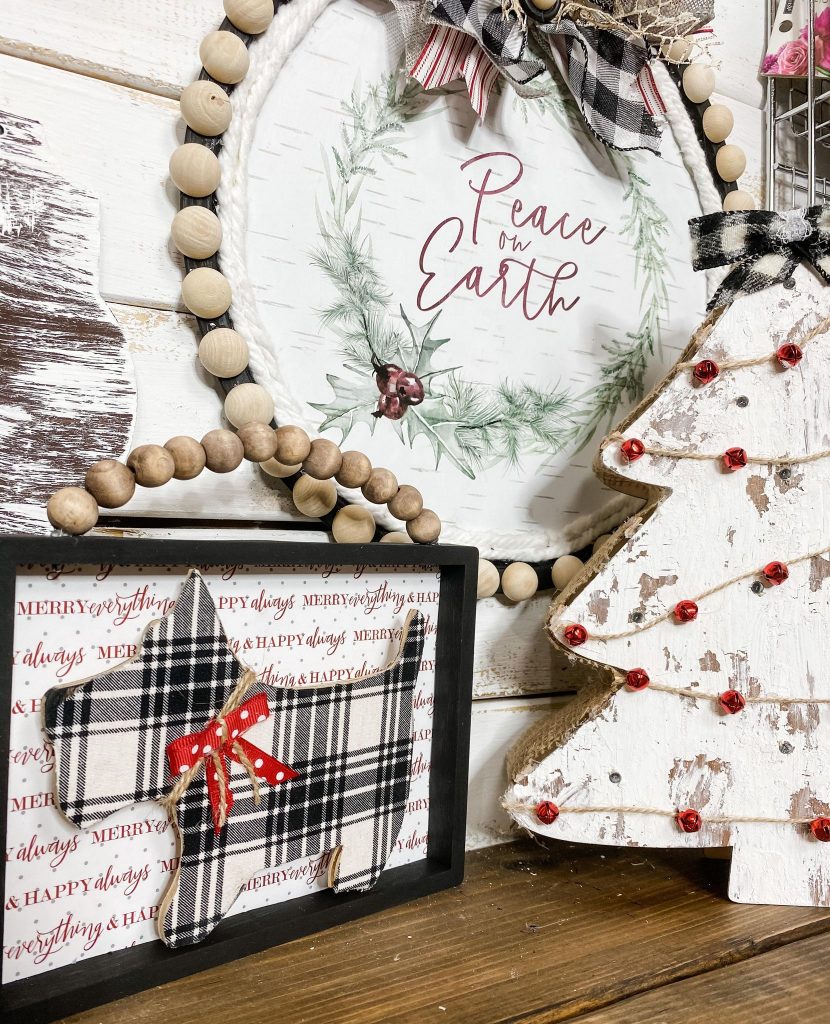
I used 2 cubes and glued them to my dog’s back then I hot glued them to the back of the sign. Finally, it is time to add our bead hanger.
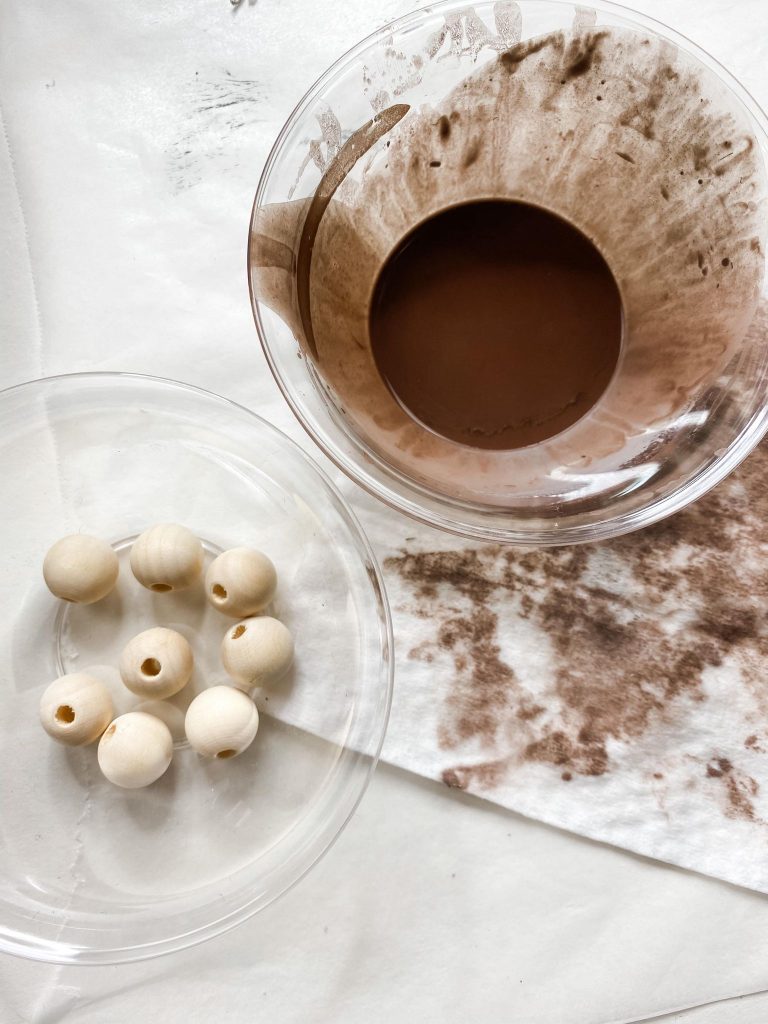
I get my beads in bulk from Amazon and I get them in a variety pack, sometimes I use the 16mm, and other times I use the 20mm. You can decide what you want to use but for this, I am using the 16mm beads.
I picked out a few and put them in my Dollar Tree plastic dishes that I get in the party section. Next, I unraveled the wired jute twine and cut a piece that was a good size for this frame.
I pre-strung the beads to see placement. Lastly, I added some brown paint to a plastic dish and I added a little water with my Continuous mist sprayer
You can get that sprayer here!
I pour just a little of the diluted paint over the beads and swirl them around and then I put them on a paper towel or baby wipe to get the excess paint off.
Next, I make sure the beads are dry. I then add them to the wire. Now it is time to pull it all together.
I used my Ryobi drill and drill bits to make a hole to put the wire in the frame of the sign on the top side.
Once you do that you can add a little glue to the holes and push the wire through and then bend the wire so that the beads on the wire do not come out when you hang it.
I hope you loved this Dollar Tree DIY Farmhouse Christmas Sign. I would love to know in the comments what you think of it and if you just might be making one of your own.
Remember how I said you could make this every day? Well, that is easy to do. Just replace the scrapbook paper and fabric and you can make this really for any time of year or every day.
If you loved this DIY you might also like this Dollar Tree Pizza Pan Christmas DIY!
Thanks for stopping by! XOXO Amber
You can also shop my ENTIRE AMAZON Favorites shop just click here! It’s packed full of all the things I use and love.
Here is the supply list I highly recommend every creative have on hand!! Would you also pin my blog for later and get on my newsletter alerts? I would love to have you join my #craftycrew.
Join my free “ON A BUDGET CRAFTS” Facebook group!
PIN THIS POST FOR LATER!

I absolutely love this idea! I’m definitely going to try this one 🙂
Great craft. Doggie is so cute! I might make it for my dad. He’s 95!
Absolutely adorable love little scotty dogs.
So freaking adorable. I love it. You couldn’t have done better..awesome.👏👏👏🎉🎉🐾🐾❤