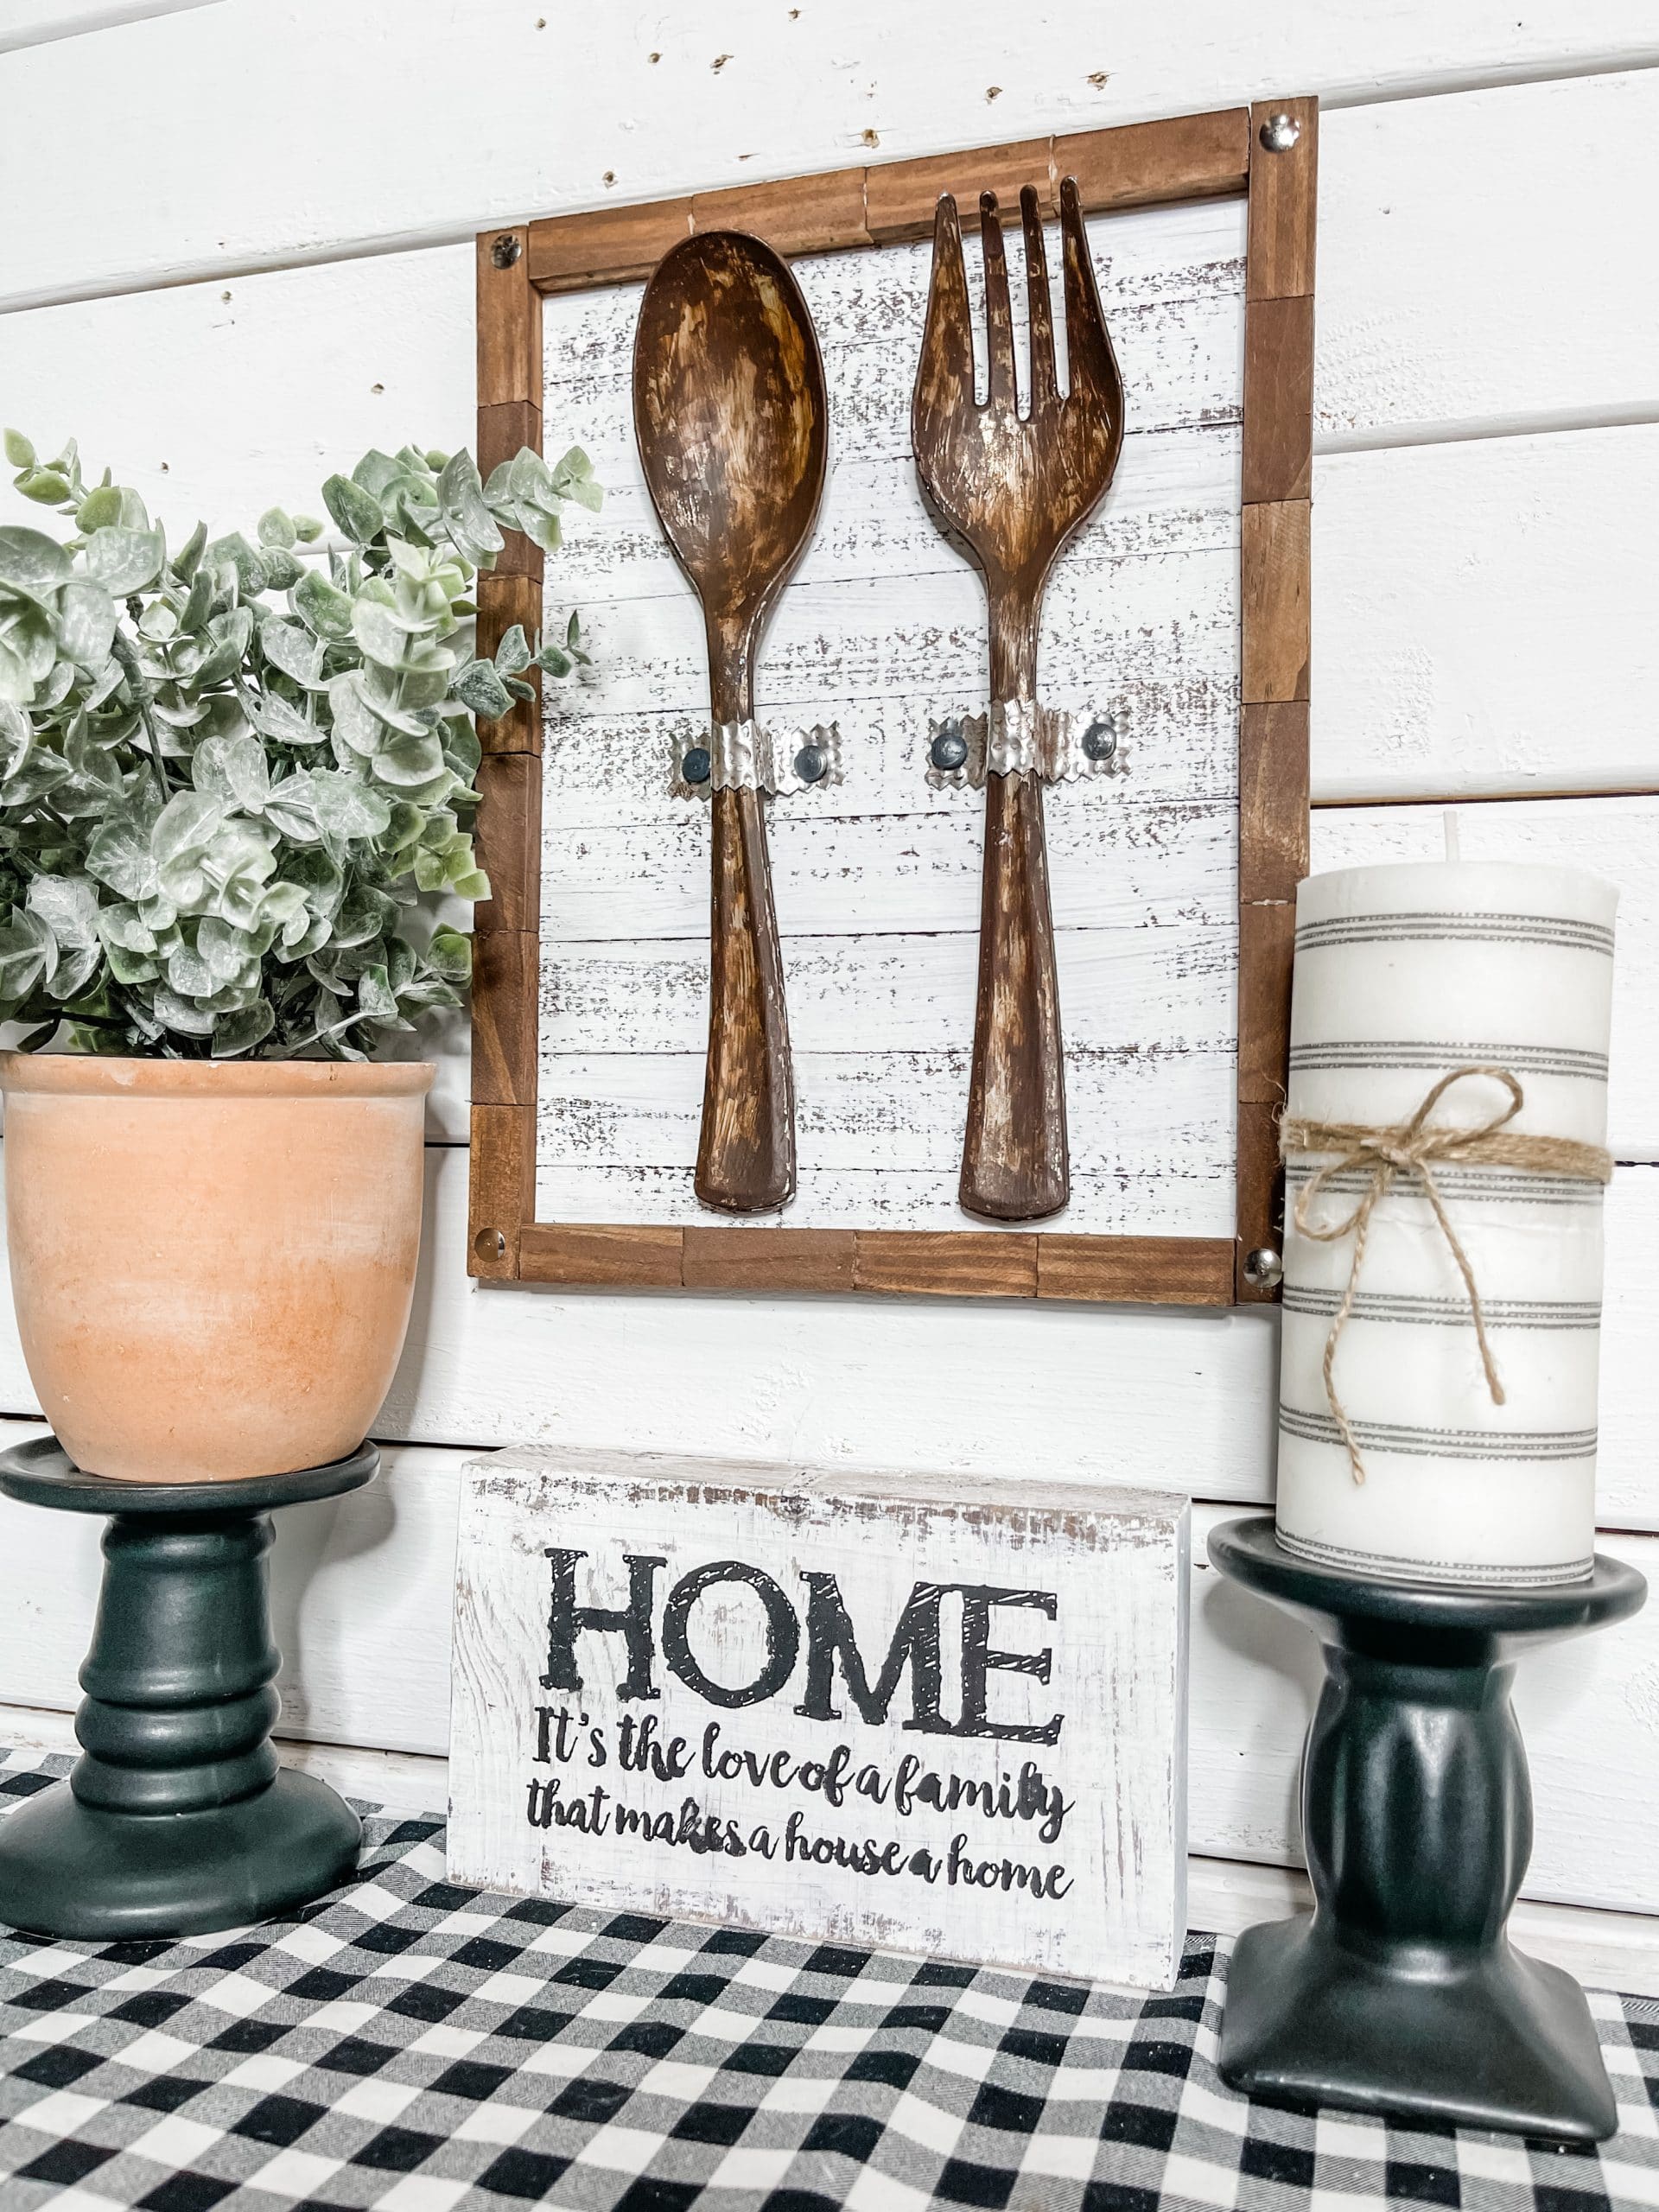
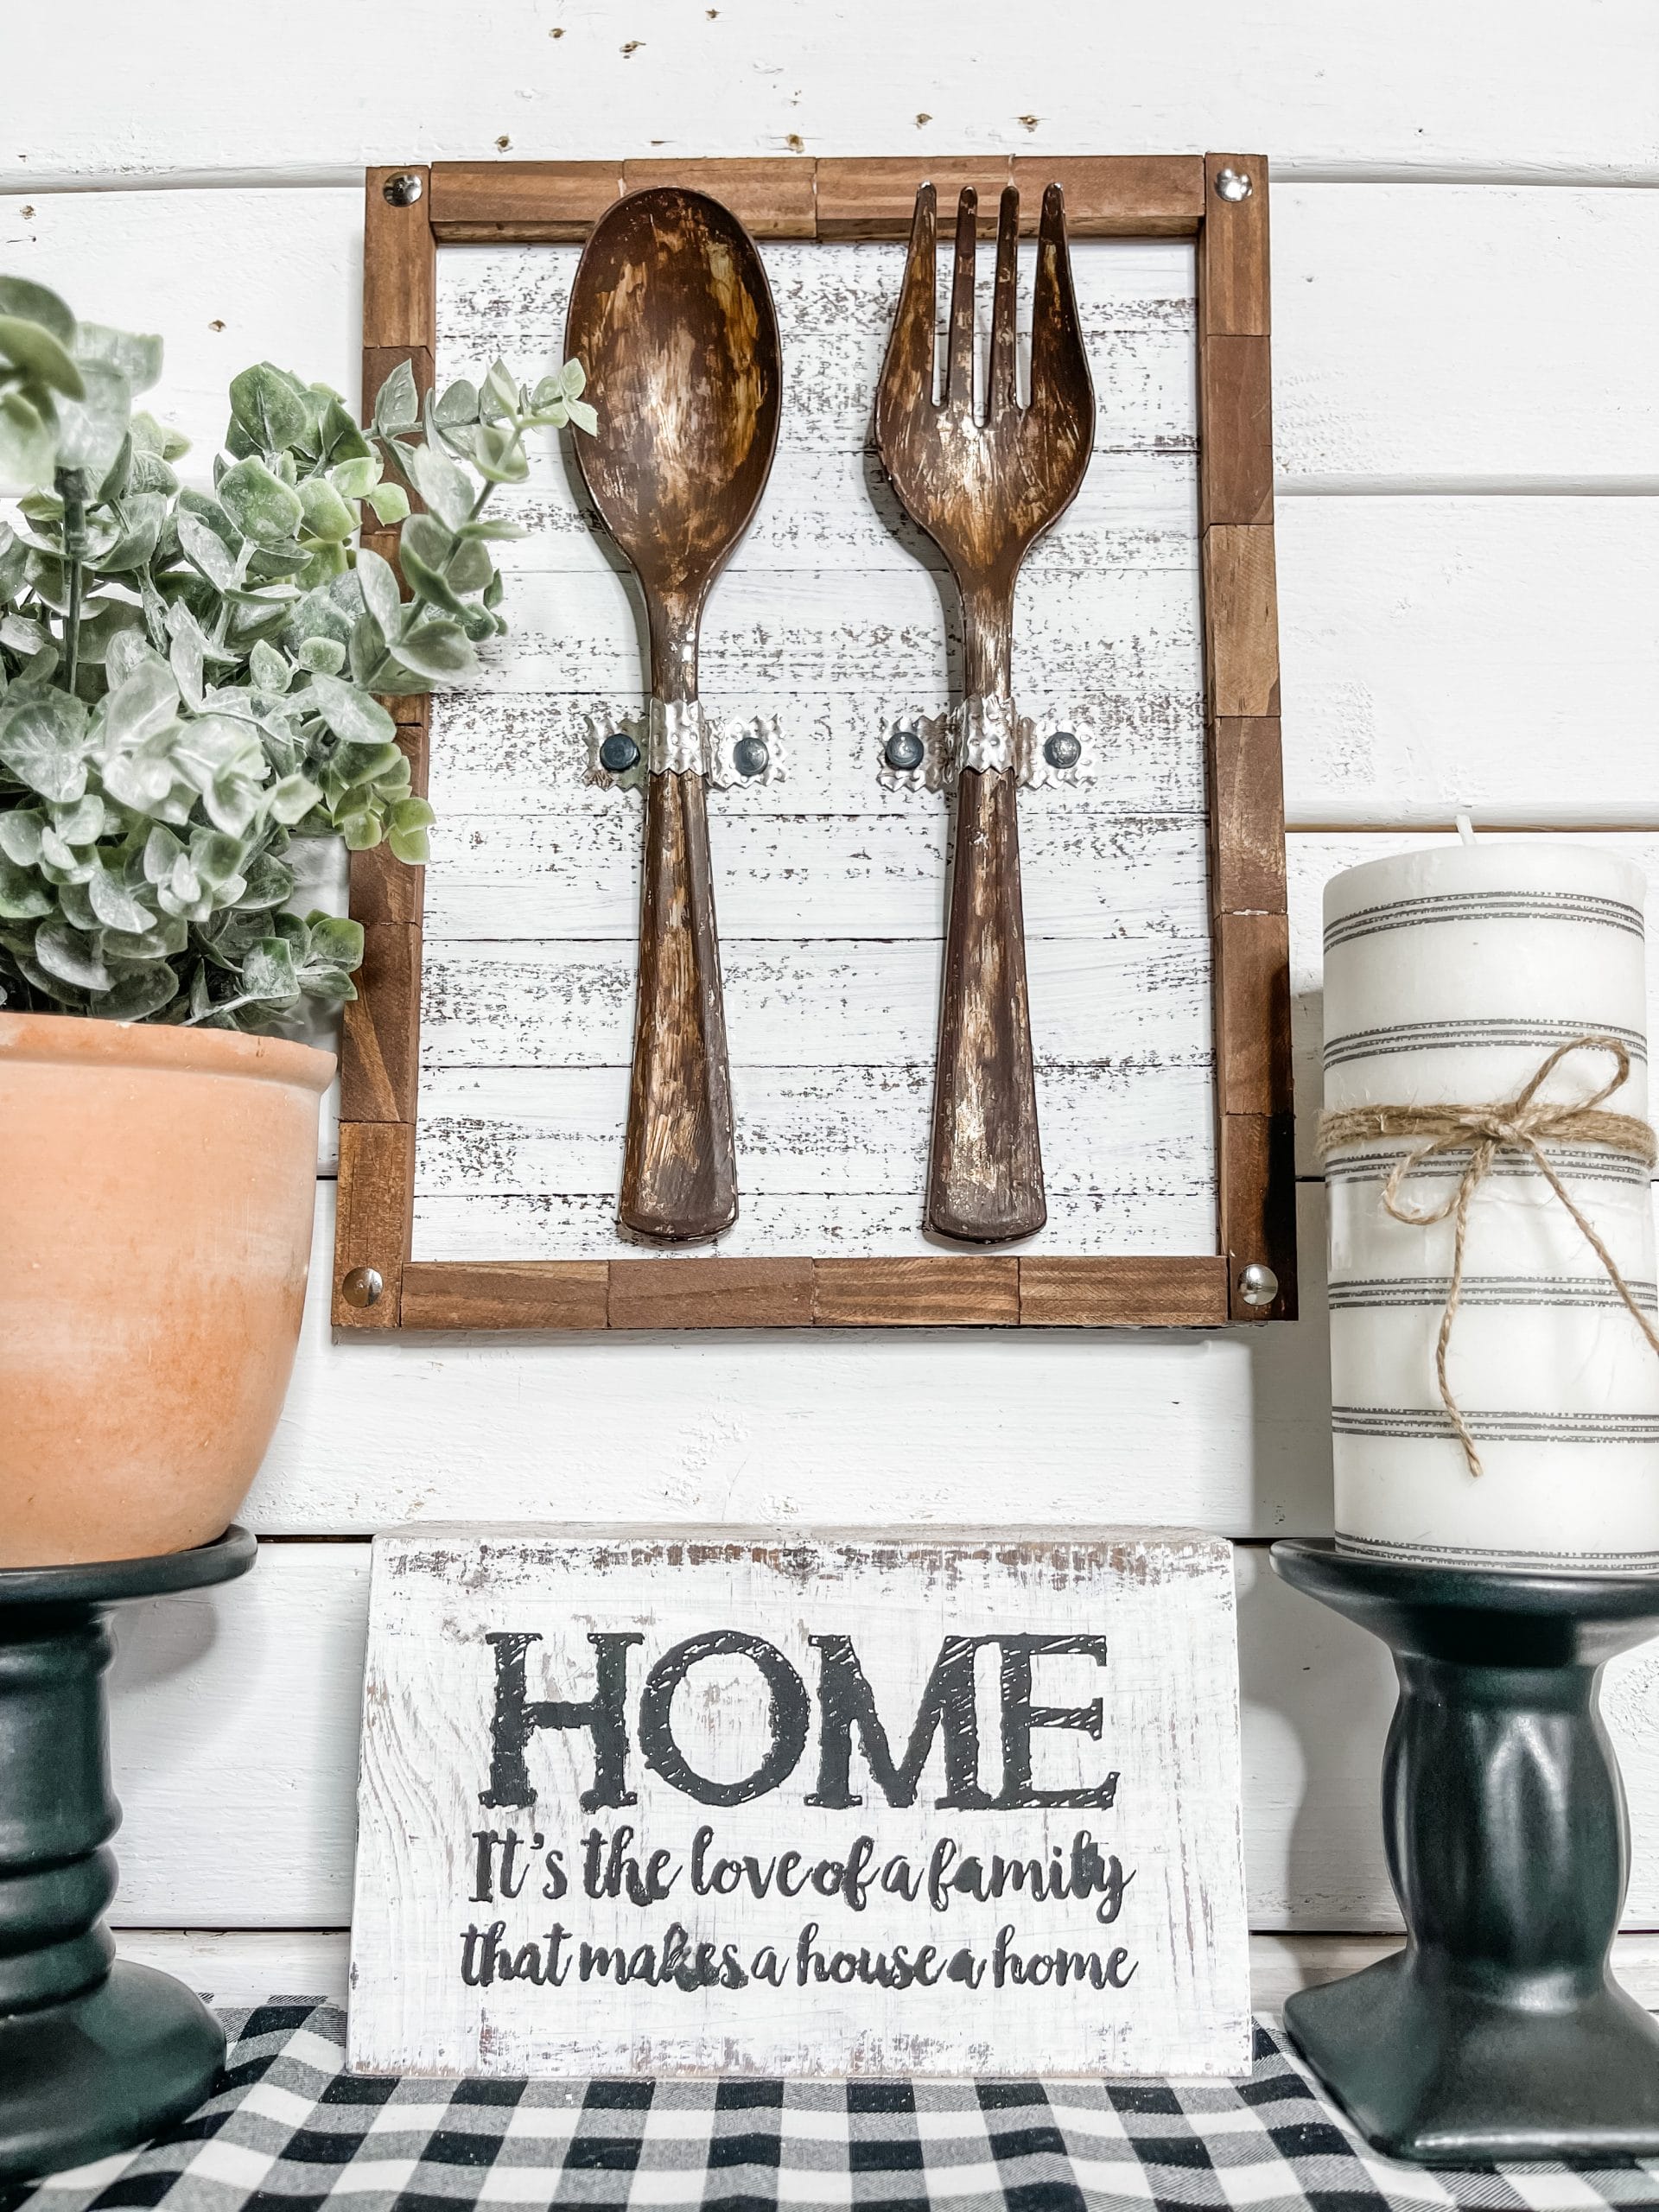
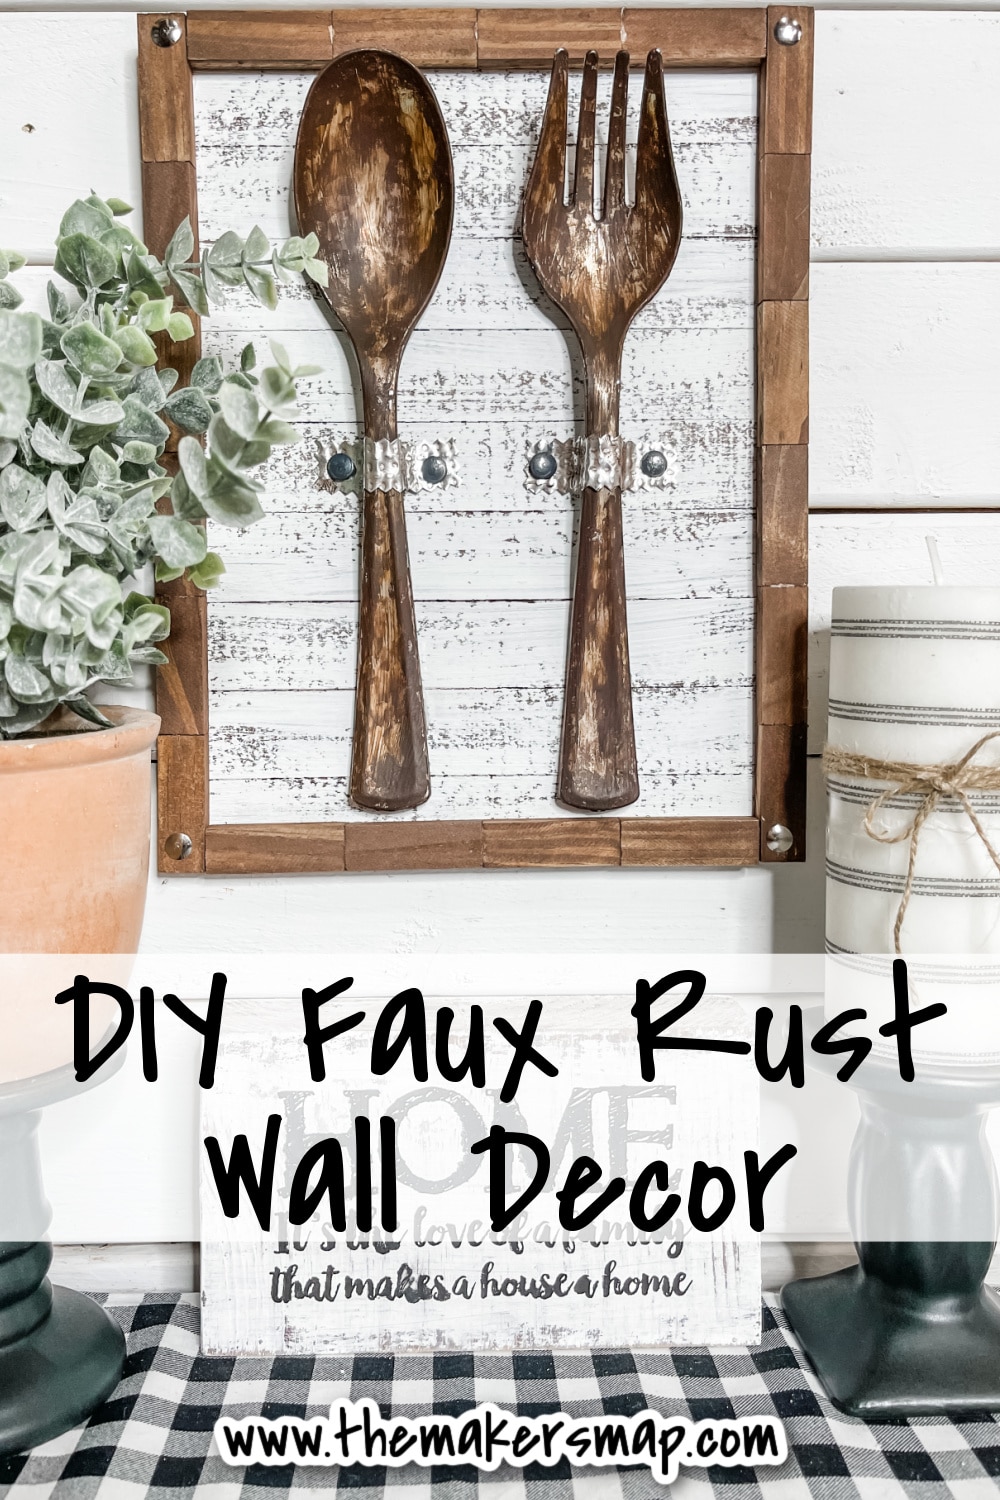
DIY Faux Rust Fork and Spoon Wall Decor
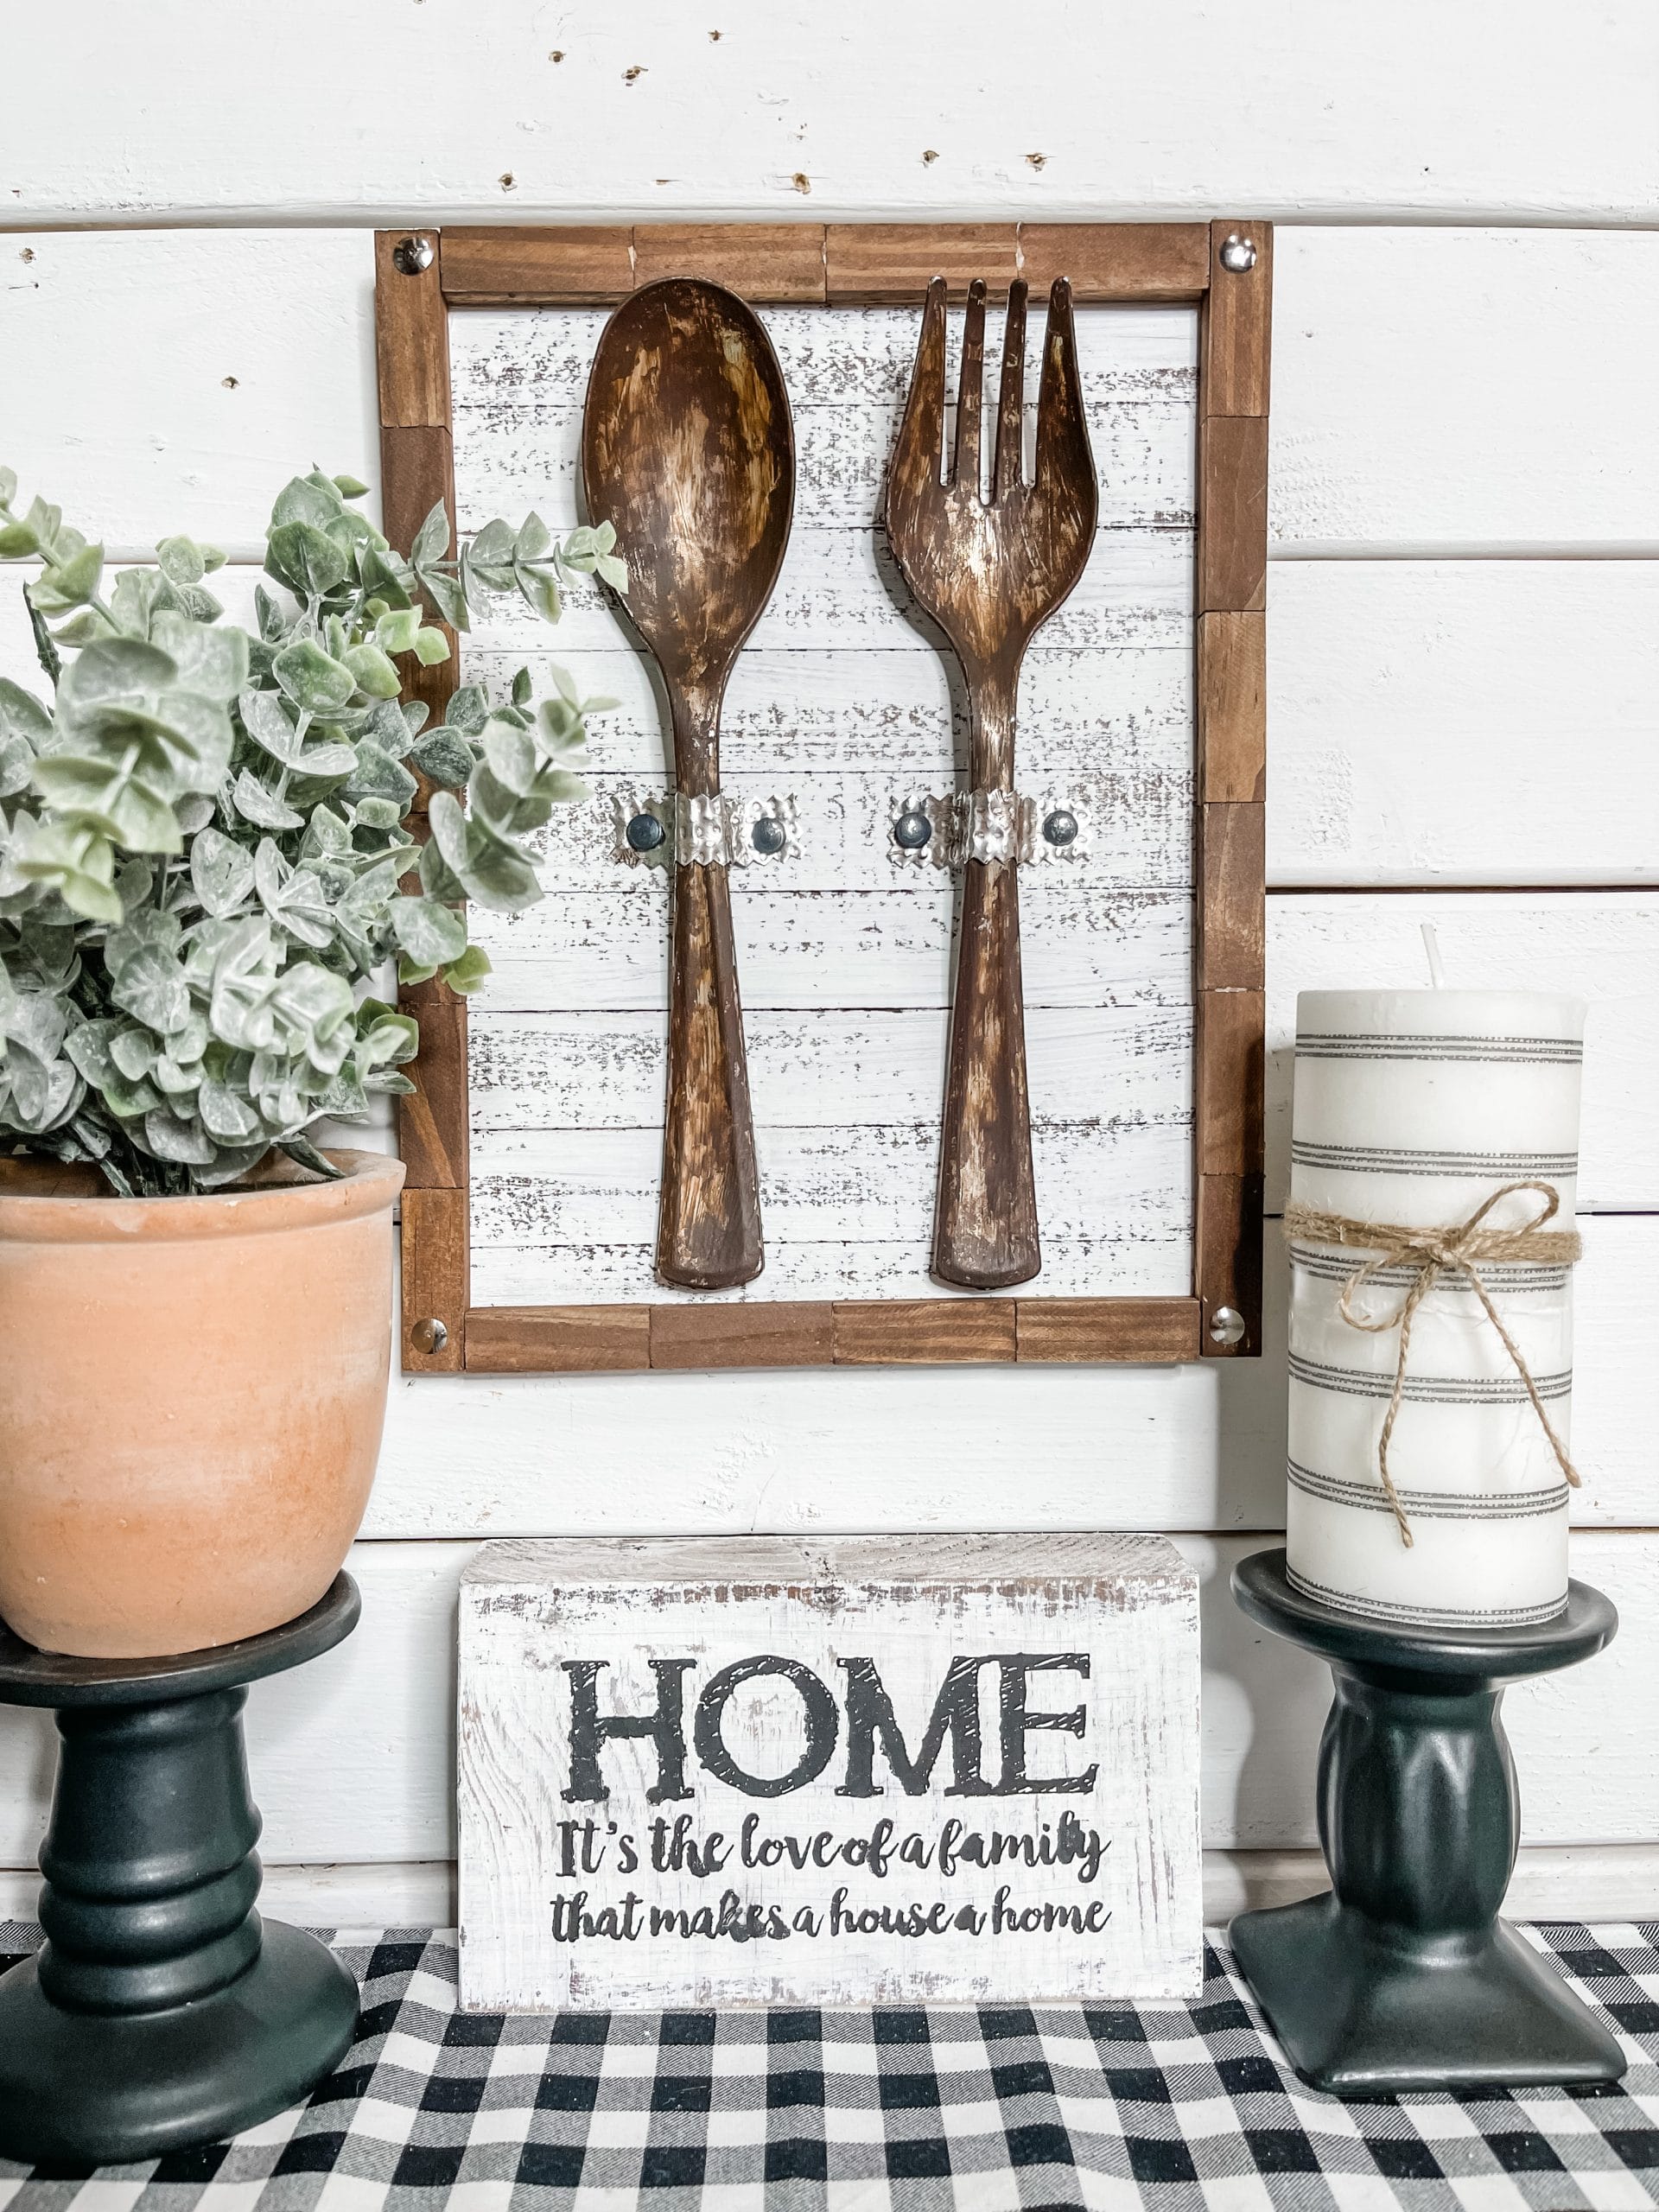
I think you’re really going to love this DIY Faux Rust Fork and Spoon Wall Decor because not only is it super affordable, it is also very easy to make!
Check out these Farmhouse DIY’s!
- DIY Mop String Planter
- Target Tile DIY Farmhouse Decor
- DIY Farmhouse Decor with Corkboard Cow
- Dollar Tree File Folder DIY Toolbox
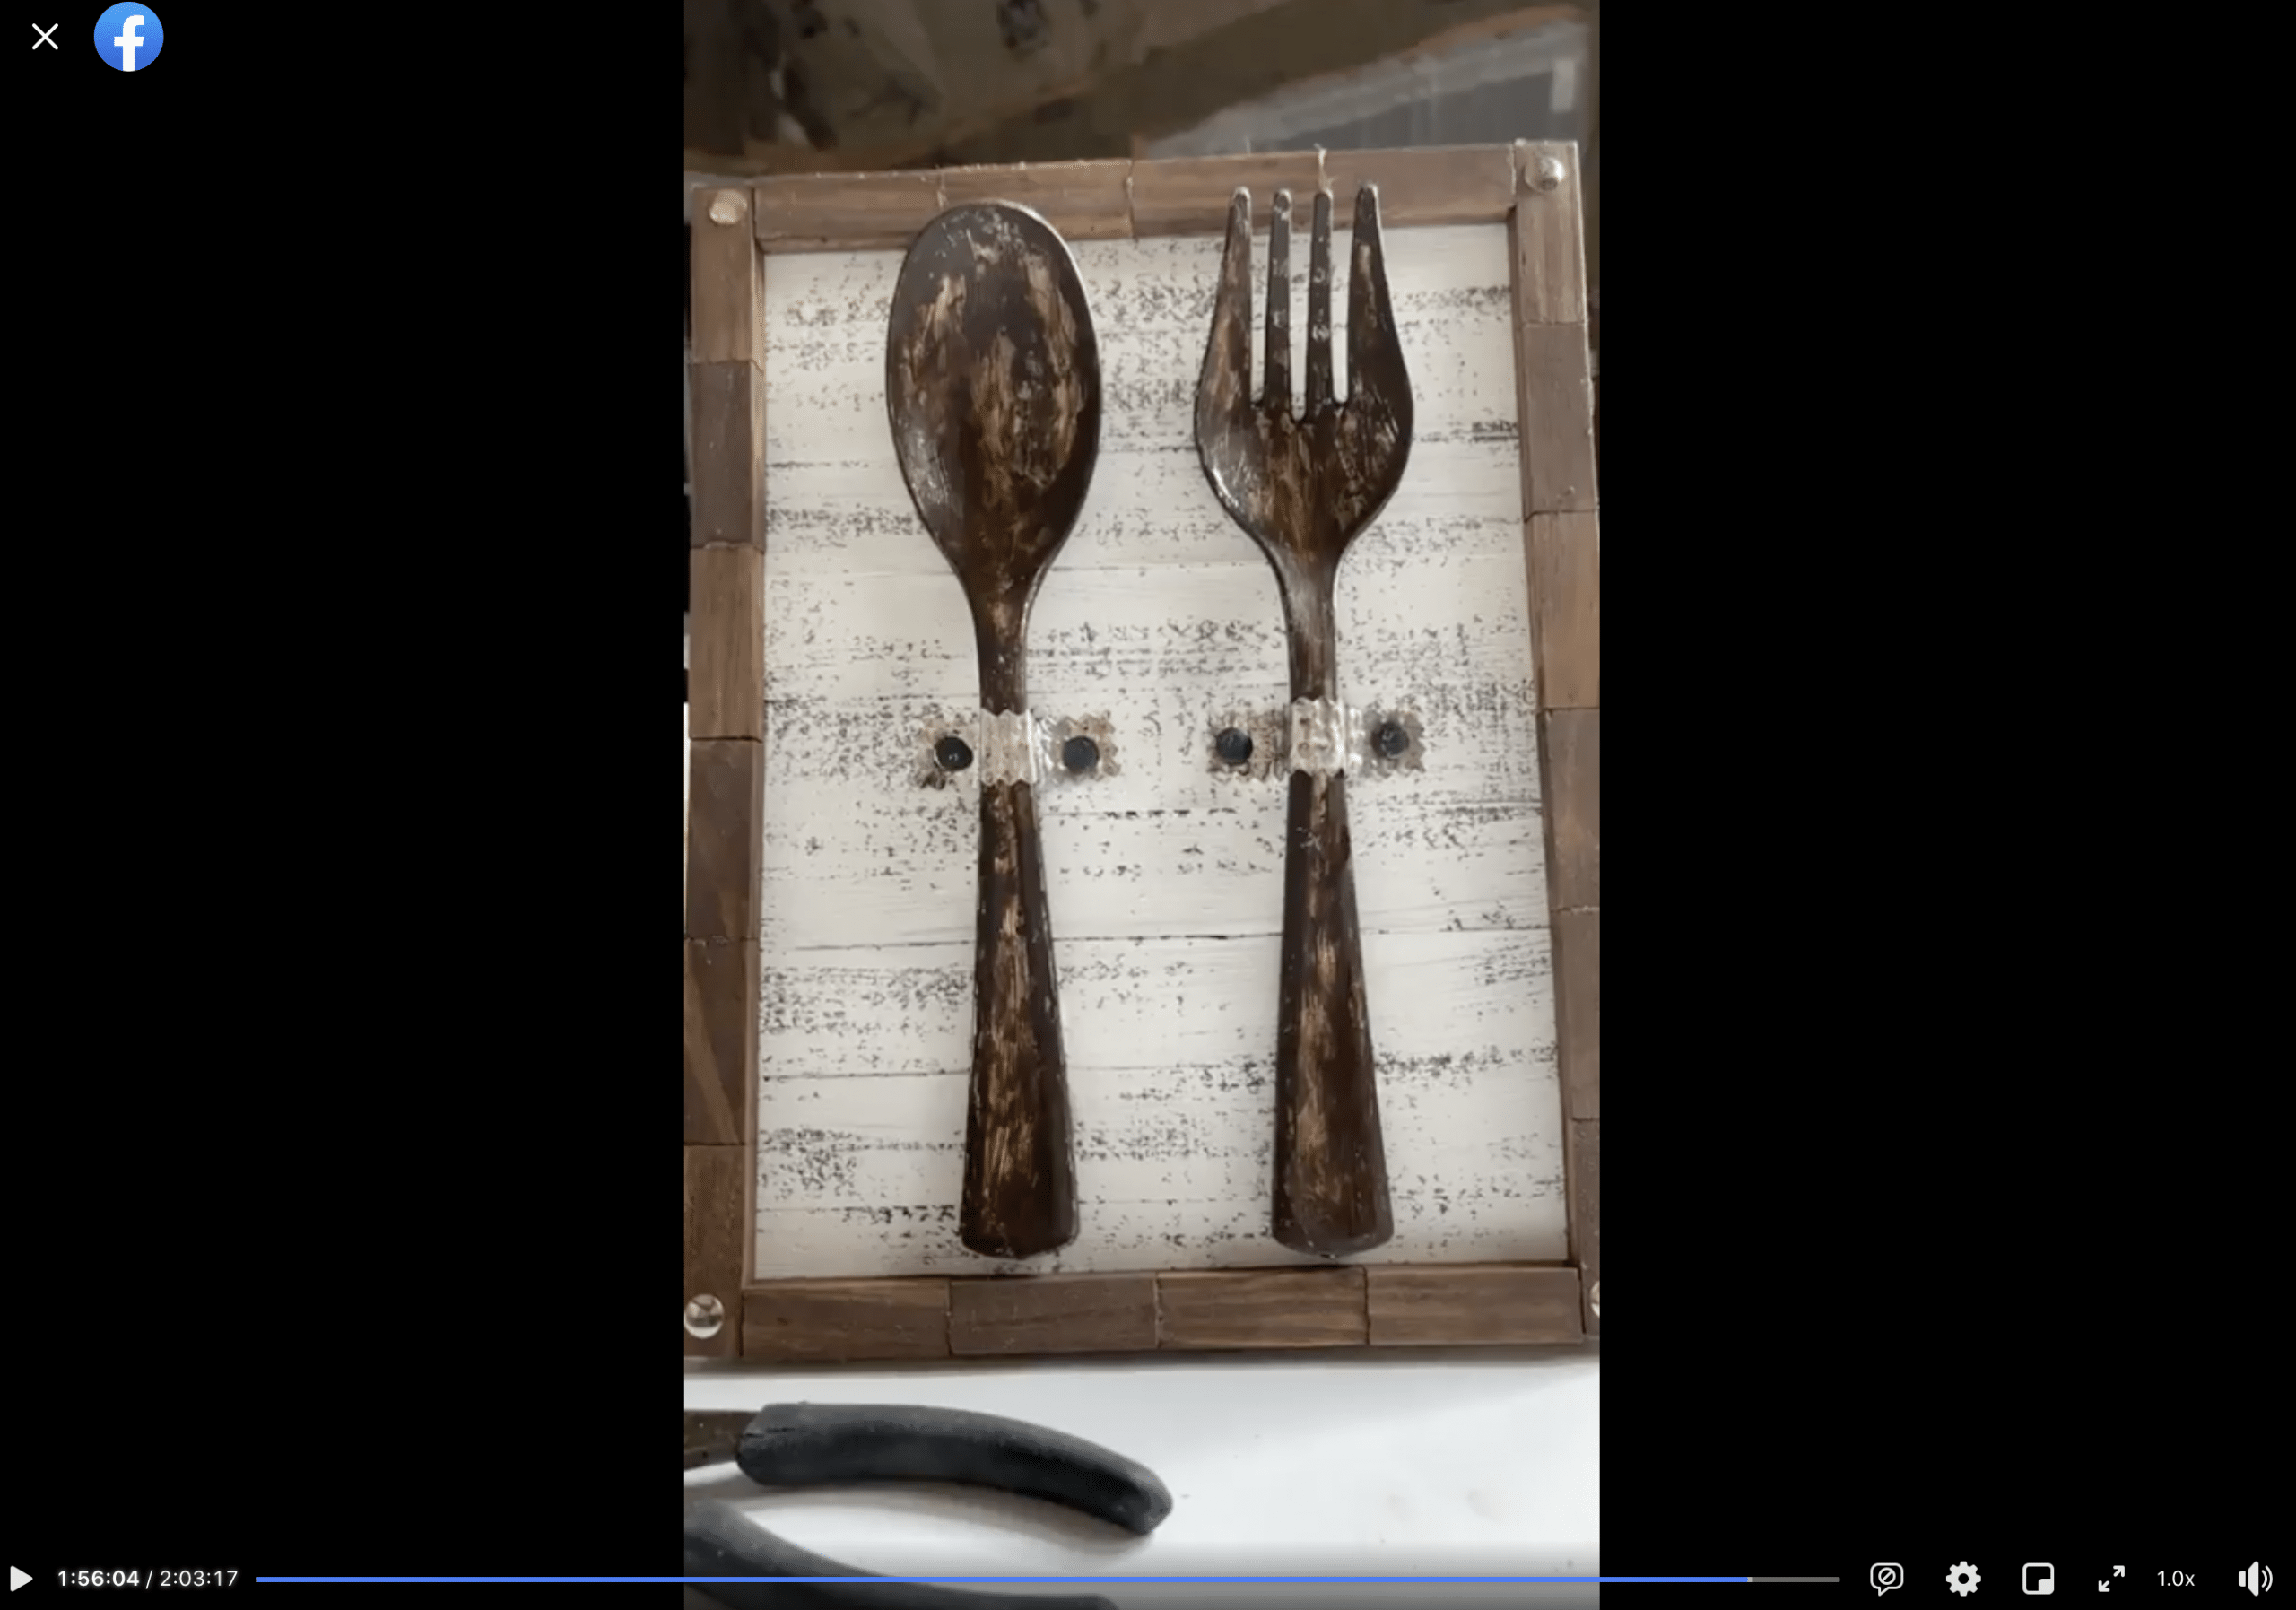
Watch the DIY tutorial
I recorded the how-to steps of making this DIY Faux Rust Fork and Spoon Wall Decor during a LIVE video on my Facebook page.
If you want to see the DIY process, craft along, or just join in on the fun conversations, you can watch the DIY tutorial replay!
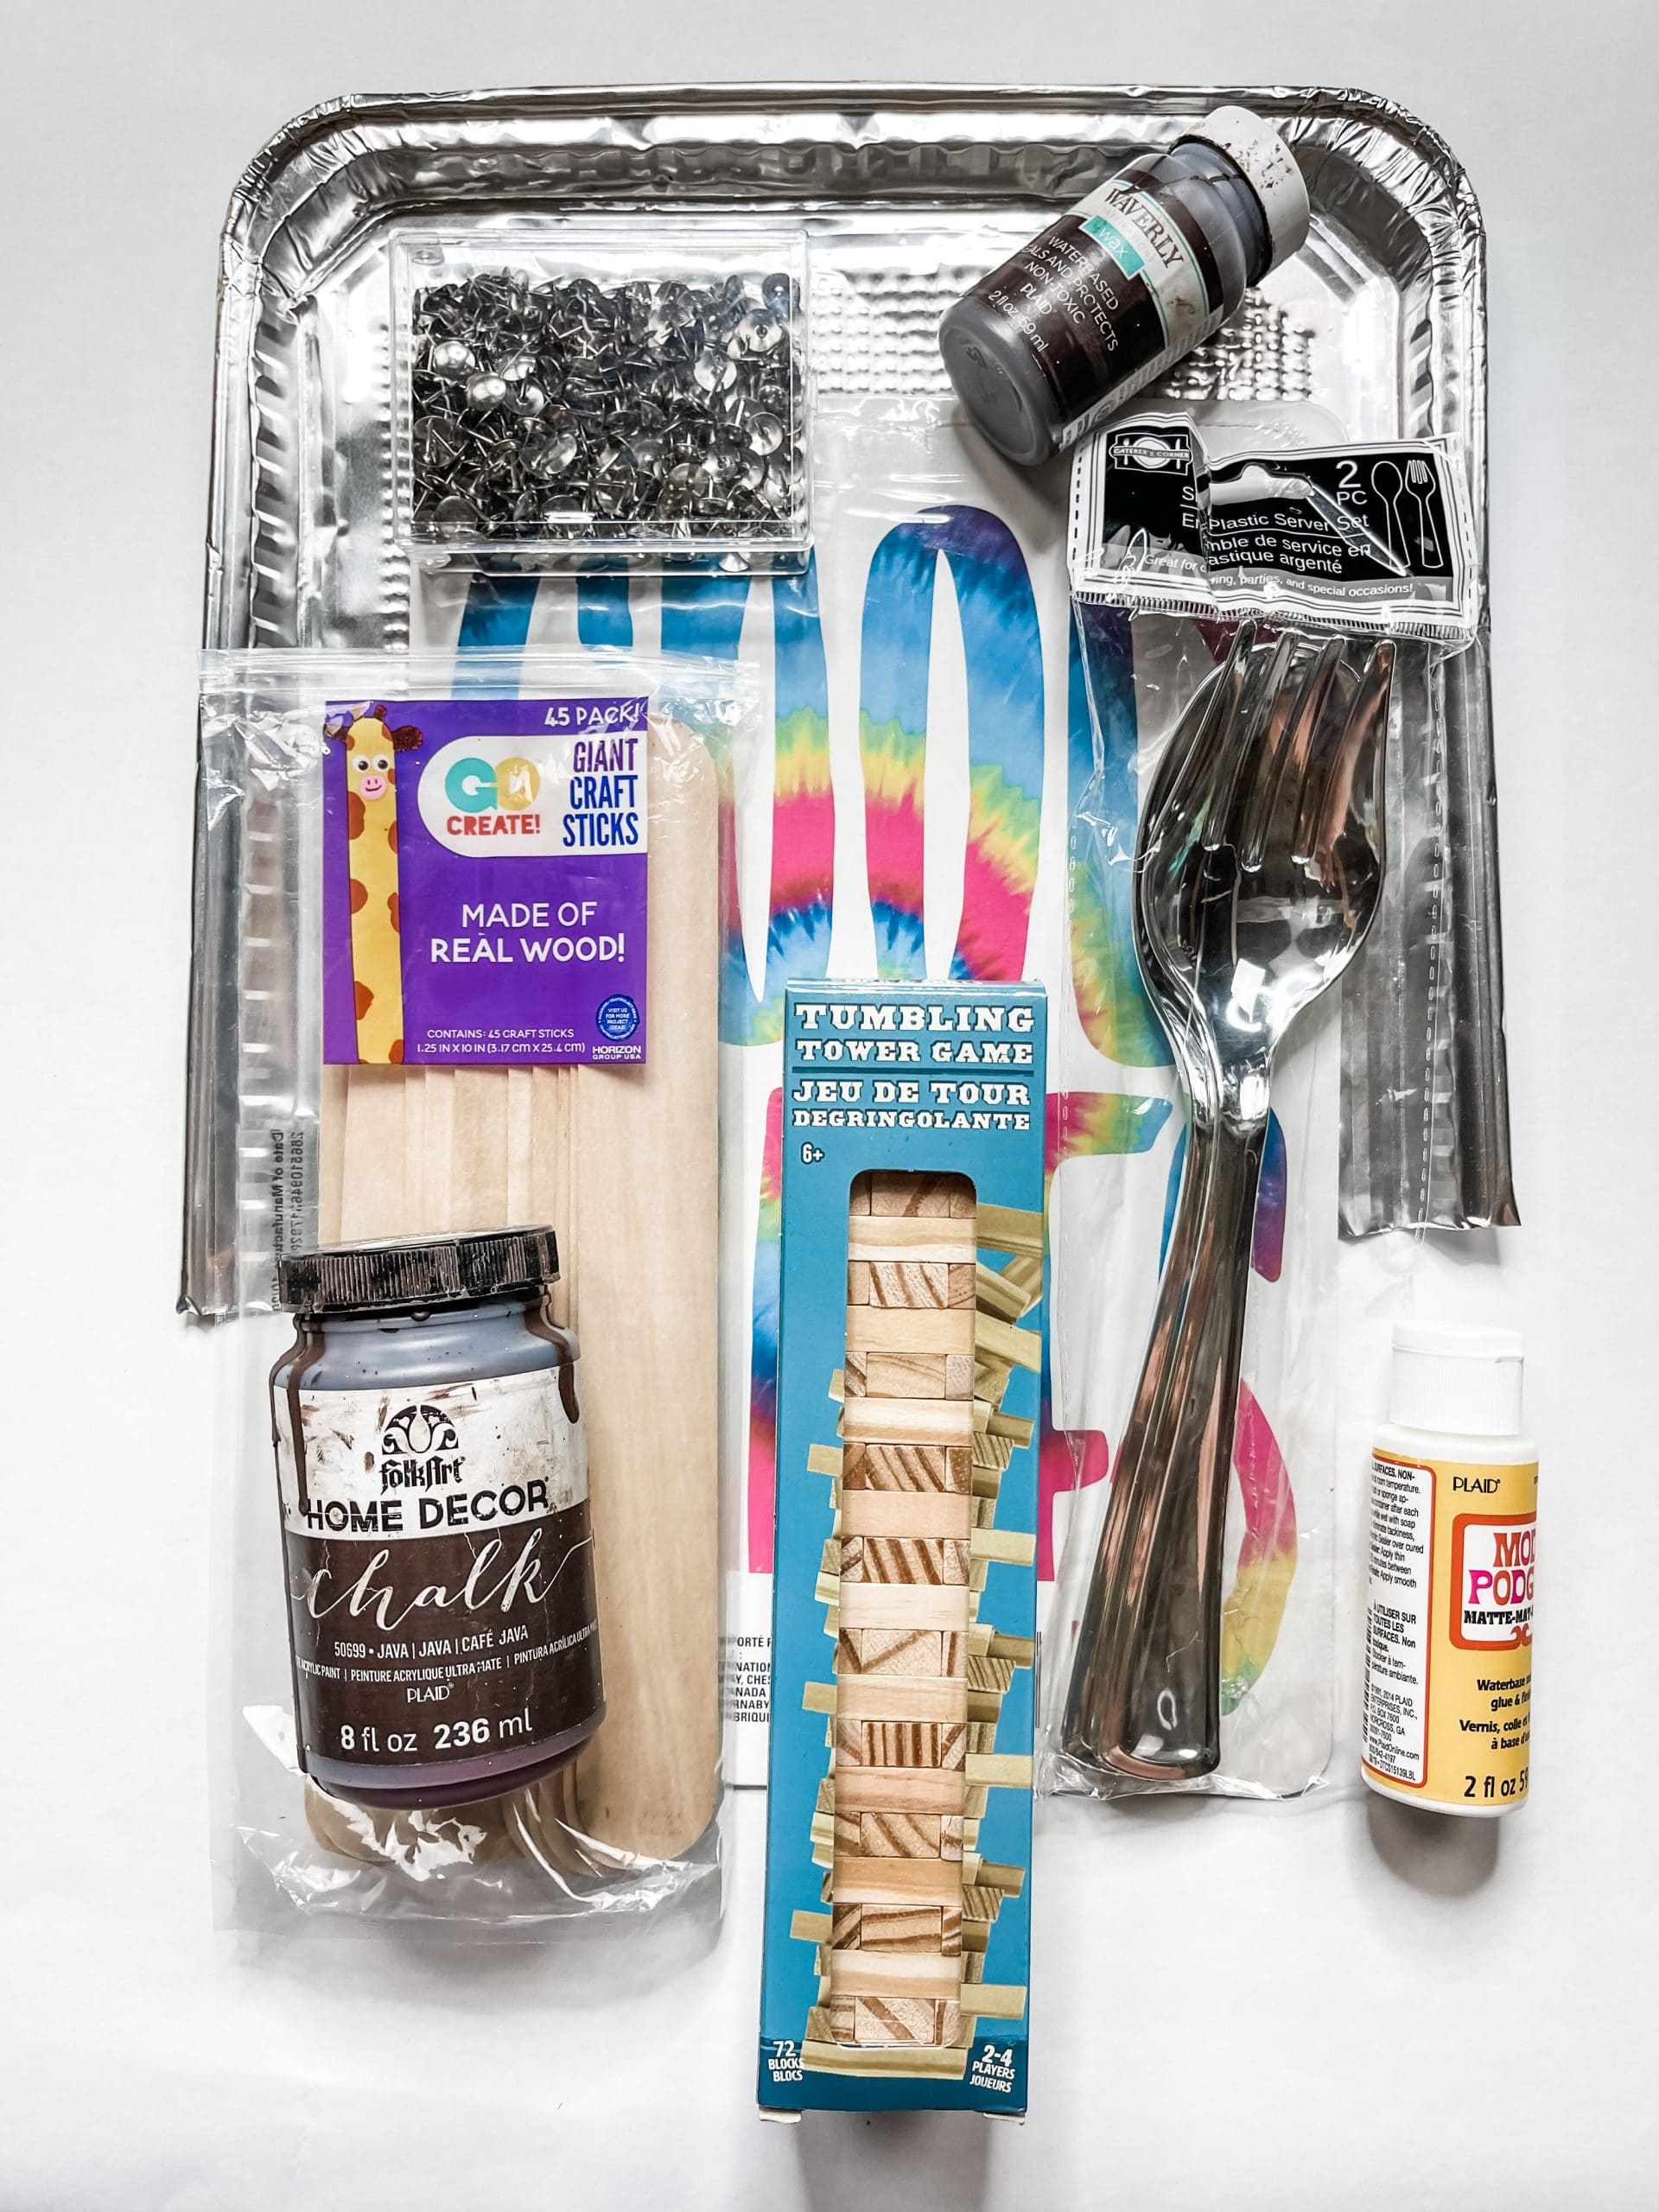
For this project, I will be using these items but you can substitute where you want.
“As an Amazon Associate, I earn from qualifying purchases.”
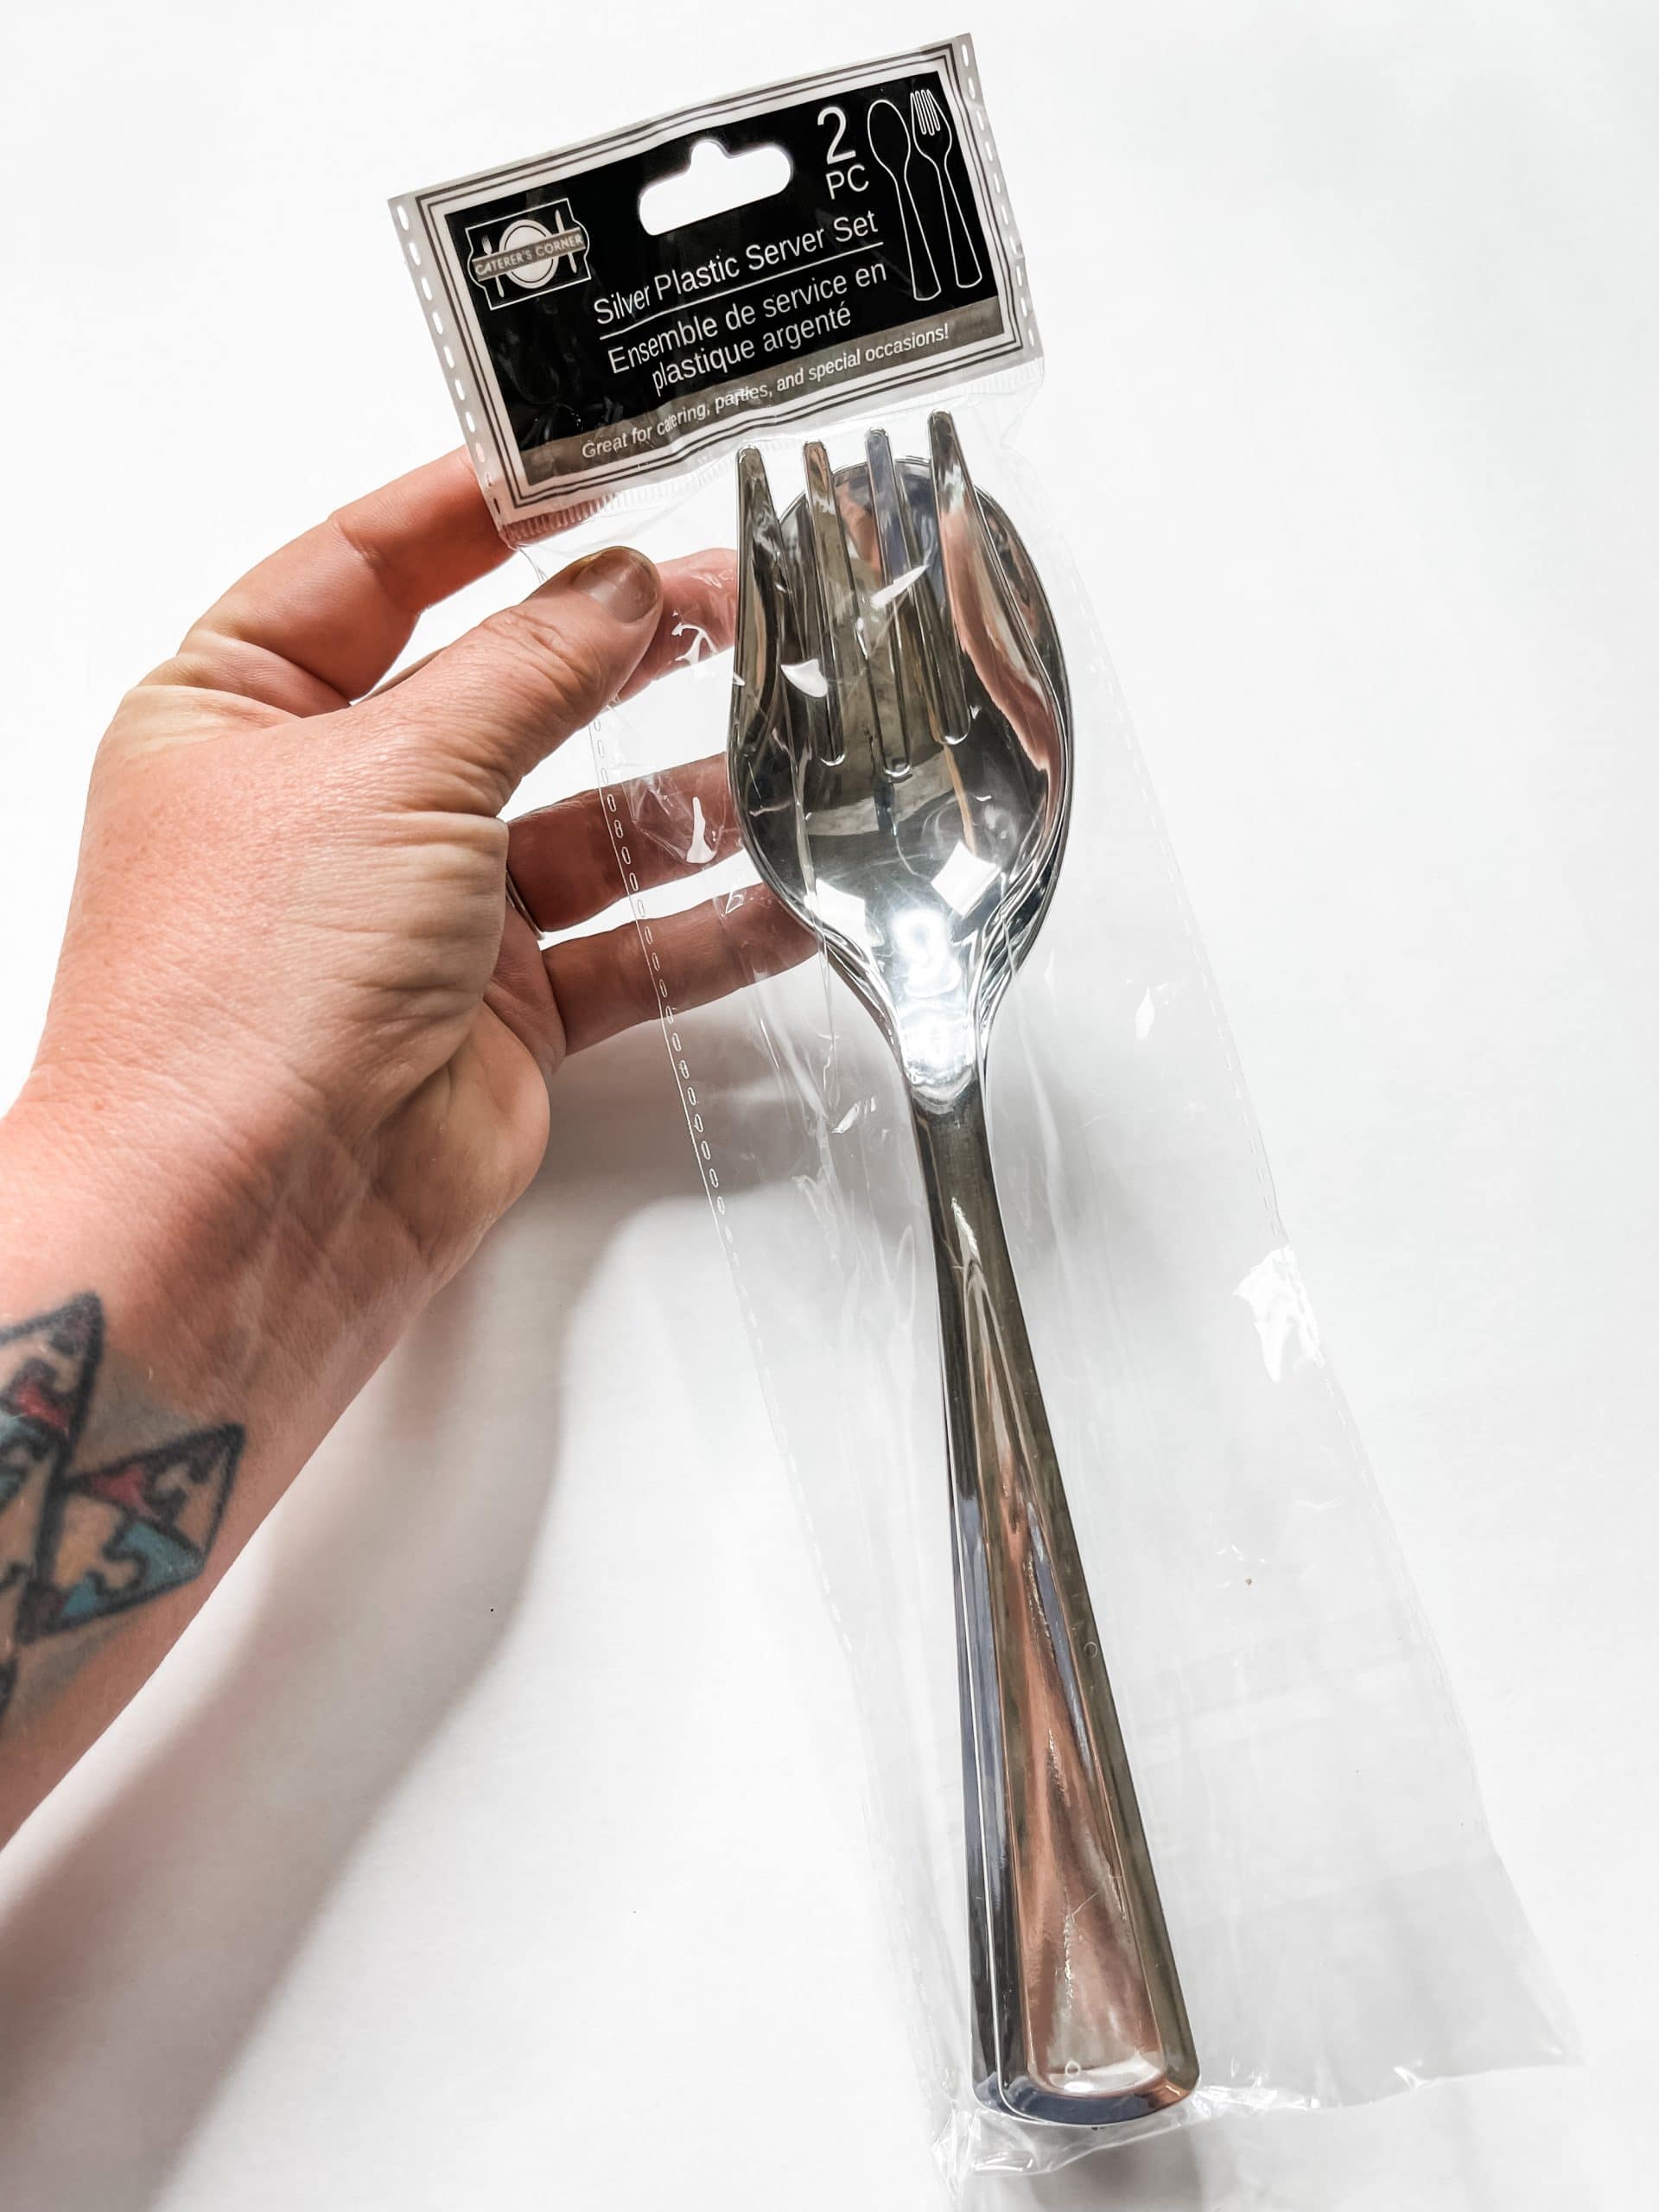
- Dollar Tree Plastic Server Set
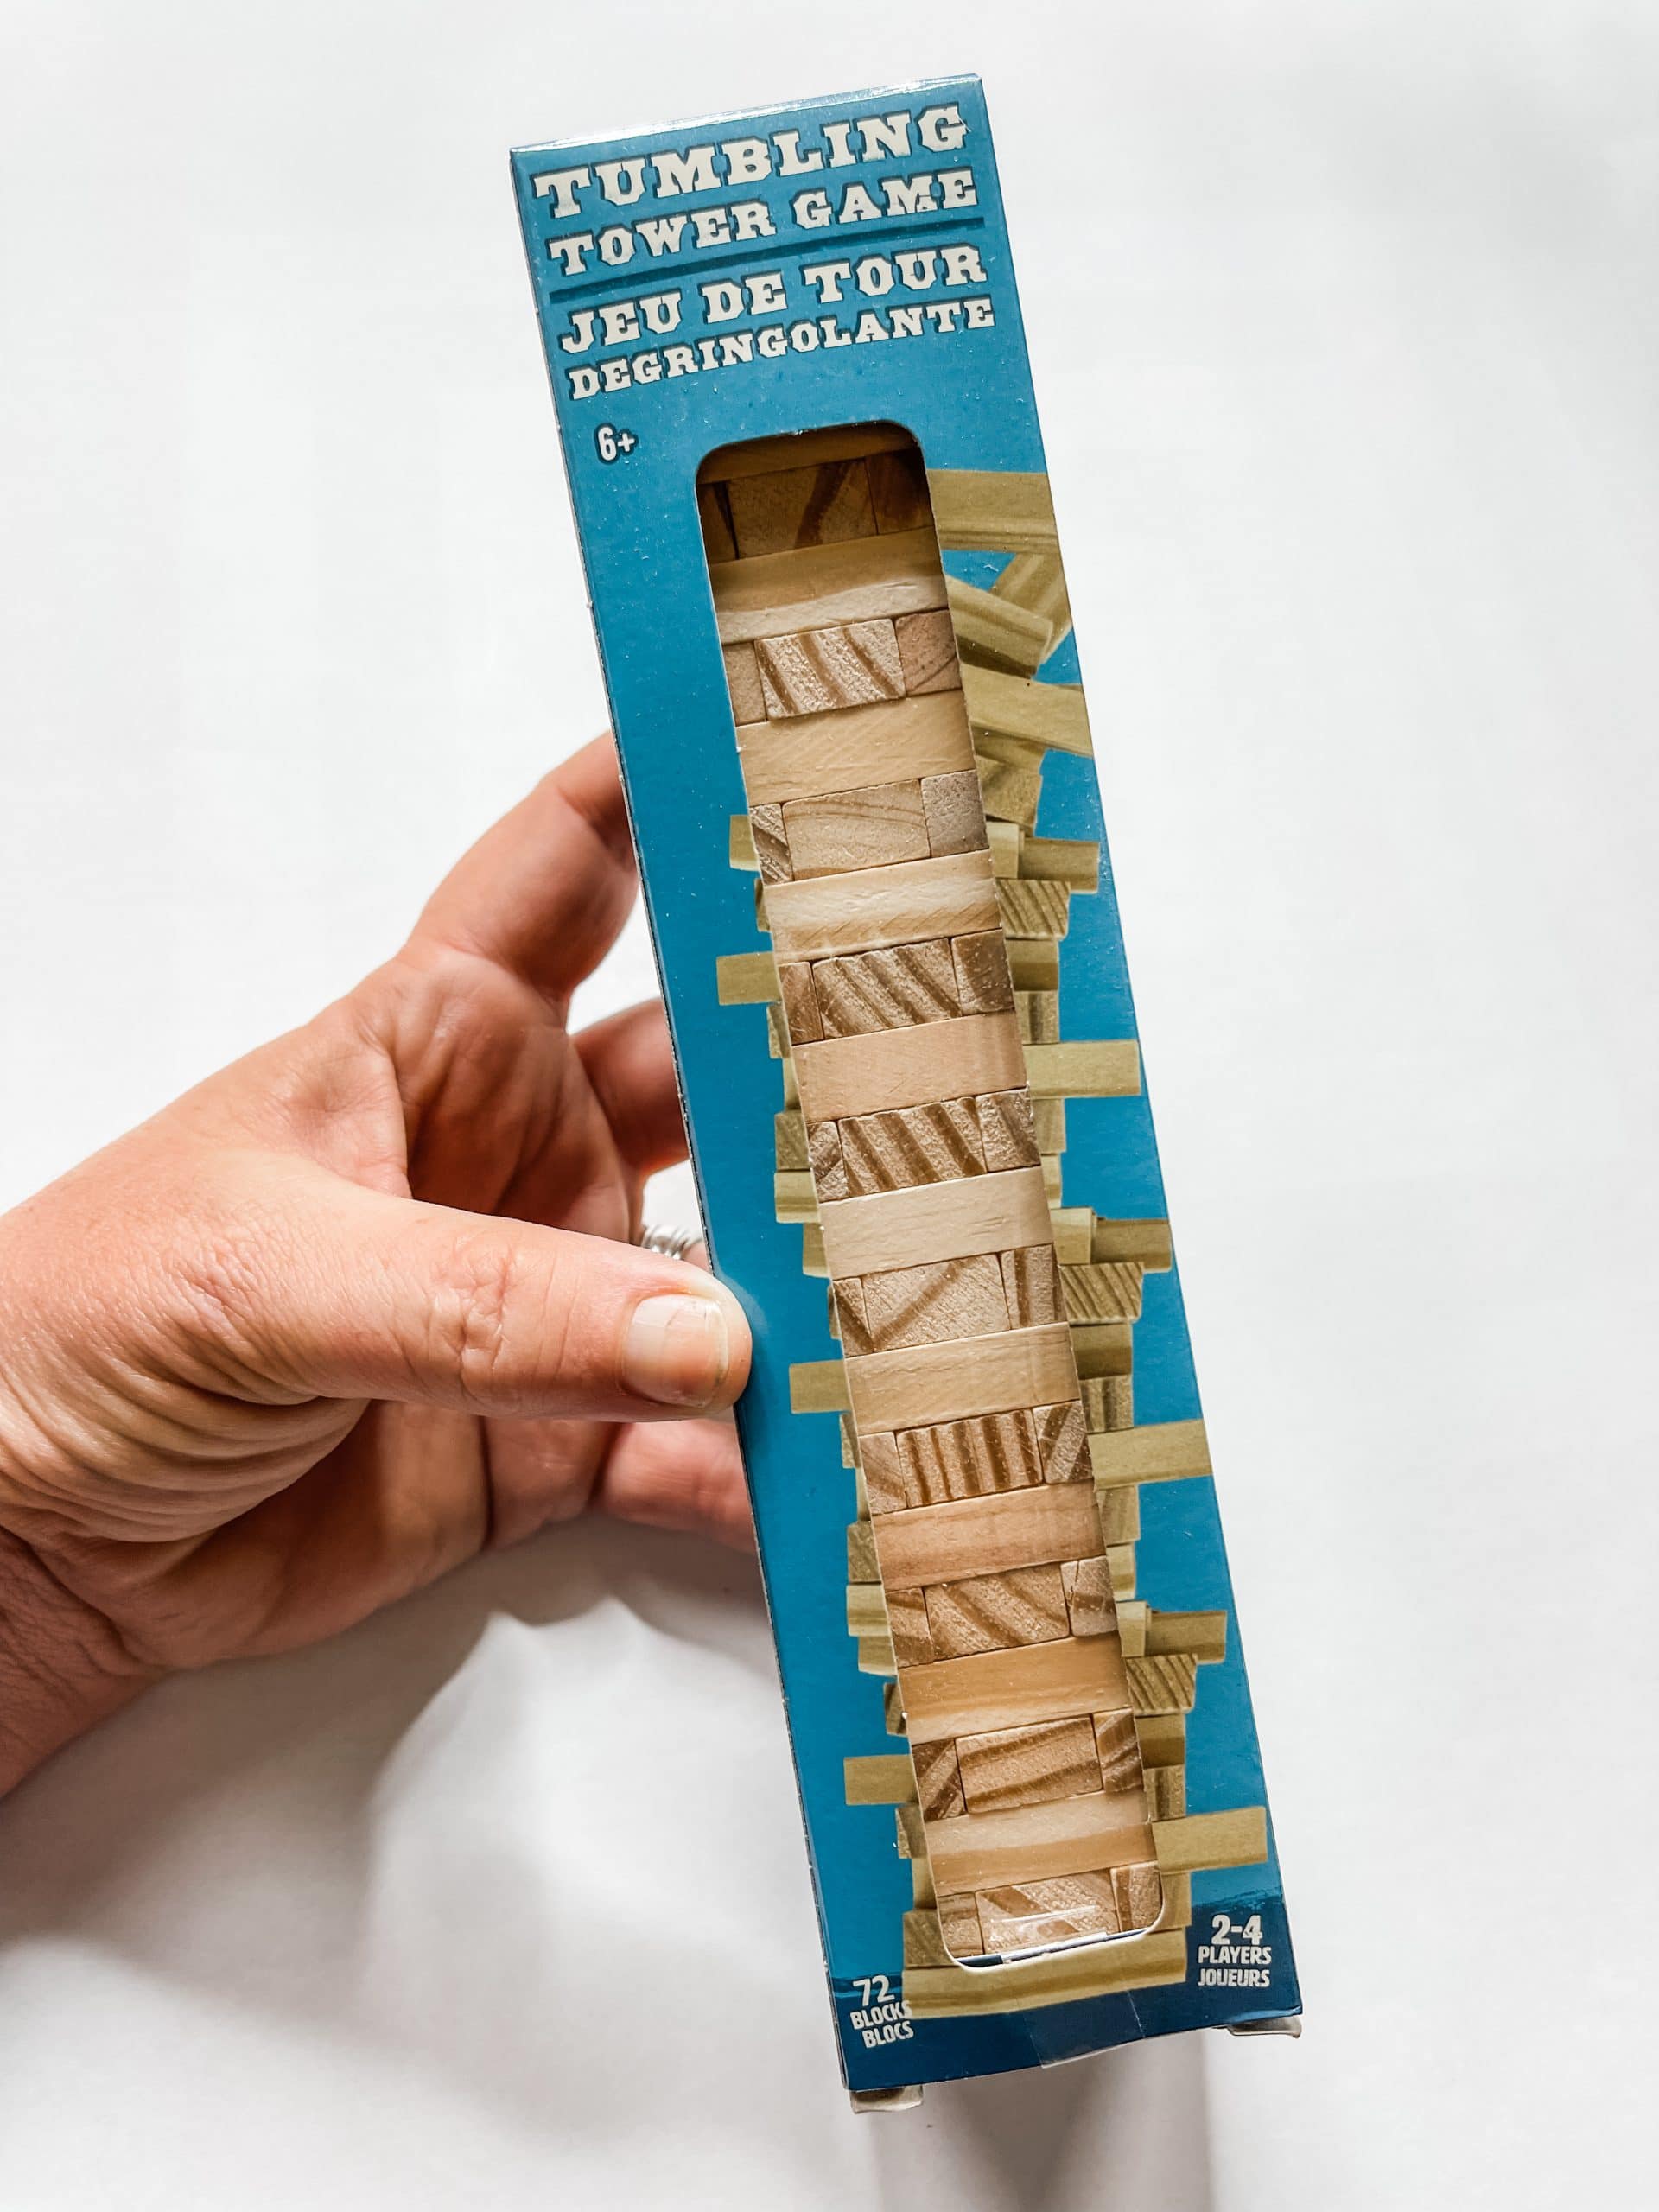
- Dollar Tree Tumbling Tower Blocks
- Thumbtacks
- Dollar Tree Sign (Or a piece of cardboard)
- Giant Craft Sticks
- Cookie Tin
- Apple Barrel Burnt Umber Acrylic Paint
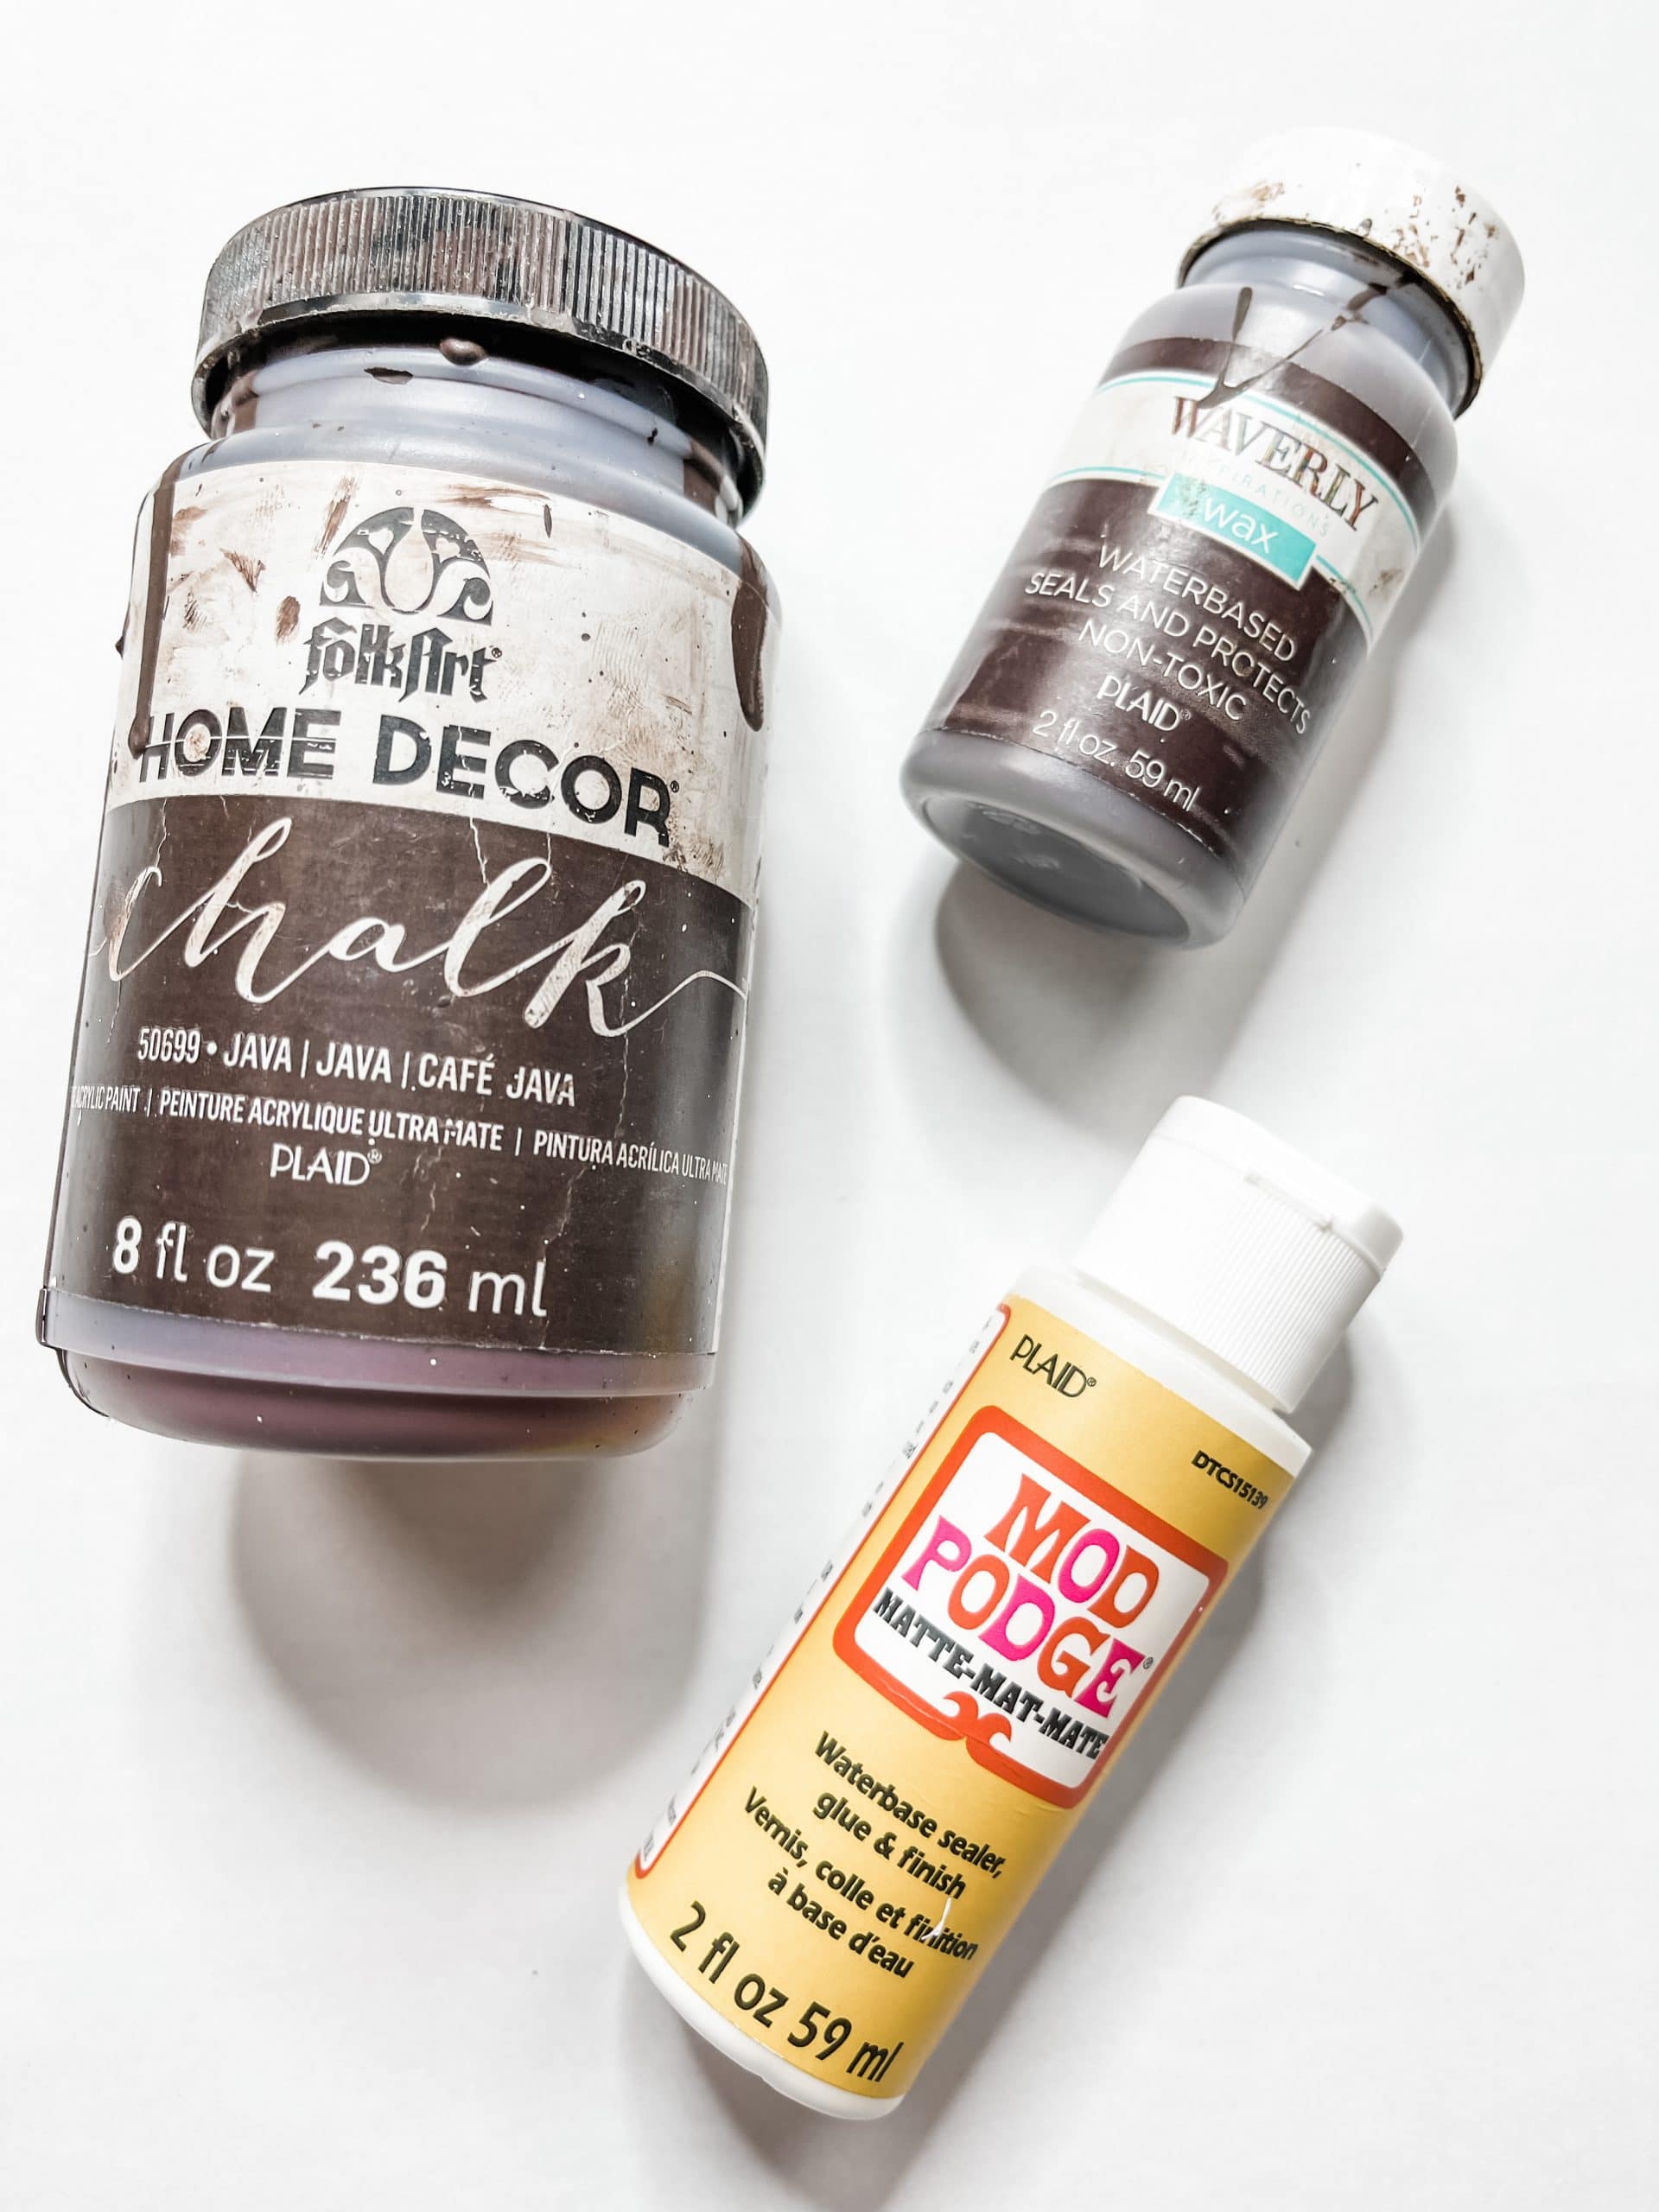
- Folkart White Chalk Paint
- Folkart Java Chalk Paint
- Waverly Antique Wax
- Rustoleum Grey Spray Paint
- Mod Podge
- Hot Glue gun
- Glue Sticks
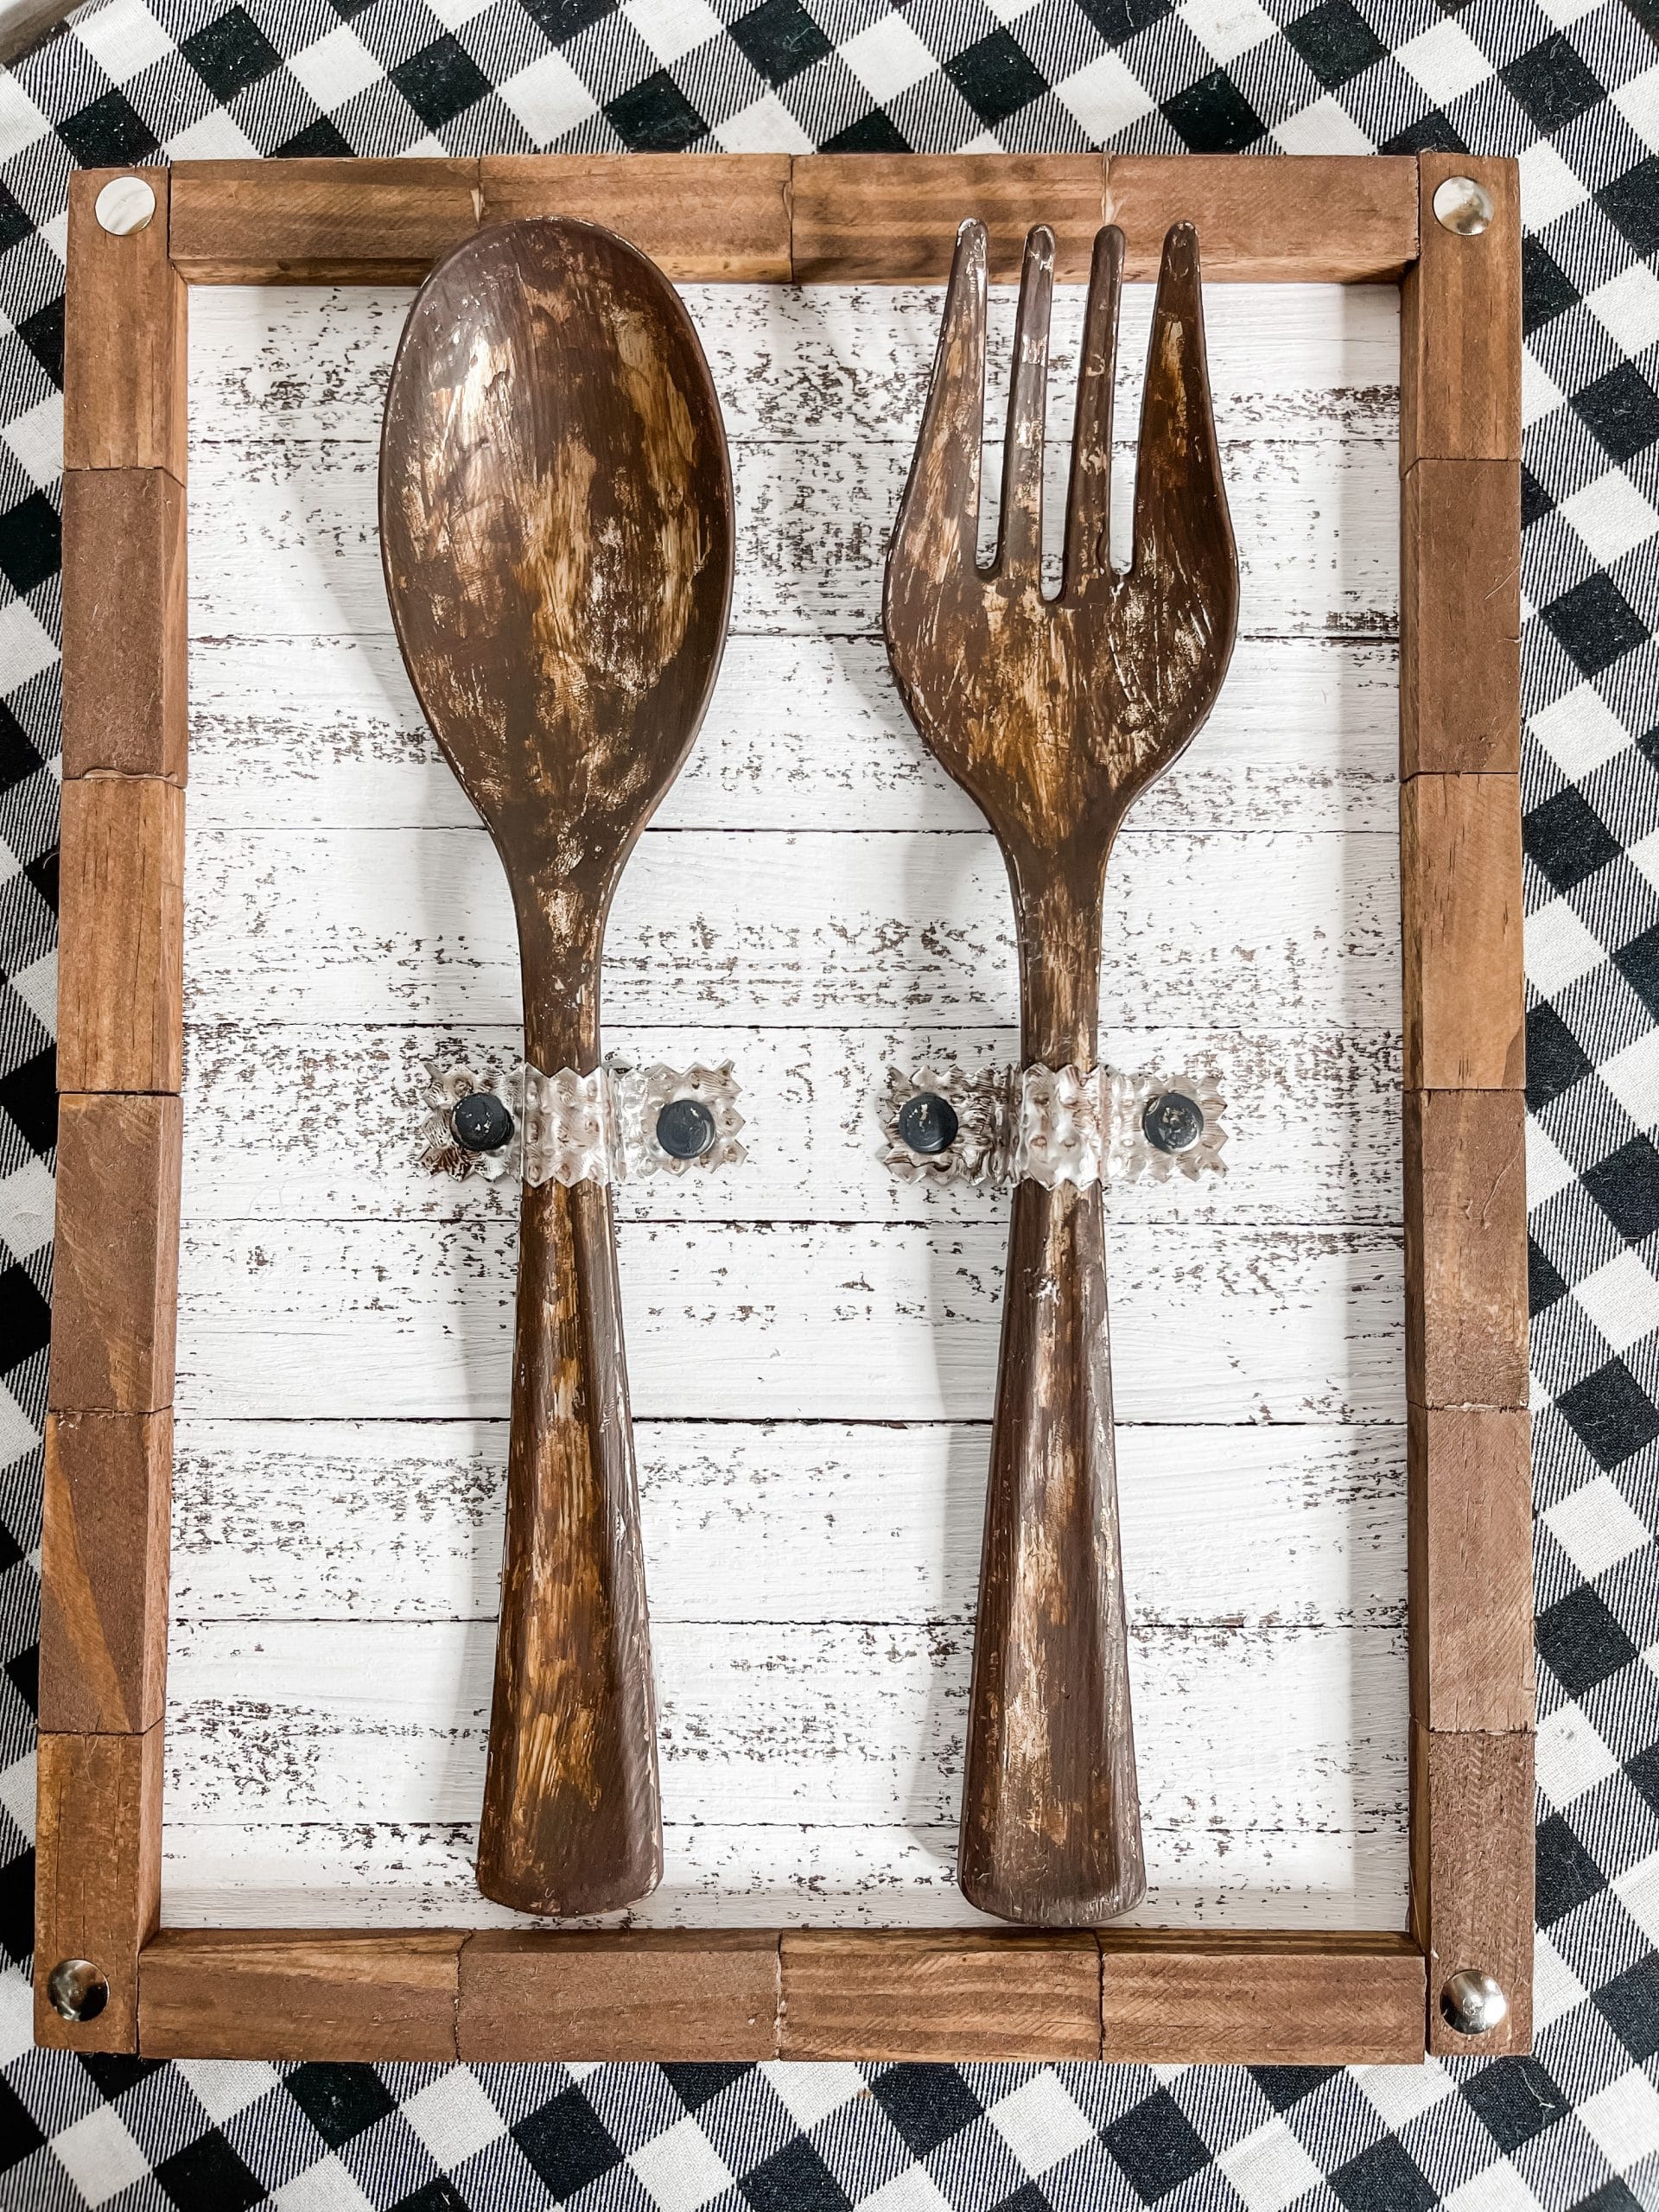
How to Make a DIY Faux Rust Fork and Spoon Wall Decor
Start this DIY by framing your piece of cardboard (or Dollar Tree cardboard sign) with the Dollar Tree tumbling tower blocks to see how many you need or if you need to trim the cardboard.

I had to trim my sign just a little to make the blocks fit properly around the edges of the cardboard. Then, hot glue the craft sticks onto the cardboard.

Once the glue has dried, cut the ends of the craft sticks that are hanging off the edge of the sign/cardboard. Try and get the edges as straight as you can.
Make sure the blocks will fit around the edges of the sign one more time, then hot glue them into four strips that will create the frame for your sign.
How to stain wood
Pour brown paint (I used Apple Barrel Burnt Umber Acrylic Paint) onto the craft stick surface, spray the wood with water, then use a wet wipe to spread the paint across the craft sticks.
Use the same technique to stain the tumbling tower block strips. Allow the wood to dry. I used my heat gun to speed up the drying process.
Next, you’re going to create the distressed farmhouse finish for the craft stick backing. Use a dry chippy paintbrush and lightly paint the Folkart white chalk paint across the stained wood.
Keep a light hand and you’ll get an effortlessly distressed finish! If you apply too much paint, you can go back over the surface with a sanding sponge to distress it more.
How to faux rust plastic
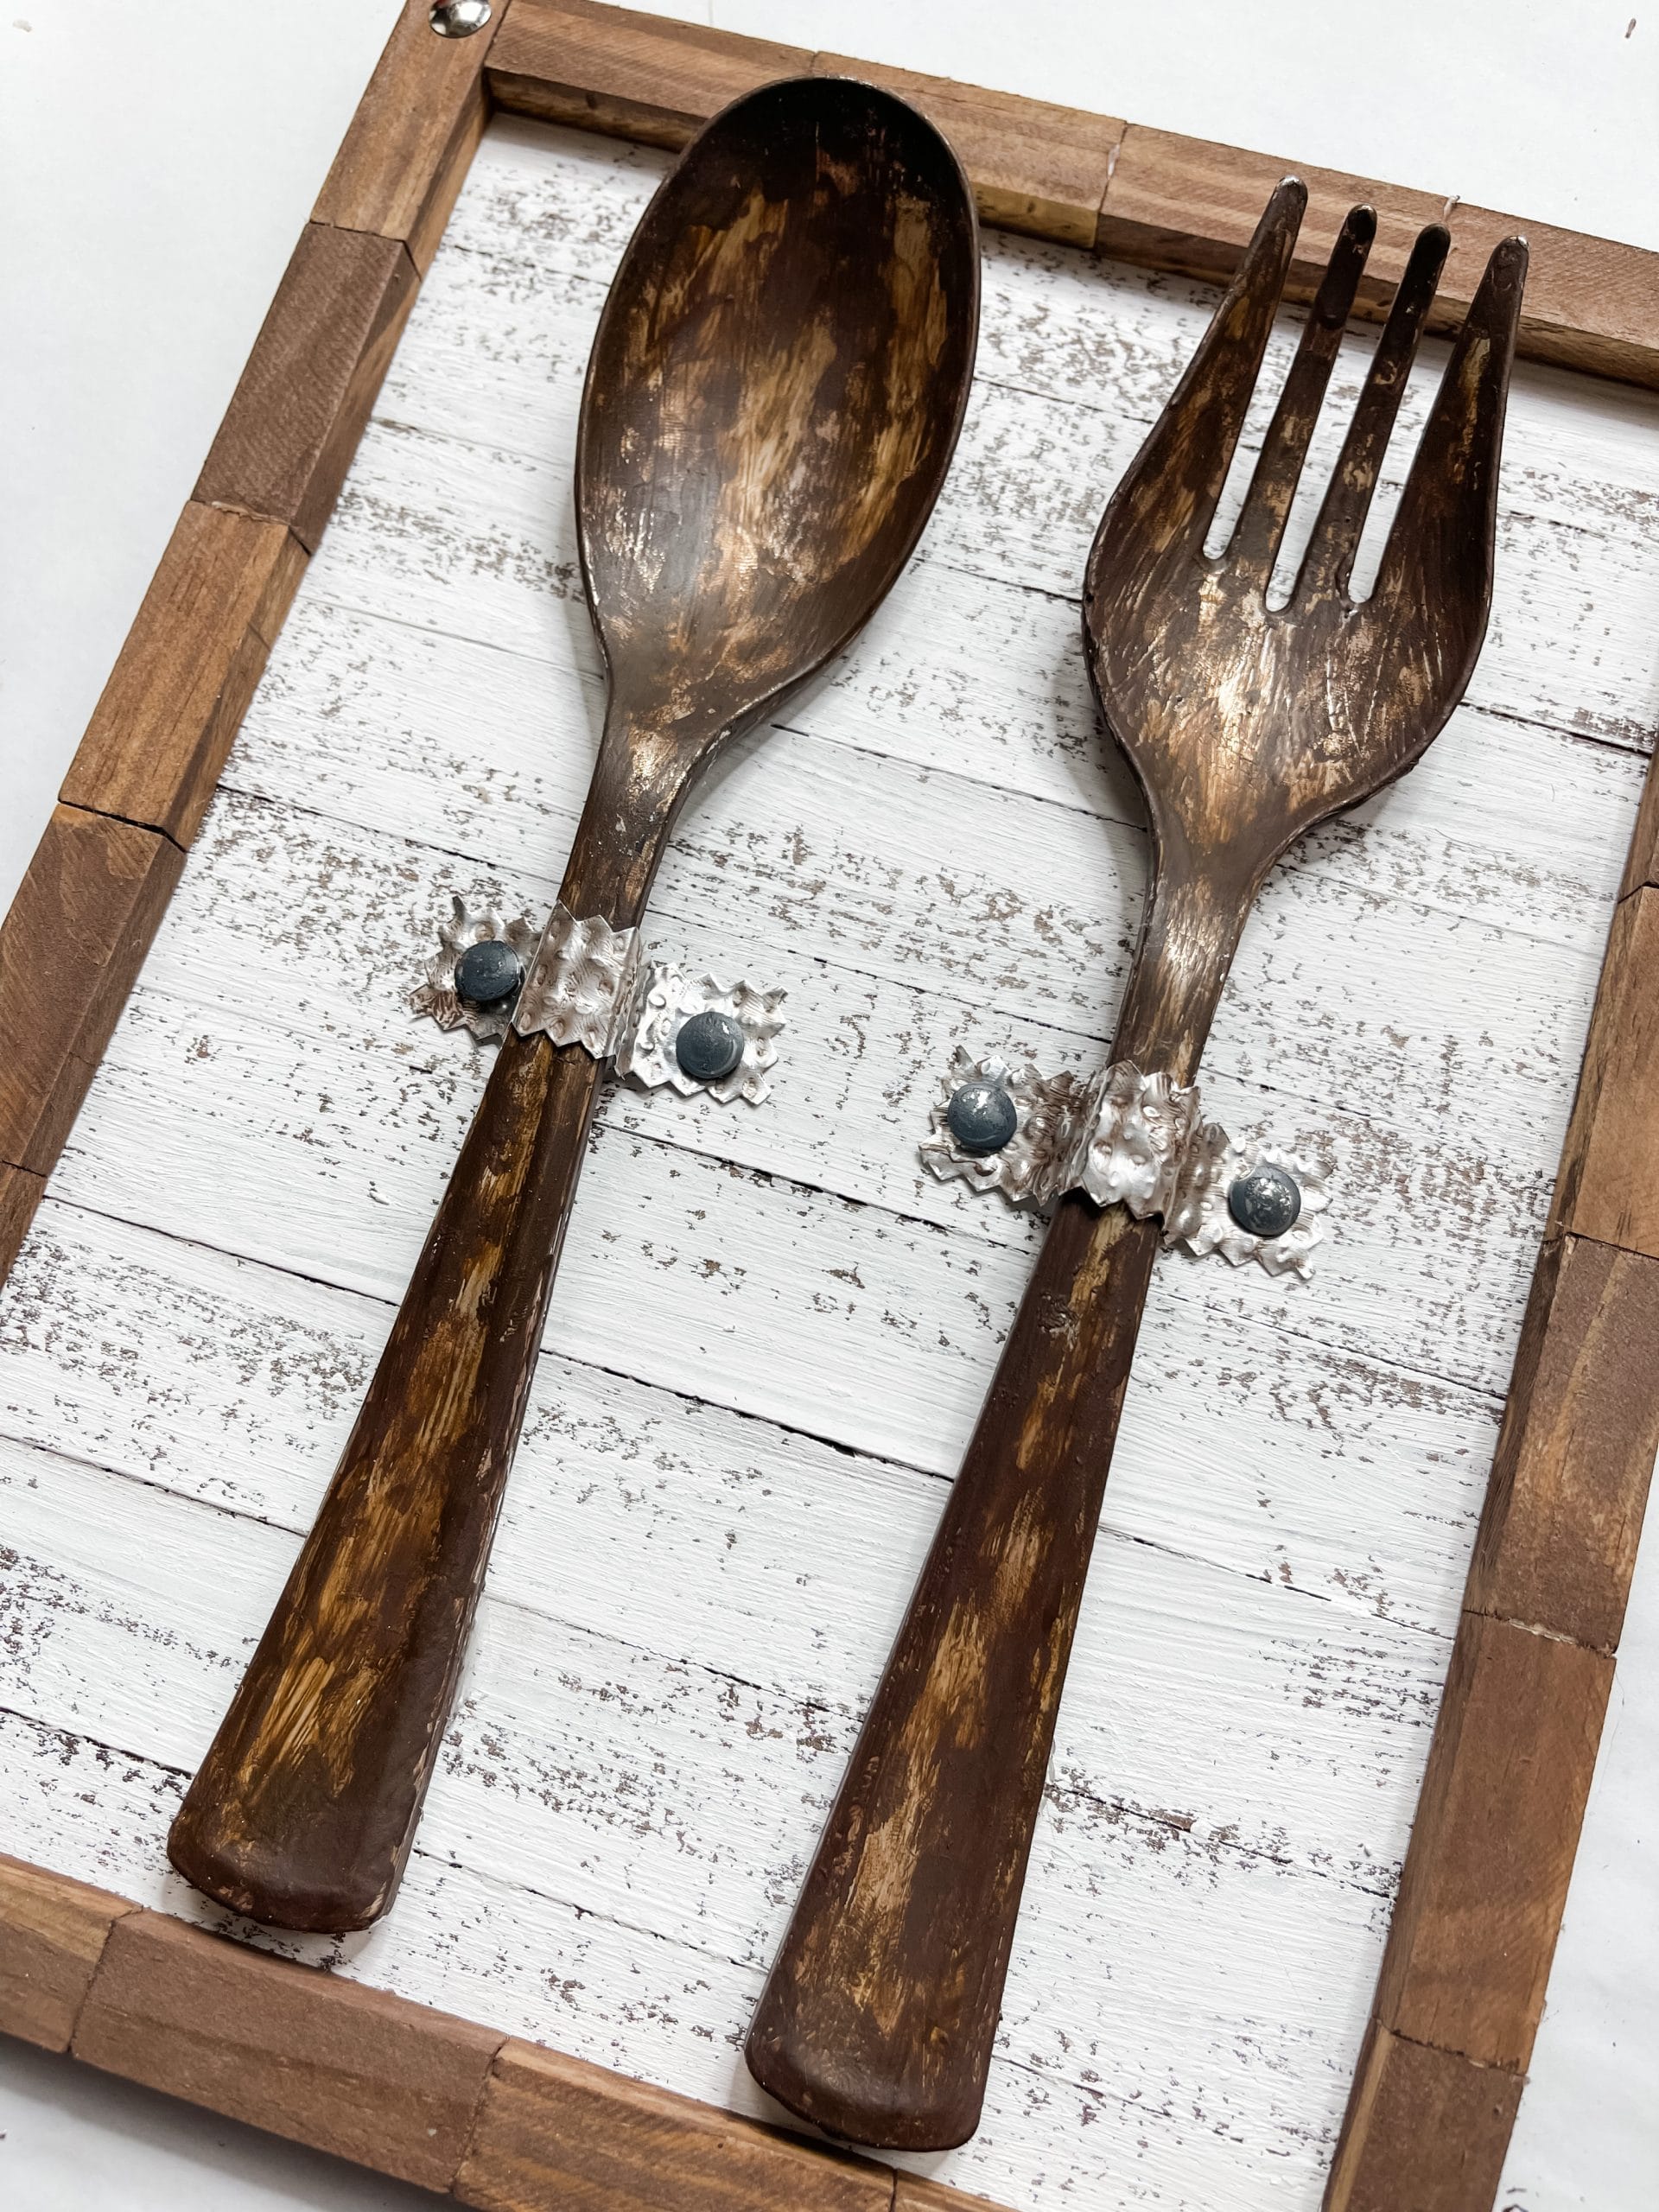
The faux rust finish I did on this DIY Faux Rust Fork and Spoon Wall Decor is so adorable and so easy to do! First, you need to apply a coat of Mod Podge to the plastic fork and spoon.
Let the Mod Podge dry completely (I used my heat gun again for this). Do the faux rust finish one piece of silverware at a time.
I did the plastic fork first. Use a small paintbrush to paint brown paint around the edges of fork, then use your finger to slightly smudge the paint.

Next, go back in with the Waverly antique wax and use it to add definition to your faux rust finish on the plastic fork.
I just used my fingertips to dab and smudge the wax onto the fork. Make sure to get the edges and back of the fork as well.
Once you’re happy with the faux rust finish on the Dollar Tree plastic serving fork, go ahead and repeat the same process on the plastic spoon!
Bring it all together
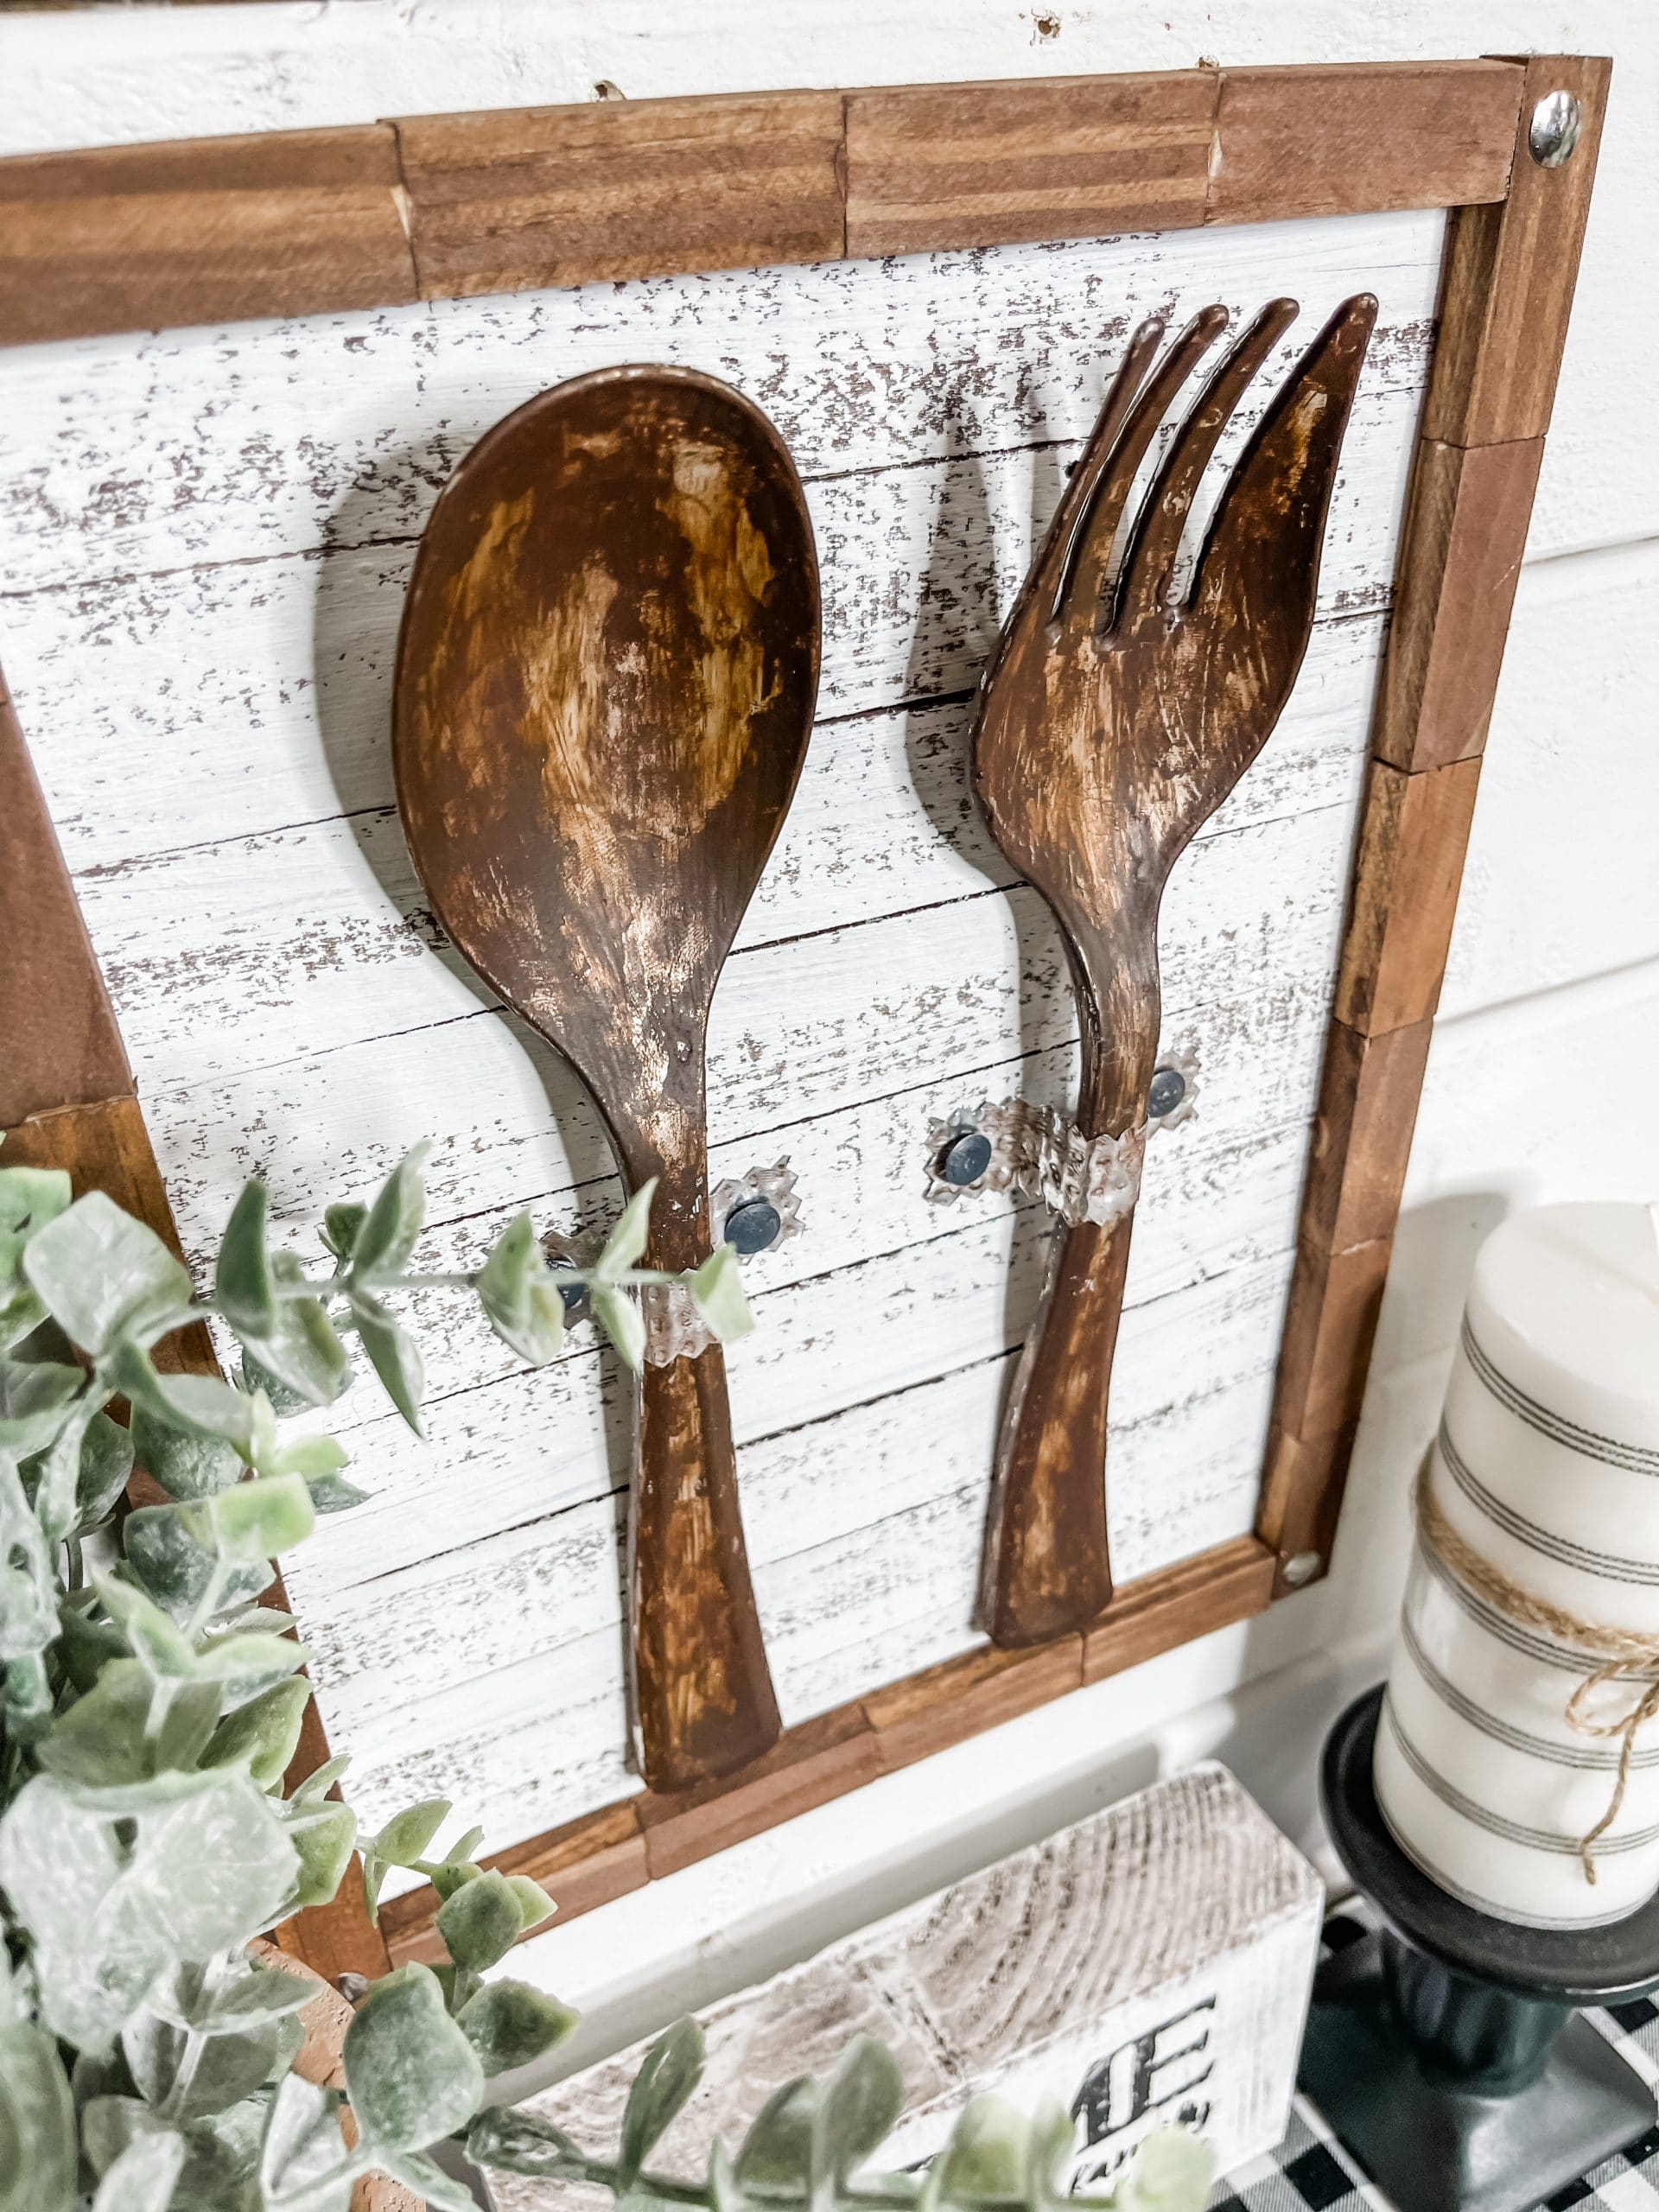
It’s time to bring all the pieces of this DIY Faux Rust Fork and Spoon Wall Decor together!

I used the cookie tin to make the “brackets” to attach the fork and spoon to the craft stick surface. Cut two small rectangles out of the cookie tin sheet.
Try to make them about the same size. I then used a pair of patterned scissors to cut a patterned edge on both of the rectangles.
Hot glue the stained tumbling tower block strips around the edge of the craft stick surface. Then, do a faux rust finish on the cookie tin rectangles.
Hot glue the cookie tin pieces over the handles of the faux rust fork and spoon to secure them to the craft stick surface.
I hammered a metal thumbtack in each corner of the DIY frame. Then, I spray painted four thumbtacks with grey paint and hammered them on either side of the “brackets” securing the spoon and fork.
Lastly, I hot glued popsicle stick on the back of the sign to create a lip that way I could hang up this adorable DIY Faux Rust Fork and Spoon Wall Decor!
I hope you enjoyed this DIY Faux Rust Fork and Spoon Wall Decor as much as I did and decide to make it for yourself! If you do, I would love to see how yours turns out
You should totally join my FREE Facebook group called On A Budget Crafts! It is a judgment-free community for DIY crafters to show off their projects and ideas.
If you loved this DIY, you might also like these DIY ideas!
- Dollar Tree DIY Faux Metal Bucket Spring Decor
- DIY Rustic Decor with Dollar Tree Cactus Succulent Stickers
- How to Make a DIY Rustic Bucket Planter
- DIY Faux Concrete Planter
Thanks for stopping by! XOXO Amber
You can also shop my ENTIRE AMAZON Favorites shop just click here! It’s packed full of all the things I use and love. Here is the supply list I highly recommend every creative have on hand!!
Would you also pin my blog for later and get on my newsletter alerts? I would love to have you join my #craftycrew.
Inspired? Leave me a comment below! I love hearing from my readers!

Join my free “ON A BUDGET CRAFTS” Facebook group!
Love the faux rust
Beautiful