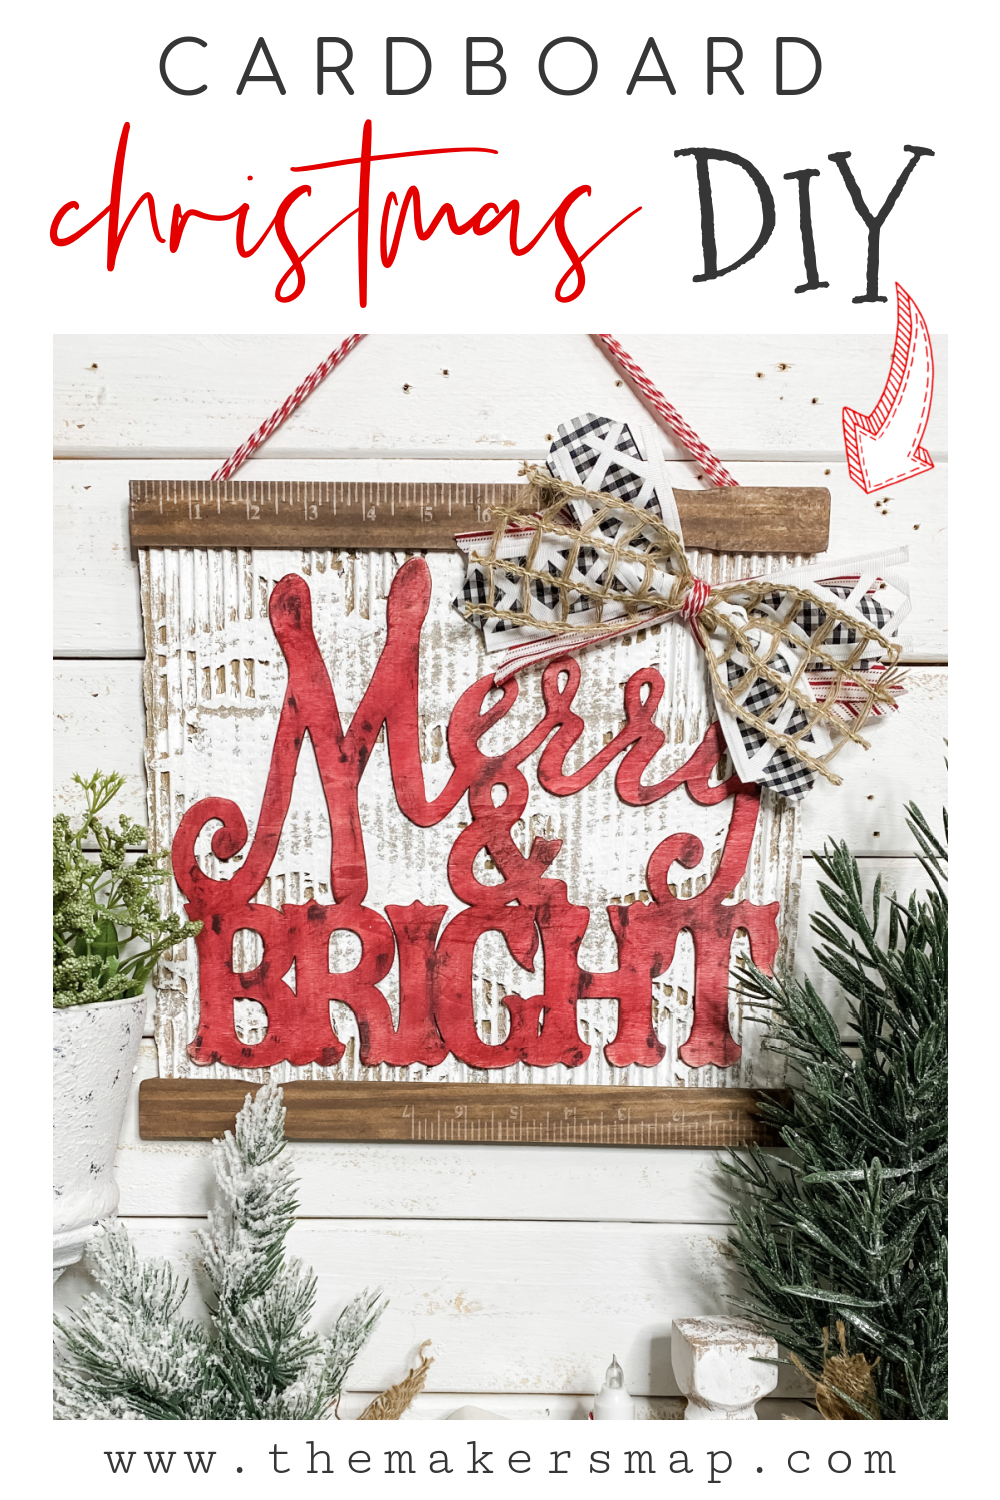
How to DIY a Christmas Merry and Bright Sign with Cardboard
I’ve made projects before with cardboard, and they are always such a big hit because nobody thinks you can make cardboard look good!
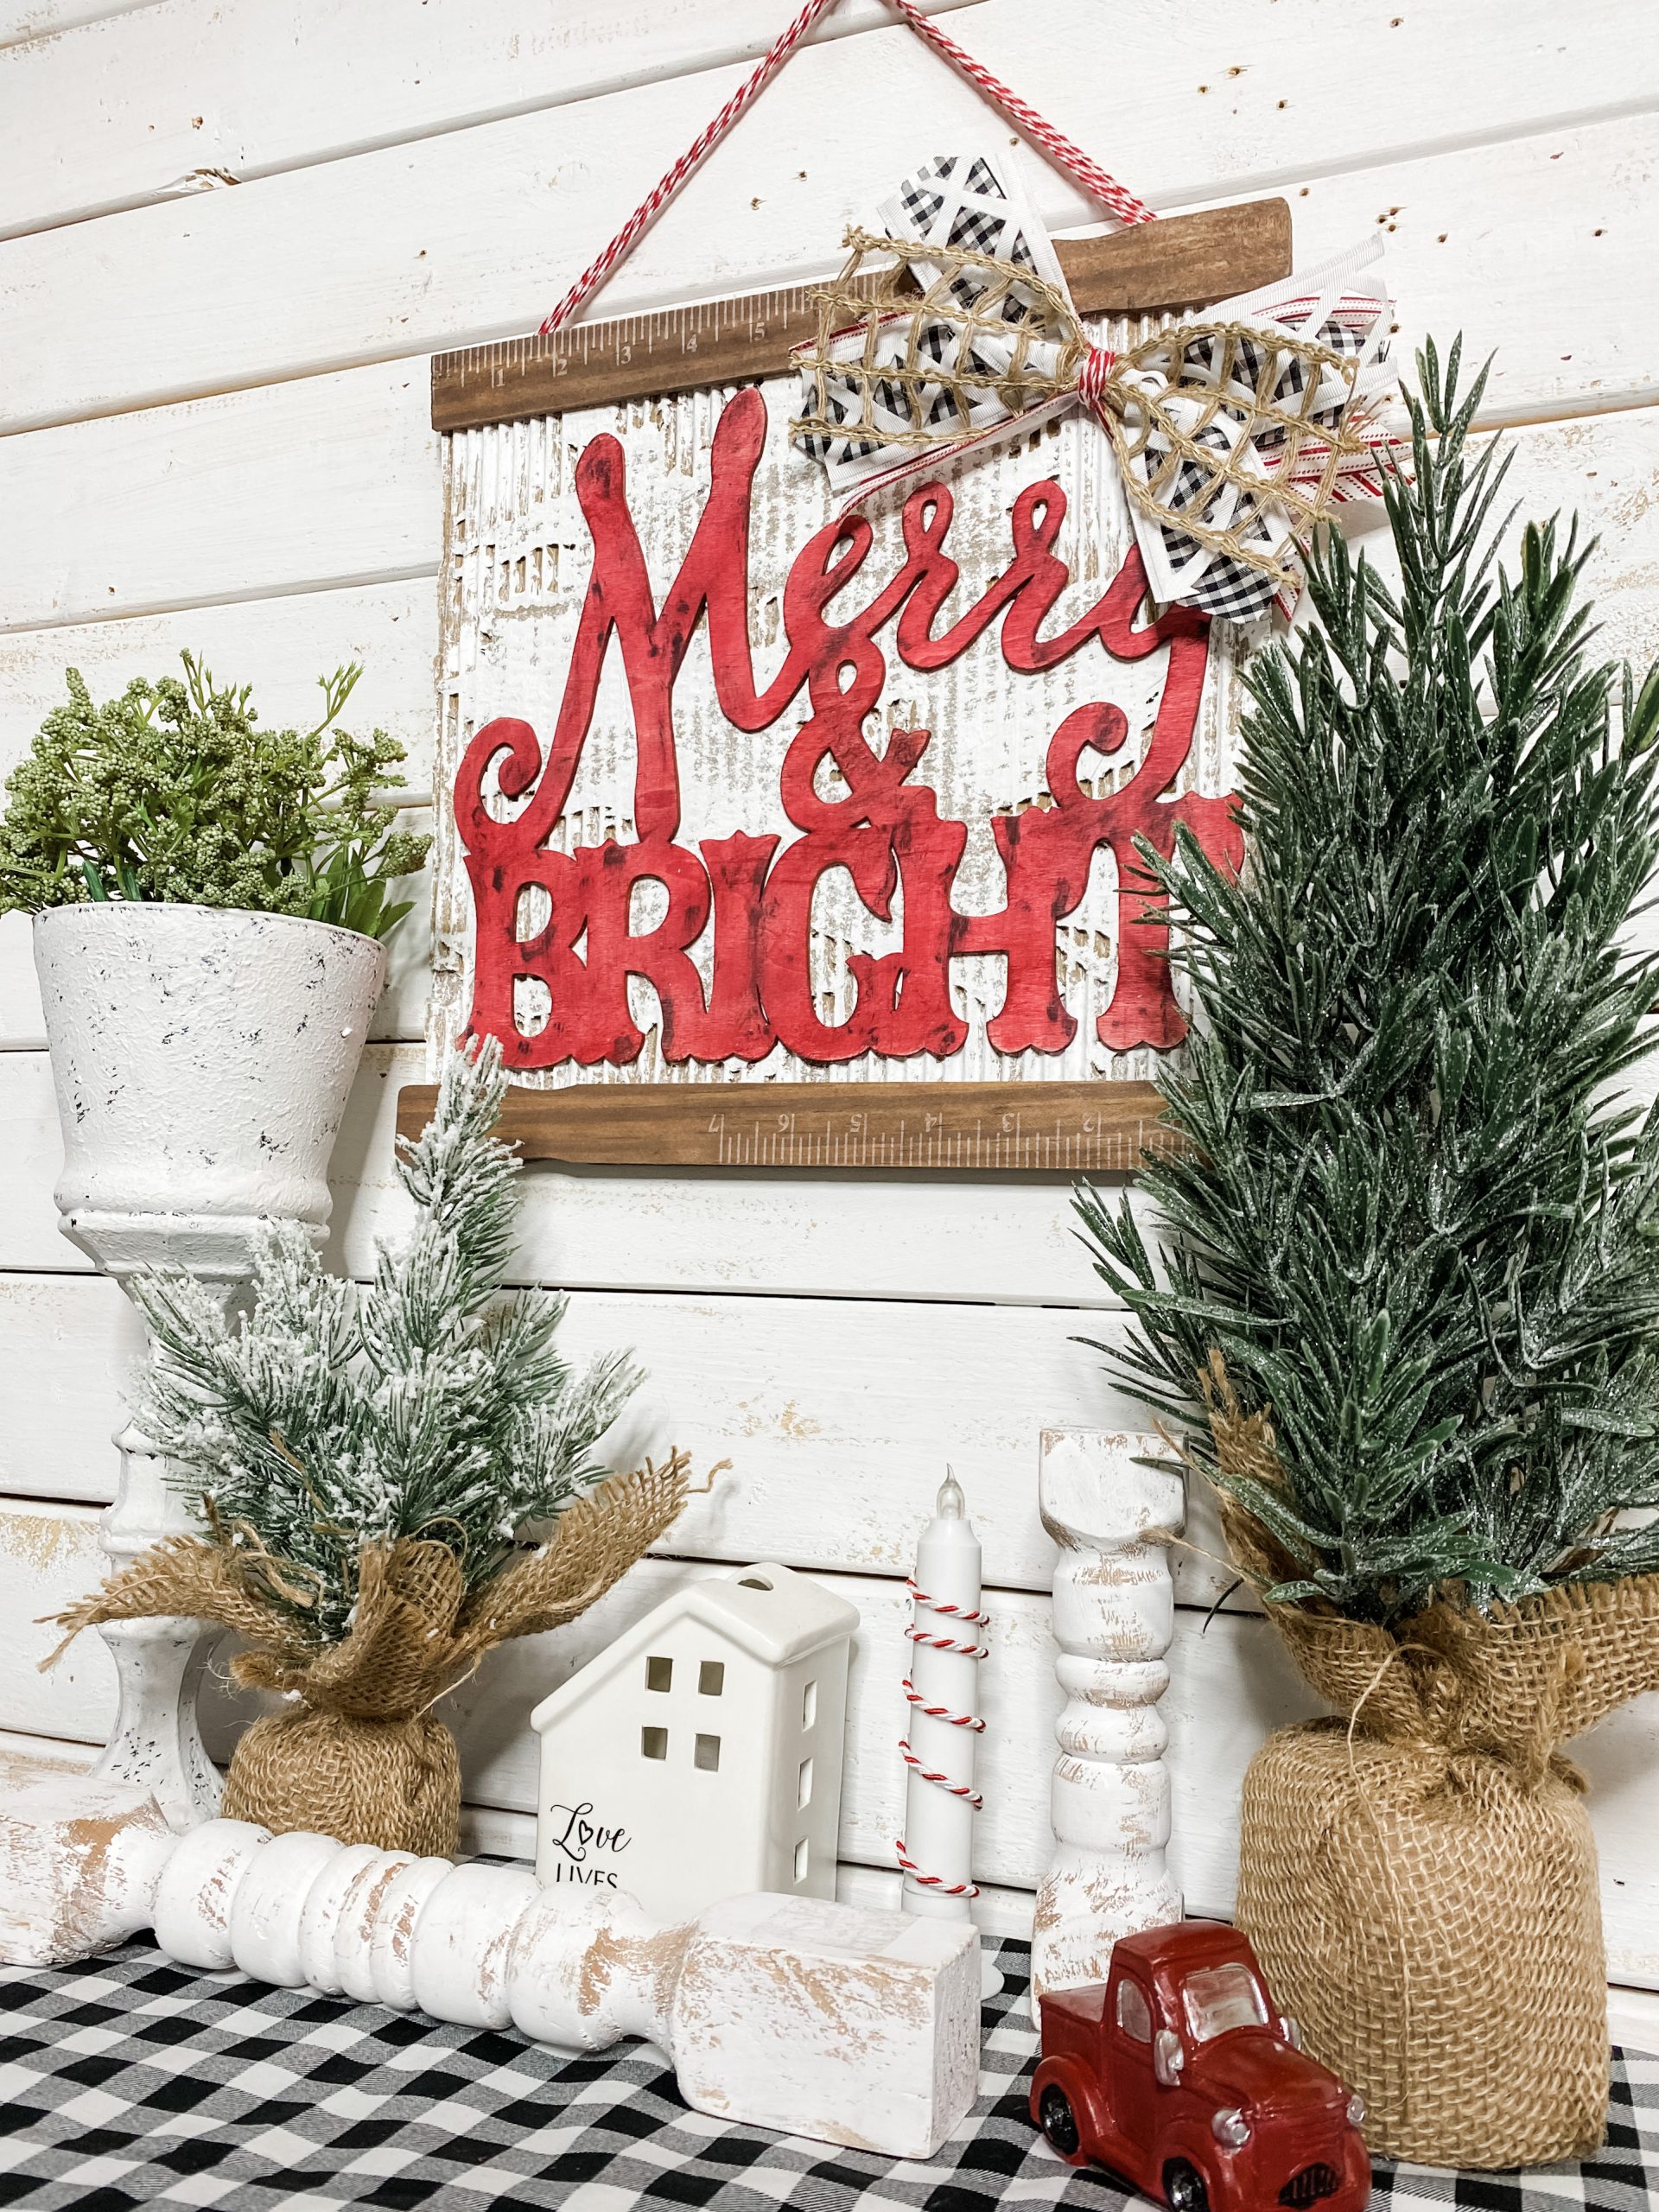
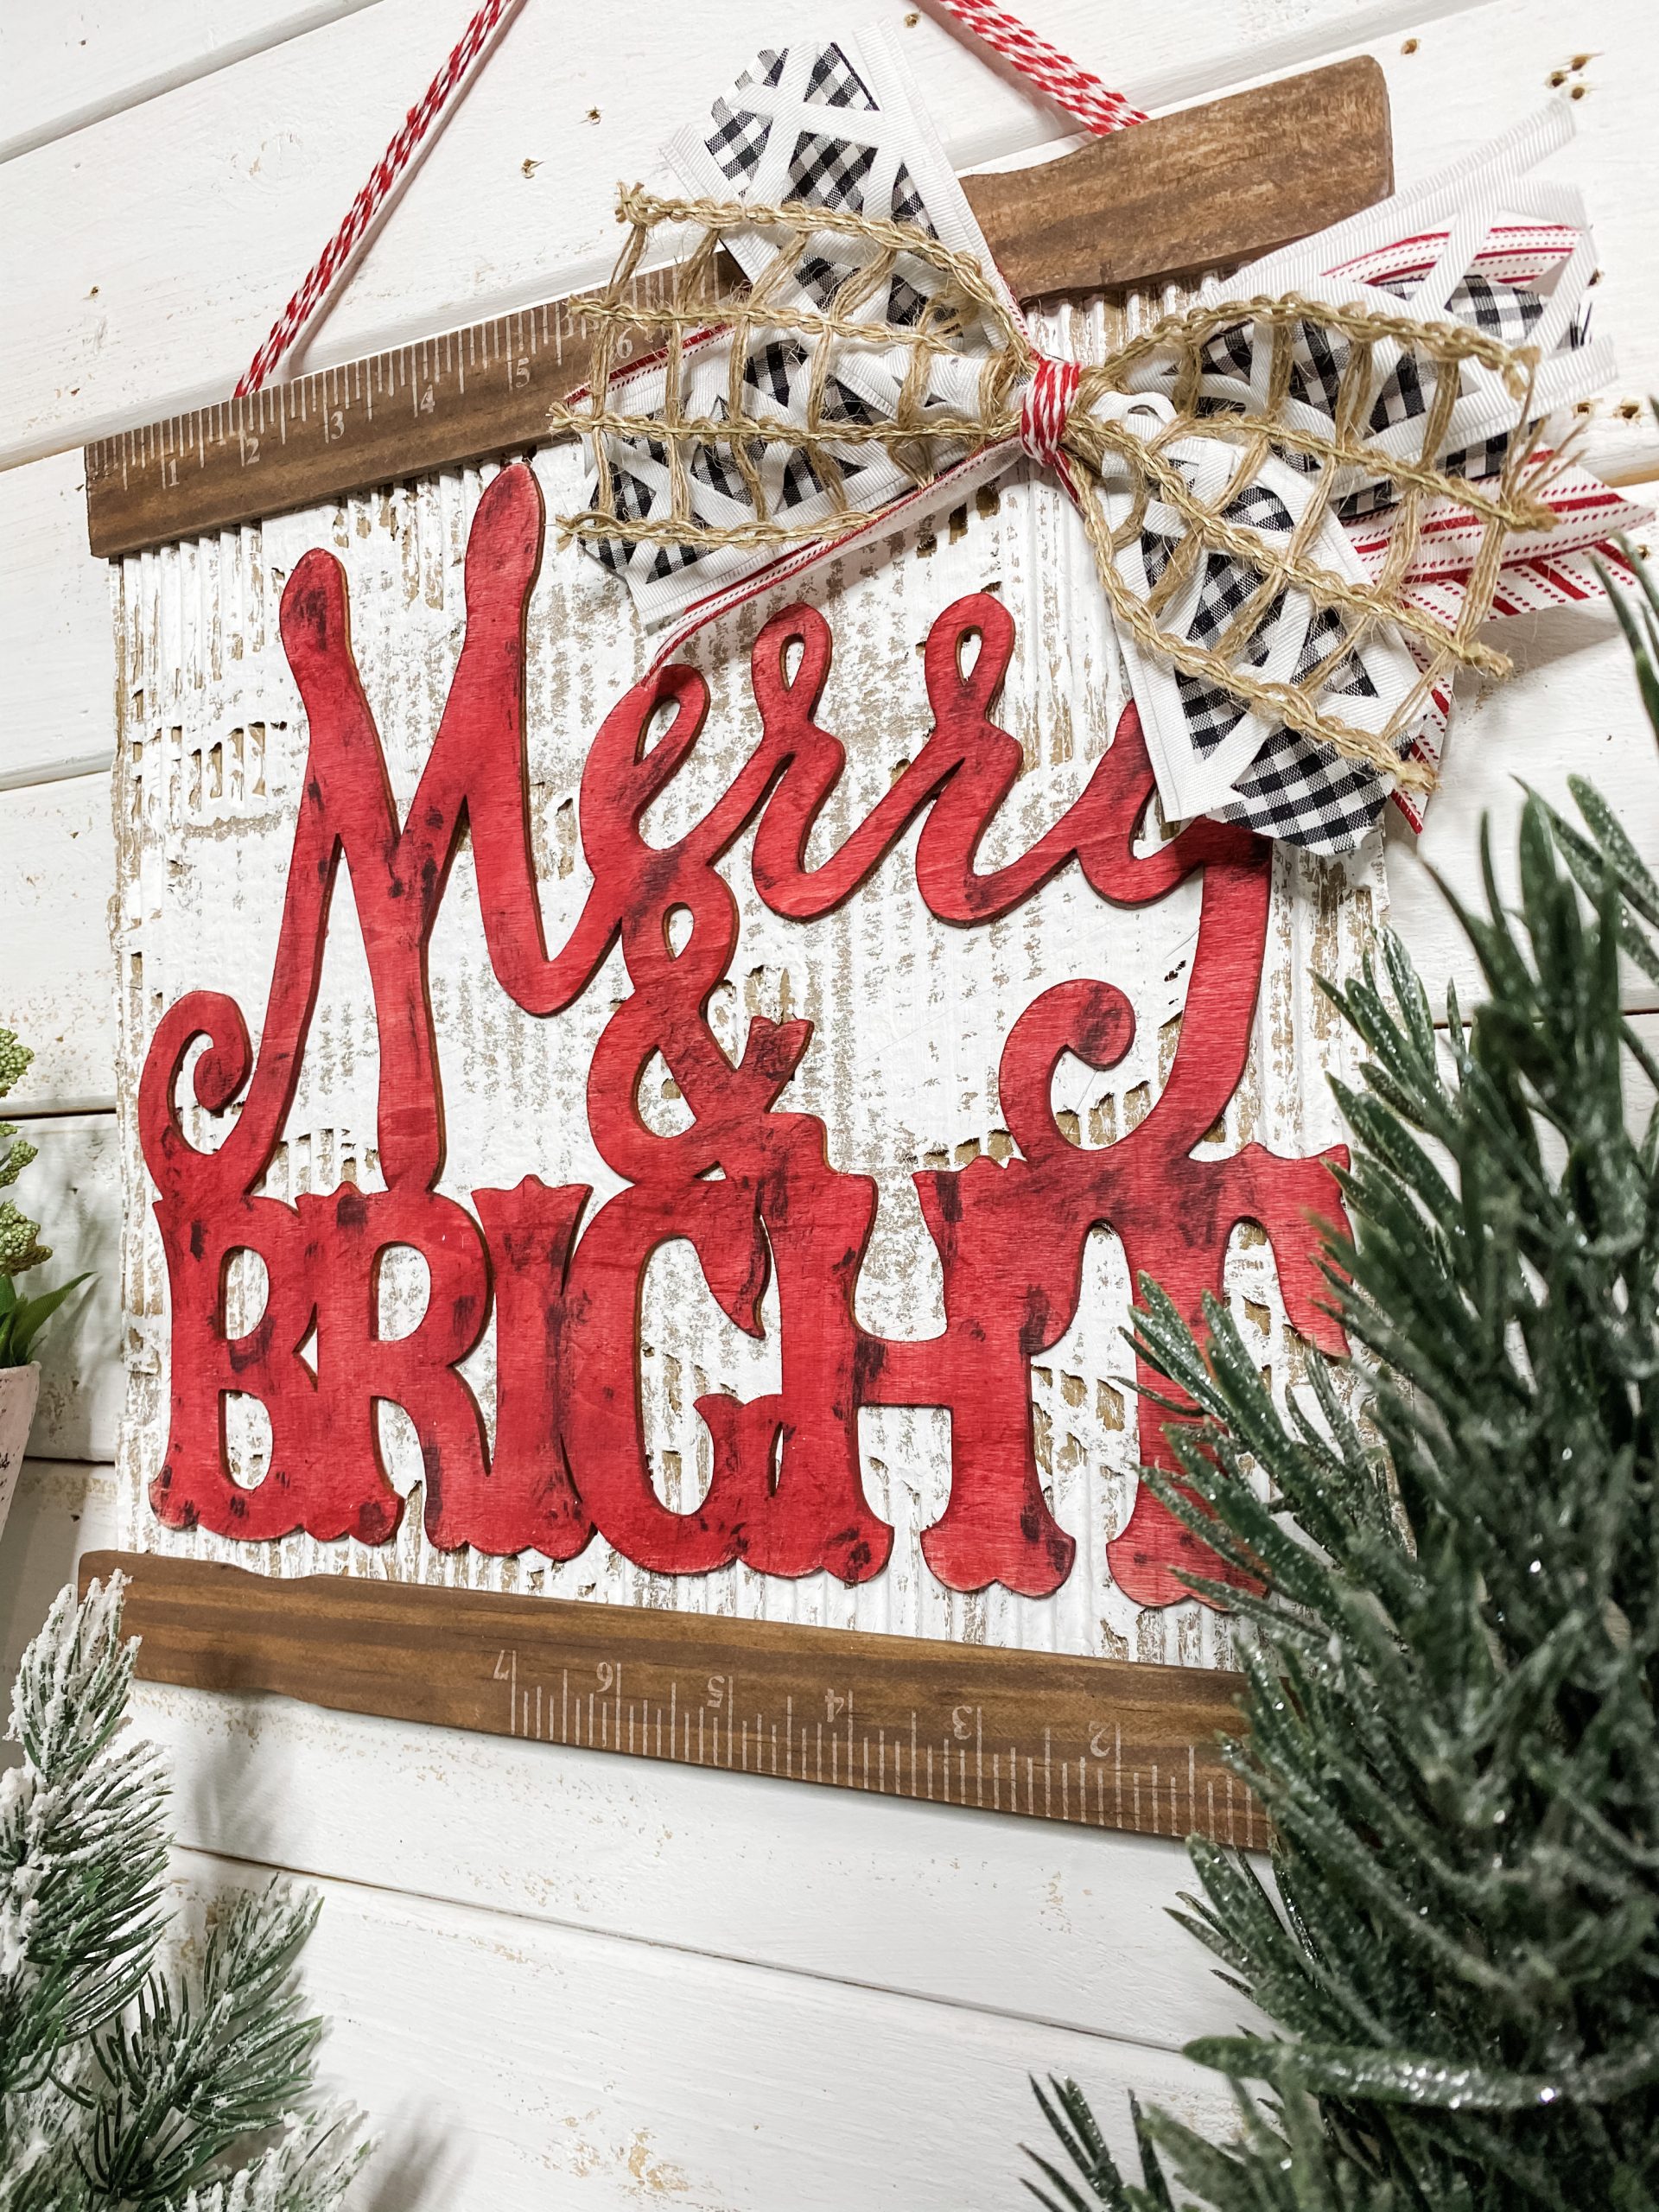
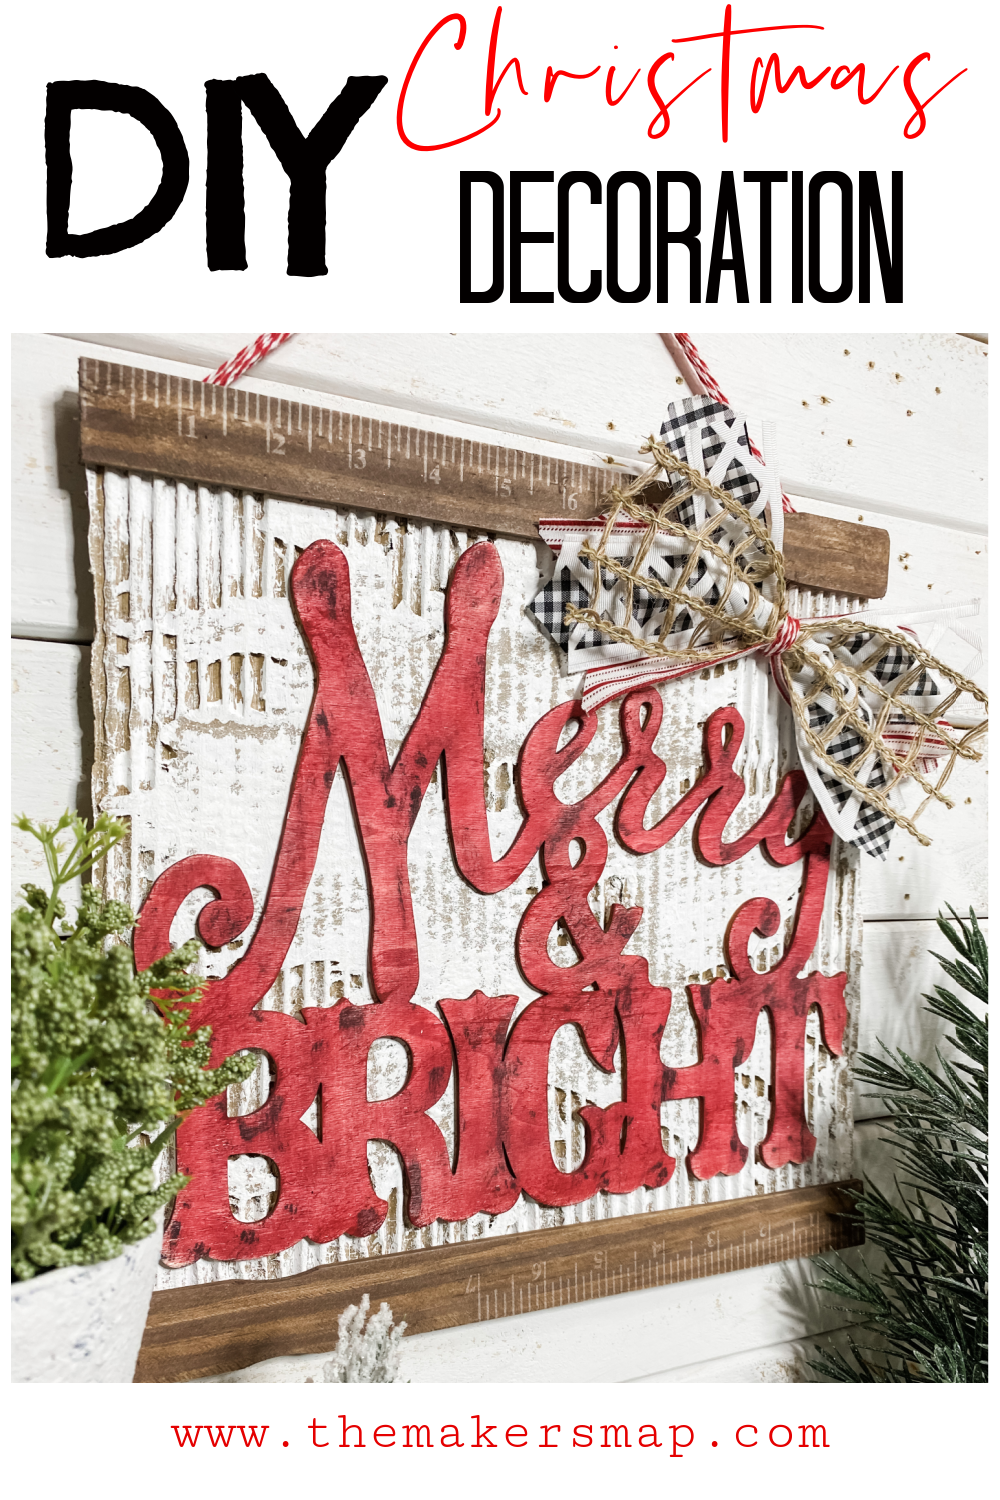
This Merry and Bright sign should show you just how wrong they are! I want to show you how to DIY a Christmas Merry and Bright sign with cardboard!
If you know me then you know that I absolutely LOVE Christmas and all things that come with Christmas decorations!
I also am obsessed with saving money and creating all the decorations for my house – seasonal and everyday decor!
Watch the Replay
If you don’t follow me on Facebook, but you love to craft and DIY, you are seriously missing out. I do LIVE videos every week where I make new and interesting craft projects.
I made this cardboard Merry and Bright sign while LIVE on my Facebook page! You can watch the REPLAY if you want to!
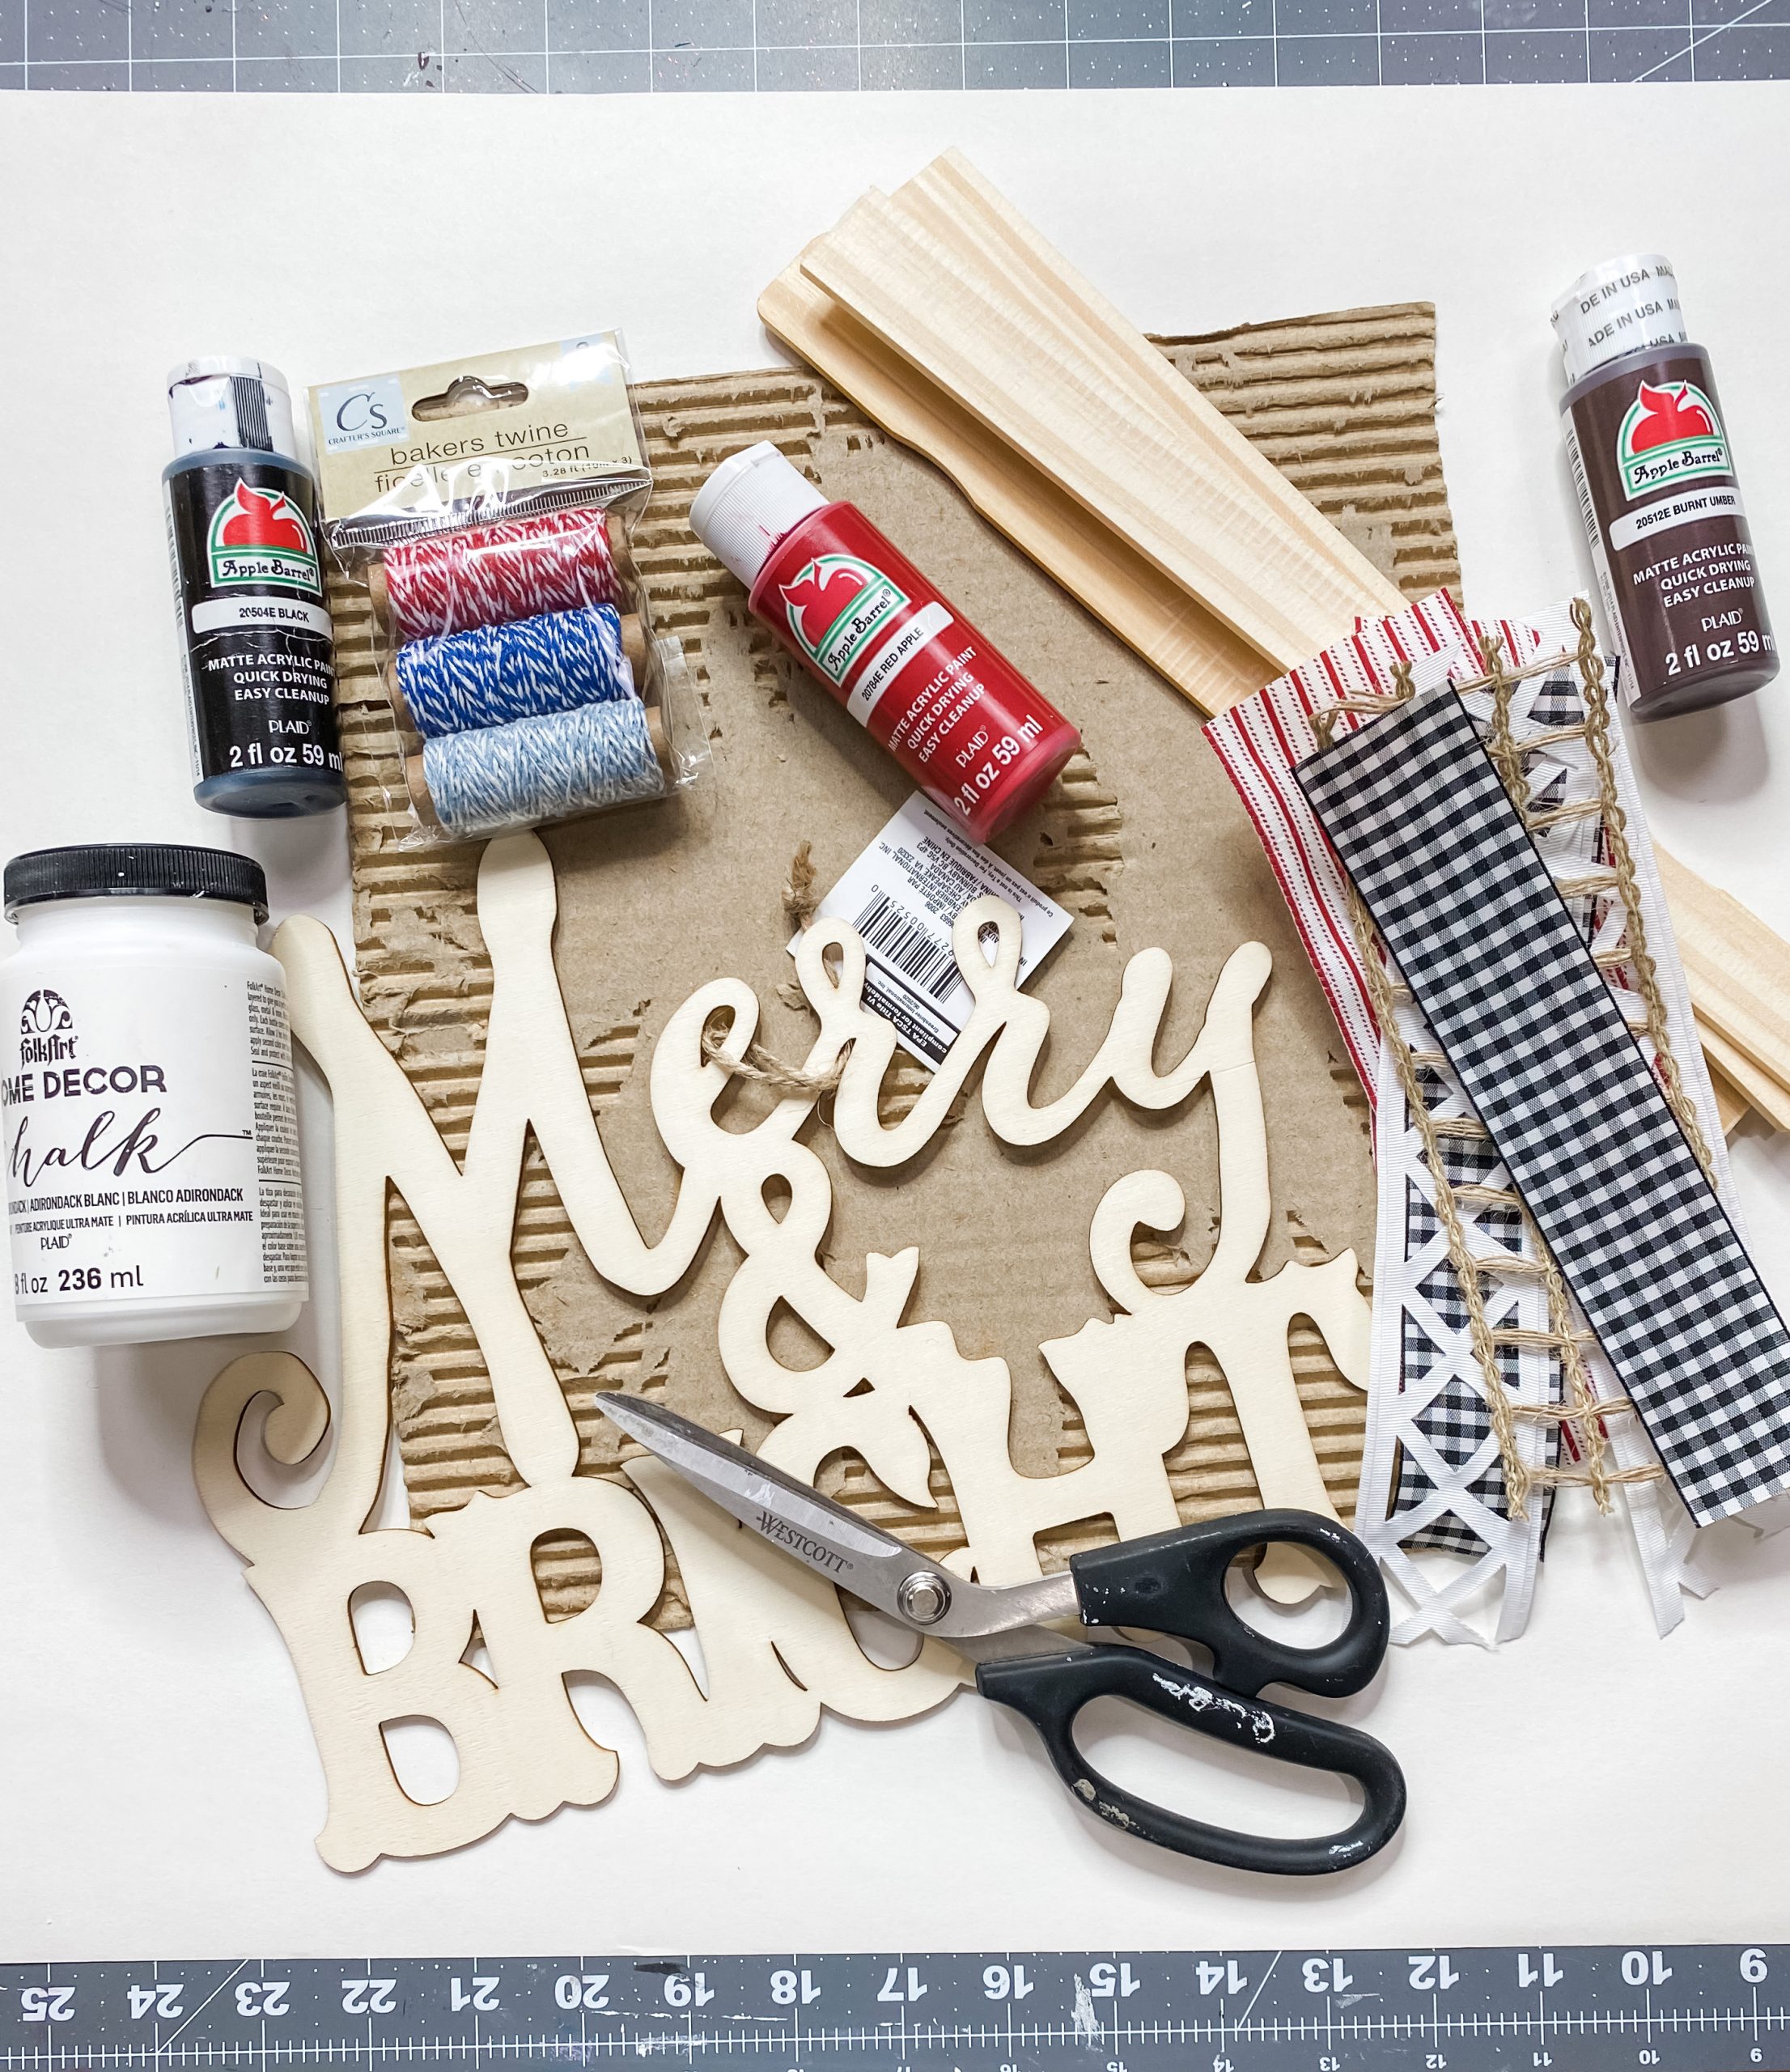
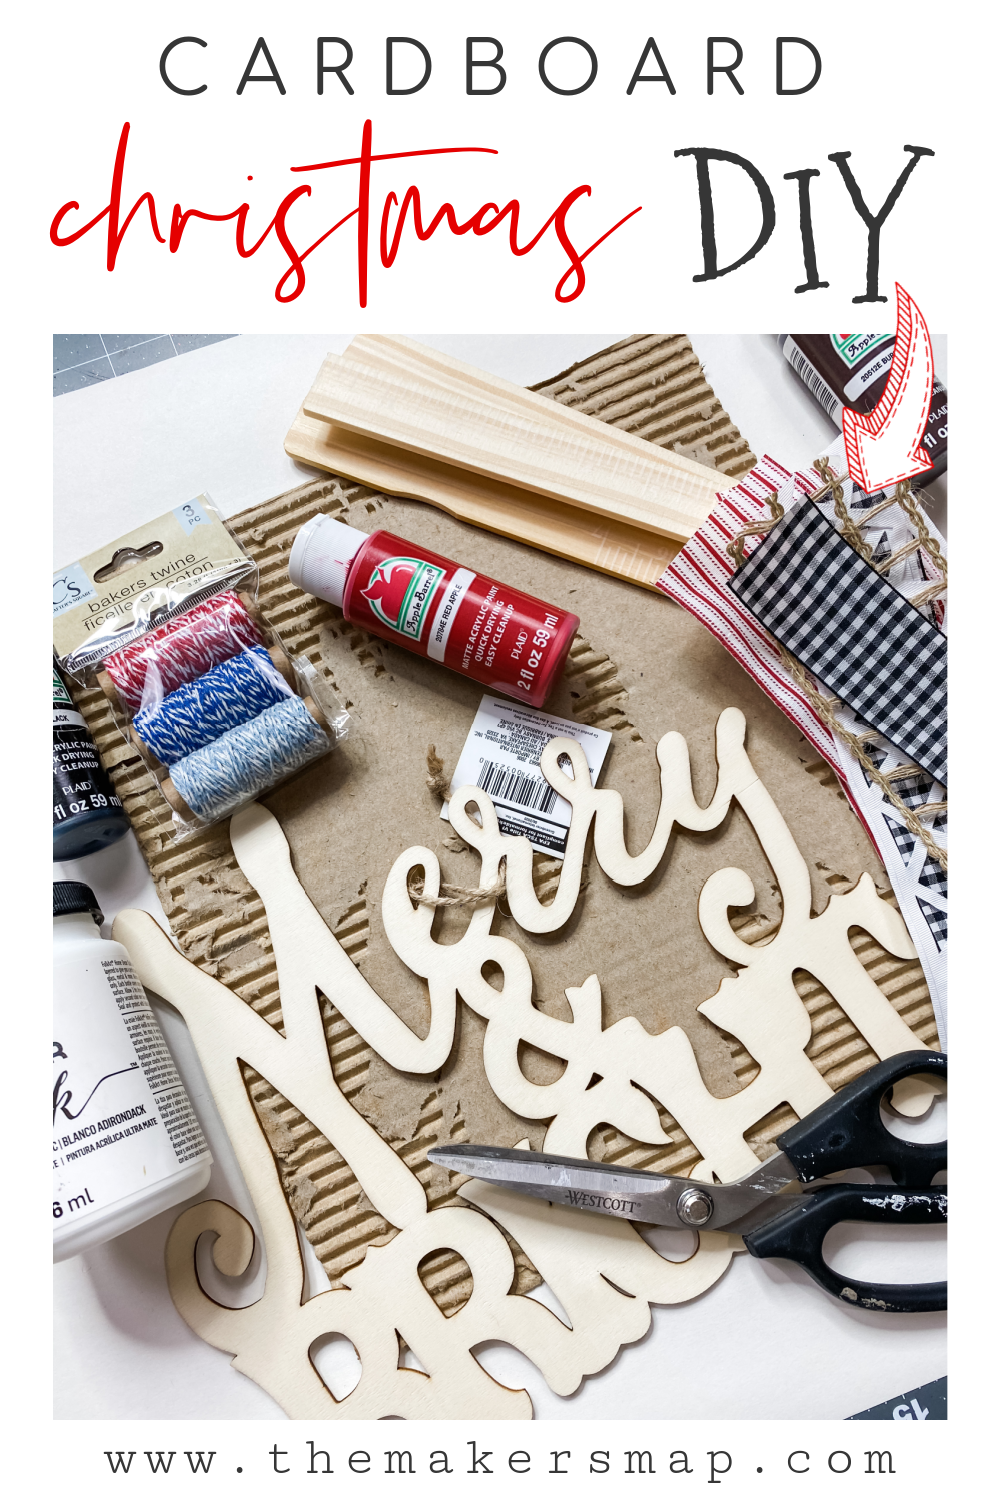
For this project, I will be using these items but you can substitute where you want.
“As an Amazon Associate, I earn from qualifying purchases.”
- Piece of cardboard
- Dollar Tree Baker’s twine
- Dollar Tree Merry and Bright wood cut out
- Apple Barrel Burnt umber (brown) acrylic paint
- Apple Barrel Black acrylic paint
- Apple Barrel Red Apply acrylic paint
- Mod Podge
- White Chalk Paint
- Glue Gun and Glue Sticks
- Heat gun
- Chippy brush 1-inch
- 4 ribbon patterns
- Scissors
- 4 1-gallon paint stirrers
Let’s get started!
You need to start by separating the liners of your cardboard to reveal the wavy inside part. I don’t know what else to call it! You’re only going to use ONE of these liners for this DIY sign.
Don’t worry about it being a smooth separation. You can see on mine that some of the cardboard from the other liner stuck to it. That is OKAY!
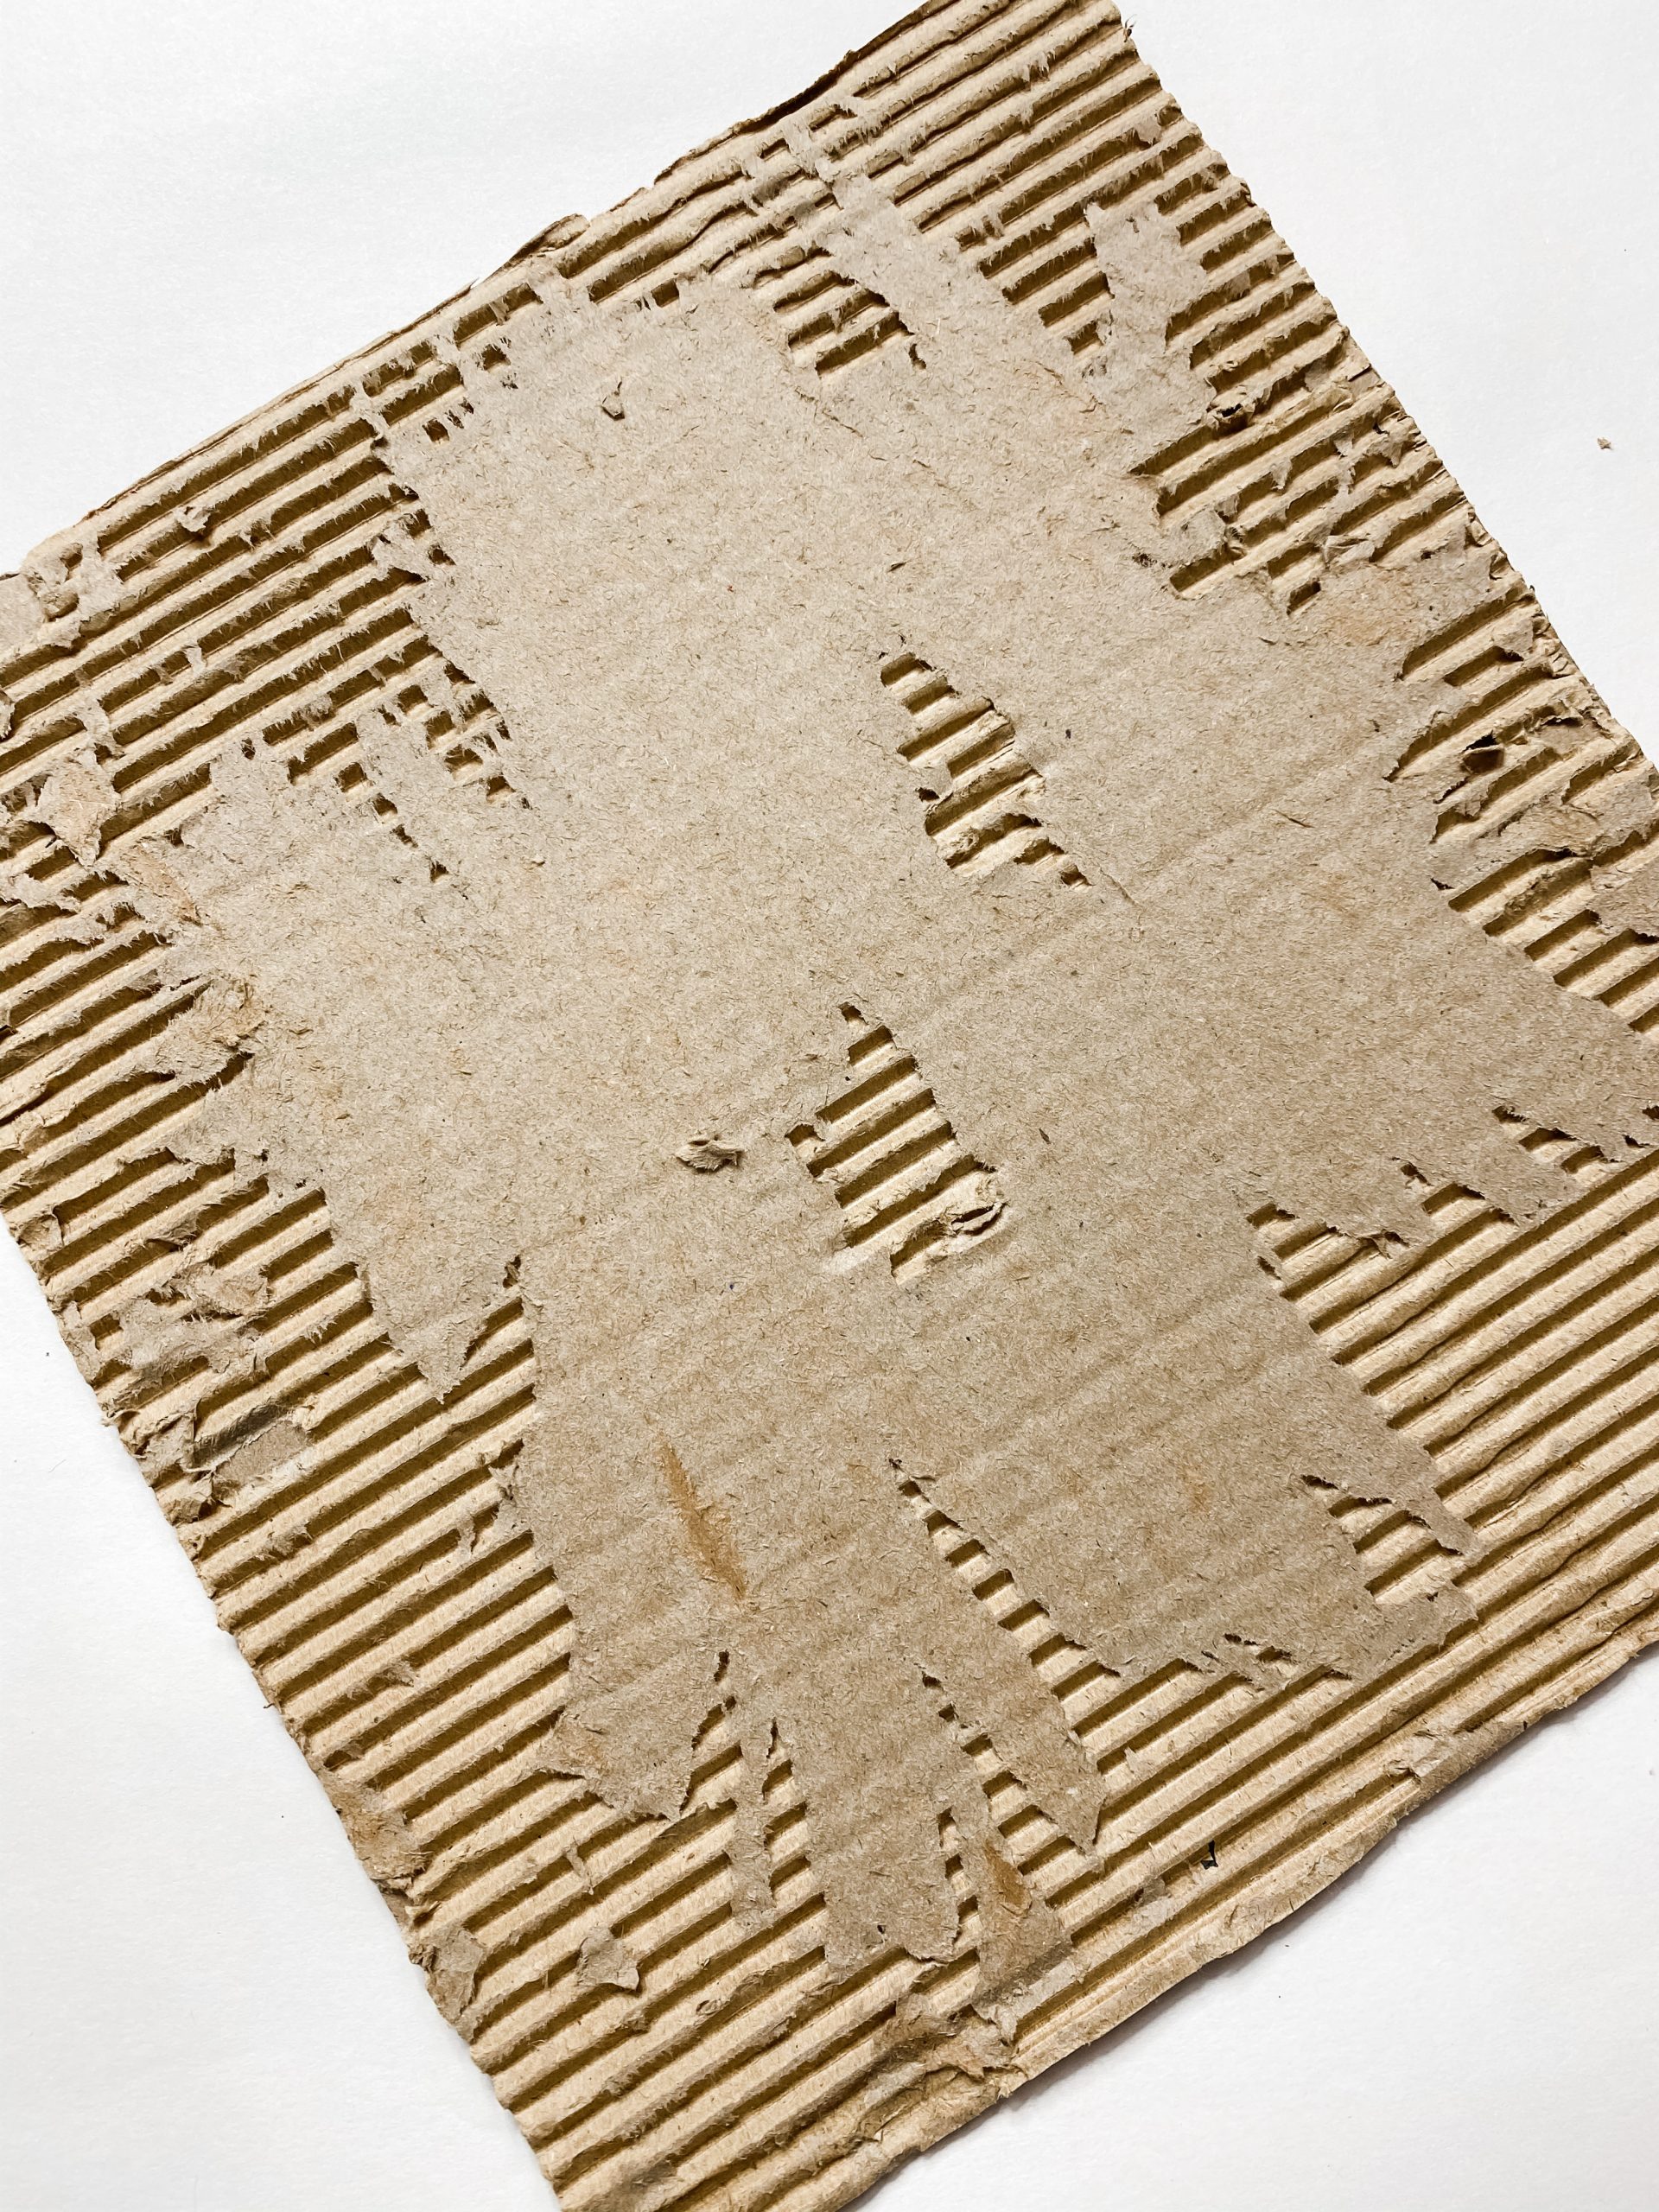
Having some of that stuck to your liner is actually good because it will help when it comes time to glue things to your cardboard!
Once you have them separated, you’re going to paint your cardboard with white chalk paint. You don’t need to get an even coating, but do try and get in between the wavy parts. Set your cardboard to the side so it can dry.
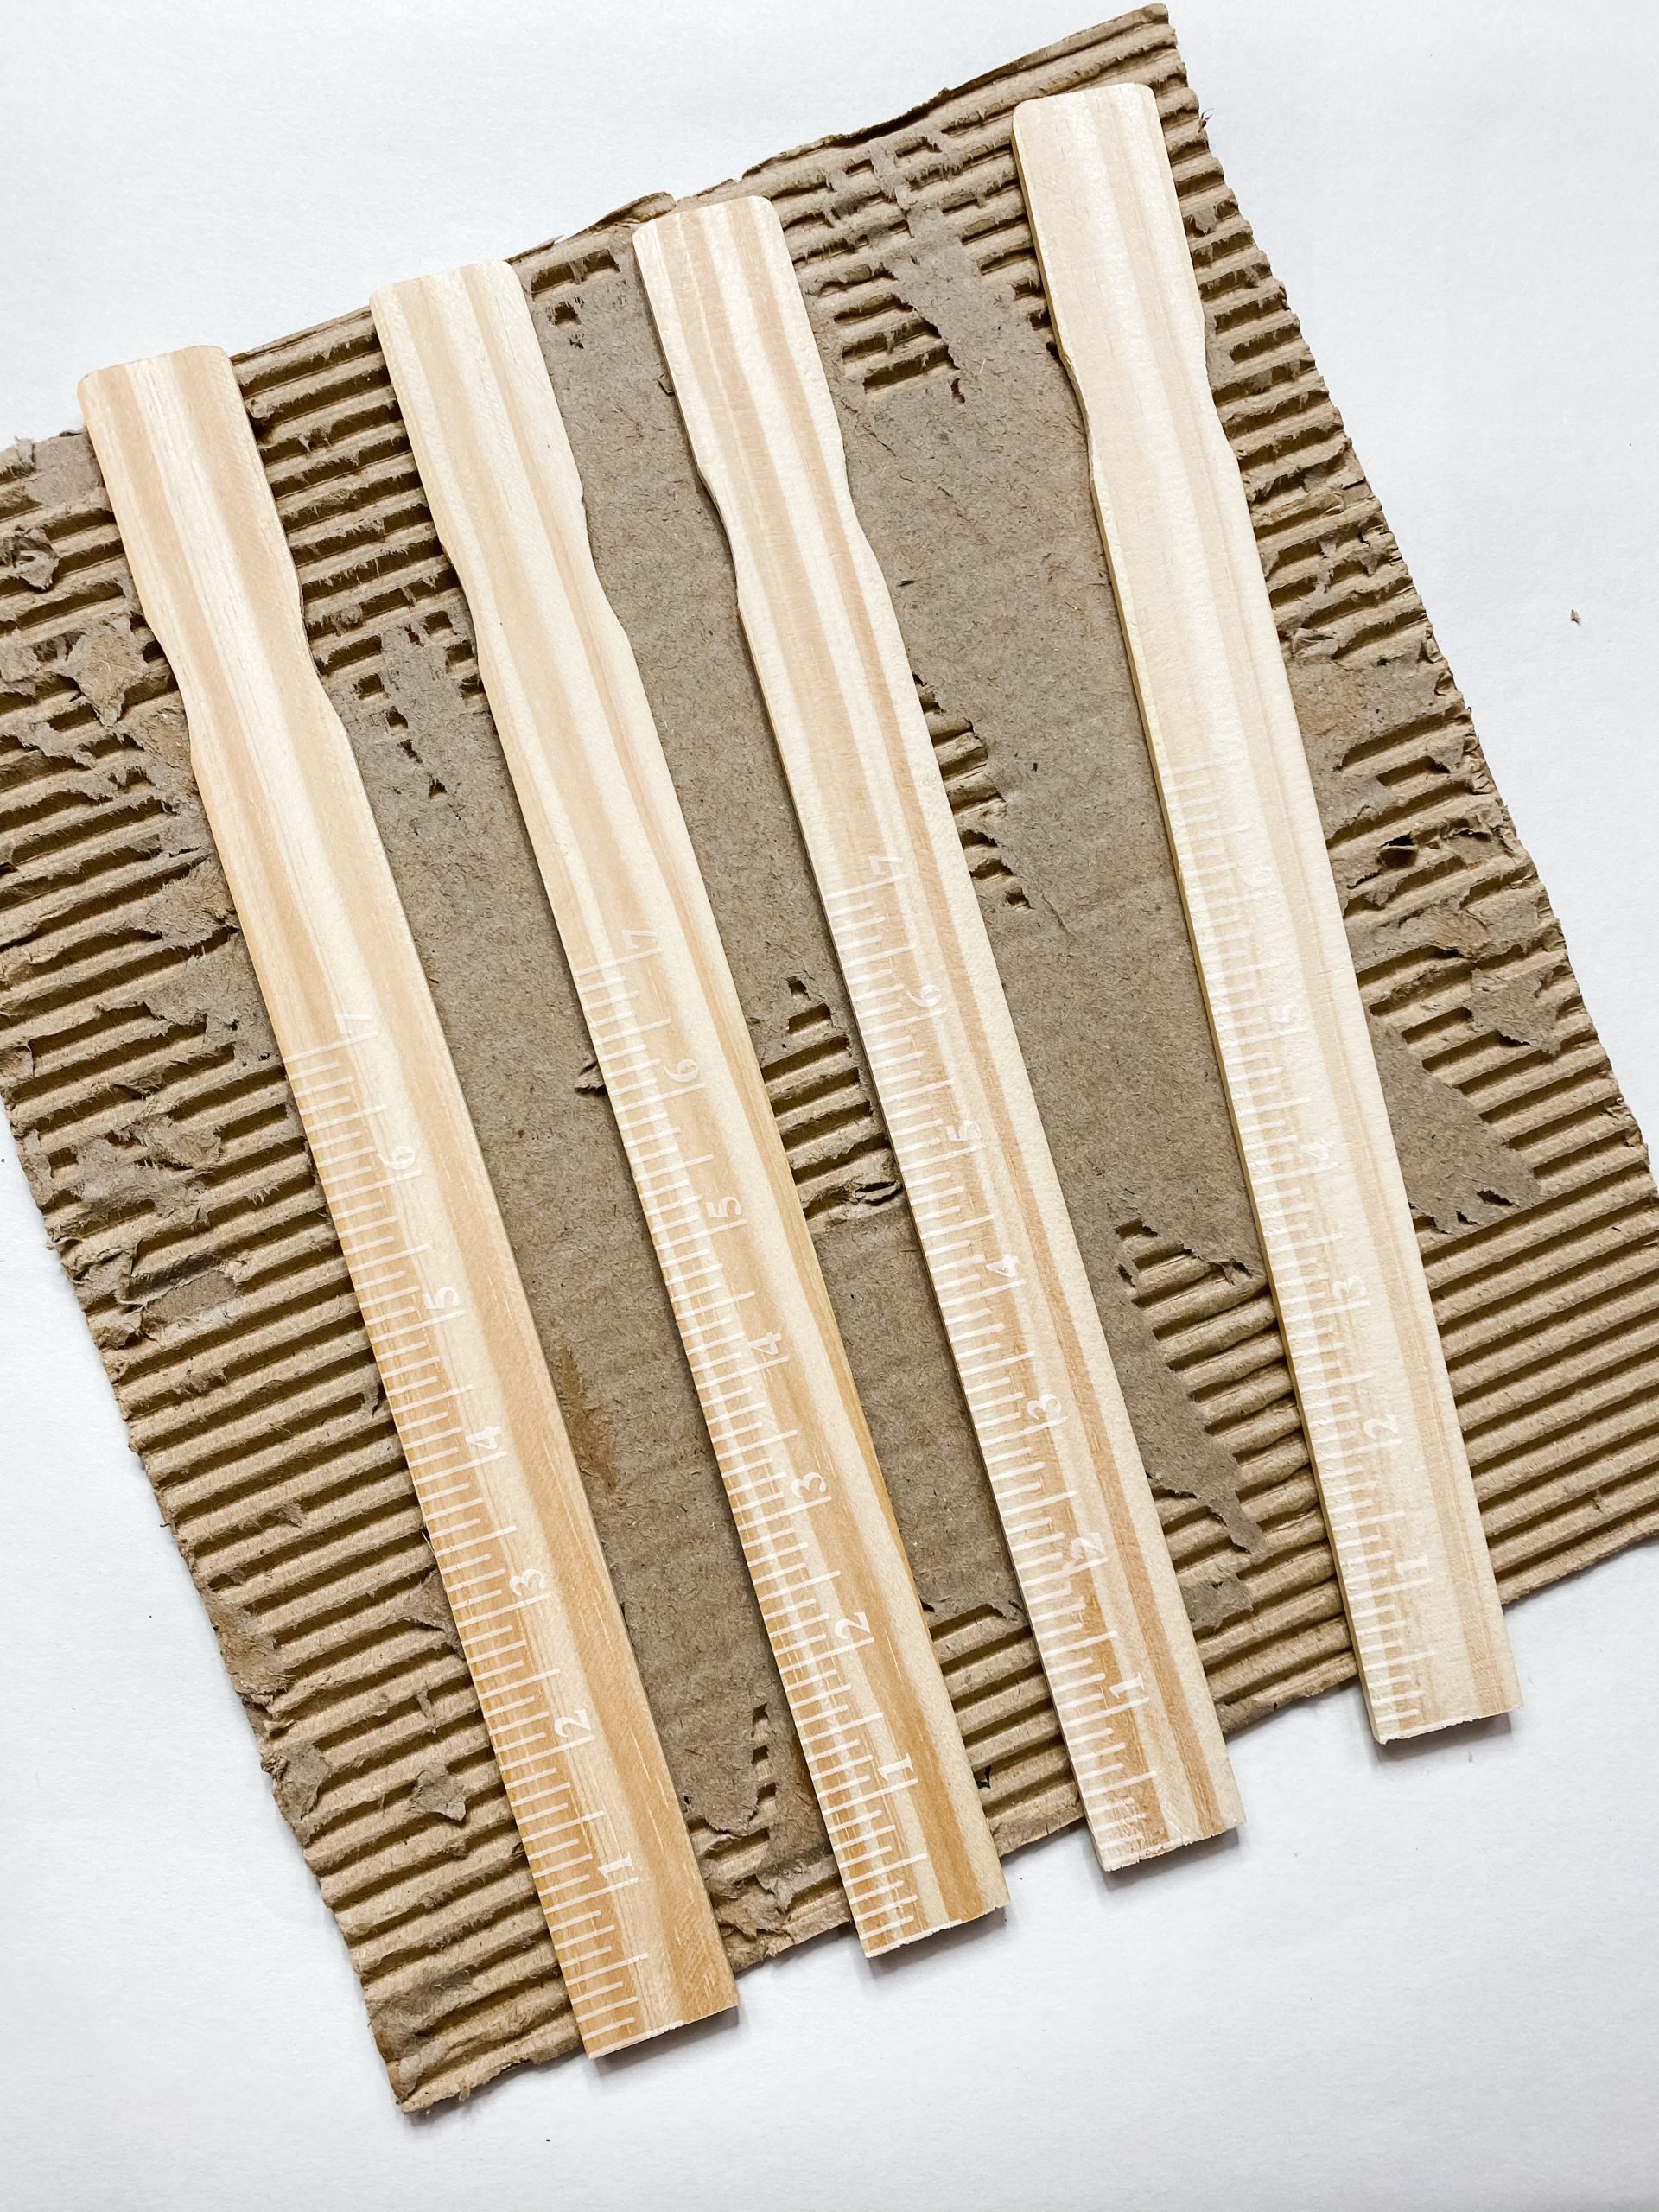
Stain the paint stirrers
Next, you’re going to stain the paint stirrers. I always spray the wood with water first if I want to stain the wood instead of paint it.
The water helps the wood absorb the paint instead of just coating the surface of it. So, spray the paint stirrers with water, then pour some of the brown paint directly onto the wood, and wipe it across with a baby wipe.
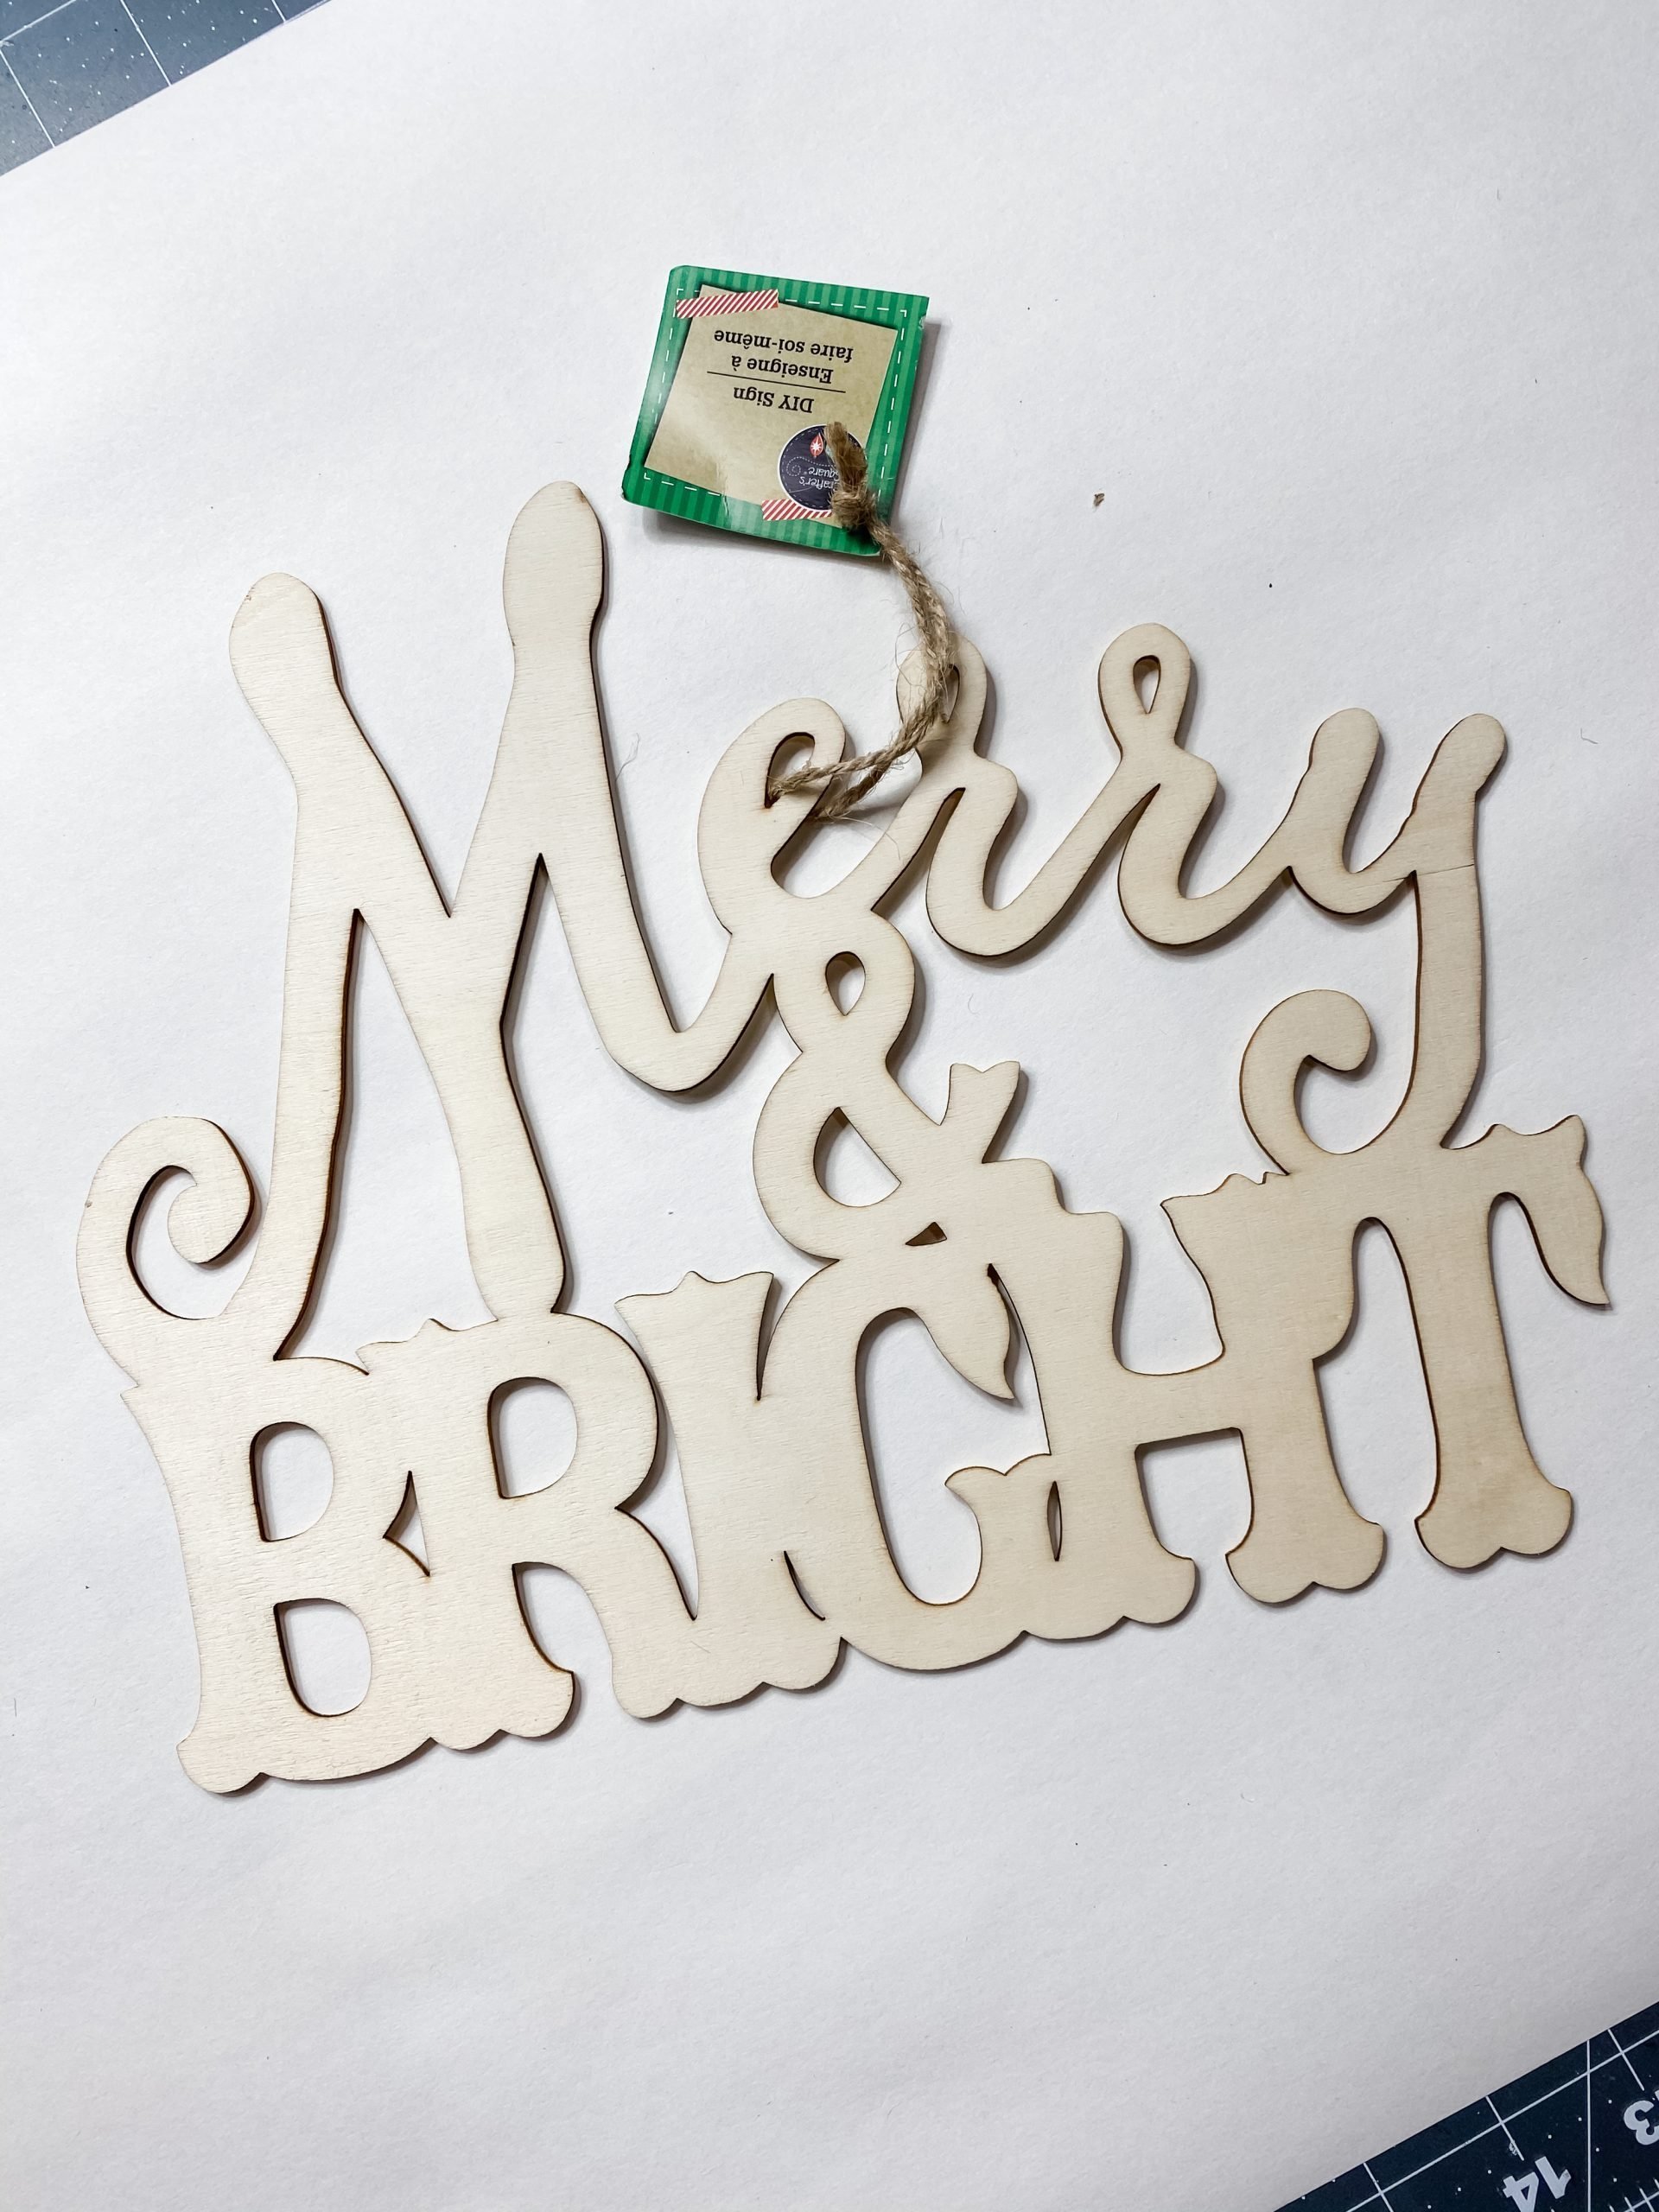
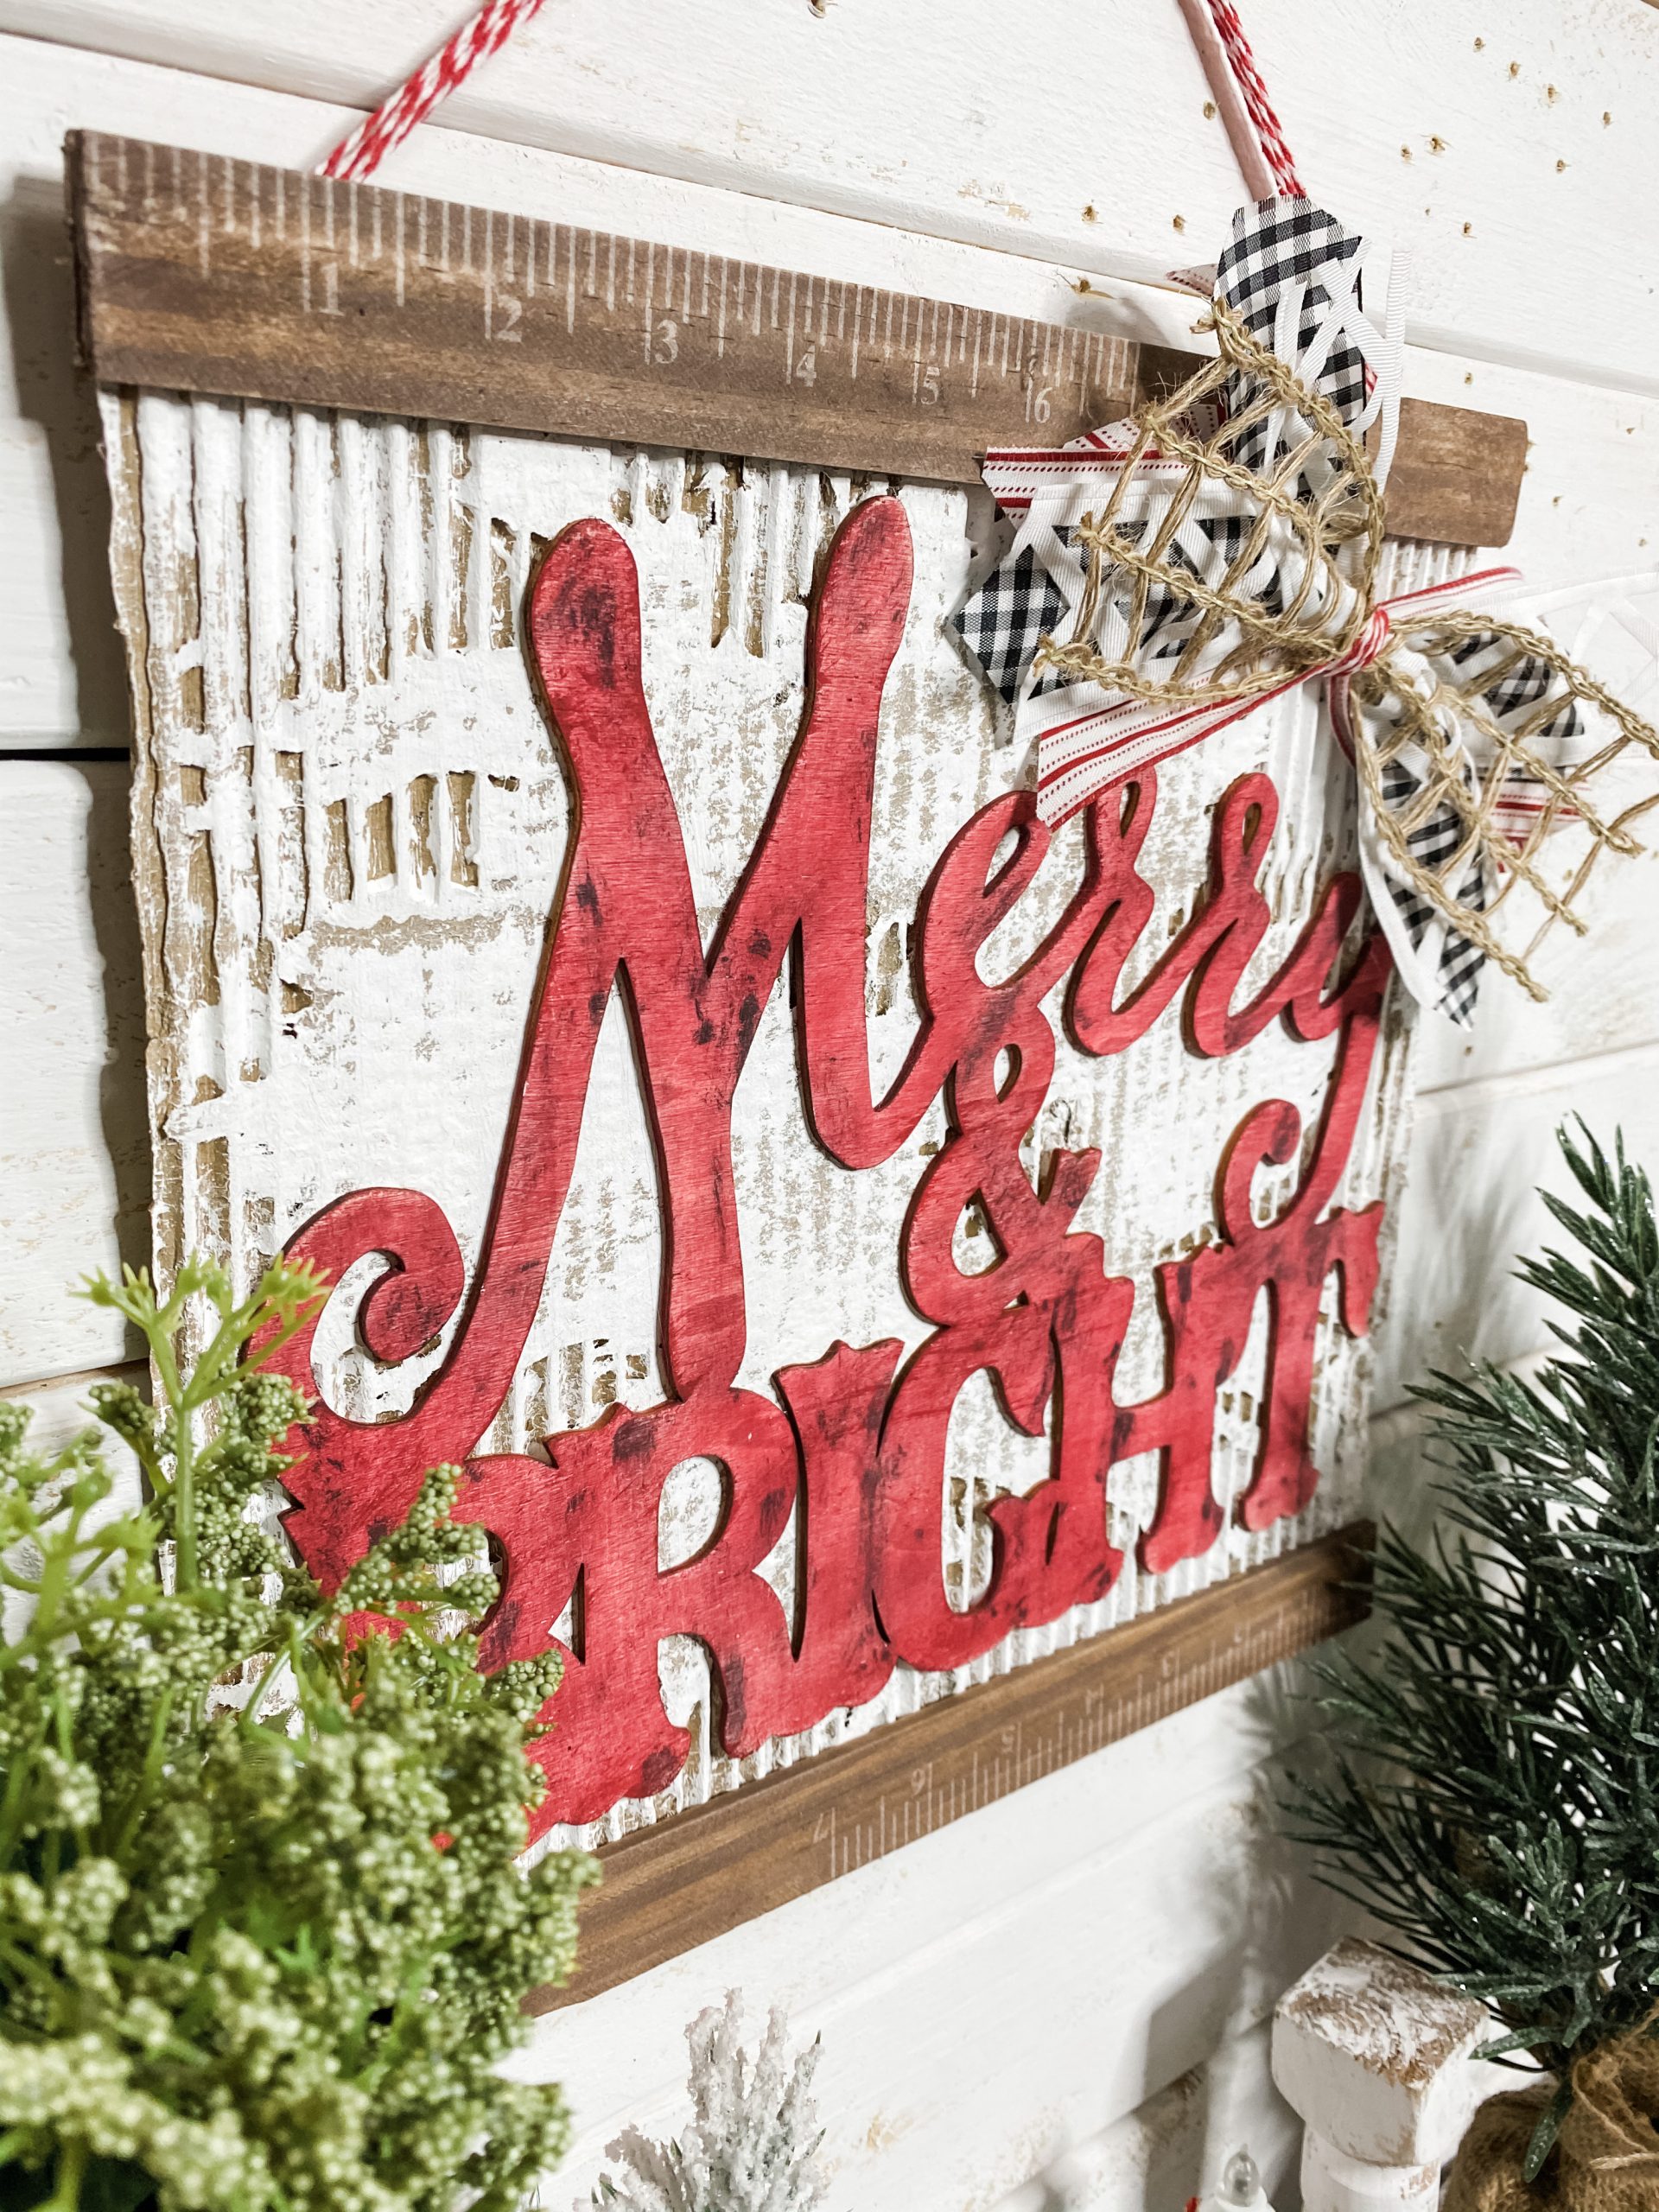
Merry and Bright
While your paint stirrers dry, you can paint the Merry and Bright wood letters. I poured some of the red paint onto a paper plate and dropped just a tiny bit of the brown paint into it.
I just wanted a deeper red, but you can choose whatever color you’d like.
Take the paint color you’ve chosen and paint the entire front and sides of the Merry and Bright wood letters. Before the paint dried, I wiped across the letters with a baby wipe to give the letters a more weathered look.
I also used a sanding sponge to help give the letters a weathered look. Next, I used some brown paint and just added some detail to random places on the Merry and Bright letters. You can be as heavy or as light as you want with the brown paint.
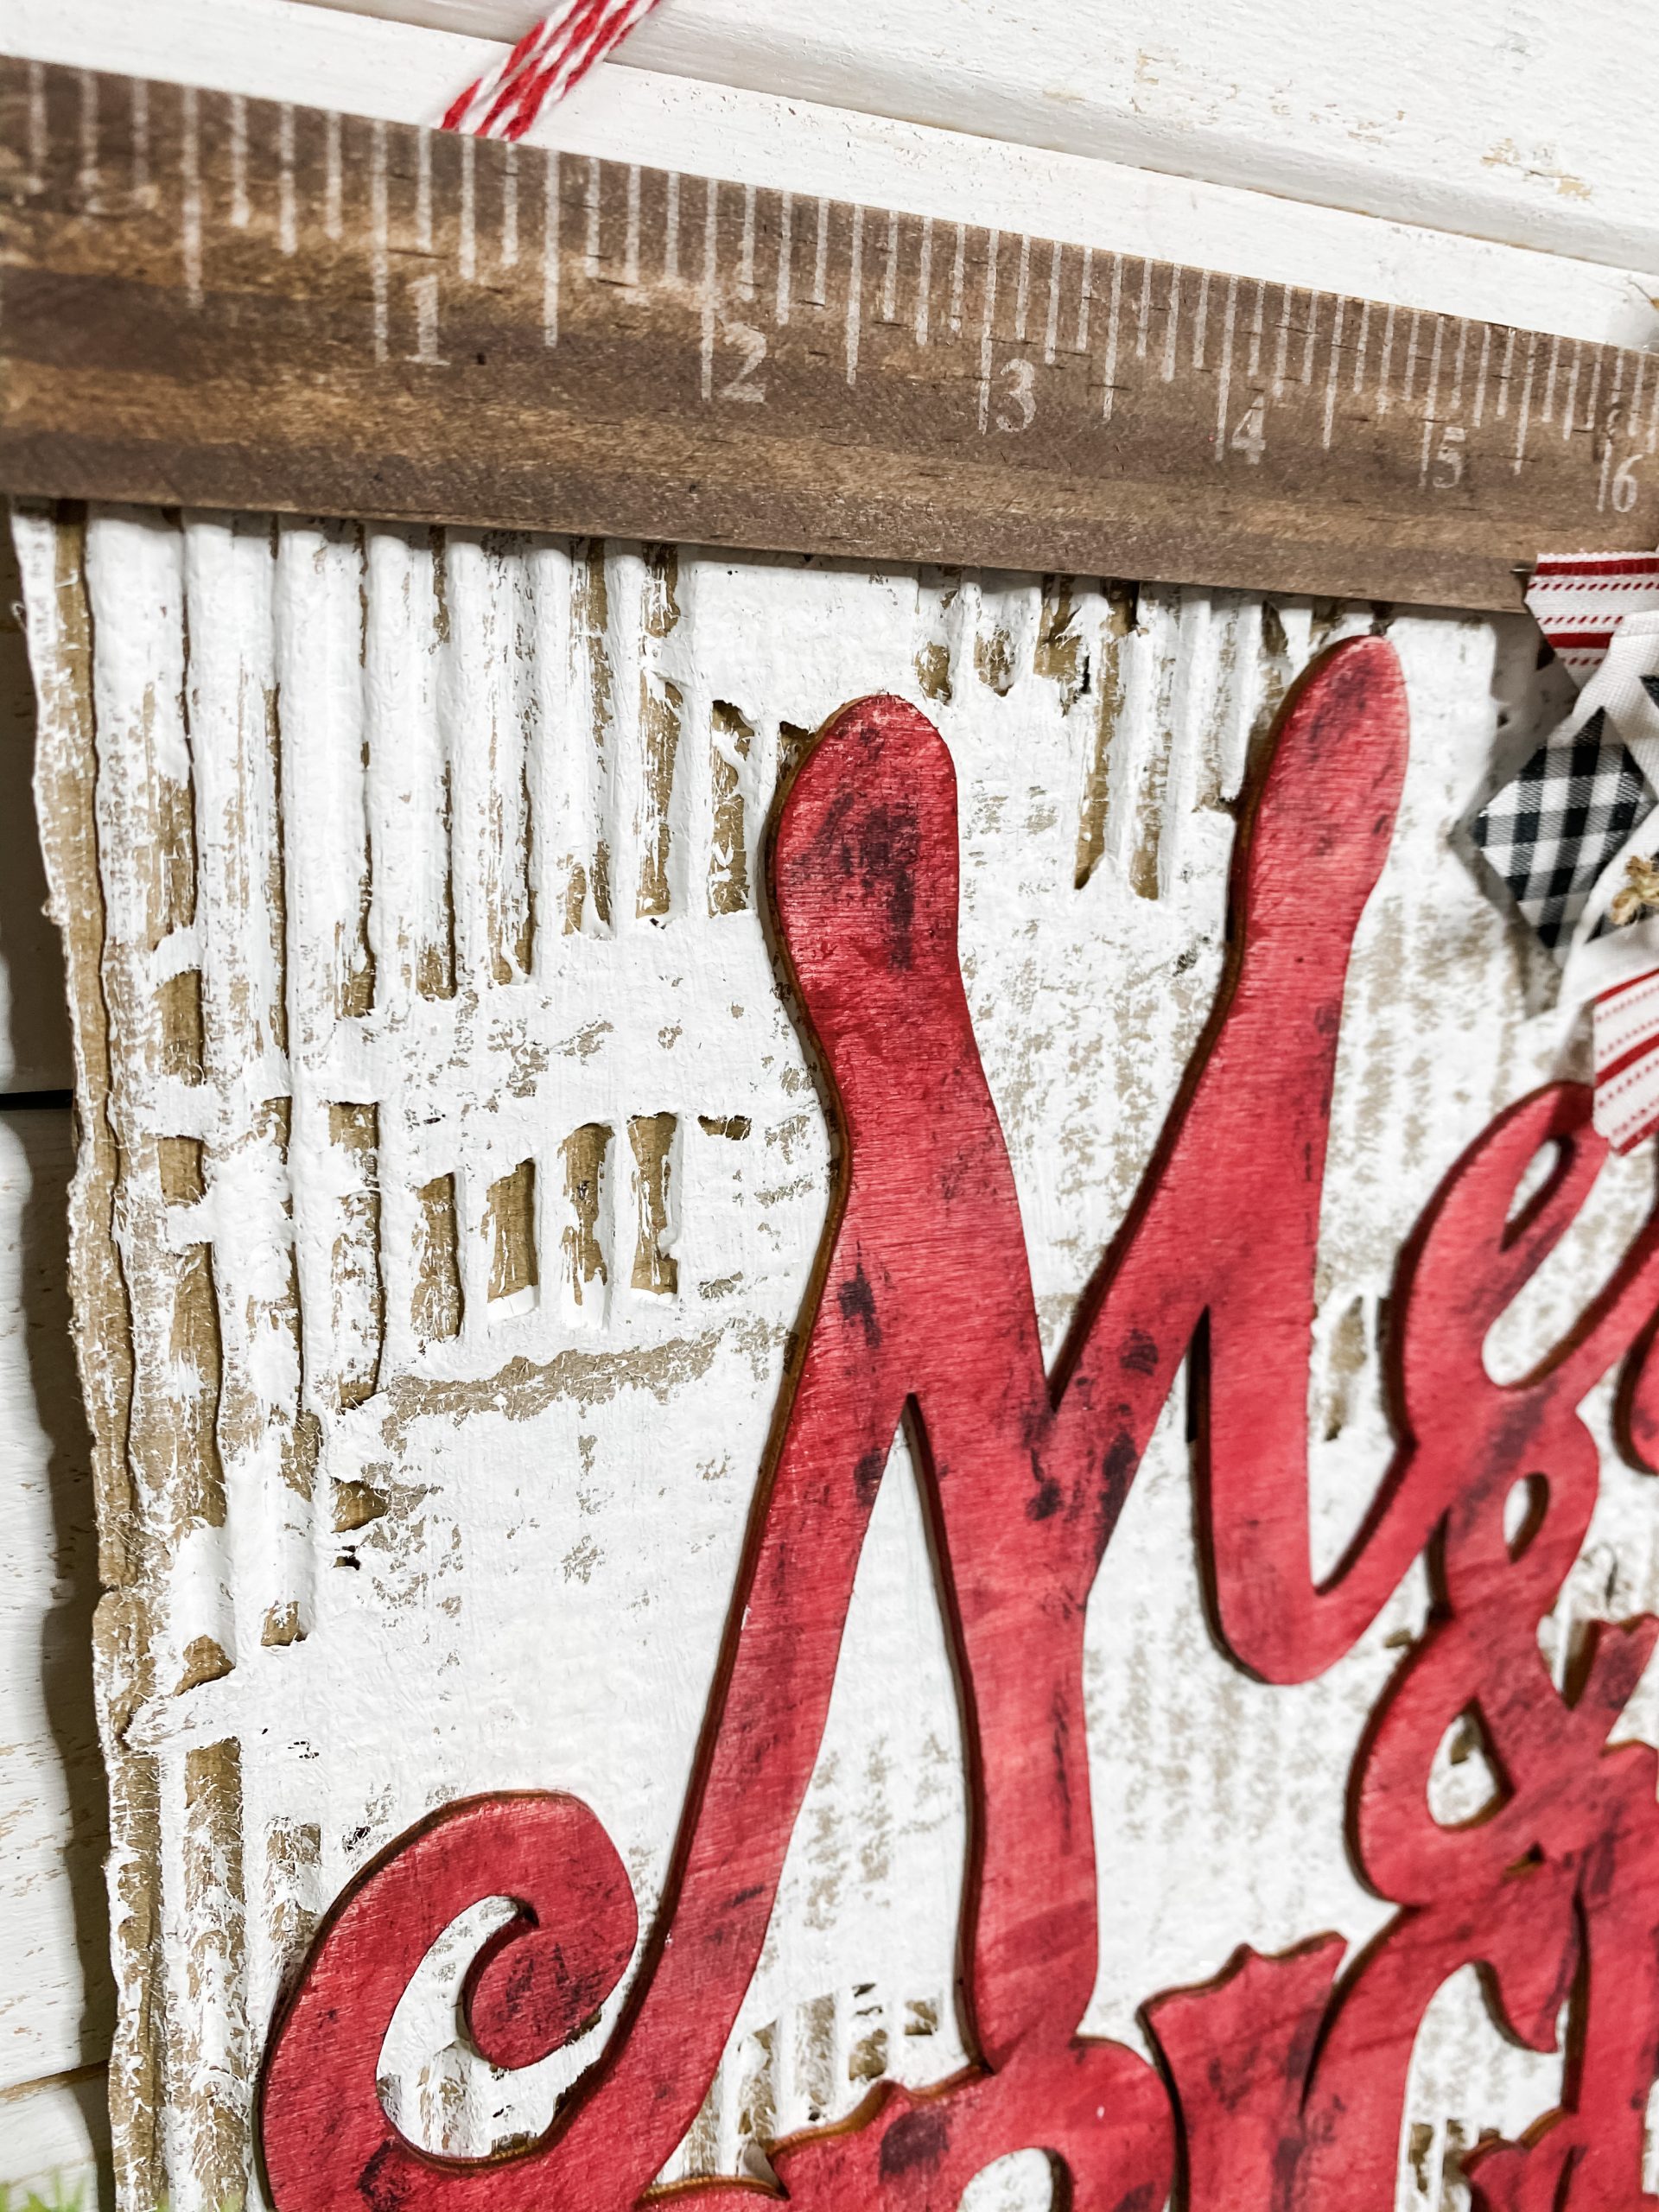
Glue them together
Once all of the paint is dry on each piece, you can glue them all together! So, I laid the Merry and Bright lettering down first to make sure I left enough space for the paint sticks.
Glue the paint stirrers to the front and back at the top and bottom of your cardboard. If you need to, you can see exactly how I did it in this Facebook Replay.
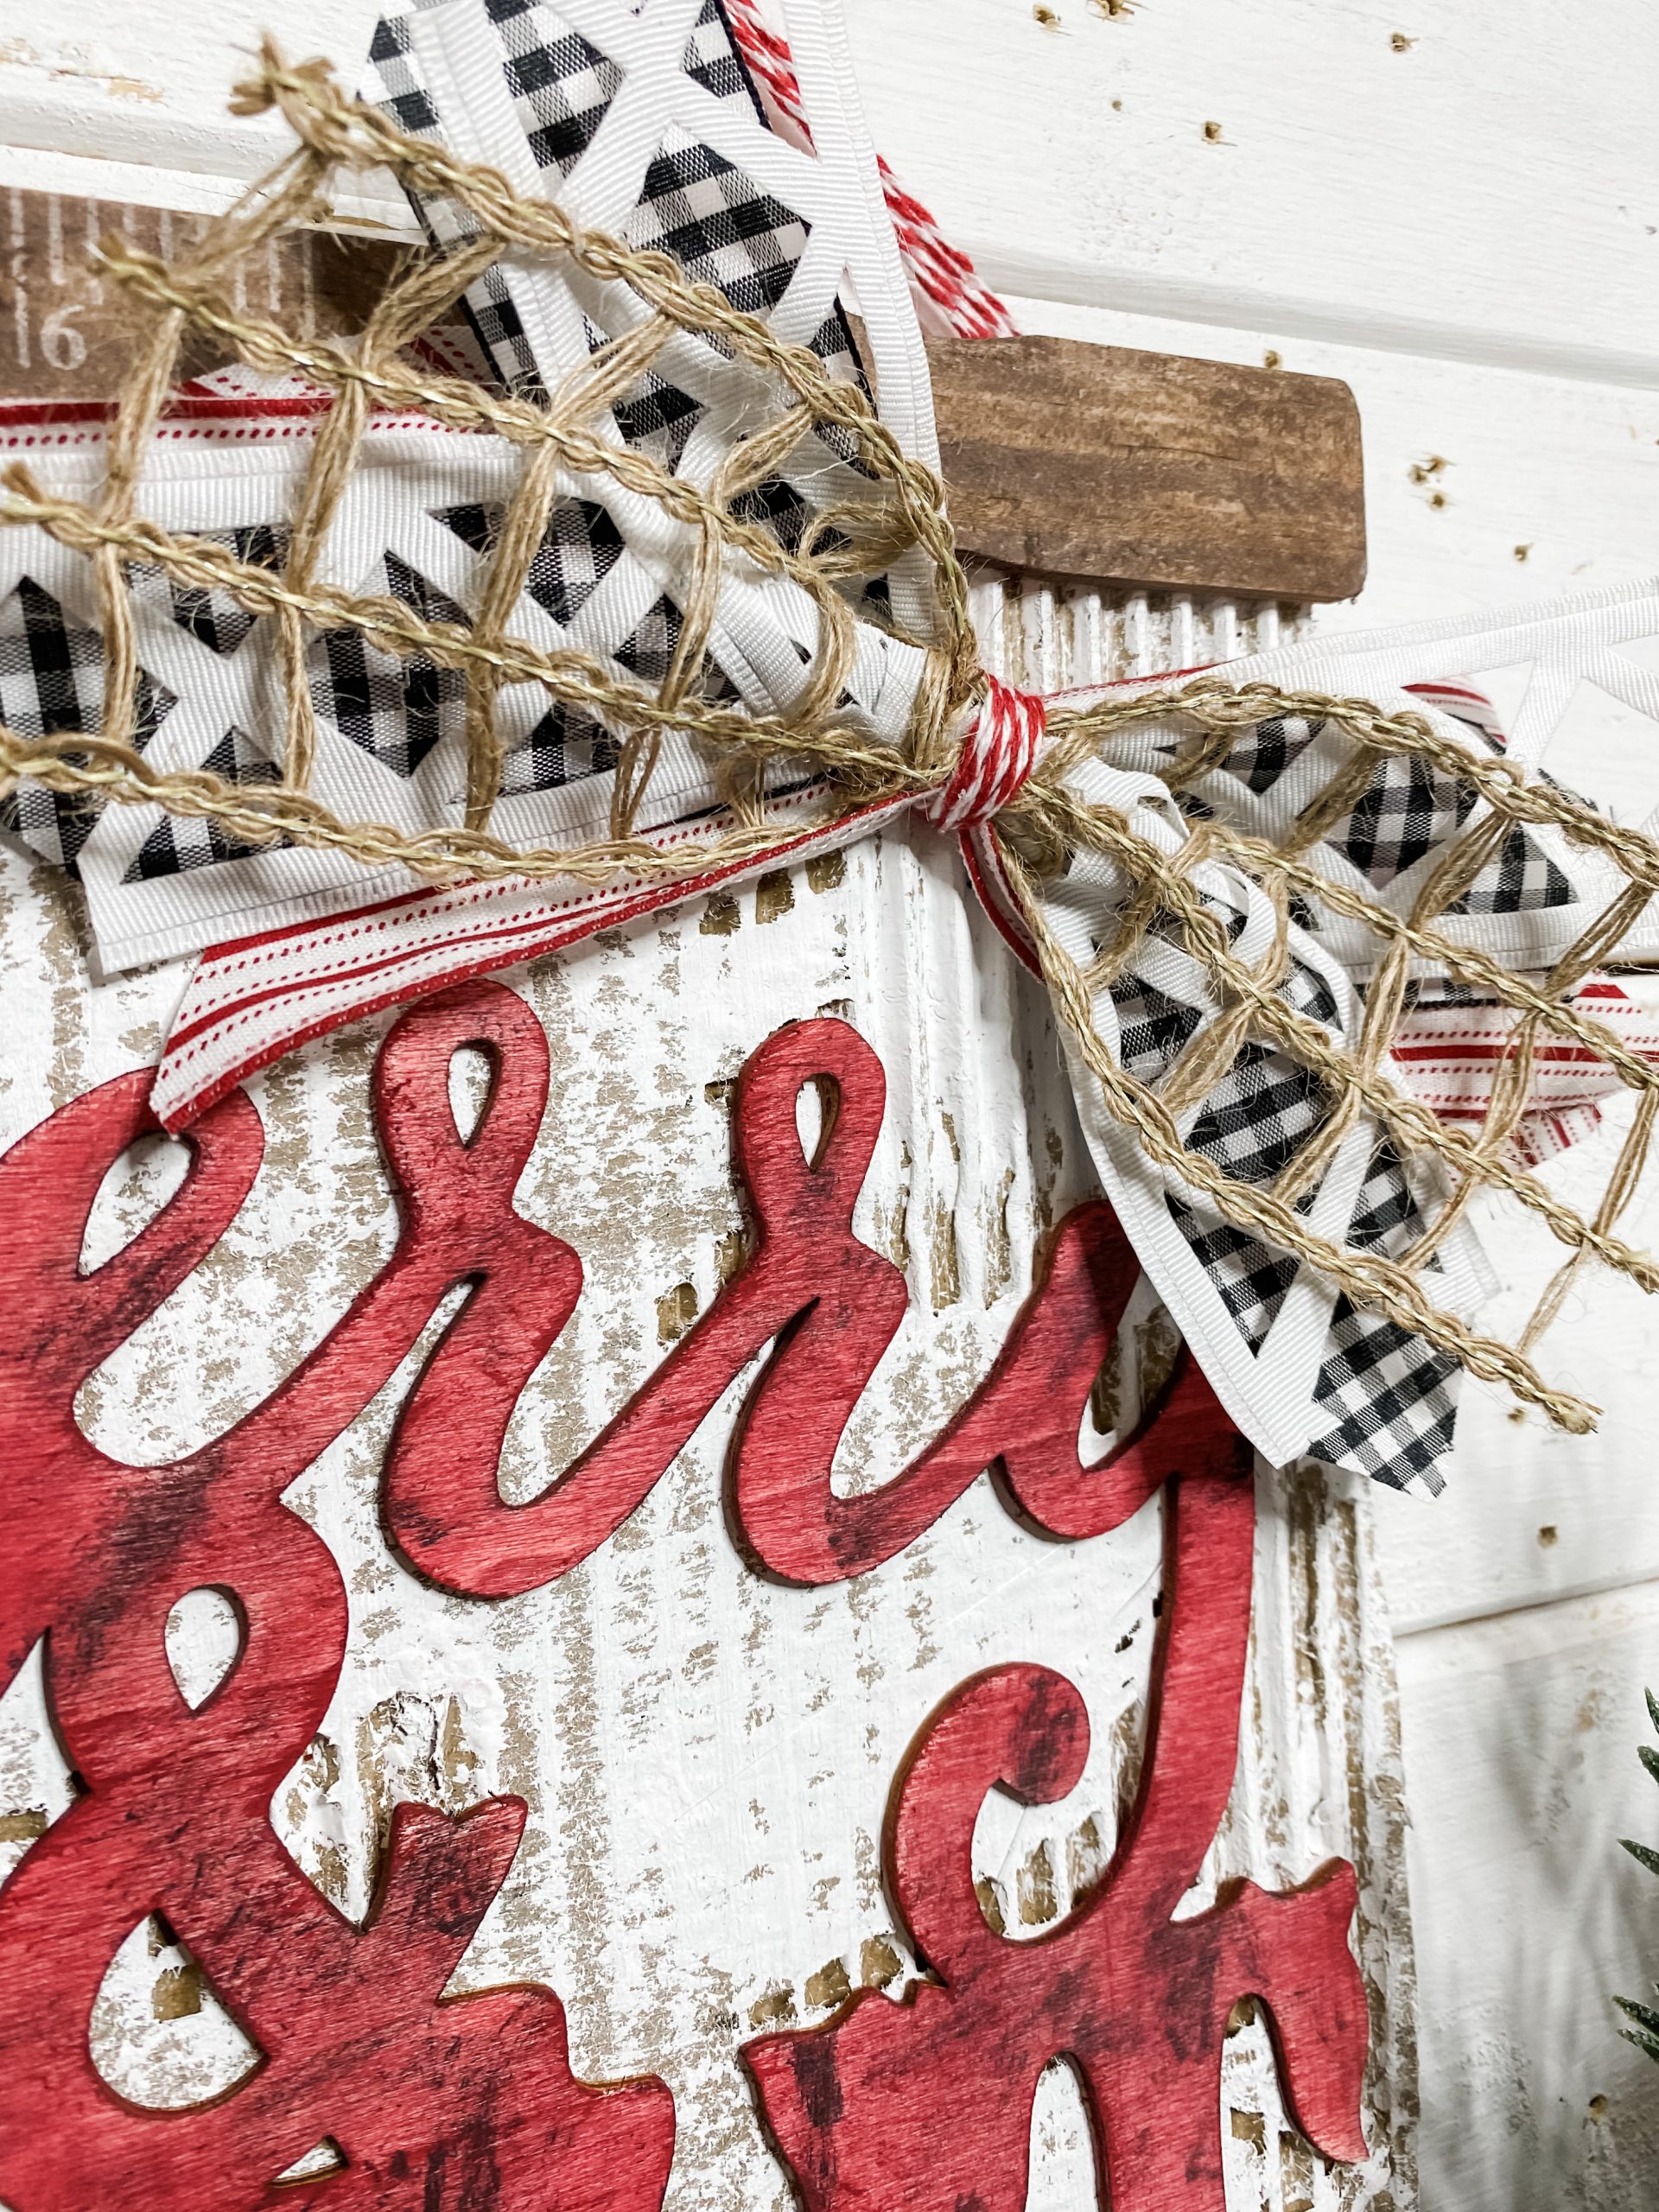
Make a messy bow
I always say that I am not a professional bow maker, but I LOVE making adorable messy bows like the one on this cardboard Merry and Bright Christmas sign! So, for this bow, I used 4 patterns of ribbon.
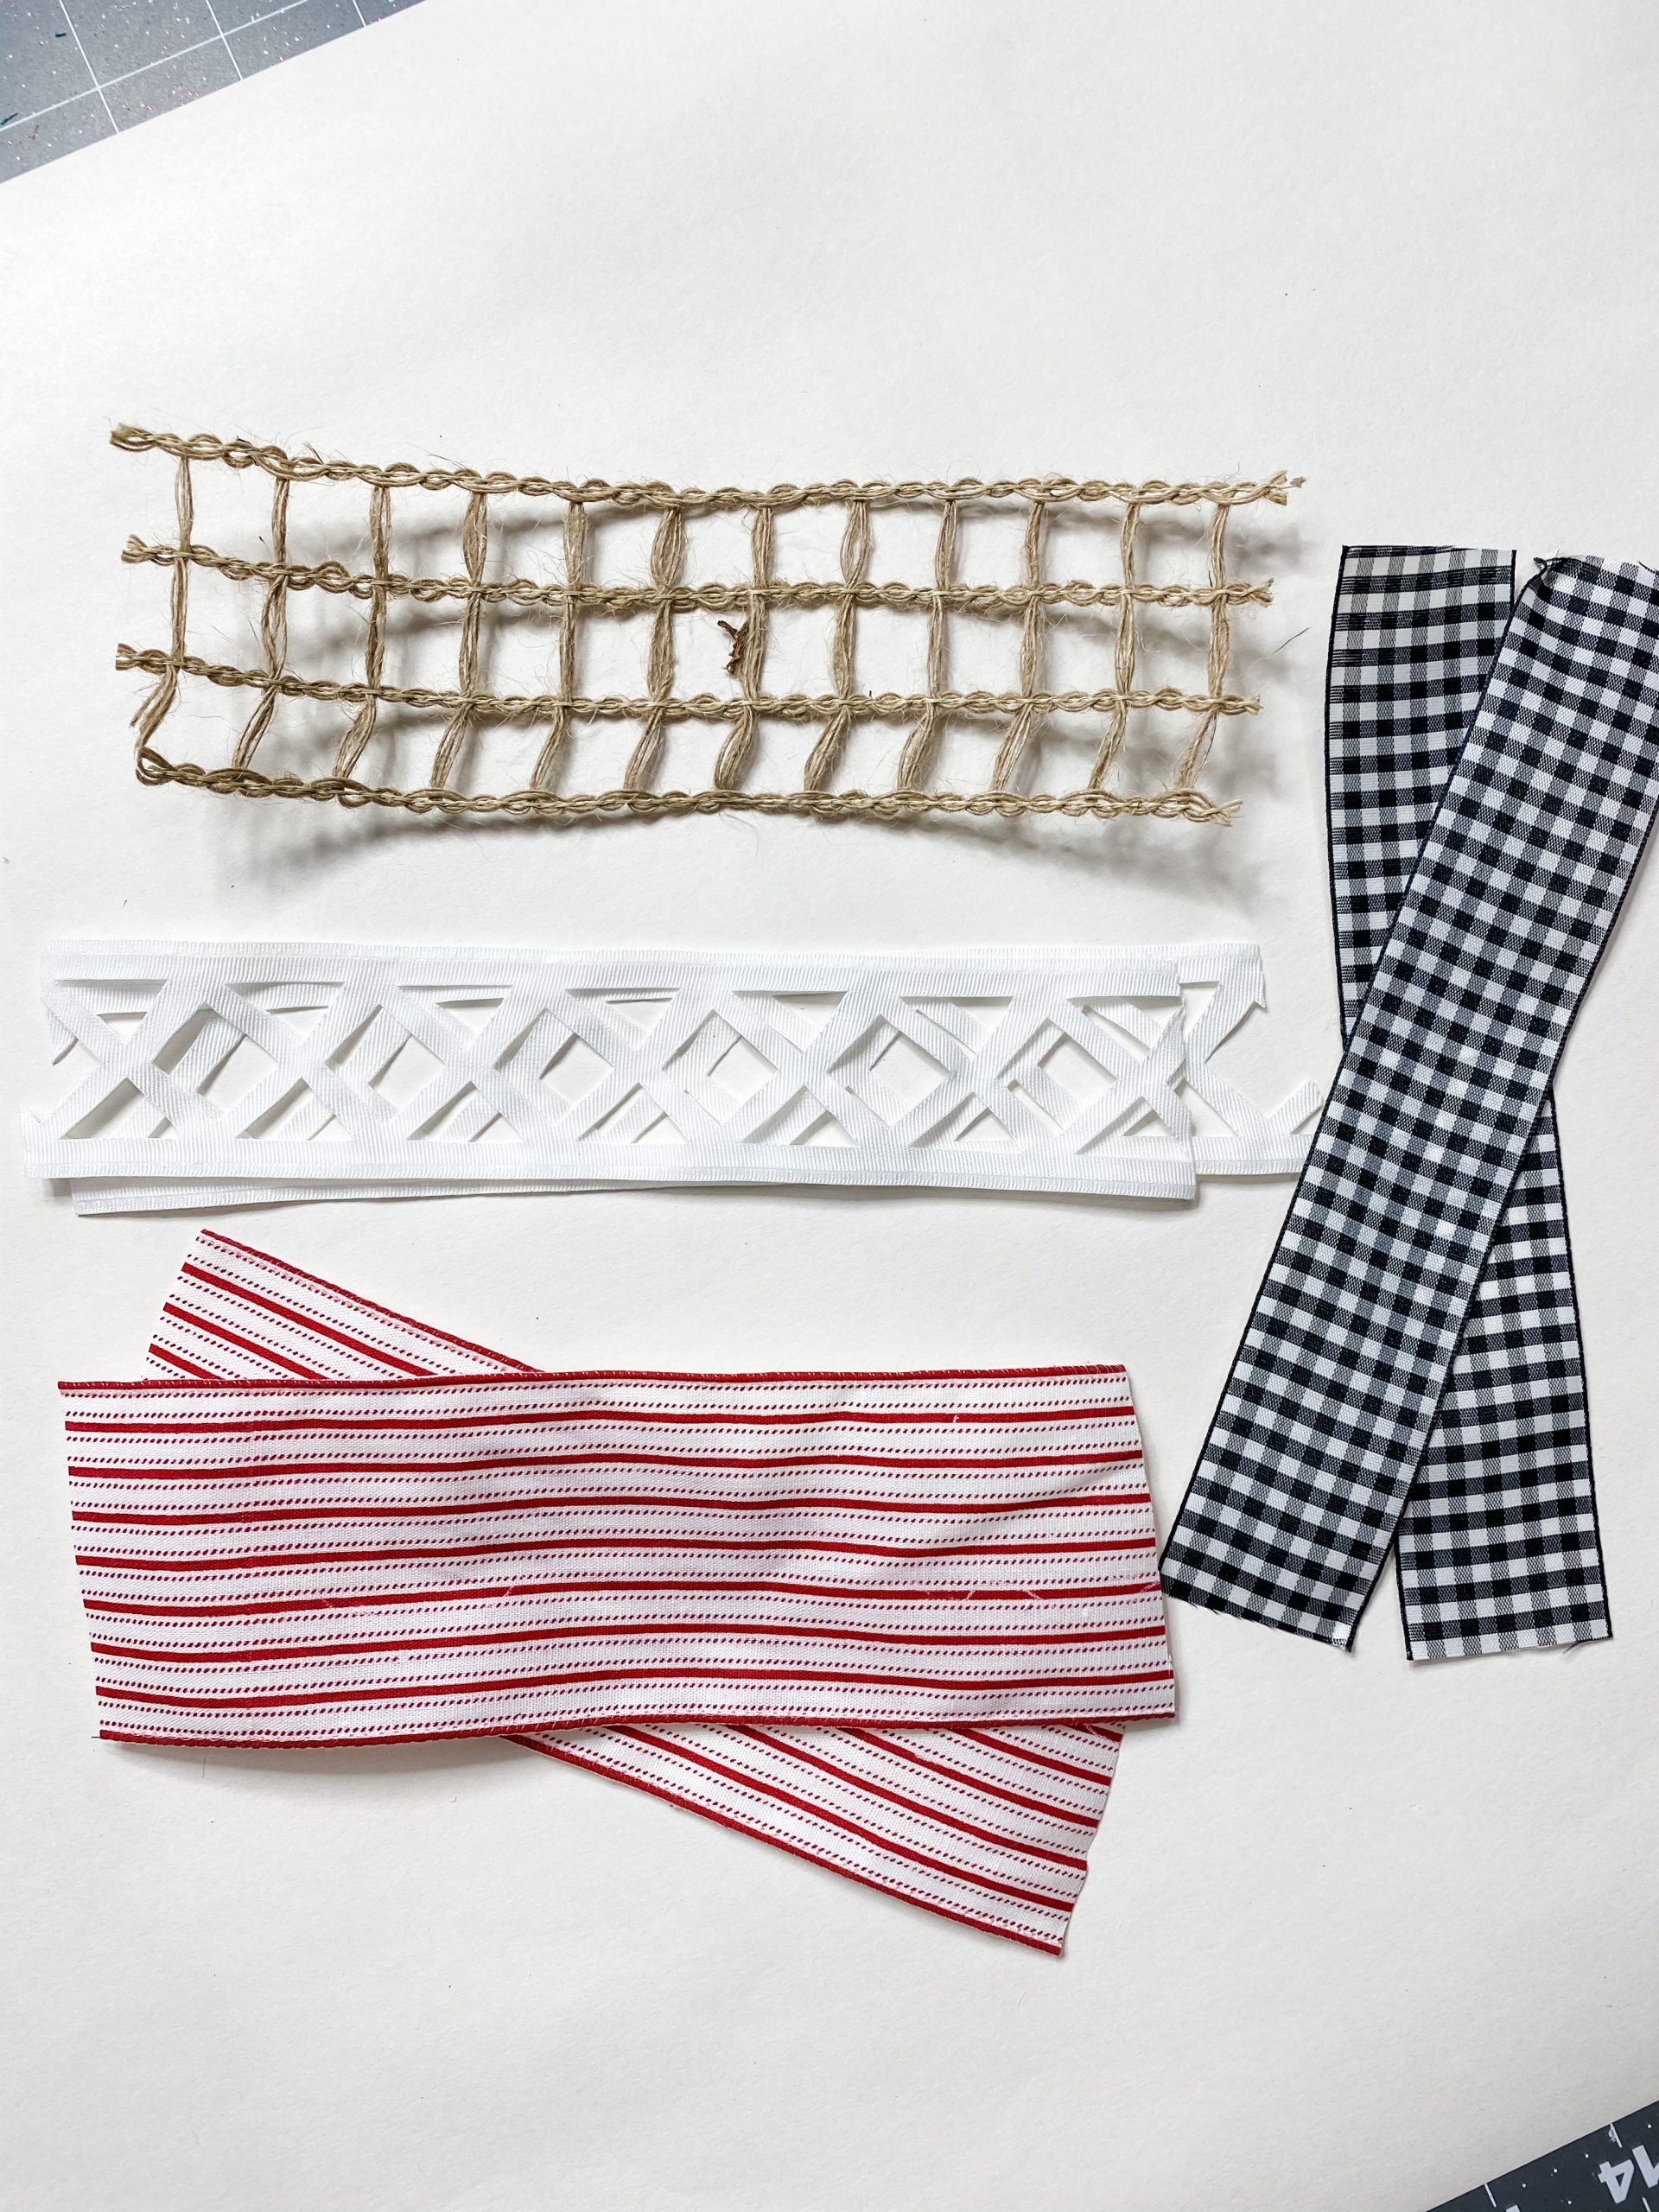
I cut 2 strips of 3 of them and one strip of one of them. The pattern that I cut only one strip of is the front piece of ribbon for this messy bow.
Next, fold each of the strips in half long-ways and cut at an angle. You can see exactly how I did it in the Replay.
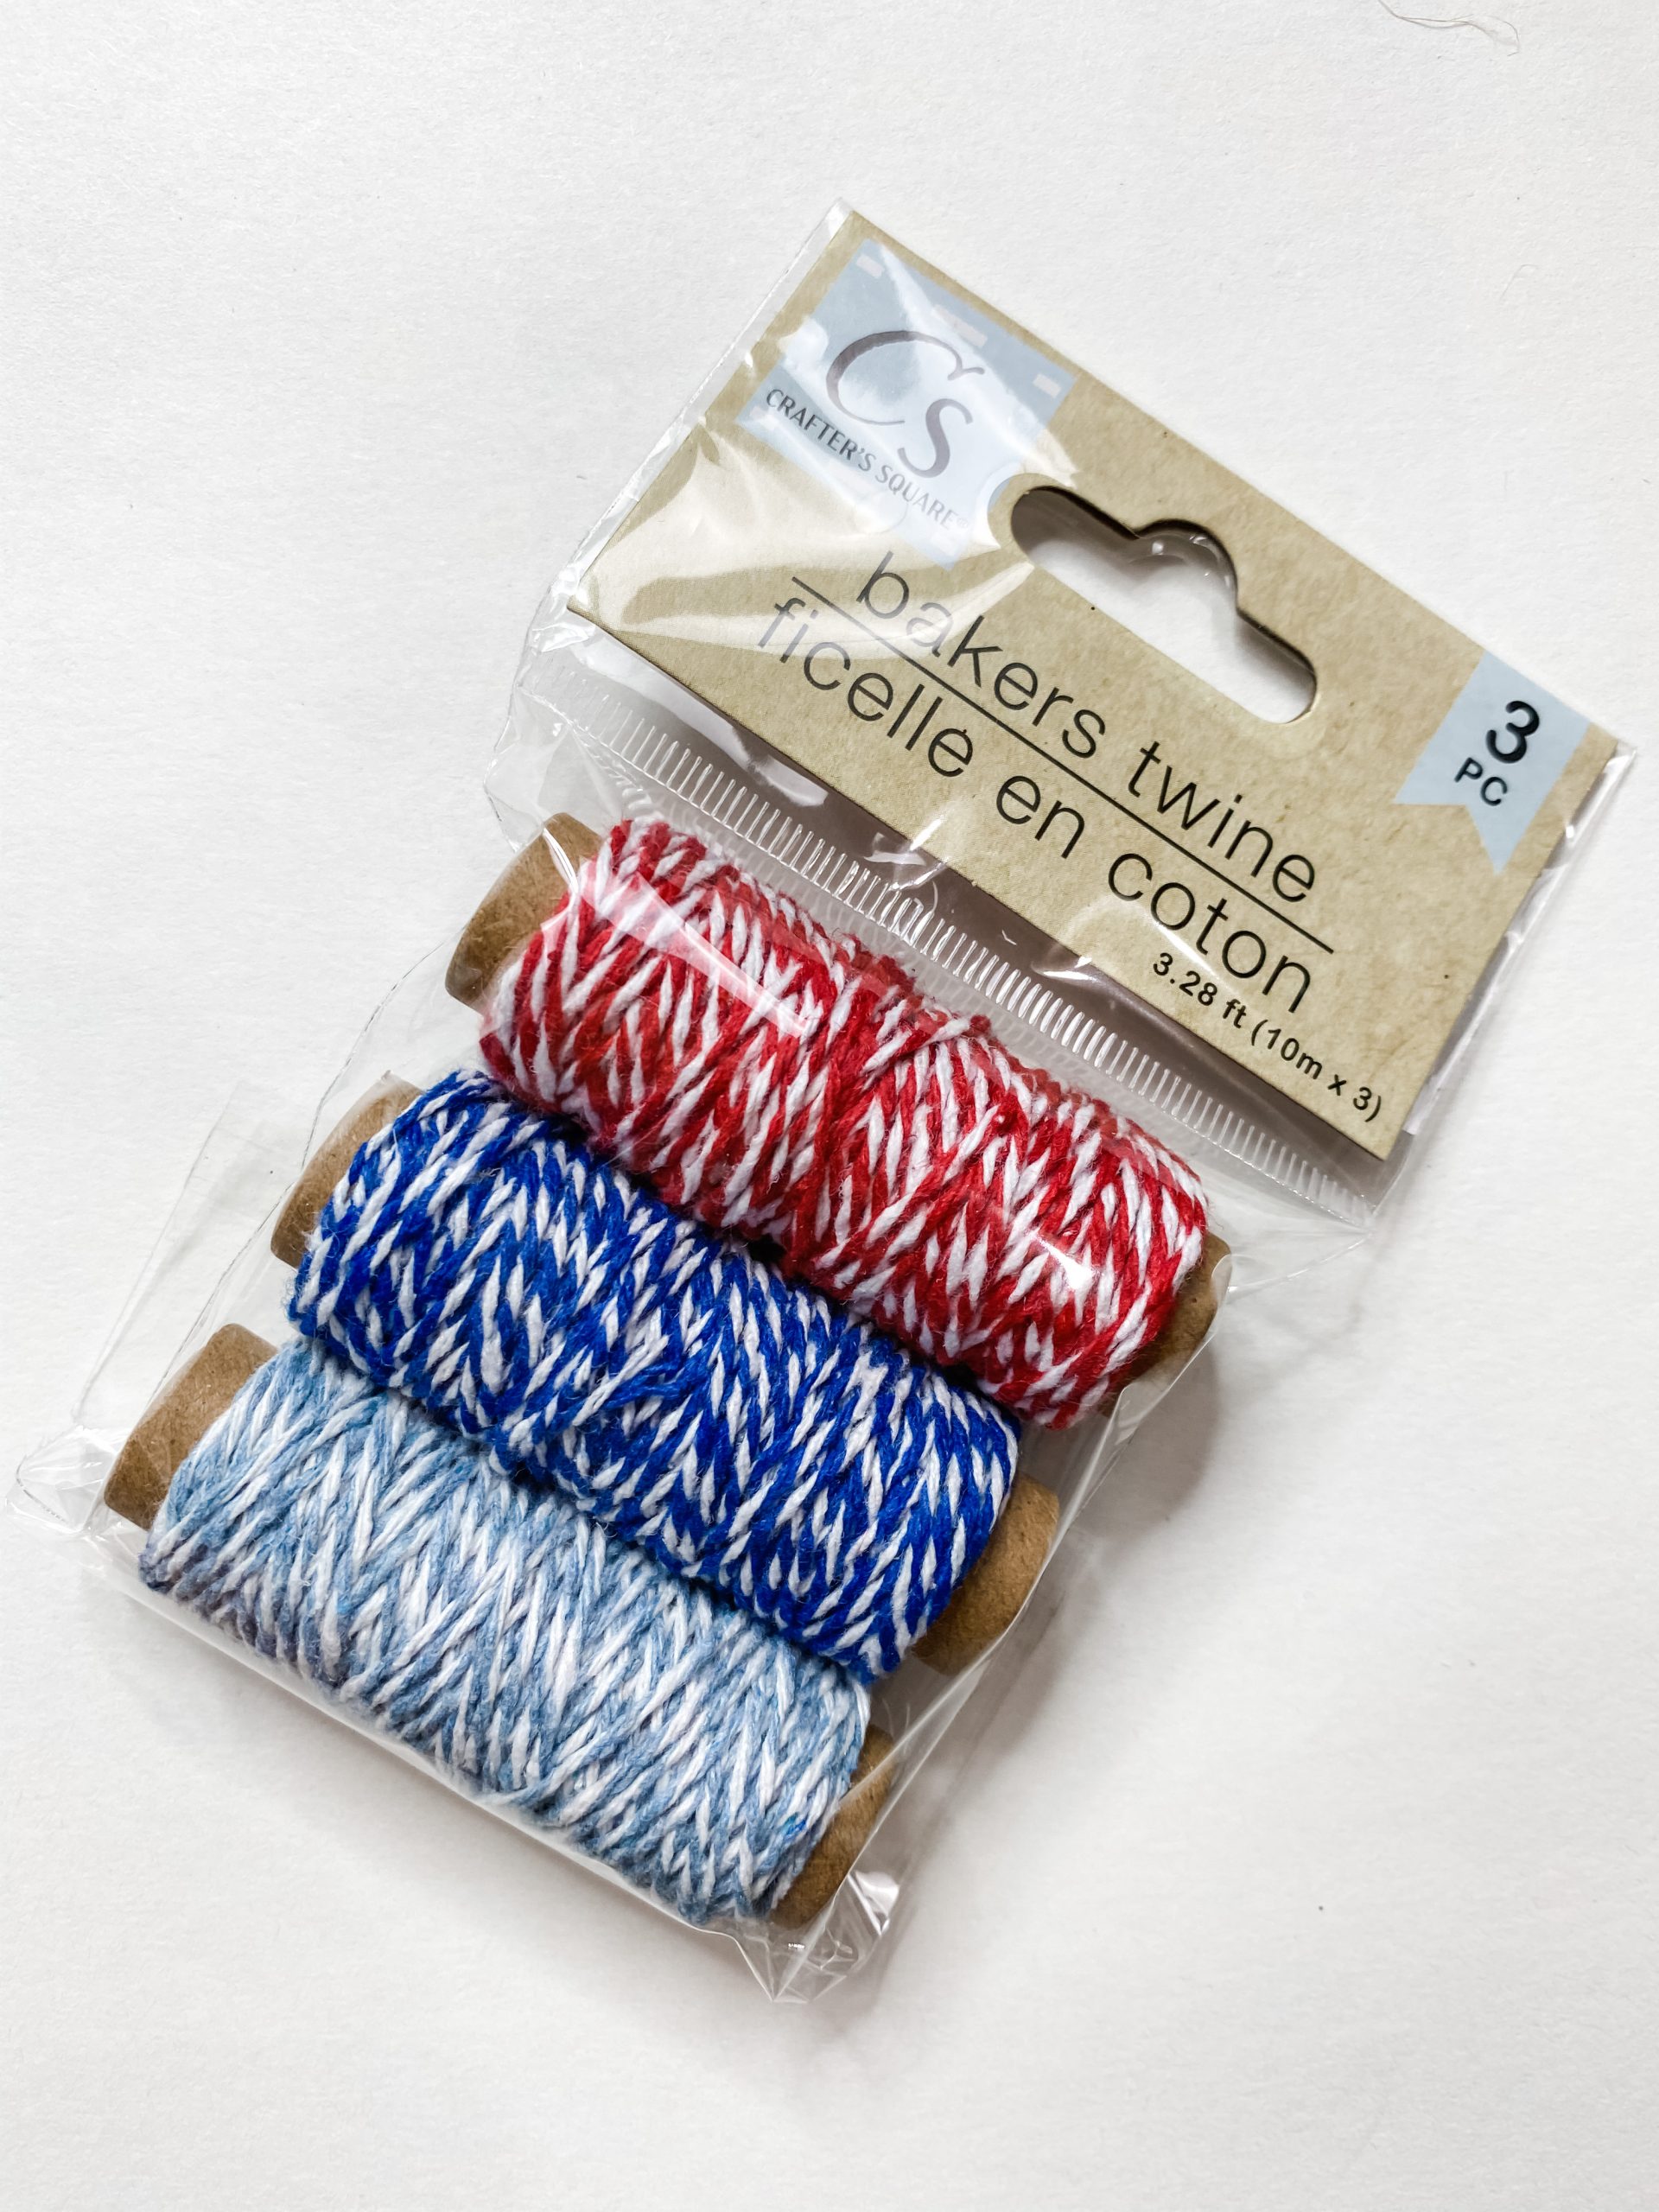
All that is left to do is layer them in the order you want, and secure them with the baker’s twine! Now you have an adorable messy bow! Hot glue it onto your Merry and Bright cardboard sign wherever you like!
The finishing touches
You could easily make this sign as a shelf sitter, but I wanted to be able to hang mine up, so I used the baker’s twine to create a hanger.
I looped together several strands of the baker’s twine to make the hanger thicker, and then hot glued the ends to the back of the Merry and Bright cardboard sign.
I took 2 small pieces of ribbon and hot glued them over the ends of the baker’s twine to give the hanger just a little more support.
I hope you’ve enjoyed learning how to DIY a Christmas Merry and Bright sign with cardboard and decide to make this amazing craft for yourself!
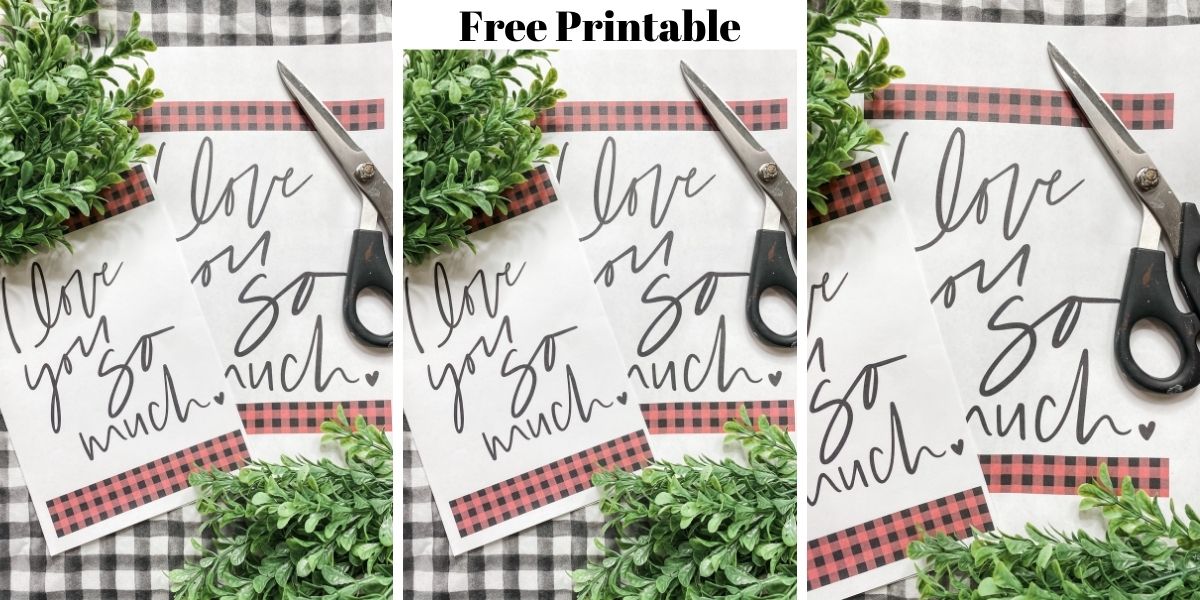
If you loved this DIY you might also like this Christmas Printable Ornament DIY!
Thanks for stopping by! XOXO Amber
You can also shop my ENTIRE AMAZON Favorites shop just click here! It’s packed full of all the things I use and love.
Here is the supply list I highly recommend every creative have on hand!! Would you also pin my blog for later and get on my newsletter alerts? I would love to have you join my #craftycrew.

Join my free “ON A BUDGET CRAFTS” Facebook group!
PIN THIS POST FOR LATER!


Love your ideas❤️