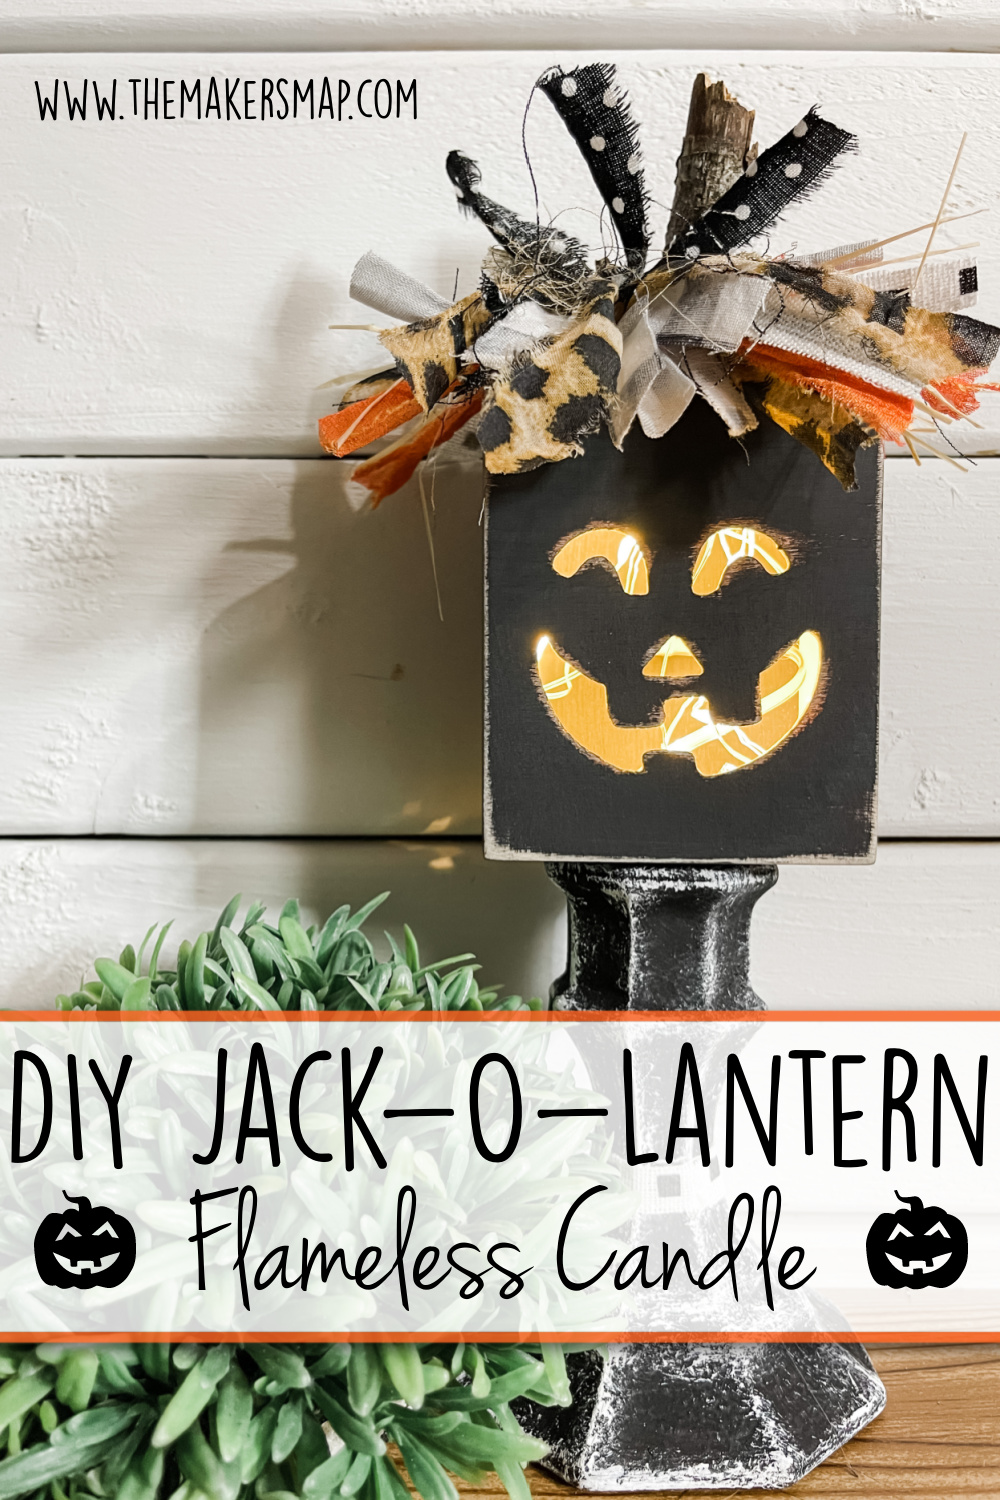
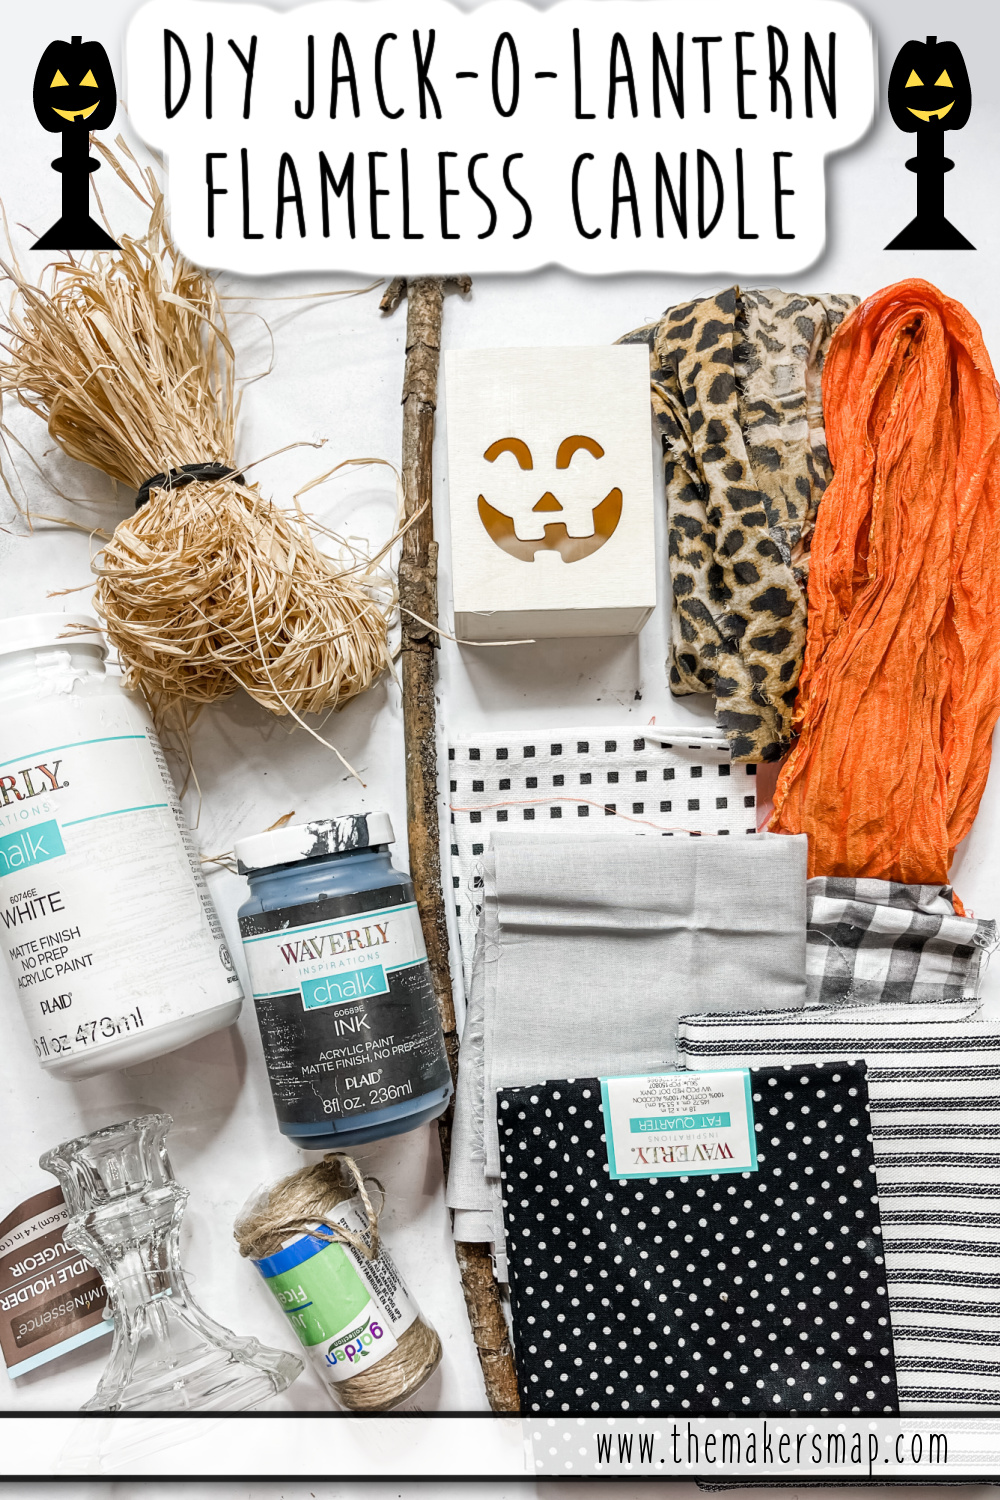
DIY Jack-O-Lantern Flameless Candle
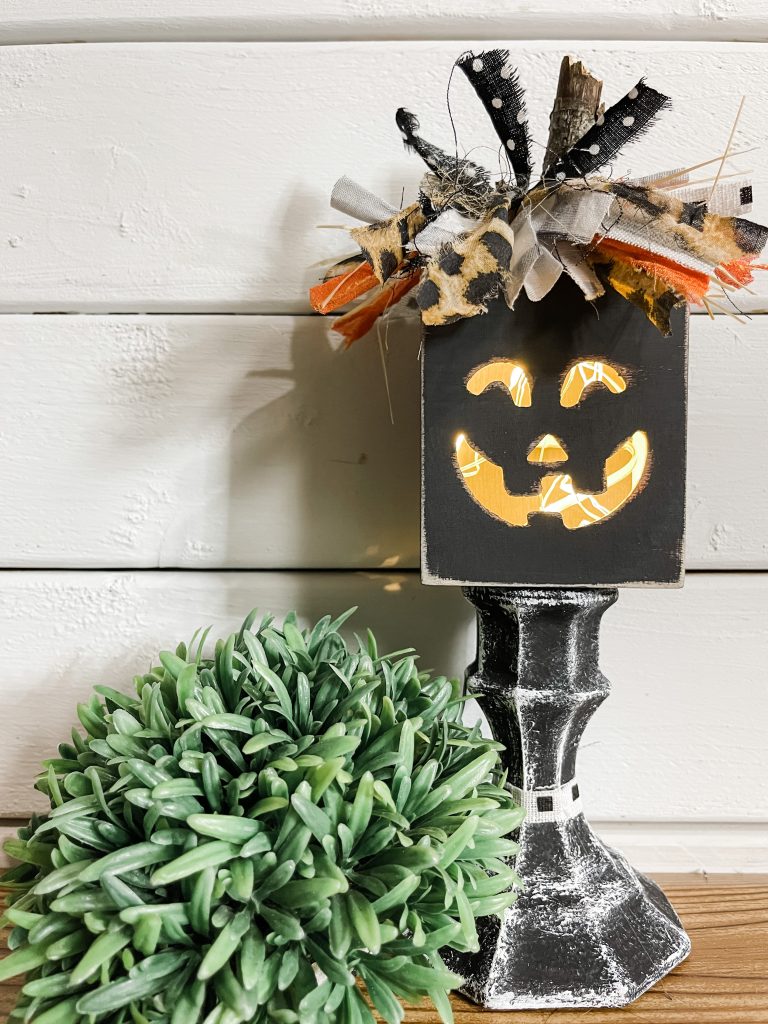
I know that Halloween decor isn’t everyone’s cup of tea, but I am slightly obsessed with how adorable this DIY Jack-O-Lantern Flameless Candle turned out!
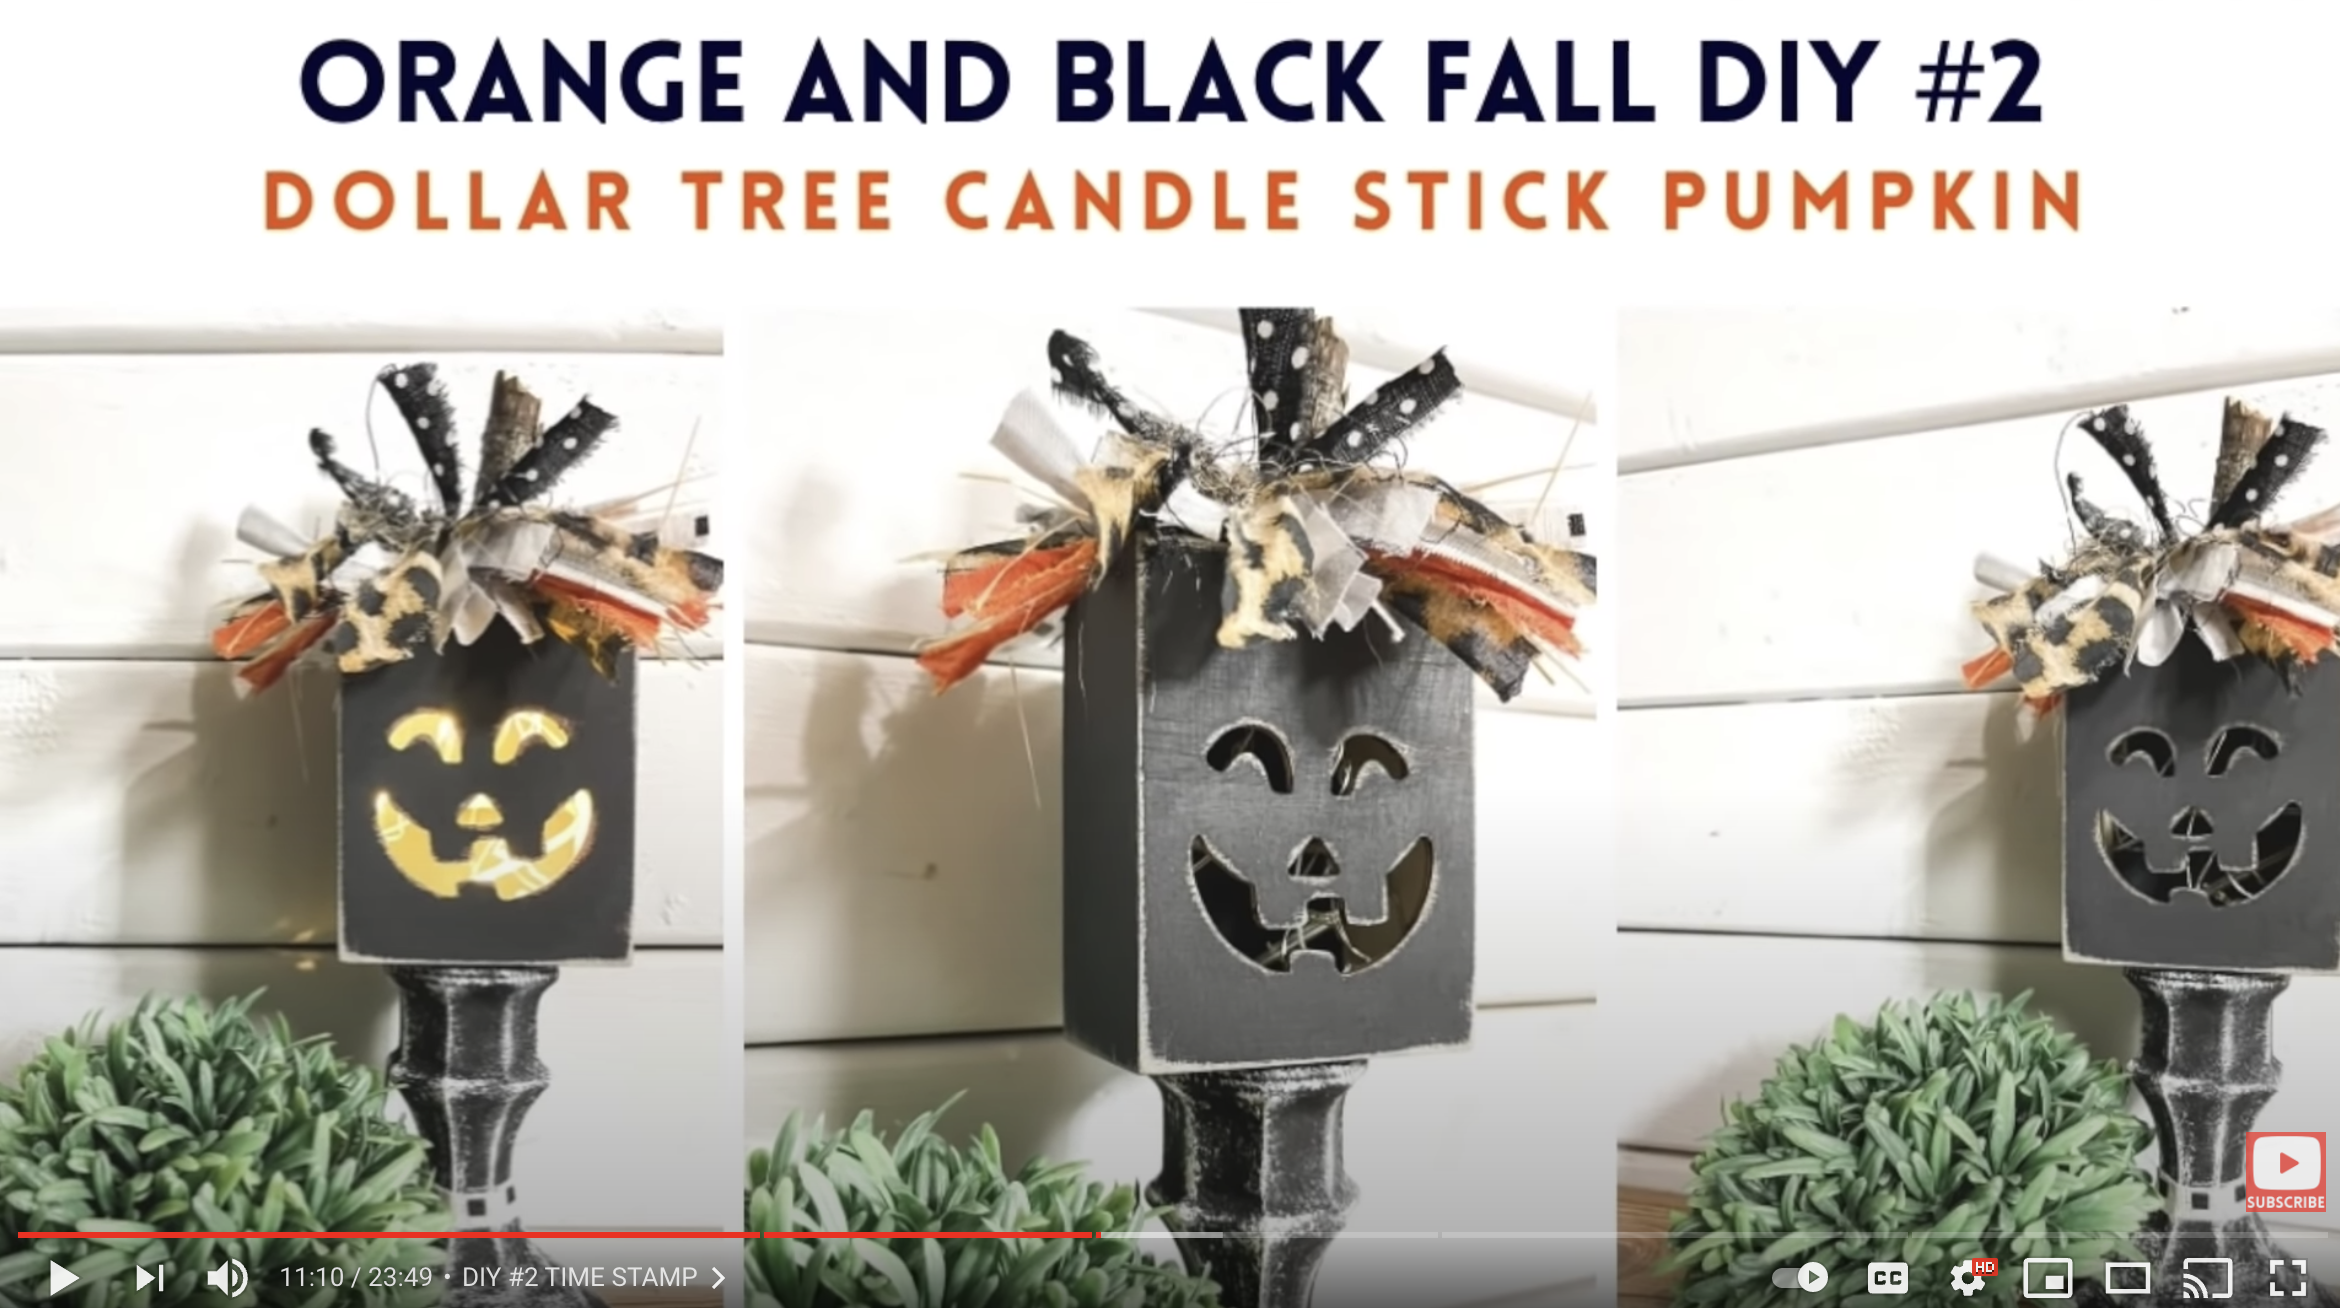
Watch the DIY tutorial video
I shared the quick DIY tutorial video for this adorable DIY Jack-O-Lantern Flameless Candle with three other orange and black DIY ideas on my Youtube channel!
Check out the other DIY ideas:
- Mummy Trio Halloween Decor
- DIY Small Standing Turkeys
- Dollar Tree Fall Splatter Screen Pumpkin
- Dollar Tree Pizza Pan DIY Distressed Pumpkin Decor
- DIY Picture Frame Pumpkin
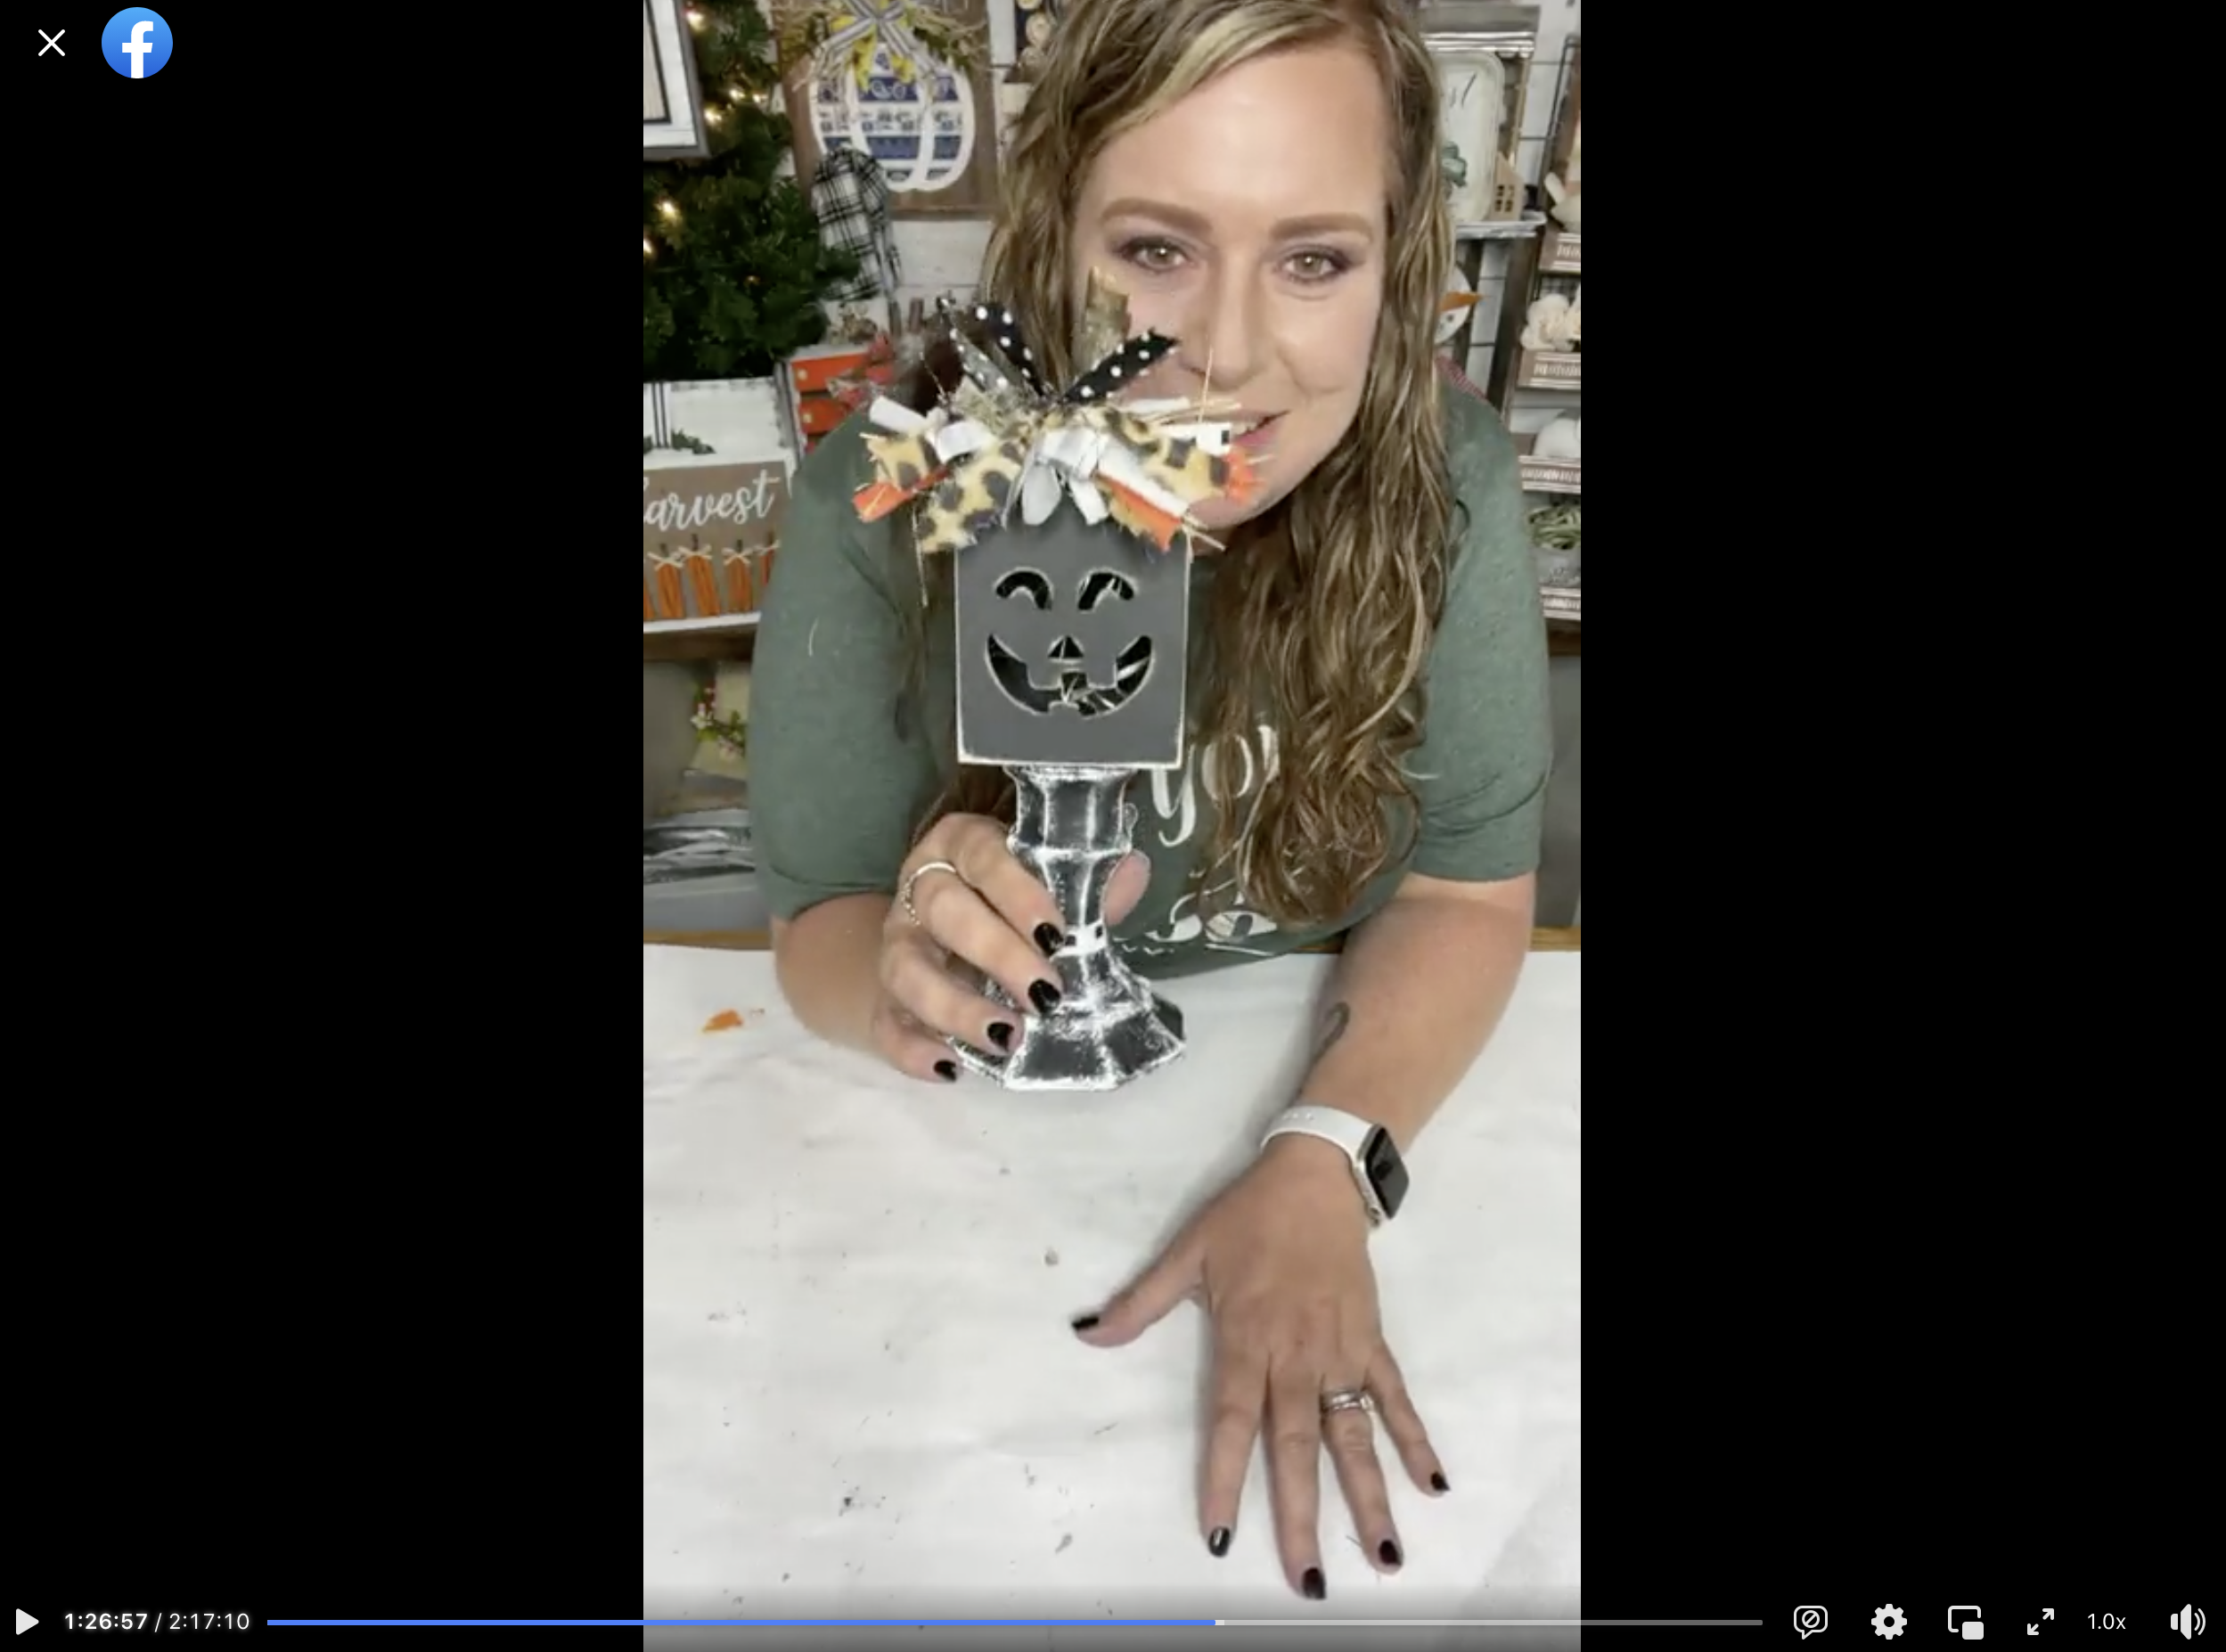
I recorded how to make this adorable DIY Jack-O-Lantern Flameless Candle during a LIVE video on my Facebook page.
If you want to see the extended DIY process, craft along, or just join in on the fun conversations, you can watch the DIY tutorial replay on Facebook!
For this project, I will be using these items, but you can substitute where you want.
“As an Amazon Associate, I earn from qualifying purchases.”
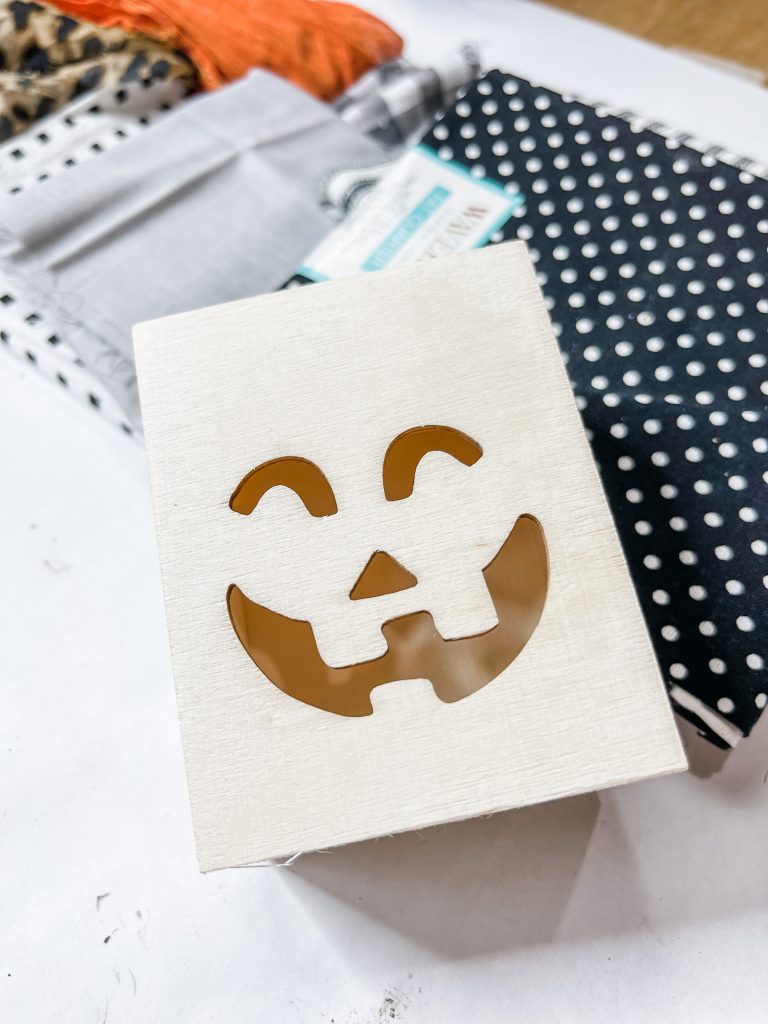
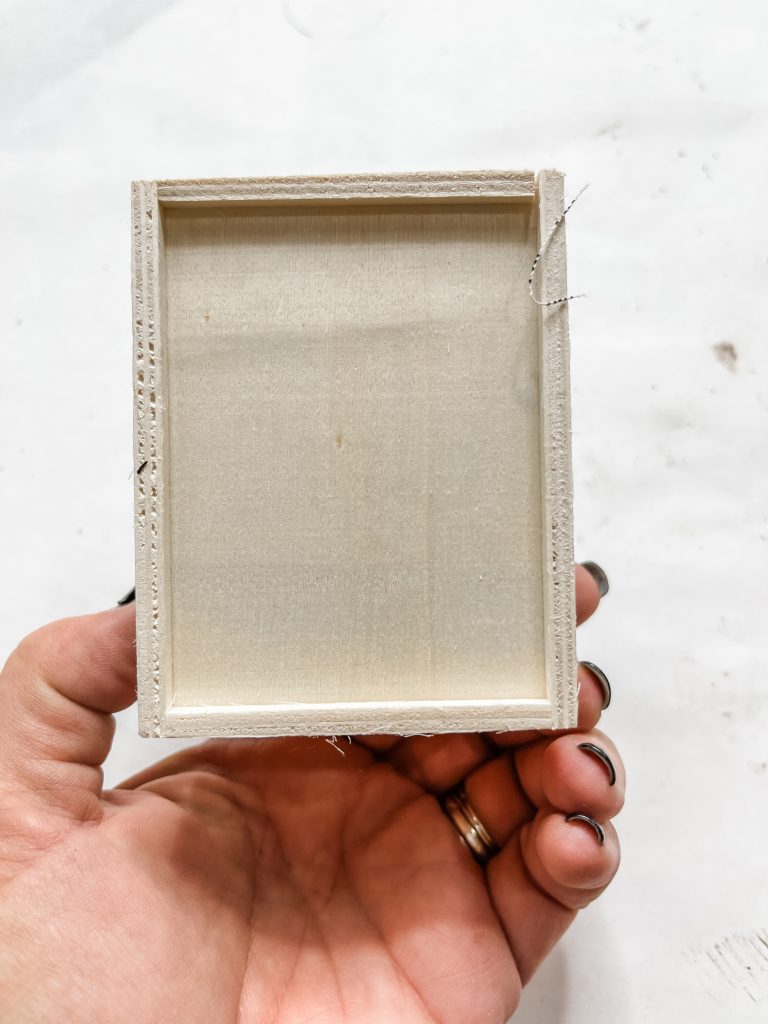
- Dollar Tree Jack-O’-Lantern Box
- Dollar Tree Raffia
- Cheetah Print Fabric
- Dollar Tree Glass Candle Holder
- Dollar Tree Jute Twine
- Orange Fabric
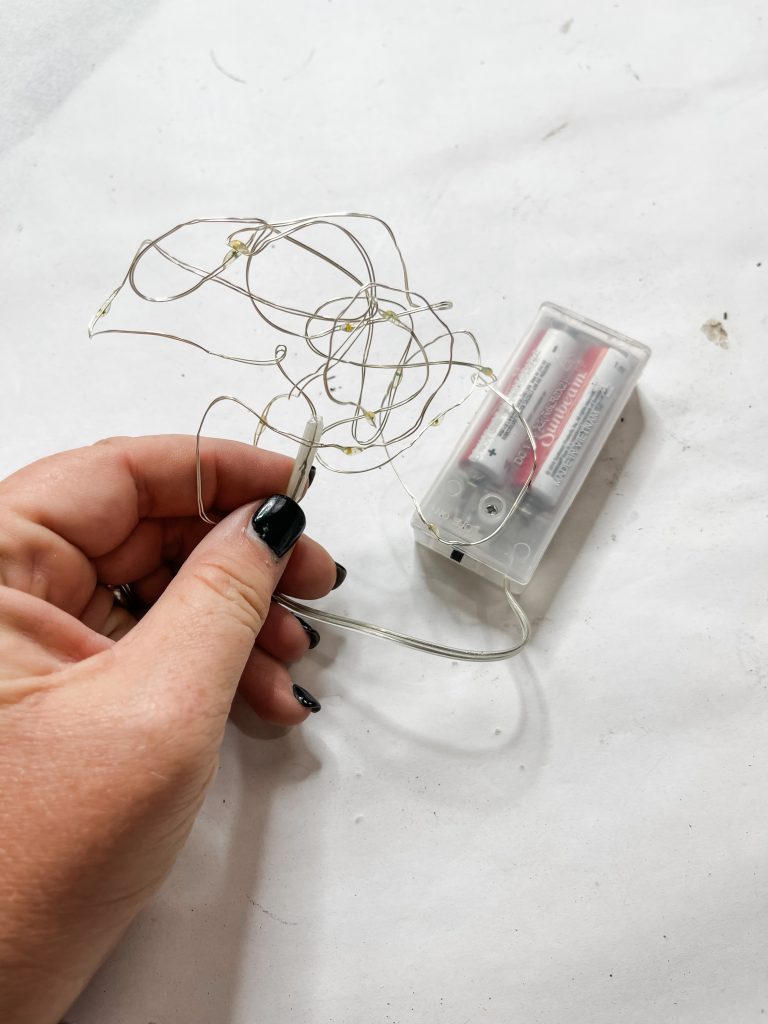
- Dollar Tree Battery Powered Twinkly Lights
- Black/White Polka Dot Fabric
- White/ Black Square Dot Fabric
- Light Grey Fabric
- Black Ticking Fabric
- Black Buffalo Check Fabric
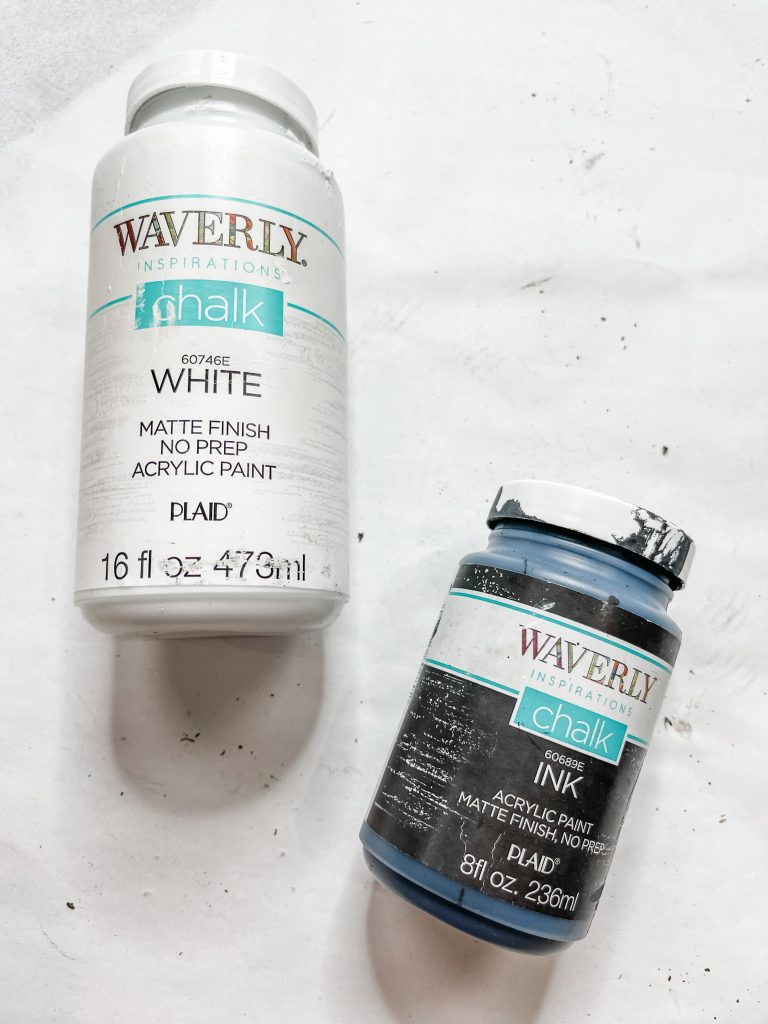
- Waverly White Chalk Paint
- Waverly Ink Chalk Paint
- A Stick (I got mine from my back yard!)
- Hot Glue gun
- Glue Stick

How to Make a DIY Jack-O-Lantern Flameless Candle
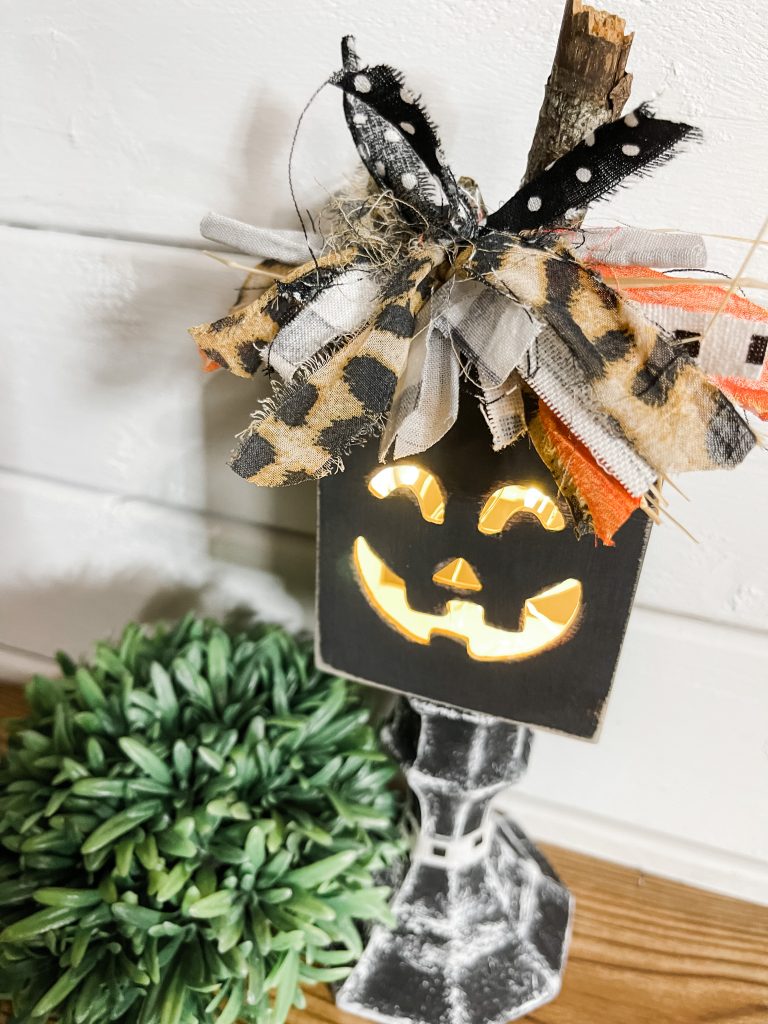
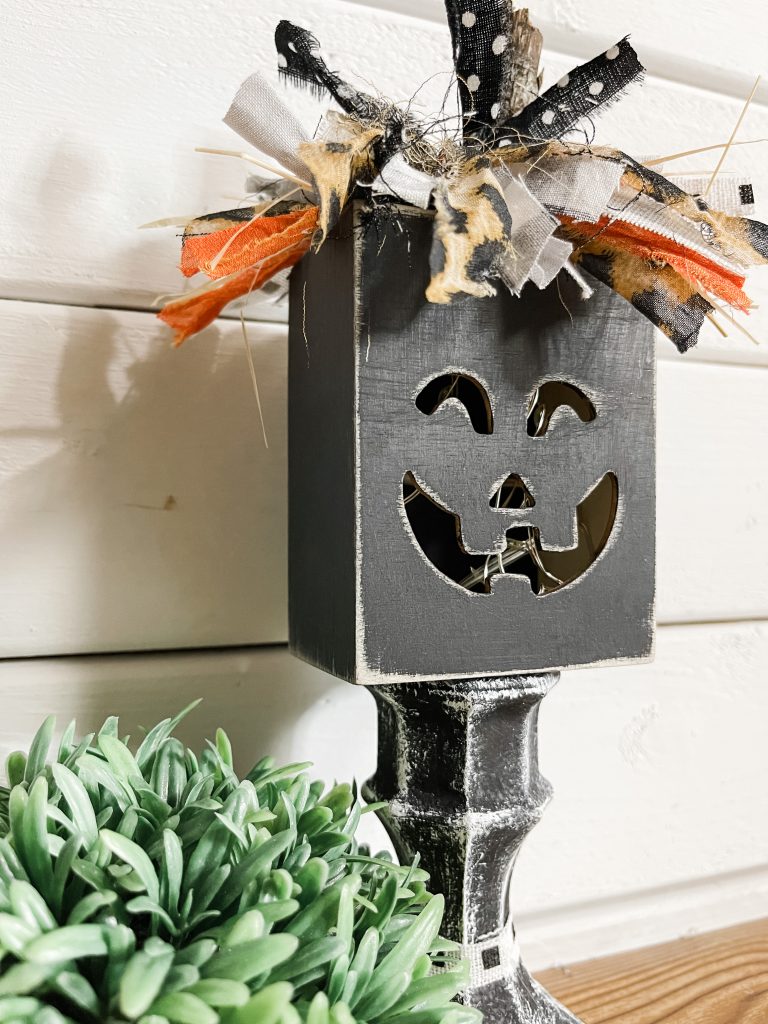
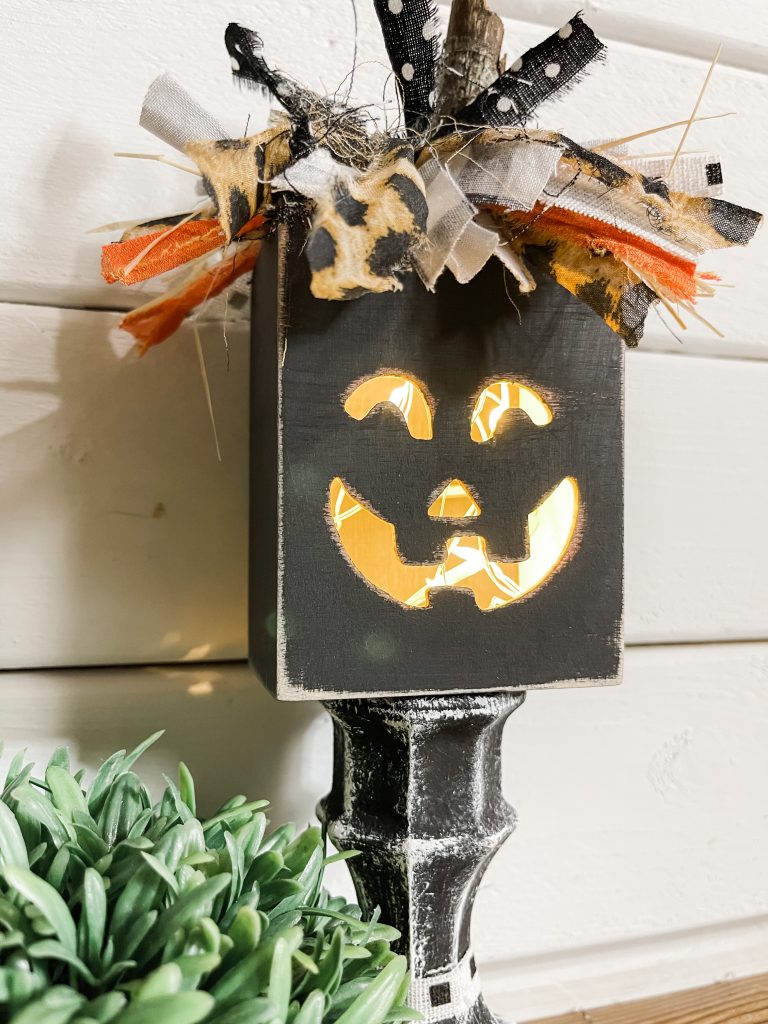
I started this project by painting the Dollar Tree wooden jack-o’-lantern box with Waverly Ink Chalk Paint. I used my heat gun to quickly dry the paint then distressed it with a sanding sponge.
To insert the twinkly lights, I pulled the backing of the jack-o-lantern up and cut a small hole in the bottom of the insert so I could thread the cords of the lights through and have the battery box on the outside.
Next, I painted the other side of the insert for the jack-o-lantern box black so you didn’t see the wood color when the lights were off.
Then, I painted the Dollar Tree glass candle holder black as well and dried the paint. Where I would’ve distressed the candle holder, I lightly painted a bit of white paint.
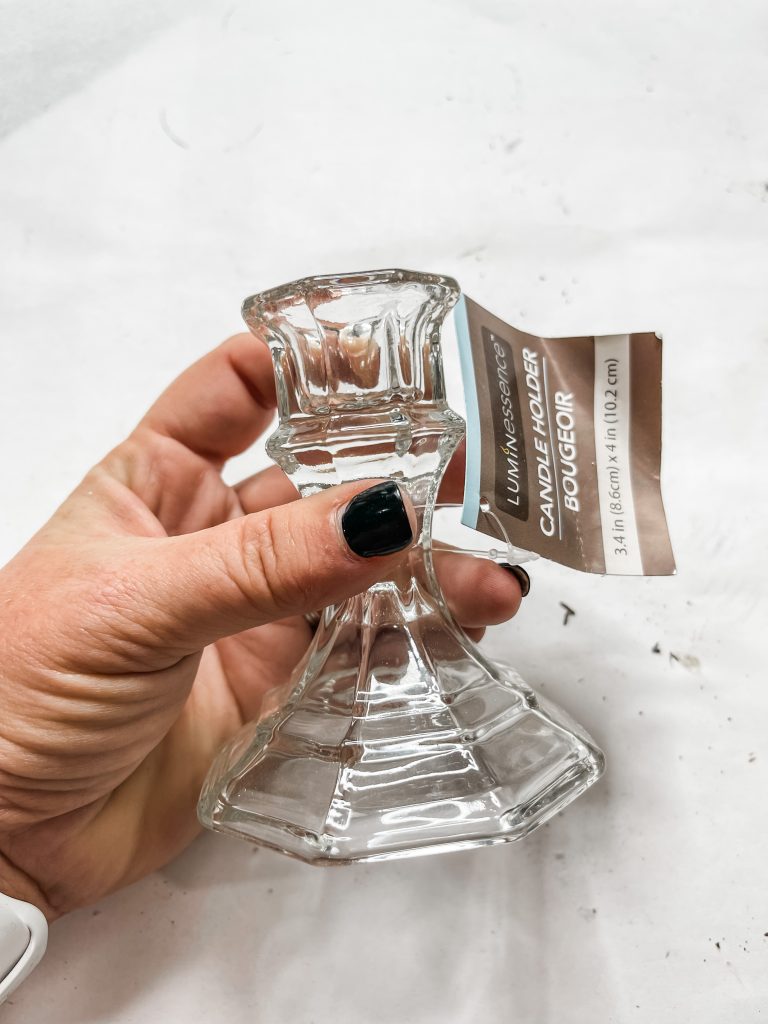
Basically, on all the ridges of the glass candle holder to highlight the detail of the candle holder. I didn’t paint straight lines and kind of smudged them outward. It kind of looked like a spider web!
Next, cut a piece of your stick to be the stem of your jack-o’-lantern and hot glue it to the top of the box. Now, it’s time to make your bow!
How to make a DIY fabric bow
Rip a few strands of each fabric pattern. I ripped them to get the frayed edges instead of straight, clean edges on the fabric.

I had to cut the strips of the black dot fabric to make sure I had straight lines of the black dots, and I did the same thing with the buffalo check and ticking fabric.
Then I pulled a few strands of raffia and separated them into thin strands. I cut the fabric strips into smaller pieces and started assembling my bow!

Lay your fabric strips in an X pattern, alternating fabric patterns as you go. Layer in some raffia as you go, then secure the center of the bow with a piece of jute twine.
Push all the strips up, like you’re making a pom-pom, and trim the ends to even out your bow. Then, tie the jute twine around the stem of your pumpkin and you can add some hot glue to secure it in place.
Bring your DIY Jack-O-Lantern Flameless Candle together!
Now it’s time to secure the jack-o-lantern box to the Dollar Tree glass candle holder! To get a really secure bond between the wood and glass, I used E6000 glue.
Then, I hot glued a strip of the square dot fabric around the lower half of the glass candle holder. Finally, I attached the twinkly lights to the jack-o-lantern!
Bundle up the strand of mini twinkly lights and put them inside the jack-o-lantern. Push the backing of the box down, keeping as much of the wire inside the box as you can.
Lastly, hot glue the battery box to the back of the jack-o-lantern, and now you have your DIY Jack-O-Lantern Flameless Candle!
I hope you enjoyed this DIY Jack-O-Lantern Flameless Candle as much as I did and decide to make it for yourself! If you do, I would love to see how yours turns out!
You should totally join my FREE Facebook group called On A Budget Crafts! It is a judgment-free community for DIY crafters to show off their projects and ideas.
If you loved this DIY Jack-O-Lantern Flameless Candle, you might also like these DIY ideas!
Thanks for stopping by! XOXO Amber
You can also shop my ENTIRE AMAZON Favorites shop just click here! It’s packed full of all the things I use and love. Here is the supply list I highly recommend every creative have on hand!!
Would you also pin my blog for later and get on my newsletter alerts? I would love to have you join my #craftycrew.
I email alerts about new blogs like this DIY Jack-O-Lantern Flameless Candle so you’re always up to date on fun, new DIY ideas!
Inspired? Leave me a comment below! I love hearing from my readers!

Join my free “ON A BUDGET CRAFTS” Facebook group!


I love this pumpkin lantern it is do cute wish I had all the materials to make it
The Jack o lantern is stinking Adorable
This is so creative and beautiful, just as every craft you make. You inspire every time I join your live craft videos. Thank you for changing my life.
This is the cutest pumpkin on a spiderweb stand!! I’ve been wanting to make this but I’m hoping they’ll come out with it next year because dollar tree no longer has the pumpkin! I watched the original live when you made this and didn’t get to dollar tree in time before they were sold out. I never would’ve thought of this idea on a glass stand. Thanks for always inspiring us!