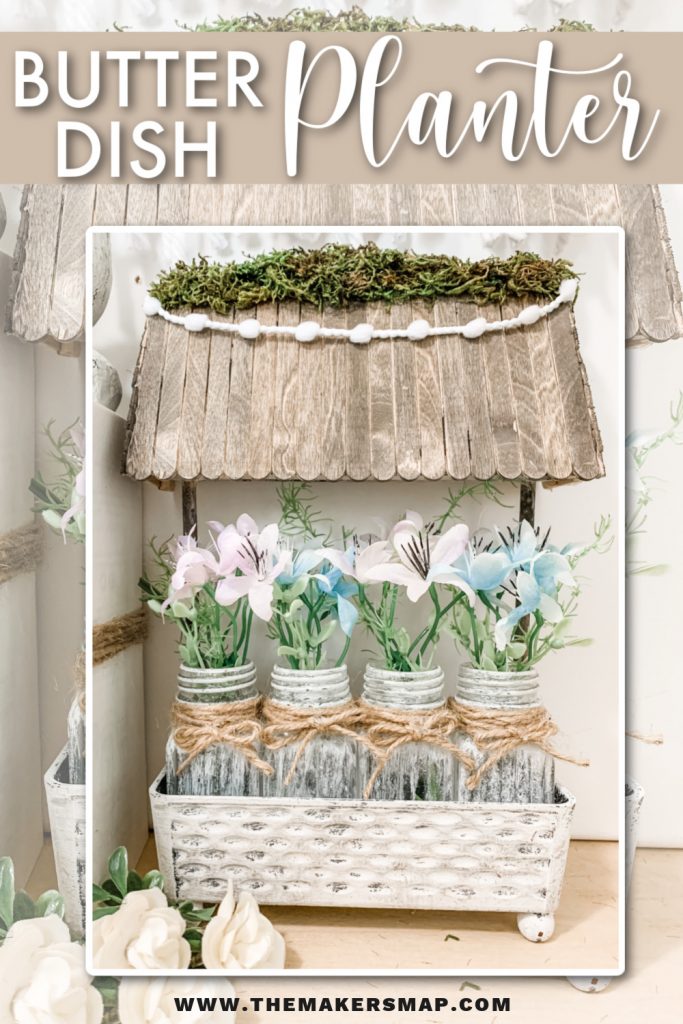
DIY Butter Dish Decorative Planter
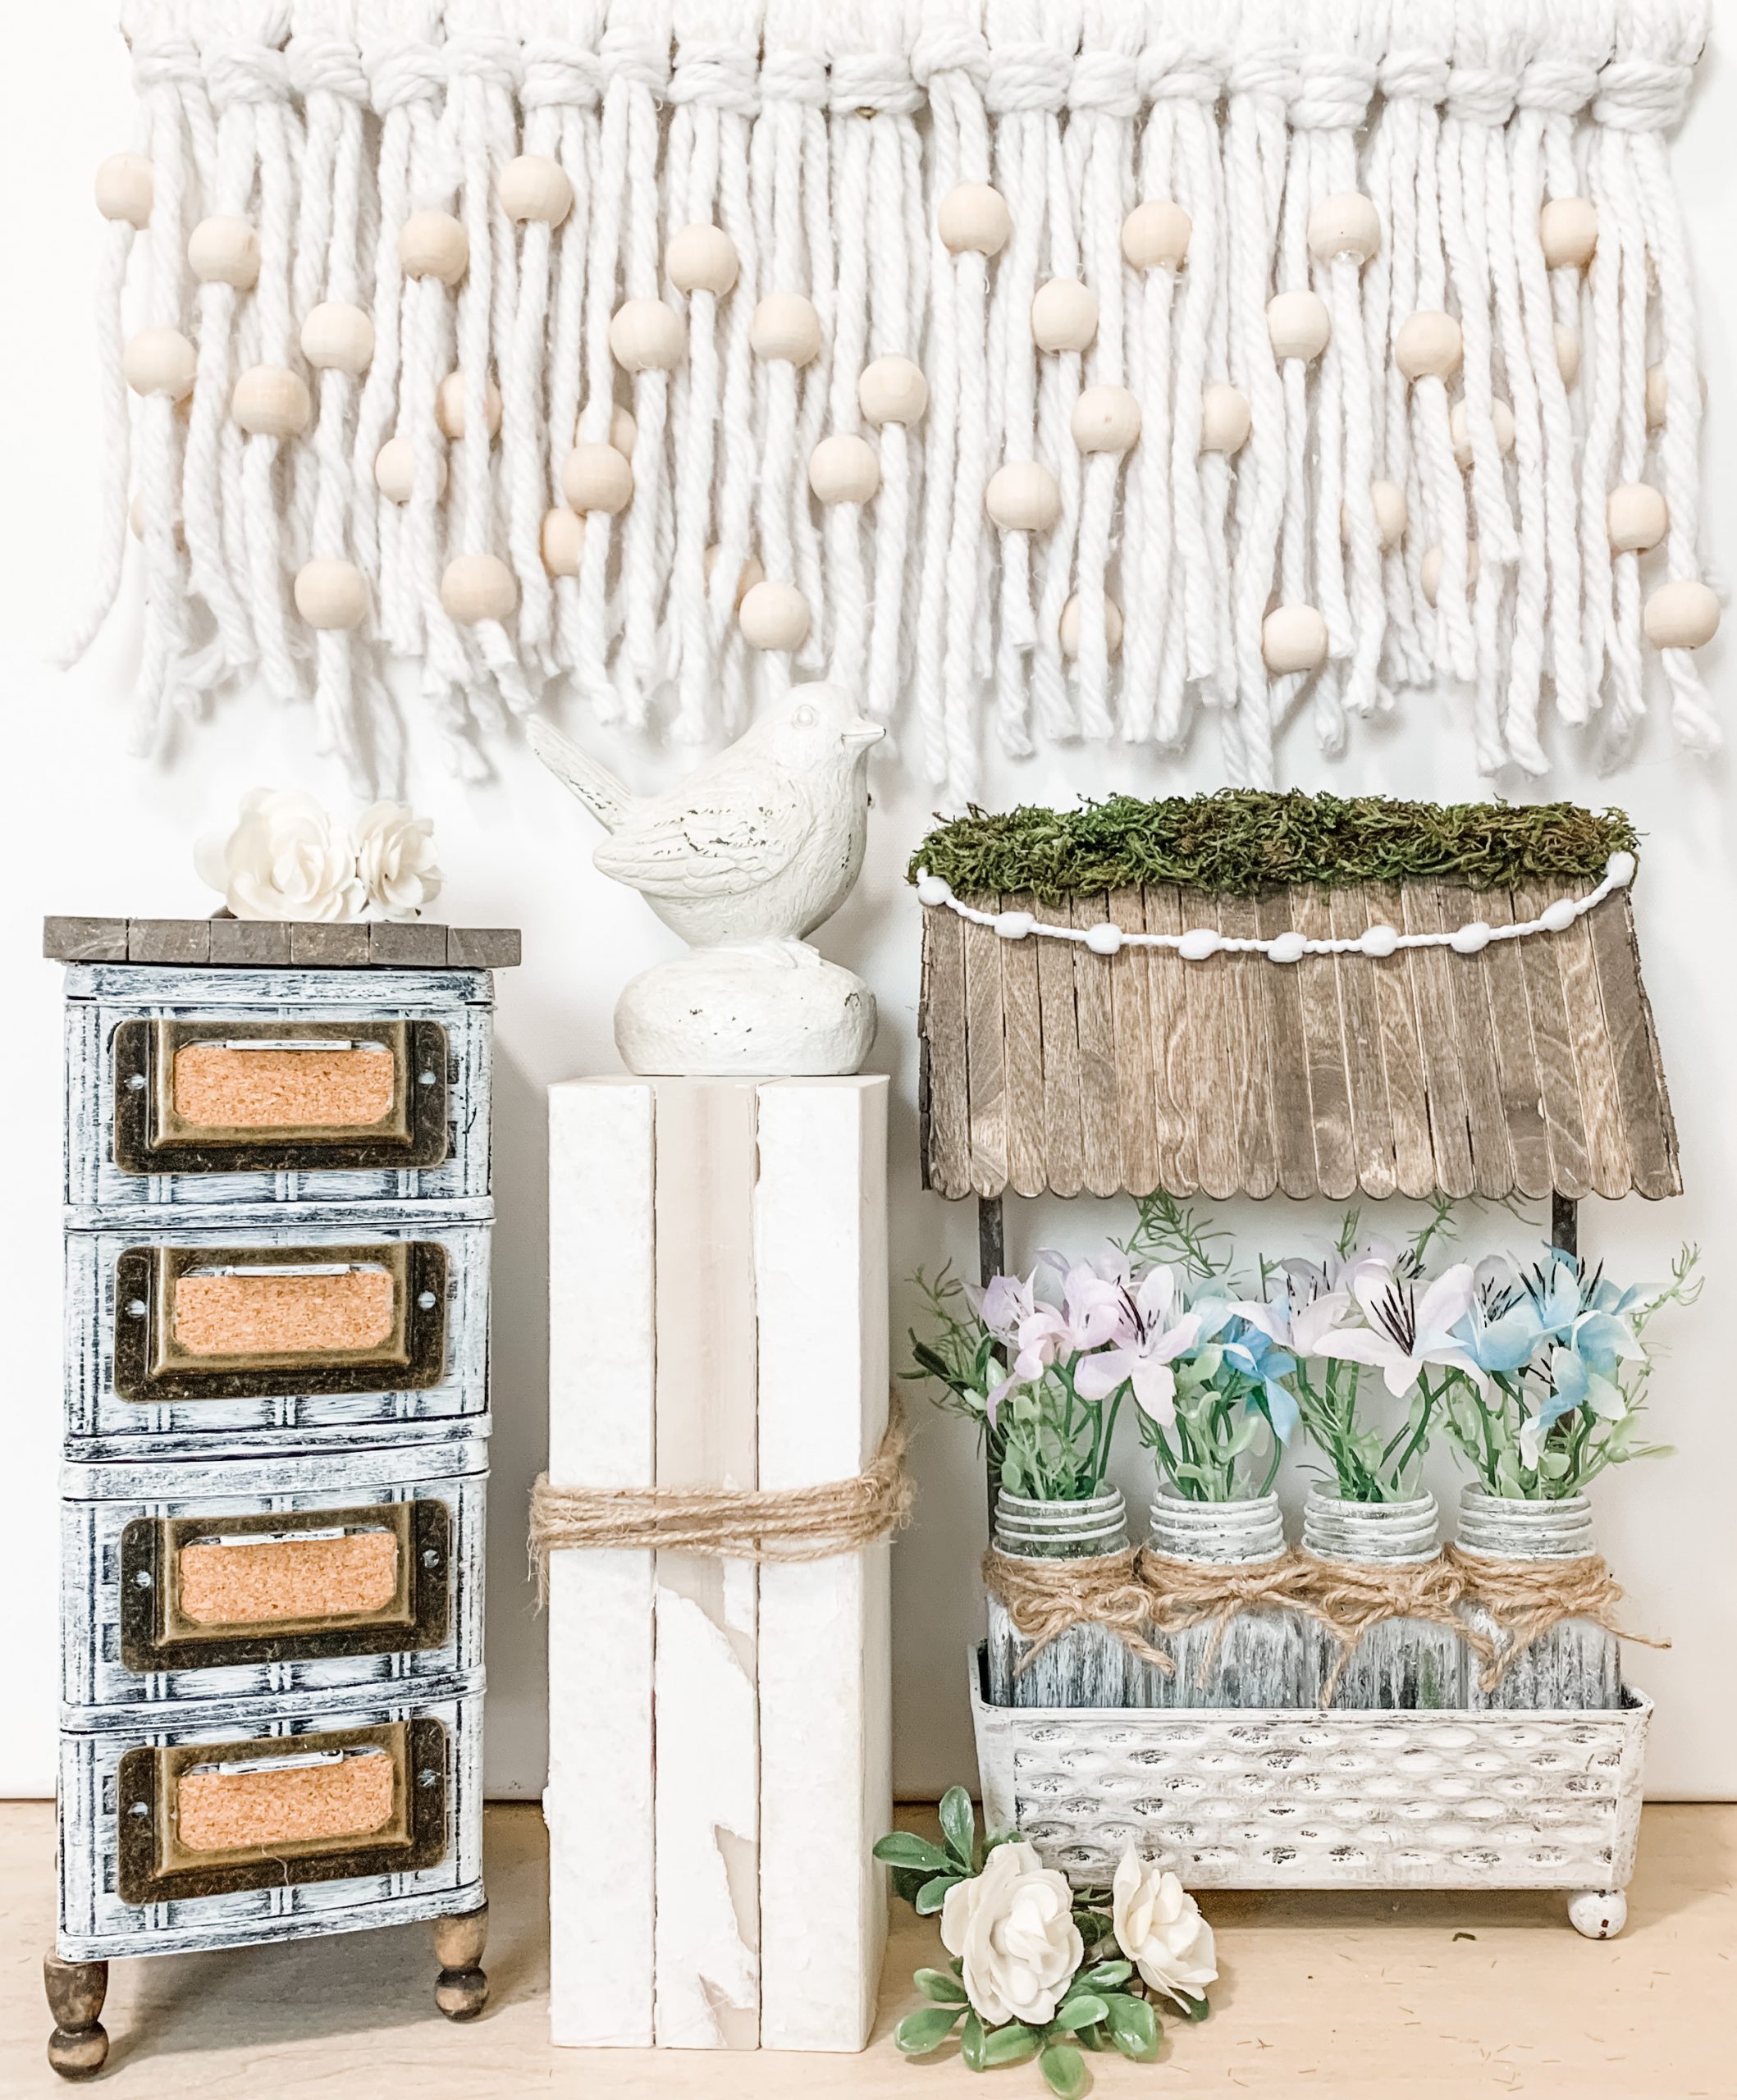
This adorable DIY Butter Dish Decorative Planter is an oldie but is absolutely a goodie! I can’t believe it took me so long to get this project on the blog, but gosh I am so excited to share it with you!
Watch the DIY tutorial
I shared how to make this adorable DIY Butter Dish Decorative Planter in a short video tutorial on Facebook!
If you want to see the DIY process as it unfolds, you can watch the tutorial video!
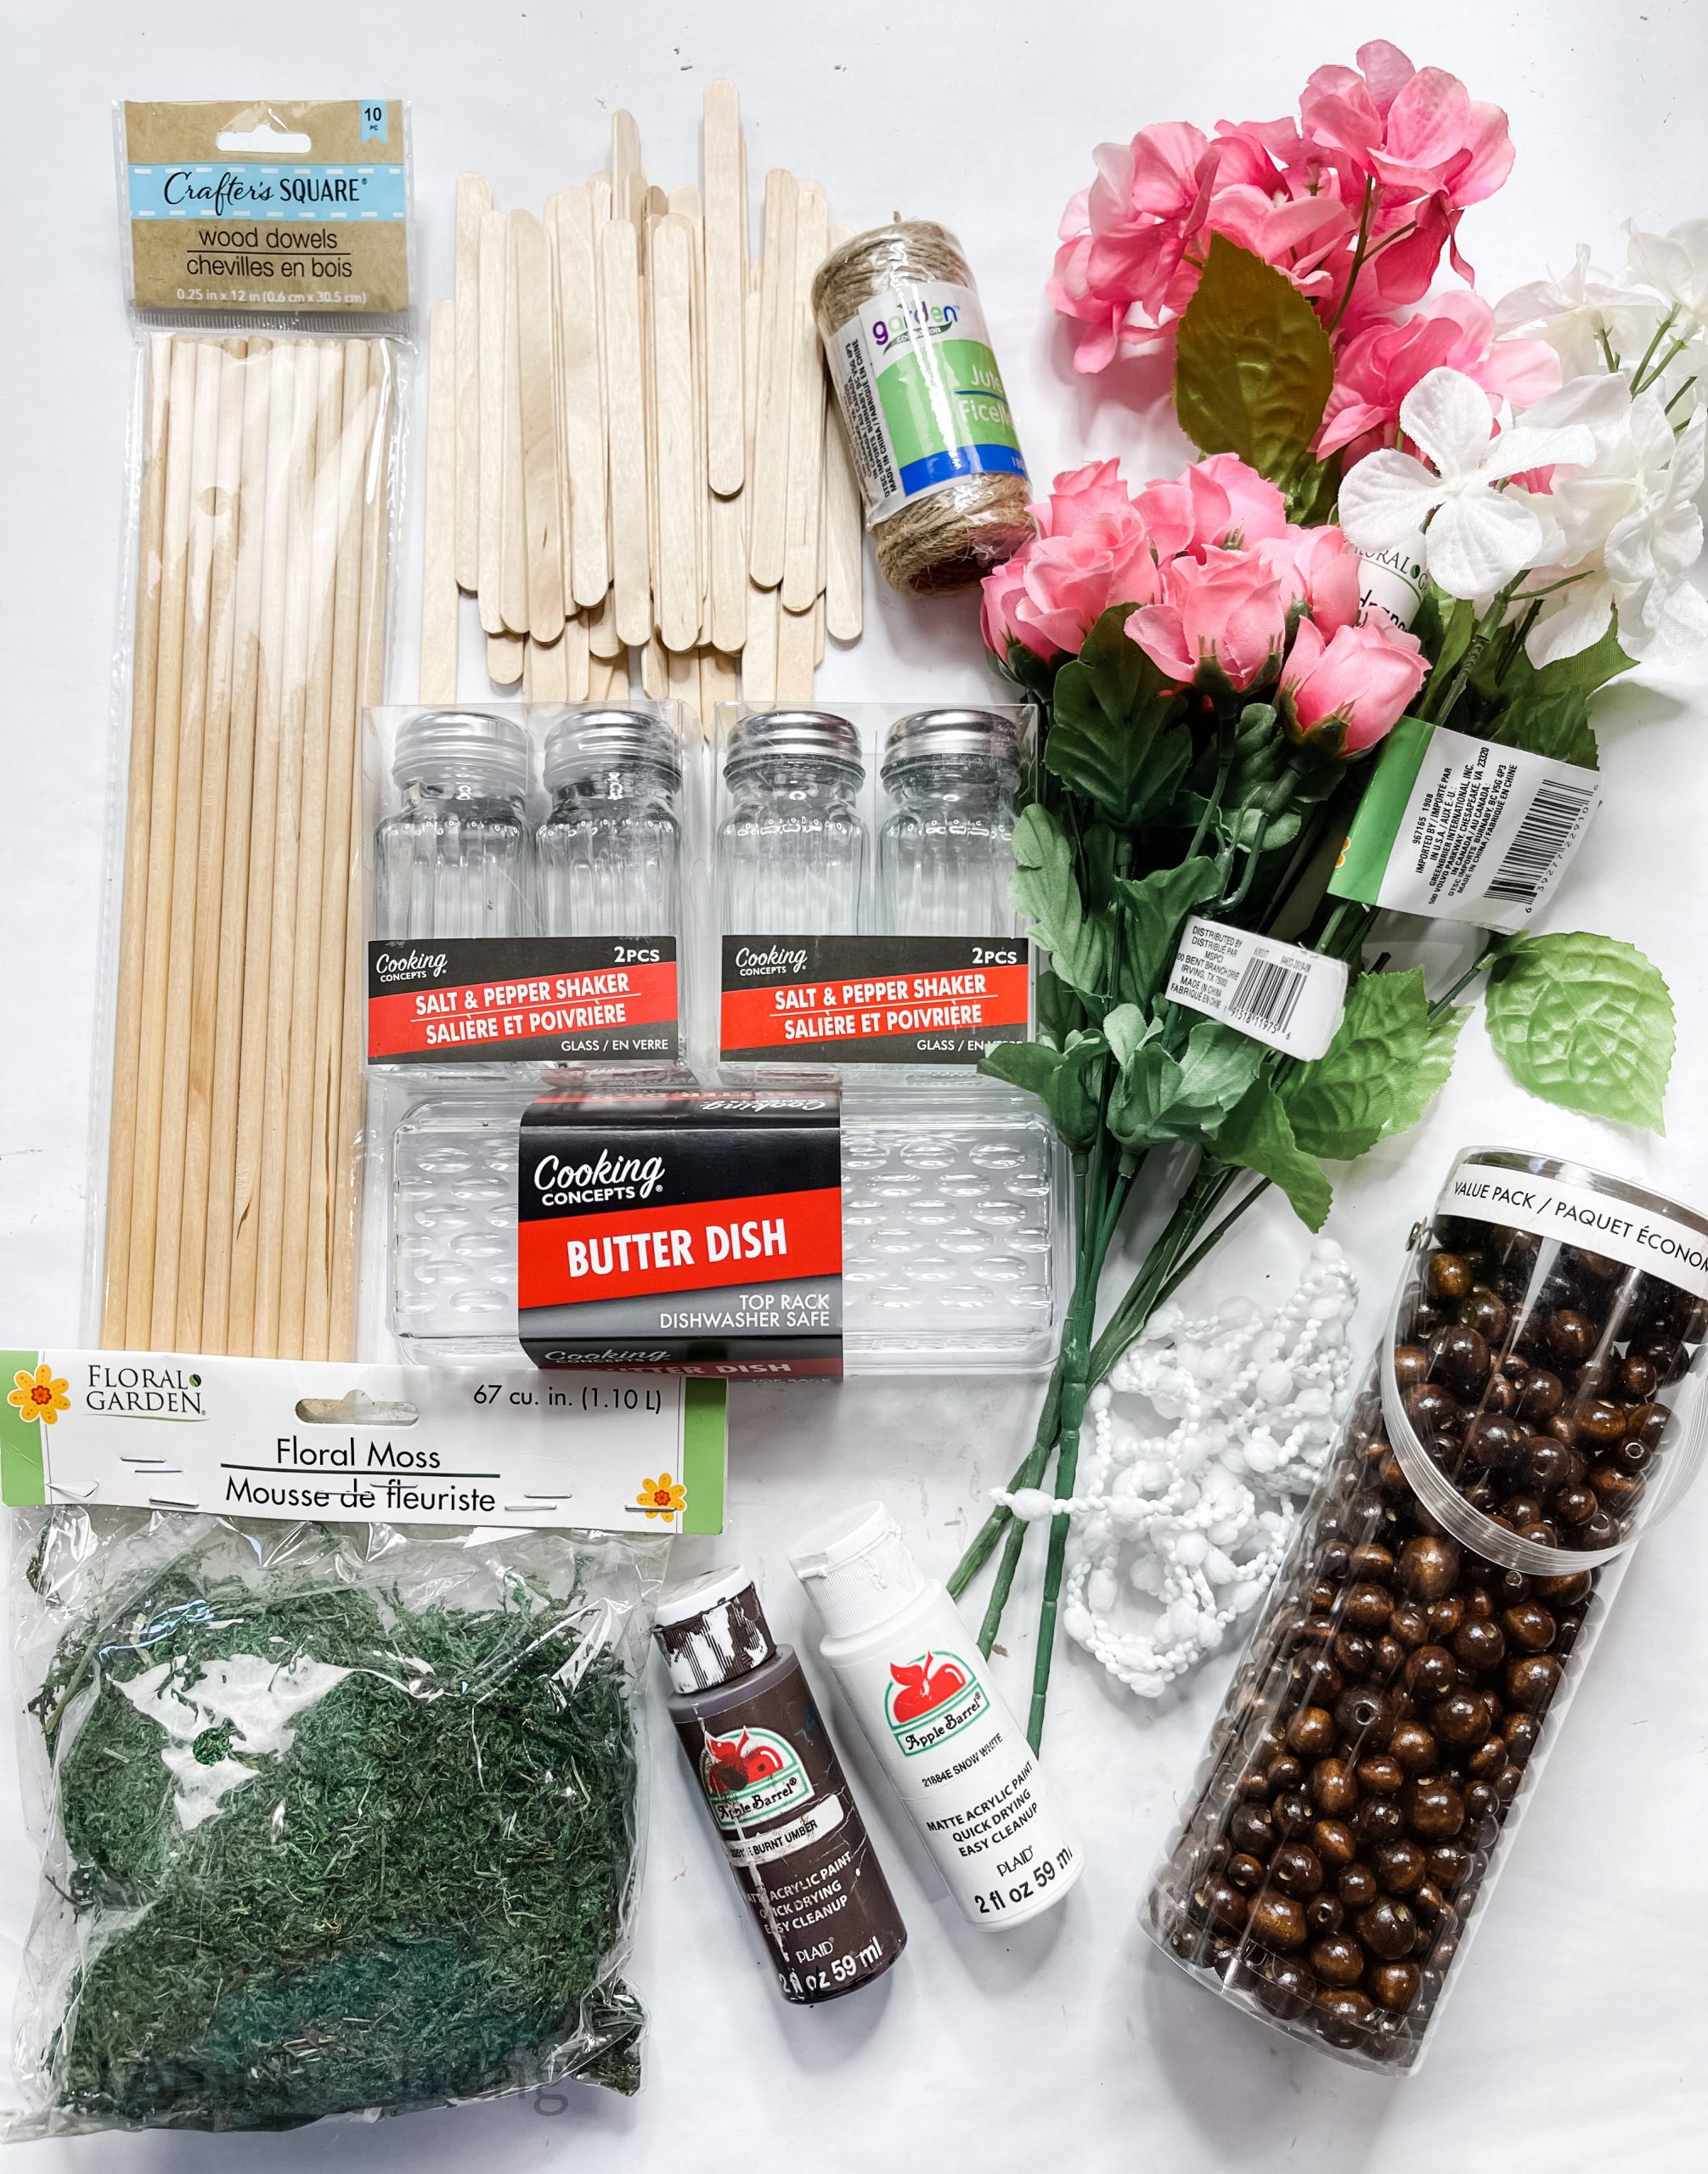
For this project, I will be using these items but you can substitute where you want.
“As an Amazon Associate, I earn from qualifying purchases.”
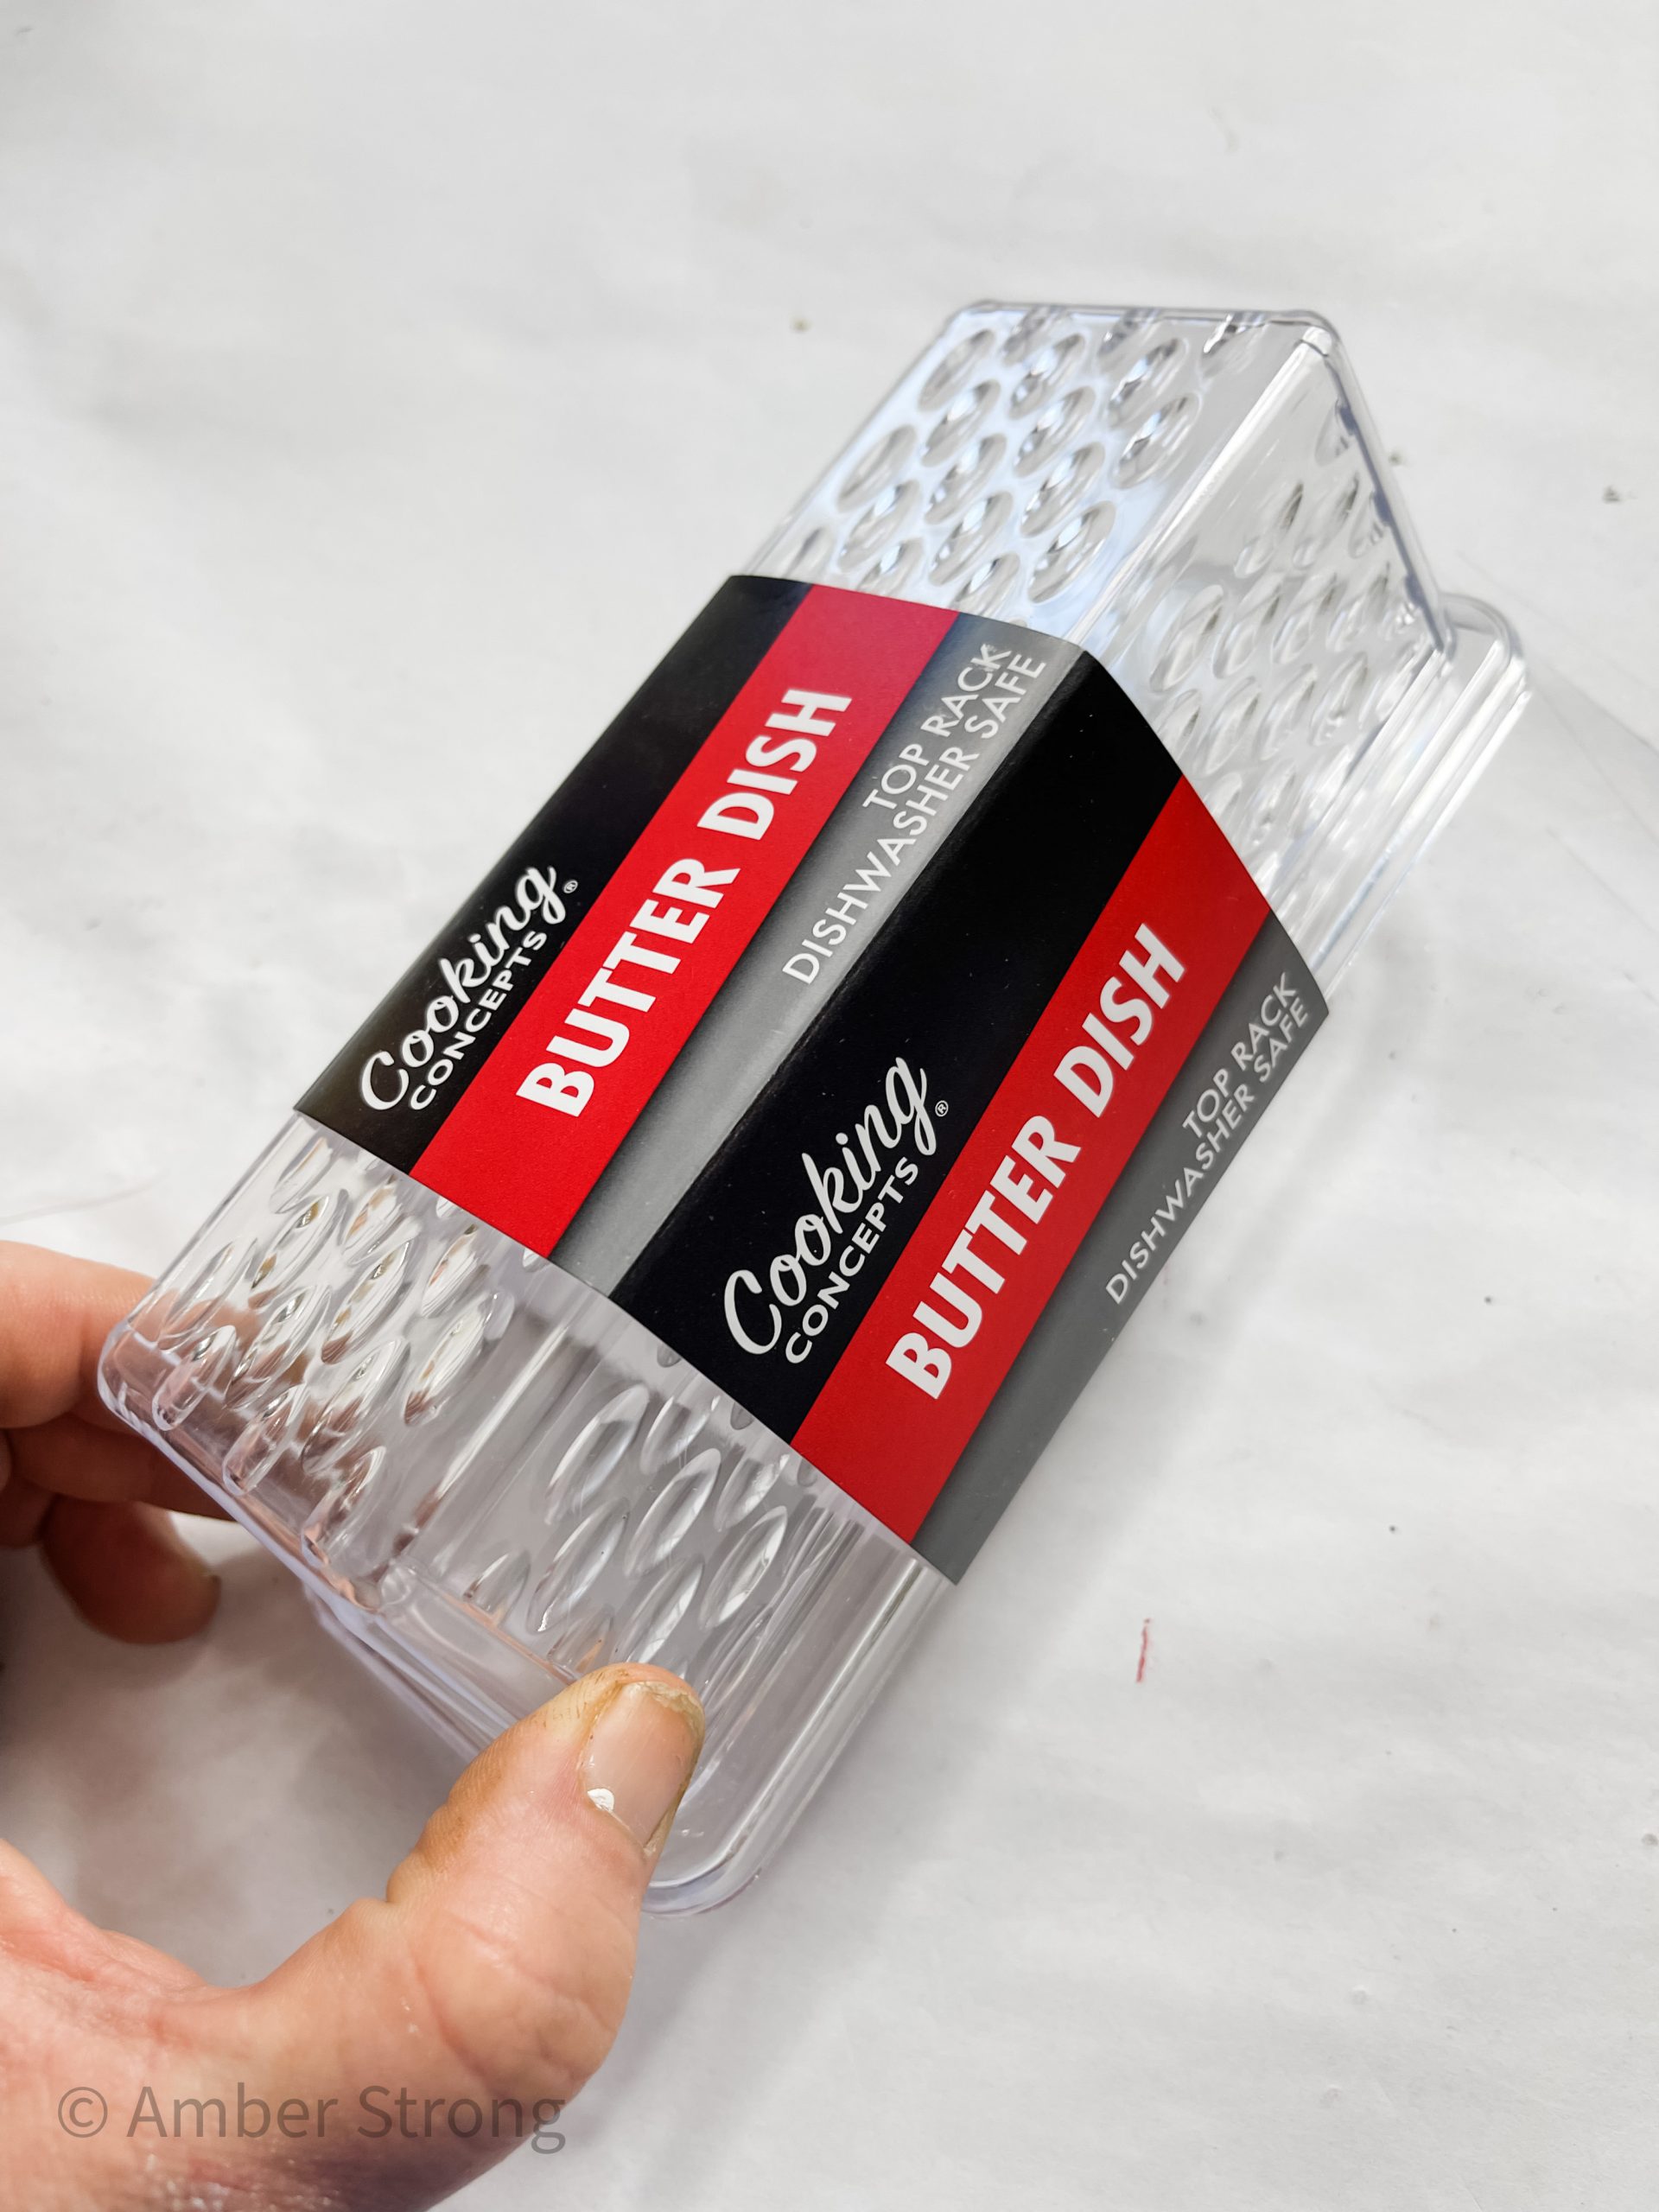
- Dollar Tree Butter Dish
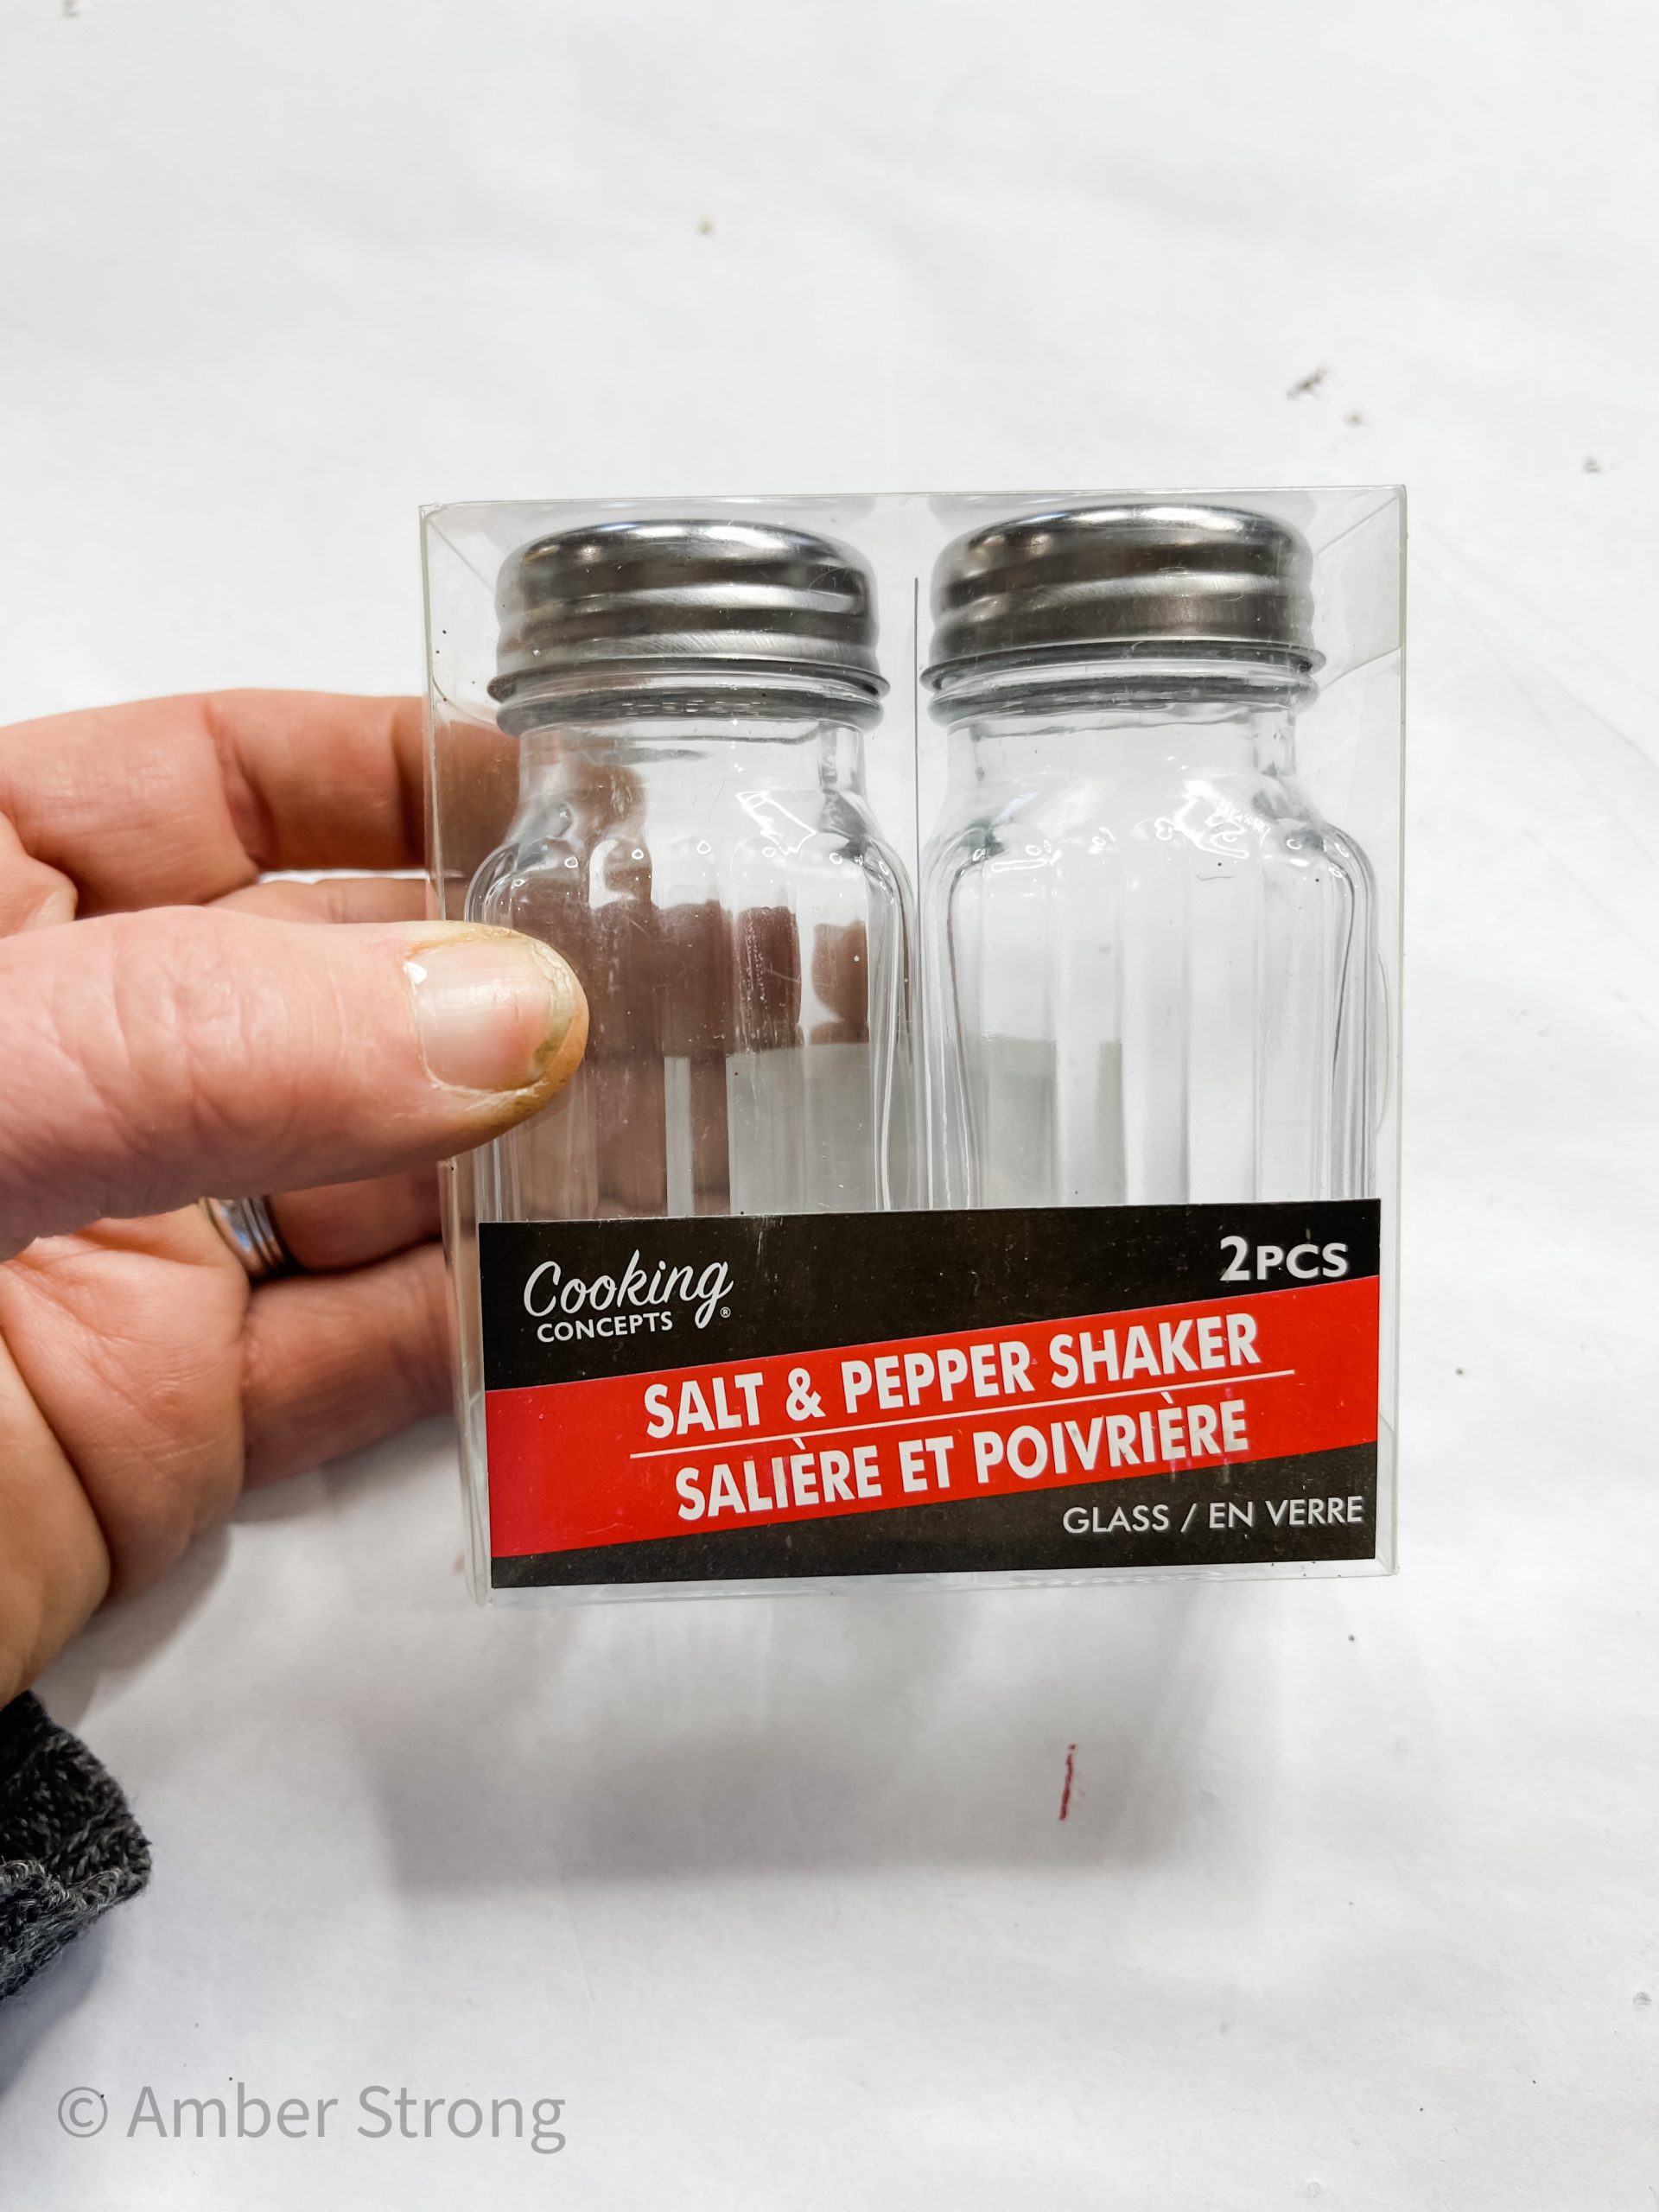
- Dollar Tree Salt and Pepper Shakers (x4)
- Beads (Michael’s)
- Dollar Tree Wood Dowels
- Dollar Tree Floral Moss
- Wired Pom Pom Cord
- Dollar Tree Flowers
- Dollar Tree Jute Twine
- Apple Barrel Black Acrylic Paint
- Popsicle Sticks
- Apple Barrel White Acrylic Paint
- Apple Barrel Burnt Umber Acrylic Paint
- Hot Glue gun
- Glue Sticks
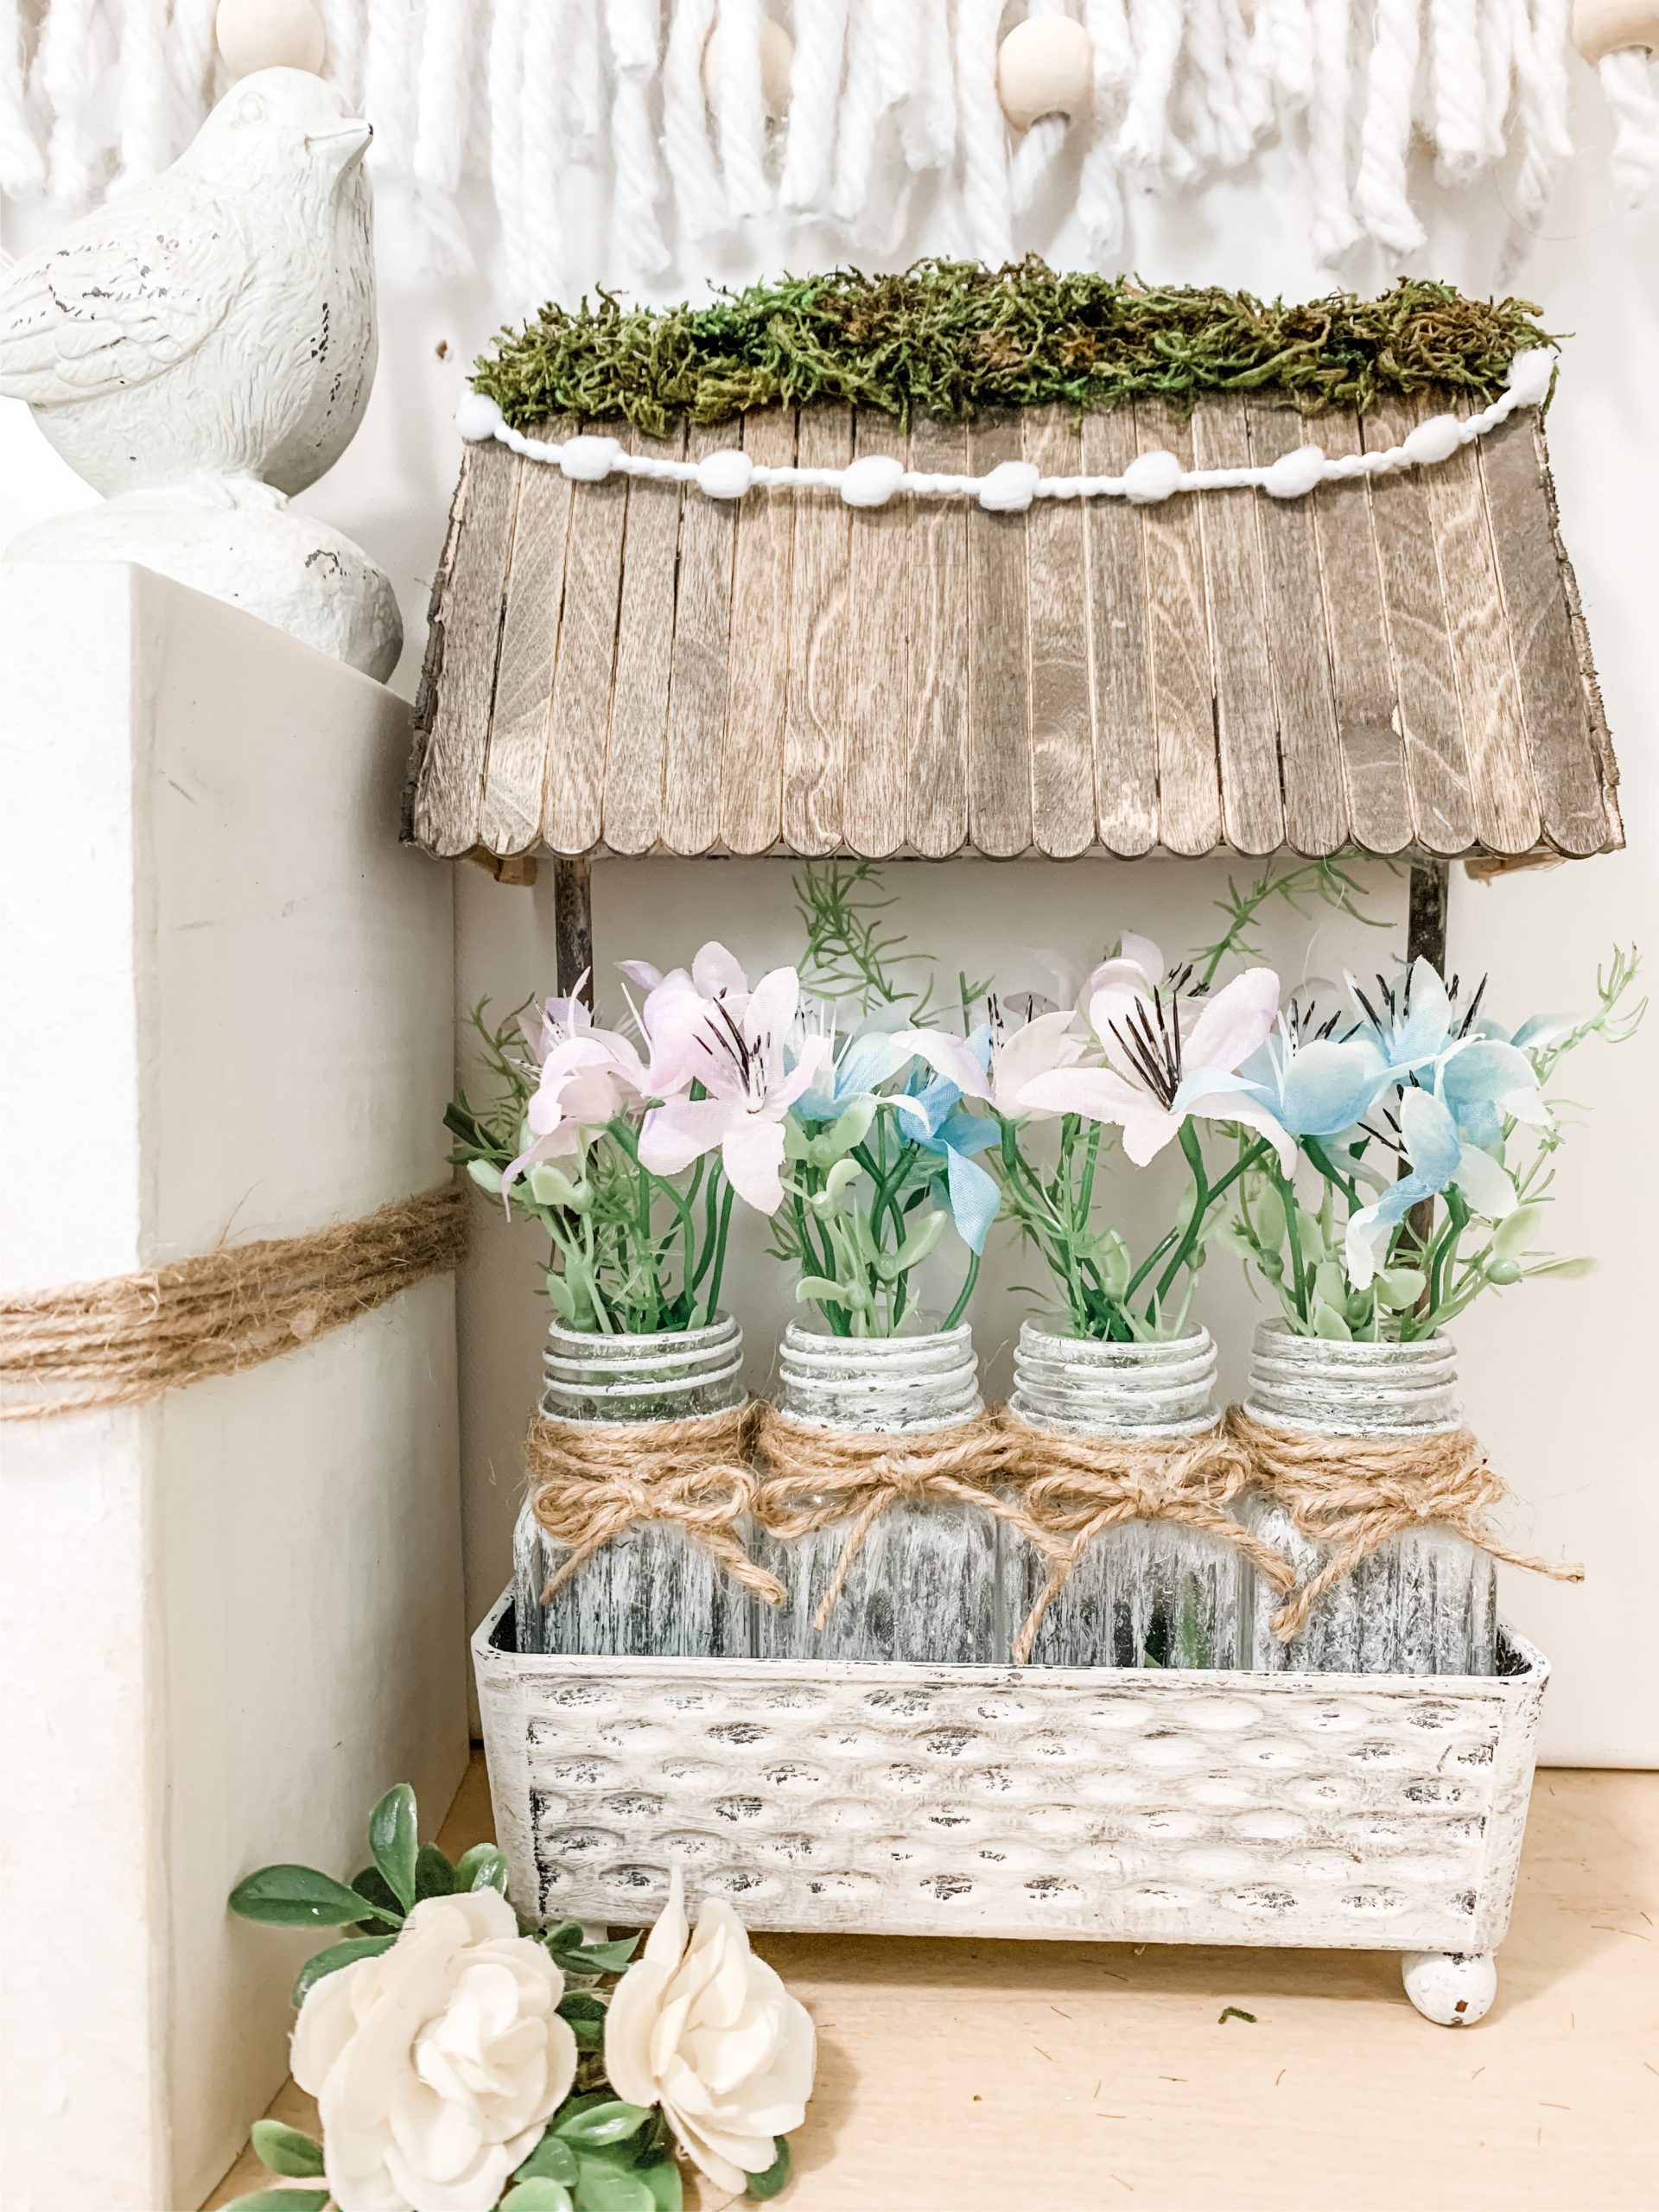
How to Make a DIY Butter Dish Decorative Planter
I started this project by gluing four beads onto the very top of the Dollar Tree plastic butter dish. You’ll end up flipping this over later, and the beads will become the feet of your planter.
Once the glue is dry and the beads are secured onto the butter dish cover, paint the beads and butter dish cover with black paint.

Allow that paint to dry completely. I used my heat gun to speed up the drying process. If you don’t have one, you can use a hairdryer on the low-cool setting instead.

Paint the bottom of the butter dish black as well. Then, layout popsicle sticks side by side until they are the same width as the butter dish base.
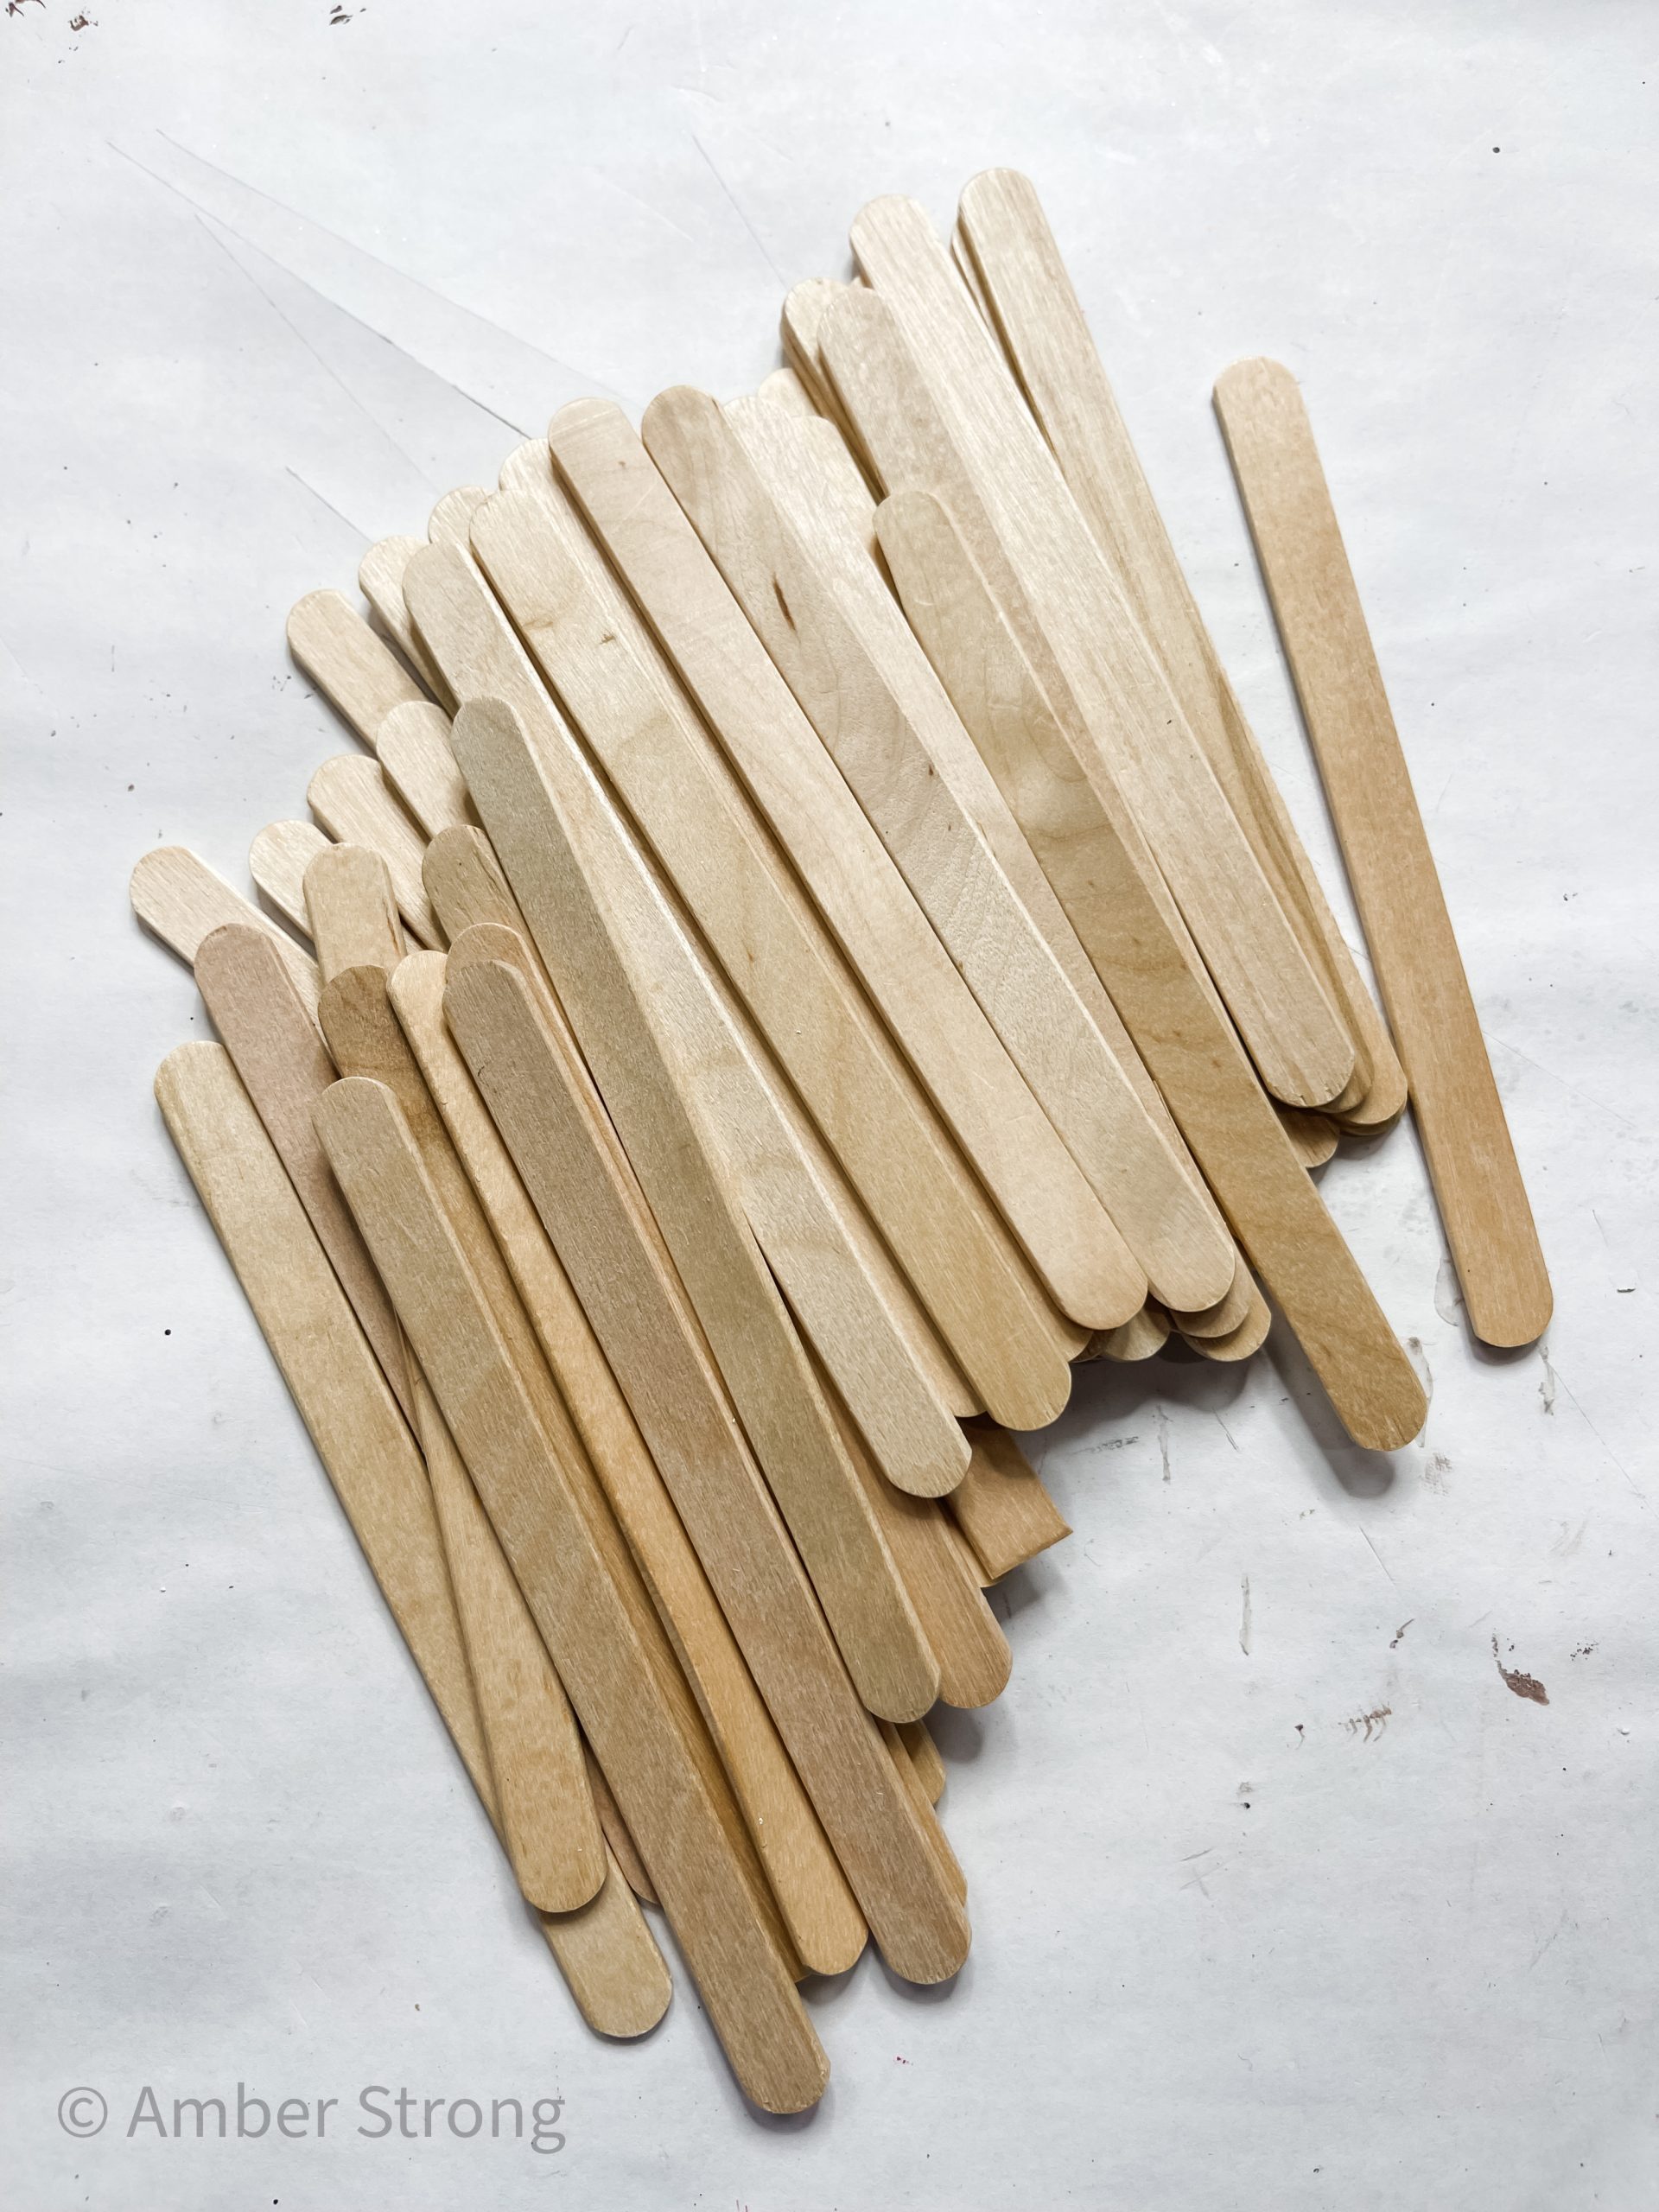
Glue popsicle sticks perpendicularly across the sticks that you laid out next to the butter dish. Next, I drilled a hole on each short end of the butter dish base.
I pushed a wood dowel through each hole and hot glued them in place. You want the wood dowels to stick up about two-three inches above the butter dish base.

Then, I trimmed a wood dowel to be the same length as the distance between the two glued wood dowels and glued it flat across the butter dish base to secure the two standing dowels.
Next, I painted the butter dish cover with beads and the butter dish base with white paint. Keep a light hand so the black paint can slightly show through the white coat.
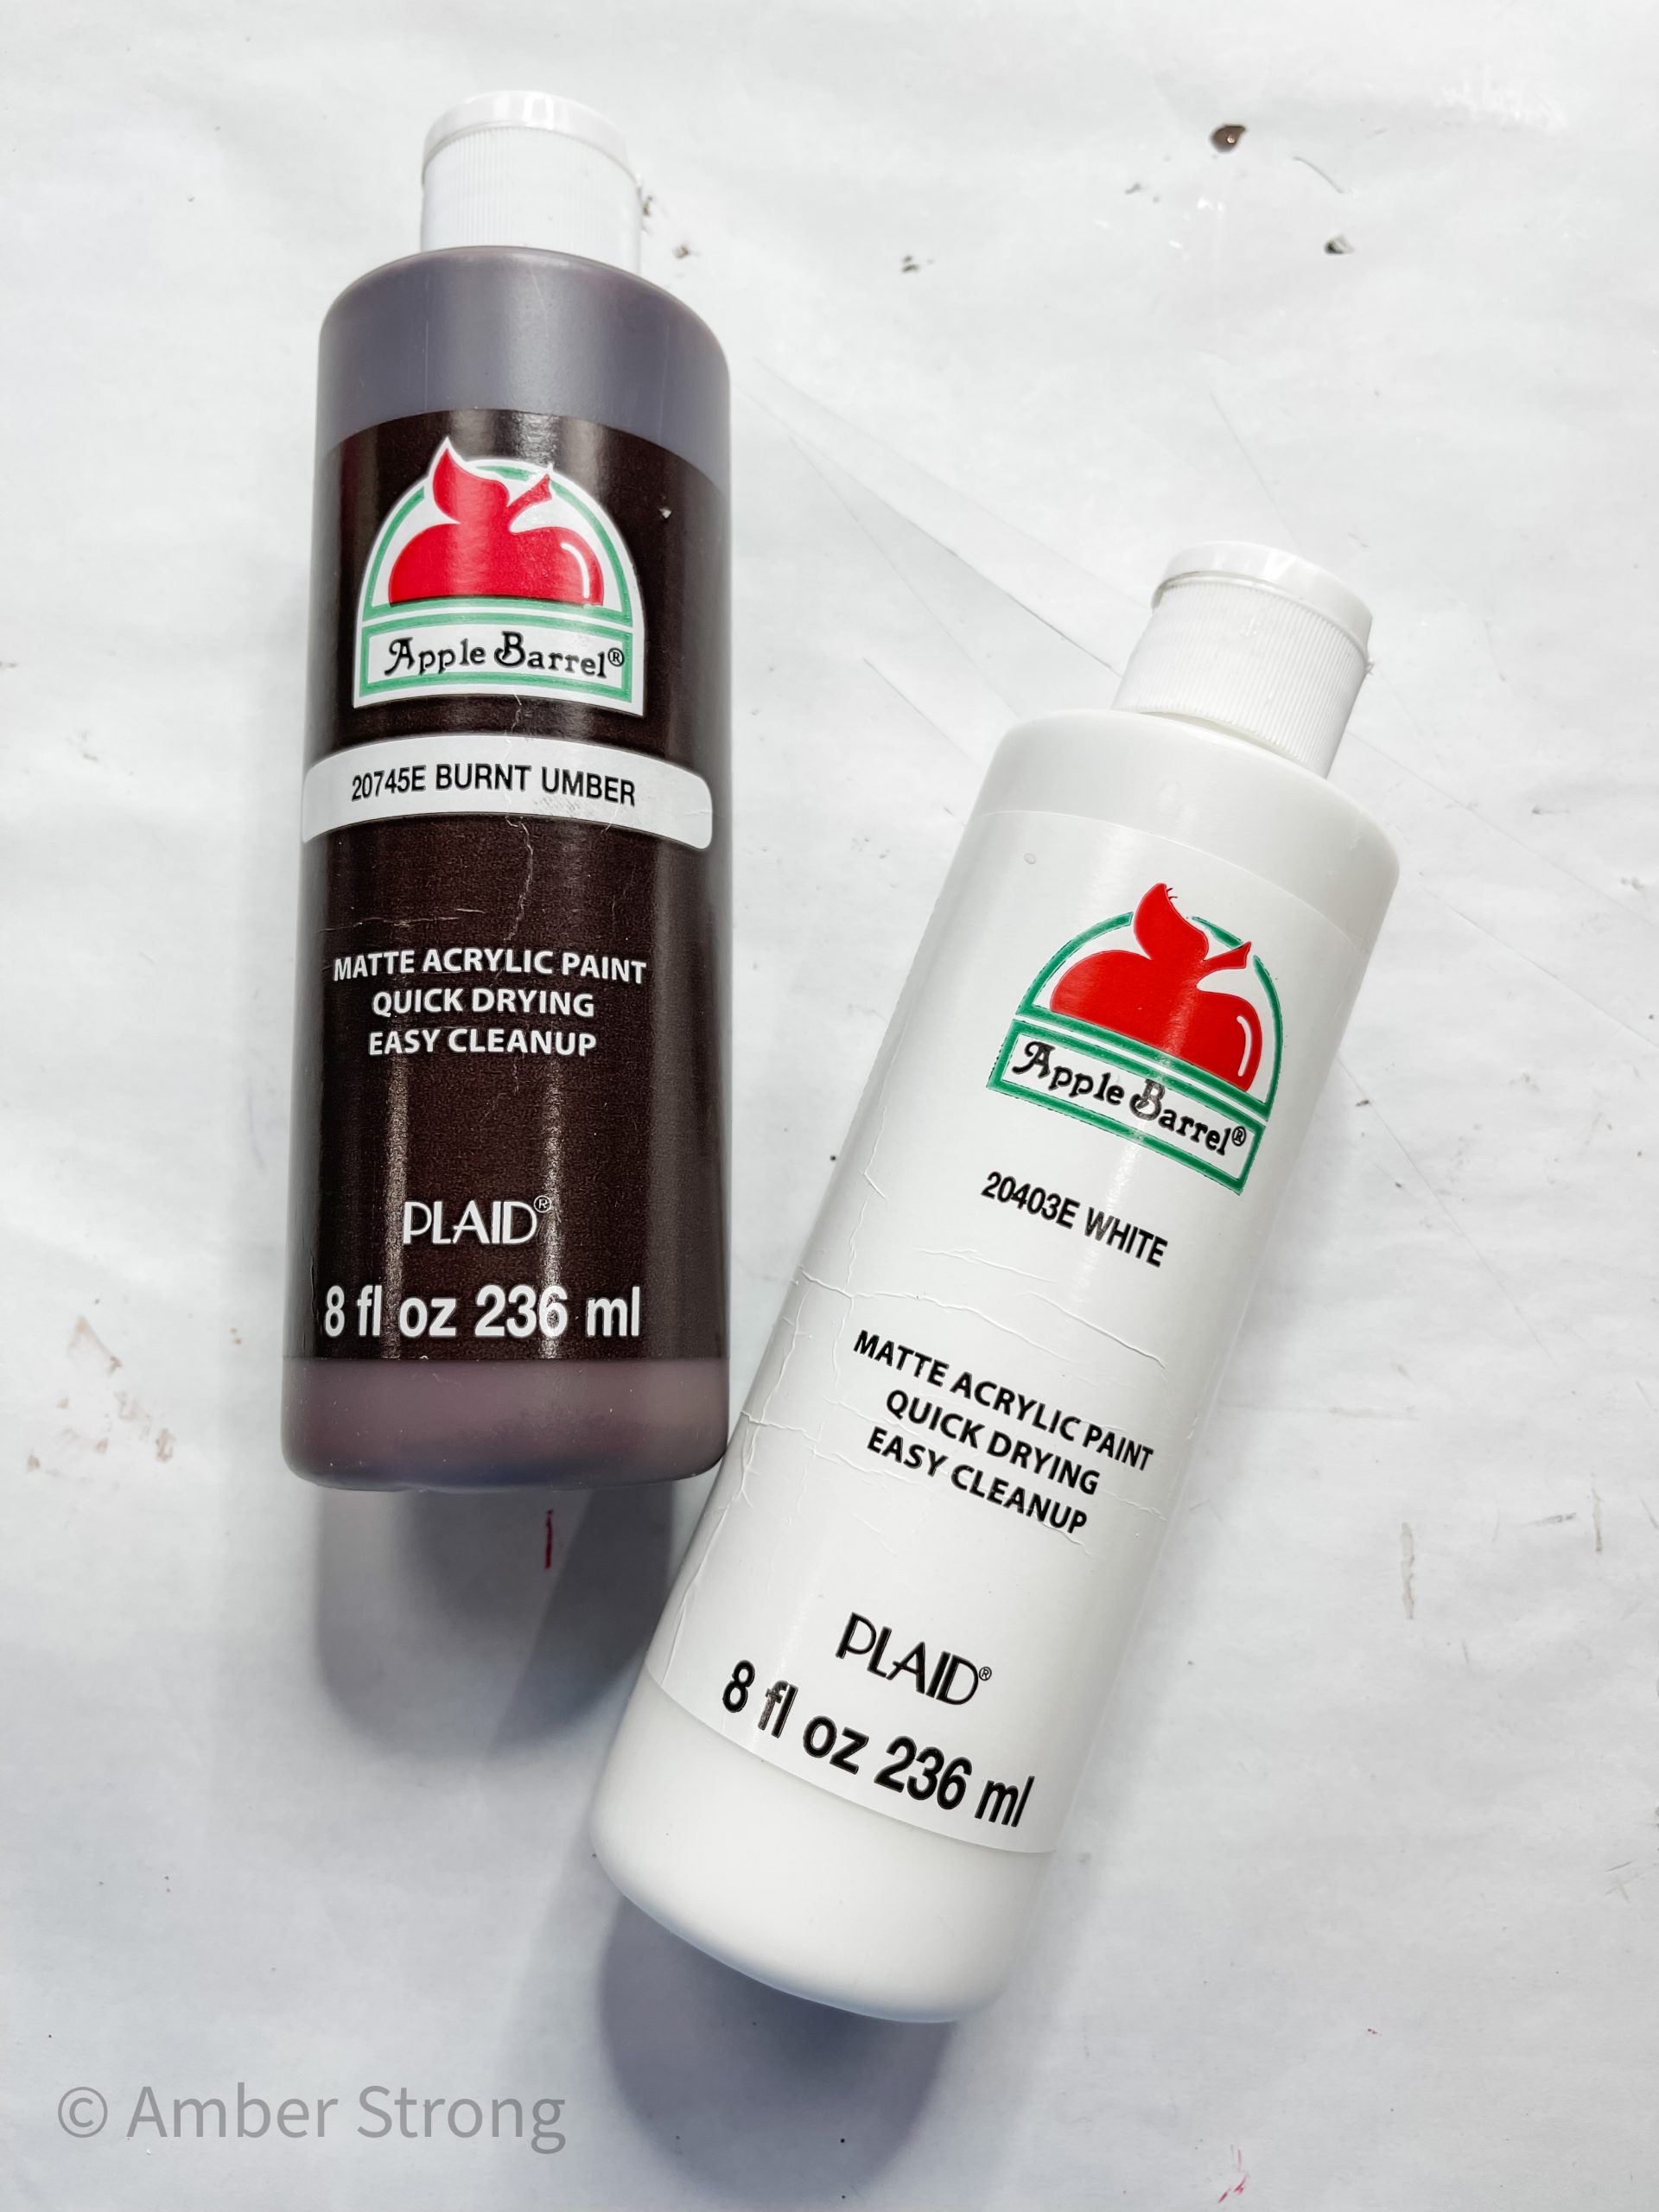
Let the white paint dry completely. Then, stain all the wood pieces with brown paint by spreading the paint on each wood surface with a wet wipe.
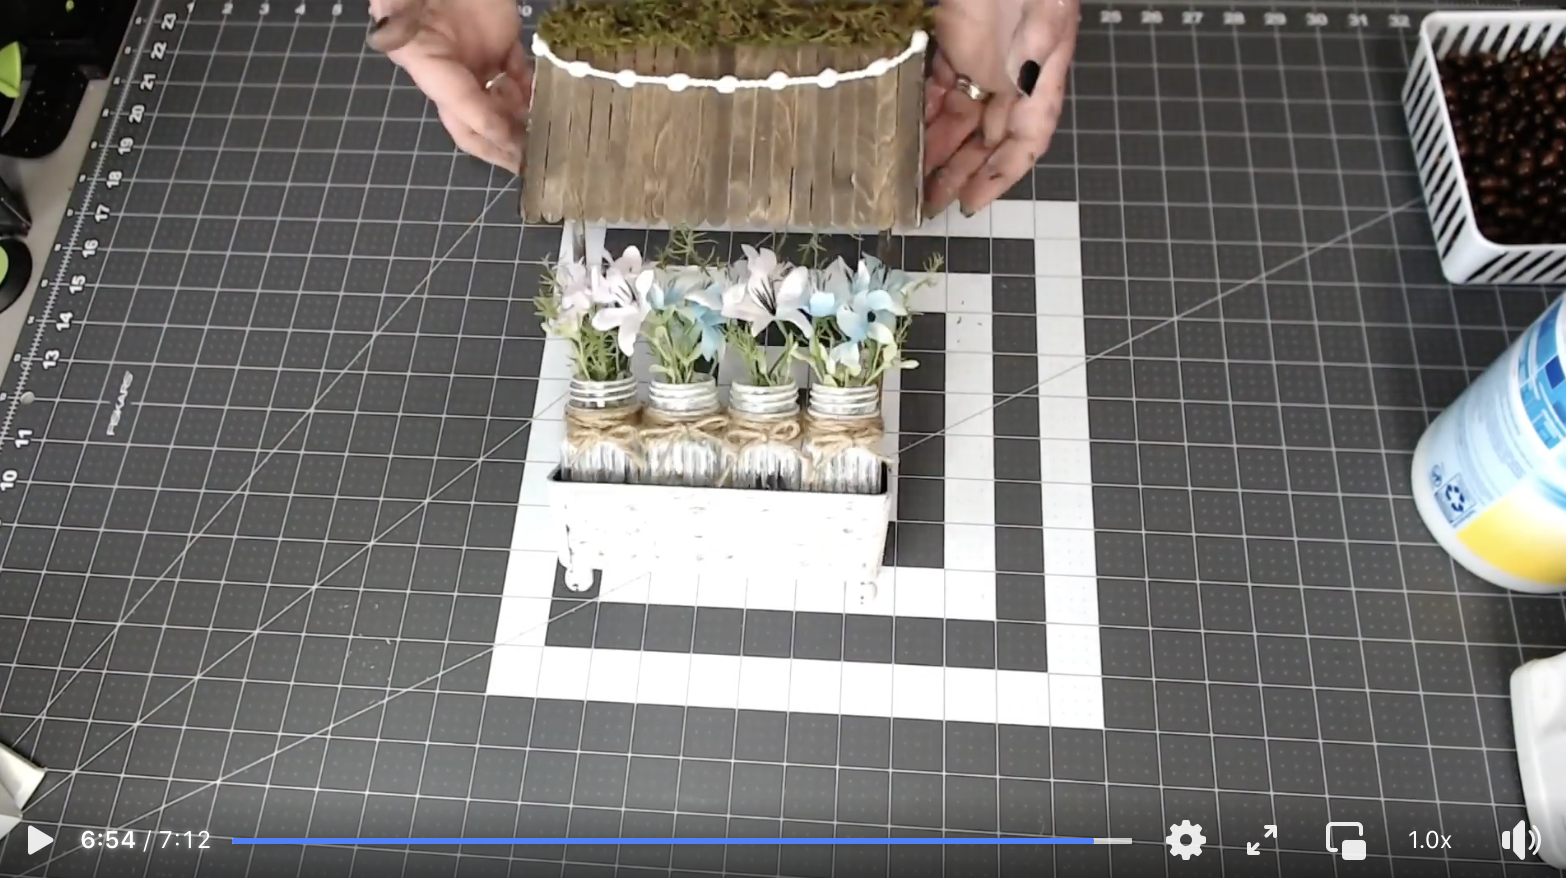
Bring it all together
Remove the lids from the glass salt and pepper shakers and lightly brush white paint onto each of the shakers.
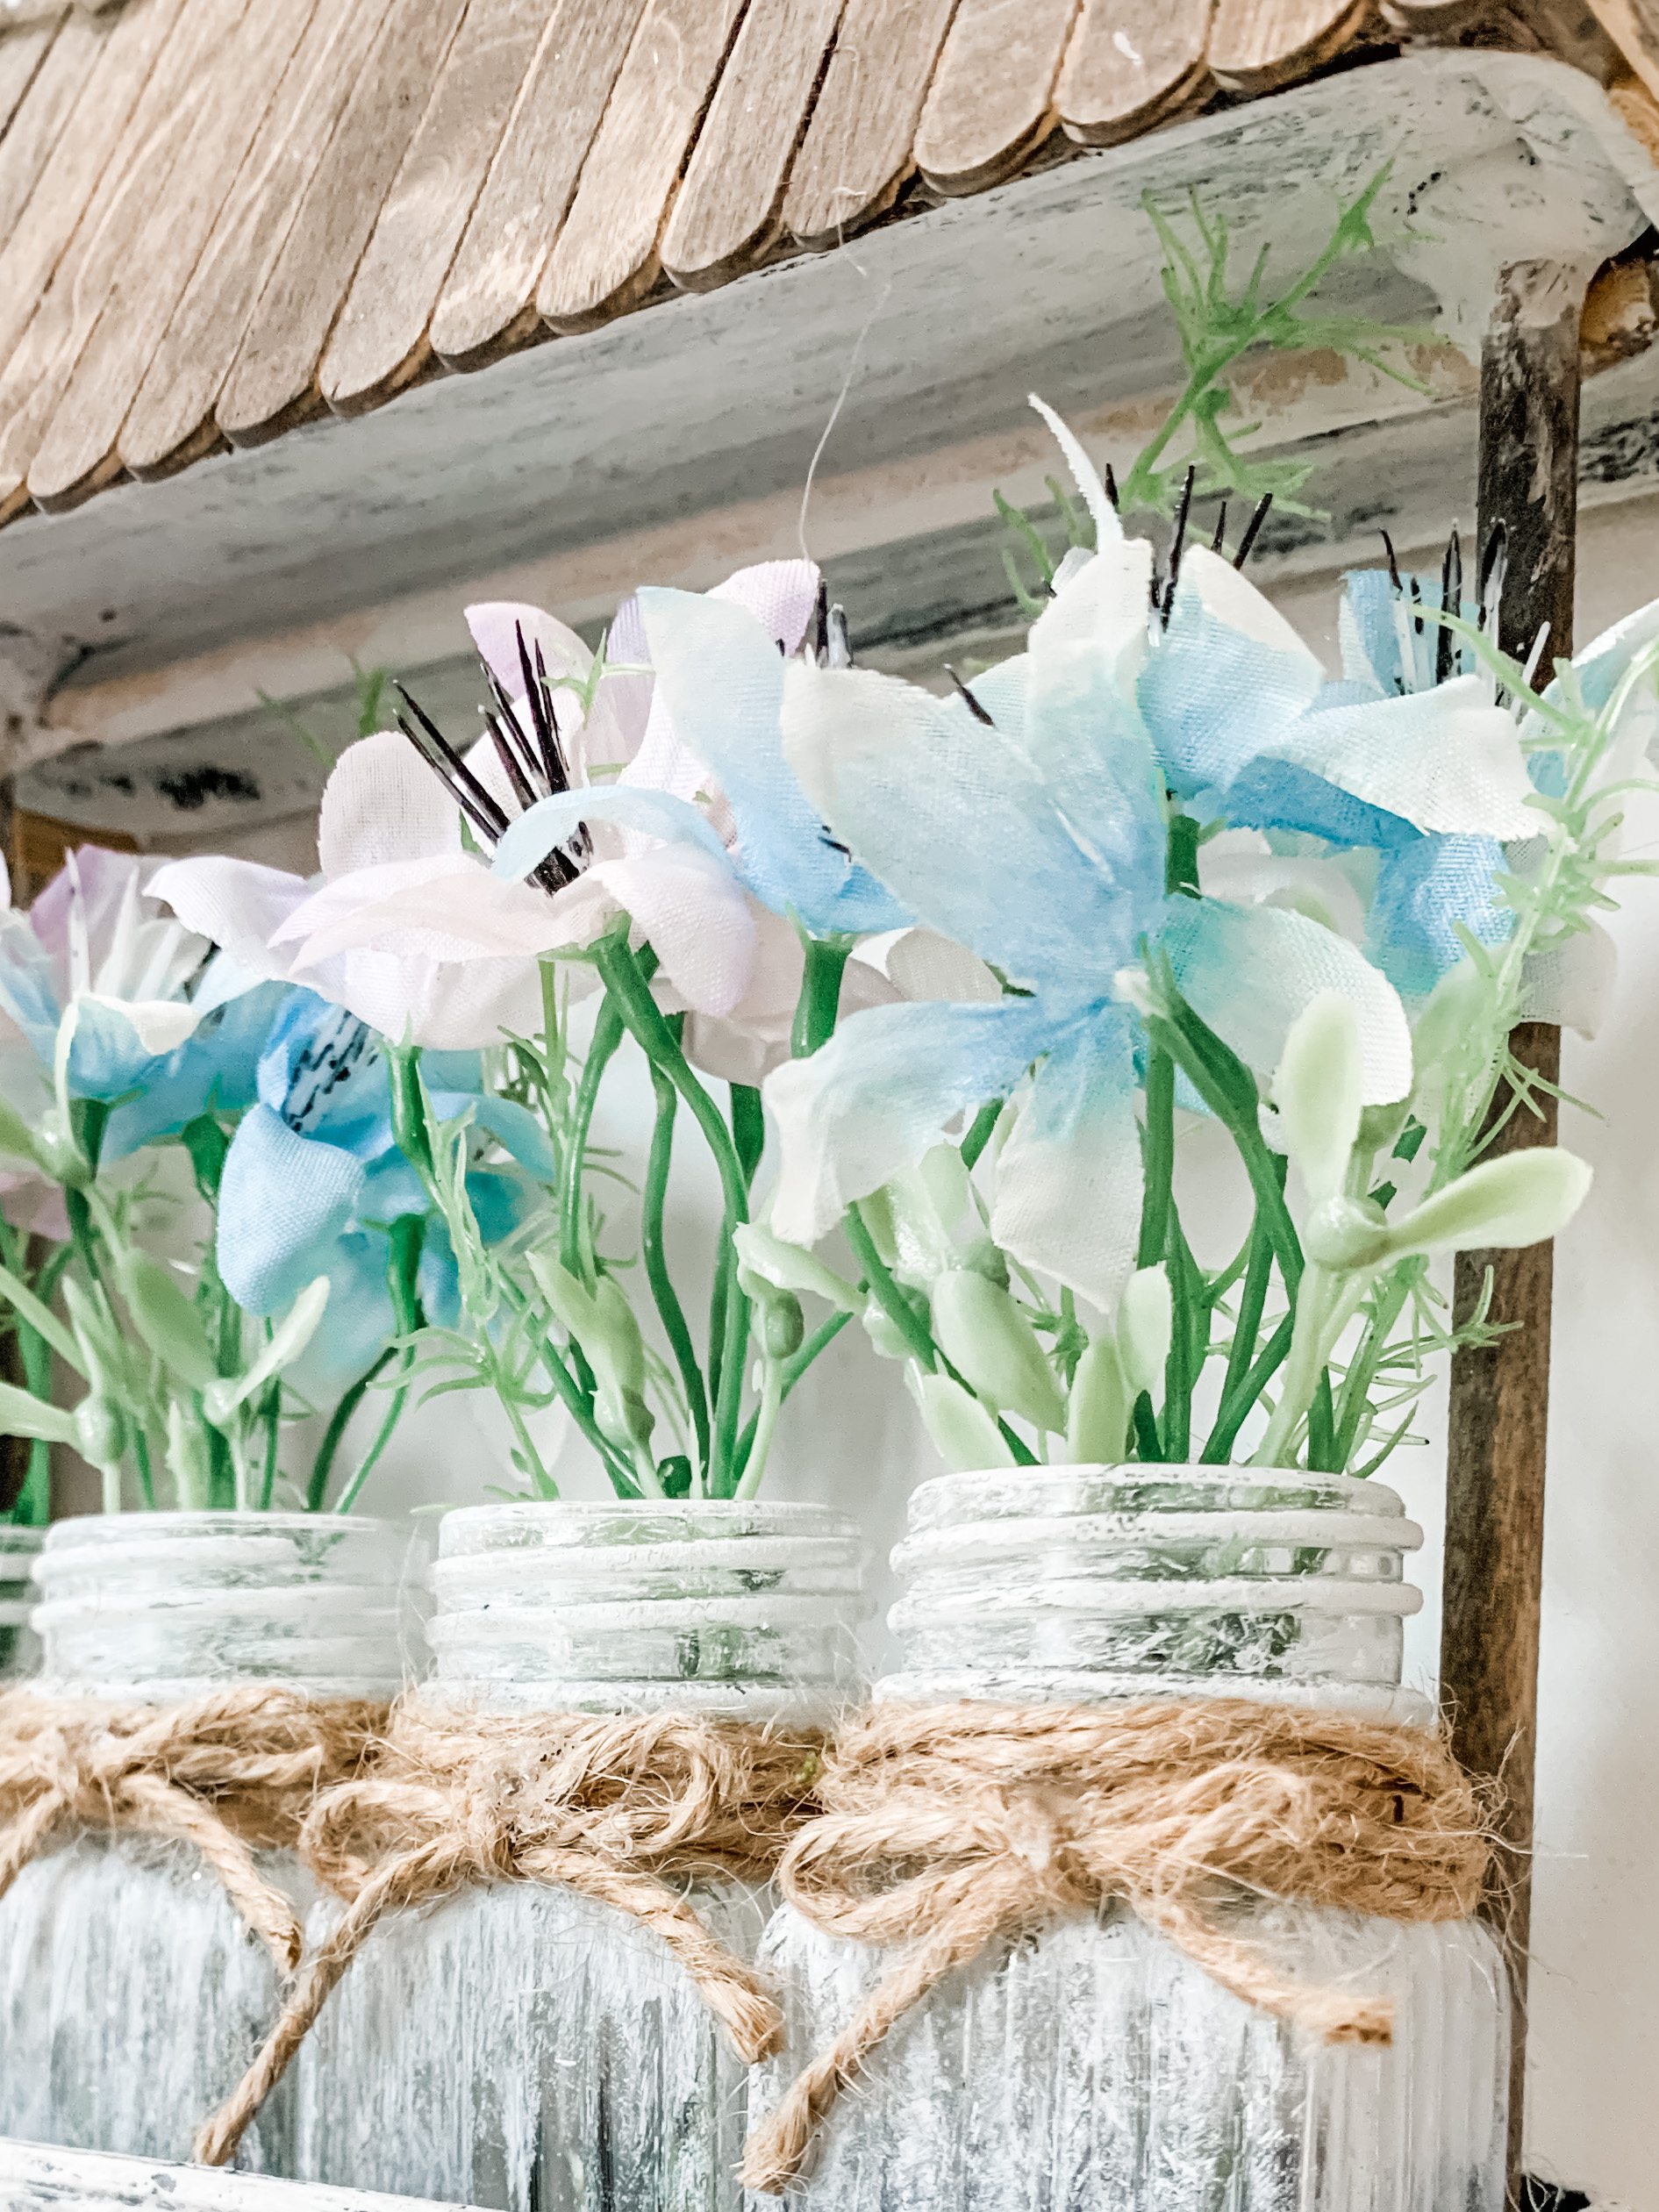
Wrap jute twine around the top of each of the shakers and tie the twine in a little bow on each one. I glued the shakers together, side-by-side, then glued them inside the butter dish cover.
Next up, glue the long side of the wood dowels inside the butter dish cover, behind the salt and pepper shakers.
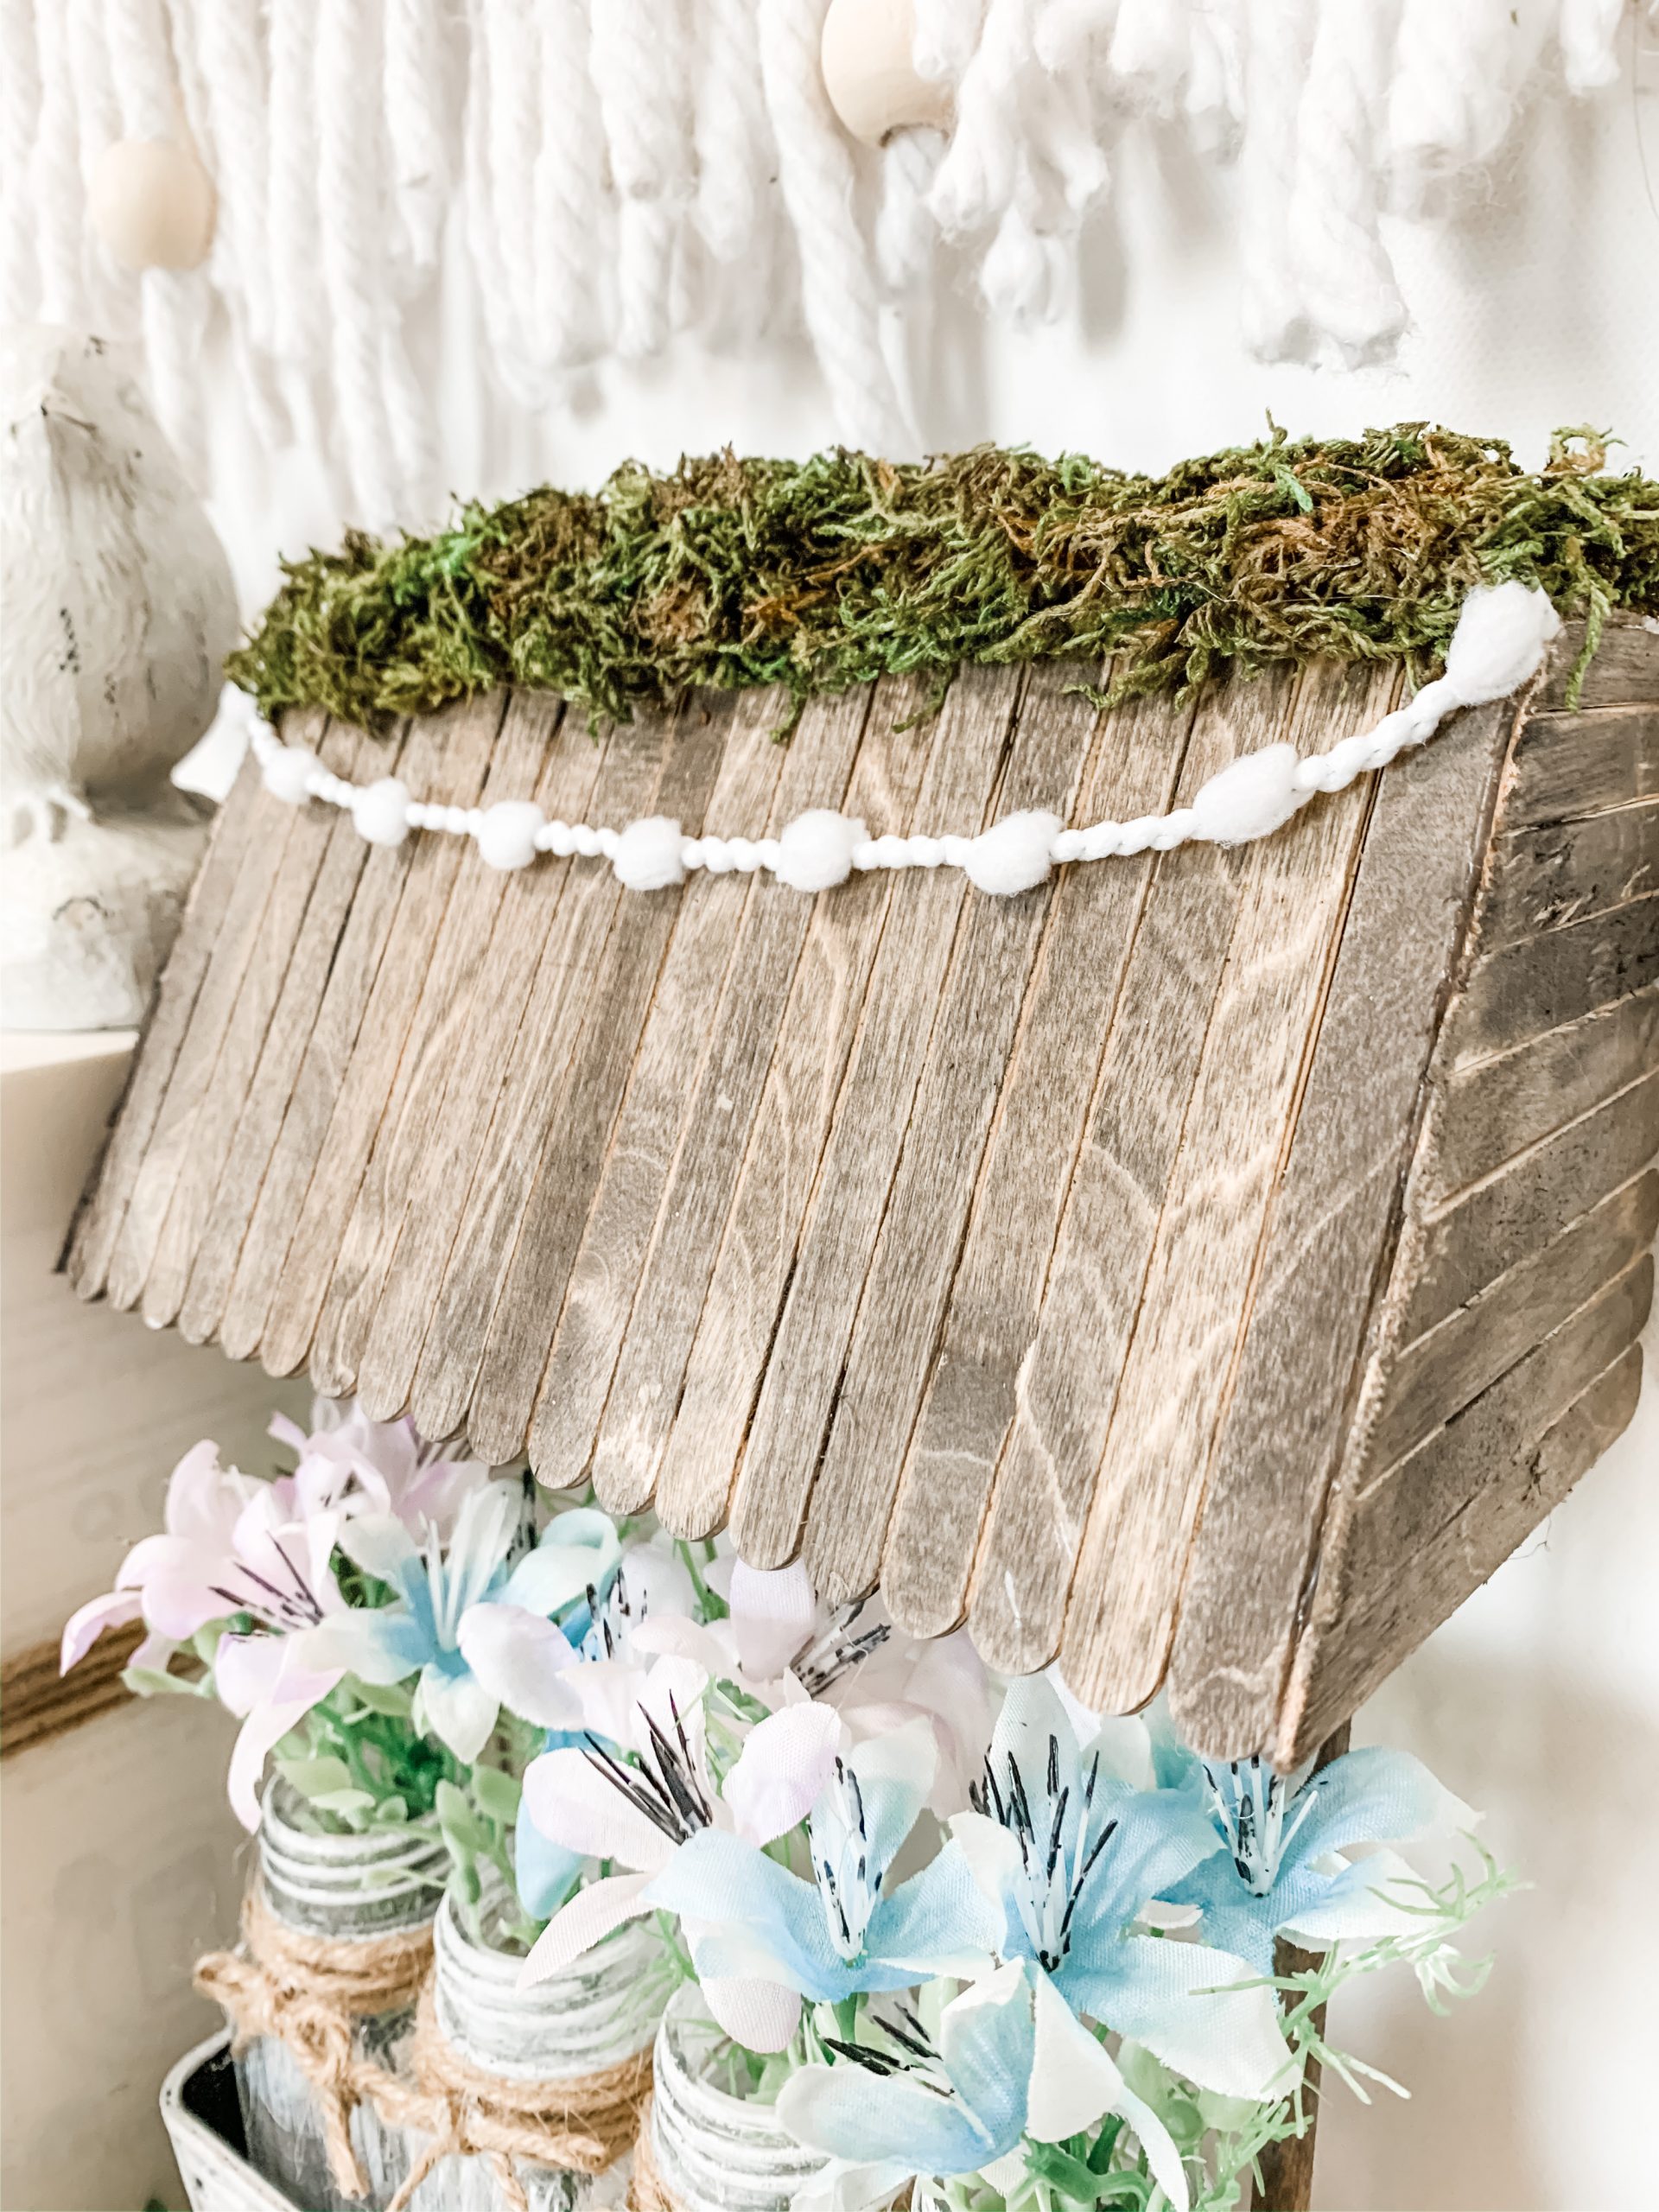
Then, I glued the stained popsicle sticks to the butter dish base to create the little “roof” of the butter dish planter.
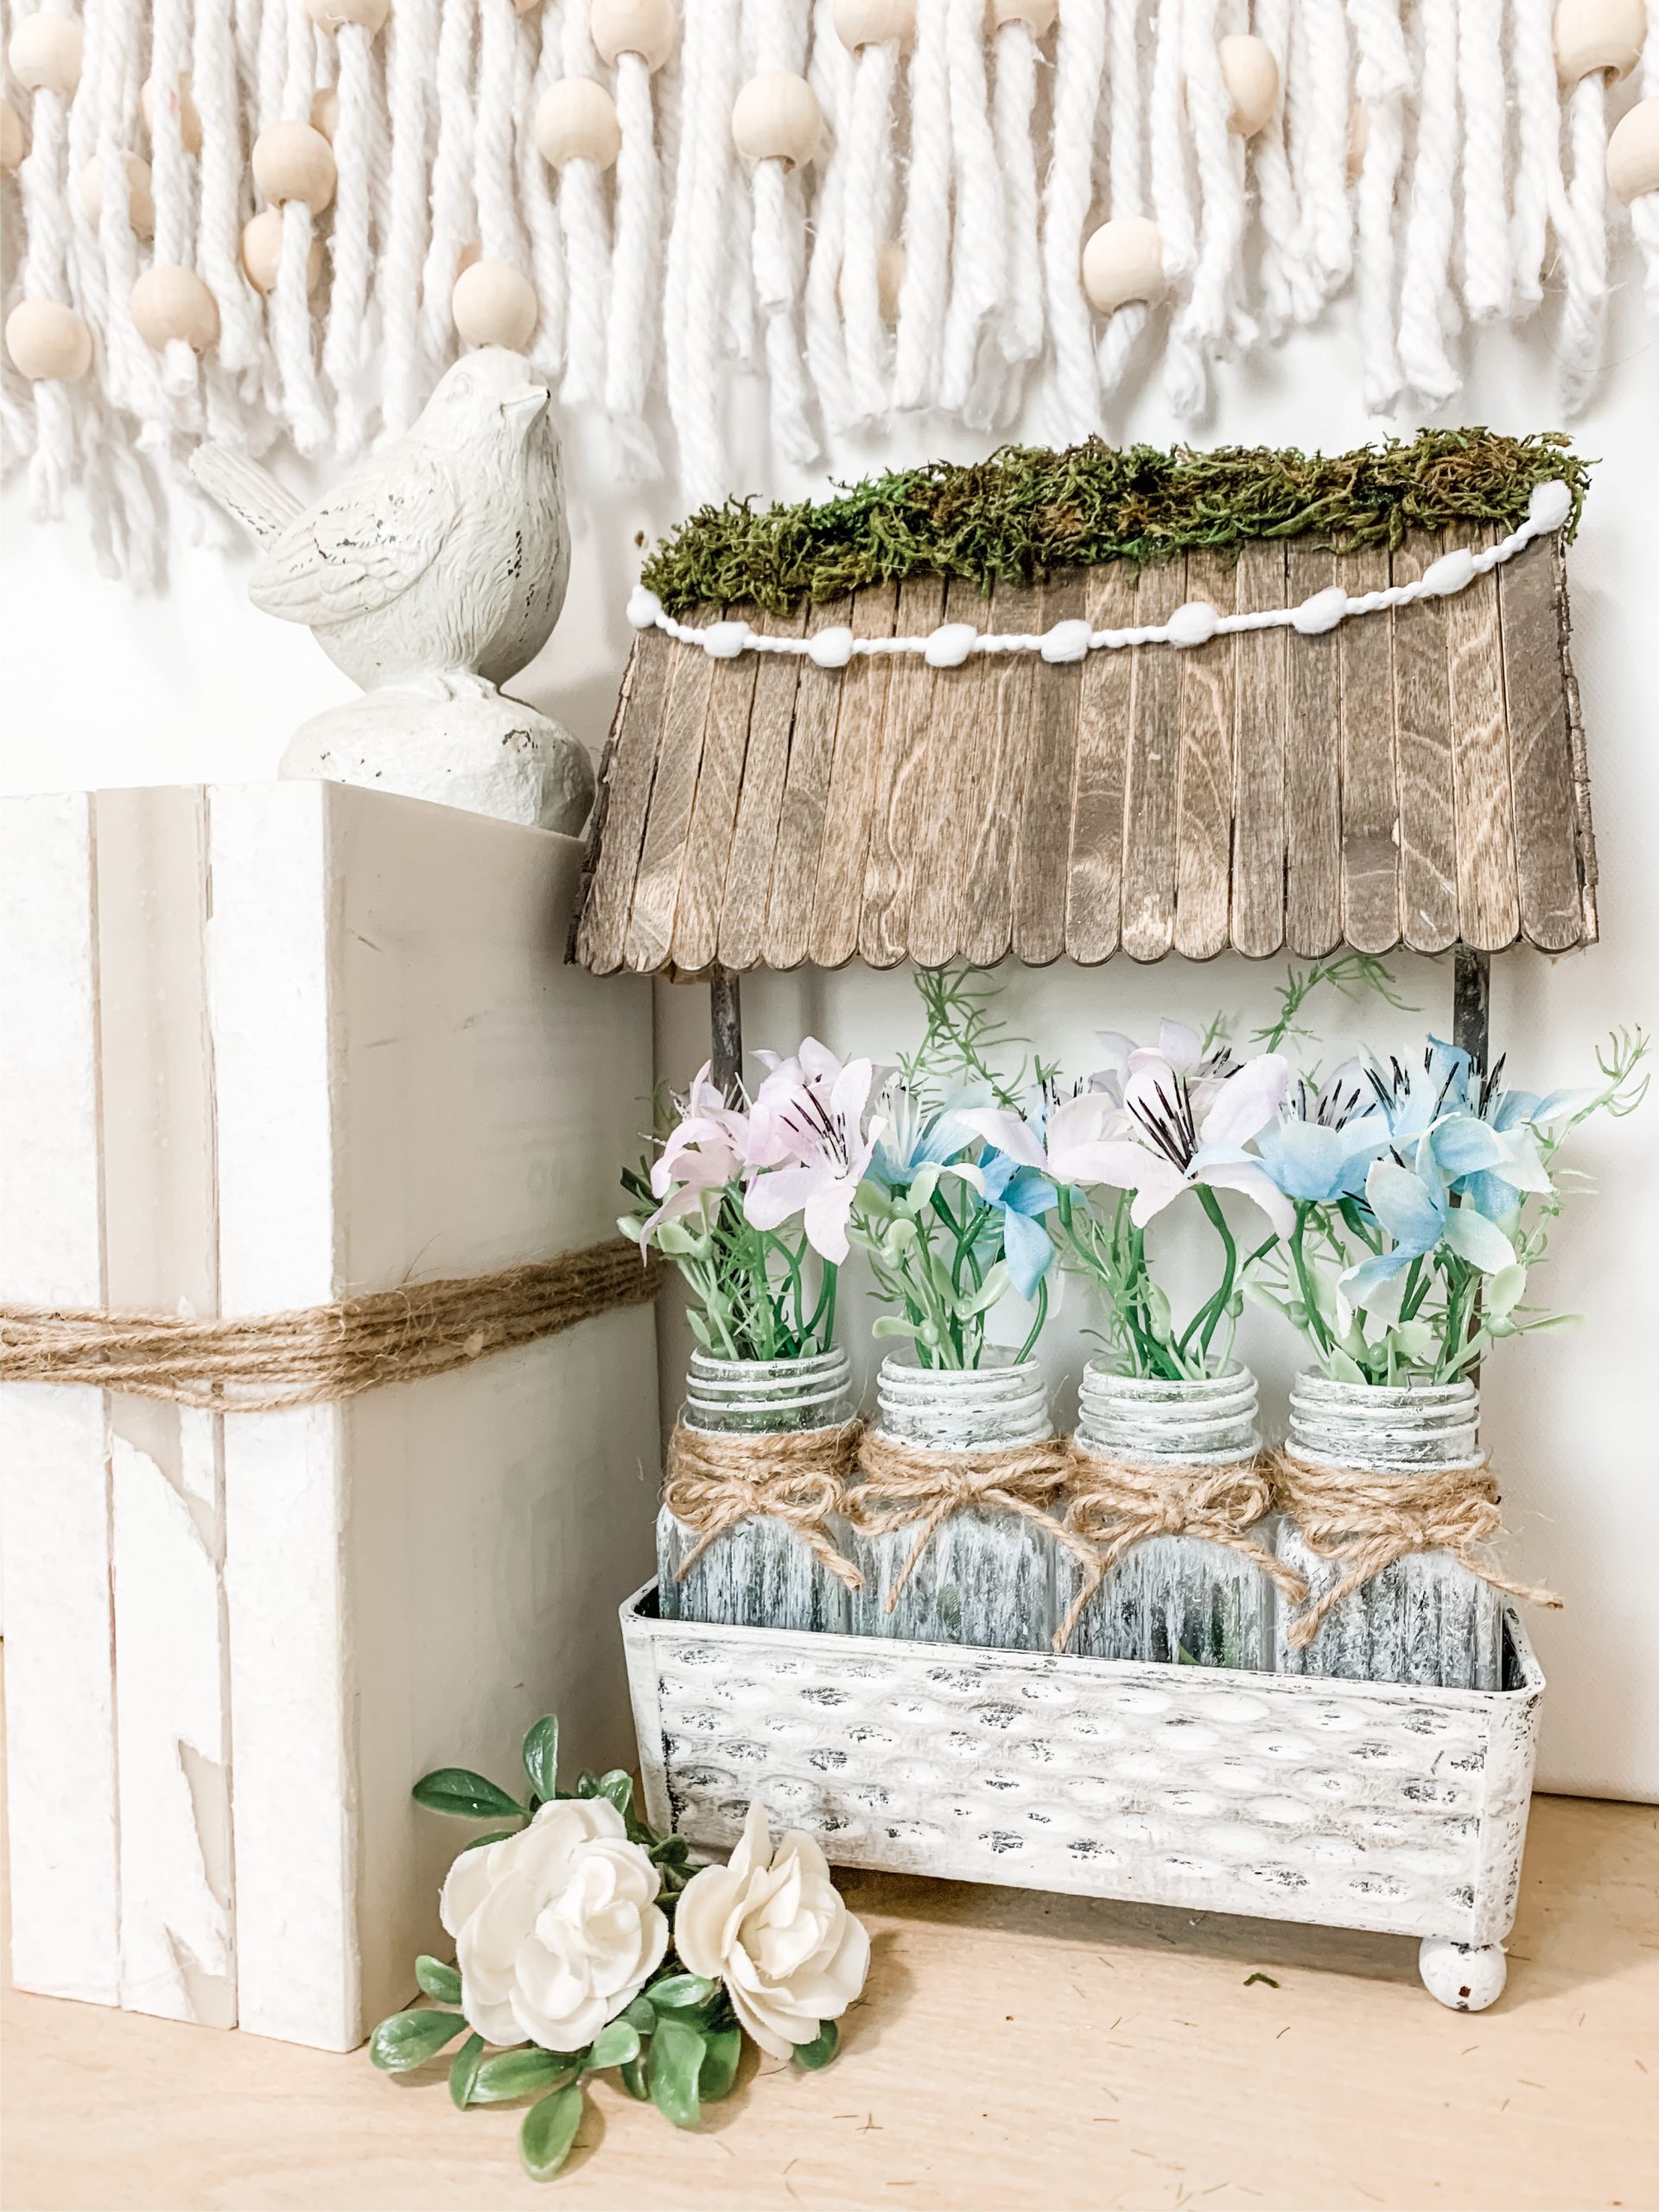
The finishing touches
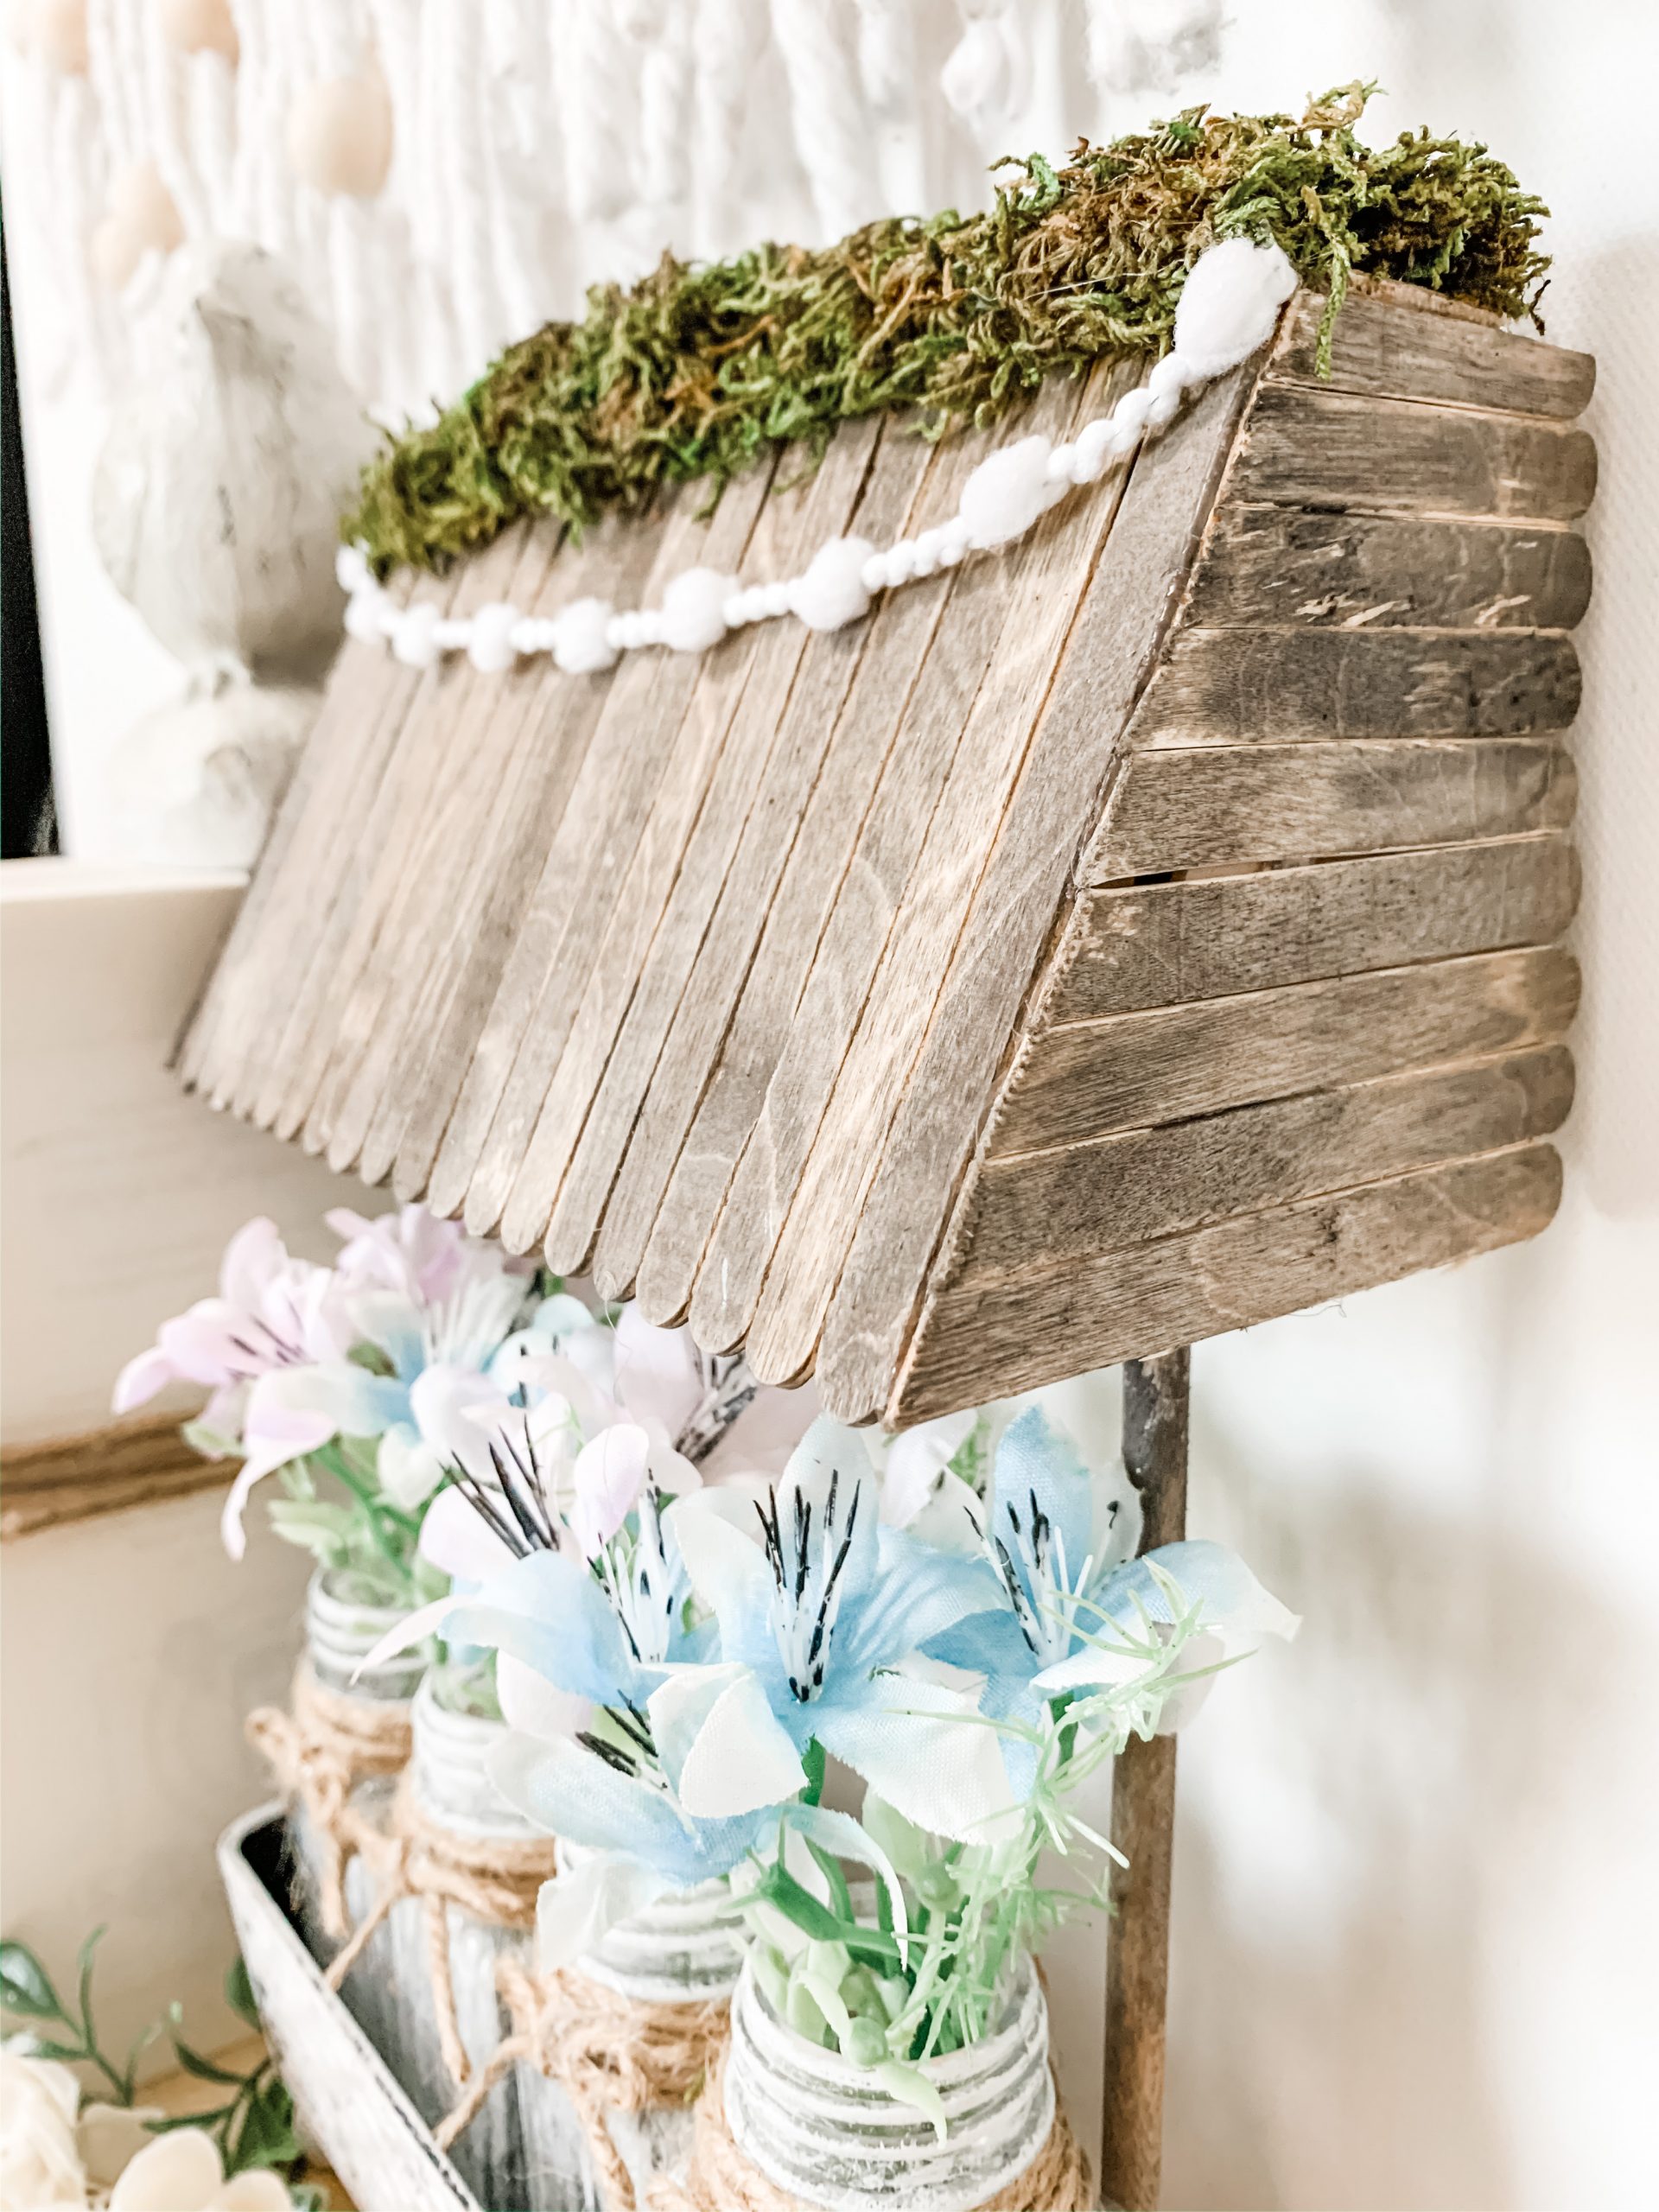
I trimmed the very top of the stained popsicle sticks to get a straight edge on the top of the roof. Then, I laid popsicle sticks out, secured them together, measured and trimmed them to fit on either side of the planter’s roof.
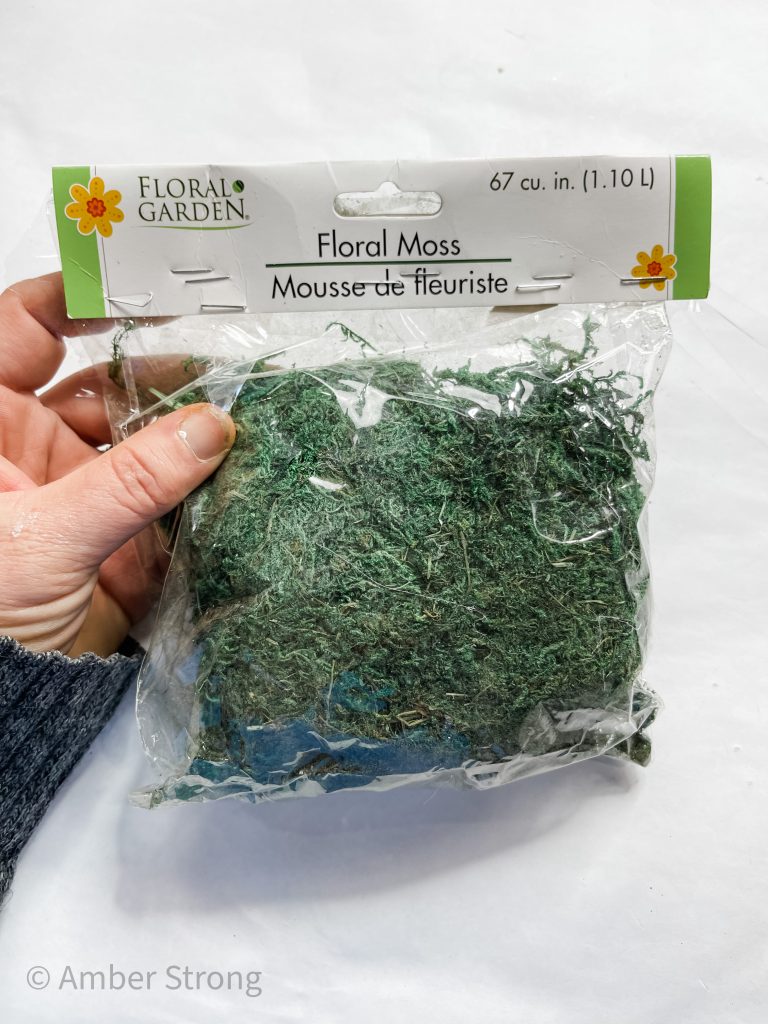
Next, I trimmed a giant craft stick to fit across the top of the planter and I glued it in place. Then, I glued the floral moss on the very top of the roof.
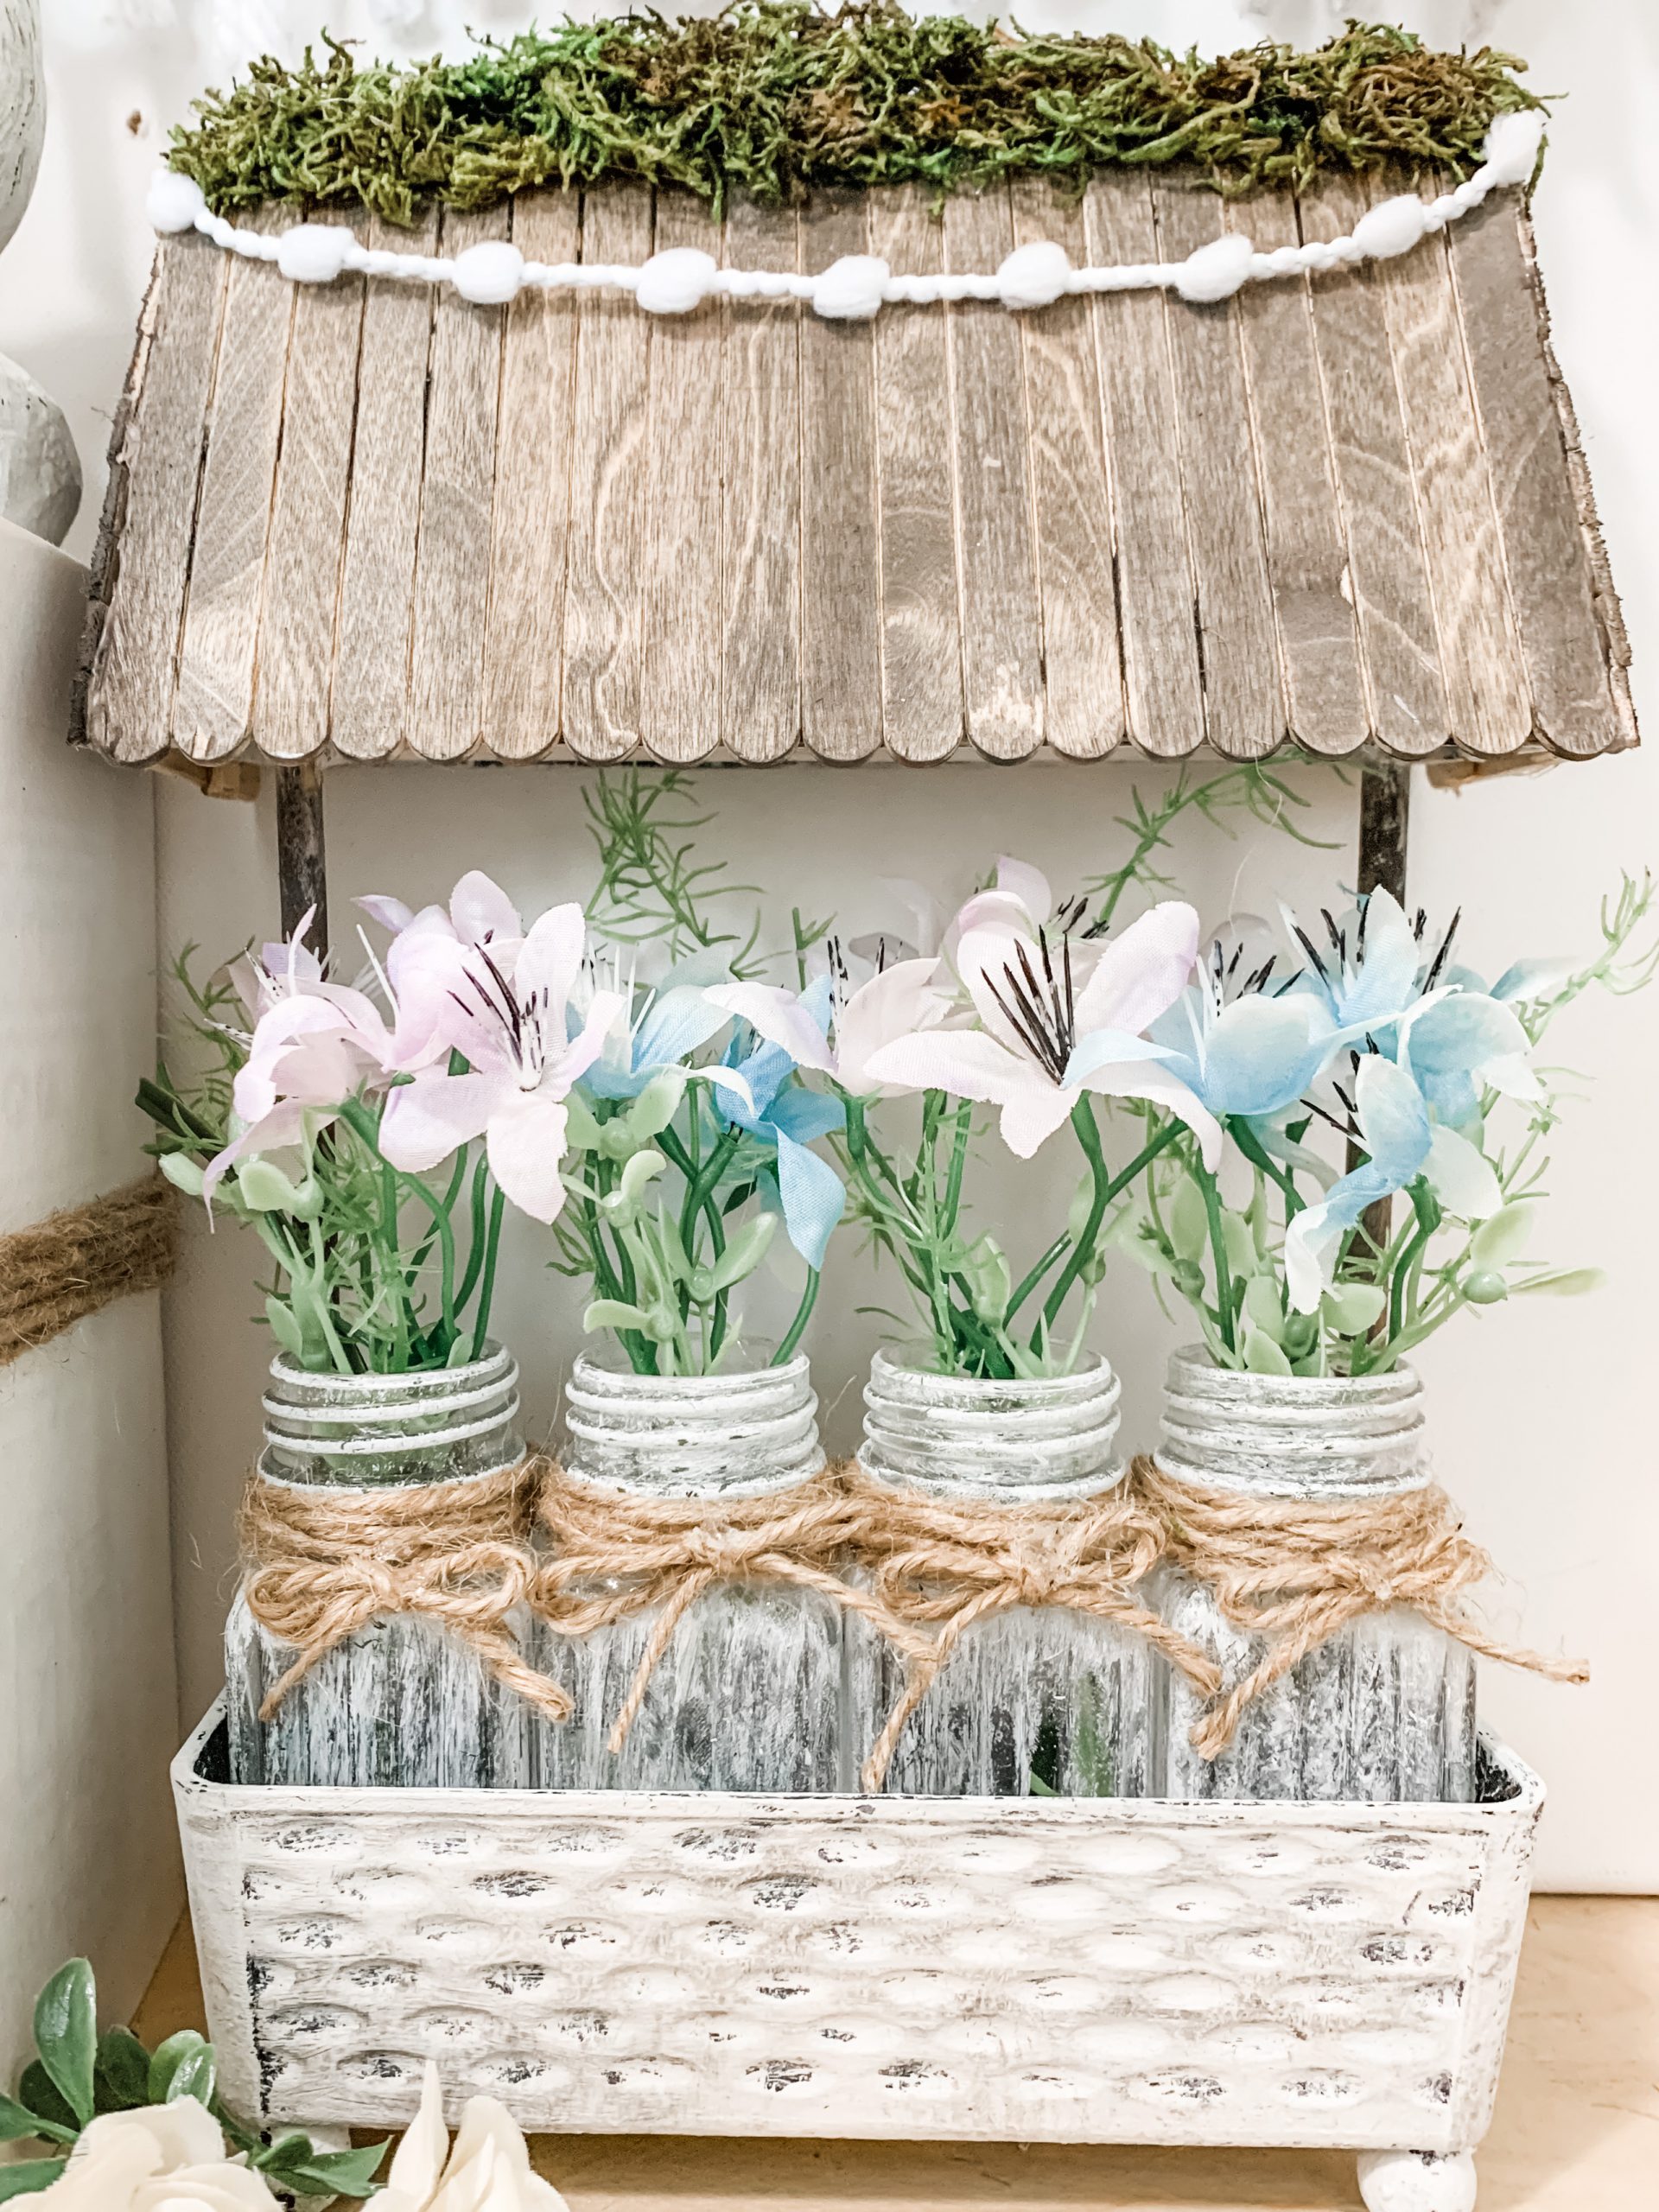
Trim your floral pieces and place them in the salt and pepper shakers. Glue a piece of the pom pom cord across the front of the roof.
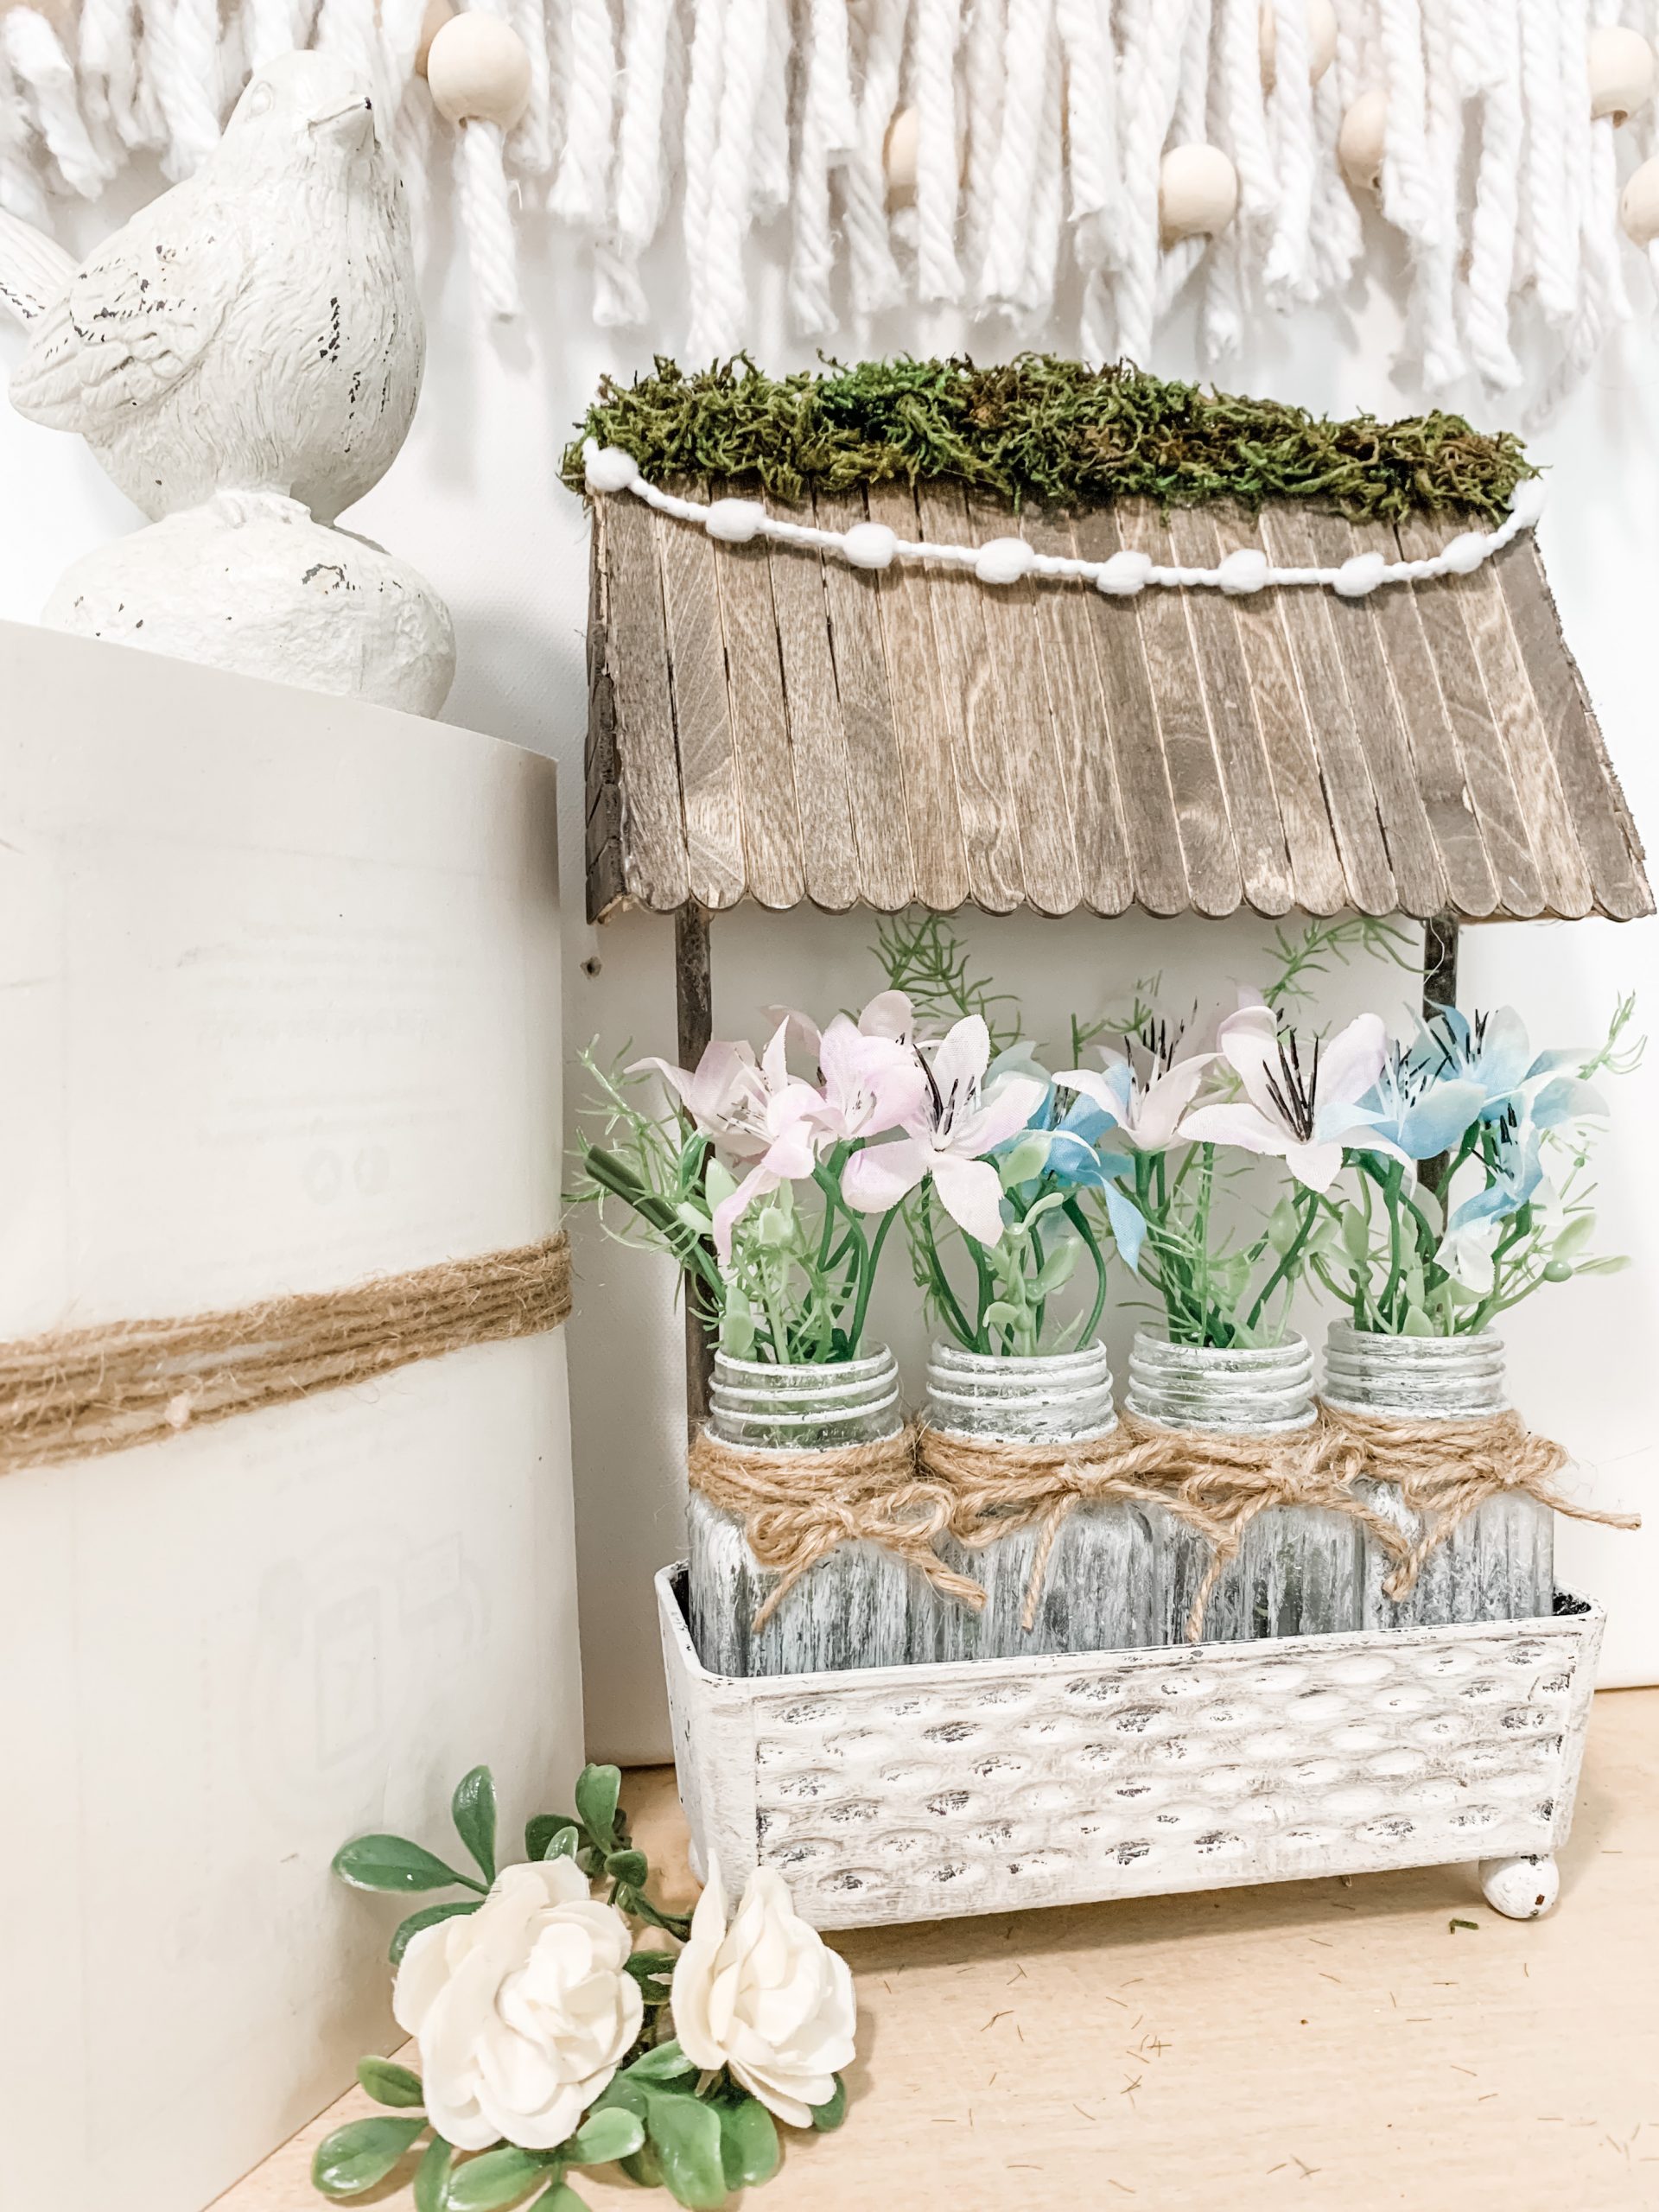
Lastly, I stained the popsicle stick sides of the roof the same way that I stained the other wood pieces of this butter dish planter.
If you’re looking for more DIY decor ideas, you should check out my adorable standing hearts craft kit!
If you love these cute little standing hearts, you have to check out my other DIY kits!
Also, check out the napkin bundles available! These are great for DIY’ing with! You can decoupage them onto practically any surface and create unique, one-of-a-kind home decor!
I hope you enjoyed this DIY Butter Dish Decorative Planter as much as I did and decide to make one for yourself! I would love to see how yours turns out!
You should totally join my FREE Facebook group called On A Budget Crafts! It is a judgment-free community for DIY crafters to show off their projects and ideas.
If you loved this DIY you might also like this Pink Heart Burlap Wreath!
Thanks for stopping by! XOXO Amber
You can also shop my ENTIRE AMAZON Favorites shop just click here! It’s packed full of all the things I use and love. Here is the supply list I highly recommend every creative have on hand!!
Would you also pin my blog for later and get on my newsletter alerts? I would love to have you join my #craftycrew.
Inspired? Leave me a comment below! I love hearing from my readers!

Join my free “ON A BUDGET CRAFTS” Facebook group!
Looks great. Creative idea