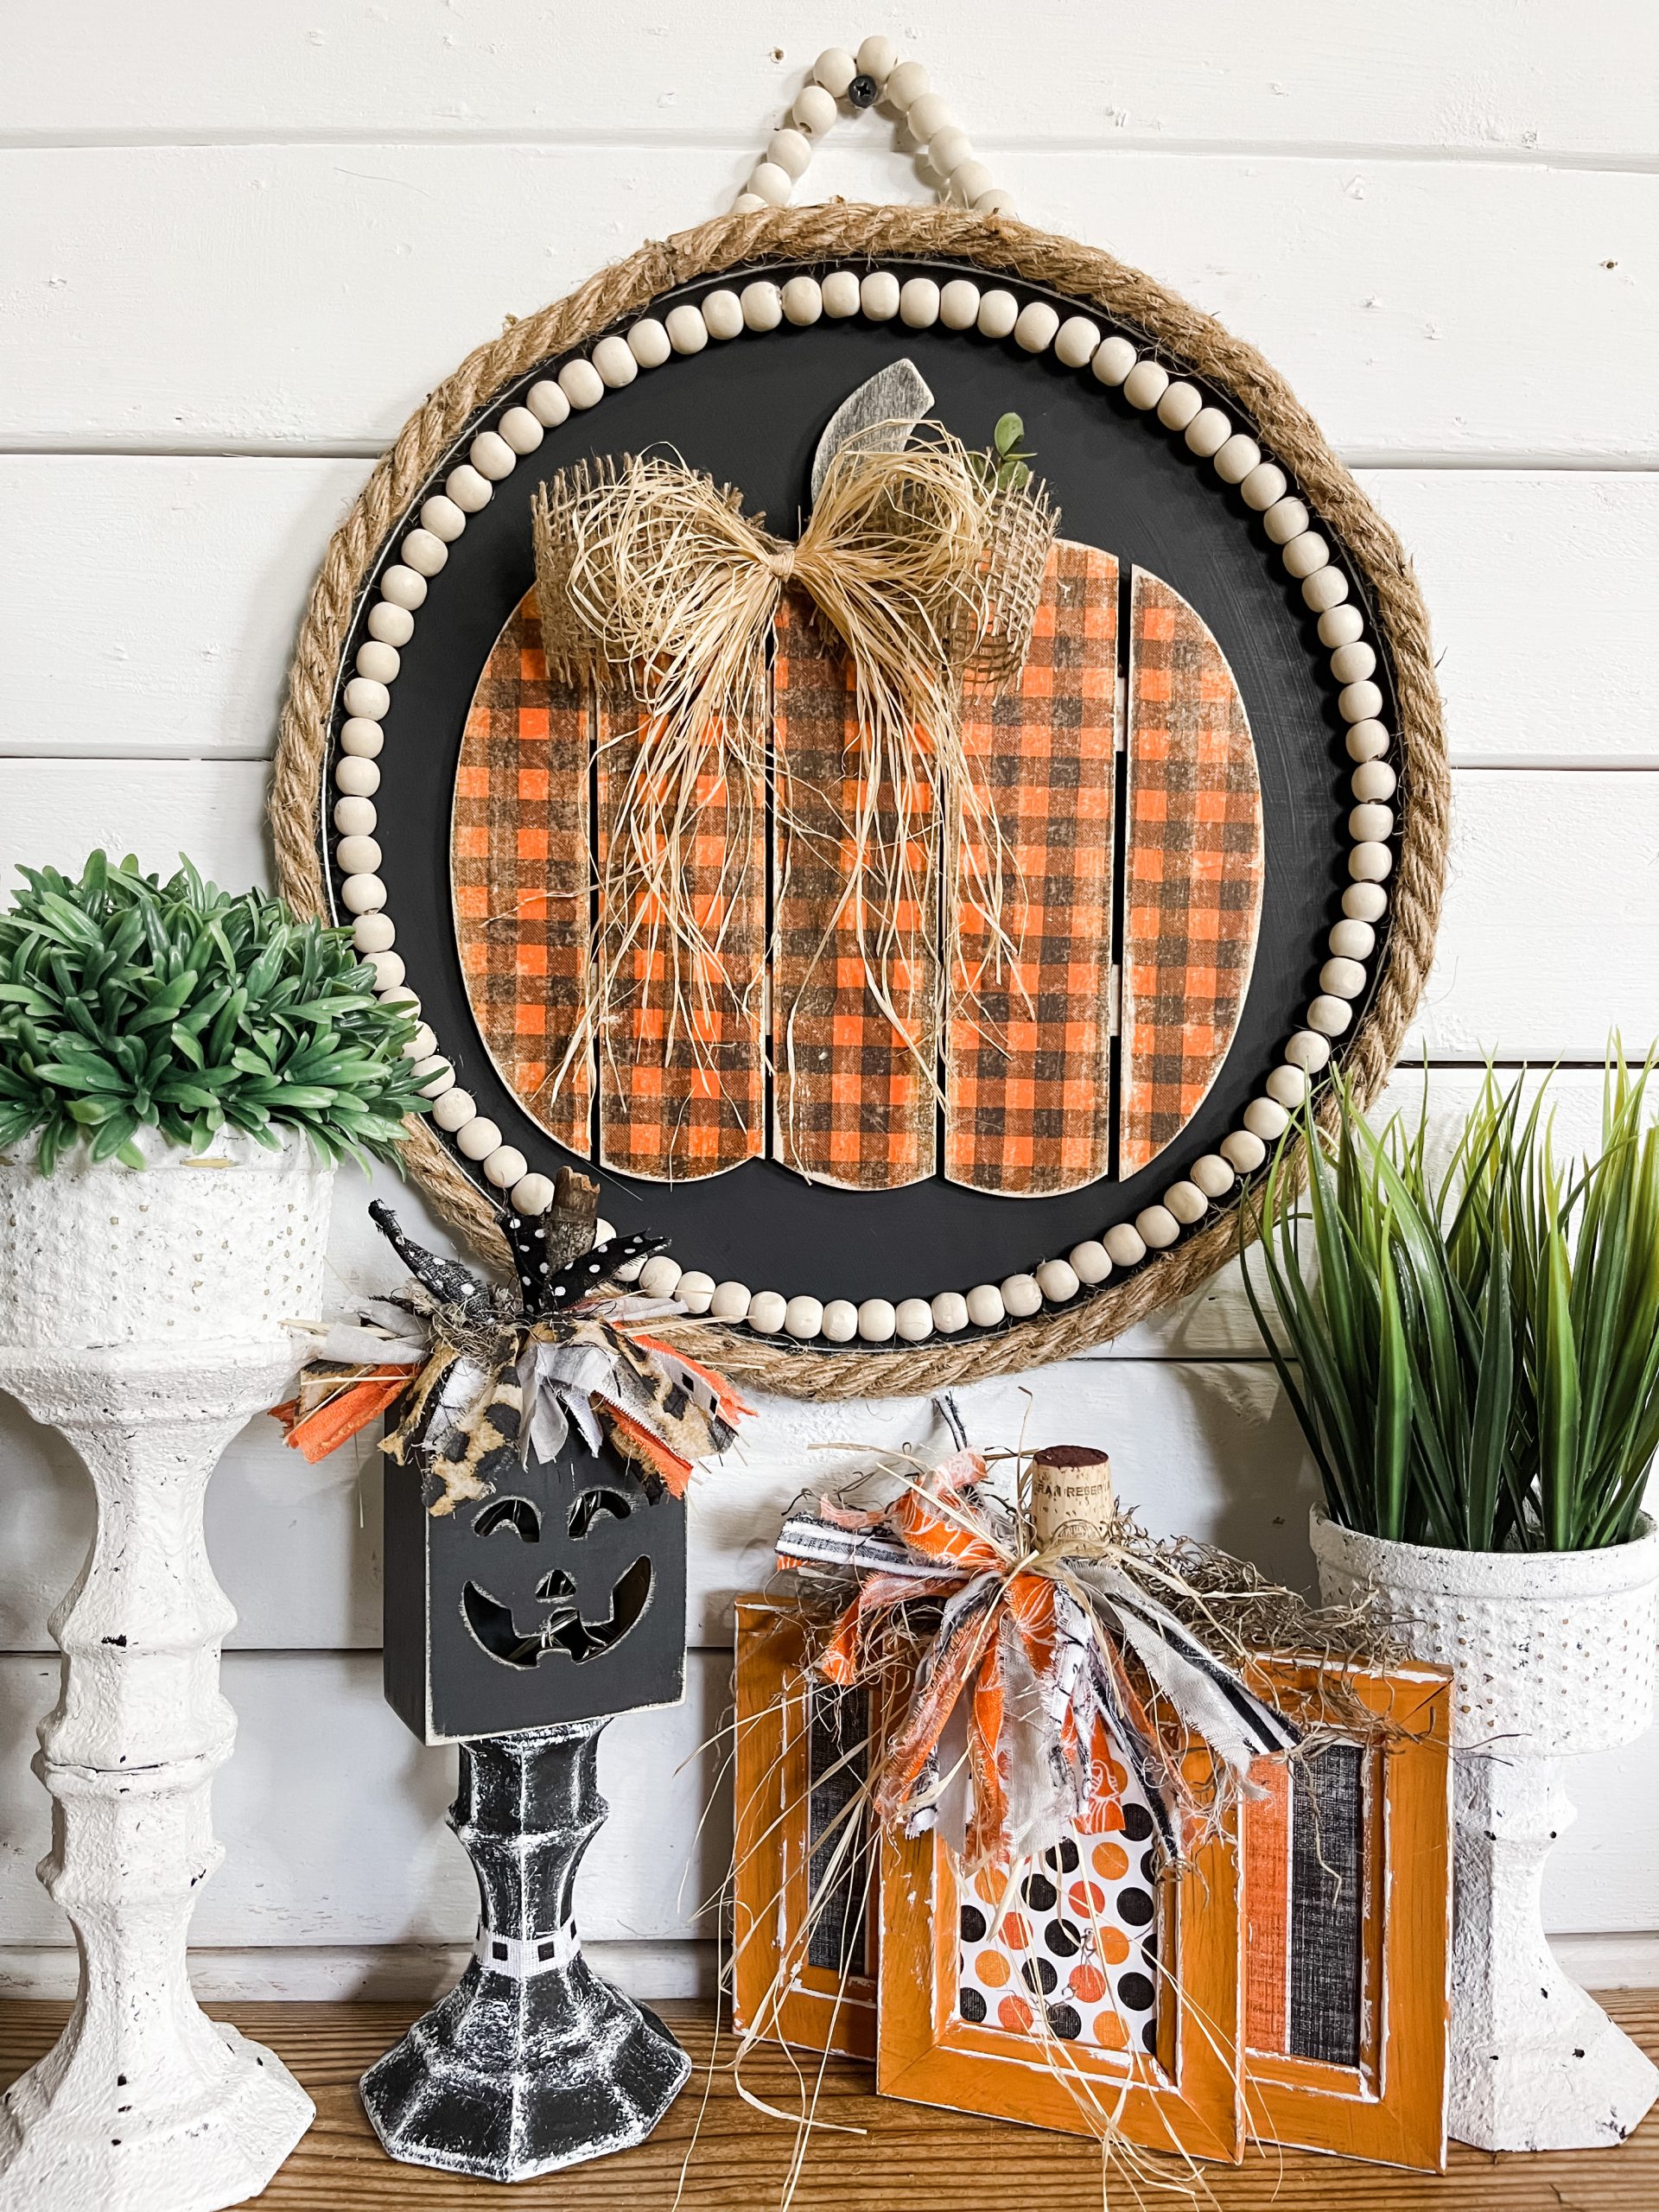
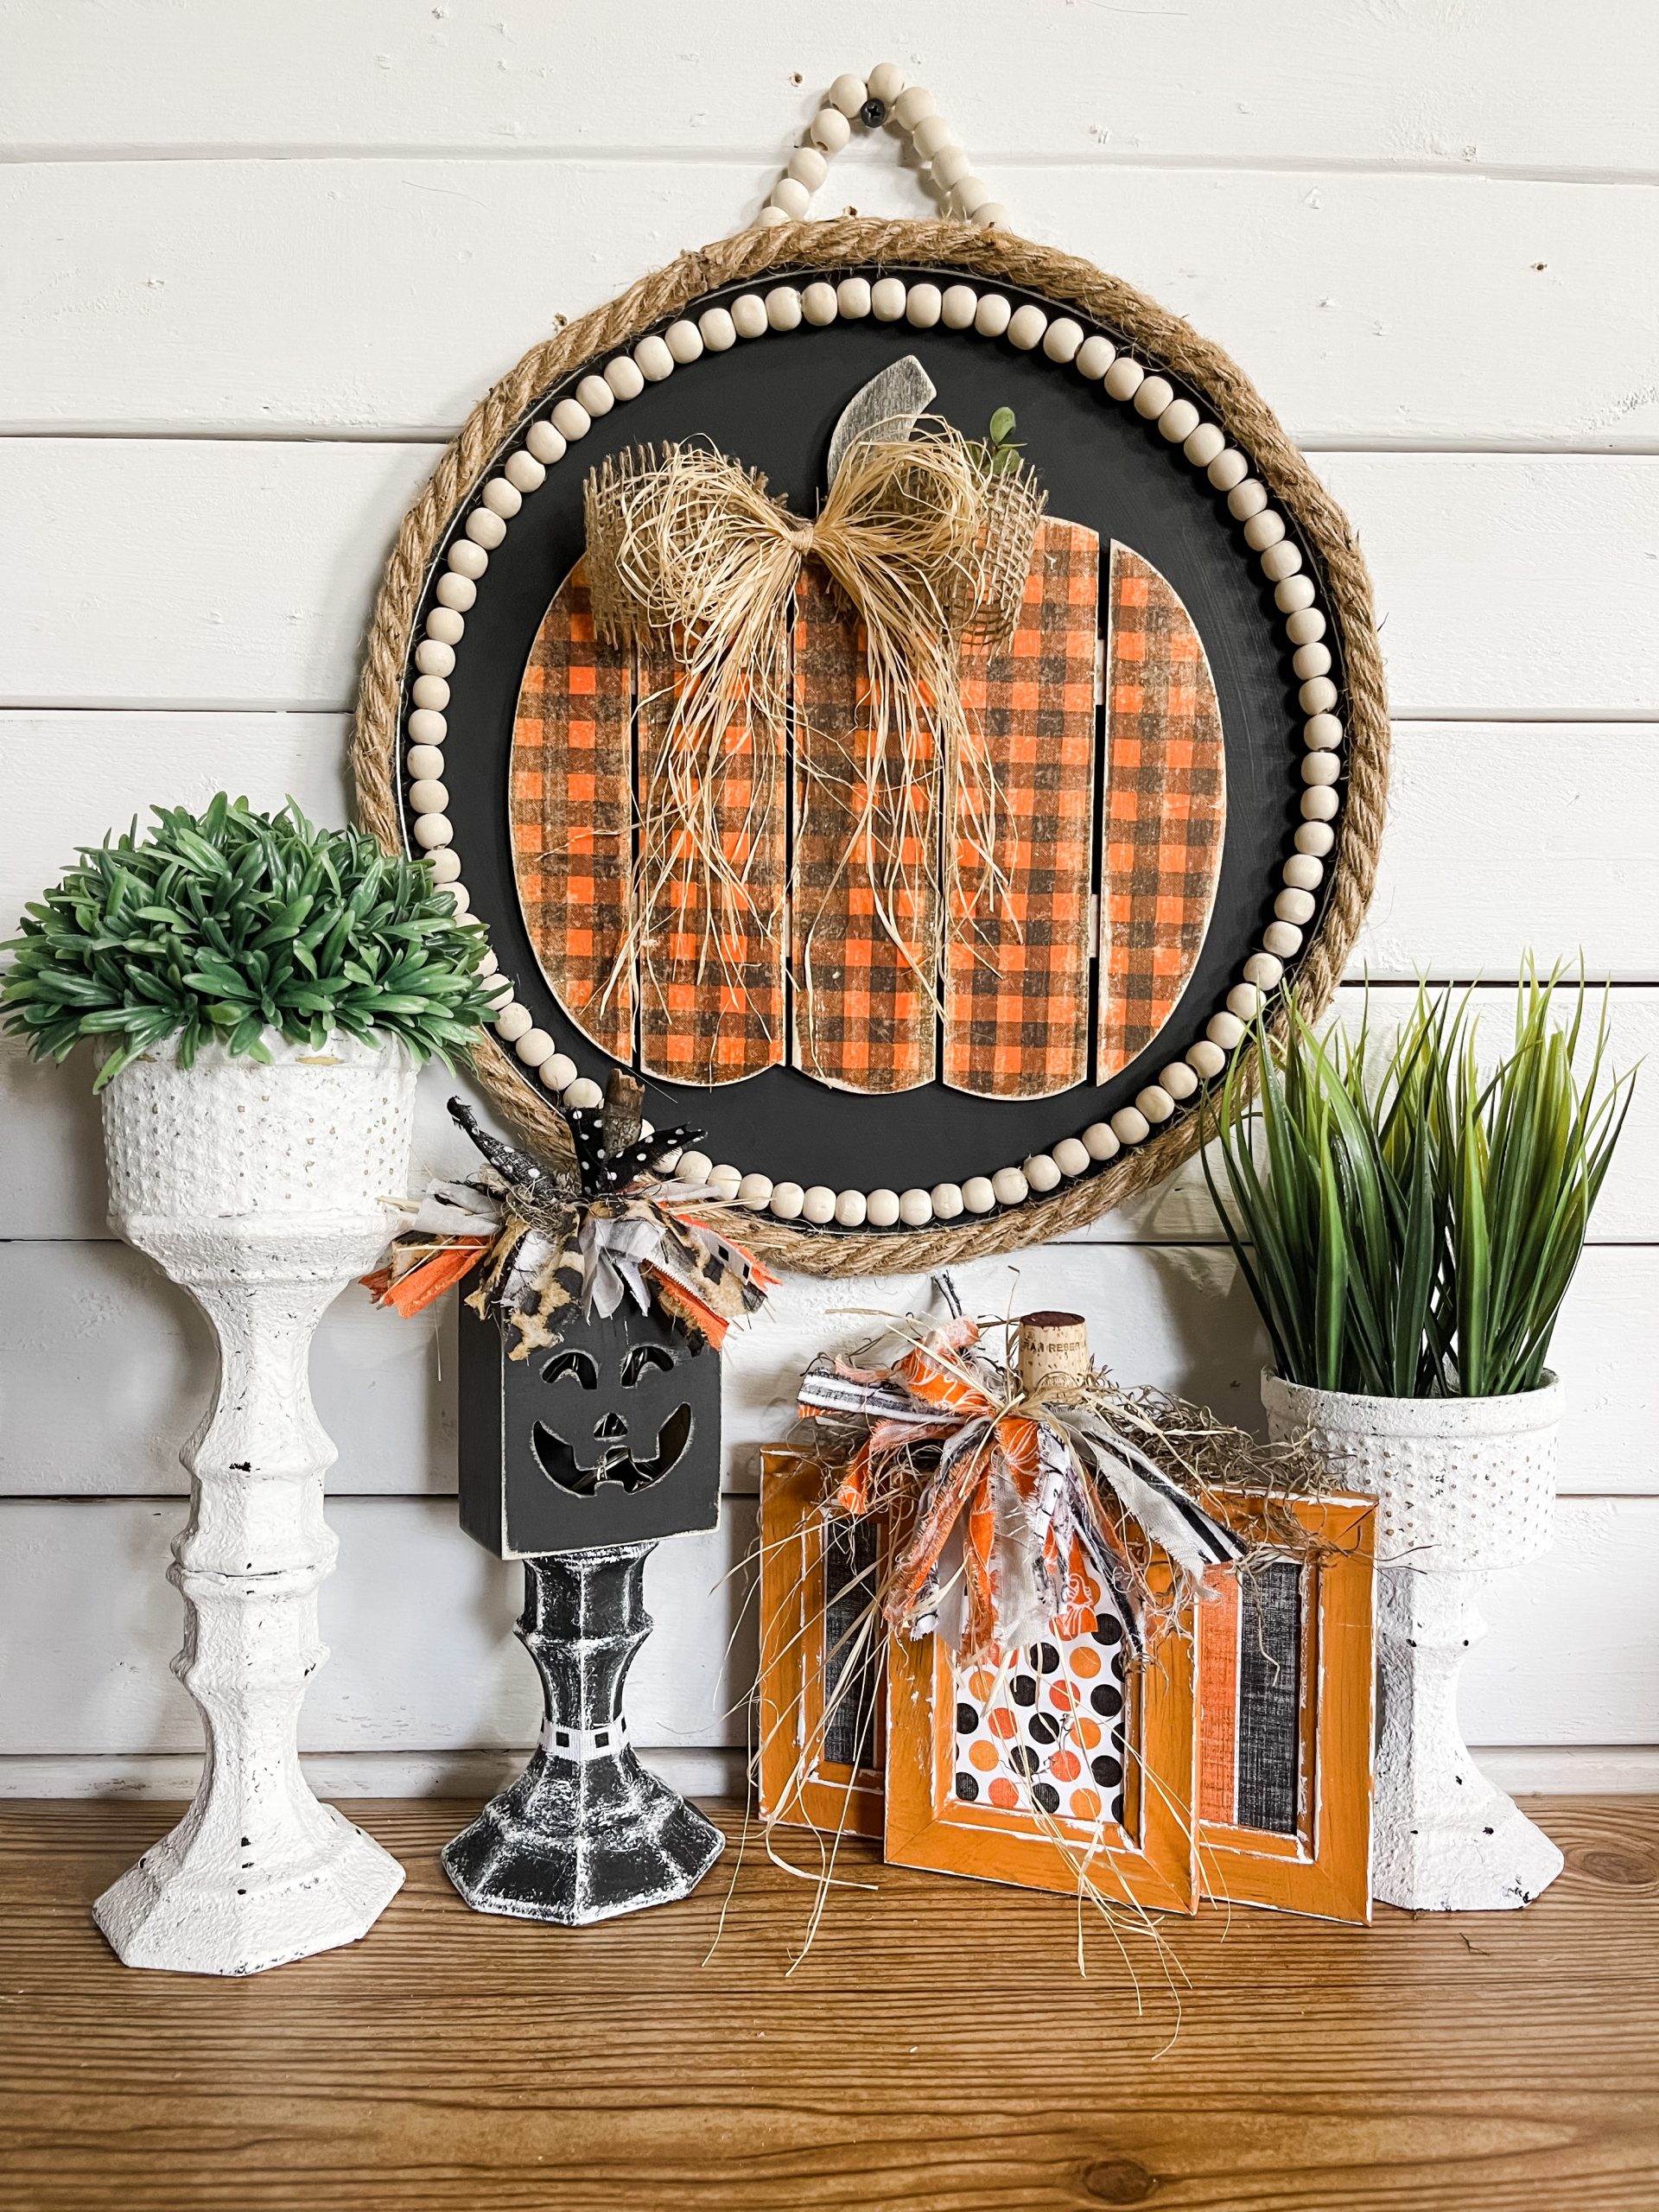
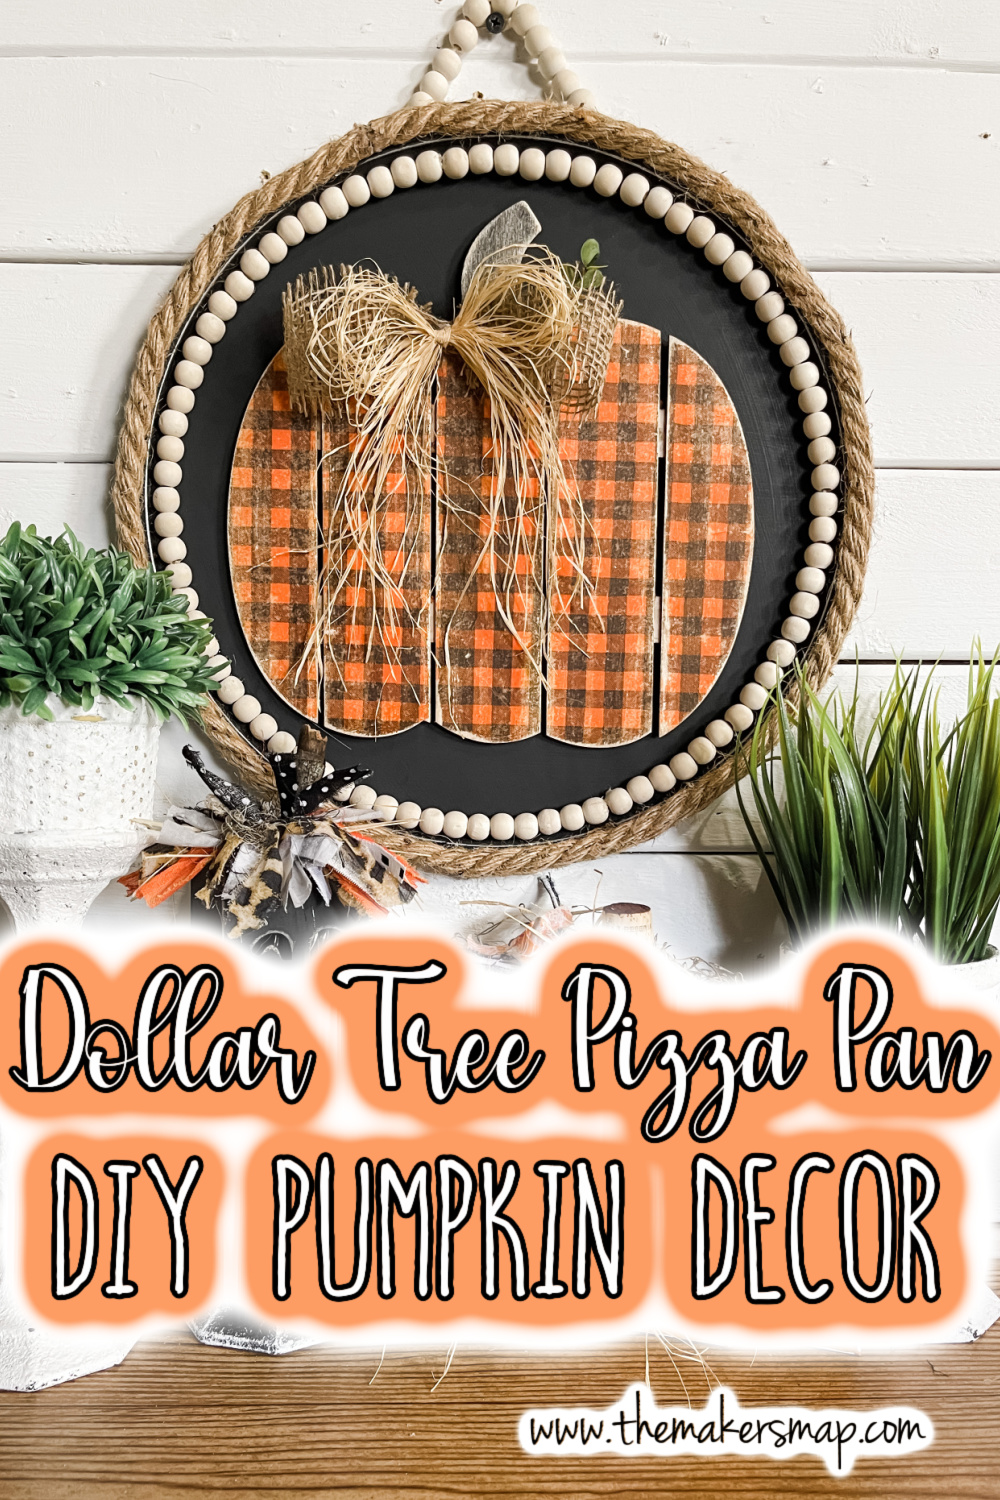
Dollar Tree Pizza Pan DIY Distressed Pumpkin Decor
I’m back with an amazing Dollar Tree pizza pan DIY Distressed Pumpkin Decor just for Fall! Call me crazy, you wouldn’t be the first, but I just had to come up with a pizza pan project for Fall!
If you are new around here, I made a pizza pan project last year for Christmas, and people loved it so much that it went viral on Facebook! I honestly think it was because I used a Dollar Tree pizza pan!
People really love the idea of turning a common household item into amazing home decor, including me!
Watch the DIY tutorial video
I shared the quick DIY tutorial for bringing this Dollar Tree Pizza Pan DIY Distressed Pumpkin Decor to life on my Facebook page!
I’m busy, so I get it. Who has time to watch a 3-hour tutorial video?? This DIY tutorial video is LESS THAN 4 MINUTES! And you can get the full supply list for this project below!
Check out the other orange and black decor ideas:
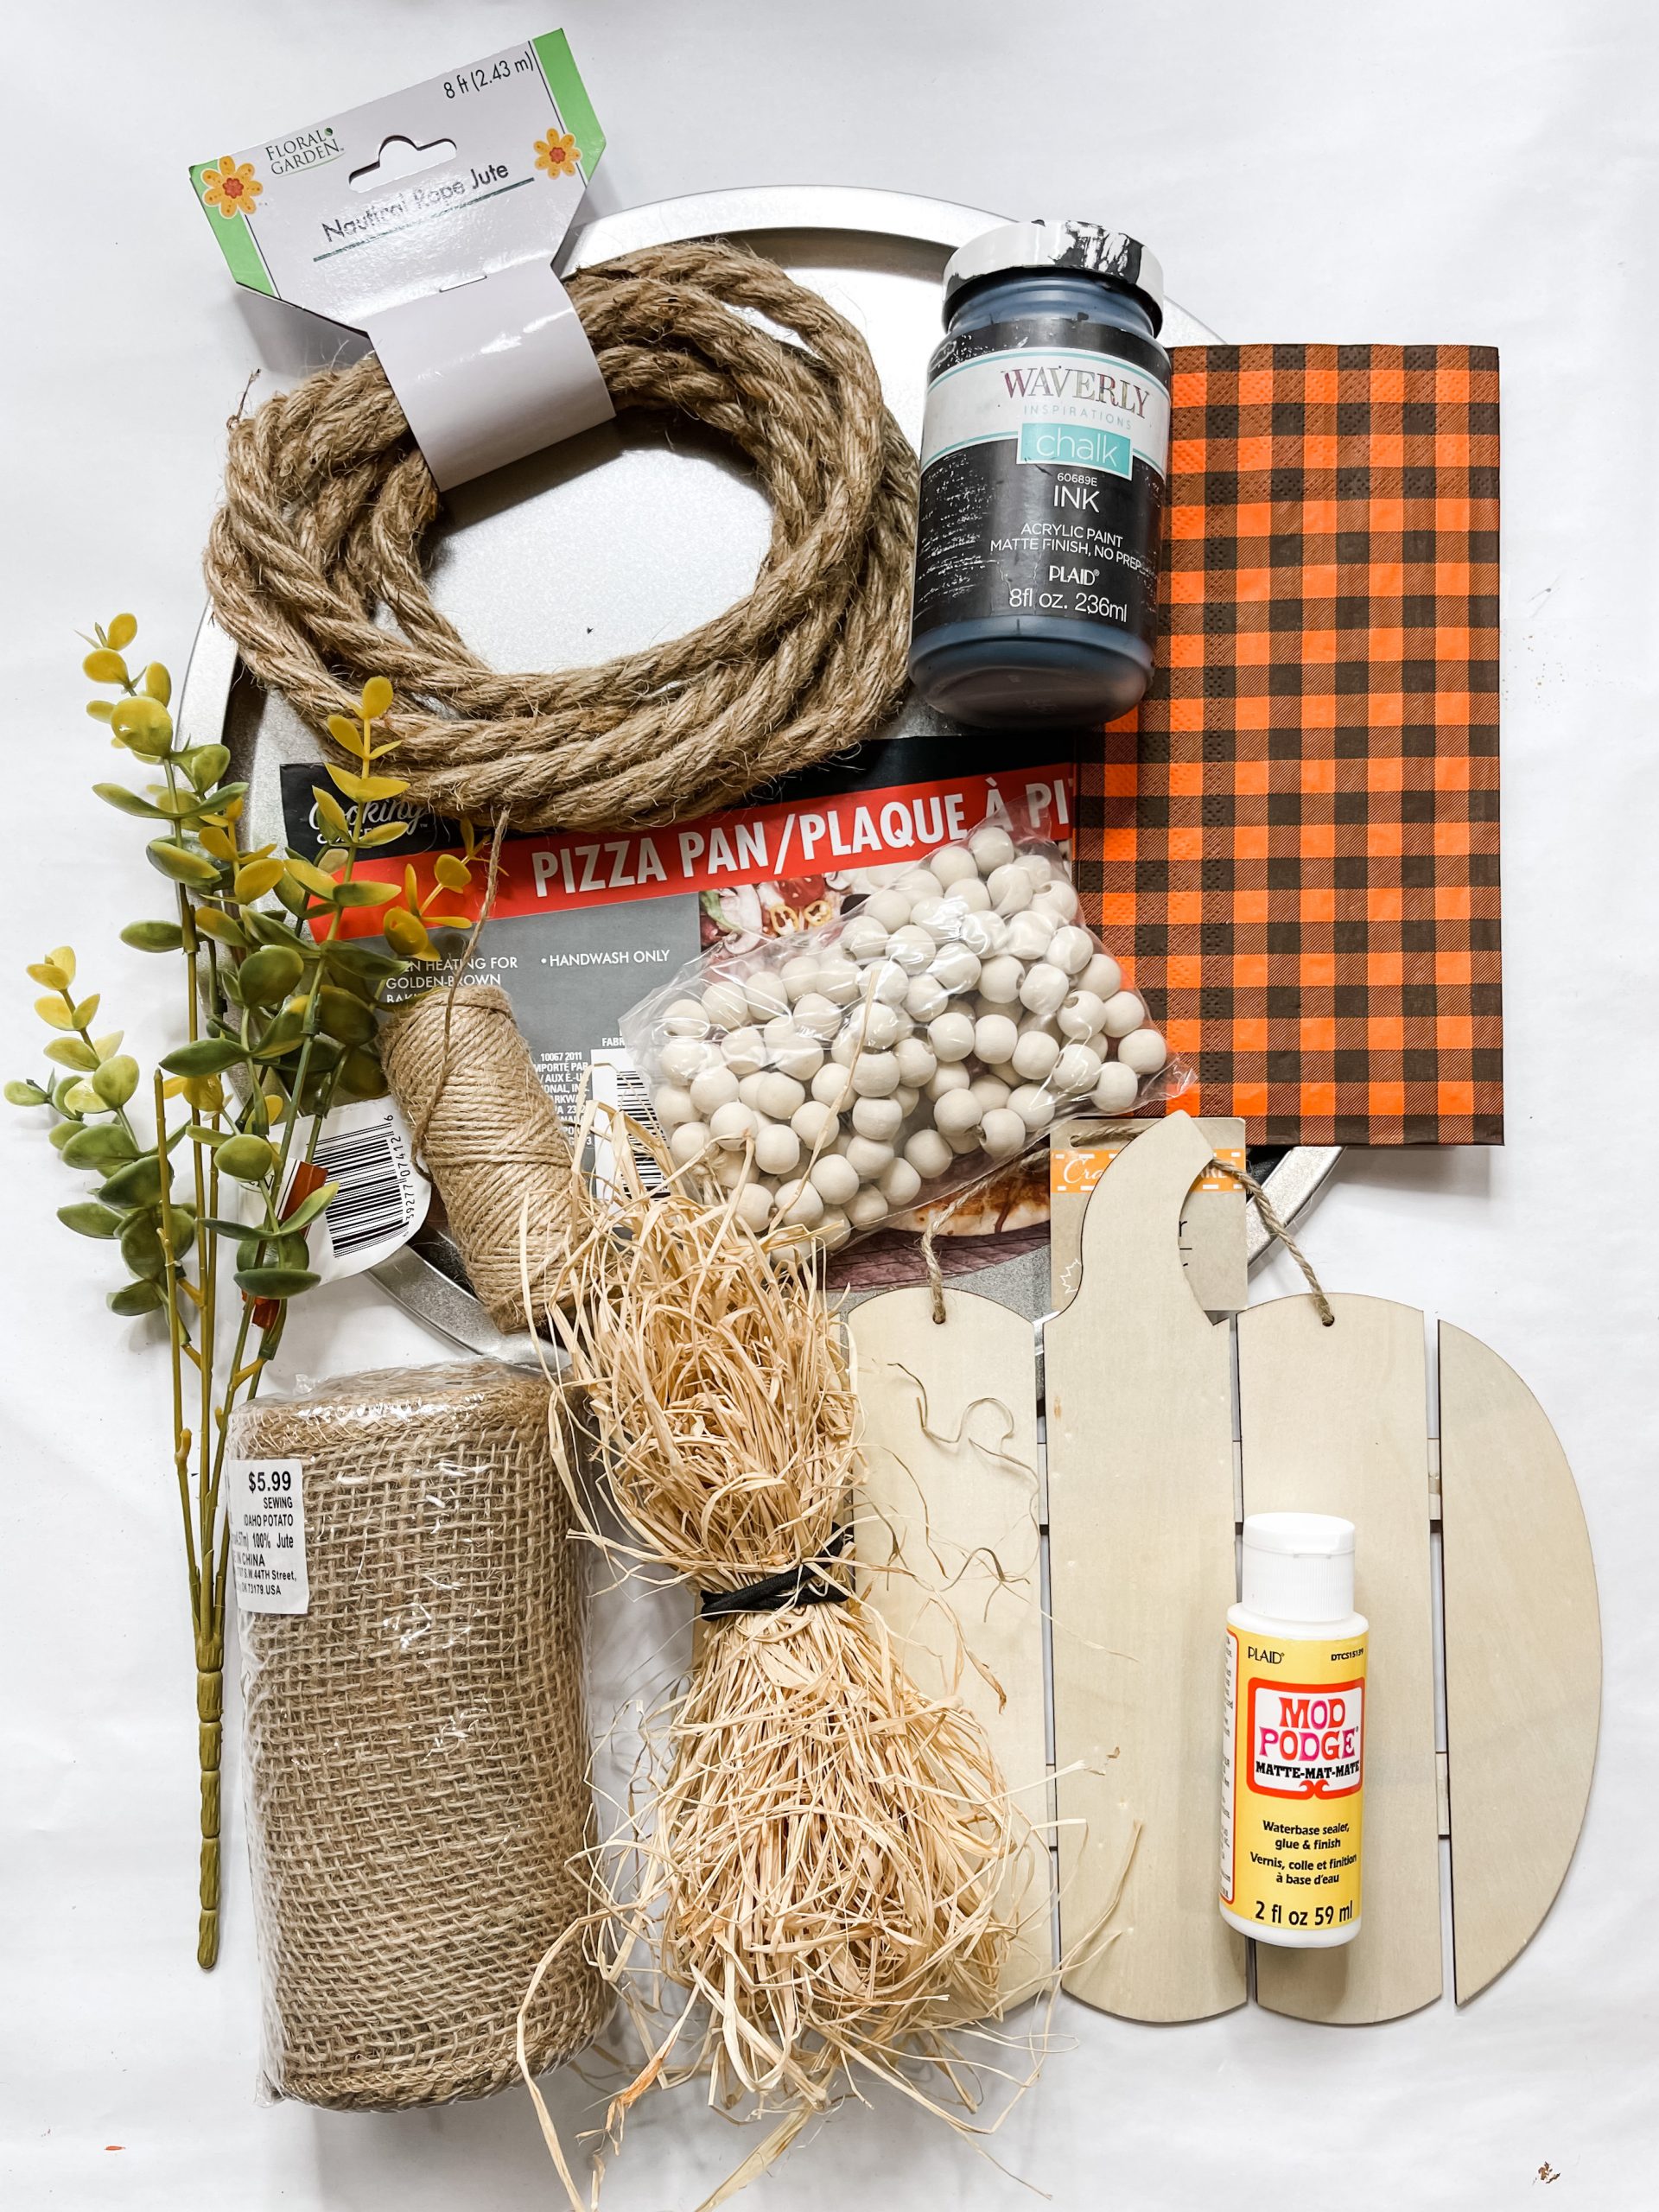
For this project, I will be using these items, but you can substitute where you want.
“As an Amazon Associate, I earn from qualifying purchases.”
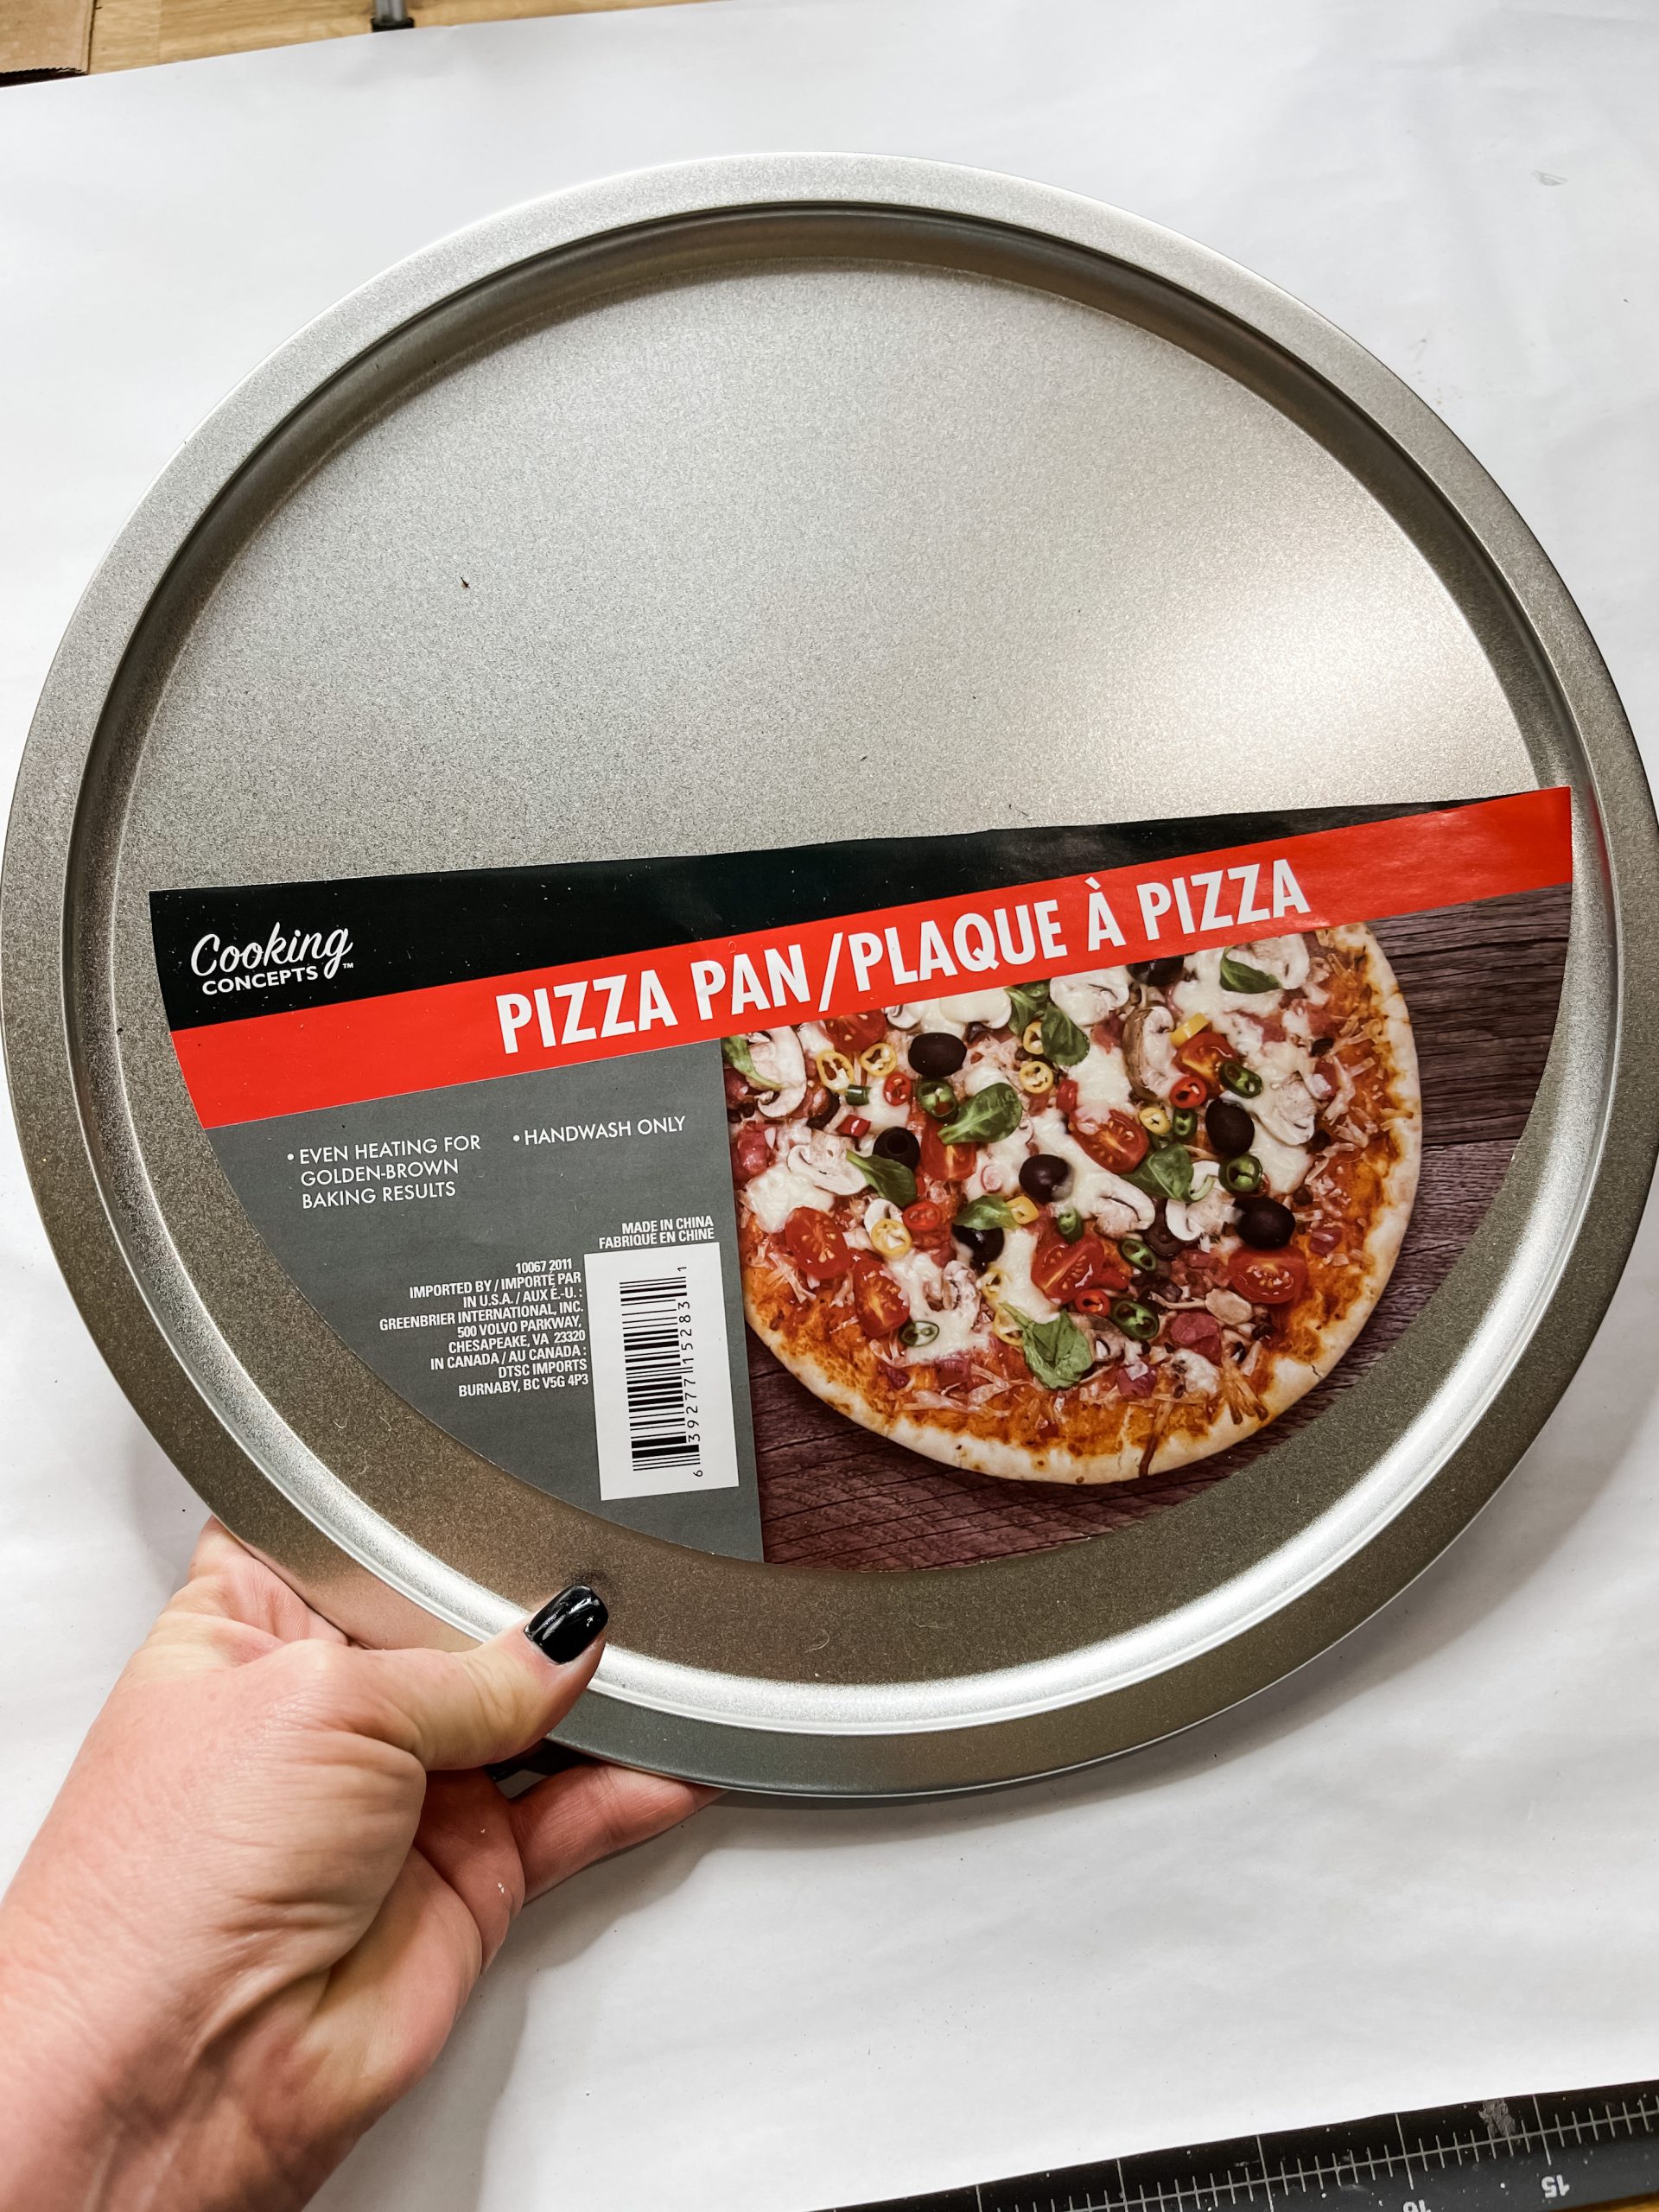
- Dollar Tree Pizza Pan
- Dollar Tree Eucalyptus
- Burlap
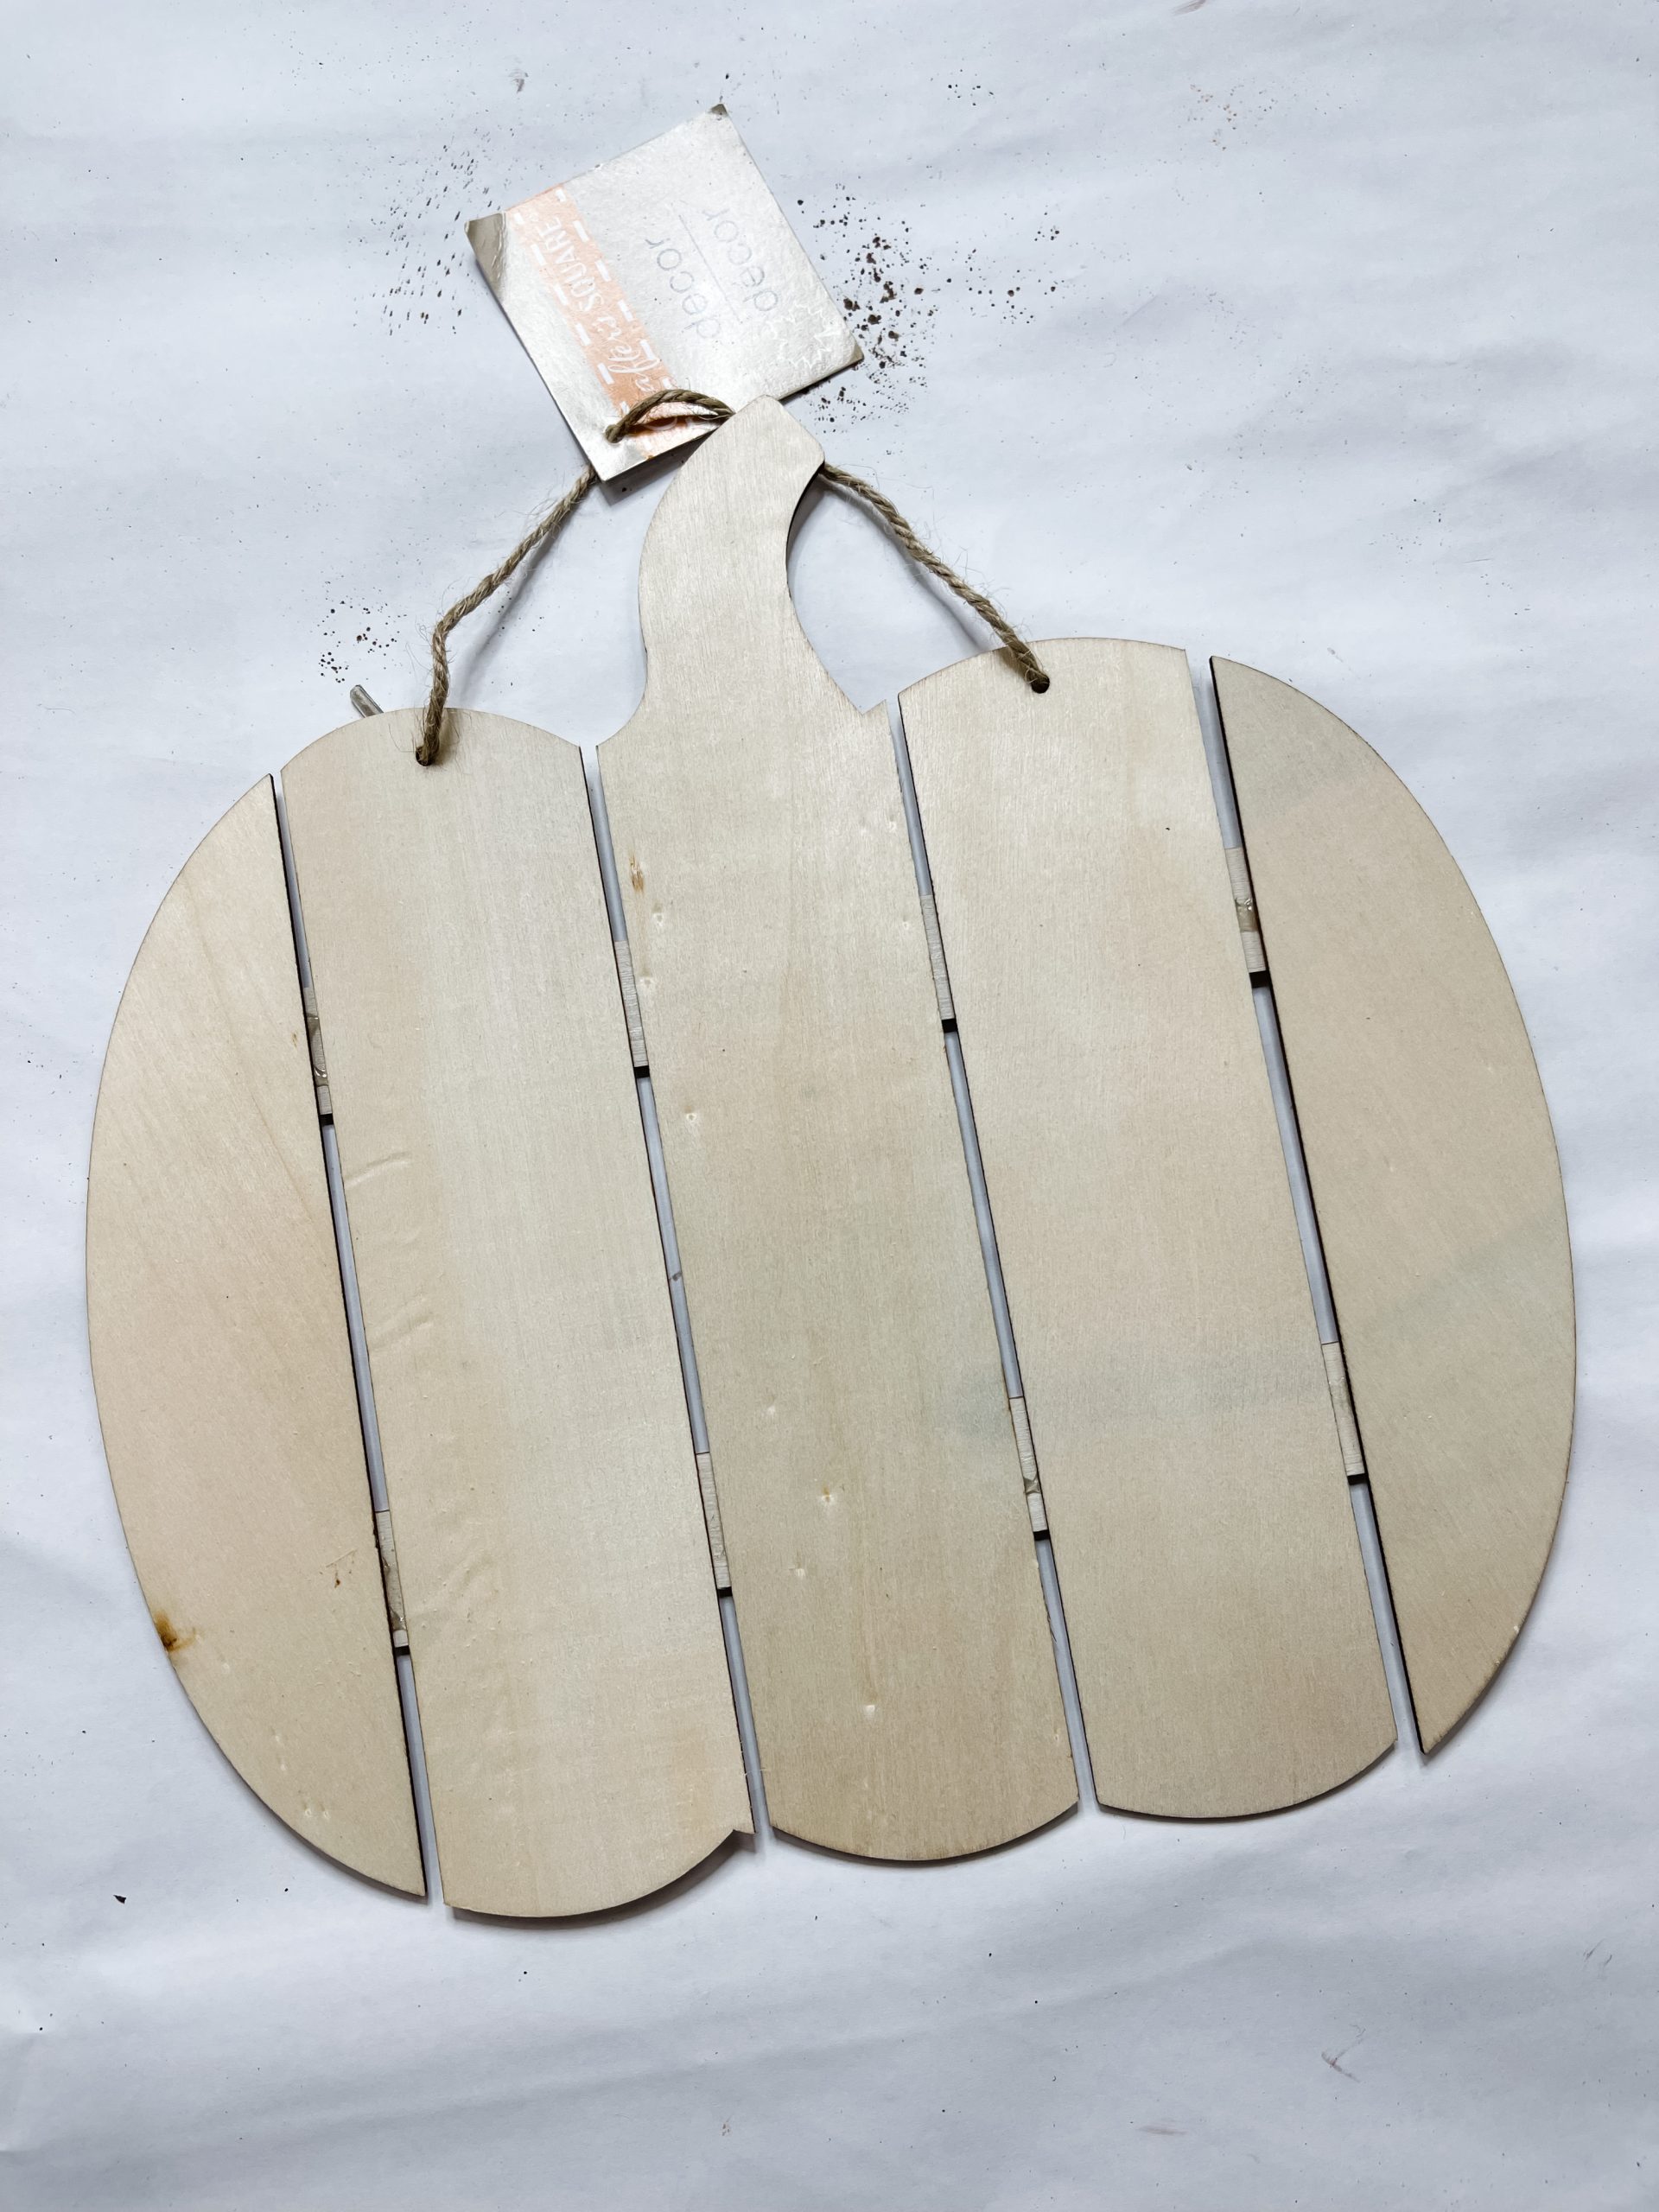
- Dollar Tree Planked Pumpkin
- Dollar Tree Nautical Rope
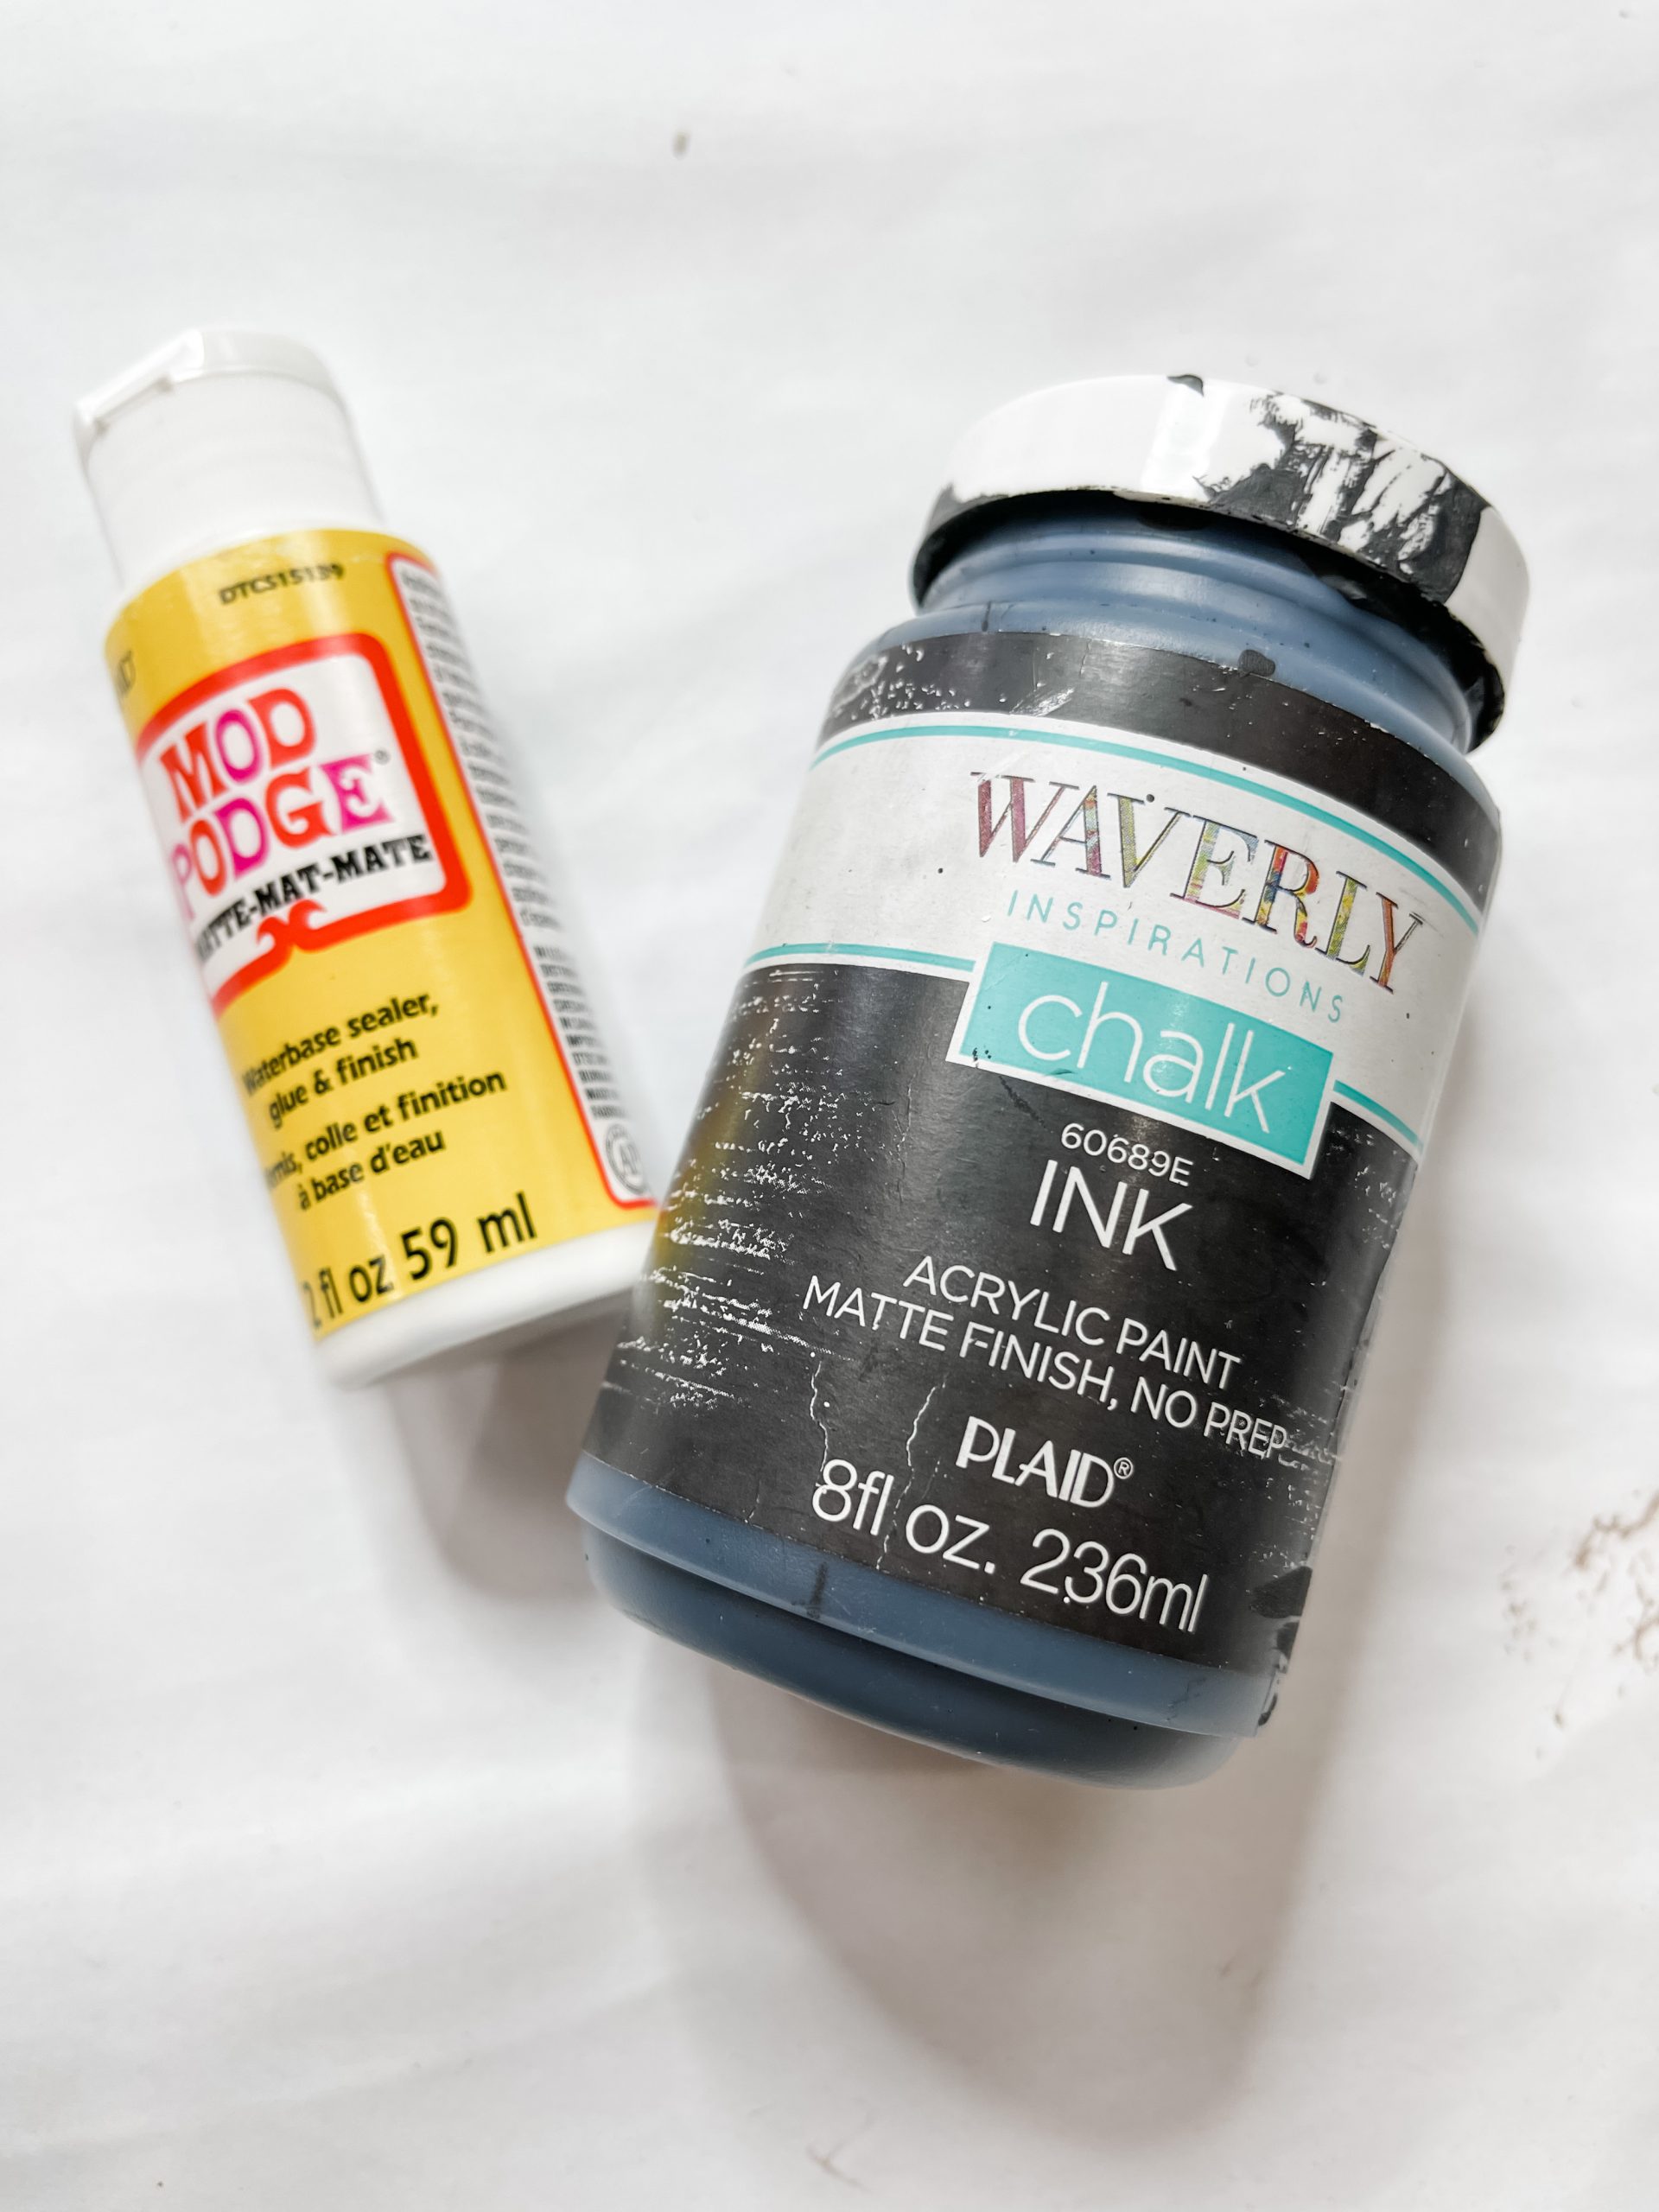
- Waverly Ink Chalk Paint
- Dollar Tree Raffia
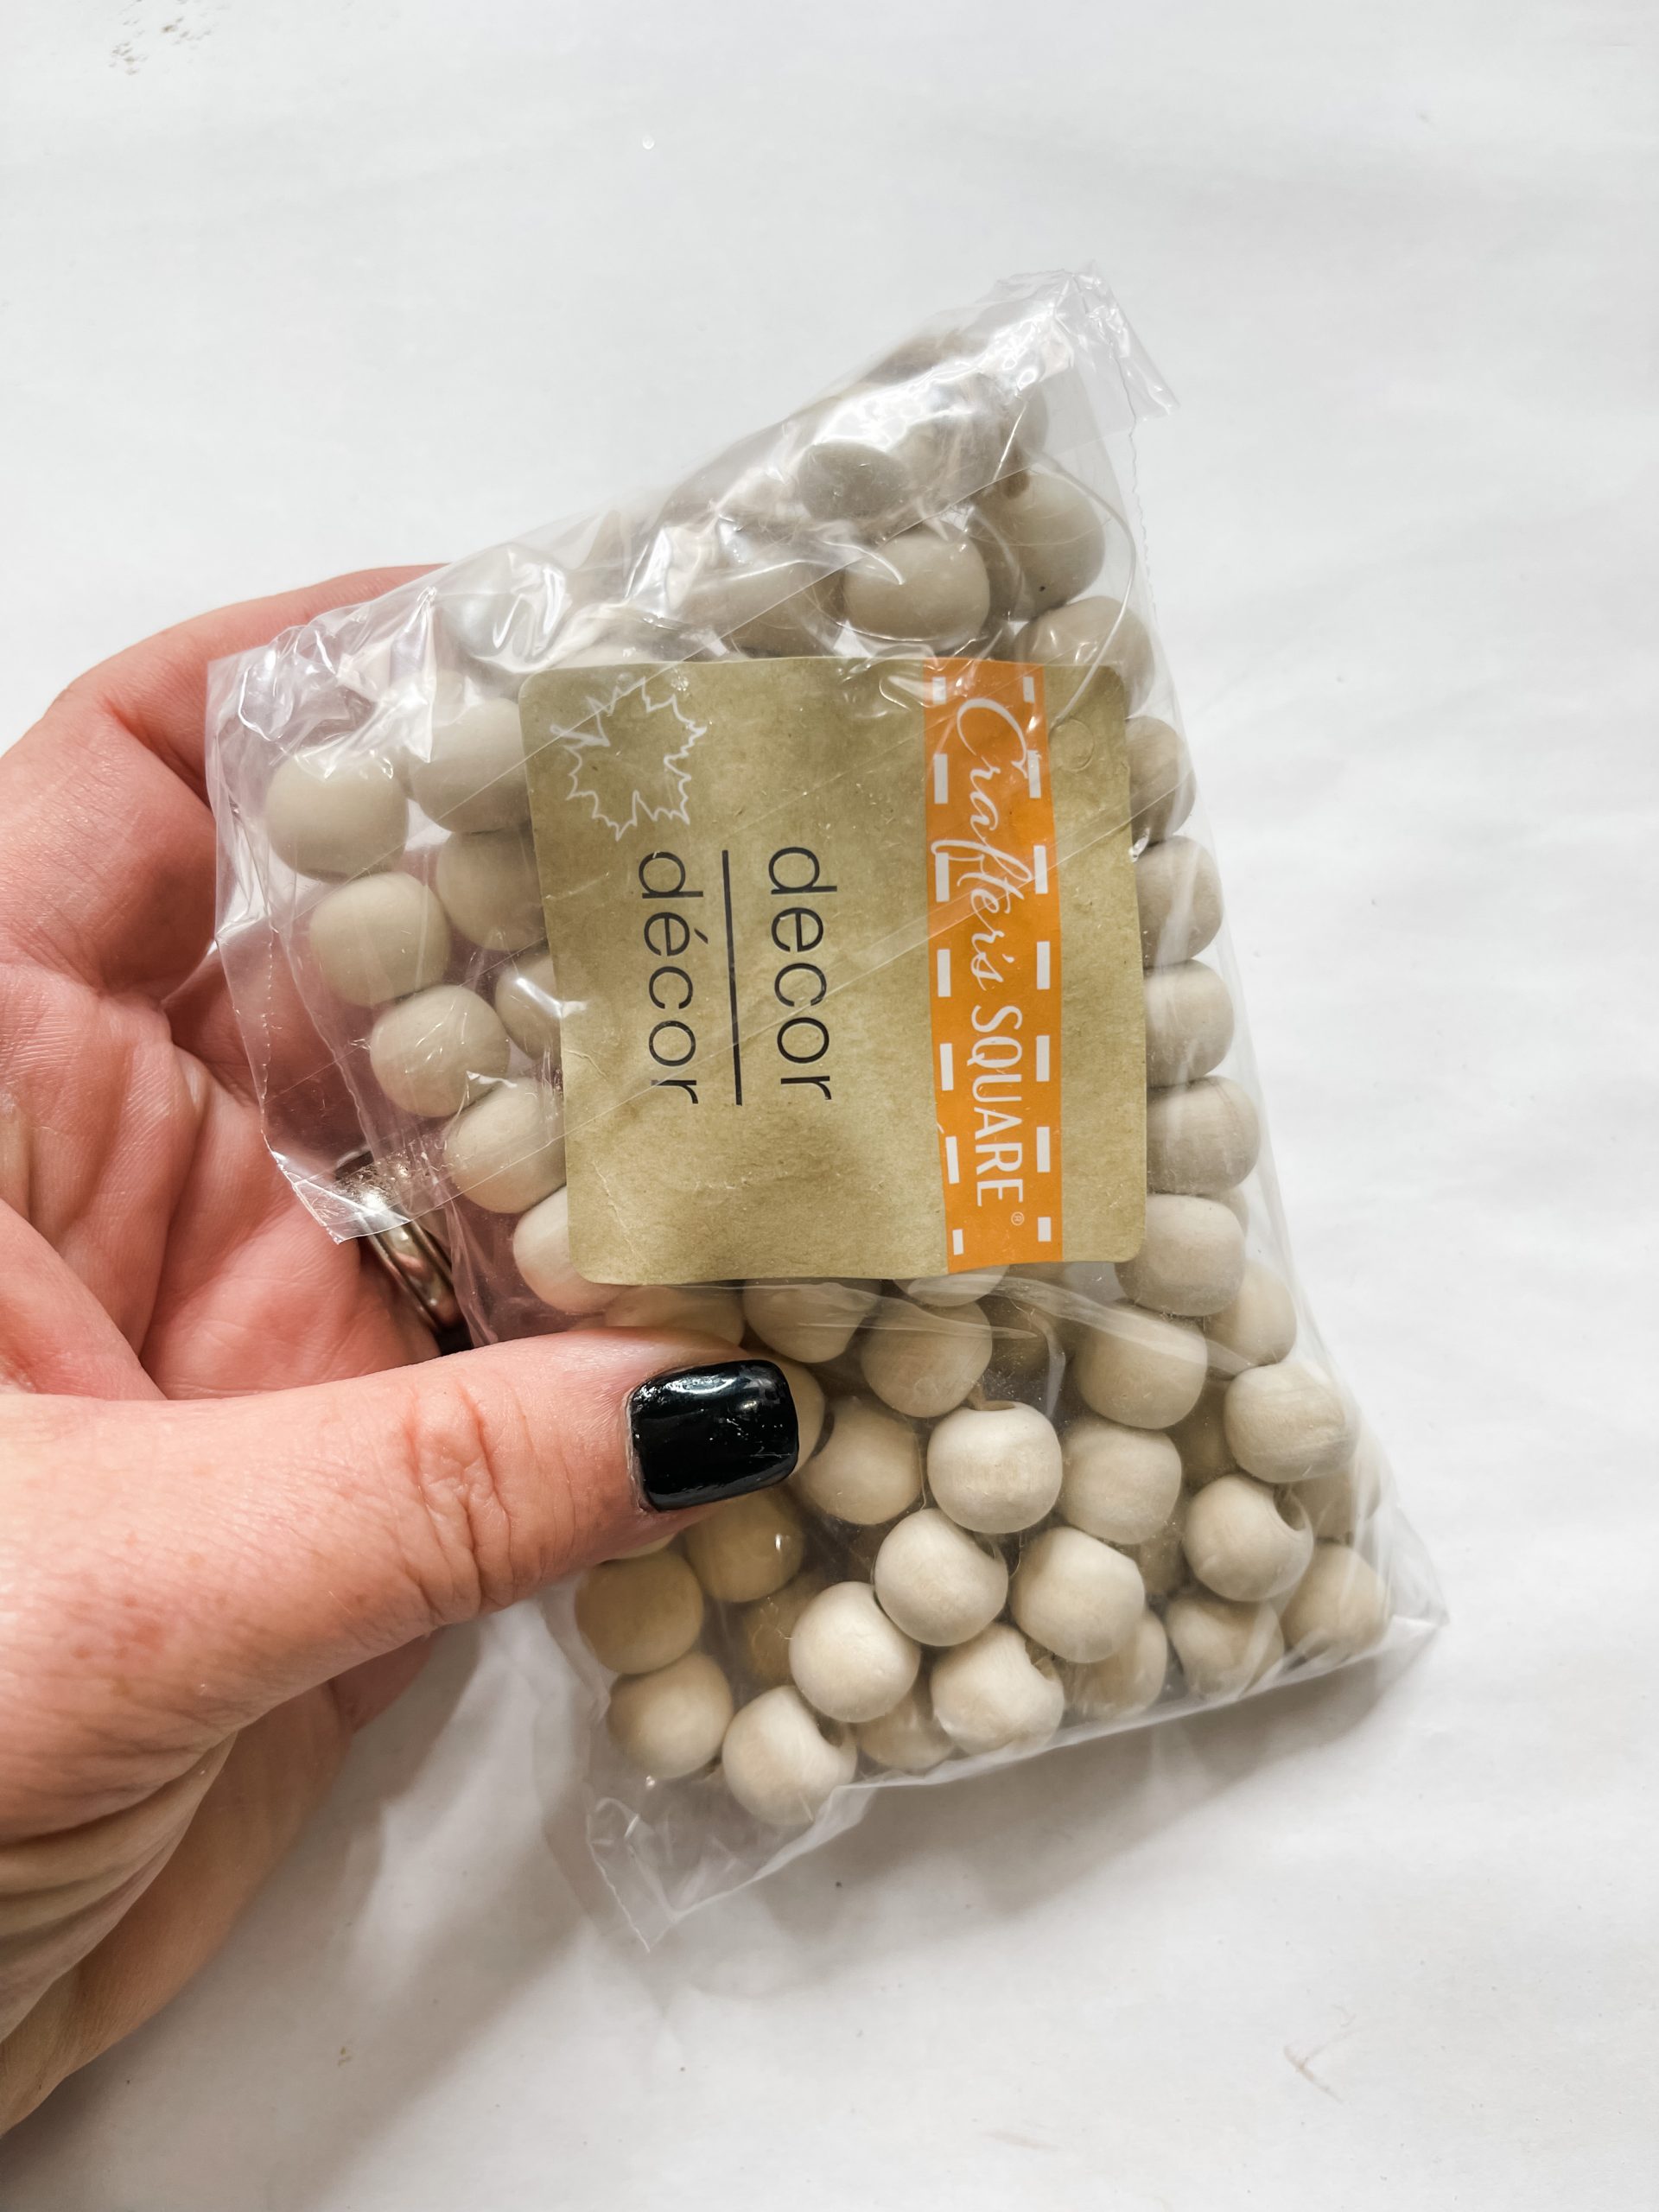
- Dollar Tree Wood Bead Garland
- Orange/Black Buffalo Check Napkin
- Mod Podge
- Sanding Sponge
- Chippy Paintbrushes
- Hot Glue gun
- Glue Stick
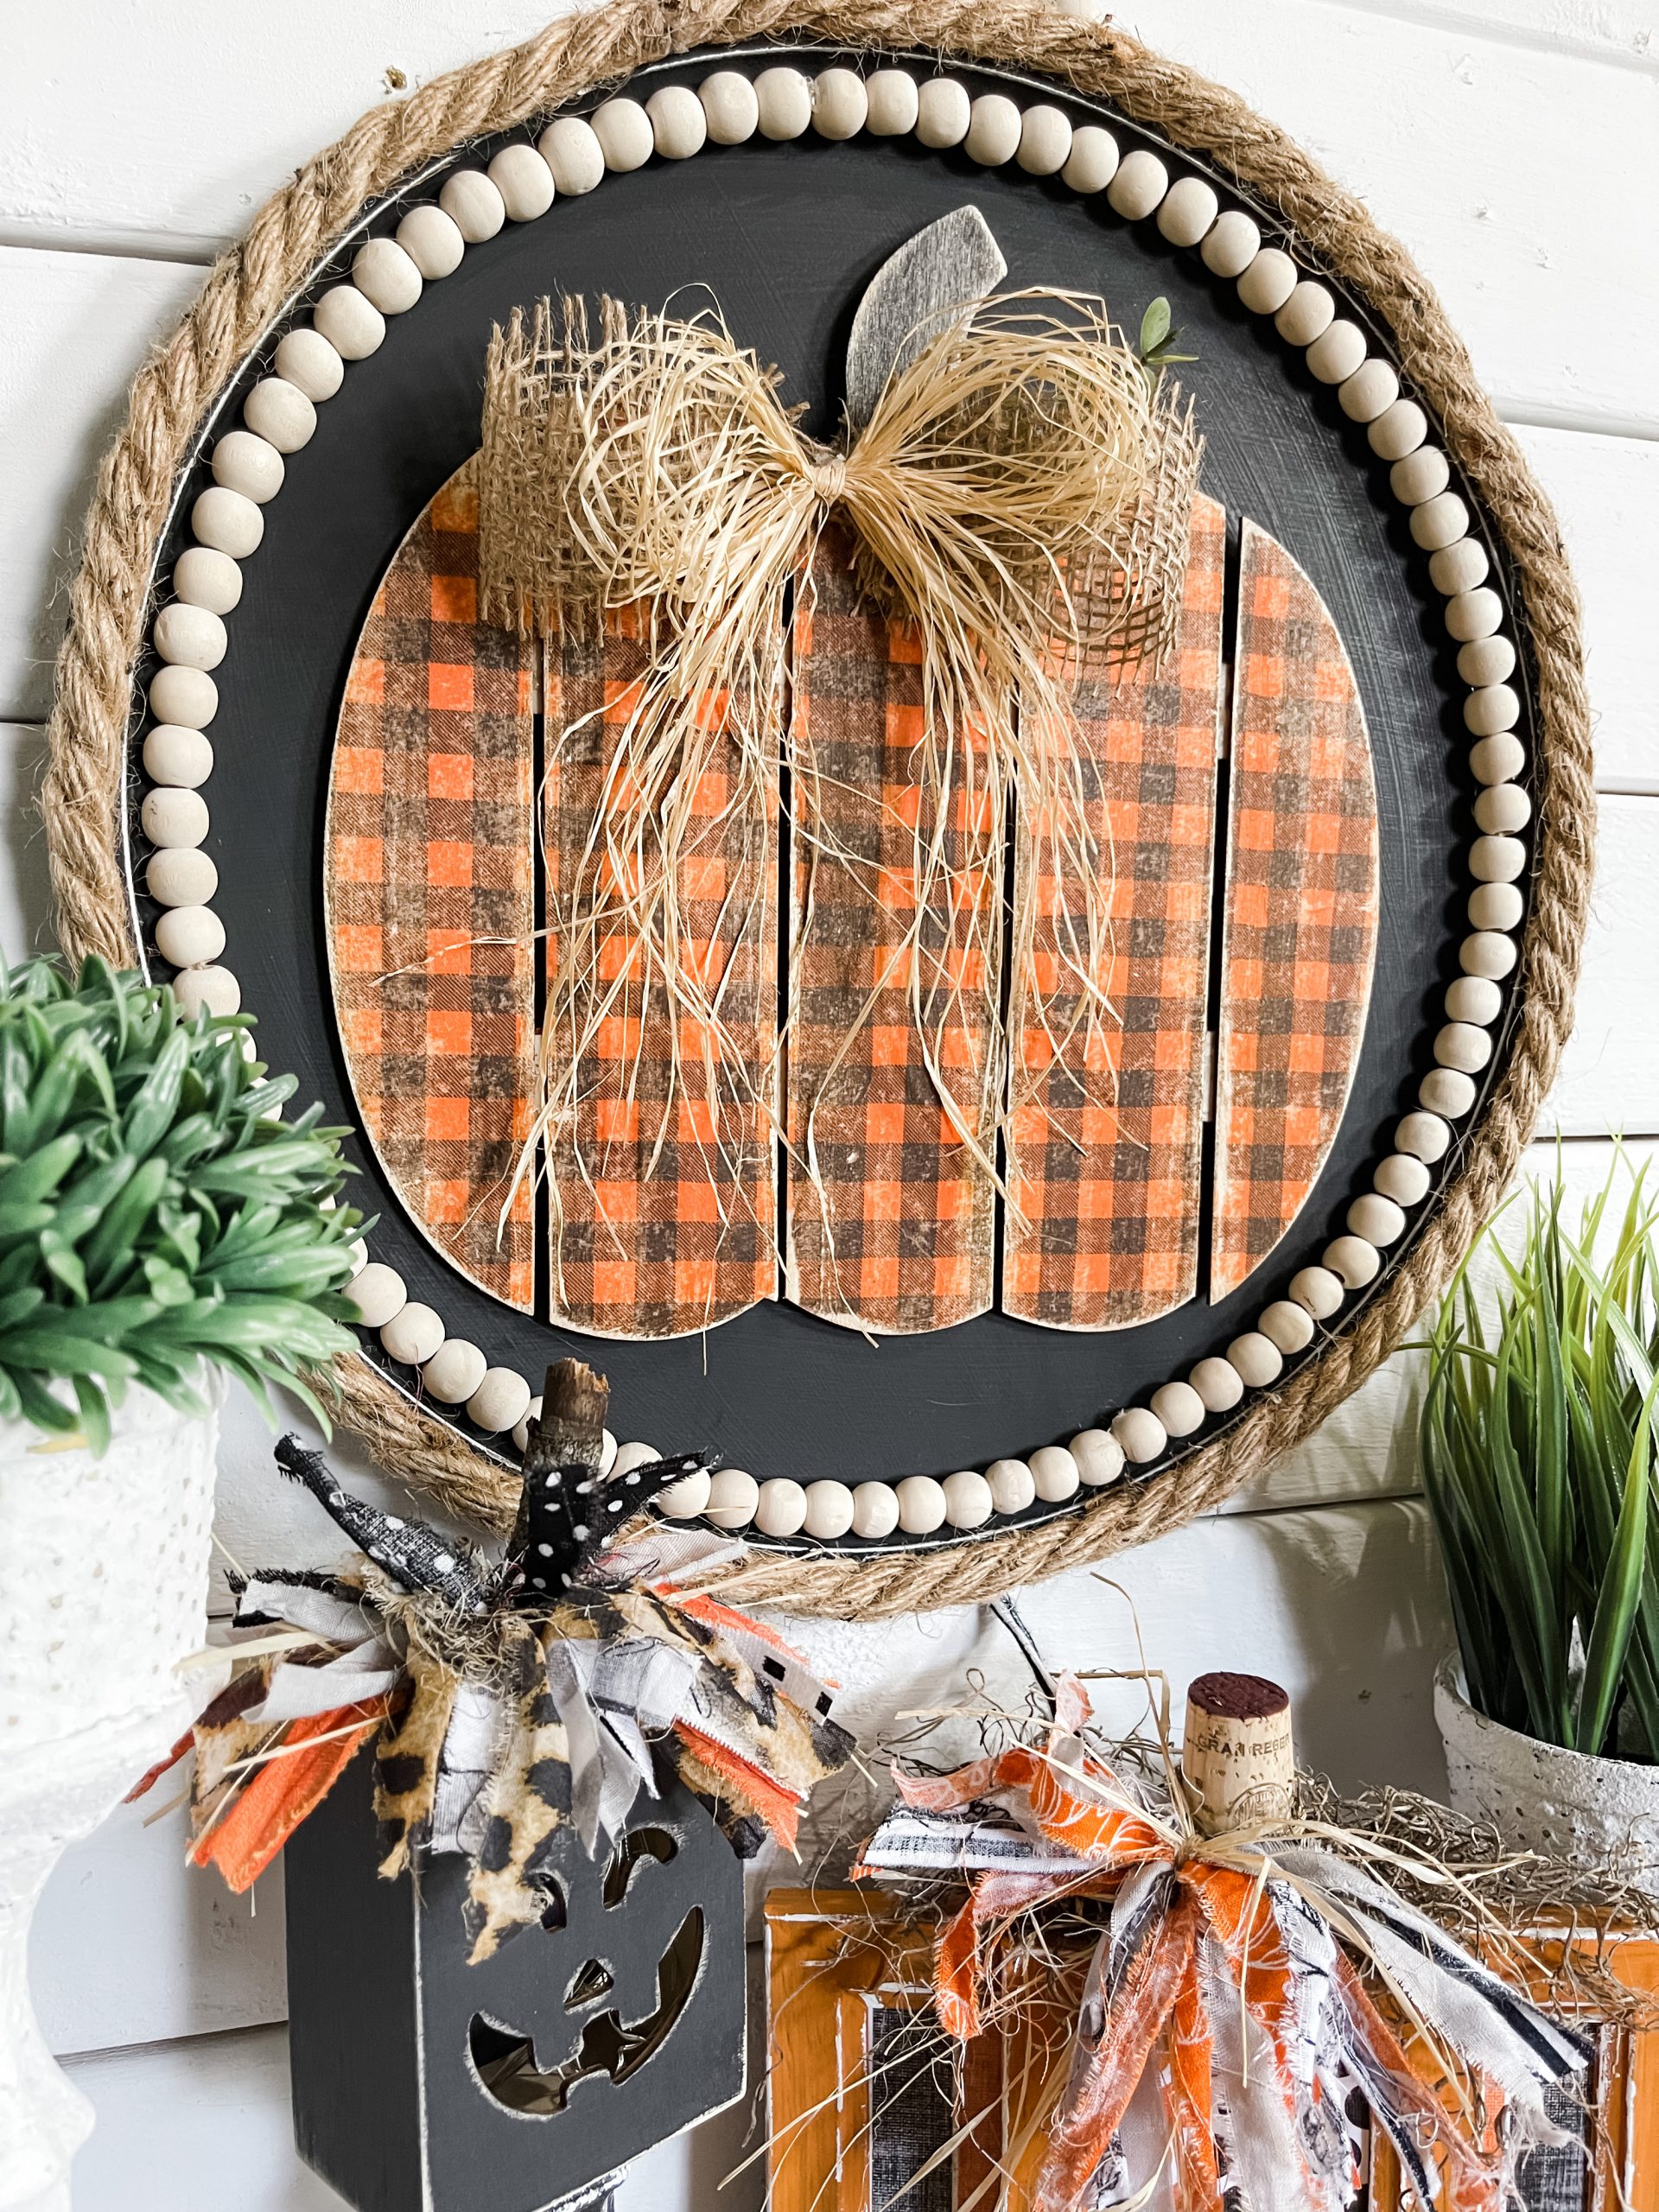
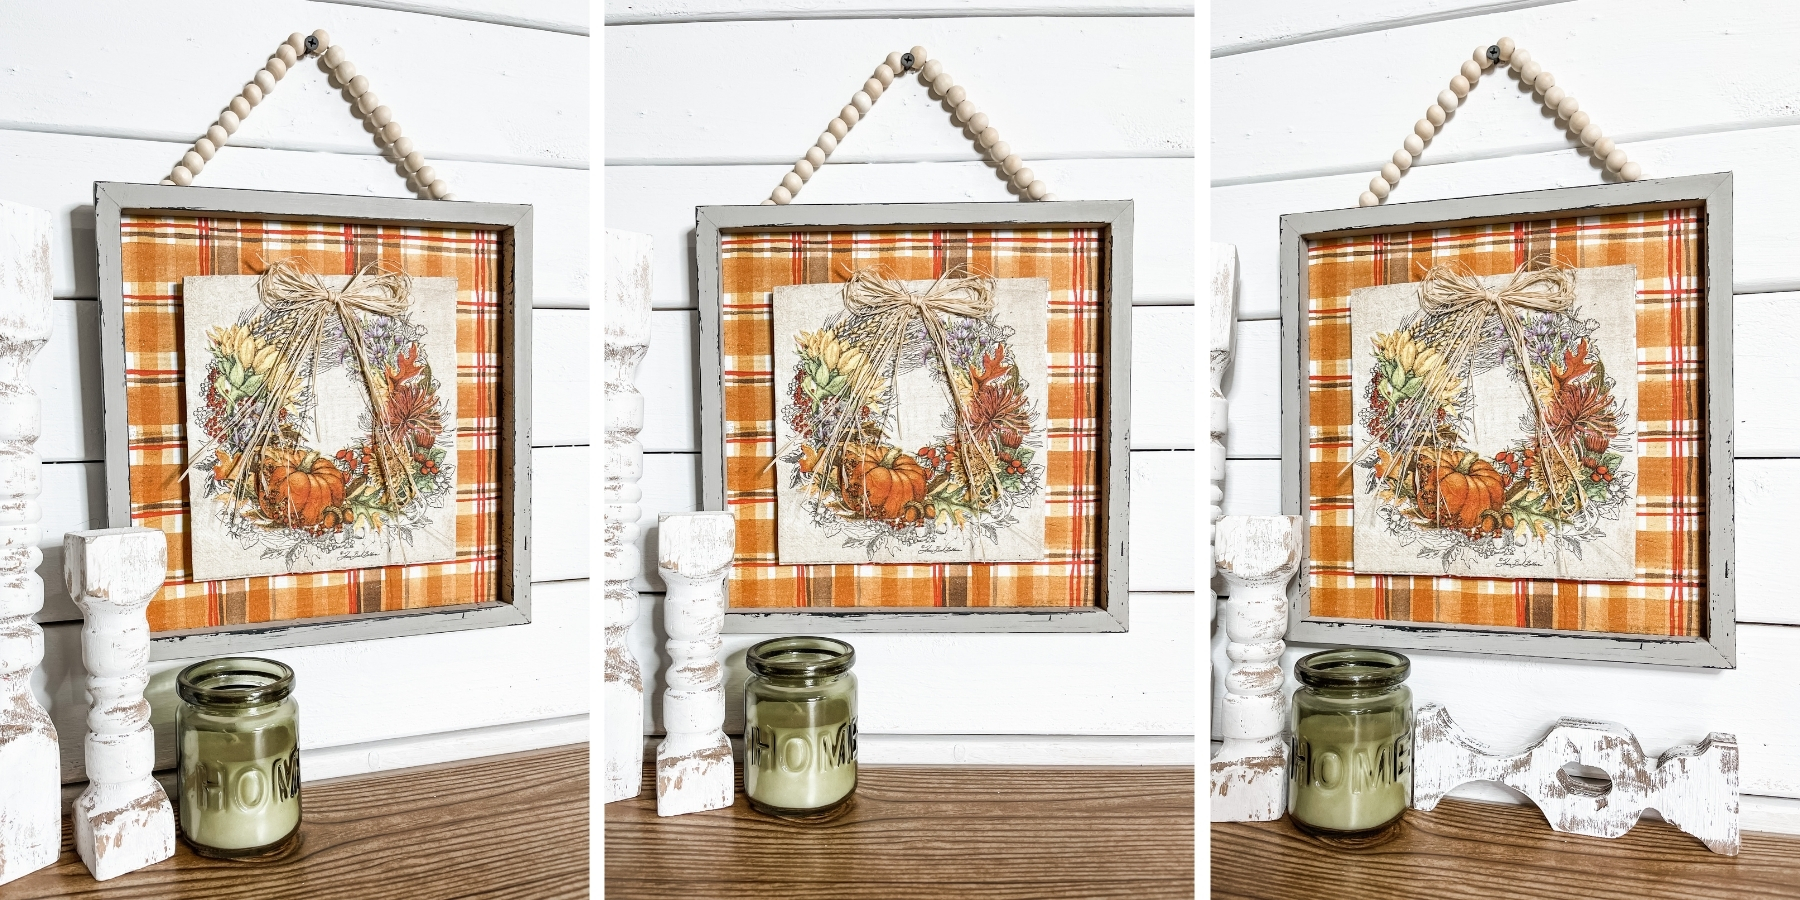
How to Make a Dollar Tree Pizza Pan DIY Distressed Pumpkin Decor
Step one of making this adorable Dollar Tree pizza pan DIY is to sand the front of the pizza pan with either a sanding sponge or a piece of sandpaper.
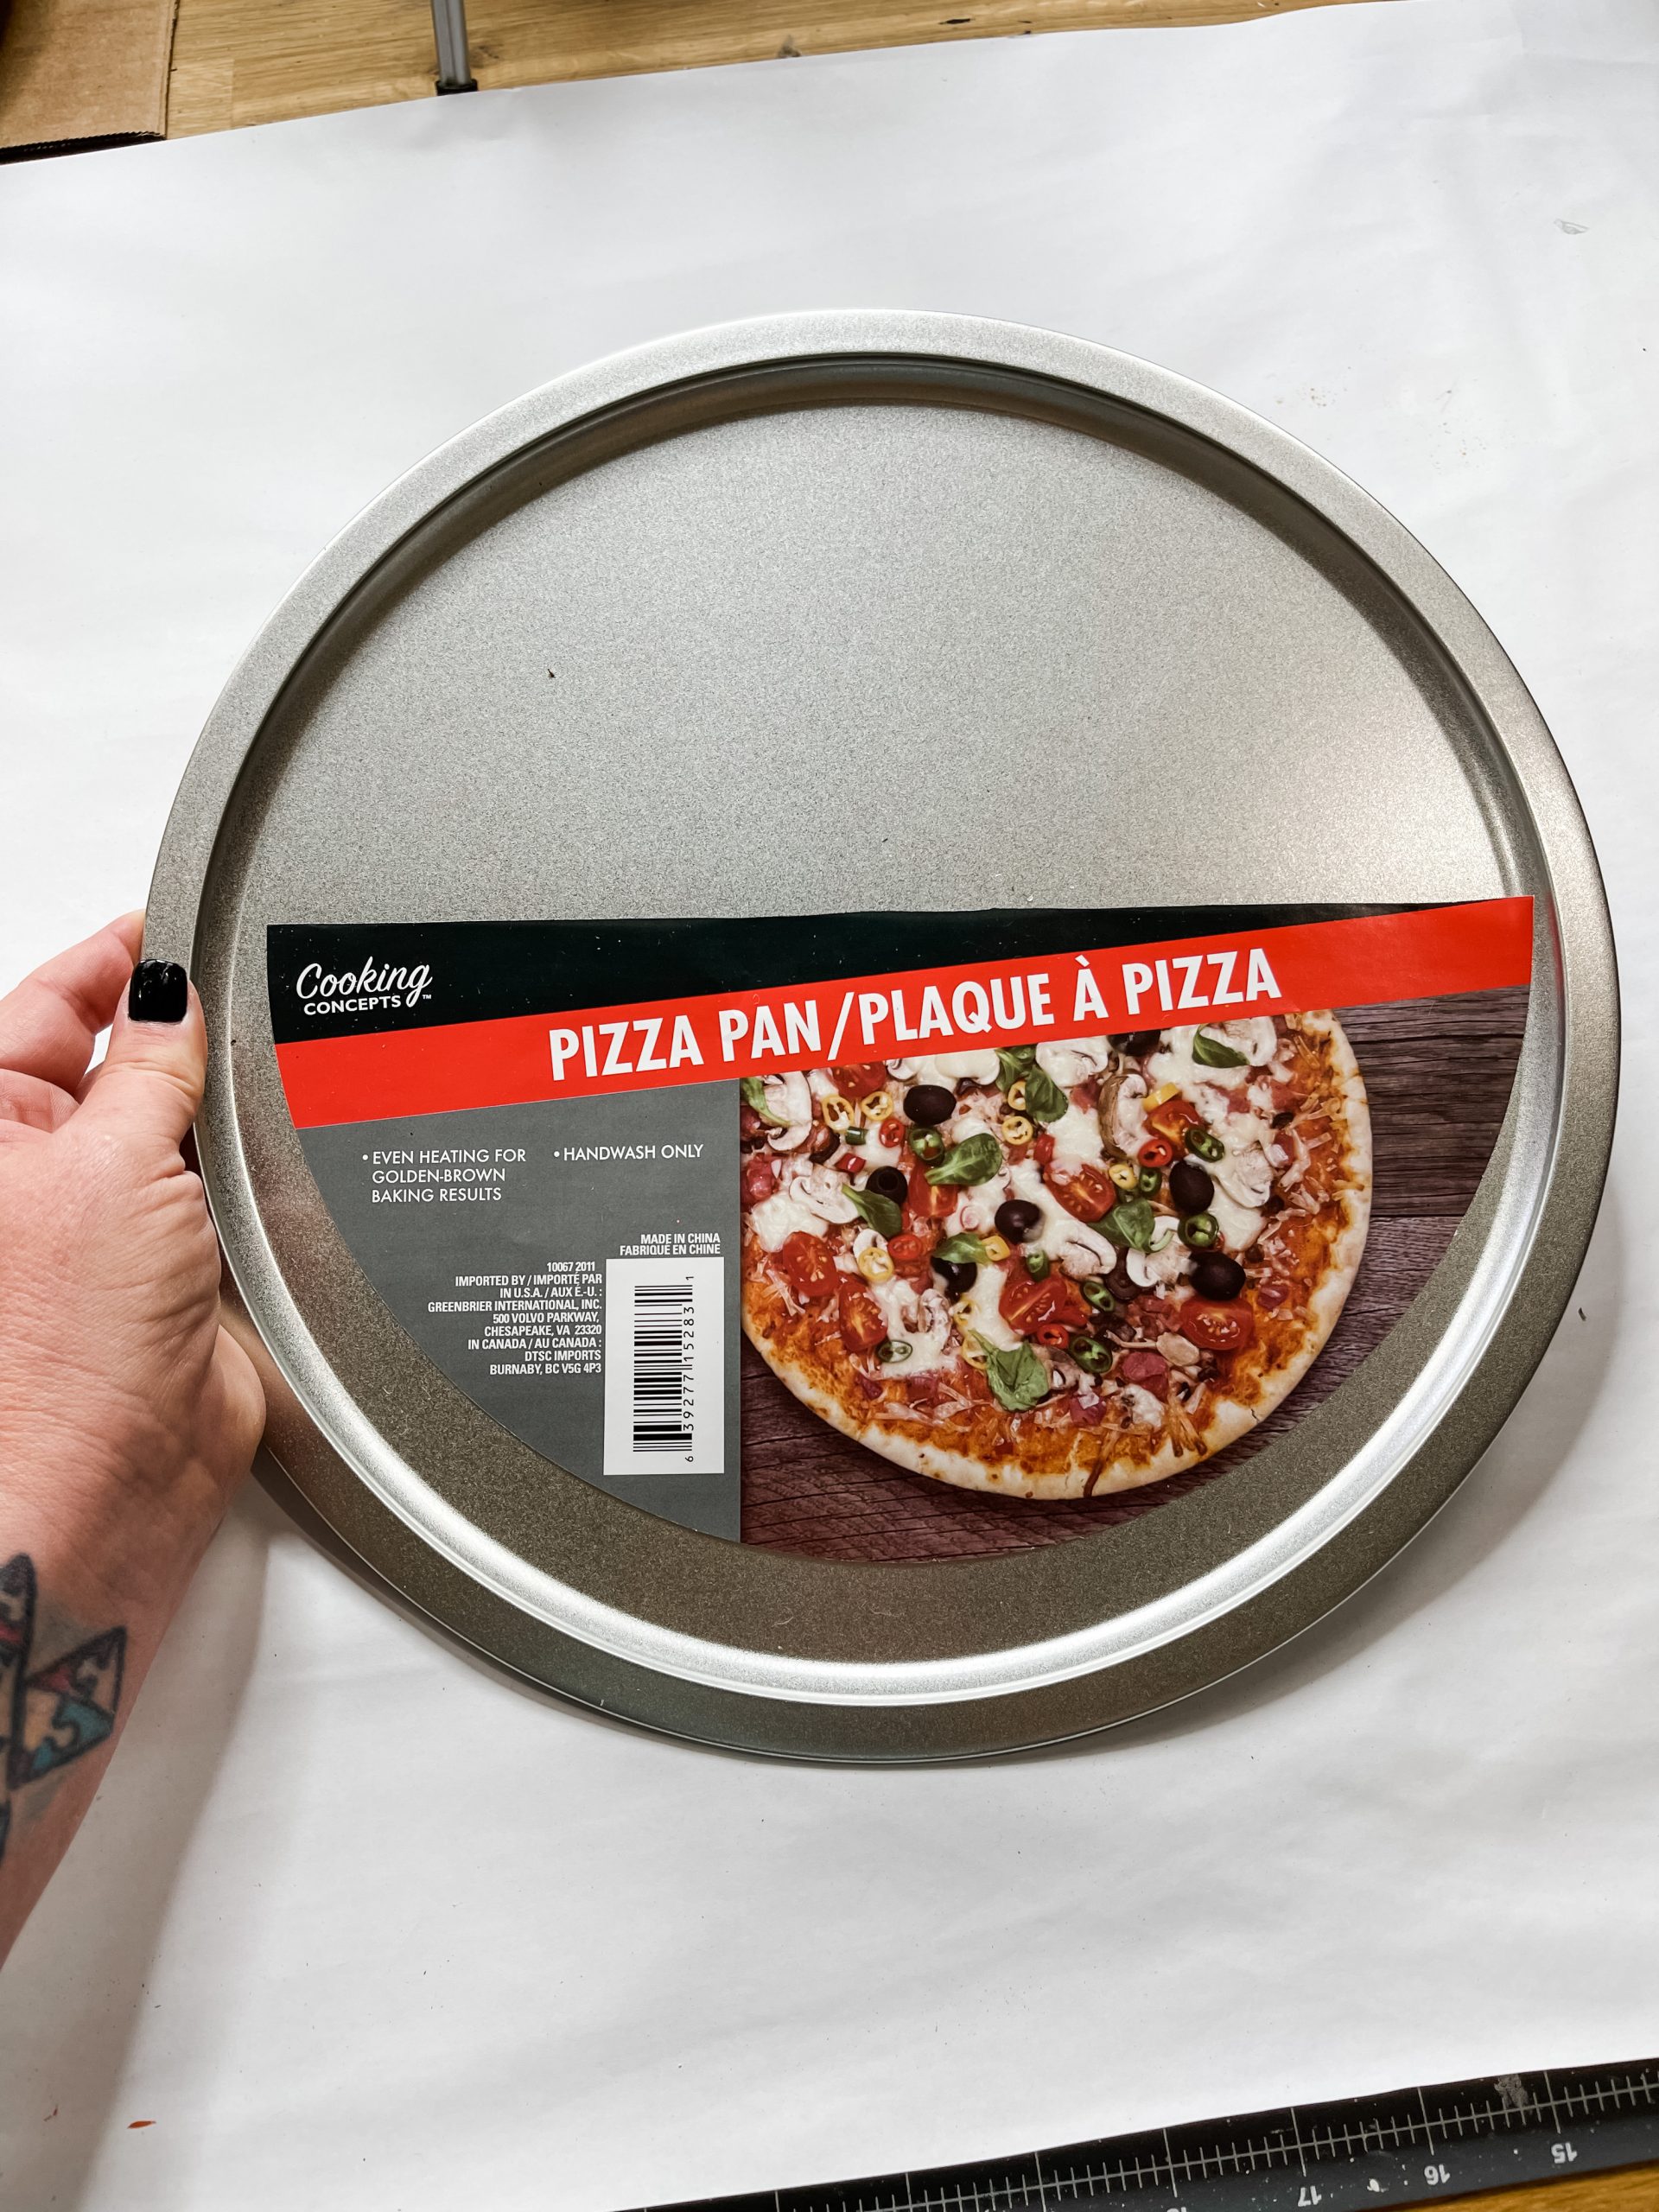
This is going to help create a texture on the metal for the paint to cling to. Dust off the pan and then paint it with Waverly Ink Chalk Paint.
Once you’ve coated the front of the pizza pan, allow the black paint to dry completely. I used my heat gun to speed up the drying process.
Then, lightly sand over the paint and use a brush to remove any paint dust from the pizza pan.
How to decoupage a napkin on wood
Next, I worked on decoupaging the orange and black buffalo check napkin onto the Dollar Tree planked wooden pumpkin.
First, you need to separate the napkin plies and isolate the ply with the pattern. Then, apply a coat of Mod Podge to the surface of the planked pumpkin and place the napkin onto it.
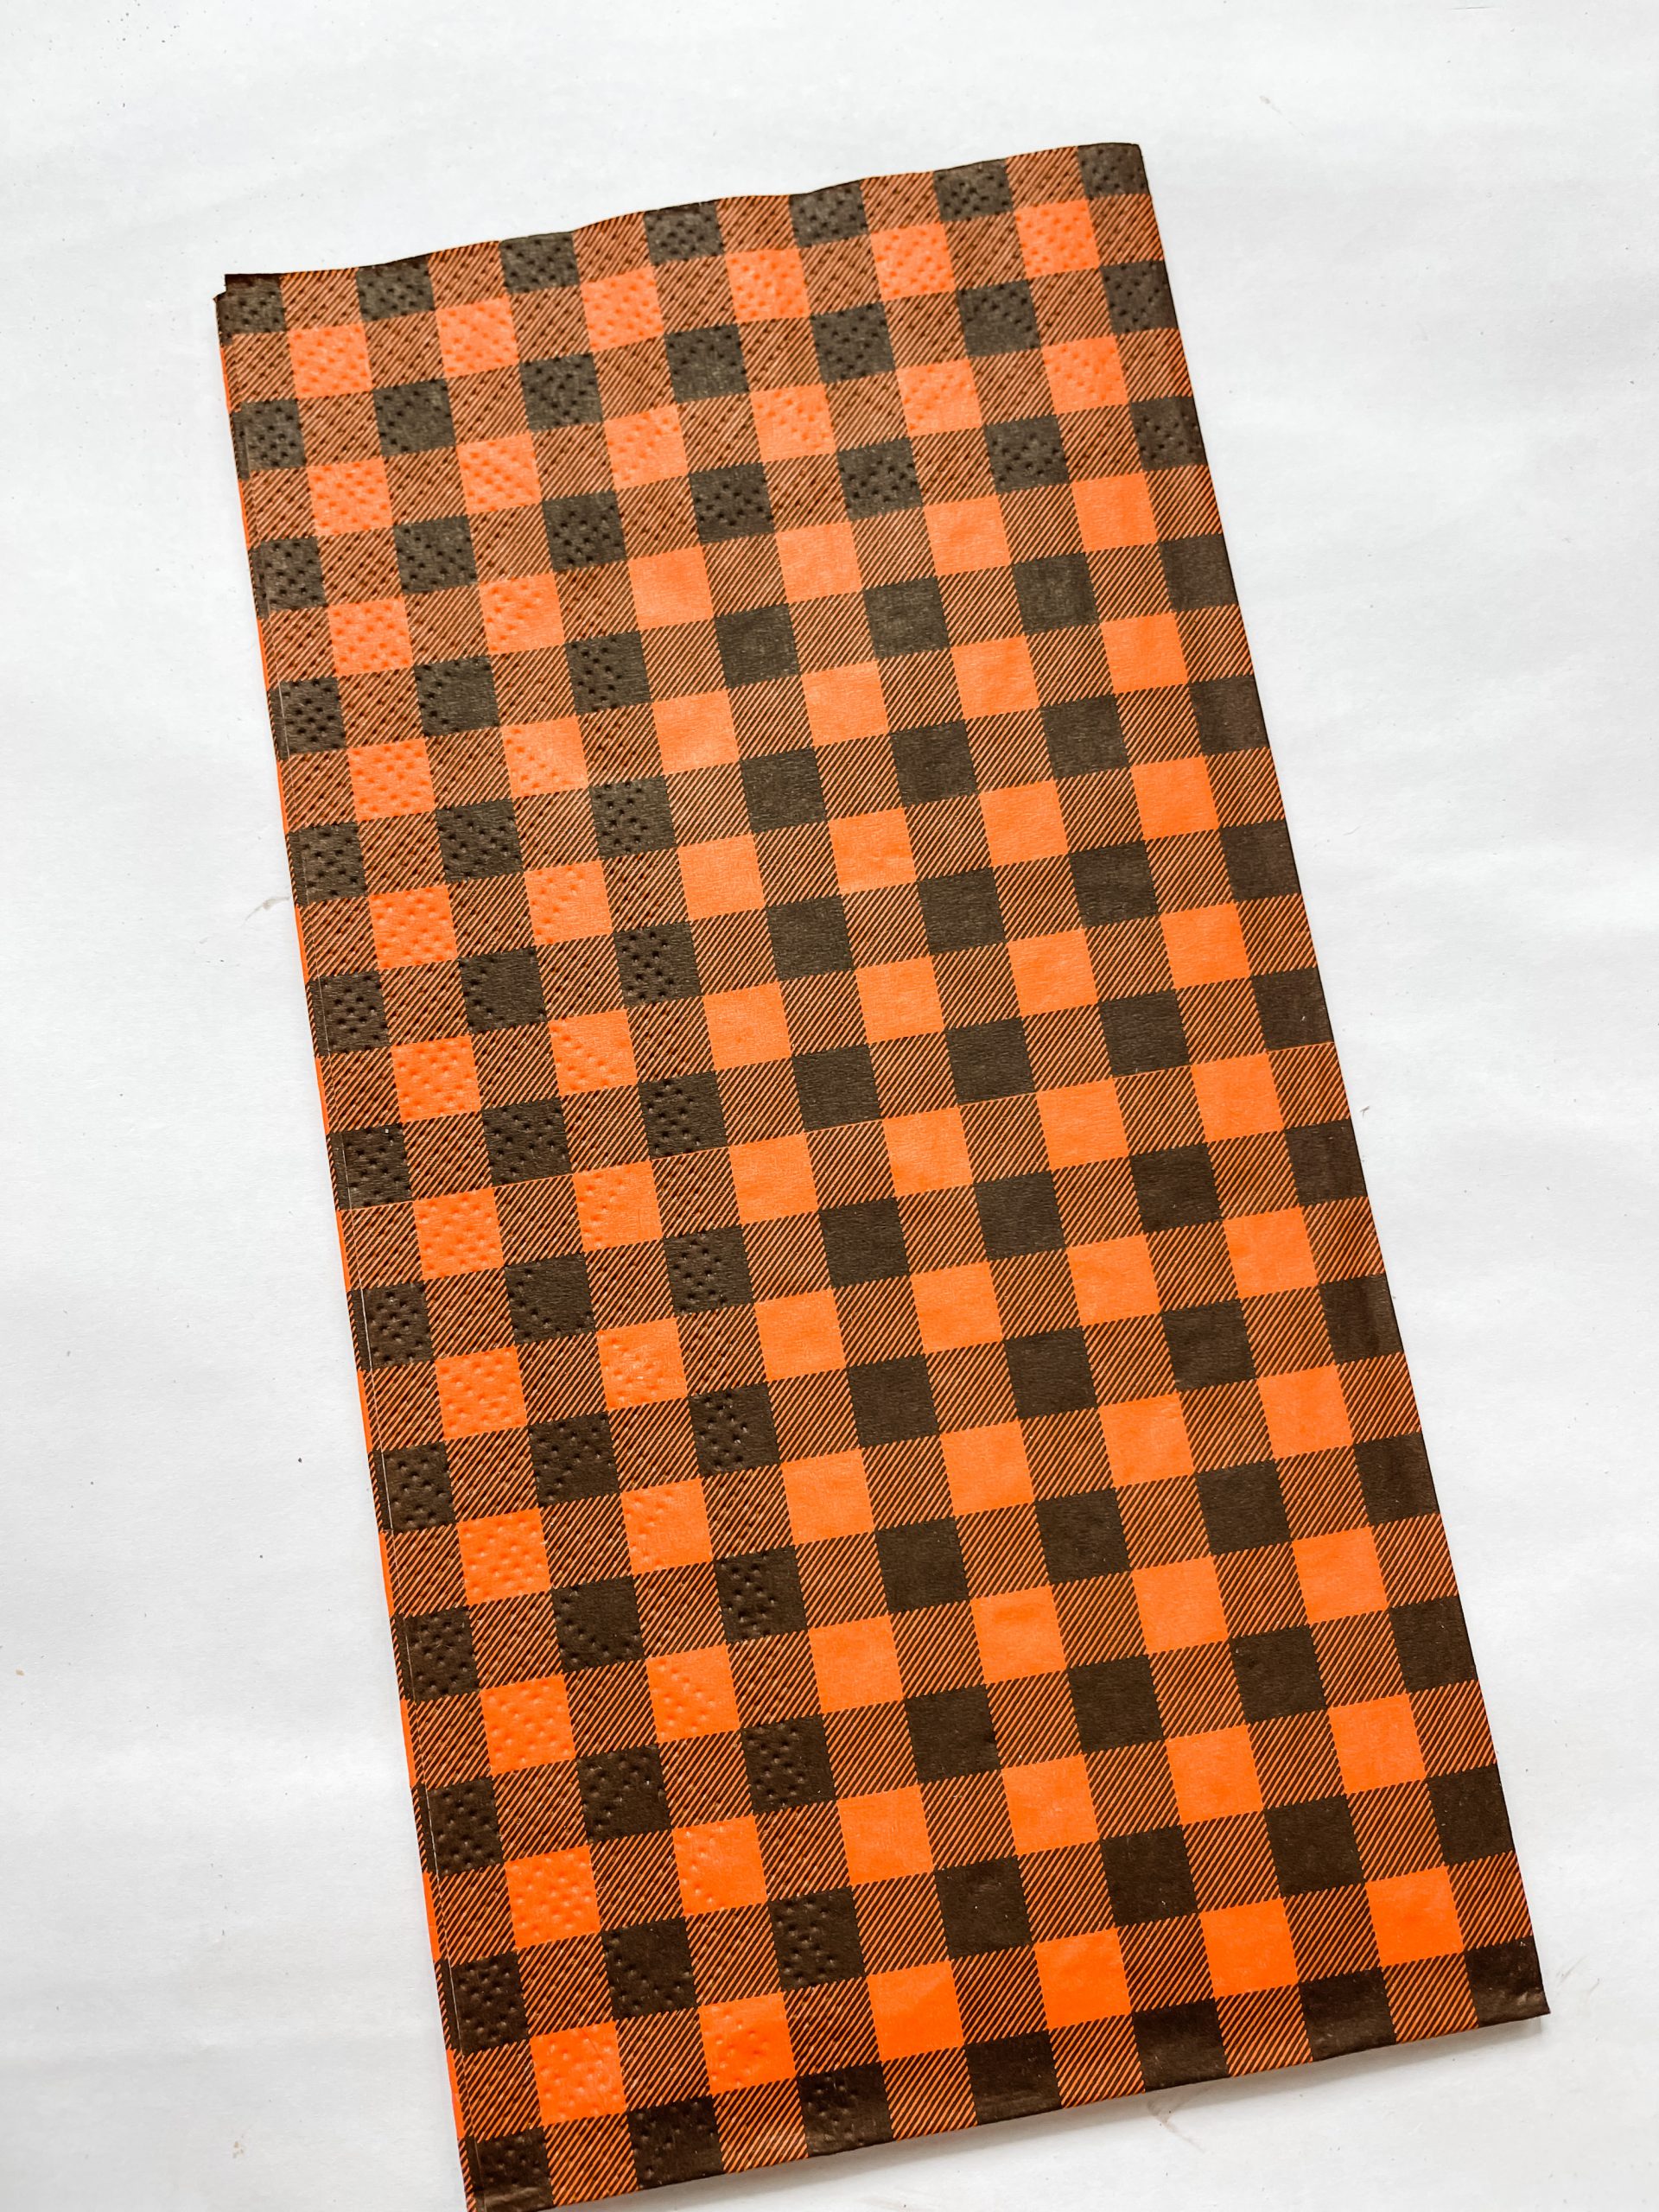
Lay a piece of plastic saran wrap over top the napkin and use a rolling pin to smooth out any wrinkles or bubbles in the napkin.
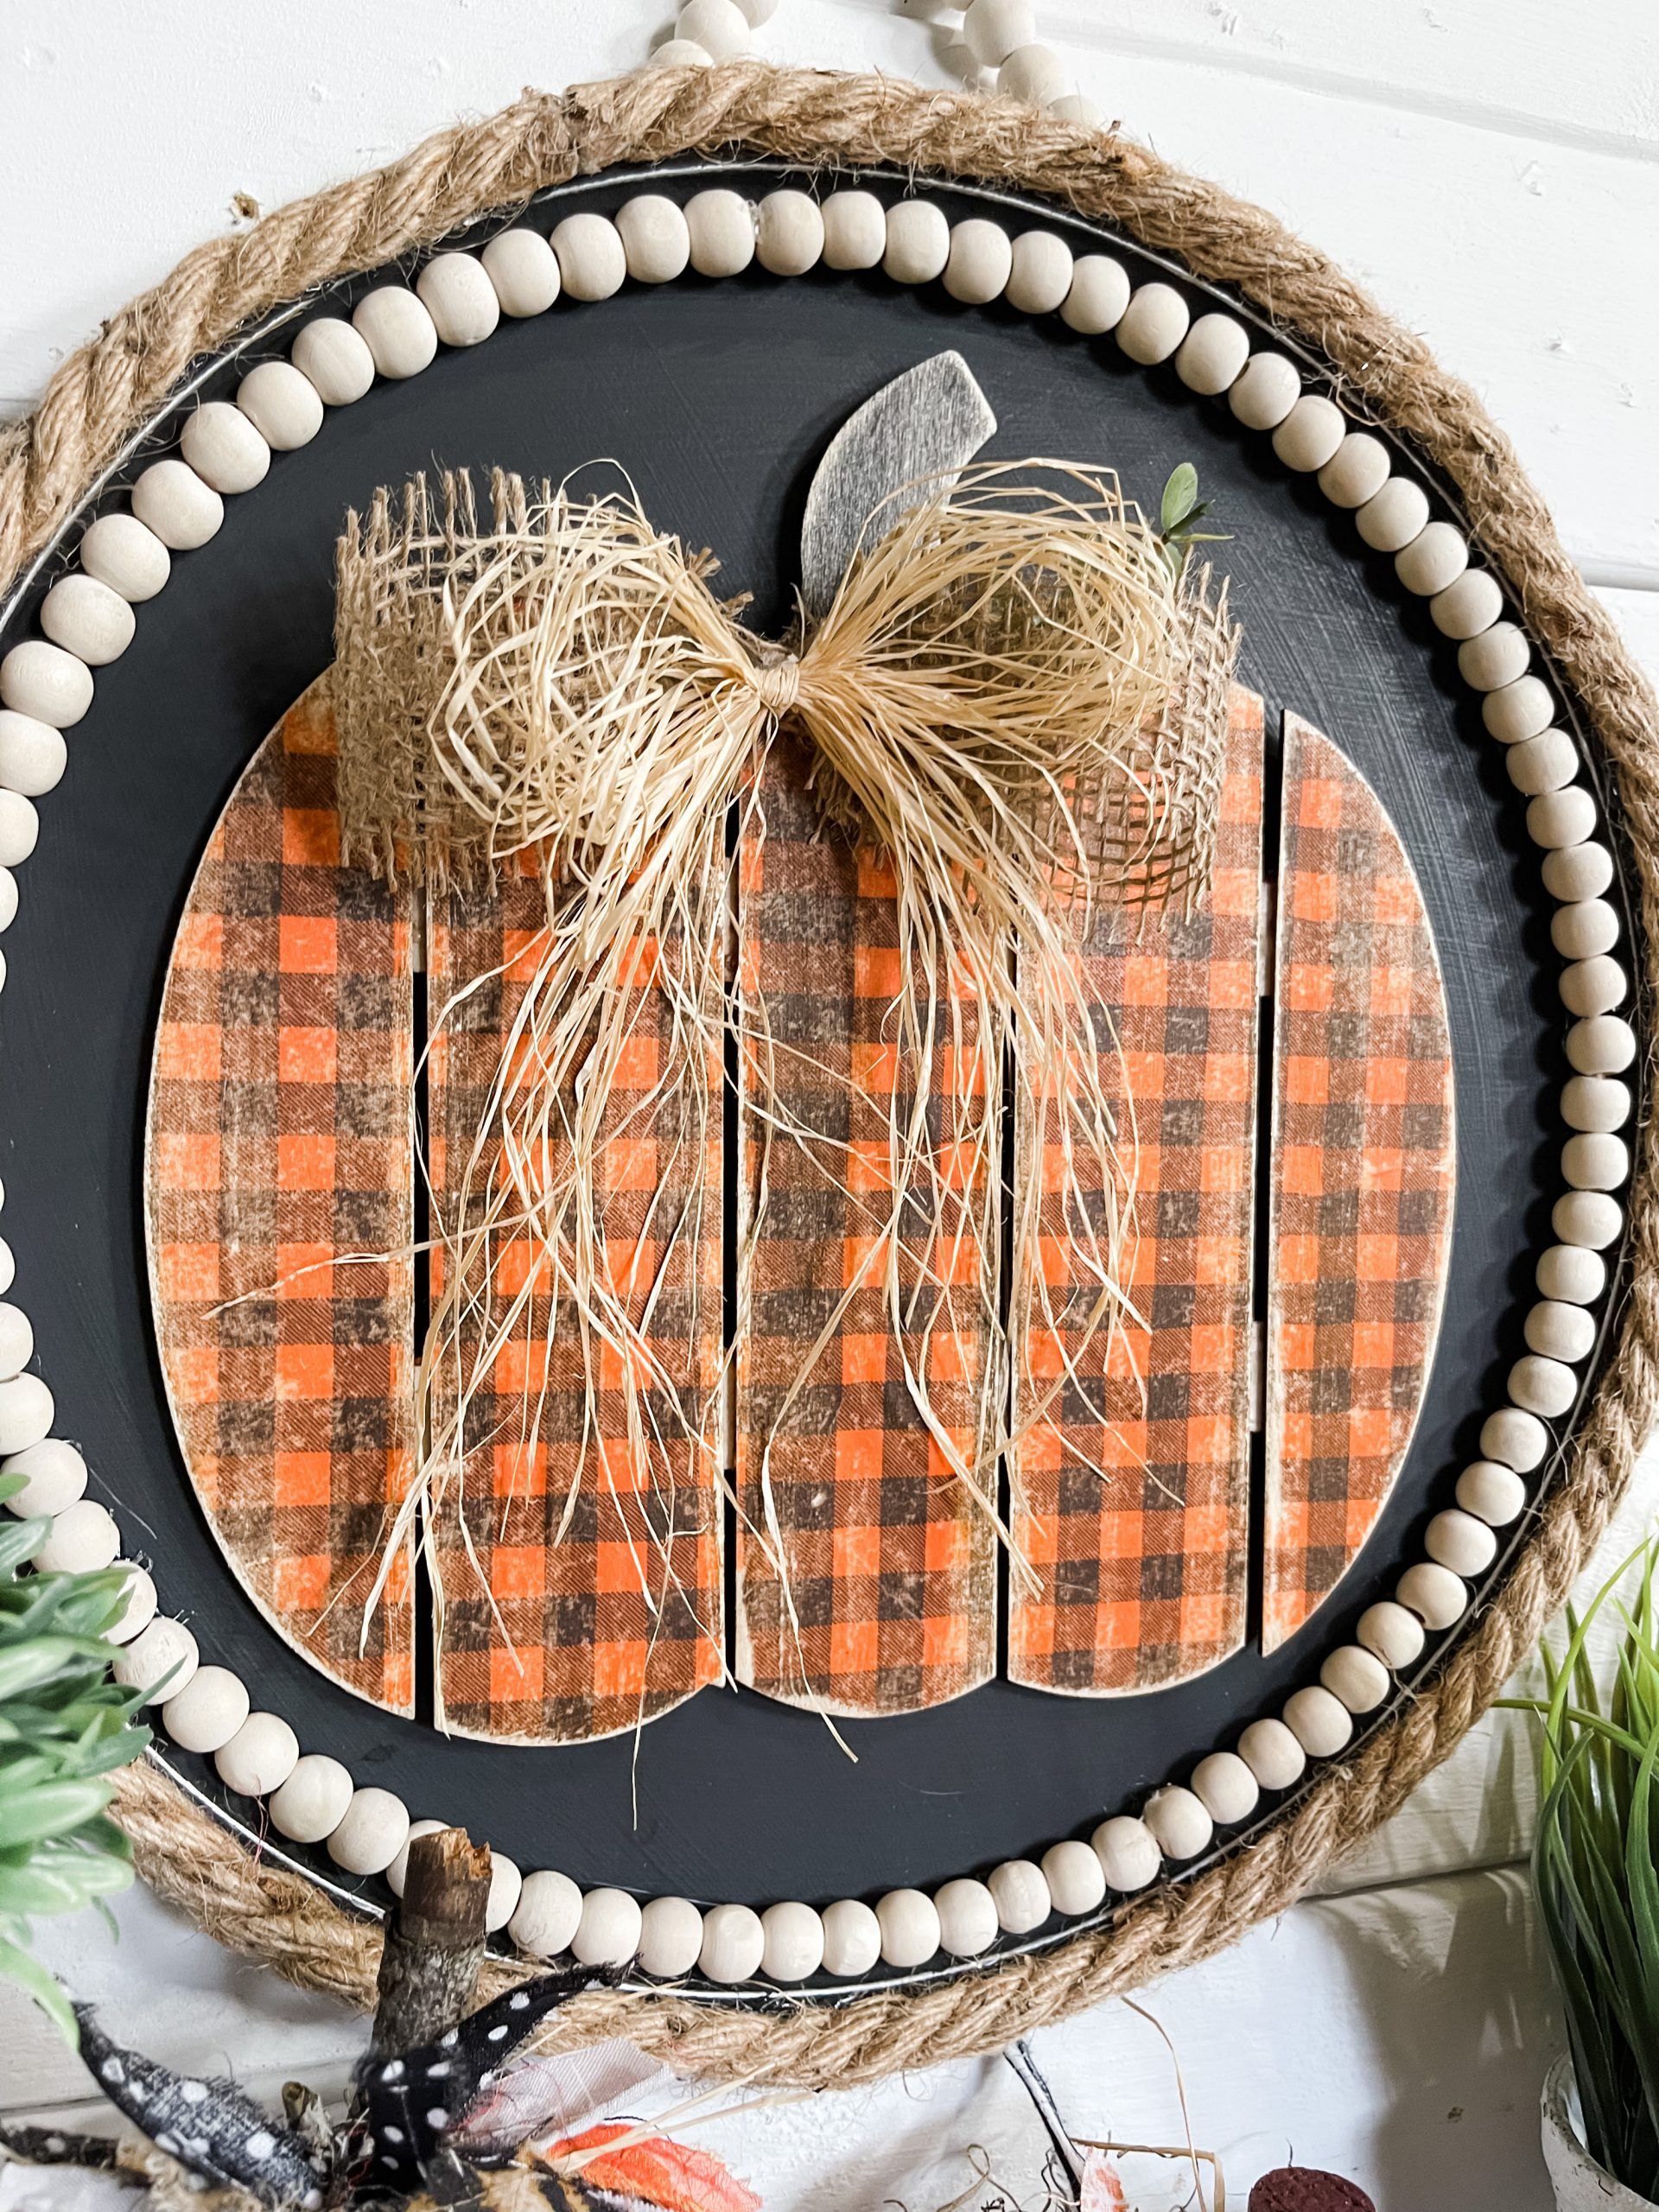
Allow the Mod Podge to dry (I used my heat gun again), then remove the excess napkin from around the pumpkin. I used a sanding sponge to tear off the excess napkin.
Go between the planks of the pumpkin with a piece of sandpaper to remove the napkin from between each plank.
Lightly go over the surface of the pumpkin with a sanding sponge to distress the napkin. Then, pain the stem of the pumpkin with black paint and distress it as well.
Bring it all together!
Now, hot glue the wood bead garland around the inner edge of the Dollar Tree pizza pan. If you don’t have the wood bead garlands from Dollar Tree, you can make your own with beads from amazon and some jute twine.
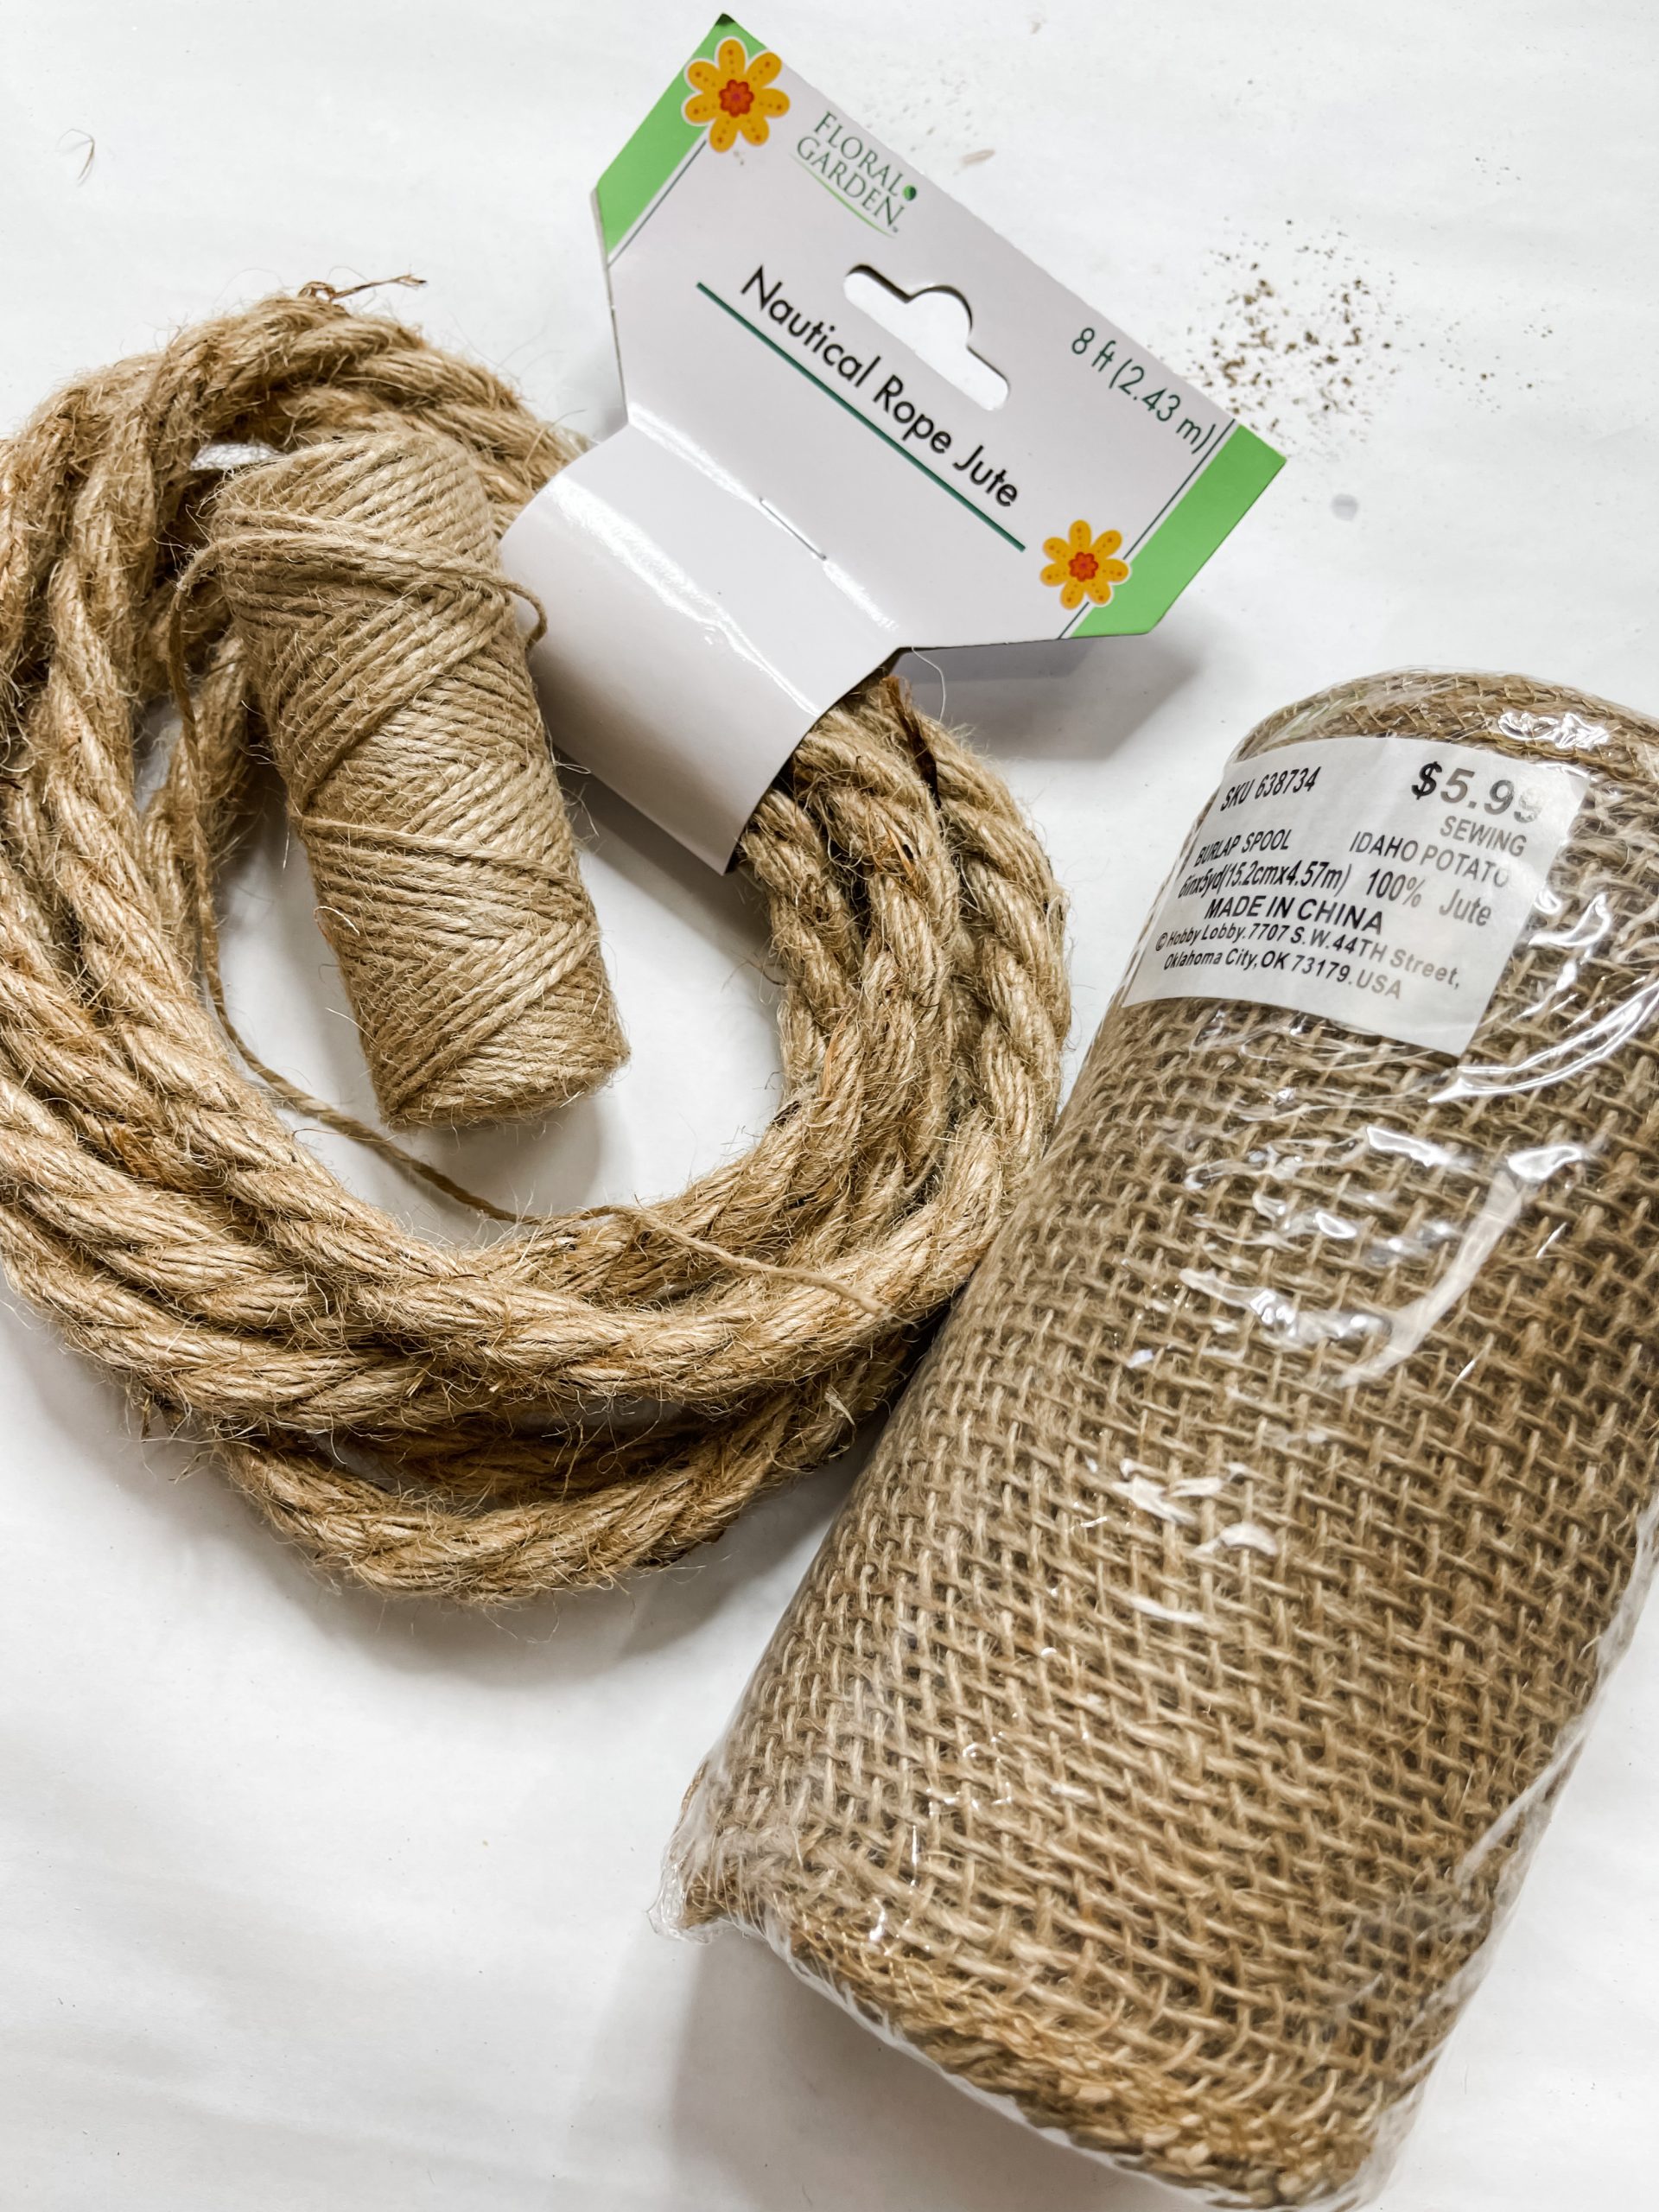
Then, hot glue the nautical rope around the outer edge of the pizza pan. Tie your raffia into the shape of a bow, cut a strip of your burlap and fold it into the shape of a bow tie, and hot glue it together.

Hot glue the burlap bow at the base of the pumpkin stem and hot glue the raffia bow overtop the burlap bow. Then, hot glue a piece of the eucalyptus behind the burlap bow.

Now, hot glue the pumpkin to the center of the Dollar Tree pizza pan. Finally, flip the pizza pan over and hot glue the wood bead garland ends to the back of the pan to create the hanger!
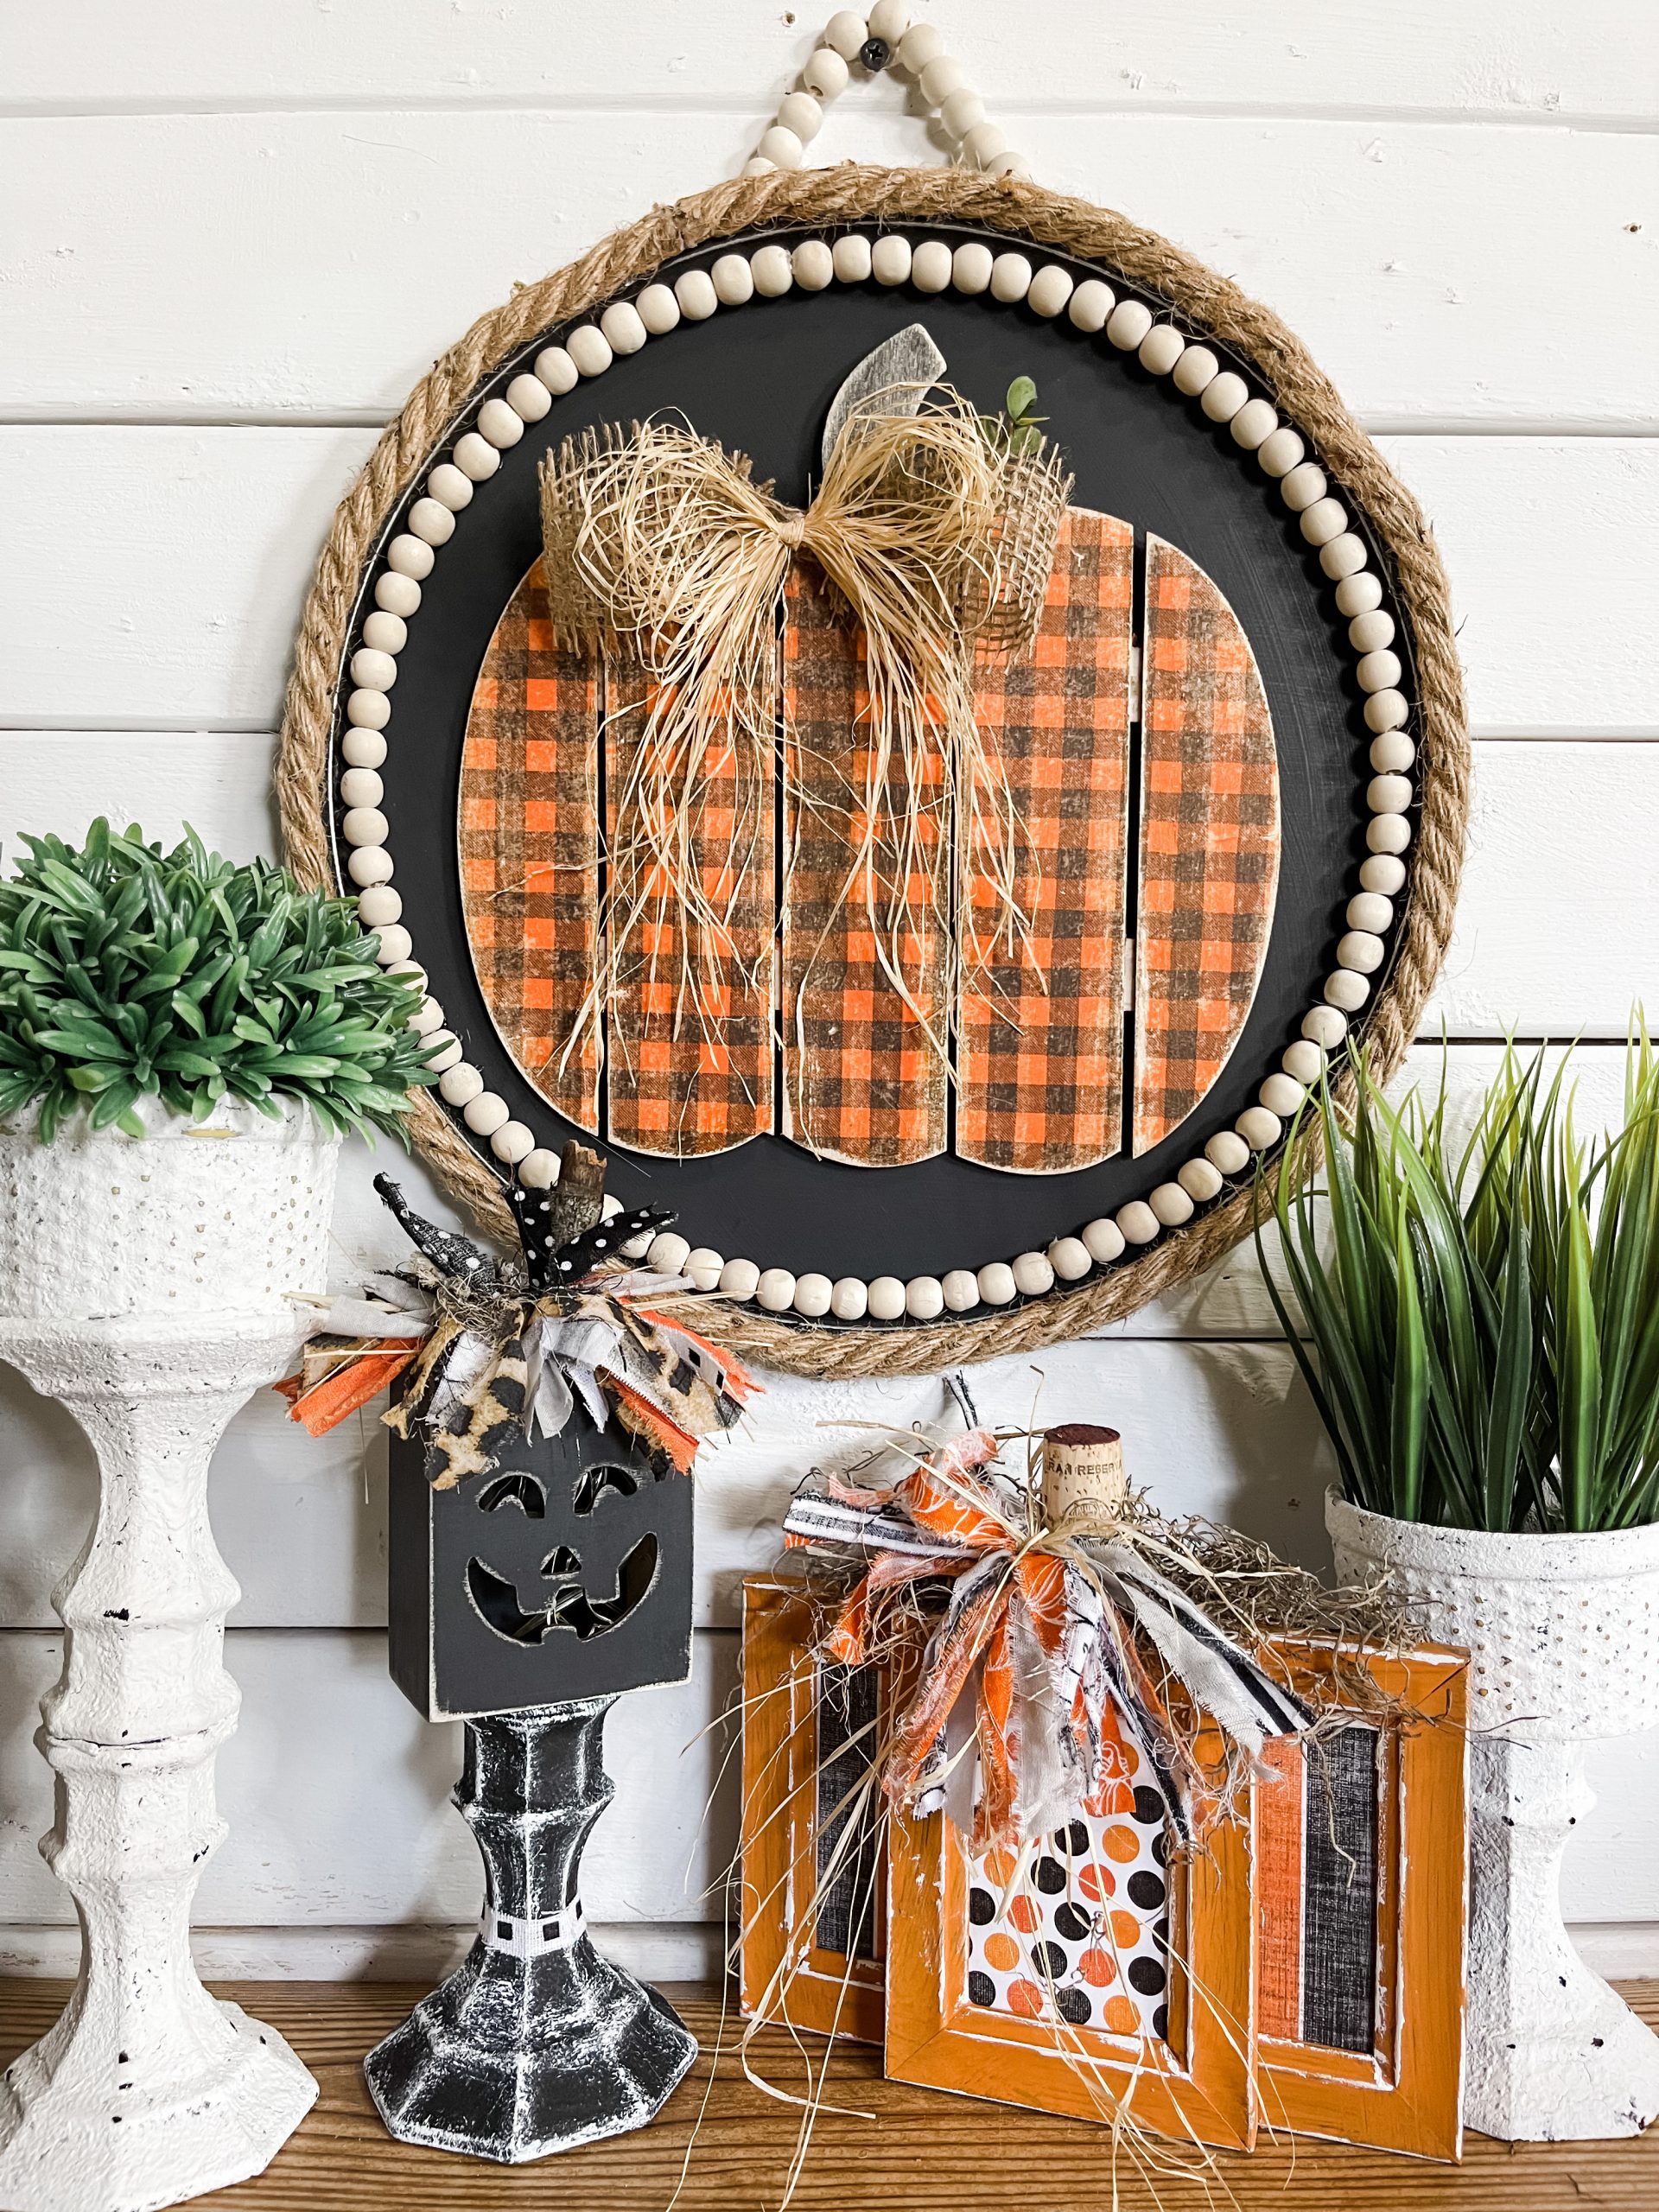
Hot glue a little piece of burlap, ribbon, or fabric over the twine on the back of the pan to really secure the hanger to the pan.
I hope you enjoyed this Dollar Tree Pizza Pan DIY Distressed Pumpkin Decor as much as I did and decide to make it for yourself! If you do, I would love to see how yours turns out!
You should totally join my FREE Facebook group called On A Budget Crafts! It is a judgment-free community for DIY crafters to show off their projects and ideas.
If you loved this Dollar Tree Pizza Pan DIY Distressed Pumpkin Decor, you might also like these DIY ideas!
Thanks for stopping by! XOXO Amber
You can also shop my ENTIRE AMAZON Favorites shop just click here! It’s packed full of all the things I use and love. Here is the supply list I highly recommend every creative have on hand!!
Would you also pin my blog for later and get on my newsletter alerts? I would love to have you join my #craftycrew.
I email alerts about new blogs like this Dollar Tree Pizza Pan DIY Distressed Pumpkin Decor so you’re always up to date on fun, new DIY ideas!
Inspired? Leave me a comment below! I love hearing from my readers!

Join my free “ON A BUDGET CRAFTS” Facebook group!

Hi! Wanting to do this cute craft for fall , but having a hard time finding the planked pumpkins anywhere. Also, what size are the pumpkins? Thanks!
The pumpkin came from Dollar Tree, but if you can’t find it you could cut your own from cardboard or foamboard. I would estimate it’s approximately 12inches wide, but you would be able to make it whatever size you wanted if you use cardboard or foamboard.
What size pizza pan did you use?
I love this pumpkin pizza pan, hope it goes viral too, so creative