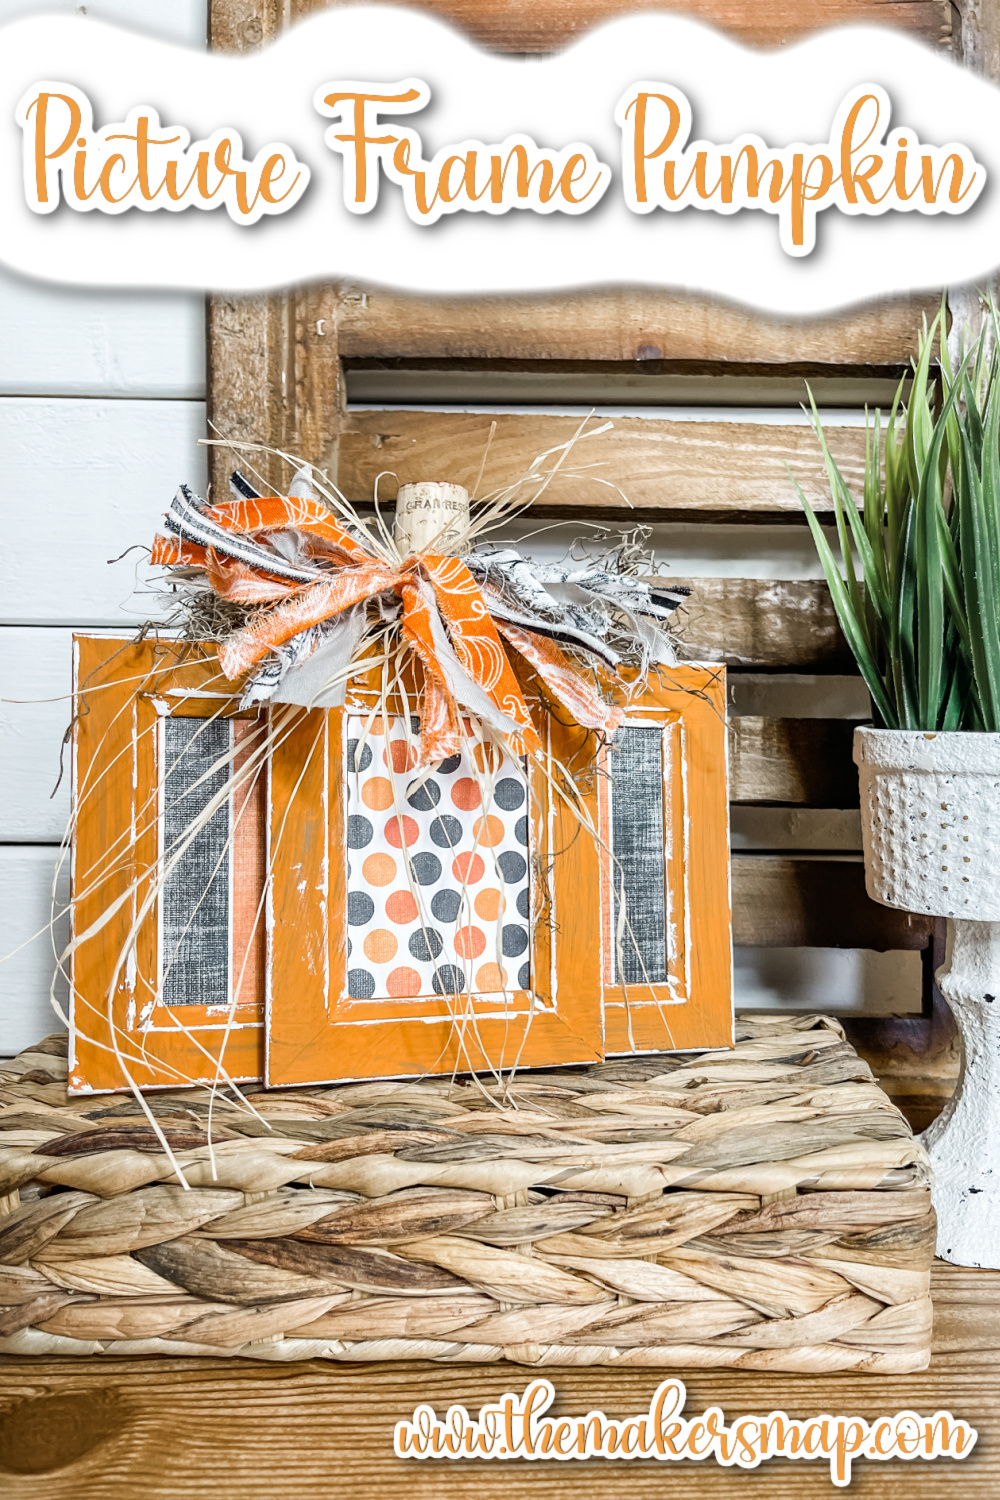
Picture Frame Pumpkin DIY Fall Decor
Okay, I know I say this a lot, but I really think I hit the nail on the head with this Picture Frame Pumpkin DIY Fall Decor! Not only is this Fall DIY project super stinking cute, but it is also very affordable to make!
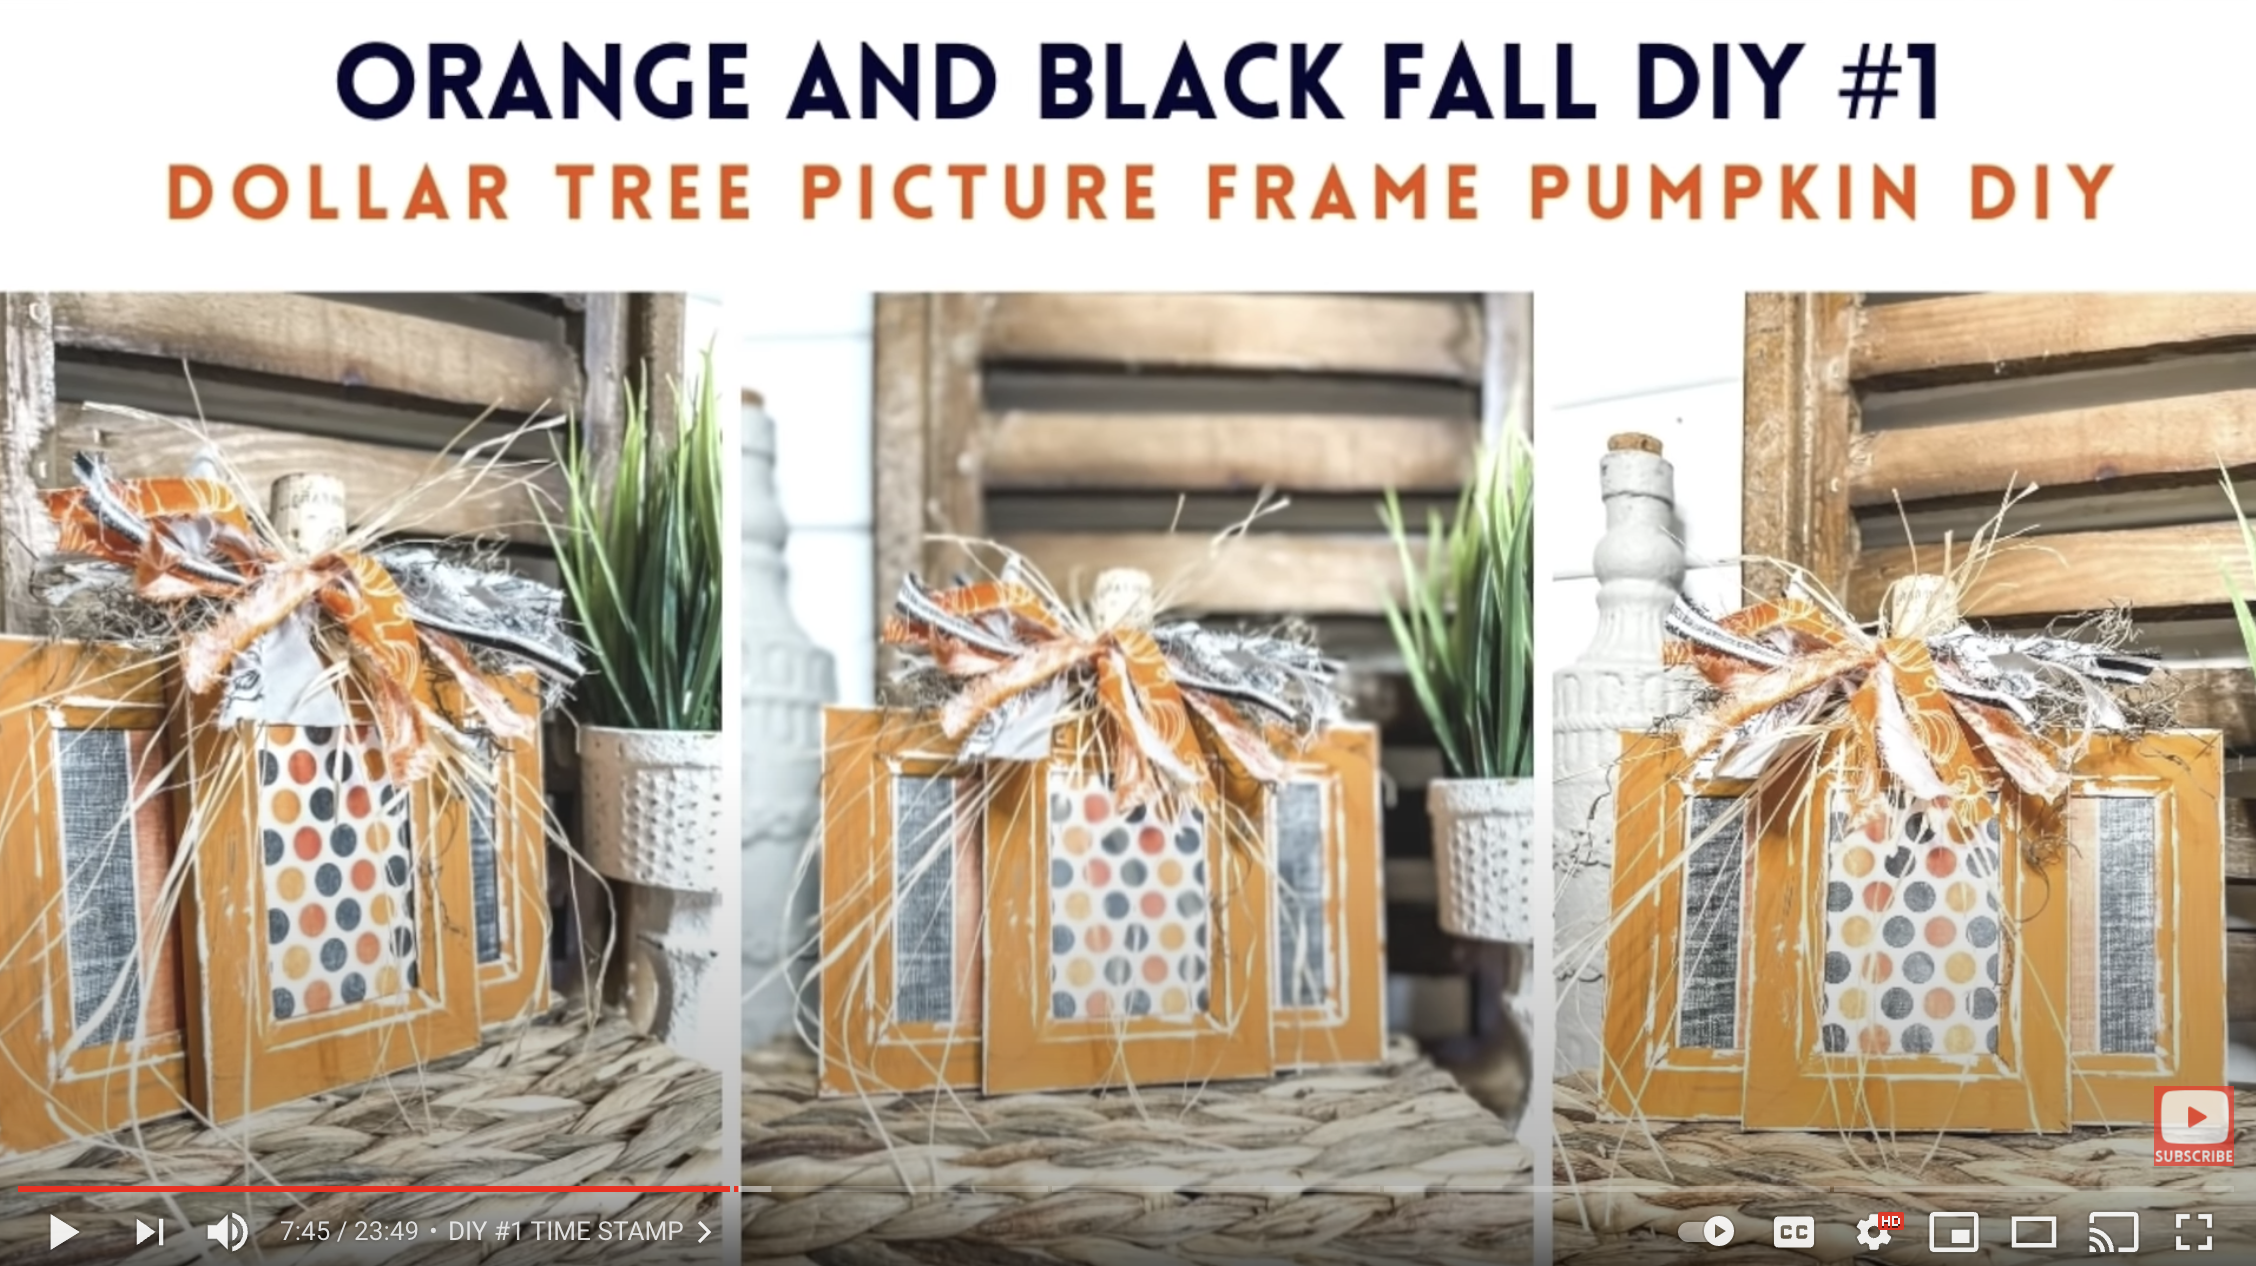
Watch the DIY tutorial video
I shared the quick DIY tutorial for this Picture Frame Pumpkin DIY Fall Decor along with three other orange and black DIY ideas for Fall on my Youtube channel!
Check out the other DIY ideas:
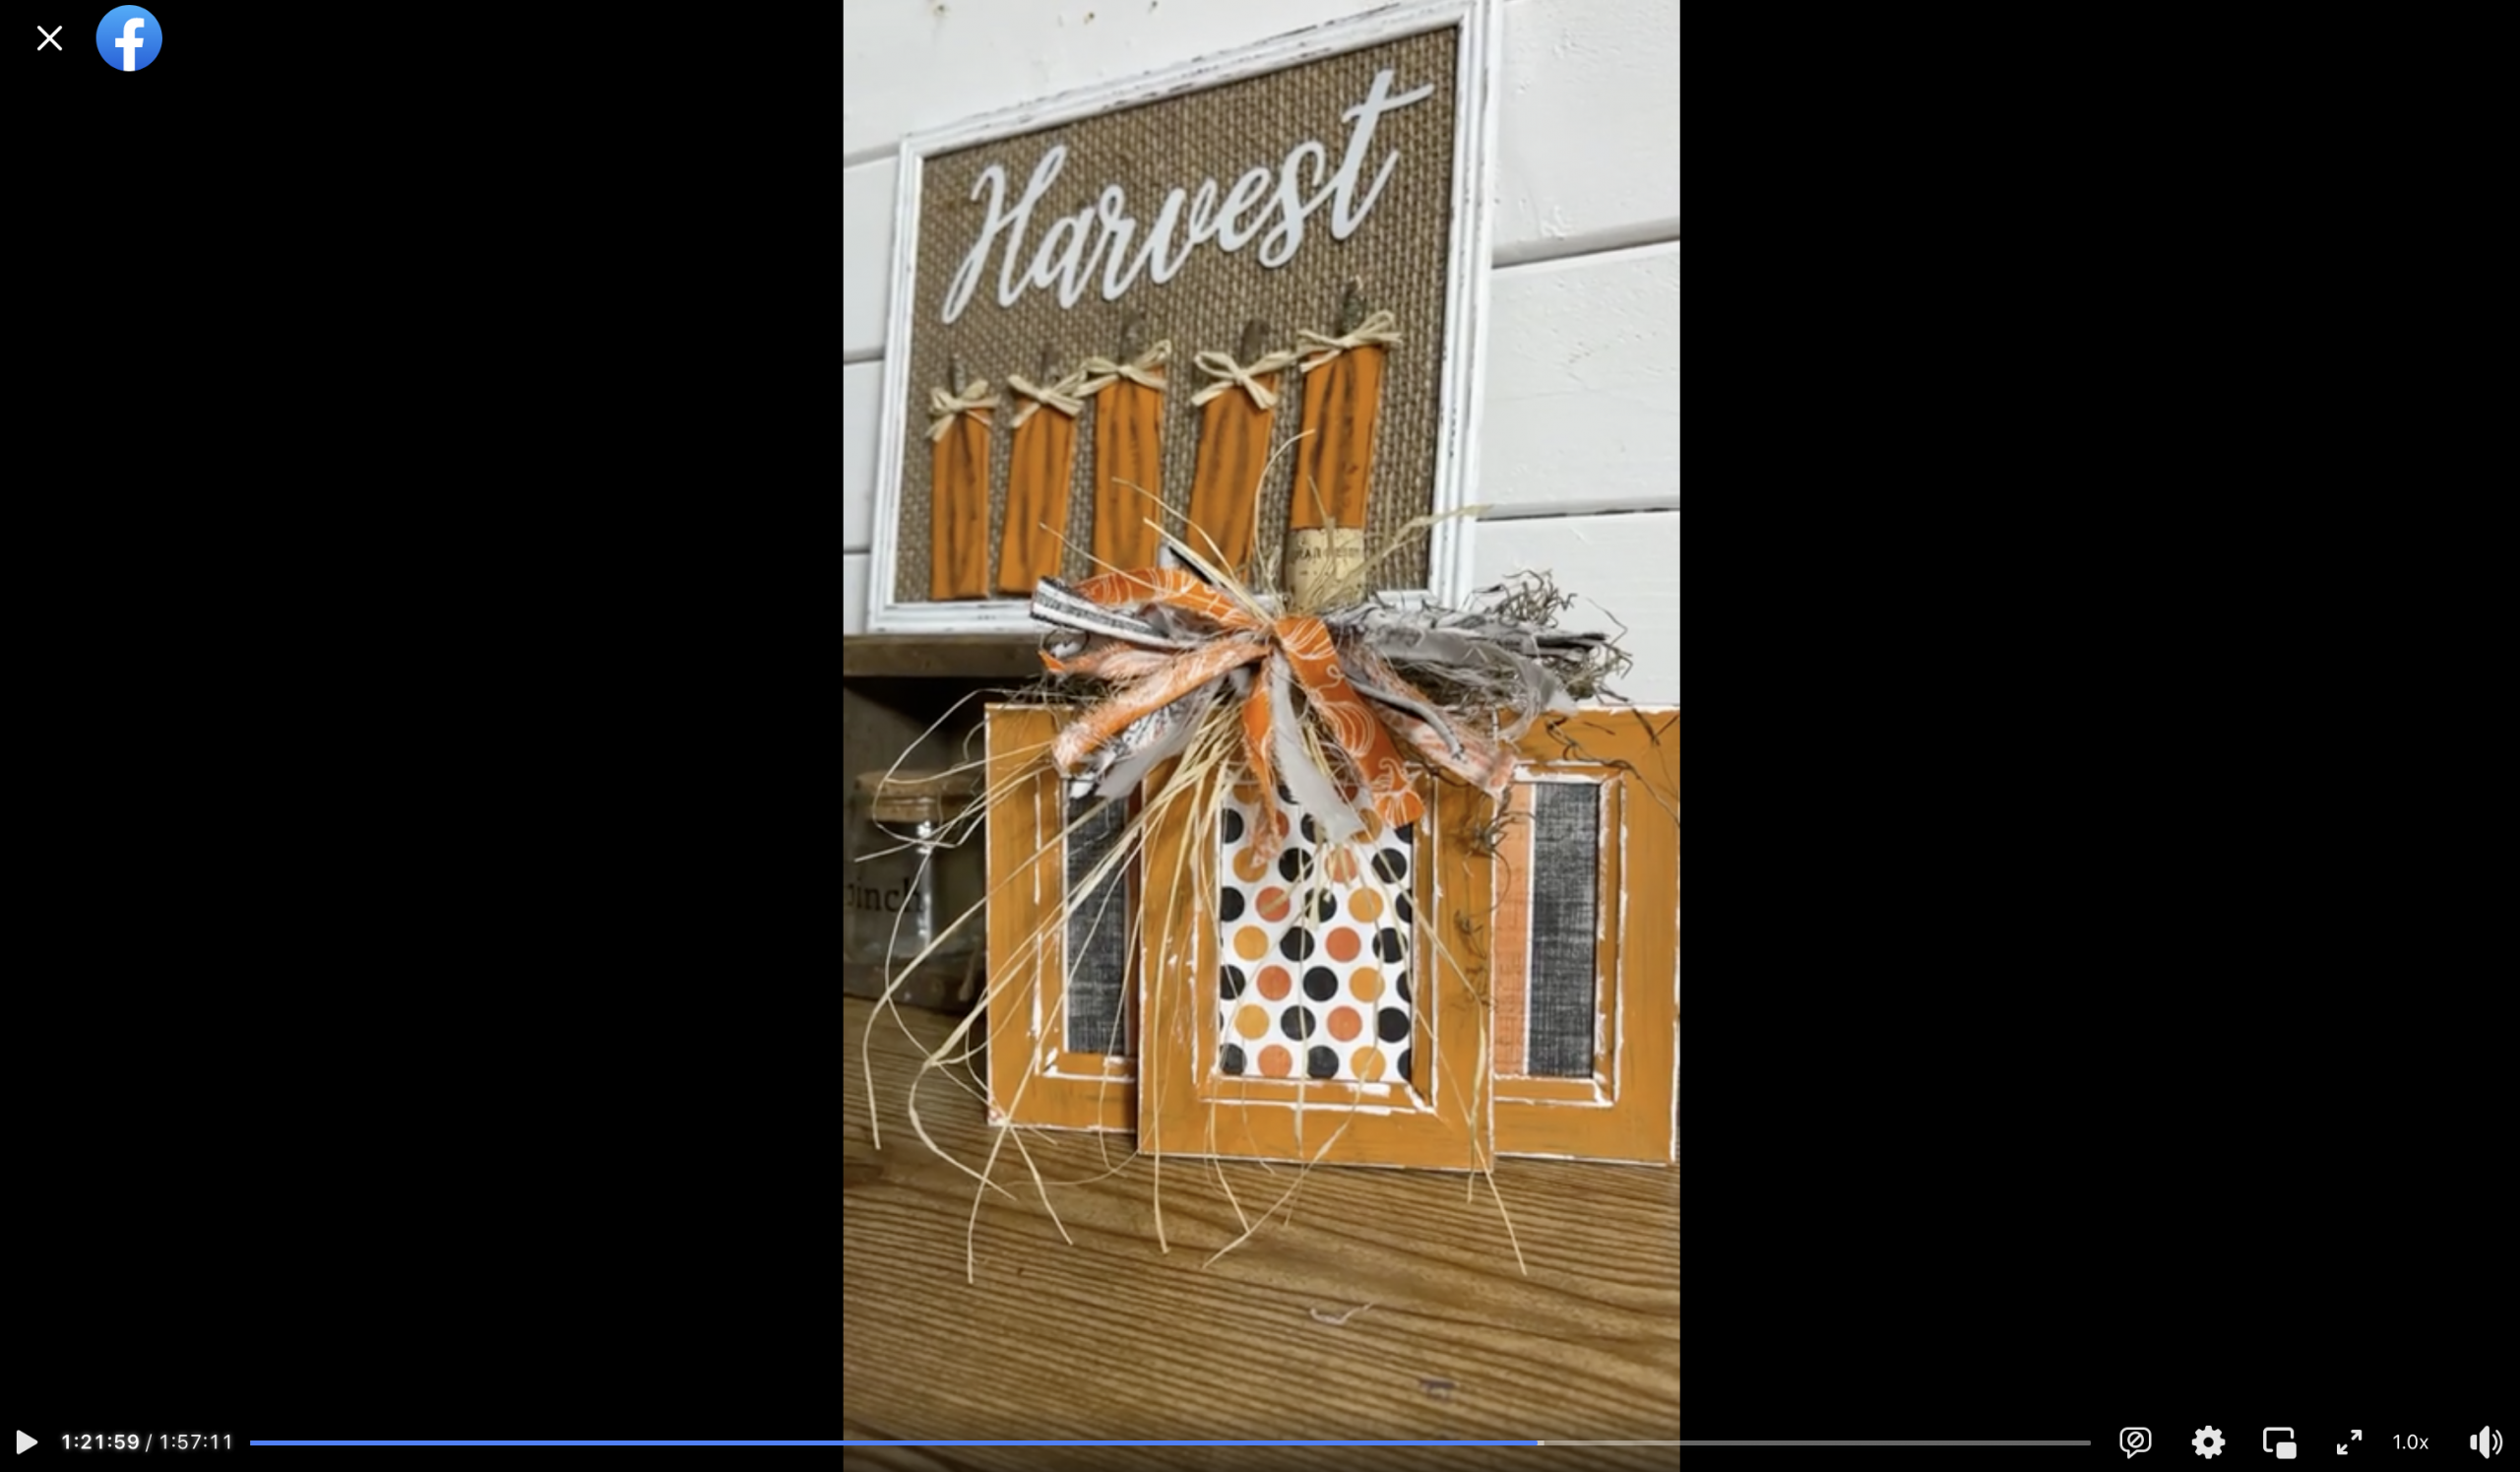
I recorded how to make this adorable picture frame pumpkin during a LIVE video on my Facebook page.
If you want to see the DIY process, craft along, or just join in on the fun conversations, you can watch the DIY tutorial replay on Facebook!
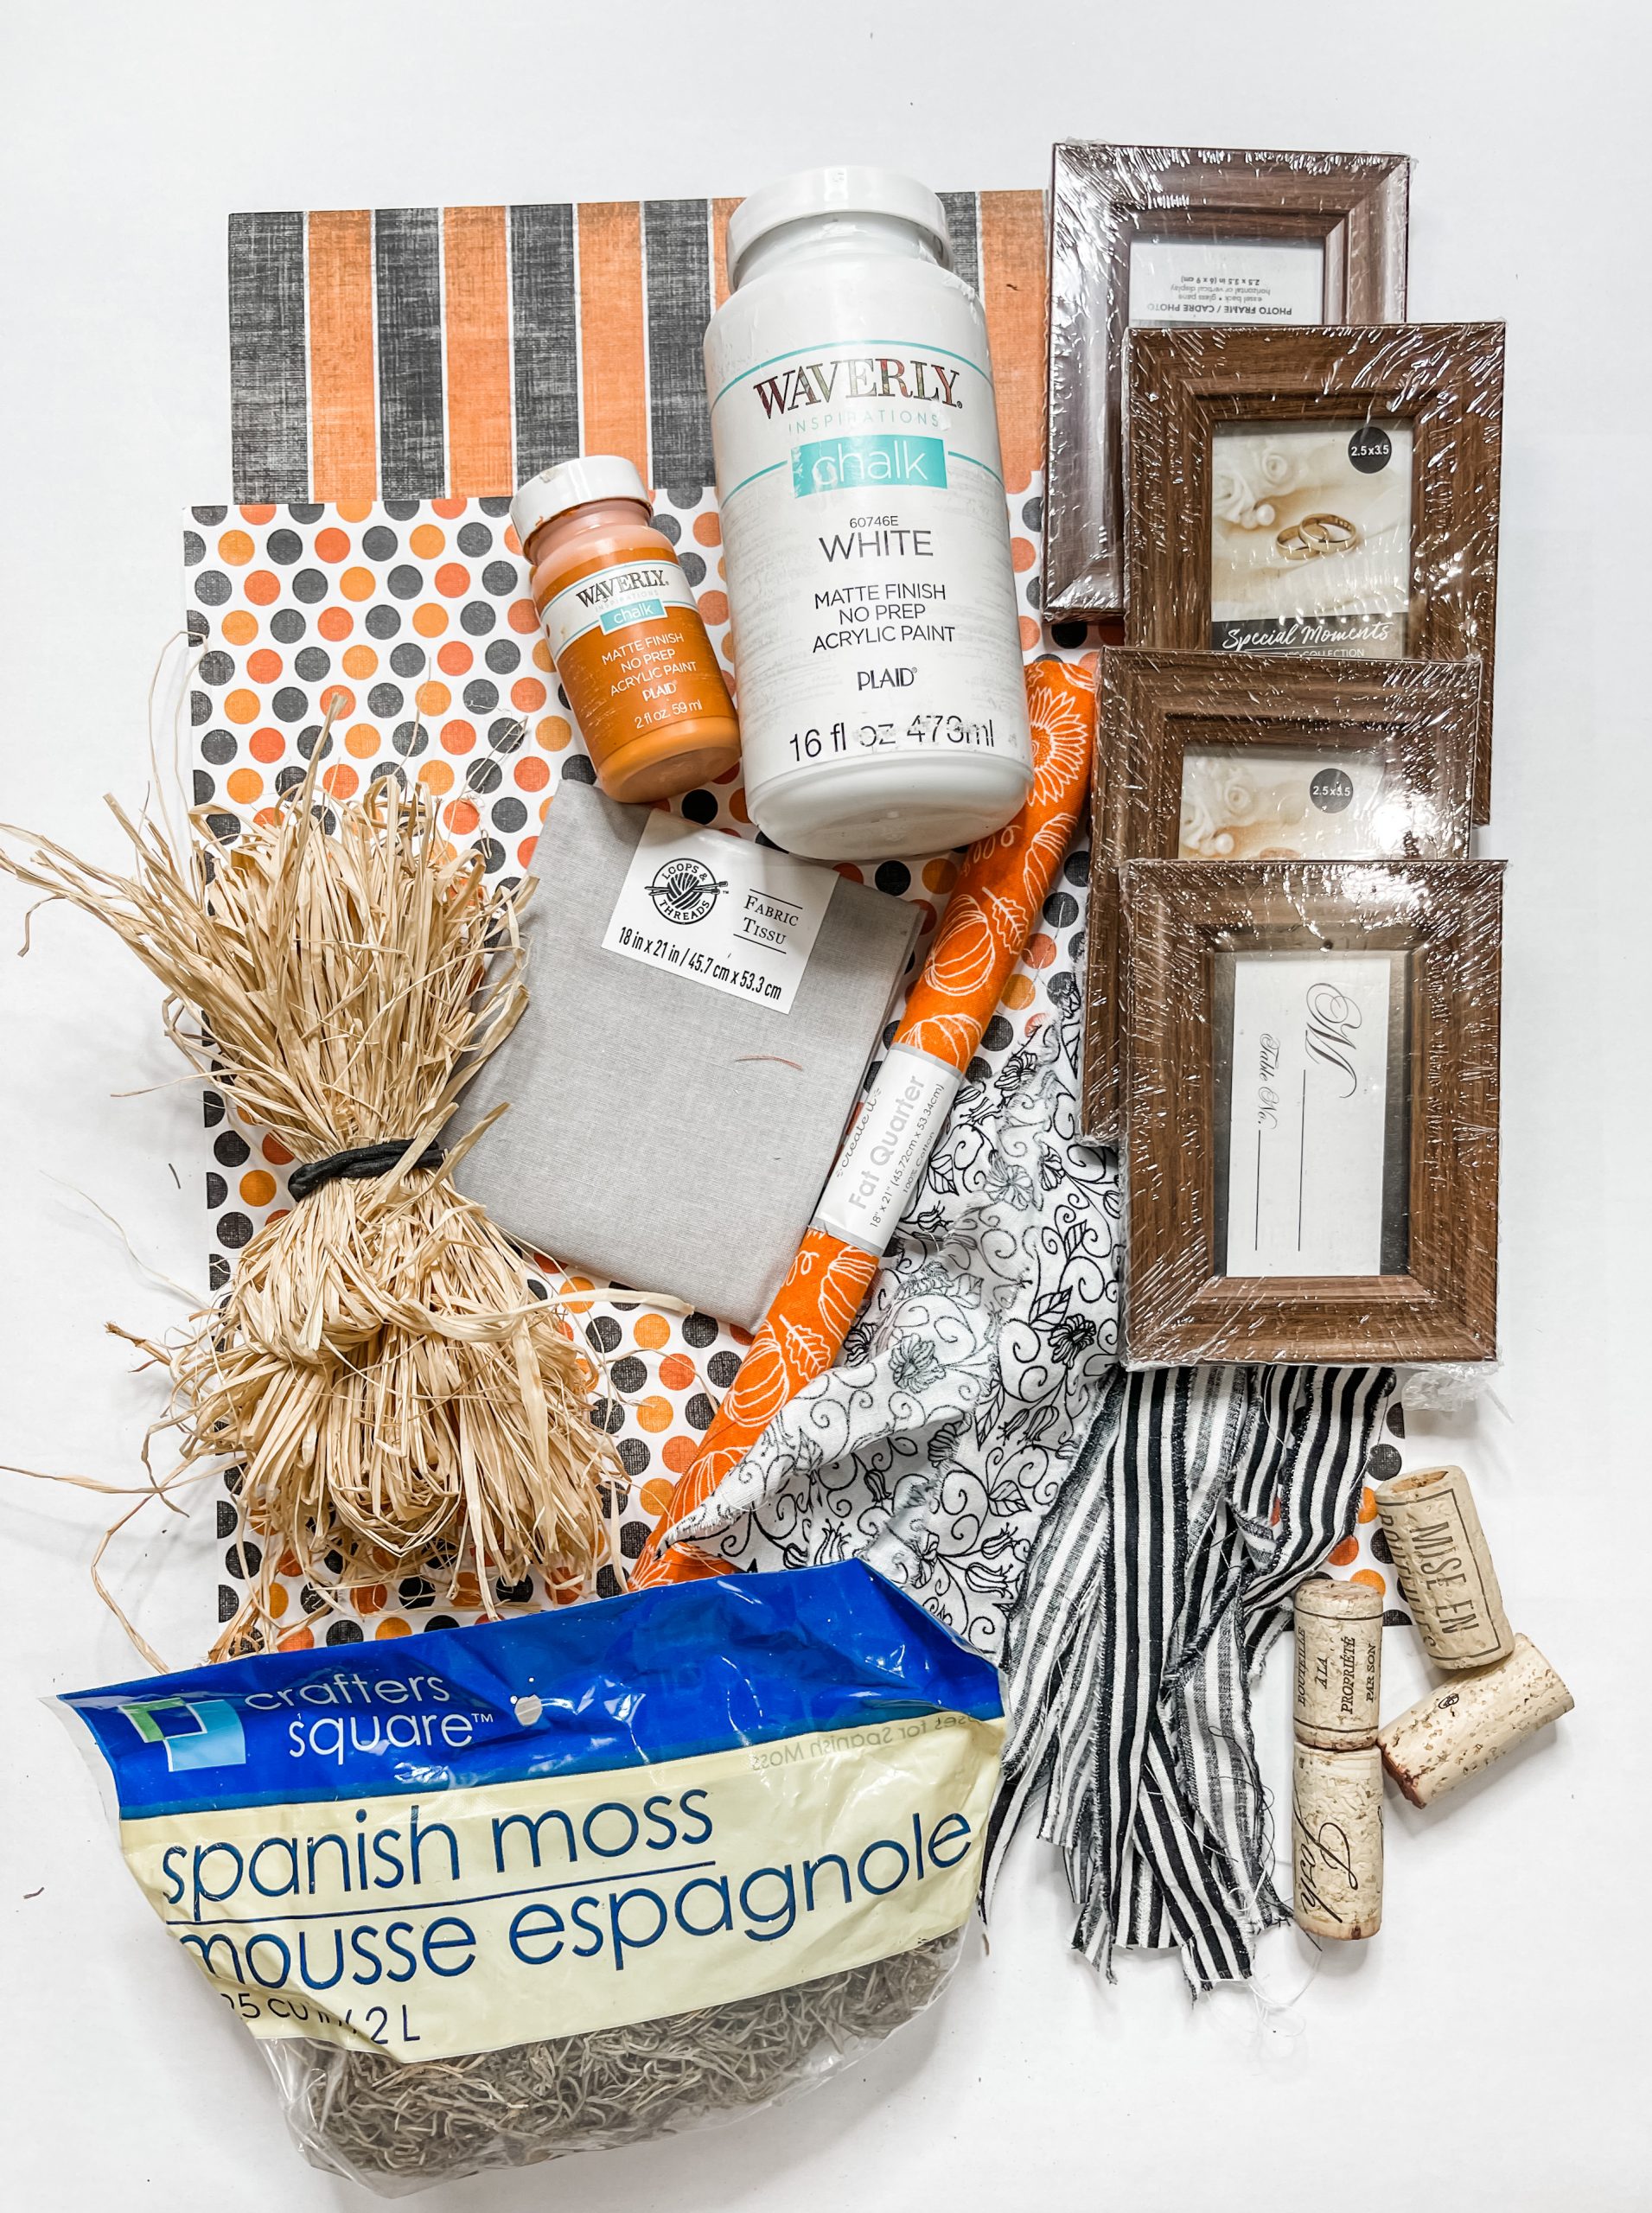
For this project, I will be using these items, but you can substitute where you want.
“As an Amazon Associate, I earn from qualifying purchases.”
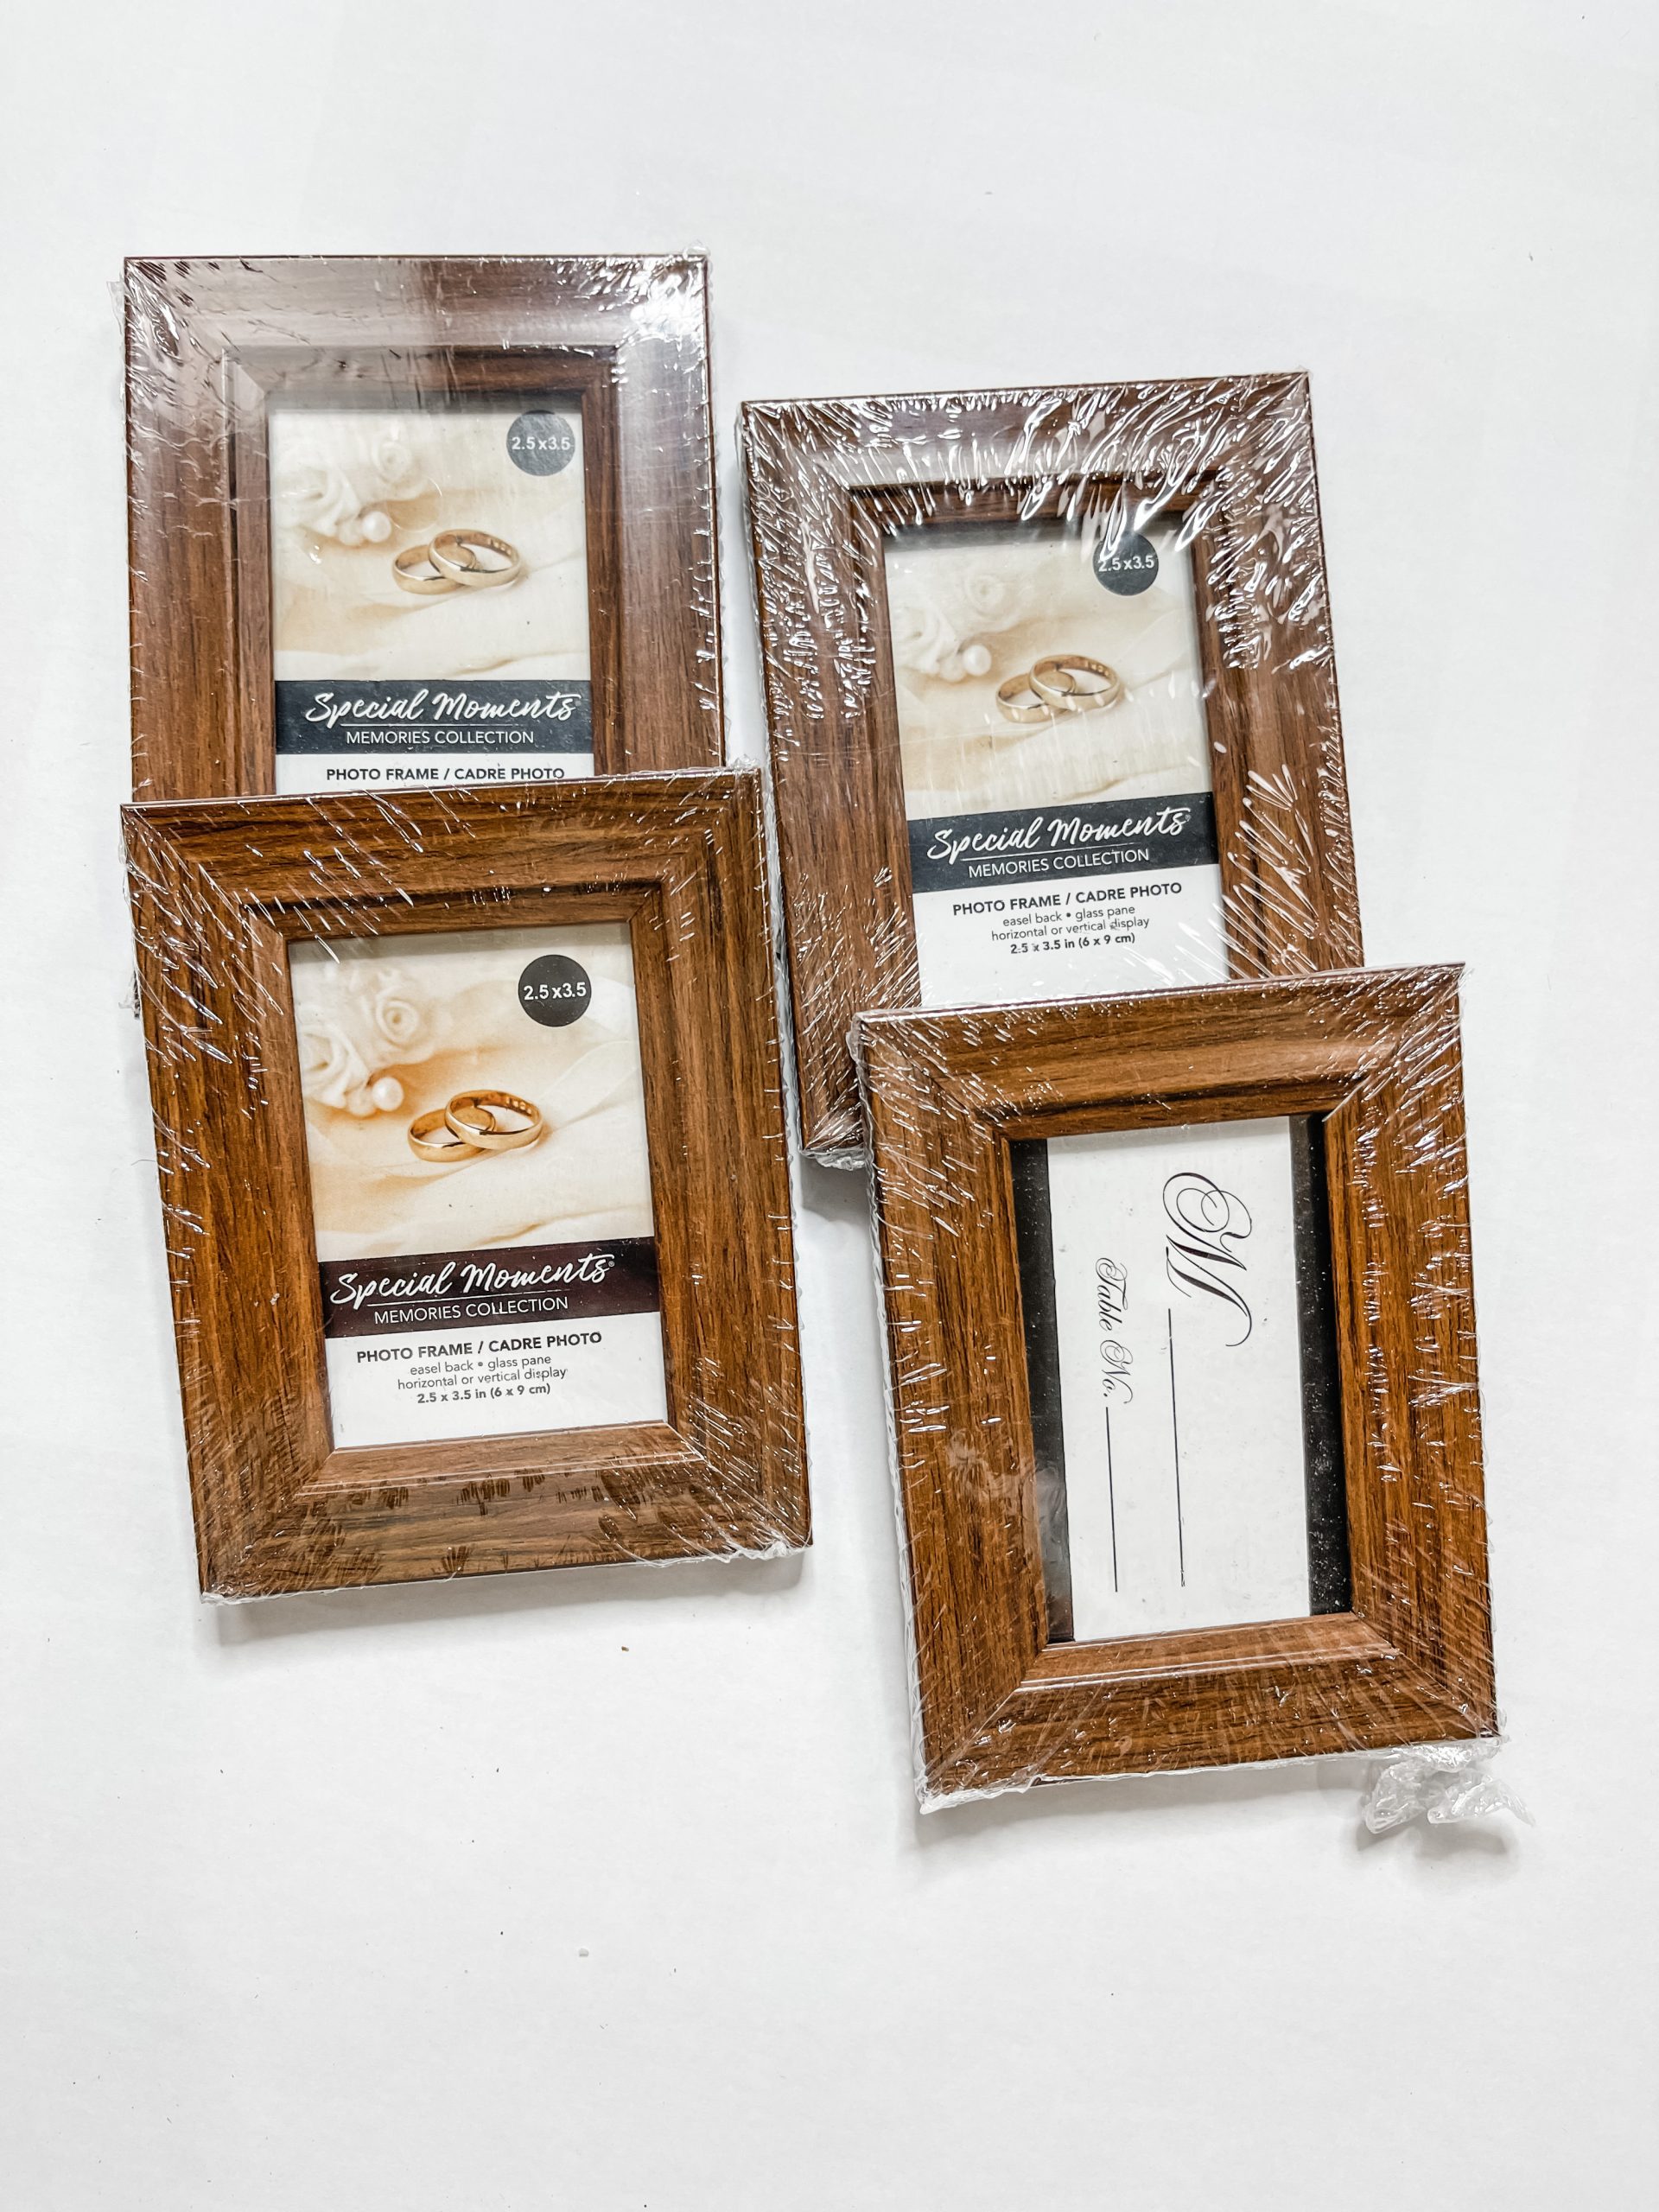
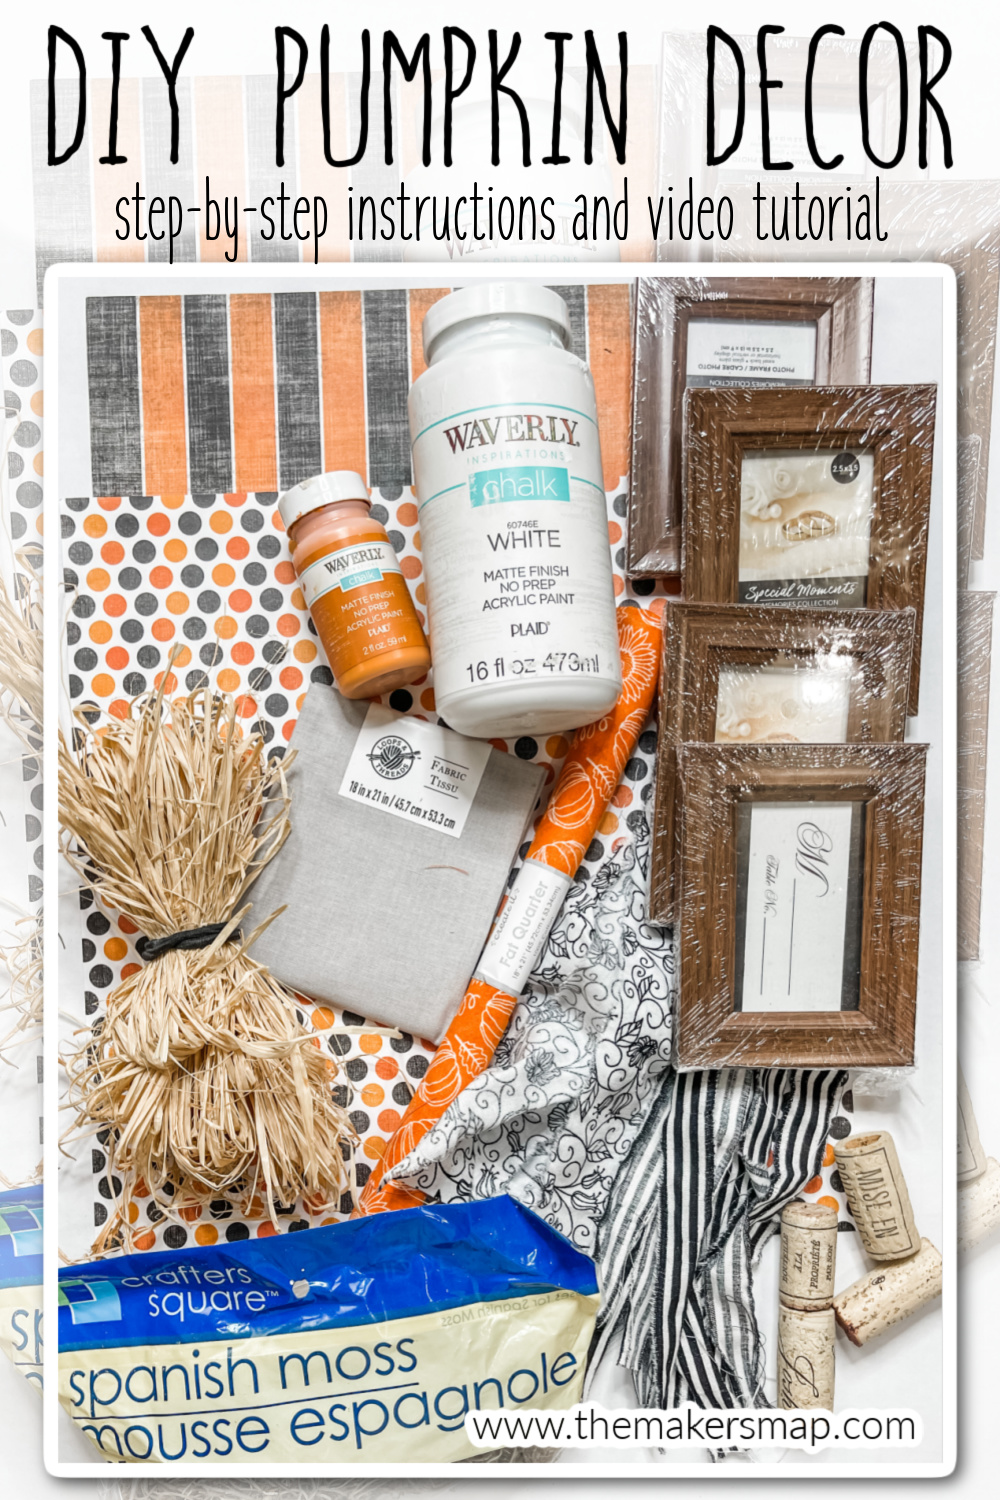
- Dollar Tree 2.5×3.5 Picture Frames(x4)
- Dollar Tree Spanish Moss
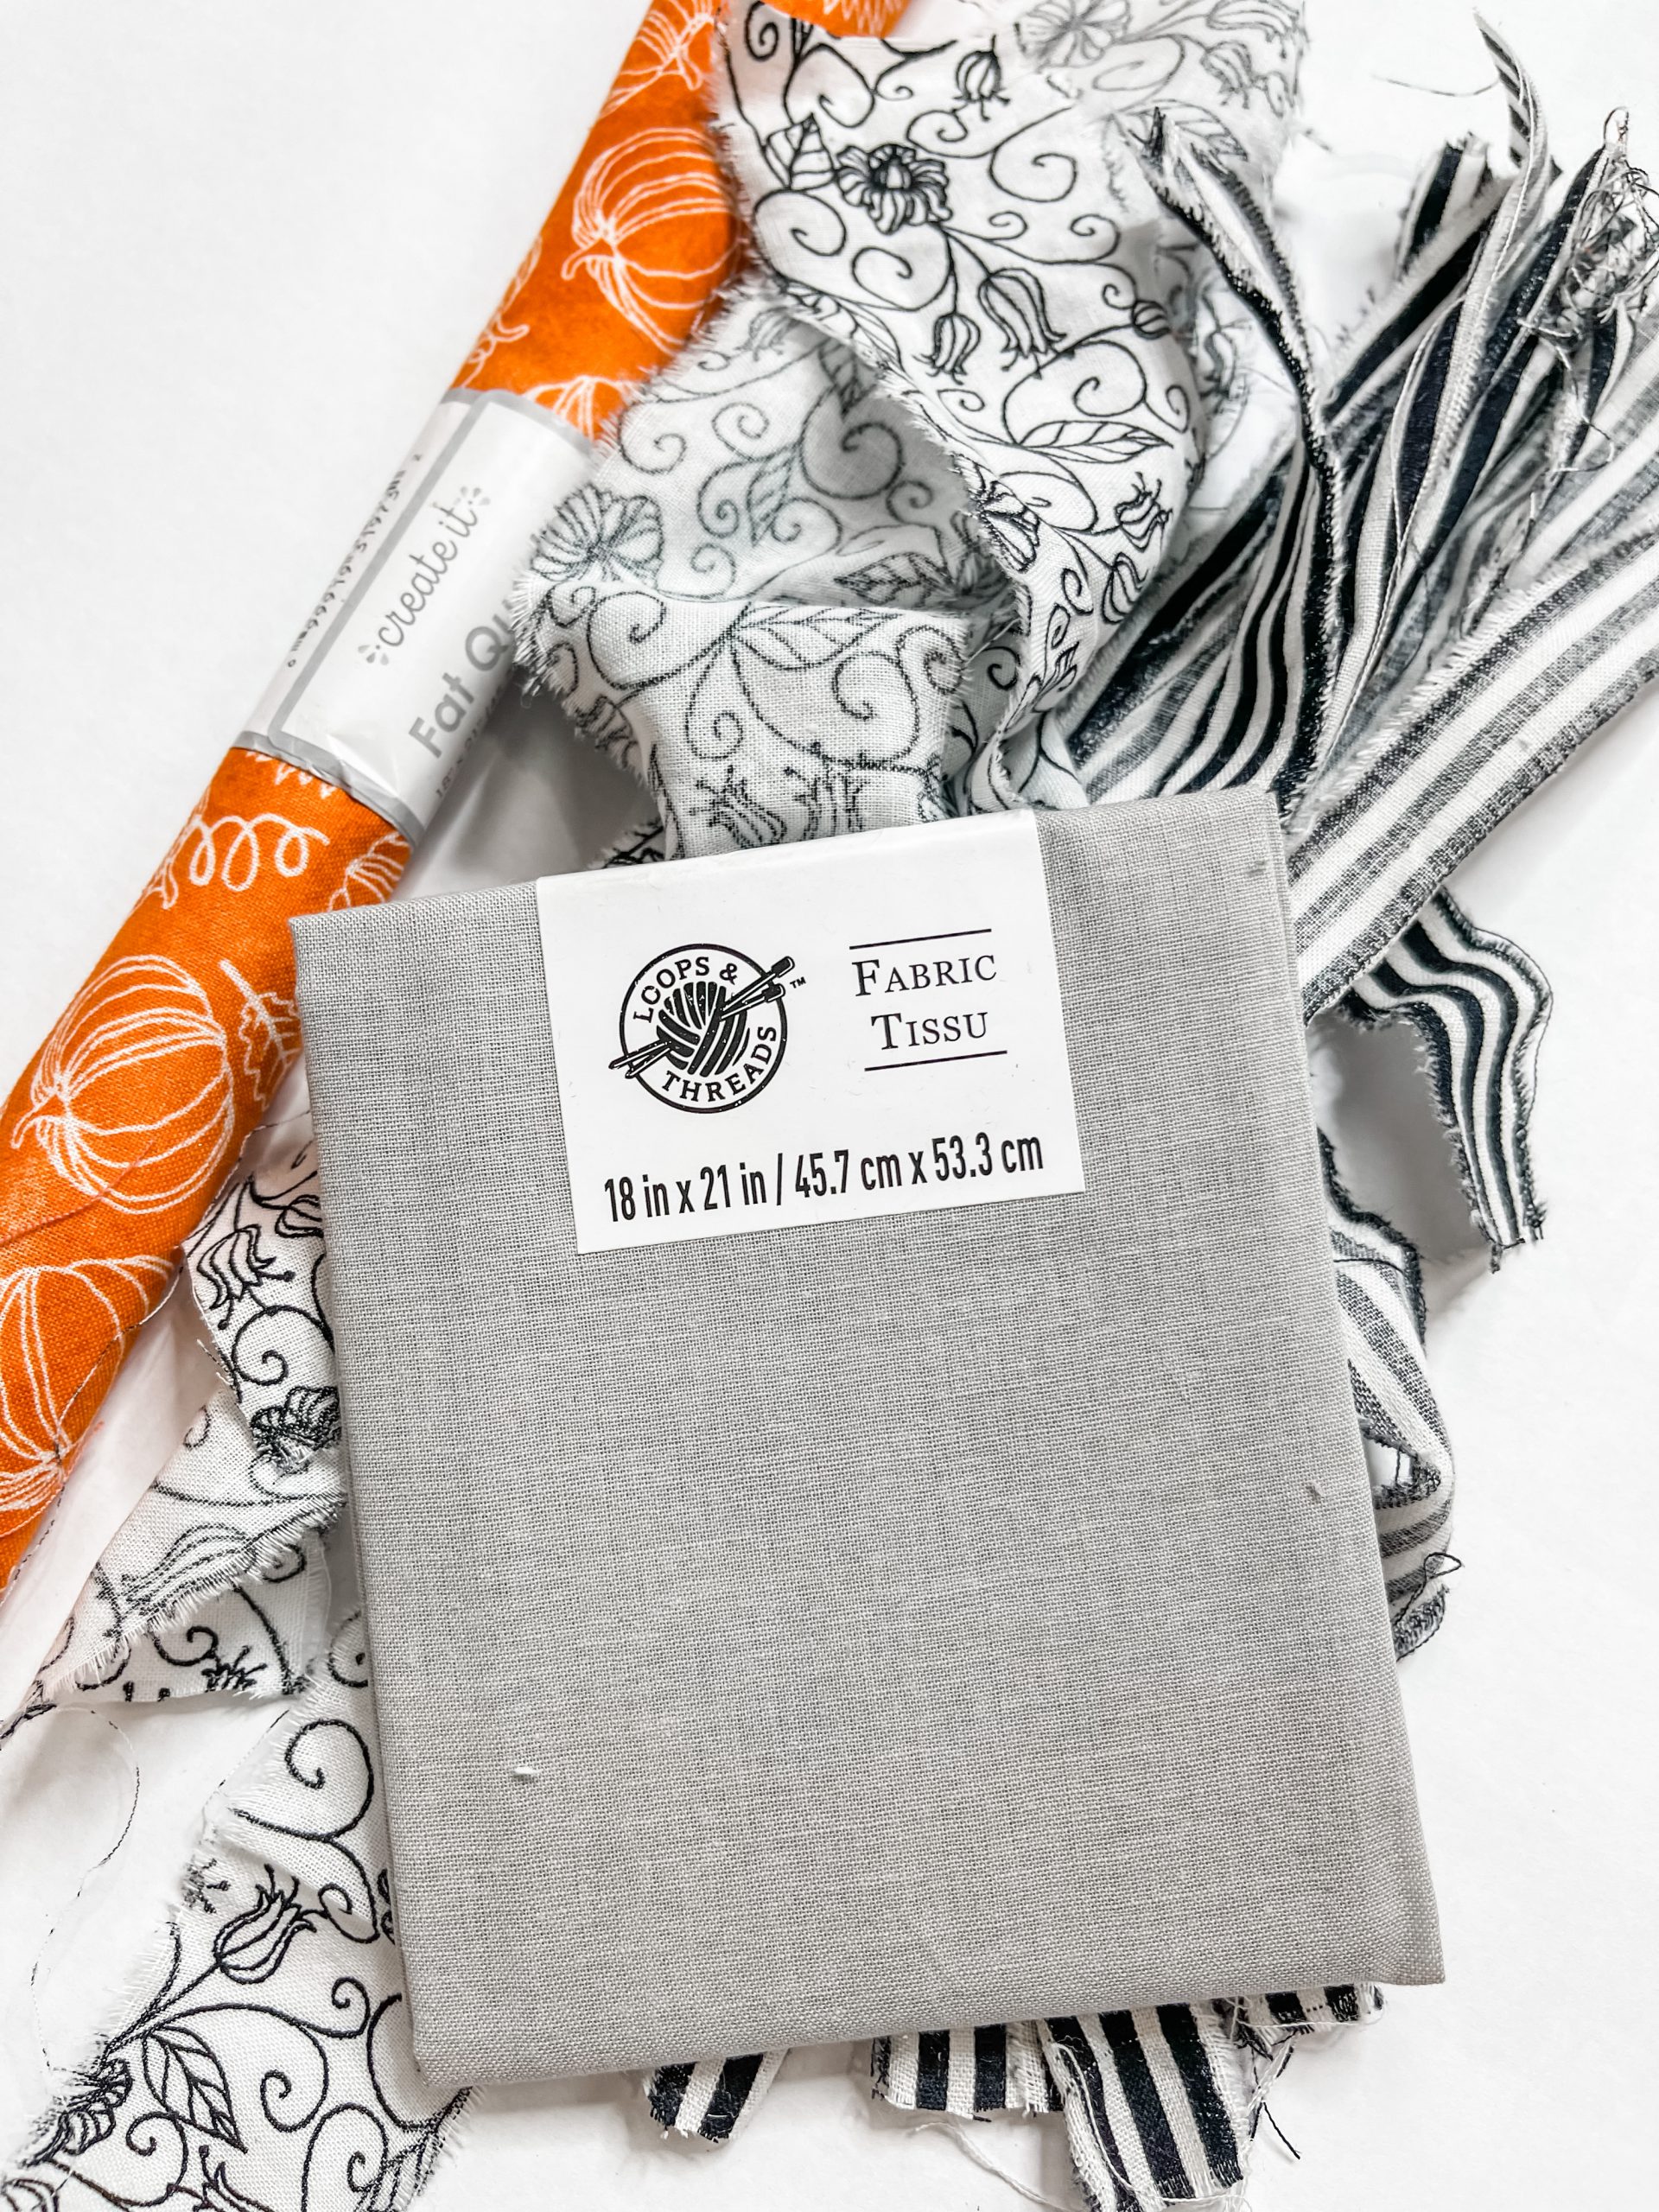
- Light Grey Fabric
- Dollar Tree Raffia
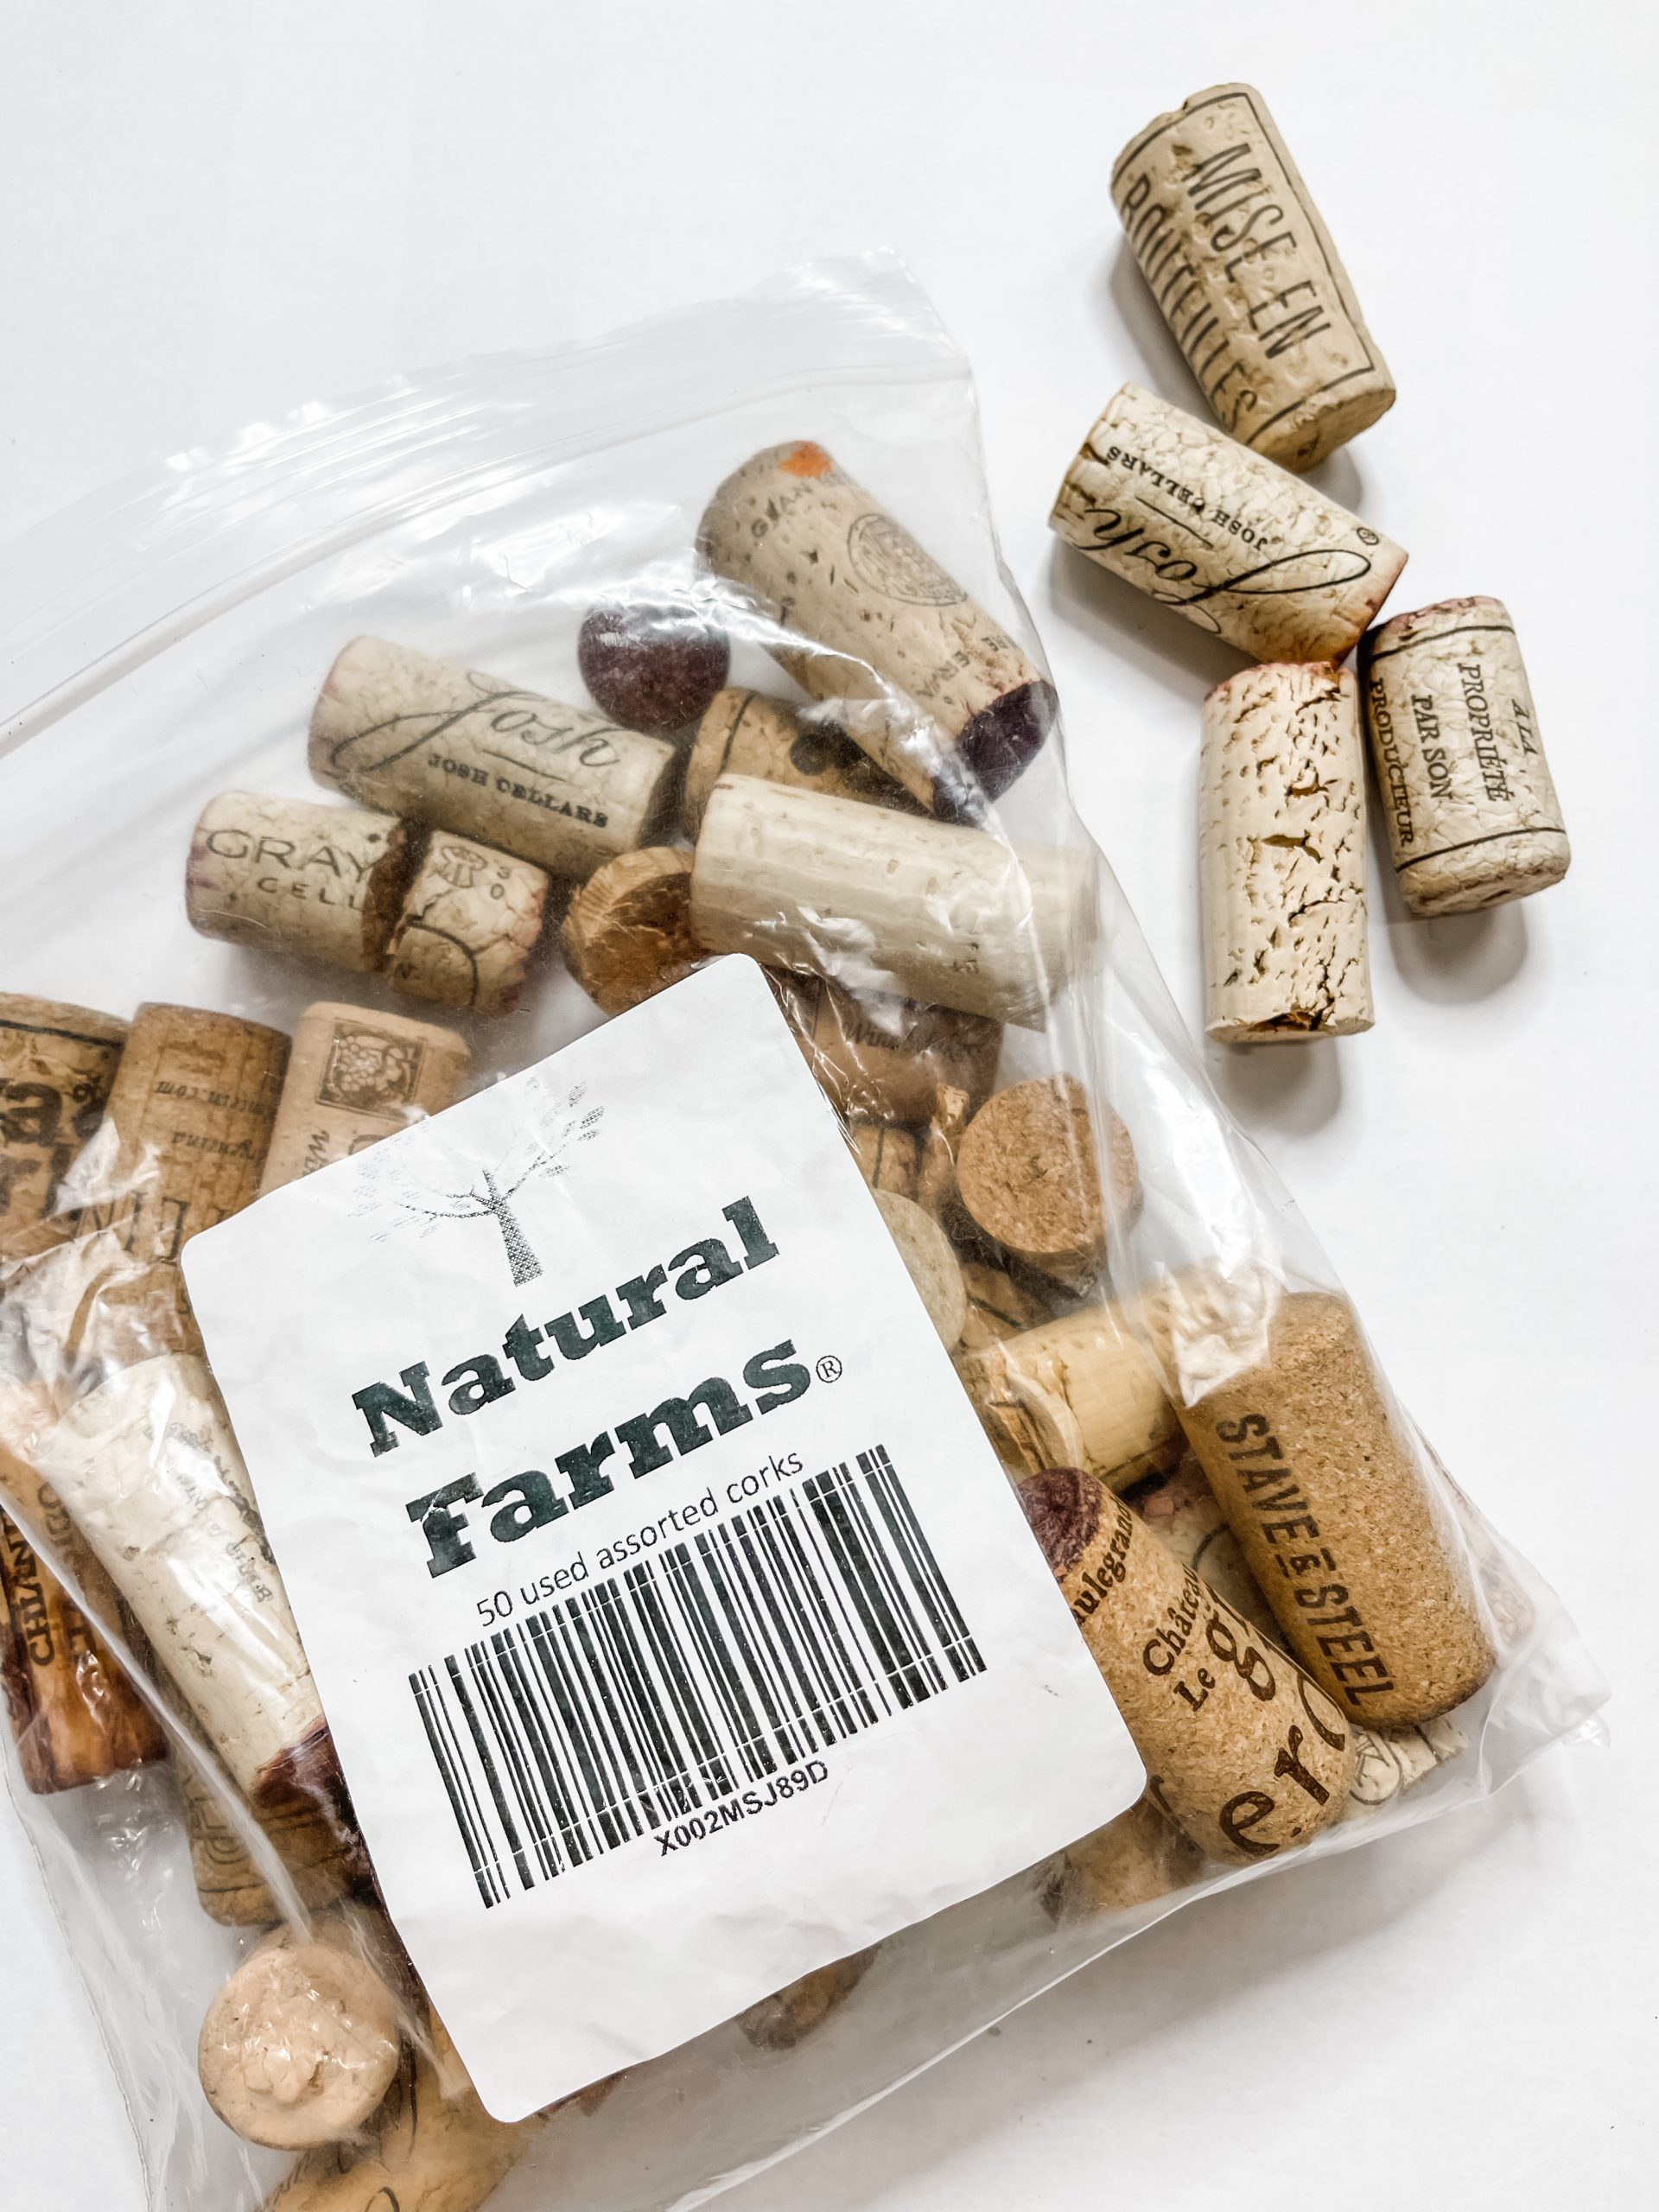
- Wine Cork
- Orange Pumpkin Fabric
- White Line Floral Fabric
- Raffia
- Black and White Striped Fabric
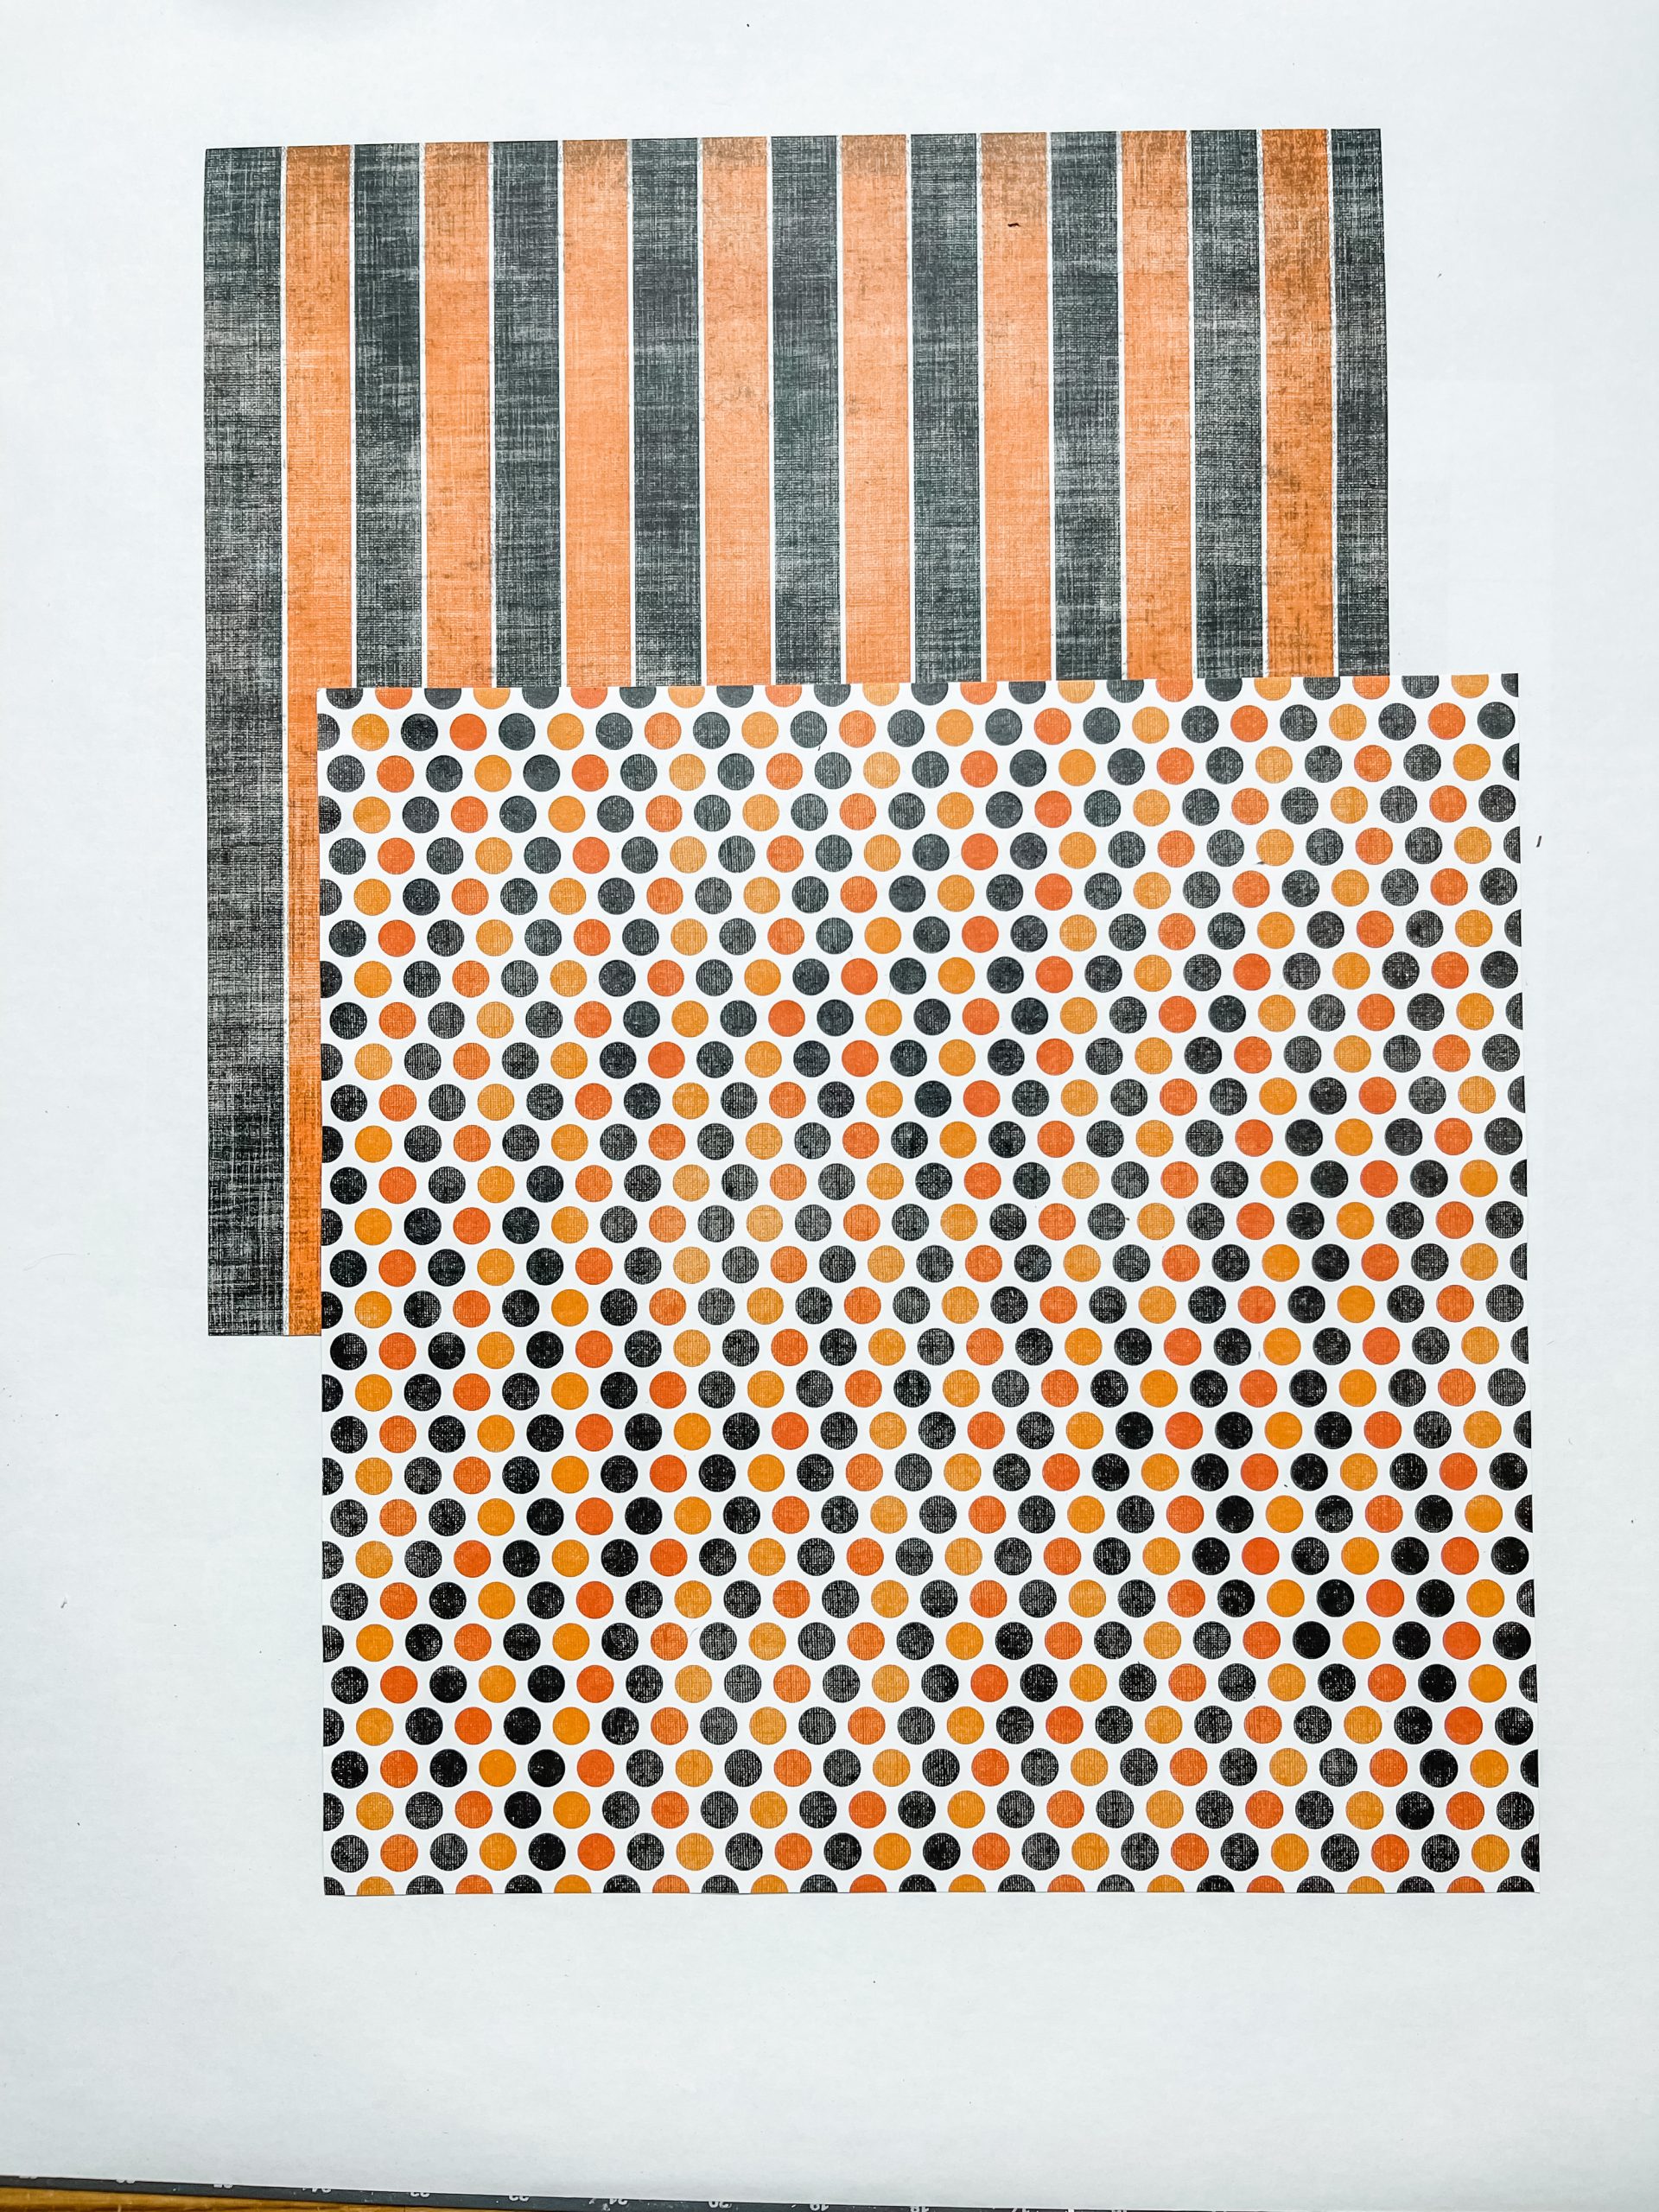
- Orange and Black Striped Distressed Scrapbook Paper
- Orange, Yellow, Black polka dot Scrapbook Paper
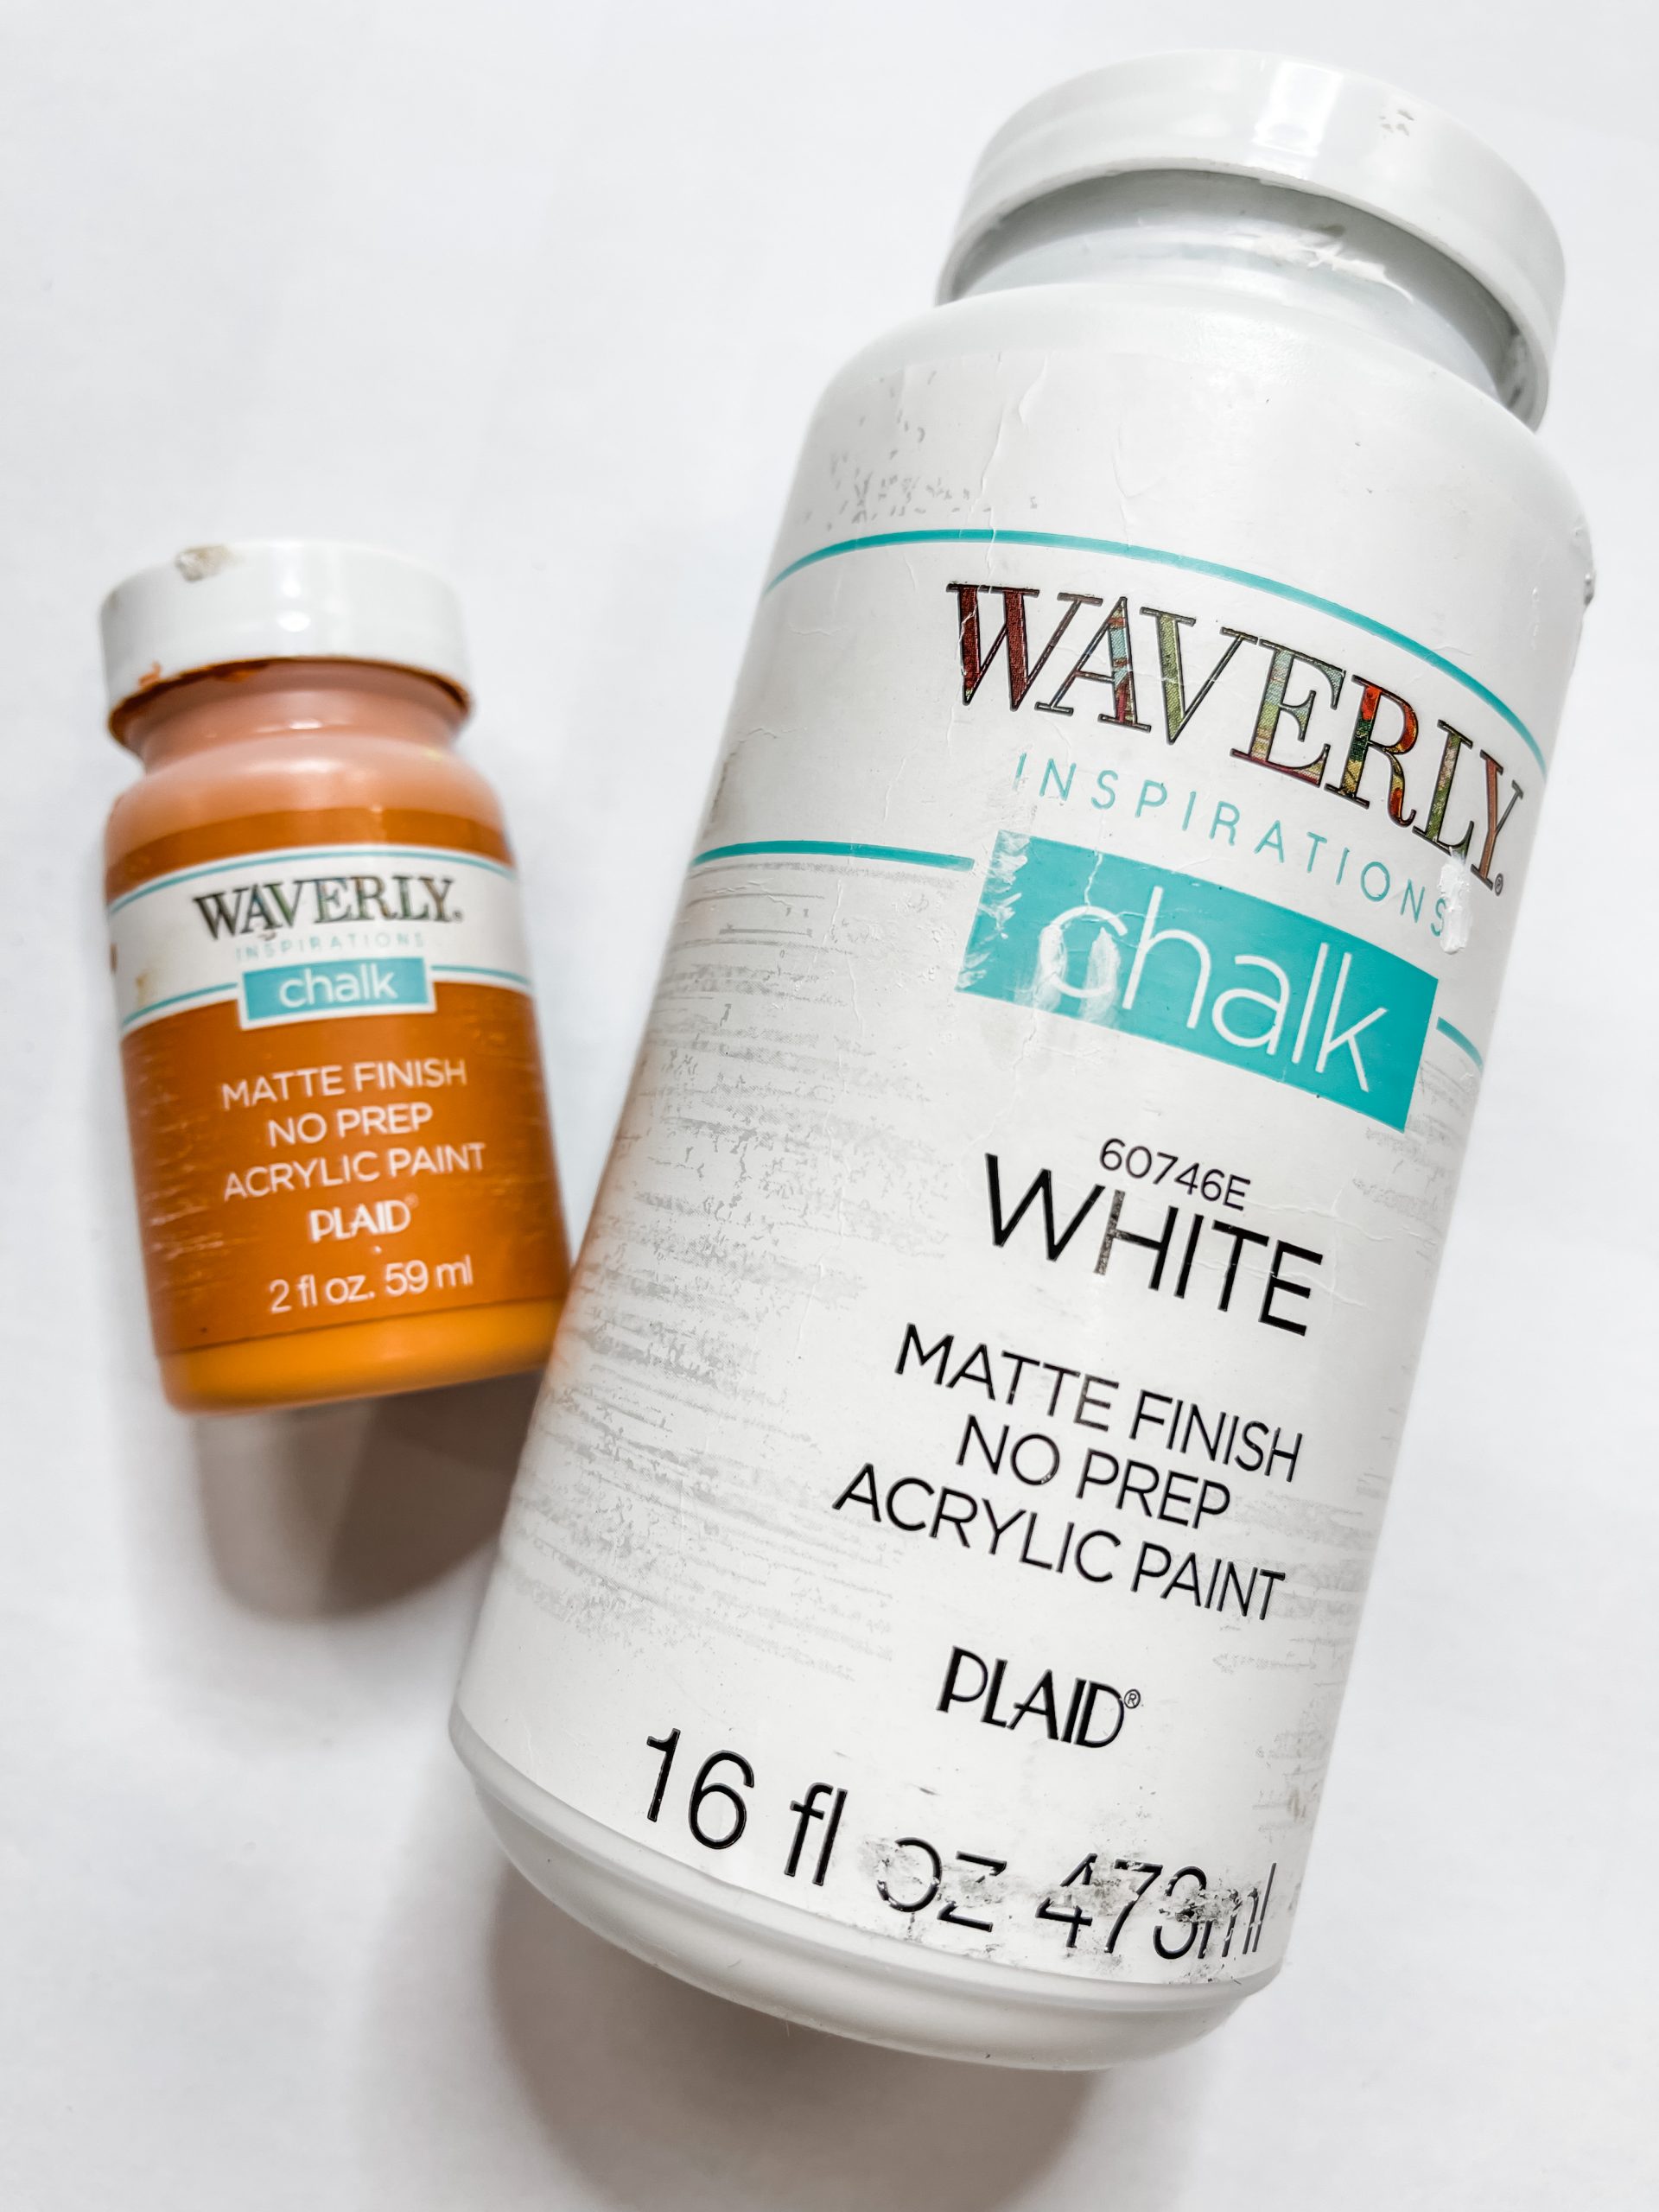
- Waverly Pumpkin Color Chalk Paint
- Waverly White Chalk Paint
- Hot Glue gun
- Glue Stick
How to Make a Picture Frame Pumpkin DIY Fall Decor
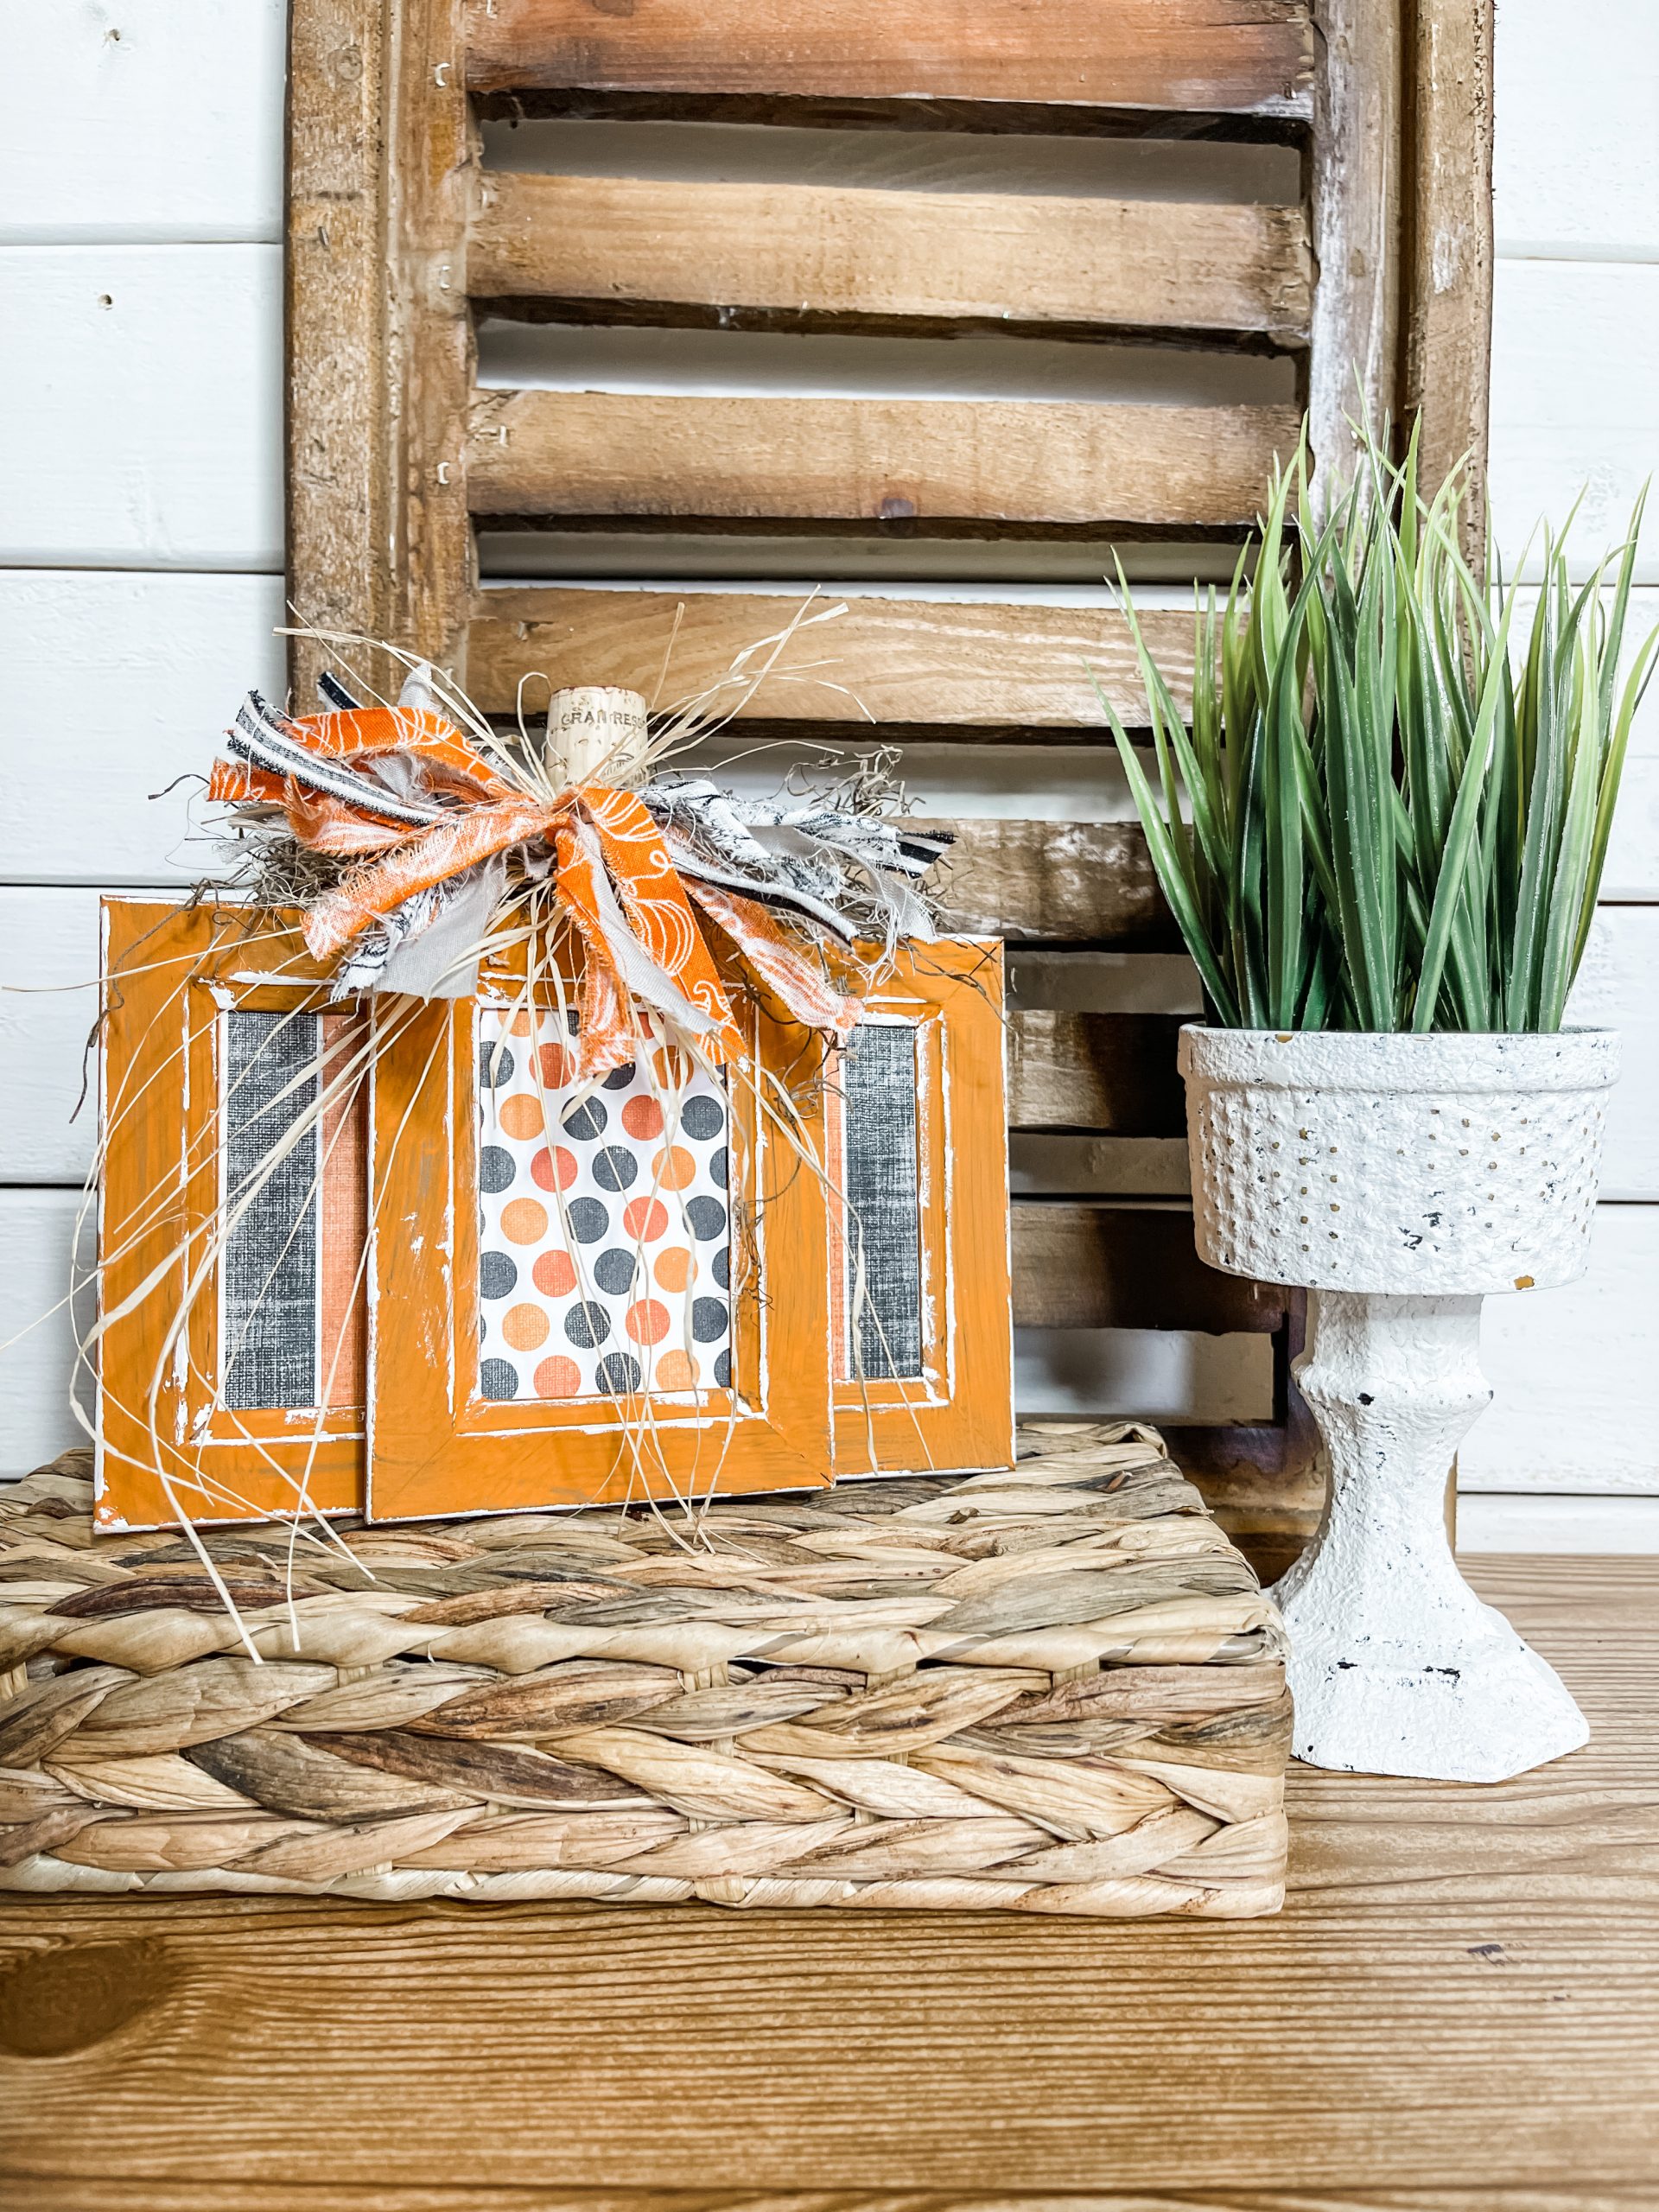
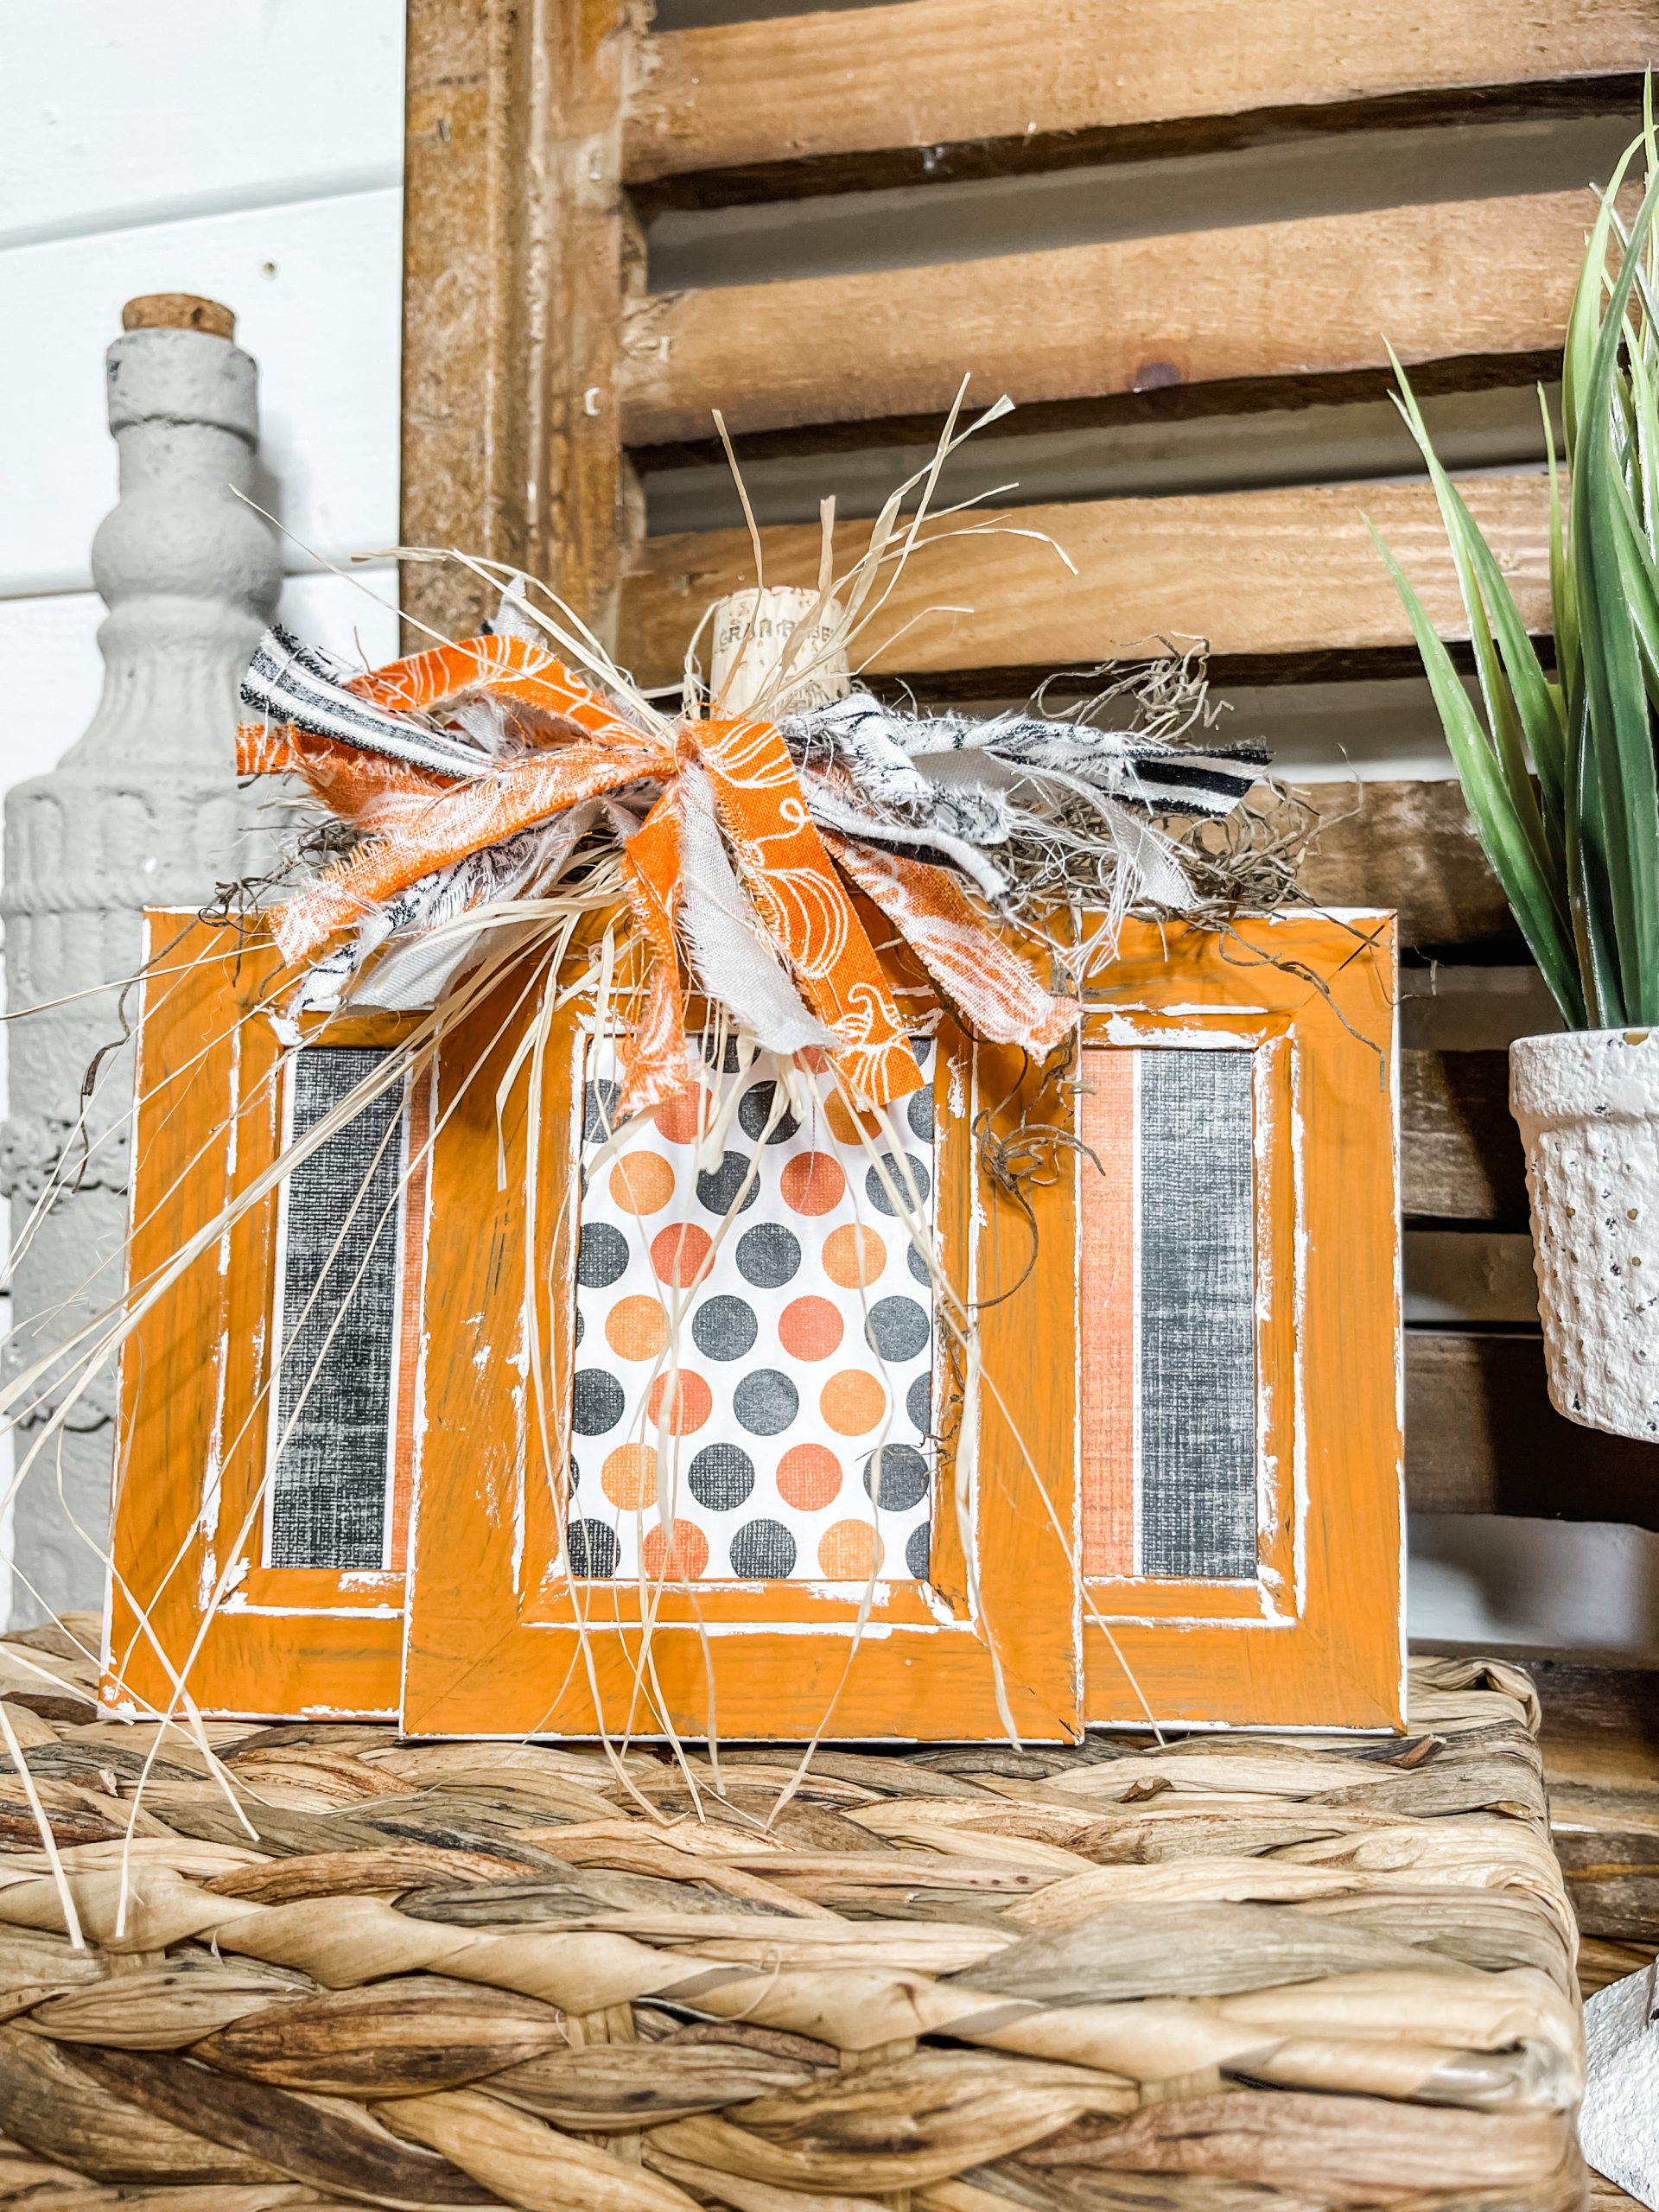
Start this project by removing the backs and glass inserts from the four Dollar Tree picture frames. Then, paint each of the frames with Waverly Orange Chalk Paint.
Then, cut two rectangles out of the black and orange striped scrapbook paper and one rectangle out of the polka dot scrapbook paper that are all the same size as the picture frame’s glass inserts.
Allow the orange paint to dry completely. I used my heat gun to speed up the drying process. Then, lightly line the edges of the frame with white paint.

Once the white paint is dry, replace the glass insert with the scrapbook paper cutouts and place the backings into the frames.
For the fourth frame, just put the glass and backing into it. This frame is going to be the back piece of your pumpkin.
Bring it all together
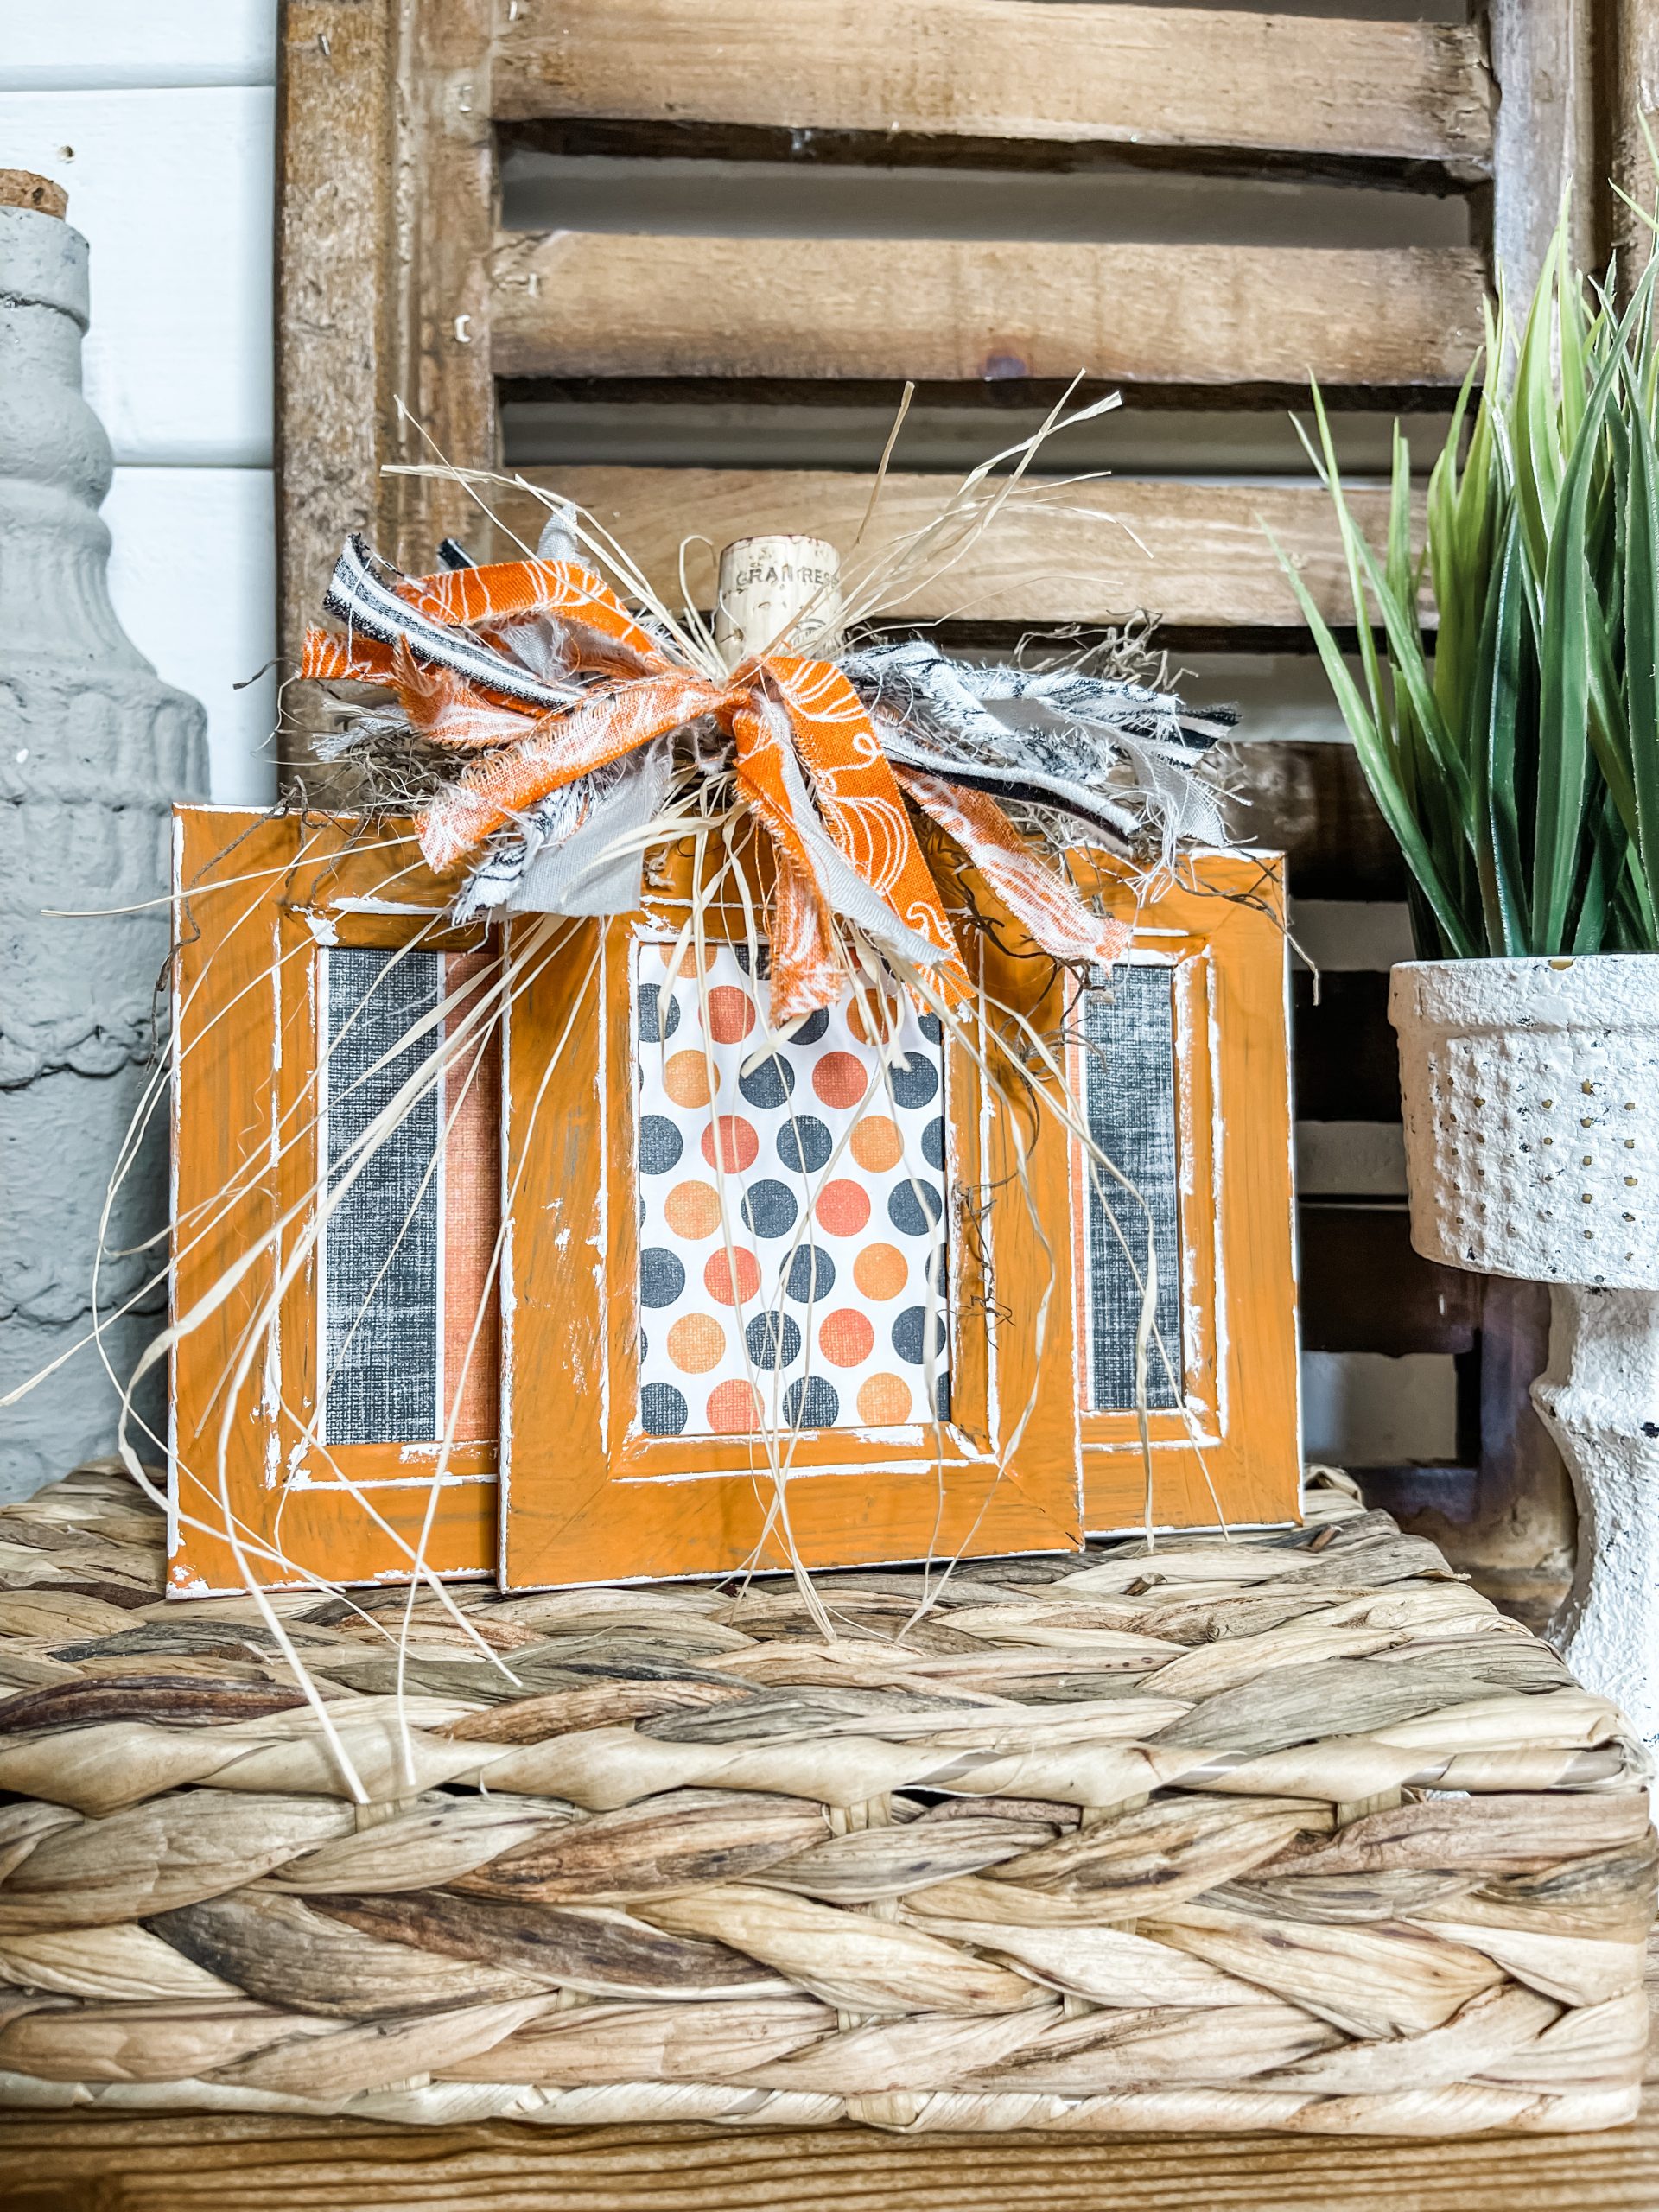
Hot glue the two frames with the striped scrapbook paper to the front of the back frame. Then, hot glue the frame with the polka dot insert over the center of the picture frames.
Now, hot glue the wine cork to the top of the picture frames and hot glue the Dollar Tree Spanish Moss around the cork.
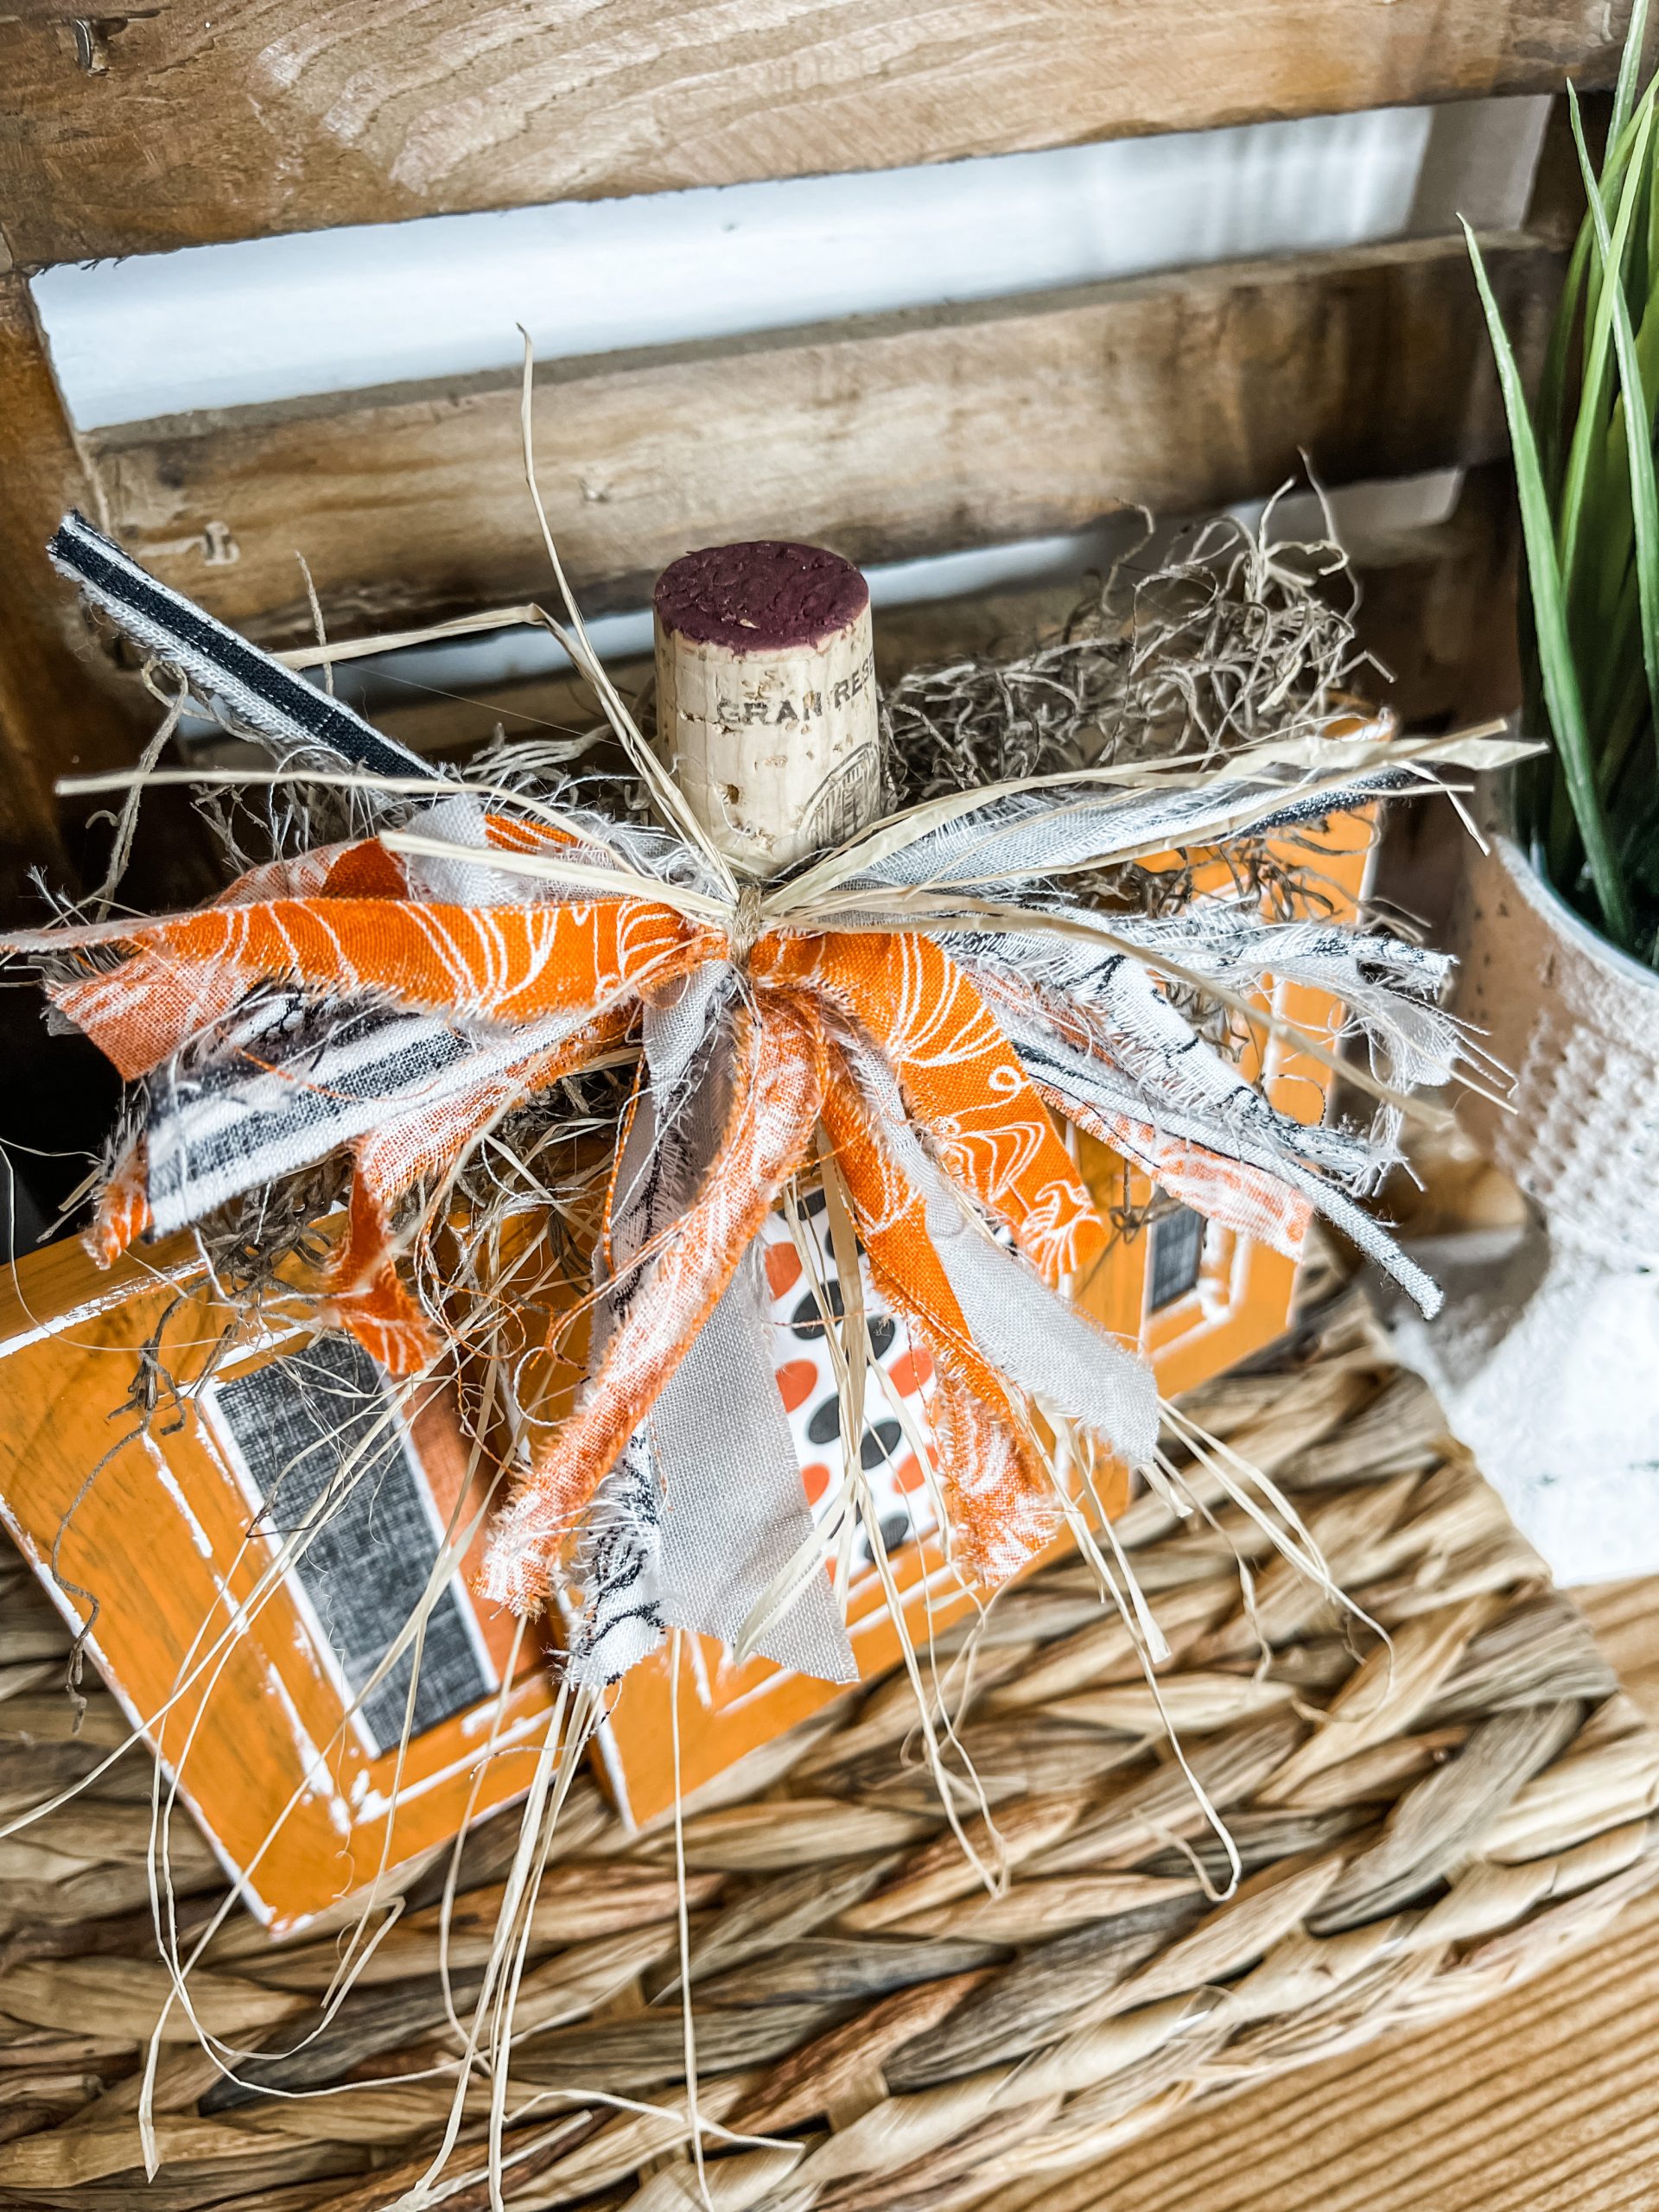
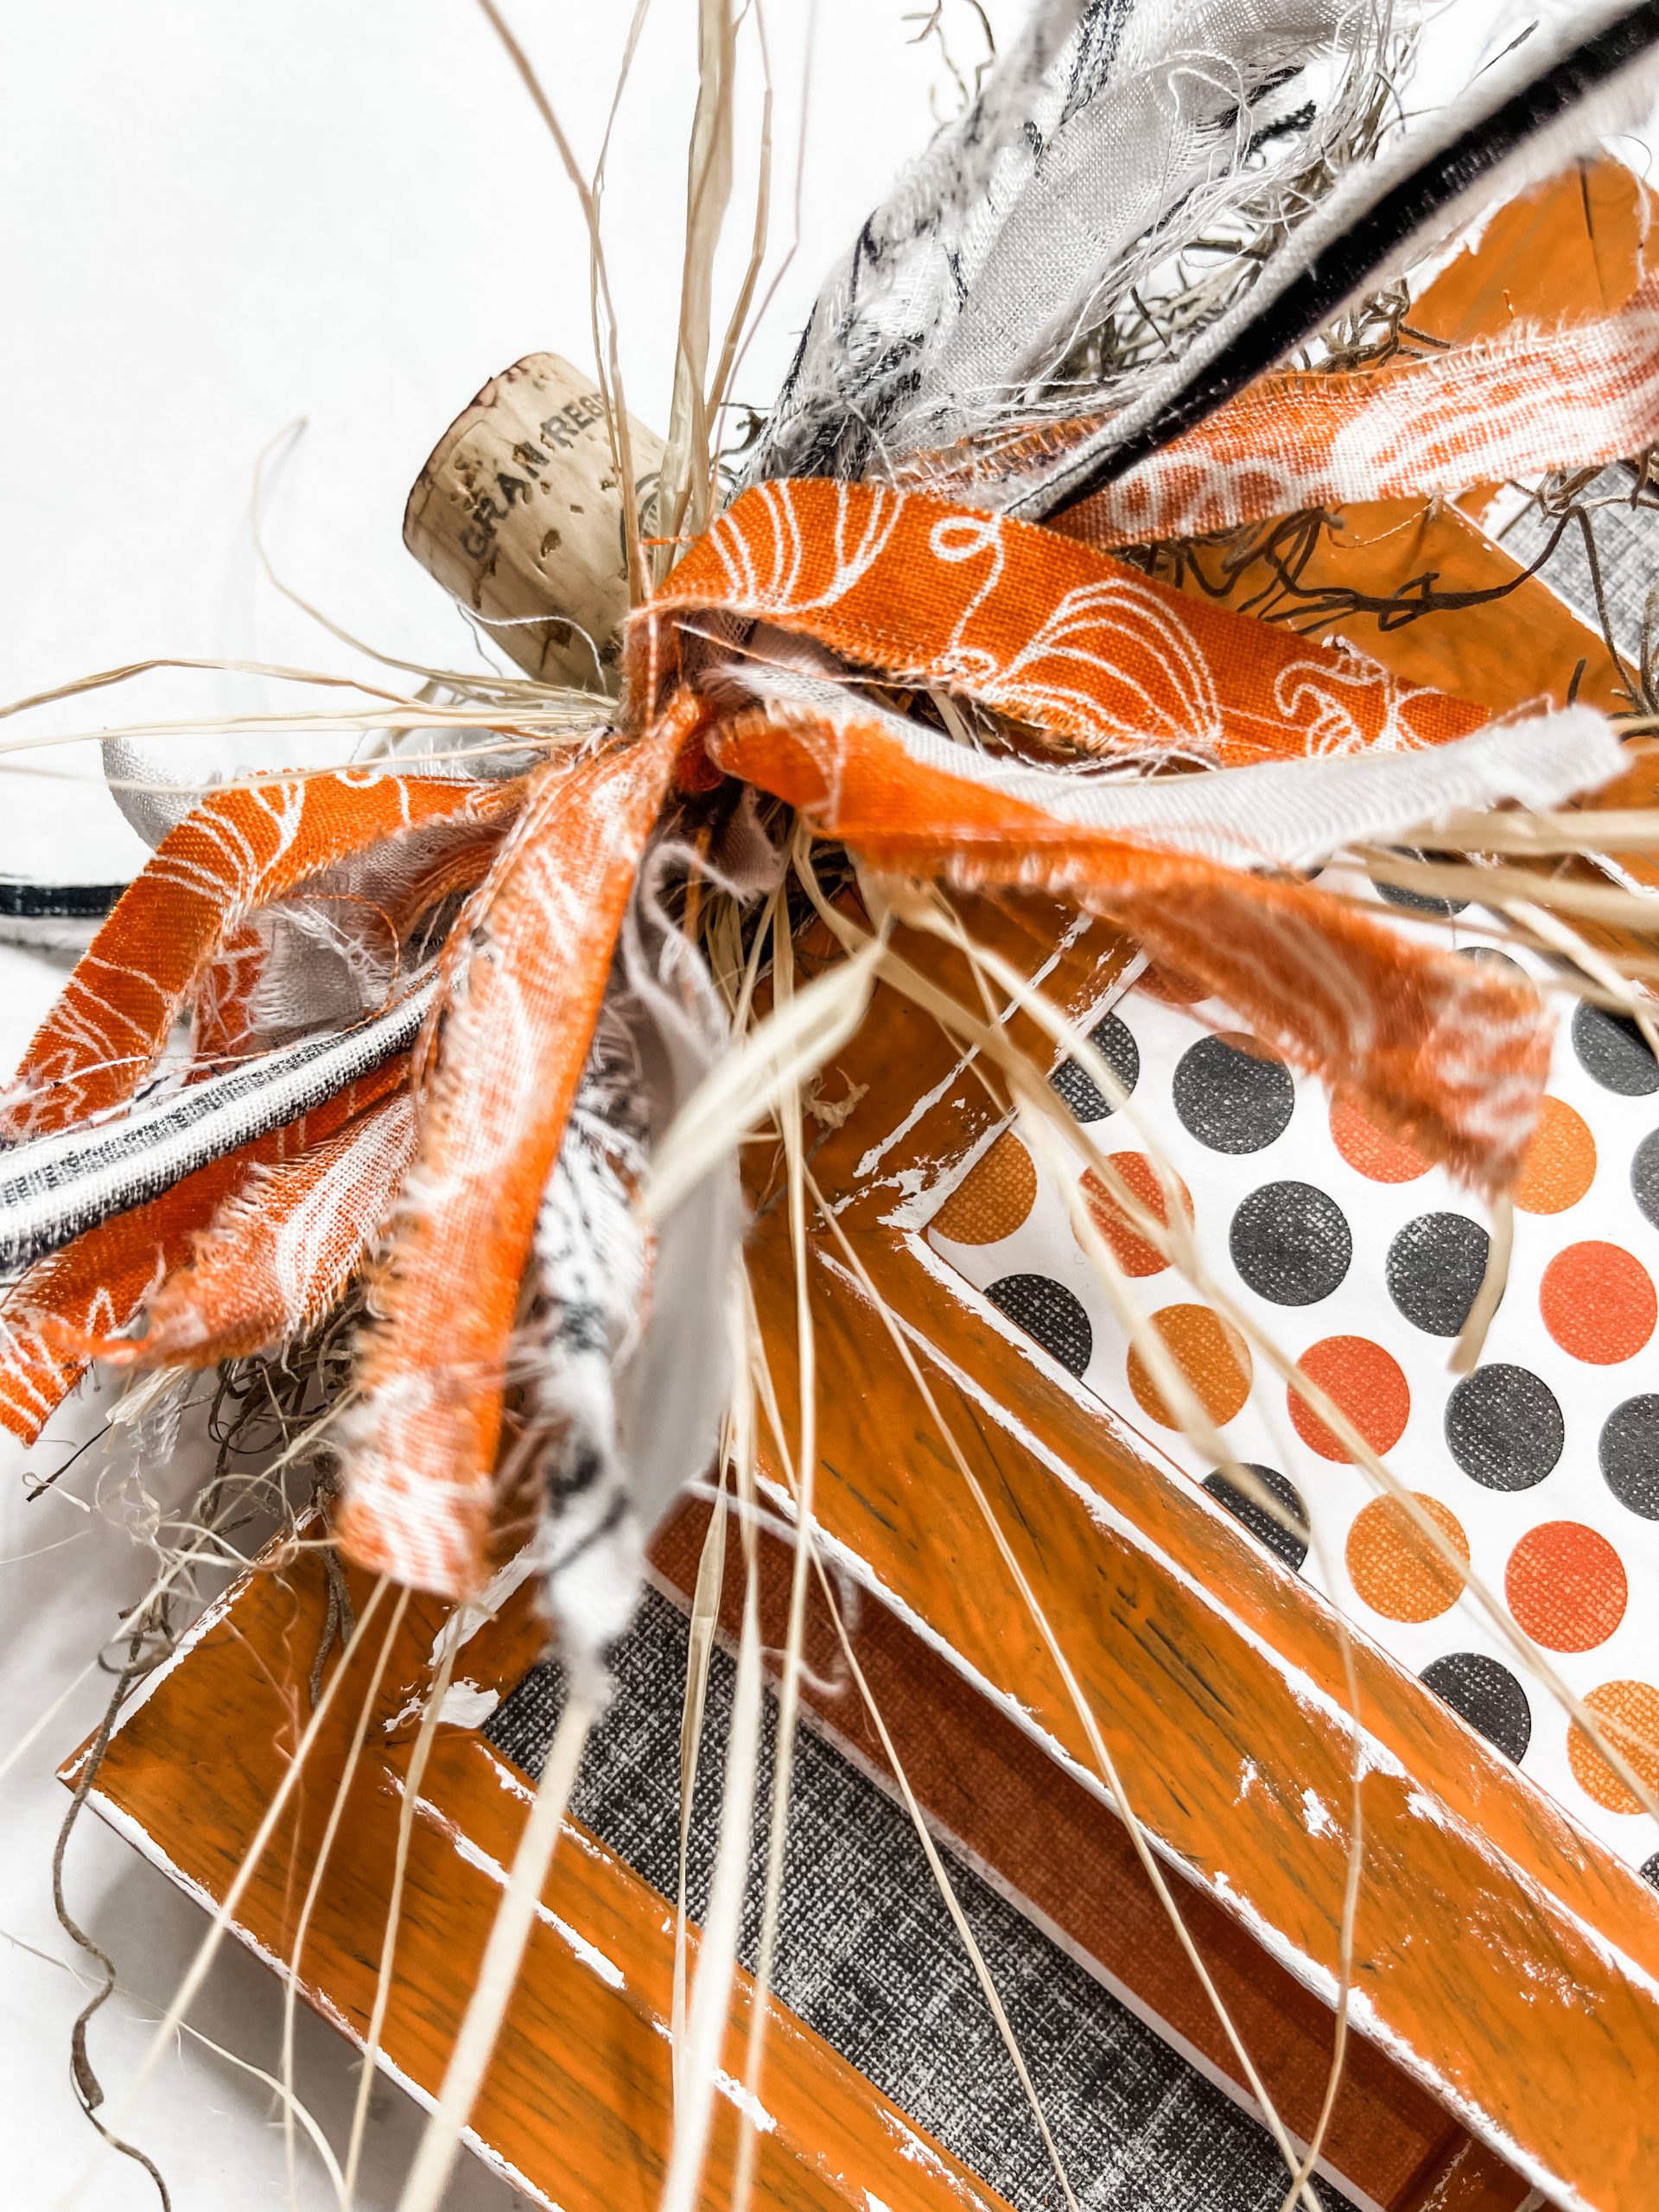
Next, I made the messy bow! I ripped several strips from the fabric patterns I had. Then, I pulled some strands of raffia and wrapped them around the wine cork, and glued them in place.
Here is another way to make a layered messy bow.
Finally, I laid my fabric strips in an X pattern and secured them together with a piece of jute twine. I trimmed the ends, fluffed the bow, and hot glued it at the base of the cork.
I hope you enjoyed this Picture Frame Pumpkin DIY Fall Decor as much as I did and decide to make it for yourself! If you do, I would love to see how yours turns out!
You should totally join my FREE Facebook group called On A Budget Crafts! It is a judgment-free community for DIY crafters to show off their projects and ideas.
If you loved this Picture Frame Pumpkin DIY Fall Decor, you might also like these DIY ideas!
Thanks for stopping by! XOXO Amber
You can also shop my ENTIRE AMAZON Favorites shop just click here! It’s packed full of all the things I use and love. Here is the supply list I highly recommend every creative have on hand!!
Would you also pin my blog for later and get on my newsletter alerts? I would love to have you join my #craftycrew.
I email alerts about new blogs like this Picture Frame Pumpkin DIY Fall Decor so you’re always up to date on fun, new DIY ideas!
Inspired? Leave me a comment below! I love hearing from my readers!

Join my free “ON A BUDGET CRAFTS” Facebook group!

4 Comments