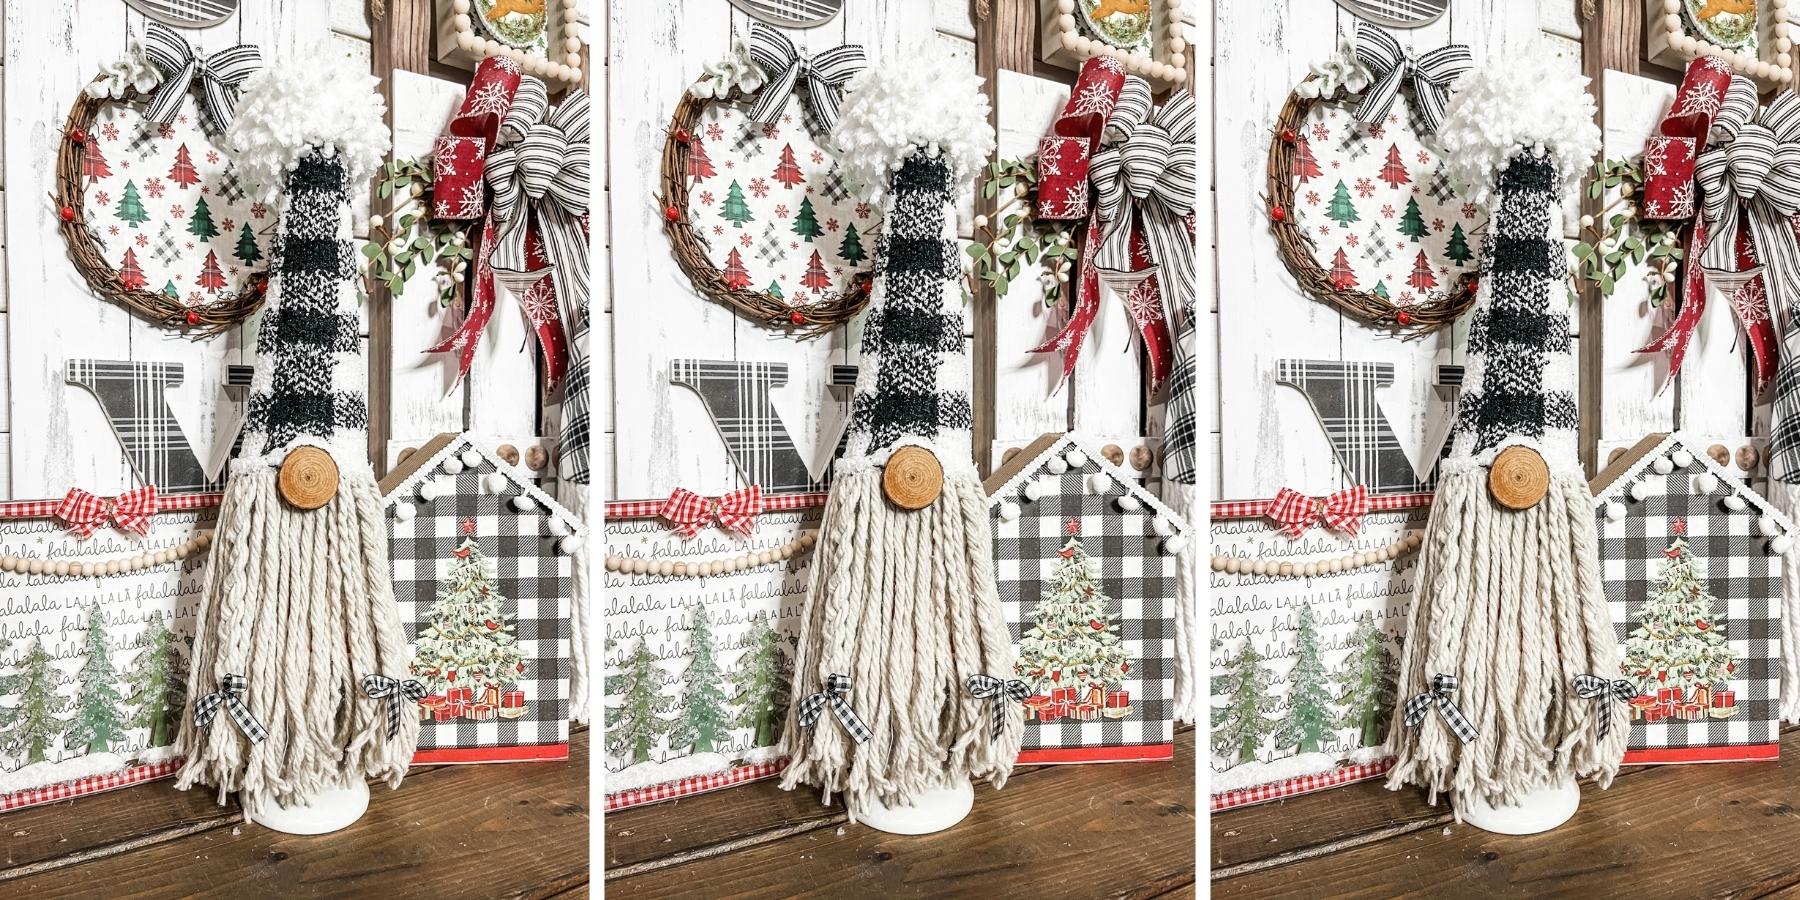
DIY Chippy Christmas Sign
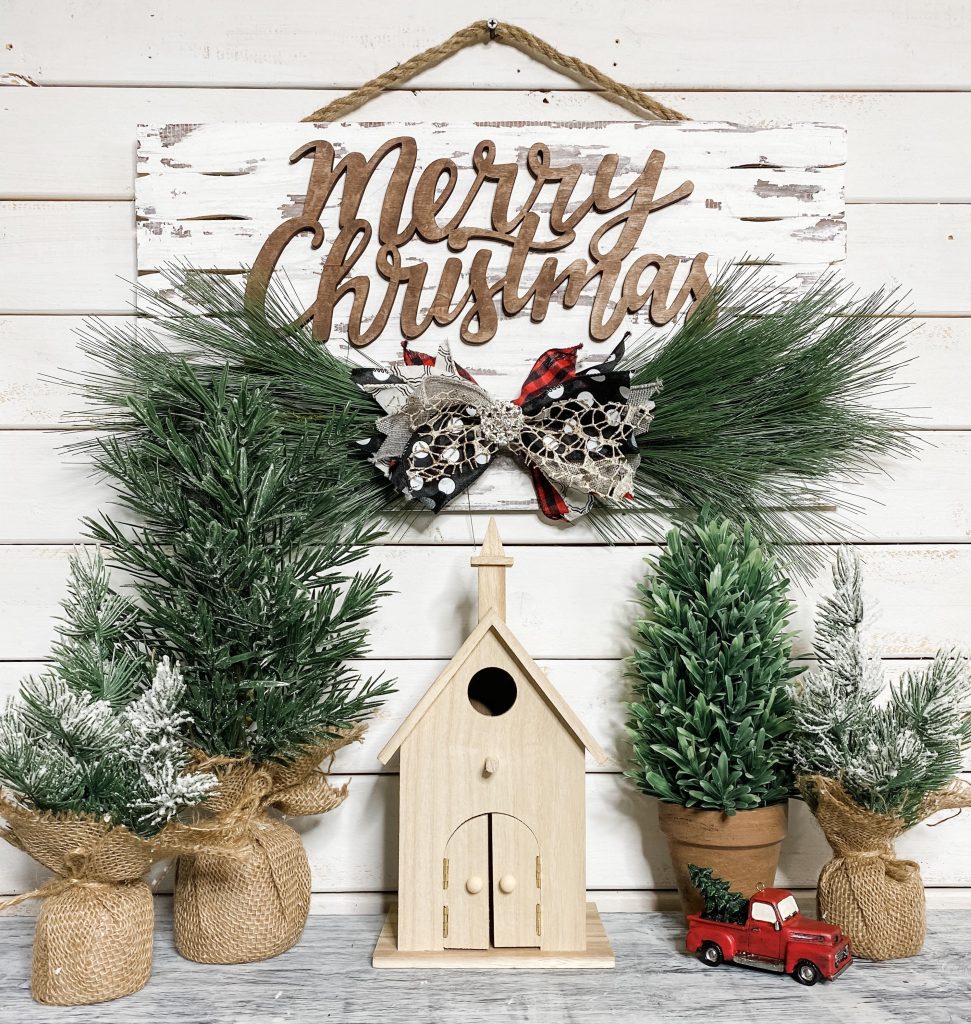
I can never say enough how much I LOVE a chippy finish! Just look at this DIY Chippy Christmas Sign!! I really, really love how amazing this craft looks and hope you do too.
One of the reasons I just absolutely am in love with this craft is because of how truly simple it is to make. This is probably one of the easier crafts I’ve done lately!
This craft is a little different than my usual projects. If you’re a regular reader of my blog, you’ve probably realized that I do a lot of Dollar Tree DIY crafts. I
f there is one thing that I love more than a chippy finish, it is saving money! That’s why so many of my projects are made with Dollar Tree supplies.
I want you to know how to make your own home decor and crafts that LOOK high-end without having to give your arm and leg away.
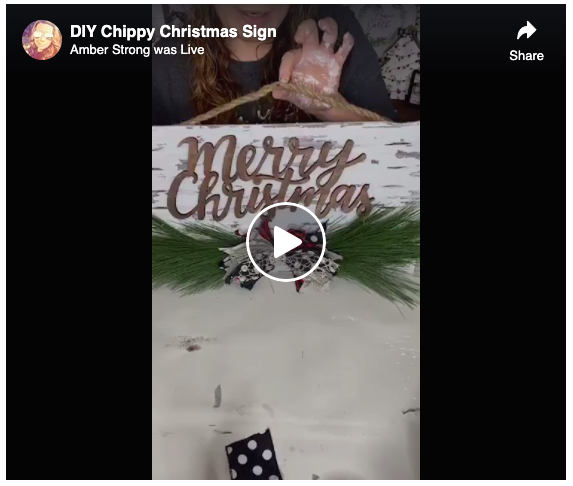
See how to make a DIY Chippy Christmas Sign
If you’re new to the crafting community, first of all, WELCOME! Second, some of the techniques I use may be new to you, but you can watch exactly how I made this craft on my Facebook page.
I recorded this project LIVE, so there may be a bit more talking than crafting (I can’t help it! I’m a talker!), but you can fast-forward to the parts you want to see!
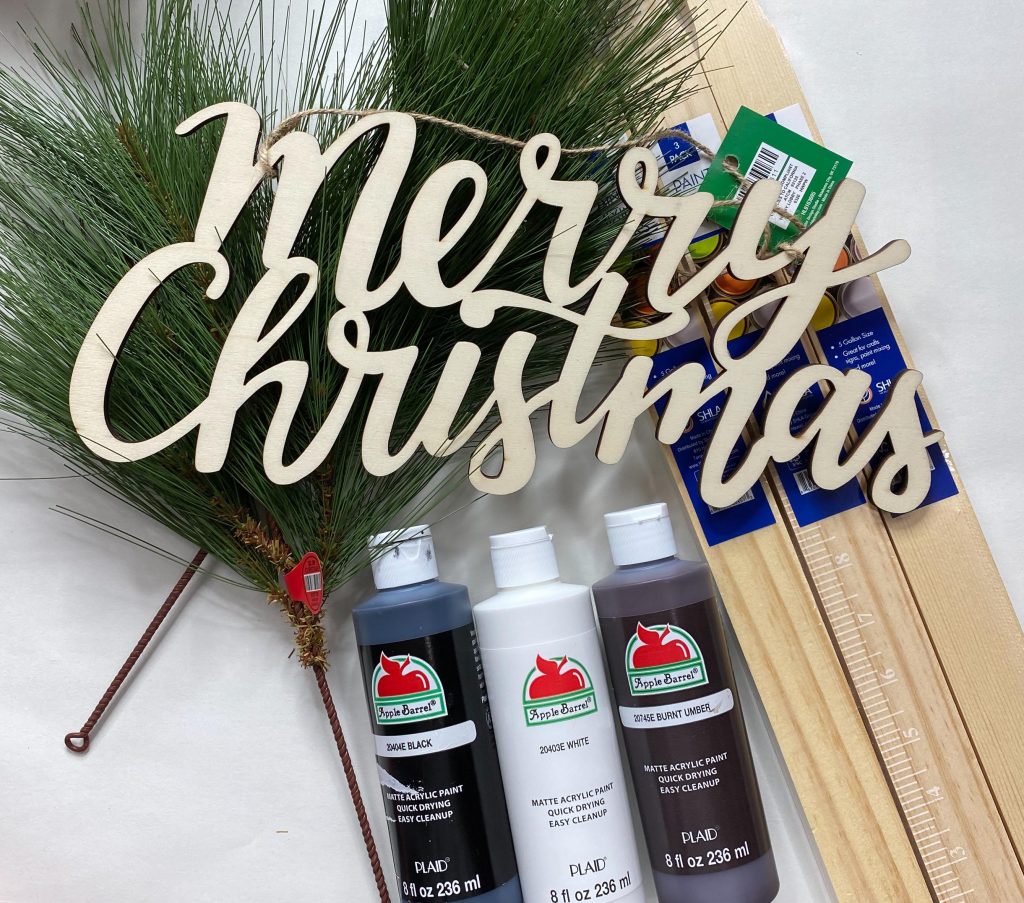
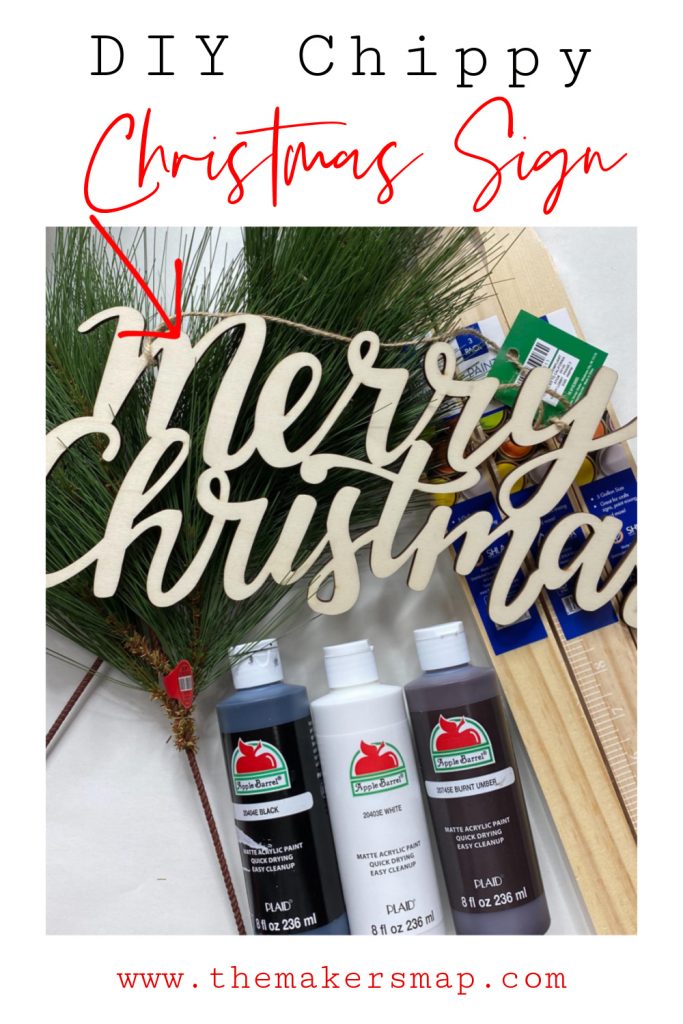
For this craft, none of my supplies came from Dollar Tree, but this is still a very affordable project to make! The supplies for this DIY Chippy Christmas sign came from Hobby Lobby, Michael’s, Amazon, and Home Depot!
**I actually ended up using Folkart Chalk Paint instead of the Apple Barrel White Acrylic Paint**
Here is what you need:
Just so you know, these are my affiliate links. If you purchase from these links, I may make a small commission, but it will not cost you any extra. “As an Amazon Associate, I earn from qualifying purchases.”
- Totally Dazzled Bling
- Merry Christmas wood lettering (Hobby Lobby)
- 5 Gallon Paint Stirrers (Home Depot)
- 1 Gallon Paint Stirrers (Home Depot)
- Aviation Snips
- Paint Scraper
- Wise Owl Lemon Verbena Furniture Salve
- Brown paint
- White paint
- Scissors
- Chippy brushes 1-inch
- Heat gun
- Hot glue gun and glue sticks
- Evergreen Spray (Hobby Lobby)
- 5 different pattern ribbons – I used ribbons from Hobby Lobby
- Stapler
Let’s get started!
The first step of making this super cute DIY Chippy Christmas Sign is to get 8 of your 5-gallon paint stirrers and lay them out.
I alternated the way I laid mine so that the curved sides weren’t all on the same side of my sign. I secured them together by hot-gluing 1-gallon paint stirrers to the back of them.
Now, the 1-gallon paint stirrers were just slightly too long and hung over the top and bottom of the 5-gallon ones, so I just cut a little off the ends of the 1-gallon stirrers using my aviation snips.
Next, I stained the front of my sign with the Apple Barrel Brown Acrylic paint. You want to do this when you plan to add a chippy finish to your craft.
I like to spray the wood with some water before I start staining because it helps the wood really soak up the paint. You’re still going to be able to see the ruler lines on the paint sticks, so don’t freak out!
How to get the Chippy Look!
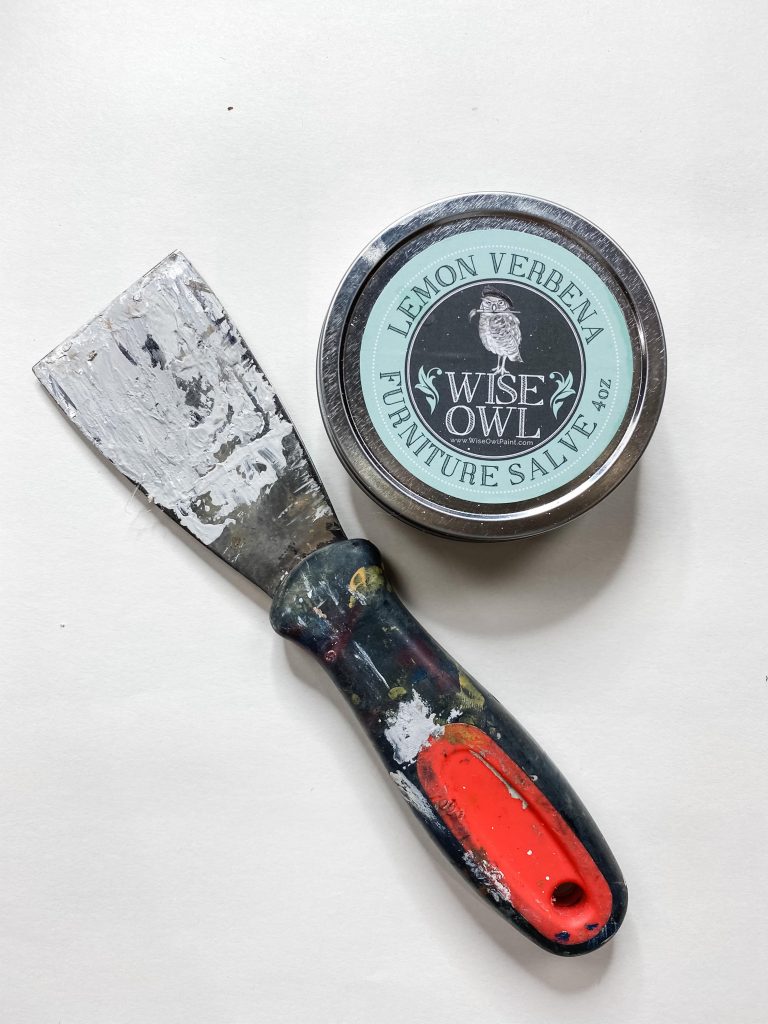
To get the best chippy look, you want to apply this Wise Owl furniture salve to the places where you don’t want the white paint to stick (i.e. where you want it to be chippy).
Brush just a light coating on random areas across the sign and paint over the entire board with your white chalk paint.
As you dry the paint, the areas where you applied the salve will stay a little wetter. You want to use the paint scraper to pull the wet paint off those areas and just drag it across the dry areas.
This is going to give you the amazing chippy finish! If you want to see exactly how I did it, you can watch the video!
A green thumb
The evergreen sprays really give this craft an extra Christmas-y feel! I took 2 of the sprays and put them end to end at the bottom of my sign.
Initially, I tried to hot glue them to the sign, but they were TOO HEAVY! So, I had to break out my stapler and attach them that way.
You want to be careful, though. The paint stirrers are pretty thin and could easily crack when you staple into them.
Merry Christmas, everyone!

Okay, set aside your chippy wood and grab your Merry Christmas lettering. I used the brown Apple Barrel Acrylic paint to stain the letters.
You could use any color you want, but I feel like the brown just goes really well with the chippy sign and doesn’t clash with the ribbons or the evergreen sprays.
Once the paint is dry (you can use a heat gun to spread up the drying process), it’s time to use your hot glue gun and glue the lettering to your sign.
Time for the Messy Bow!
Fair warning, I am no professional bow maker, but I absolutely love making messy bows! I used 5 2-inch thick ribbons to make this bow.
Please don’t feel like you have to use the exact same patterns I did. Pick 5 ribbon patterns that you love and get creative!
I cut 2, 9-inch strips of 4 of the ribbons and only 1 strip of one ribbon. The pattern that you only cut one strip of will be the very front layer, so make sure it is your favorite!
Then I put the 2 strips of matching ribbon on top of each other, folded them in half long-ways, and cut the ends at an angle. Next, I created an “X” with the ribbon strips and alternated patterns as I laid them down. I promise, if you watch the video, this will all make a lot more sense!
All that’s left to do to make this Messy Bow is to pinch the center together, wrap a zip-tie around the center, and add your BLING!
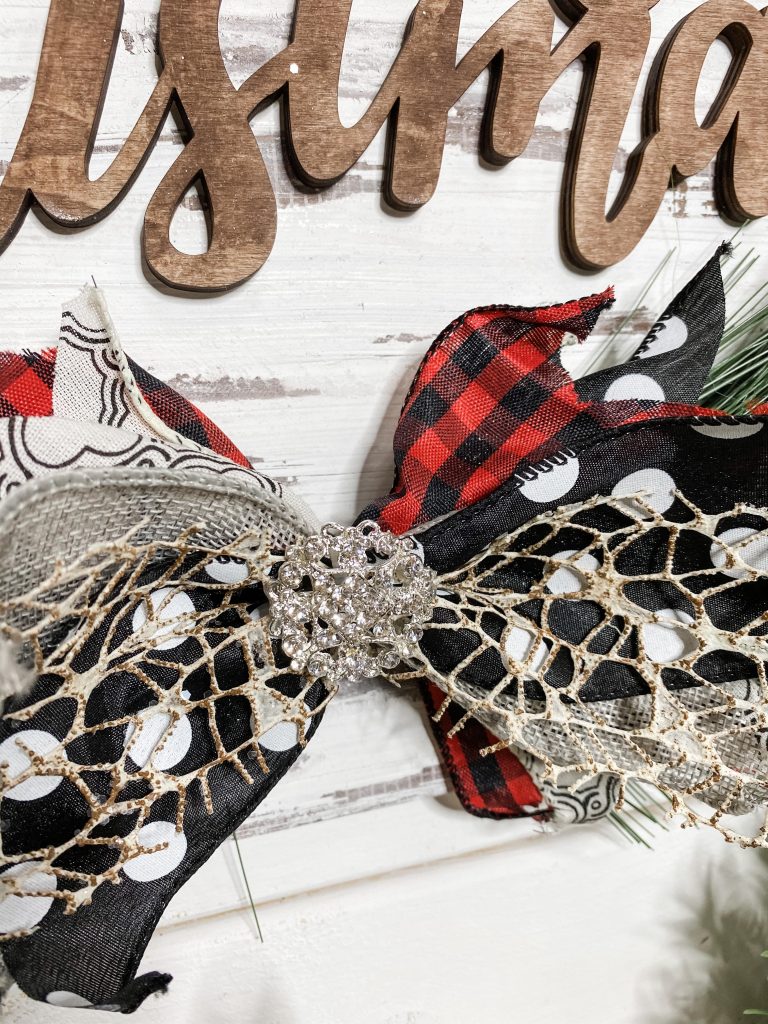
Where’d you get that bling??
The super cute bling in the center of this messy bow came from Totally Dazzled! They have a ton of amazing bling options in different styles and sizes. It honestly adds the perfect touch to this DIY Chippy Christmas Tree Sign! I love it!
The finishing touches
All that’s left to do is glue down your messy bow and attach your rope hanger to the back! I used hot glue to stick the messy bow. For the rope hanger, I first glued the ends of the rope to the back of the sign.
Then I took some ribbon and cut it into about 2-inch strips. I glued these over top of the ends of the rope to help secure the rope.
Some of my #craftycrew suggested that I just staple the rope, but I was worried that the staples would split the paint stirrers and it would be very obvious at the top of the sign. That was a risk I just wasn’t willing to take!
It looks AMAZING!
I hope you enjoyed this craft as much as I did! If you decide to make this yourself, I would love to see how it turns out! You can share your crafts in my FREE Facebook group called On A Budget Crafts.
If you loved this DIY, you might also like this Chippy Christmas Tree Decor!
Thanks for stopping by! XOXO Amber
You can also shop my ENTIRE AMAZON Favorites shop just click here! It’s packed full of all the things I use and love.
Here is the supply list I highly recommend every creative has on hand!! Would you also pin my blog for later and get on my newsletter alerts? I would love to have you join my #craftycrew.

Join my free “ON A BUDGET CRAFTS” Facebook group!
PIN THIS POST FOR LATER!


5 Comments