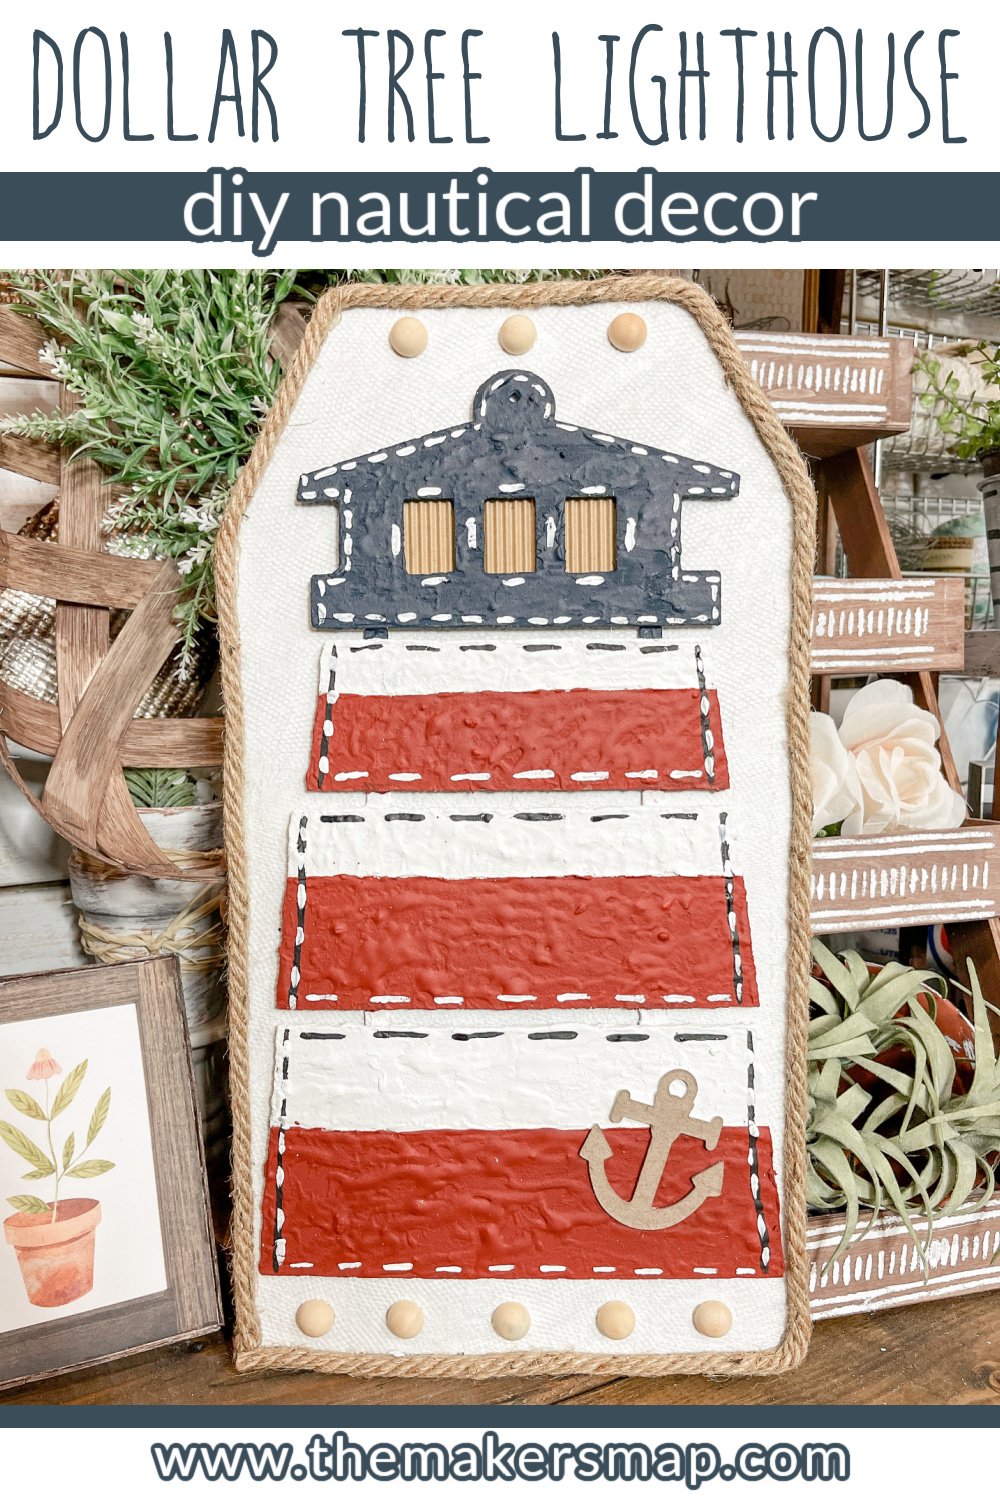
Dollar Tree Lighthouse DIY Nautical Decor
This Dollar Tree Lighthouse DIY Nautical Decor is another great way to use the new Dollar Tree Shore Living Collection to create your own amazing DIY home decor! I used the lighthouse from their new collection, paint, spackling, and another Dollar Tree tag sign to create this incredible DIY nautical decor!
I can see this hanging in a bathroom or on the living room wall of a beach vacation rental!
Watch the DIY Tutorial
I recorded the how-to steps of this easy DIY nautical decor during a LIVE video on Facebook. If you want to see the process, craft along, or just join in on the fun conversations, you can watch the DIY tutorial replay!
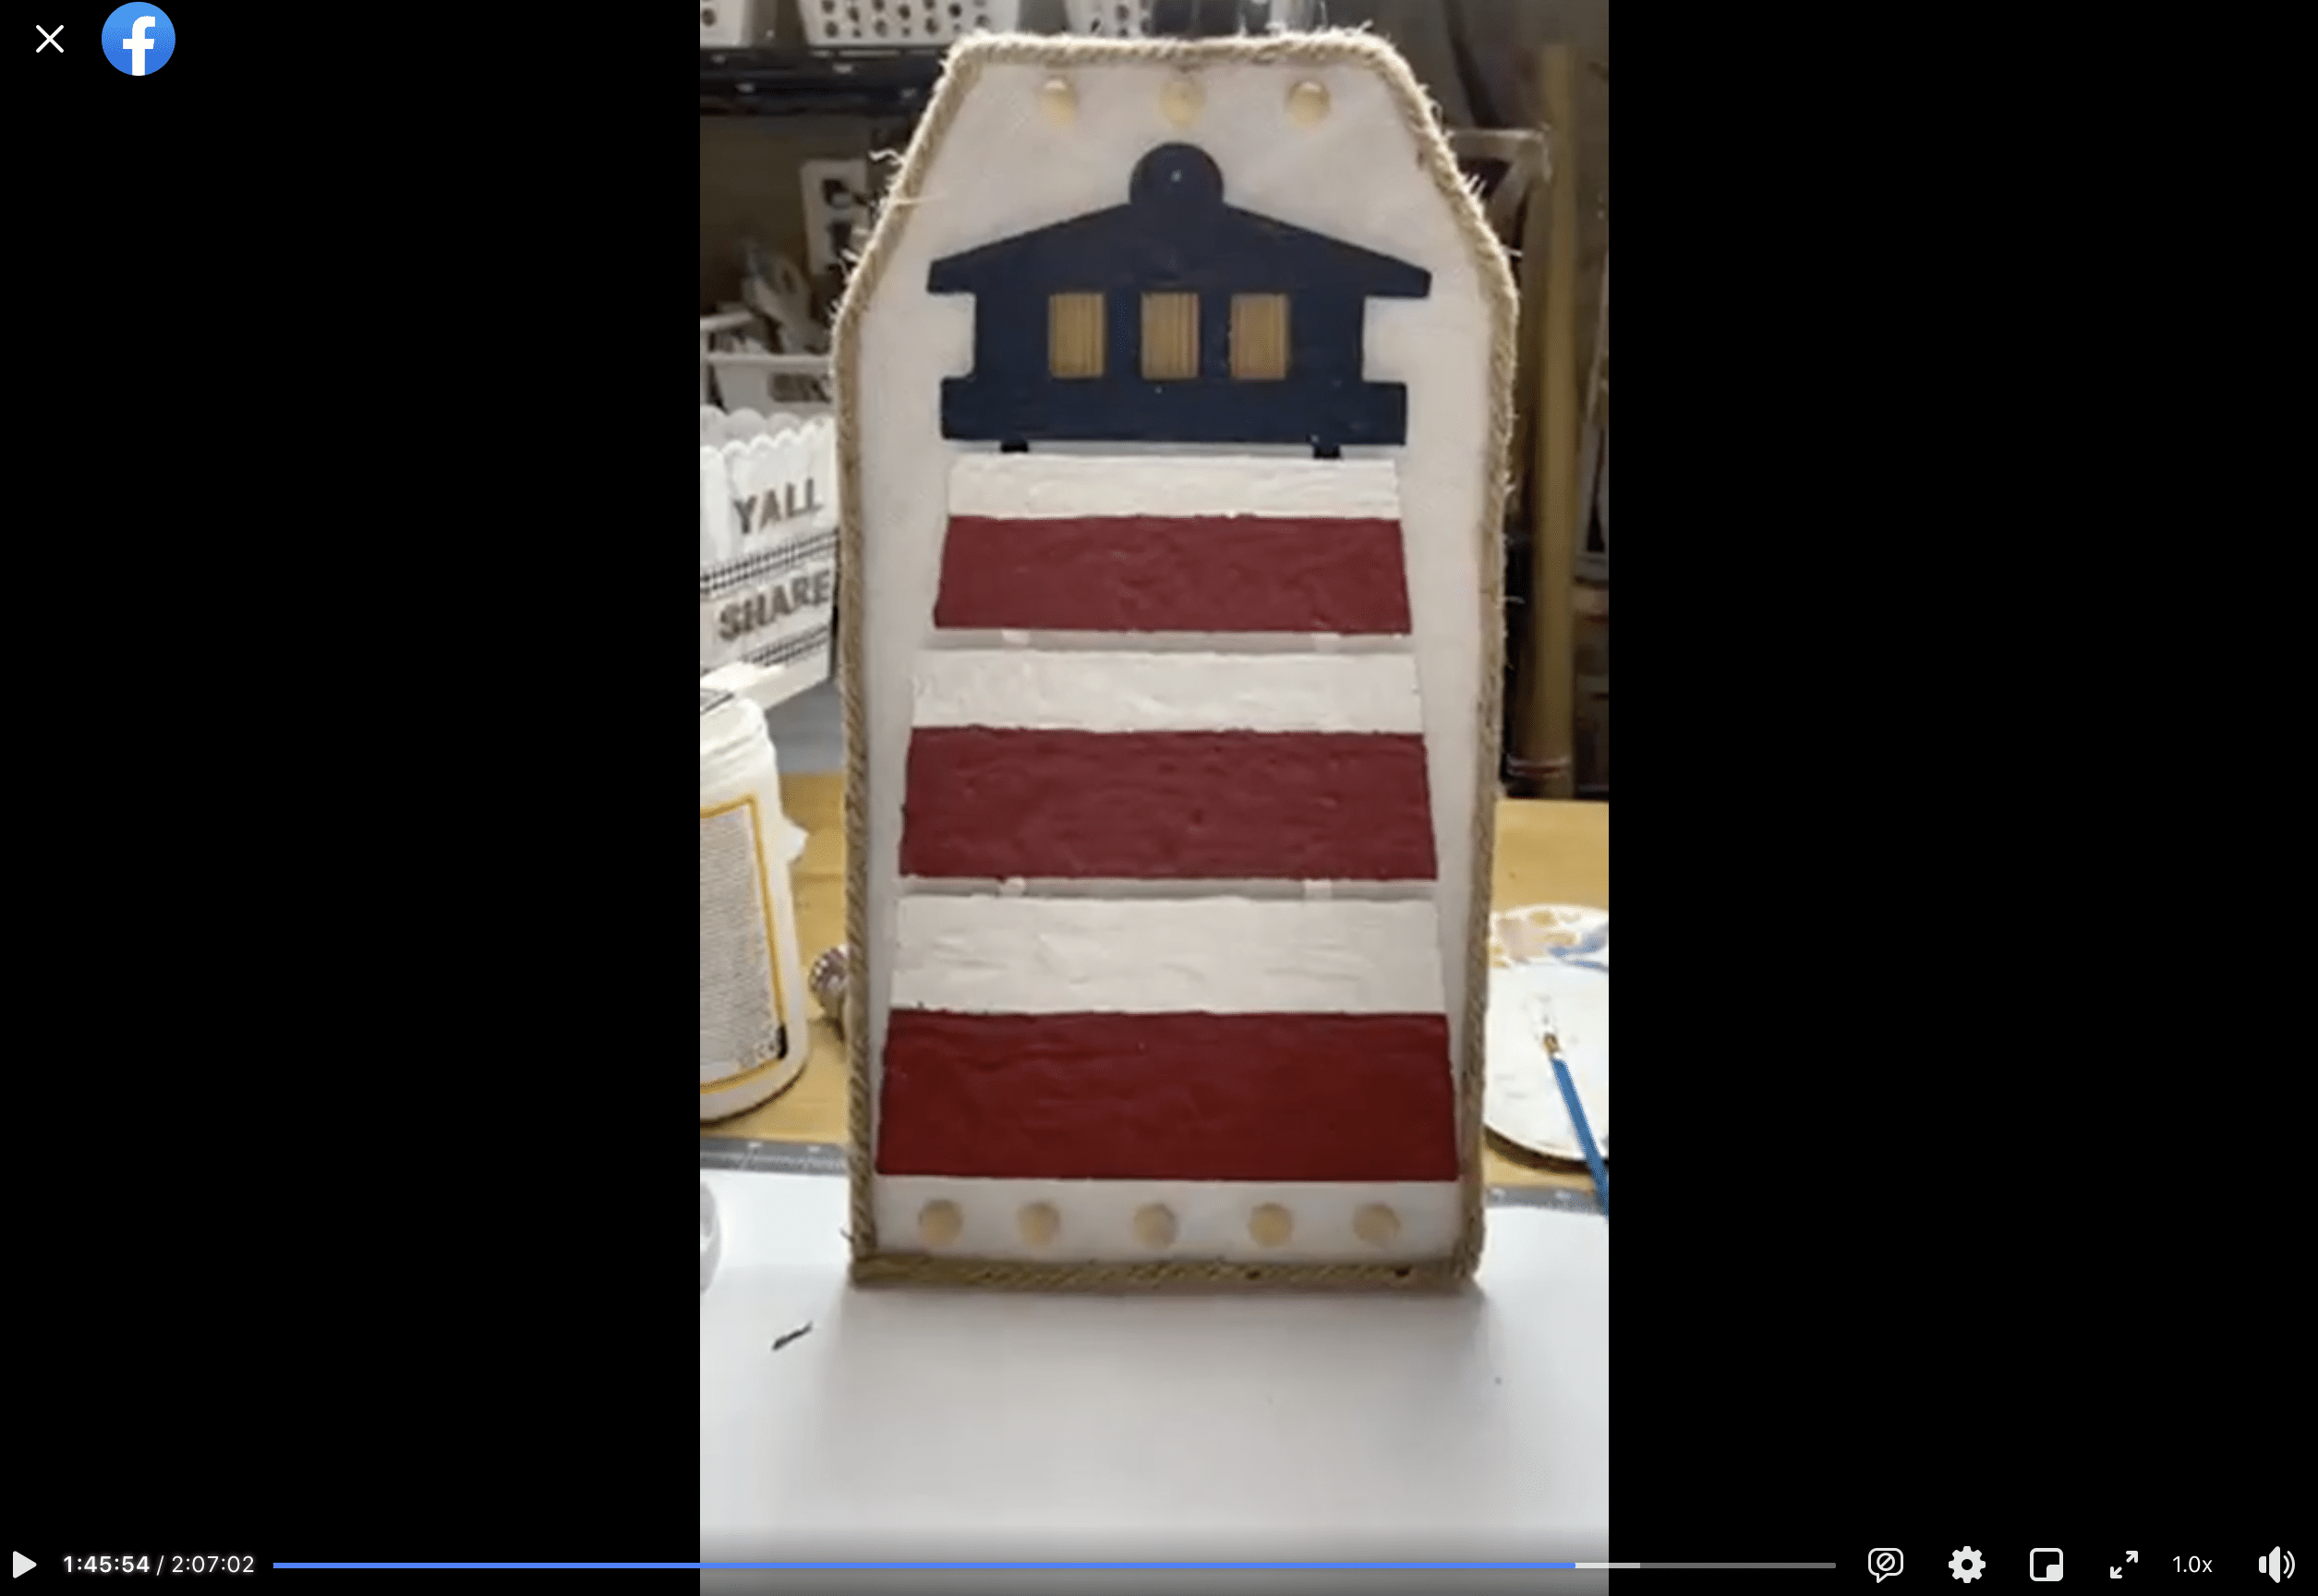
WATCH THE DIY TUTORIAL VIDEO
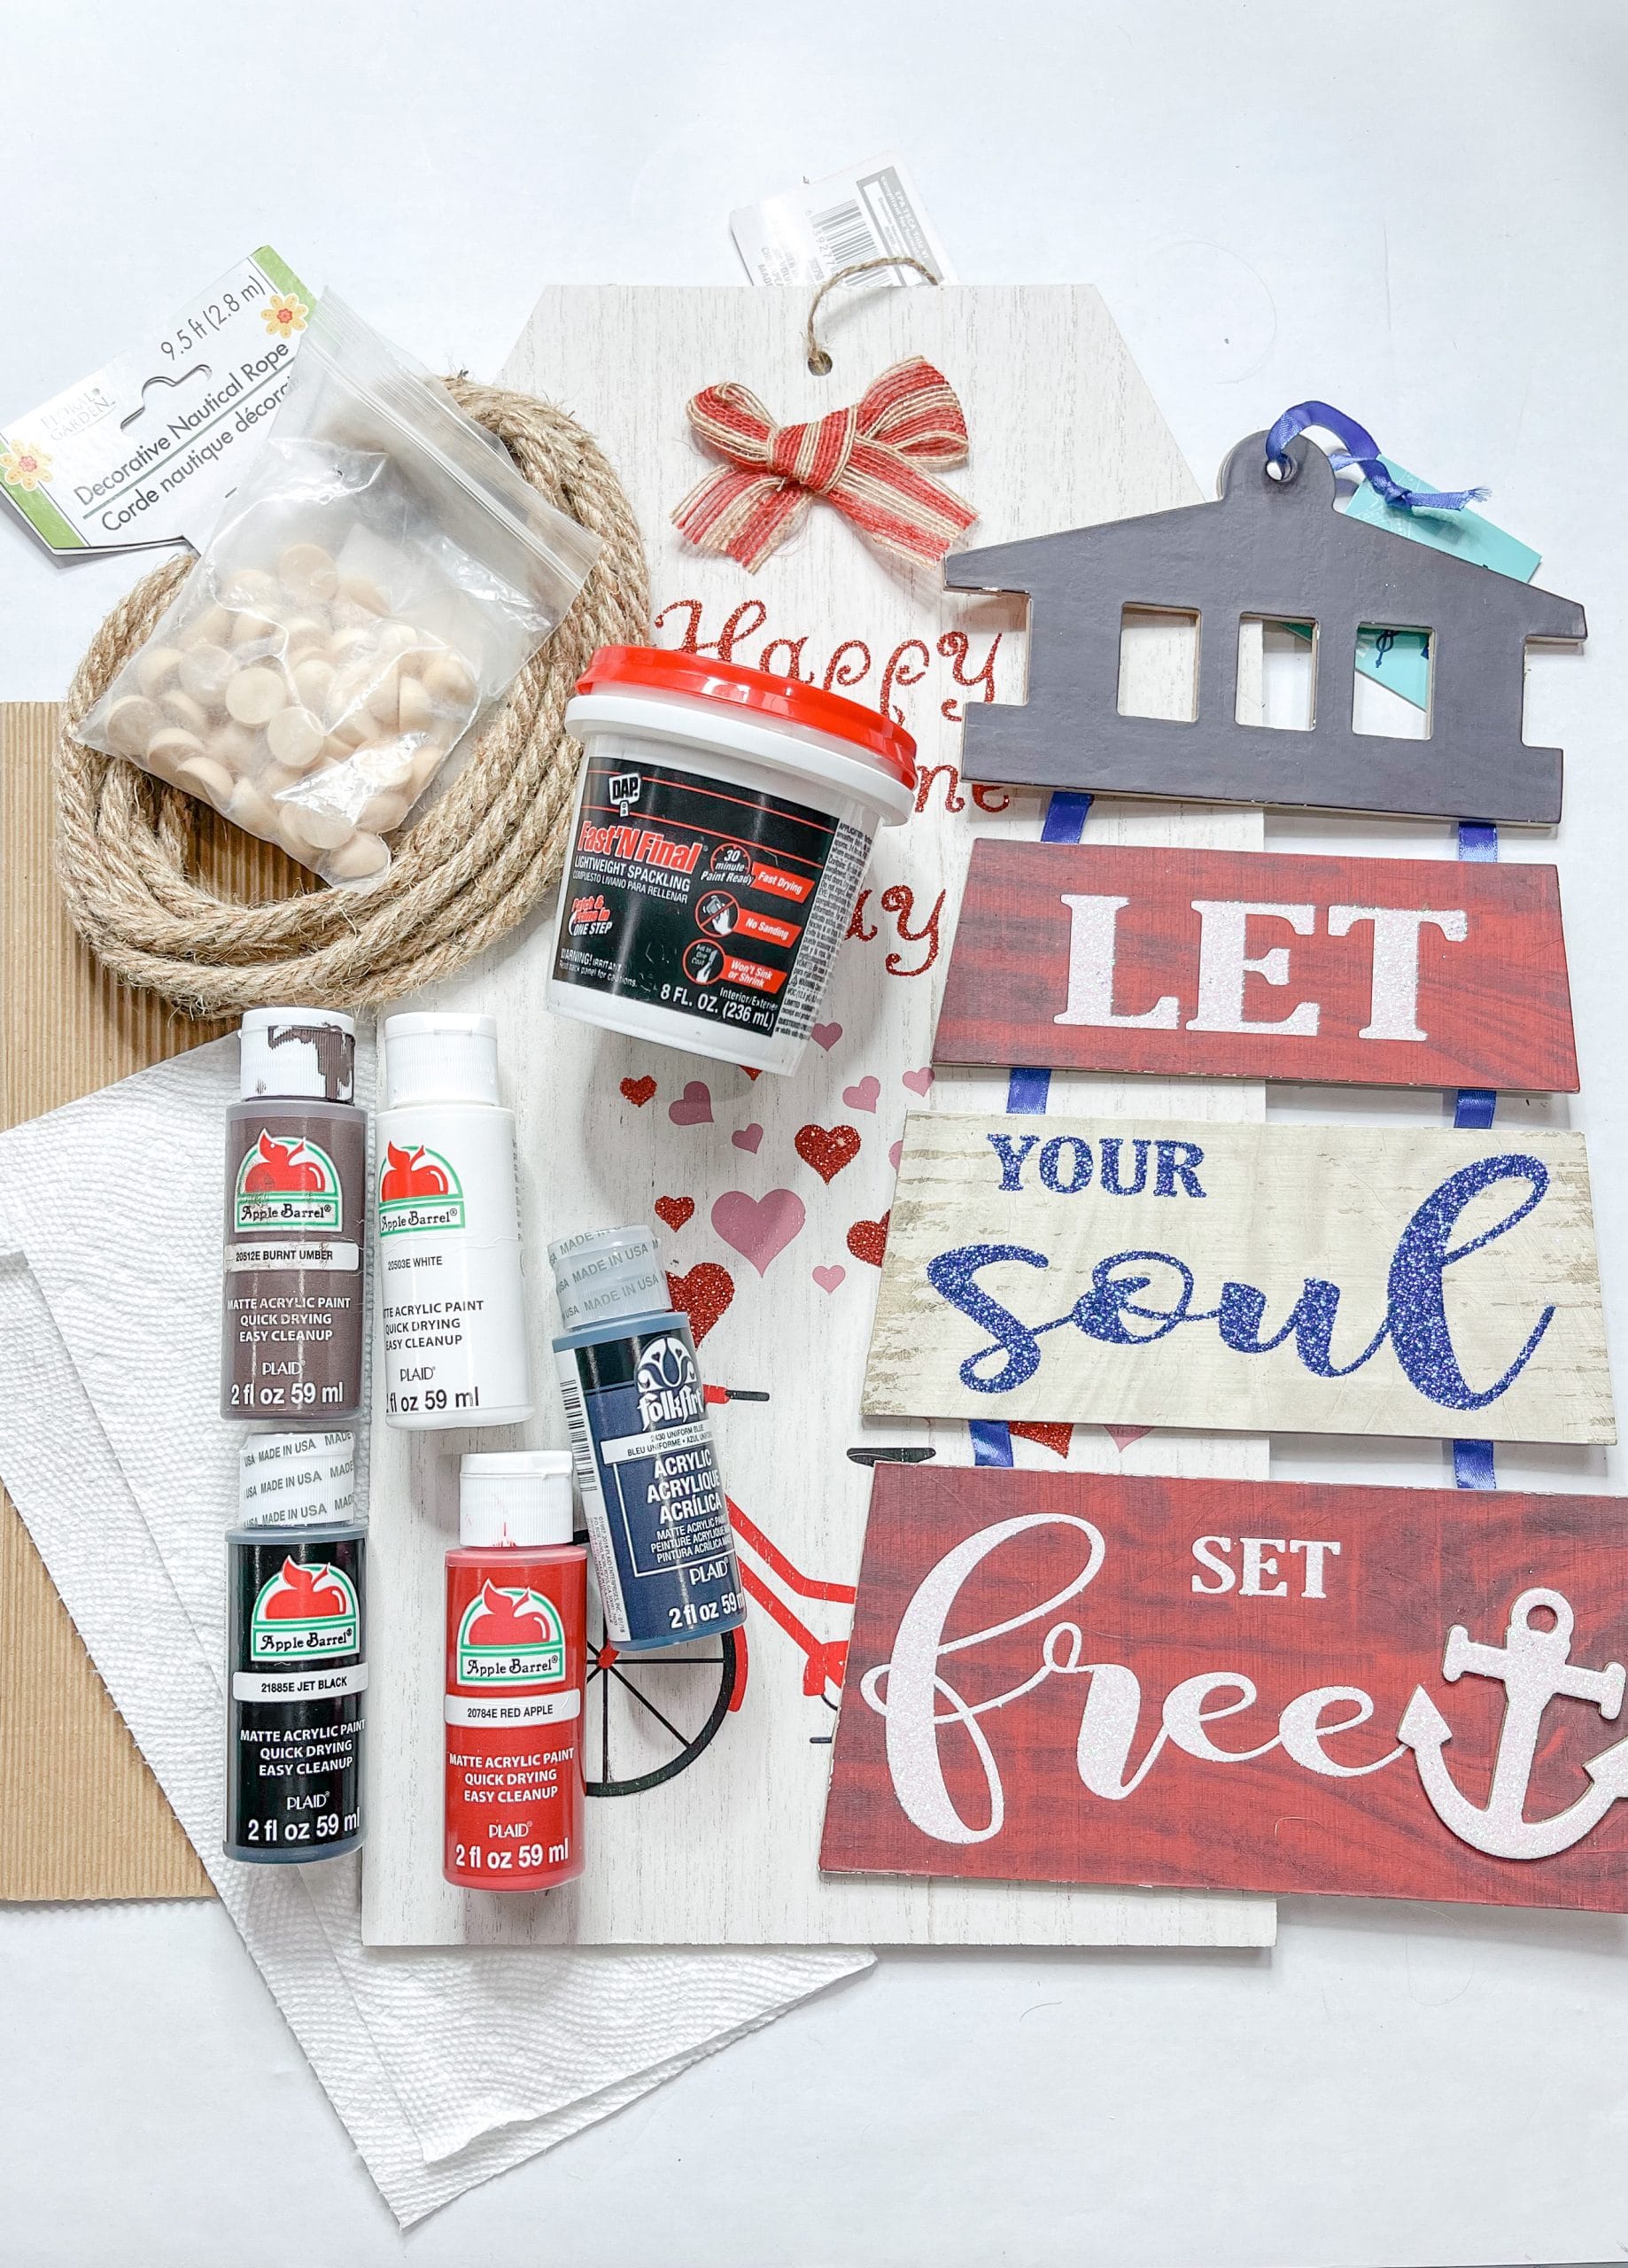
For this project, I will be using these items but you can substitute where you want.
“As an Amazon Associate, I earn from qualifying purchases.”
- Dollar Tree Lighthouse
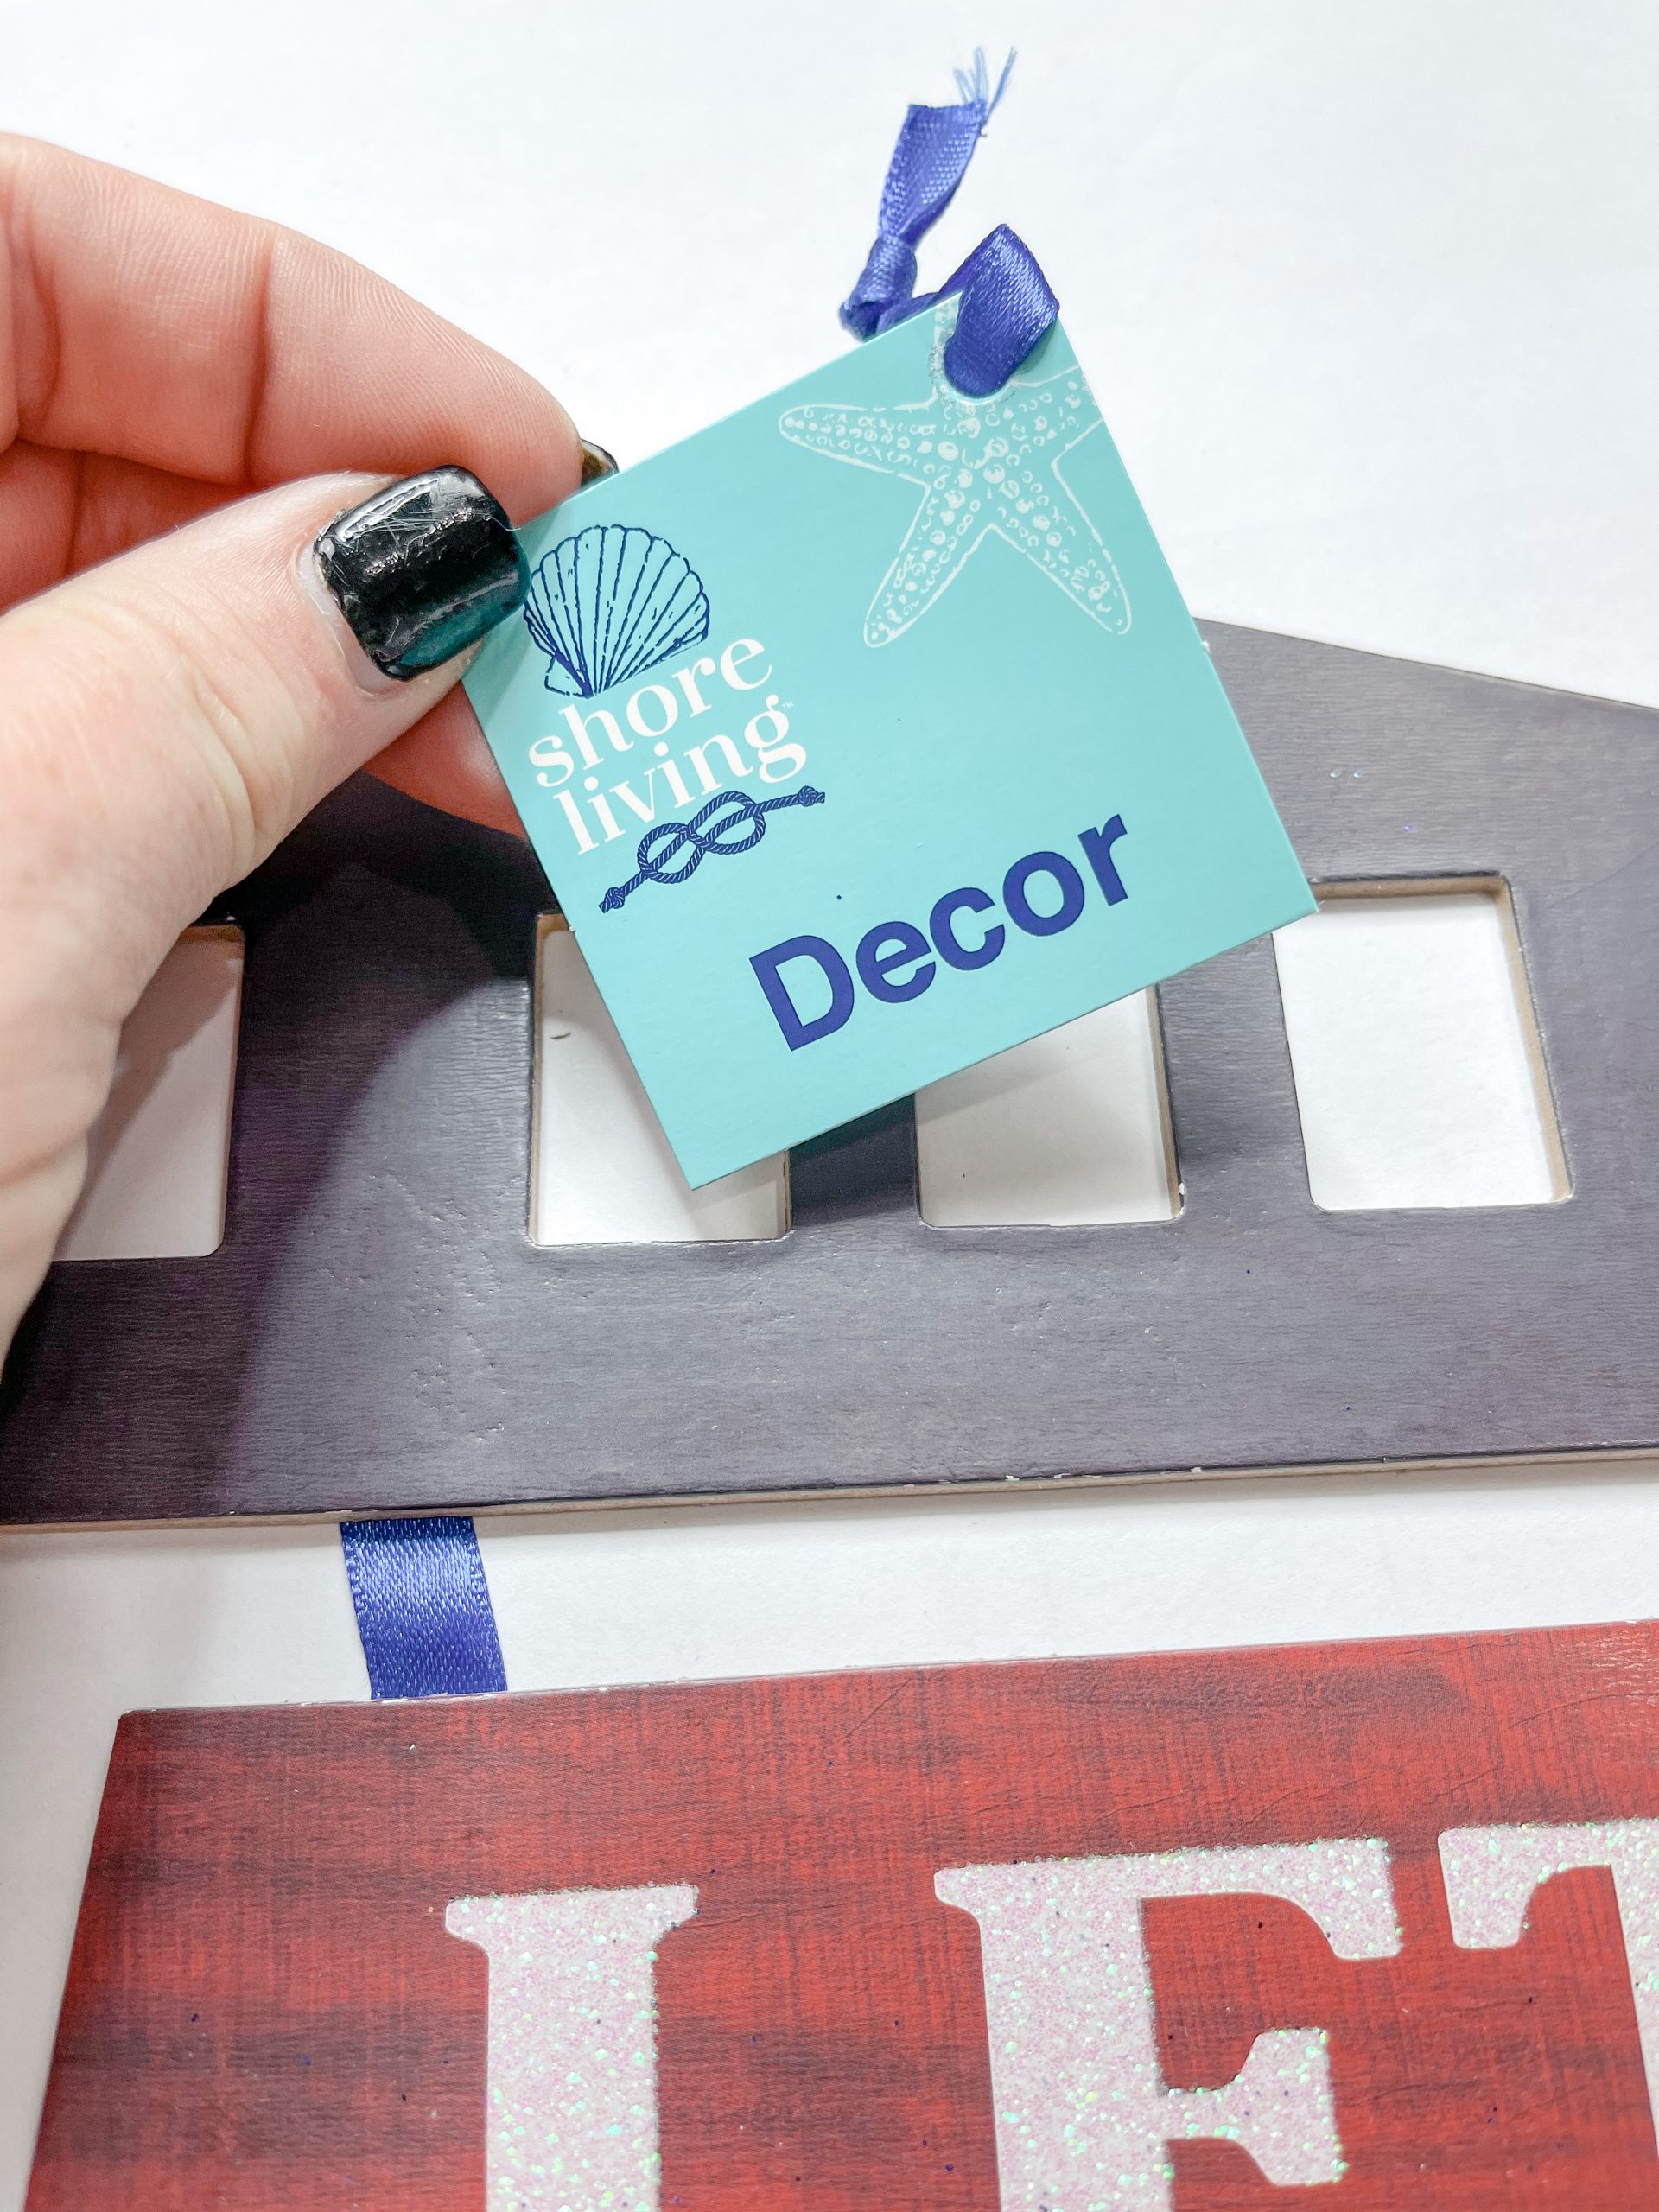
- Dollar Tree Tag Sign
- Halfwood Beads
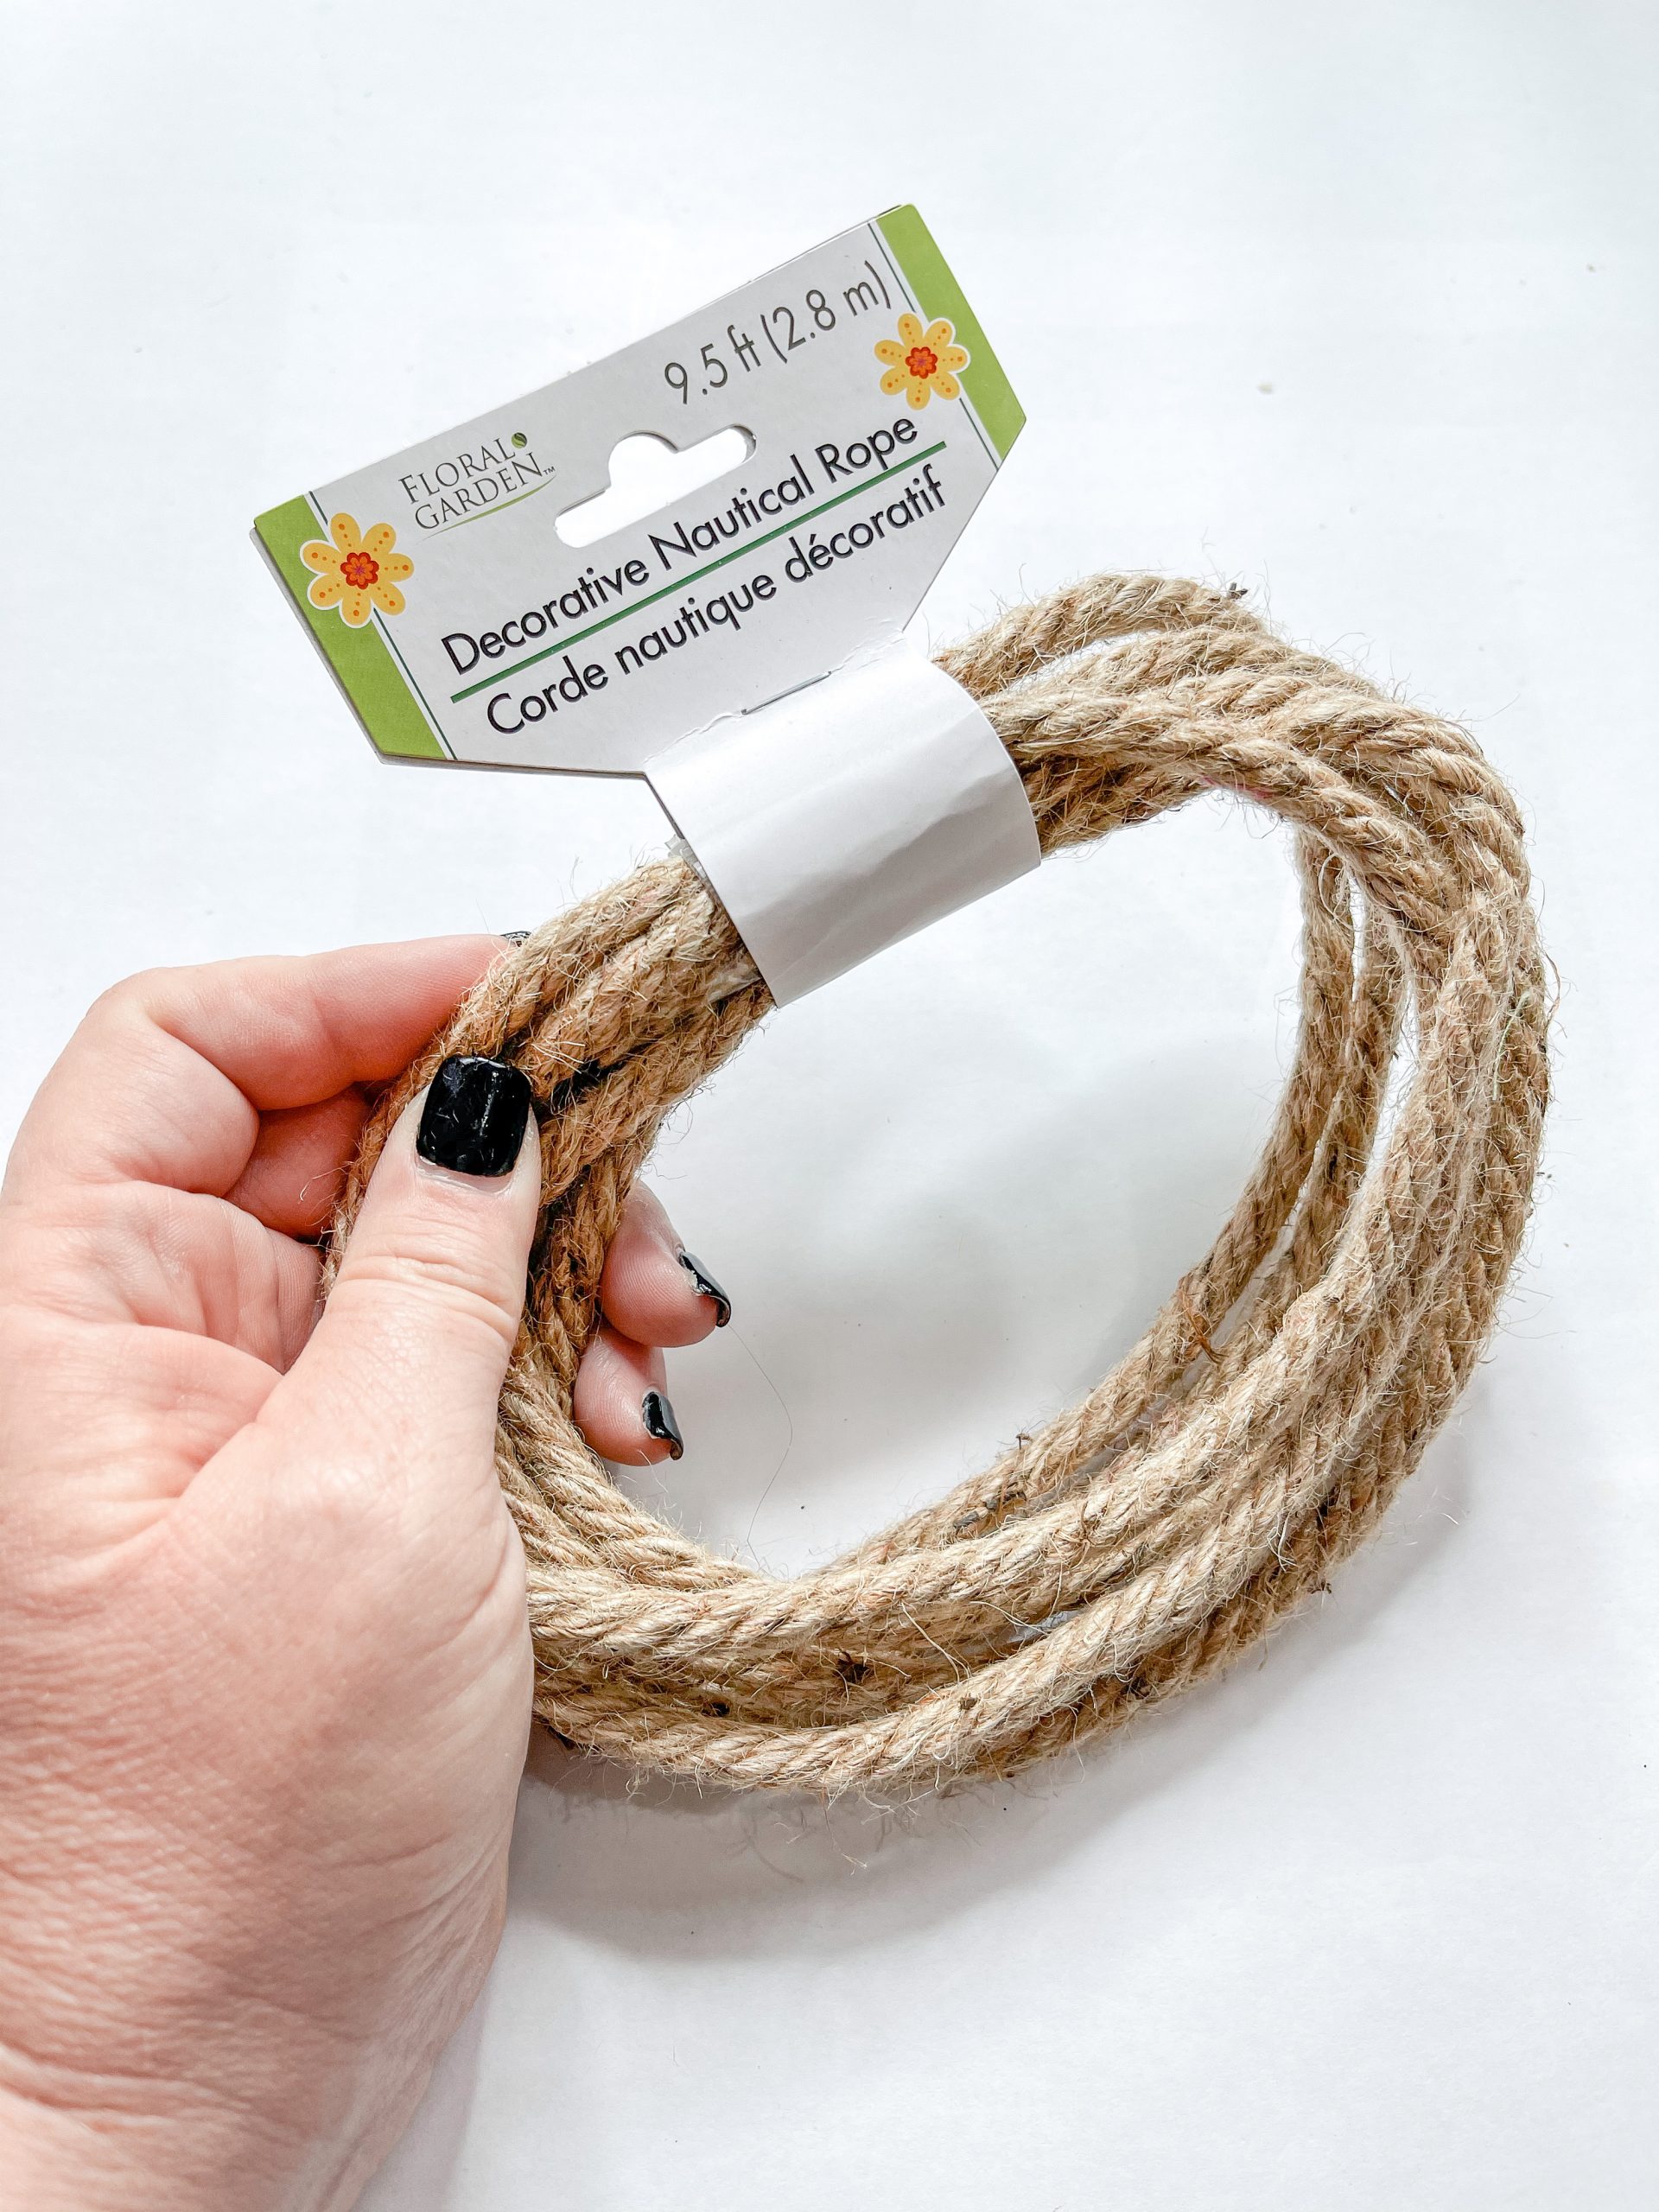
- Dollar Tree Nautical Rope
- Dollar Tree Spackling
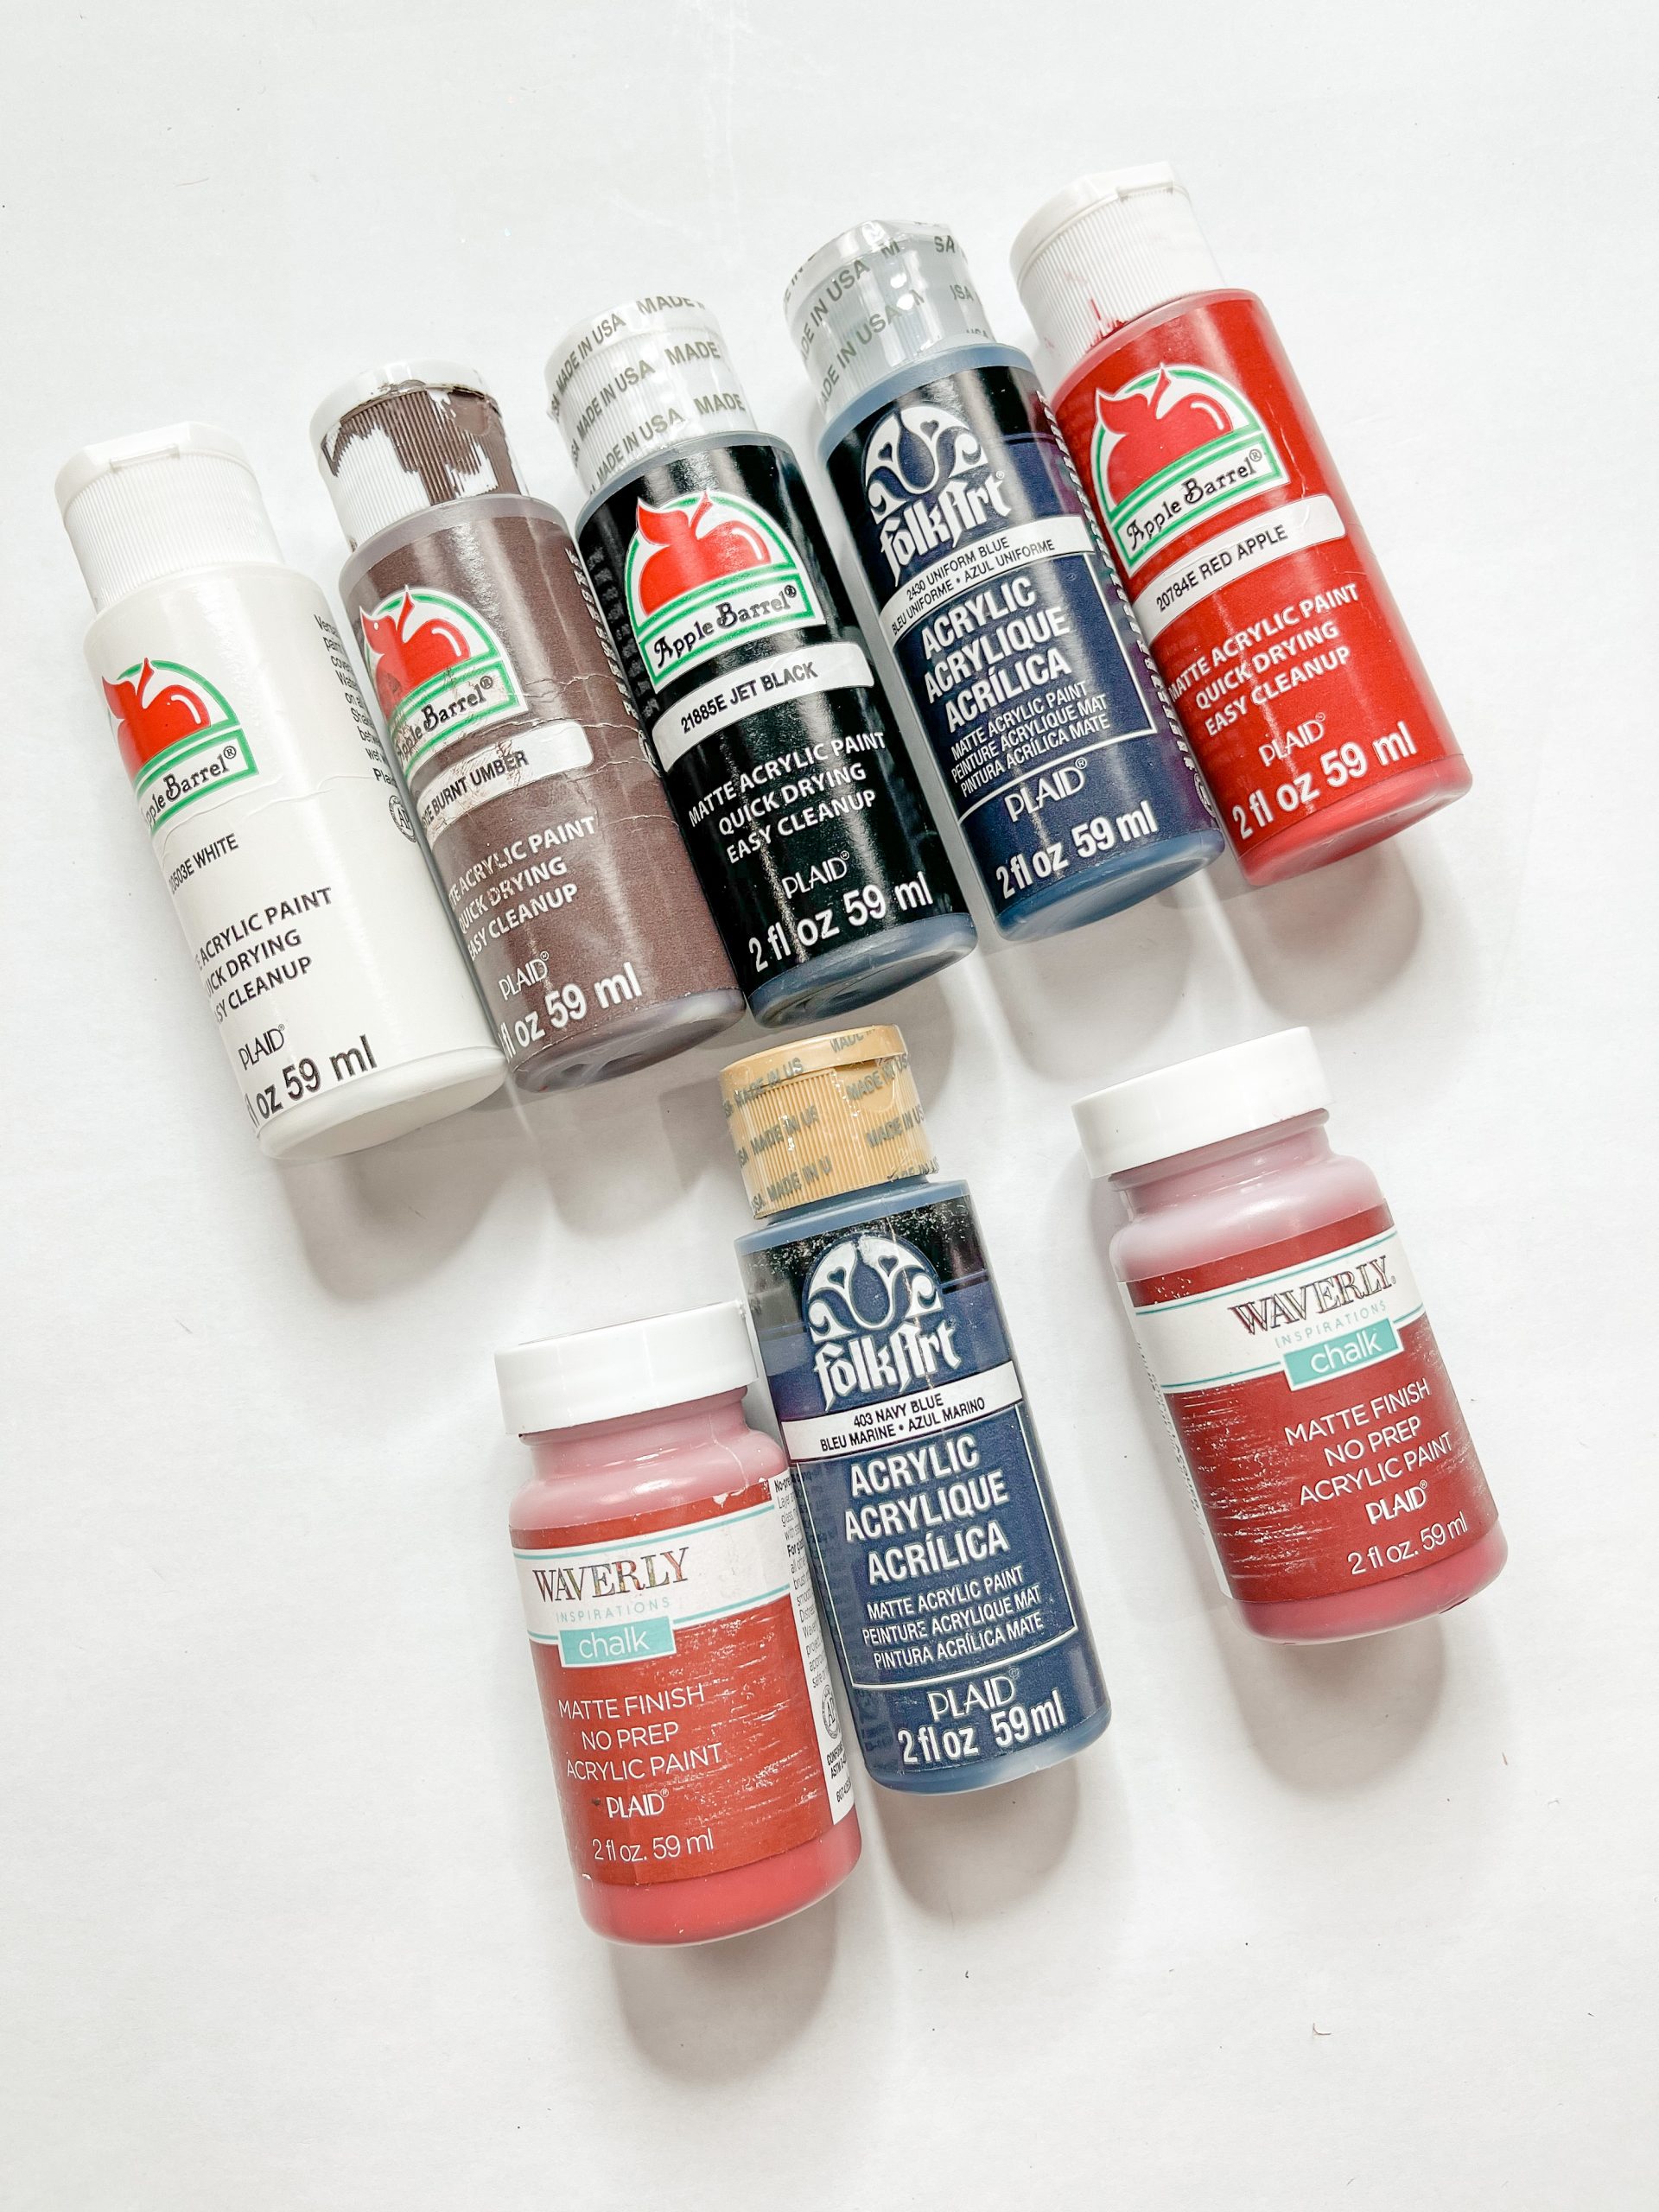
- Apple Barrel Burnt Umber Acrylic Paint
- Apple Barrel Jet Black Acrylic Paint
- Folkart Uniform Blue Acrylic Paint
- Apple Barrel White Acrylic Paint
- Apple Barrel Red Apple Acrylic Paint
- Paper Towels
- Hot Glue gun
- Glue Sticks
Before we get started, I want to let you know that I created a FREE coastal/nautical template printable of several pieces from Dollar Tree’s new nautical collection!
You can get the free template sent straight to your email, and then you can download it and print it from your device!
GET THE FREE COASTAL/NAUTICAL TEMPLATE
How to Make a Dollar Tree Lighthouse DIY Nautical Decor
The Dollar Tree lighthouse that I used was planked and the planks were connected by two ribbons glued down the back of the lighthouse pieces. I started by removing the ribbons from the back of the lighthouse.
The easiest way, in my opinion, is to use a heat gun and melt the glue adhering the ribbons to the sign, and slowly and gently pull the ribbon up as the glue heats up. It should pull the ribbon up seamlessly without messing up the boards.
Next, I removed the anchor from the front of the lighthouse. I had to use a putty knife to pry the anchor off the surface. Then, I spaced out the planks evenly and secured them together with popsicle sticks.
I still kept some space between each of the planks, but the popsicle sticks are a sturdier way to secure the planks together than the ribbon. You may need to break the popsicle sticks in half to make them fit and work for this step.

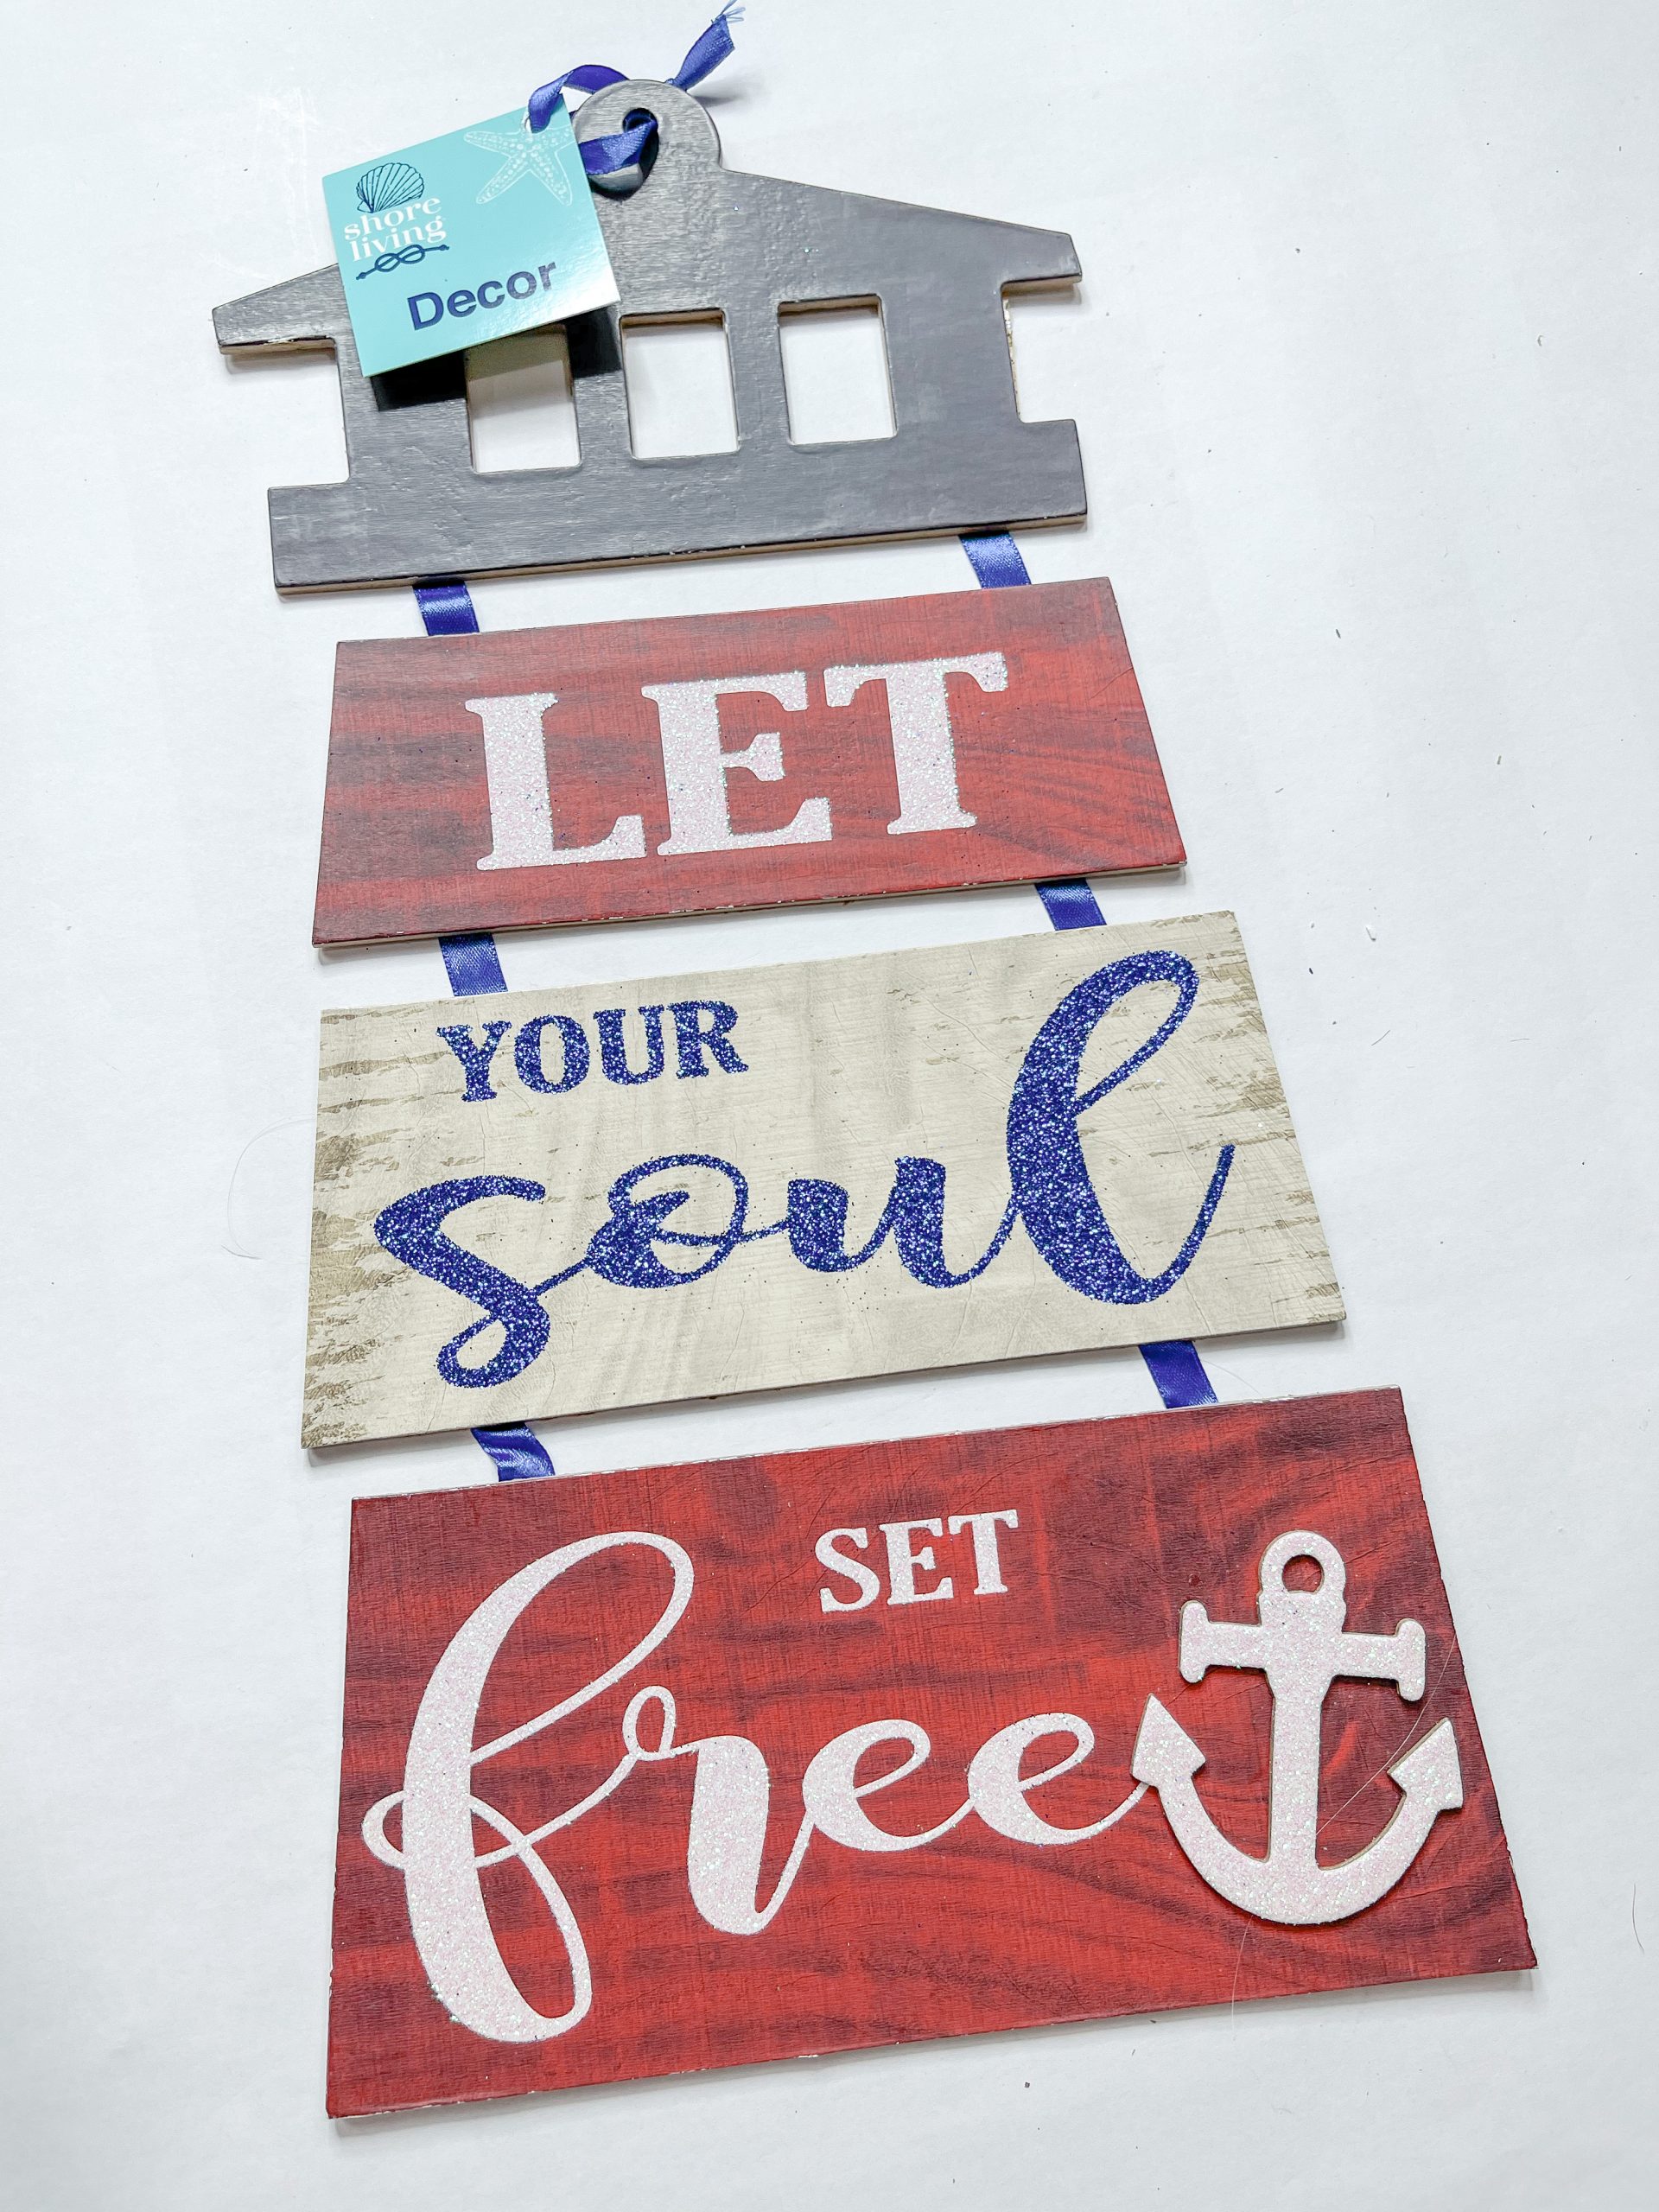
Set the lighthouse to the side and get your Dollar Tree tag sign. The one that I used was from Valentine’s Day and it had a red bow on the front of it. I used my heat gun to melt the glue and peel the ribbon off.

How to decoupage a paper towel
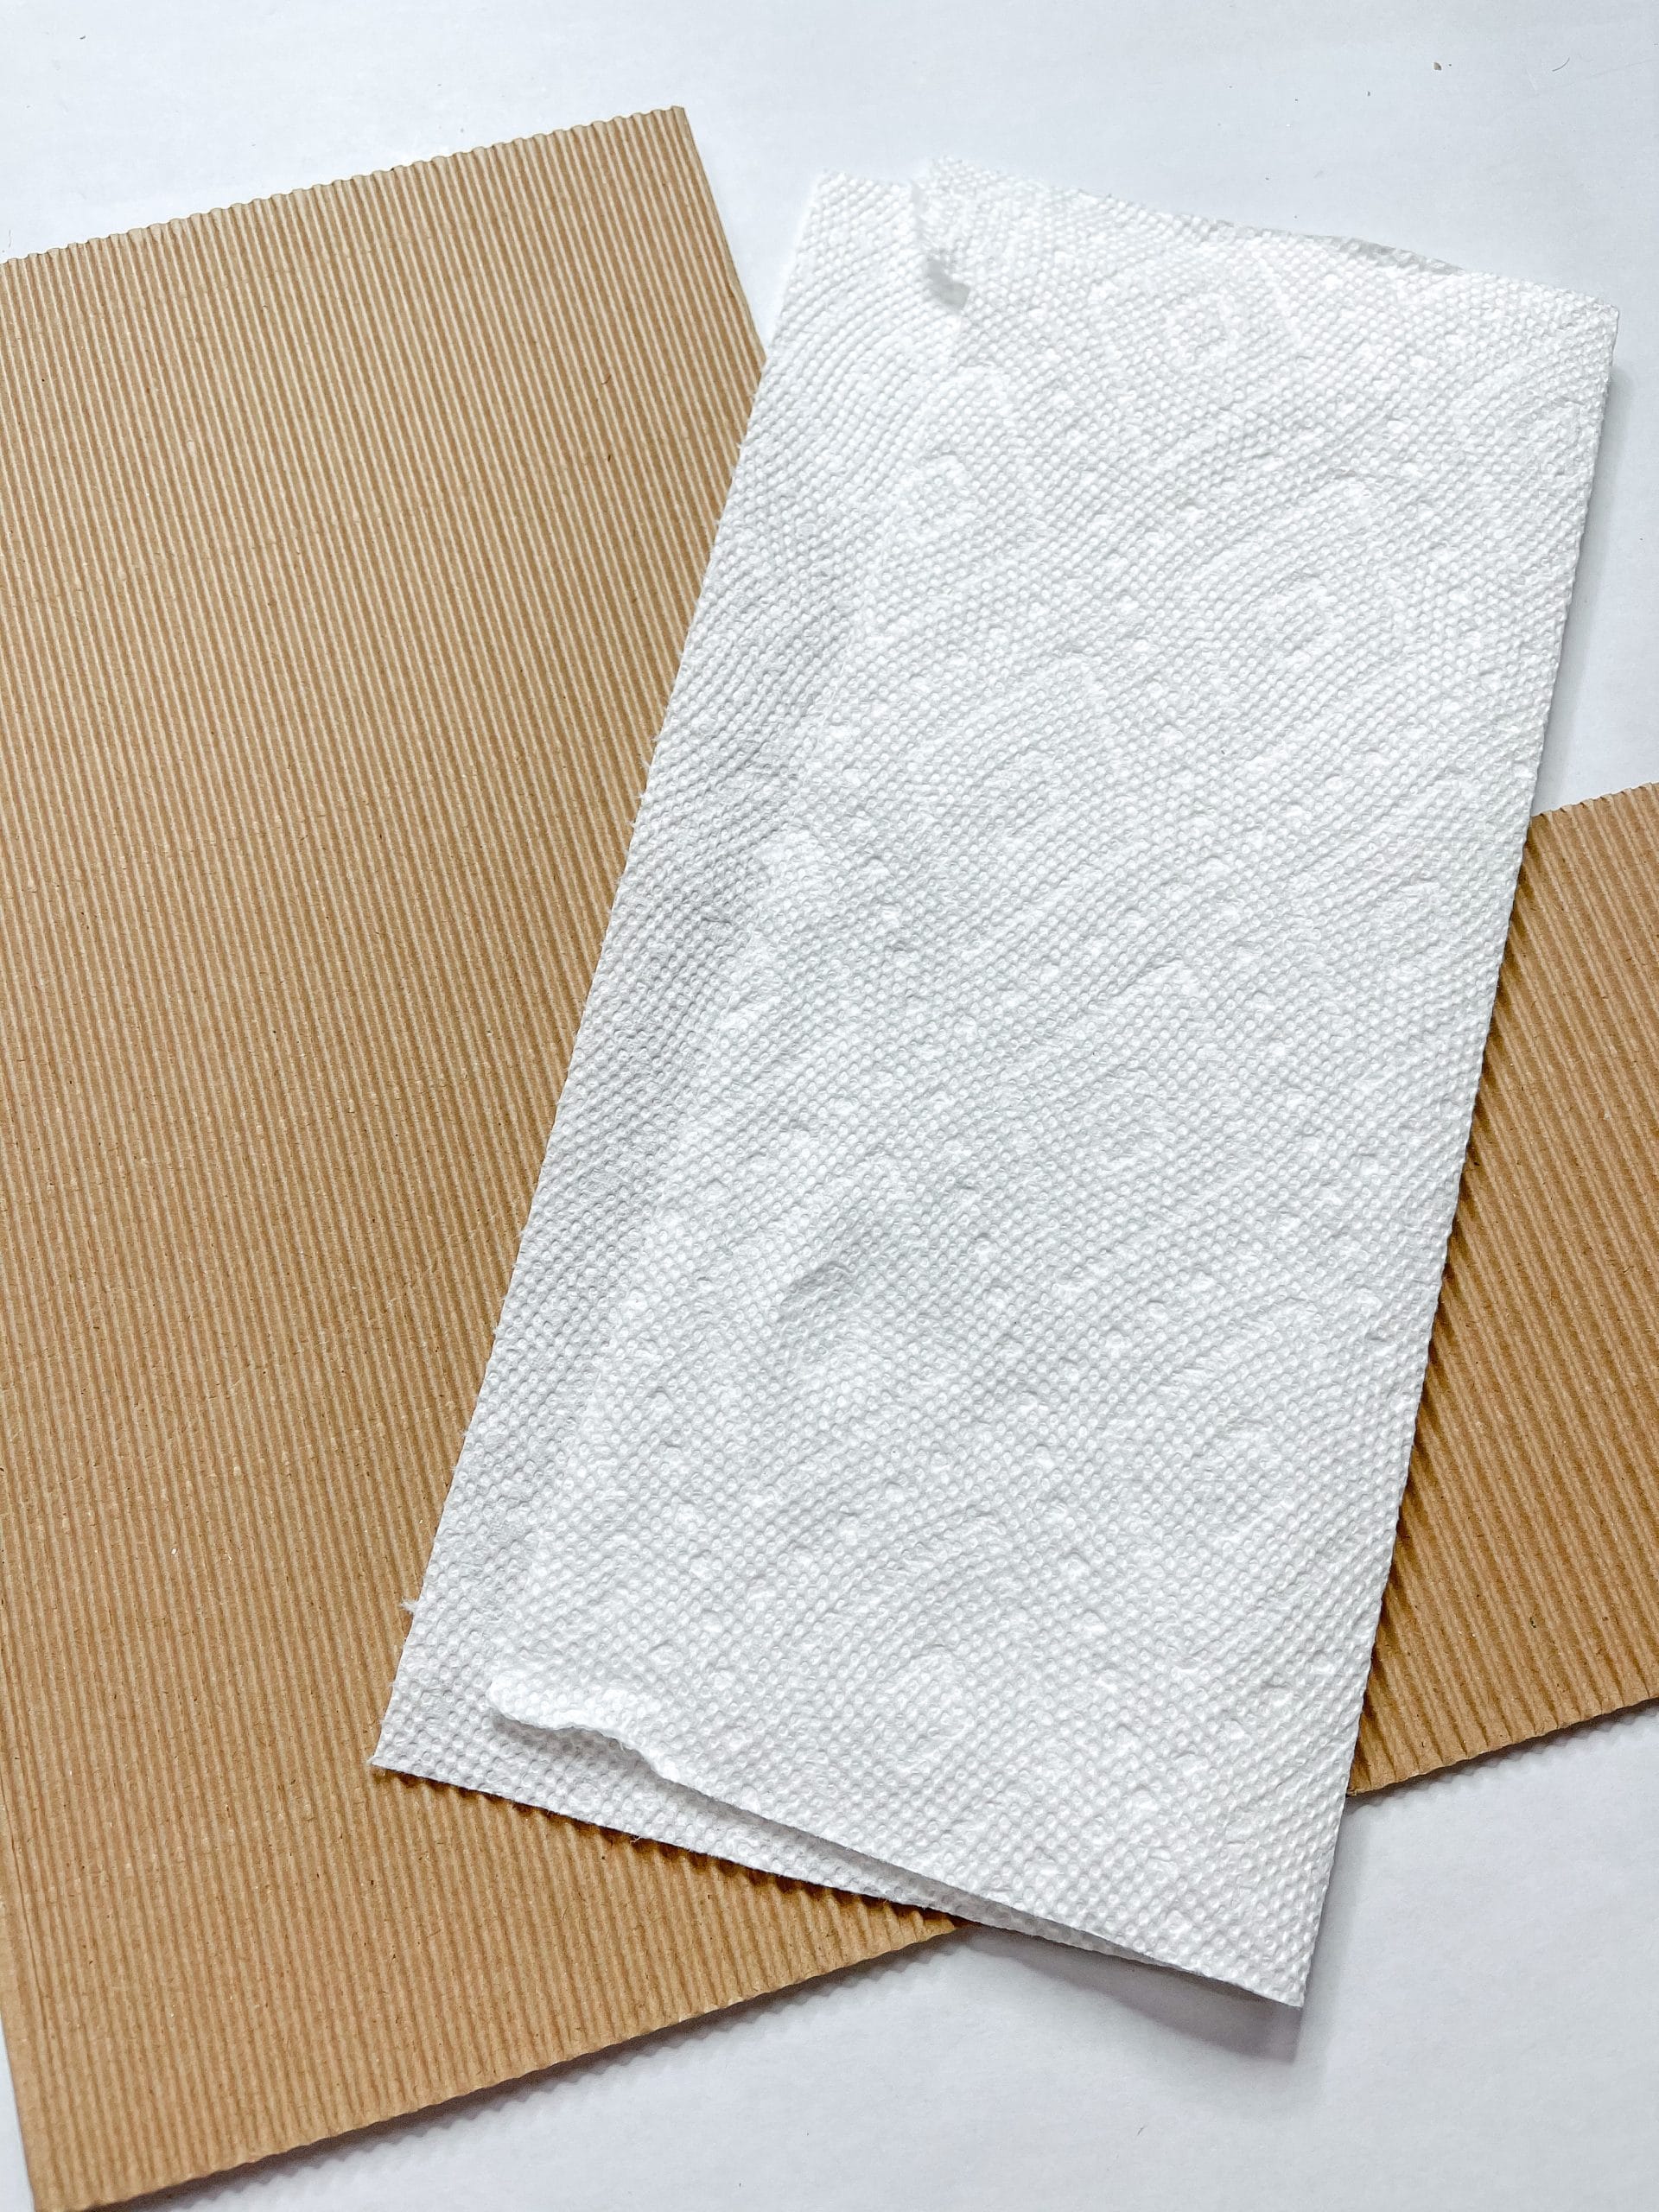
I turned the tag sign over so the backside was facing up. Next, I separated the plies of a paper towel to get it ready to decoupage onto the back of the sign. Pour some white paint onto the back of the sign and spread it out to cover the brown color.
Otherwise, the brown will show through your paper towel when you decoupage it onto the sign. You don’t have to wait for the paint to dry, but next apply a coat of Mod Podge over the paint and carefully place the paper towel onto the Dollar Tree tag sign.

One piece of a paper towel won’t cover the entire sign, but thankfully you get two pieces when you separate the plies! So, place the second ply over the extra exposed space on the sign.
Once the Mod Podge has dried, go over the edges of the sign with a sanding sponge to remove the excess paper towel from around the sign.
How to DIY with Dollar Tree spackling
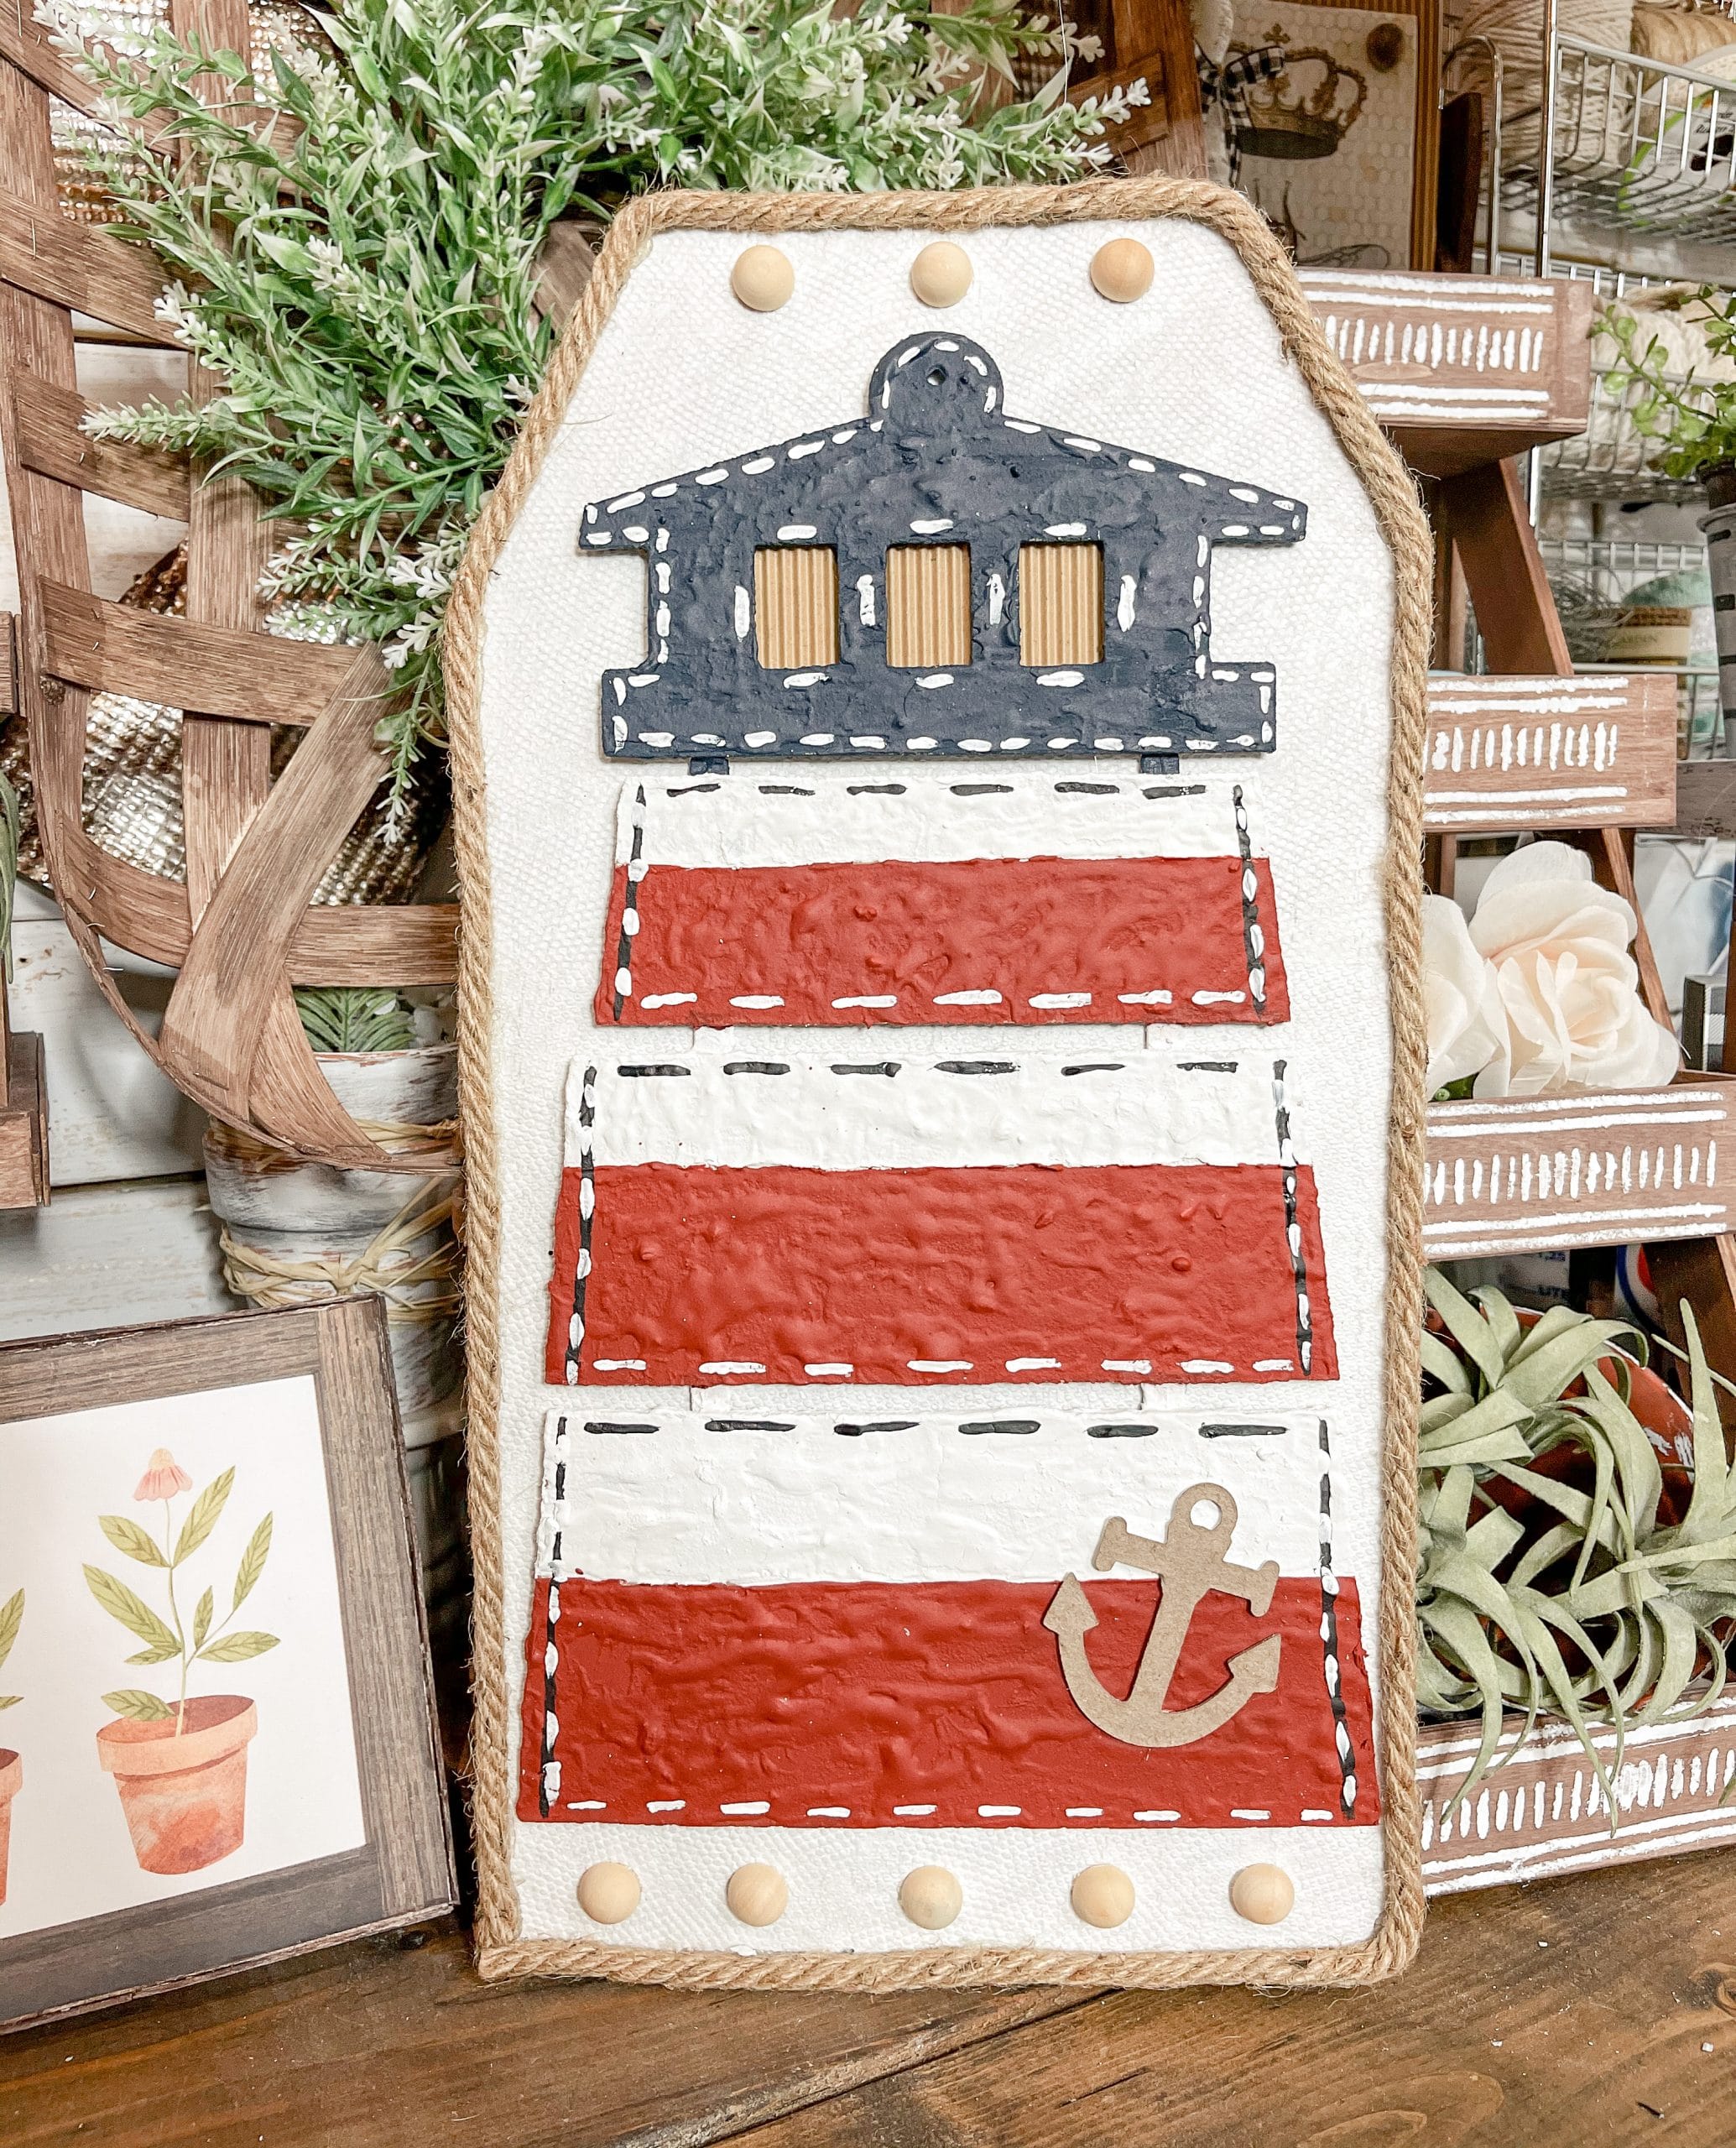
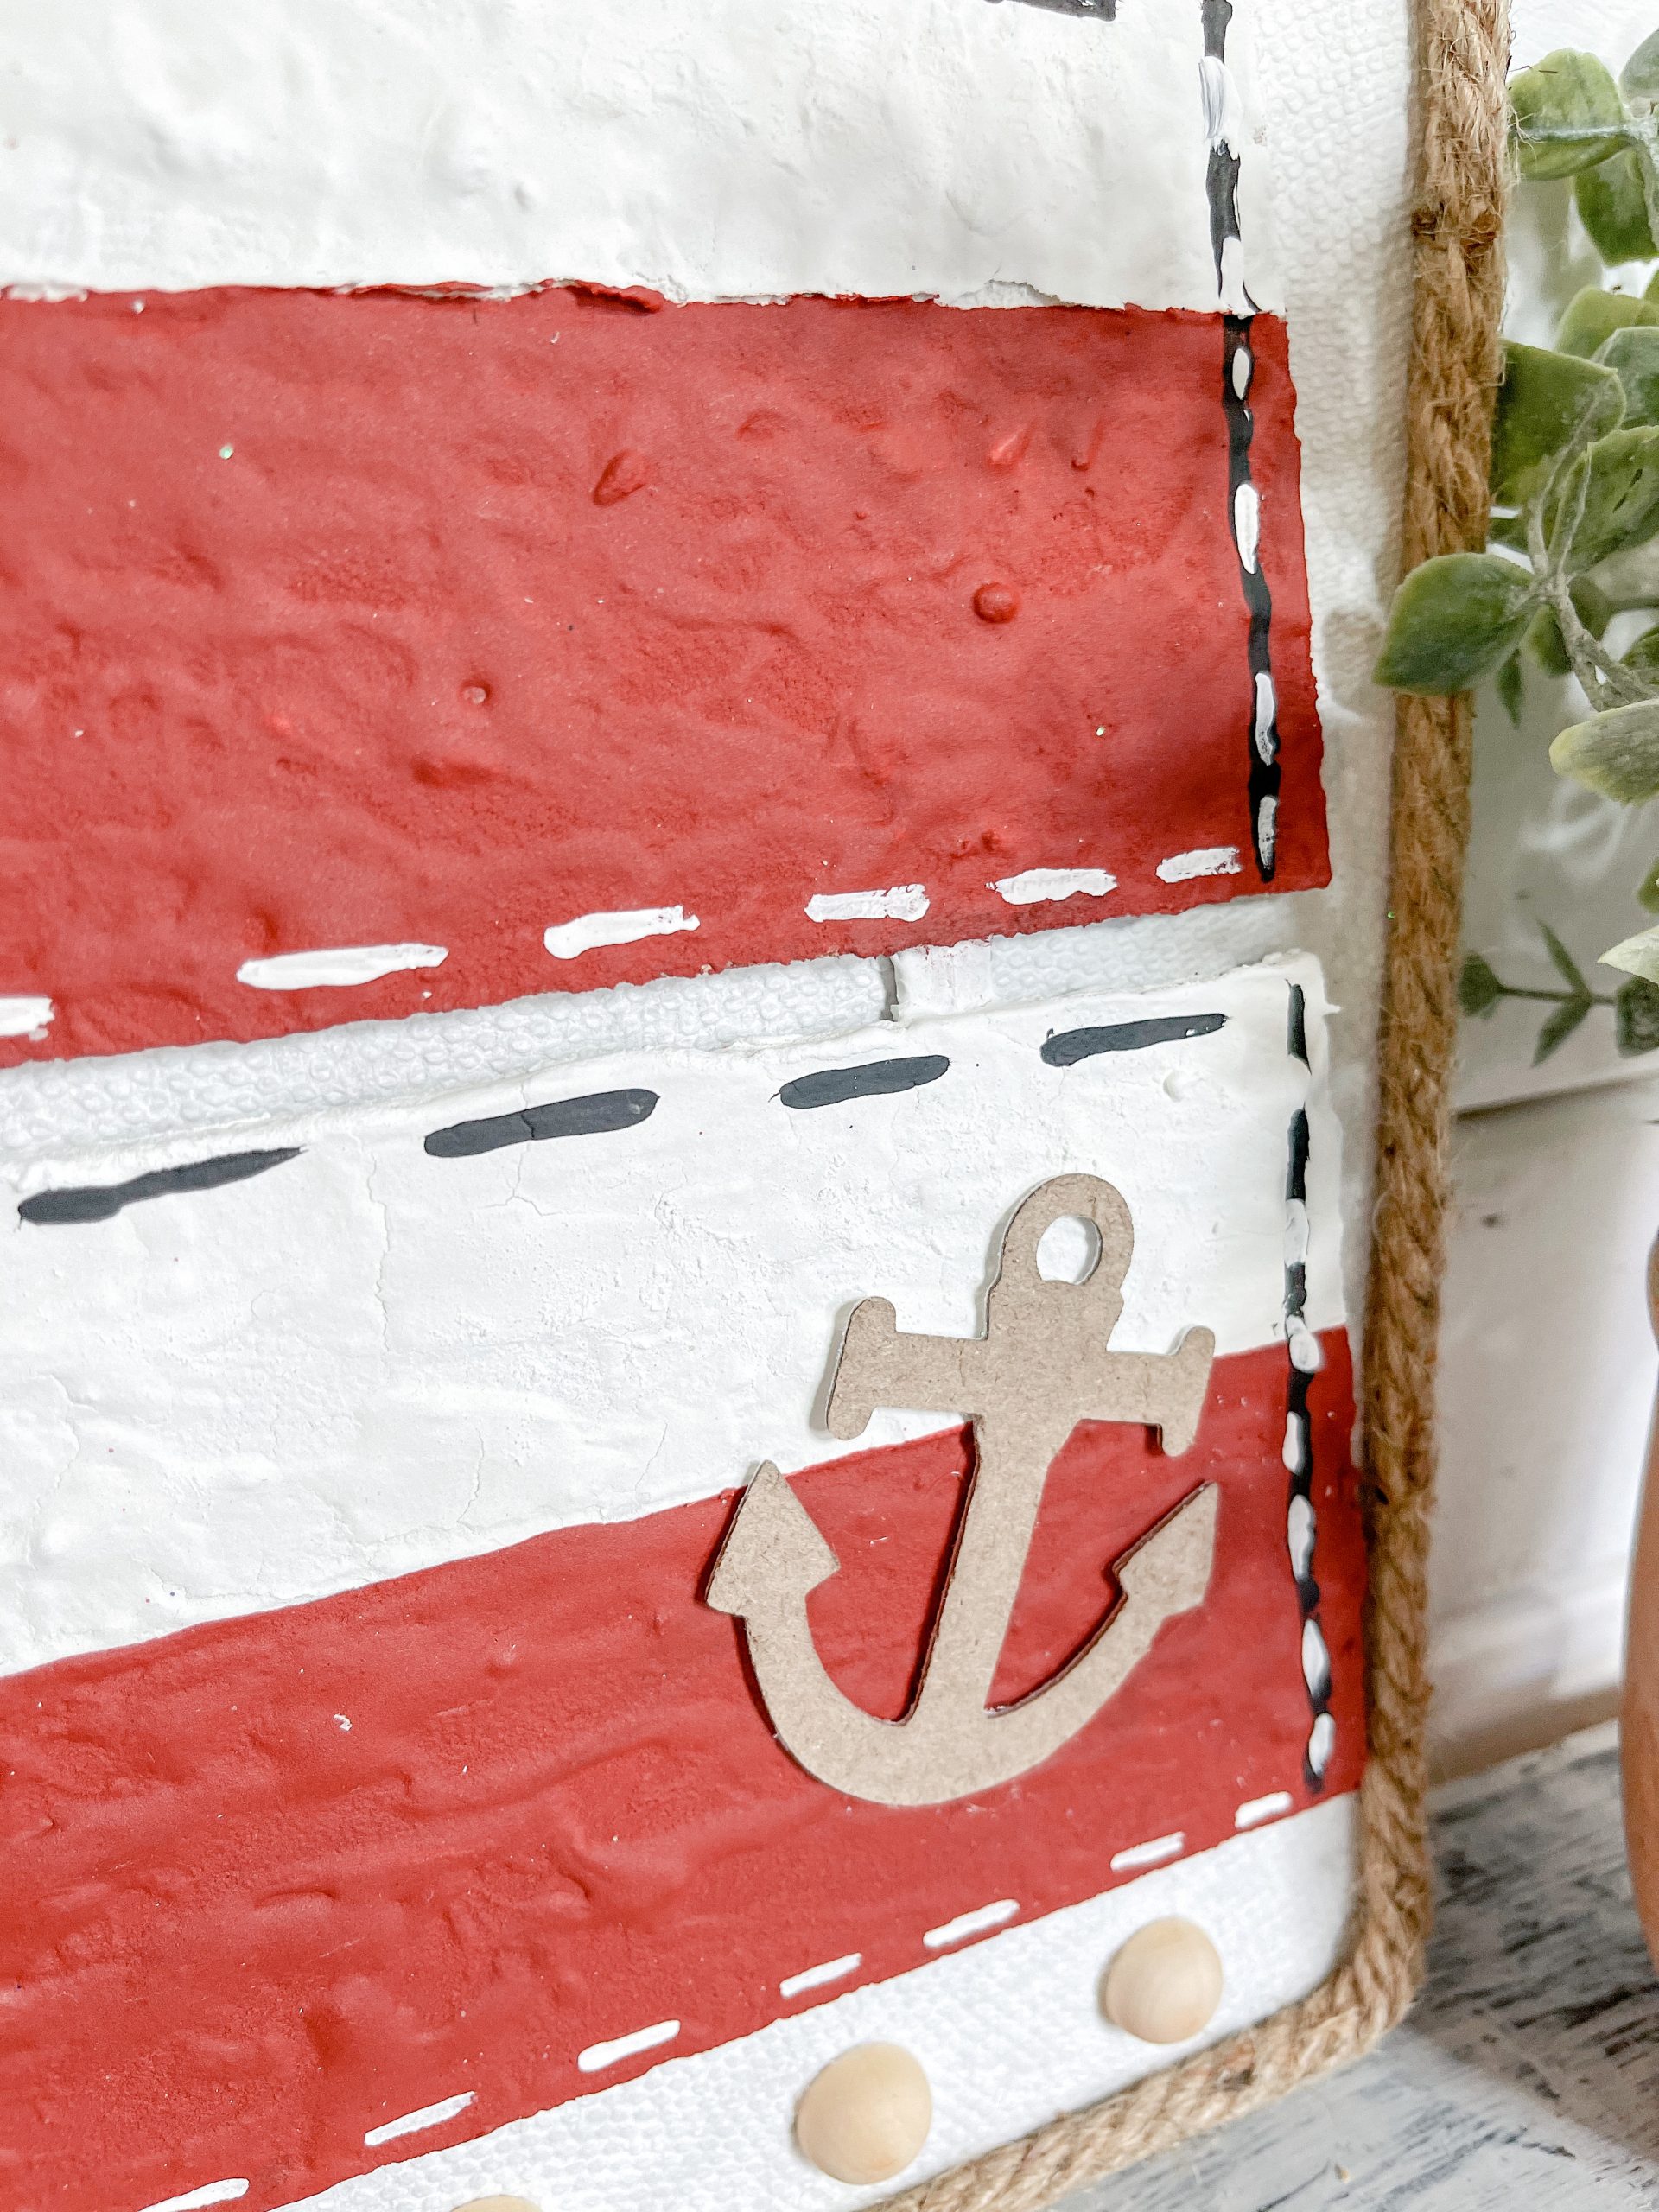
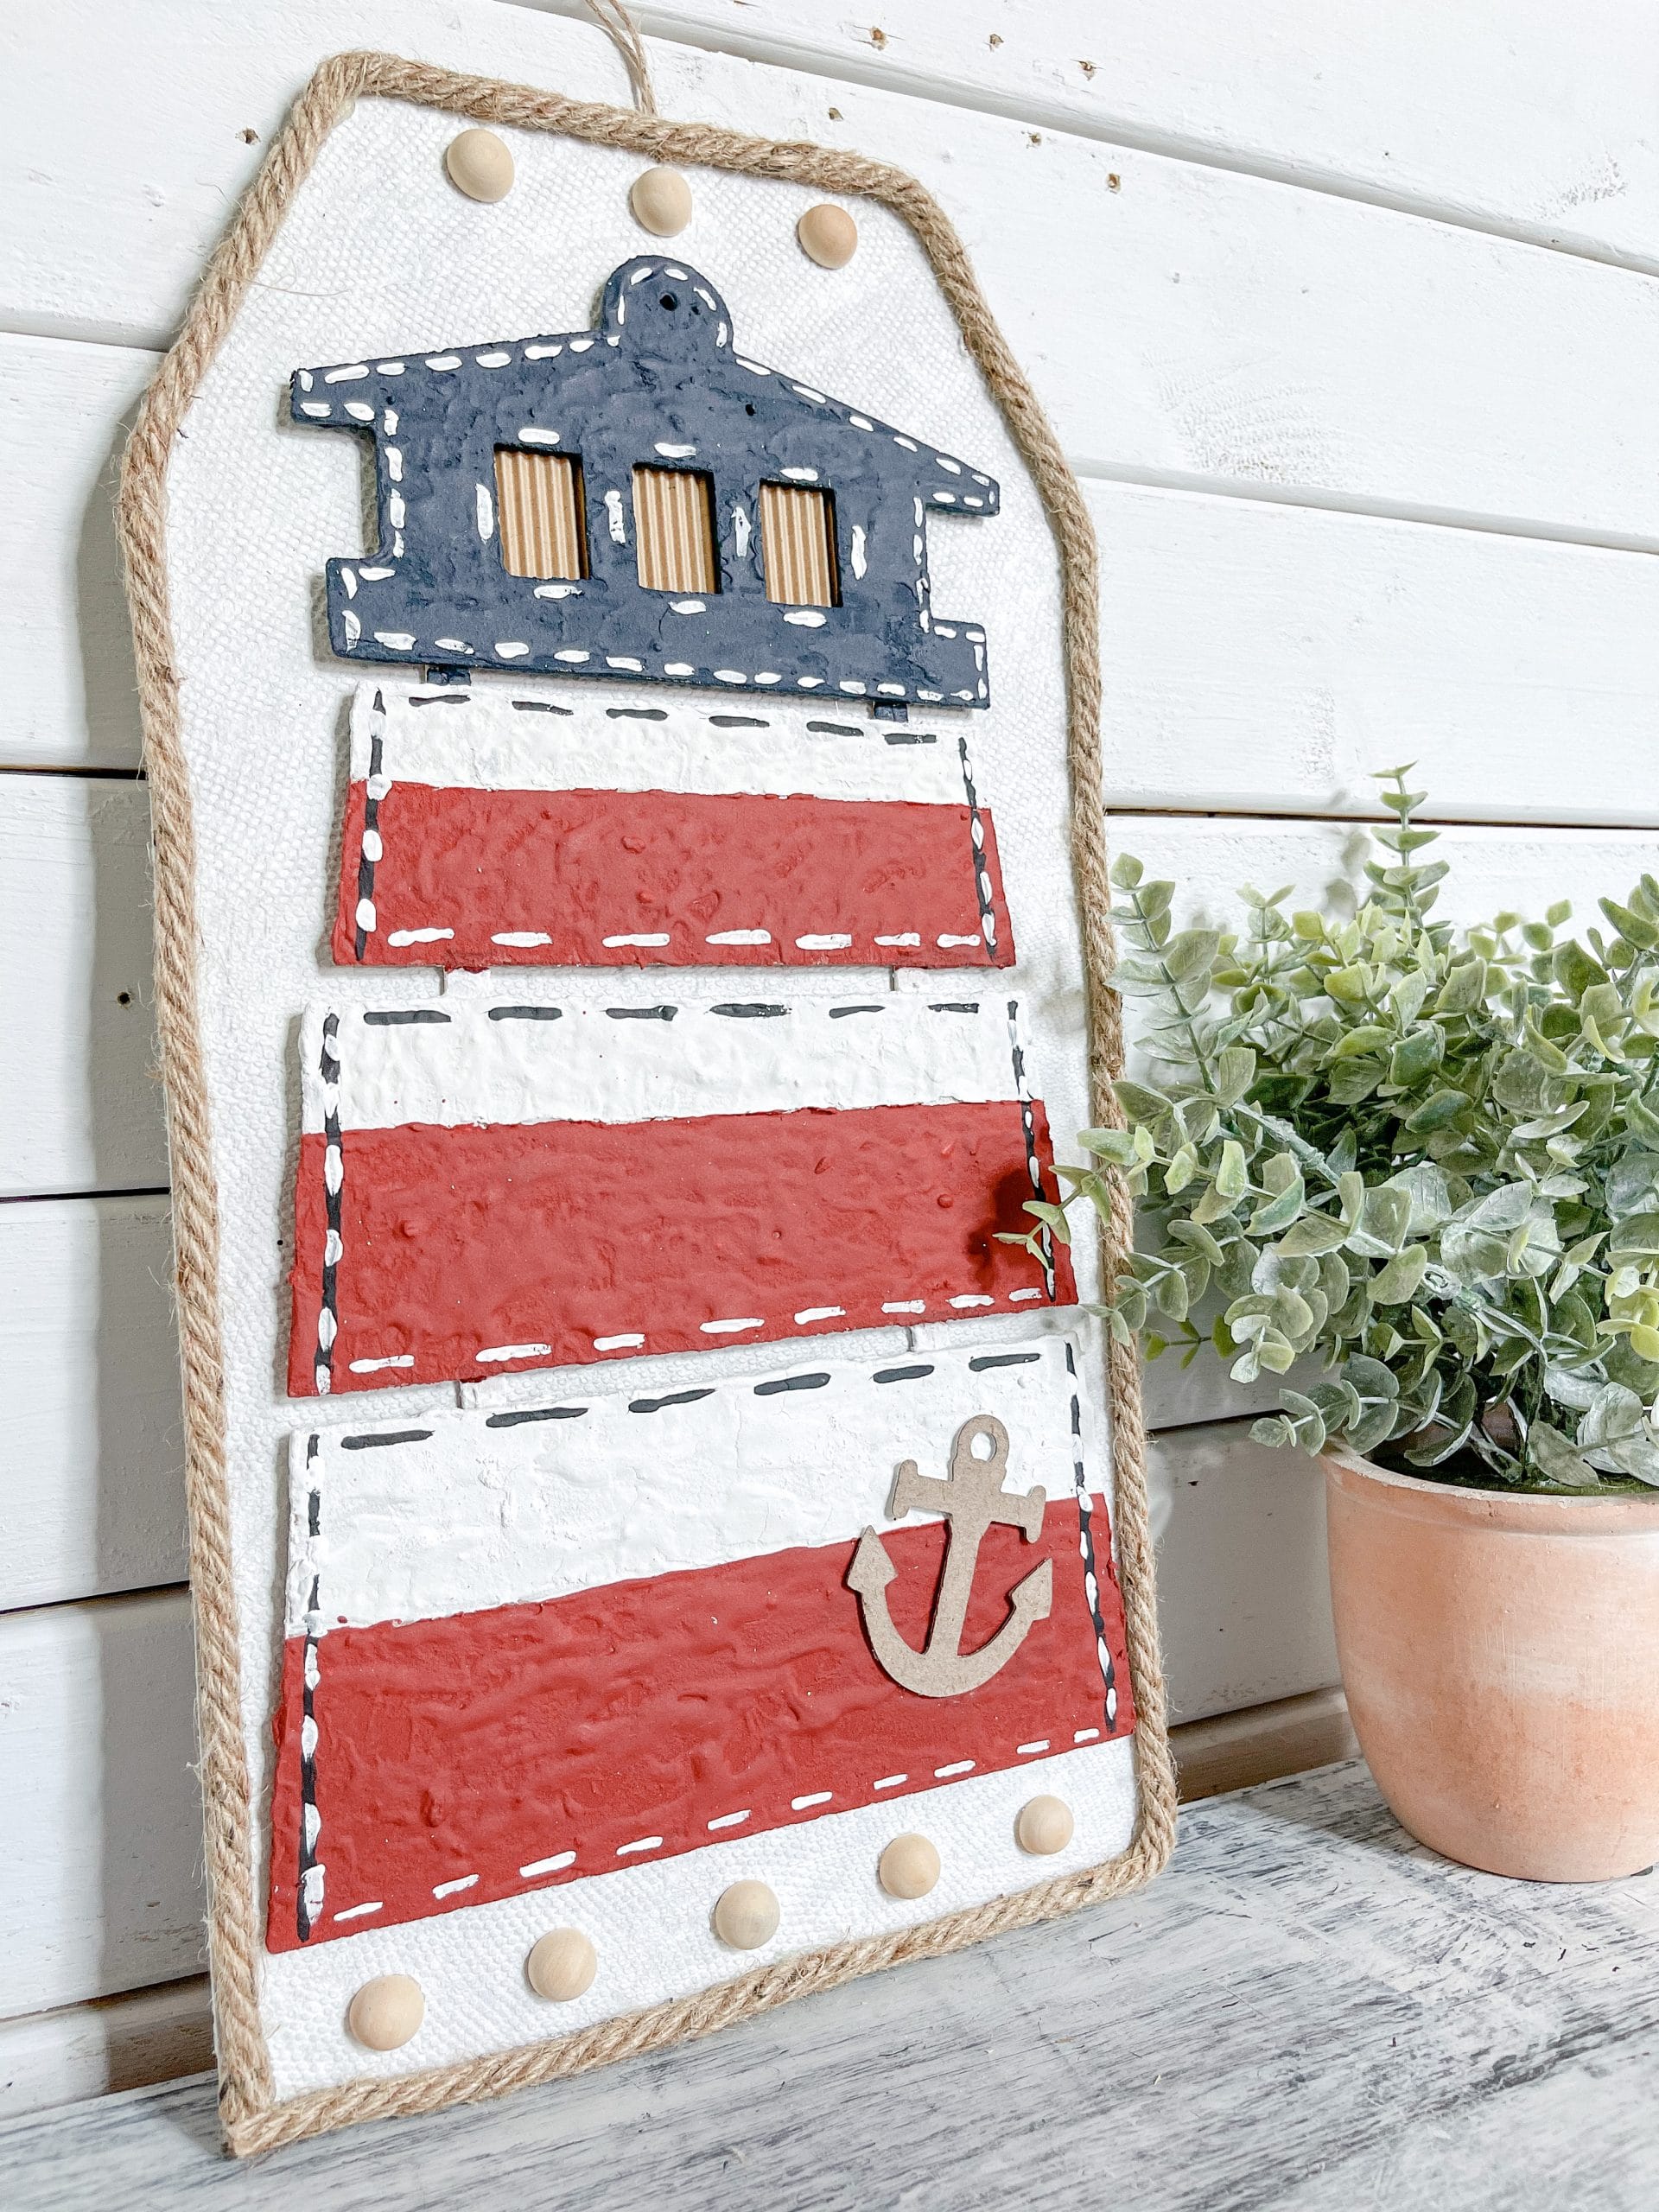
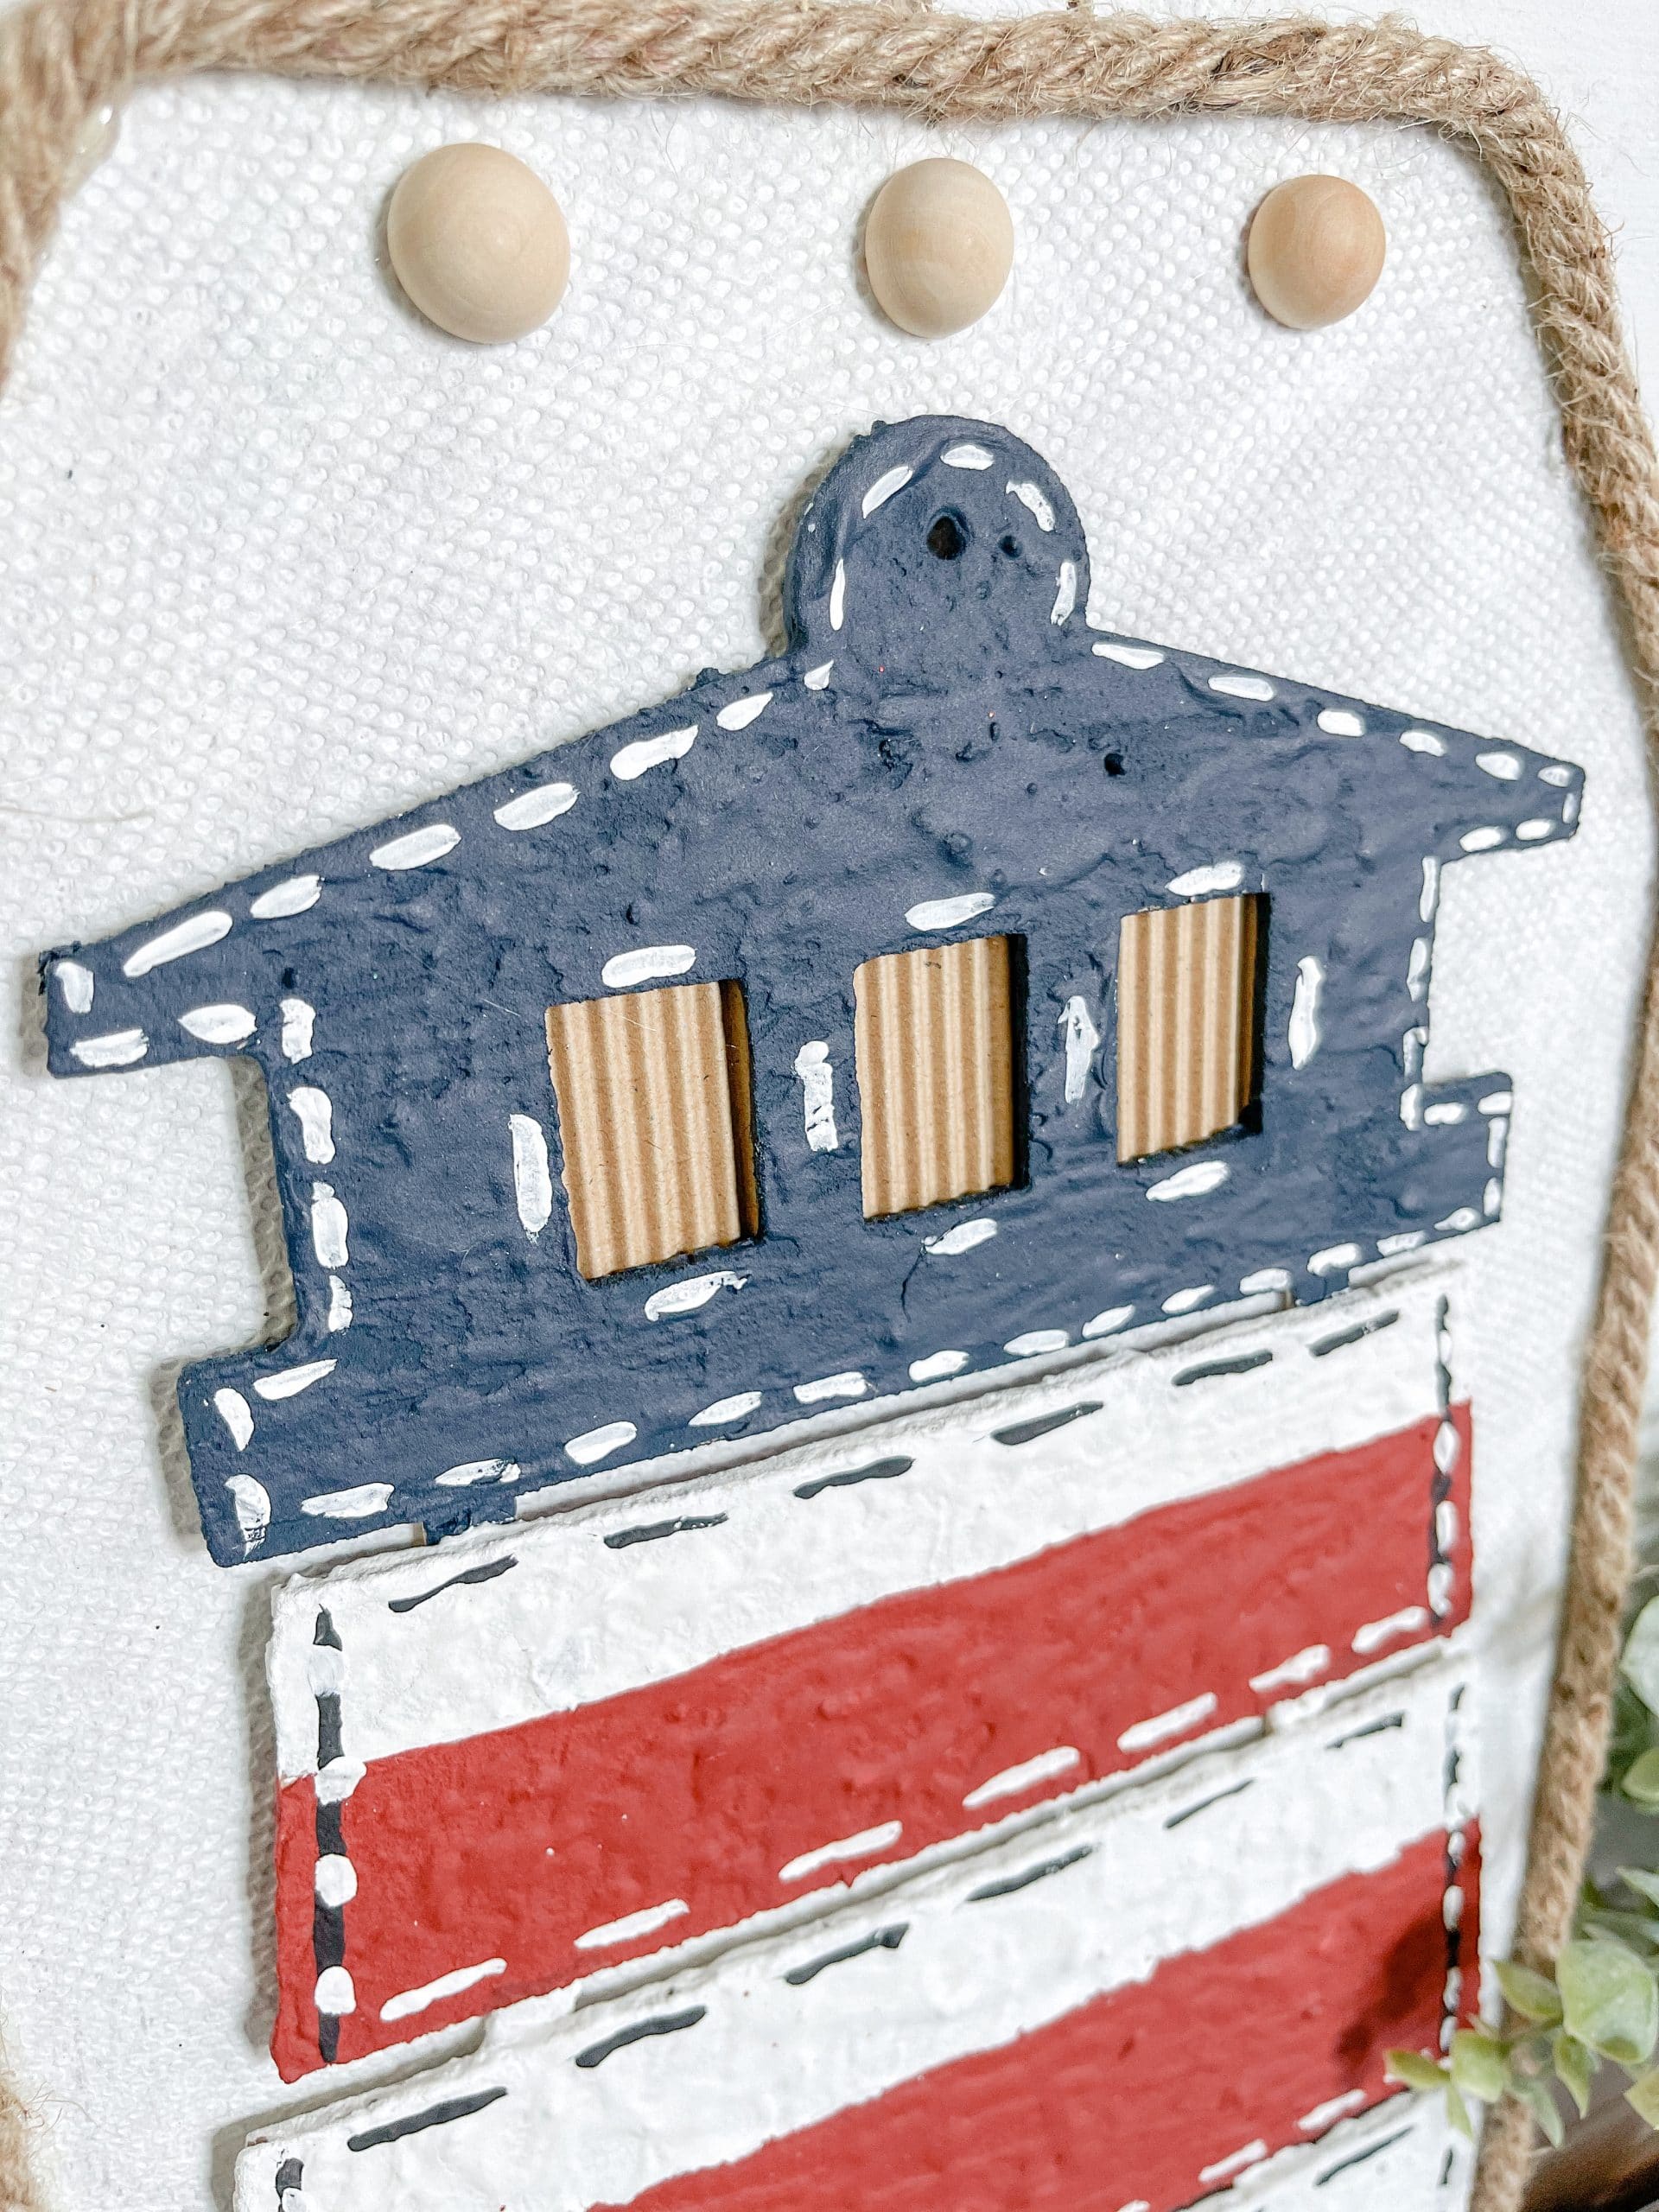
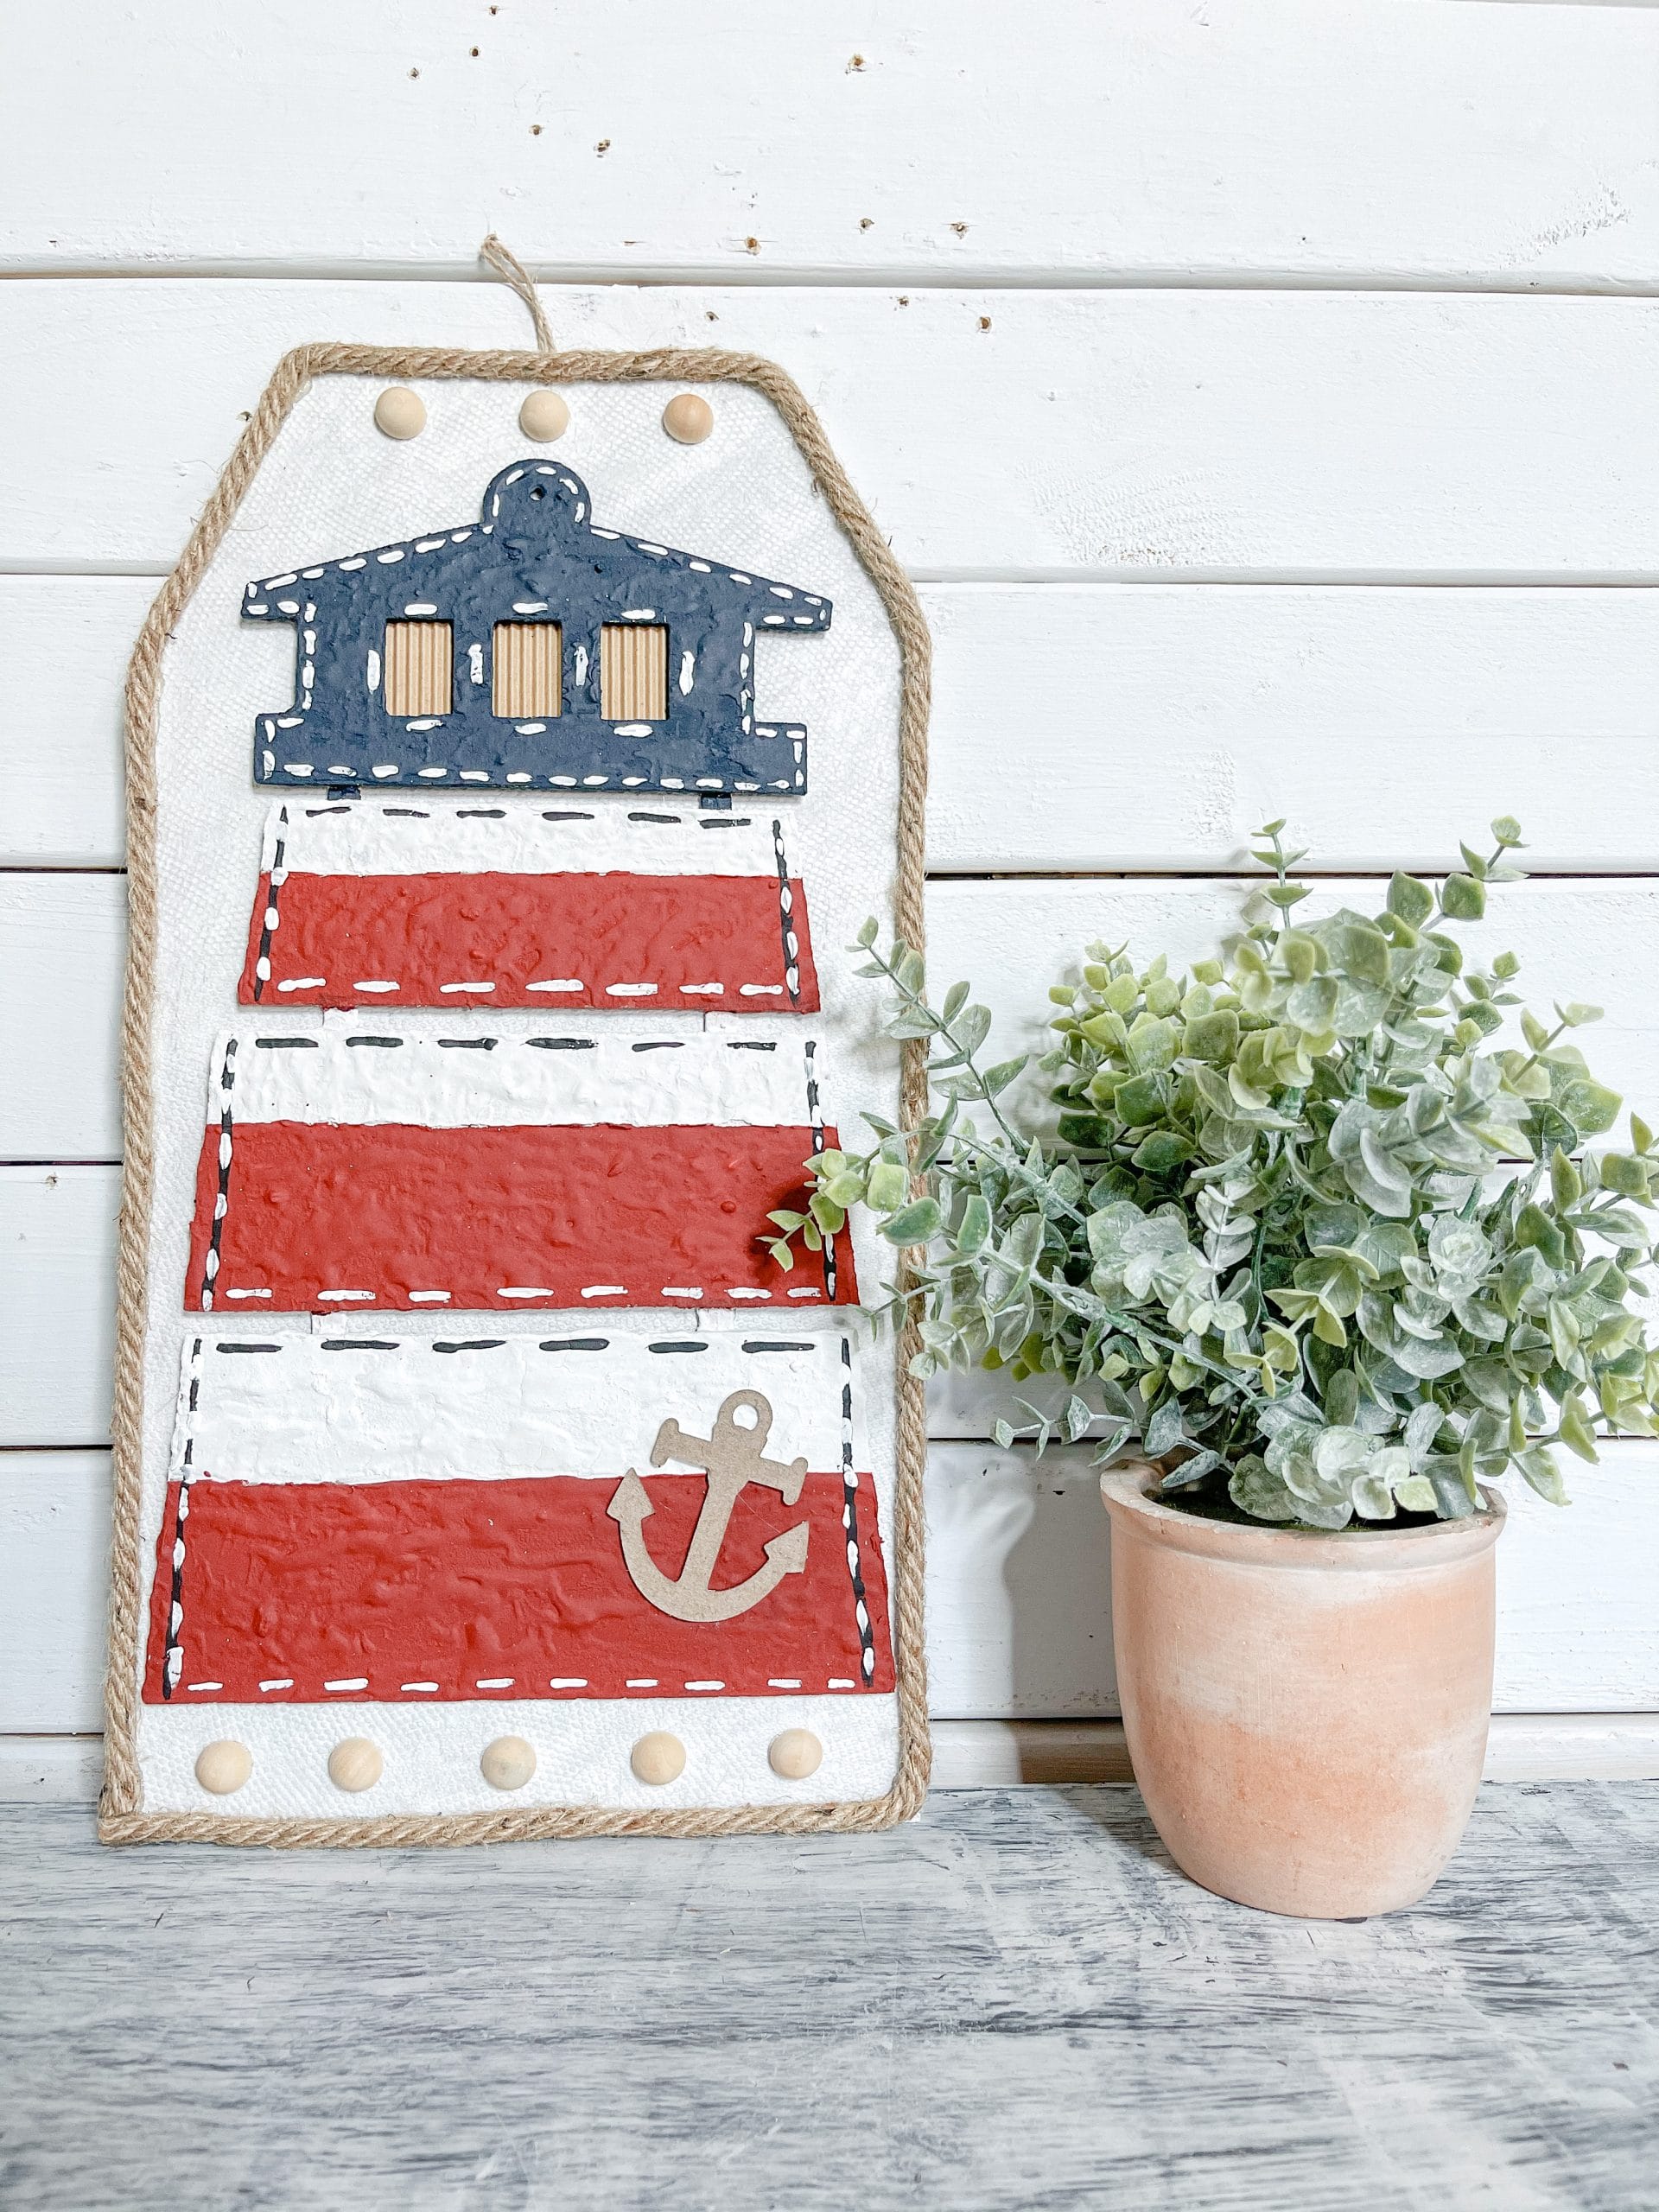
Okay, this next part was so much fun! I used red, white, and blue paint as well as Dollar Tree spackling to decorate the Dollar Tree lighthouse. The spackling gives texture to the surface of the lighthouse!
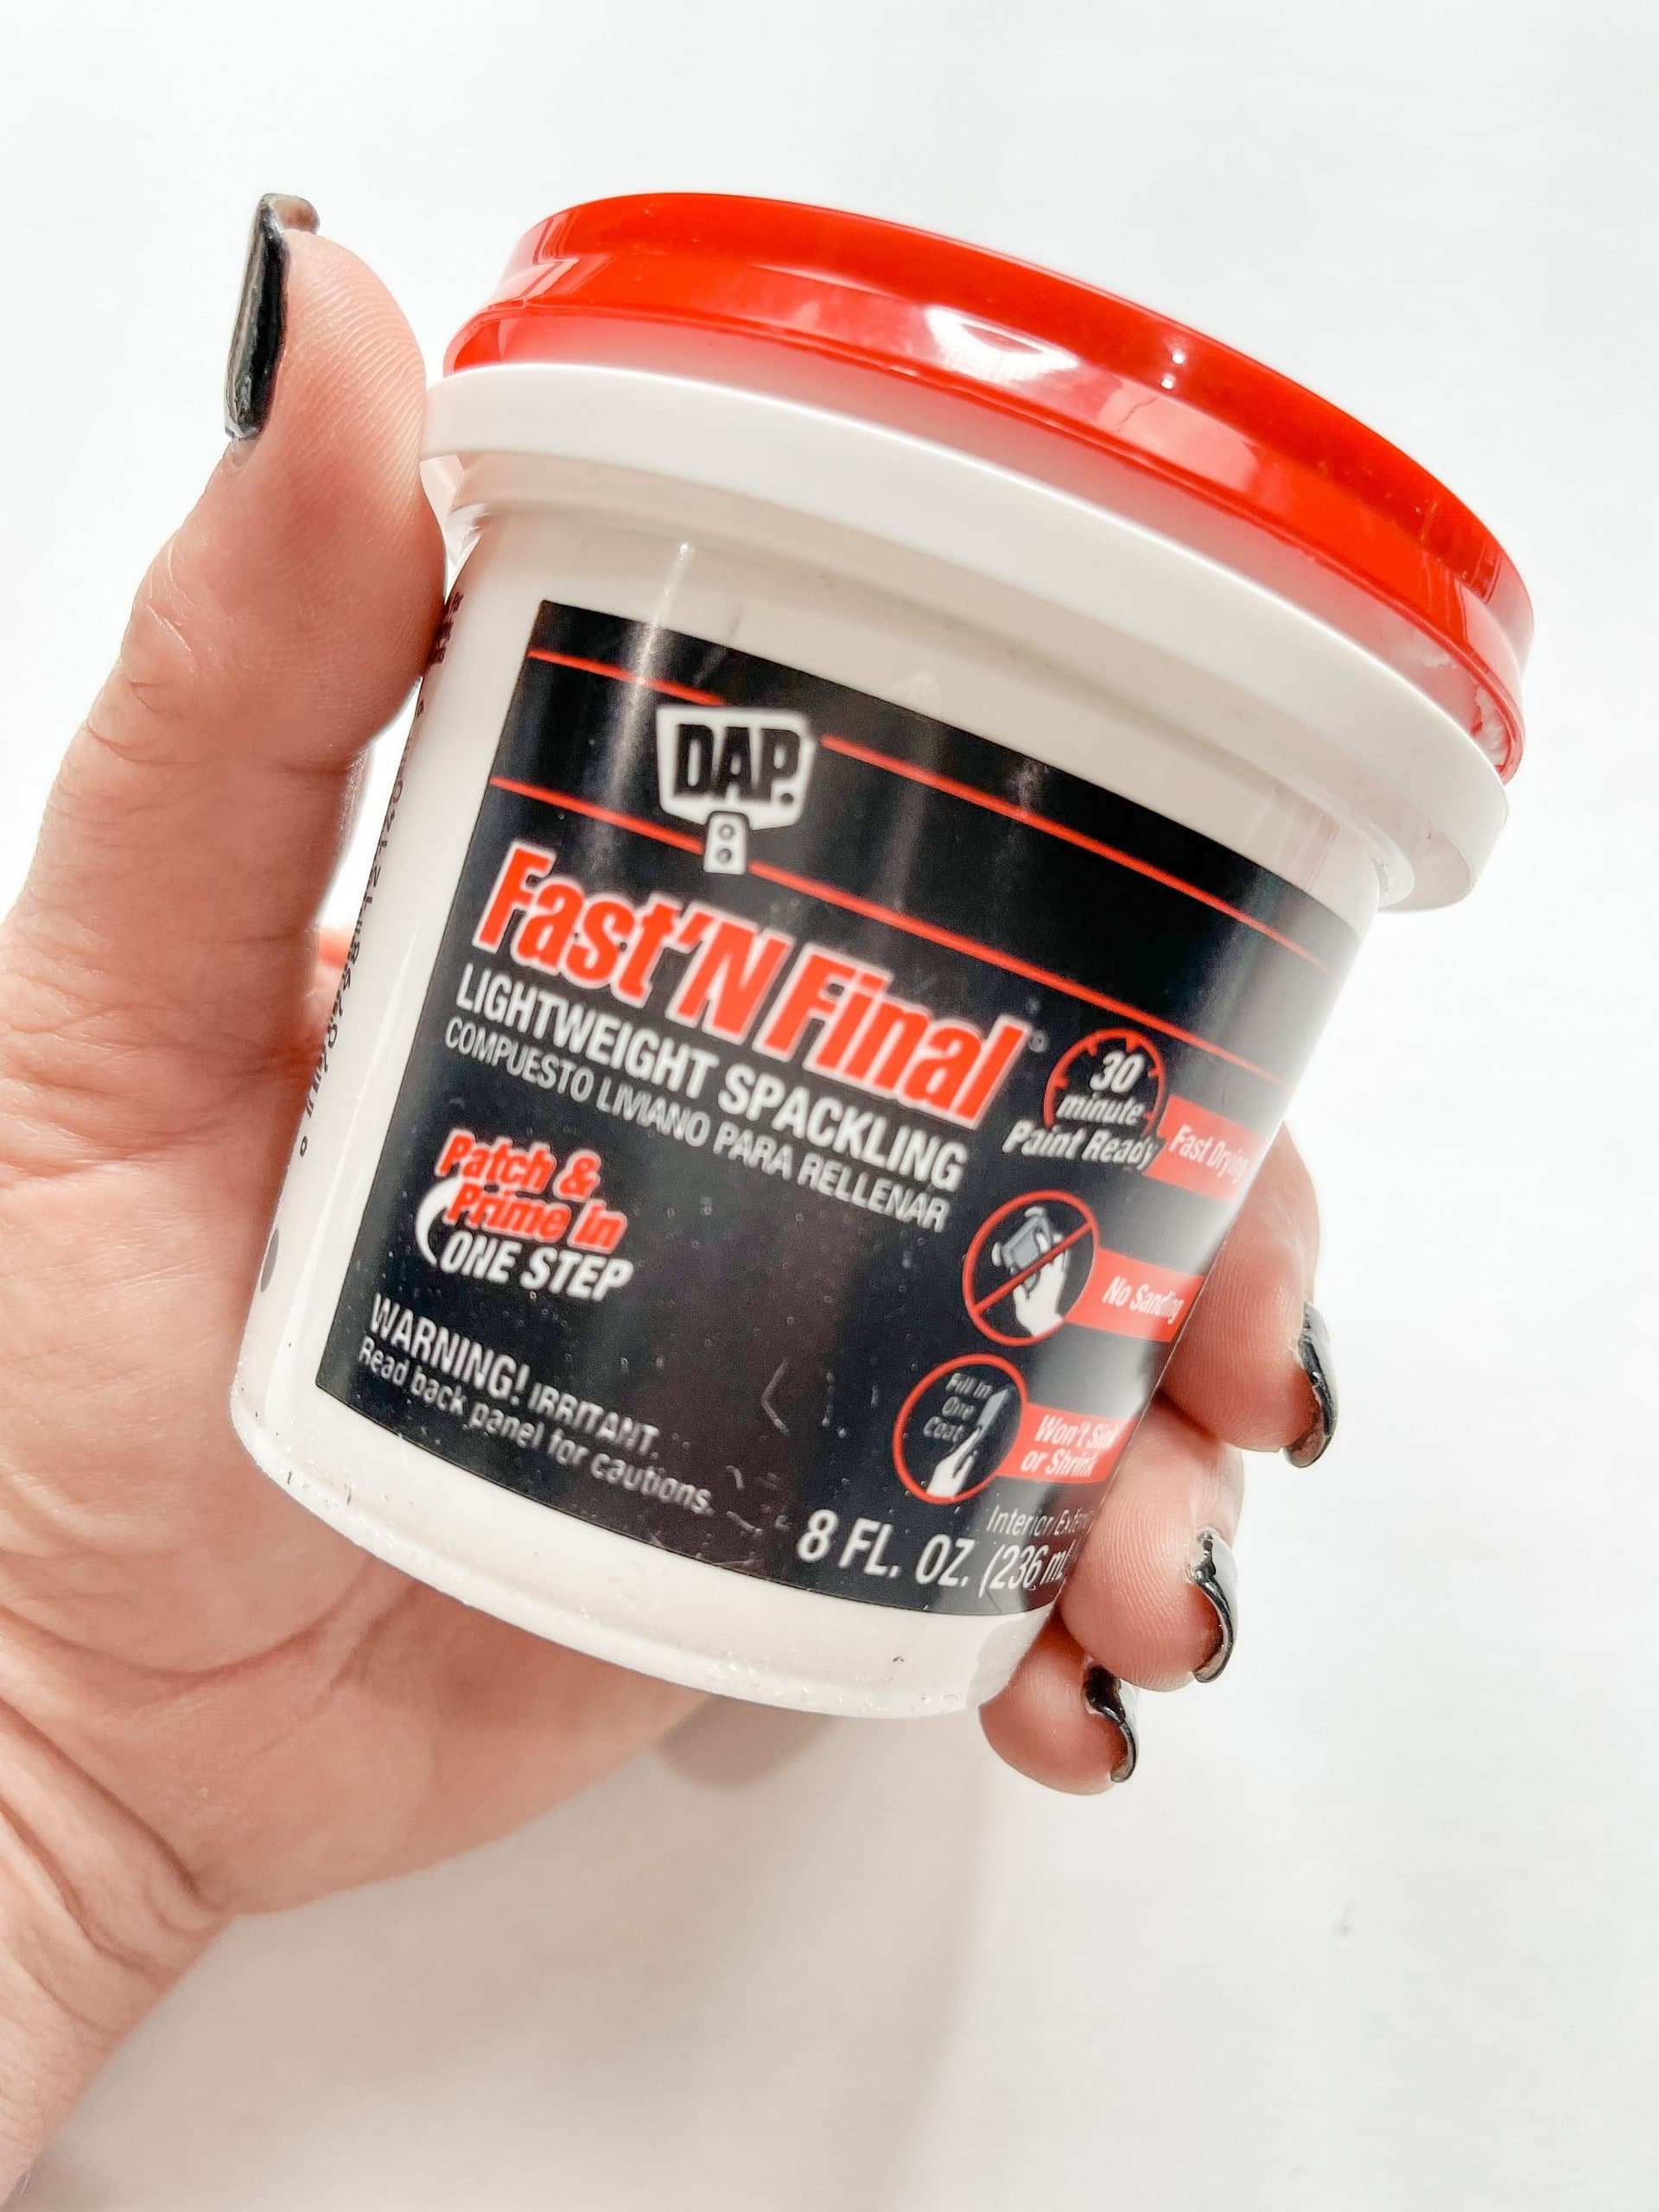
Start with your red paint and put it onto a small paper plate or in a mixing bowl. Then, mix in some of the spackling. It’s going to create a paste-like texture. Now, do the same thing with your blue and white paints.

Paint the top of the lighthouse with the blue paint/spackling mixture. You’re not trying to hide your brush strokes here because you want the texture of the spackling to show. You can even dab the paint/spackling mixture onto the surface if you wanted to.
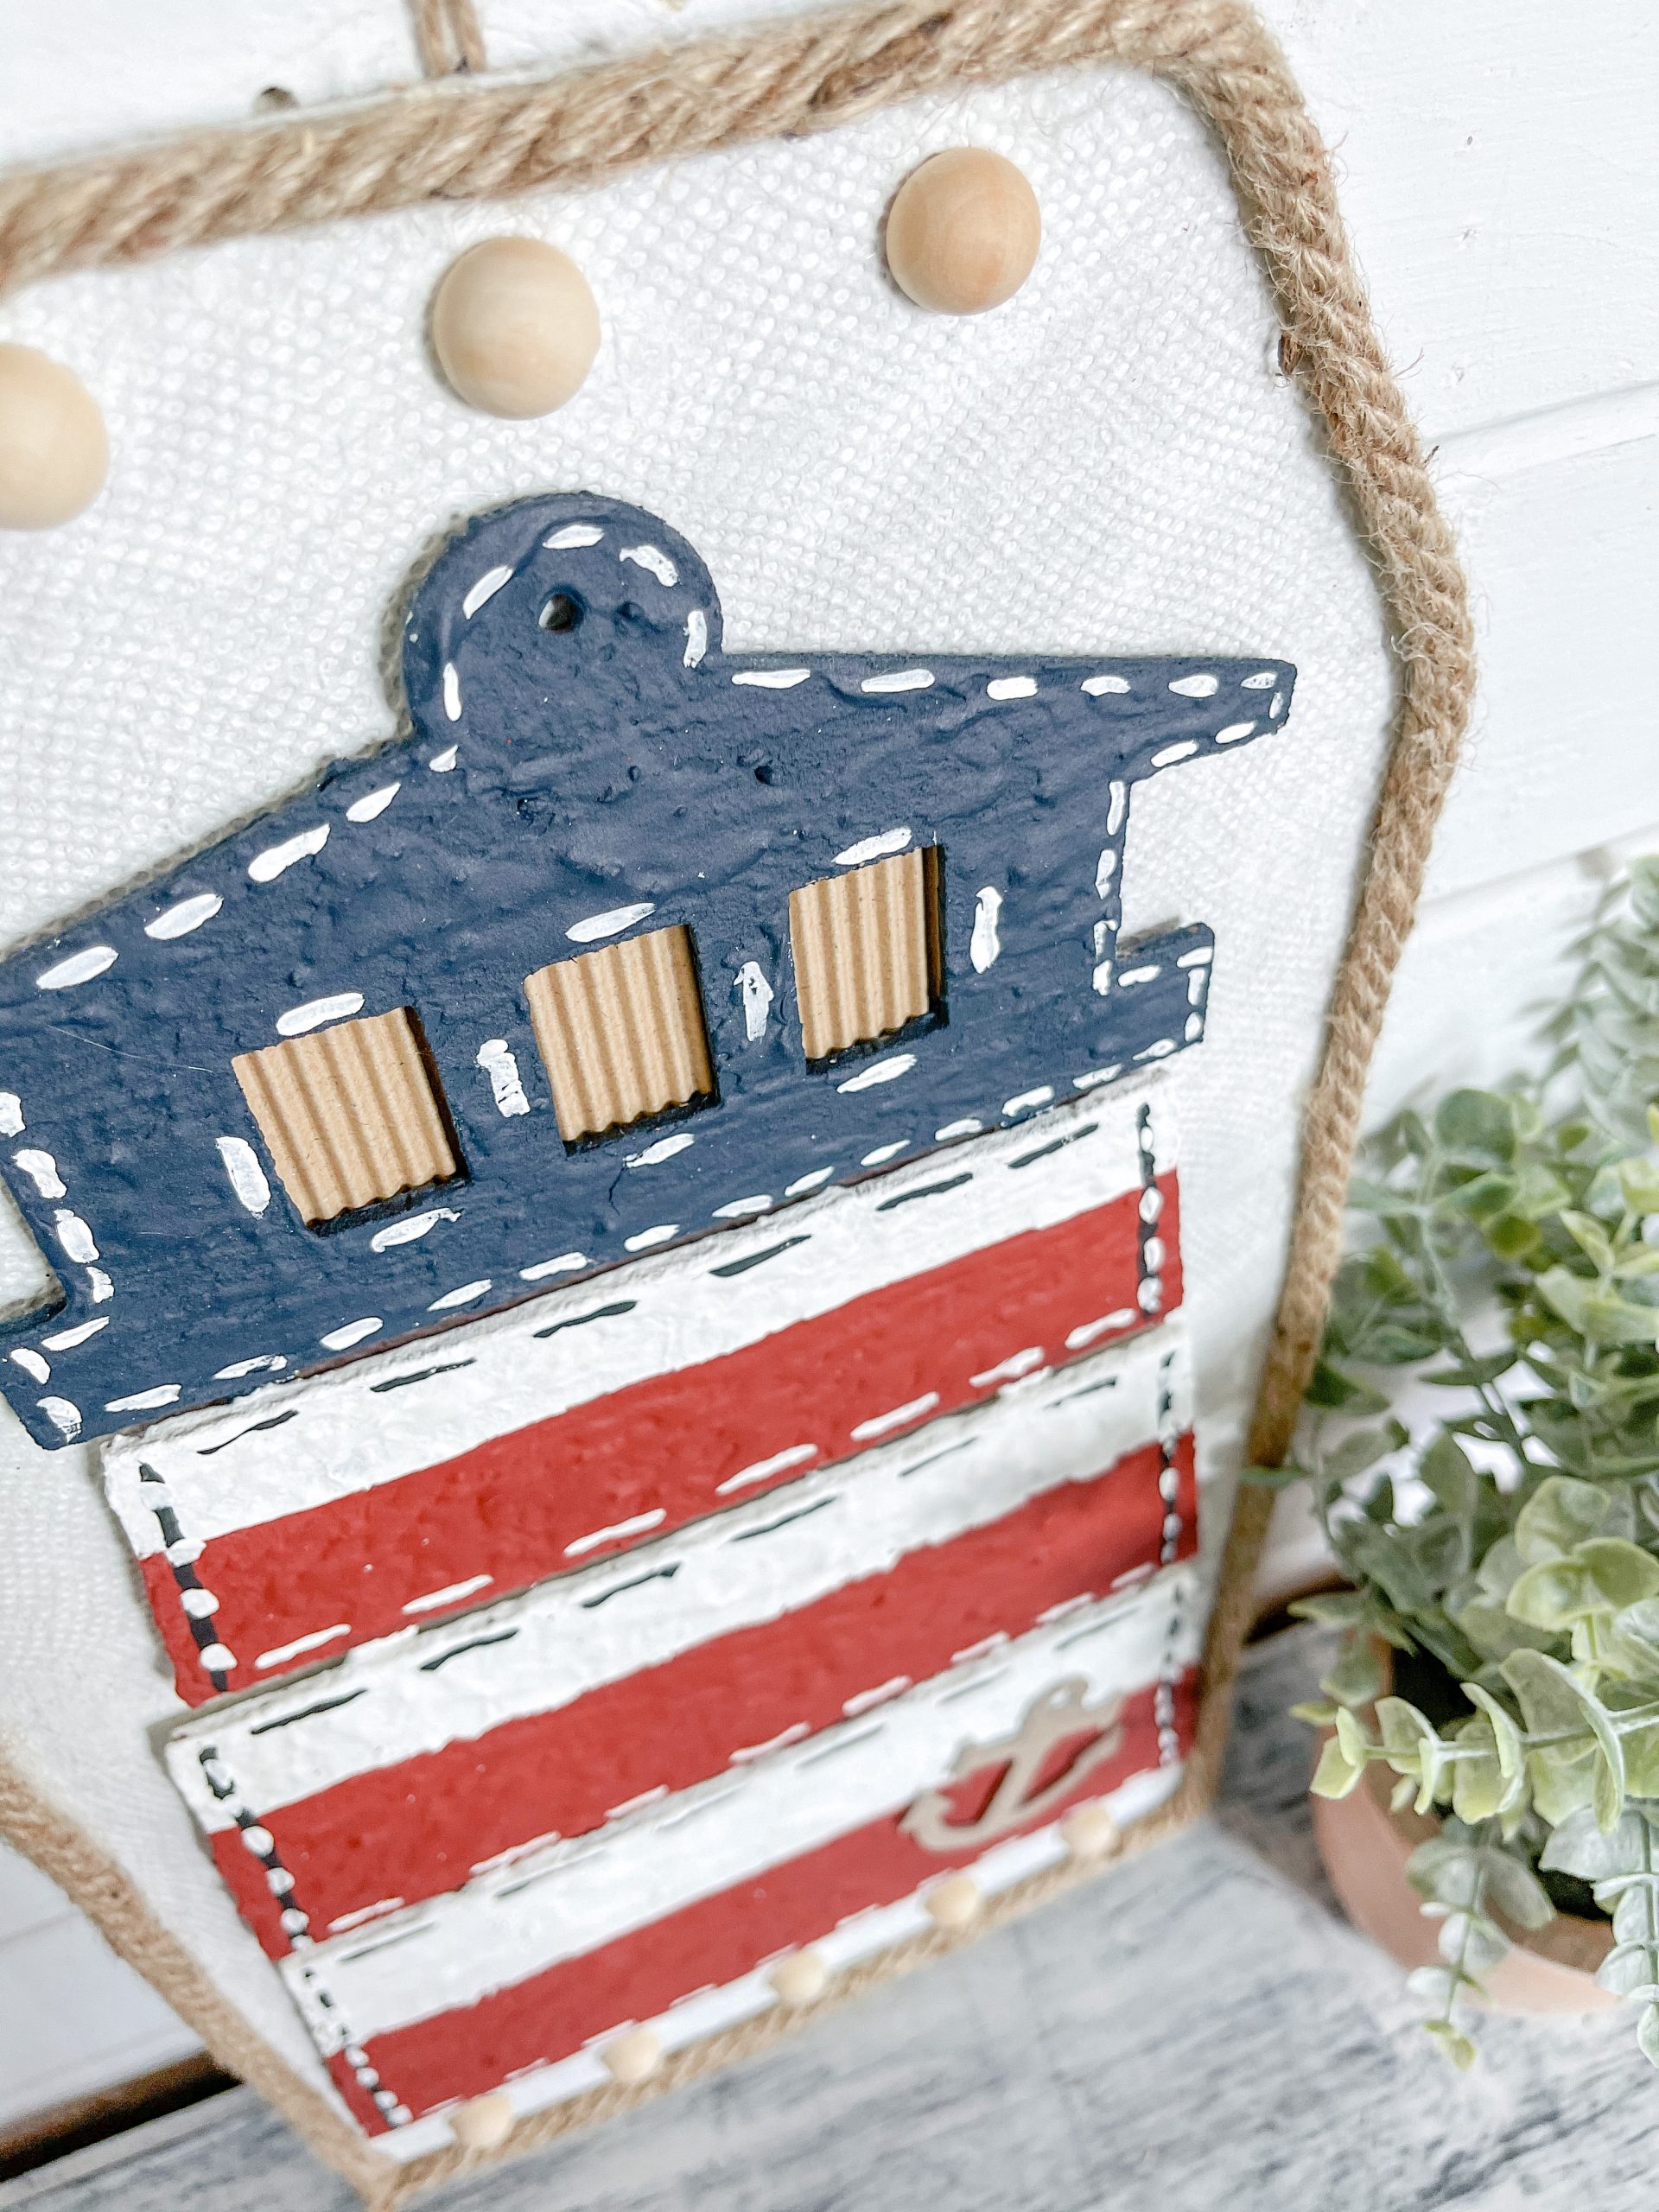
You can add layers to create even more texture. Once you’re happy with it, use your heat gun to quickly dry the blue paint/spackling mixture. Next, you’re going to paint the red and white stripes across the rest of the lighthouse.
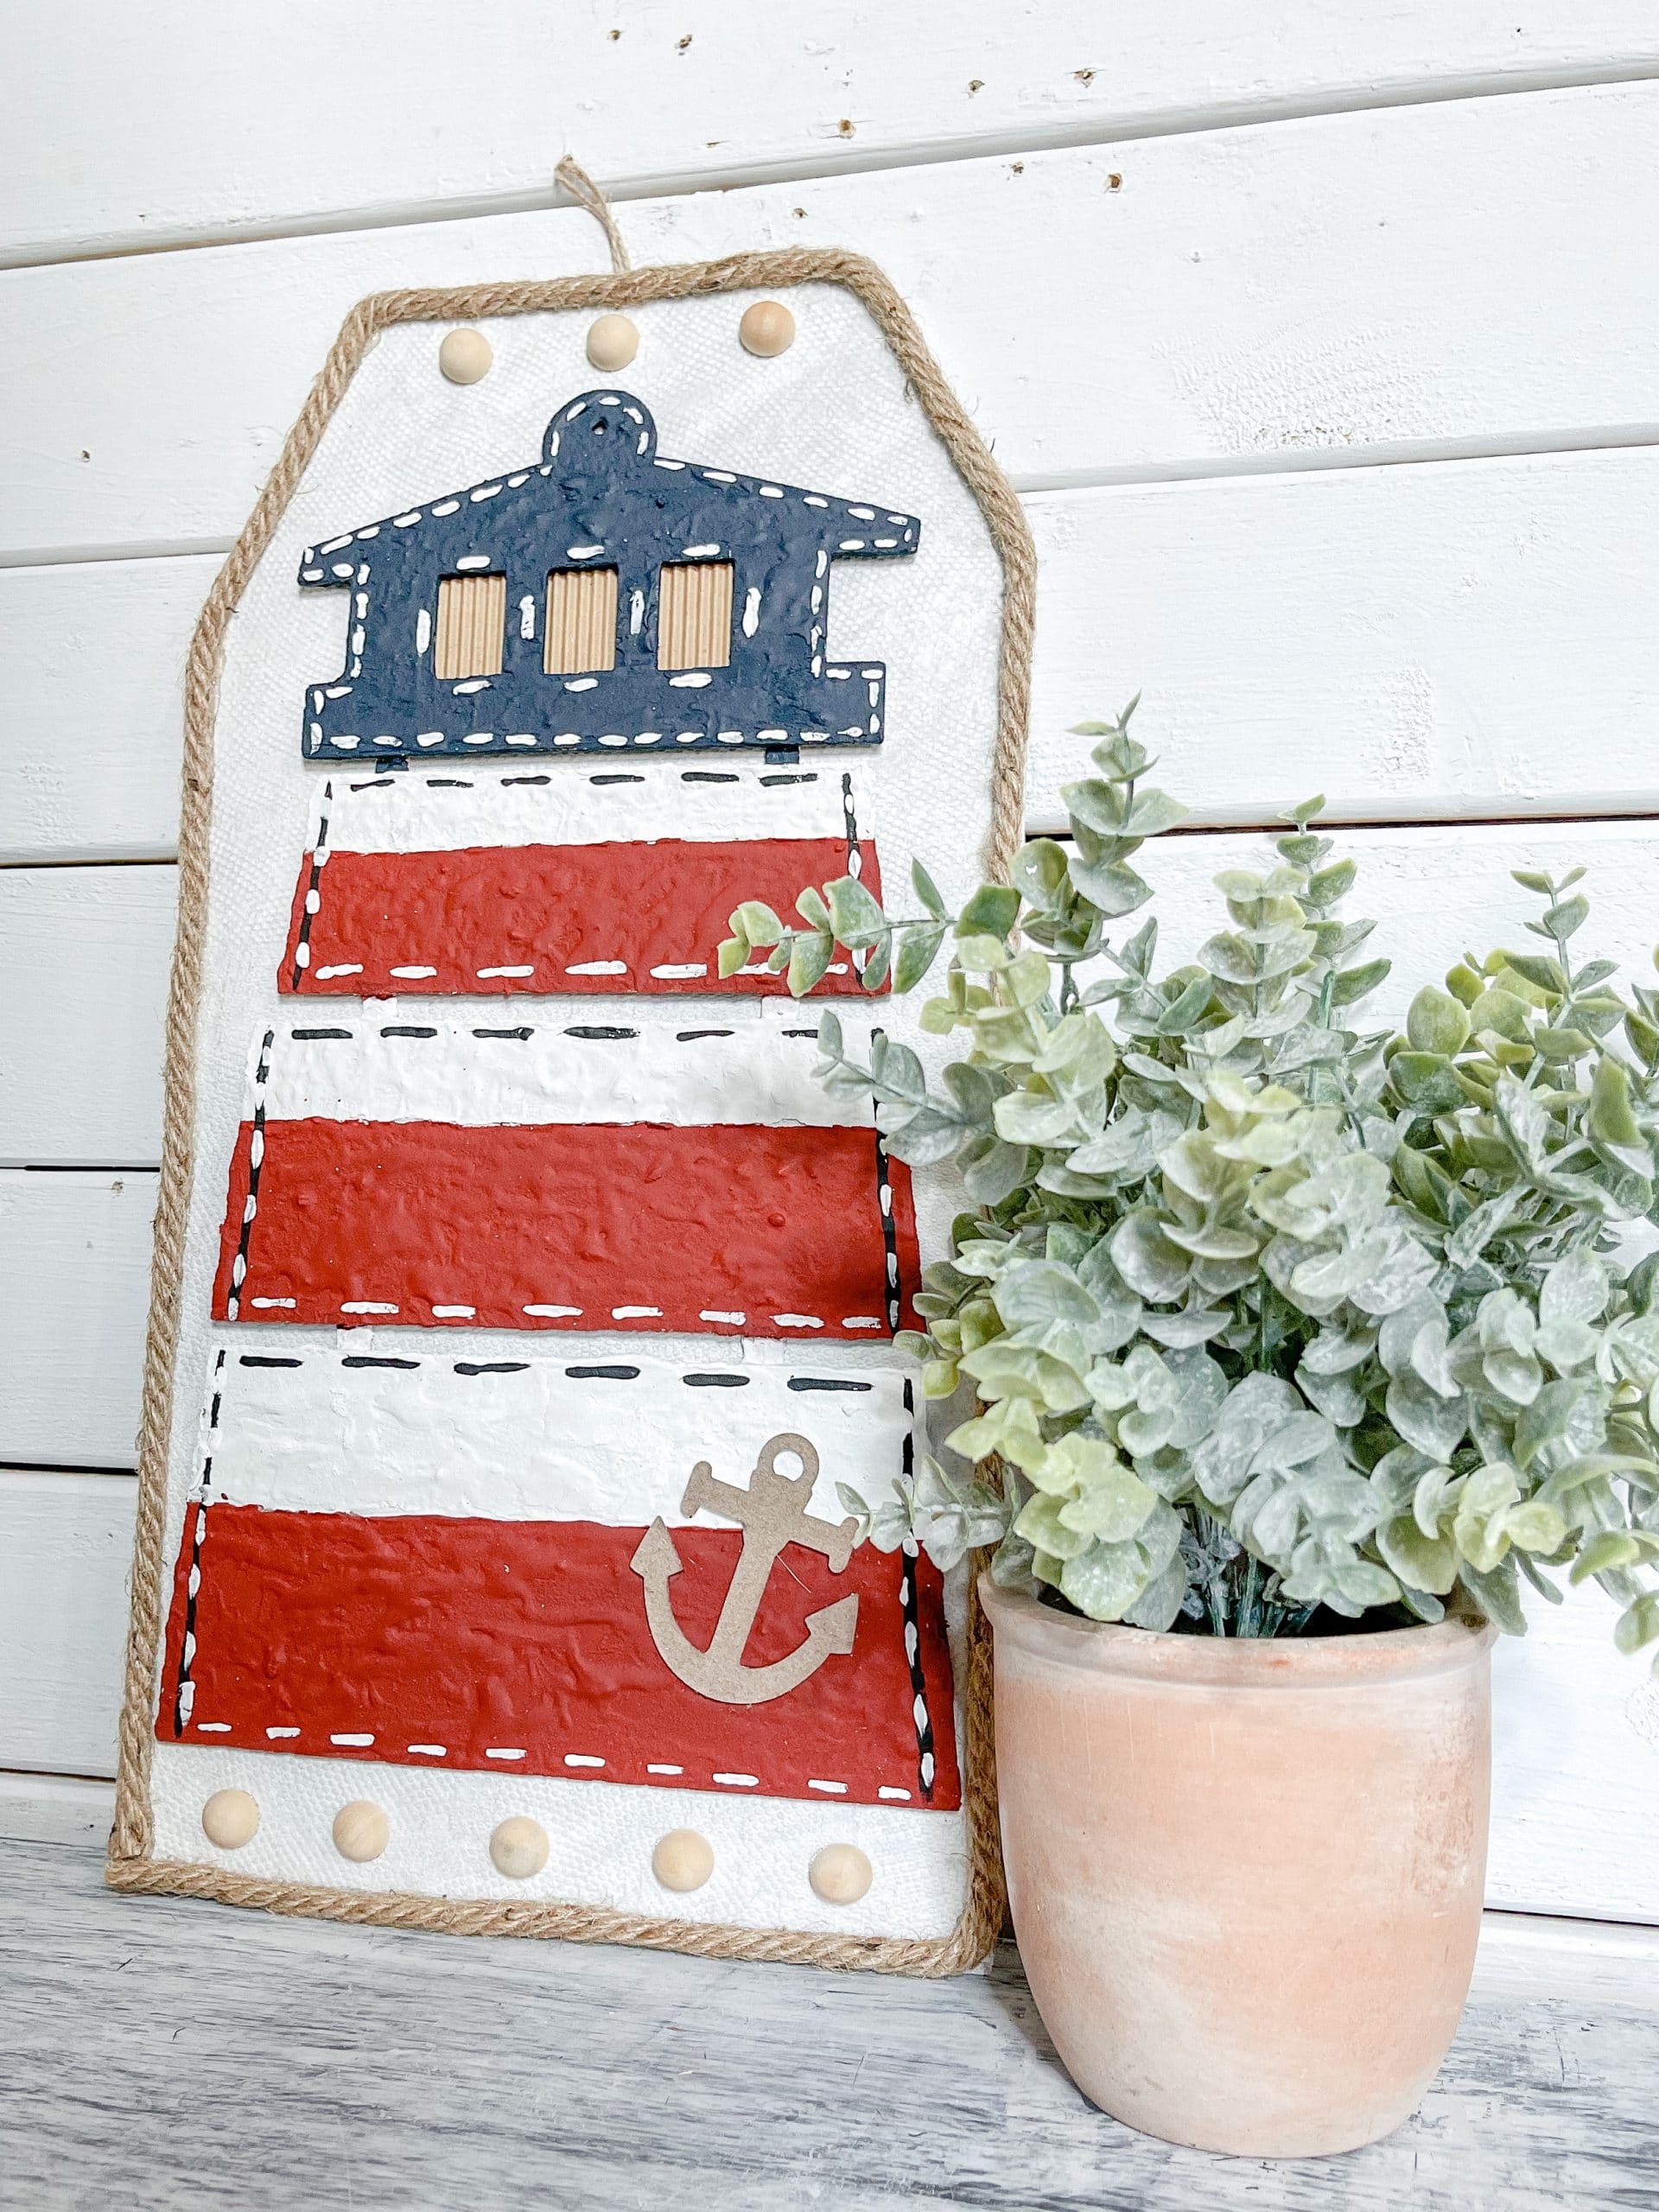
I painted the top half of each of the remaining planks with white paint and the bottom half of each plank with red paint. If you want very straight edges, you can use painter’s tape or a straight edge when painting your stripes.
Use the same technique you used for the blue section of the lighthouse to create a consistent texture across the entire lighthouse. Again, use your heat gun to quickly dry the red and white paint/spackling mixtures.
Bring it all together
You can set your DIY lighthouse sign to the side while you embellish the decoupage Dollar Tree tag sign from before. Hot glue Dollar Tree nautical rope around the outer edge of the tag sign. Then, hot glue 5 half wood beads across the bottom of the sign and 3 half wood beads across the top.
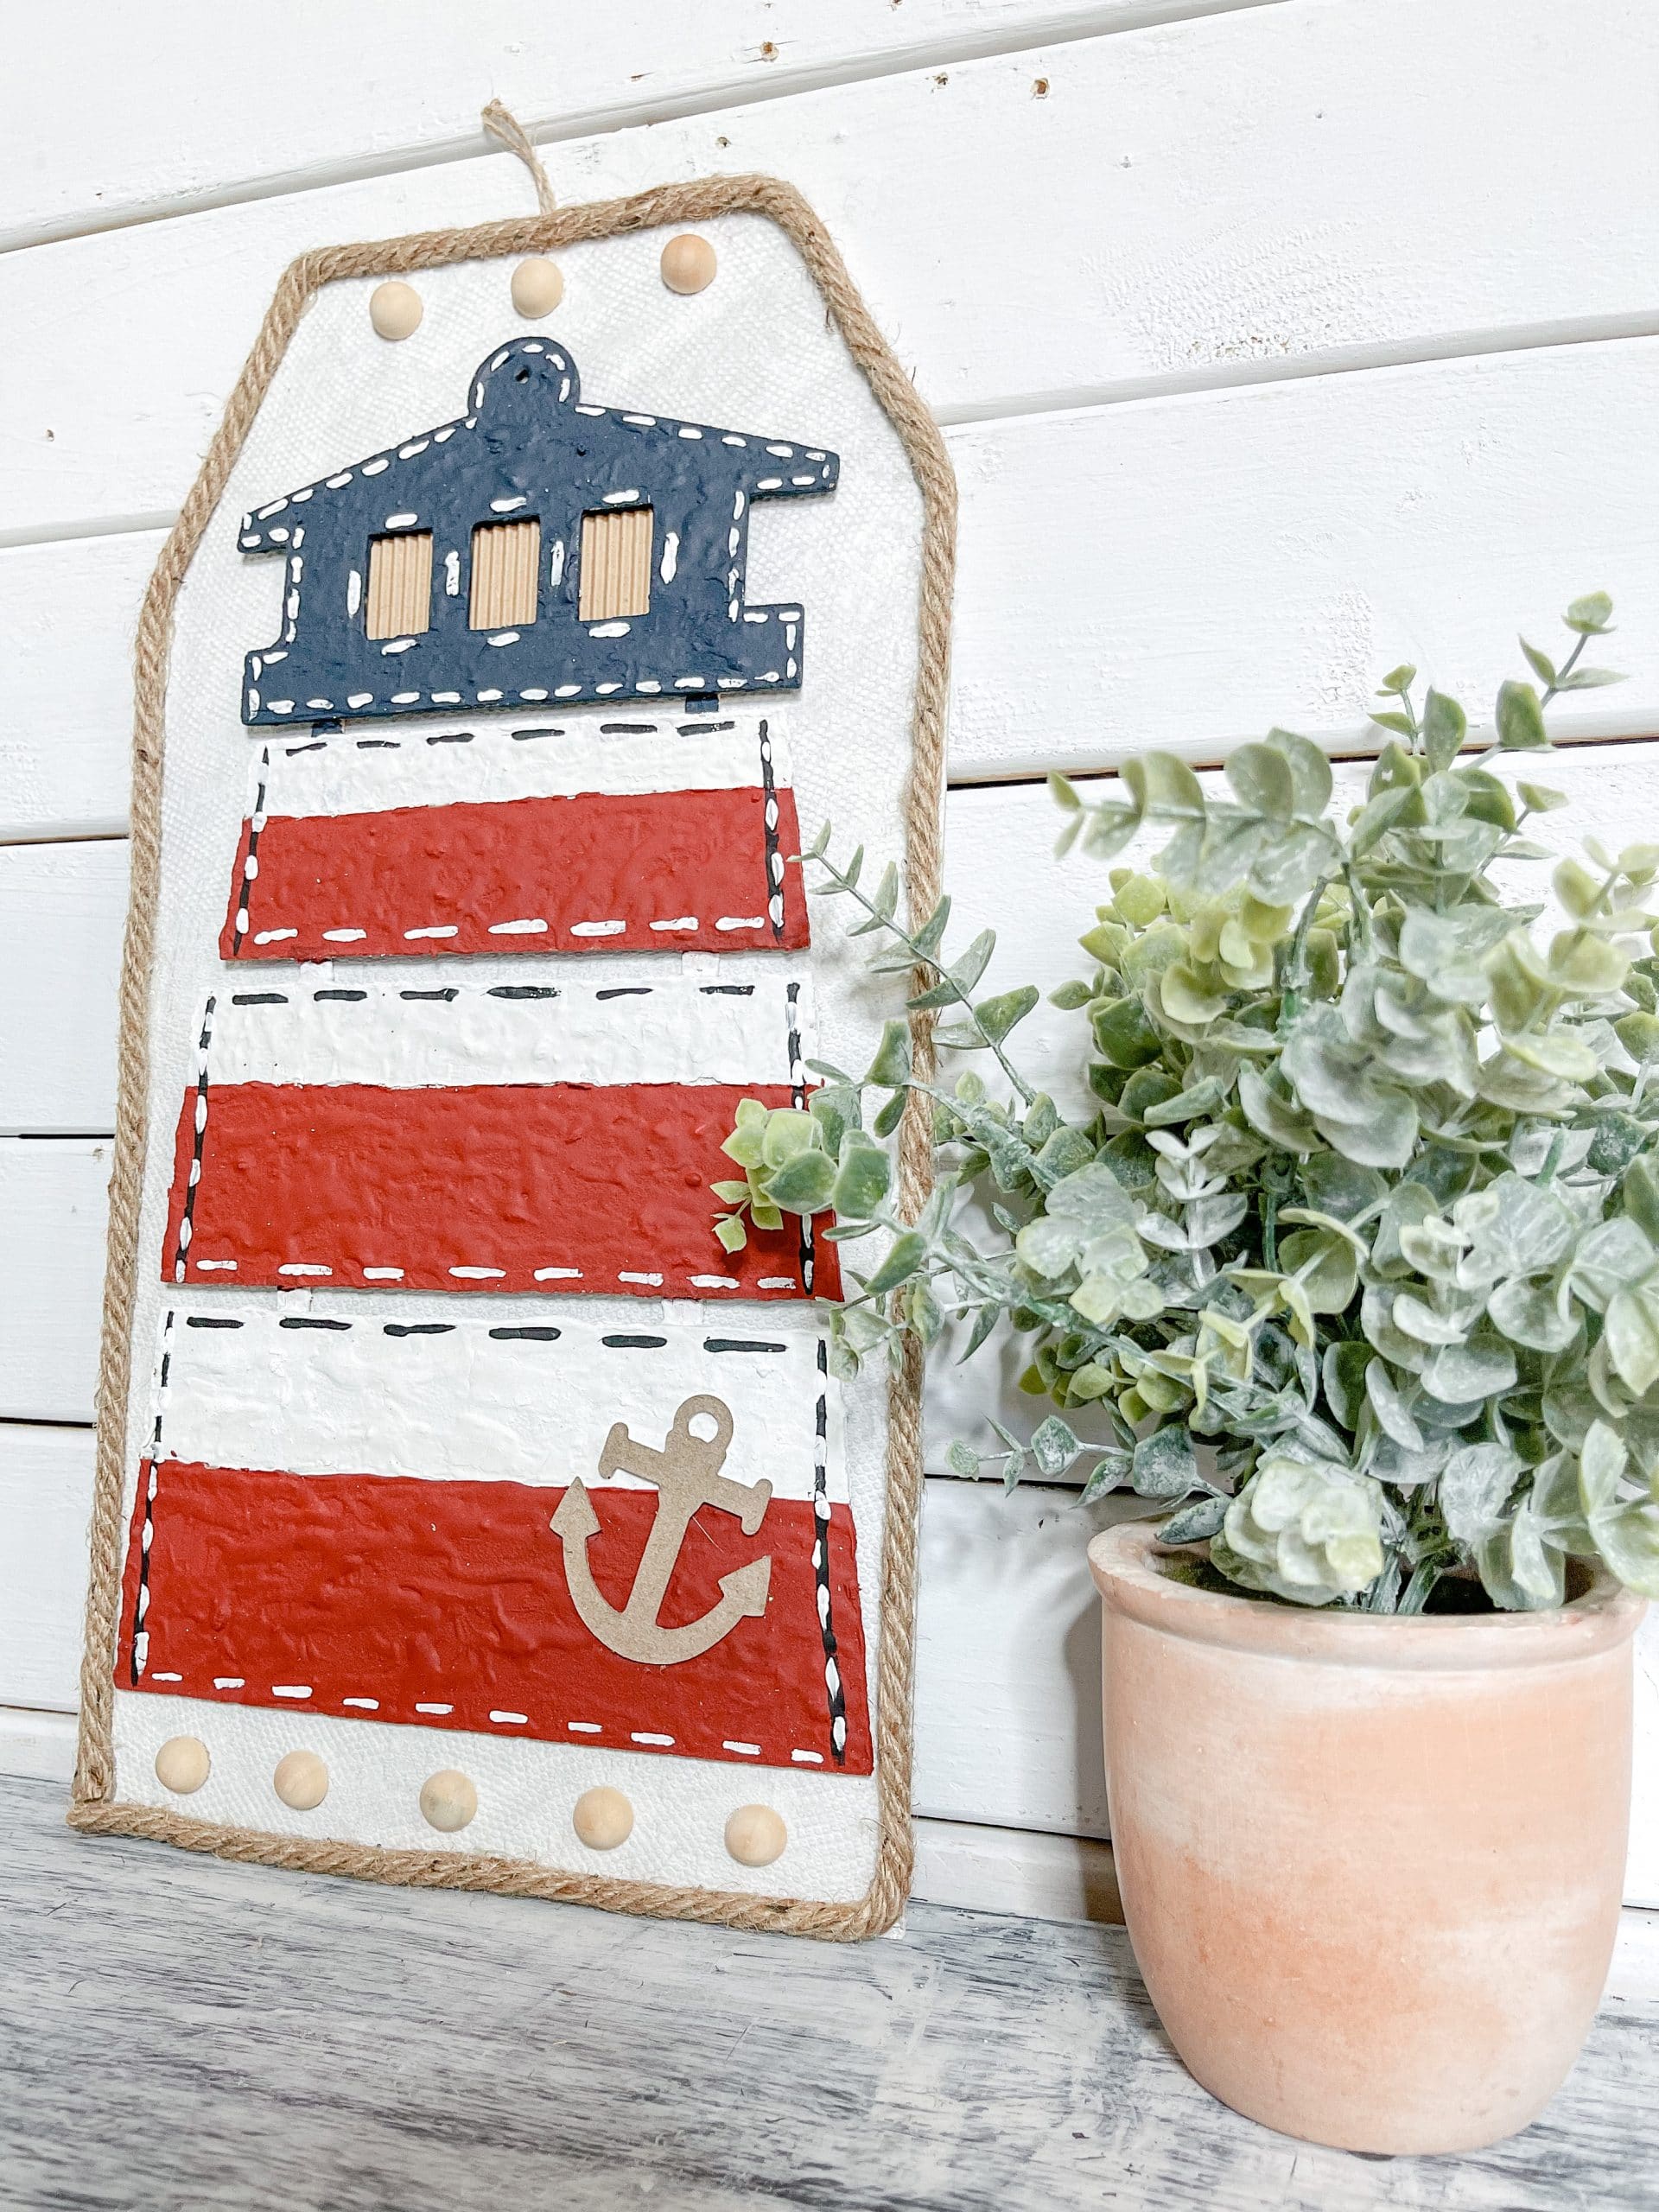
Next, you’re going to cut the corrugated scrapbook paper to fit behind the three little windows at the top of the lighthouse. Hot glue the strip of corrugated scrapbook paper to the back of the lighthouse
Now you can hot glue the lighthouse onto the tag sign! Make sure you press the lighthouse down firmly to allow the glue to really secure it in place. Finally, hot glue the anchor you removed in the beginning to the bottom corner of the lighthouse!
I hope you enjoyed this Dollar Tree Lighthouse DIY Nautical Decor as I did and decide to make it for yourself! If you do, I would love to see how yours turns out!
You should totally join my FREE Facebook group called On A Budget Crafts! It is a judgment-free community for DIY crafters to show off their projects and ideas.
If you loved this DIY, you might also like these FREE nautical template printables!
Thanks for stopping by! XOXO Amber
You can also shop my ENTIRE AMAZON Favorites shop just click here! It’s packed full of all the things I use and love. Here is the supply list I highly recommend every creative have on hand!!
Would you also pin my blog for later and get on my newsletter alerts? I would love to have you join my #craftycrew.
Inspired? Leave me a comment below! I love hearing from my readers!

Join my free “ON A BUDGET CRAFTS” Facebook group!
I loved watching you create this on the Live. You did a fantastic job on this. Love the technique
This turned out great, love the use of the paper towel and spakling. You come up with great ideas
Hi Amber the link to the halfwood beads goes to Apple Barrel Burnt umber instead of the beads.
Thanks for letting us know! I just went in and fixed it!