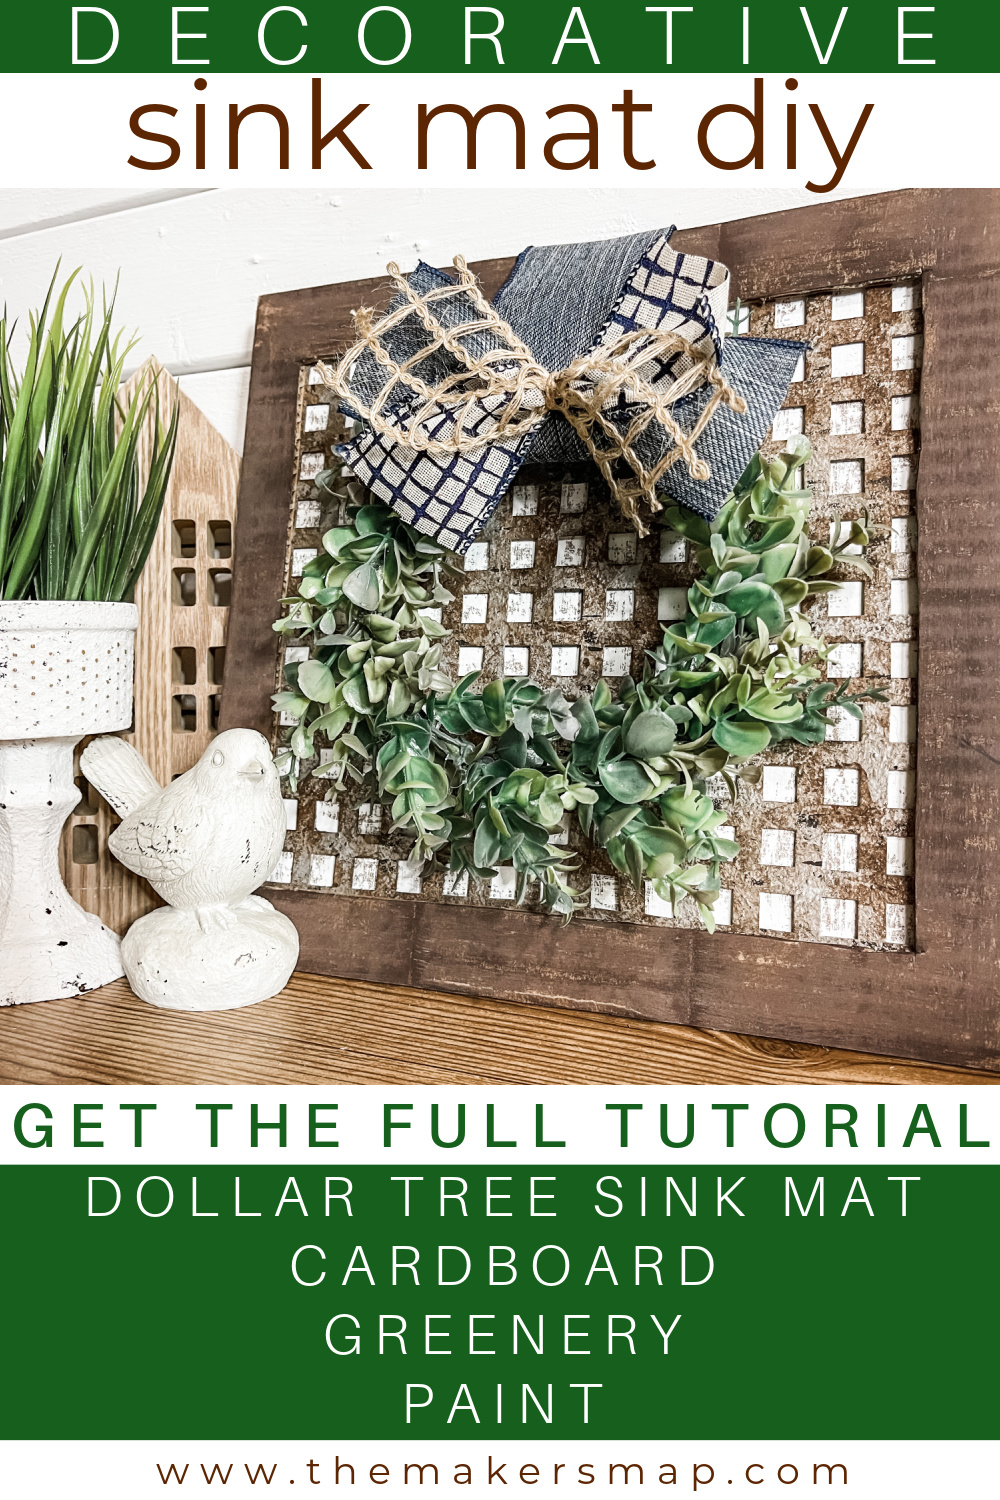
Rustic Decorative Sink Mat DIY
I had so much fun making this rustic decorative sink mat DIY! Turning simple or basic items into unique and up-scale home decor is just so exciting!
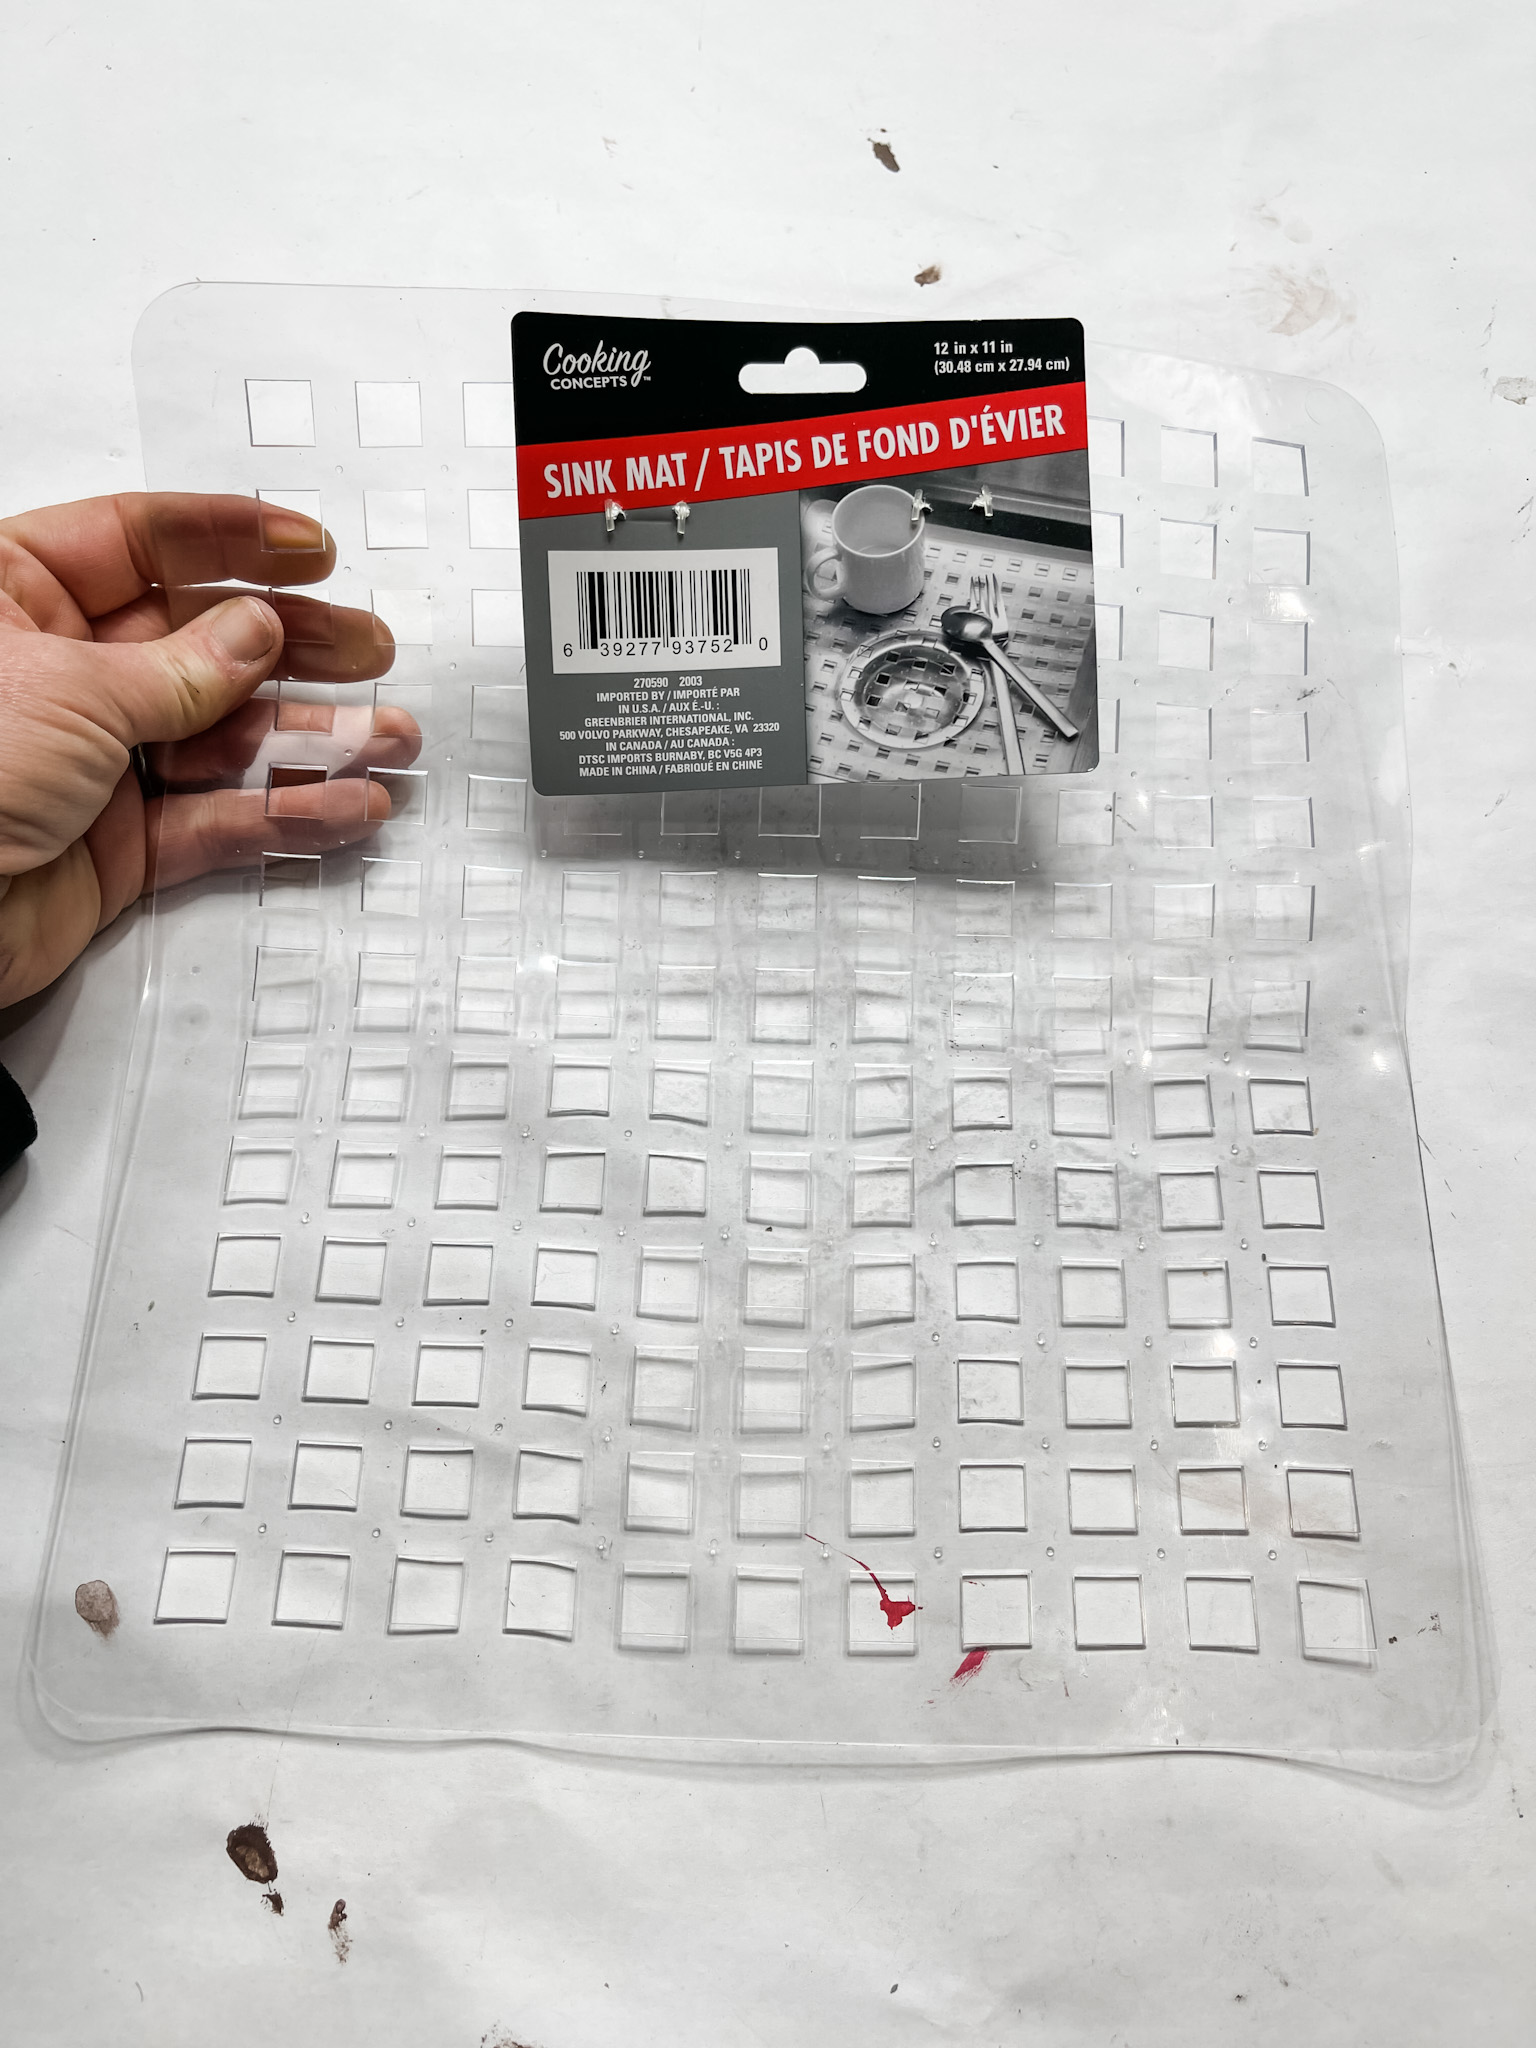
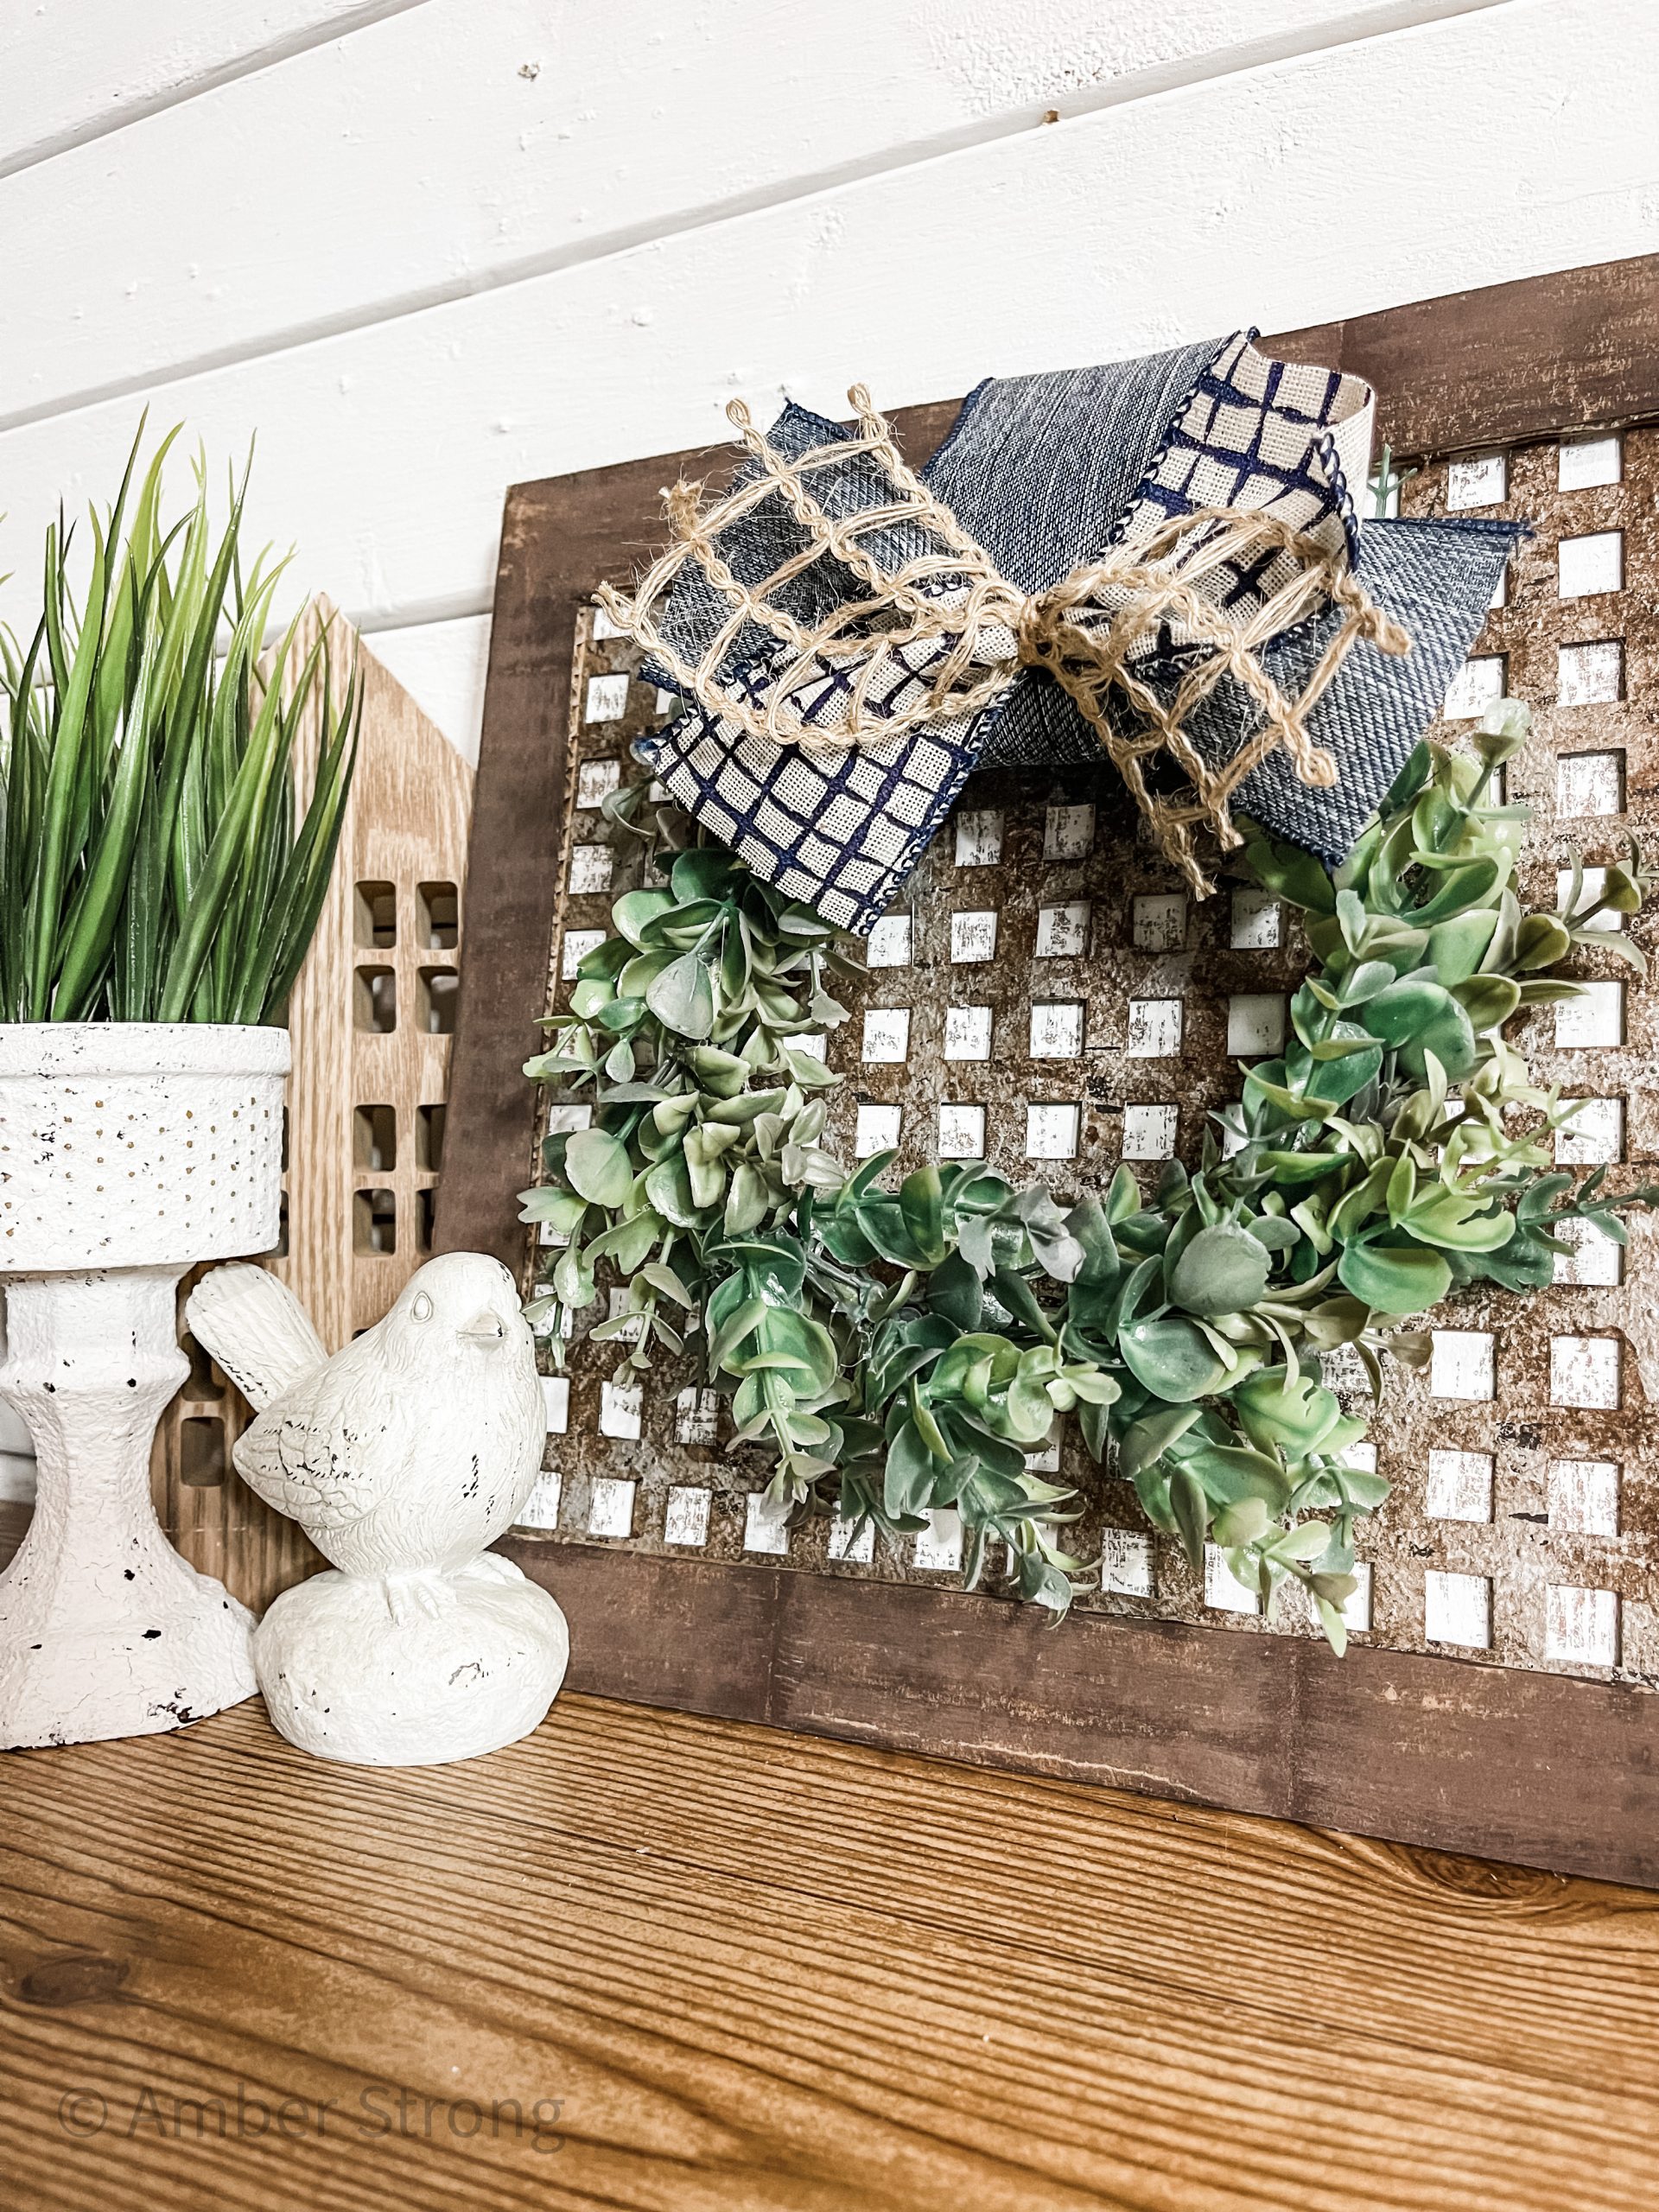
For this rustic farmhouse craft, I used cardboard and a Dollar Tree plastic sink mat! With a little bit of technique and some paint, you get the amazing faux rust finish on the sink mat.
Then, just add your DIY wreath and make your own custom bow and you have amazing, high-end-looking home decor!
Who says it has to cost an arm and a leg to decorate your home?? I’m always finding ways to affordably decorate my home, and you can too!
Check out these Farmhouse DIY’s!
- DIY Farmhouse Decor with Corkboard Cow
- Dollar Tree File Folder DIY Toolbox
- Walmart Grill Scraper DIY Home Decor
- DIY Standing Rope Wreath
- Dollar Tree DIY Orange Flower Decor
- Dollar Tree DIY Tea Towel Ladder
- DIY Decorative Houses Craft Kit
- DIY Chicken Wire Gather Sign
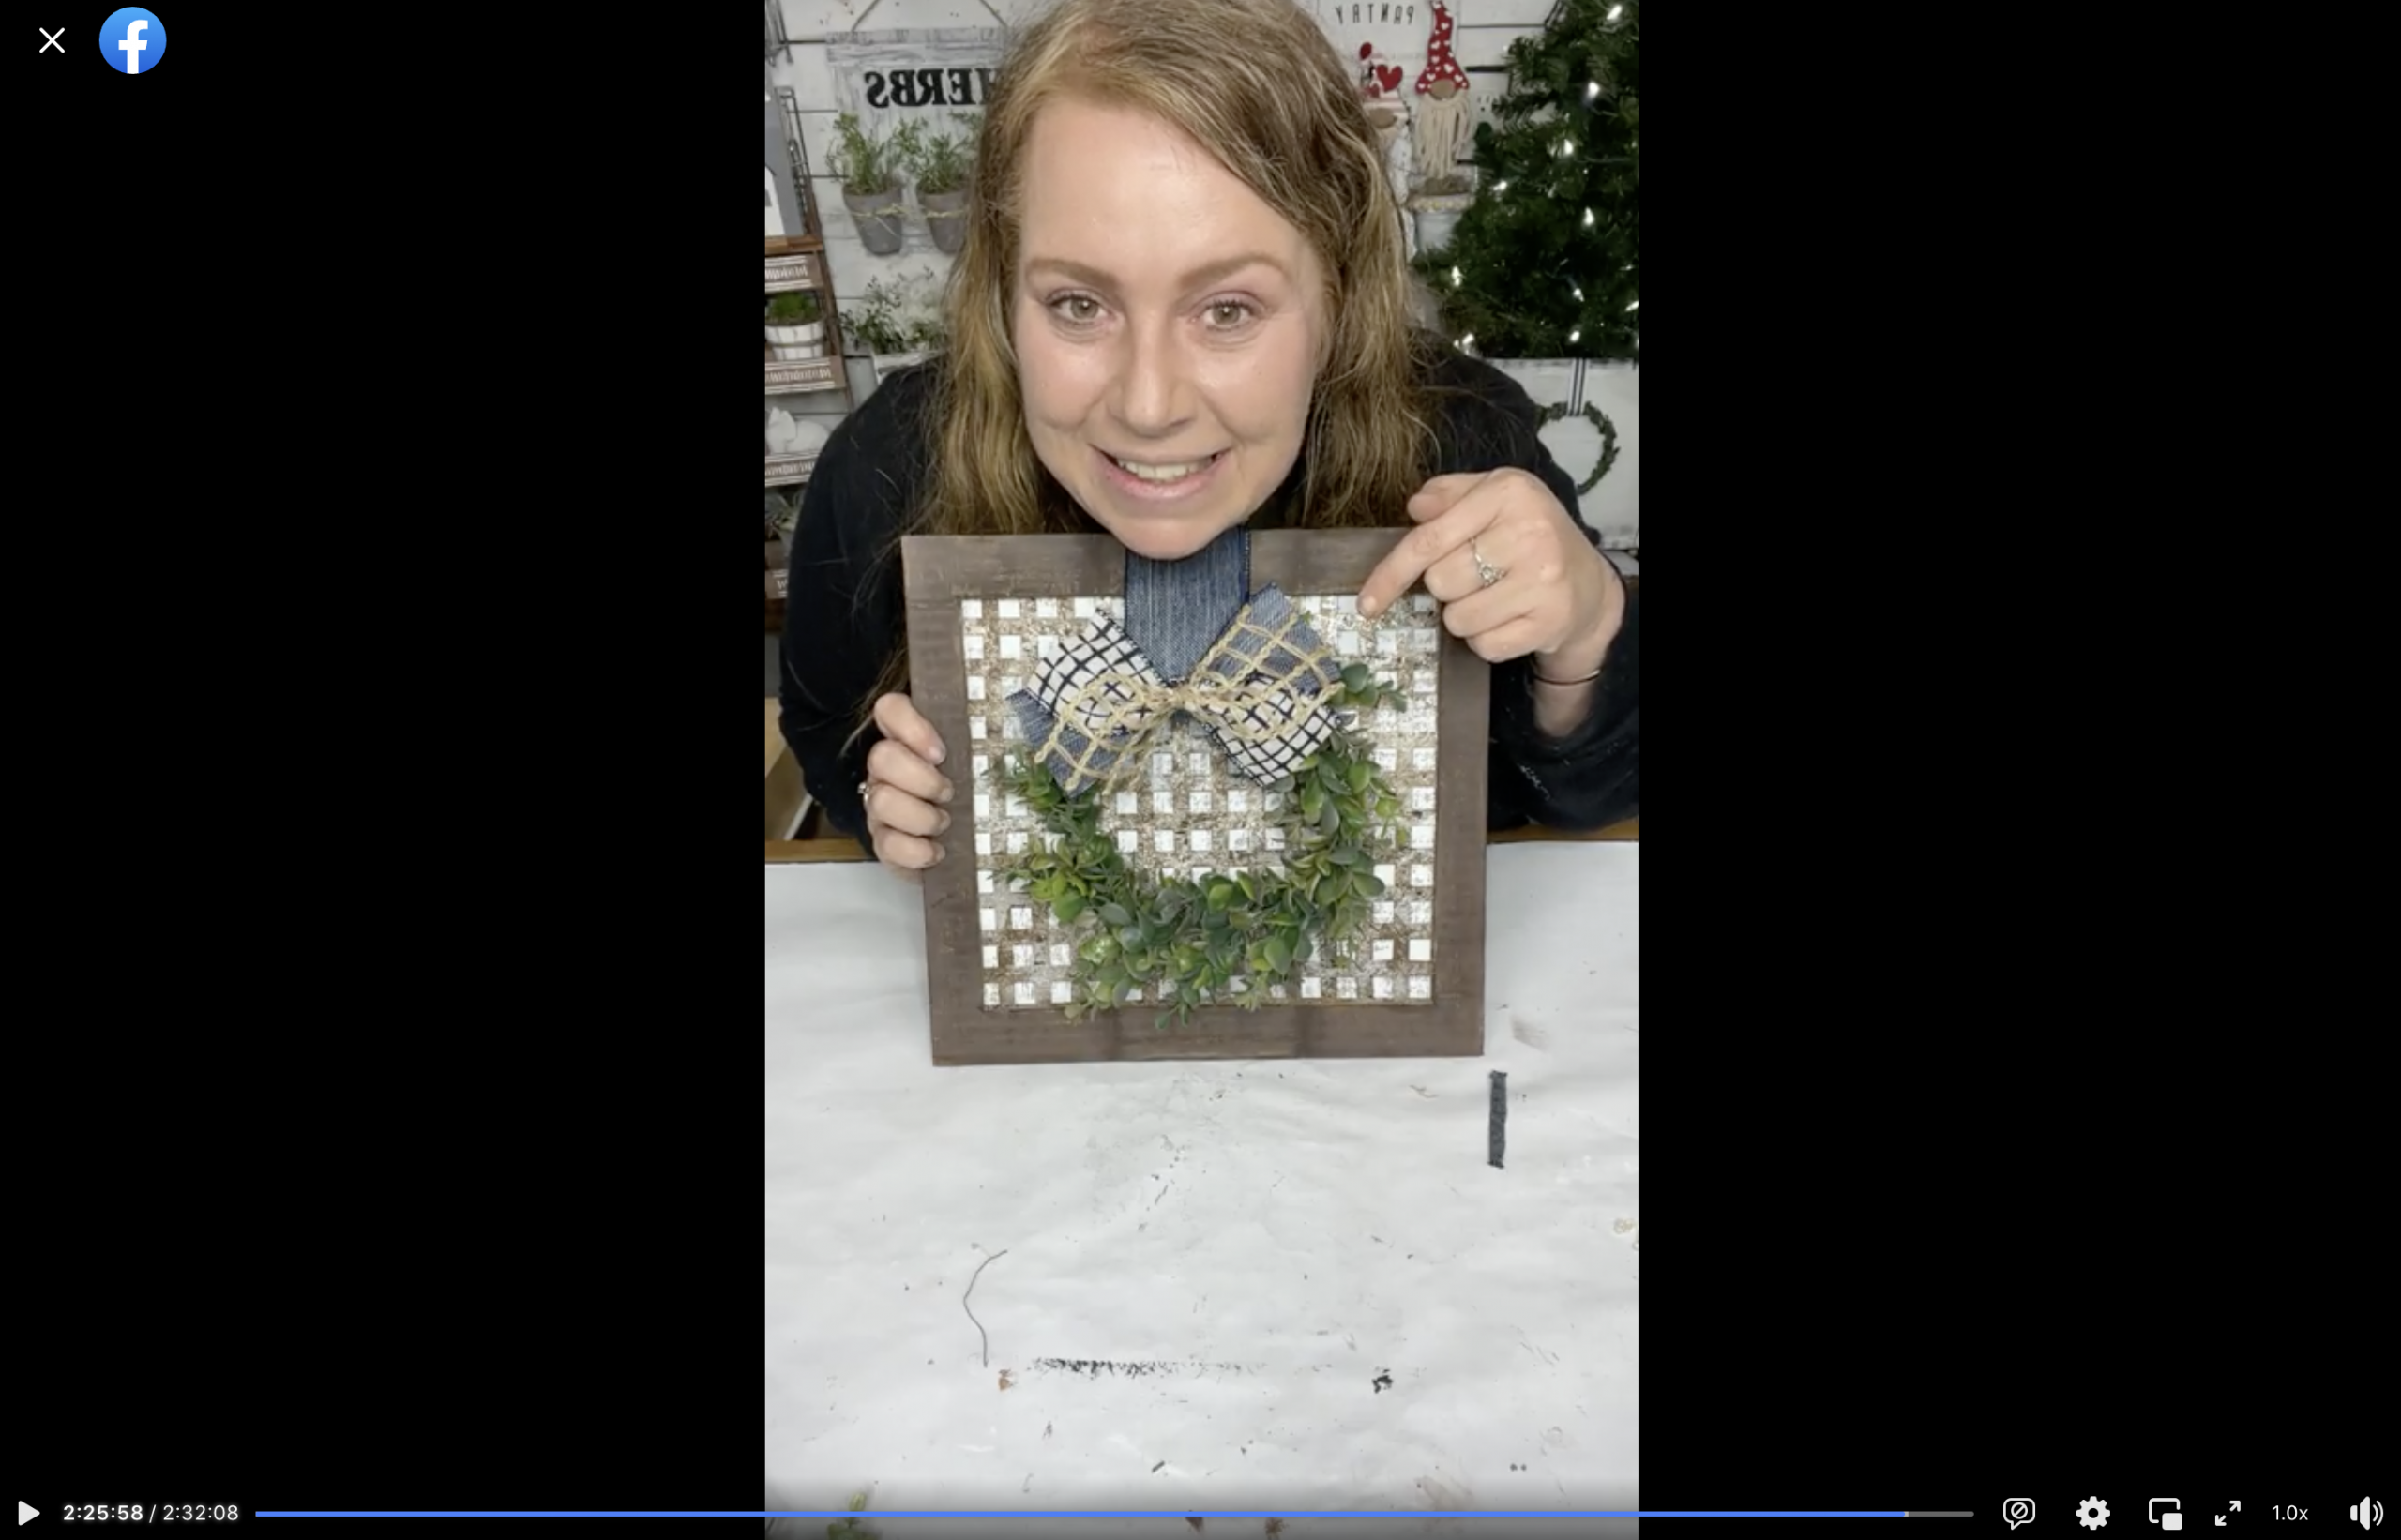
Watch the DIY tutorial
I recorded how to make this Rustic Decorative Sink Mat DIY during a LIVE video on my Facebook page.
If you want to see the DIY process, craft along, or just join in on the fun conversations, you can watch the DIY tutorial video on Facebook!
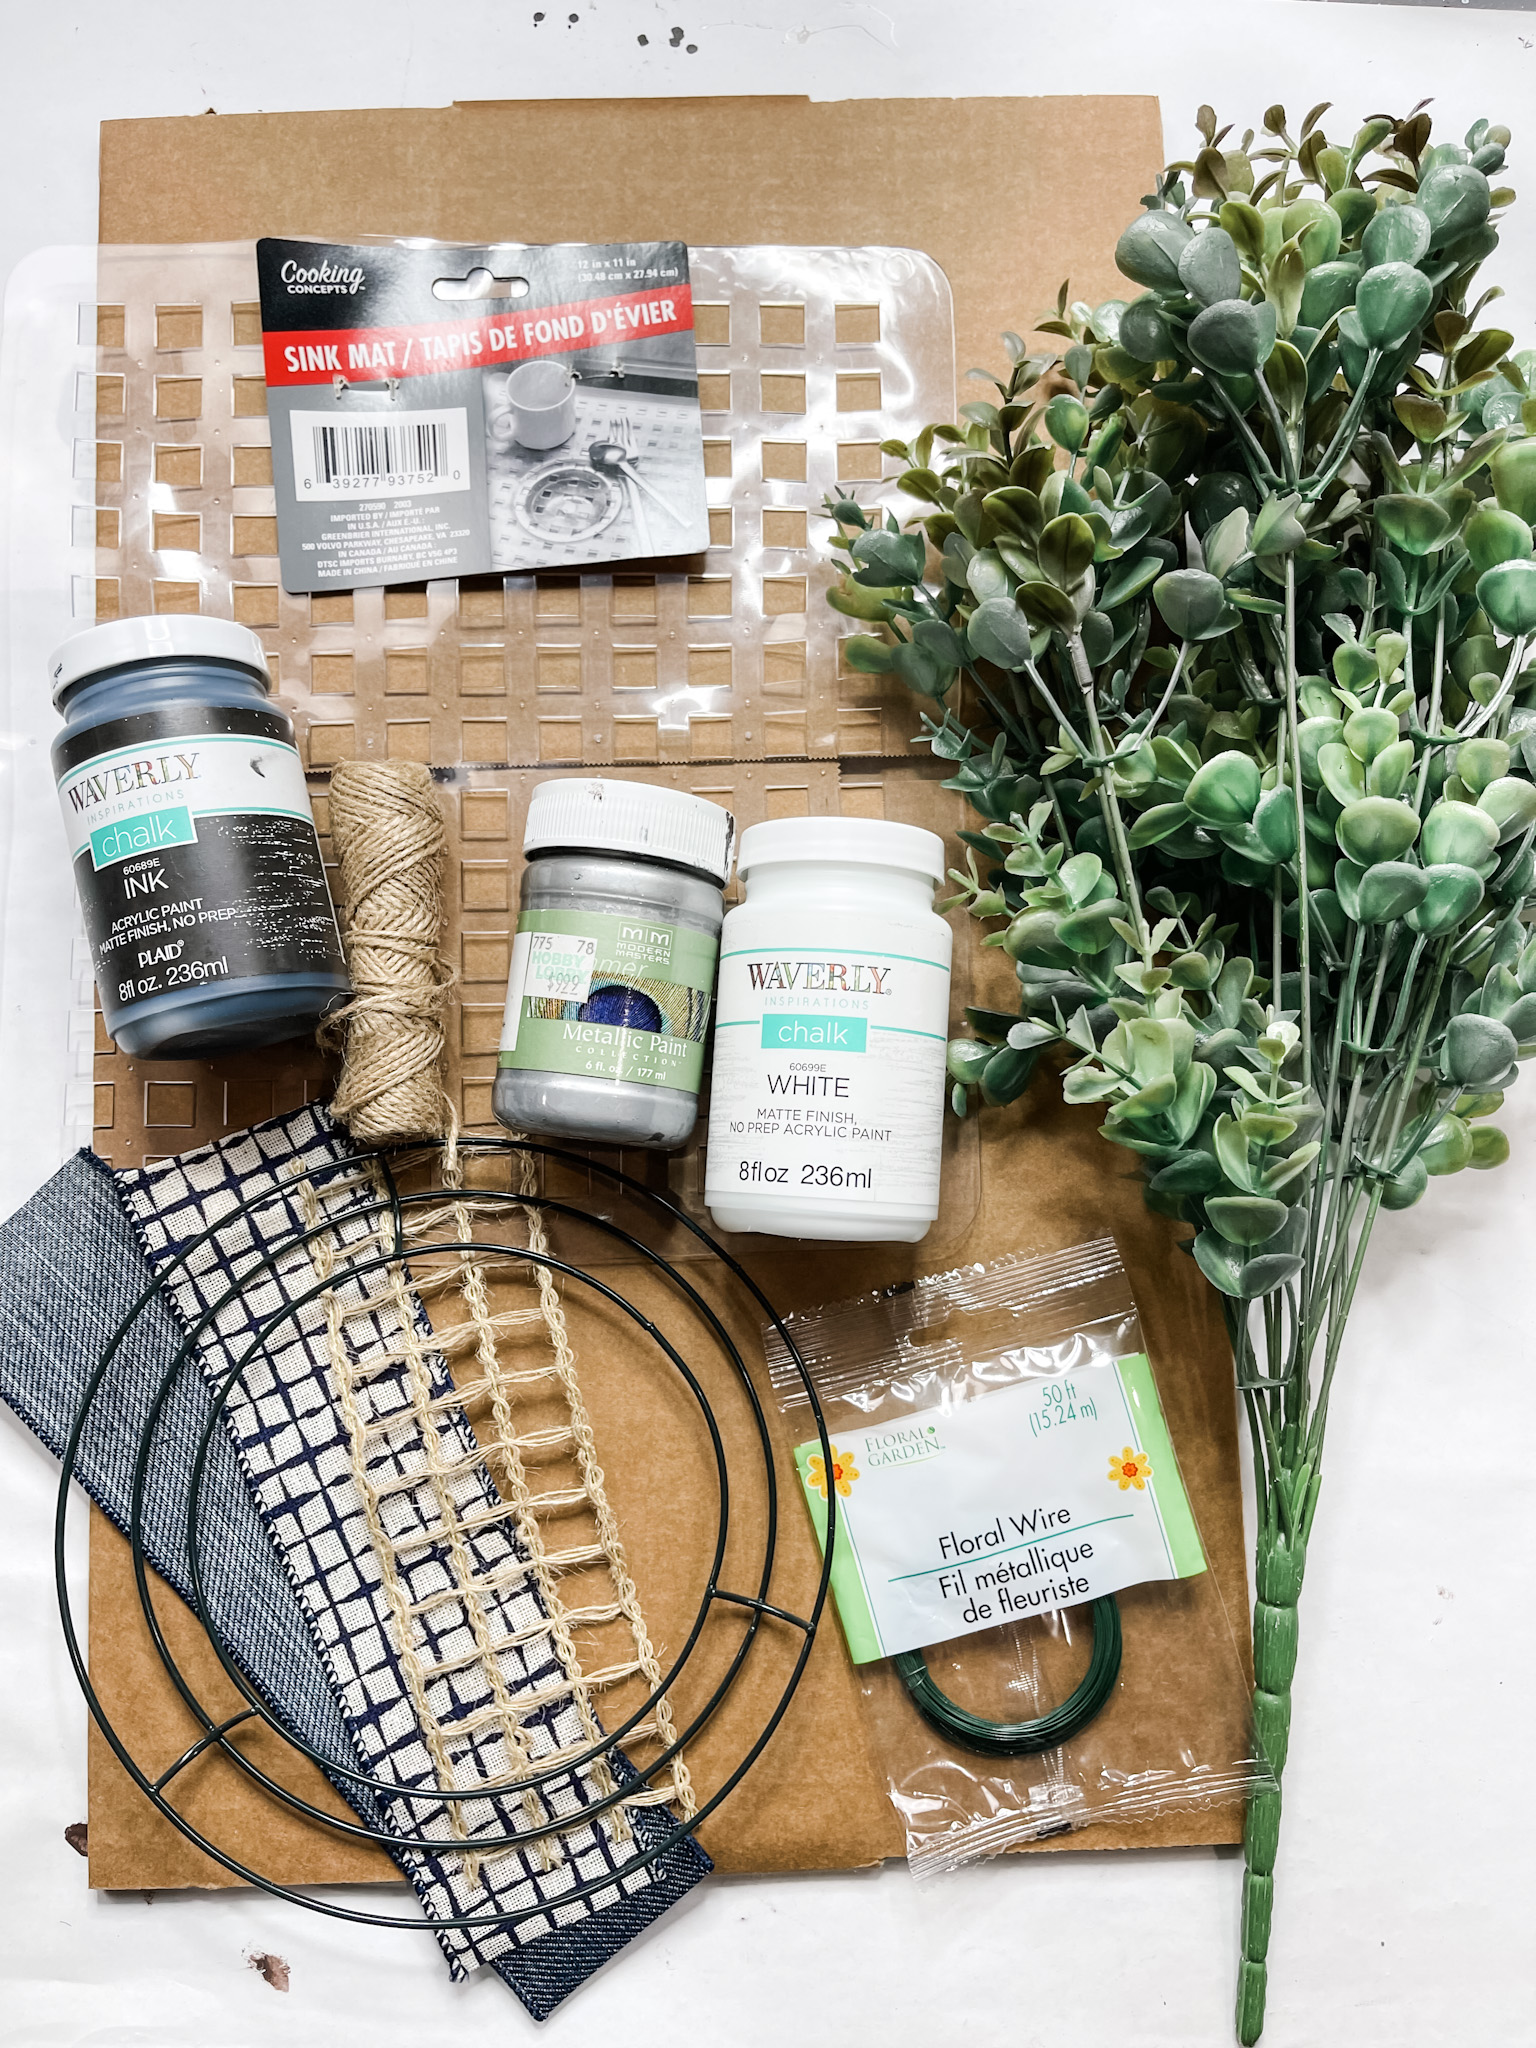
For this project, I will be using these items but you can substitute where you want.
“As an Amazon Associate, I earn from qualifying purchases.”
- Dollar Tree Sink Mat
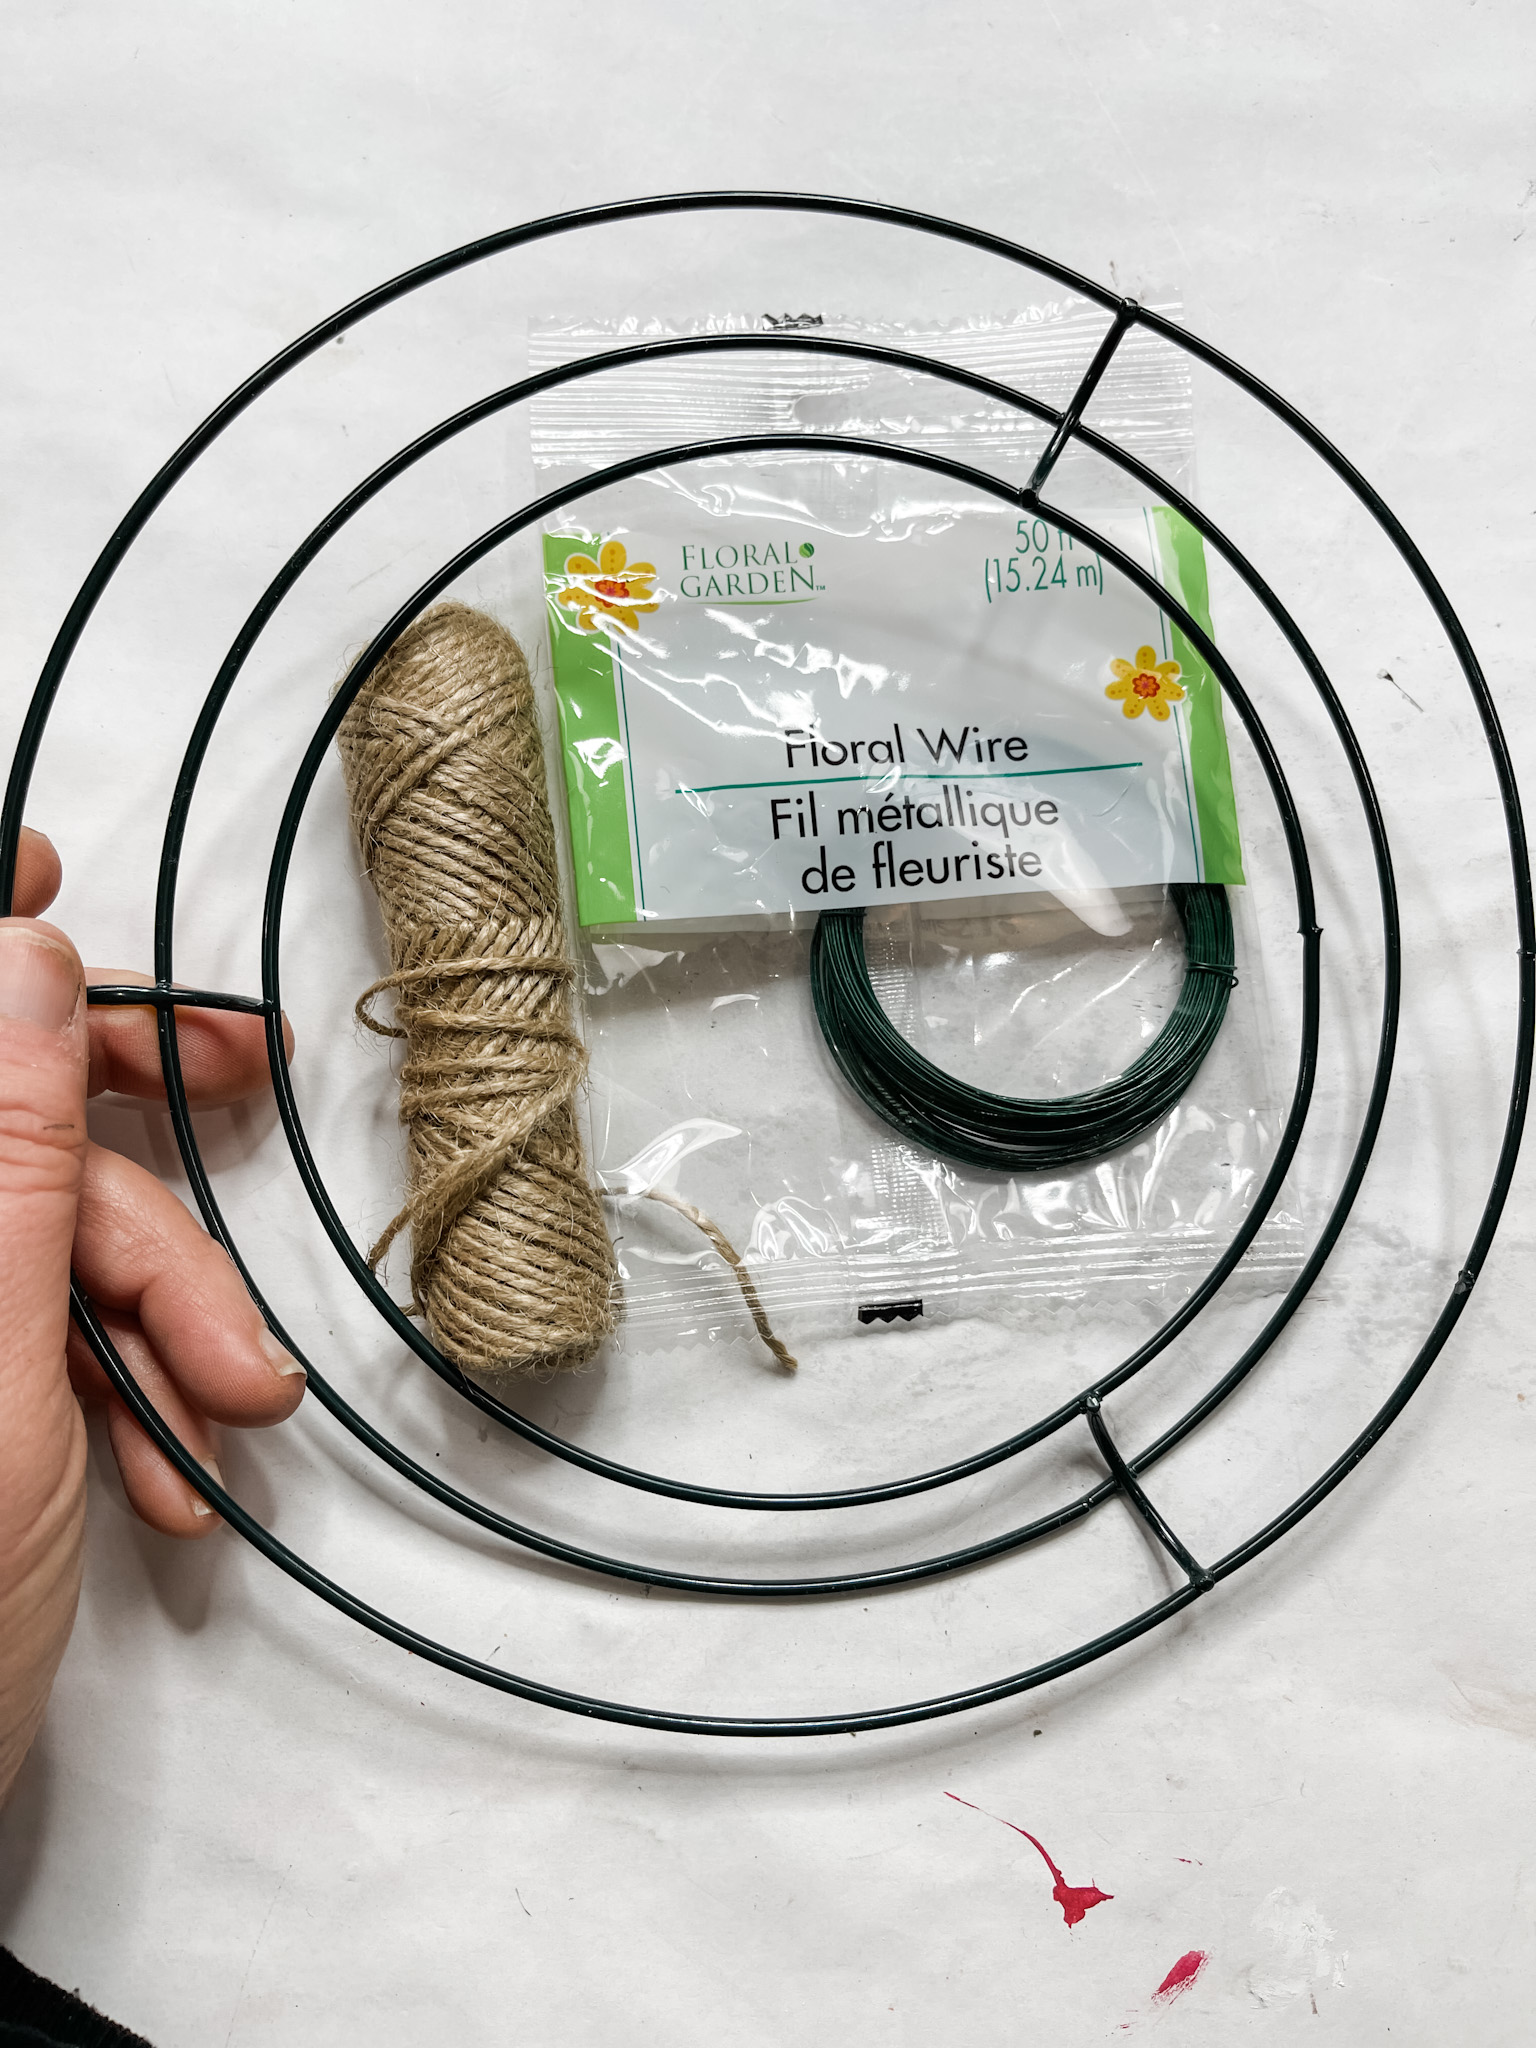
- Dollar Tree Floral Wire
- Mini Wreath Form
- Dollar Tree Jute Twine
- Ribbon of Choice
- Greenery of choice
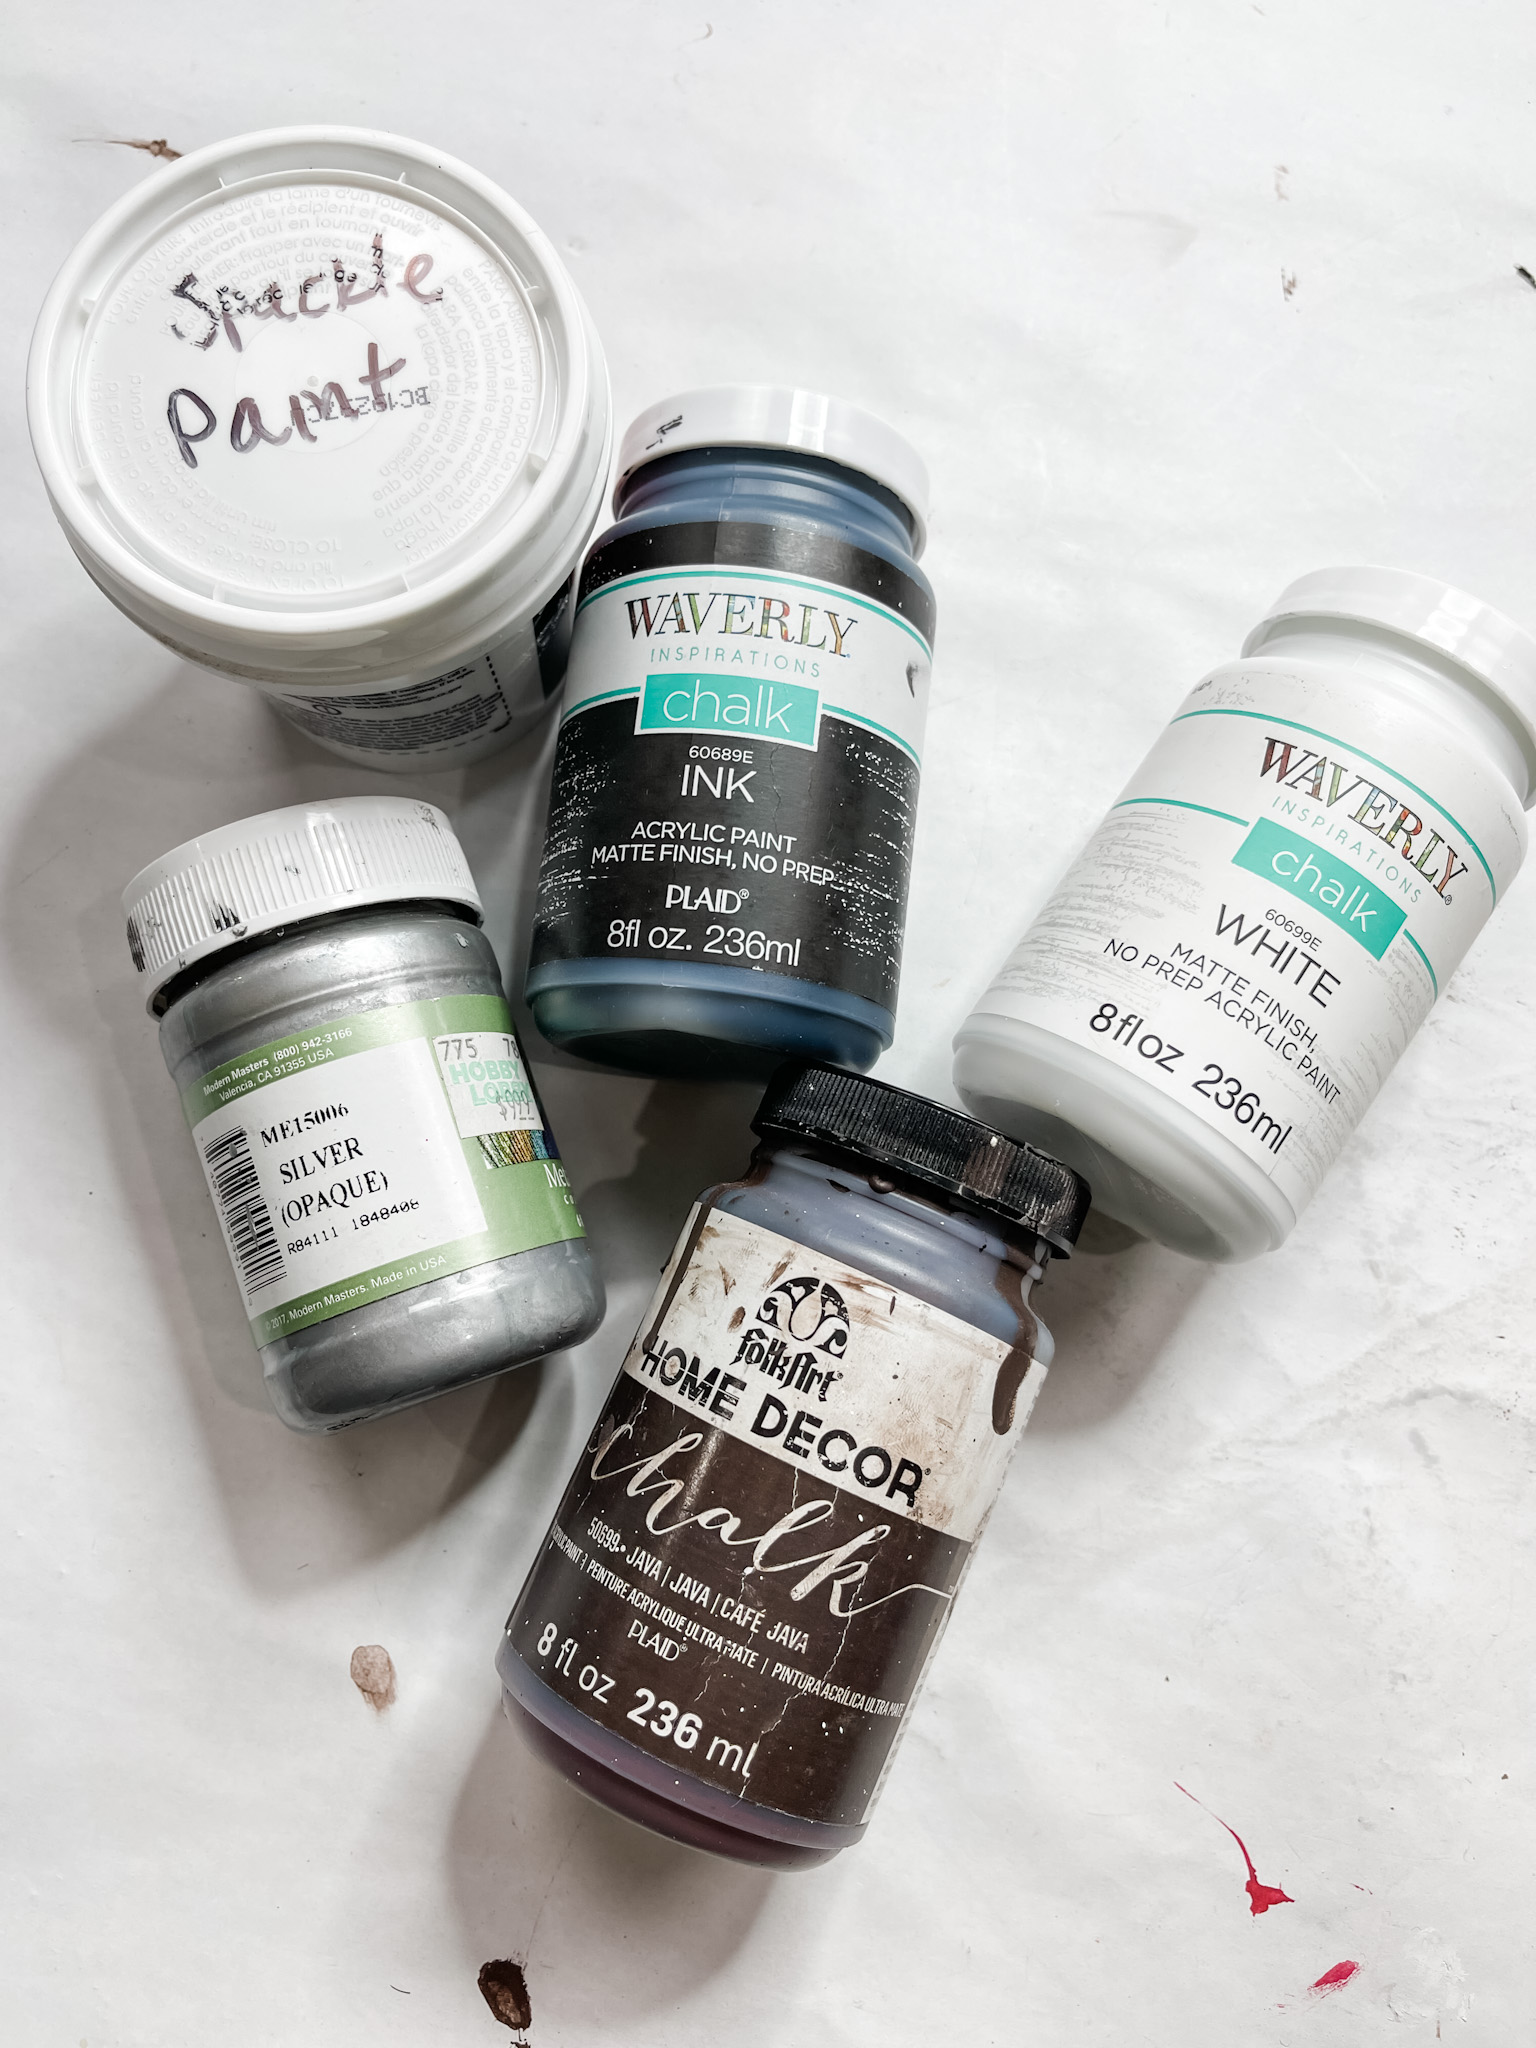
- Waverly Ink Chalk Paint
- Waverly White Chalk Paint
- Modern Masters Metallic Paint
- Waverly Antique Wax
- Apple Barrel Burnt Umber Acrylic Paint
- Aviation Snips
- Cardboard
- Hot Glue gun
- Glue Sticks
How to Make a Rustic Decorative Sink Mat DIY
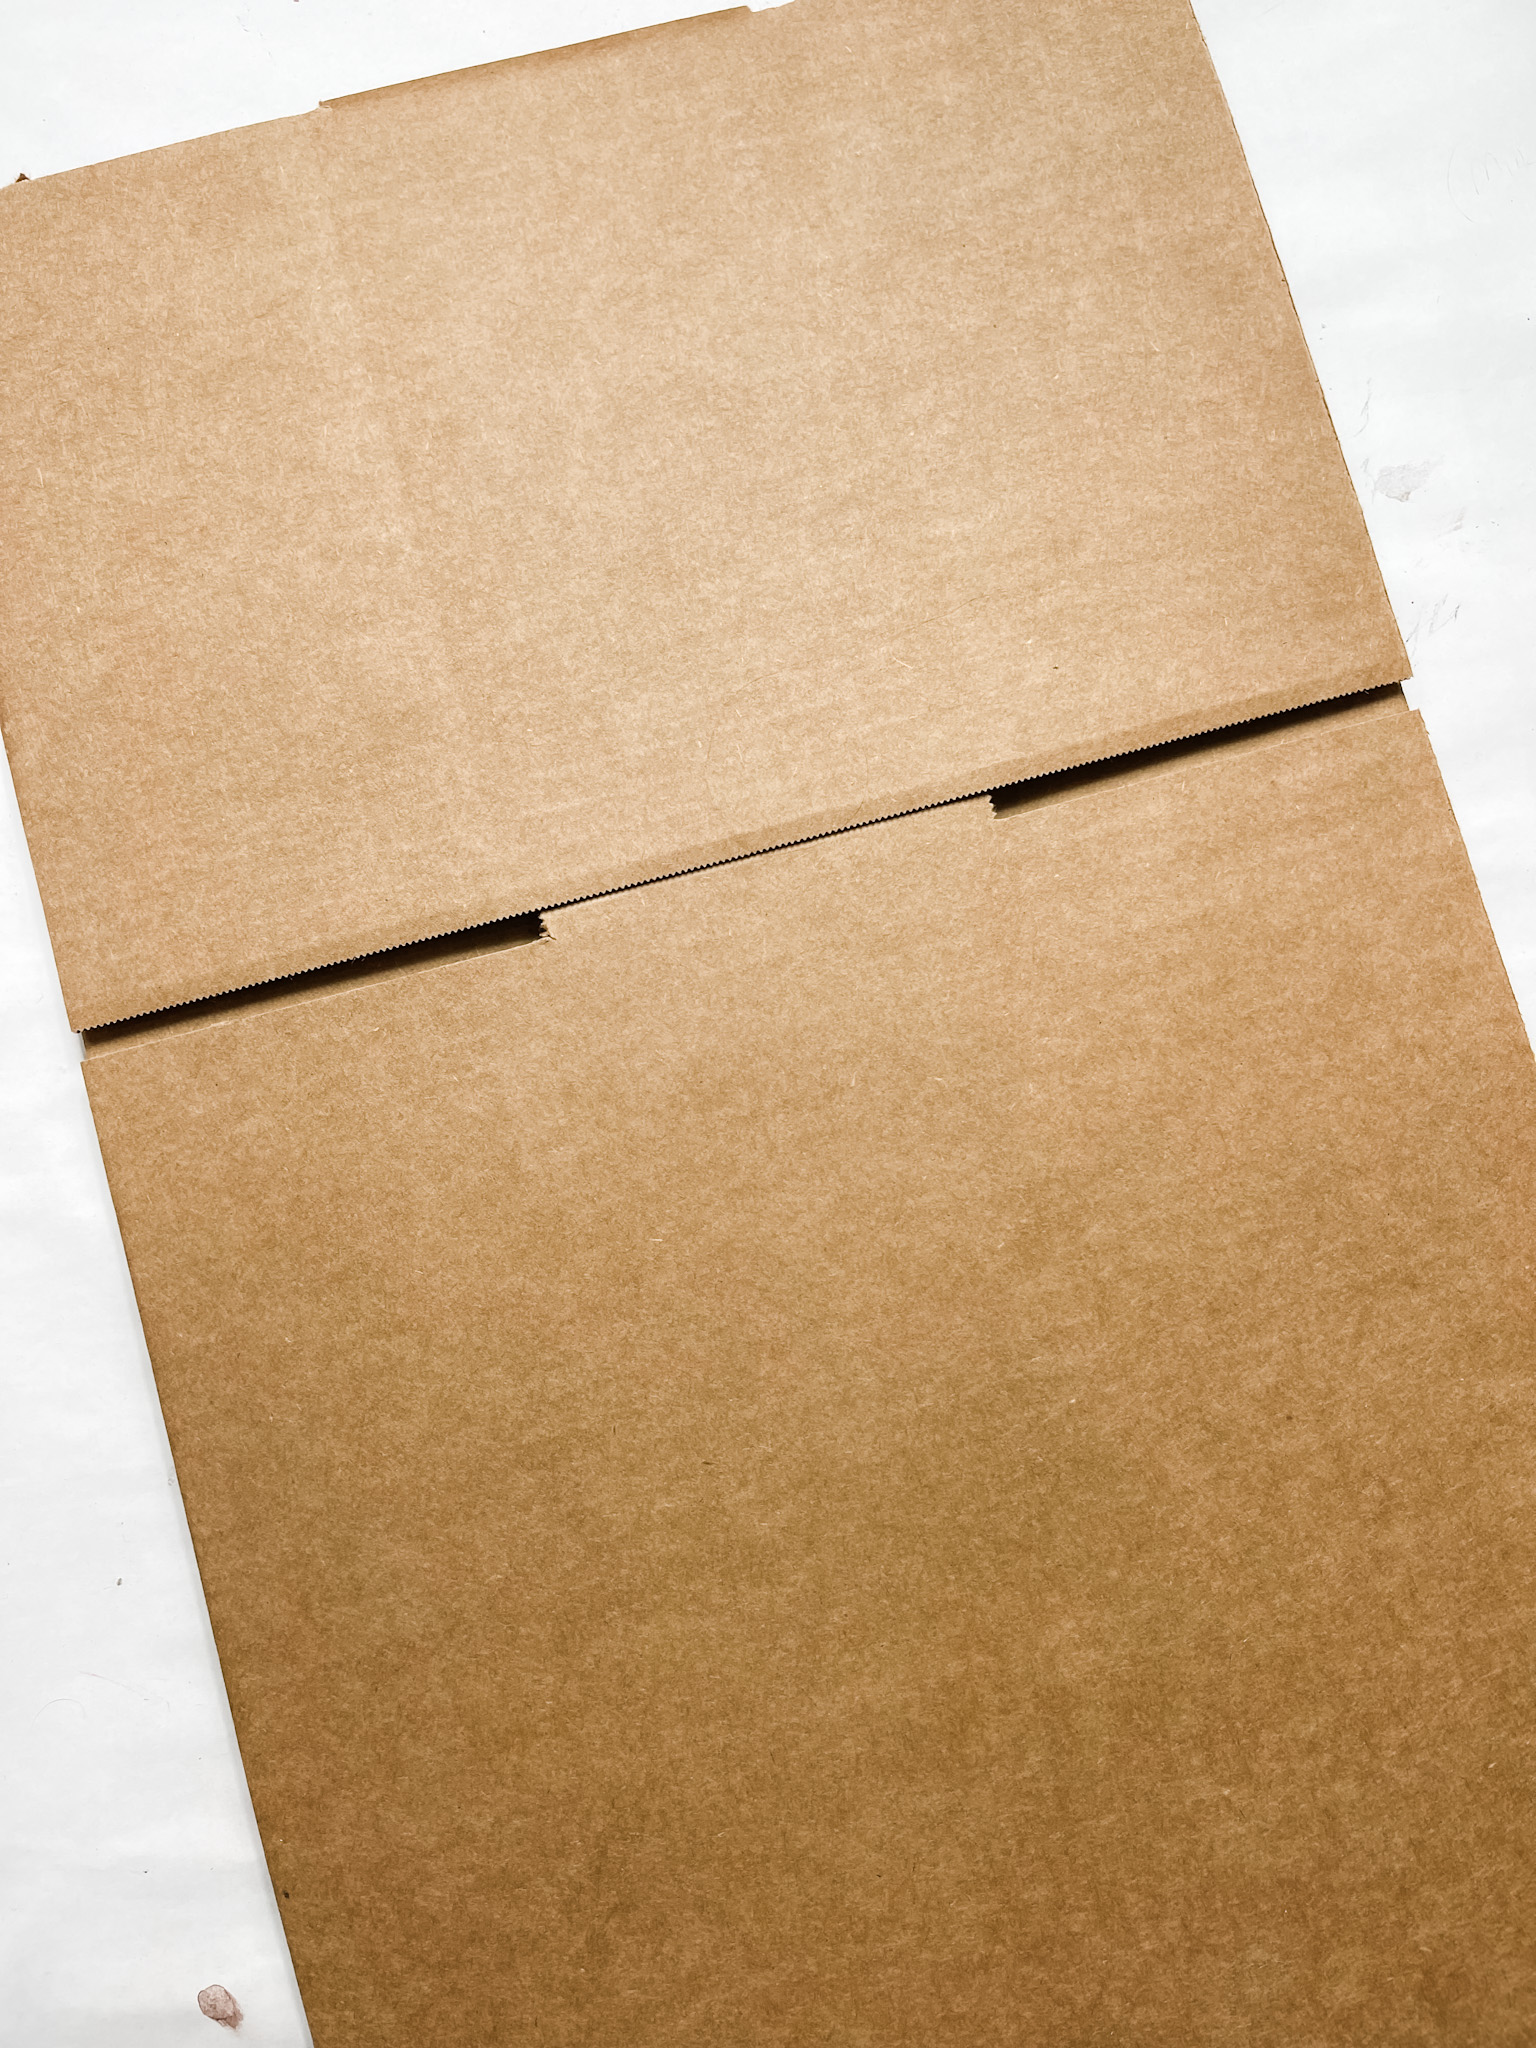
I started by measuring the size of cardboard I would need for my sink mat. Cut two pieces of cardboard the exact same size, just slightly larger than the sink mat.
Then, I cut out a rectangle from inside one of the pieces of cardboard to create a frame. The sink mat is going to fit between the solid back piece and the frame front piece.
Lightly brush white paint across the solid piece of cardboard to create a distressed finish on the cardboard. Alternate brush stroke directions to hide any creases in the cardboard and create a natural finish.
Allow the white paint to dry completely. Then, mix a small amount of water with your brown paint and spread it onto the frame piece of cardboard.
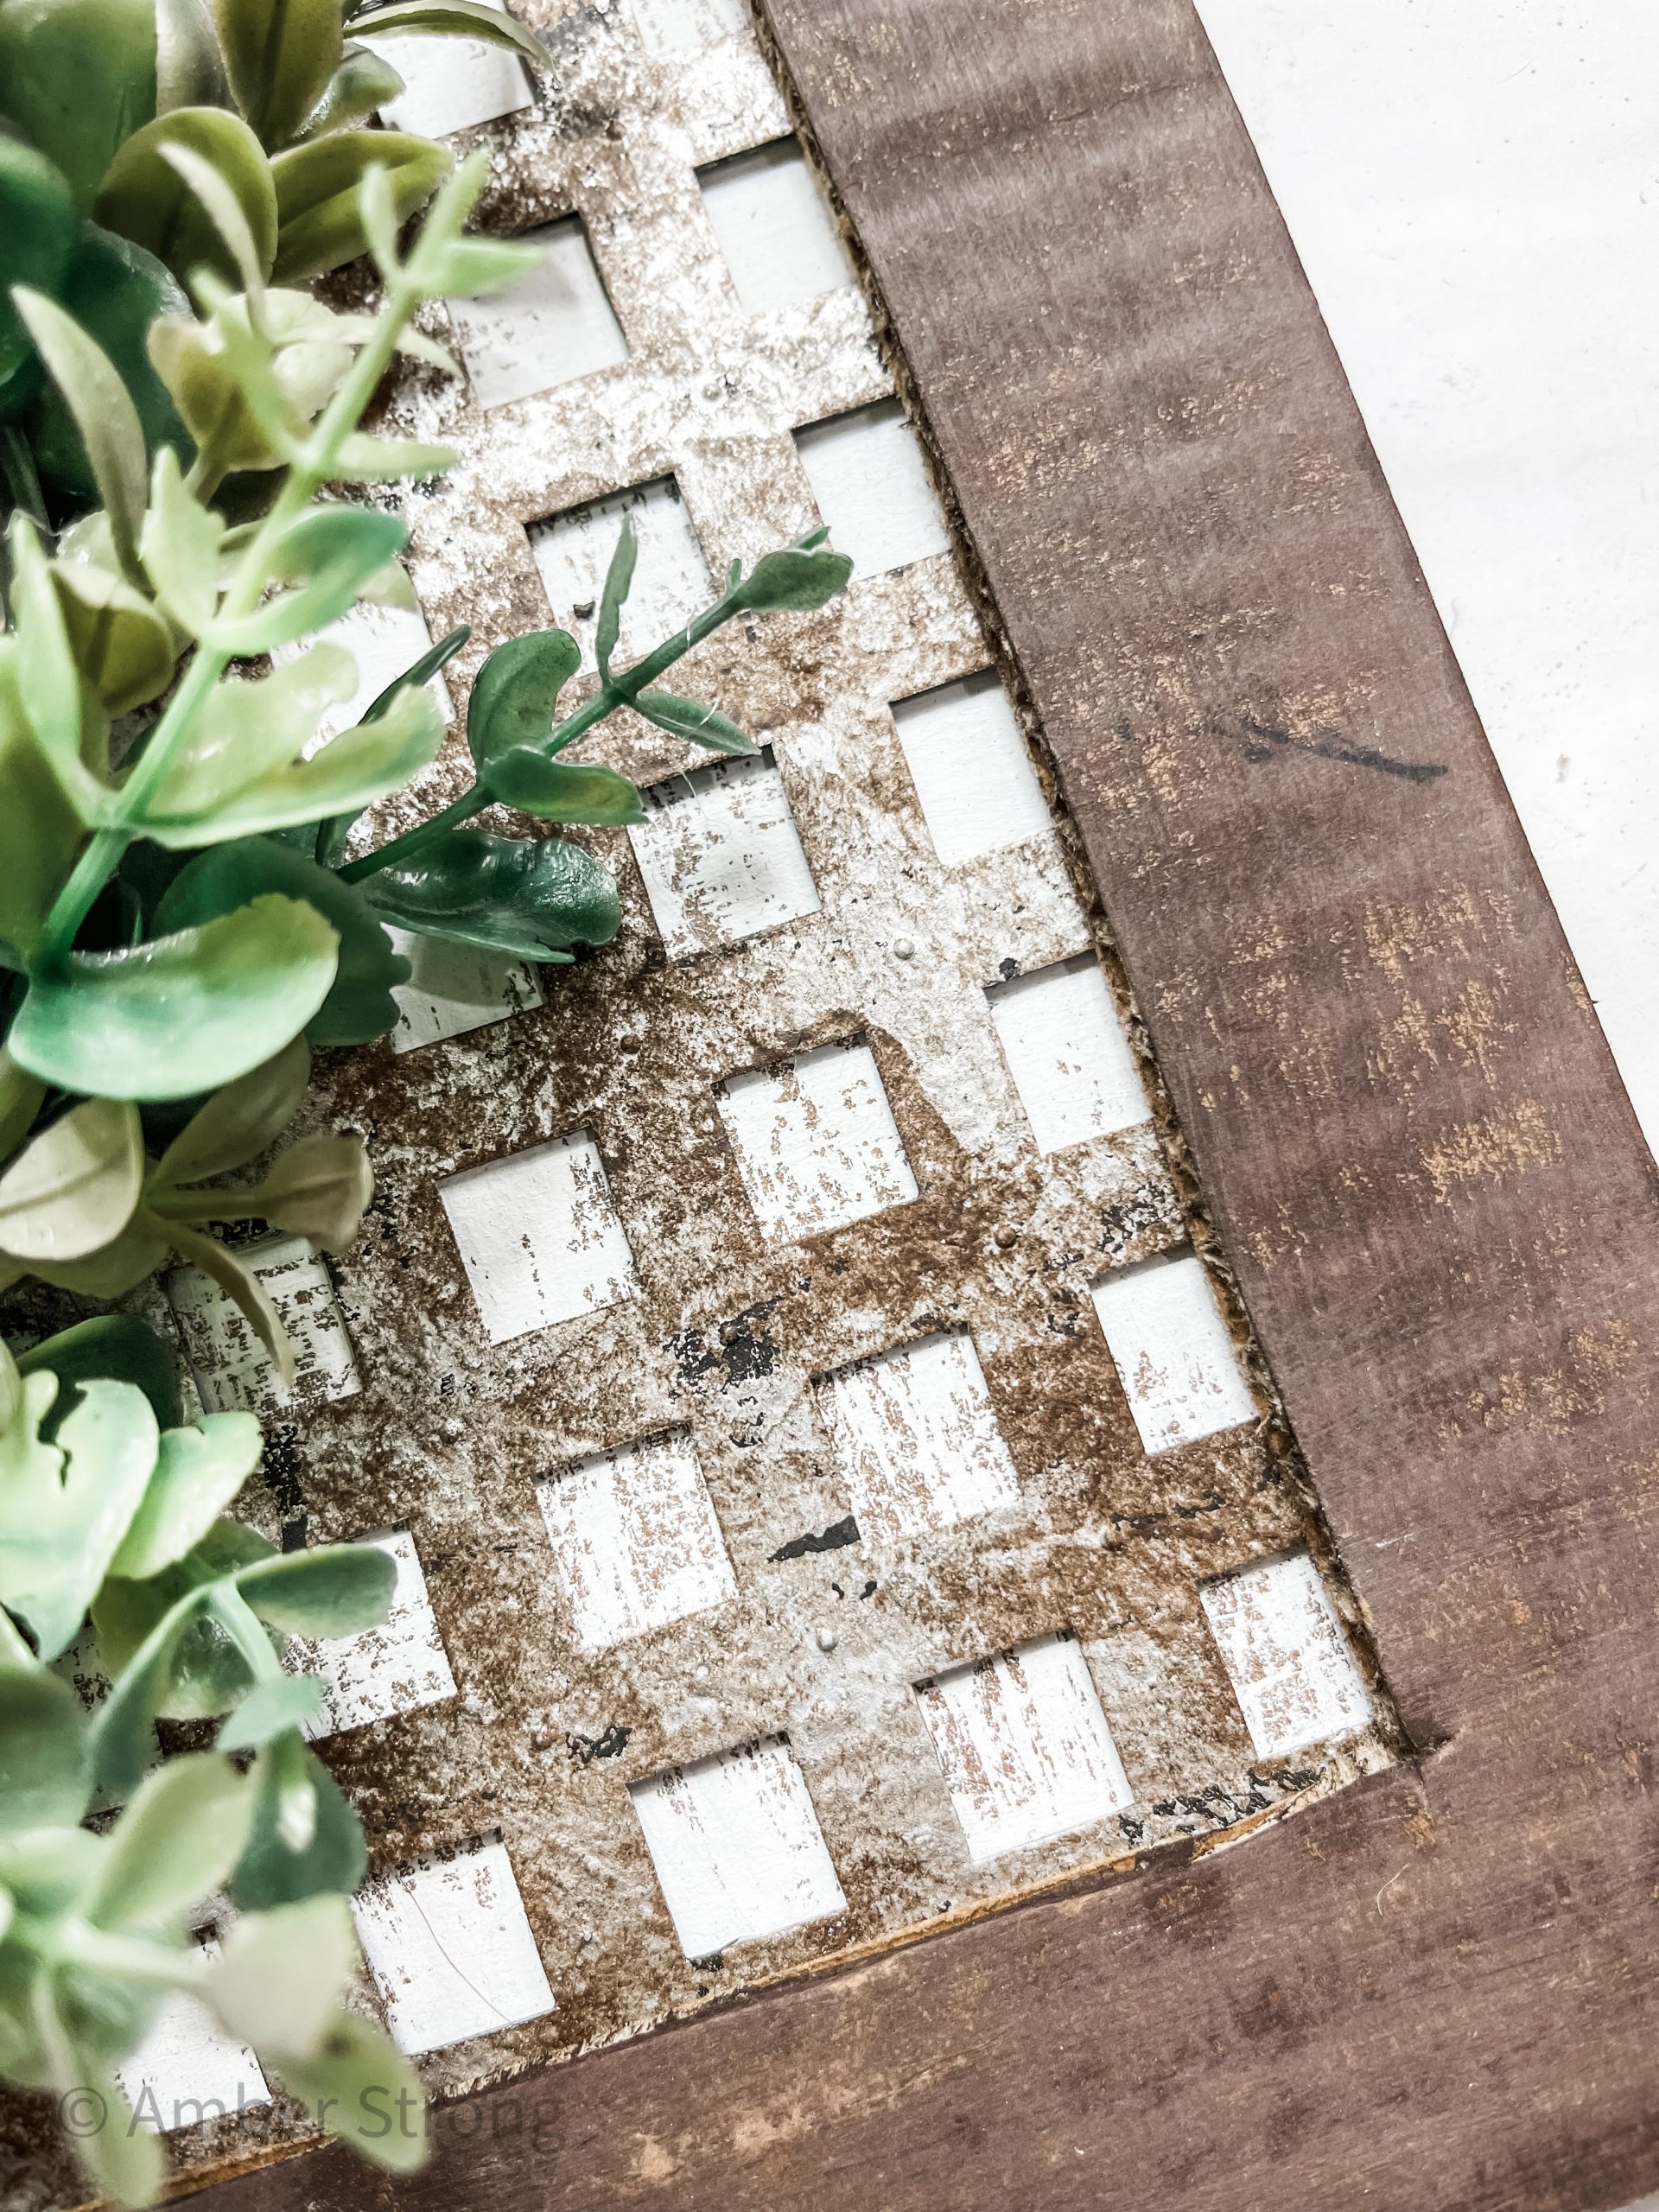
Next up is the sink mat! Paint the entire sink mat with Waverly Black Chalk Paint. I dabbed the paint instead of brushing it, and it created a textured surface on the plastic sink mat.
Let the black paint dry completely, then dab the metallic silver paint over the dried black paint. Again, allow the silver paint to dry. I use my heat gun to speed up the drying process.
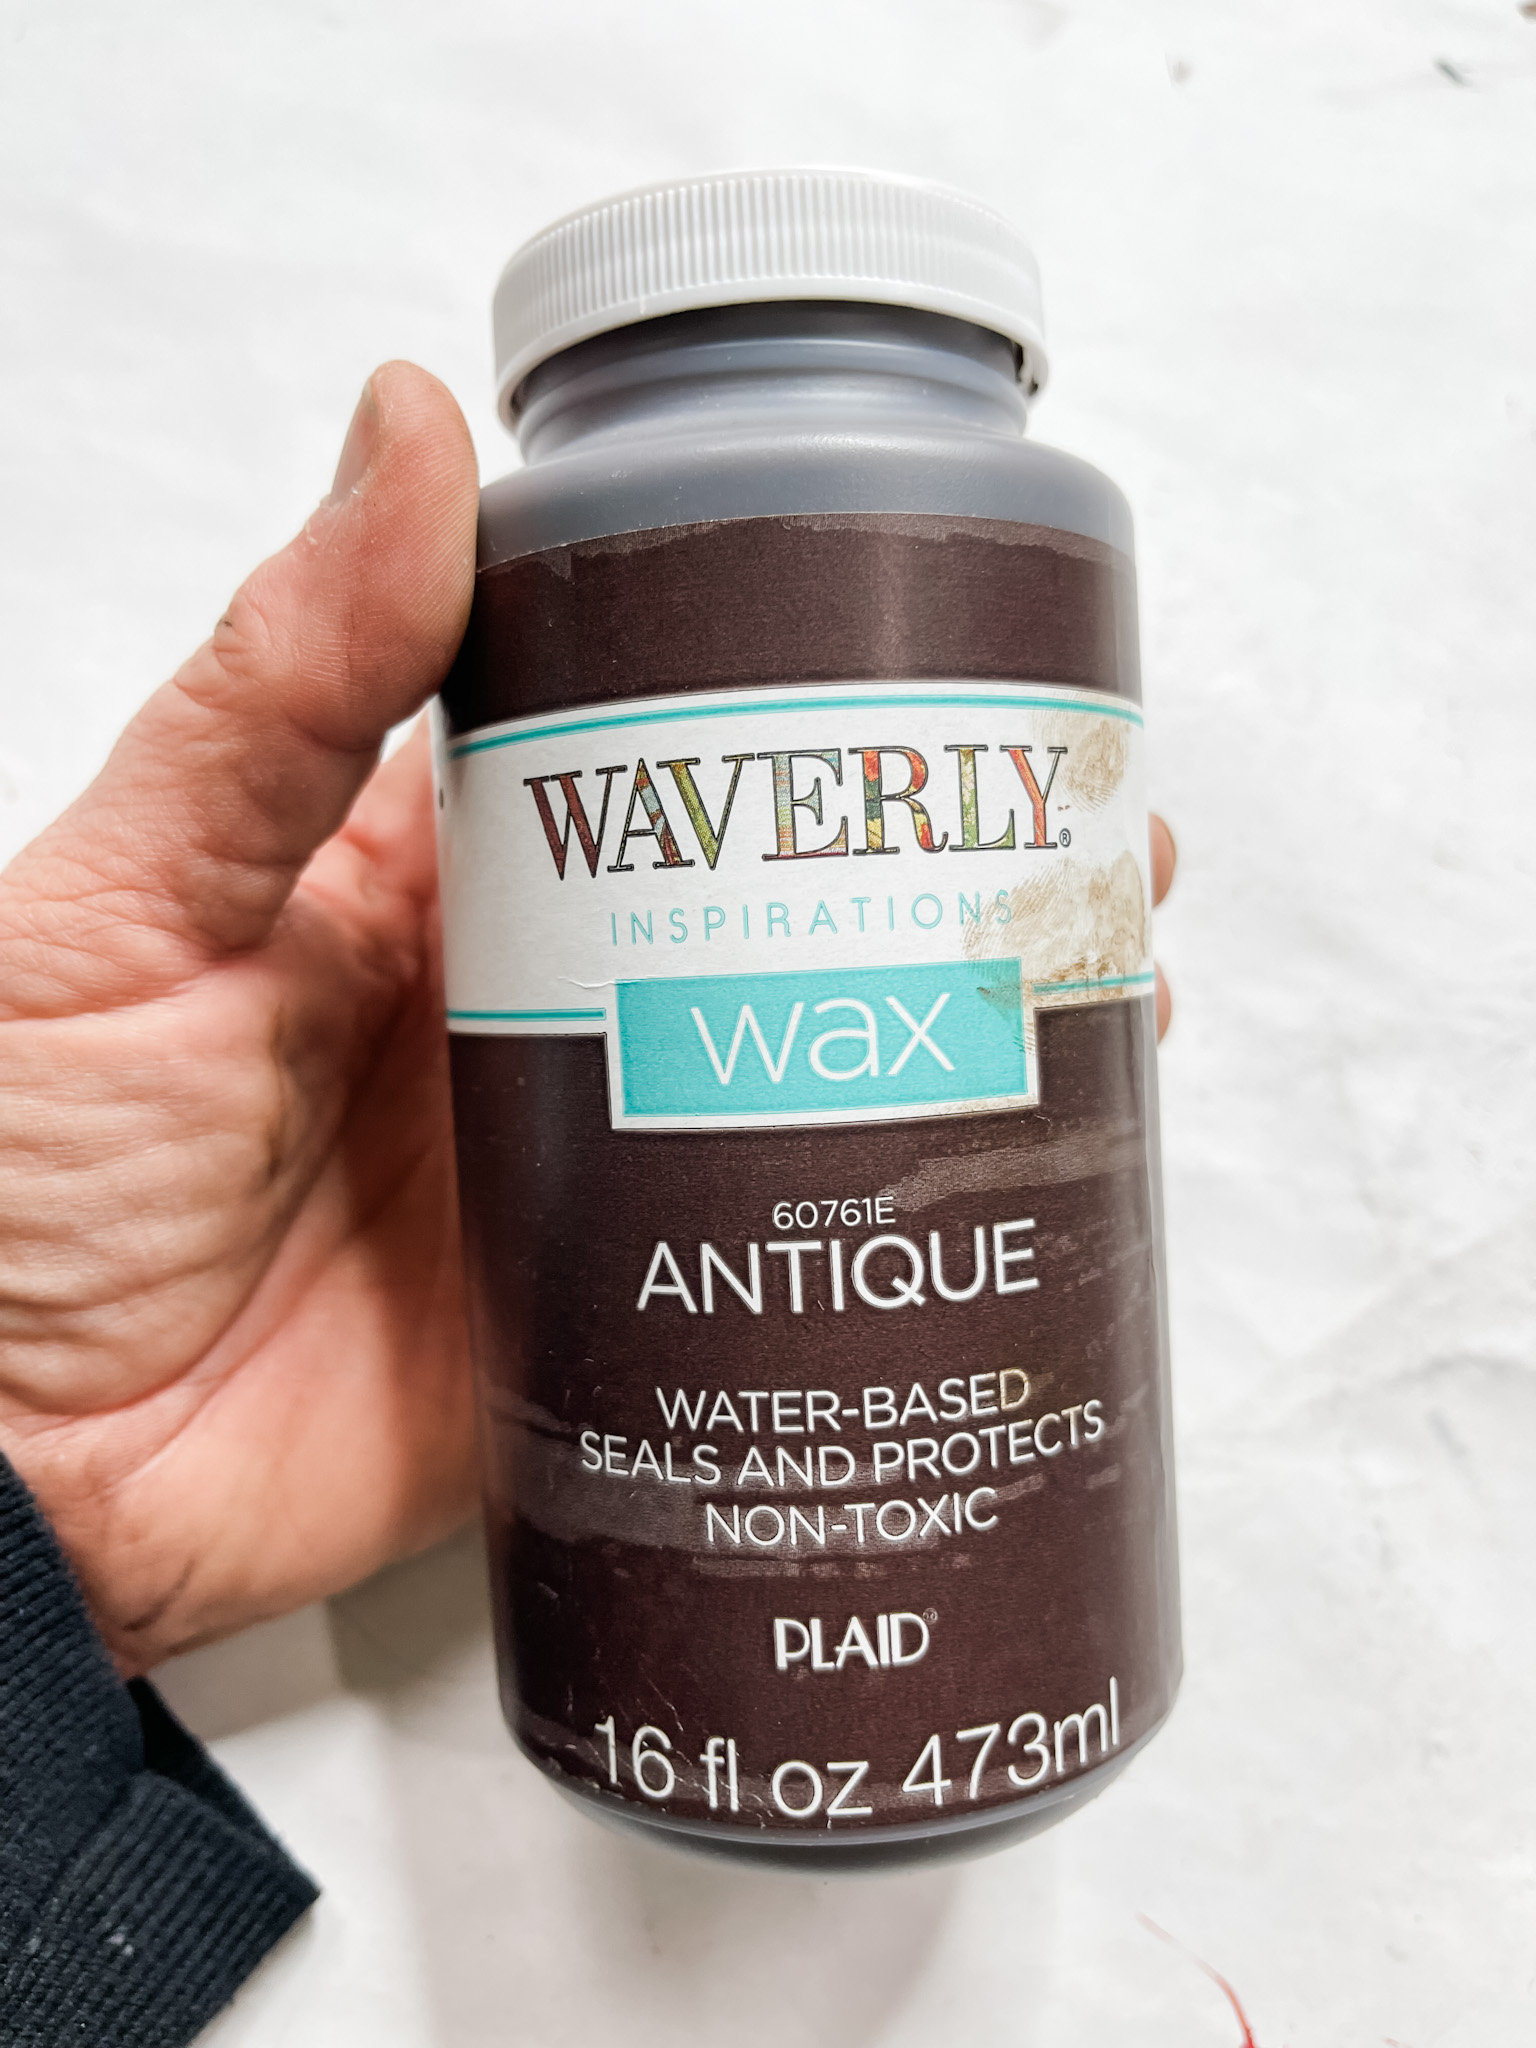
This project is all about layers! The next layer is Waverly Antique Wax. Use a wet wipe to dab the antique wax onto the sink mat, and you’ll start to see your faux rust finish come to life!
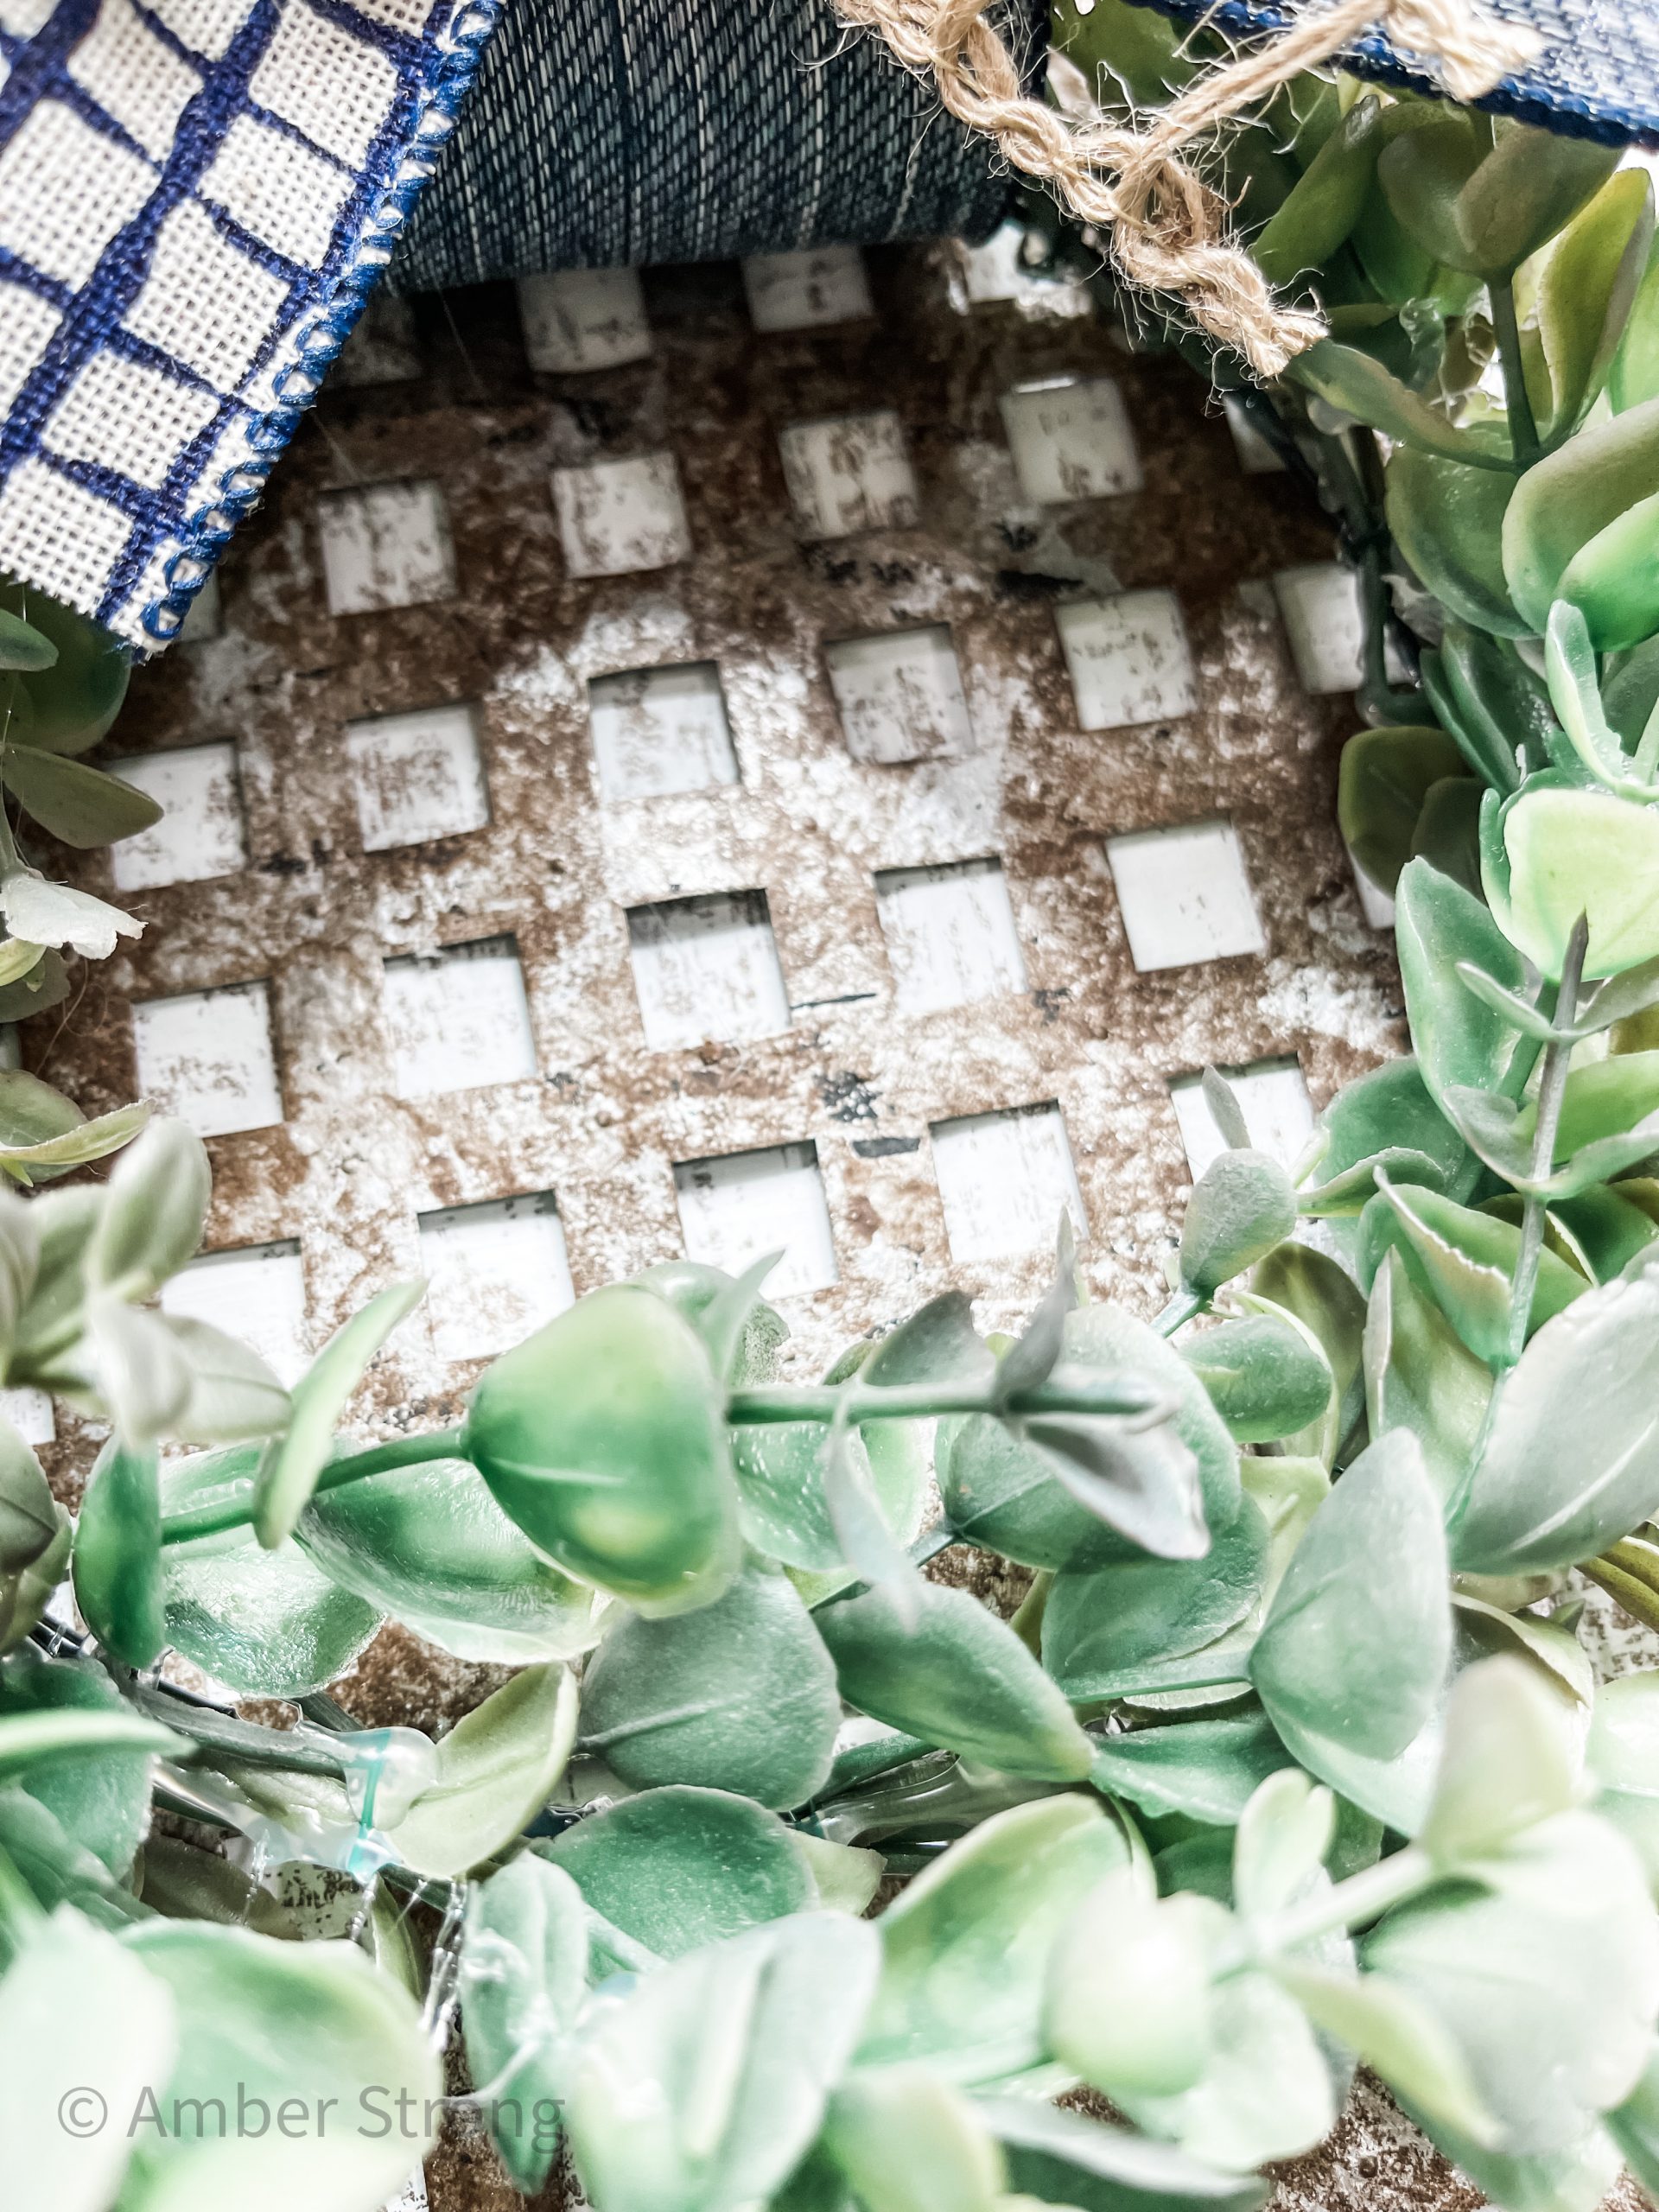
Add a touch of green
Next, I had to kind of deconstruct the mini wreath form. I cut the two outer rings off the wreath form with my aviation snips. I used floral wire and hot glue to secure my greenery to my metal ring.
Bring it all together!
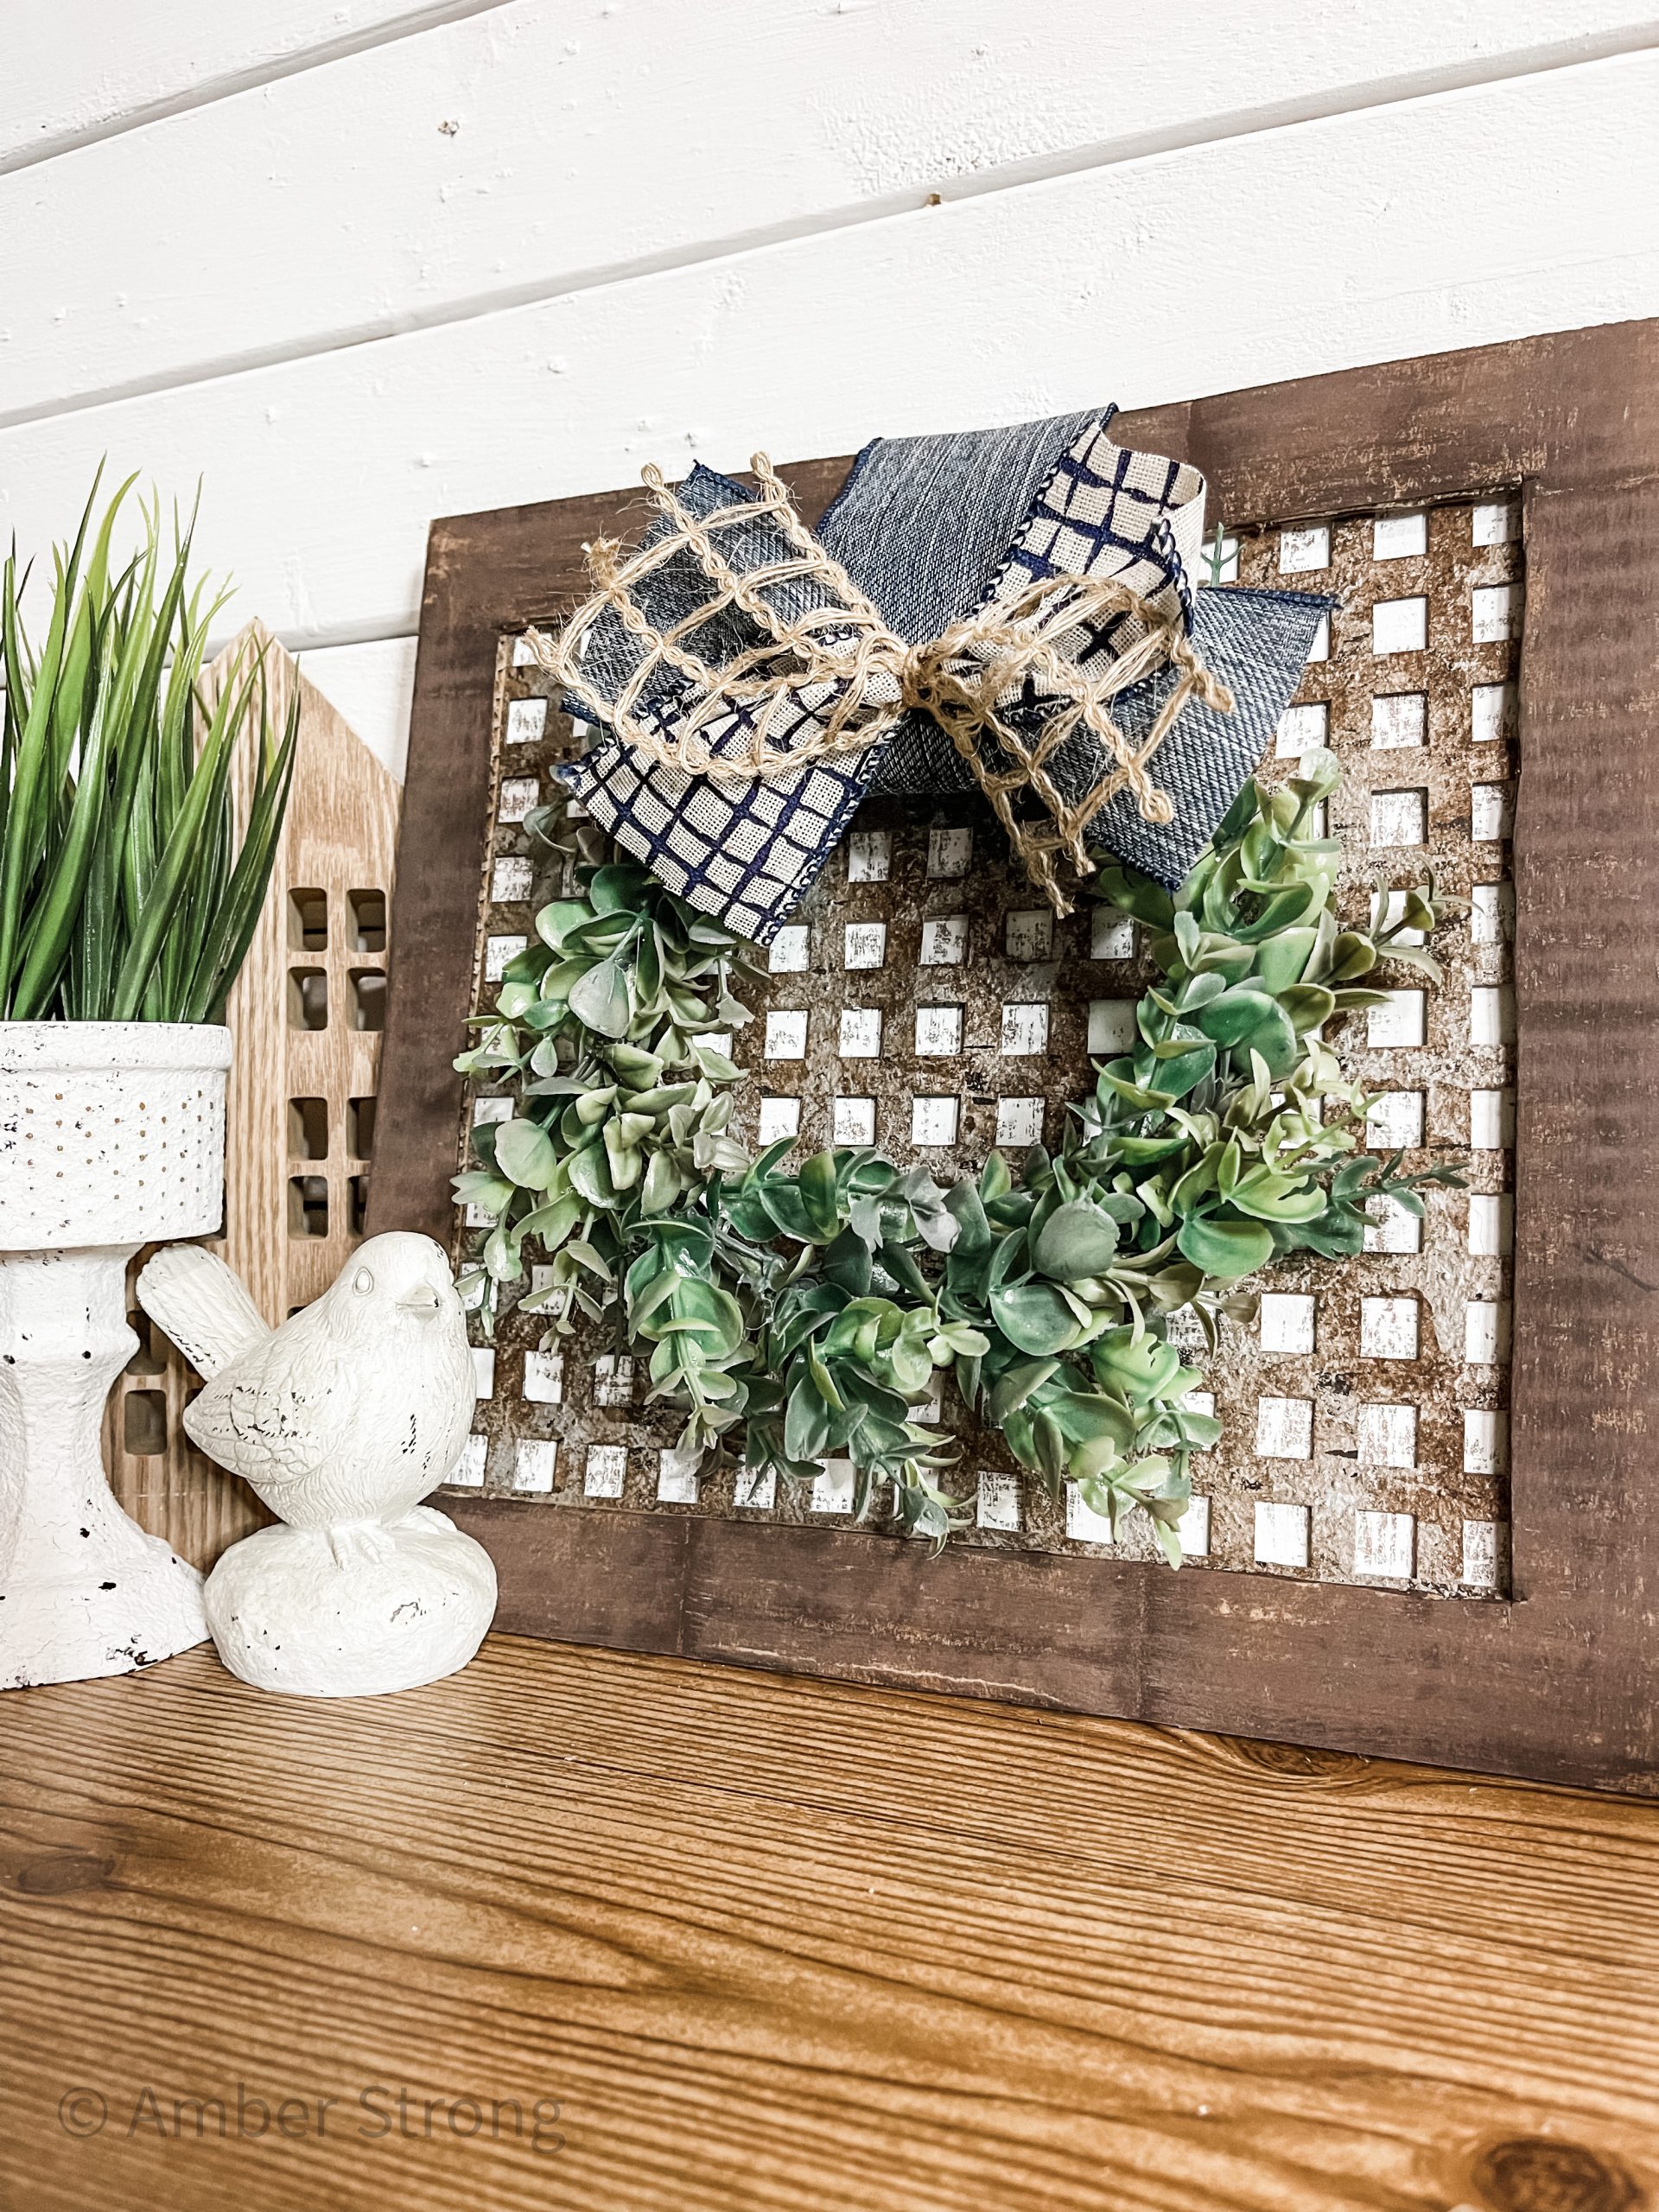
It’s time to start bringing all the parts of the rustic decorative sink mat DIY together! Glue the plastic sink mat to the white distressed piece of cardboard.
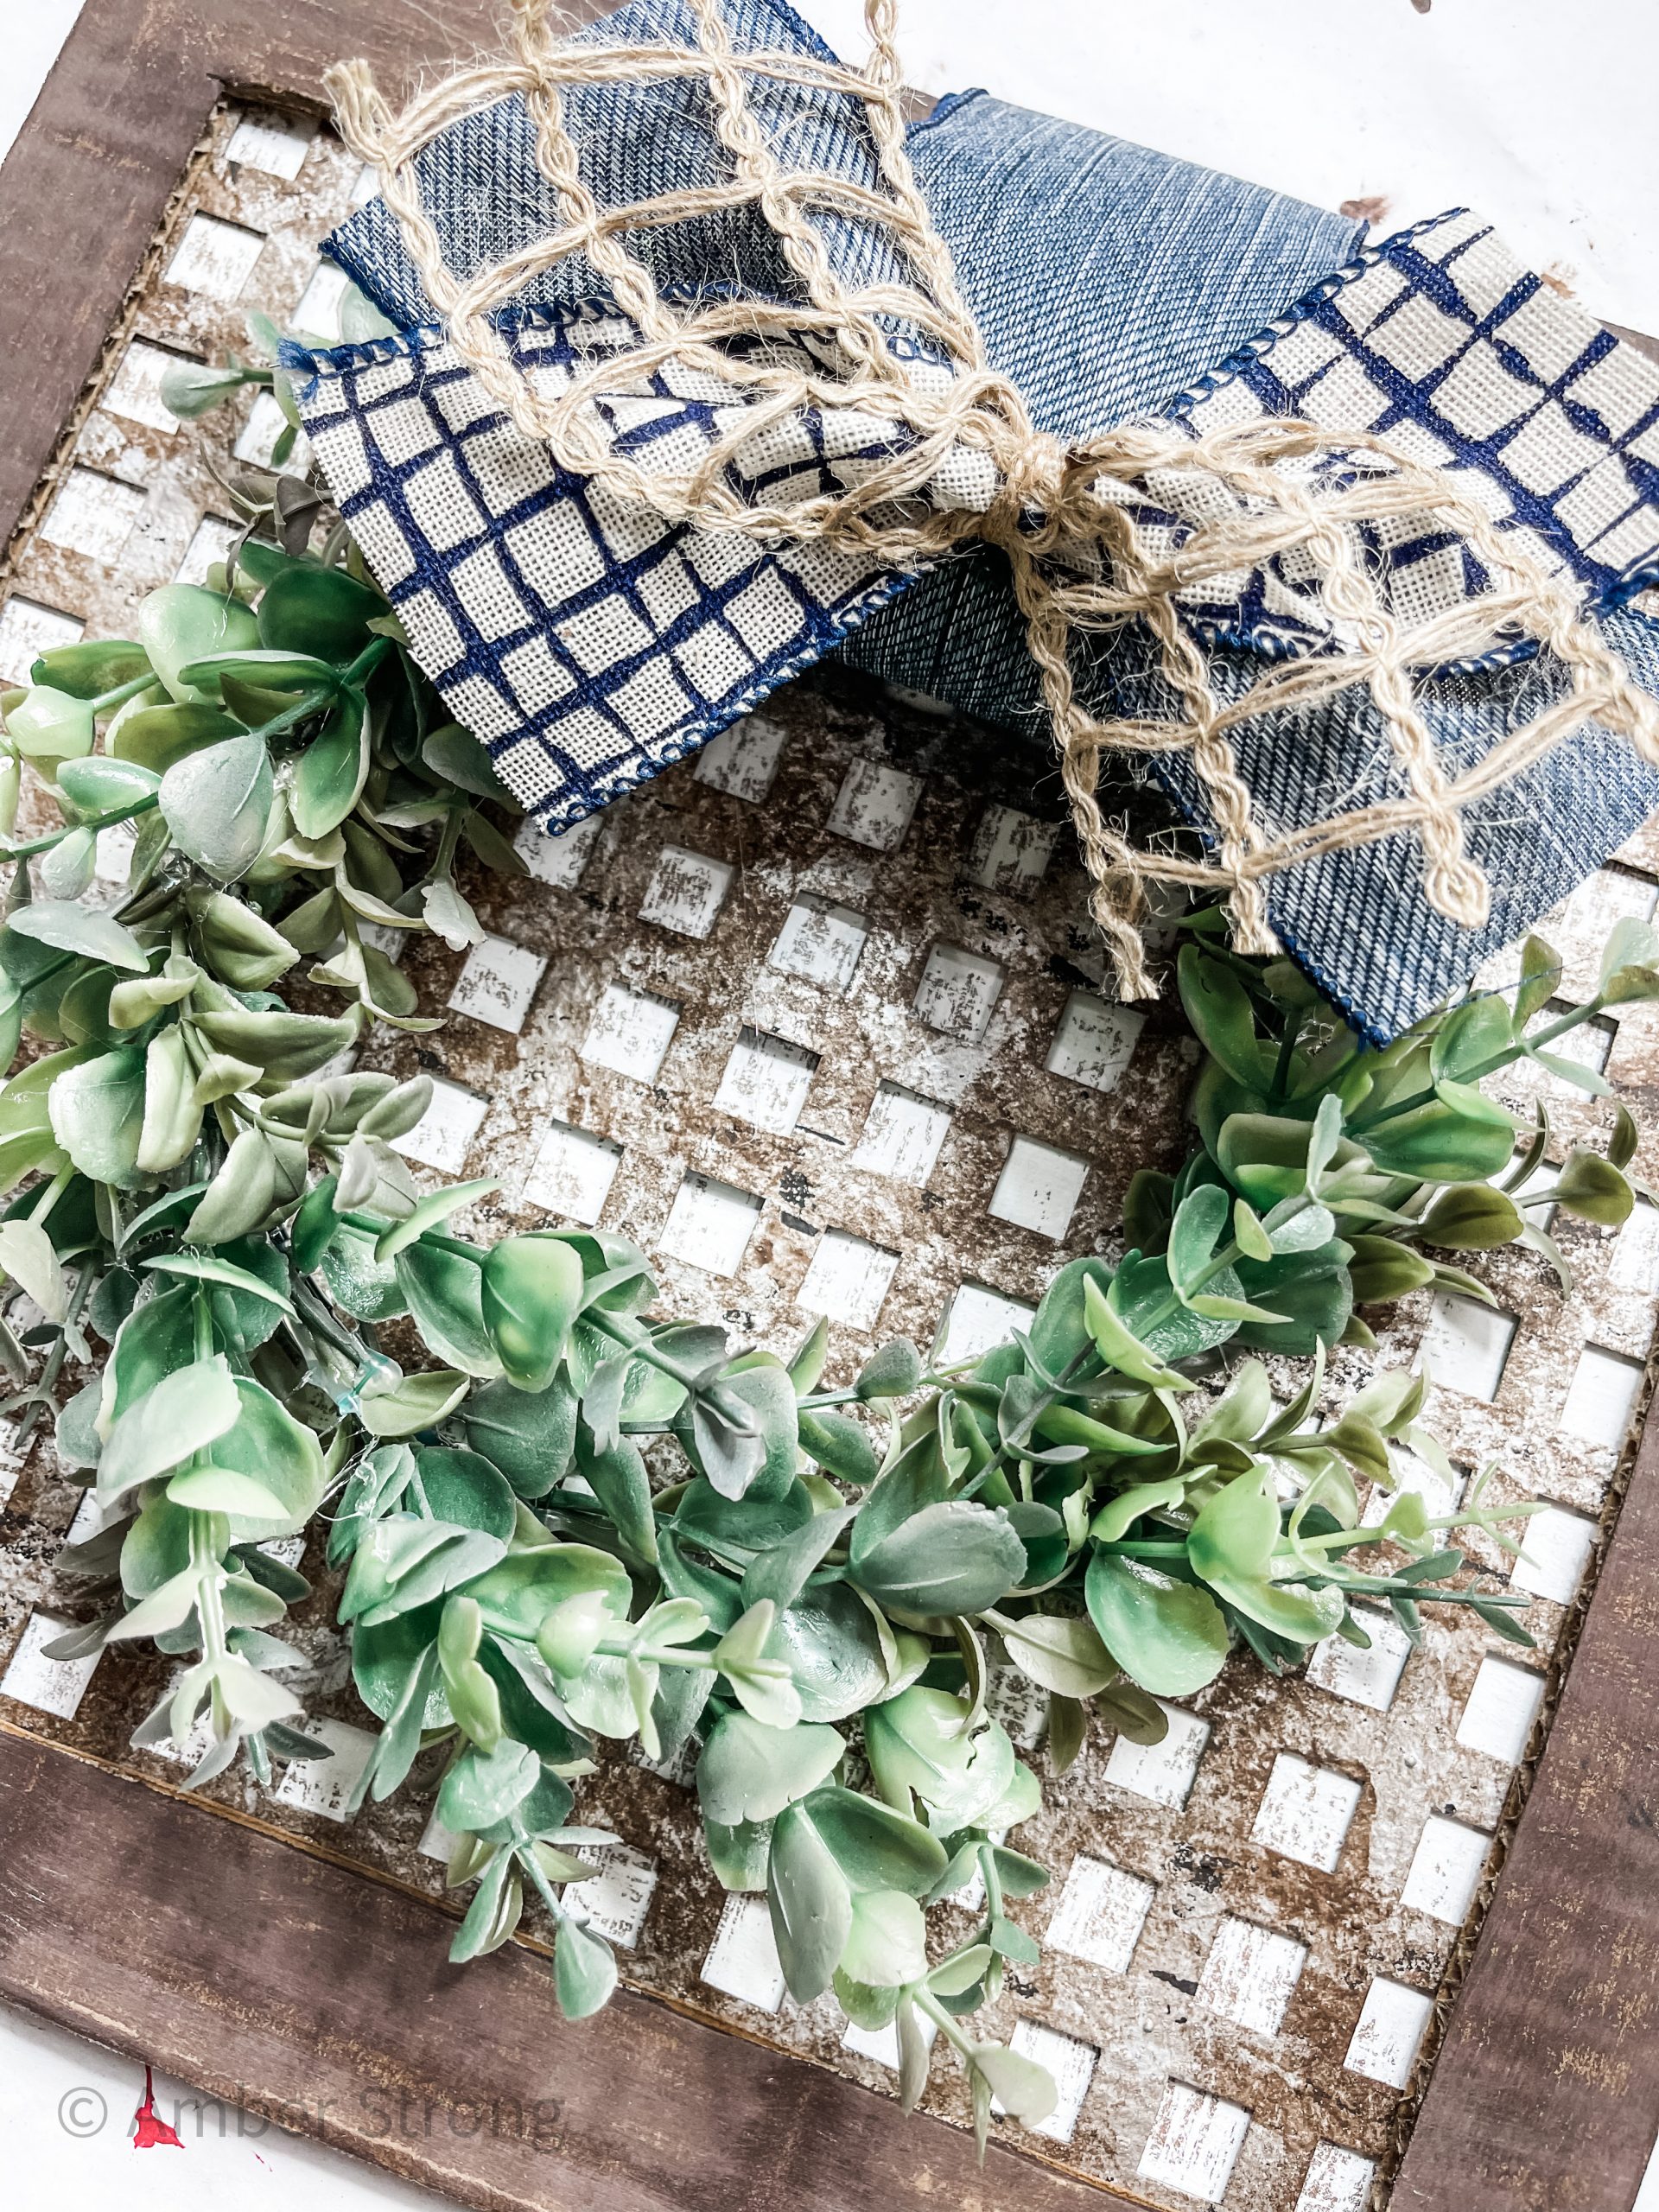
Then, glue the brown cardboard frame on top of the sink mat. I took a wide ribbon, looped it around my wreath, and glued the ends of the ribbon on the back of the cardboard so it hung over the front of the sink mat.
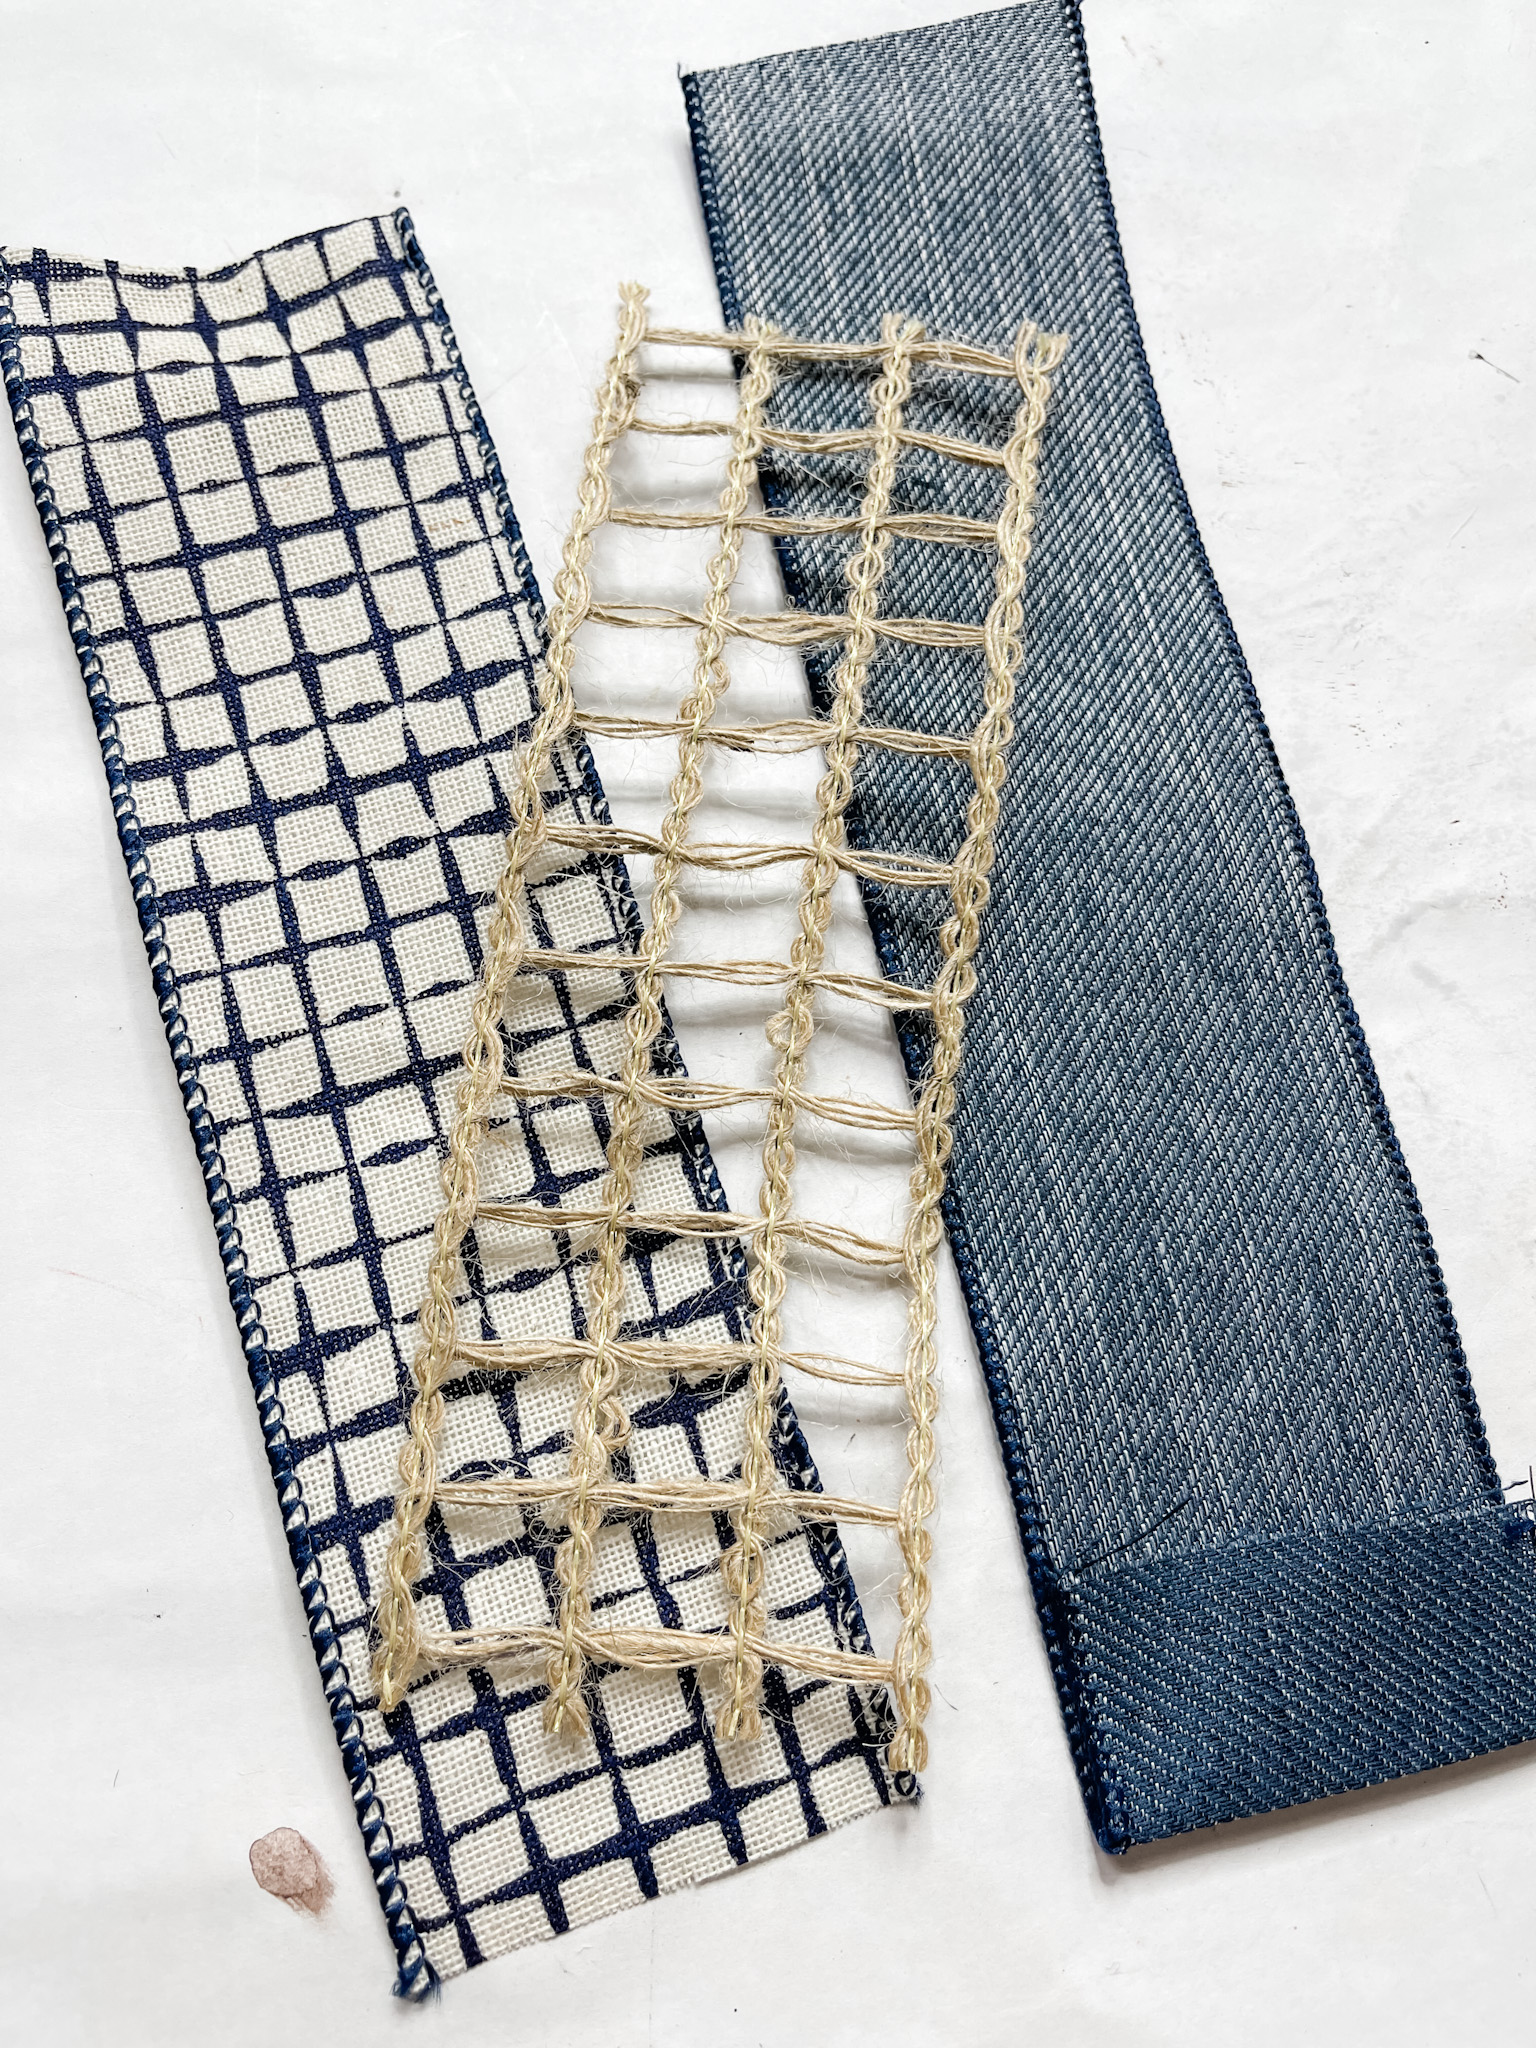
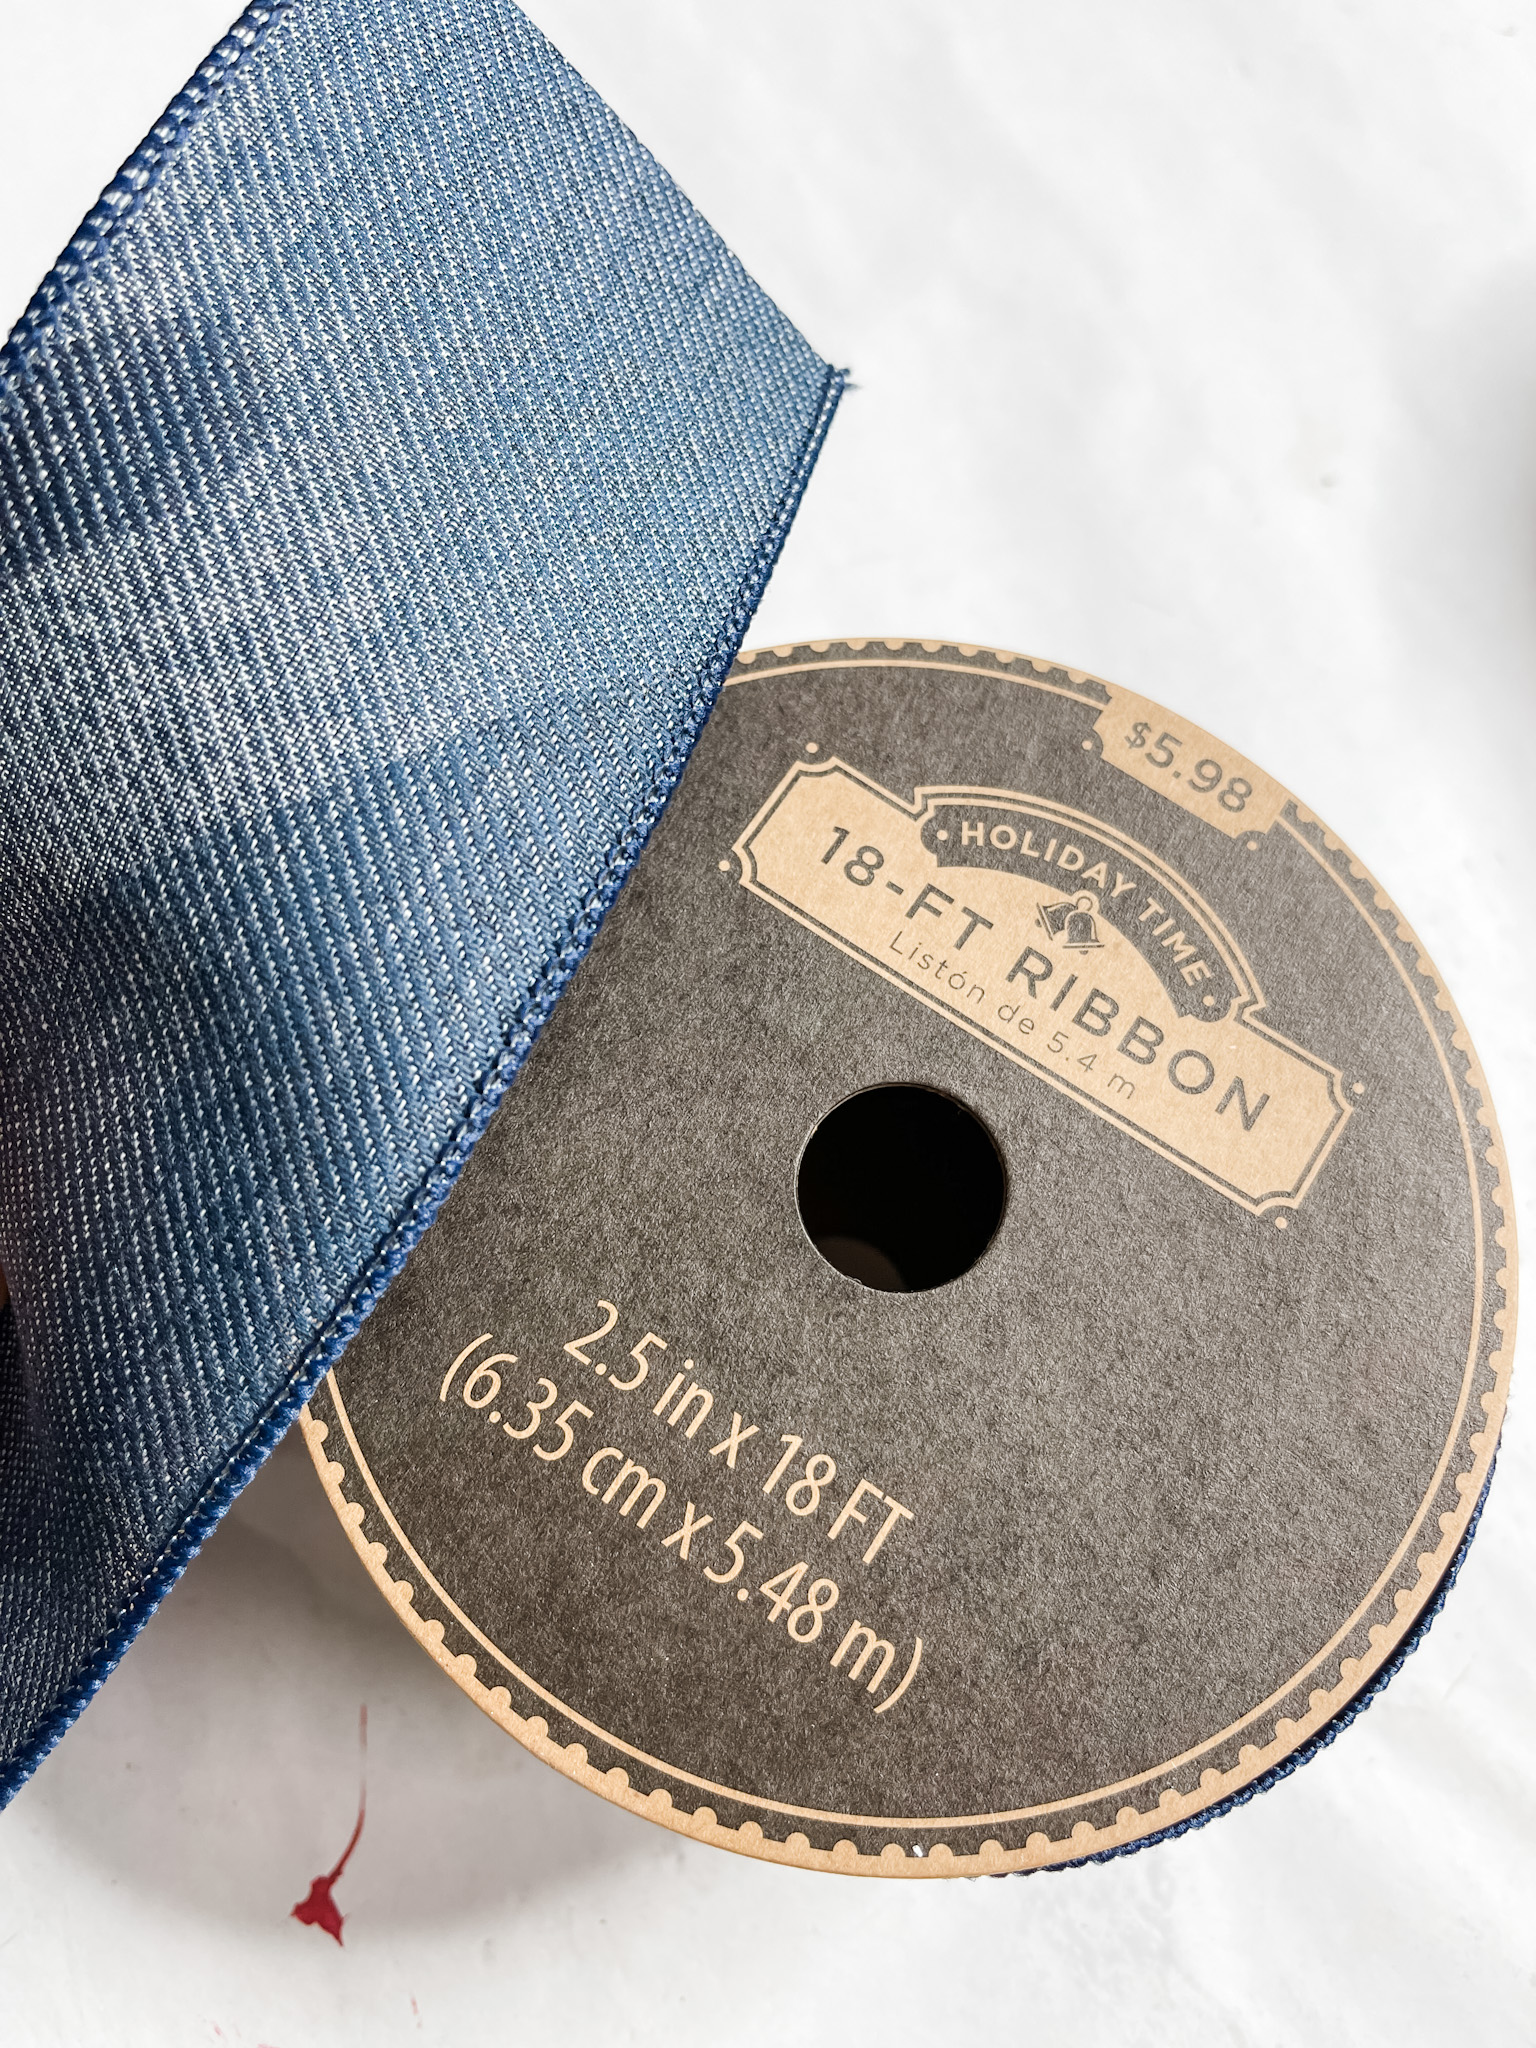
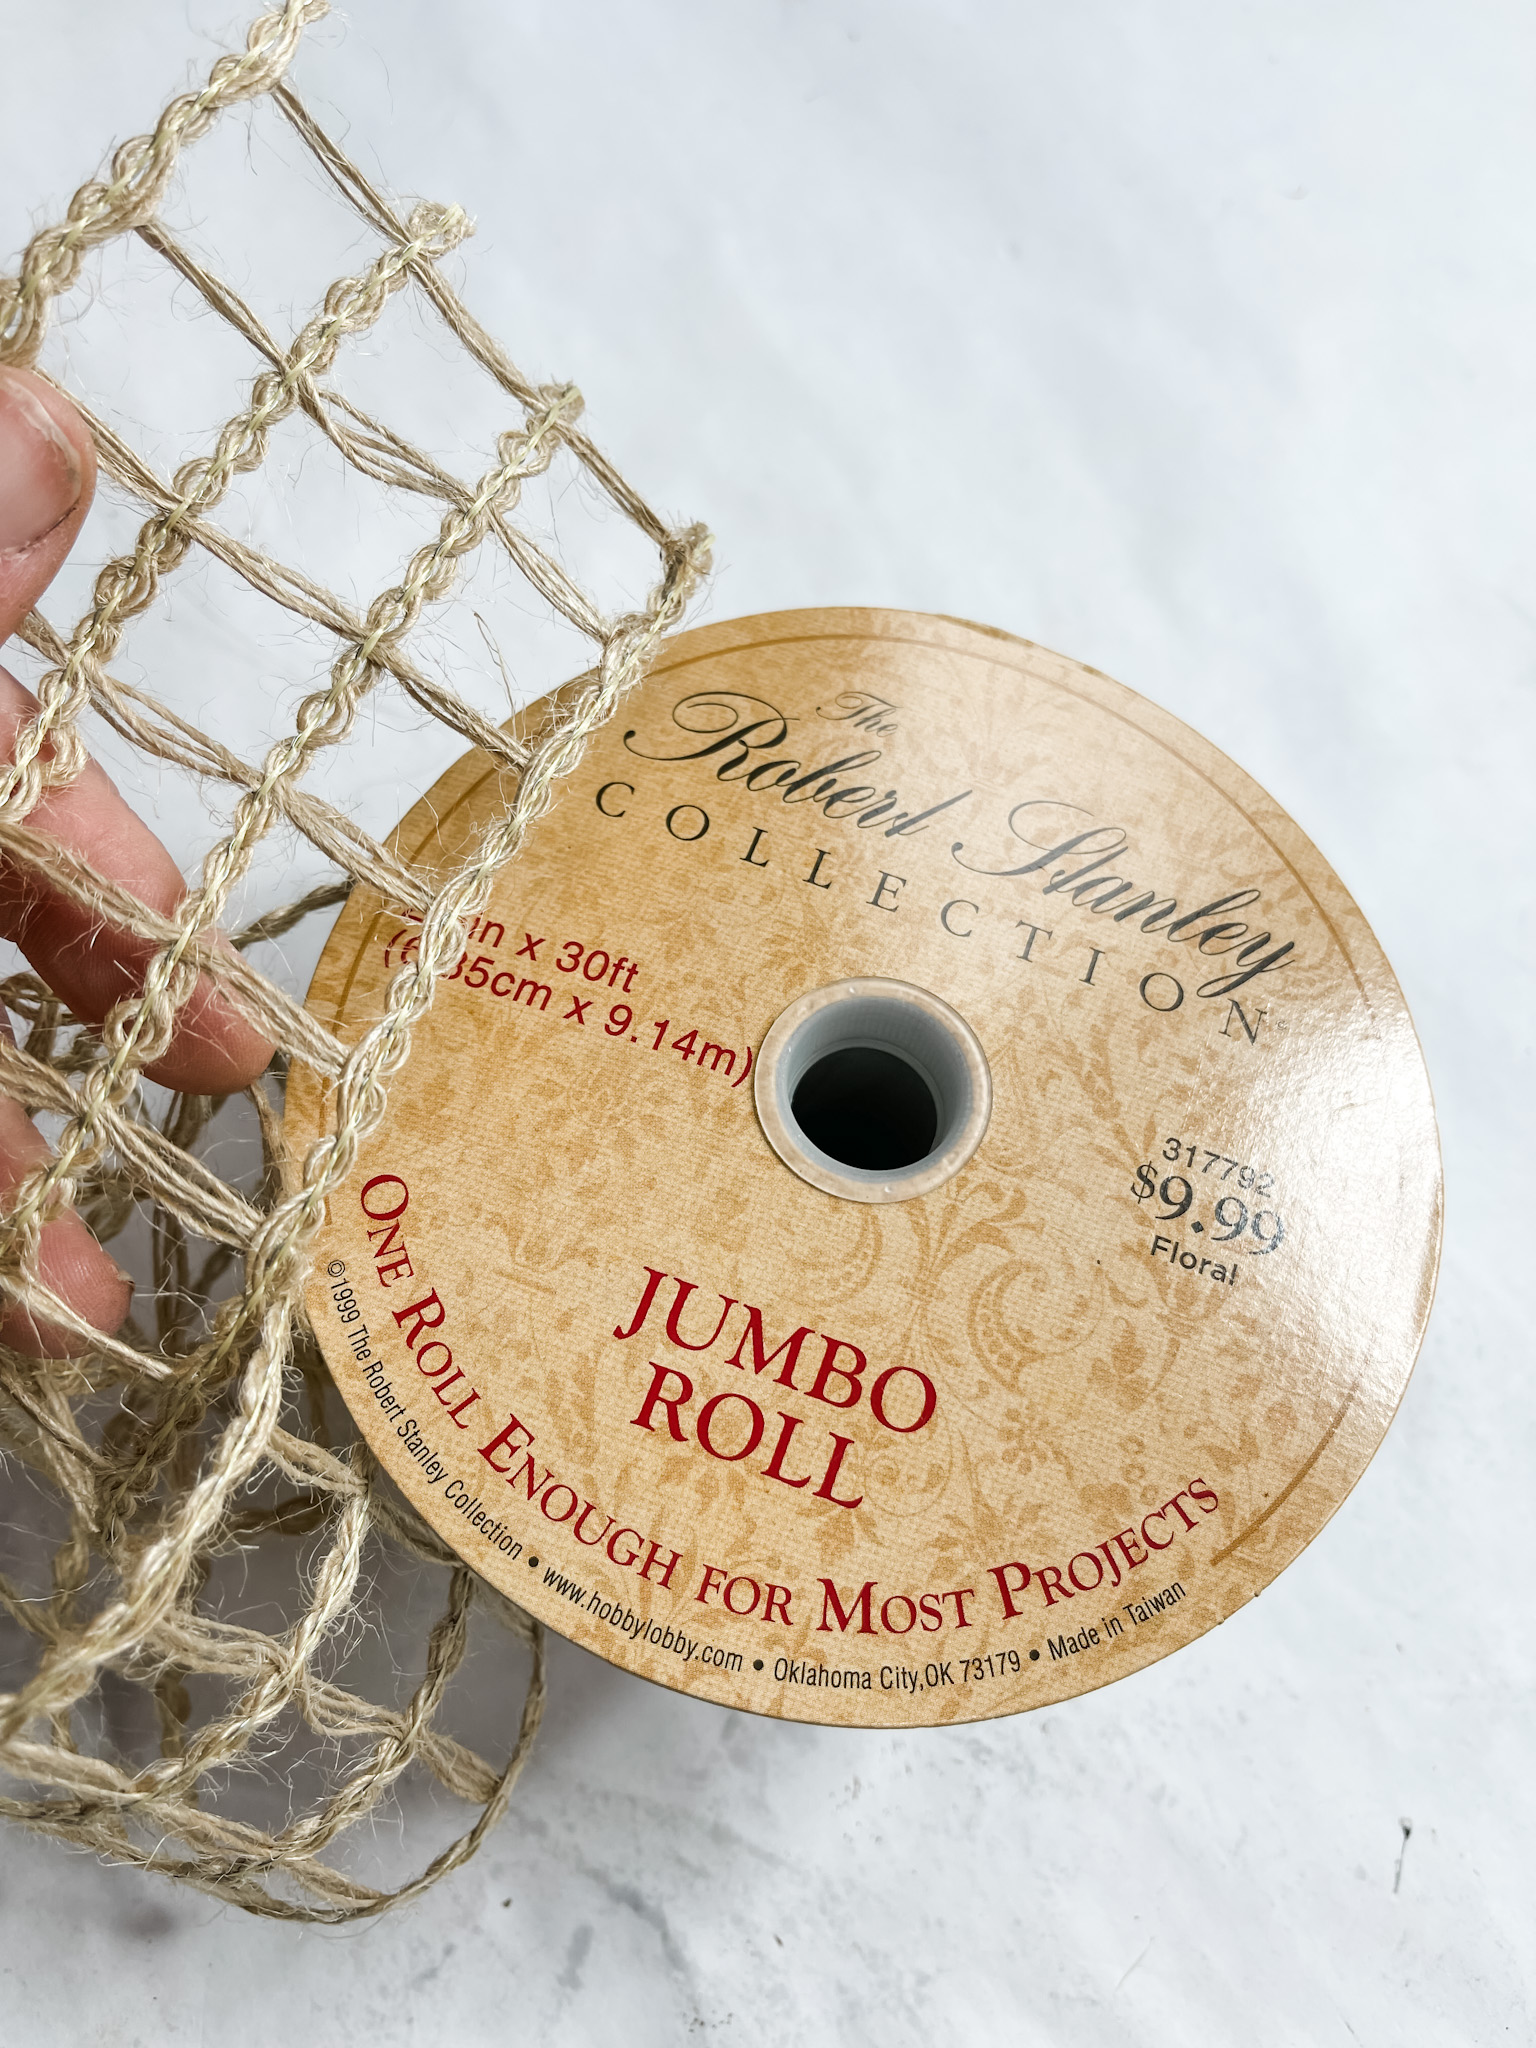
Next, I made my bow. I took three different pieces of ribbon, cut them to the same size, layered them over each other in an X pattern, and secured them together with a piece of jute twine.
(Scroll down to see the three ribbons that I used to make my bow.)
Glue the bow onto the wreath, and you’re all done!
I hope you enjoyed this Rustic Decorative Sink Mat DIY as much as I did and decide to make it for yourself! If you do, I would love to see how yours turns out
Here are the three ribbons that I used to make my bow:

You should totally join my FREE Facebook group called On A Budget Crafts! It is a judgment-free community for DIY crafters to show off their projects and ideas.
If you loved this DIY, you might also like these DIY ideas!
- Dollar Tree DIY Faux Metal Bucket Spring Decor
- DIY Rustic Decor with Dollar Tree Cactus Succulent Stickers
- How to Make a DIY Rustic Bucket Planter
- DIY Faux Concrete Planter
Thanks for stopping by! XOXO Amber
You can also shop my ENTIRE AMAZON Favorites shop just click here! It’s packed full of all the things I use and love. Here is the supply list I highly recommend every creative have on hand!!
Would you also pin my blog for later and get on my newsletter alerts? I would love to have you join my #craftycrew.
Inspired? Leave me a comment below! I love hearing from my readers!

Join my free “ON A BUDGET CRAFTS” Facebook group!

Love this. Looks so high end, nobody would ever guess it was a sink mat