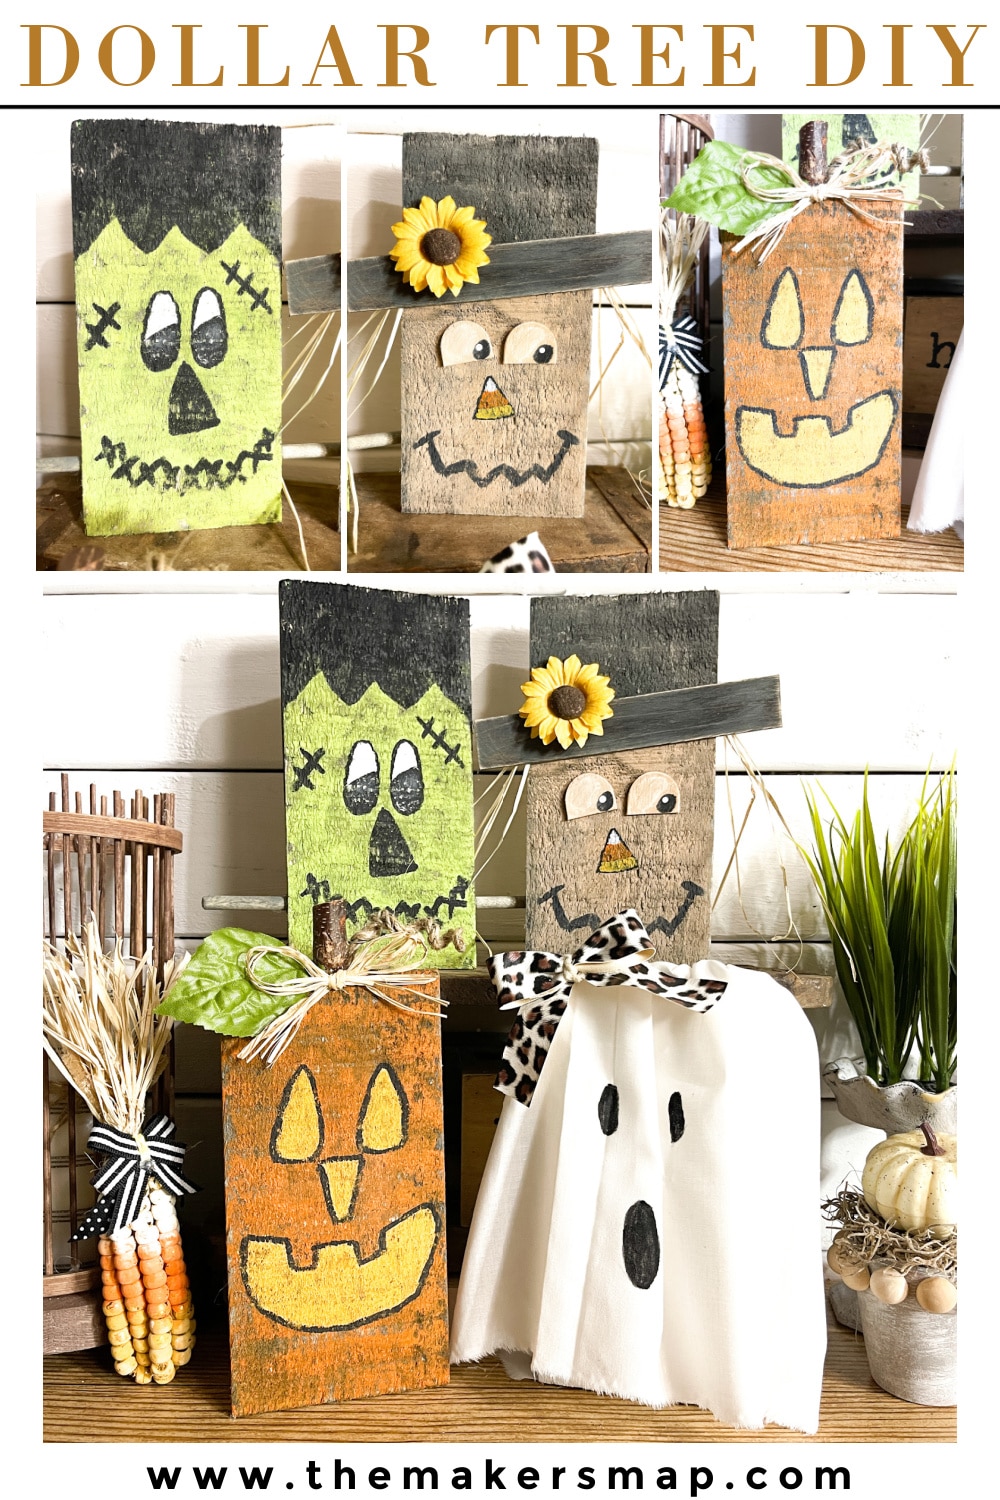
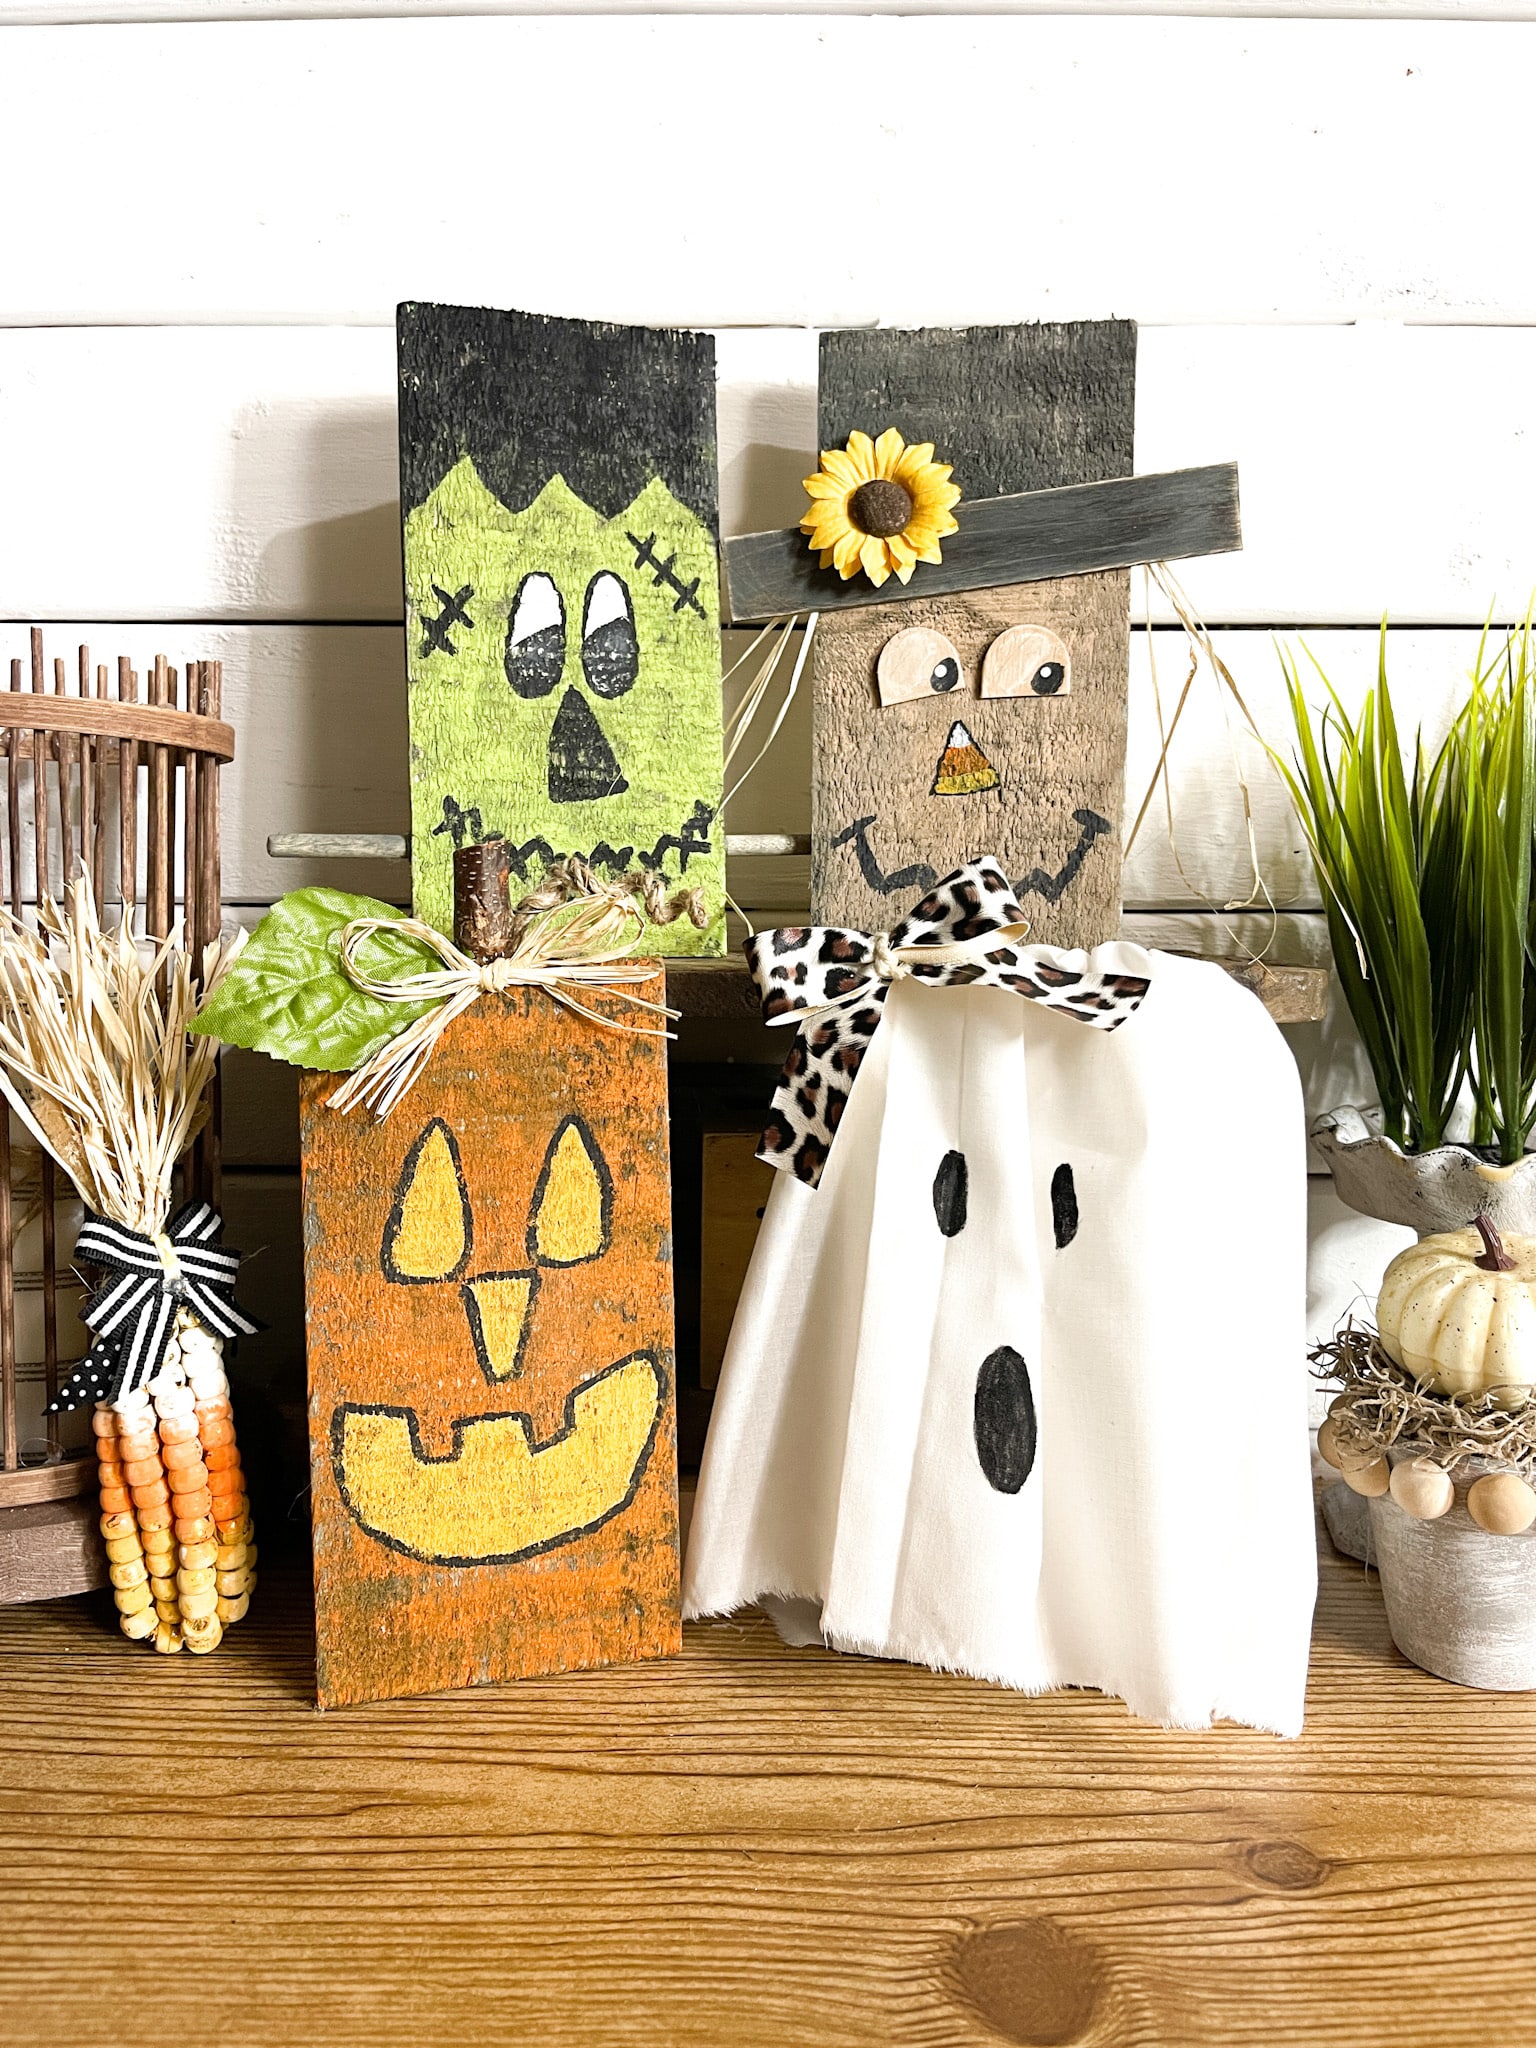
Dollar Tree Wood Plank Fall Craft Ideas
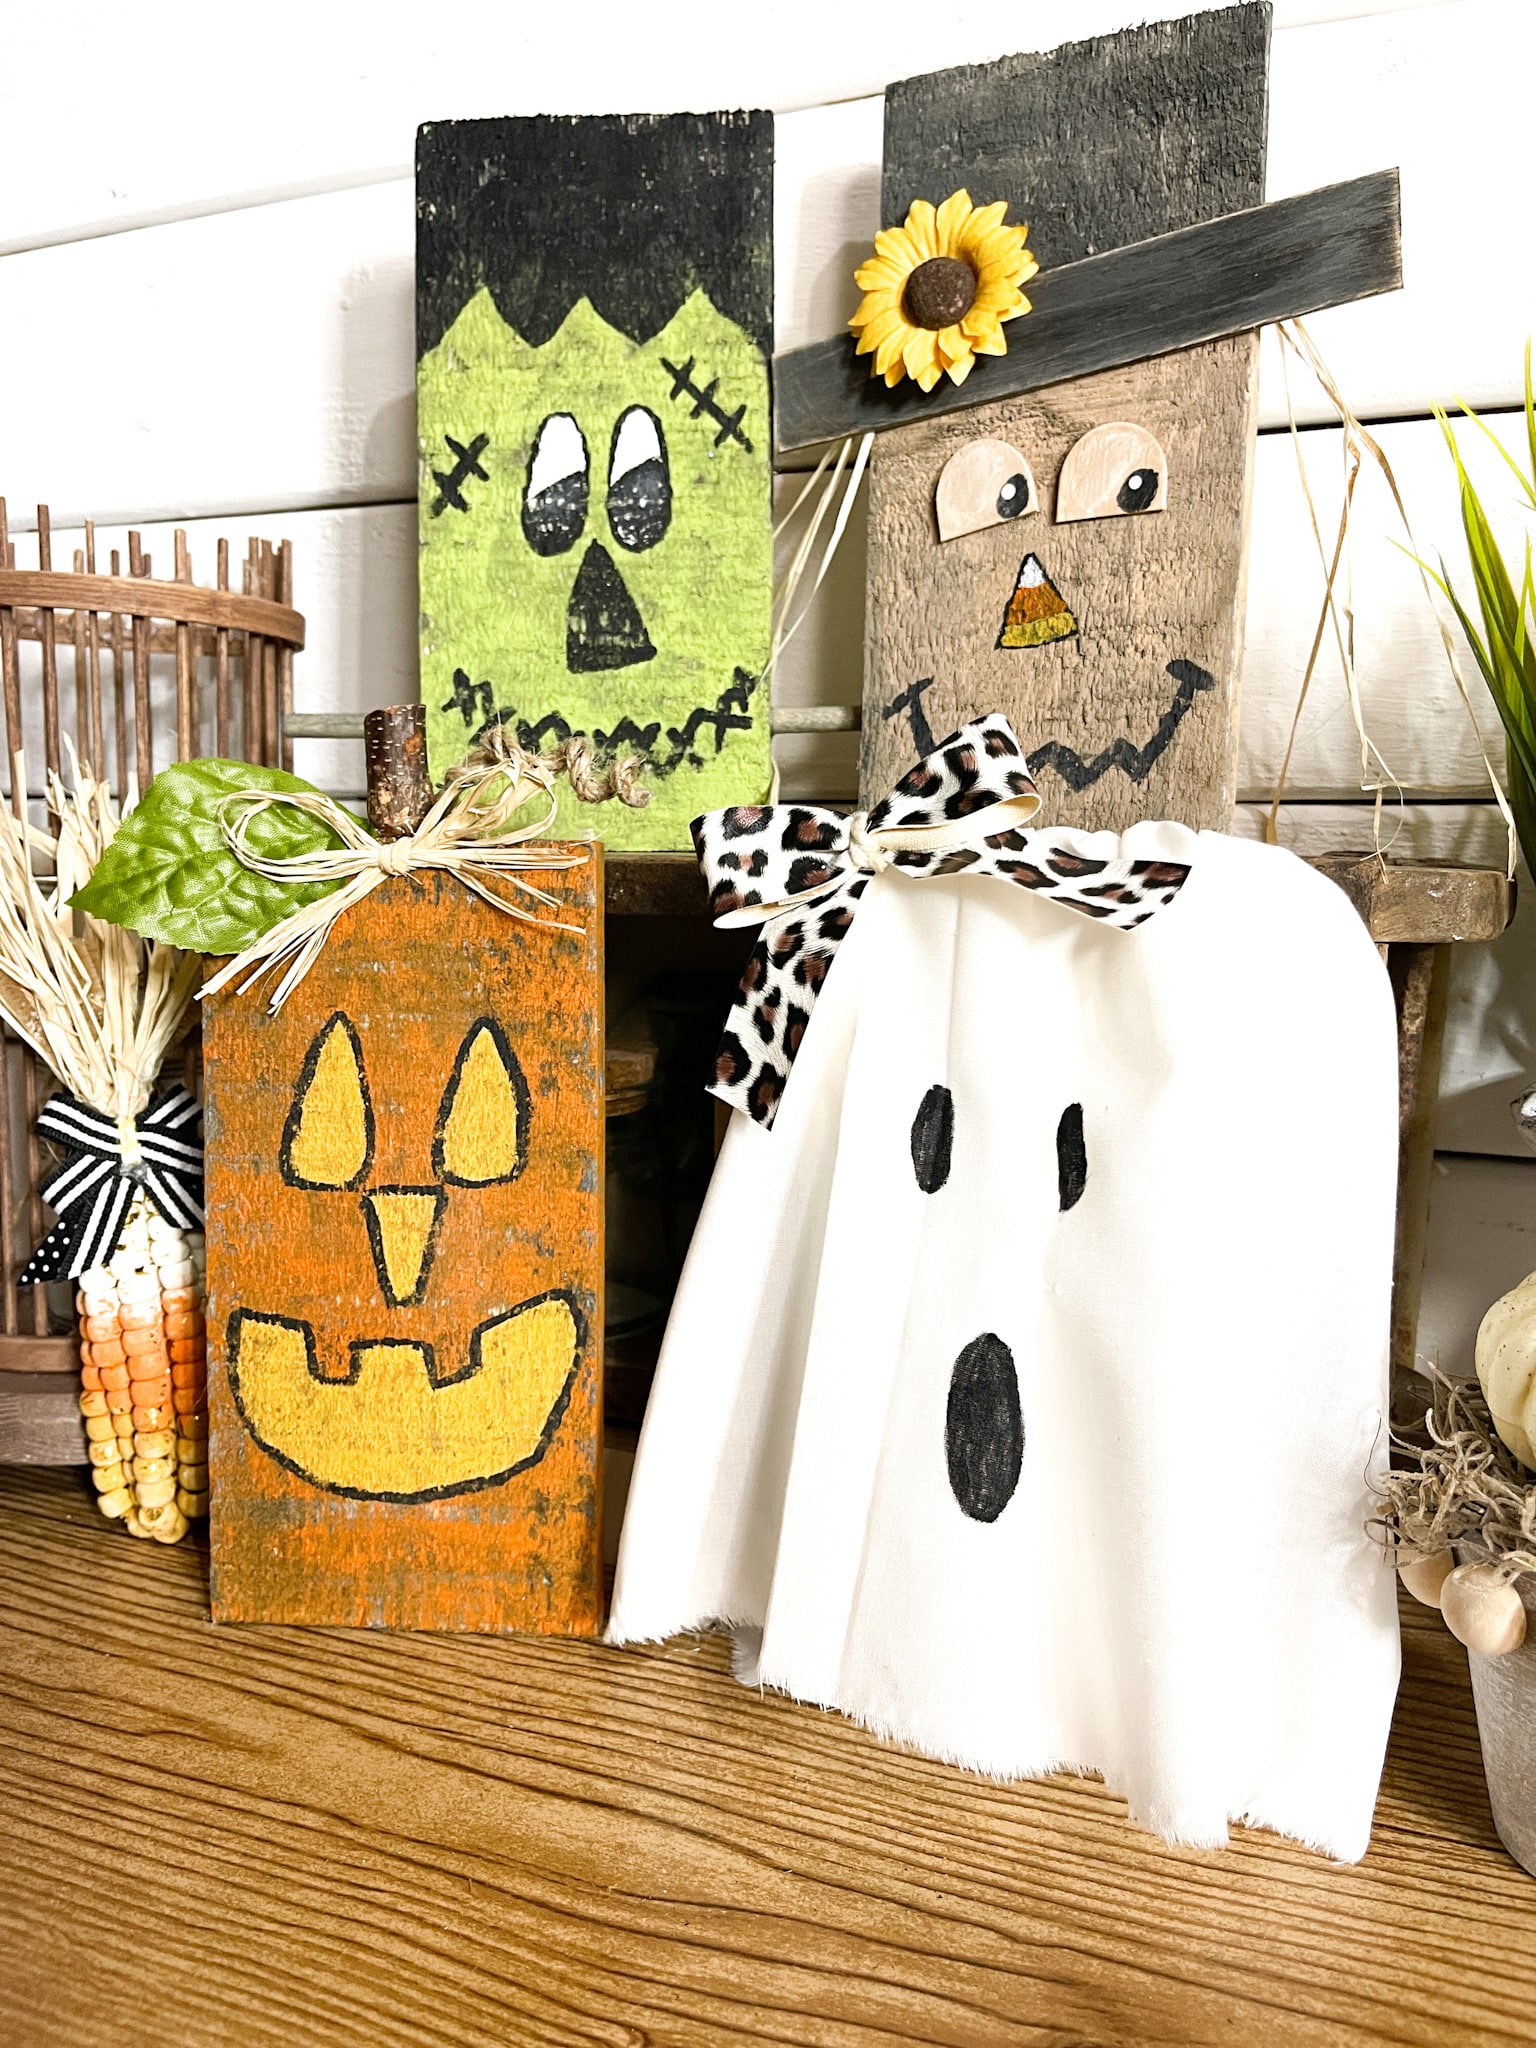
I’m so excited to show you 4 Dollar Tree Wood Plank Fall Craft Ideas that I came up with. I used the same Dollar Tree wood plank for each of the ideas and made a ghost, scarecrow, Frankenstein’s monster, and Jack-o-lantern!
These 4 Dollar Tree DIY’s were so much fun to make and it was amazing showing my Crafty Crew the versatility of the wood planks.
I’m always looking for new ways to inspire my fellow creatives and turn something plain and simple into something incredible they could use in their homes!
If you love these Fall/Halloween planks, you might also love these ideas!
- Dollar Tree Witch Pumpkin Gnome
- Mummy Trio Halloween Decor
- DIY Small Standing Turkeys
- Dollar Tree Fall Splatter Screen Pumpkin
How to Make 4 Dollar Tree Wood Plank Fall Craft Ideas
The first project I made with the Dollar Tree wood plank was a ghost. This one might be the most simple of the 4 Dollar Tree wood plank fall craft ideas!
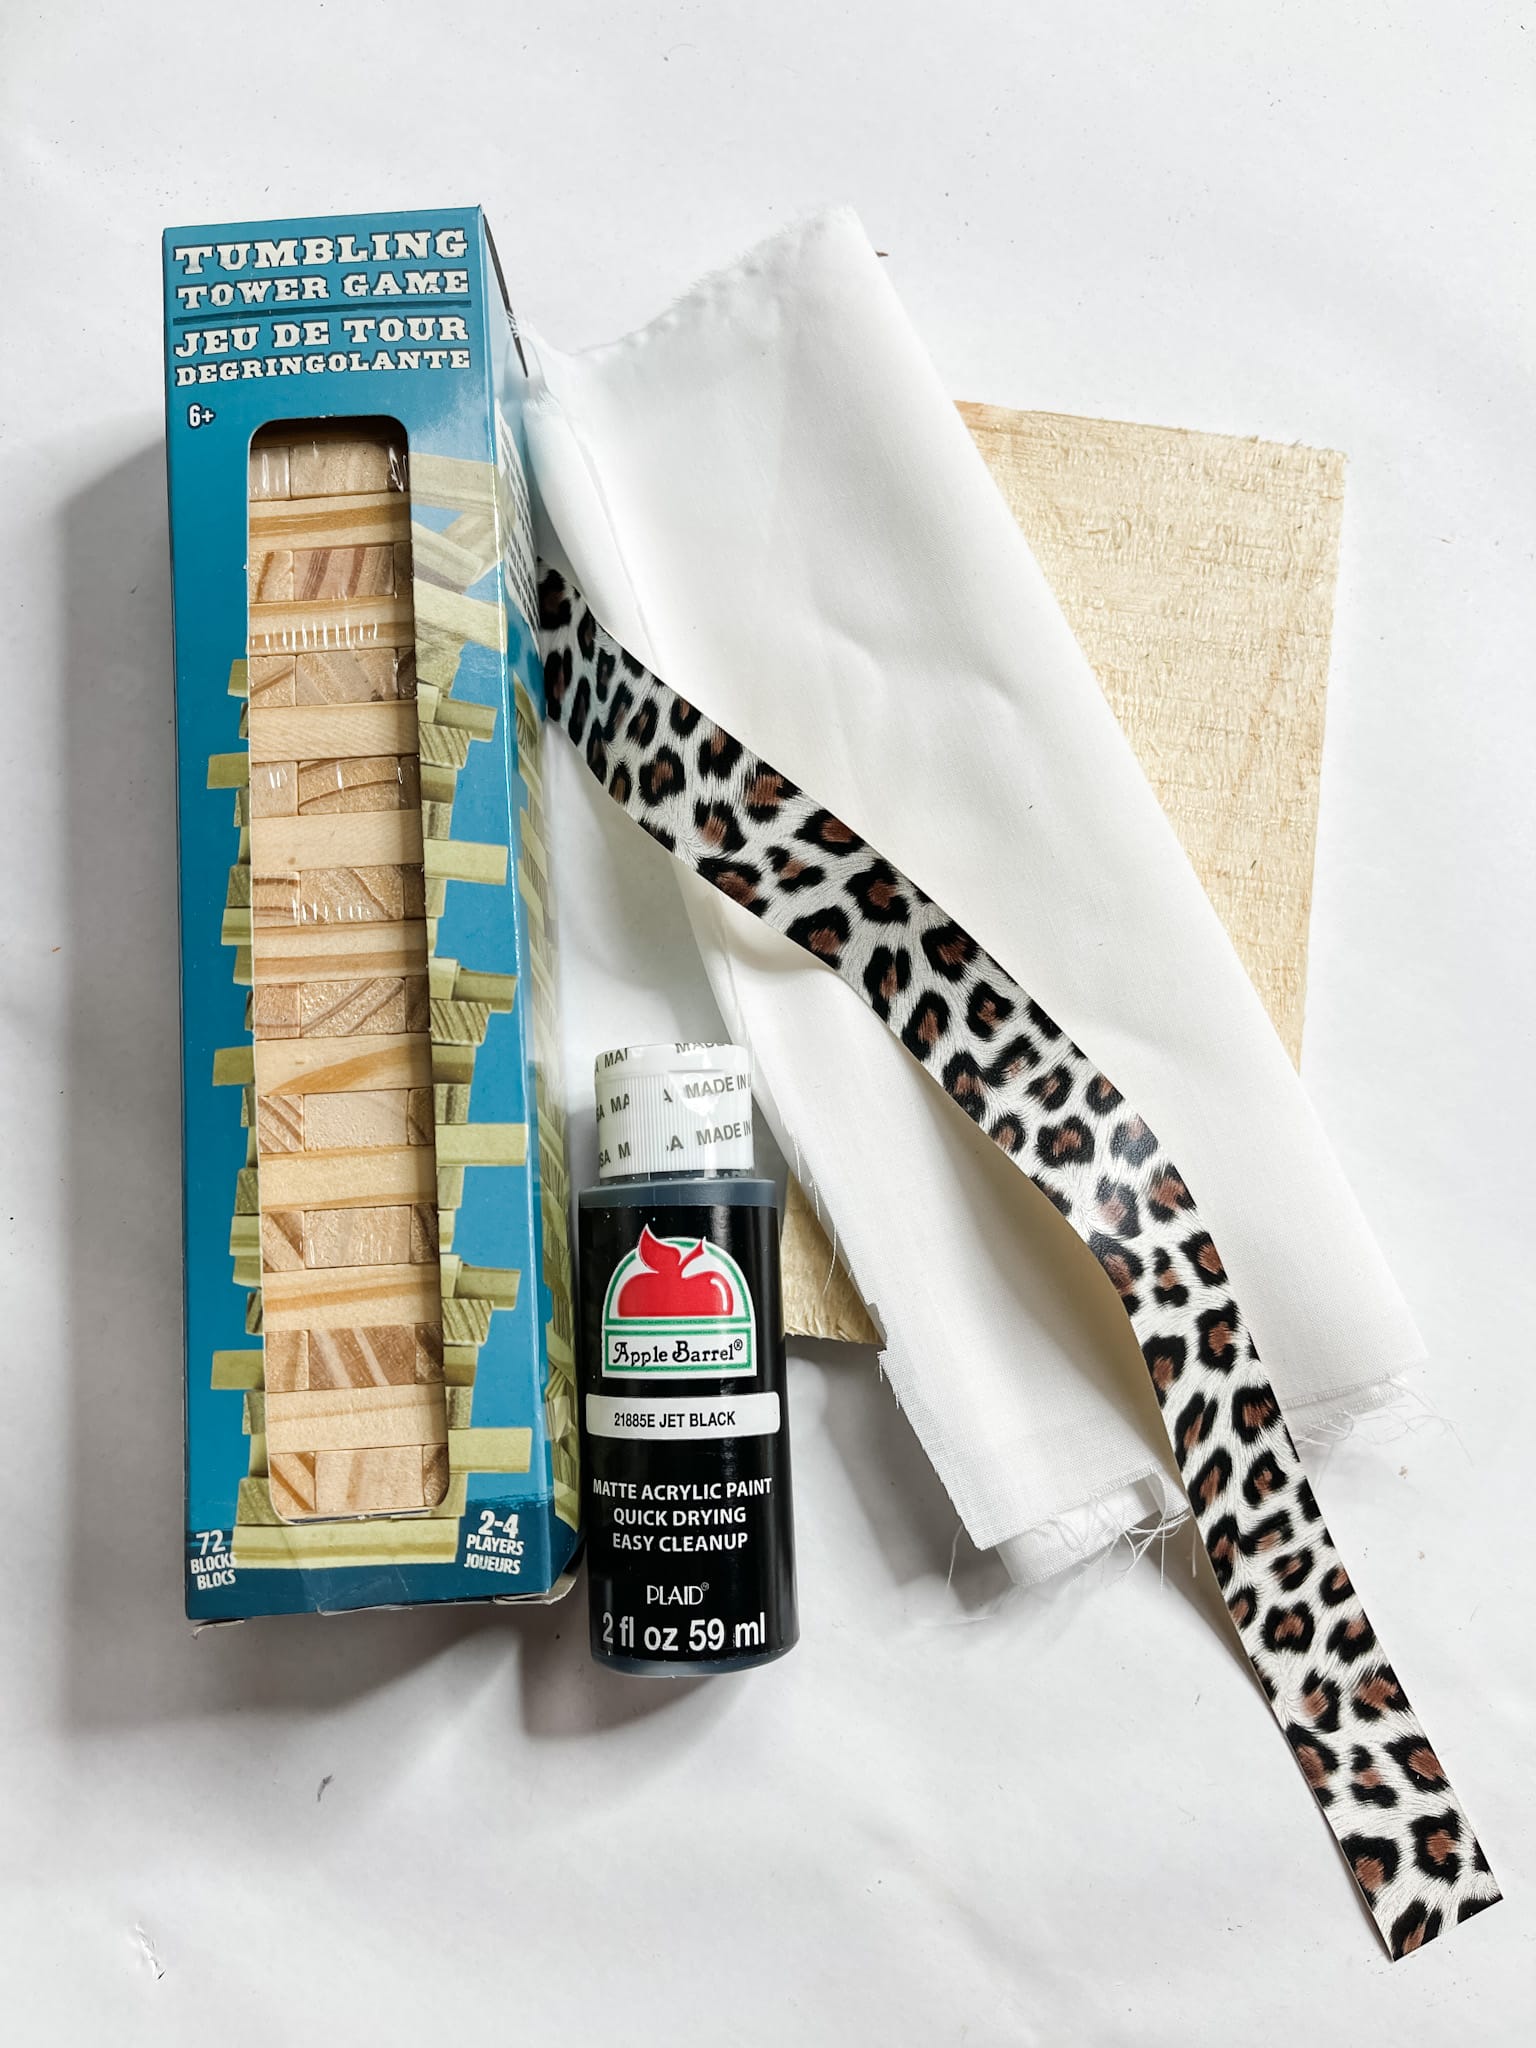
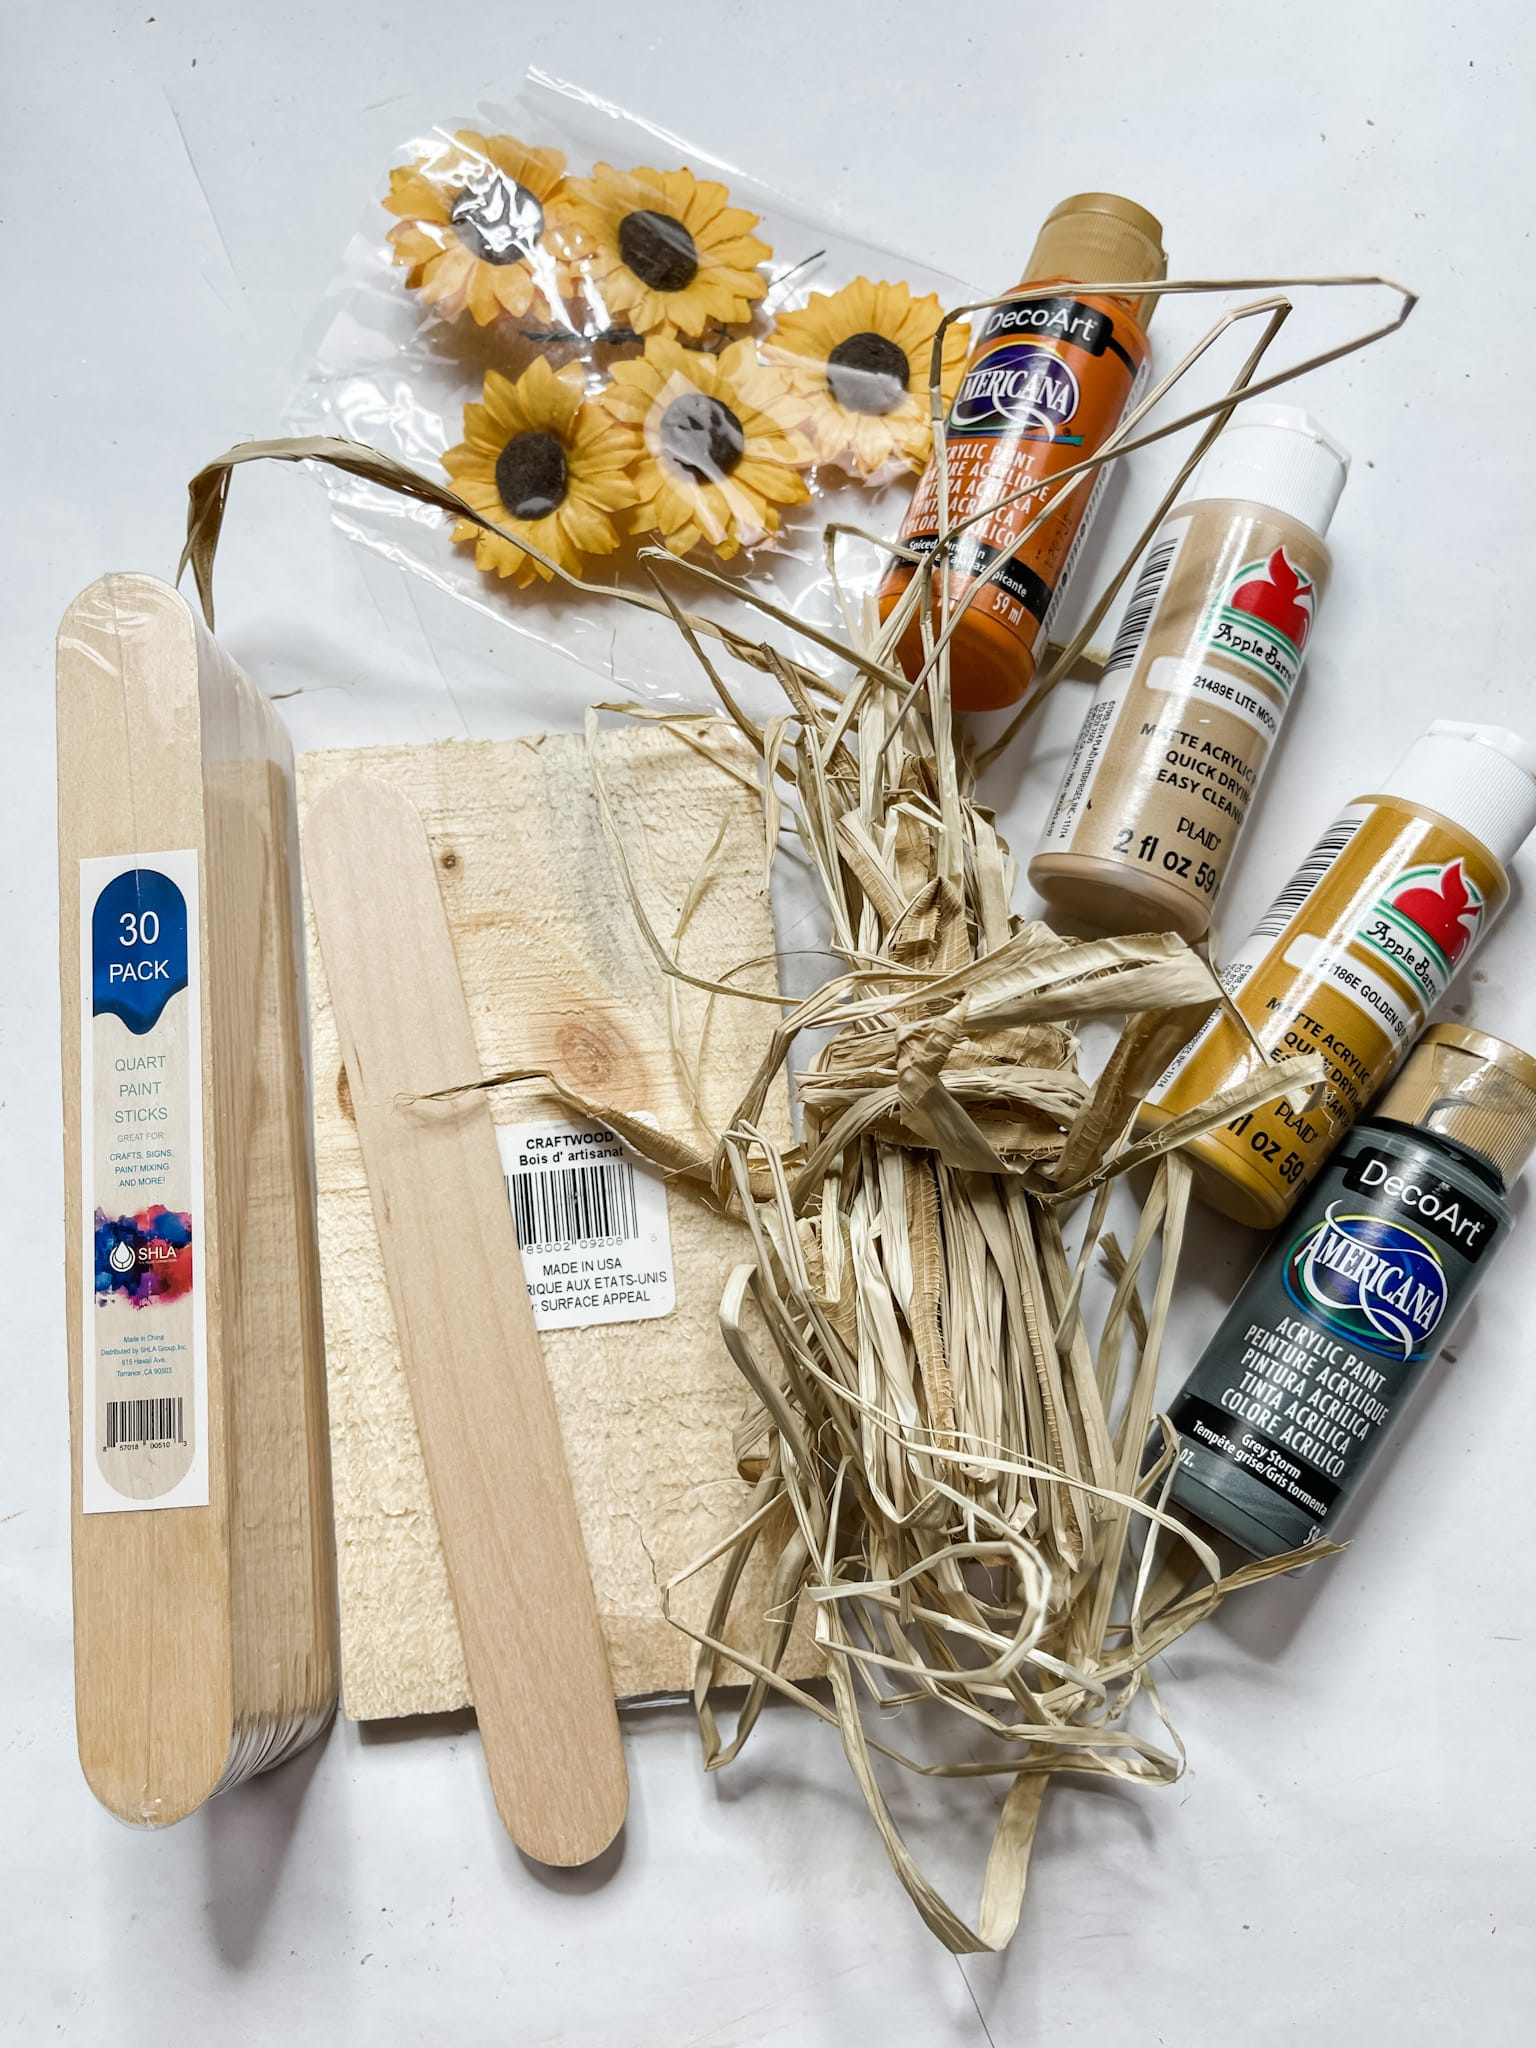
Here’s what you need for this project:
- Dollar Tree Tumbling Tower Blocks
- Dollar Tree Wood Plank
- White Fabric
- Leopard Print Ribbon
- White Paint
- Apple Barrel Jet Black Acrylic Paint
- Black marker
- Hot Glue gun
- Glue Stick
How to make the wood plank ghost
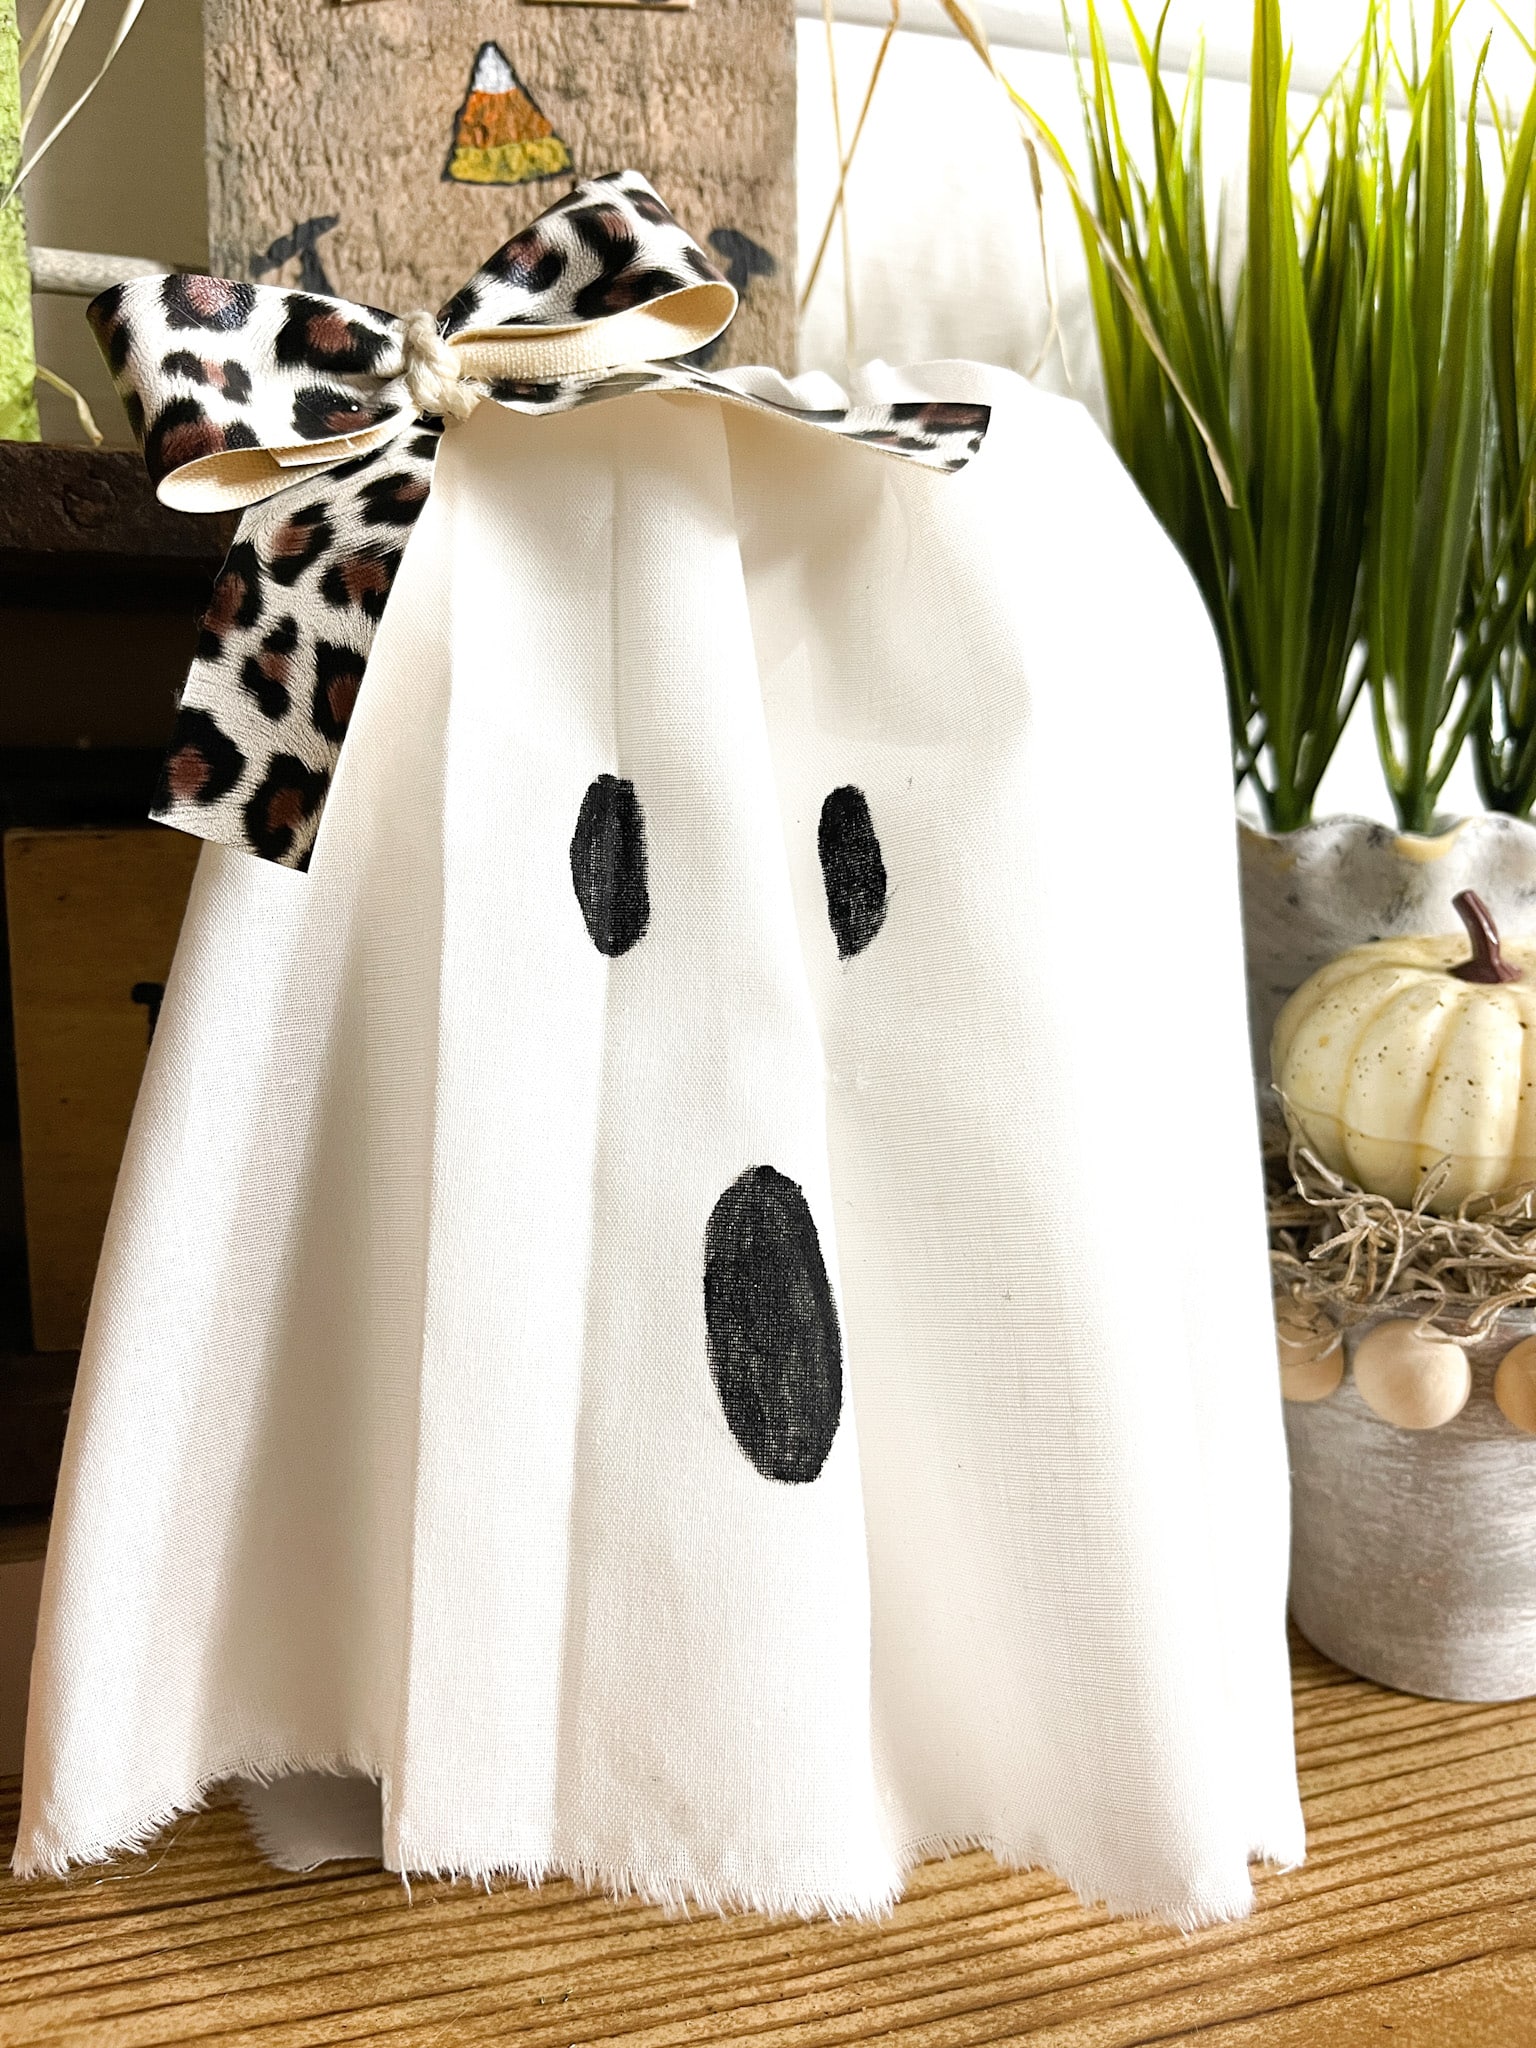
Start by painting your wood plank with white paint. You don’t want the natural tan color of the wood plank to show through the white fabric.
Next, drape your white fabric over the wood plank and create folds and creases to add dimension to the ghost. Use hot glue to secure the fabric to the wood plank.
Trim the fabric so it isn’t too long for the wood plank. Use a black marker to draw the eyes onto the white fabric. I used black paint to color in the eyes and make the mouth.
Next, you have to create a stand so your ghost can stand up! That’s where the Tumbling Tower blocks come in!
Glue two Tumbling Tower blocks to the back of the wood plank at the bottom to sit your ghost upright.
Lastly, you have to make your bow! Use the leopard print fabric (or any pattern/print you prefer) and fold it into a bow. Secure it onto the ghost and you’re done!
The second Dollar Tree wood plank Fall craft idea
Next up on the list of Dollar Tree plank craft ideas is the jack-o-lantern! I had fun with this one because other than the stem and leaf, it’s pretty much a painting project!
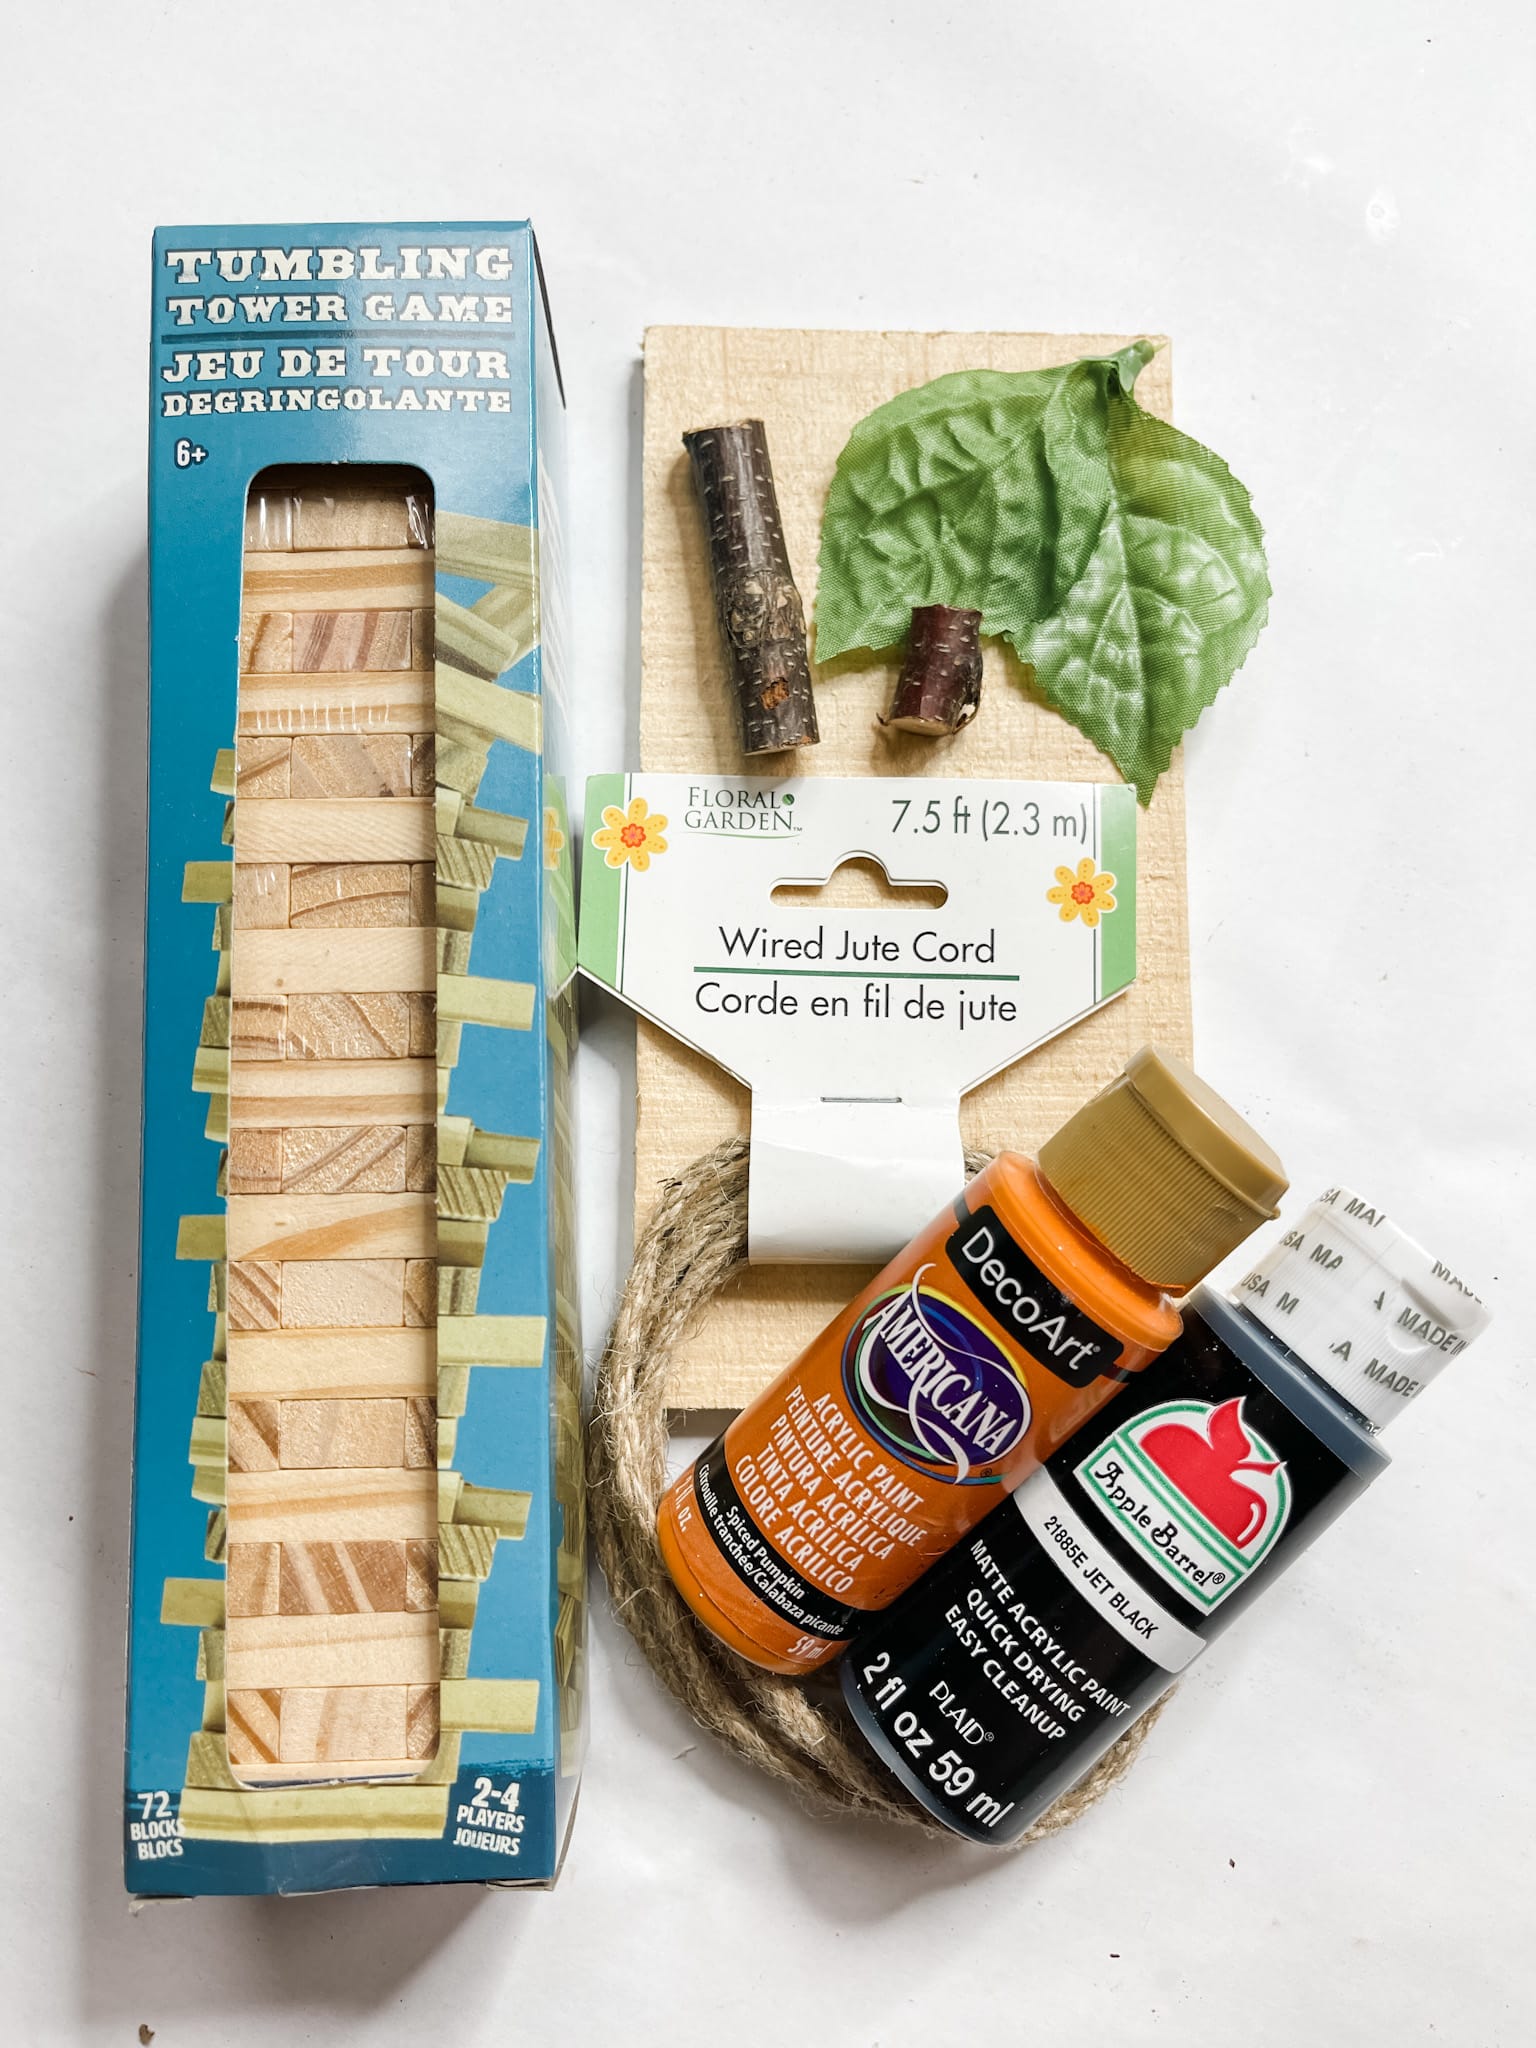
Here’s what you need for the jack-o-lantern:
- Dollar Tree Tumbling Tower Blocks
- Dollar Tree Wood Plank
- Leaf (pull it from any greenery spray of your choice)
- Dollar Tree Wired Jute Cord
- Dollar Tree Wood Stem
- DecoArt Spiced Pumpkin Acrylic Paint
- Dollar Tree Raffia
- Apple Barrel Jet Black Acrylic Paint
- Apple Barrel King’s Gold Acrylic Paint
- Hot Glue gun
- Glue Stick
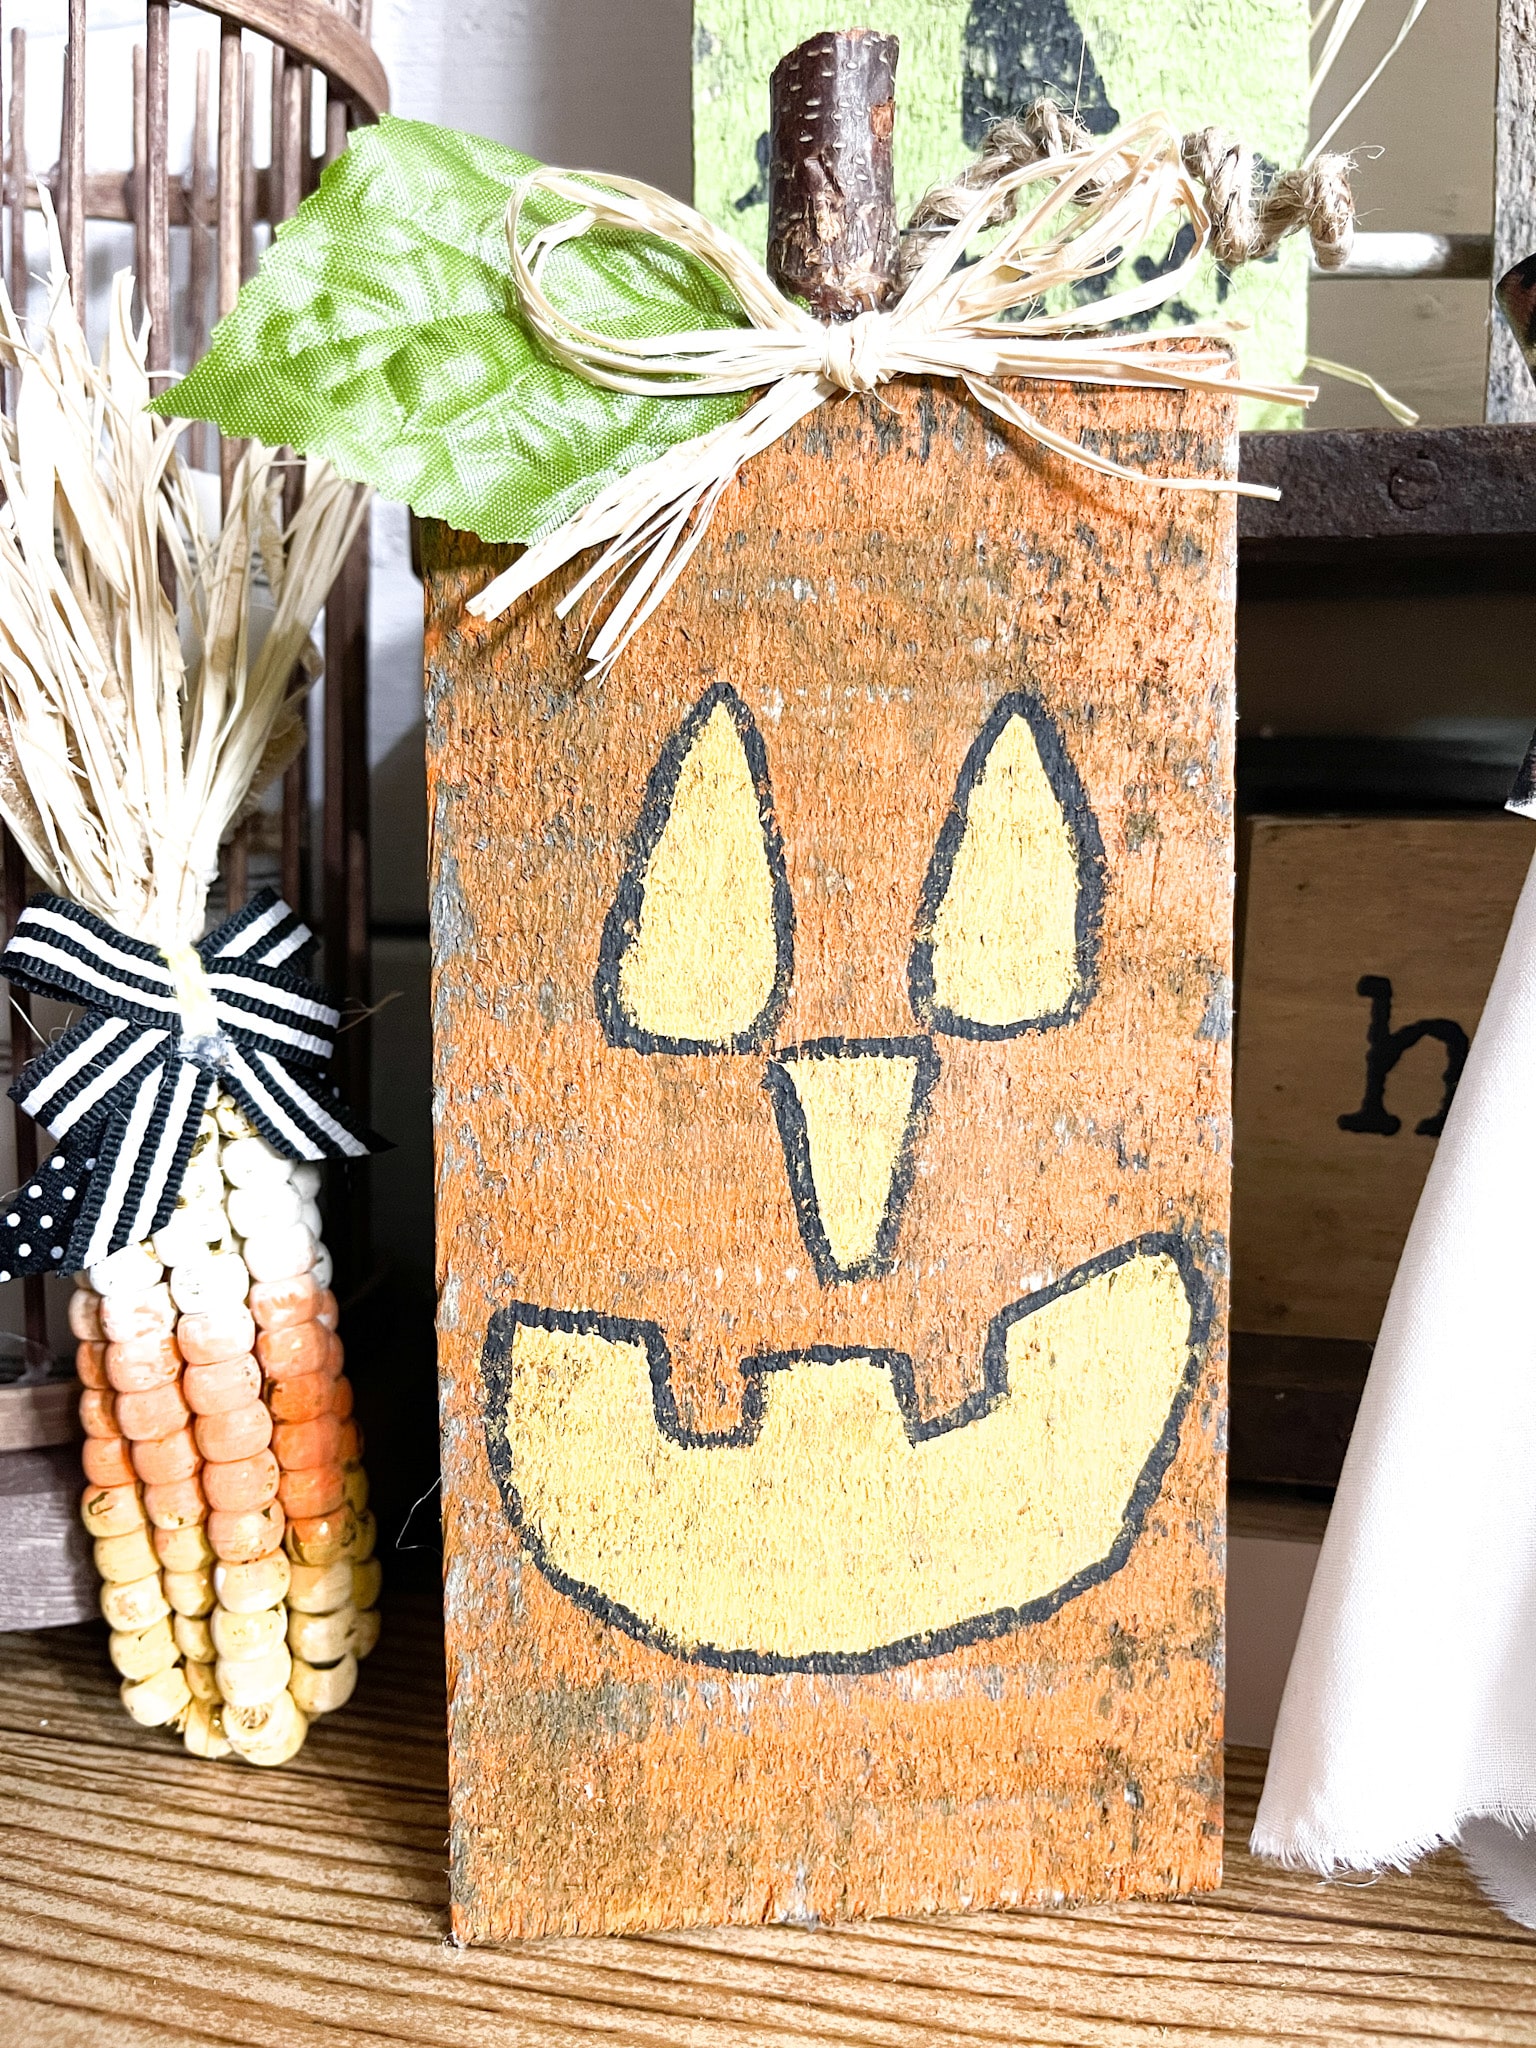
How to make the wood plank jack-o-lantern
I started by staining the wood plank with the jet black acrylic paint. To do so, mix a bit of black paint with water on a paper plate and use a wet wipe to spread it onto the wood plank.
Allow the wood plank to dry completely, then paint it with the DecoArt spiced pumpkin acrylic paint. I poured the paint onto the wood and used a foam sponge to dab it across the surface.
You’re not going to for full coverage because you want the black stain to show through the orange paint just a little bit.
I sanded and distressed the wood plank once the paint was dry, then trimmed the wood stem to be more proportionate for my jack-o-lantern.
Glue the wood stem at the top of the wood plank and glue the leaf coming off the stem. Next, I started painting the face of my jack-o-lantern.
I used the King’s Gold paint to make the eyes and mouth. Once the yellow paint was dry, I outlined the eyes and mouth with black paint.
Next, I tied a little bow out of raffia and glued it at the base of the stem. Lastly, I glued the Tumbling Tower blocks at the bottom of the plank on the back to stand up my jack-o-lantern!
The third Dollar Tree wood plank Fall craft idea
Next up on the roster of Dollar Tree wood plank crafts is Frankenstein’s monster! Just like the jack-o-lantern, this project is more about painting with just a few embellishments!
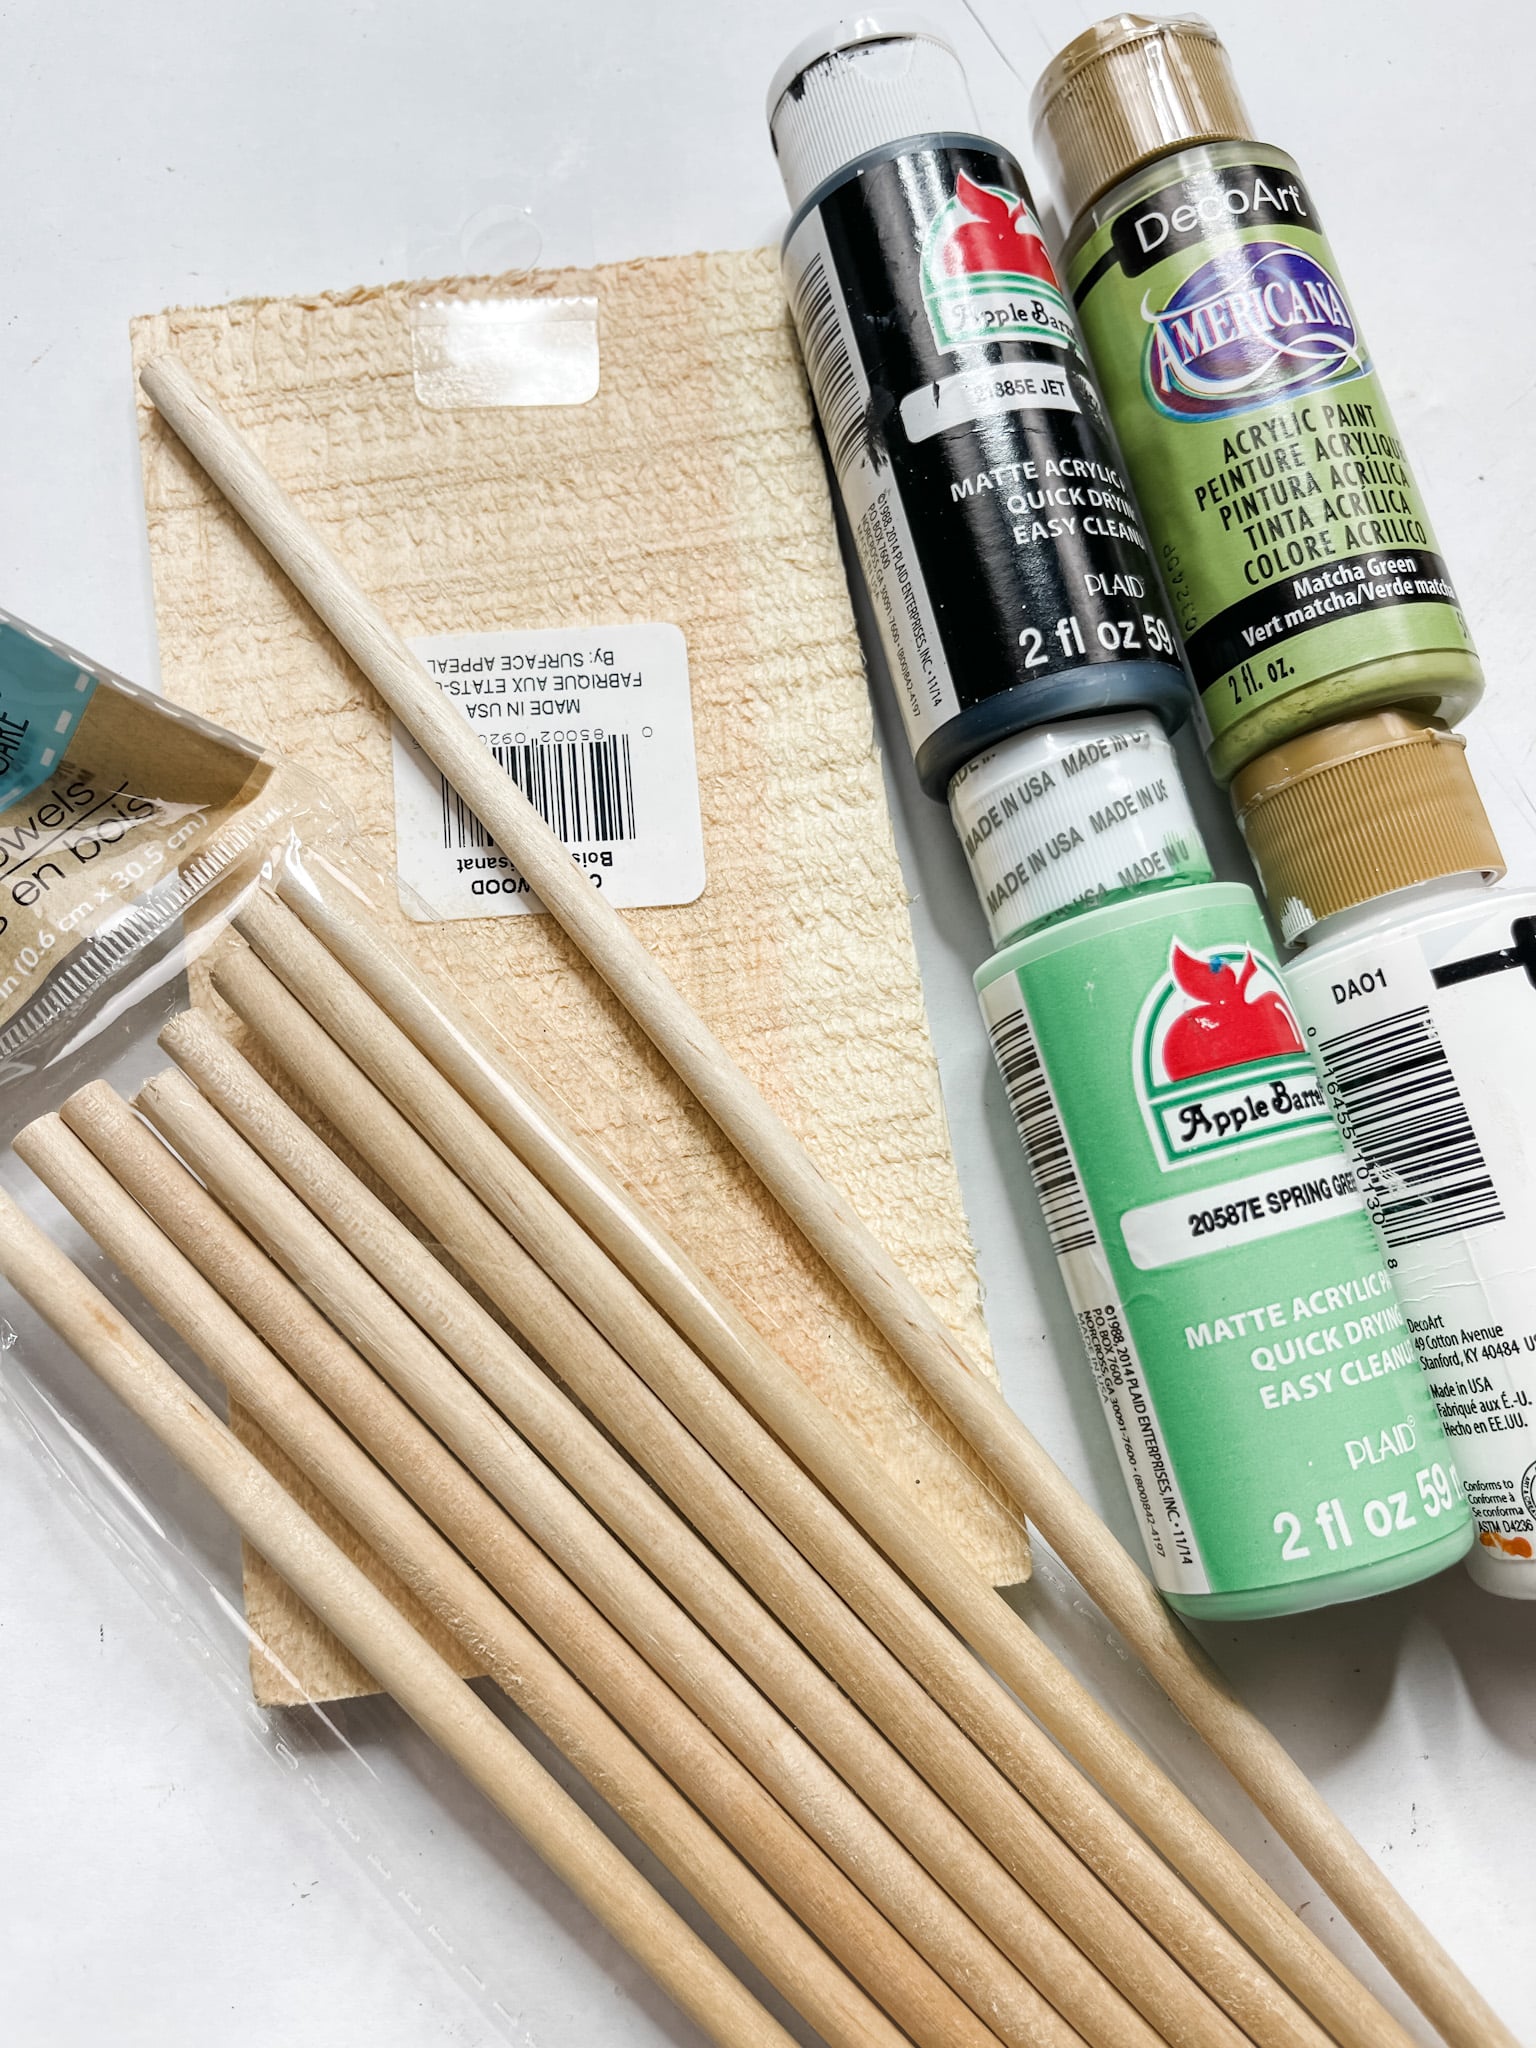
Here’s what you need to make the monster:
- Dollar Tree Tumbling Tower Blocks
- Dollar Tree Wood Plank
- Apple Barrel Jet Black Acrylic Paint
- Dollar Tree Wood Dowels
- Apple Barrel Spring Green Acrylic Paint
- DecoArt Matcha Green Acrylic Paint
- DecoArt White Acrylic Paint
- Hot Glue gun
- Glue Stick
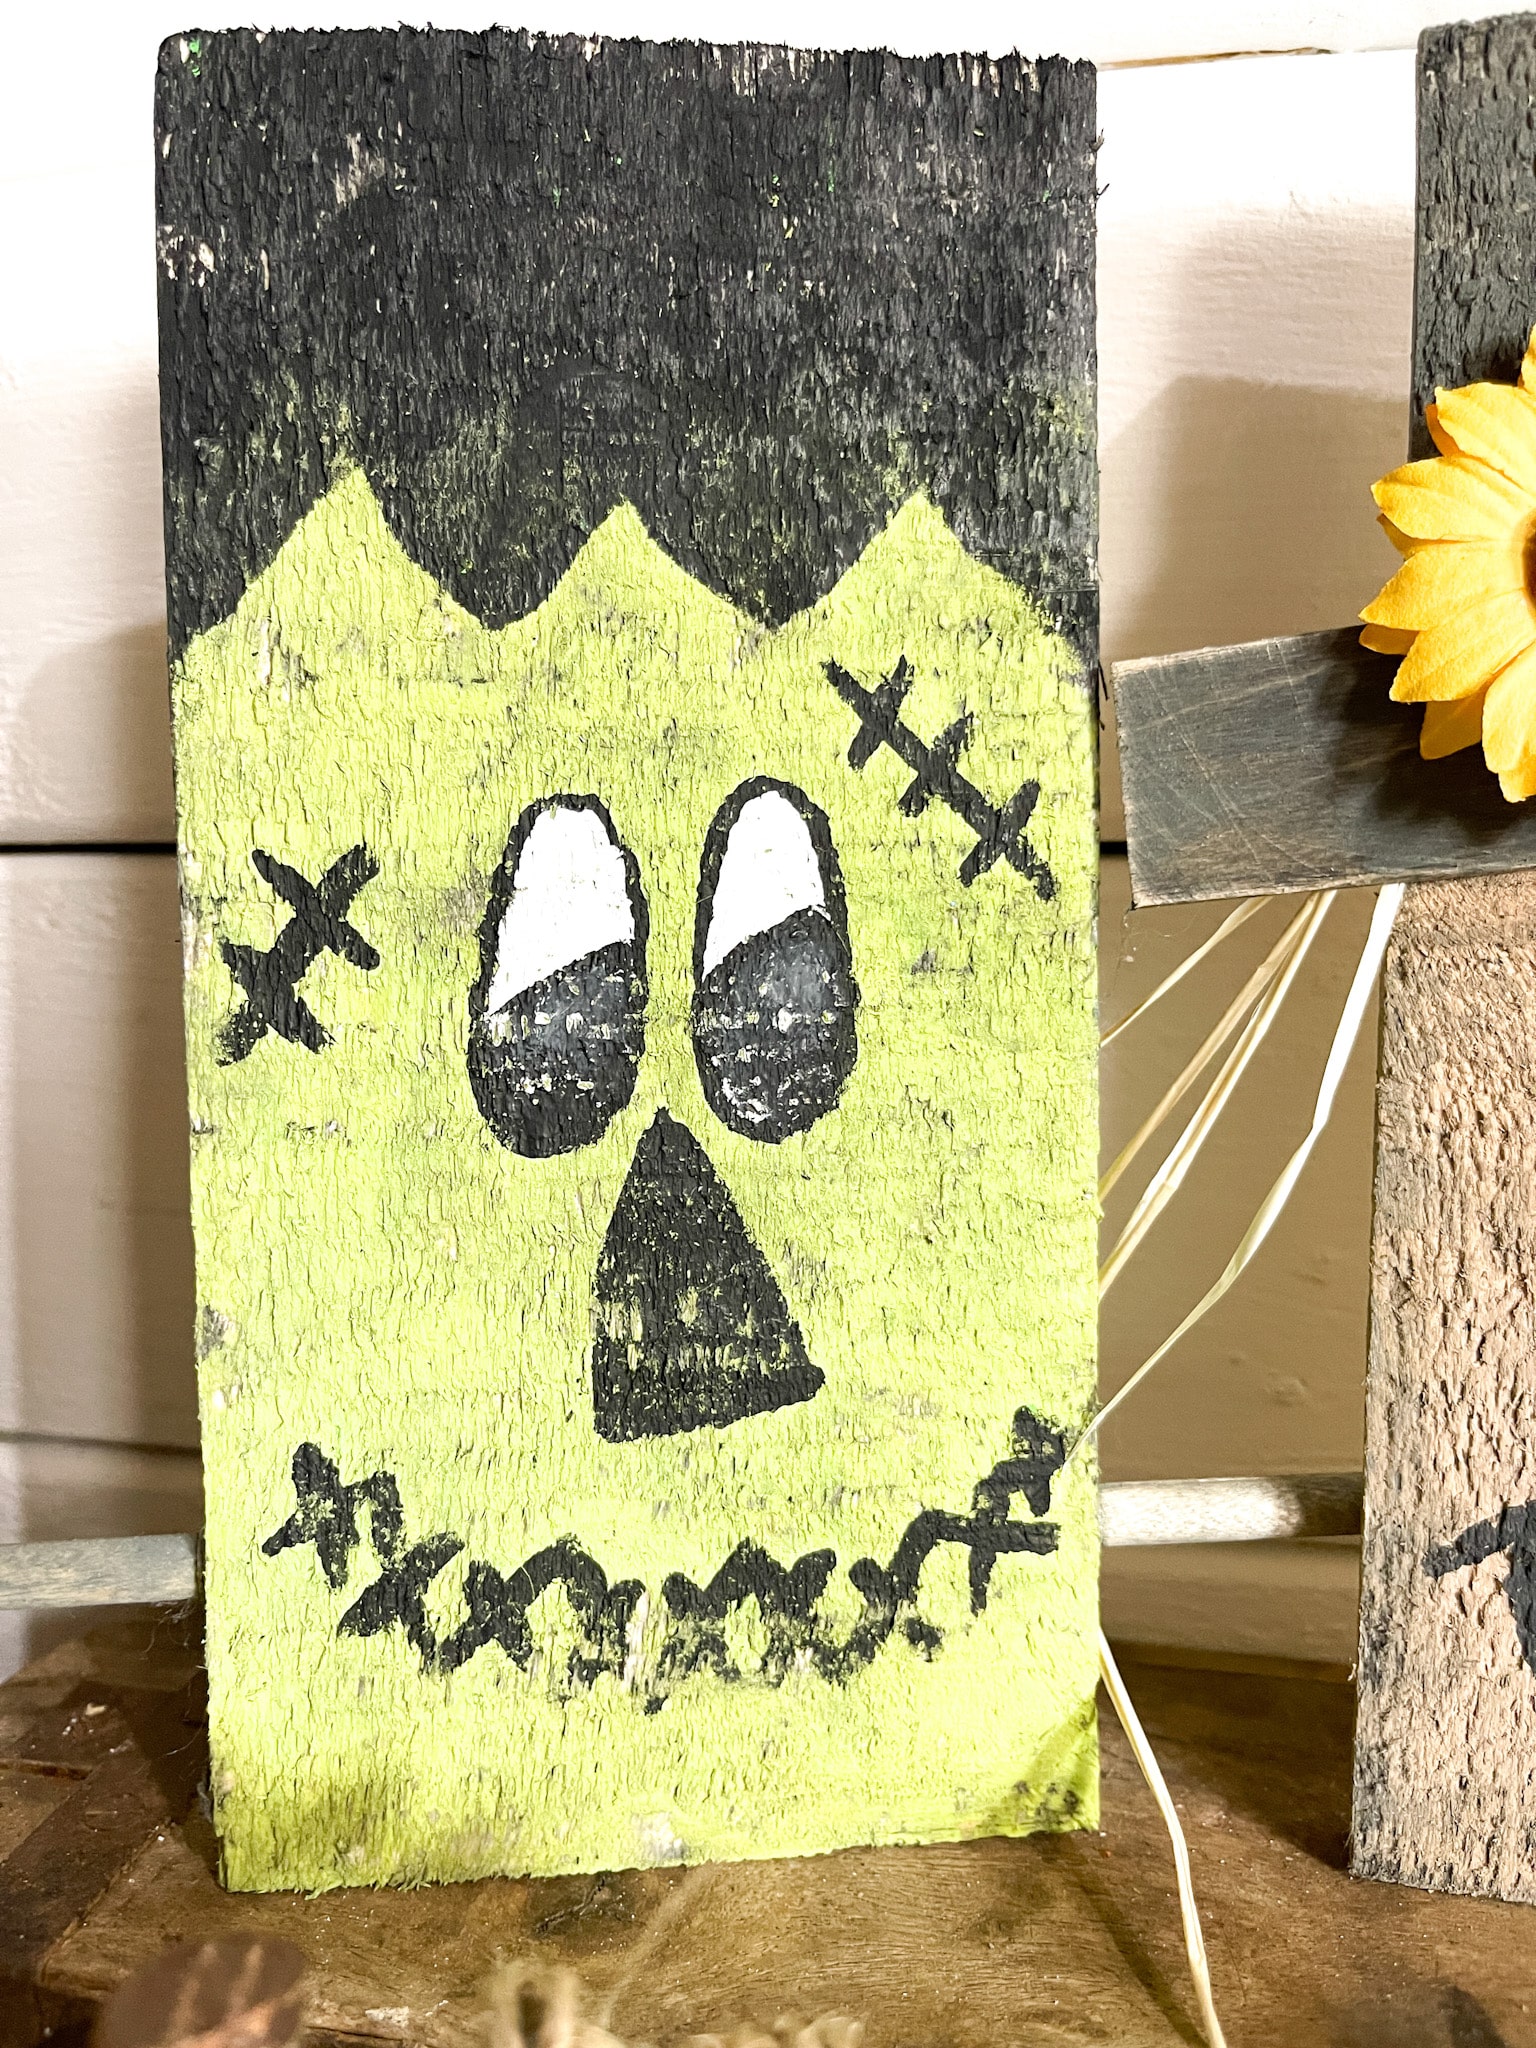
How to make the wood plank monster
I started this project just like the jack-o-lantern and stained the wood plank with black paint. Once the black was dry, I mixed my greens to create a custom shade of green for my monster.
I used a foam sponge to apply the green paint to the wood, but left black at the top for the monster’s hair.
Next, I used black paint to draw on the monster’s eyes, nose, mouth, and two lines with “stitches” on his head. I filled in his eyes with white paint then painted on the pupils.
I used the wood dowels to create the “screws” for the monsters head. You could also use thumbtacks, but I didn’t have any on hand.
I stained the wood dowels grey and trimmed them to the size I wanted. Then, I glued them onto the sides of the monster’s head.
Lastly, I glued the Tumbling Tower blocks to the back of the wood plank so my monster could sit upright!
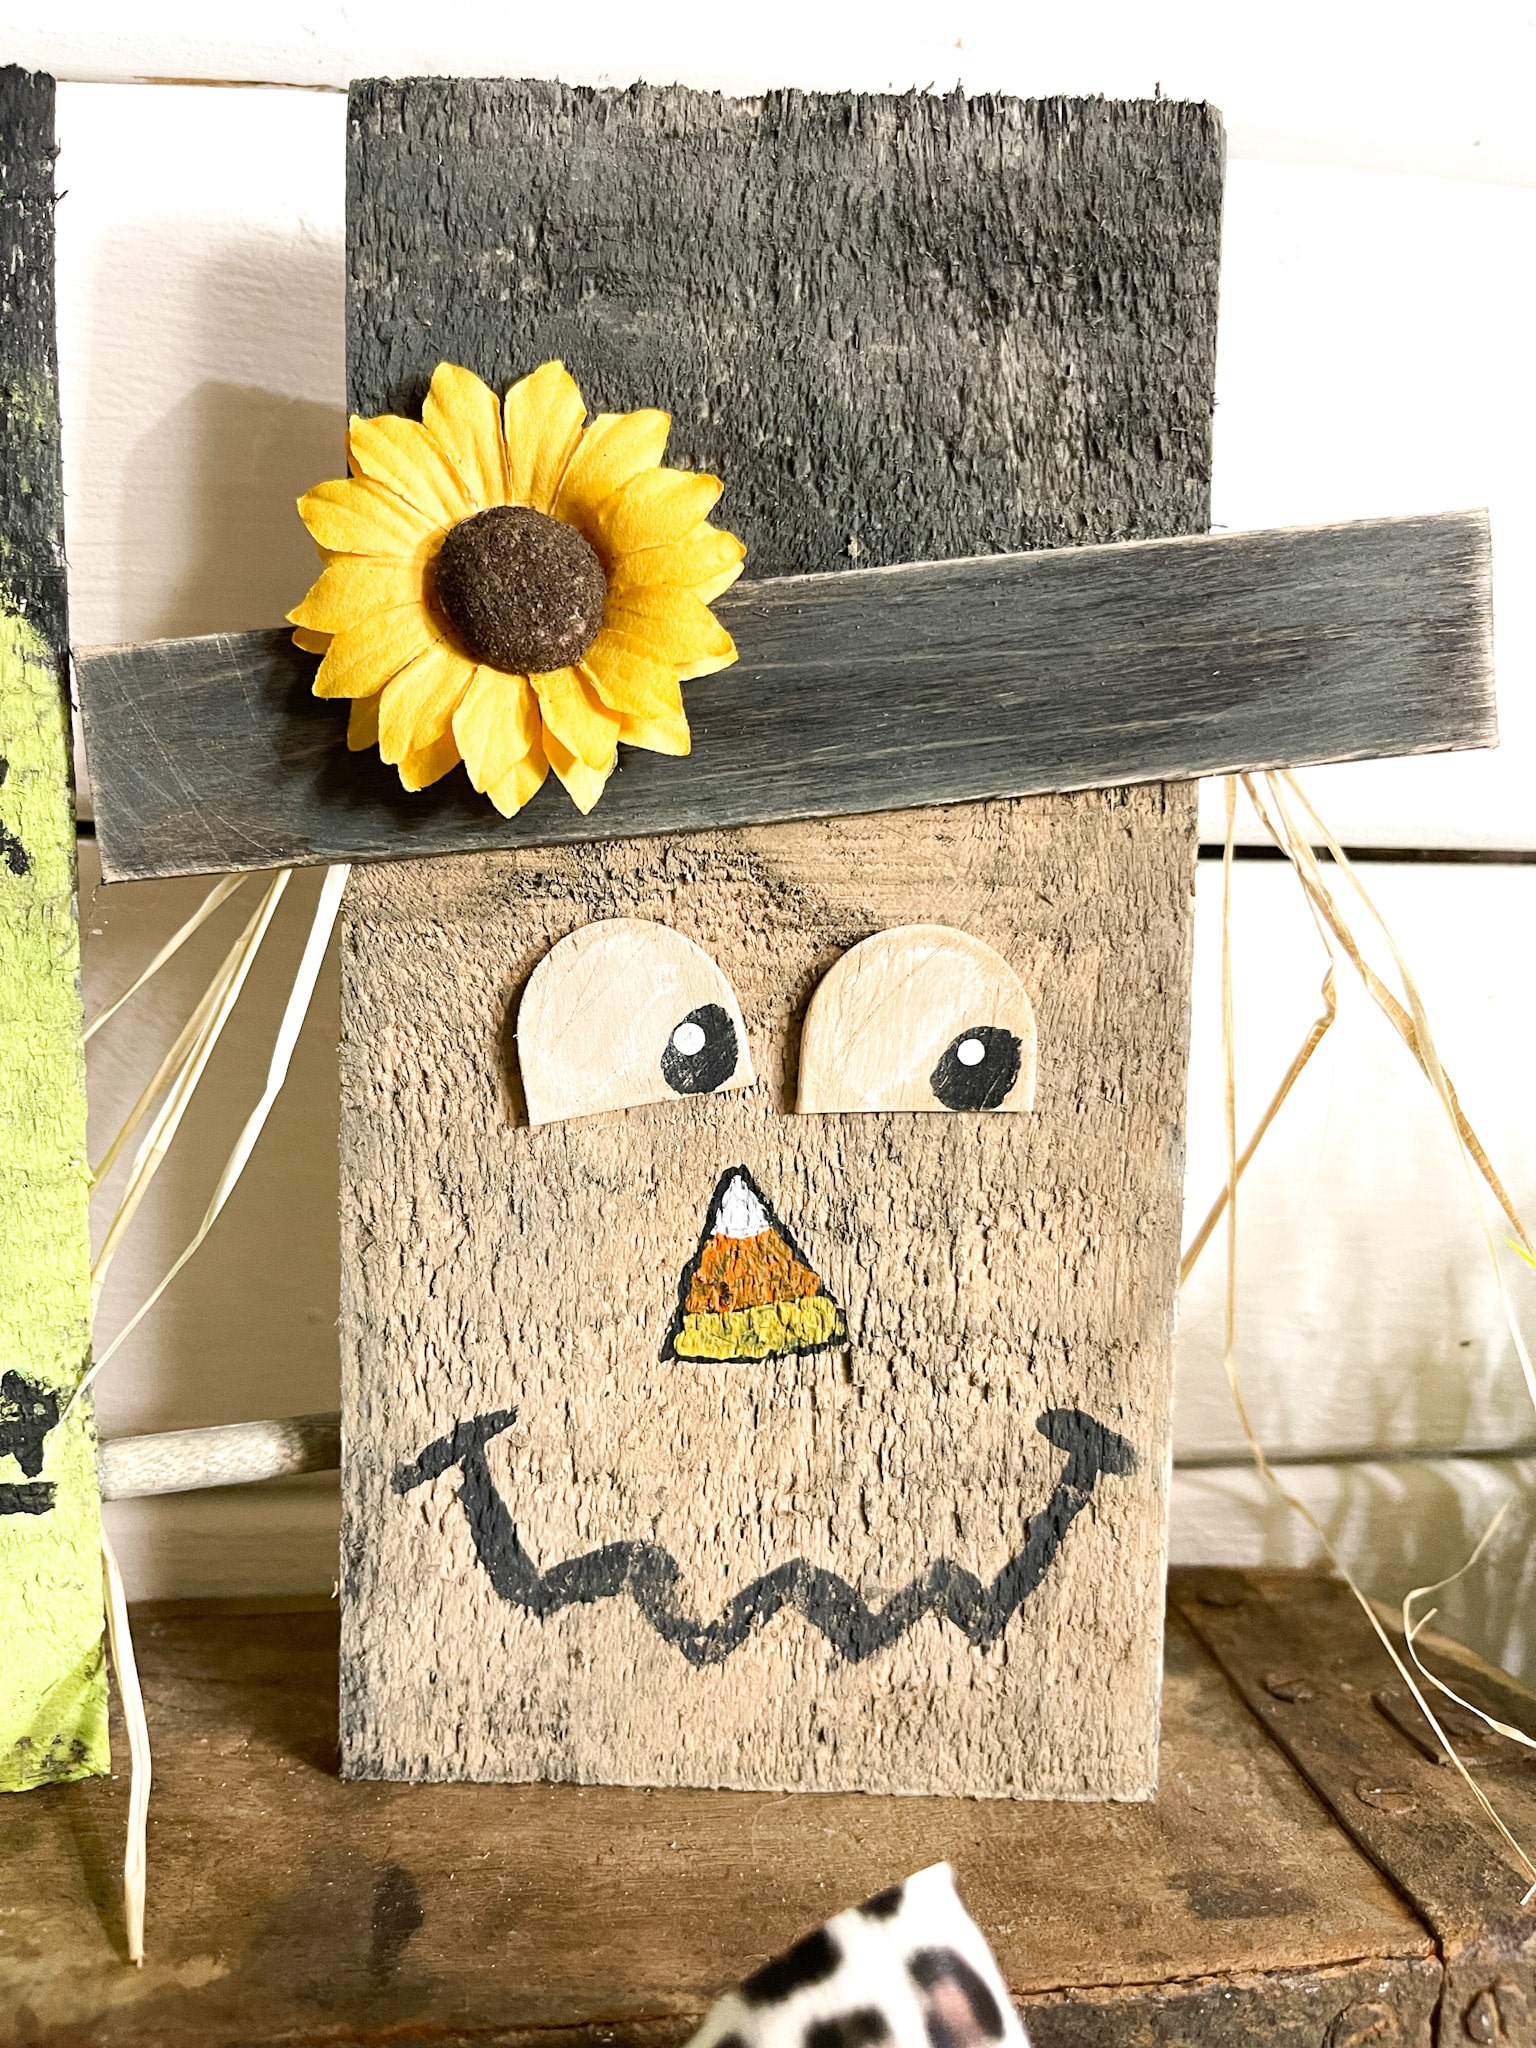
The fourth Dollar Tree wood plank Fall craft idea
The fourth and last Dollar Tree wood plank craft idea I have for you is a scarecrow! Scarecrows are just the epitome of Fall, and this one is a super cute and affordable shelf sitter!
Here’s what you need to make the scarecrow:
- Dollar Tree Tumbling Tower Blocks
- Dollar Tree Wood Plank
- Raffia
- Sunflowers (I think I got these at Hobby Lobby)
- Quart Paint Sticks
- Apple Barrel Jet Black Acrylic Paint
- Apple Barrel Golden Sunrise Acrylic Paint
- DecoArt Spiced Pumpkin Acrylic Paint
- DecoArt Grey Storm Acrylic Paint
- Apple Barrel Lite Mocha Acrylic Paint
- Apple Barrel Pebble Acrylic Paint
- Hot Glue gun
- Glue Stick
How to make the wood plank scarecrow
Just like the last two Dollar Tree wood plank craft ideas, I started the scarecrow by staining the wood plank with black paint.
Trim the curved ends of the quart paint stick off so you have straight edges and stain the quart paint stick with black paint the same as the wood plank.
Once the black paint is dry, I used the pebble paint to paint the “skin” of my scarecrows face on the wood plank. Leave the top portion stained black. That will be the hat for your scarecrow.
Next, I lightly brushed the grey paint over the stained black portion of the wood plank and the quart paint stick. I saved the ends of the quart paint stick for the eyes and painted them light mocha.
I painted the scarecrow’s nose on with black paint and its mouth with grey paint. Also, I painted the pupils in the eyes with black paint and a candy corn pattern on the nose.
Glue raffia to the back of the quart paint stick and glue it to the wood plank. Then, glue a little sunflower to the front of the quart paint stick.
Lastly, glue the eyes onto the scarecrow’s face, and glue the Tumbling Tower blocks to the back so your scarecrow can stand up!
You should totally join my FREE Facebook group called On A Budget Crafts! It is a judgment-free community for DIY crafters to show off their projects and ideas.
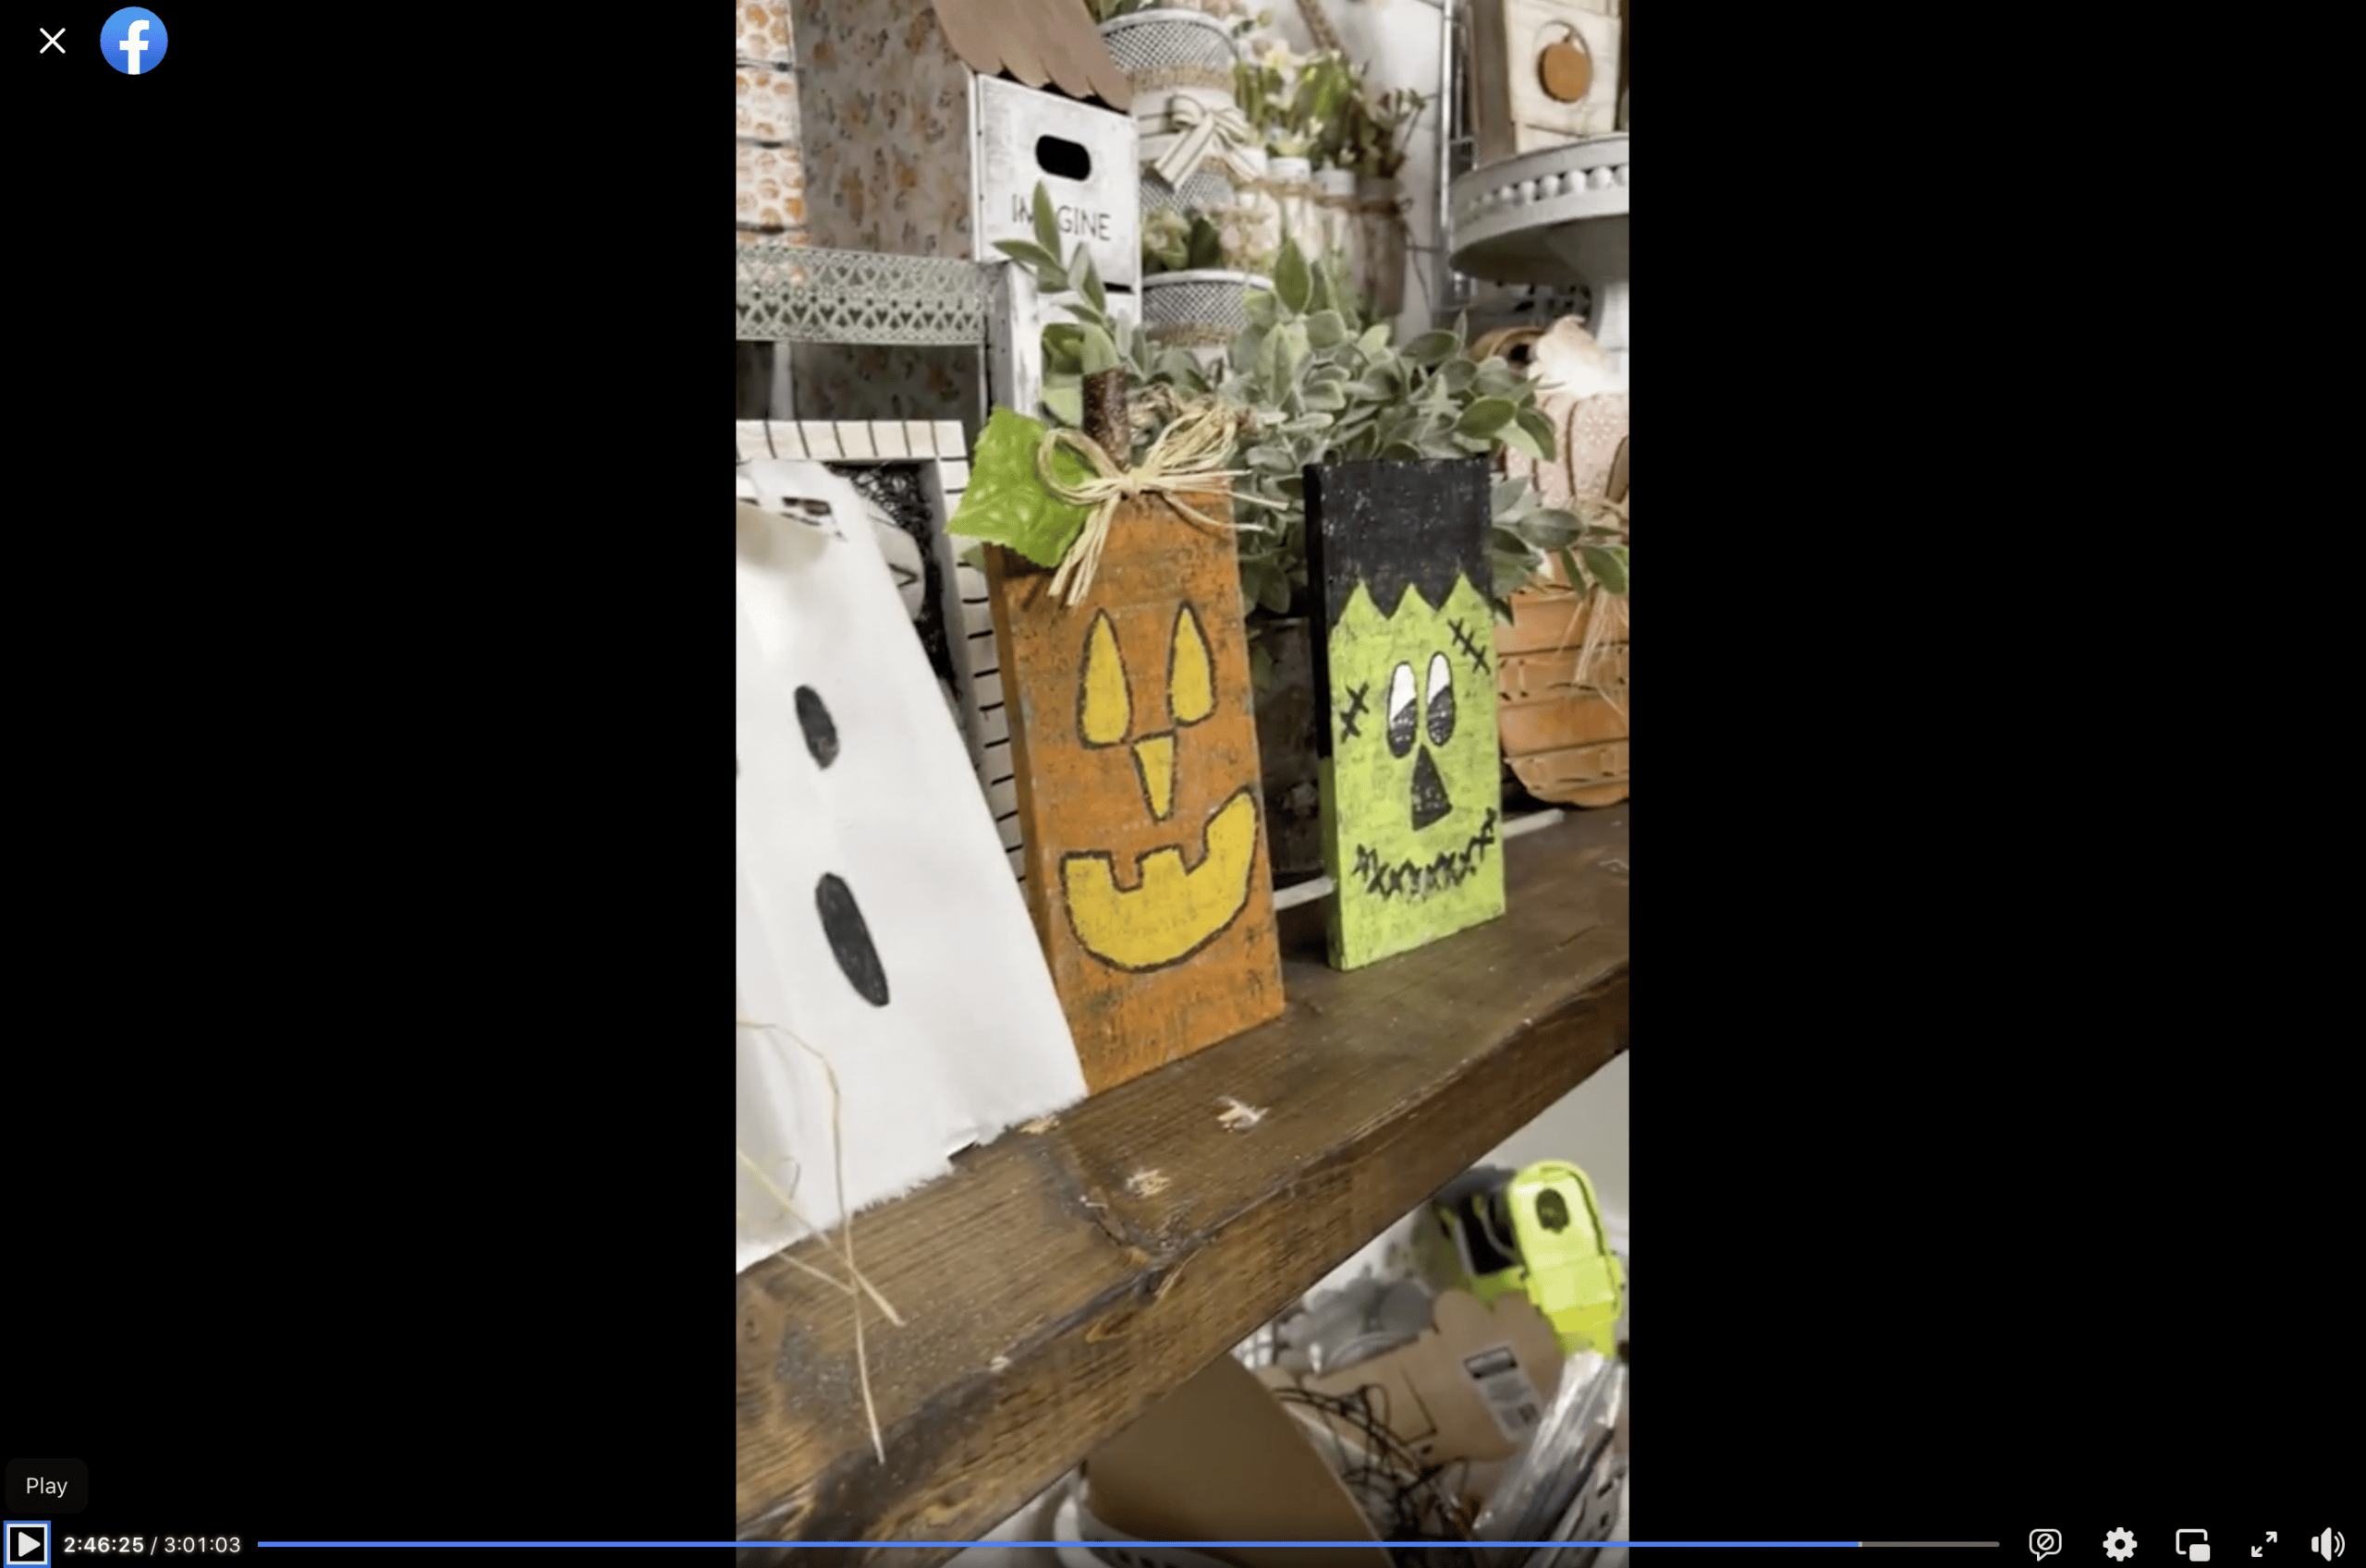
Watch the DIY tutorial replay
I recorded how to make these adorable Dollar Tree Wood Plank Fall Craft Ideas during a LIVE video on my Facebook page.
If you want to see the DIY process, craft along, or just join in on the fun conversations, you can watch the DIY tutorial replay!
If you loved these Dollar Tree Wood Plank Fall Craft Ideas, you might also like these DIY ideas!
Thanks for stopping by! XOXO Amber
You can also shop my ENTIRE AMAZON Favorites shop just click here! It’s packed full of all the things I use and love. Here is the supply list I highly recommend every creative have on hand!!
Would you also pin my blog for later and get on my newsletter alerts? I would love to have you join my #craftycrew.
I email alerts about new blogs like these Dollar Tree Wood Plank Fall Craft Ideas so you’re always up to date on fun, new DIY ideas!
Inspired? Leave me a comment below! I love hearing from my readers!


These are super adorable!! I’m wanting to make these for my bay window