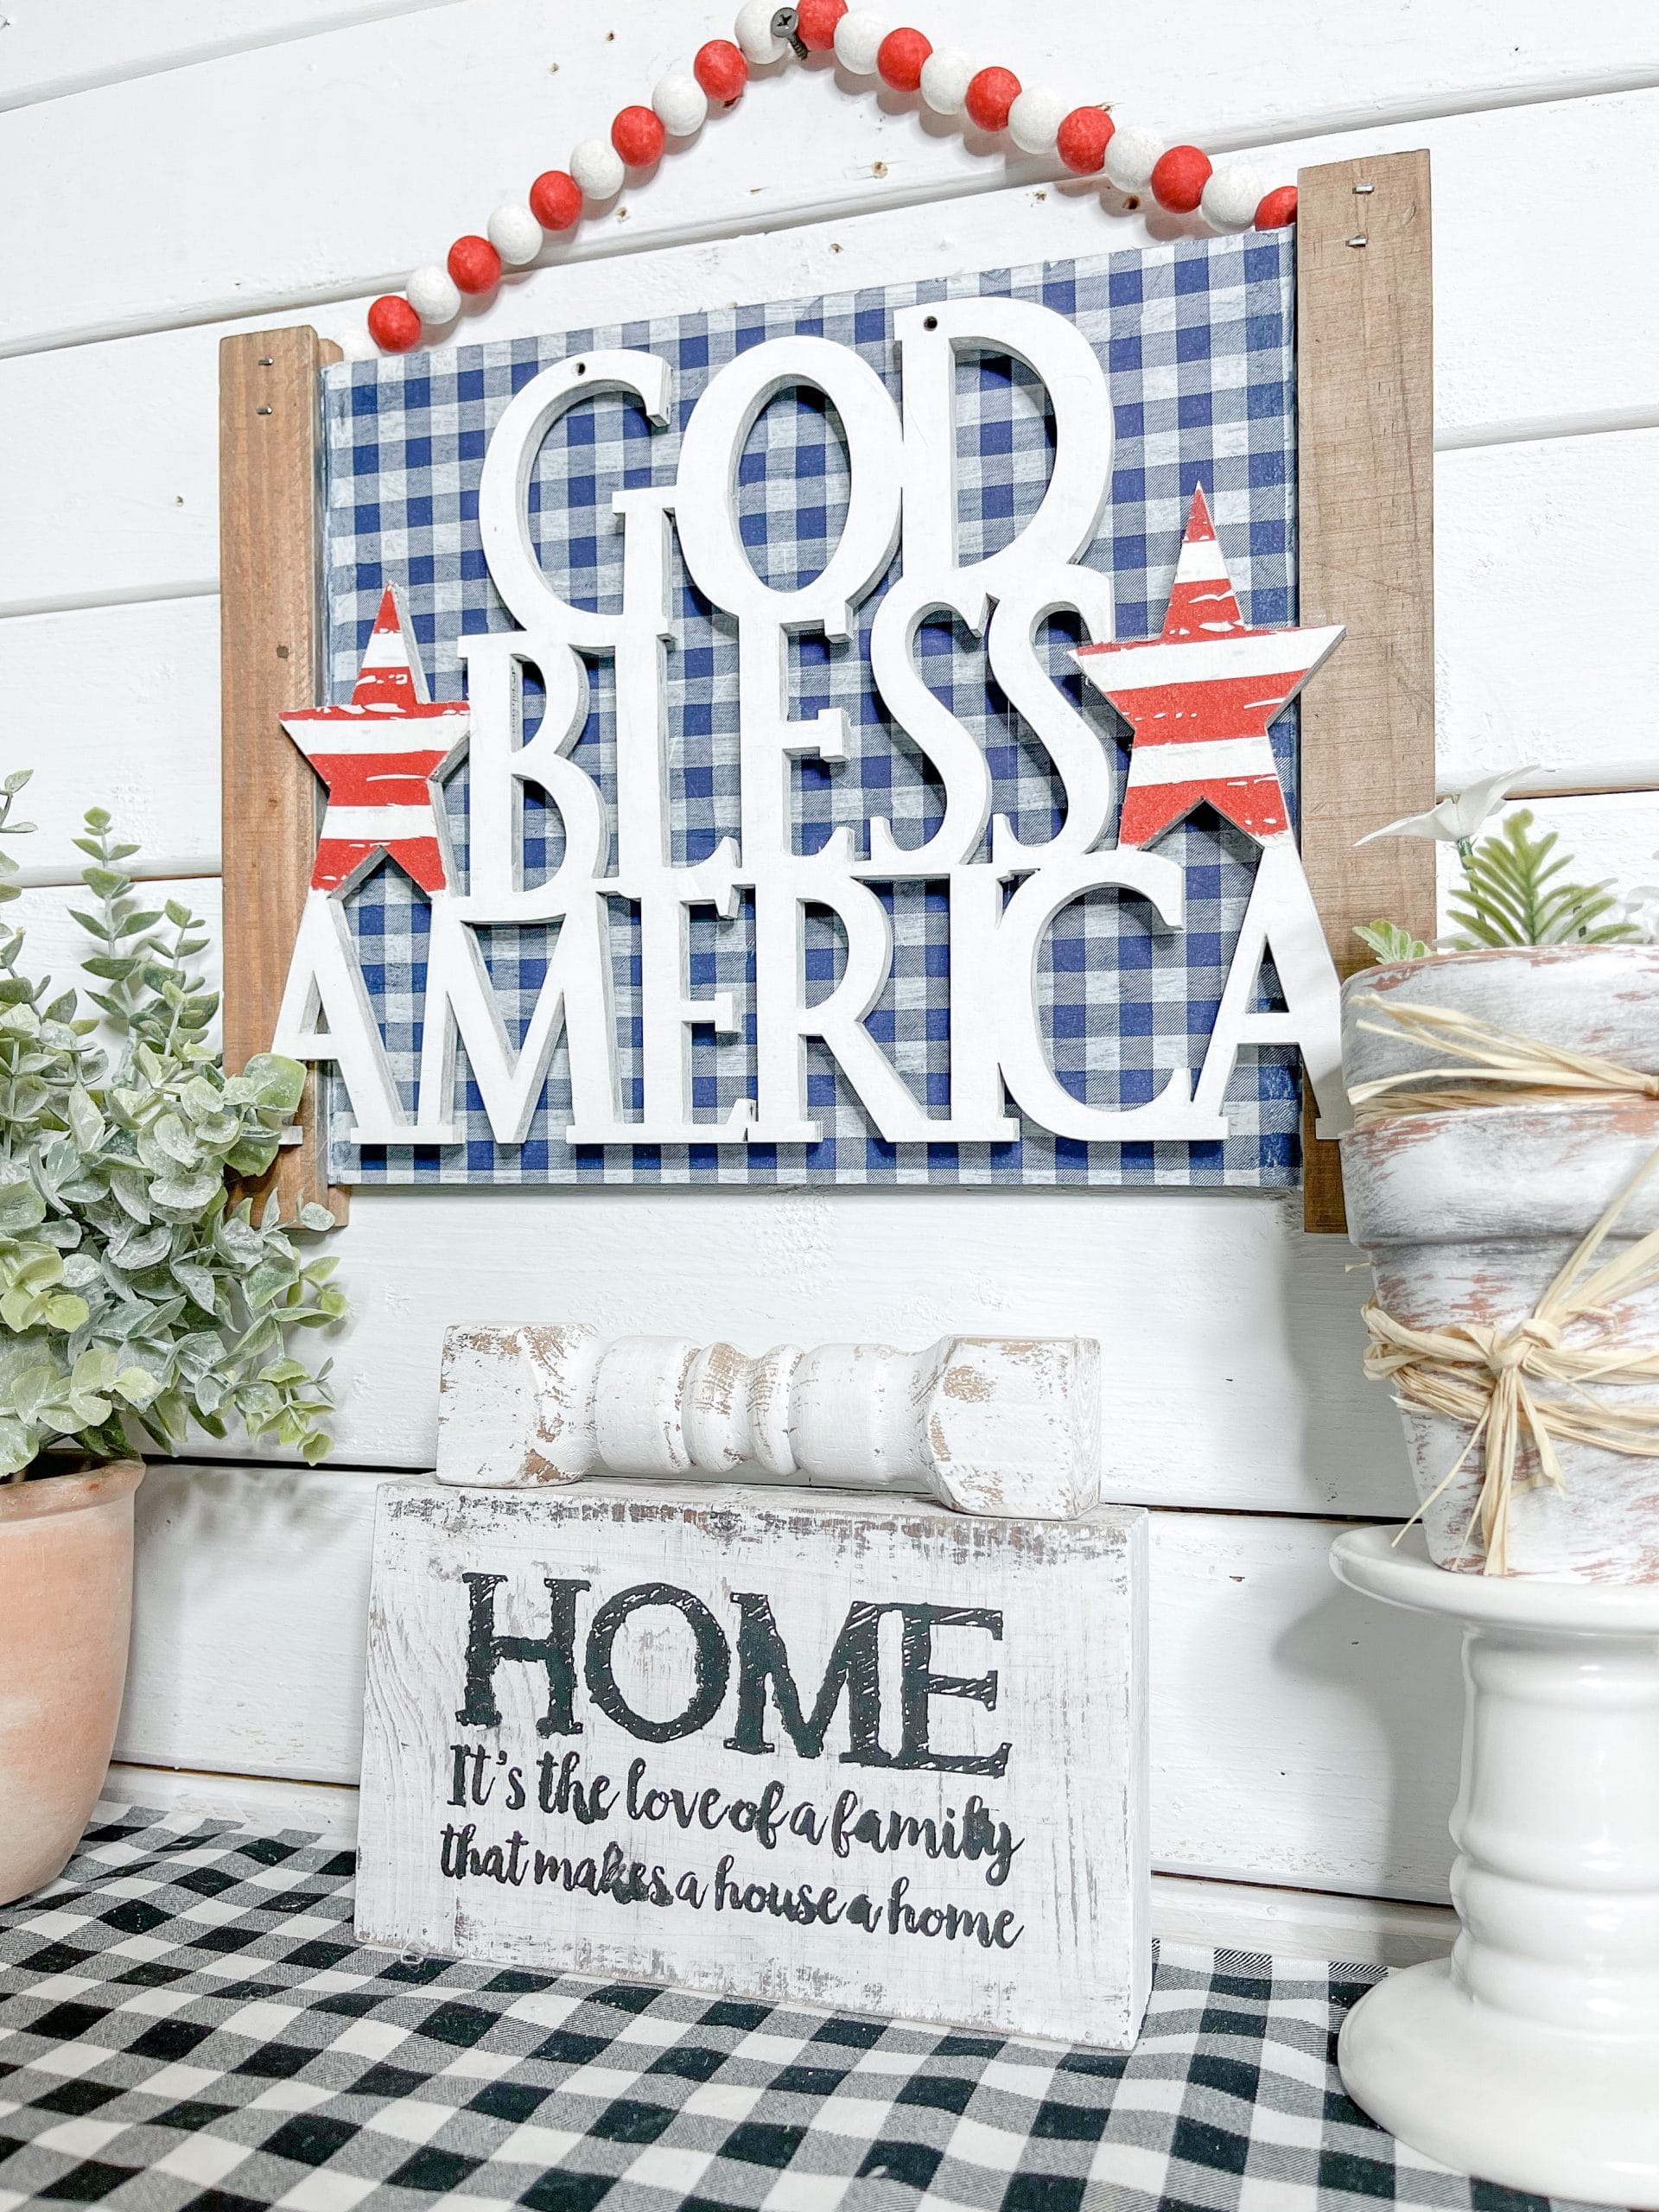
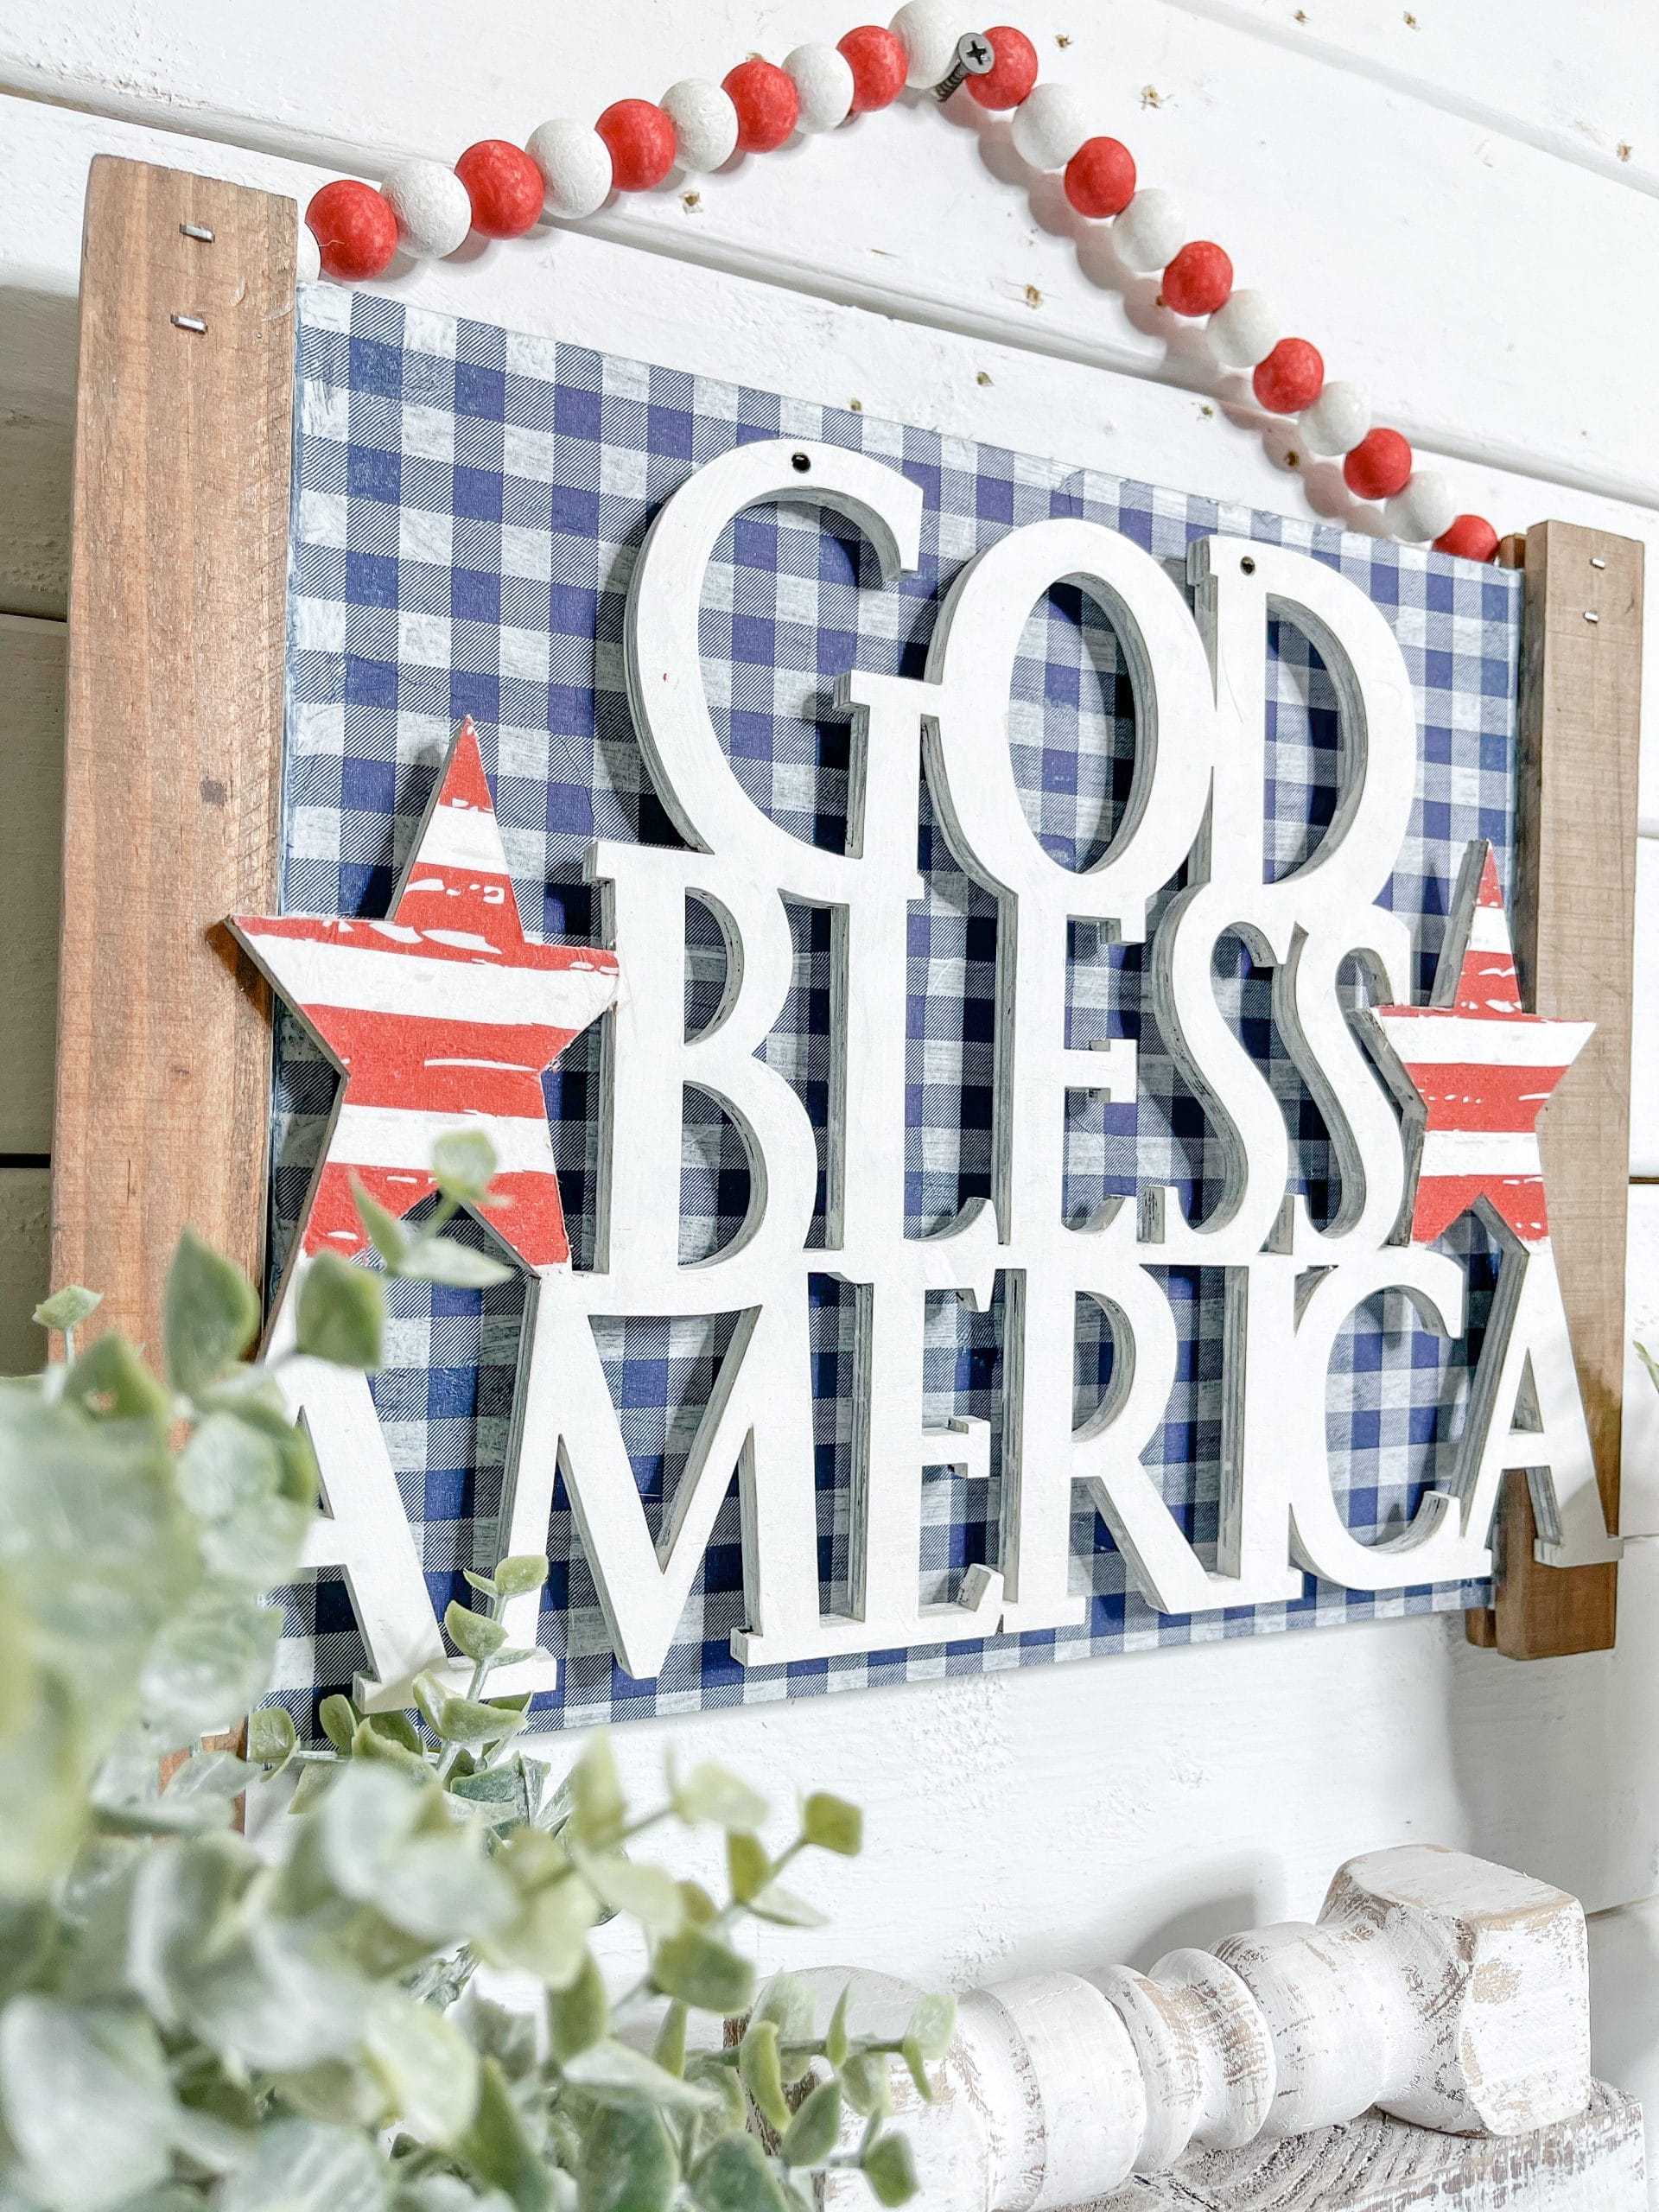
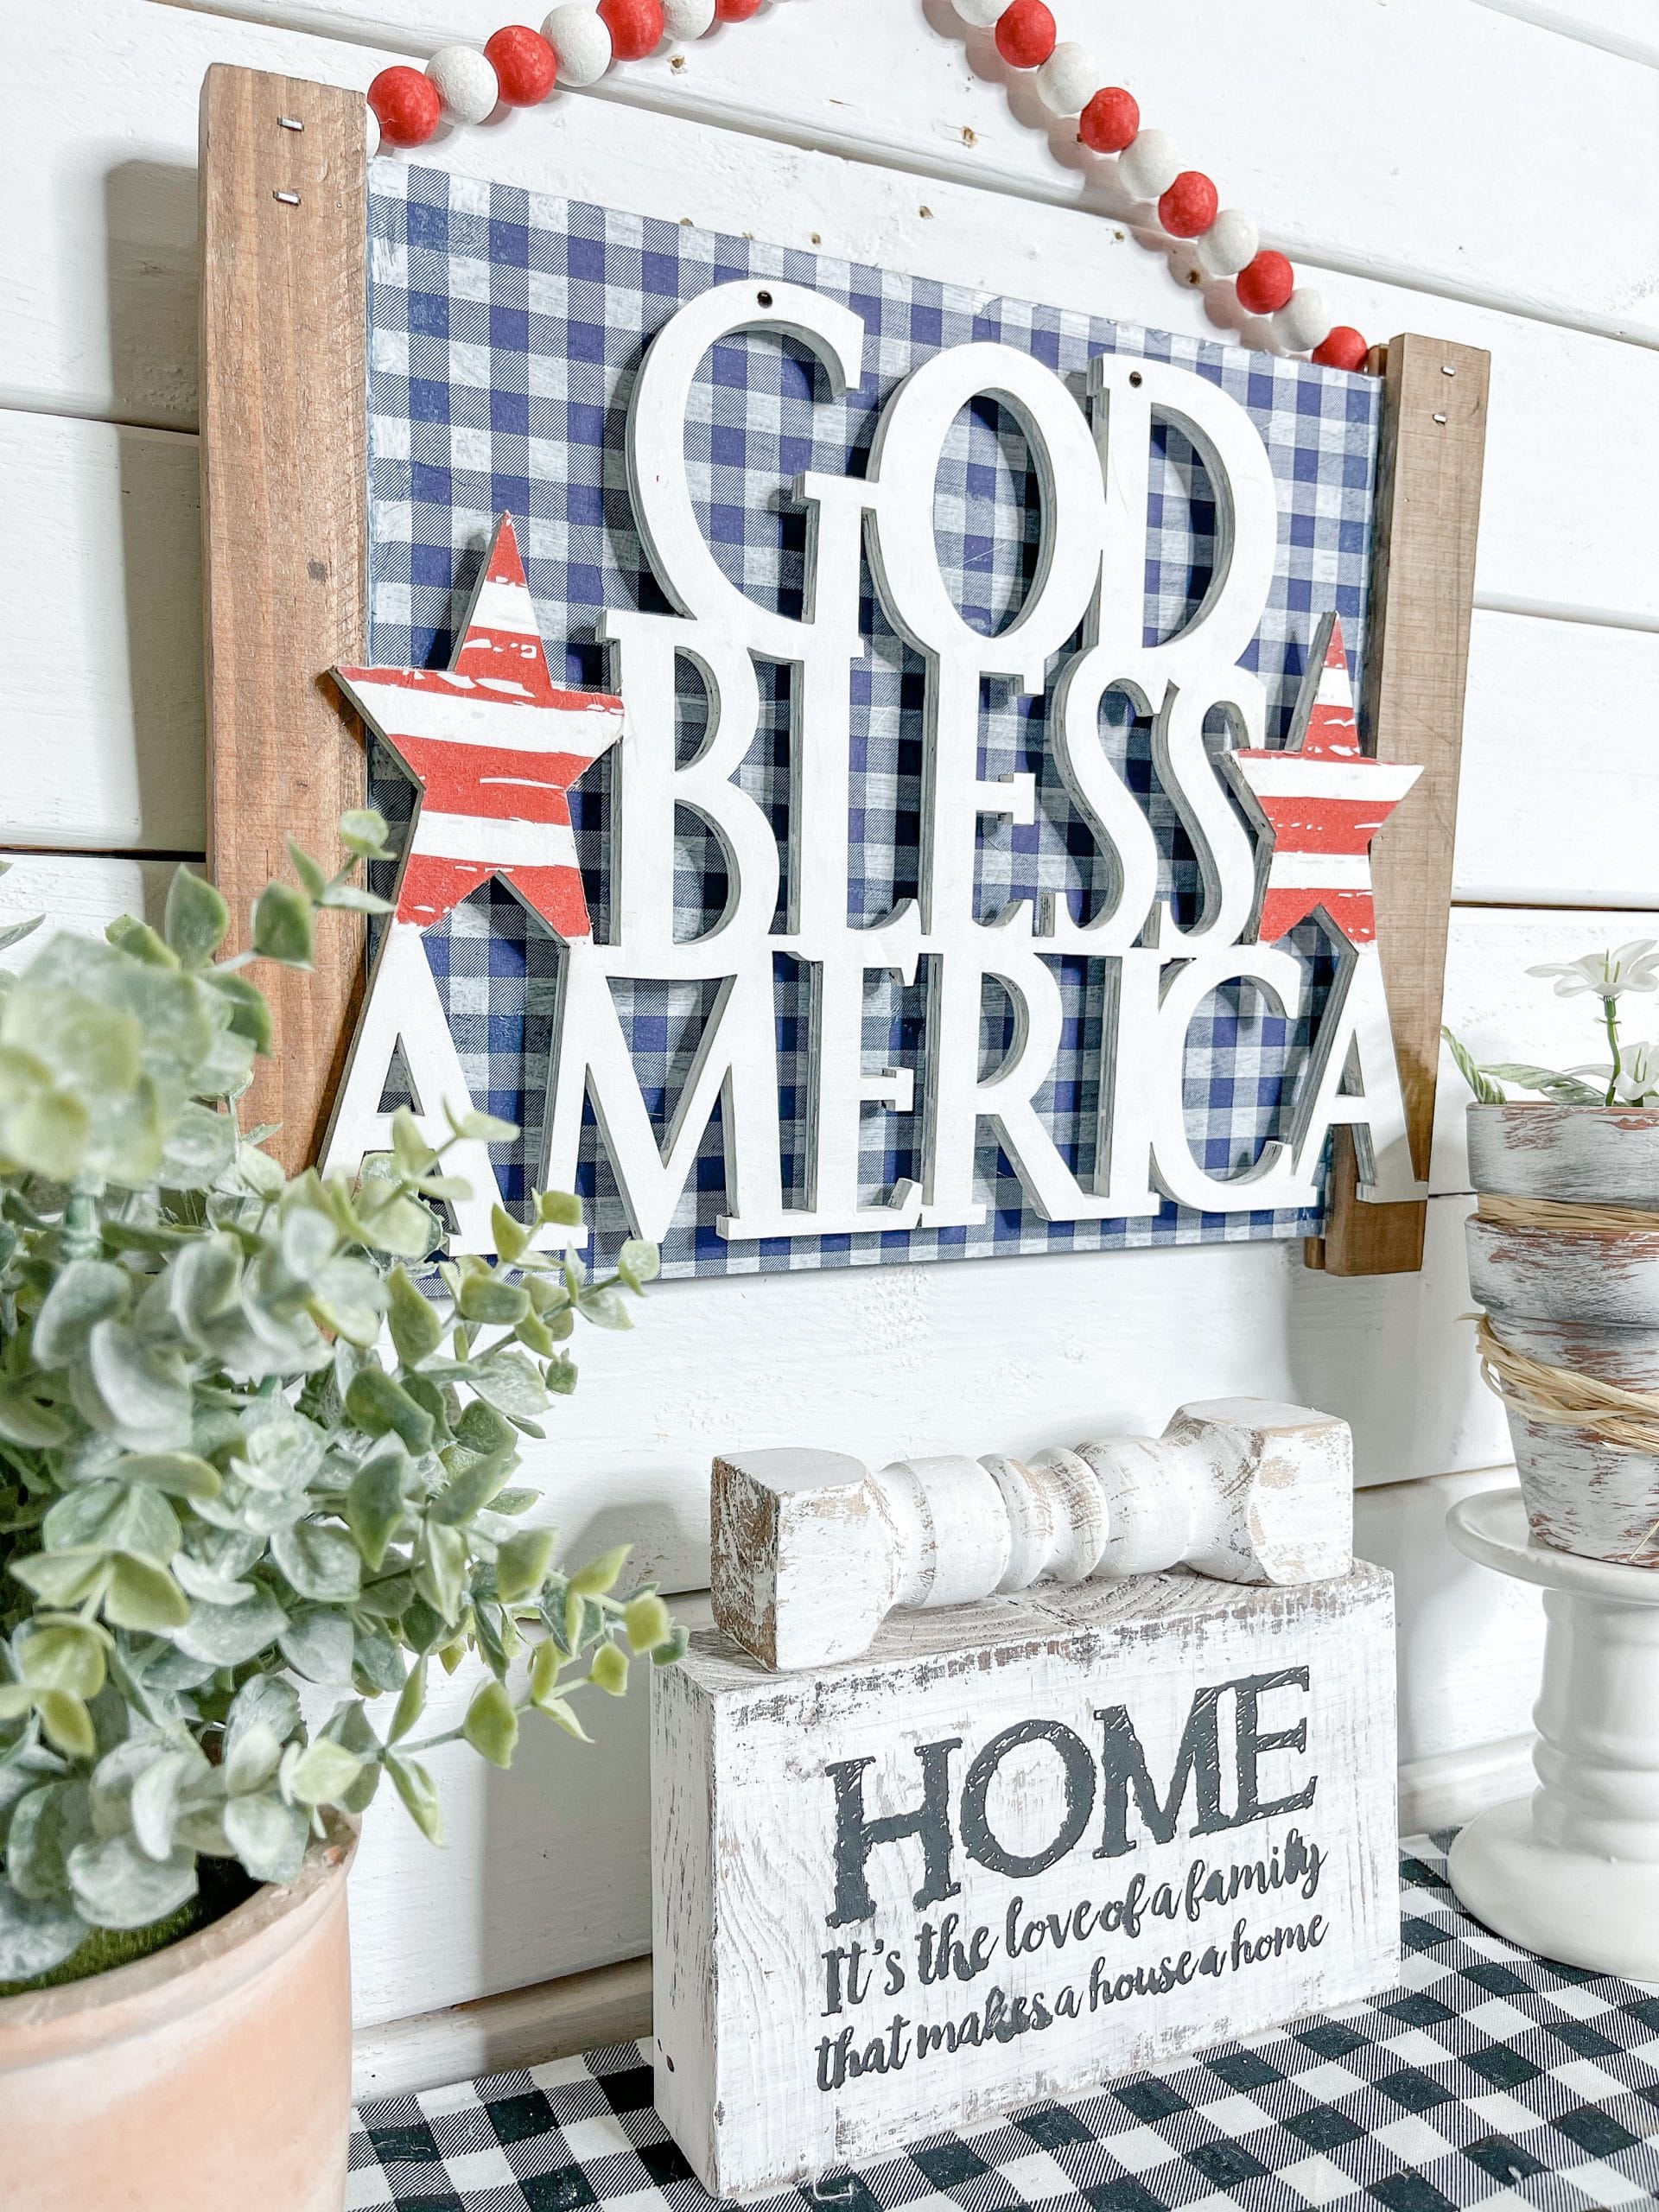
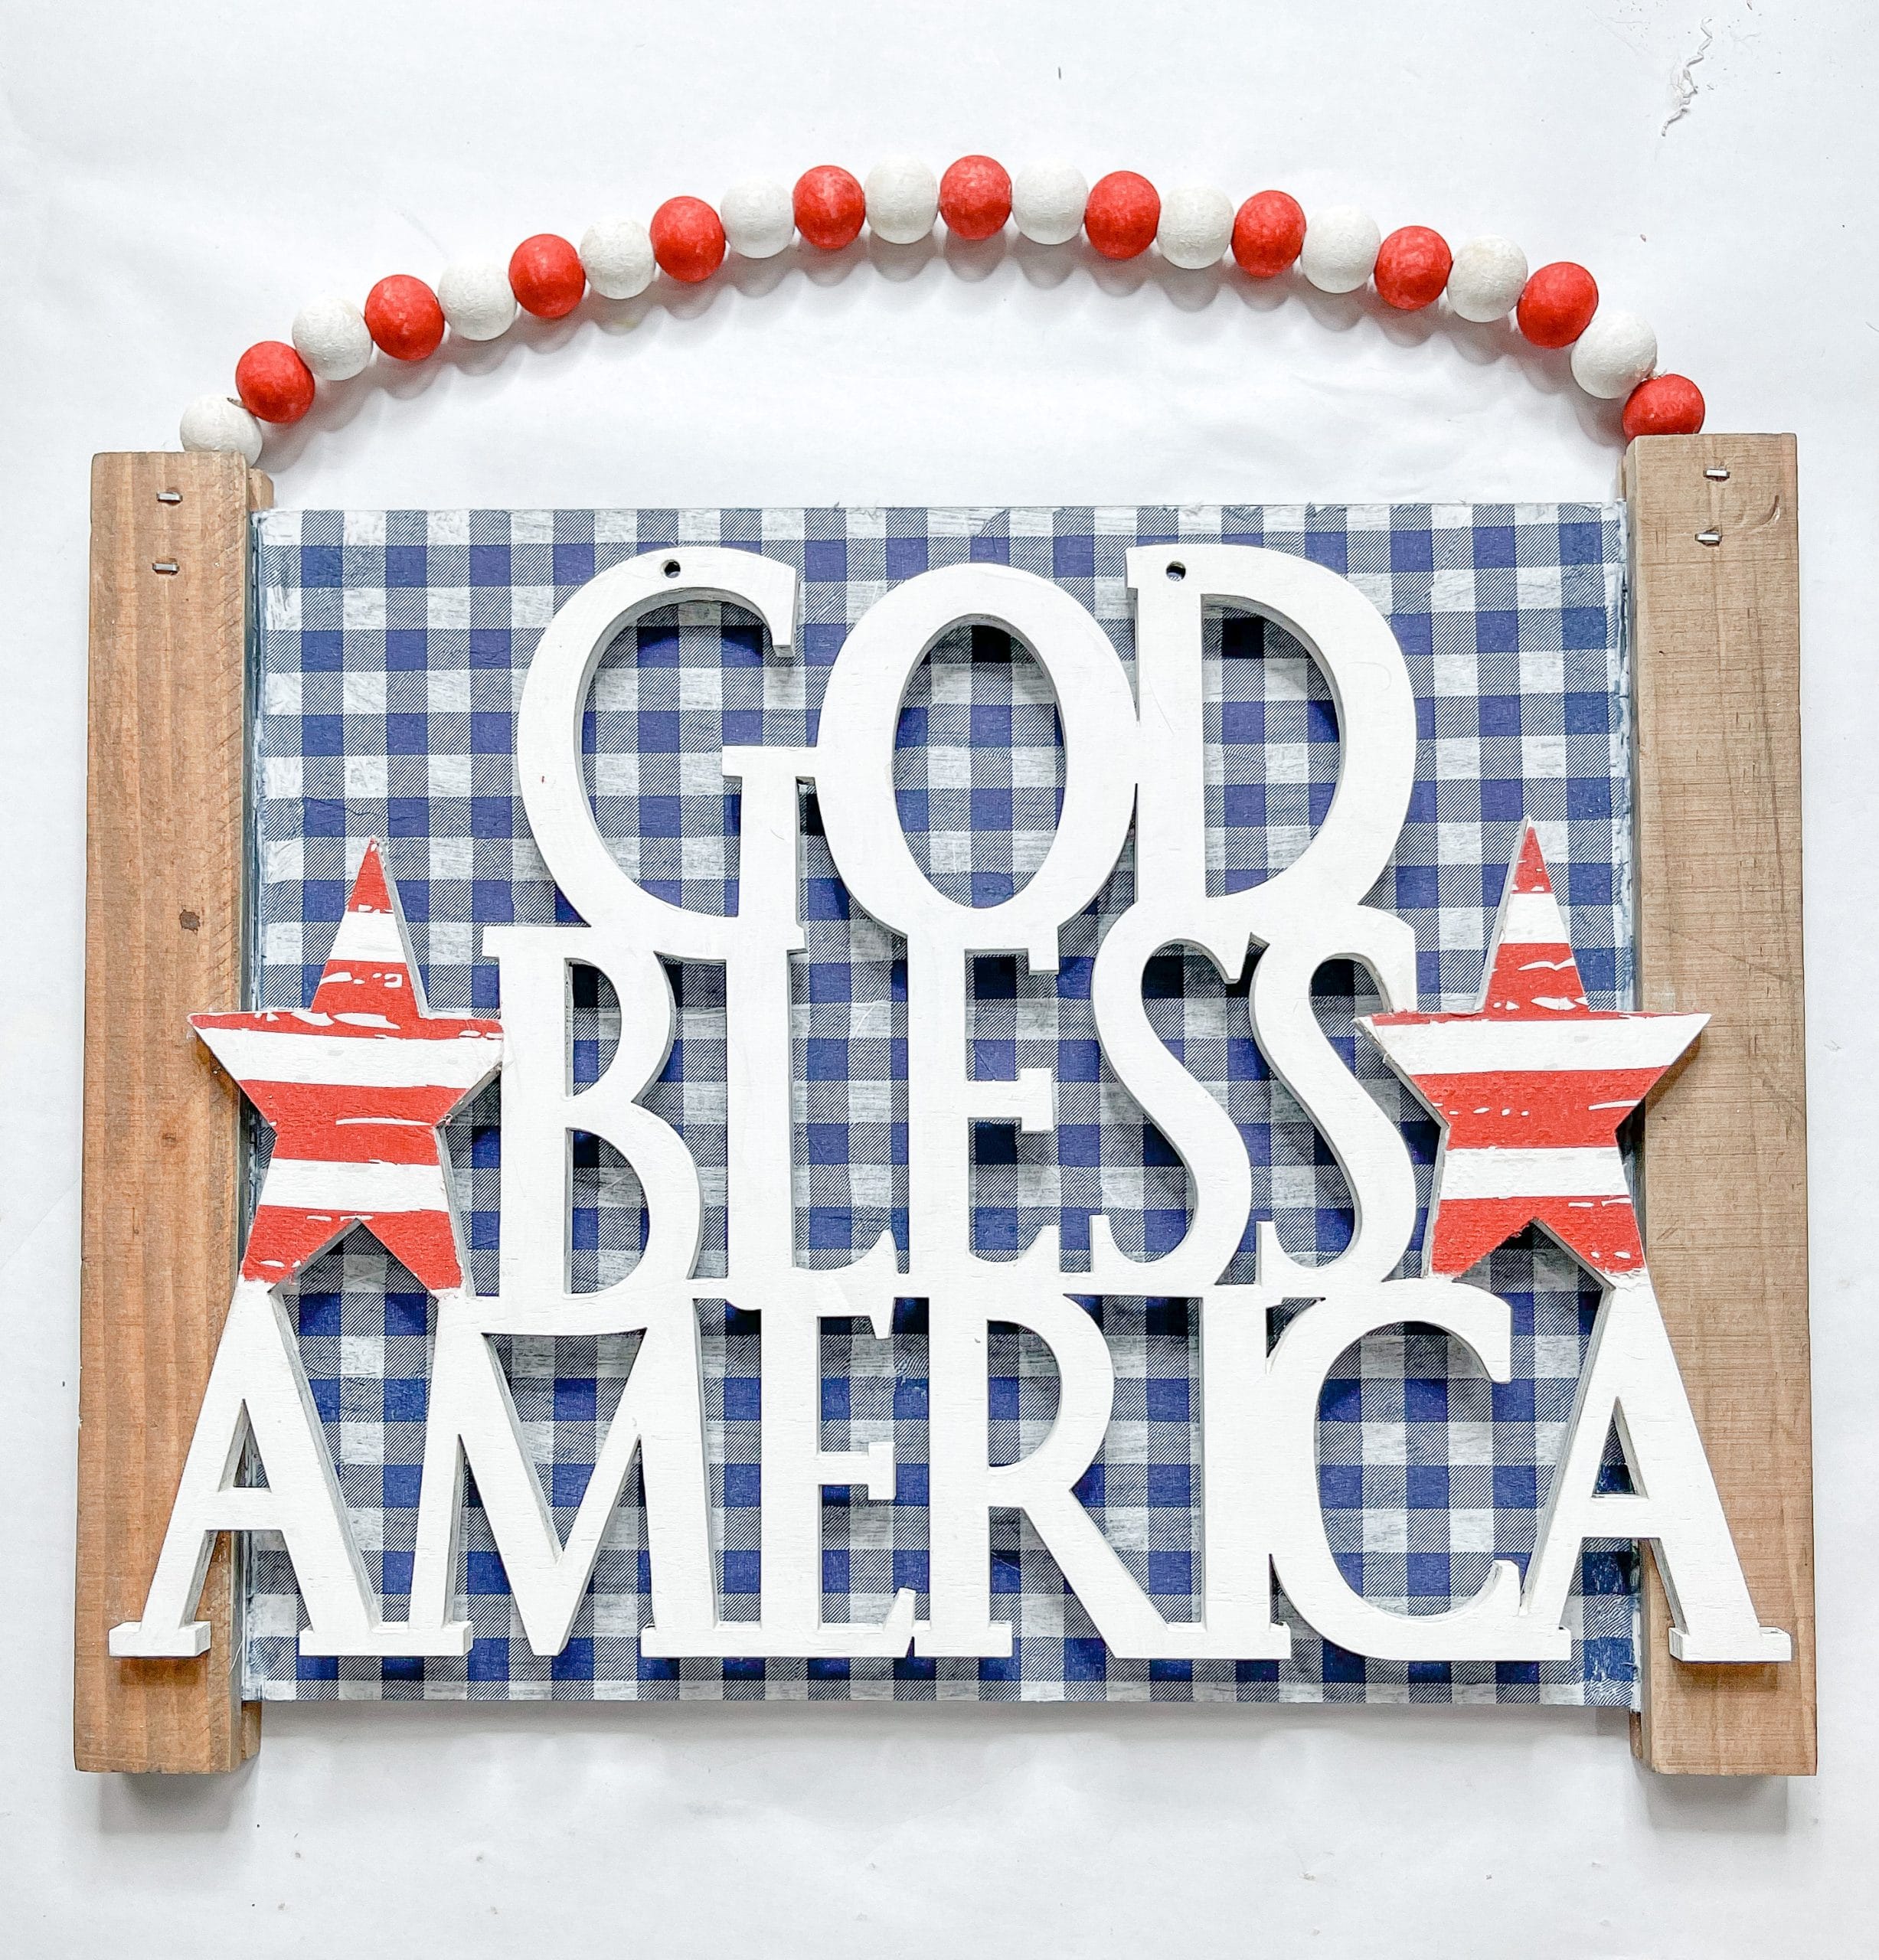
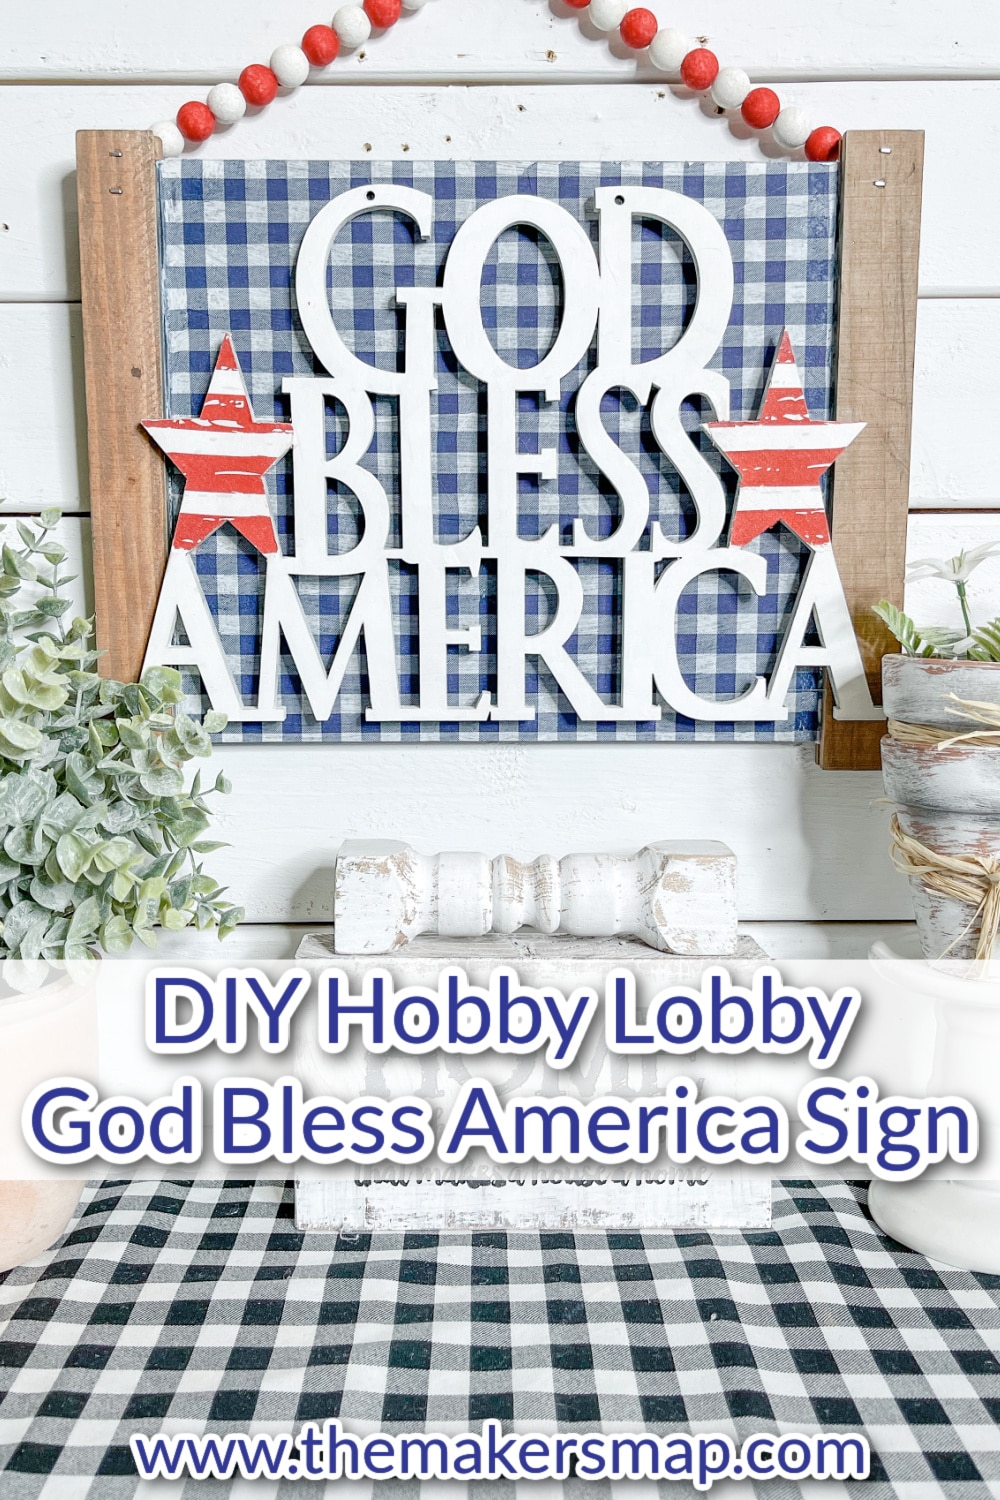
DIY God Bless America Sign
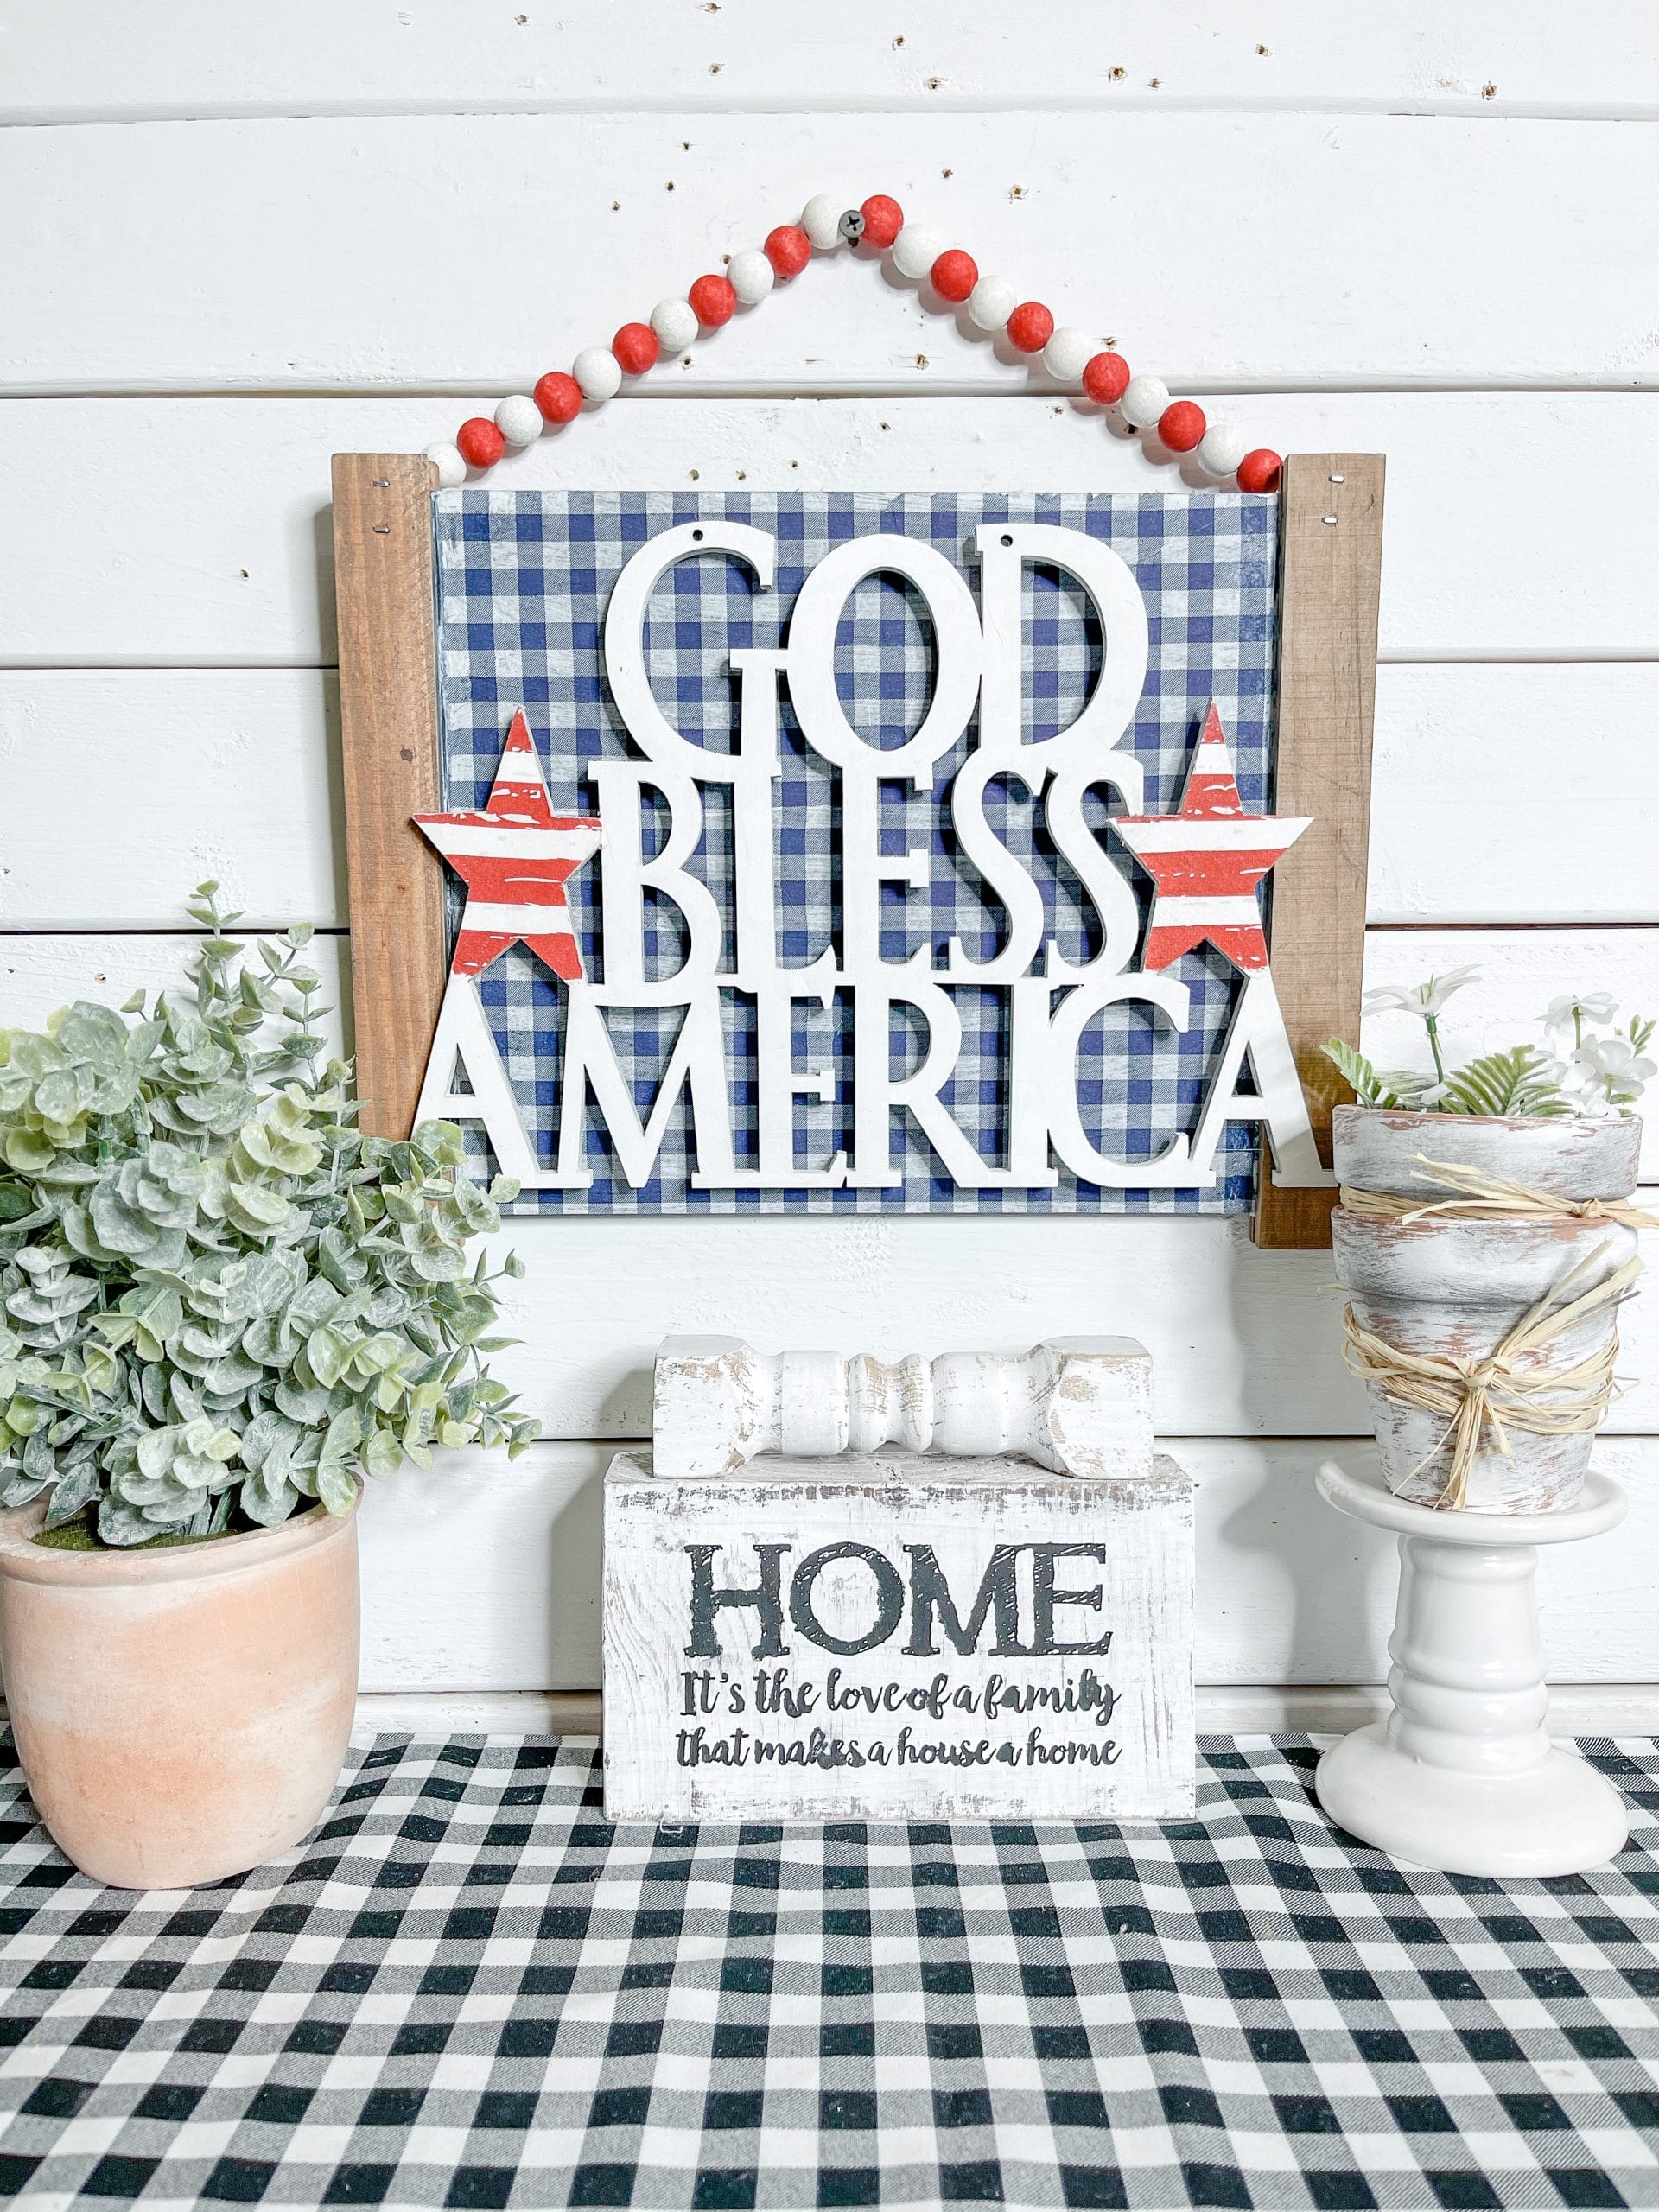
This DIY God Bless America Sign is the epitome of a simplistic DIY decor project. With only a few pieces, it is very affordable and easy to make!
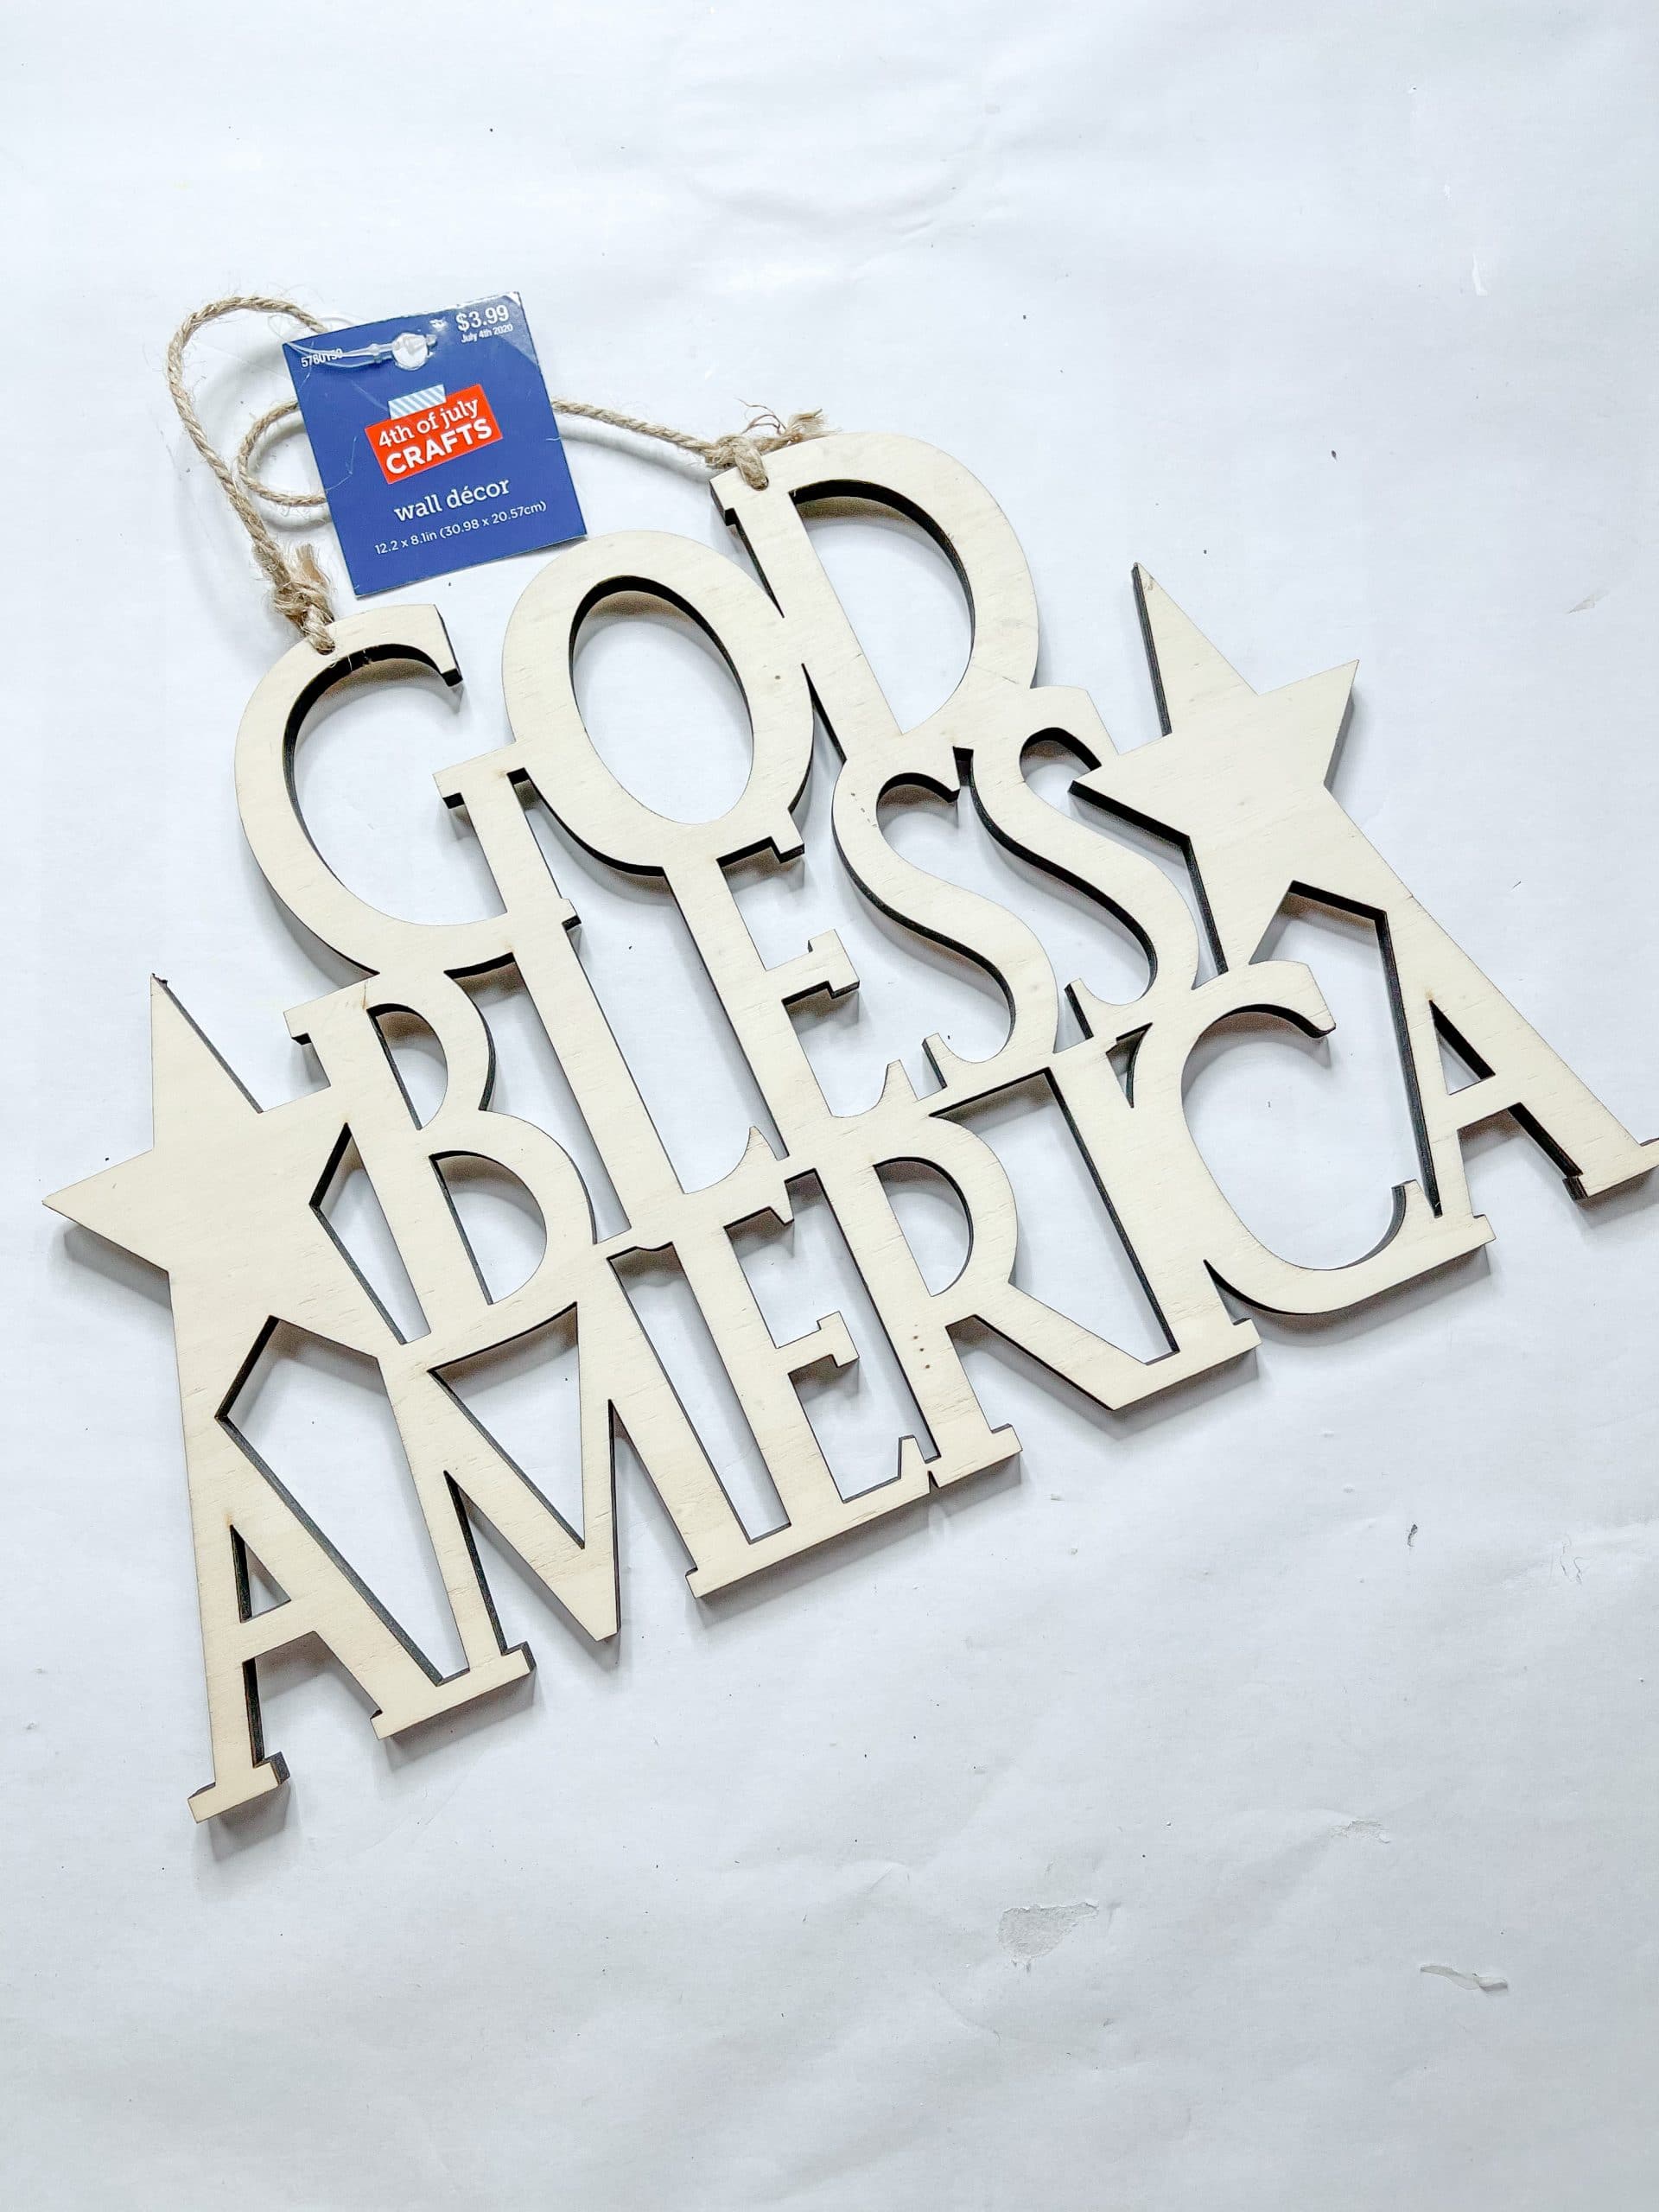
Even though there aren’t any Dollar Tree items, I scored the God Bless America lettering from Hobby Lobby for over 50% OFF and the frame at Tuesday Morning for like 90% OFF!
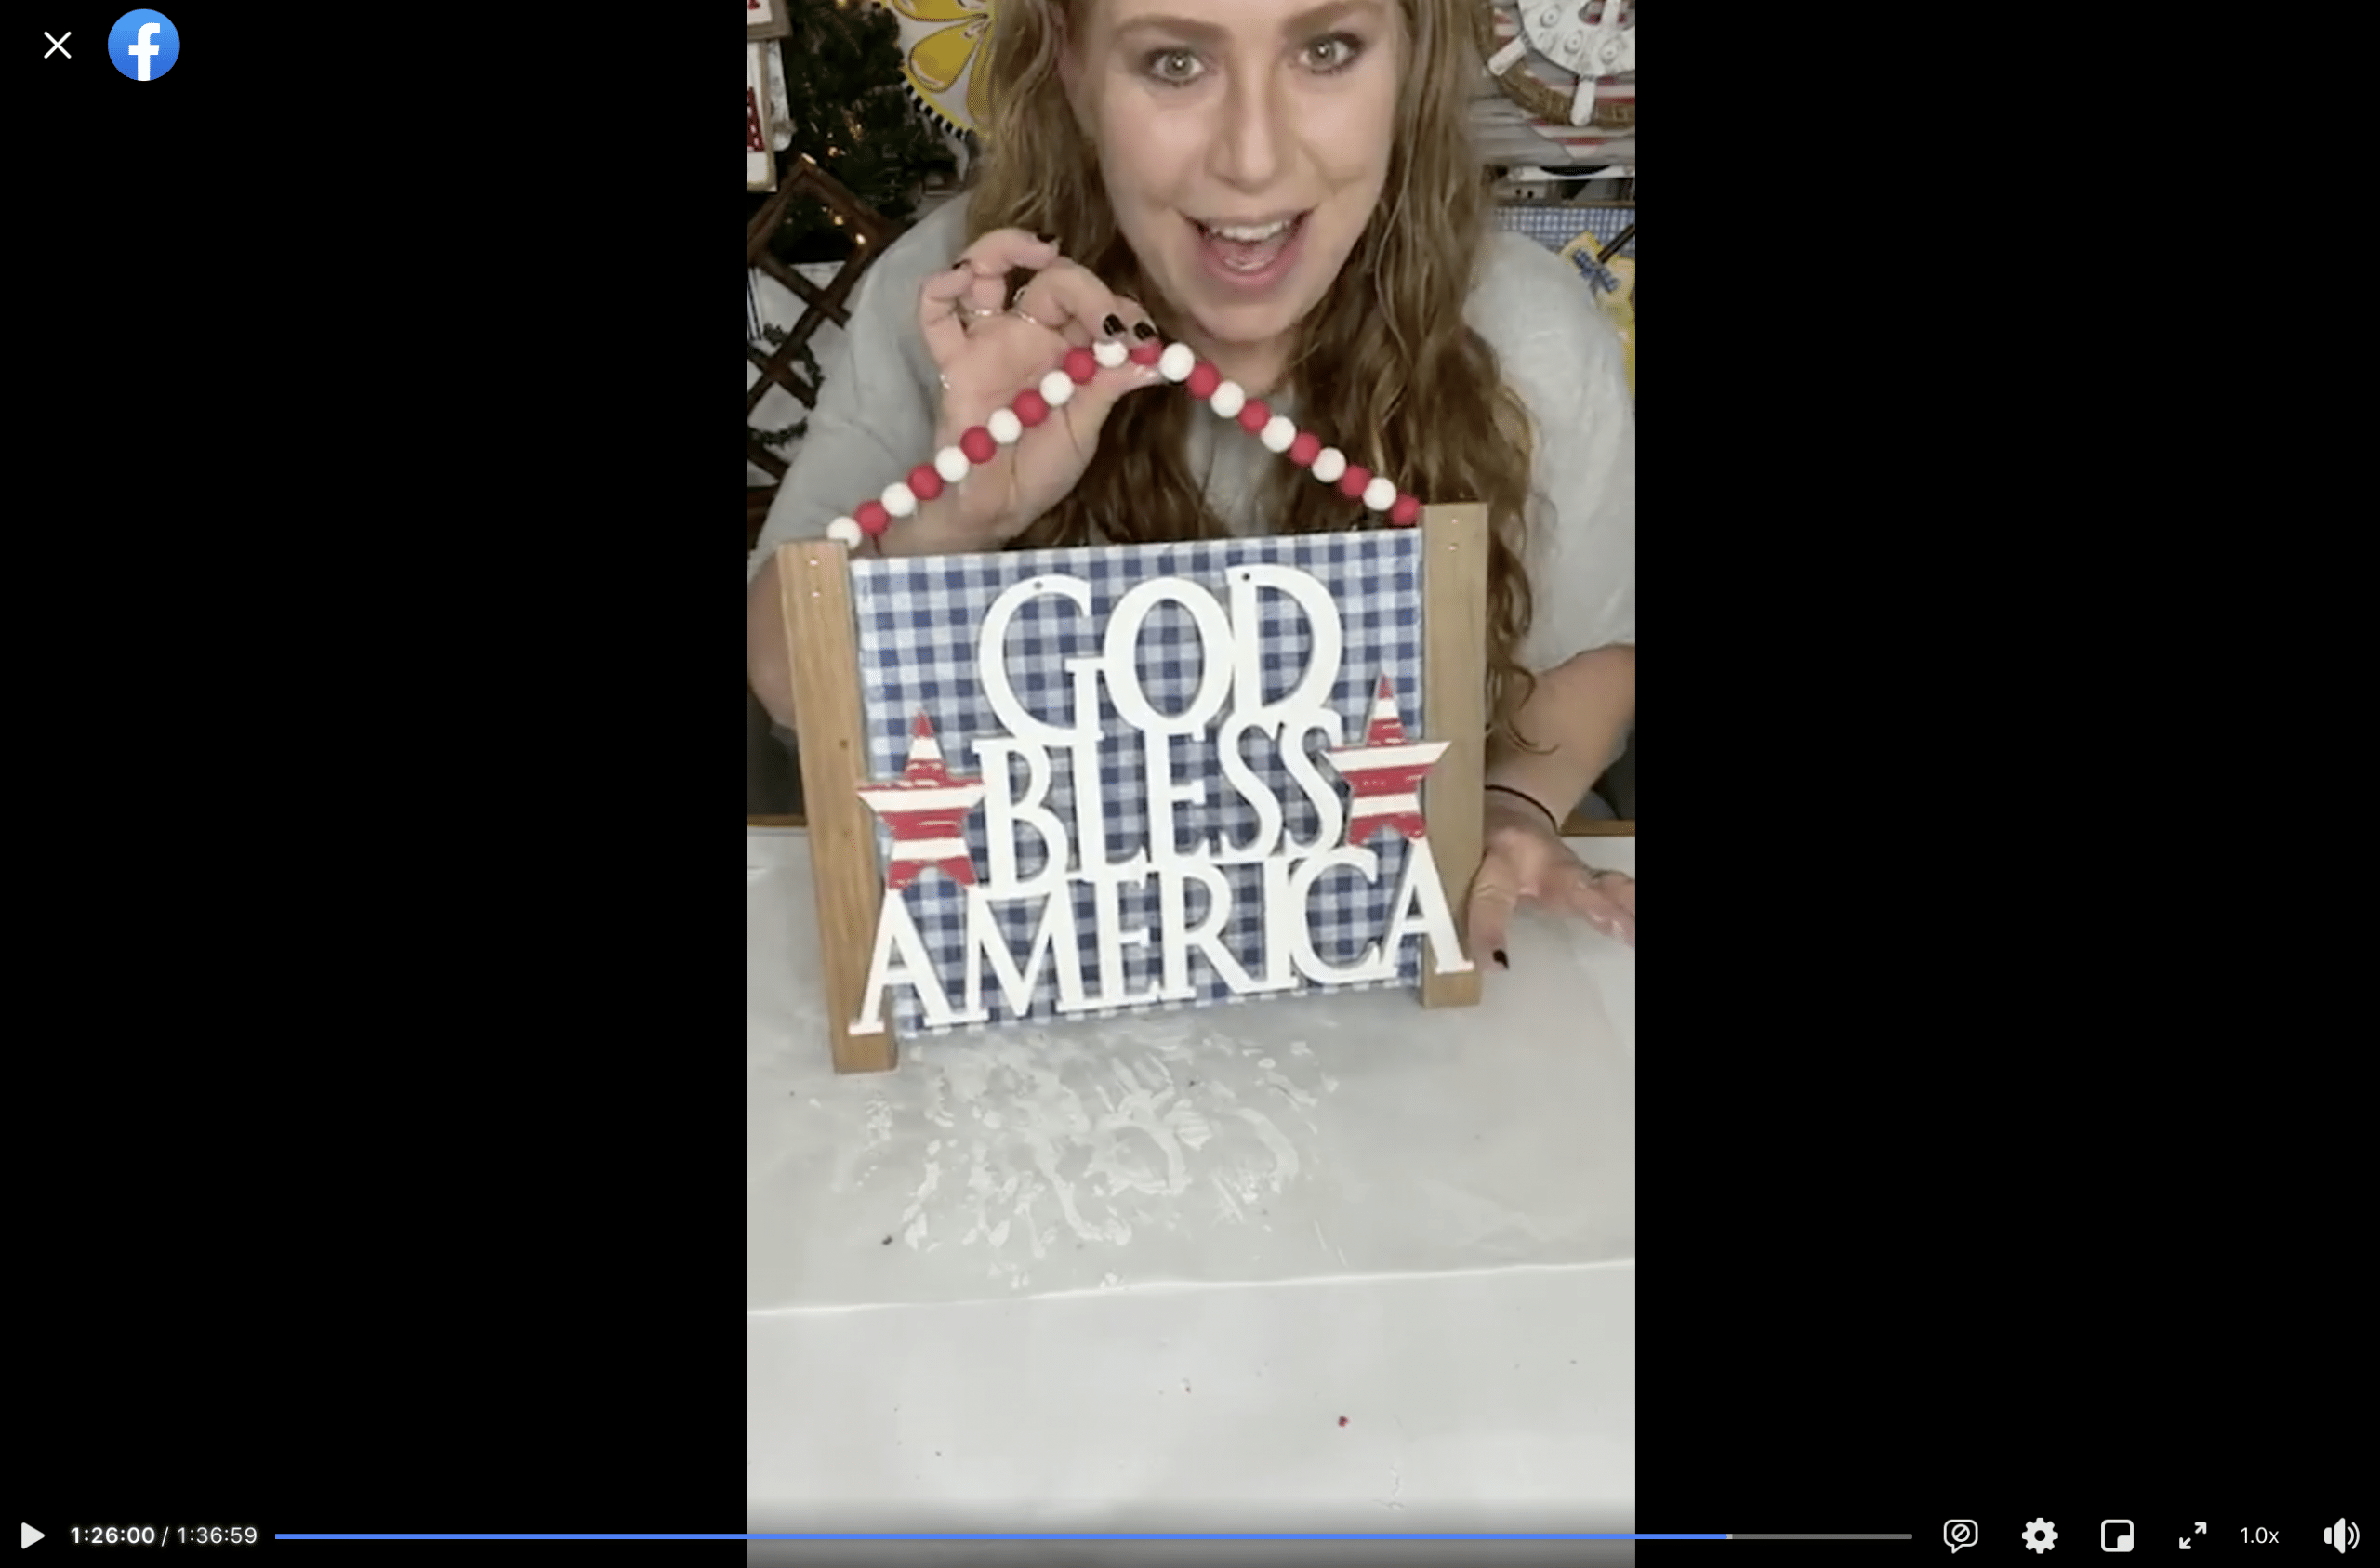
Watch the DIY Tutorial on Facebook
I put all the steps of making this easy 4th of July DIY decor into a quick video and shared it on my Youtube channel!
There are also 3 other amazing patriotic DIY decor projects in that same video to inspire you and get those creative juices flowing!

WATCH THE YOUTUBE DIY TUTORIAL
Facebook LIVE DIY Tutorial Replay
I originally recorded the how-to steps of this adorable DIY God Bless America Sign during a LIVE video on my Facebook page.
If you want to watch the extended DIY version and join in on the fun conversations, you can watch the Facebook LIVE DIY Tutorial Replay.
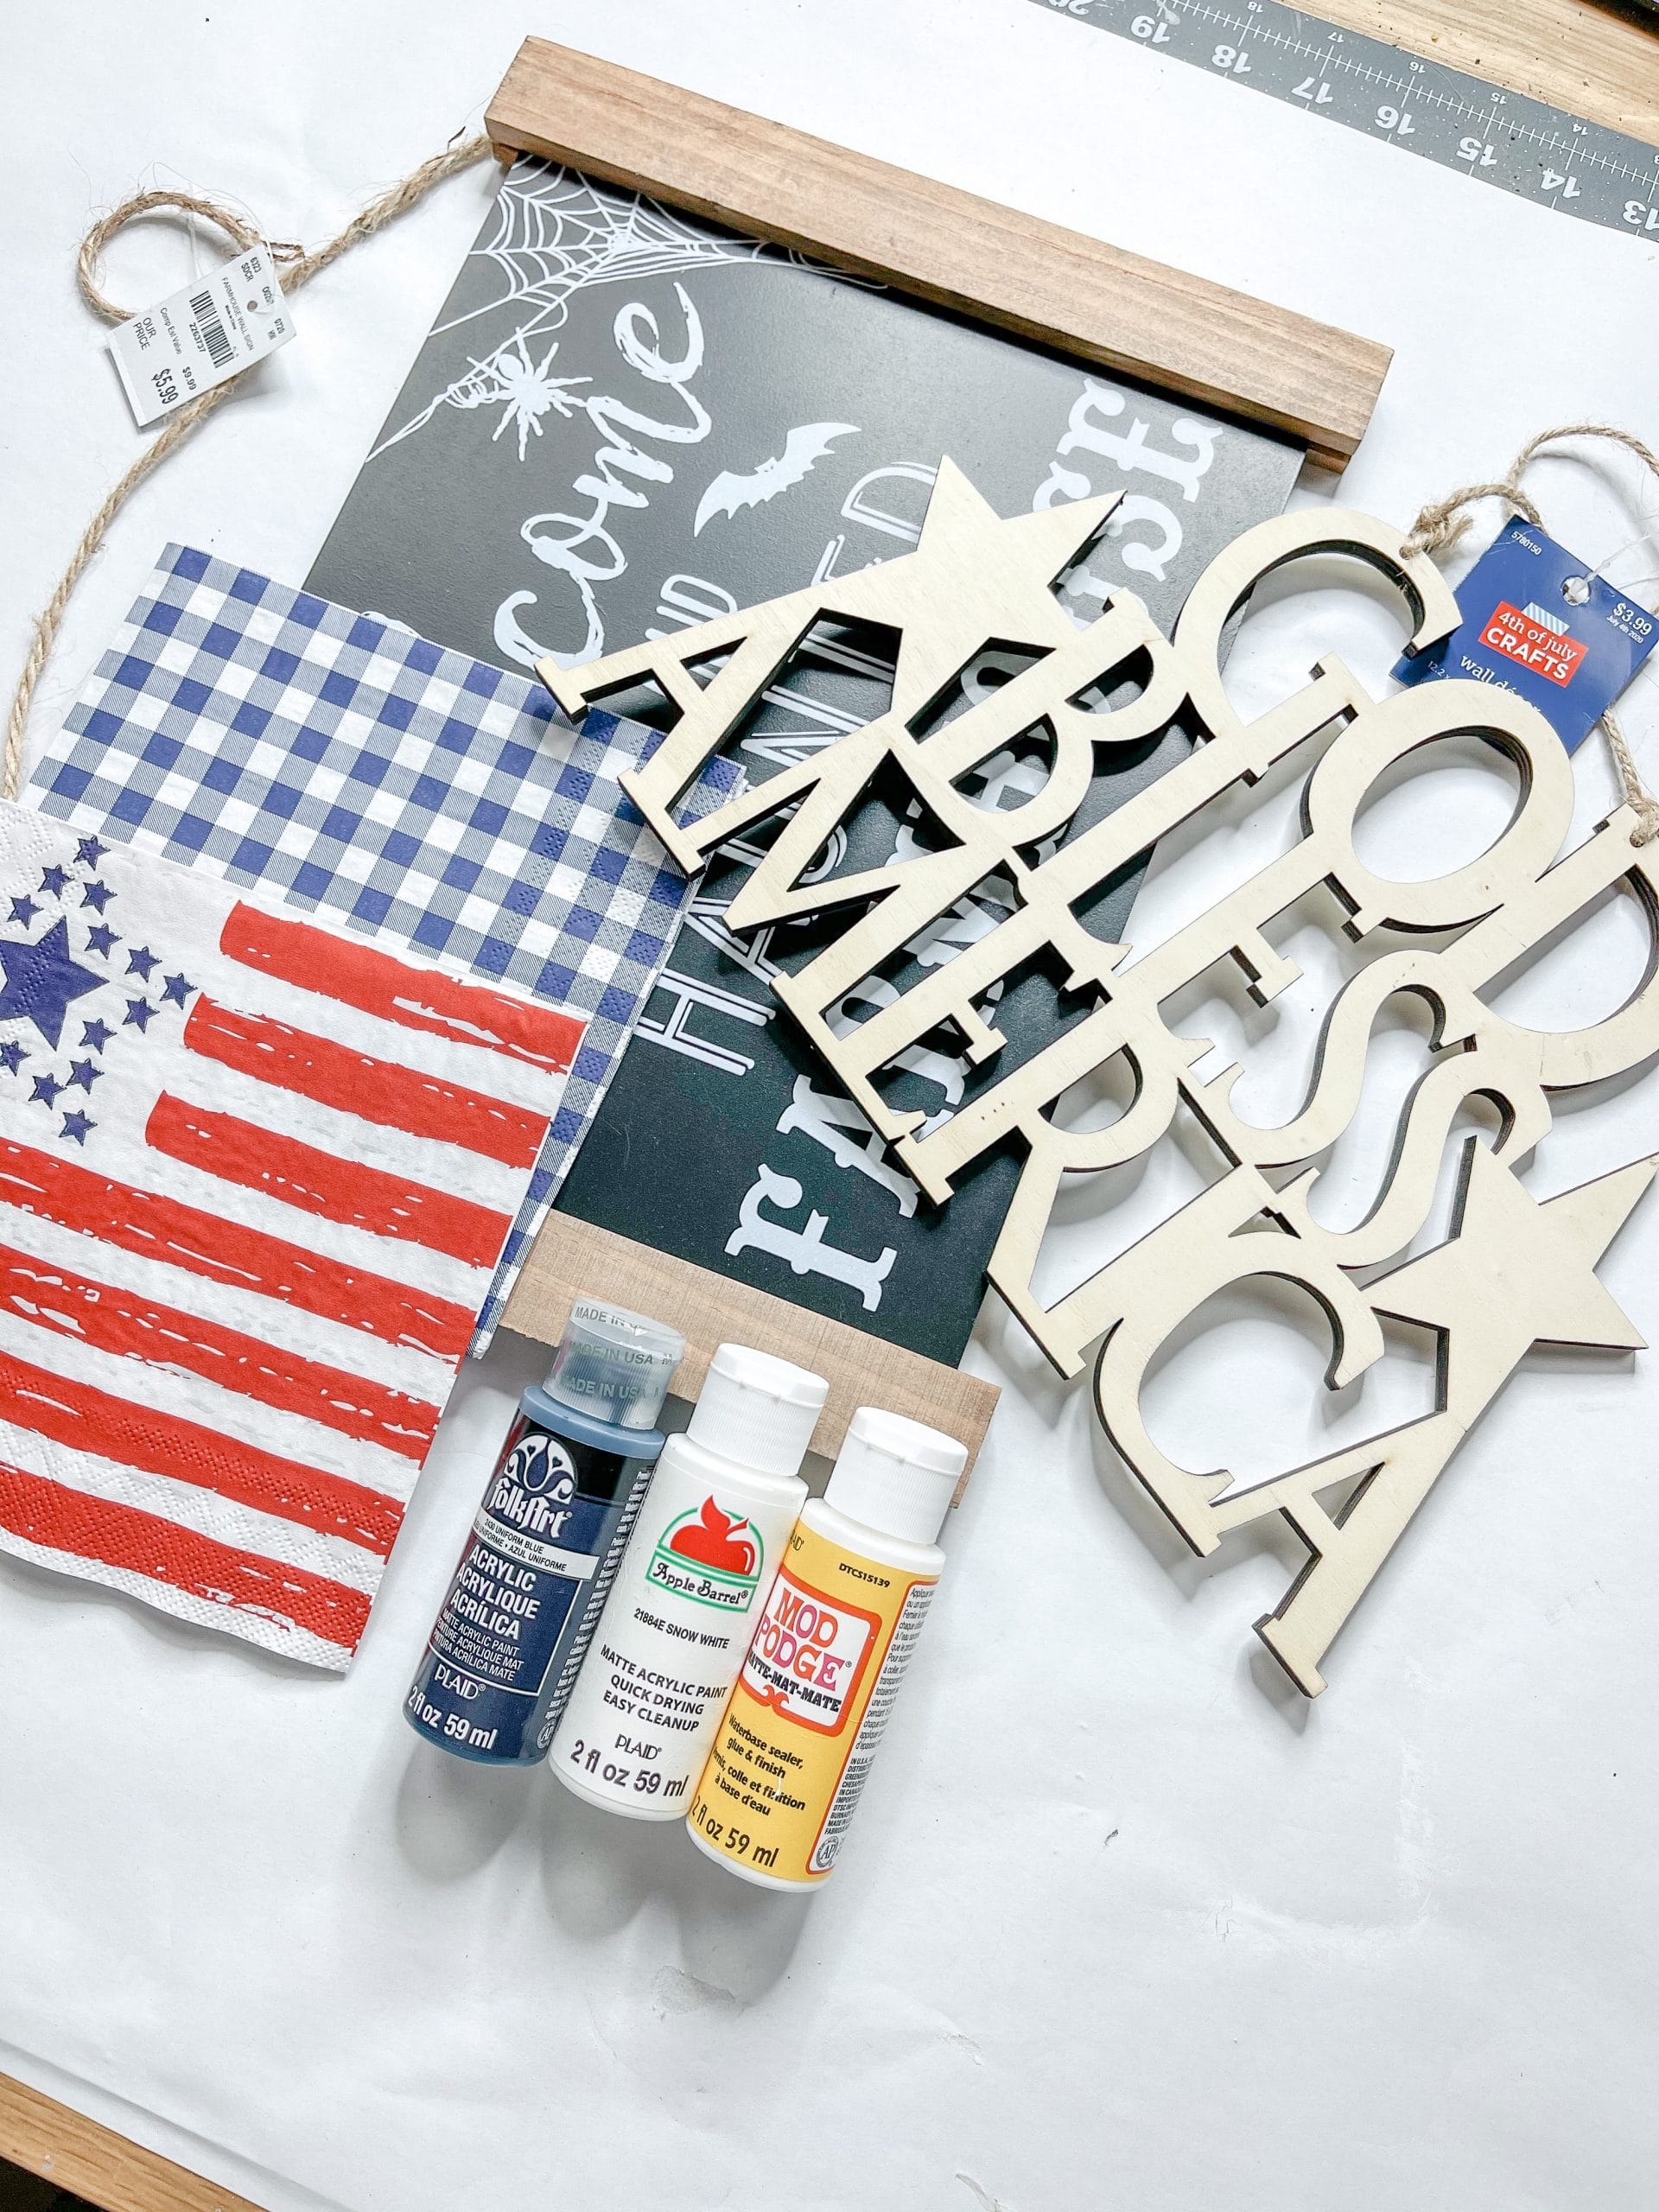
For this project, I will be using these items but you can substitute where you want.
“As an Amazon Associate, I earn from qualifying purchases.”
- God Bless America Lettering (Hobby Lobby)
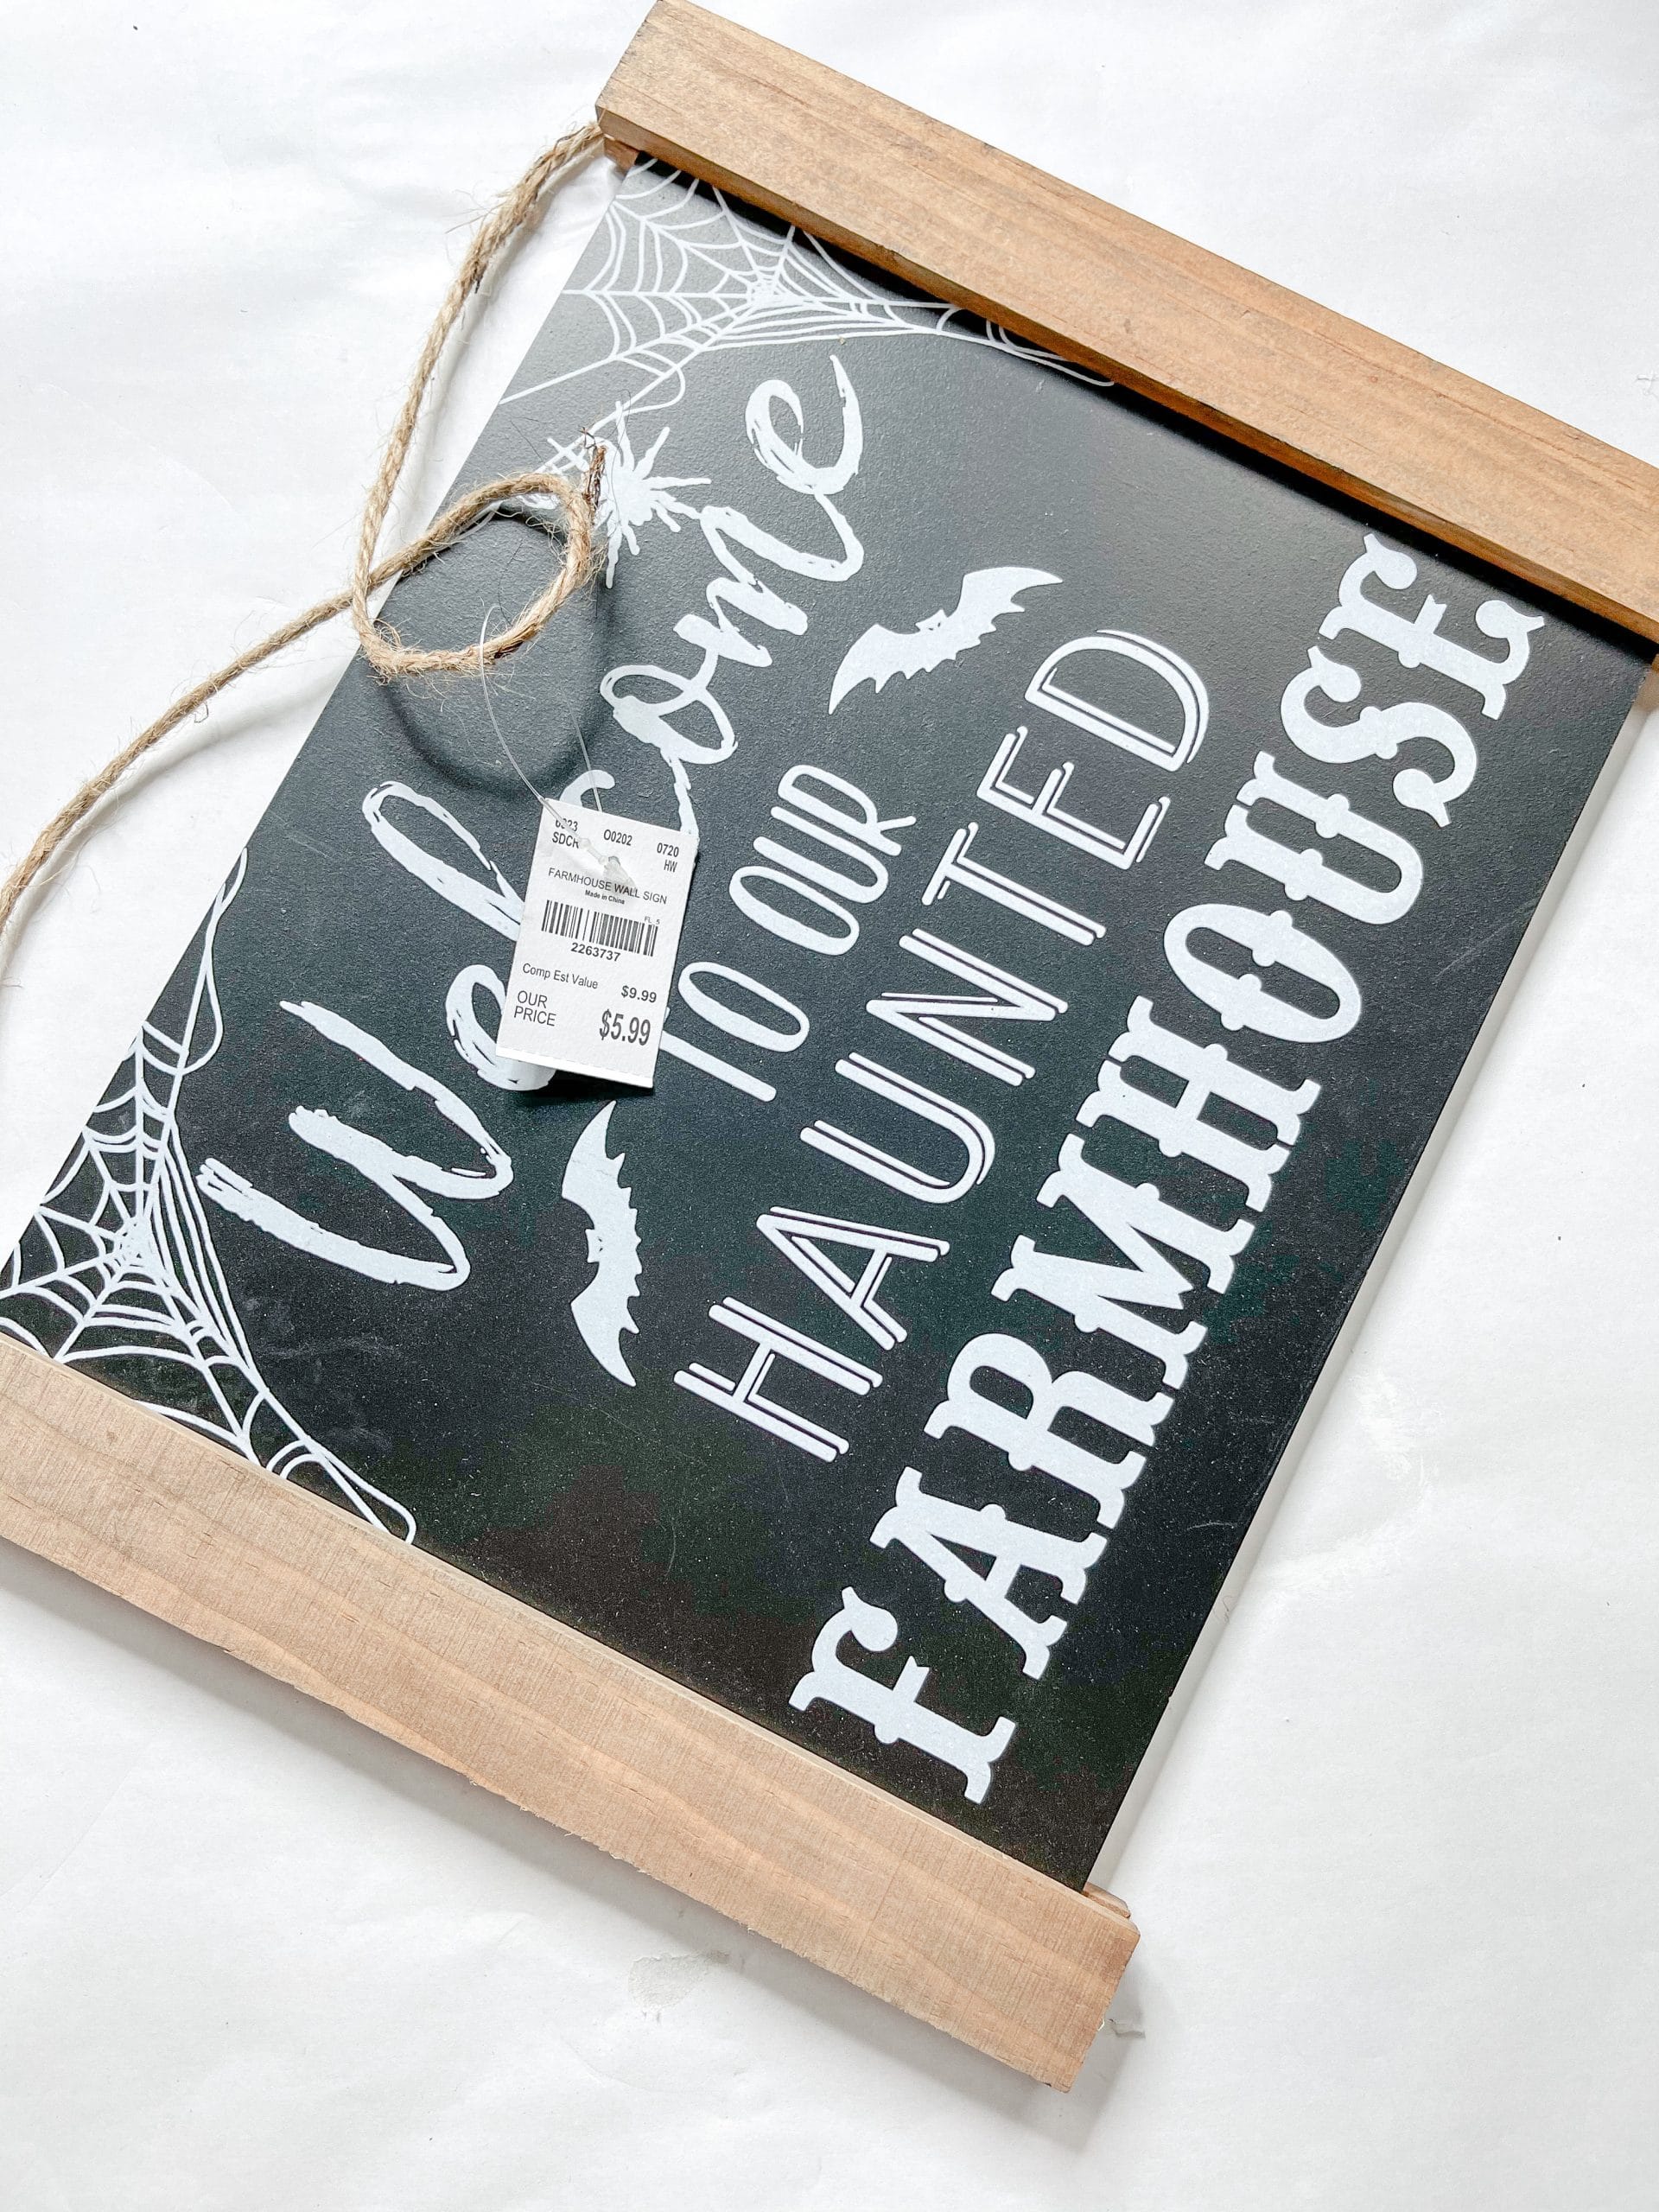
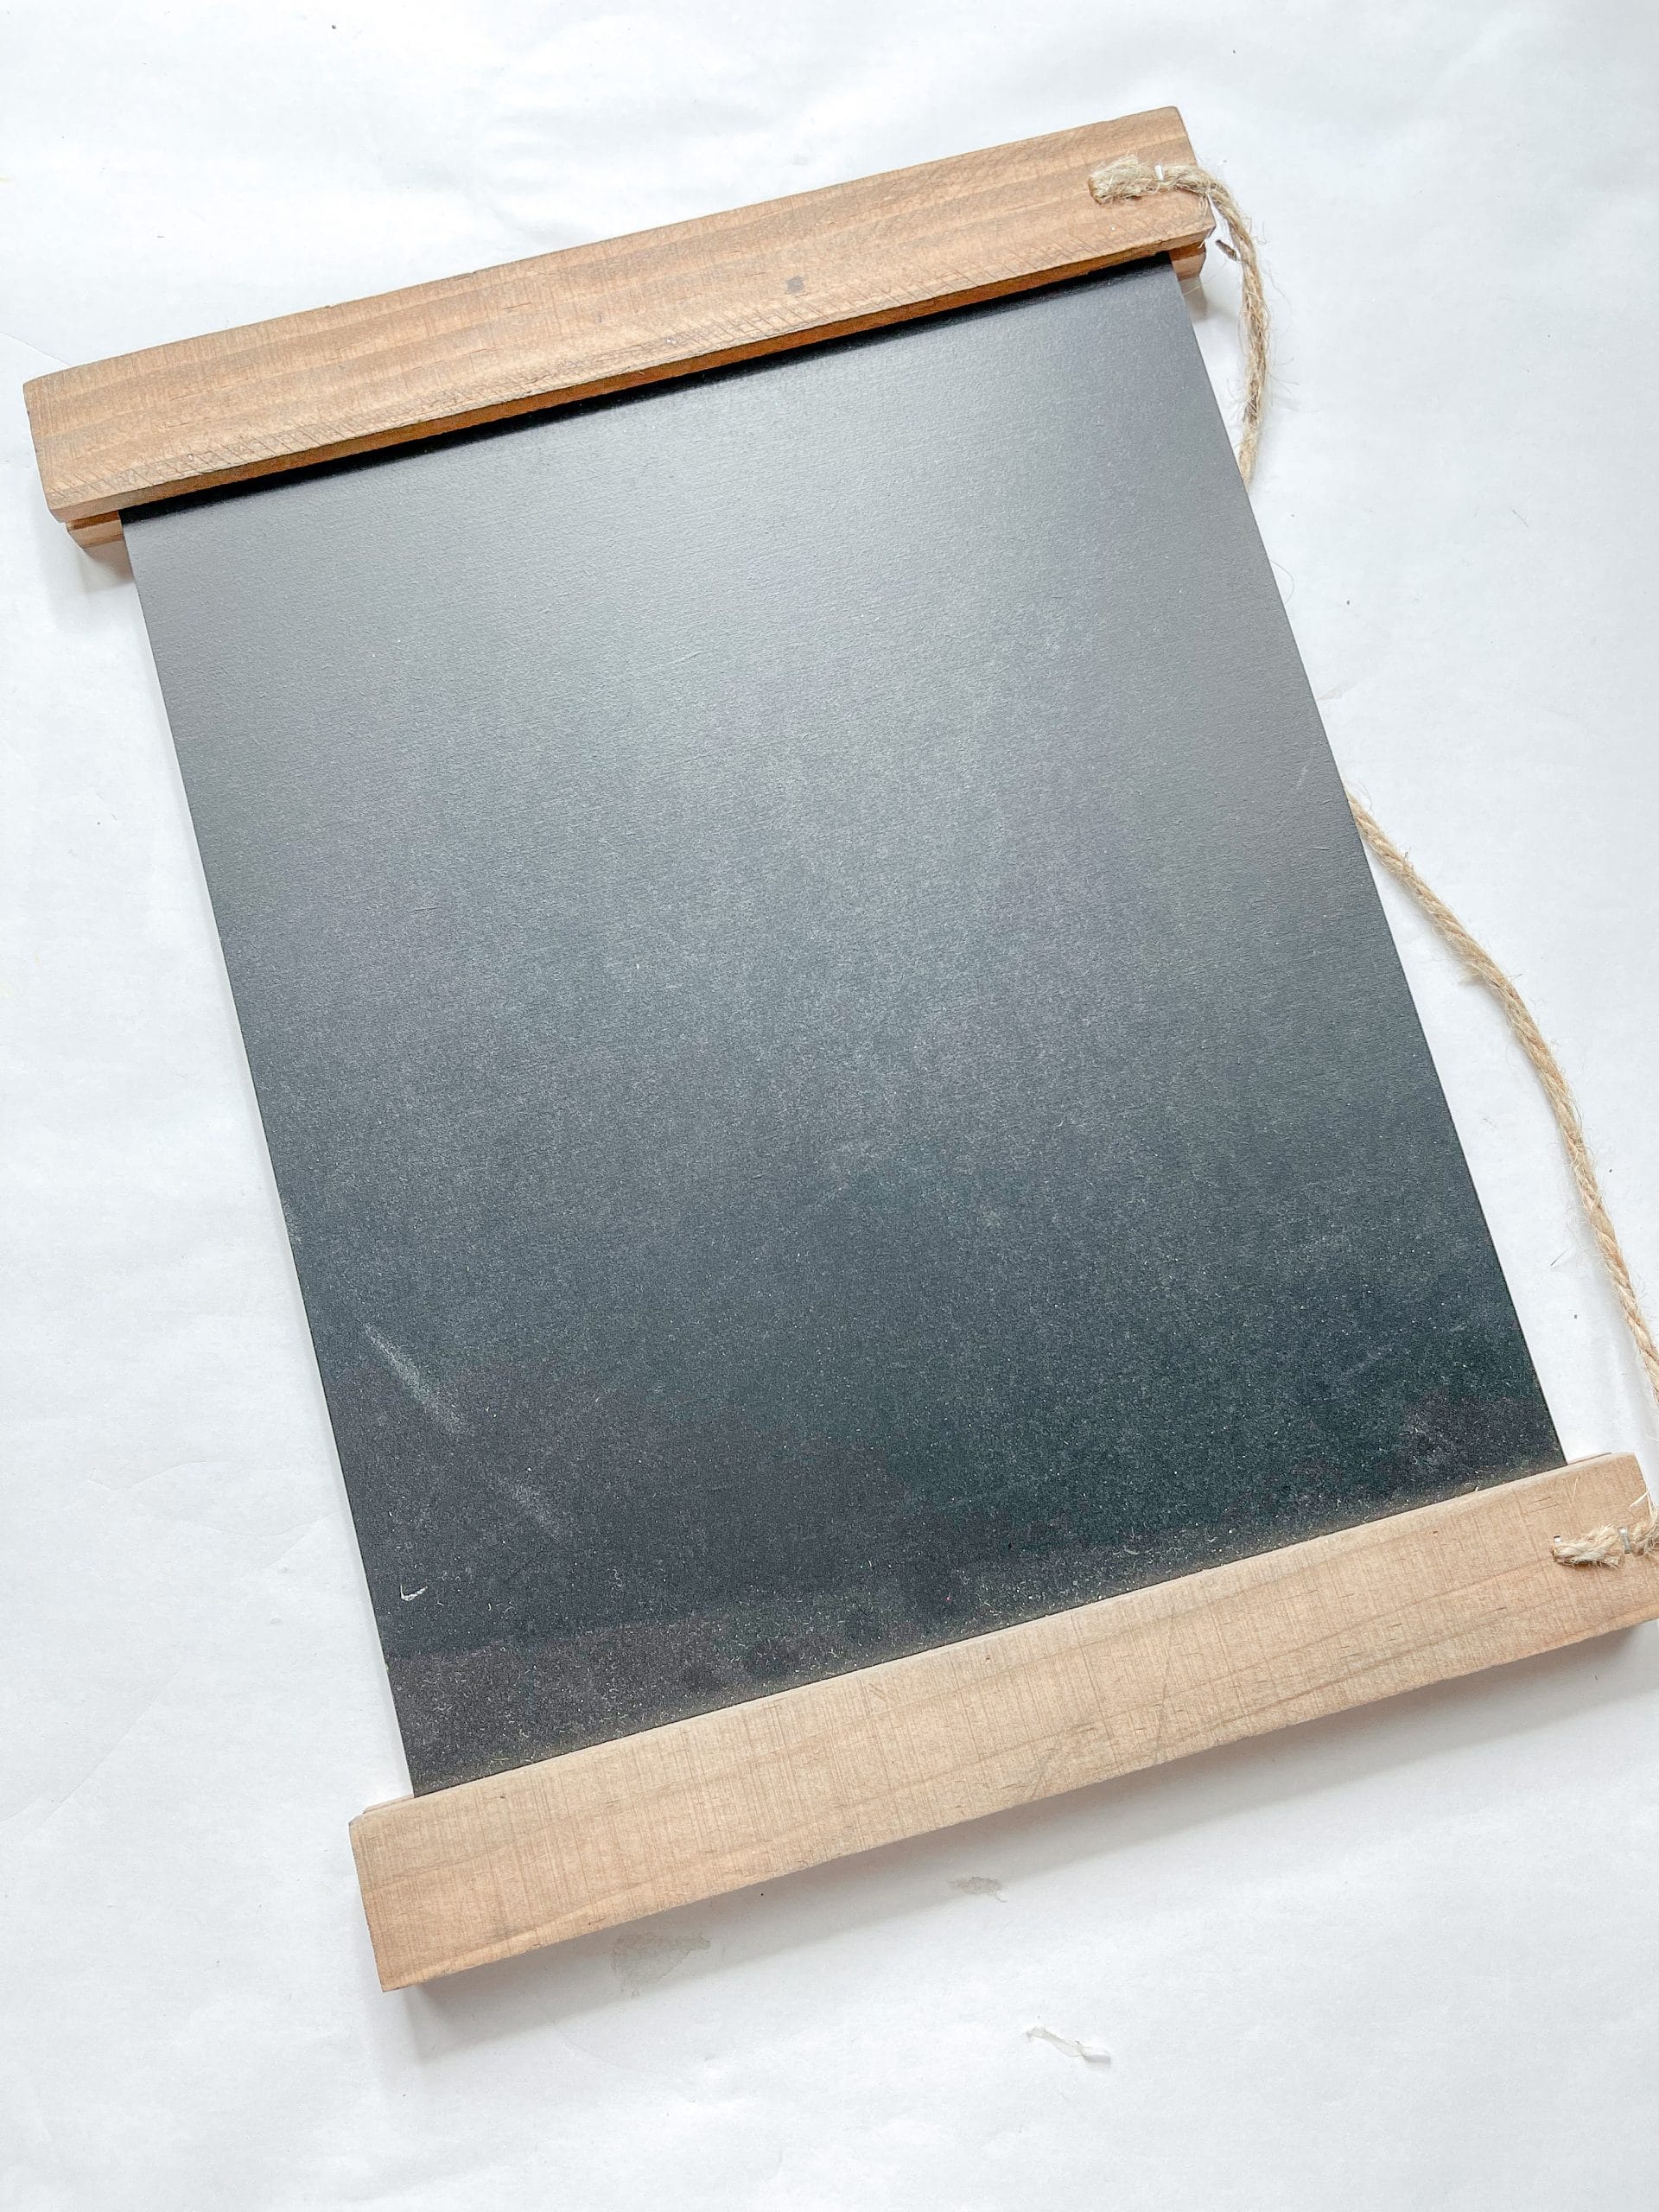
- Haunted Farmhouse Side Framed Sign (Tuesday Morning)
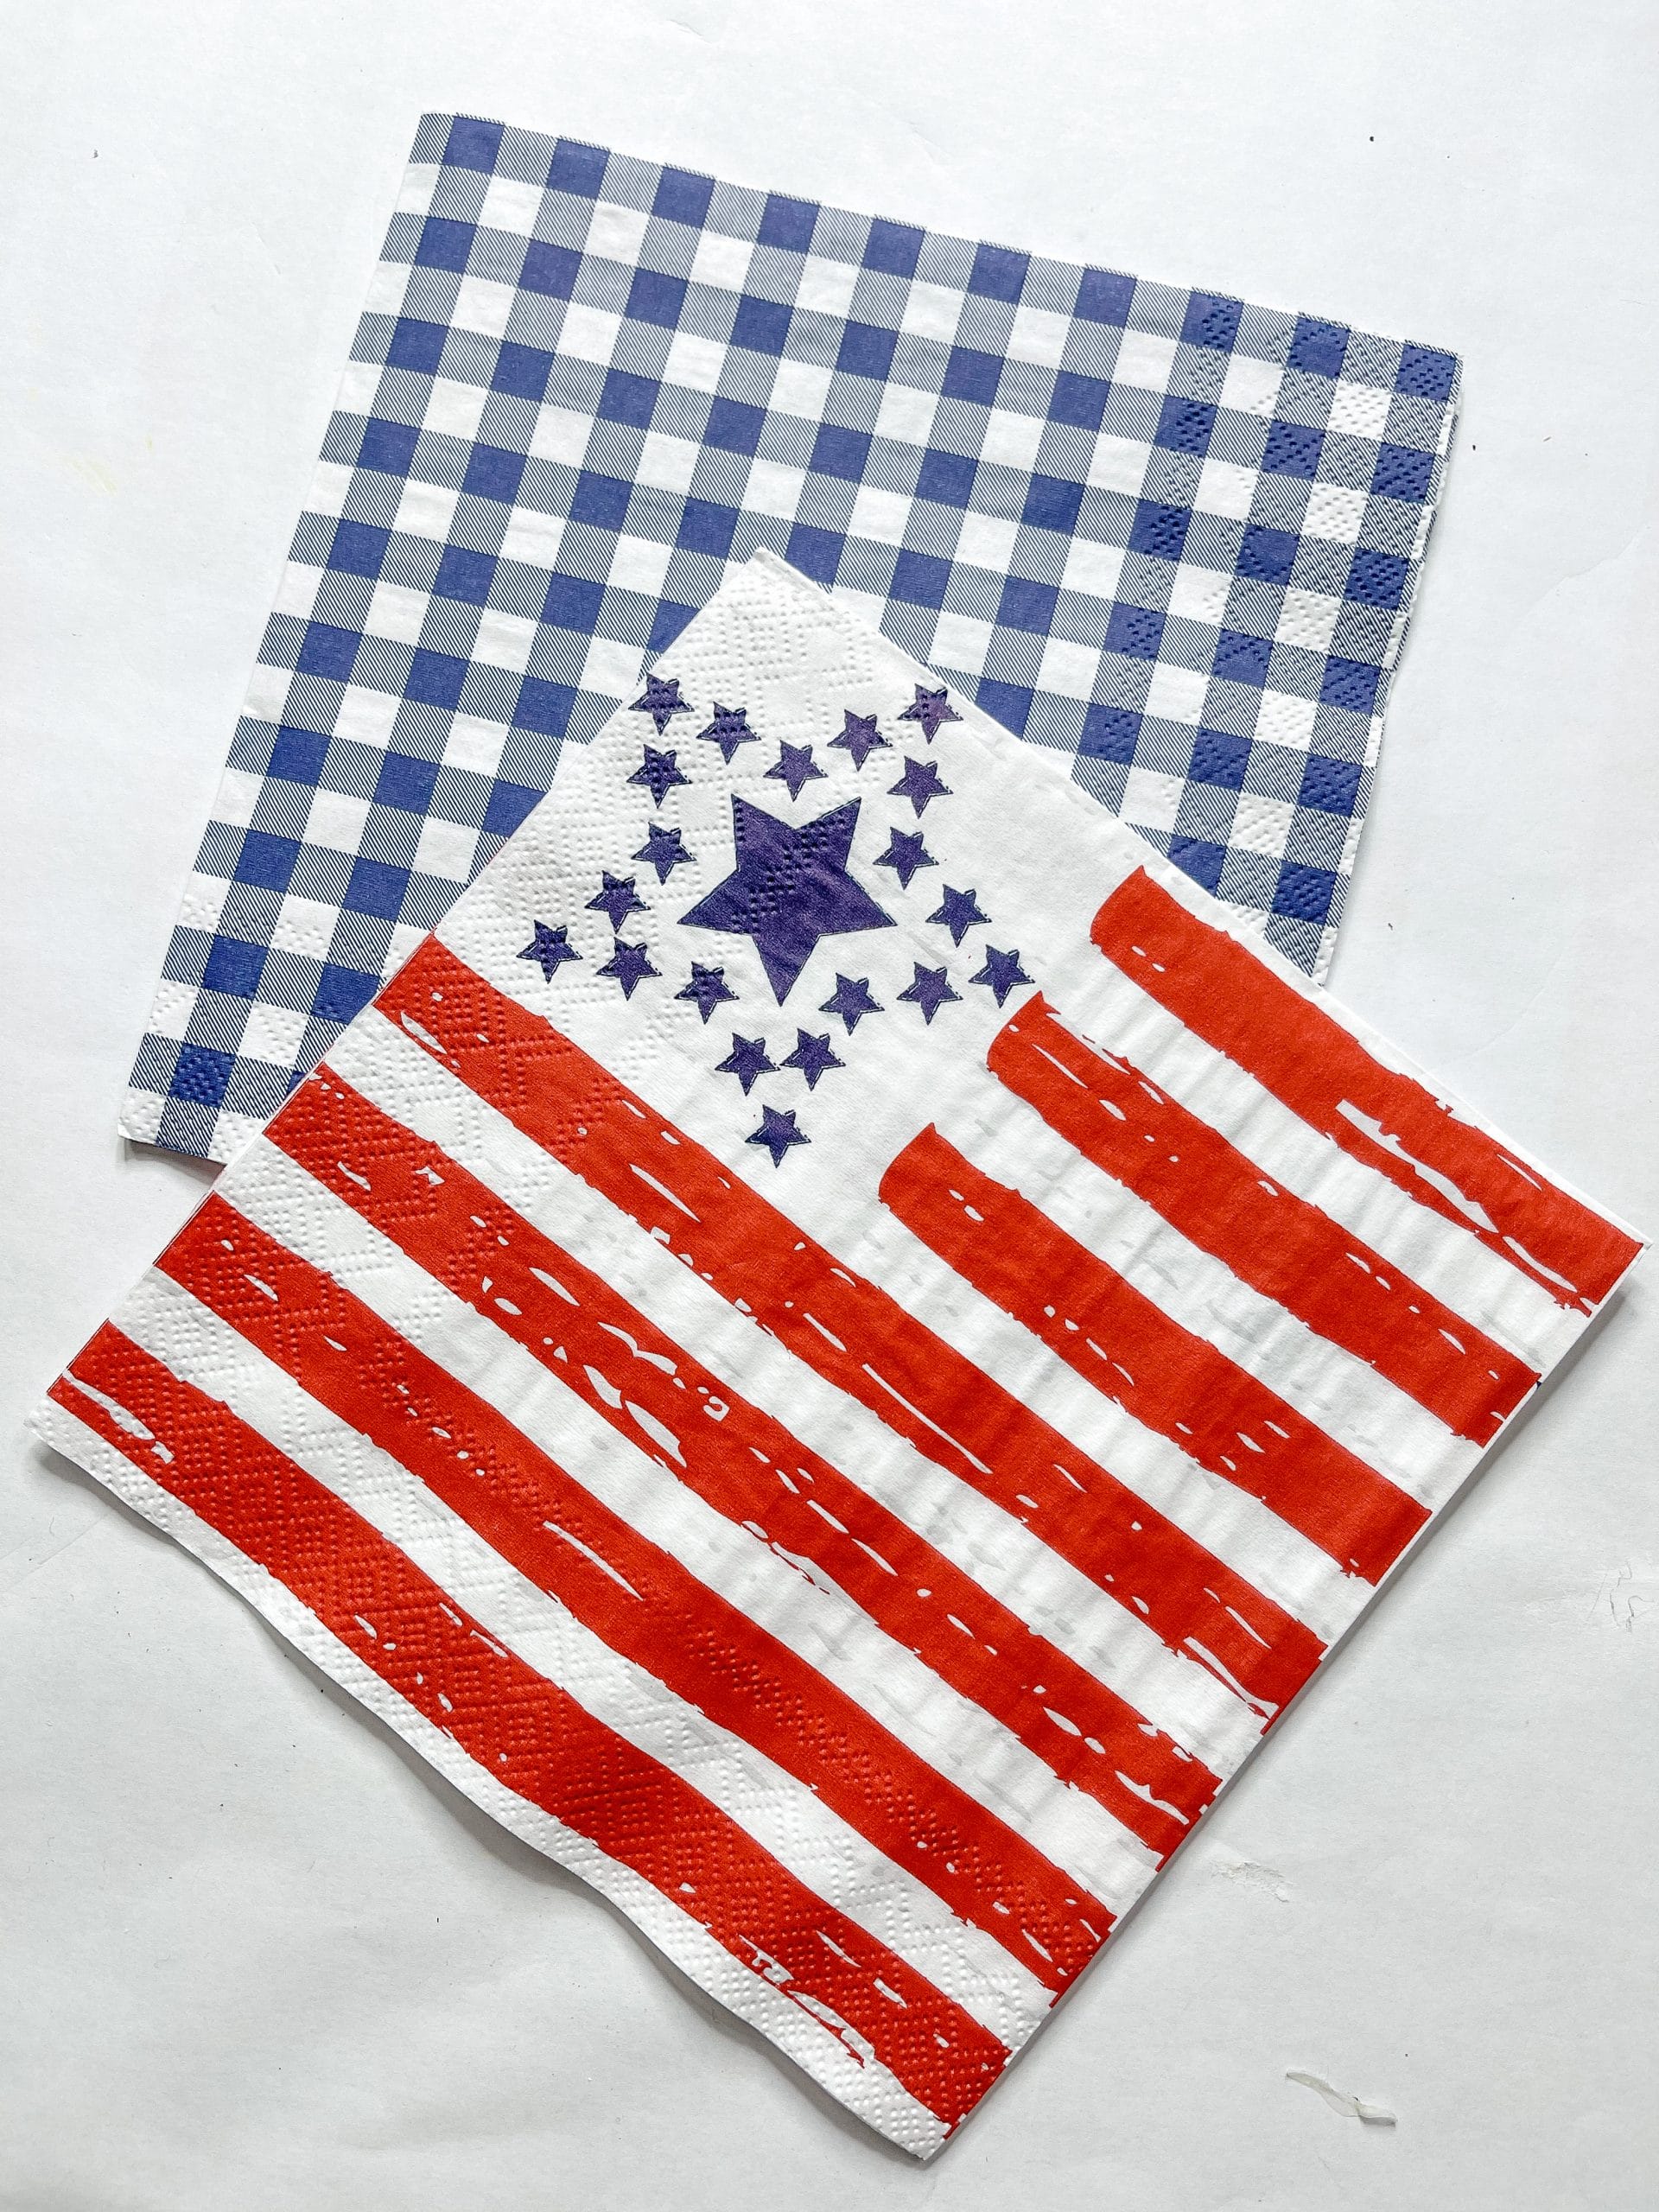
- Blue Buffalo Check Napkin
- American Flag Napkin
- Apple Barrel Snow White Acrylic Paint
- Apple Barrel Red Acrylic Paint
- Wooden Beads
- Mod Podge
- Hot Glue gun
- Glue Sticks
How to make a DIY God Bless America Sign
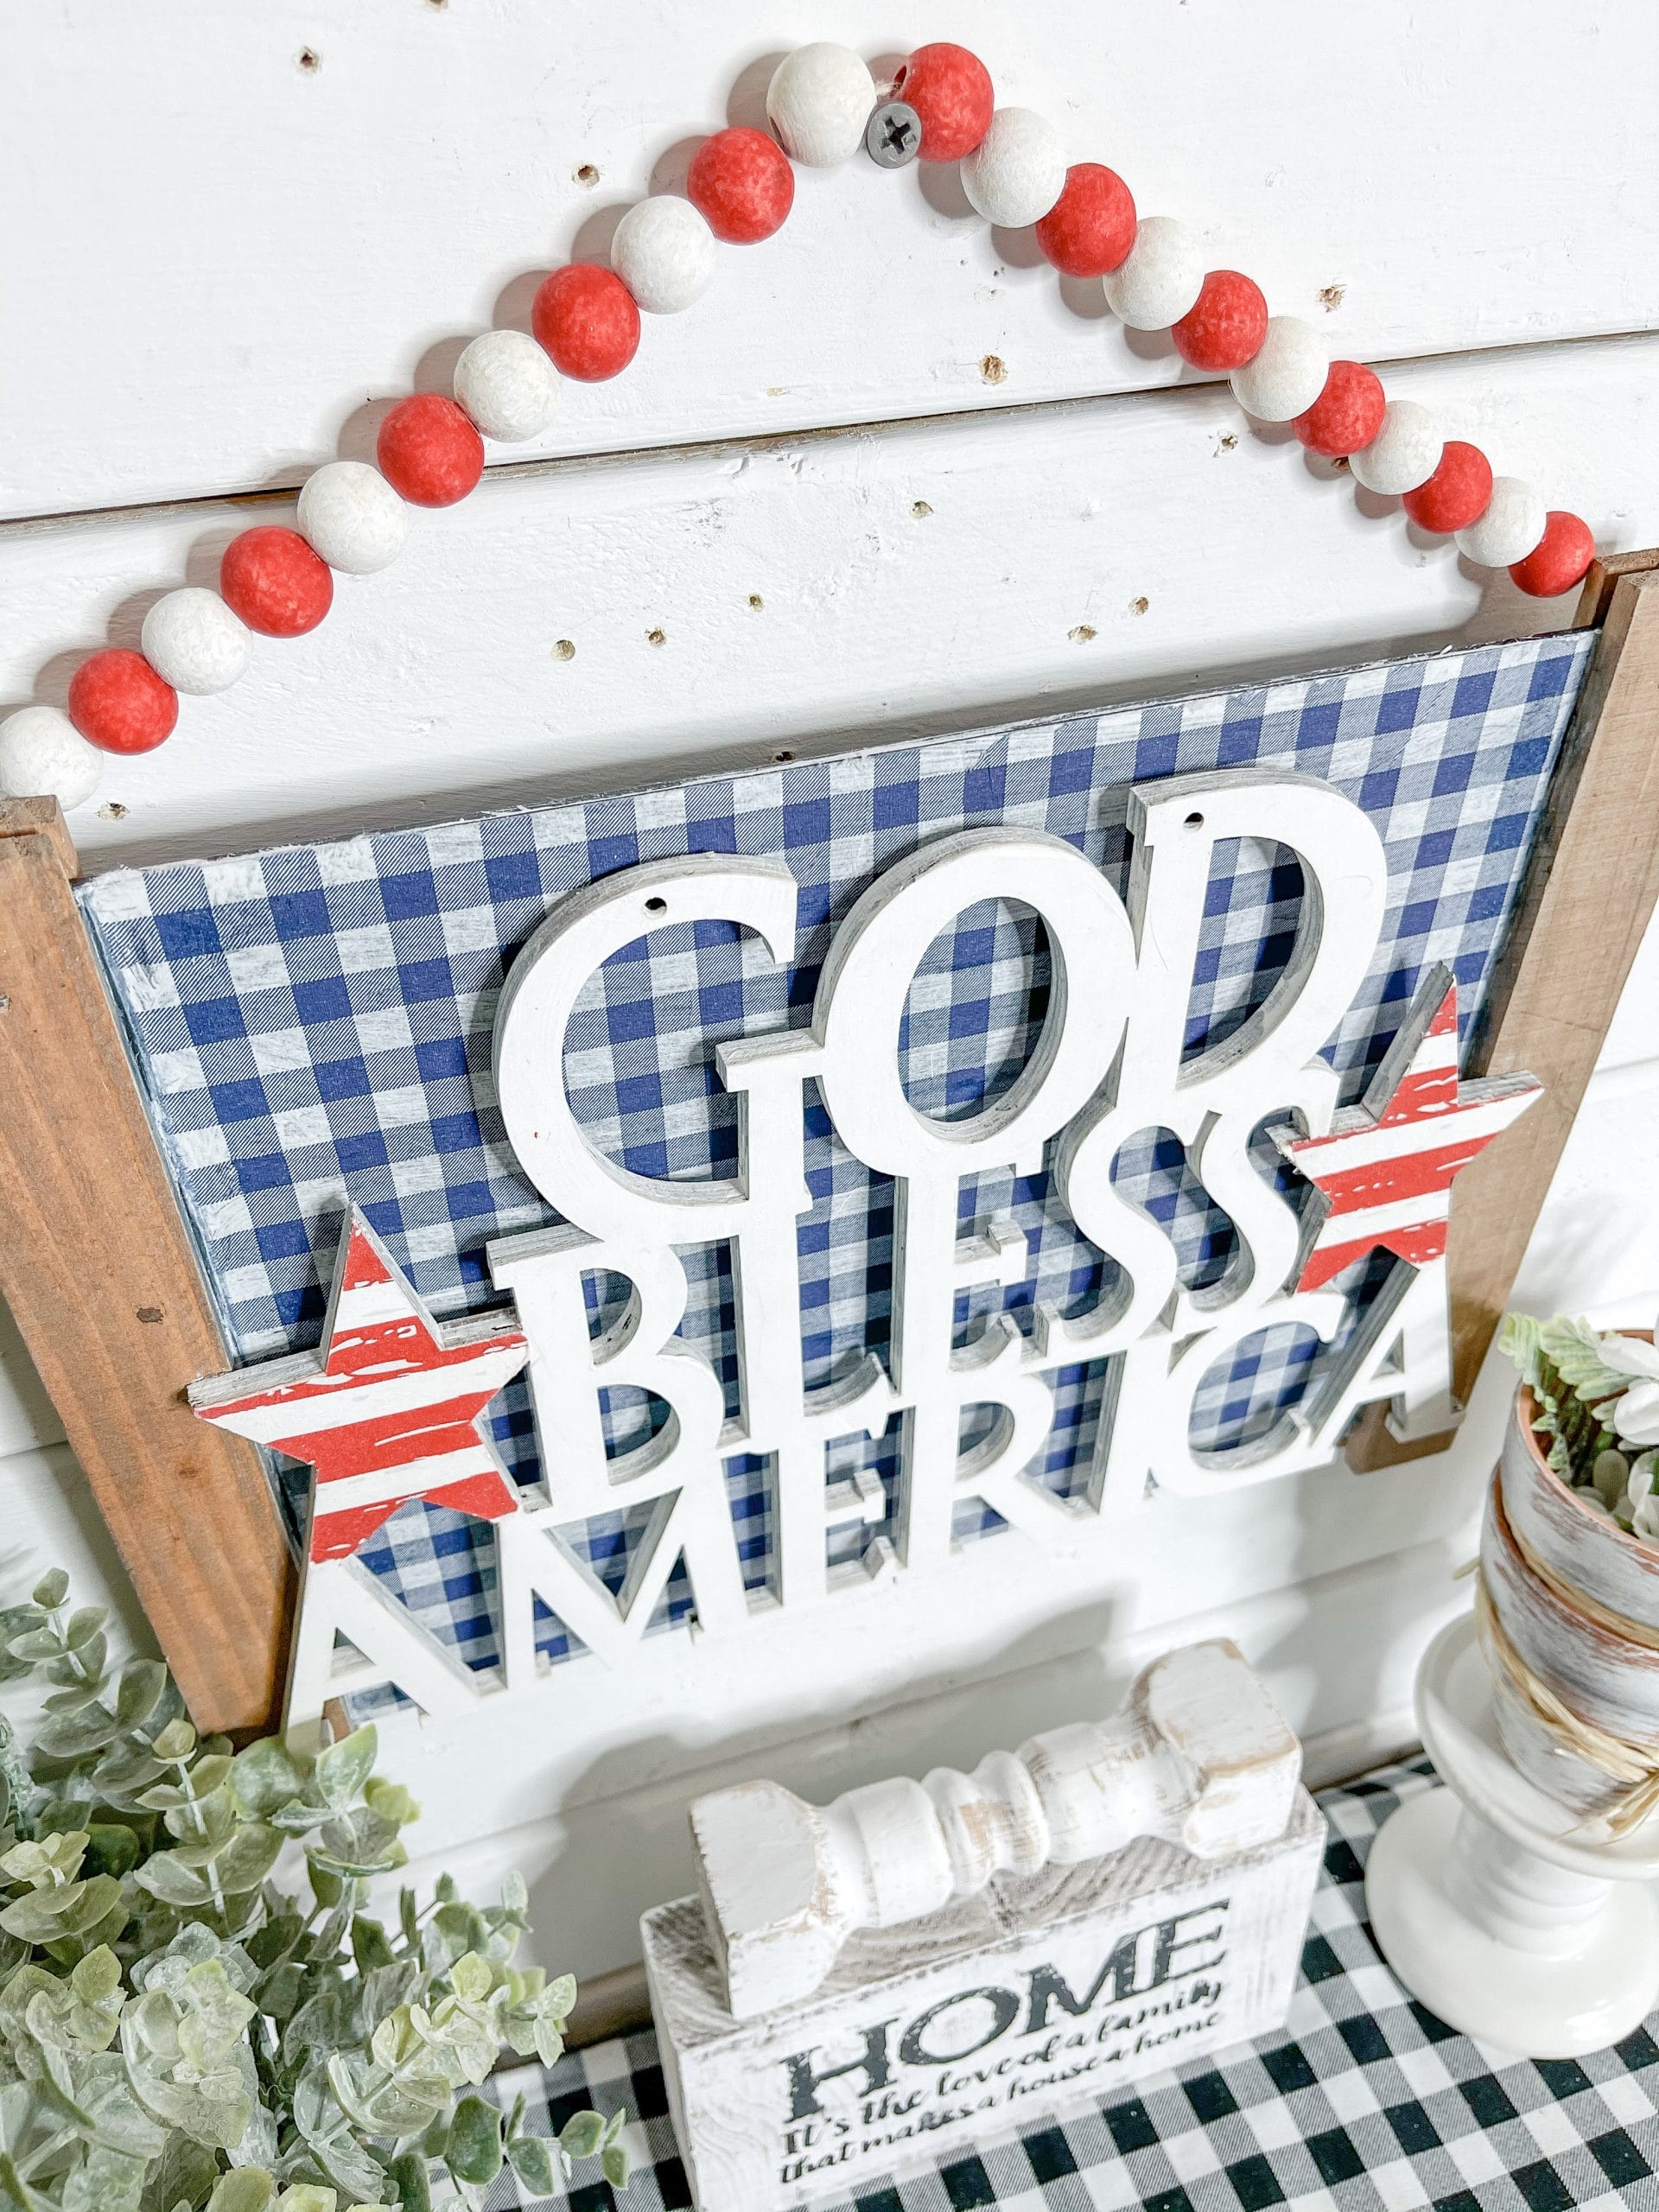
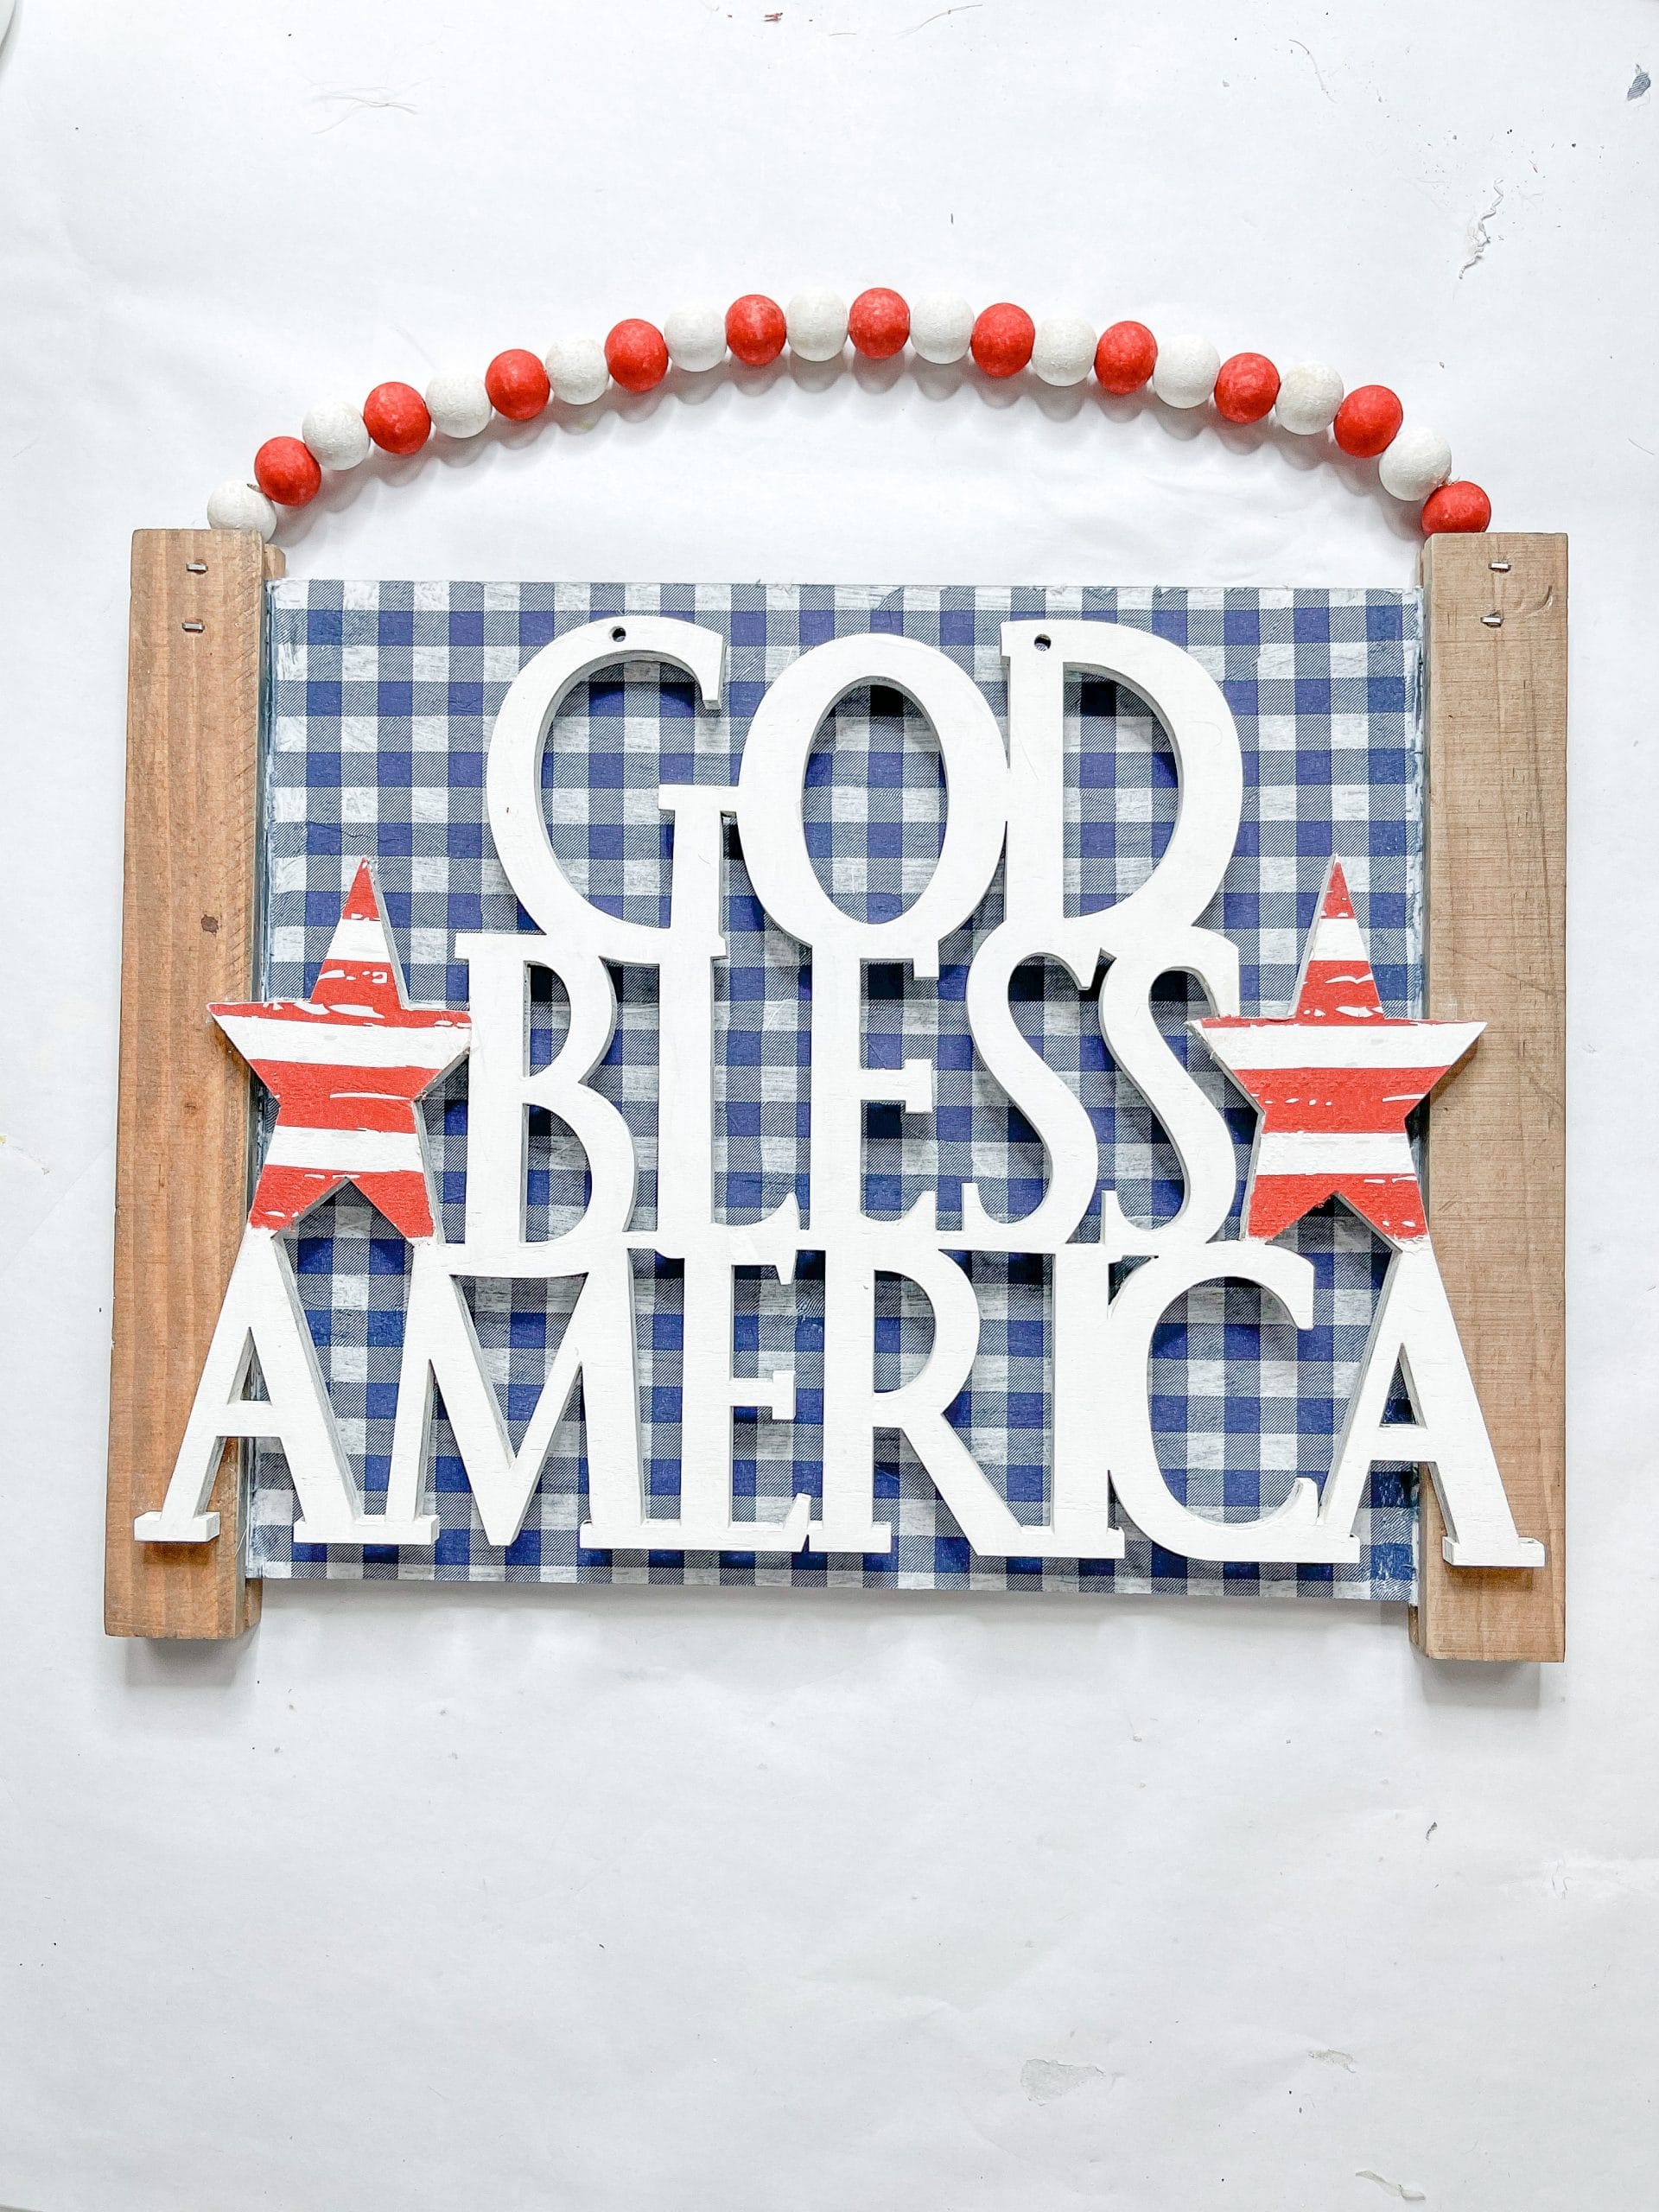
the first thing I did was remove the twine hanger from the God Bless America Hobby Lobby sign. Then, I painted the back of the Tuesday Morning Halloween sign (just the black part) with white paint.
Unless your surface is already white, you’re going to want to paint the surface white. Otherwise, the original color of the surface will show through the napkin when you decoupage it on.
Before you can decoupage the blue buffalo check napkin onto the surface, you need to separate the plies. If you don’t, the top ply (the one with the design) might not adhere properly to the surface.
Apply a coat of Mod Podge to the painted section of your sign, and place the blue buffalo check napkin onto the surface.
Lay a piece of plastic saran wrap over the decoupaged napkin and use a roller or your hand to smooth out any wrinkles or bubbles in the napkin.
Because the sides of the sign were raised, I had to do something a little different to remove the excess napkin.
I took a clean, small paintbrush, dipped it in water, and brushed it along the edge of the sign. I pulled up gently on the very edge of the napkin as I brushed the water and tore the excess off.
God Bless America
Next up is the Hobby Lobby God Bless America lettering! You’re going to decoupage the American flag napkin onto the stars, so go ahead and separate the napkin plies like before.
Then, paint the entire lettering with white paint. I like to use Apple Barrel paints because they are very affordable, but still great quality for my DIY projects!
Make sure that you paint the edges of the lettering as well. Let the paint completely dry before continuing. I like to use my heat gun to speed up the drying process.
Once your paint is dry, apply Mod Podge to the stars and place the red and white striped portion of the American flag napkin onto each of the stars.
You can use an emery board or filer to remove the excess napkin from around the stars, but be careful not to pull the napkin off the stars or tear it.
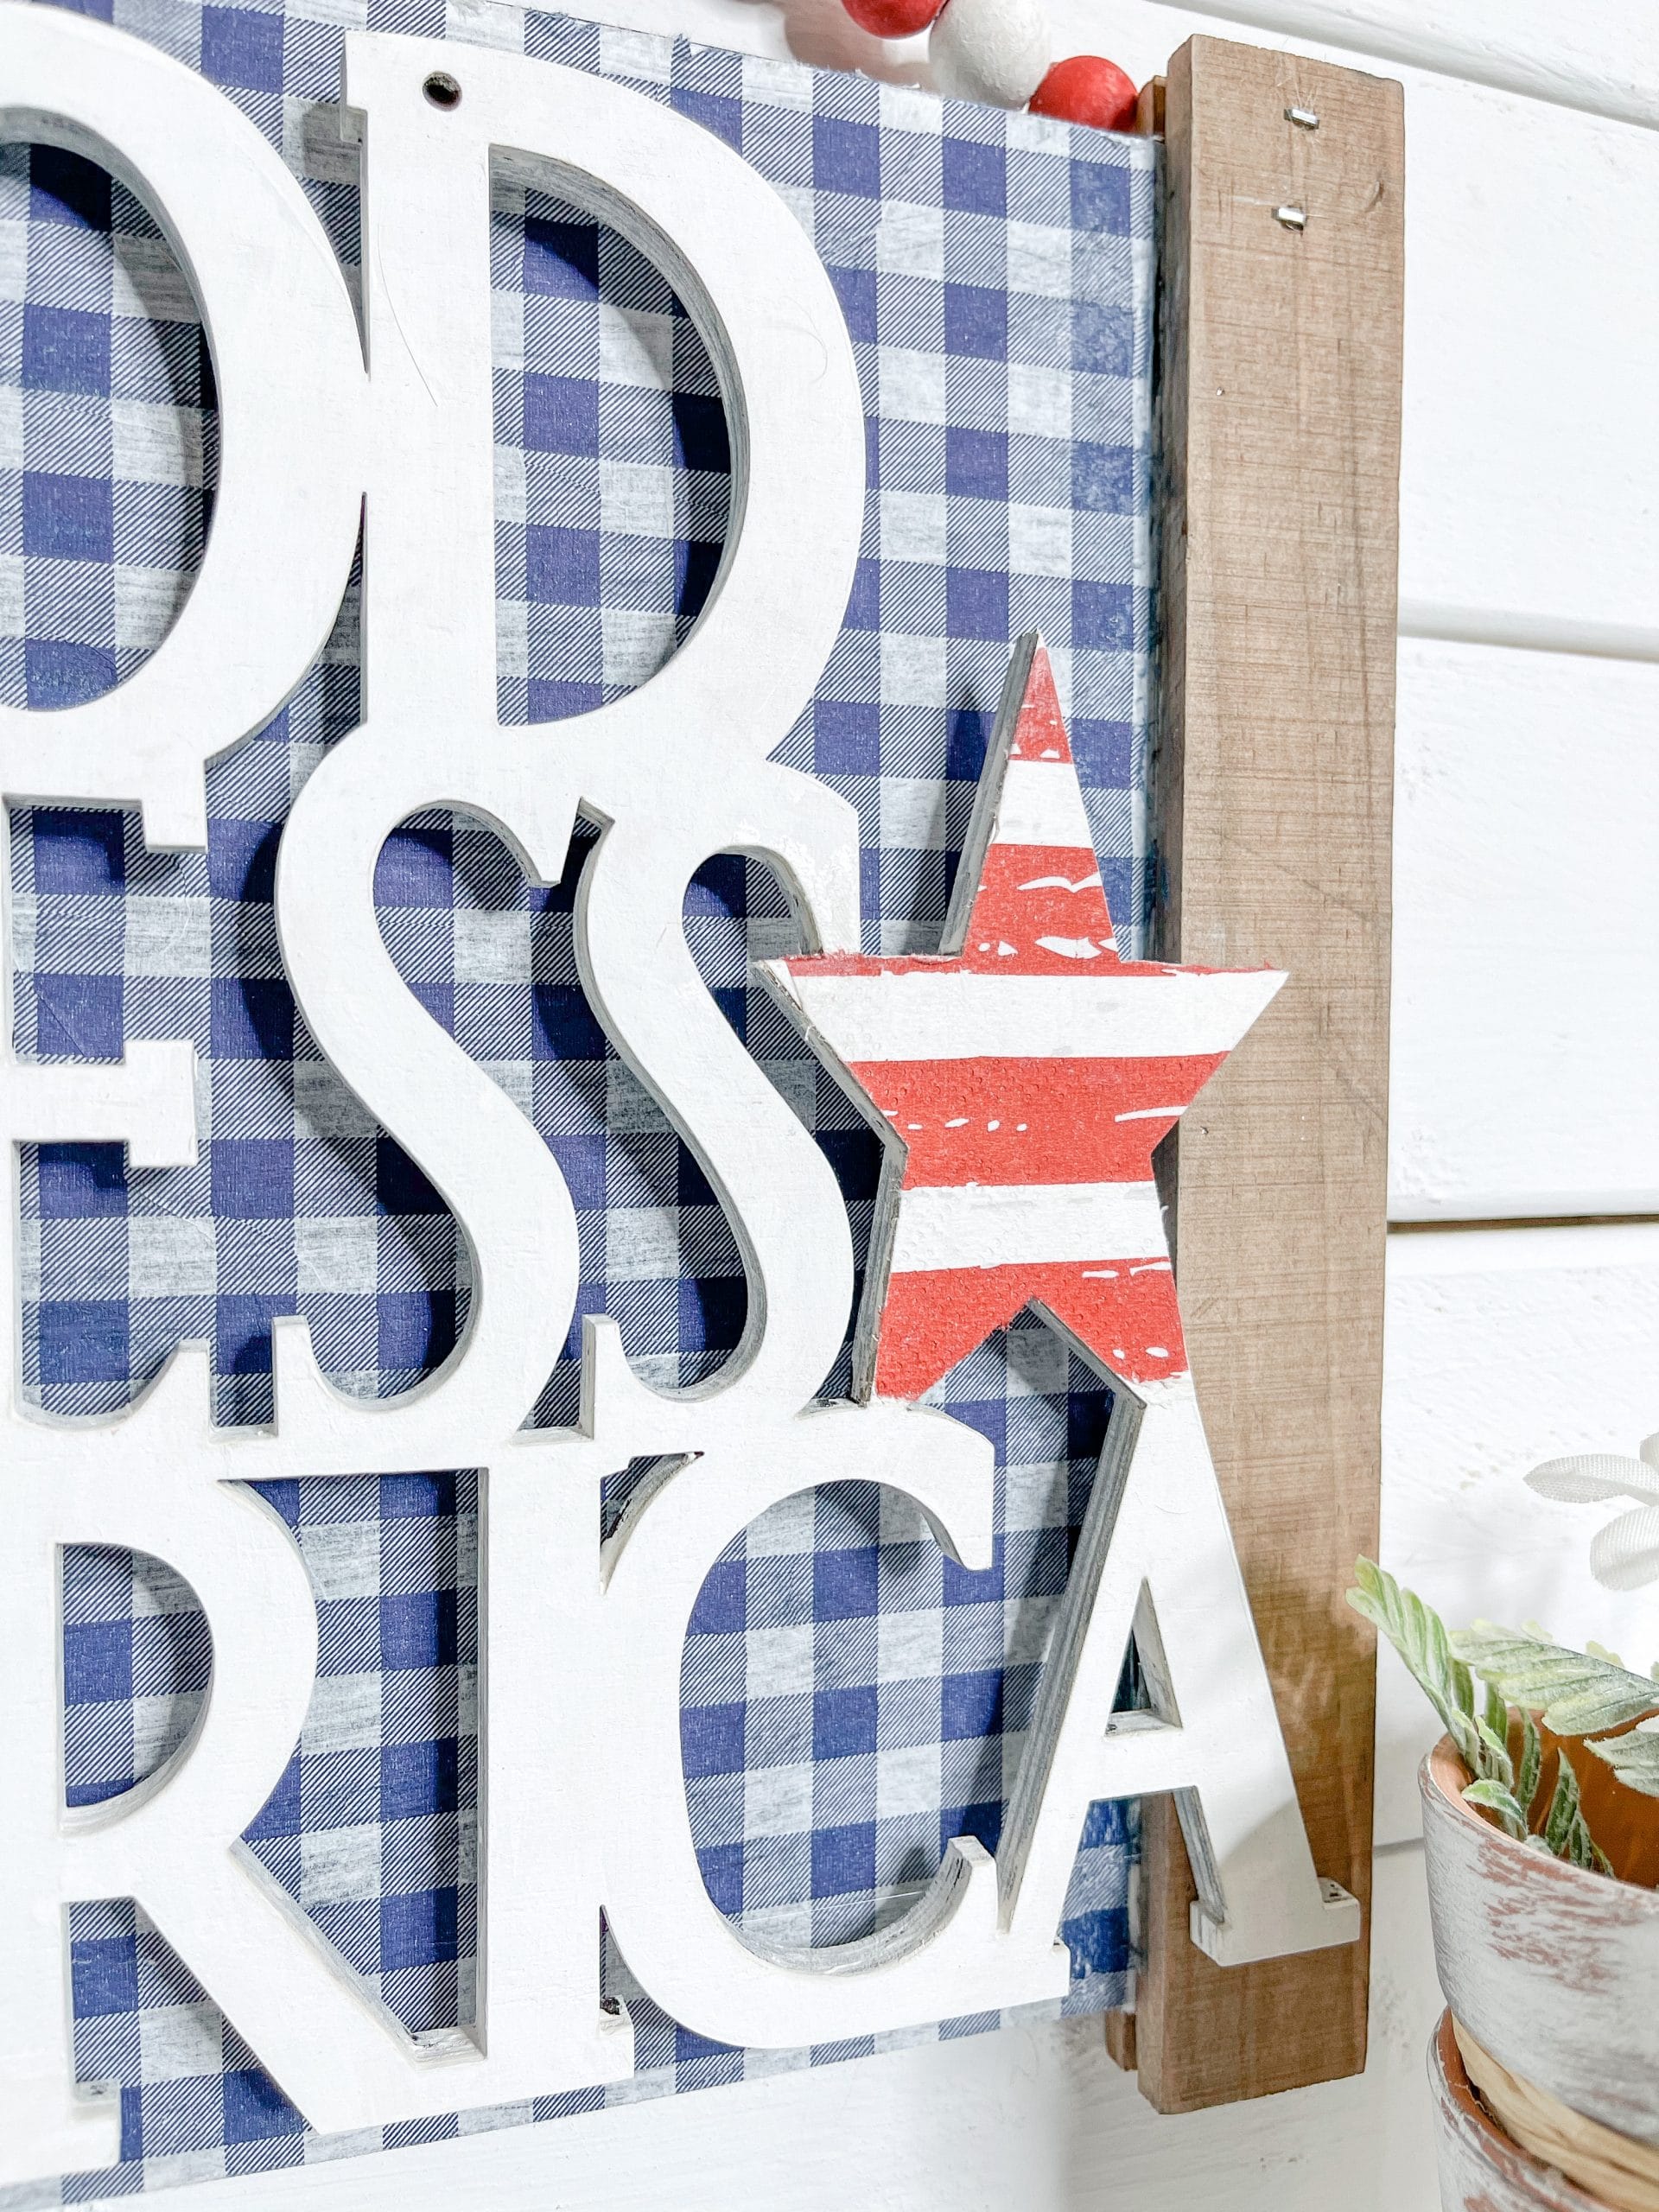
Now, hot glue the God Bless American lettering onto the decoupaged sign, and remove the twine hanger from the Tuesday Morning sign.
How to Make a DIY Hanger
I used jute twine, wood beads and red and white paint to make the hanger for this DIY God Bless America Sign.
Divide your beads in two different small bowls. Spray water in both bowls, then pour the red paint in one bowl and white paint in the other bowl.
Swirl the beads around until they are all coated with paint, then dry the beads. I used my heat gun and just kept swirling the beads under the barrel of the heat gun until they were all dry.
Once all the beads are dry, thread them onto the hanger, alternating red and white as you go. Keep going until you’re happy with the length of the hanger.
Add a dab of hot glue at the end of each bead to hold them all in place. You can also tie a knot next to each end bead if you wanted to.
Finally, hot glue the ends of the twine hanger to the back of the Tuesday Morning sign. You can hot glue a small piece of fabric or ribbon over the ends to secure the hanger even more.
I hope you enjoyed this DIY God Bless America Sign as I did and decide to make it for yourself! If you do, I would love to see how yours turns out!
You should totally join my FREE Facebook group called On A Budget Crafts! It is a judgment-free community for DIY crafters to show off their projects and ideas.
If you loved this DIY you might also like these DIY ideas!
- DIY 4th of July Shirt Idea
- DIY Dollar Tree American Flag Decor
- Simple Buffalo Check Farmhouse Plant Jar
- DIY Faux Concrete Planter
- DIY Patriotic Dollar Tree Mason Jar
Thanks for stopping by! XOXO Amber
You can also shop my ENTIRE AMAZON Favorites shop just click here! It’s packed full of all the things I use and love. Here is the supply list I highly recommend every creative have on hand!!
Would you also pin my blog for later and get on my newsletter alerts? I would love to have you join my #craftycrew.
Inspired? Leave me a comment below! I love hearing from my readers!

Join my free “ON A BUDGET CRAFTS” Facebook group!

This turned out awesome, love it