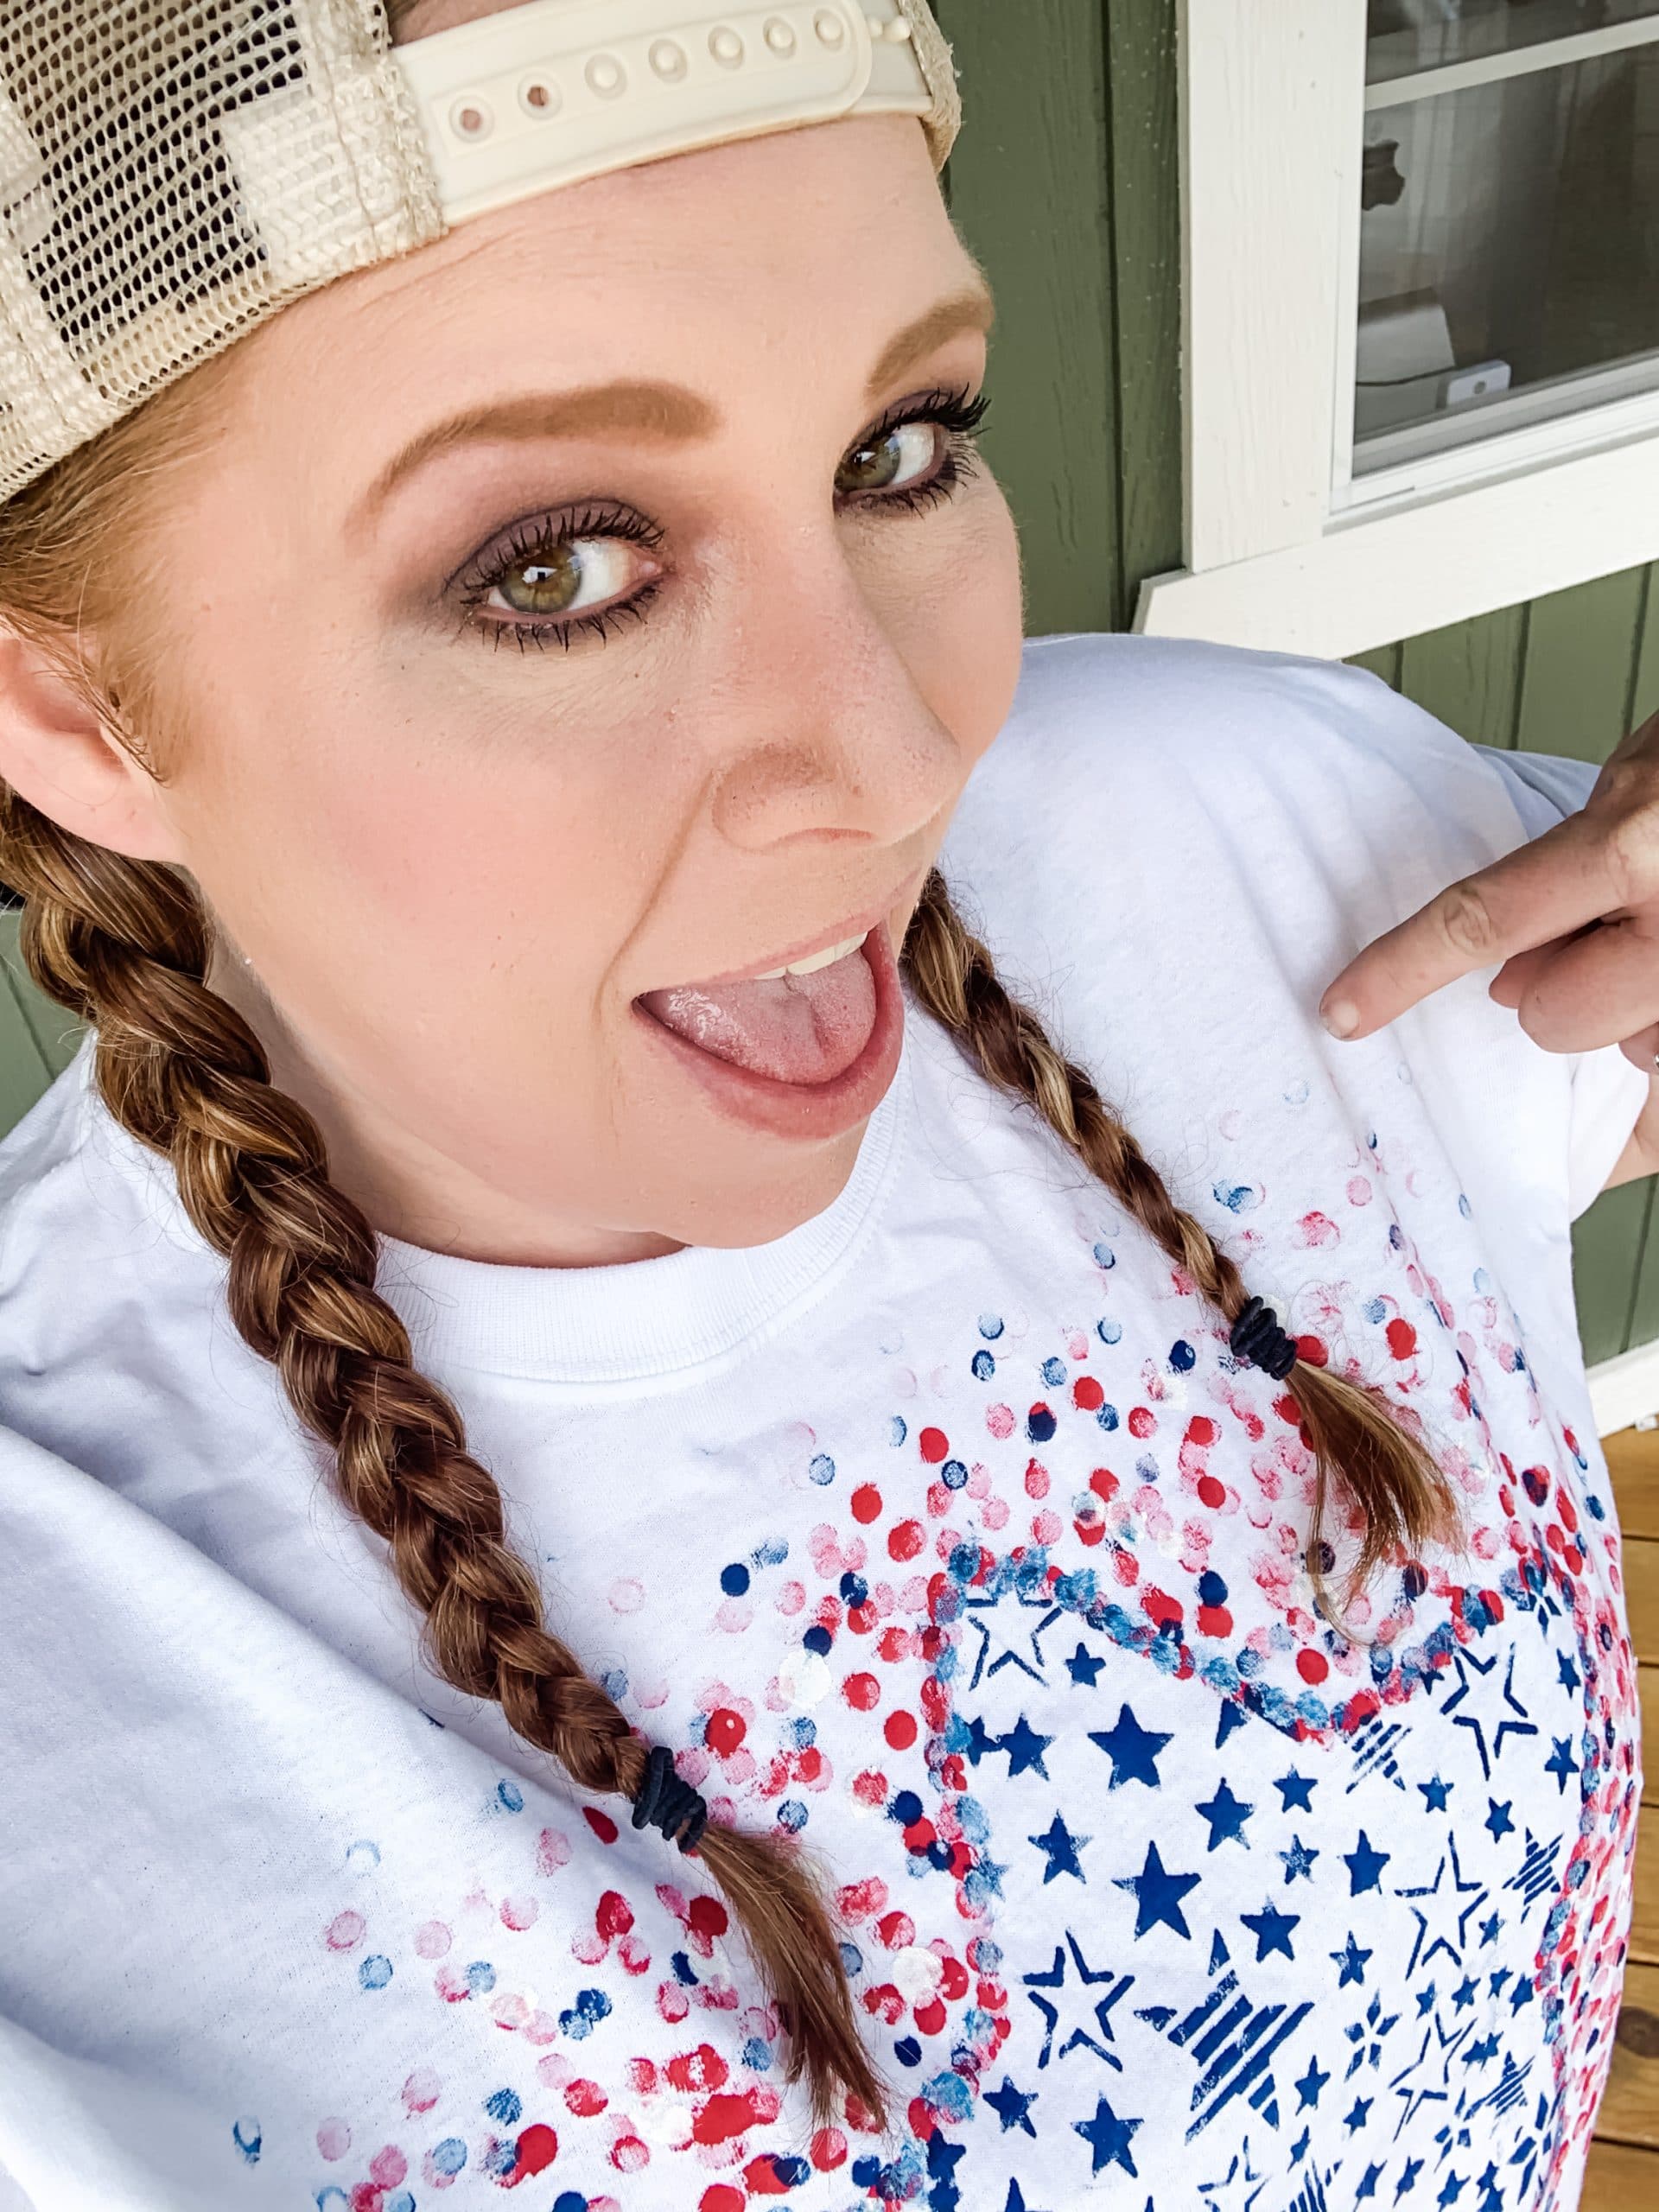
DIY 4th of July Shirt Idea

I had so much fun bringing this DIY 4th of July Shirt Idea to life last year, and it is so EASY, I just HAD to share how to make it with you! This is such a great way to make matching family shirts for your 4th of July pictures without having to sell your kidney!
All you need is a little bit of red, white and blue paint, a stencil, and a t-shirt! You can get plain white t-shirts at Michael’s or Hobby Lobby, and they usually have a variety of sizes!
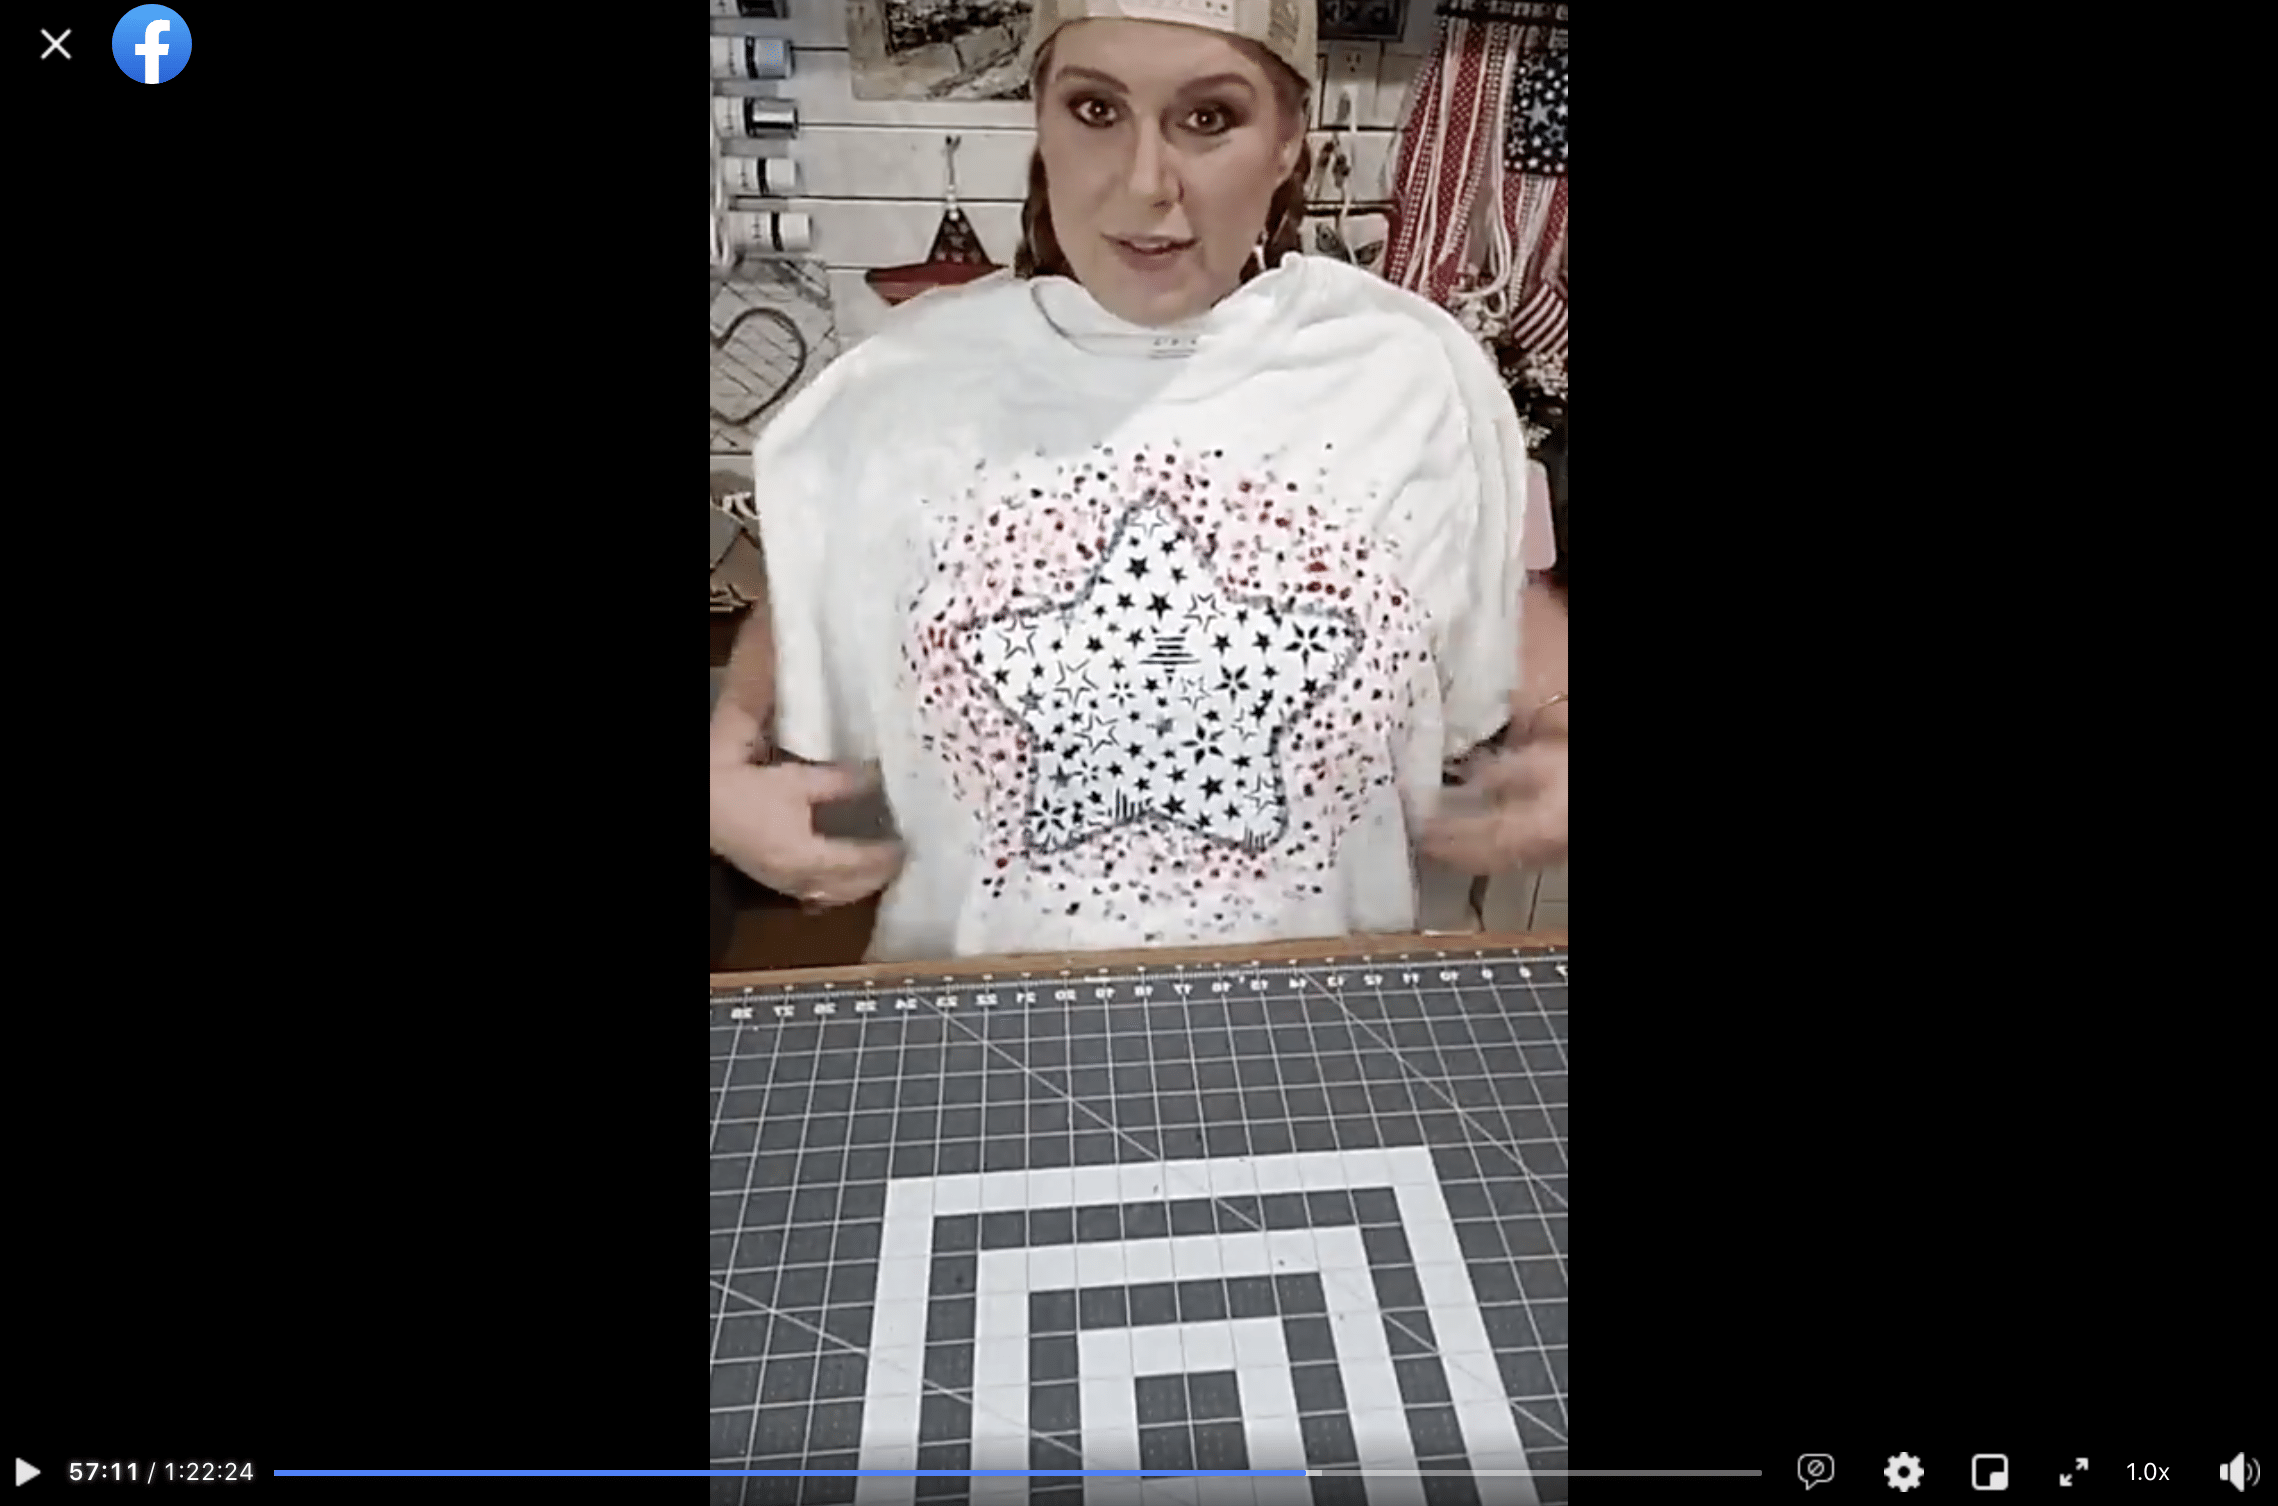
Watch the replay
I recorded how to make this shirt during a LIVE video on my Facebook page. If you want to see the process, craft along, or just join in on the fun conversations, you can watch the replay!
For this project, I will be using these items but you can substitute where you want.
“As an Amazon Associate, I earn from qualifying purchases.”
- White T-Shirt
- Star Template
- Dollar Tree Stencil
- Apple Barrel Red Apple Paint
- Apple Barrel Deep Navy Paint
- Pencils with erasers
- Apple Barrel White Paint
- Paintbrush
How to make a DIY 4th of July Shirt
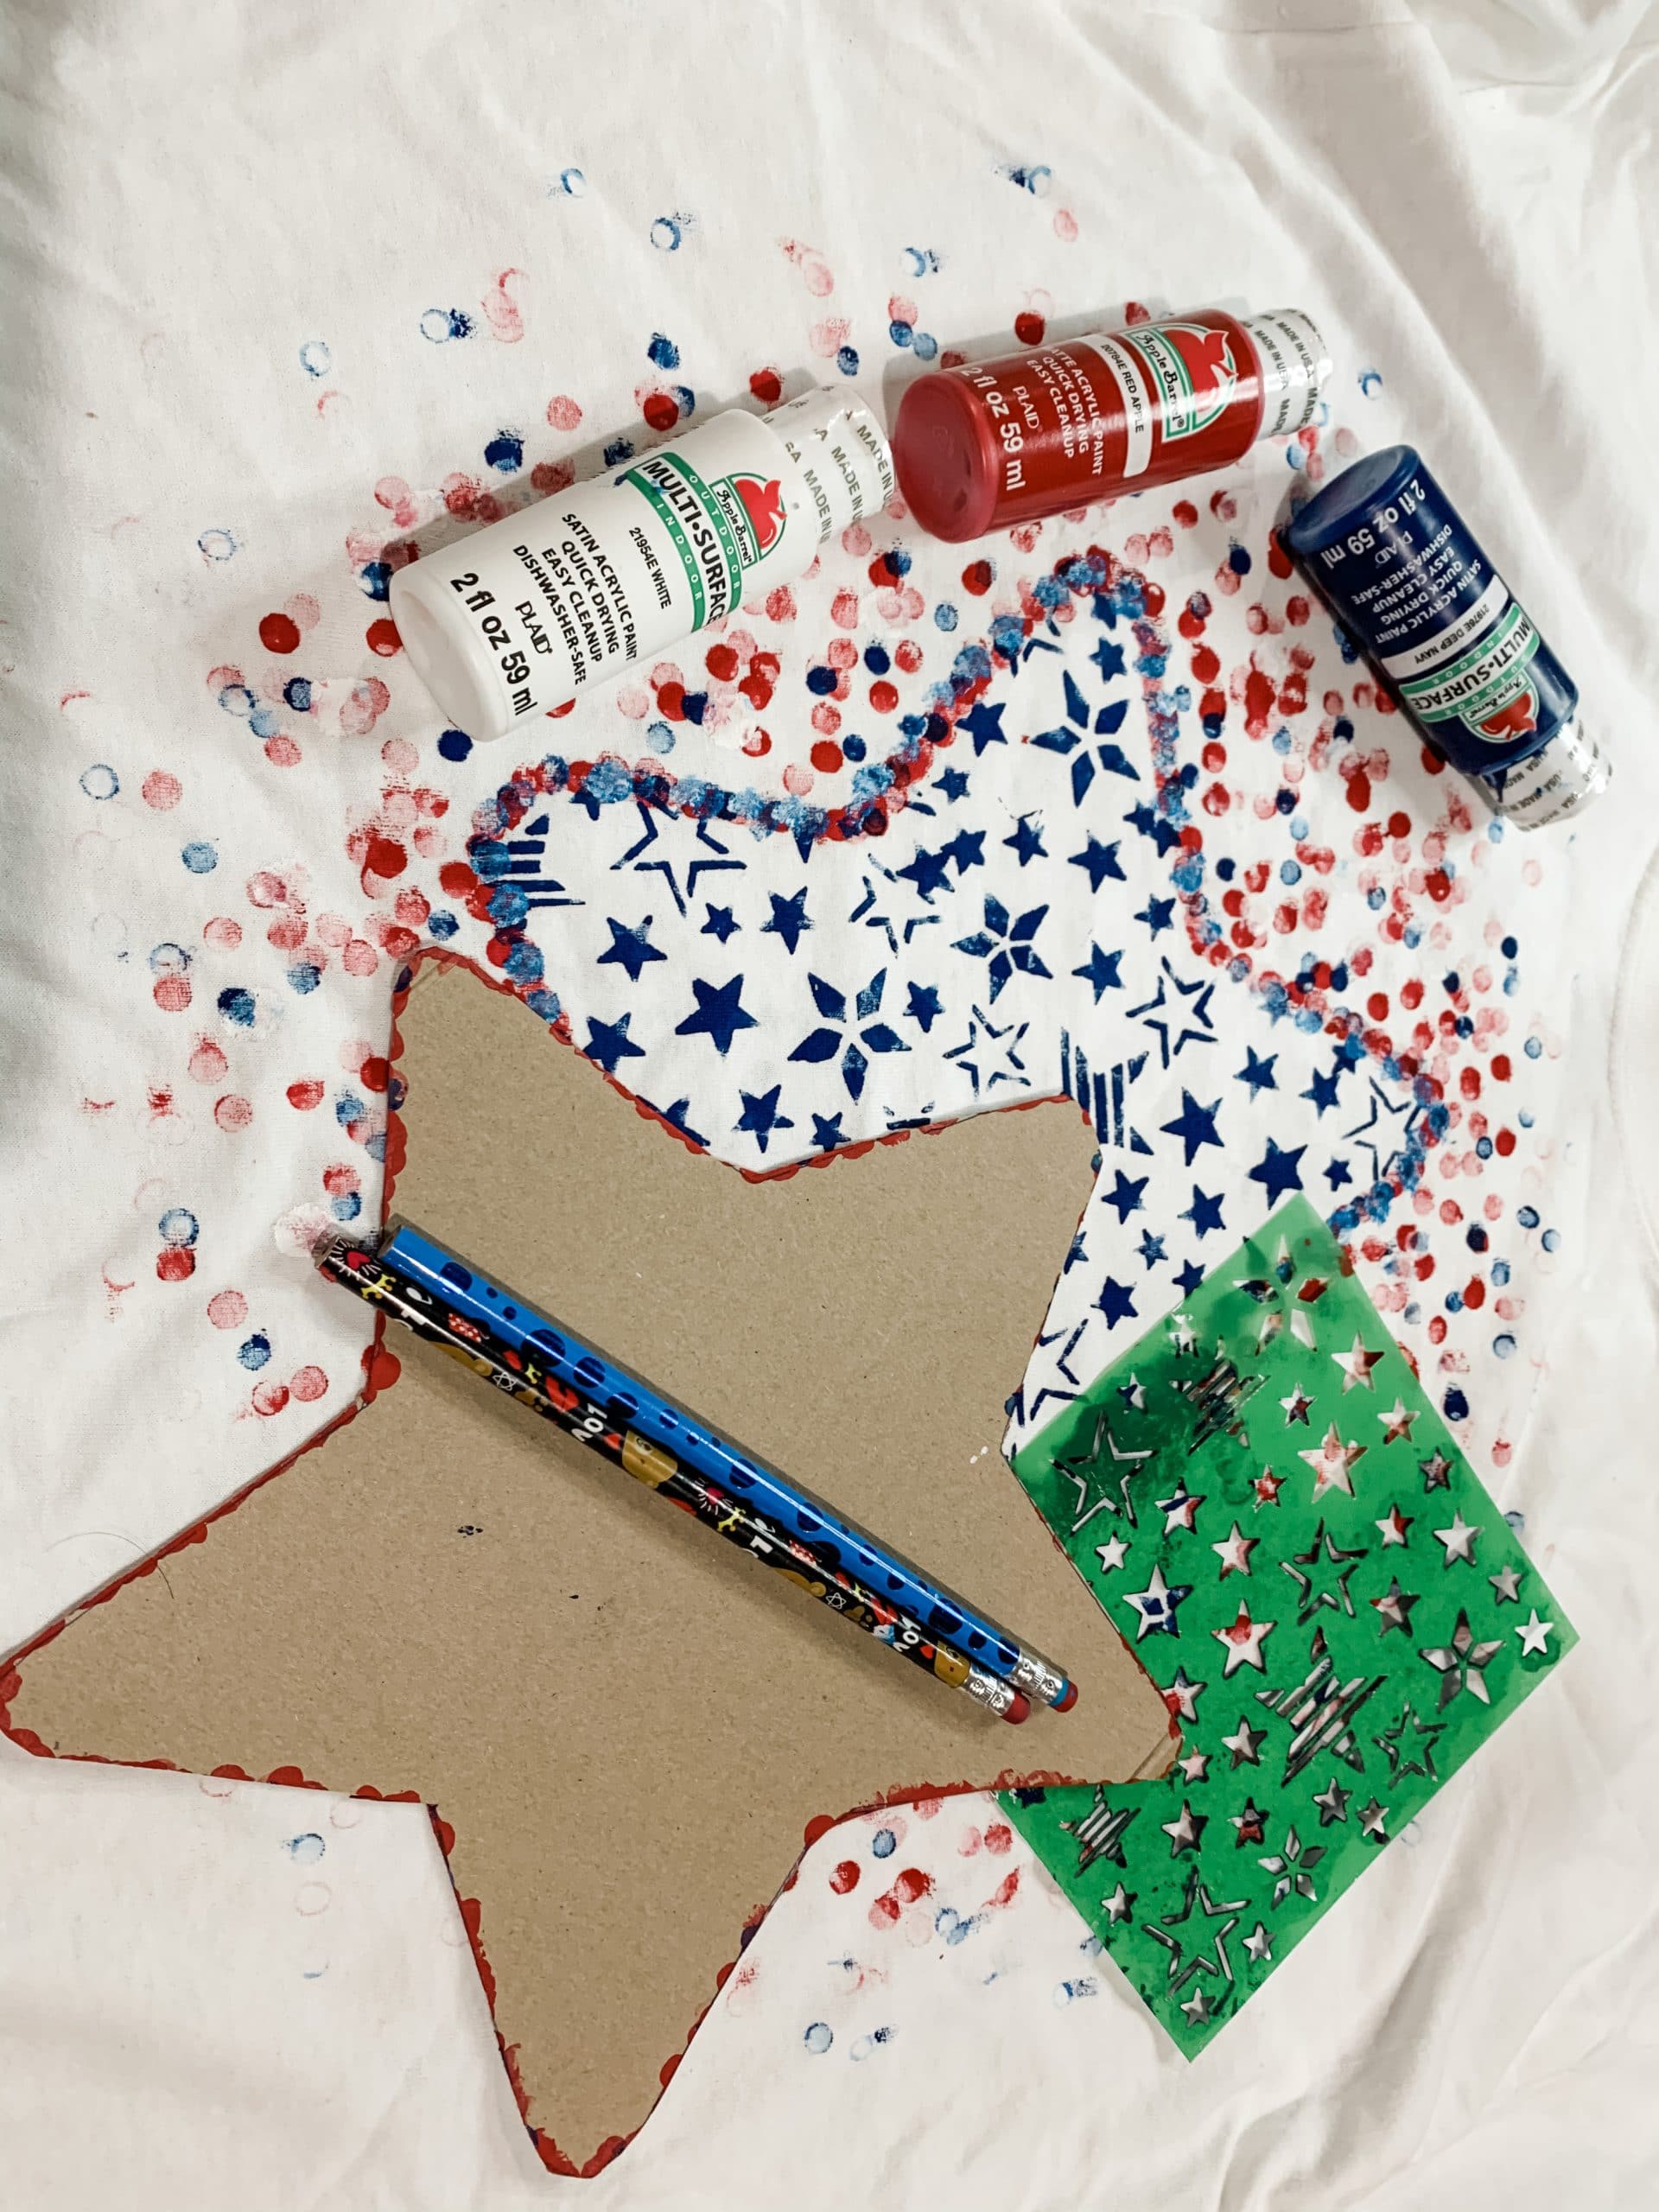
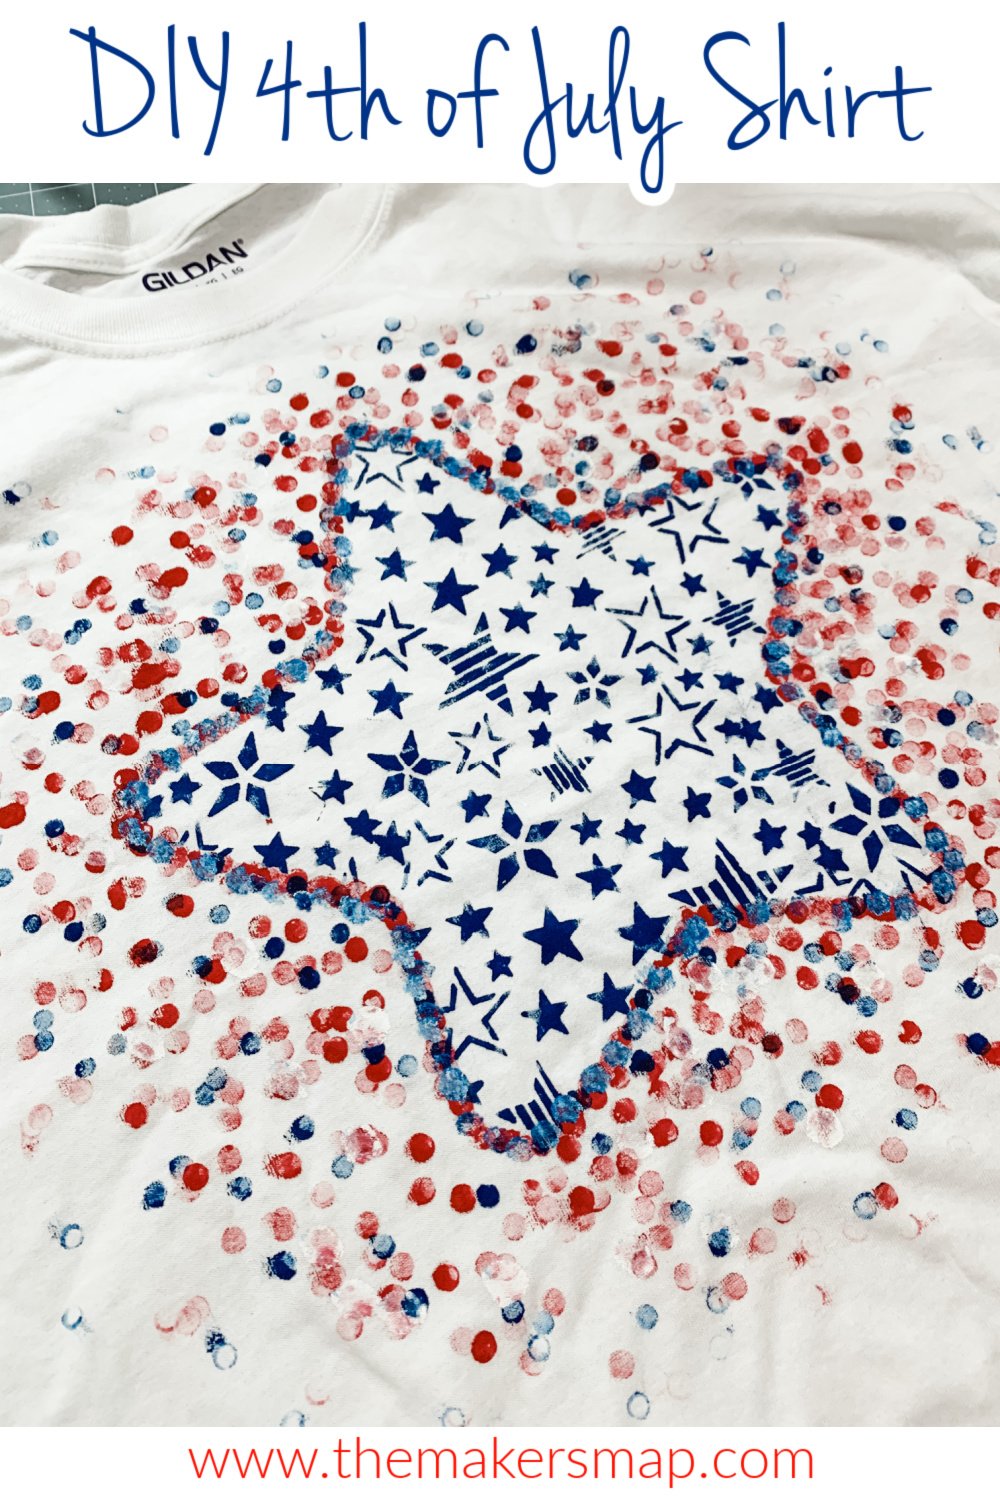
Start by getting your star template ready. I traced a wooden star that was gifted to me onto a piece of cardboard and cut it out to be my star template. Then, figure out where you want the star to be on your t-shirt.
I got a white t-shirt from Michael’s. The placement of your star is going to depend on the size of your shirt and the size of your star template. It’s best to lay your shirt out flat and move the star template around until you’re happy with the placement.
Then, pour a small amount of blue paint and red paint onto a coffee filter or into small mixing bowls. Pick which color you want to start with, then dab the eraser of one of your pencils into the paint and dot it around the edge of the star template.
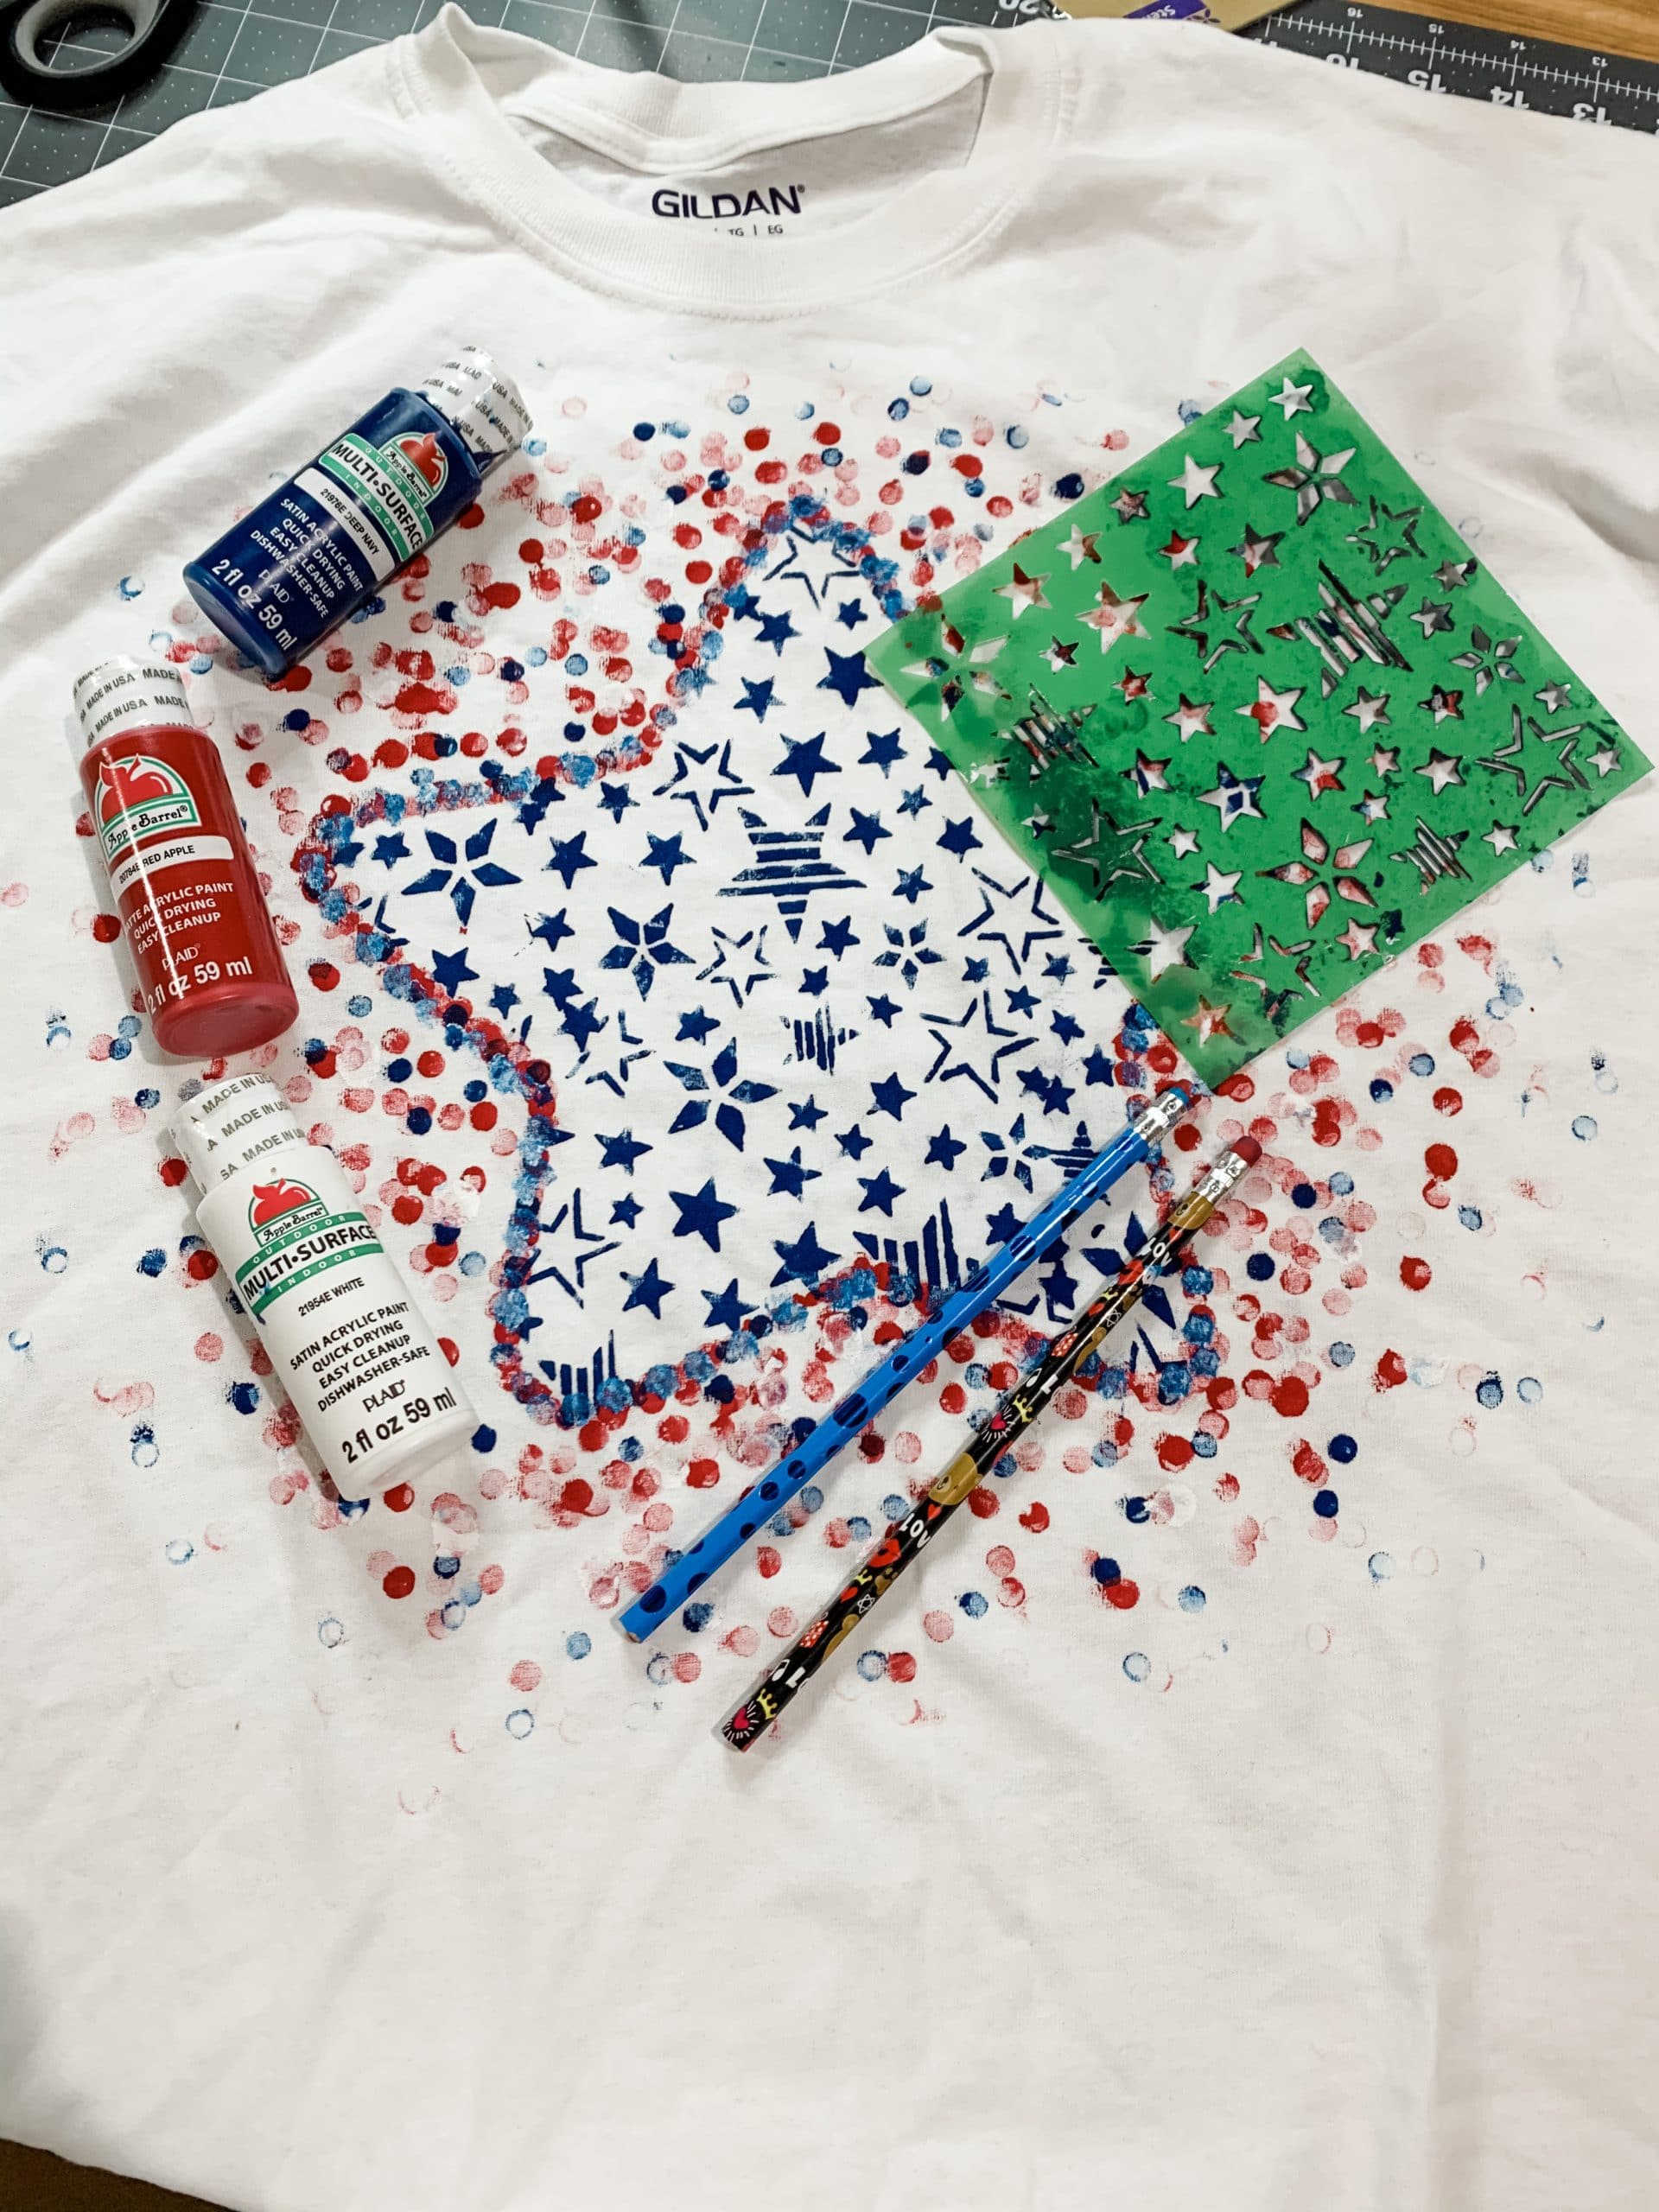
Keep dotting the red paint around the star template, moving further from the star after you have the outer edge done. I had the fainter dots be further away from the star and it created a slight gradient look.
Once you’re happy with the amount of red dots, it’s time to add the blue! Repeat the same process with a new pencil and your blue paint. I used Apple Barrel Red Apple and Deep Navy Acrylic Paints for this project.
How to stencil
Make sure you dry this paint before you do the stencil, otherwise it might smudge when you go to place the stencil. I like to use my heat gun to quickly dry the paint, but you can use a hairdryer on the low cool setting.
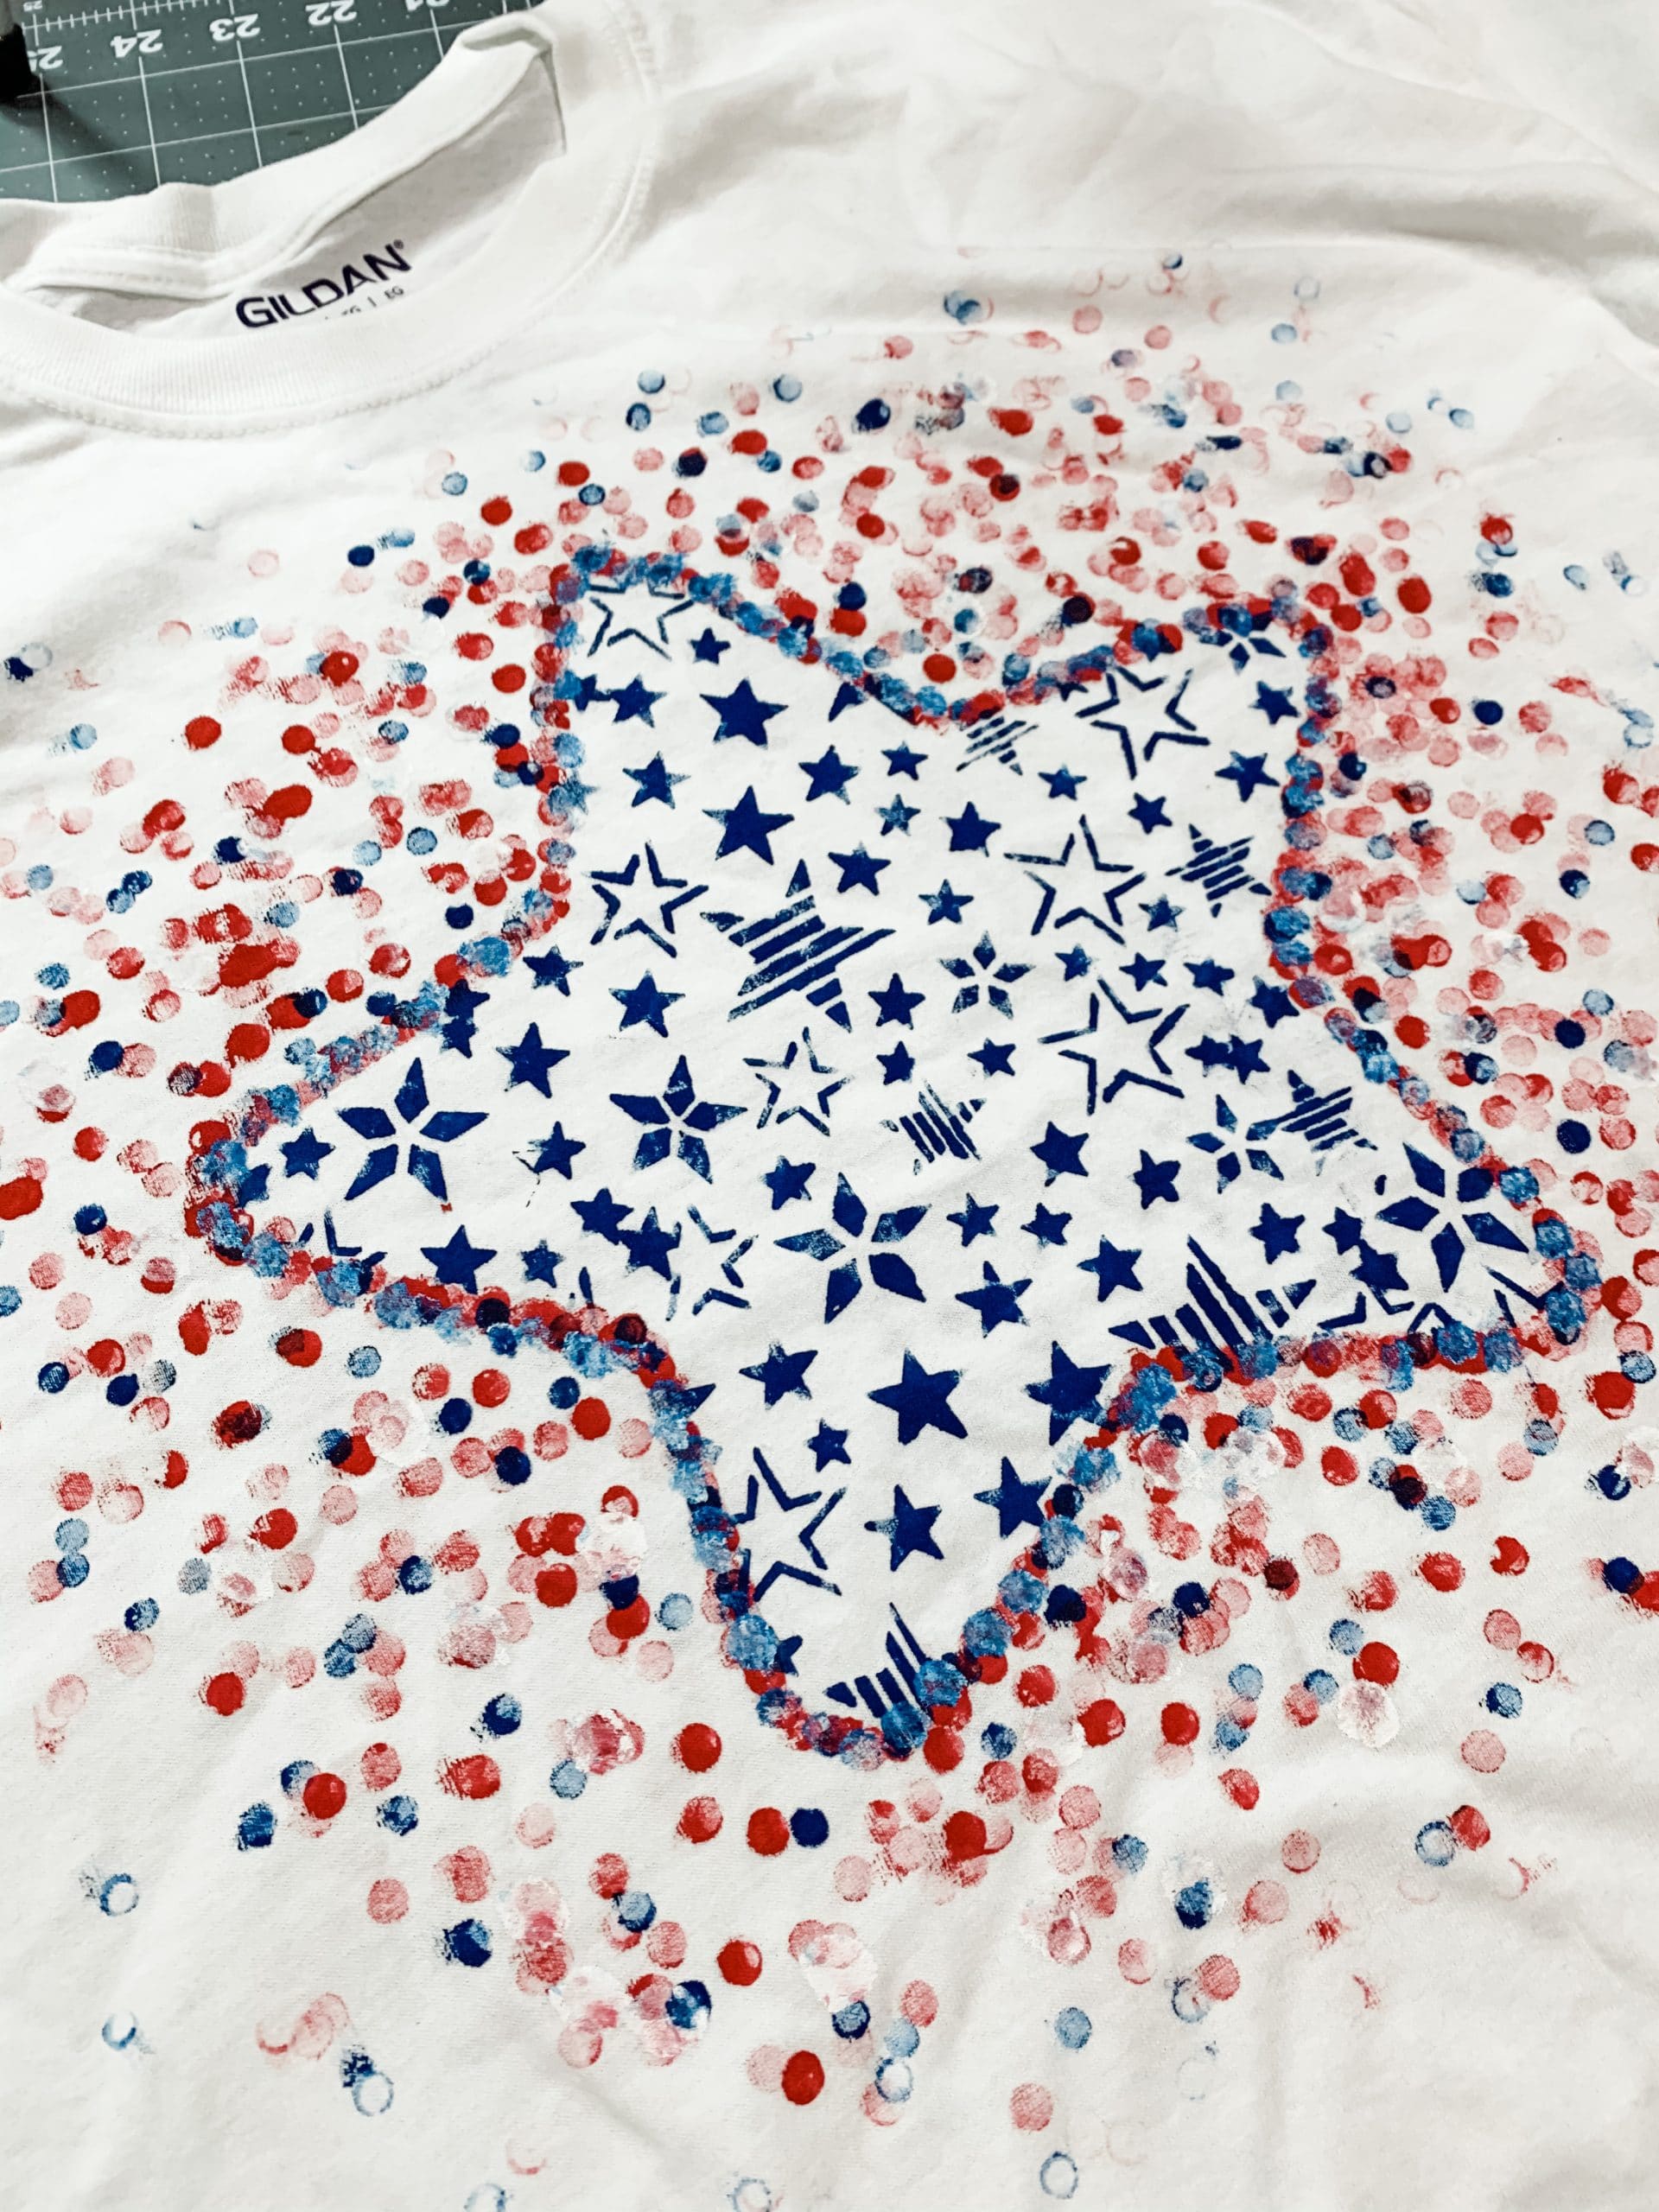
Then, you’re going to place the stencil and paint over it with your blue paint. The star template that I used was larger than the Dollar Tree star stencil that I had, so I had to move the stencil a couple of times to cover the star with the stenciled stars.
Once you have applied the stencil, allow the blue painted stars to completely dry, then you’re ready to wear your new DIY 4th of July shirt!
I hope you enjoyed this DIY 4th of July Shirt Idea as I did and decide to make it for yourself! If you do, I would love to see how yours turns out!
You should totally join my FREE Facebook group called On A Budget Crafts! It is a judgment-free community for DIY crafters to show off their projects and ideas.
If you loved this DIY you might also like these patriotic DIYs!
- Repurposed Tablecloth DIY Patriotic Decor
- DIY Red White and Blue Rag Wreath
- DIY Dollar Tree Patriotic Door Hanger
- American Flag Anchor DIY Patriotic Decor
- DIY Ribbon American Flag
- Blue Jean American Flag
- DIY Dollar Tree American Flag Decor
- DIY Patriotic Dollar Tree Mason Jar
Thanks for stopping by! XOXO Amber
You can also shop my ENTIRE AMAZON Favorites shop just click here! It’s packed full of all the things I use and love. Here is the supply list I highly recommend every creative have on hand!!
Would you also pin my blog for later and get on my newsletter alerts? I would love to have you join my #craftycrew.
Inspired? Leave me a comment below! I love hearing from my readers!

Join my free “ON A BUDGET CRAFTS” Facebook group!

Made this on a canvas last year, but going to do a shirt this year. I love it
Loved this fourth of July shirt 👕
Just wondering if you can wash it? Does the acrylic paint wash out, peel or run? TIA
I have washed mine several times. I did let it sit and soak in. I can not promise it wont wash out though.
I love this page. It’s the only way I can craft with you right now.