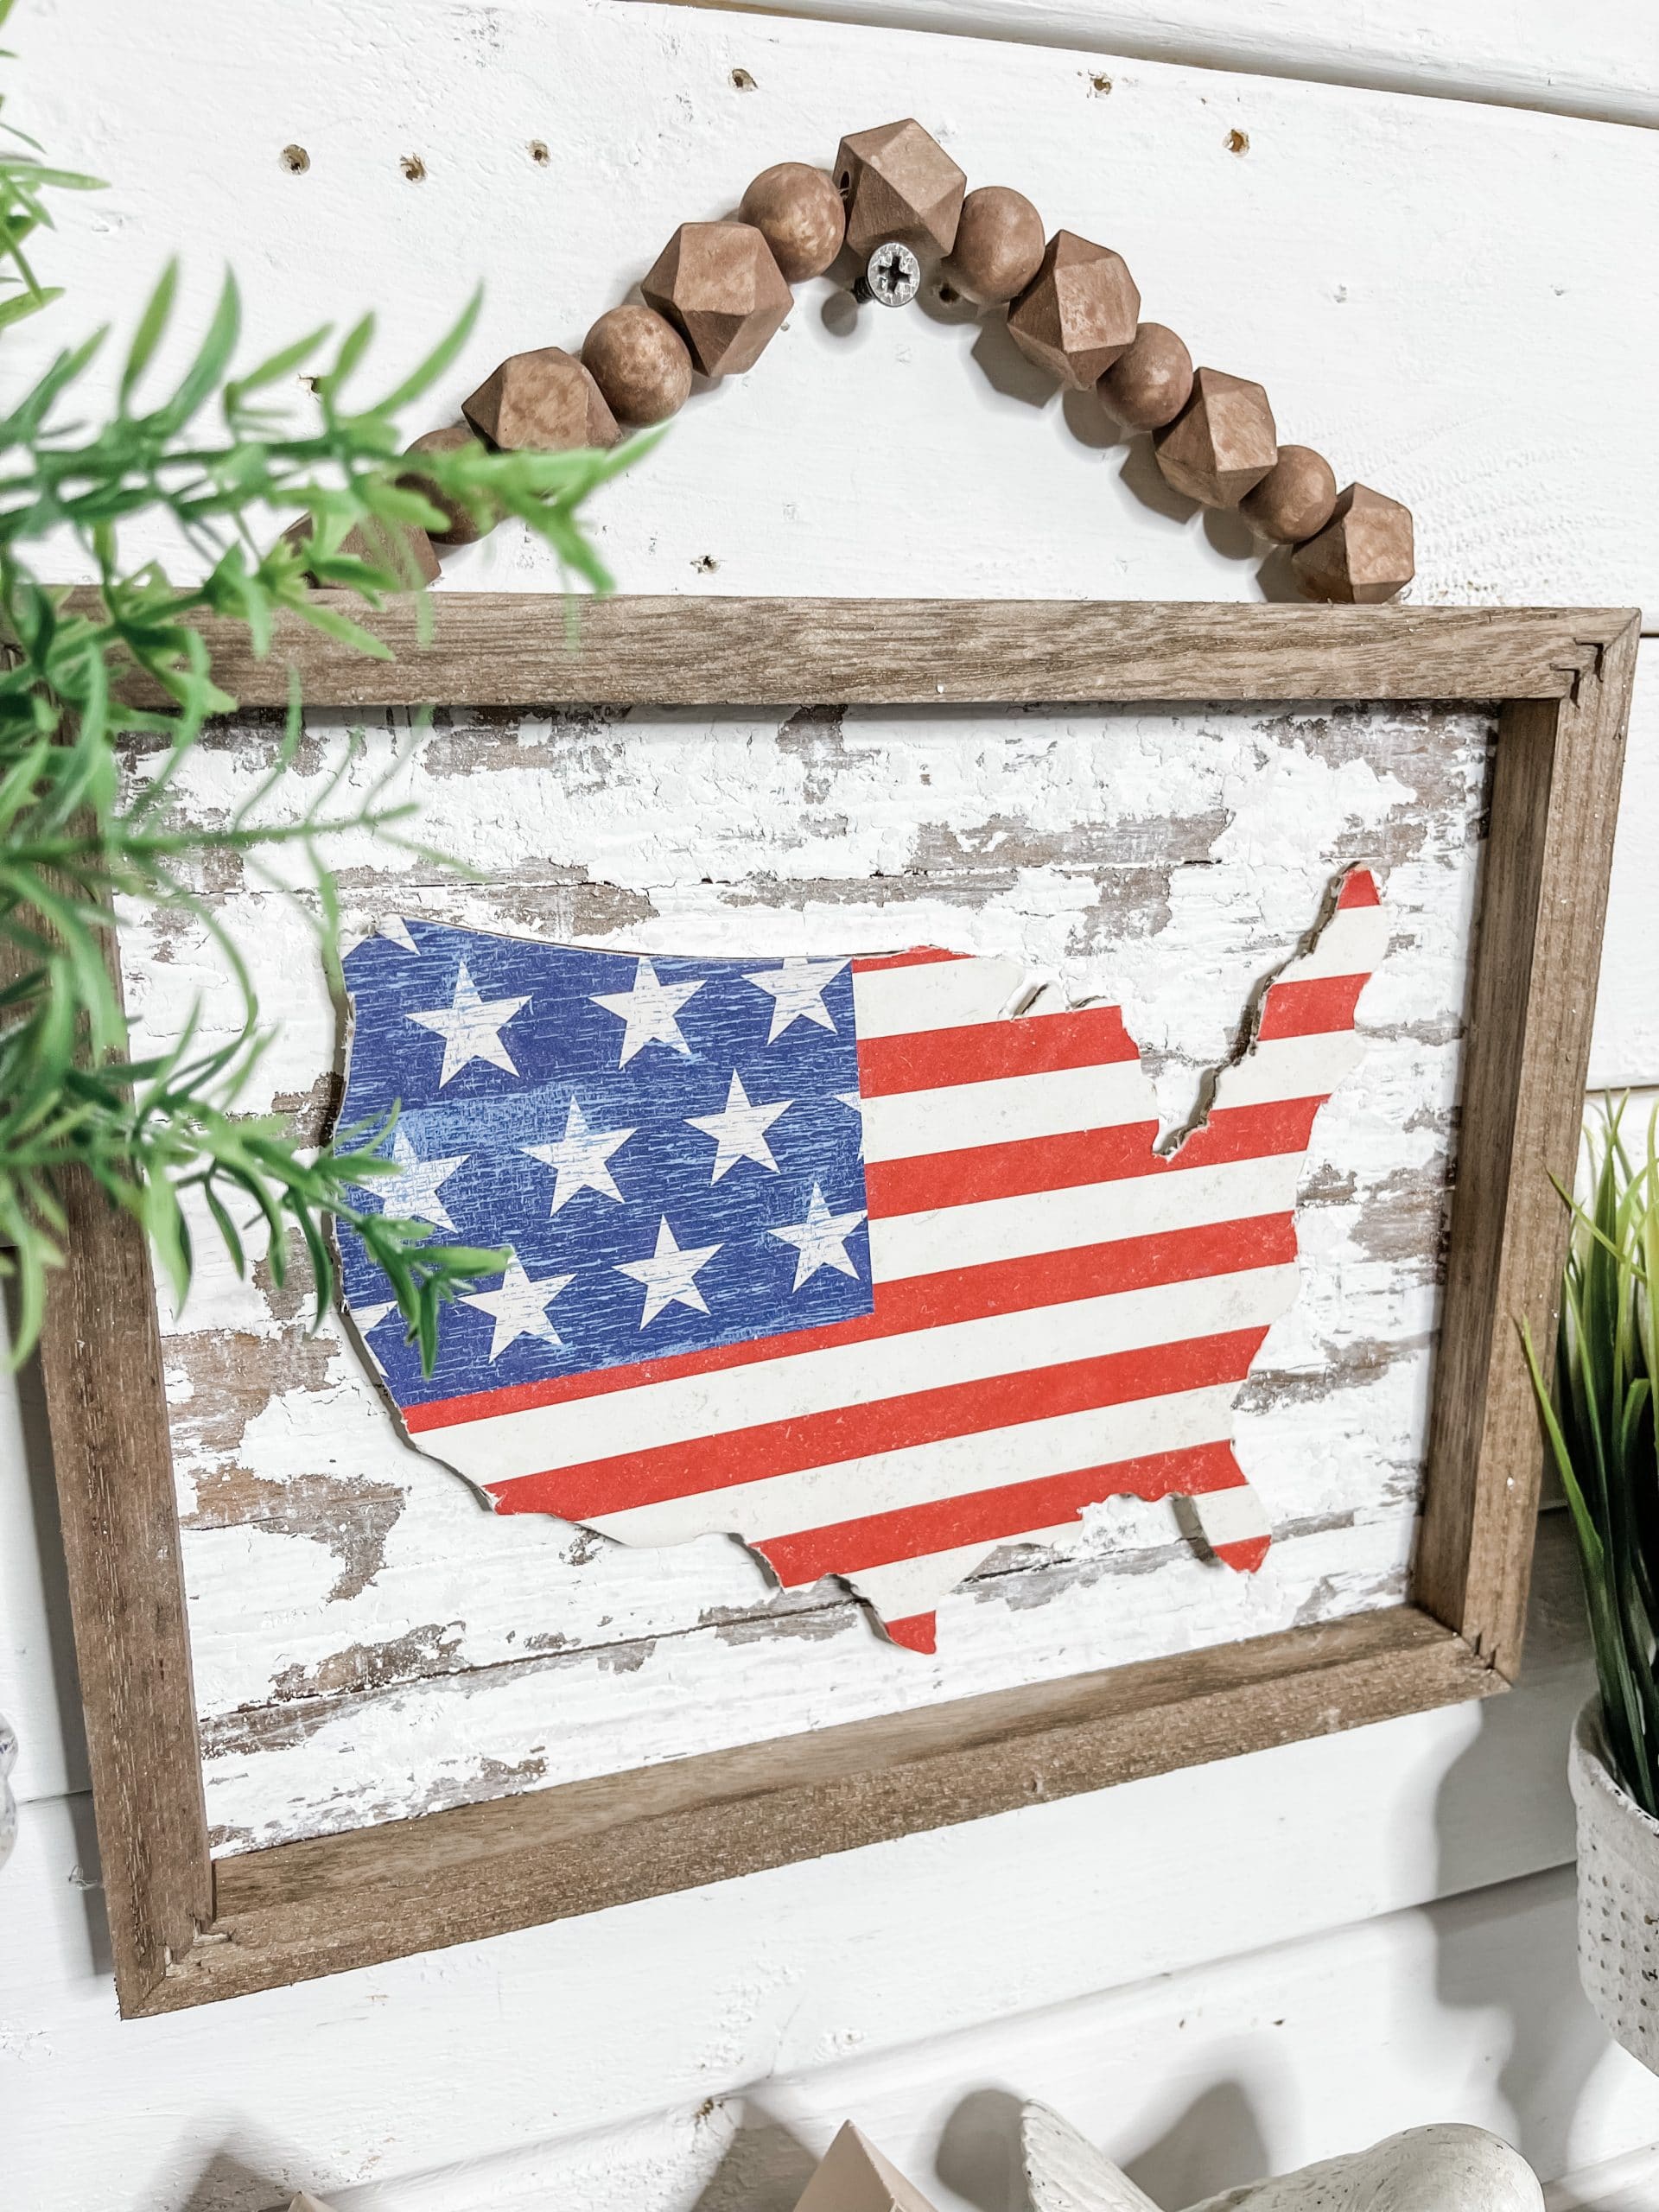
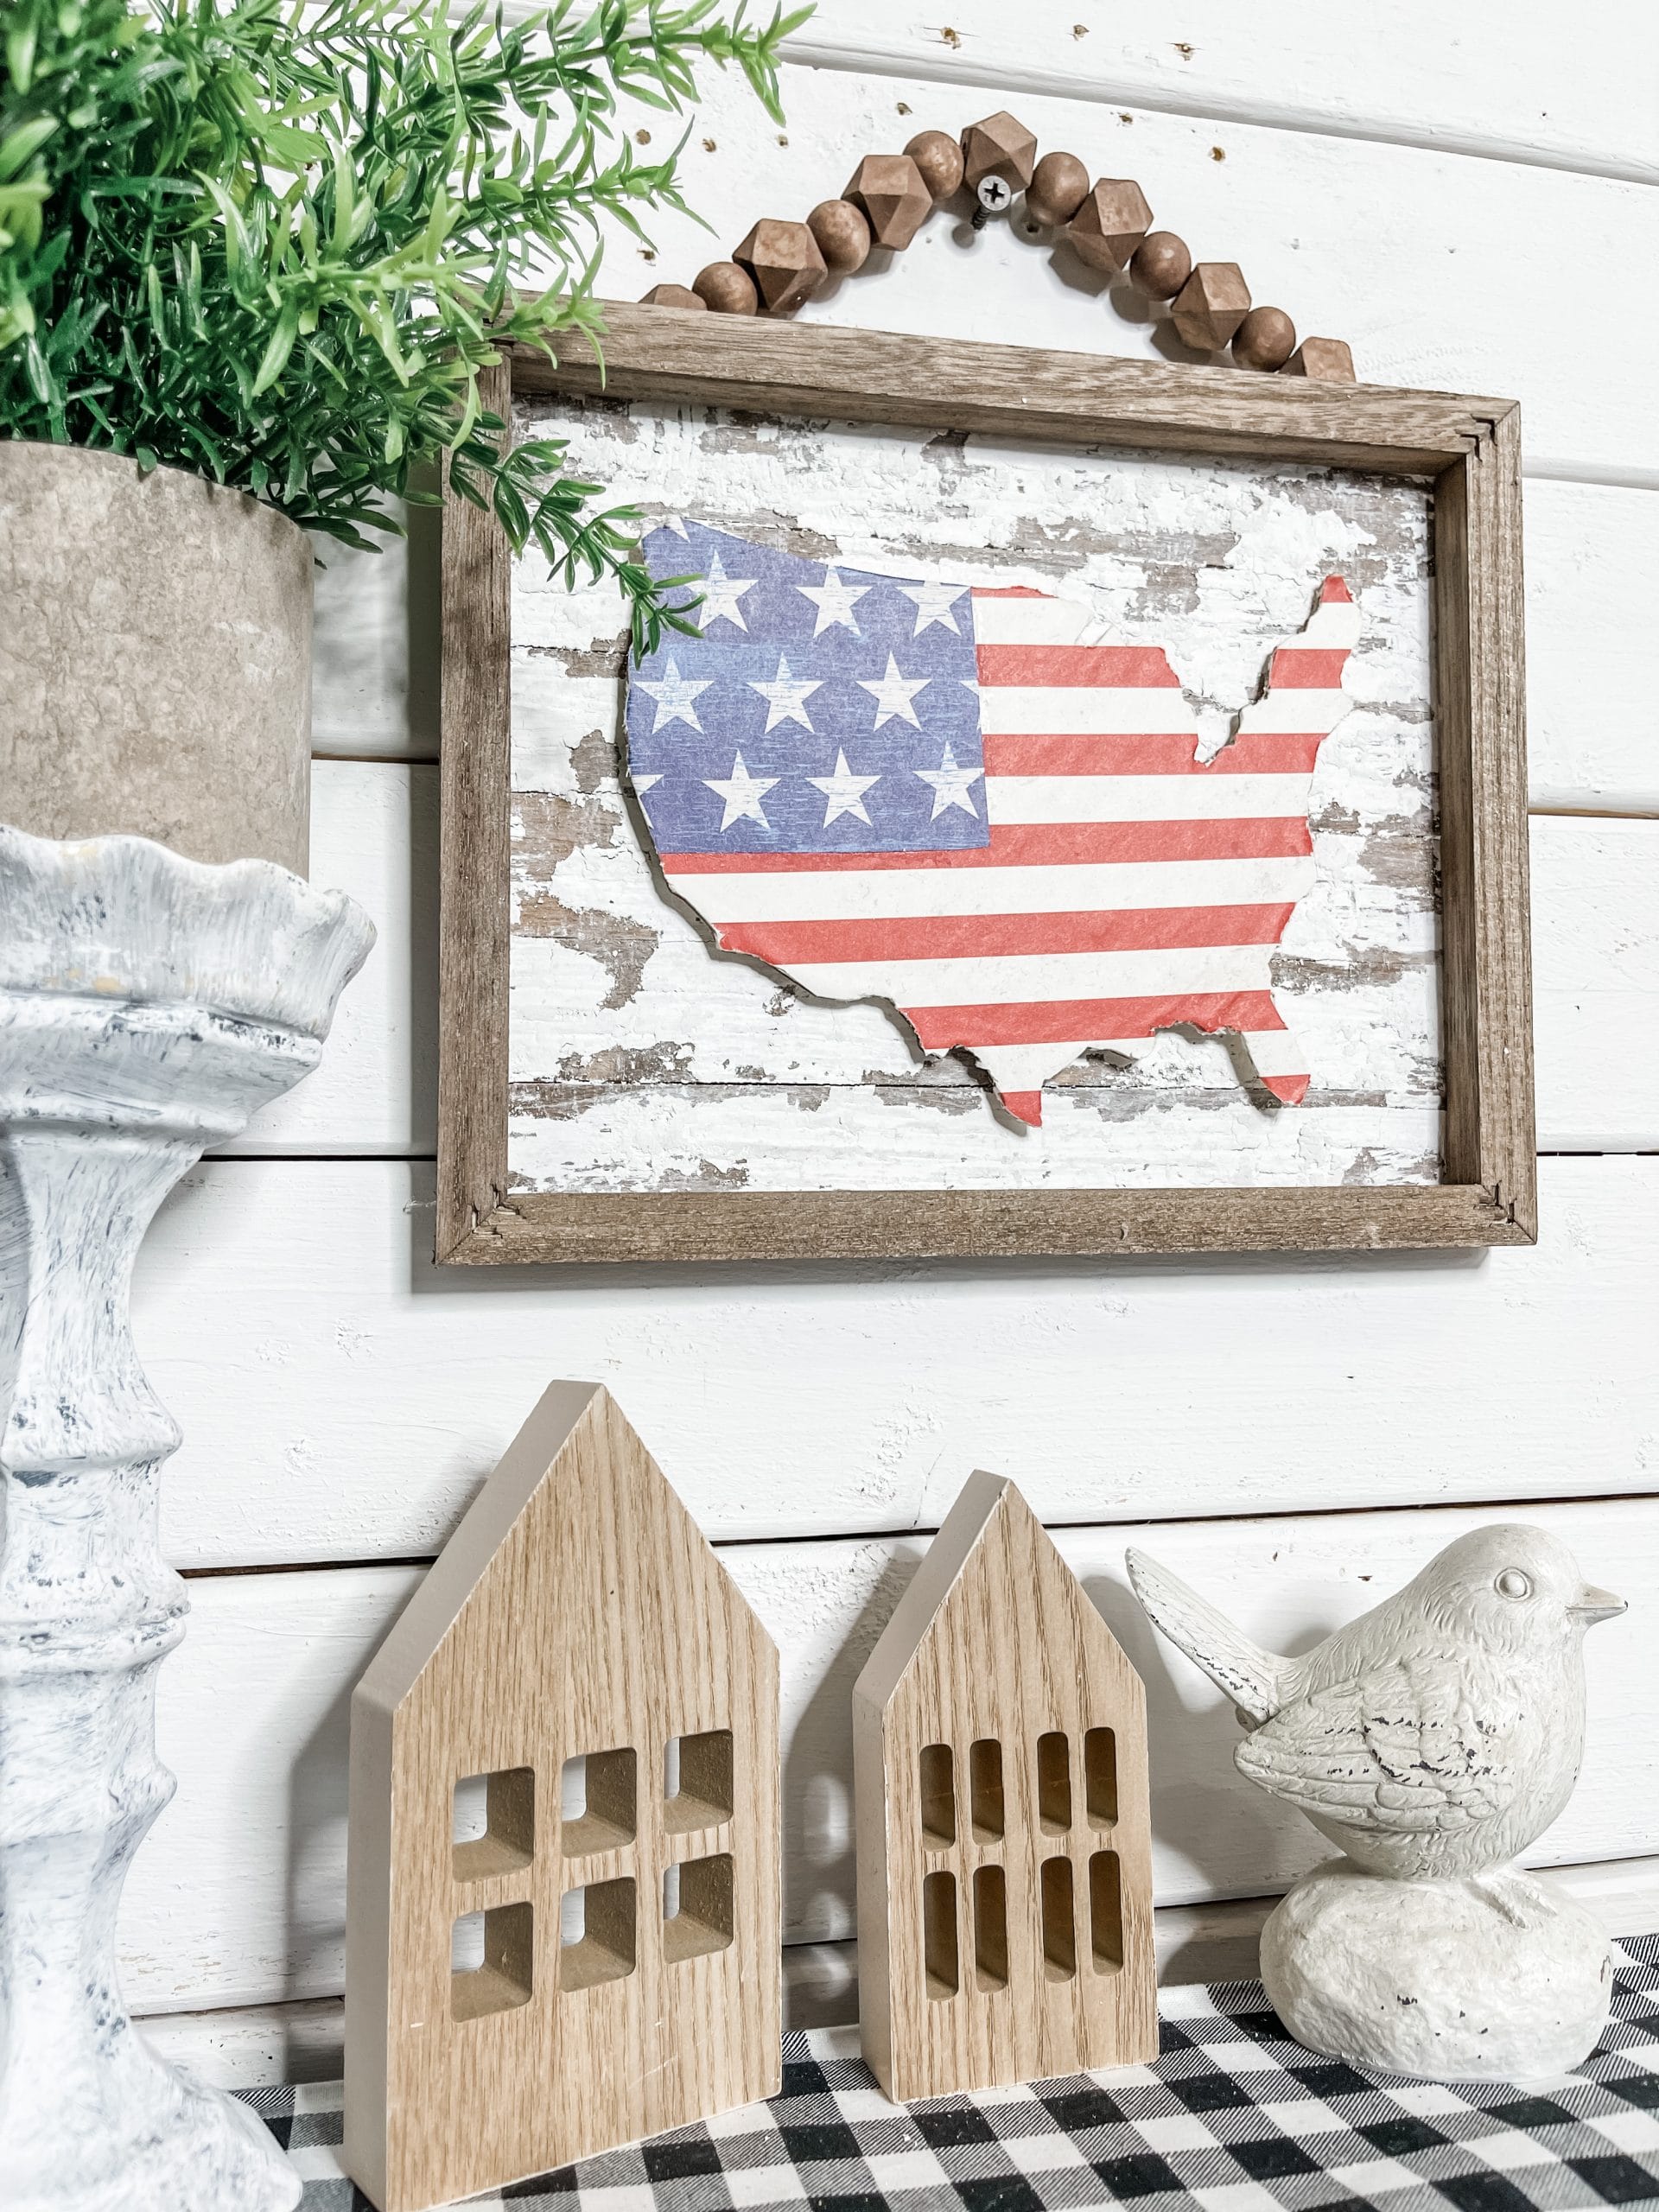
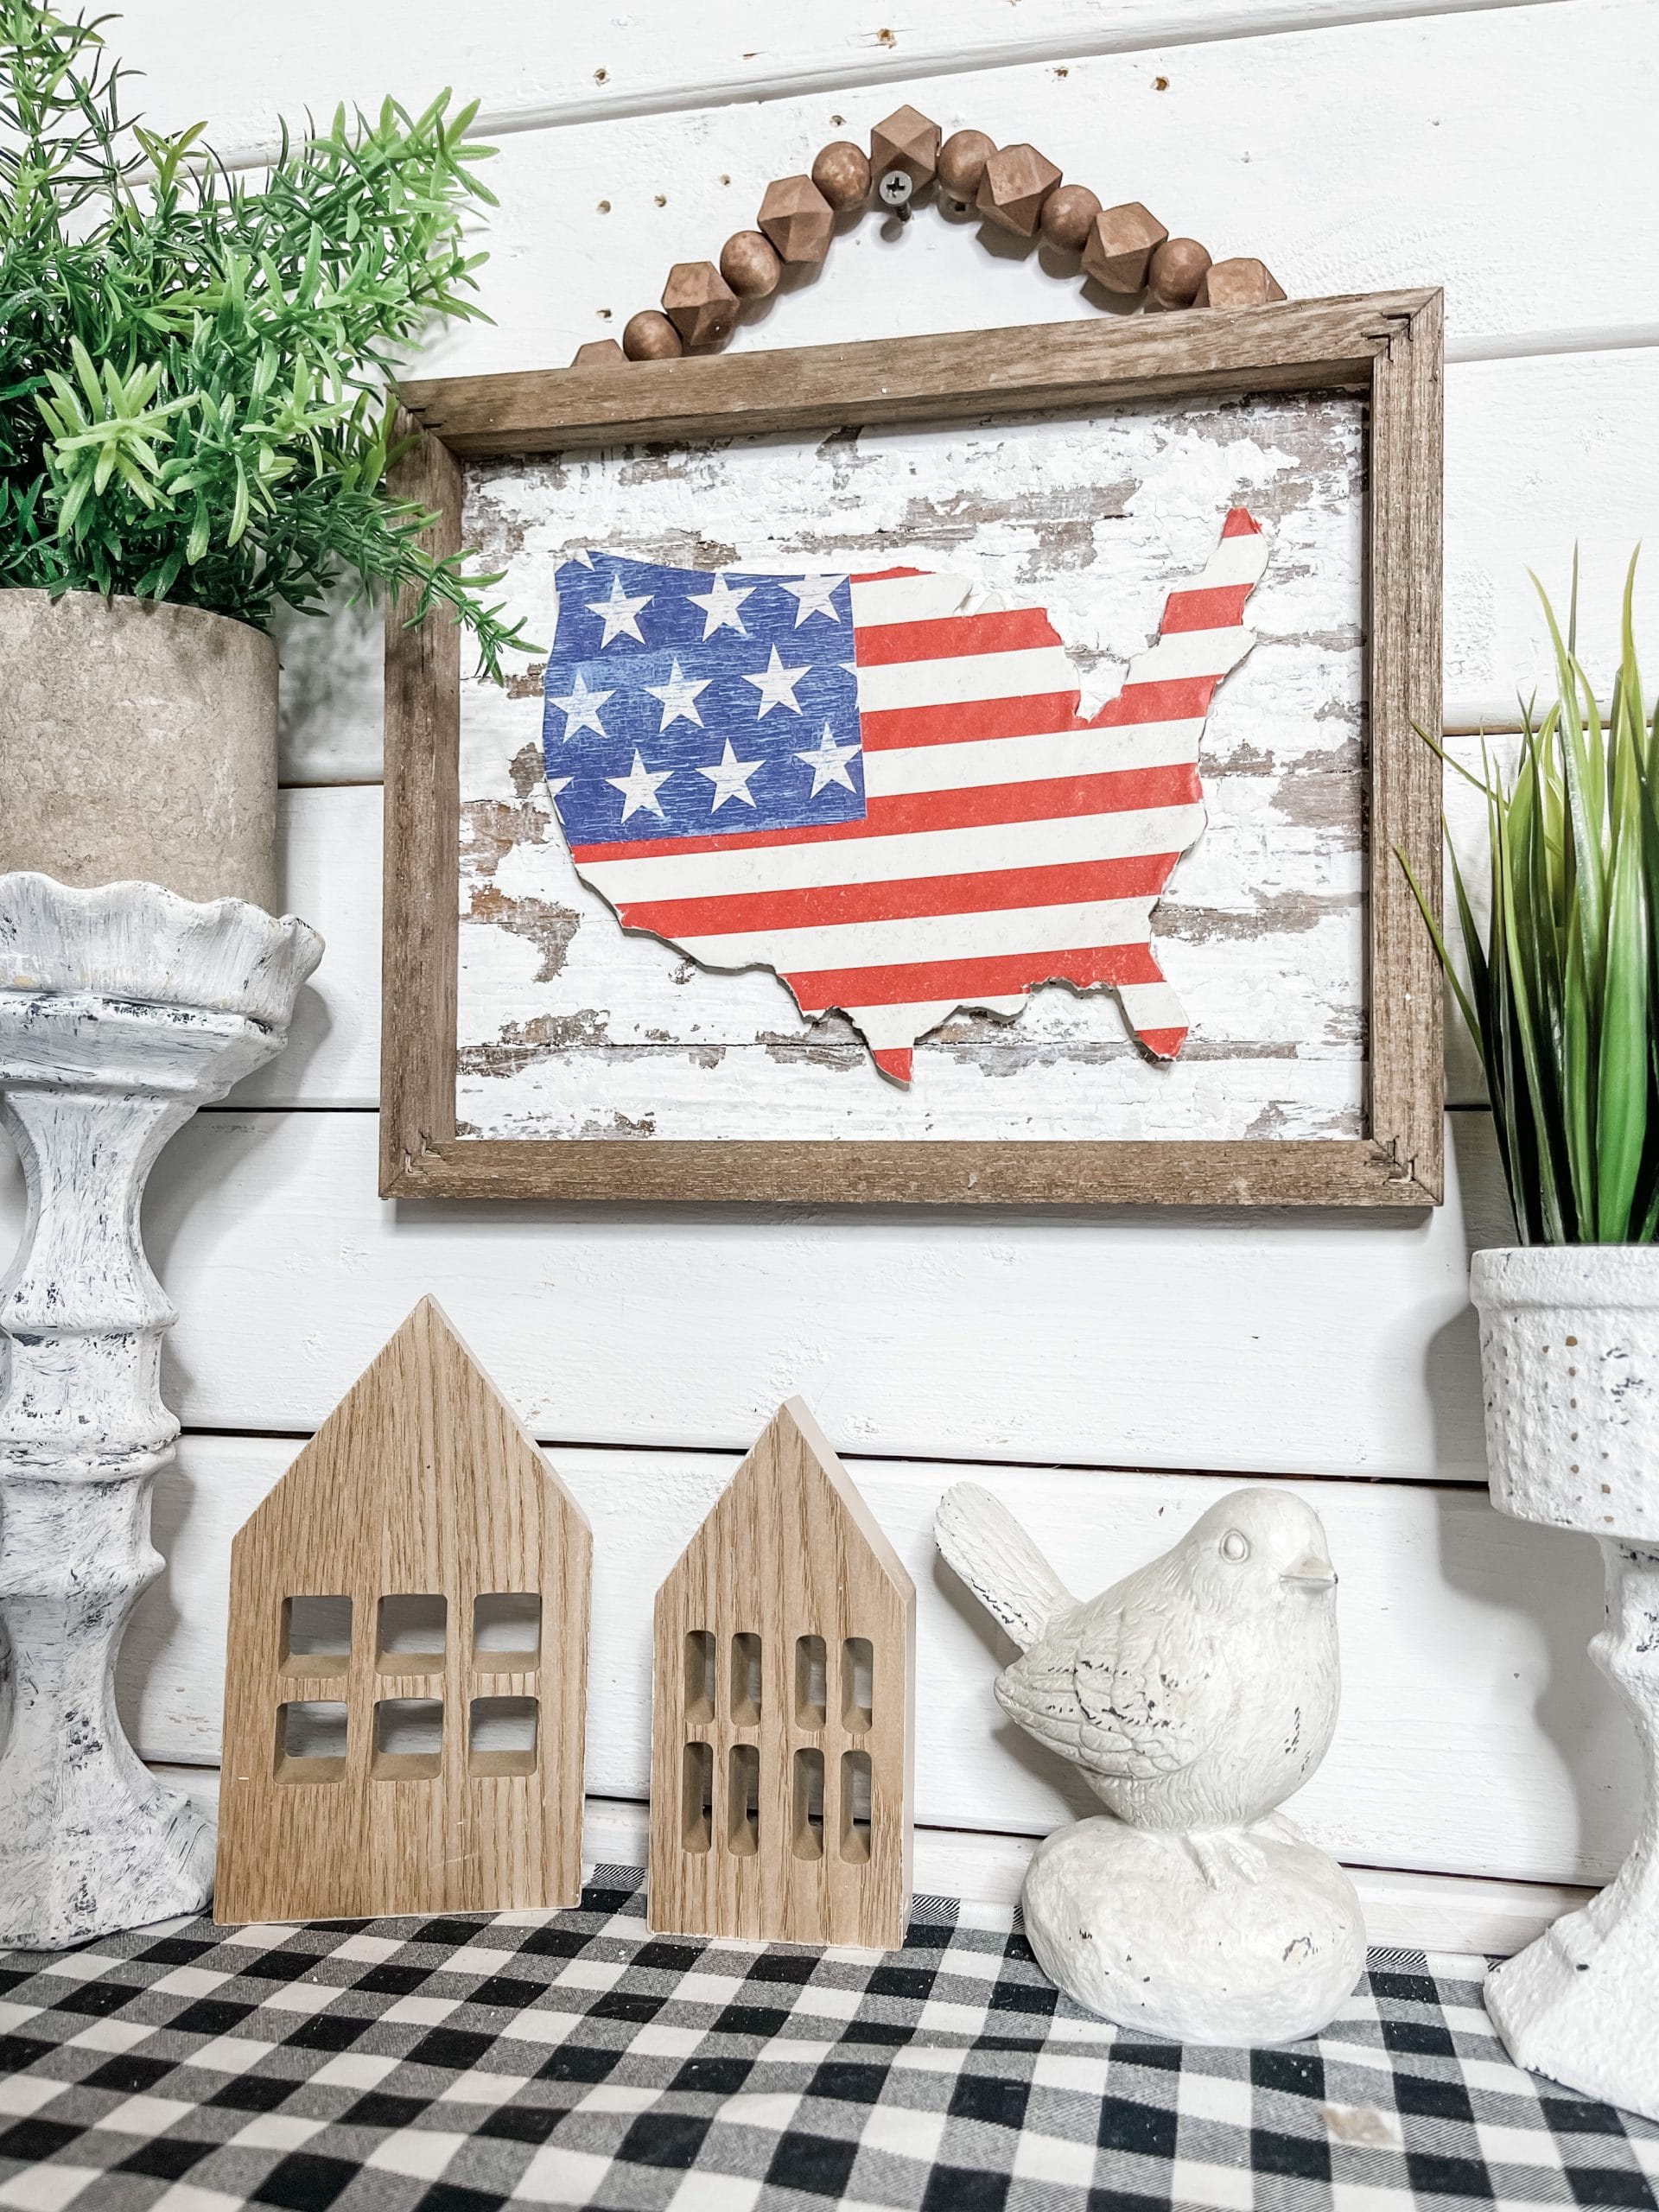
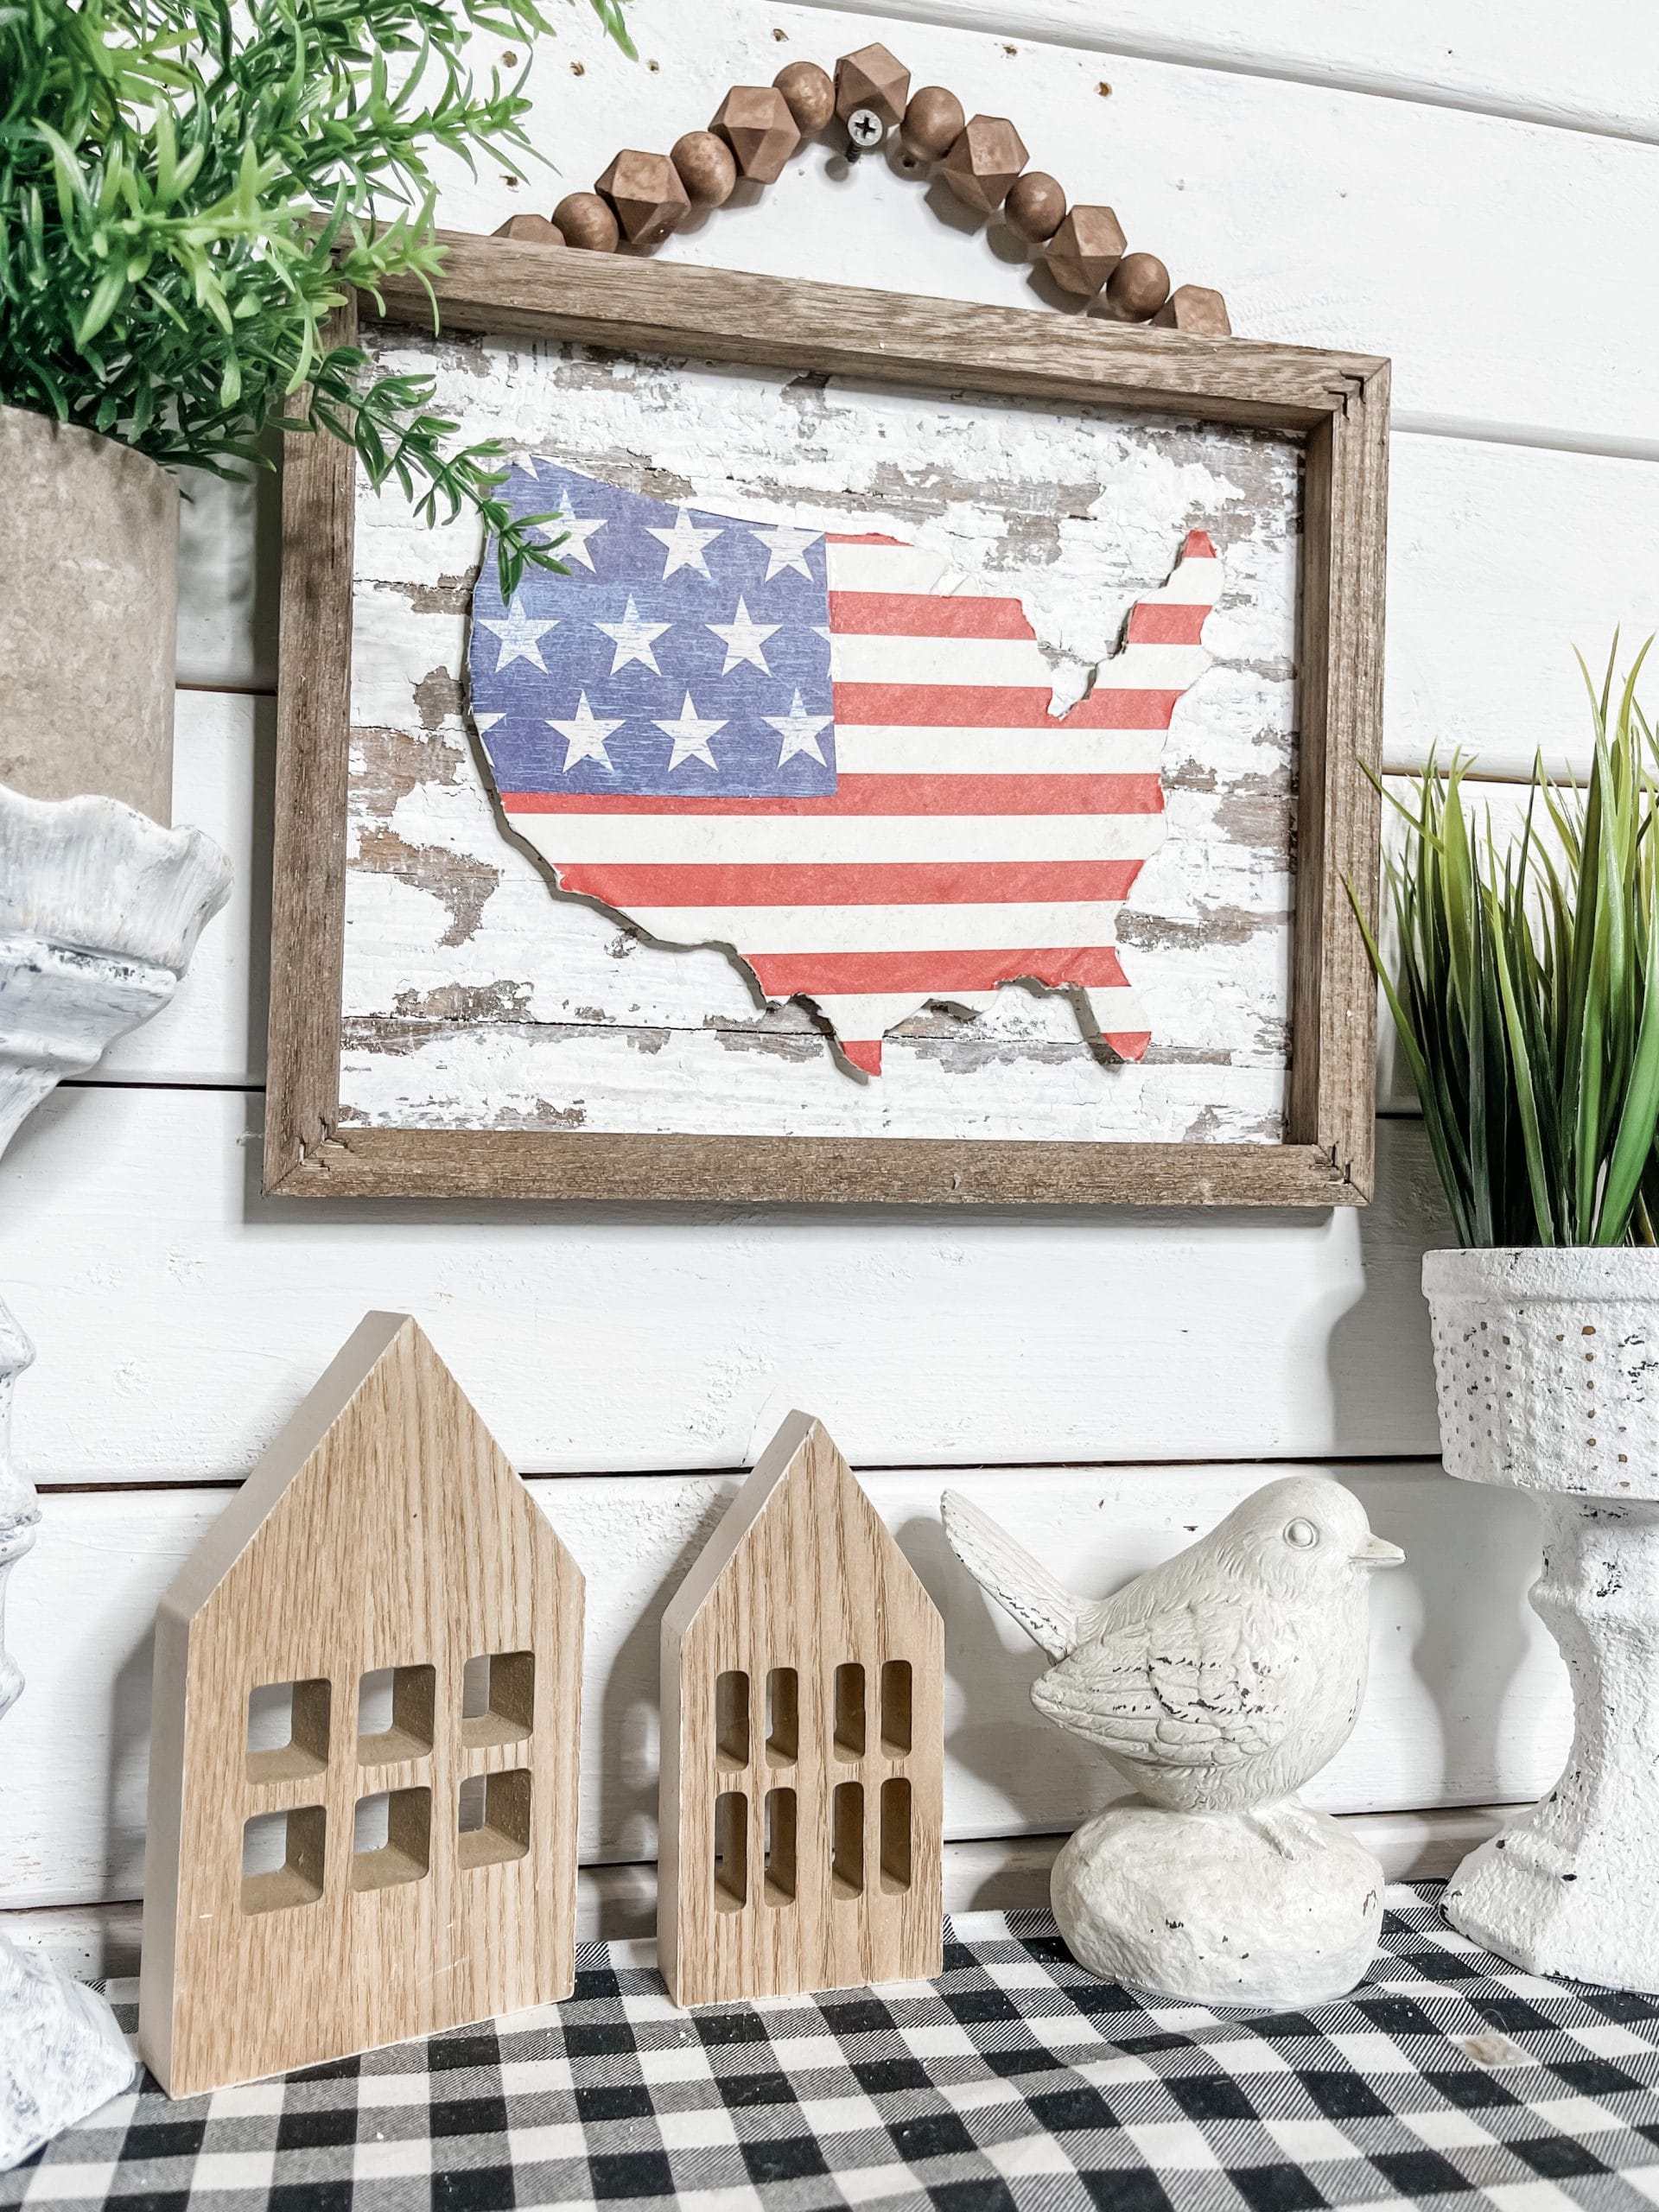
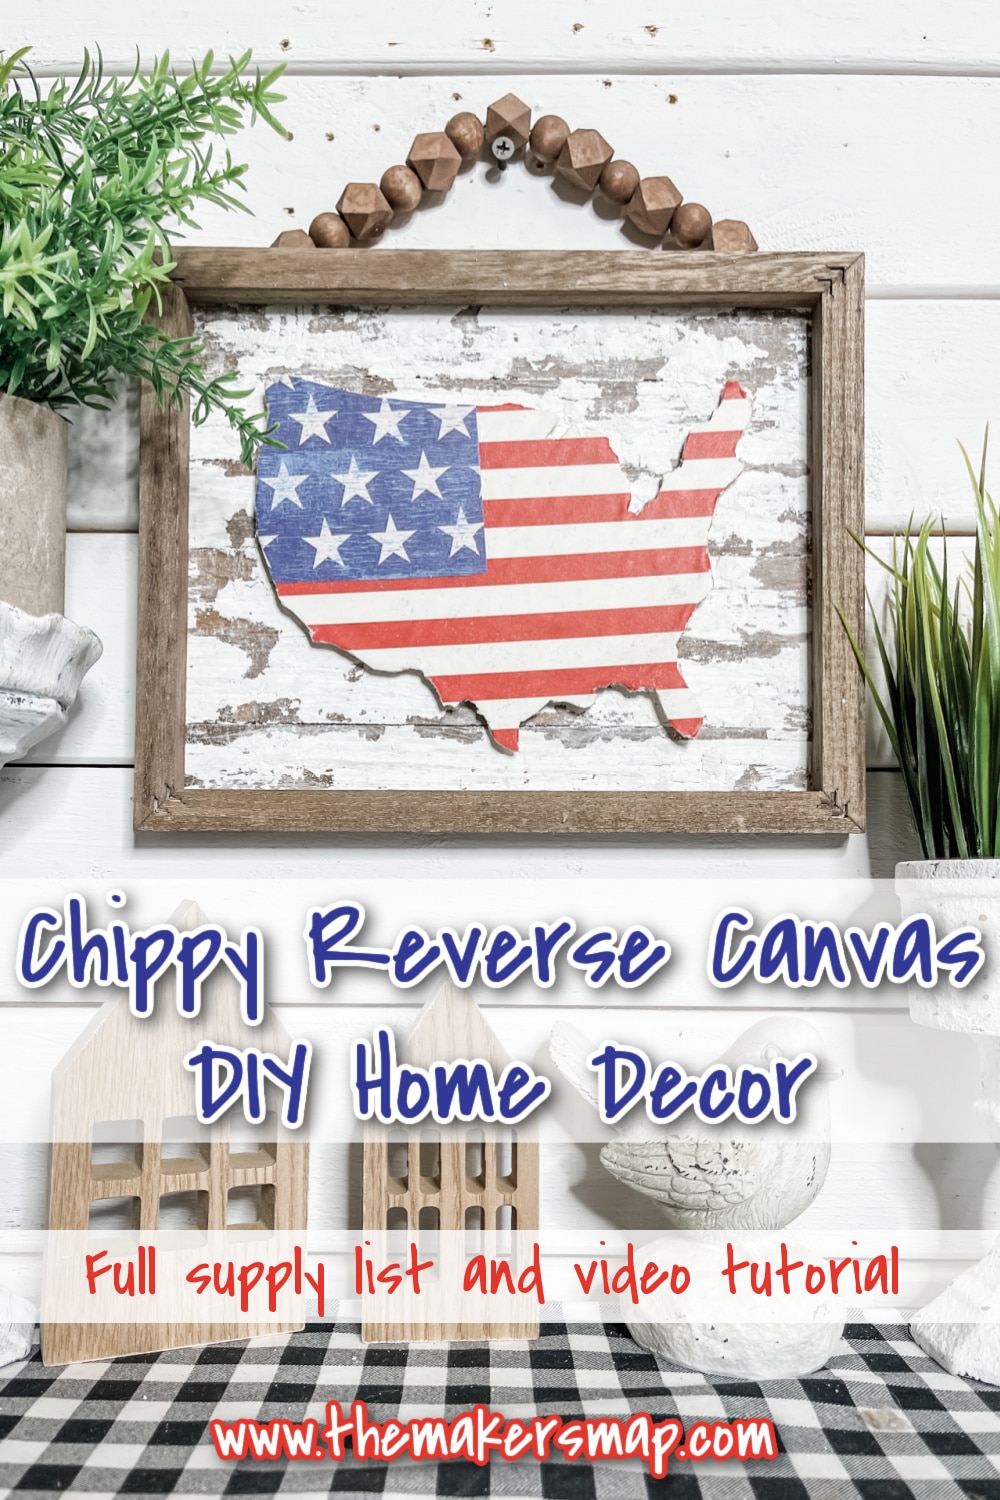
Chippy USA Reverse Canvas DIY Home Decor
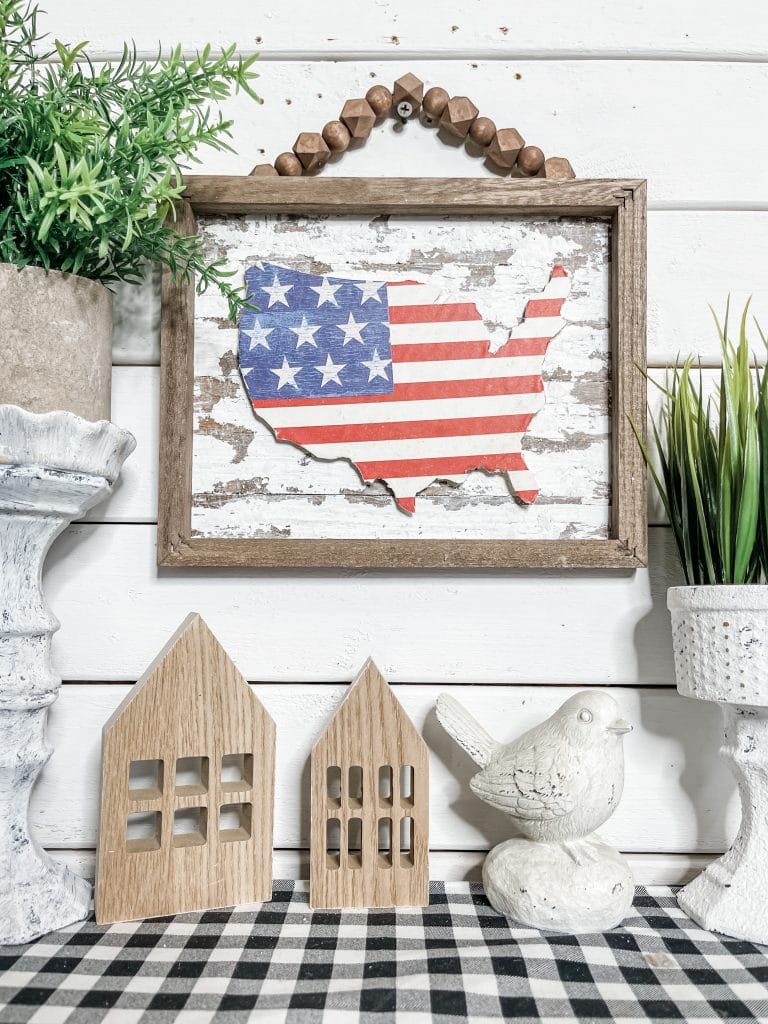
I absolutely love a good chippy finish on my DIY decor projects, so that might be why I love this Chippy USA Reverse Canvas DIY Home Decor so much!
This is such a simple DIY to make, and it is also incredibly affordable! I think you’re really going to love this DIY idea!
Watch the DIY tutorial
I recorded the how-to steps of making this Chippy USA Reverse Canvas DIY Home Decor during a LIVE video on my Facebook page.
If you want to see the process, craft along, or just join in on the fun conversations, you can watch the DIY tutorial replay!

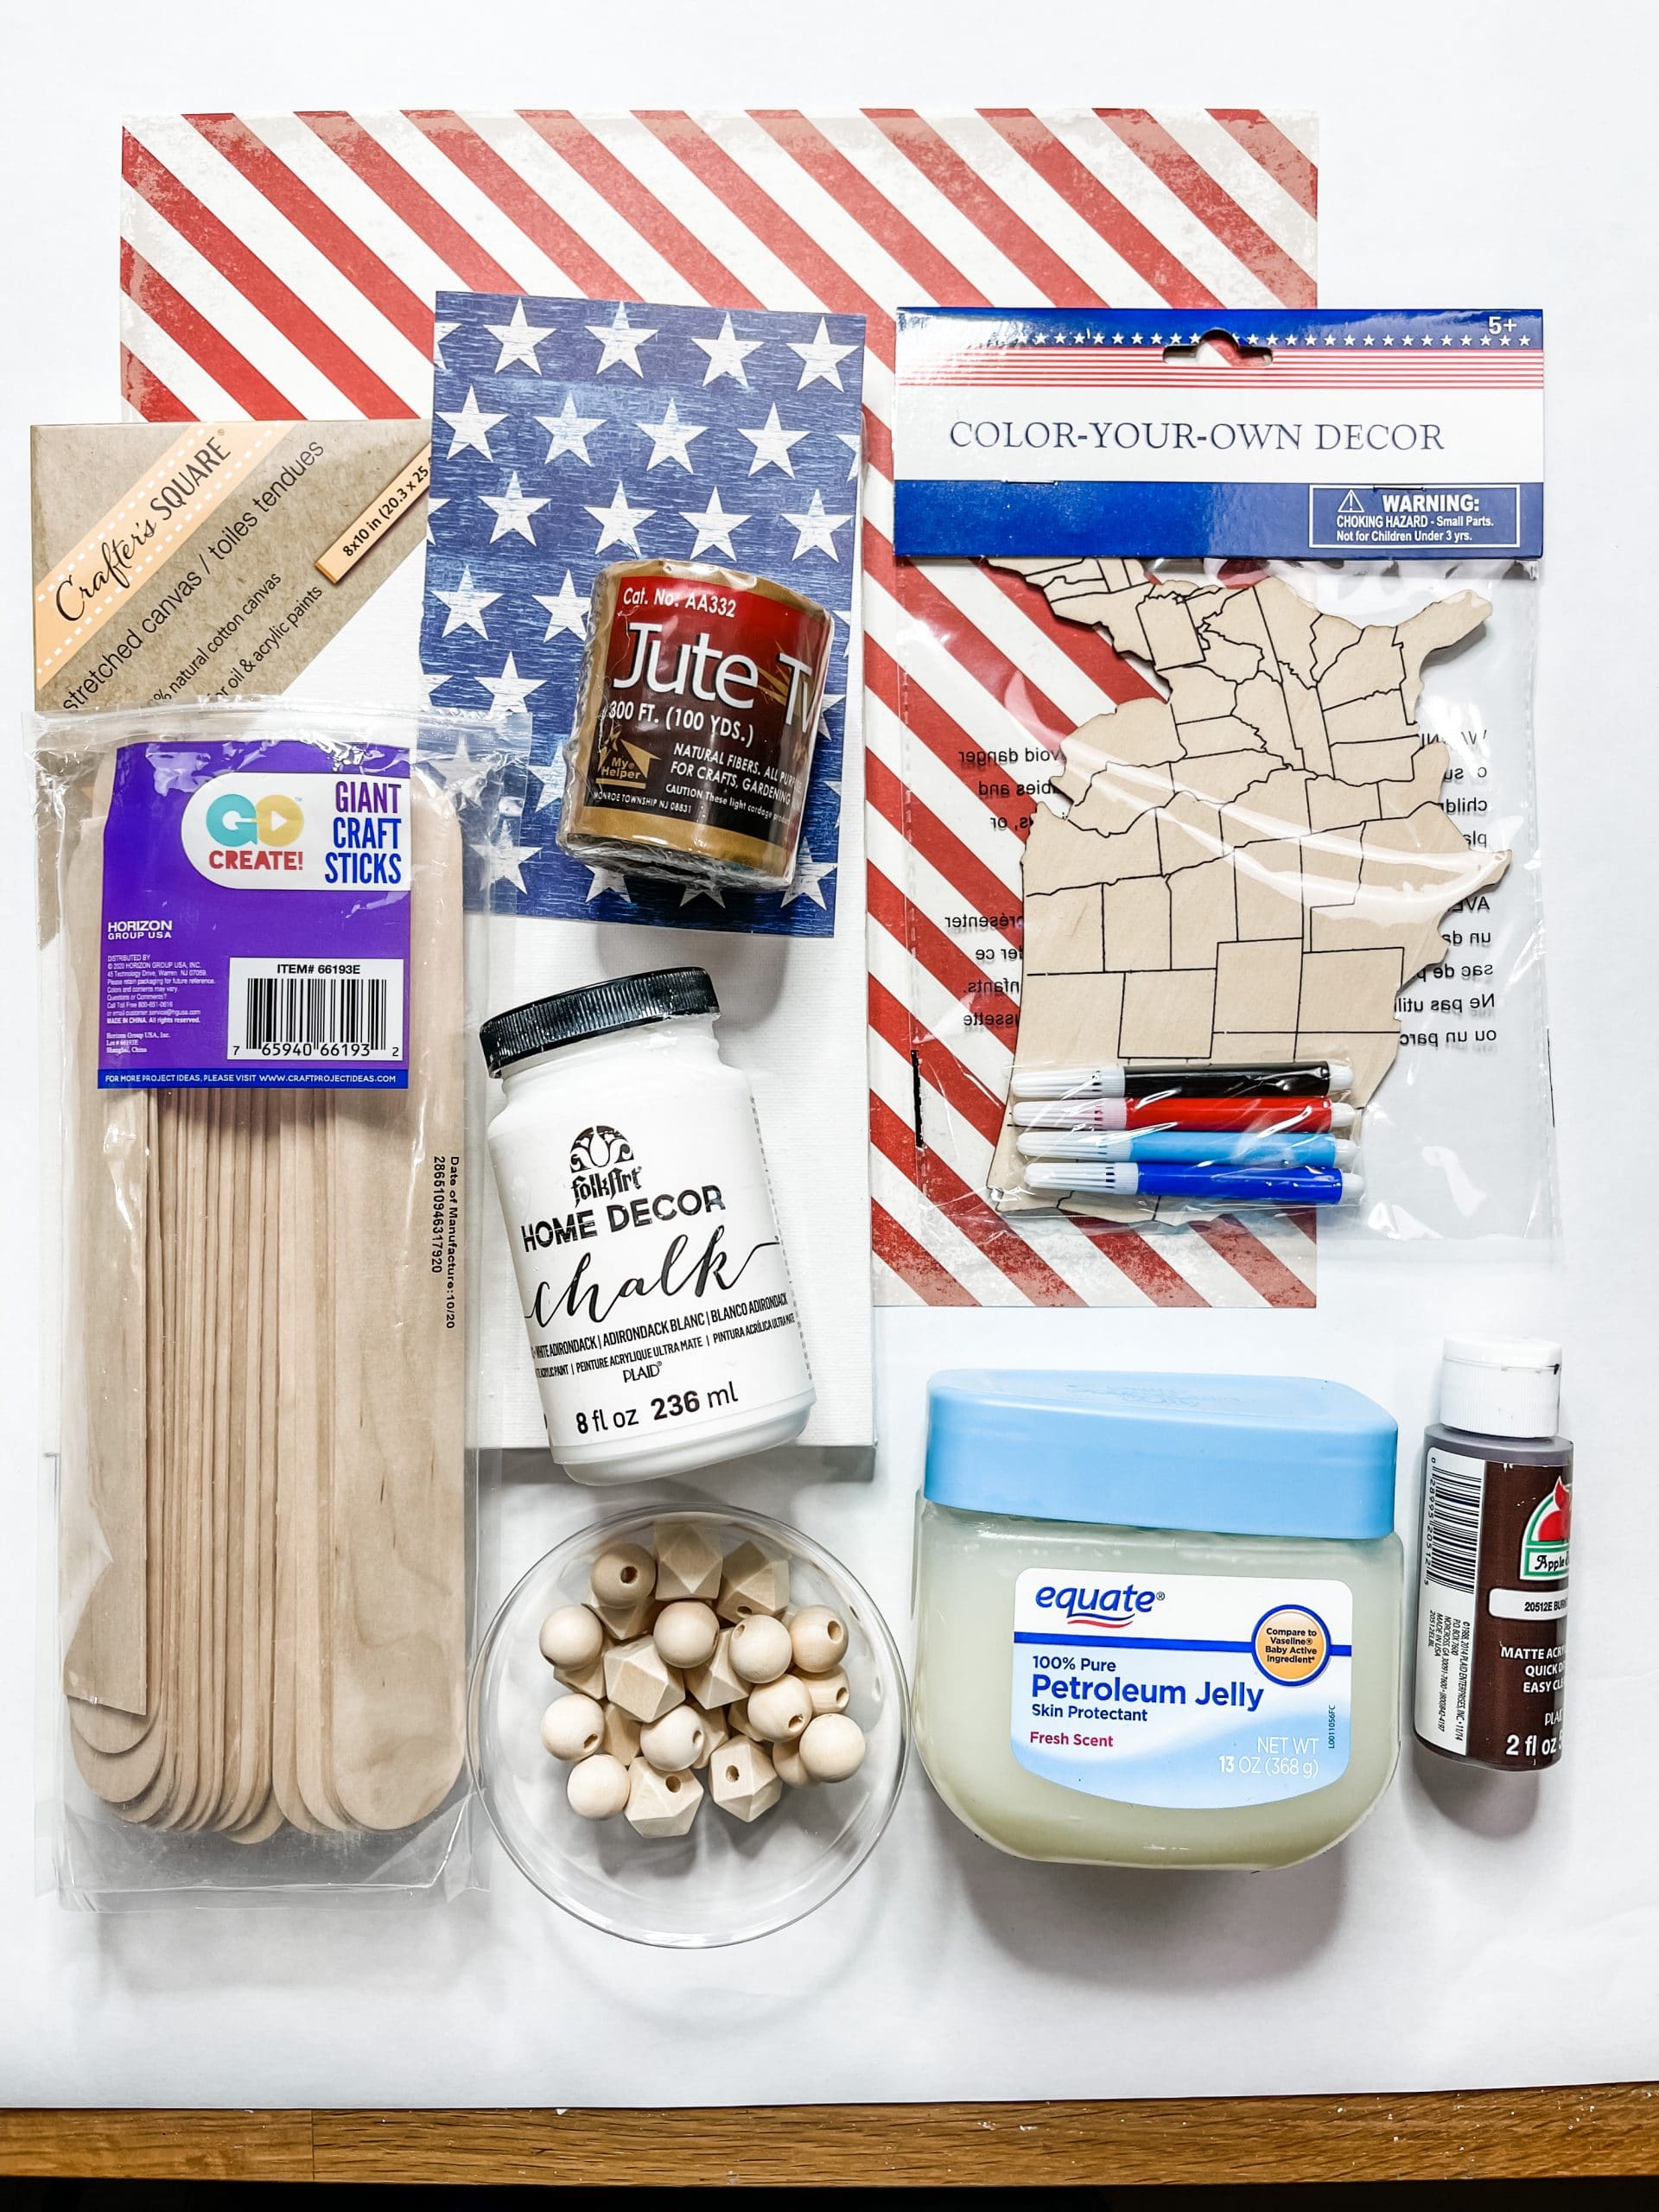
For this project, I will be using these items but you can substitute where you want.
“As an Amazon Associate, I earn from qualifying purchases.”
- Dollar Tree Canvas
- Dollar Tree Color-Your-Own USA
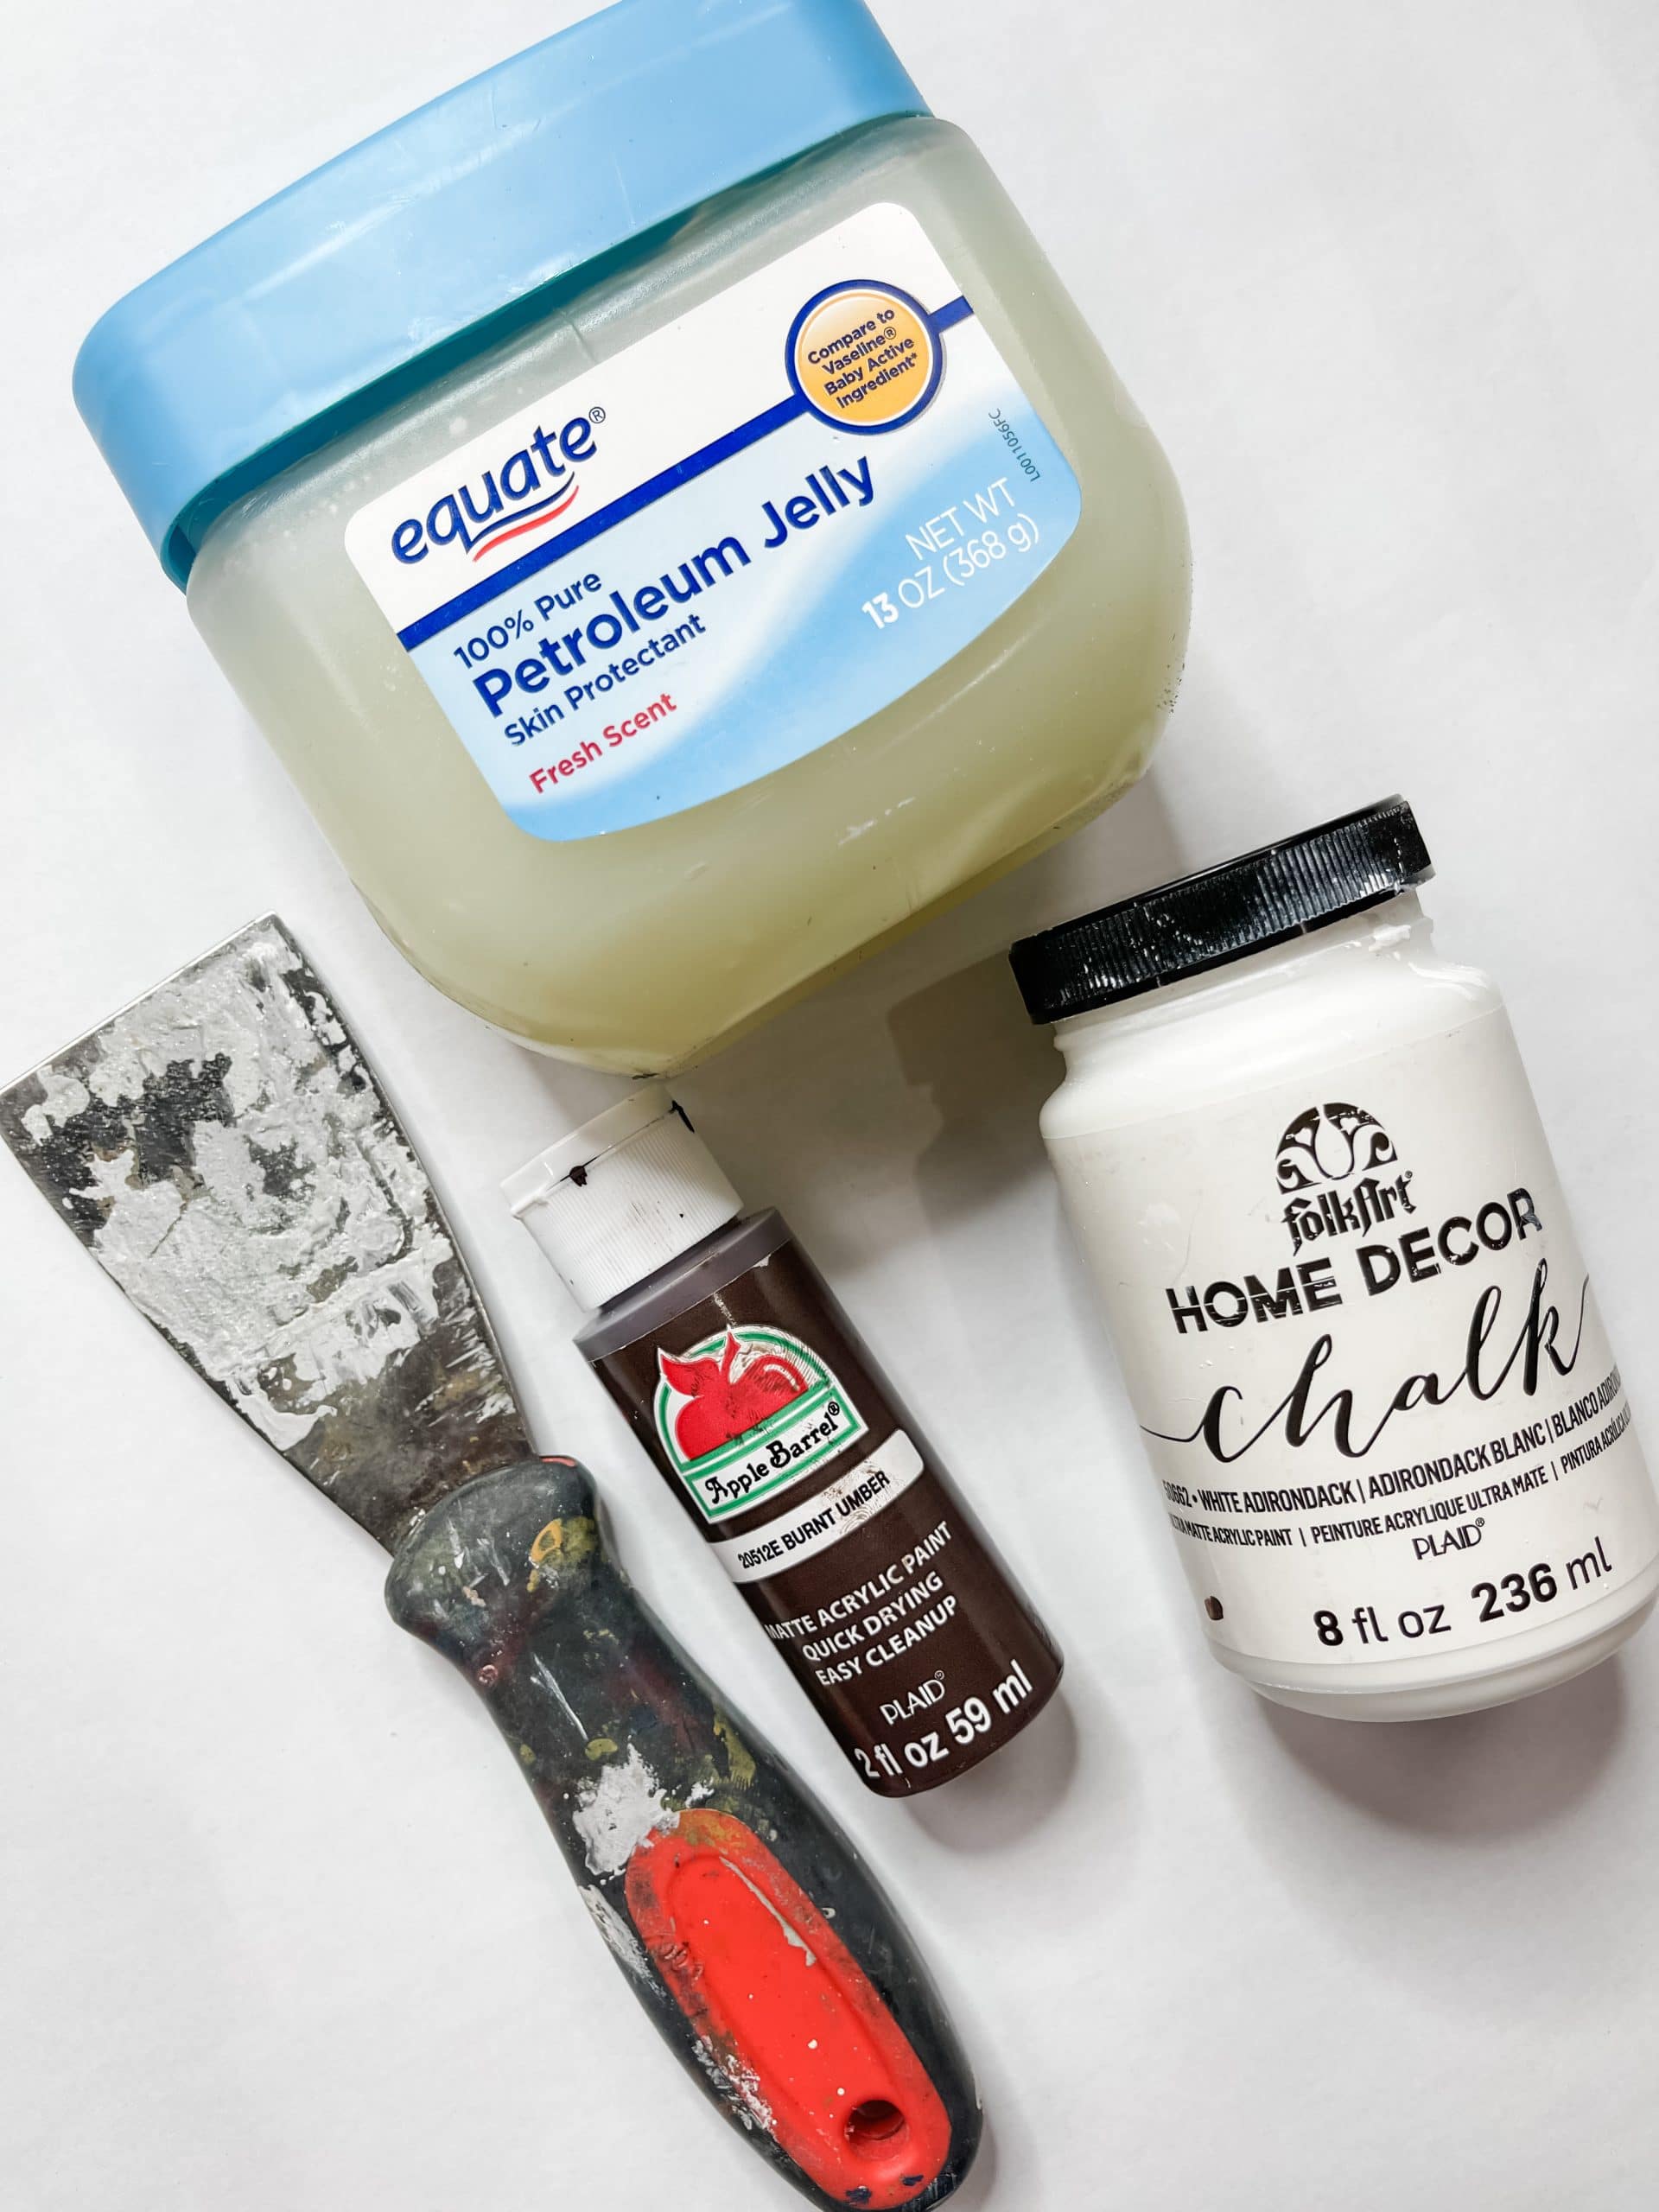
- Folkart White Chalk Paint
- Apple Barrel Burnt Umber Acrylic Paint
- Red/White Striped Scrapbook Paper
- Blue (White Stars) Scrapbook Paper
- Wood Beads (Spherical/Geometric)
- Jute Twine
- Giant Craft Sticks
- Popsicle Sticks
- Petroleum Jelly
- Putty Knife
- Exacto Knife
- Filer
- Hot Glue gun
- Glue Sticks
How to Make a Chippy USA Reverse Canvas DIY Home Decor
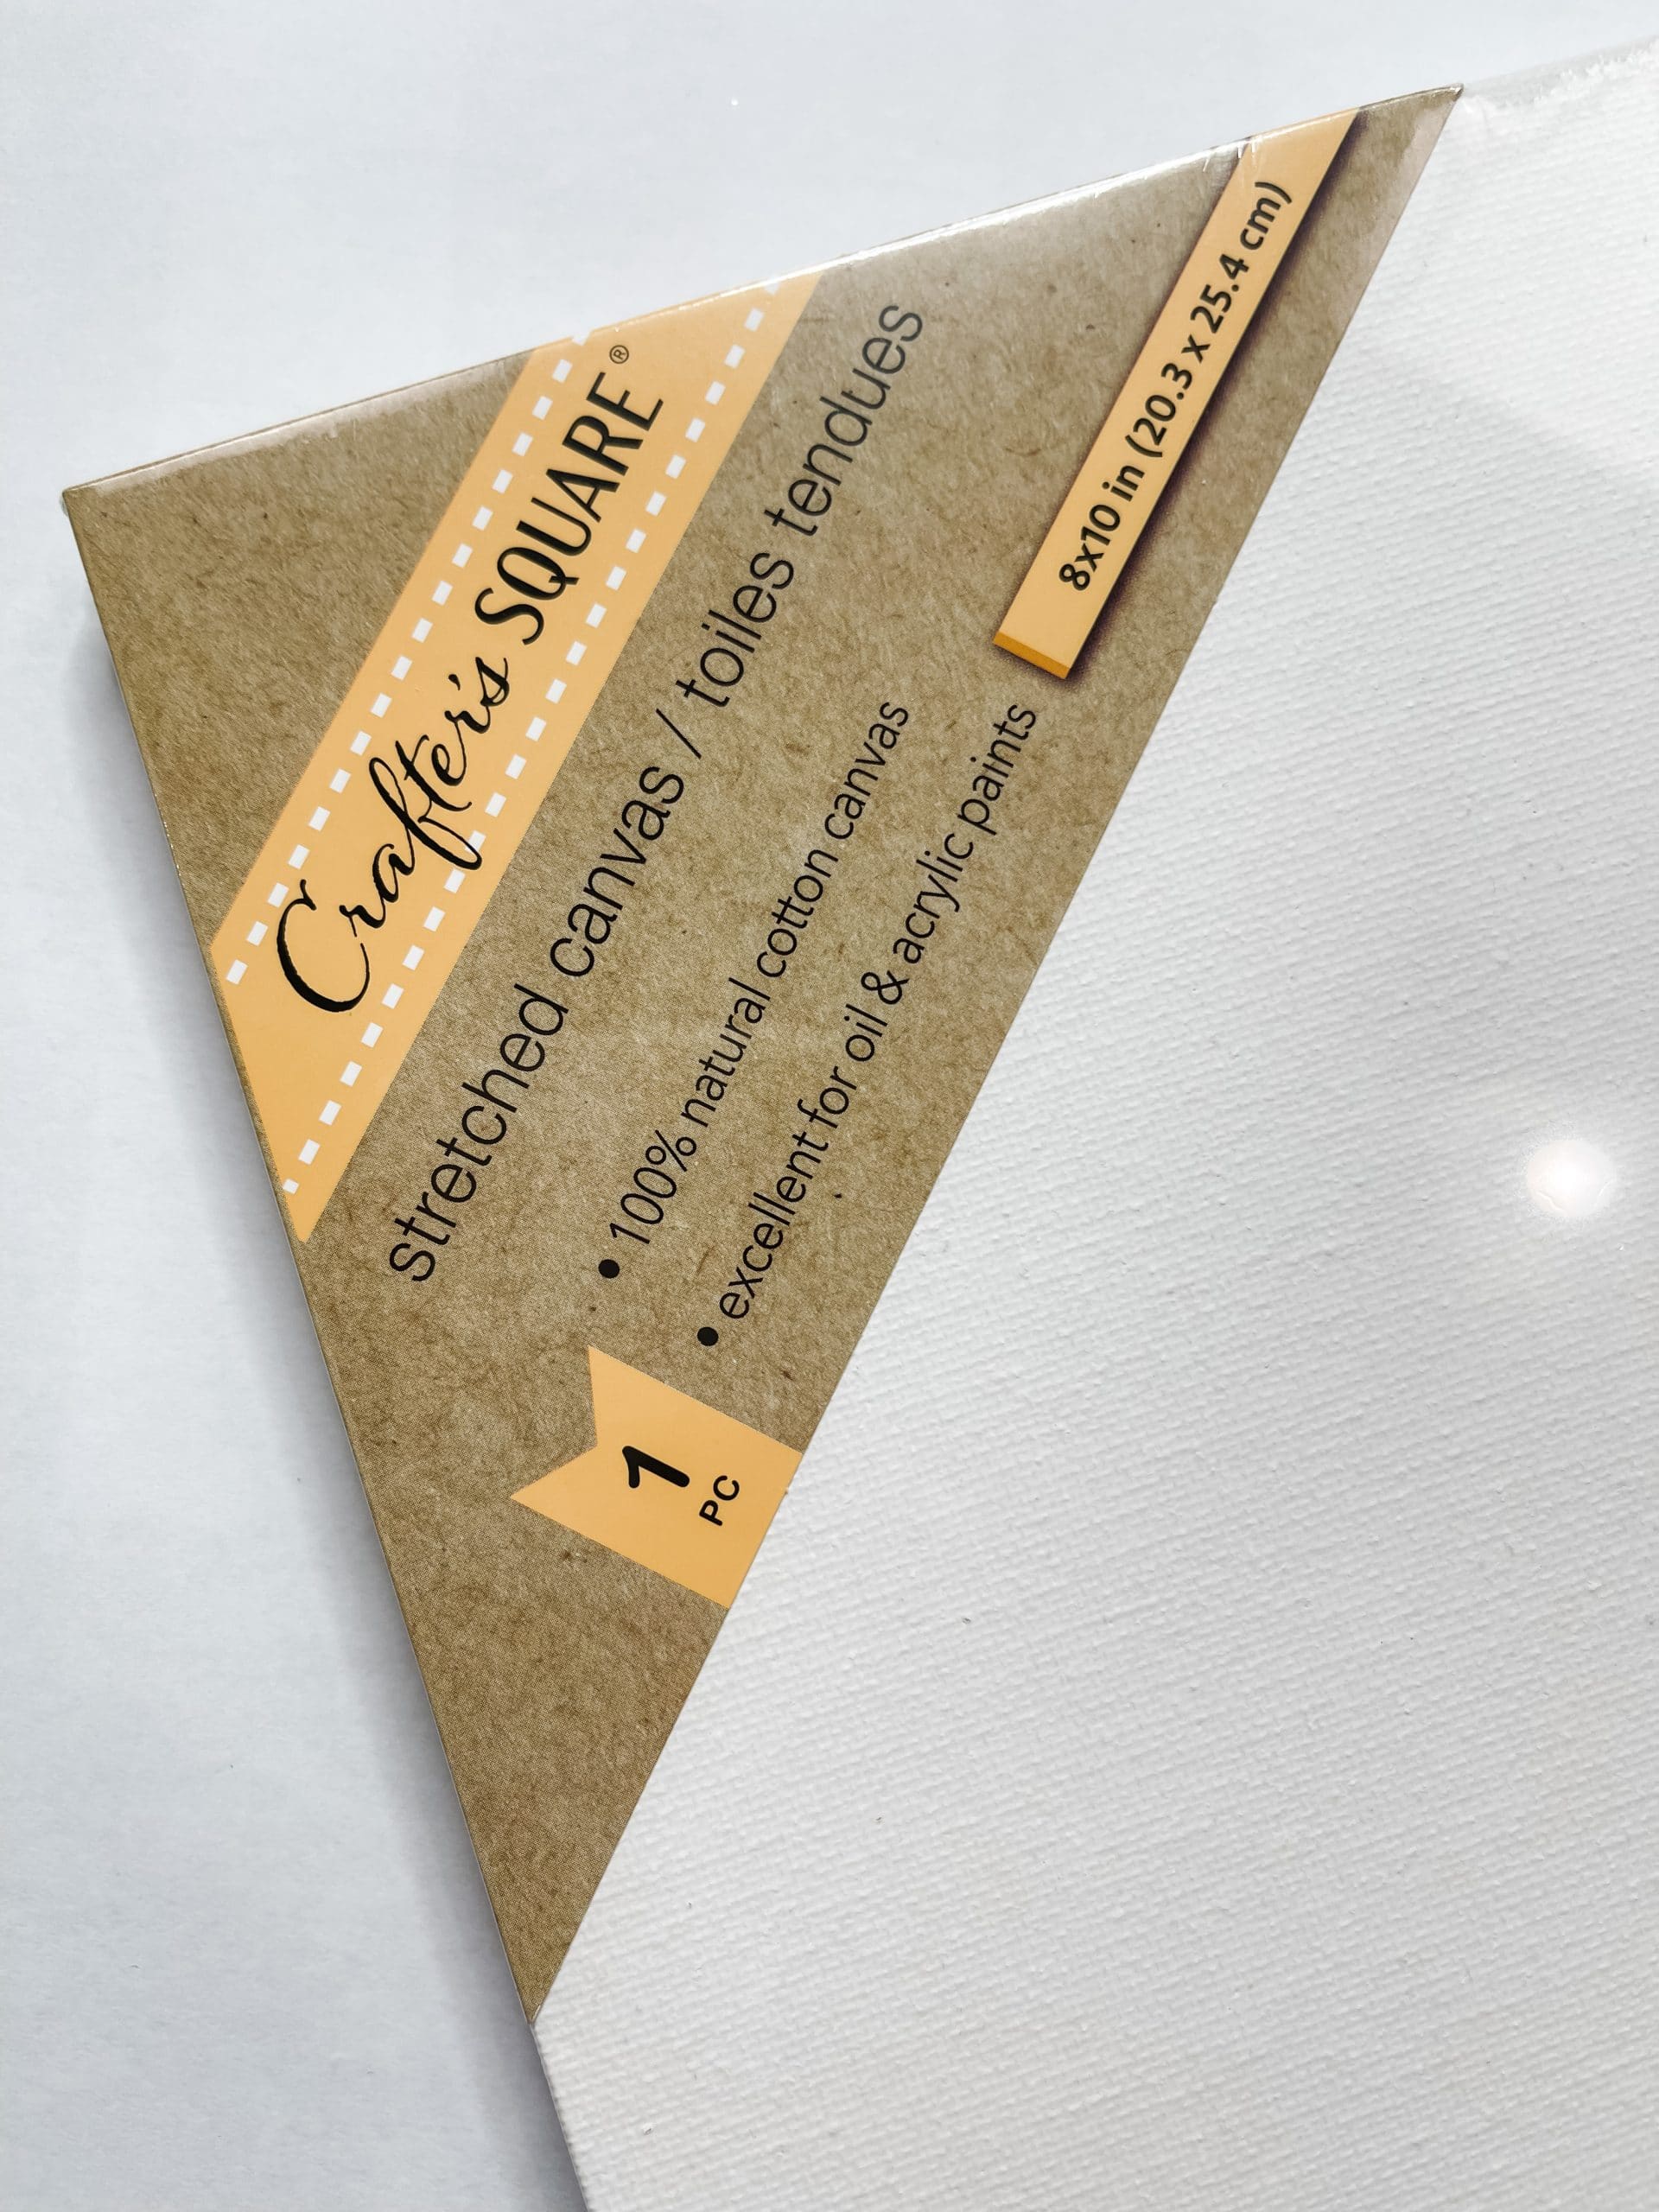
Step one of any reverse canvas DIY project is to remove the canvas from its frame. I love using Dollar Tree canvas because they are so affordable!
Cut the canvas off the frame, but do your best not to destroy the canvas so you can reuse it in another project.
Once the canvas is removed, either hammer the staples back into the frame or use a staple remover to pull them out.
Next, you’re going to stain the wooden canvas frame! Get your brown paint (I used Apple Barrel Burnt Umber Acrylic Paint) and some wet wipes.
I like to use a continuous mist spray bottle when I am staining wood (I just ordered mine off of Amazon). You don’t have to, but wet your wood with water.
Then use a wet wipe to spread the paint across the wood. The water helps the wood absorb the paint pigment and gives the wood a stained finish!
You can also mix the paint with a bit of water in a small bowl and then spread it across the wood. Either technique will give you an effortless (and affordable) stained finish!
Make your backing out of craft sticks
You can make the backing for this reverse canvas DIY out of anything you want, but I used six giant craft sticks.
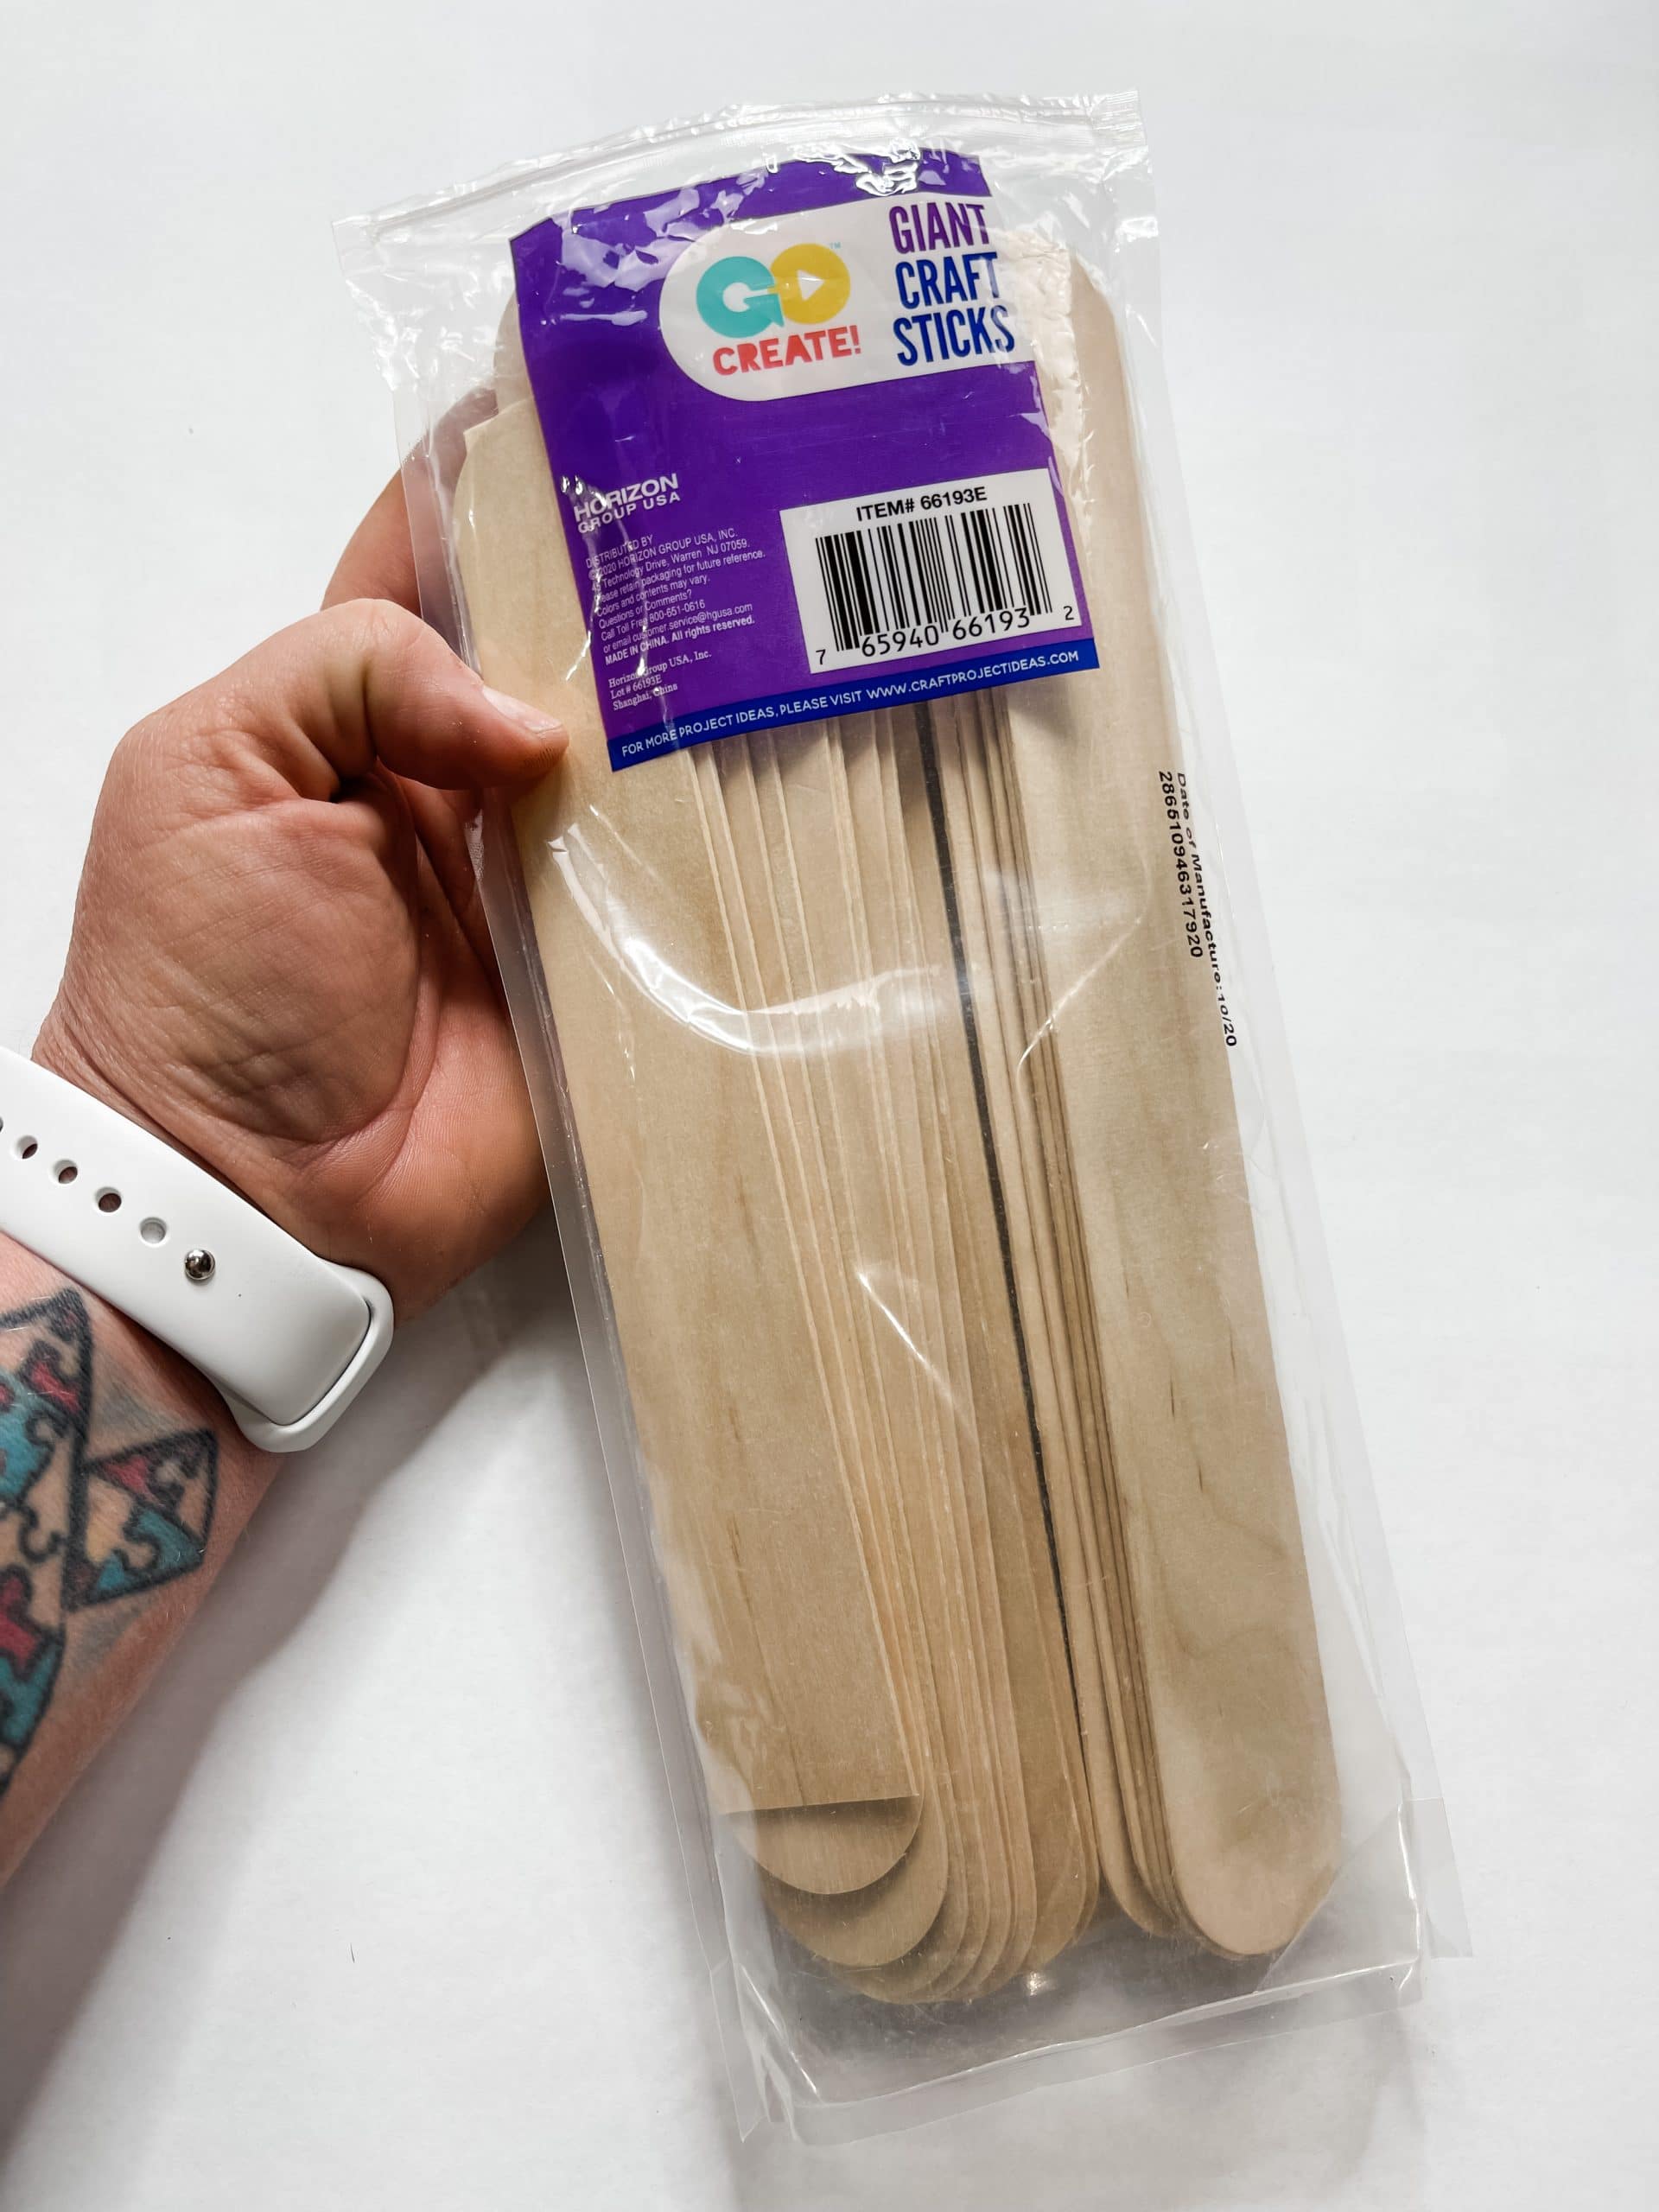
Lay them across the canvas frame and secure them together by hot gluing four more giant craft sticks across them.
The giant craft sticks I hot glued across the back were hanging over the edge of my craft stick surface, so I had to trim them up with scissors.
How to: Chippy Finish
The first step to getting a chippy finish on wood is to stain the wood. Use the same staining technique that you used on the canvas frame to stain the craft sticks.
Allow the craft sticks to dry. I used my heat gun to speed up the drying process. If you don’t have a heat gun, you can use a hair dryer on the low, cool setting.
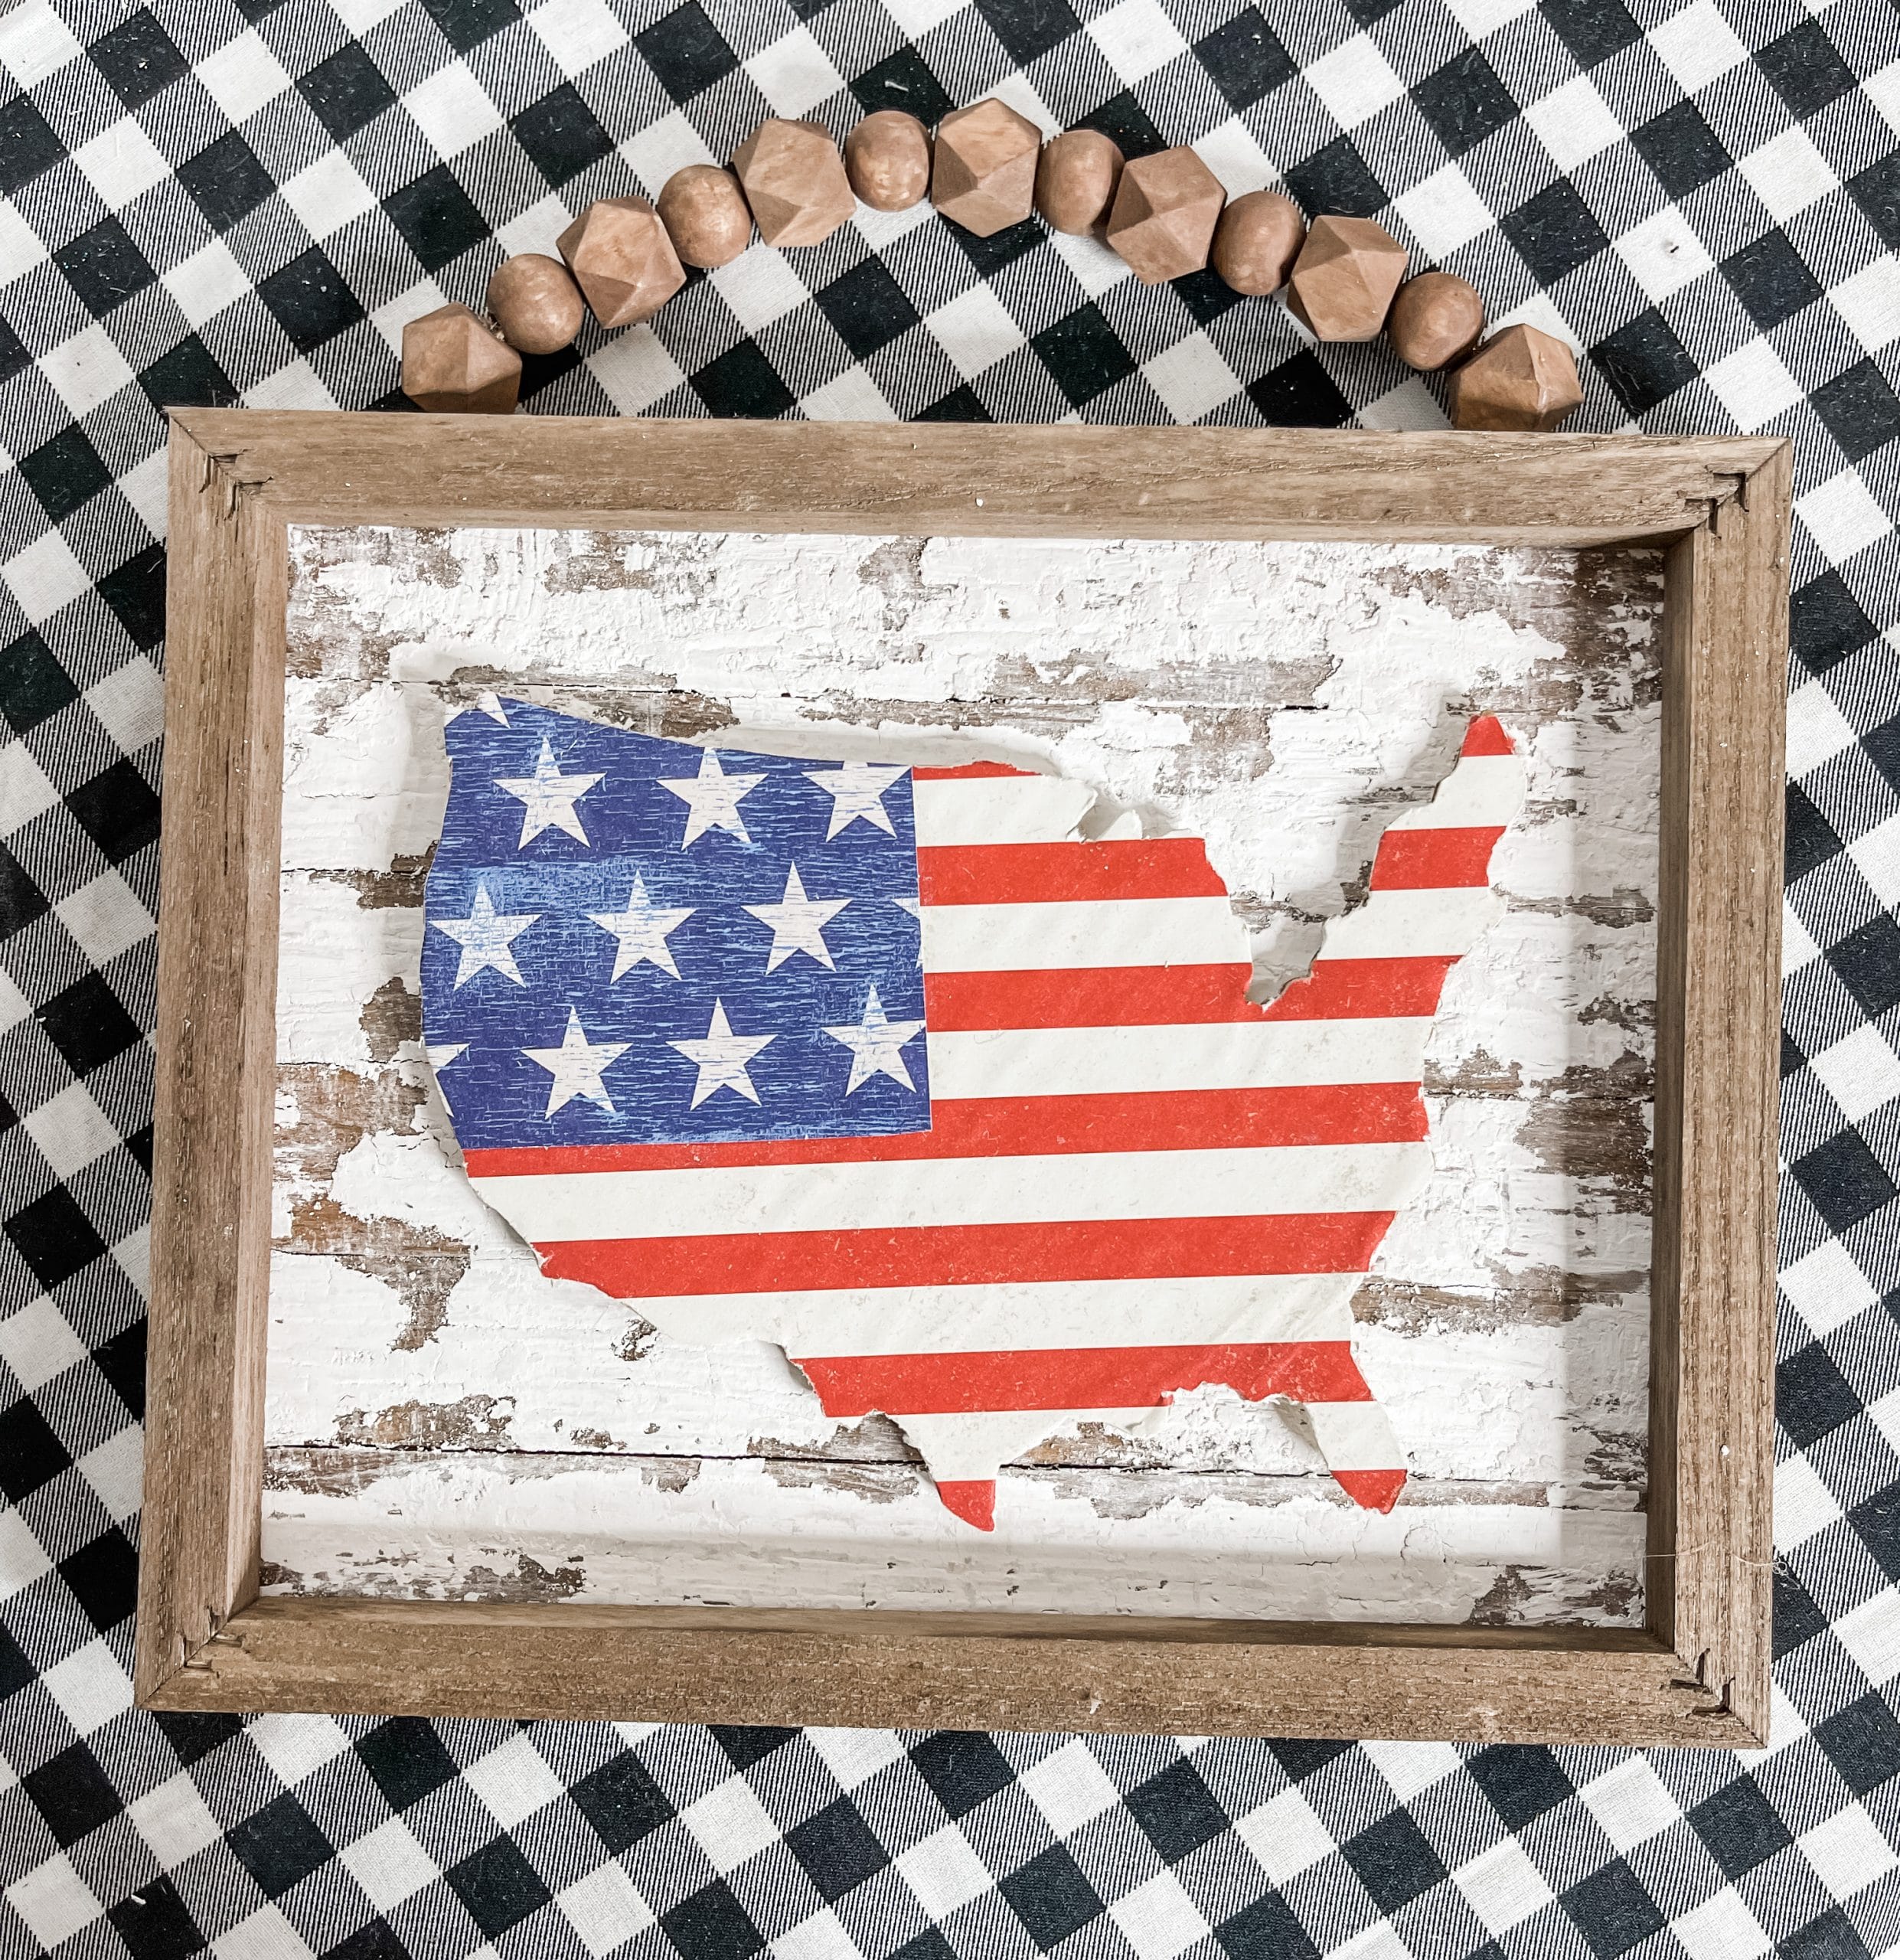
The secret to getting a perfect chippy finish is . . . petroleum jelly! Use a chippy paintbrush to brush petroleum jelly onto the wooden surface where you want the paint to be chippy.
The petroleum jelly acts as a barrier when you add the white paint and keeps it from adhering to the wood. This allows you to pull the paint up and create the chippy paint look.

After you apply the jelly to different areas on the wooden surface, paint over the entire surface with white paint. I used Folkart White Chalk Paint.
Let the white paint dry almost completely (it is still going to be wet where you applied the petroleum jelly), then start pulling your putty knife across the paint in straight lines.

The putty knife is going to pull the white paint up where you applied the petroleum jelly. Pull the paint up and drag it back over the surface.
The paint will start crackling as it mixes with the petroleum jelly and dries, and there will be spots on the surface where the brown stain is showing.
Keep pulling and dragging the putty knife until you are happy with your chippy finish, then allow the paint to completely dry. (Again, I used my heat gun.)
How to Decoupage
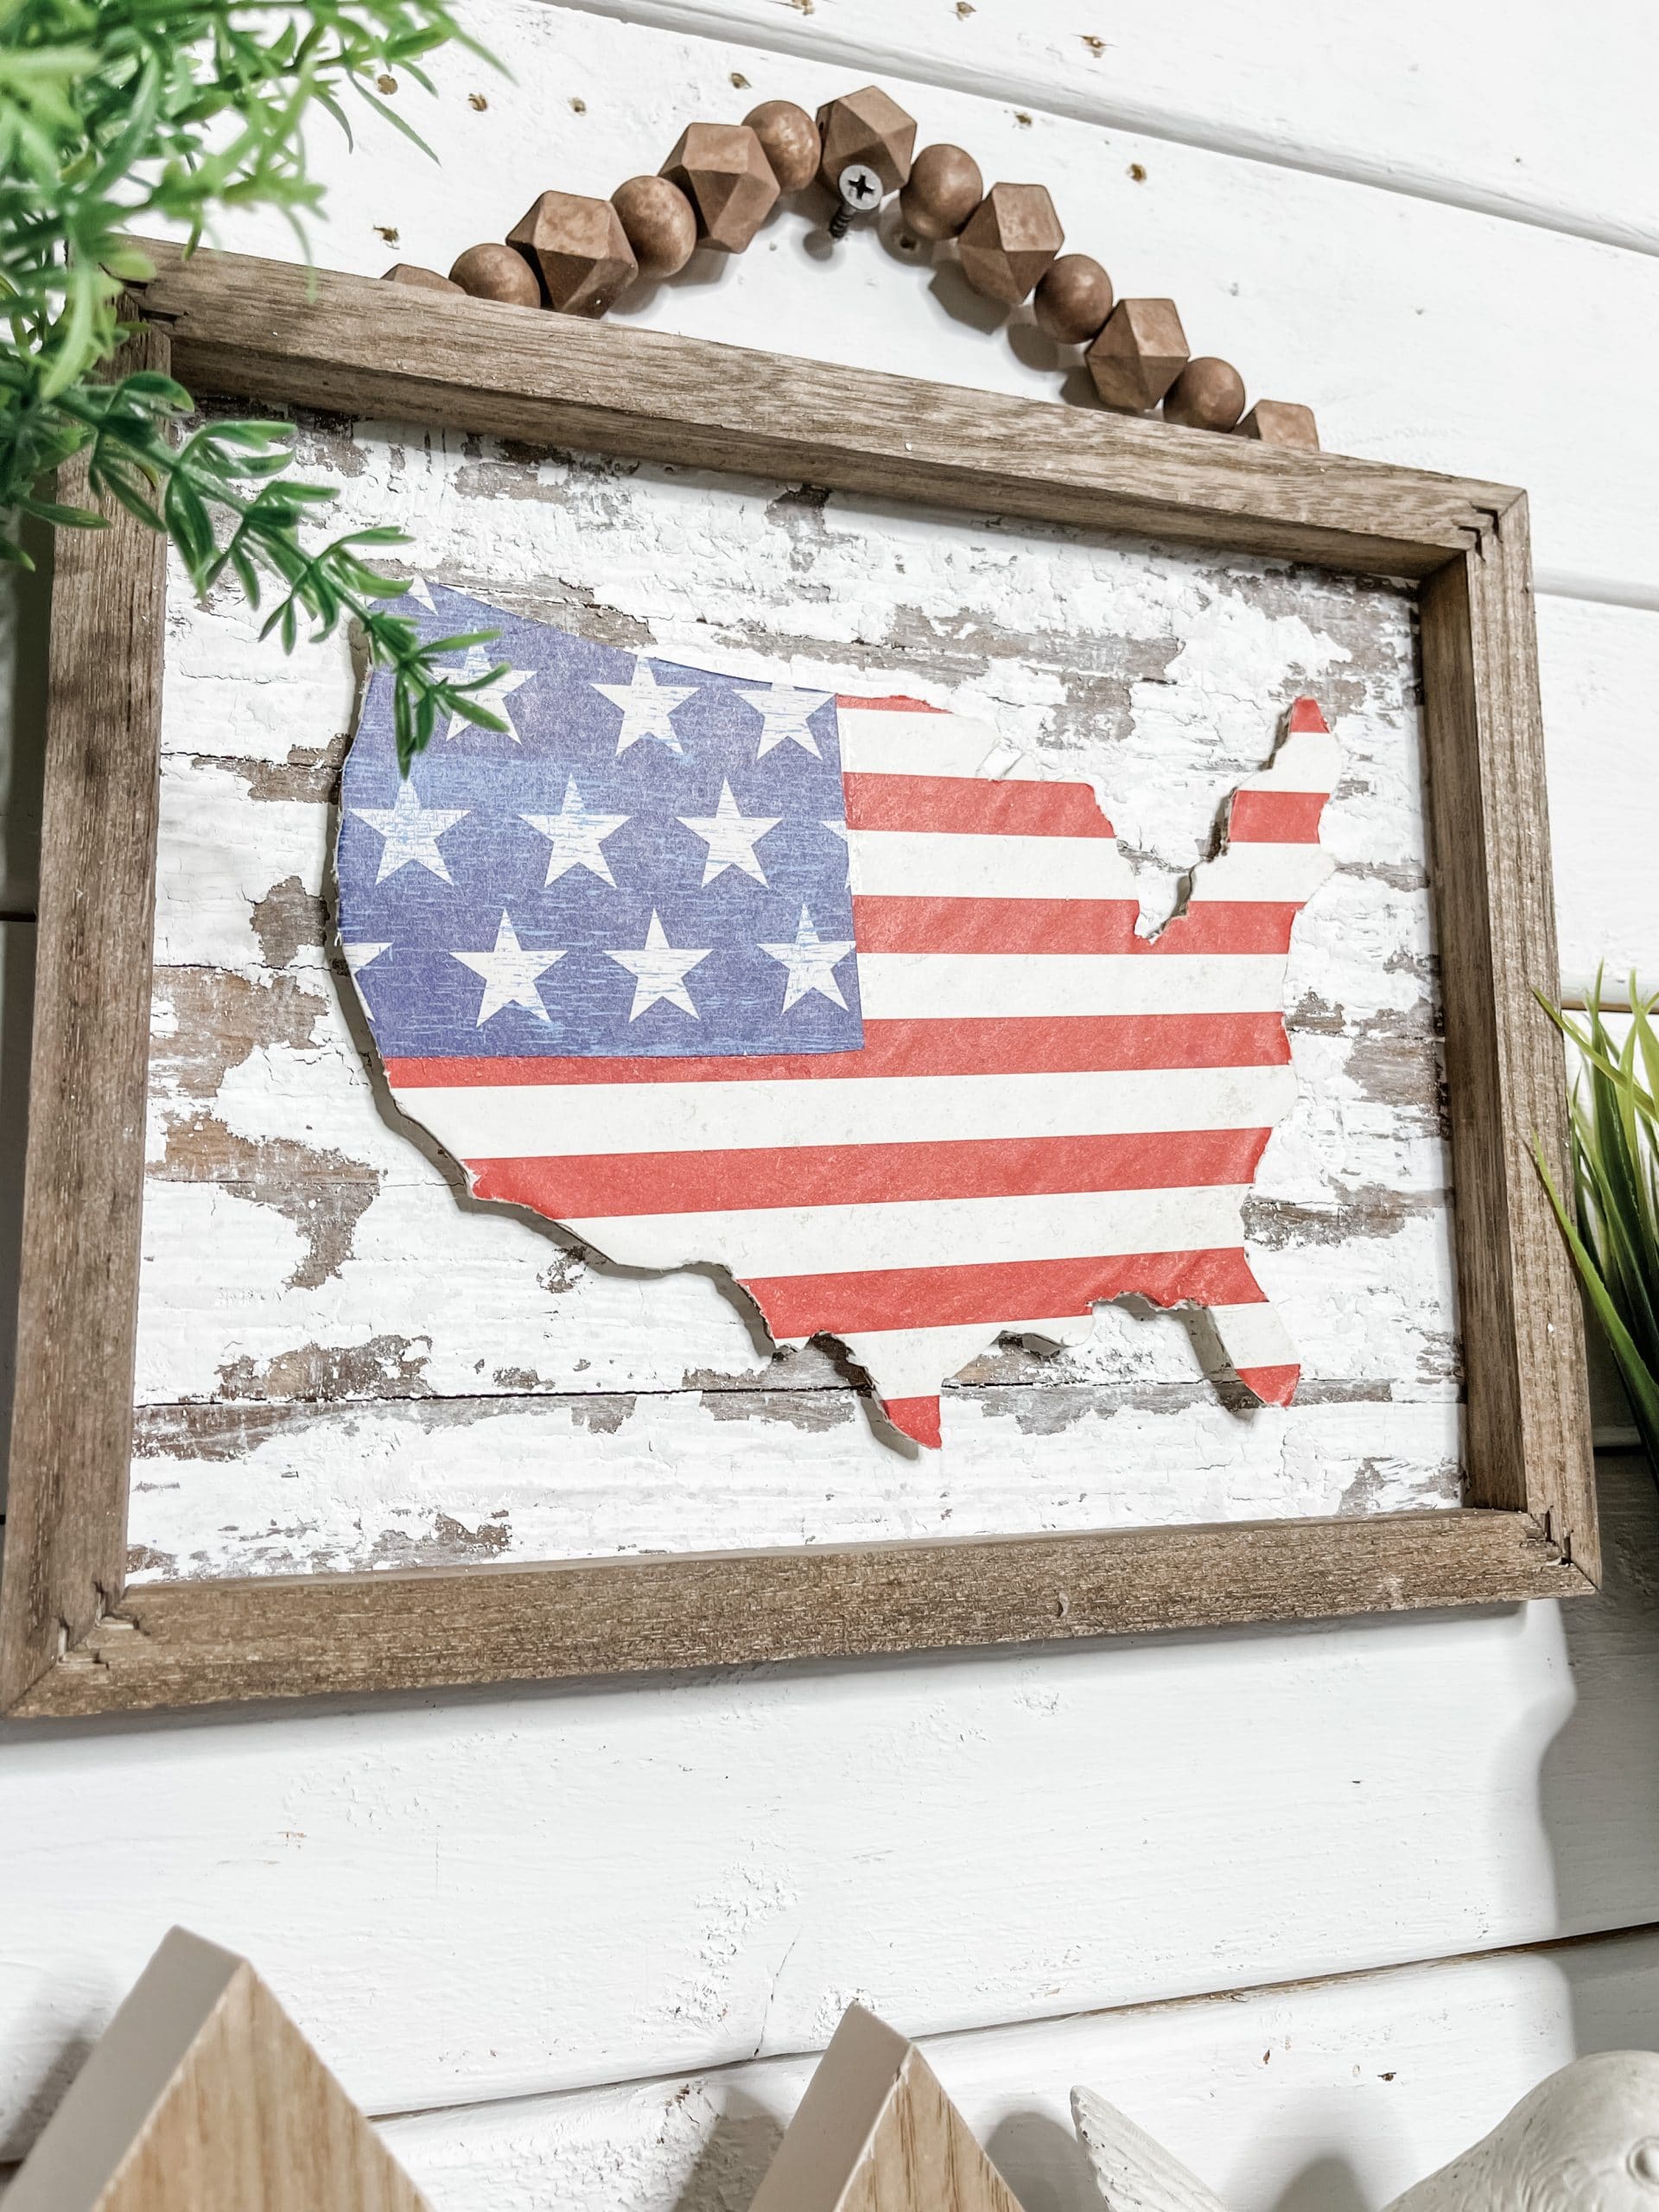
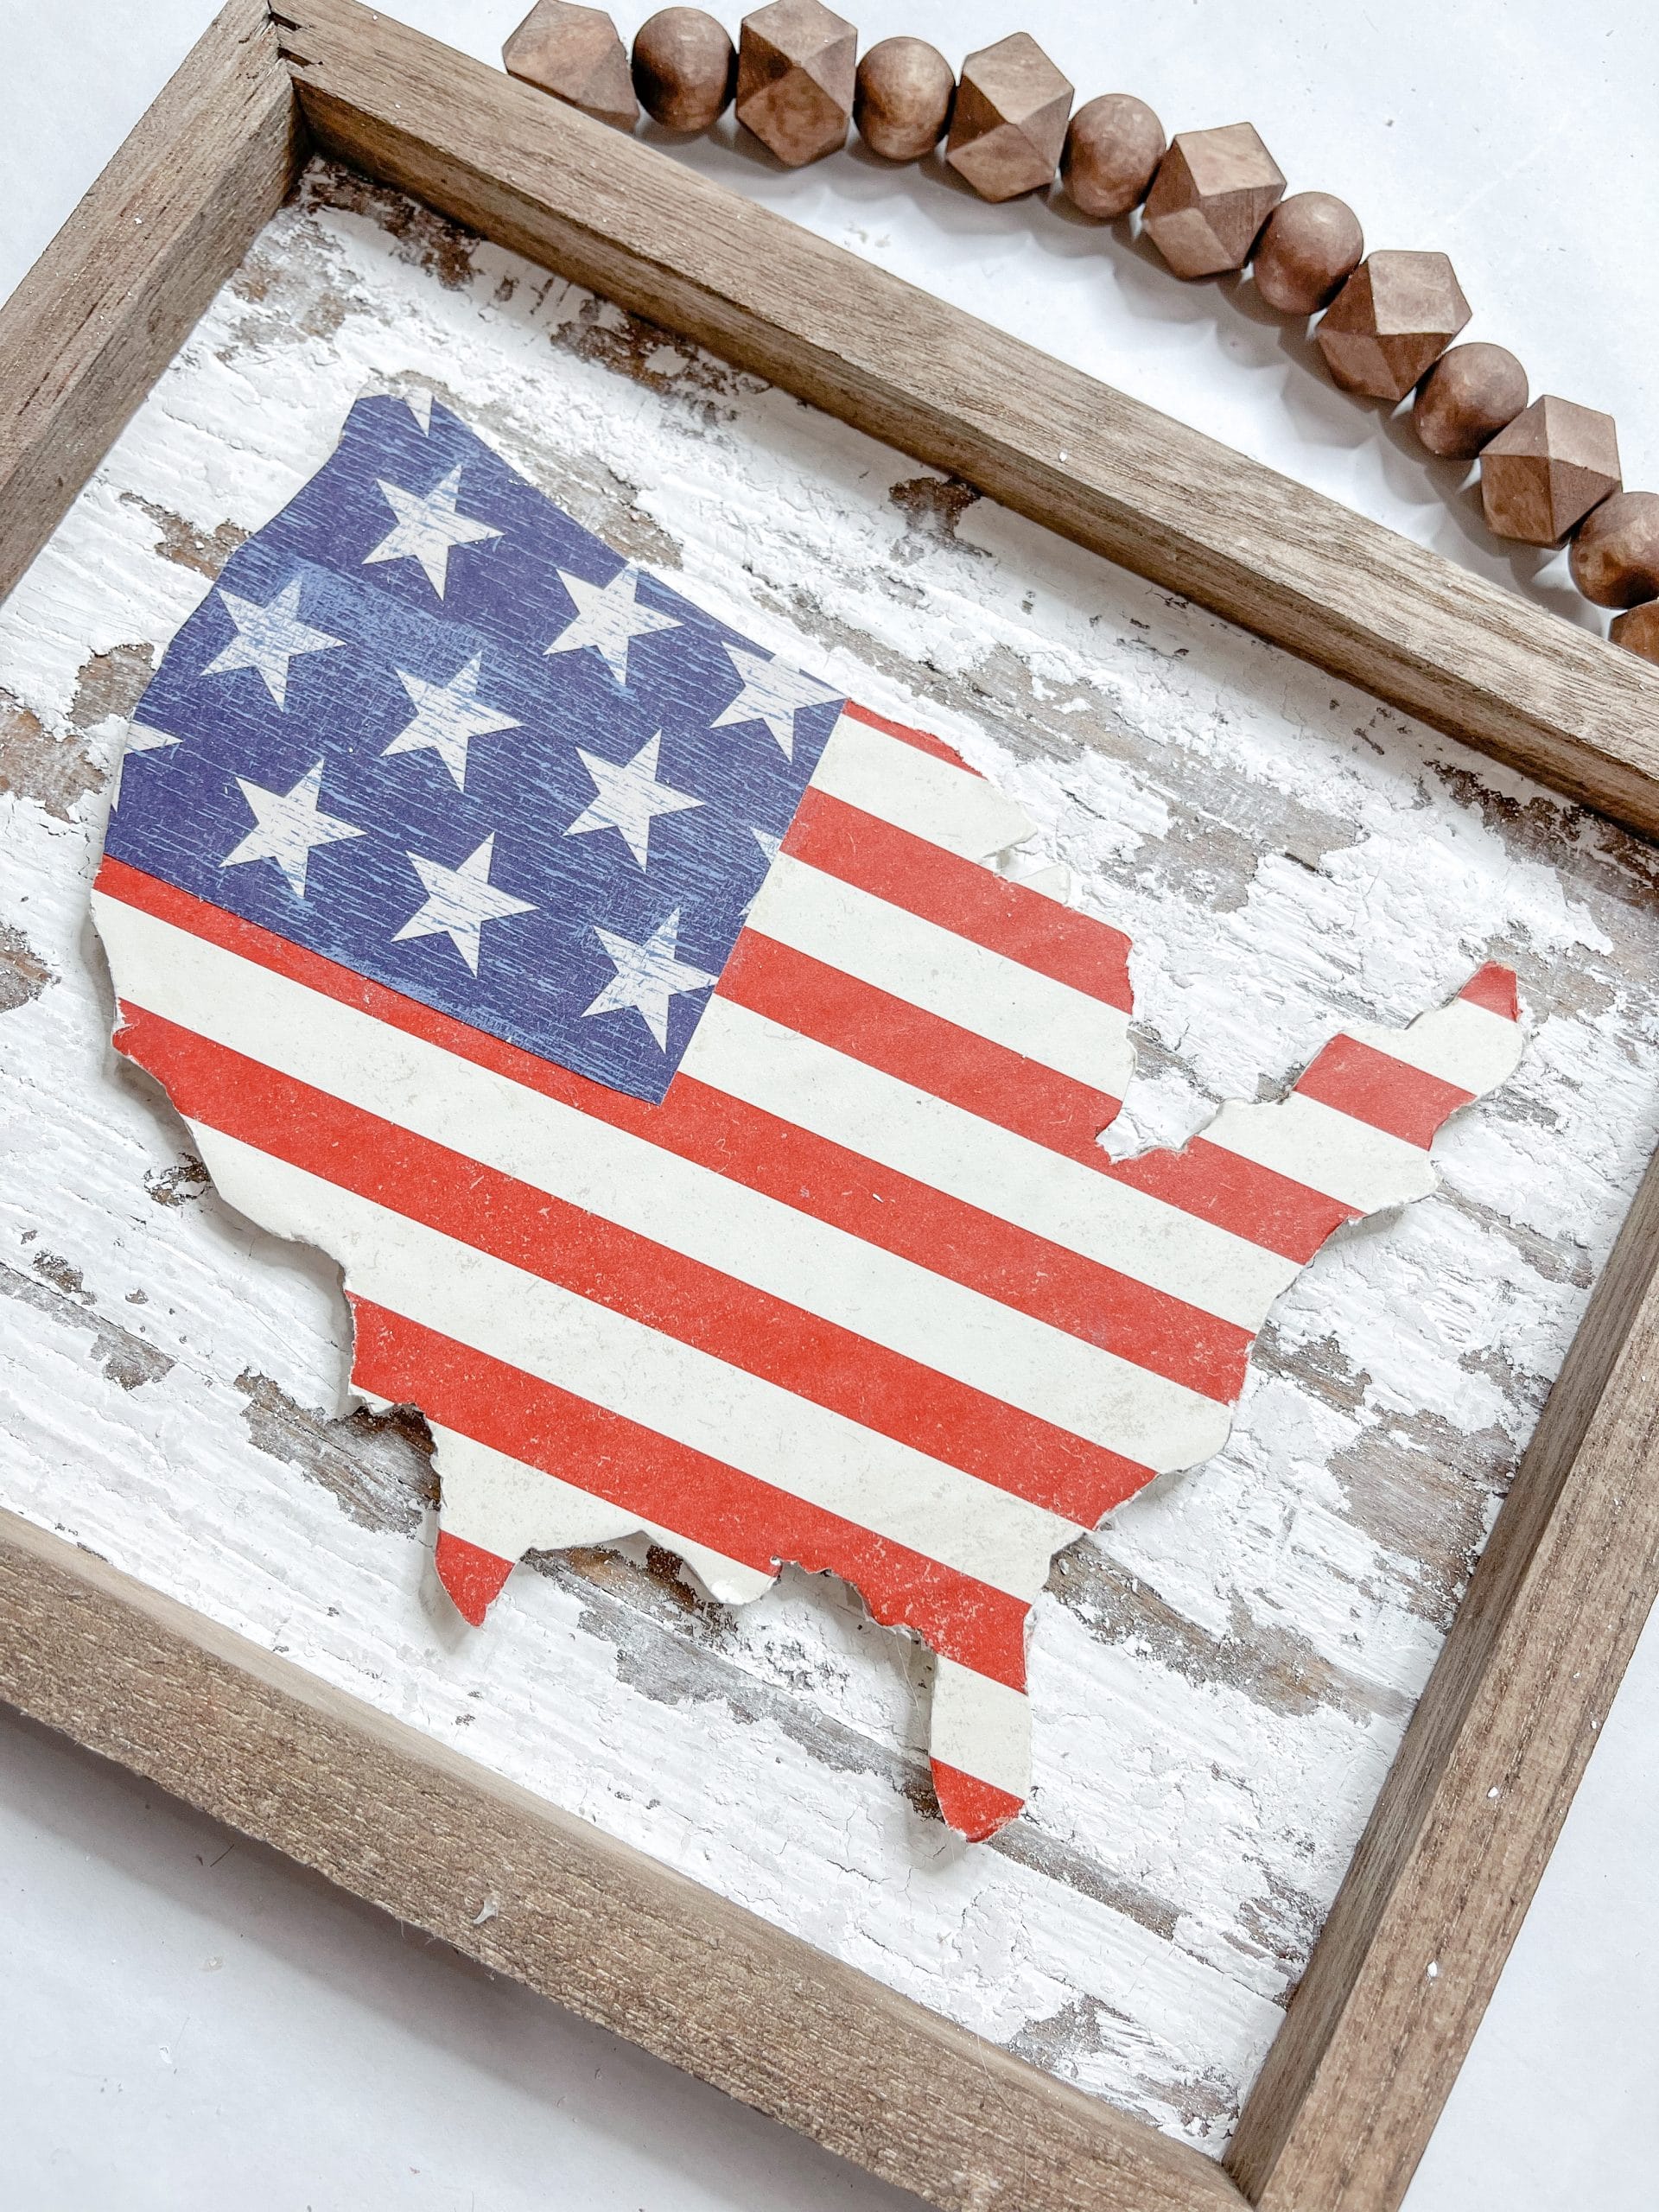
Next, you’re going to decoupage your striped and starred scrapbook papers onto the Dollar Tree color your own USA.

Apply a coat of Mod Podge to the front of your USA cutout, then press the striped scrapbook paper onto the wood. Make sure the stripes are horizontal.
Allow the Mod Podge to completely dry, then remove the excess scrapbook paper from around the wooden USA cutout. An Exacto Knife will come in handy for that.

I went over the edges with a filer to sand off even more of the excess and get clean lines around the edges of the USA.
Next, you’re going to decoupage the blue starred scrapbook paper onto the USA. I dry placed the paper, then marked where the edges of it would be.
Apply Mod Podge where you’re going to place the scrapbook paper, and carefully place the paper onto the surface.
Once the Mod Podge has dried, again remove the excess paper with an Exacto knife and sand it down with a filer.
Bring it all together
It’s time to bring all the pieces together! Start by hot glueing the chippy backing onto the Dollar Tree canvas frame.
I hot glued a few popsicle sticks to the back of the USA to raise it up off the craft stick surface, then hot glued the USA onto the sign.
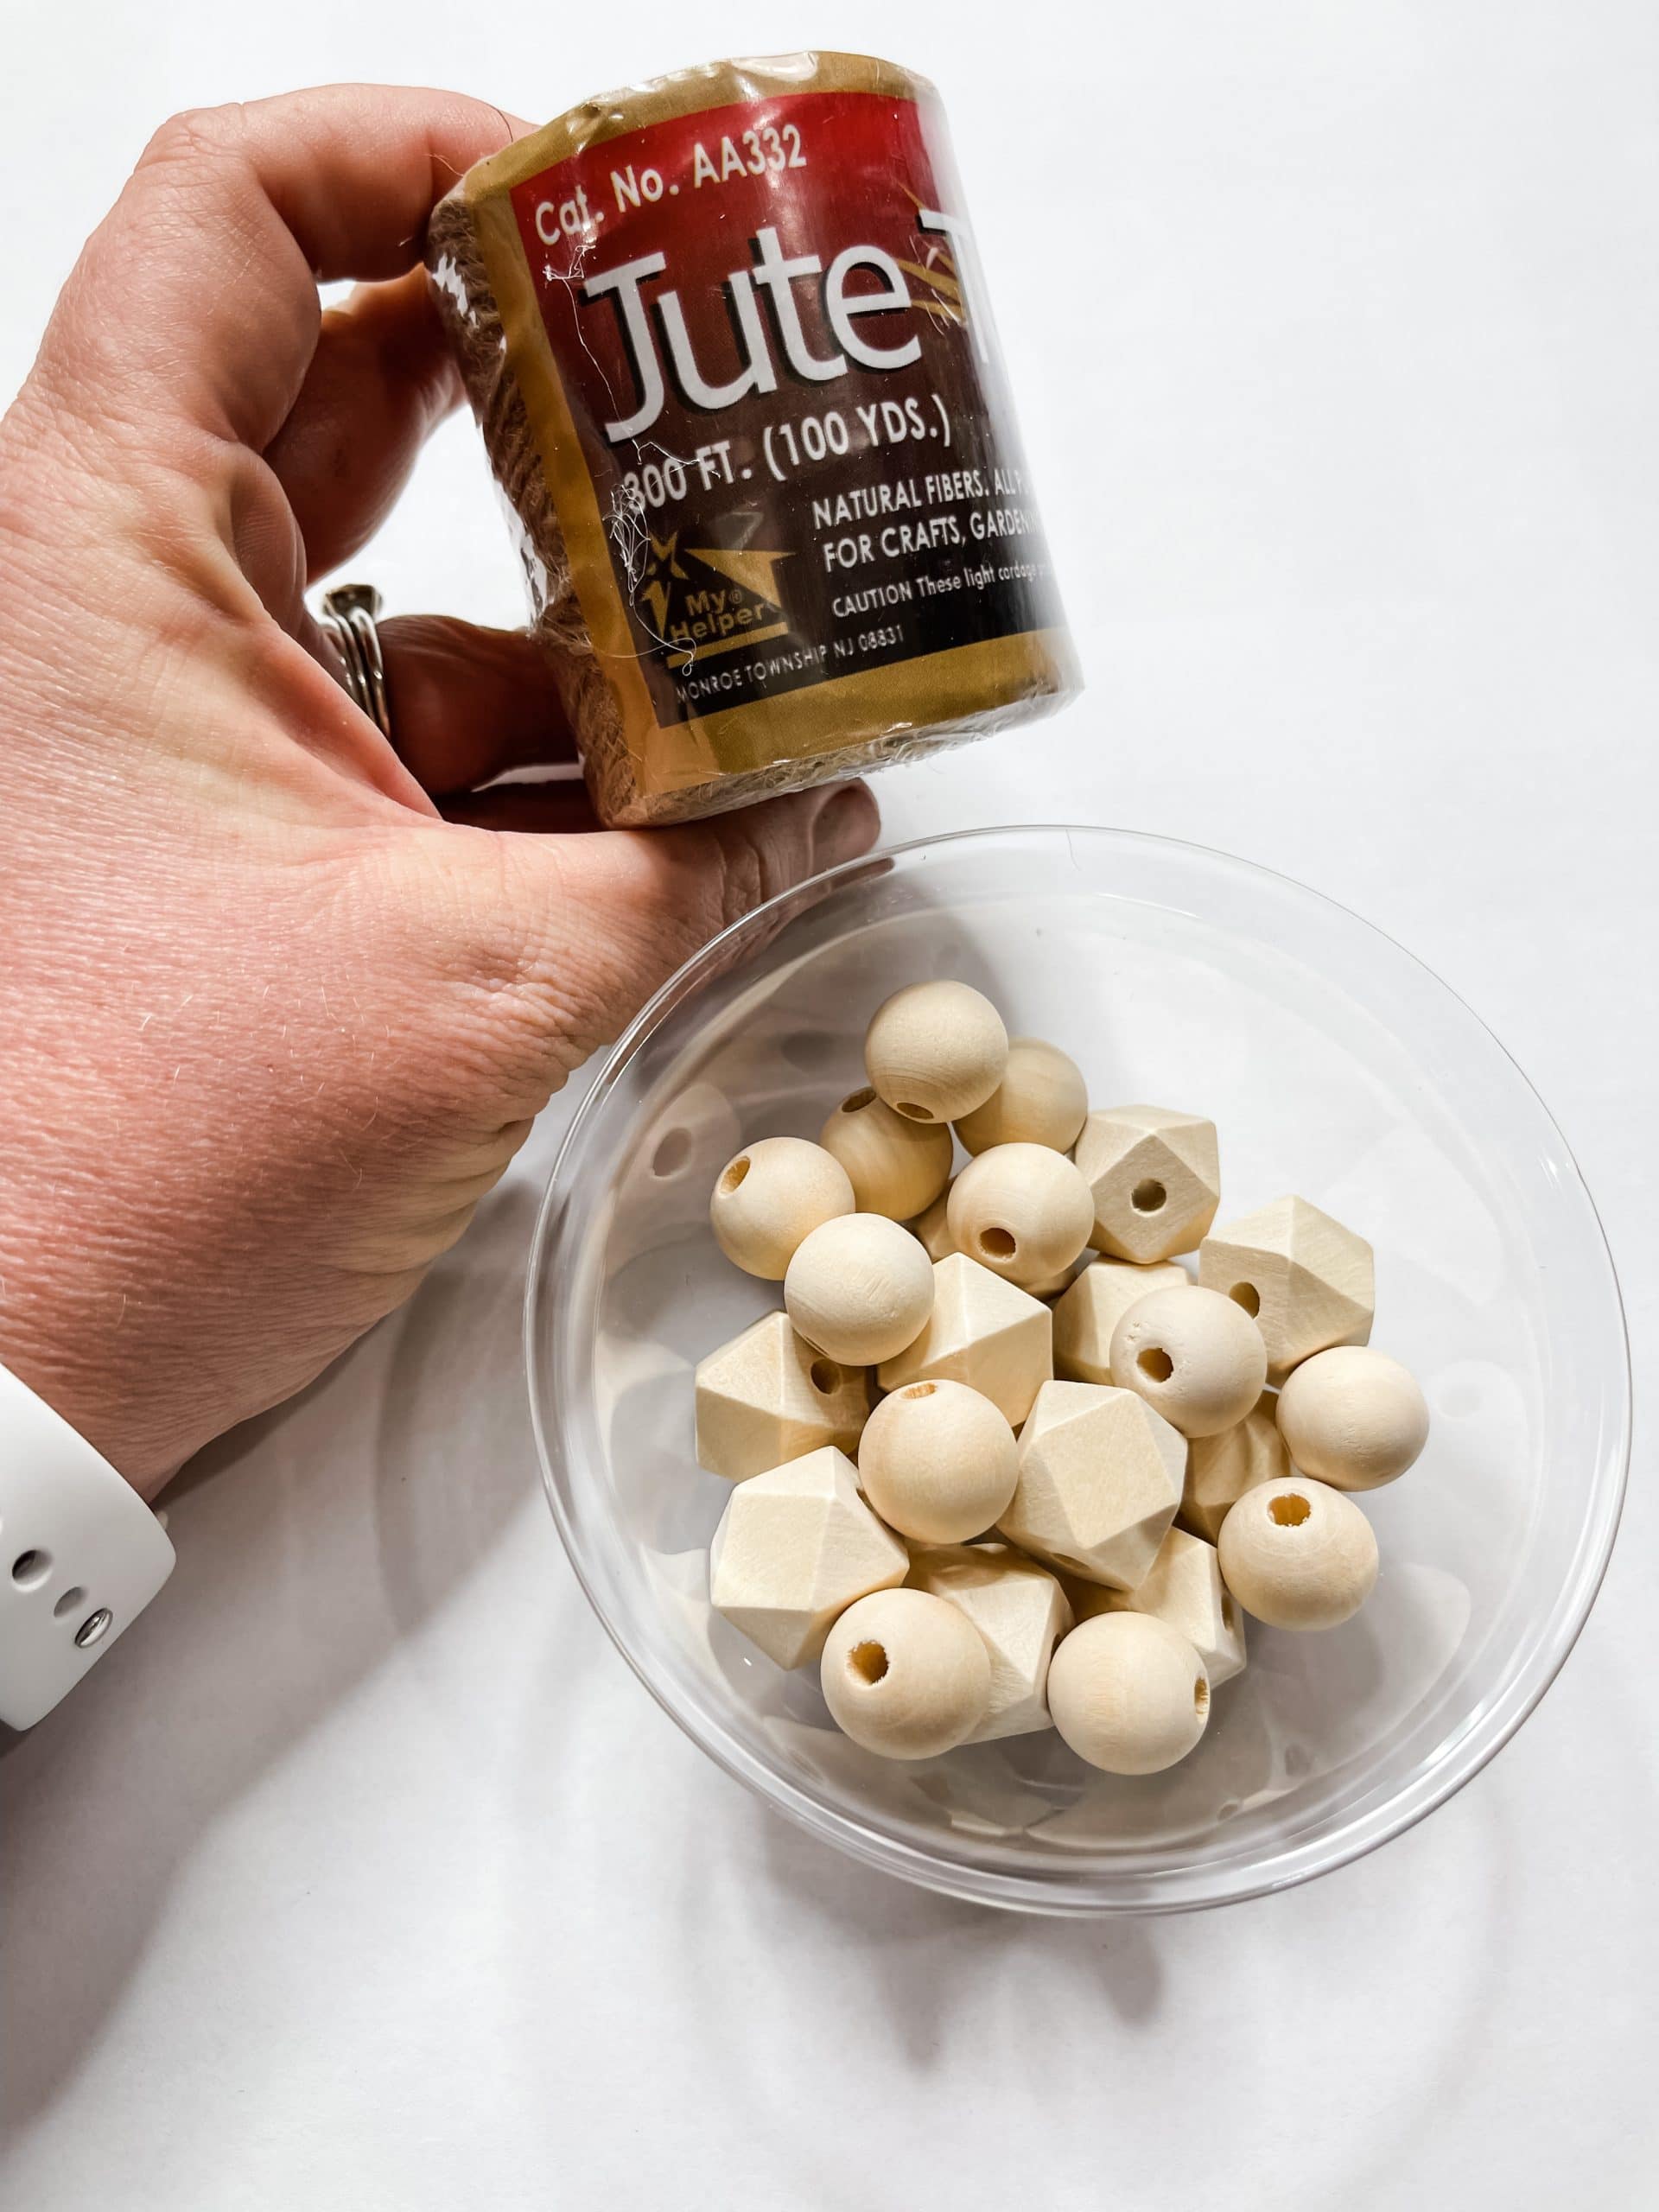
Finally, you’re going to make the hanger! Pick your beads (Amazon has great, affordable beads) and your paint colors.
I chose to stain my beads with the same paint and technique as the frame, but instead of applying the paint with a wet wipe, I poured it into a bowl with water and swirled the beads around until they were all covered.
You can take the beads out of the bowl and roll them around on a paper towel to remove any excess paint, then let them dry.
Once the beads are dry, thread them onto some jute twine until you’re happy with the length of your hanger. Put a dab of hot glue on the end beads to keep them all in place.
Finally, hot glue the ends of the jute twine to the back of the Dollar Tree canvas frame! You can hot glue a little bit of fabric or ribbon over the twine ends to make it more secure, if you want!
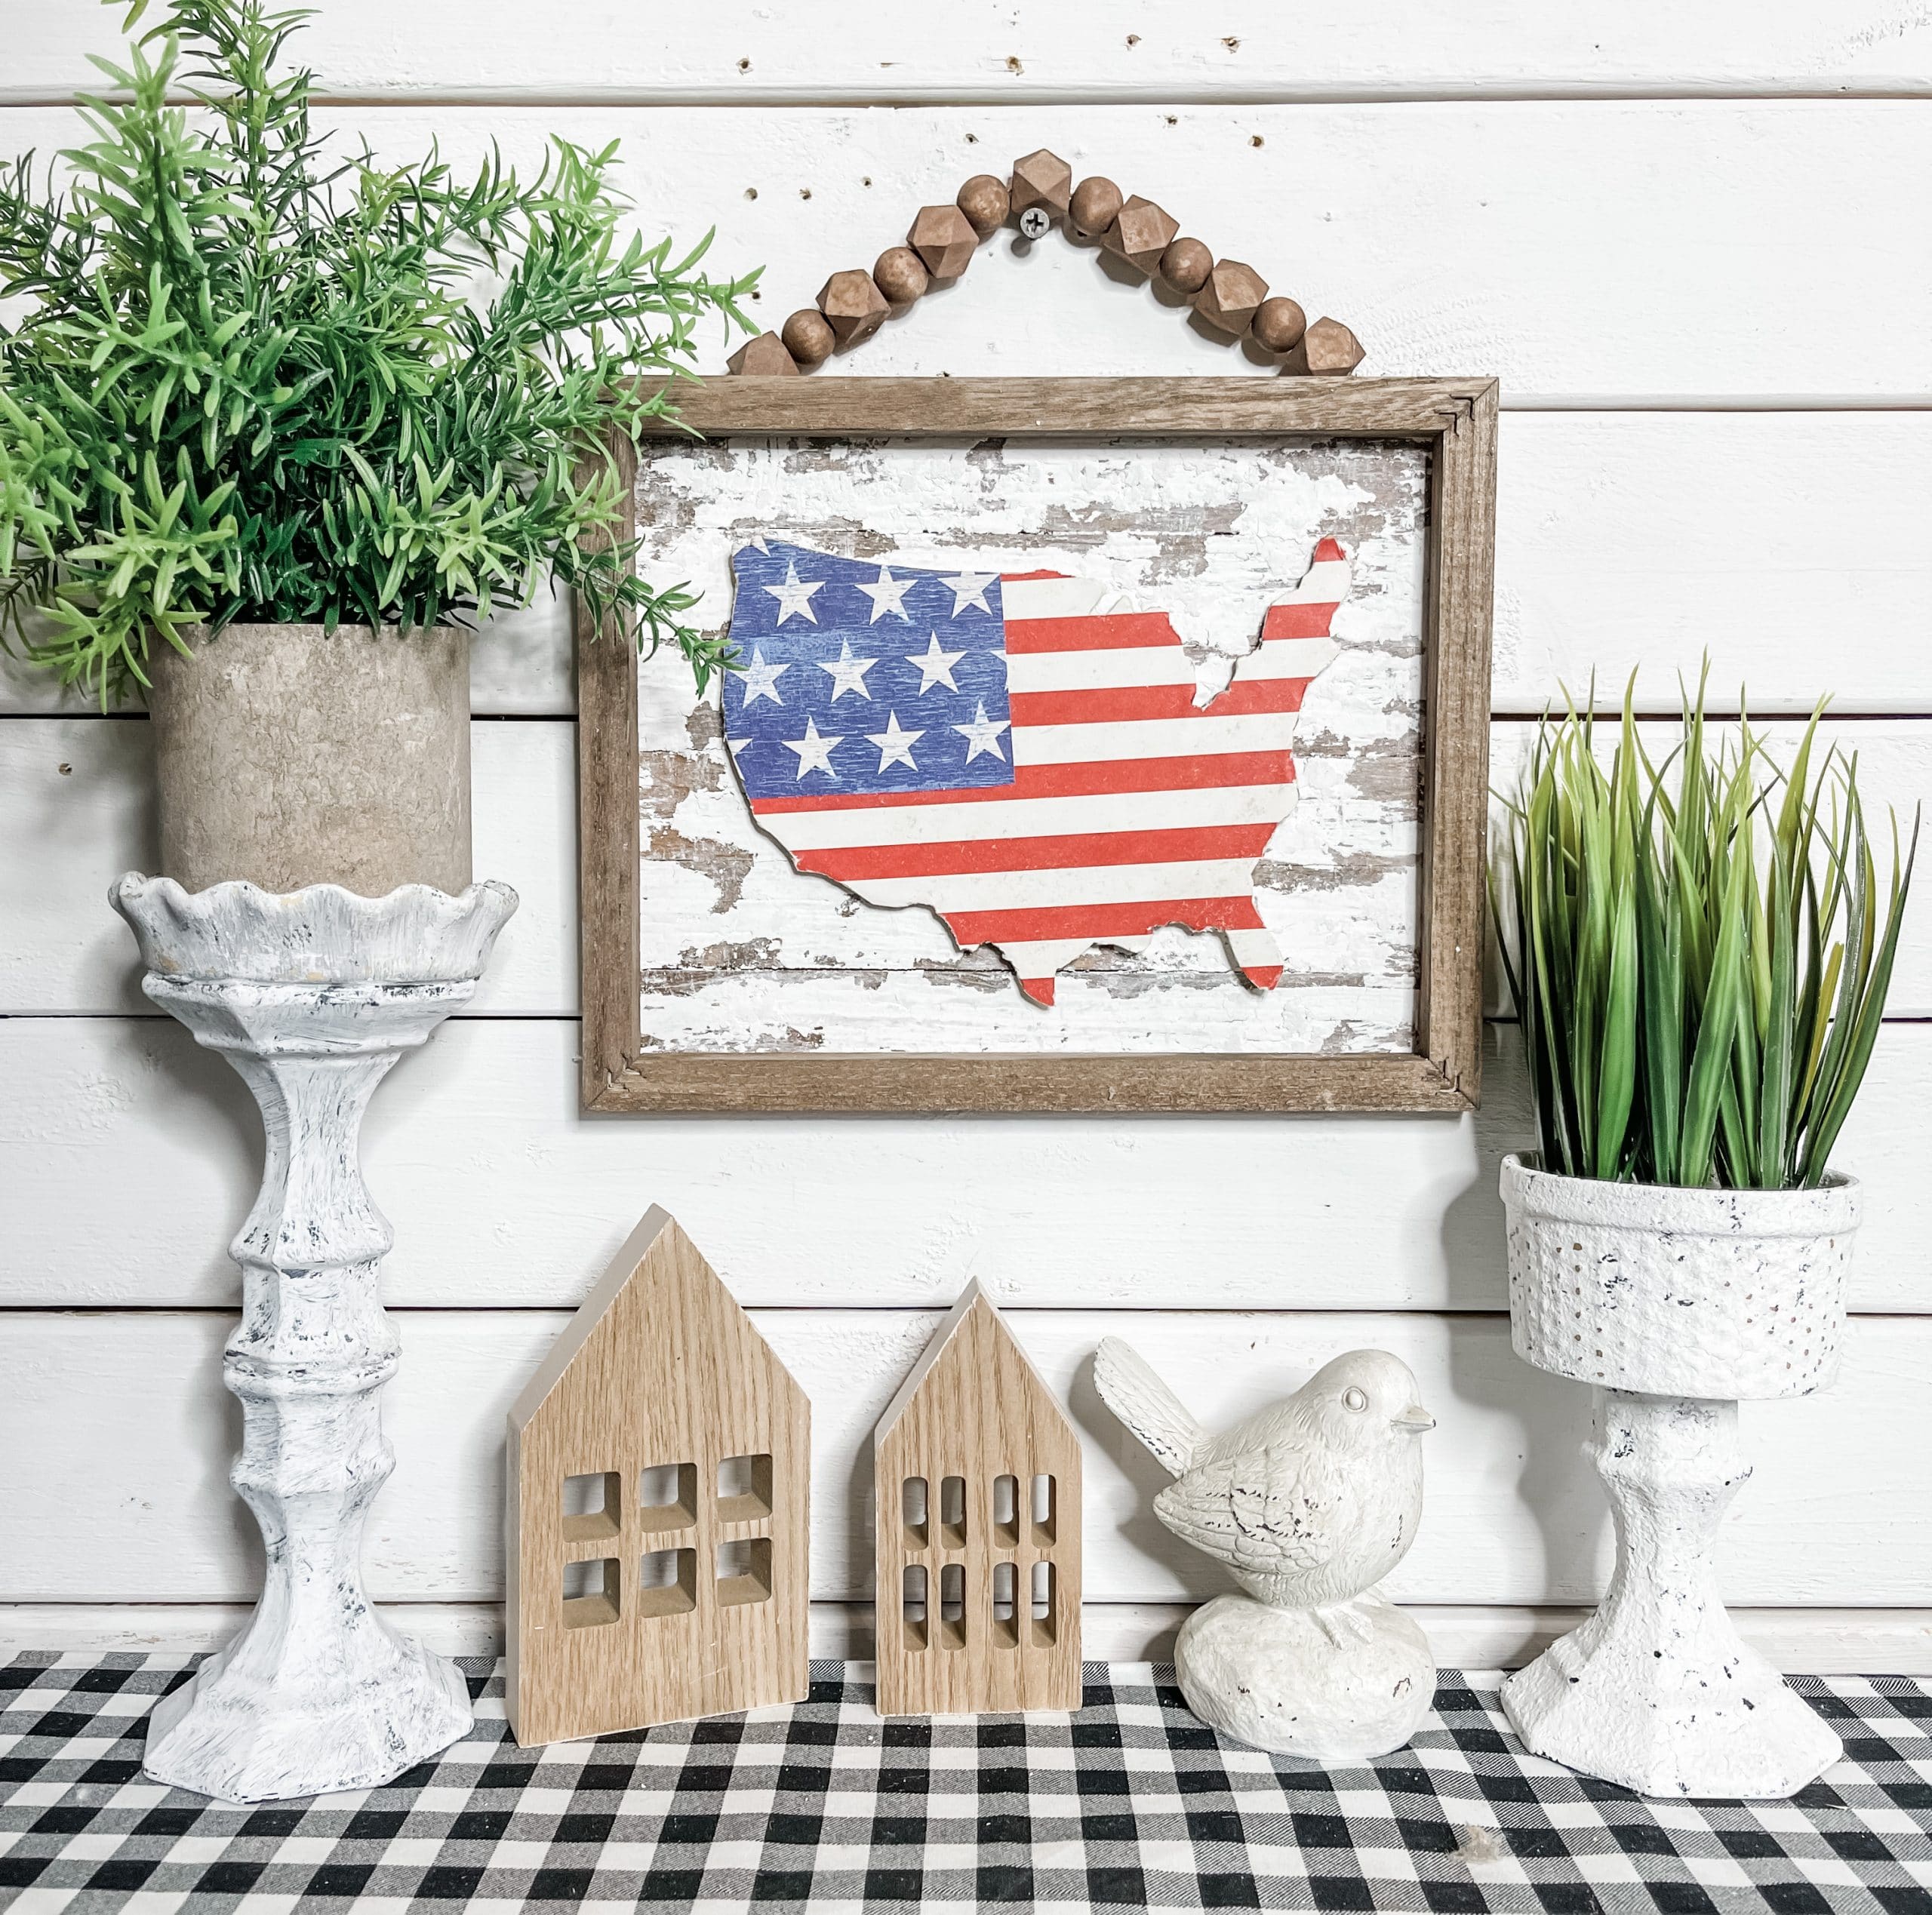
I hope you enjoyed this Chippy USA Reverse Canvas DIY Home Decor as I did and decide to make it for yourself! If you do, I would love to see how yours turns out!
You should totally join my FREE Facebook group called On A Budget Crafts! It is a judgment-free community for DIY crafters to show off their projects and ideas.
If you loved this DIY you might also like these patriotic DIYs!
- Repurposed Tablecloth DIY Patriotic Decor
- DIY Red White and Blue Rag Wreath
- DIY Dollar Tree Patriotic Door Hanger
- American Flag Anchor DIY Patriotic Decor
- DIY Ribbon American Flag
- DIY 4th of July Shirt Idea
- Blue Jean American Flag
- DIY Dollar Tree American Flag Decor
- DIY Patriotic Dollar Tree Mason Jar
Thanks for stopping by! XOXO Amber
You can also shop my ENTIRE AMAZON Favorites shop just click here! It’s packed full of all the things I use and love. Here is the supply list I highly recommend every creative have on hand!!
Would you also pin my blog for later and get on my newsletter alerts? I would love to have you join my #craftycrew.
Inspired? Leave me a comment below! I love hearing from my readers!

Join my free “ON A BUDGET CRAFTS” Facebook group!

Love the chippy