Dollar Tree Easy Gnomes DIY
If you’re looking gnome idea, this Dollar Tree Easy Gnome DIY is it! Honey, you’ve hit the jackpot. This post is a 2-for-1.
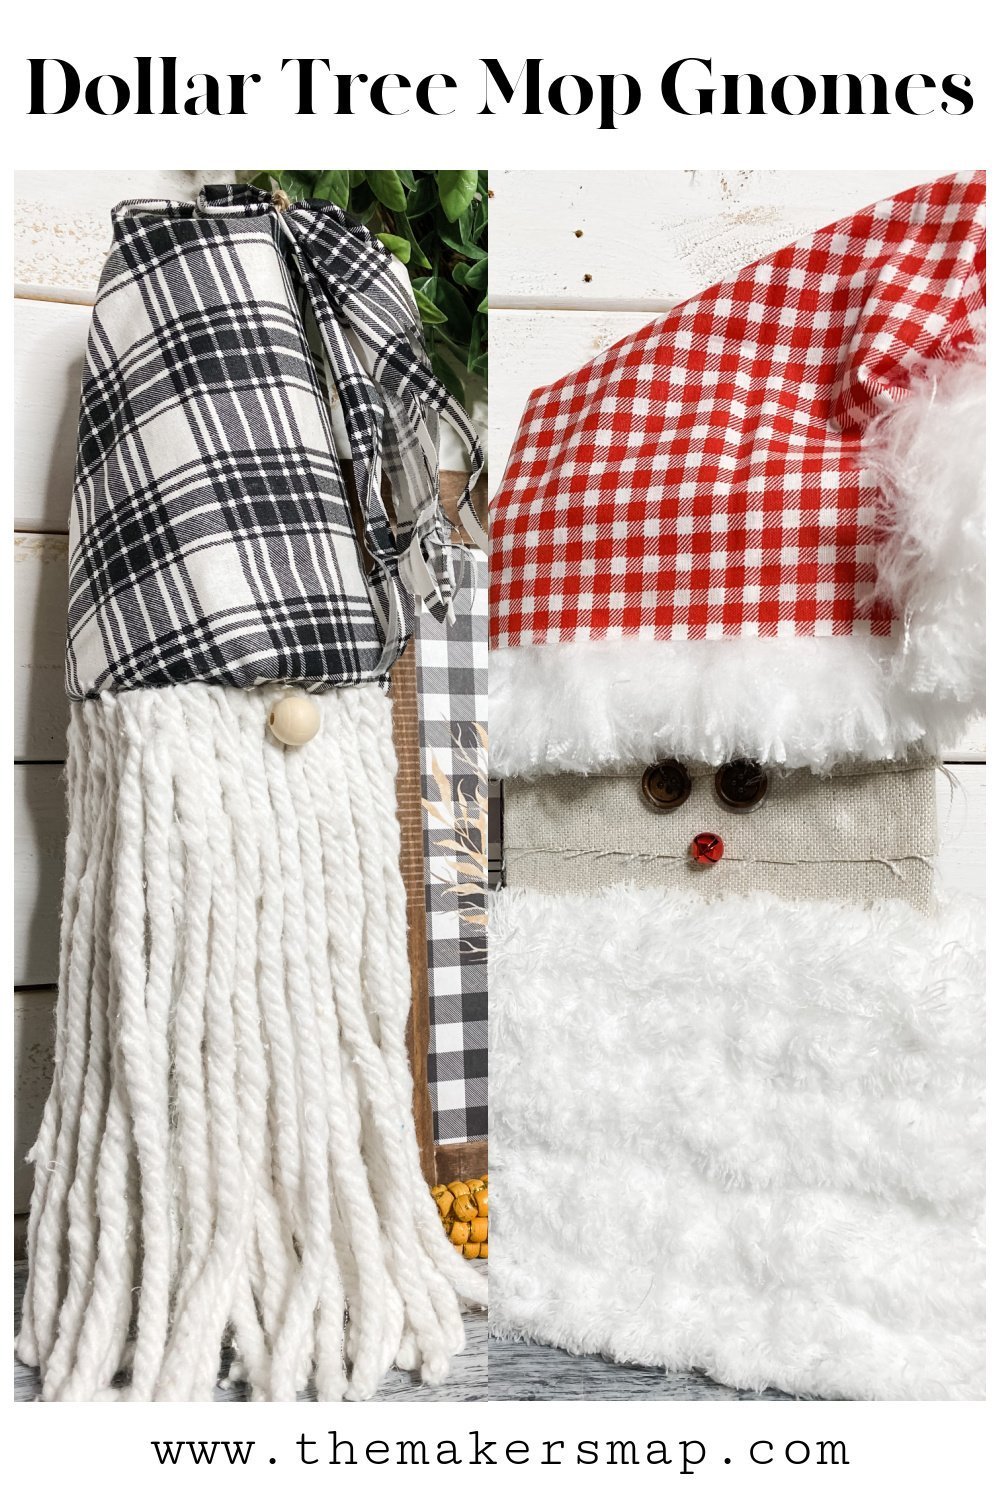
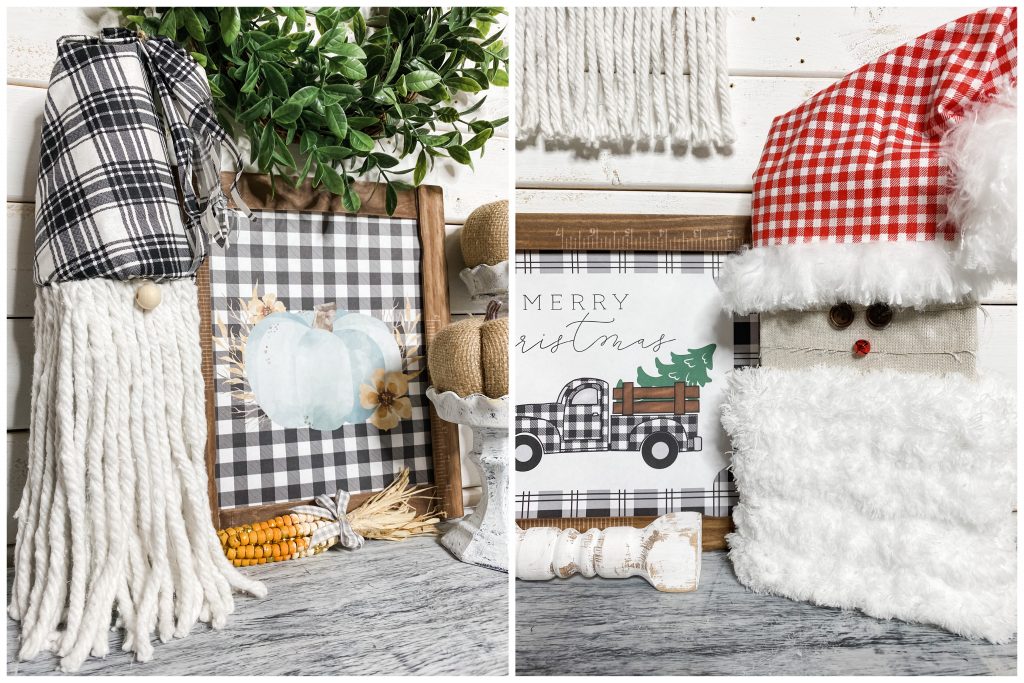
I’m going to show you how I made a Fall (honestly could be used every day) and Santa gnomes. I made both of these Dollar Tree DIY mop head gnomes at the same time, and I am SO happy with how stinkin’ cute they are!
The key features of these DIY gnomes were made with cleaning supplies. Yes, you read that right! I used the strings from a Dollar Tree mop head, a Swiffer duster mop, and a duster refill for this project. All Dollar Tree! A Dollar Tree Mop head DIY is happening y’all!
Don’t believe me?
Watch me make this Dollar Tree Easy Gnomes DIY!
You would never guess that these adorable gnomes were made with dollar tree cleaning supplies! Am I right? It’s amazing the things you can repurpose (and the money you can save!) when you DIY.
Both of these Dollar Tree mop head gnomes can stand on their own, but it would be so cute to add some twine and turn them into a door hanger.
What would you do to make these gnomes your own? Share your creations and get inspired by others too in On a Budget Crafts, a free group on Facebook. I would love to see what you’ve made!
Time to make this Dollar Tree Easy Gnome DIY!
Alright! Let’s get right to it! (These are my affiliate links. If a purchase is made through one of my links, I may earn a small commission, but that does not cost you any extra)
The supplies I used:
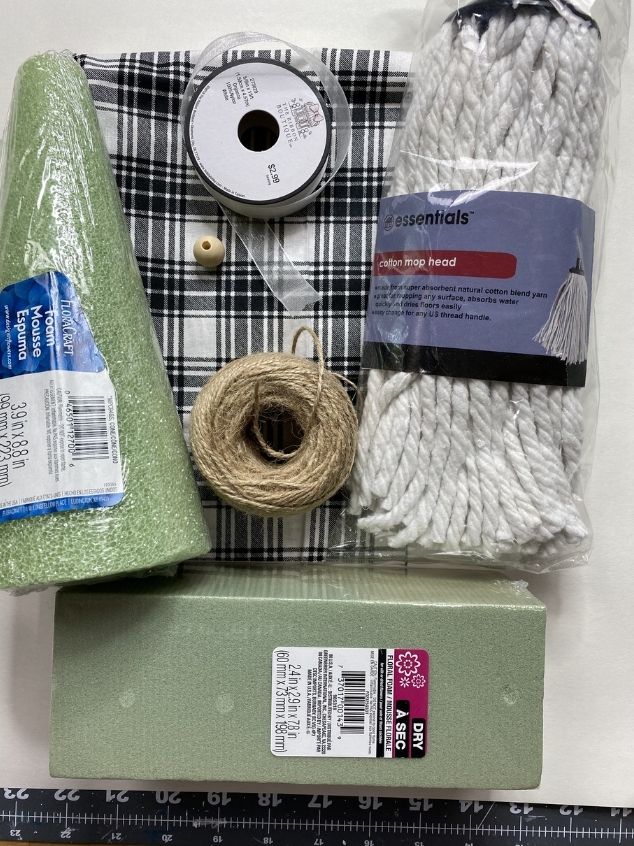
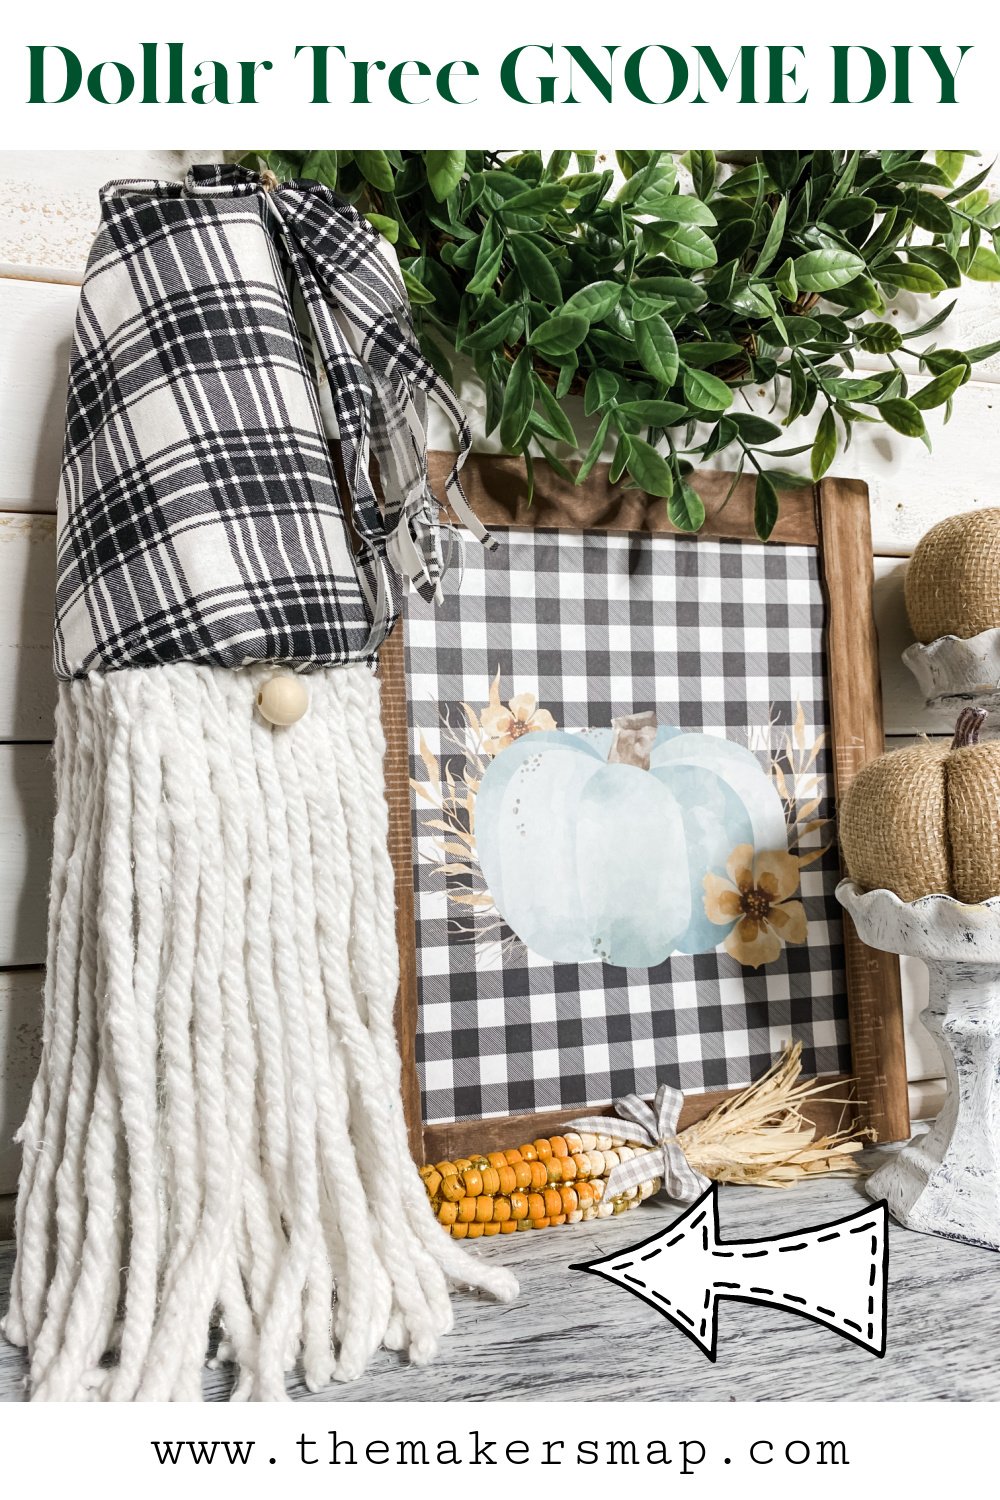
First, we will start with the Farmhouse feel Dollar Tree mop head gnome! To make this Dollar Tree Easy Gnome DIY, you will need:
- Buffalo check fabric
- Dollar Tree mop head or Dollar Tree Mop Strings
- 1in. paintbrush
- floral foam block
- floral foam cone
- jute twine
- glue gun, glue sticks
- White paint
- heat gun
First, start by painting the Dollar Tree floral foam white. I did this just in case I was able to see through the Dollar Tree mop head strings to the green foam.
Additionally, You will need to layer the Dollar Tree mop strings in a few areas to get fullness and better coverage. Next, I cut down and shaped my Dollar Tree cone floral foam so that it was just a little bit shorter.
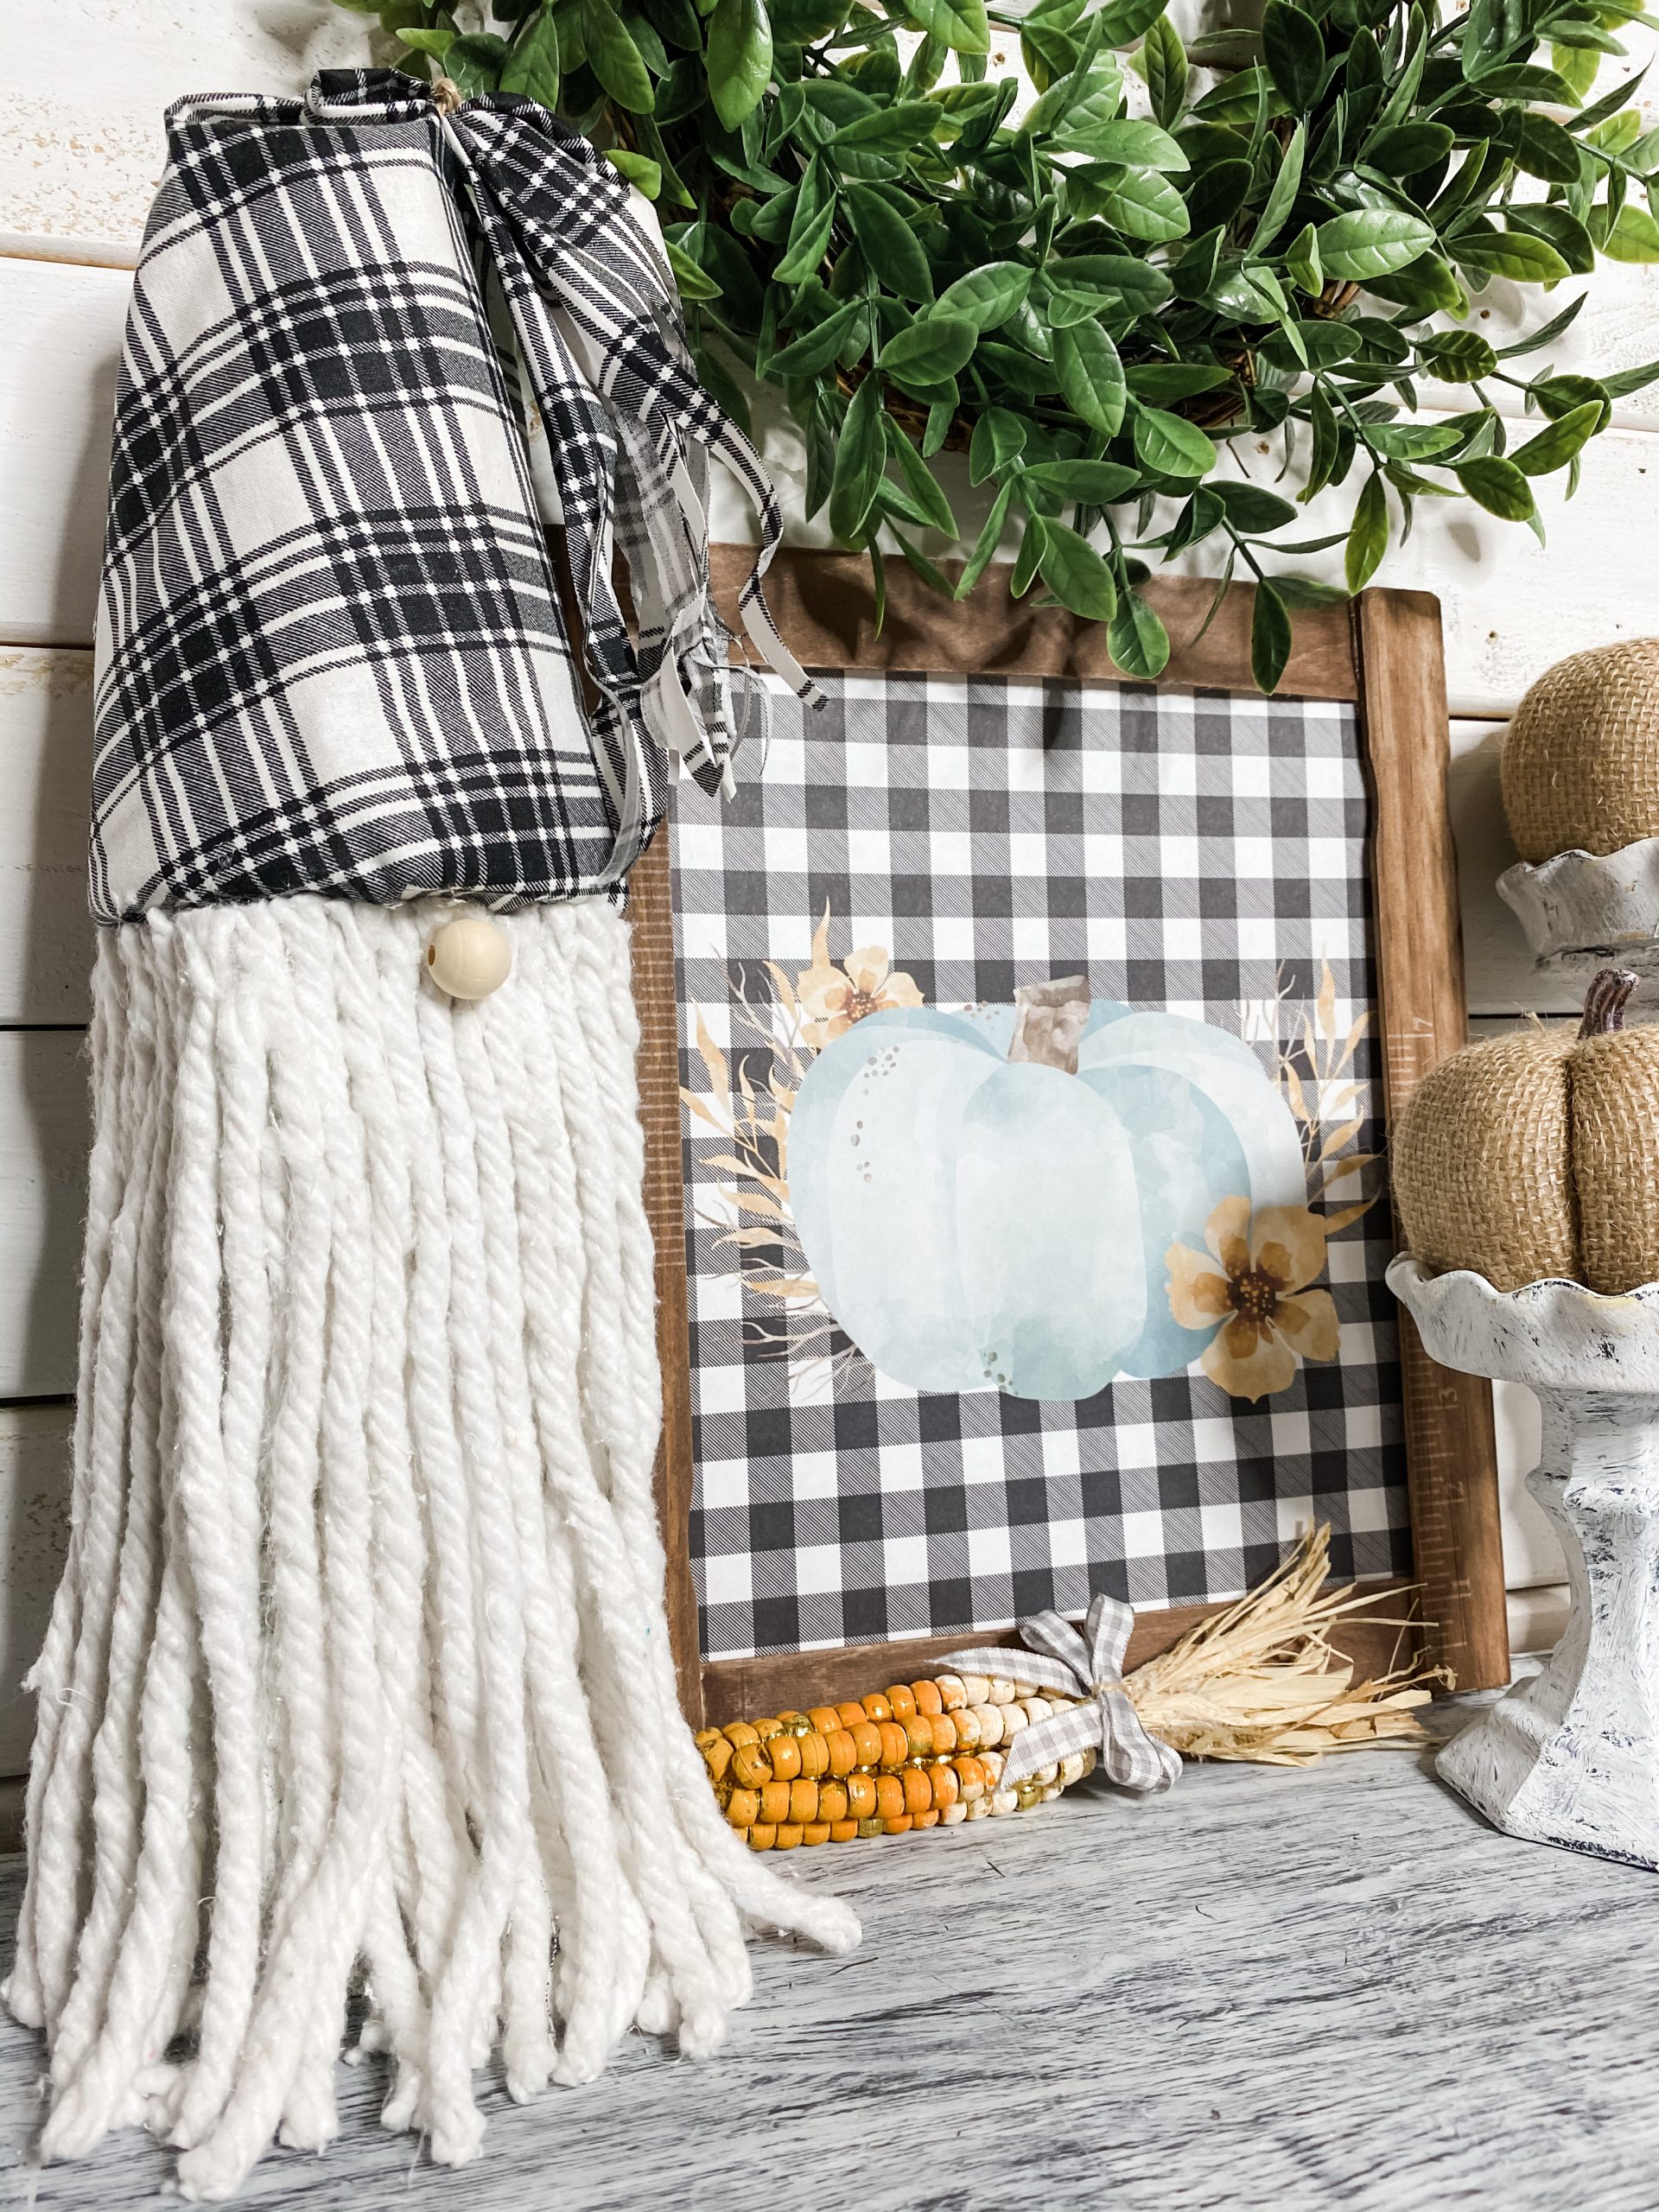
I laid out my buffalo check fabric (which is one of my favorite prints) and started wrapping it around the cone to the shape I wanted. I left enough room at the top to fold over the hat.
Looking cute!
In my head, I was thinking “this guy needs some fringe!” So I cut the tip of the buffalo check fabric of the hat in strips and created a fringe look and tied it off with twine.
Moving on to the last steps, I glued several layers of the Dollar Tree mop head strings to the floral foam to start to bring the DIY Mop Head Gnome to life. Lastly, I glued the top hat on and added him a wood bead nose.
Tell me this DIY Dollar Tree Mop Head Gnome didn’t turn out just the cutest! I am absolutely addicted to Dollar Tree Mop string crafting!
Now it is time to make this Dollar Tree Easy Santa Gnome DIY:
The supplies I used:
To make the Santa Dollar Tree Easy Gnome DIY, you will need: “As an Amazon Associate, I earn from qualifying purchases.”
- Dollar Tree wood sign box
- Red buffalo check fabric
- Dollar Tree Swiffer mop
- Dollar Tree duster refill
- Leftover fabric
- 2 buttons
- 1 small red bell
- glue gun, glue sticks

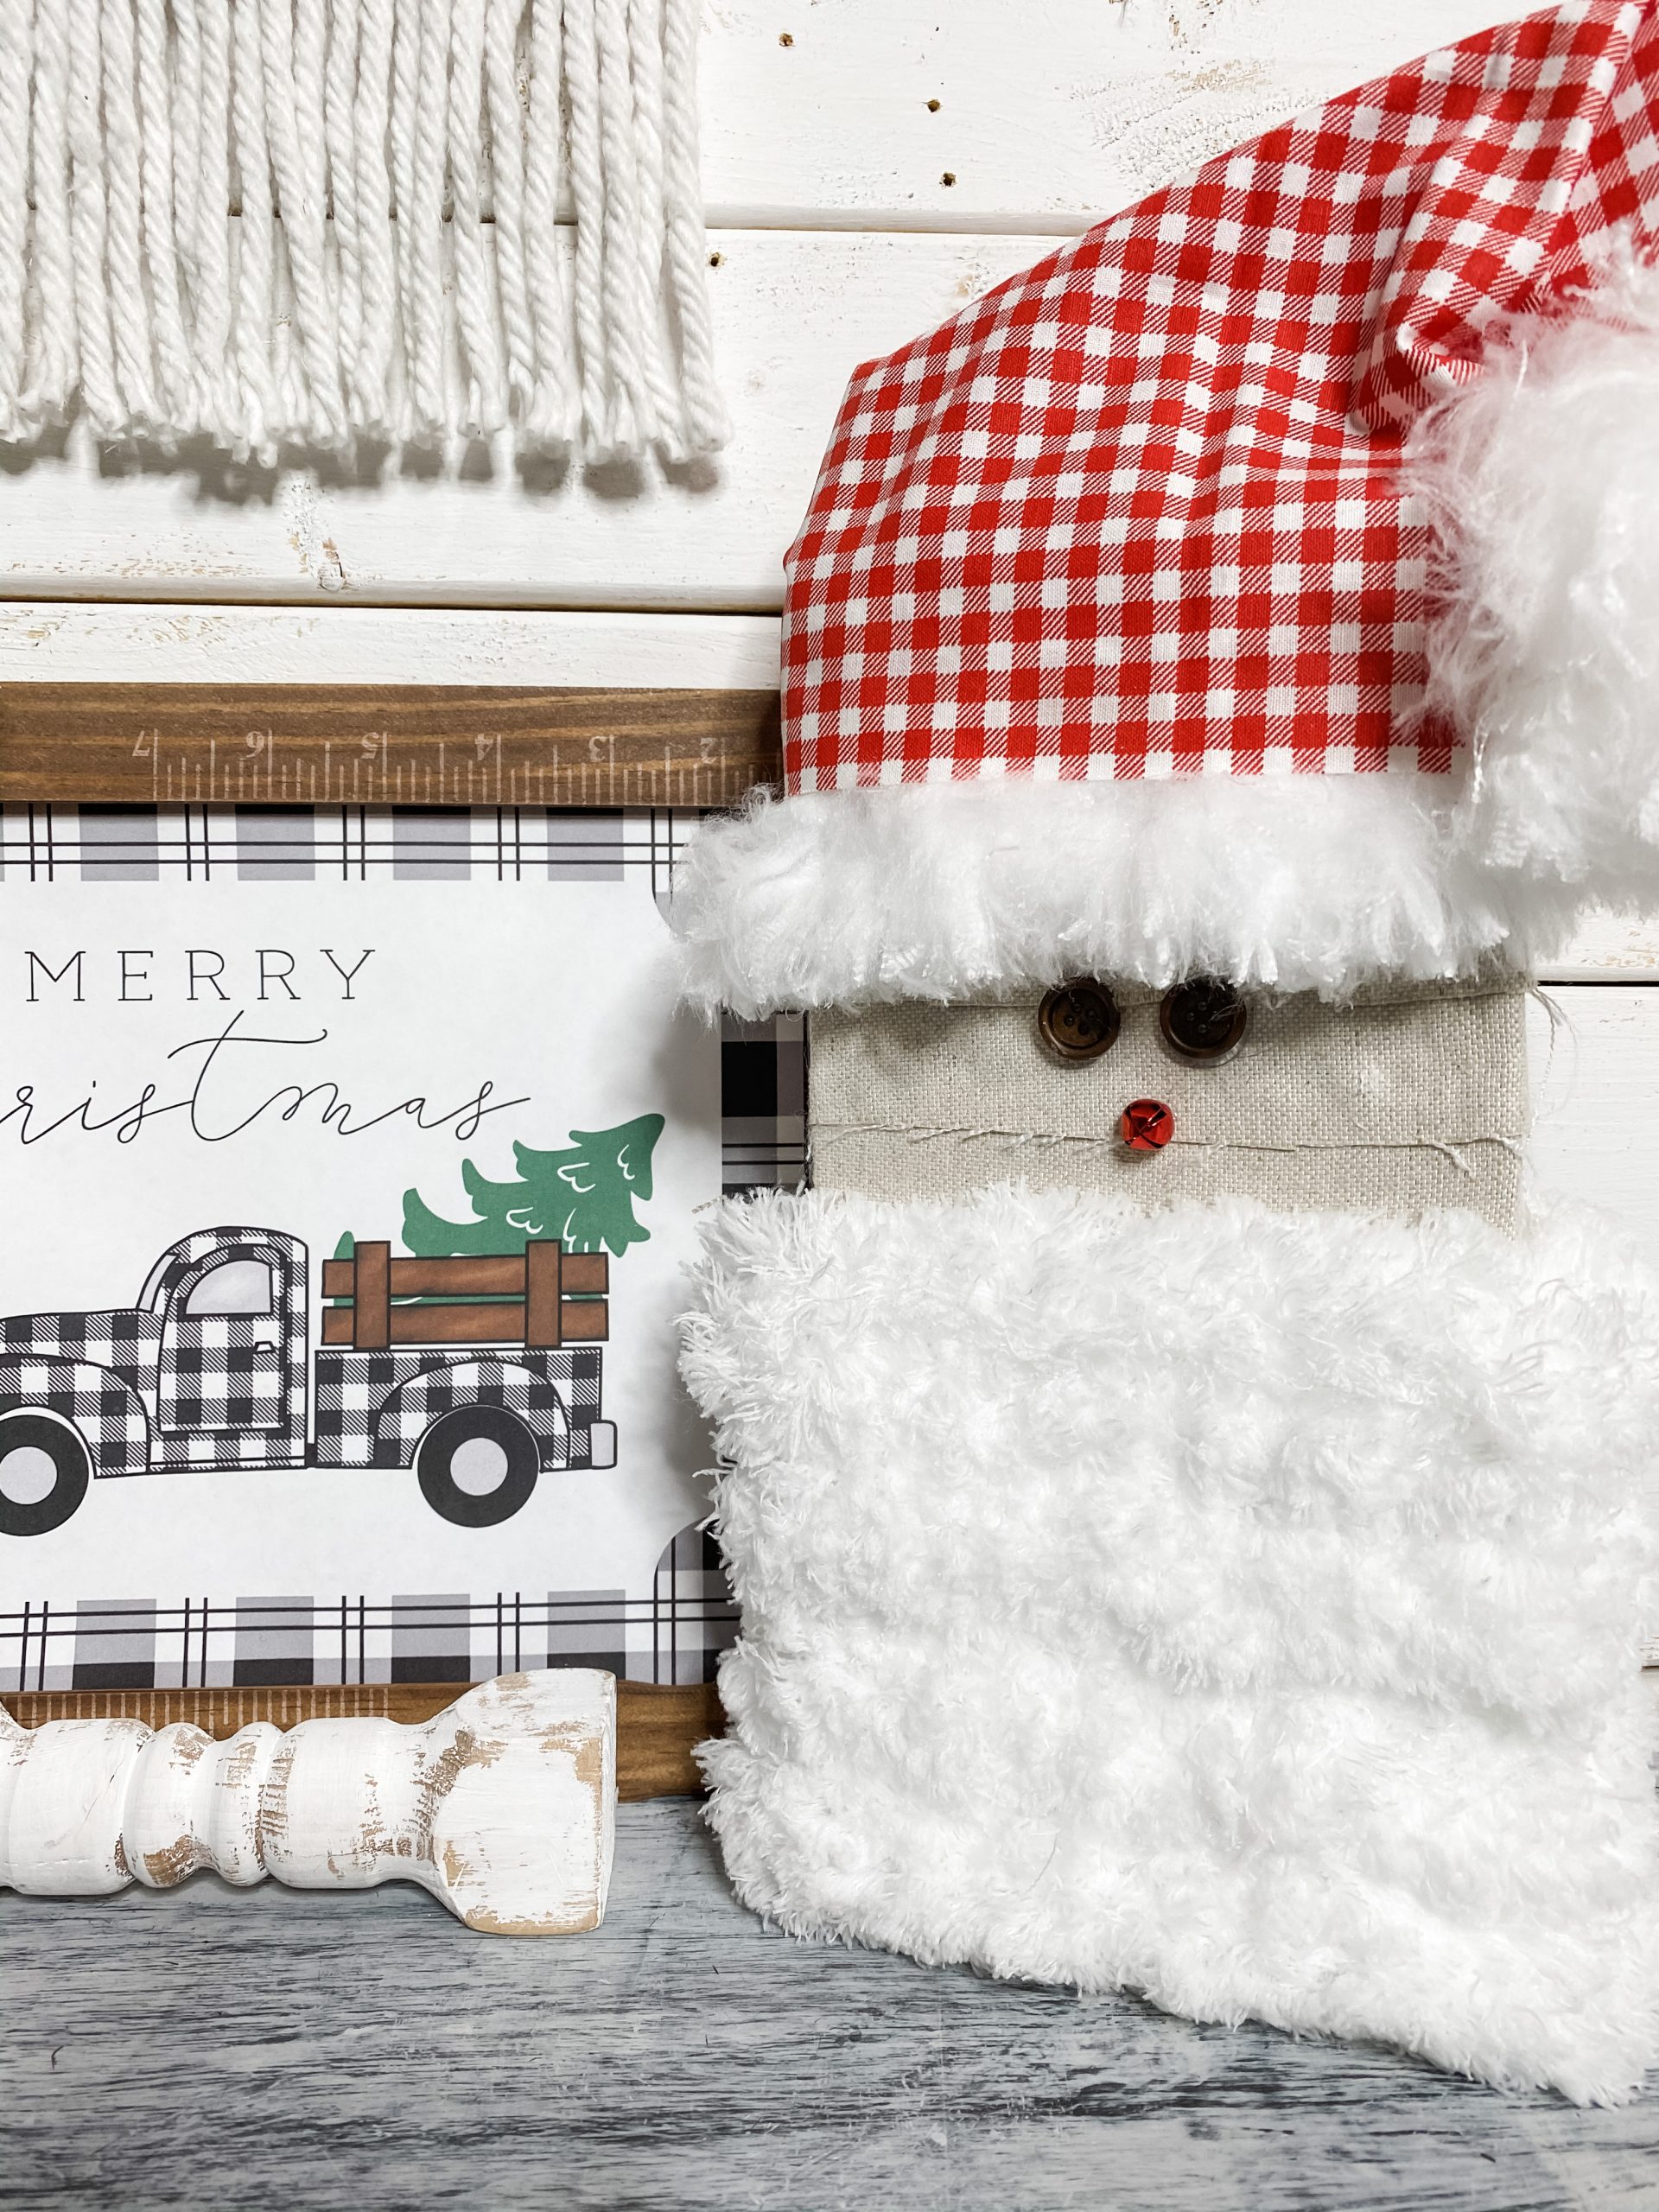
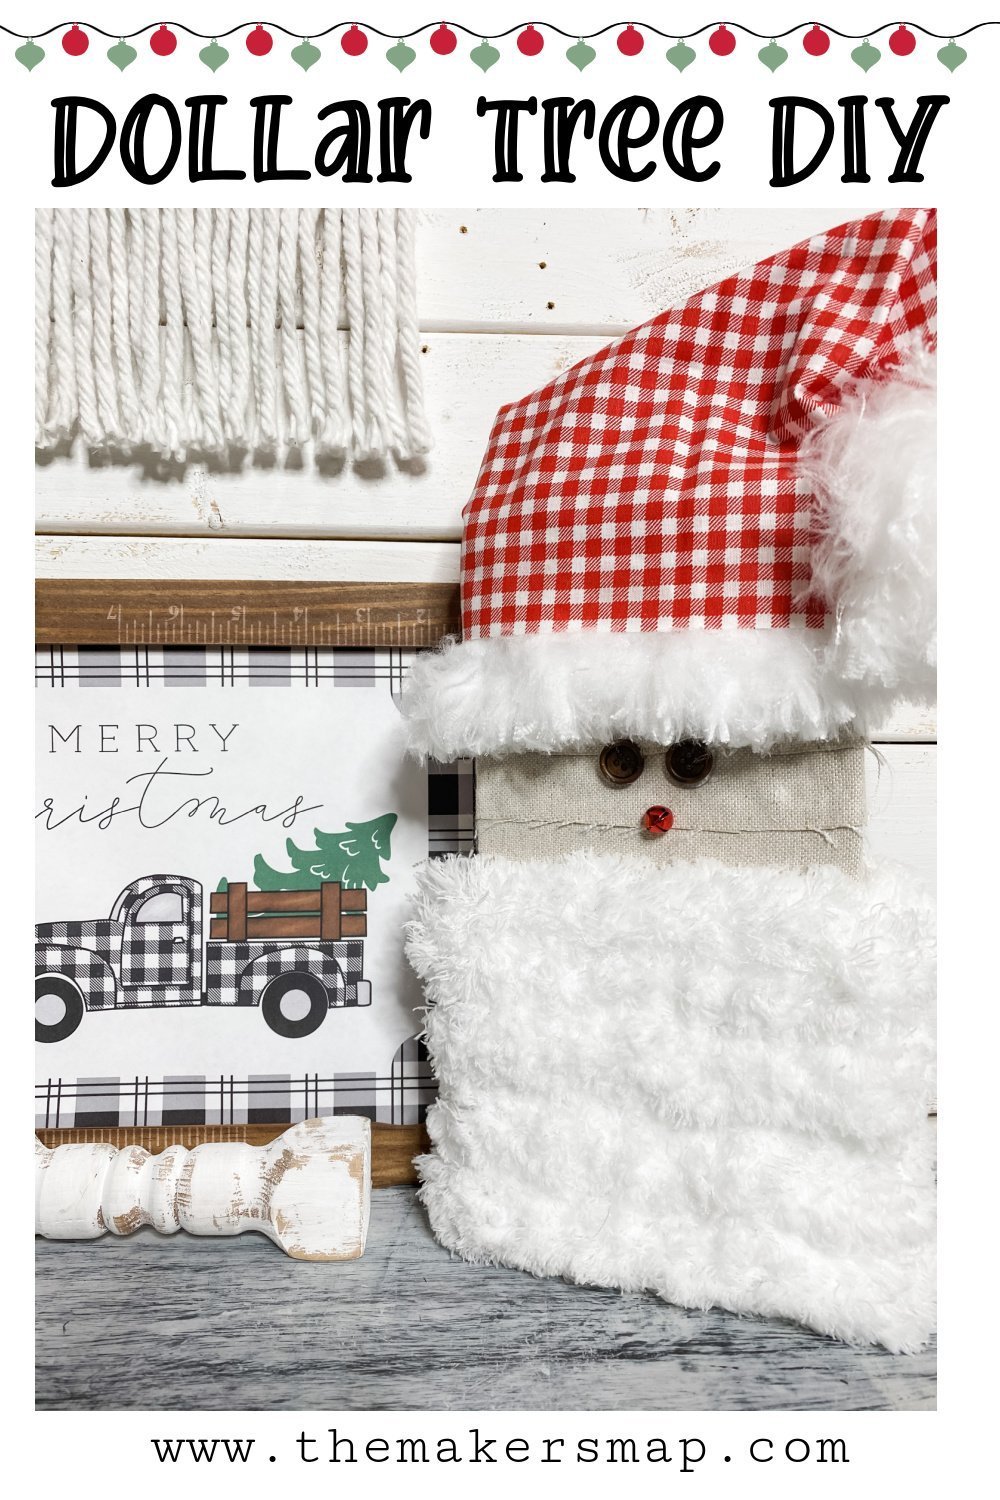
For the Dollar Tree Easy Gnomes DIY Santa Gnome, I wanted to do something different so I used a Dollar Tree Sign box and started wrapping it with all my materials.
I used a Dollar Tree duster mop head for the beard. The ones that are Swiffer style. In addition, I wrapped some scrap strips of fabric to make the Santa gnome his face.
Next, I used the Dollar Tree duster refills to make the fluffy part of his hat and the ball on the end of his hat.
A few months ago I scored this red and white buffalo check fabric at Dollar Tree and I knew it was perfect for this DIY.
I laid out my fabric and basically guessed at the placement and started gluing. I finished it all off with button eyes and a bell nose! He isn’t your typical gnome but he has a gnome feel. Which I sorta love.
The possibilities are ENDLESS when you DIY!
Think outside the box and start creating things that come to mind. Trust me, you will have the absolute best time making things like this, especially in fall and Christmas time. (which are my favorite times of the year)
If you loved this DIY you might also like this one too!
I hope you loved this project and are inspired to get creative! Stay creative friends! See you on the next blog post #craftycrew – XOXO Amber
Make Sure to Pin This Post


Love the gnomes