DIY Dollar Tree Mini Pallet Valentine’s Day Decor

This adorable DIY Dollar Tree Mini Pallet Valentine’s Day Decor reminds me of what got me into the DIY business in the first place. I used to build furniture from old pallets!
It’s crazy to think of how much has changed and how far I’ve come since I started making things in my garage. It just goes to show you how much you can achieve when you do what you love and you never give up your passions!
Watch the replay
Are you more of a visual learner and prefer to watch the tutorial rather than read it? Well, I’ve got you covered! I recorded how to make this easy Valentine’s Day decor during a Facebook LIVE video.
The great thing about Facebook is even though I recorded this DIY project live, you can watch the replay at any time!

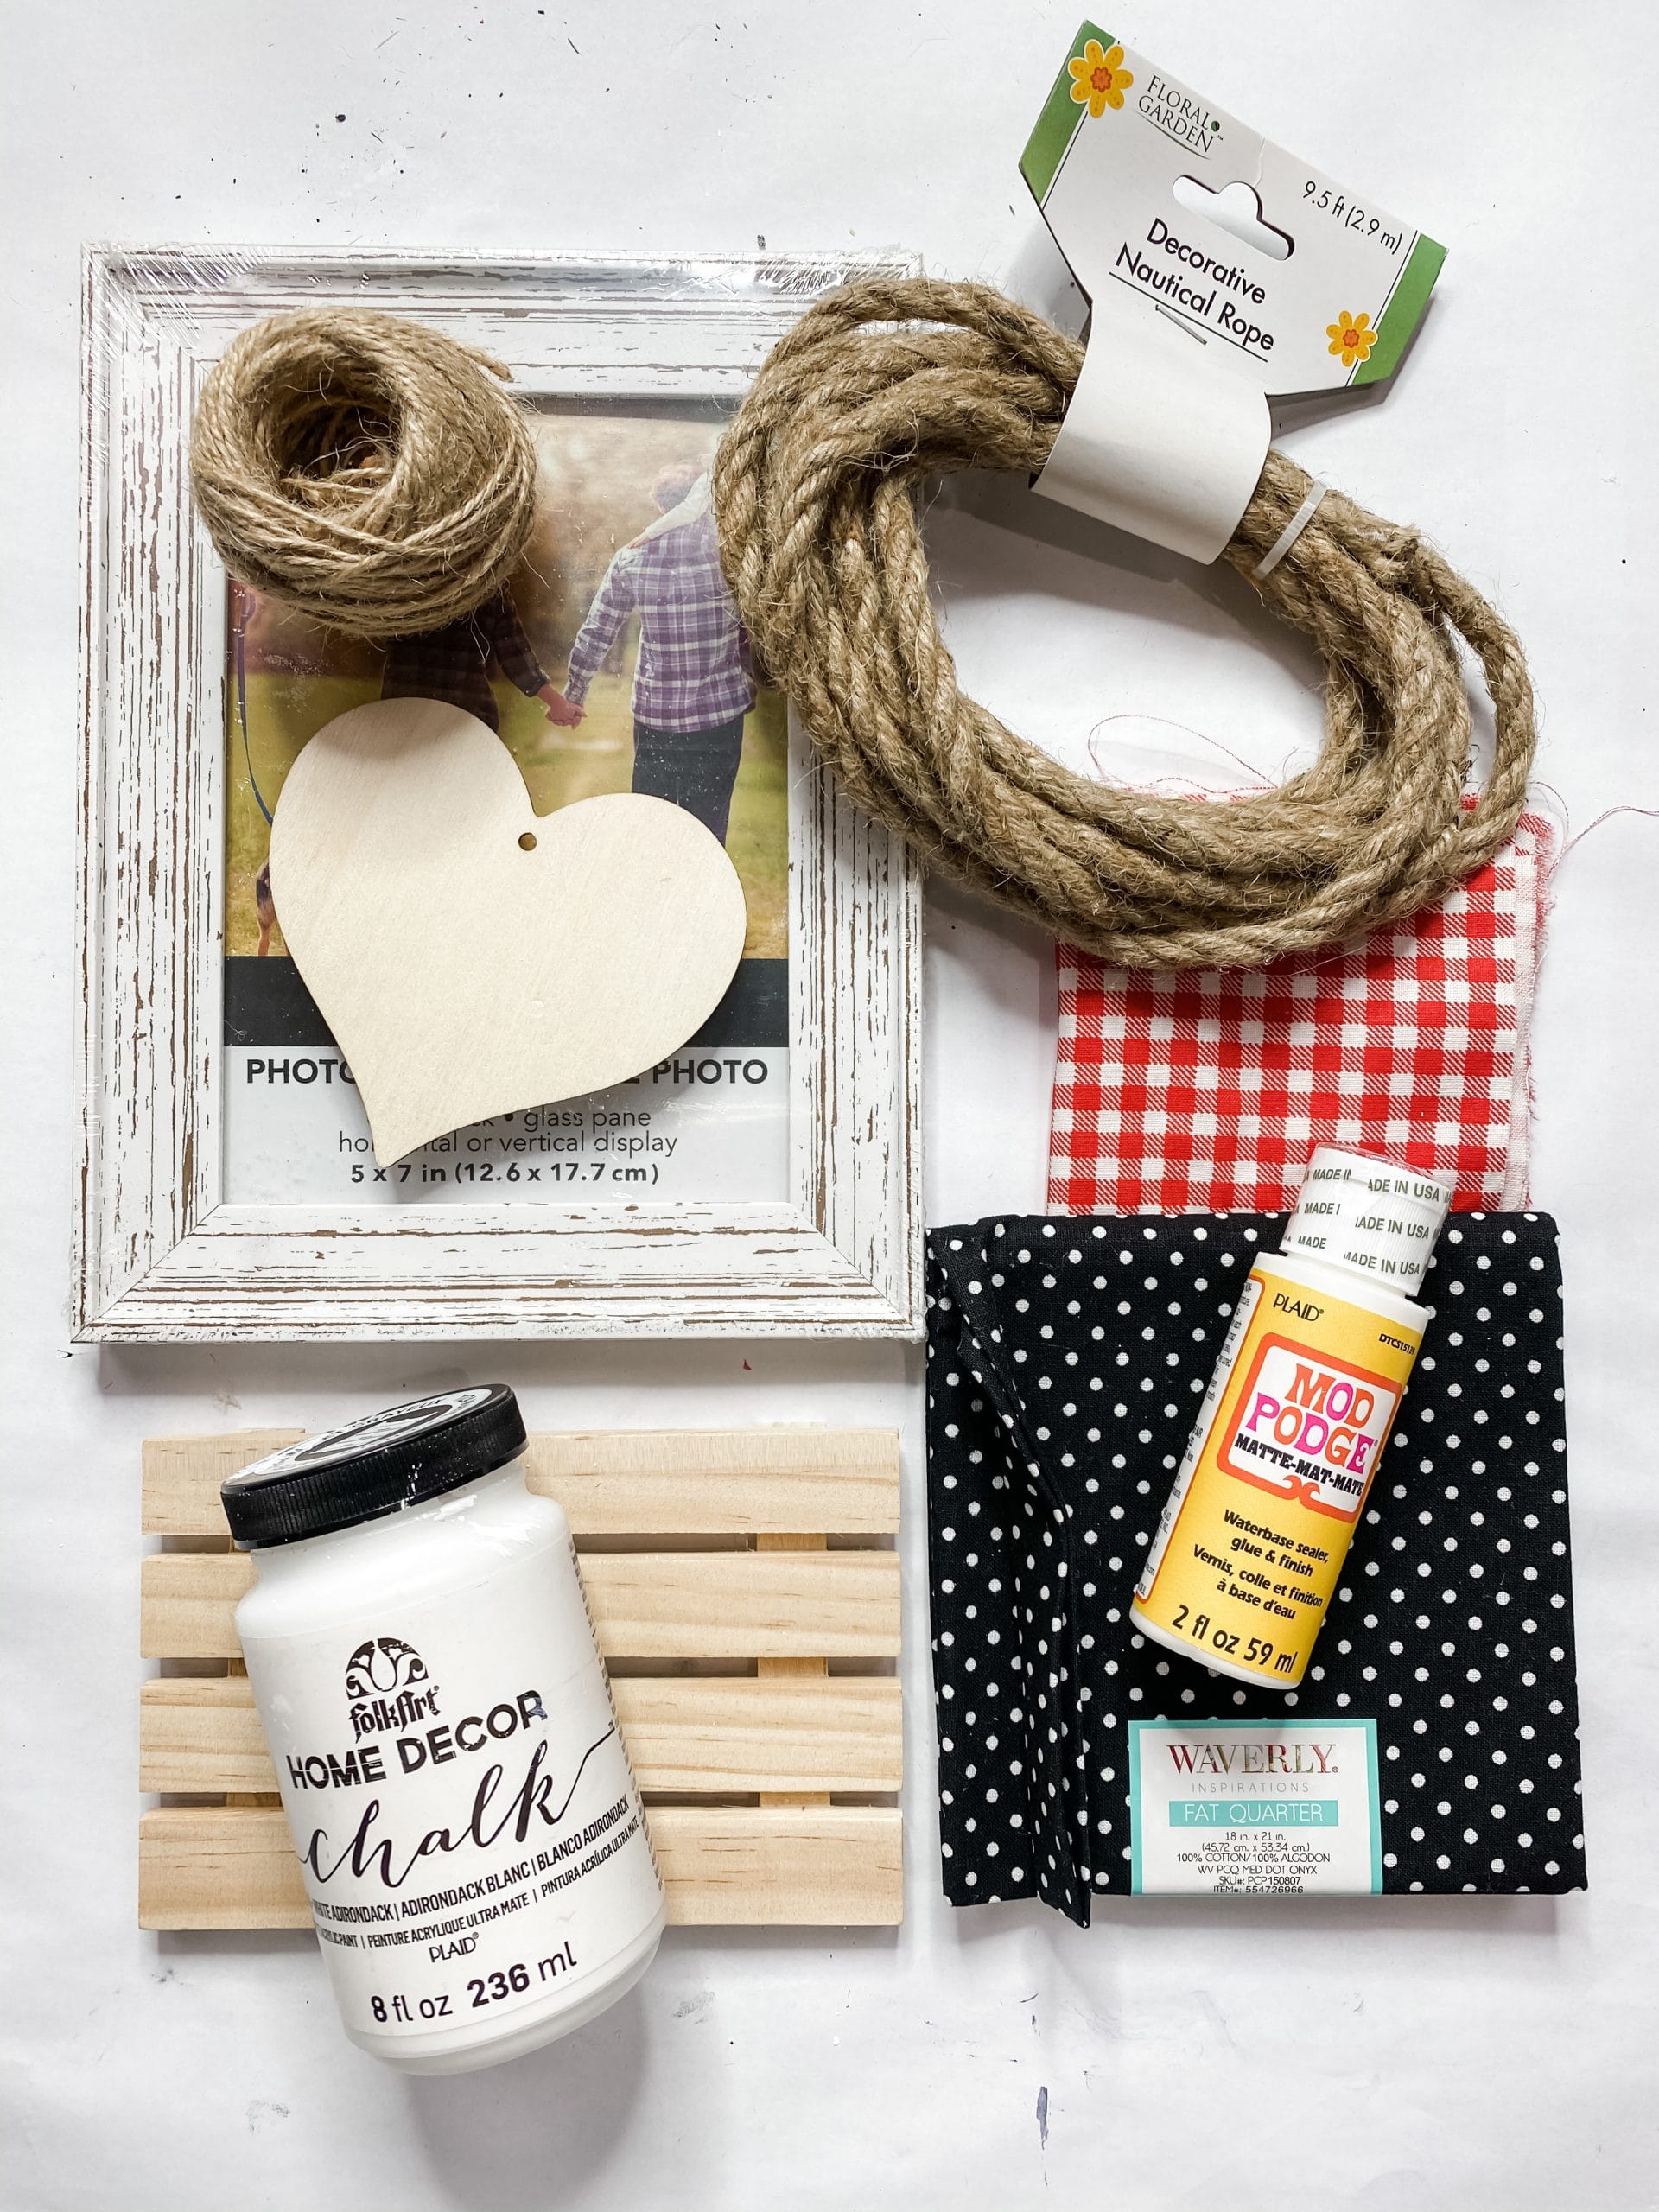
For this project, I will be using these items but you can substitute where you want.
“As an Amazon Associate, I earn from qualifying purchases.”
- Dollar Tree Mini Wood Pallet
- Dollar Tree Picture Frame (5×7)
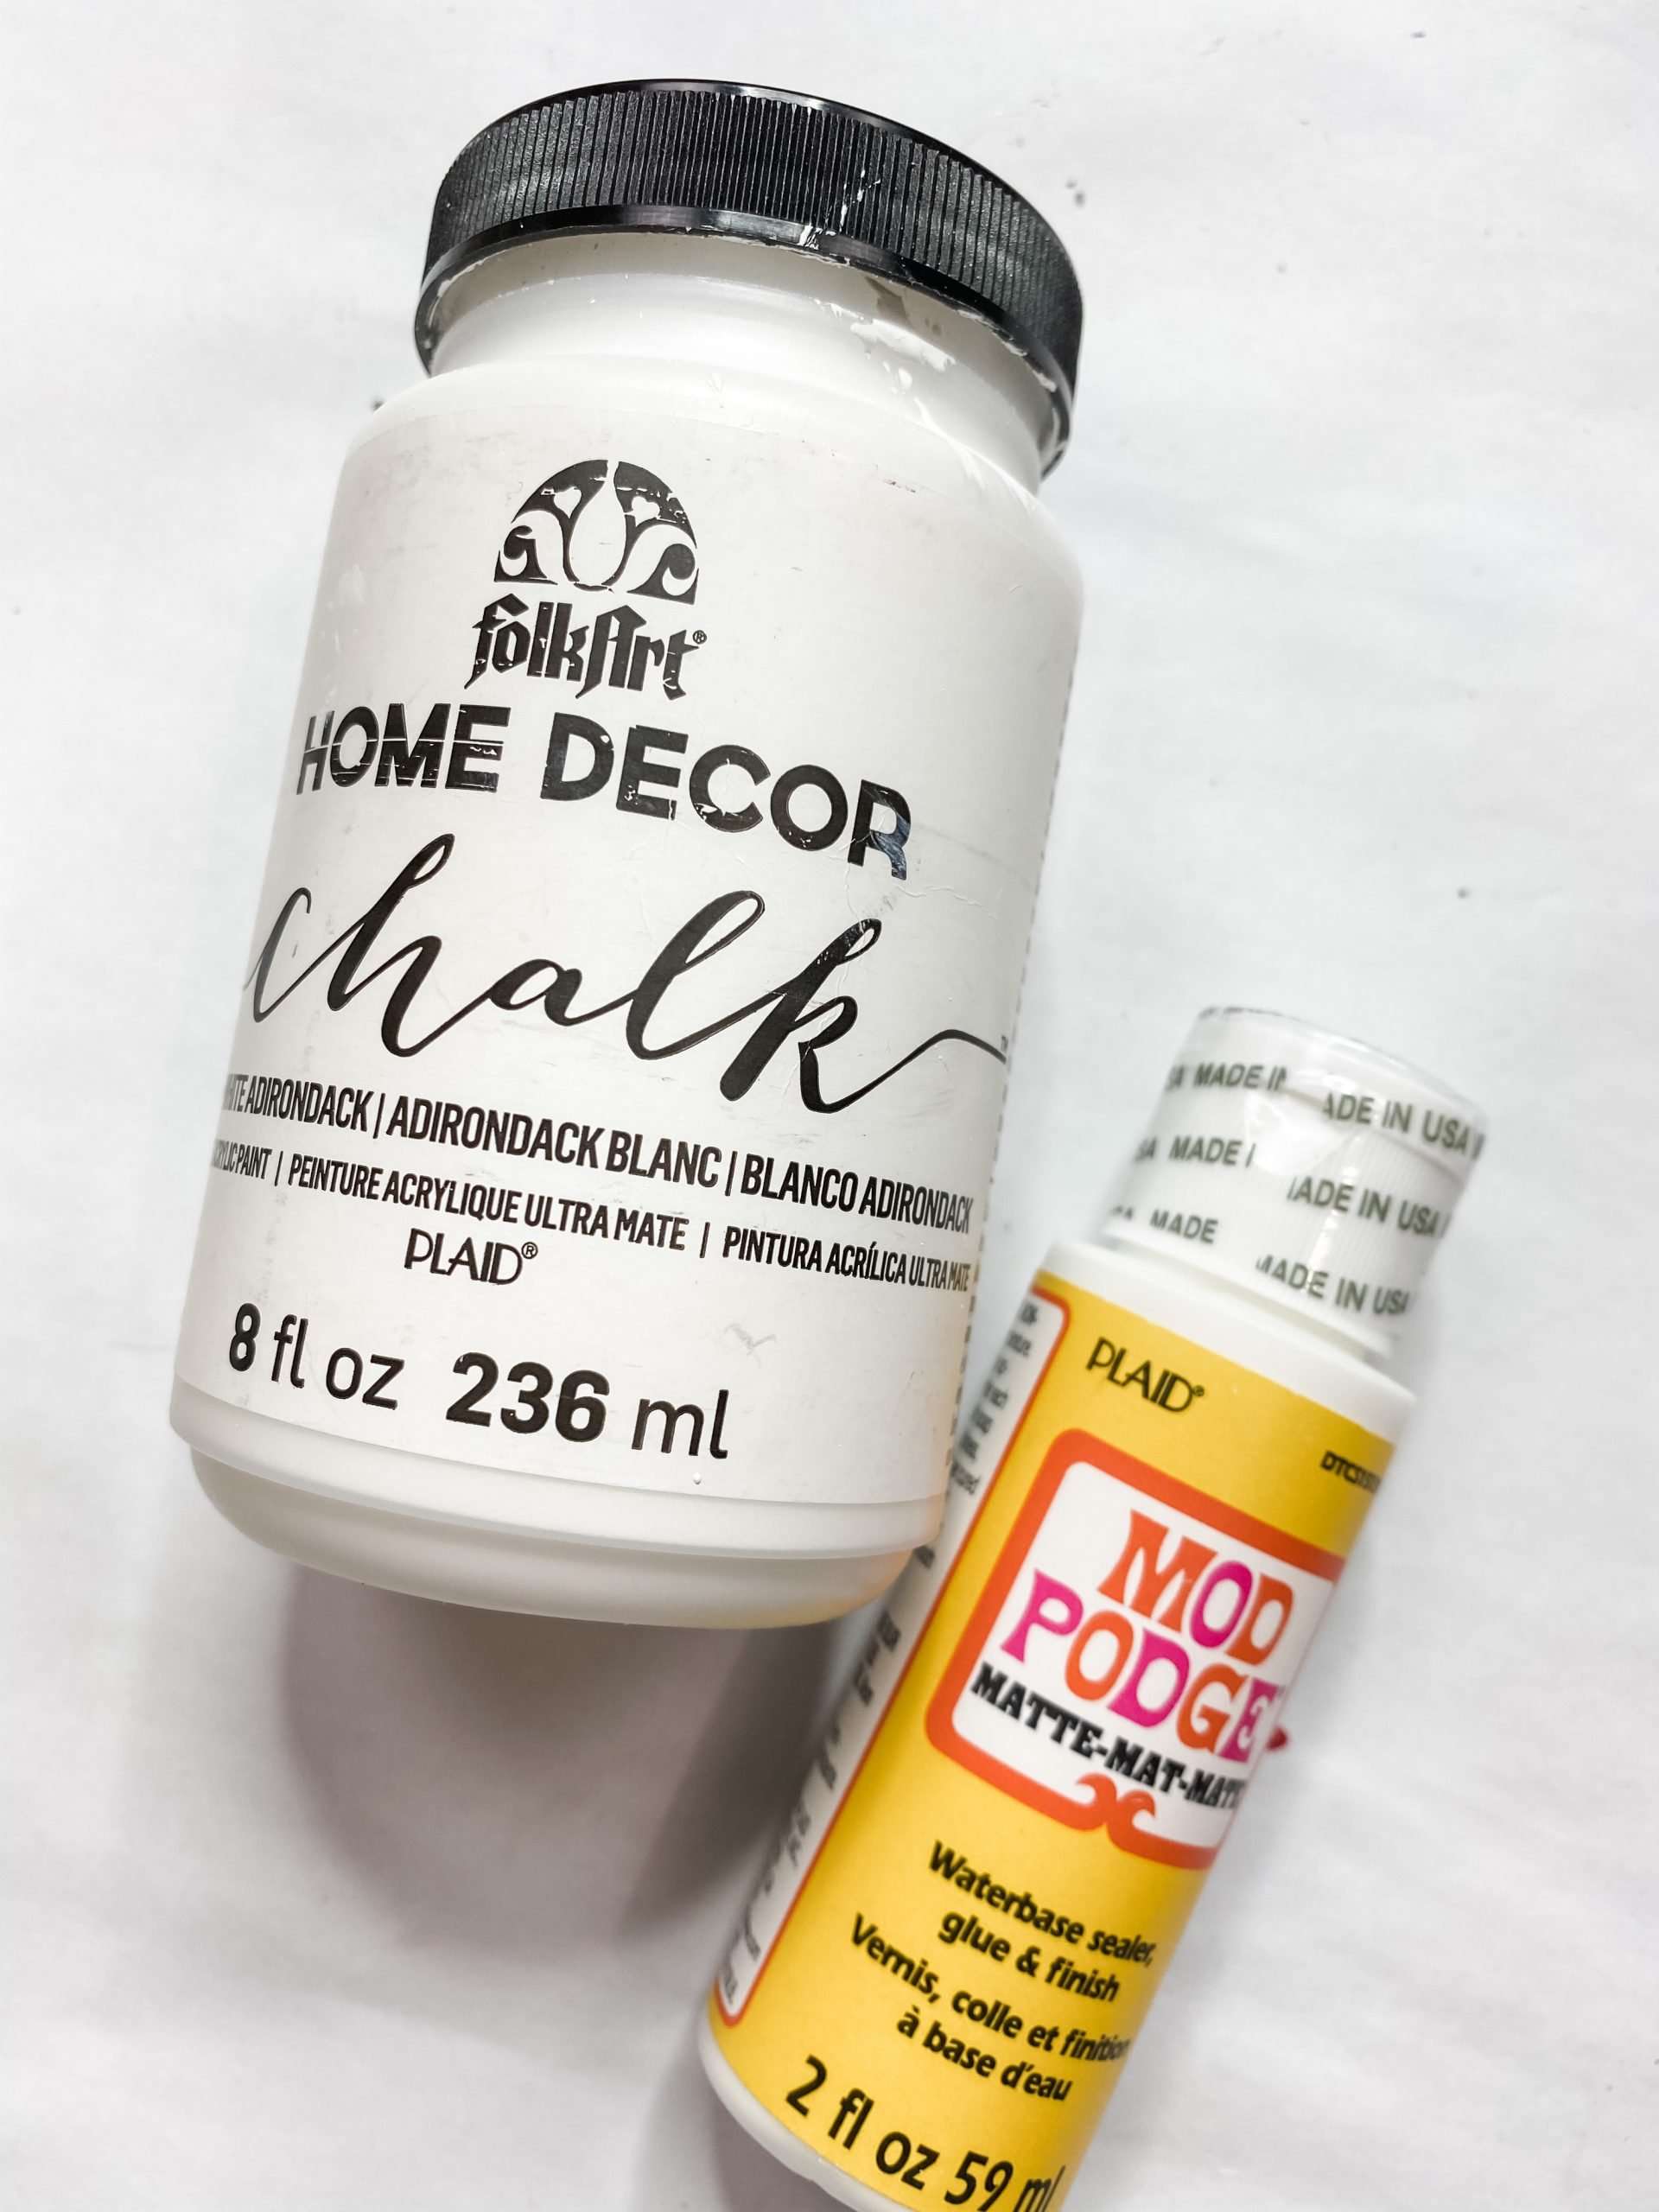
- Folkart White Chalk Paint
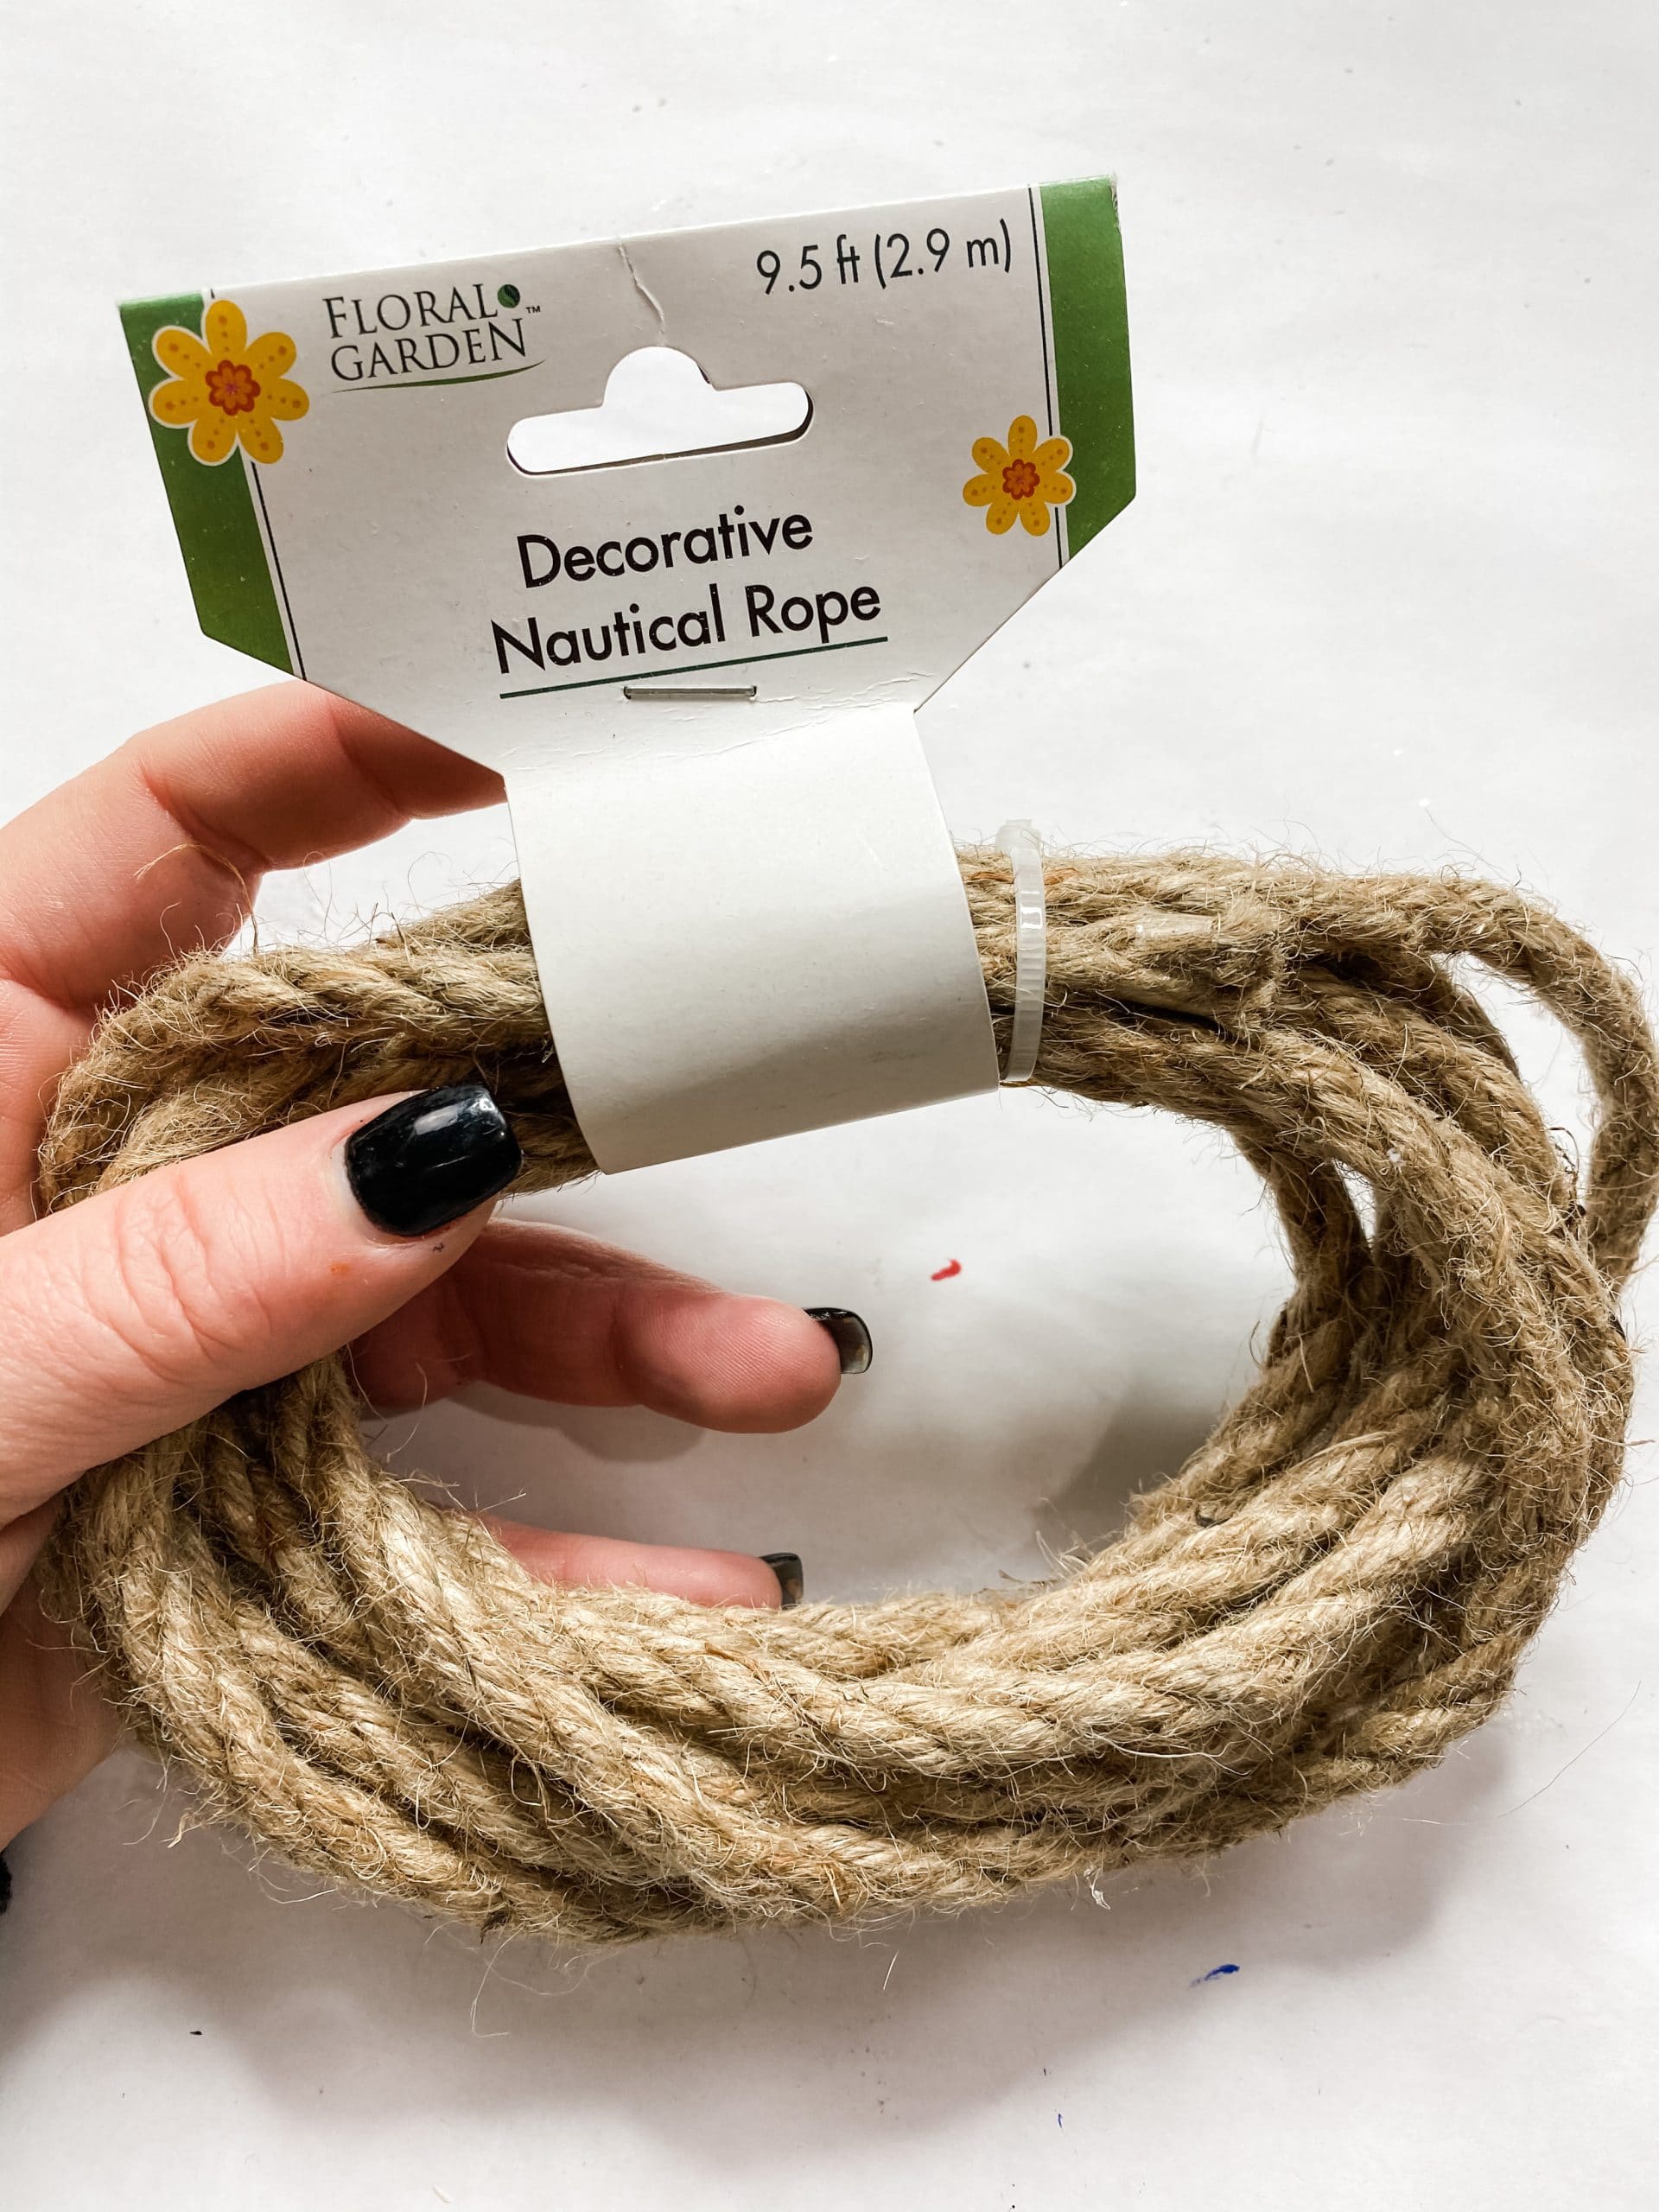
- Dollar Tree Nautical Rope
- Dollar Tree Wood Heart Ornament
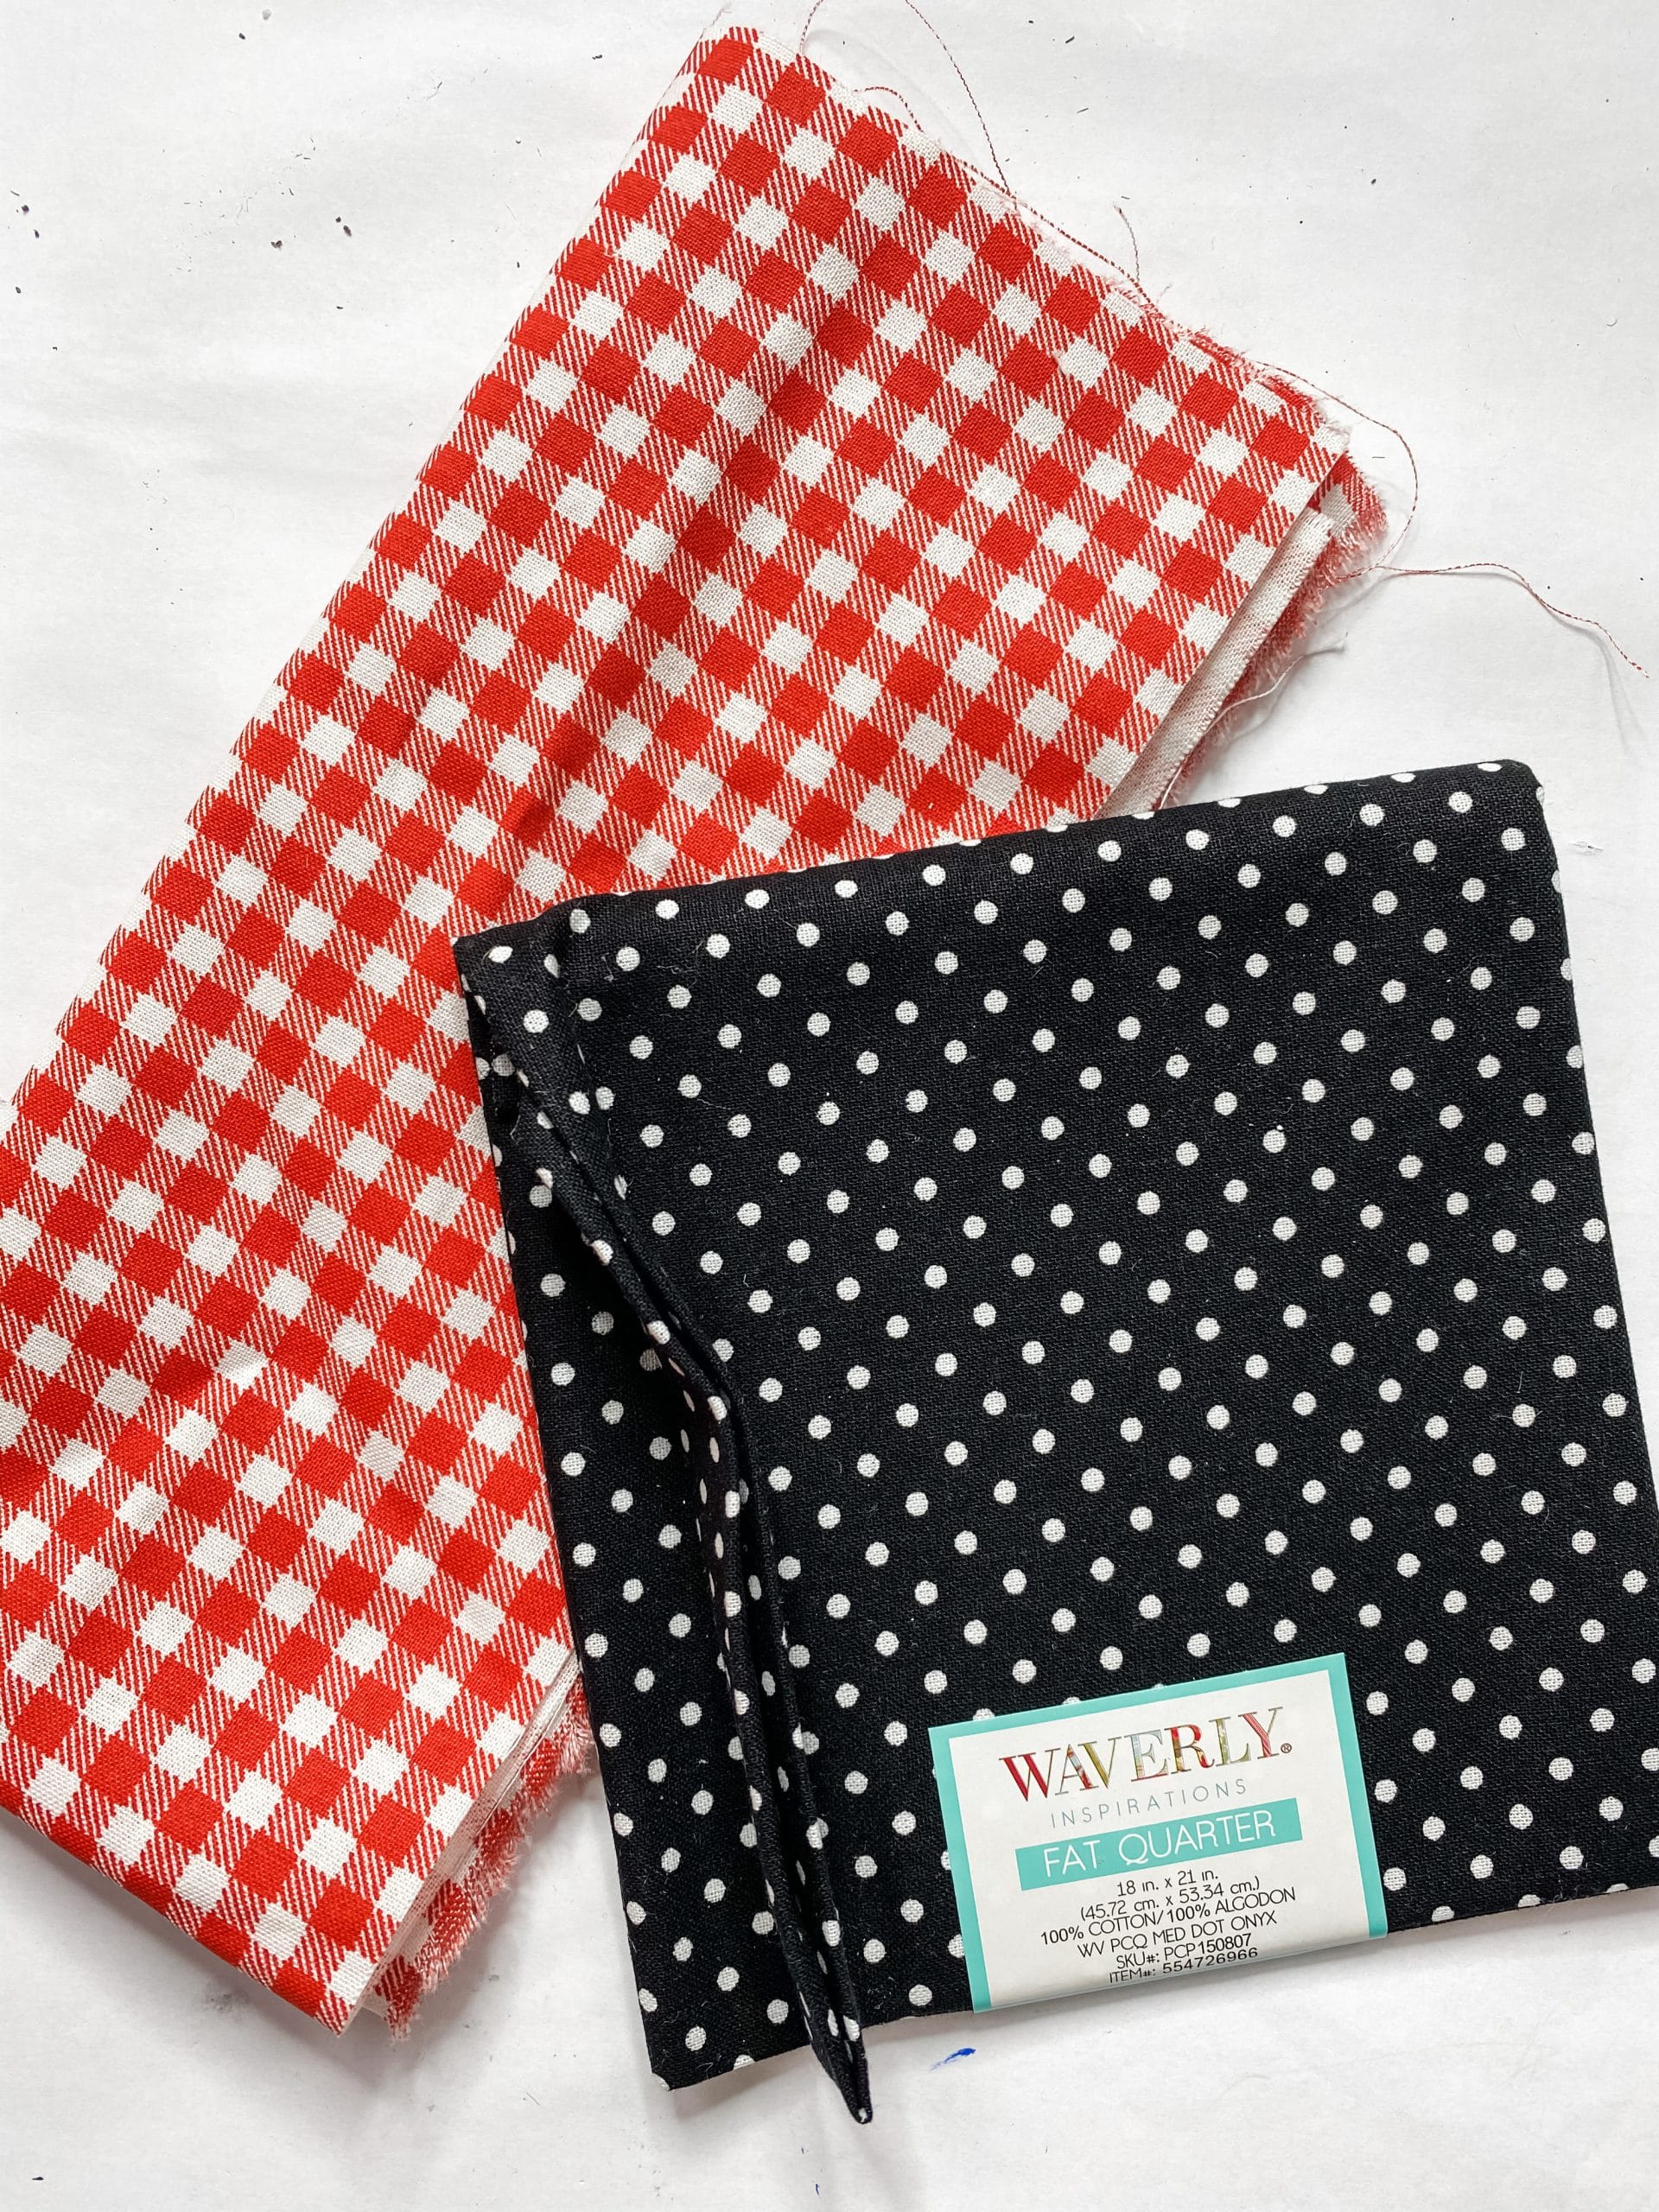
- Black Polka Dot Fabric
- Dollar Tree Red Buffalo Check Fabric
- Mod Podge
- Jute Twine
- Hot Glue gun
- Glue Sticks
- Scissors
Let’s get started
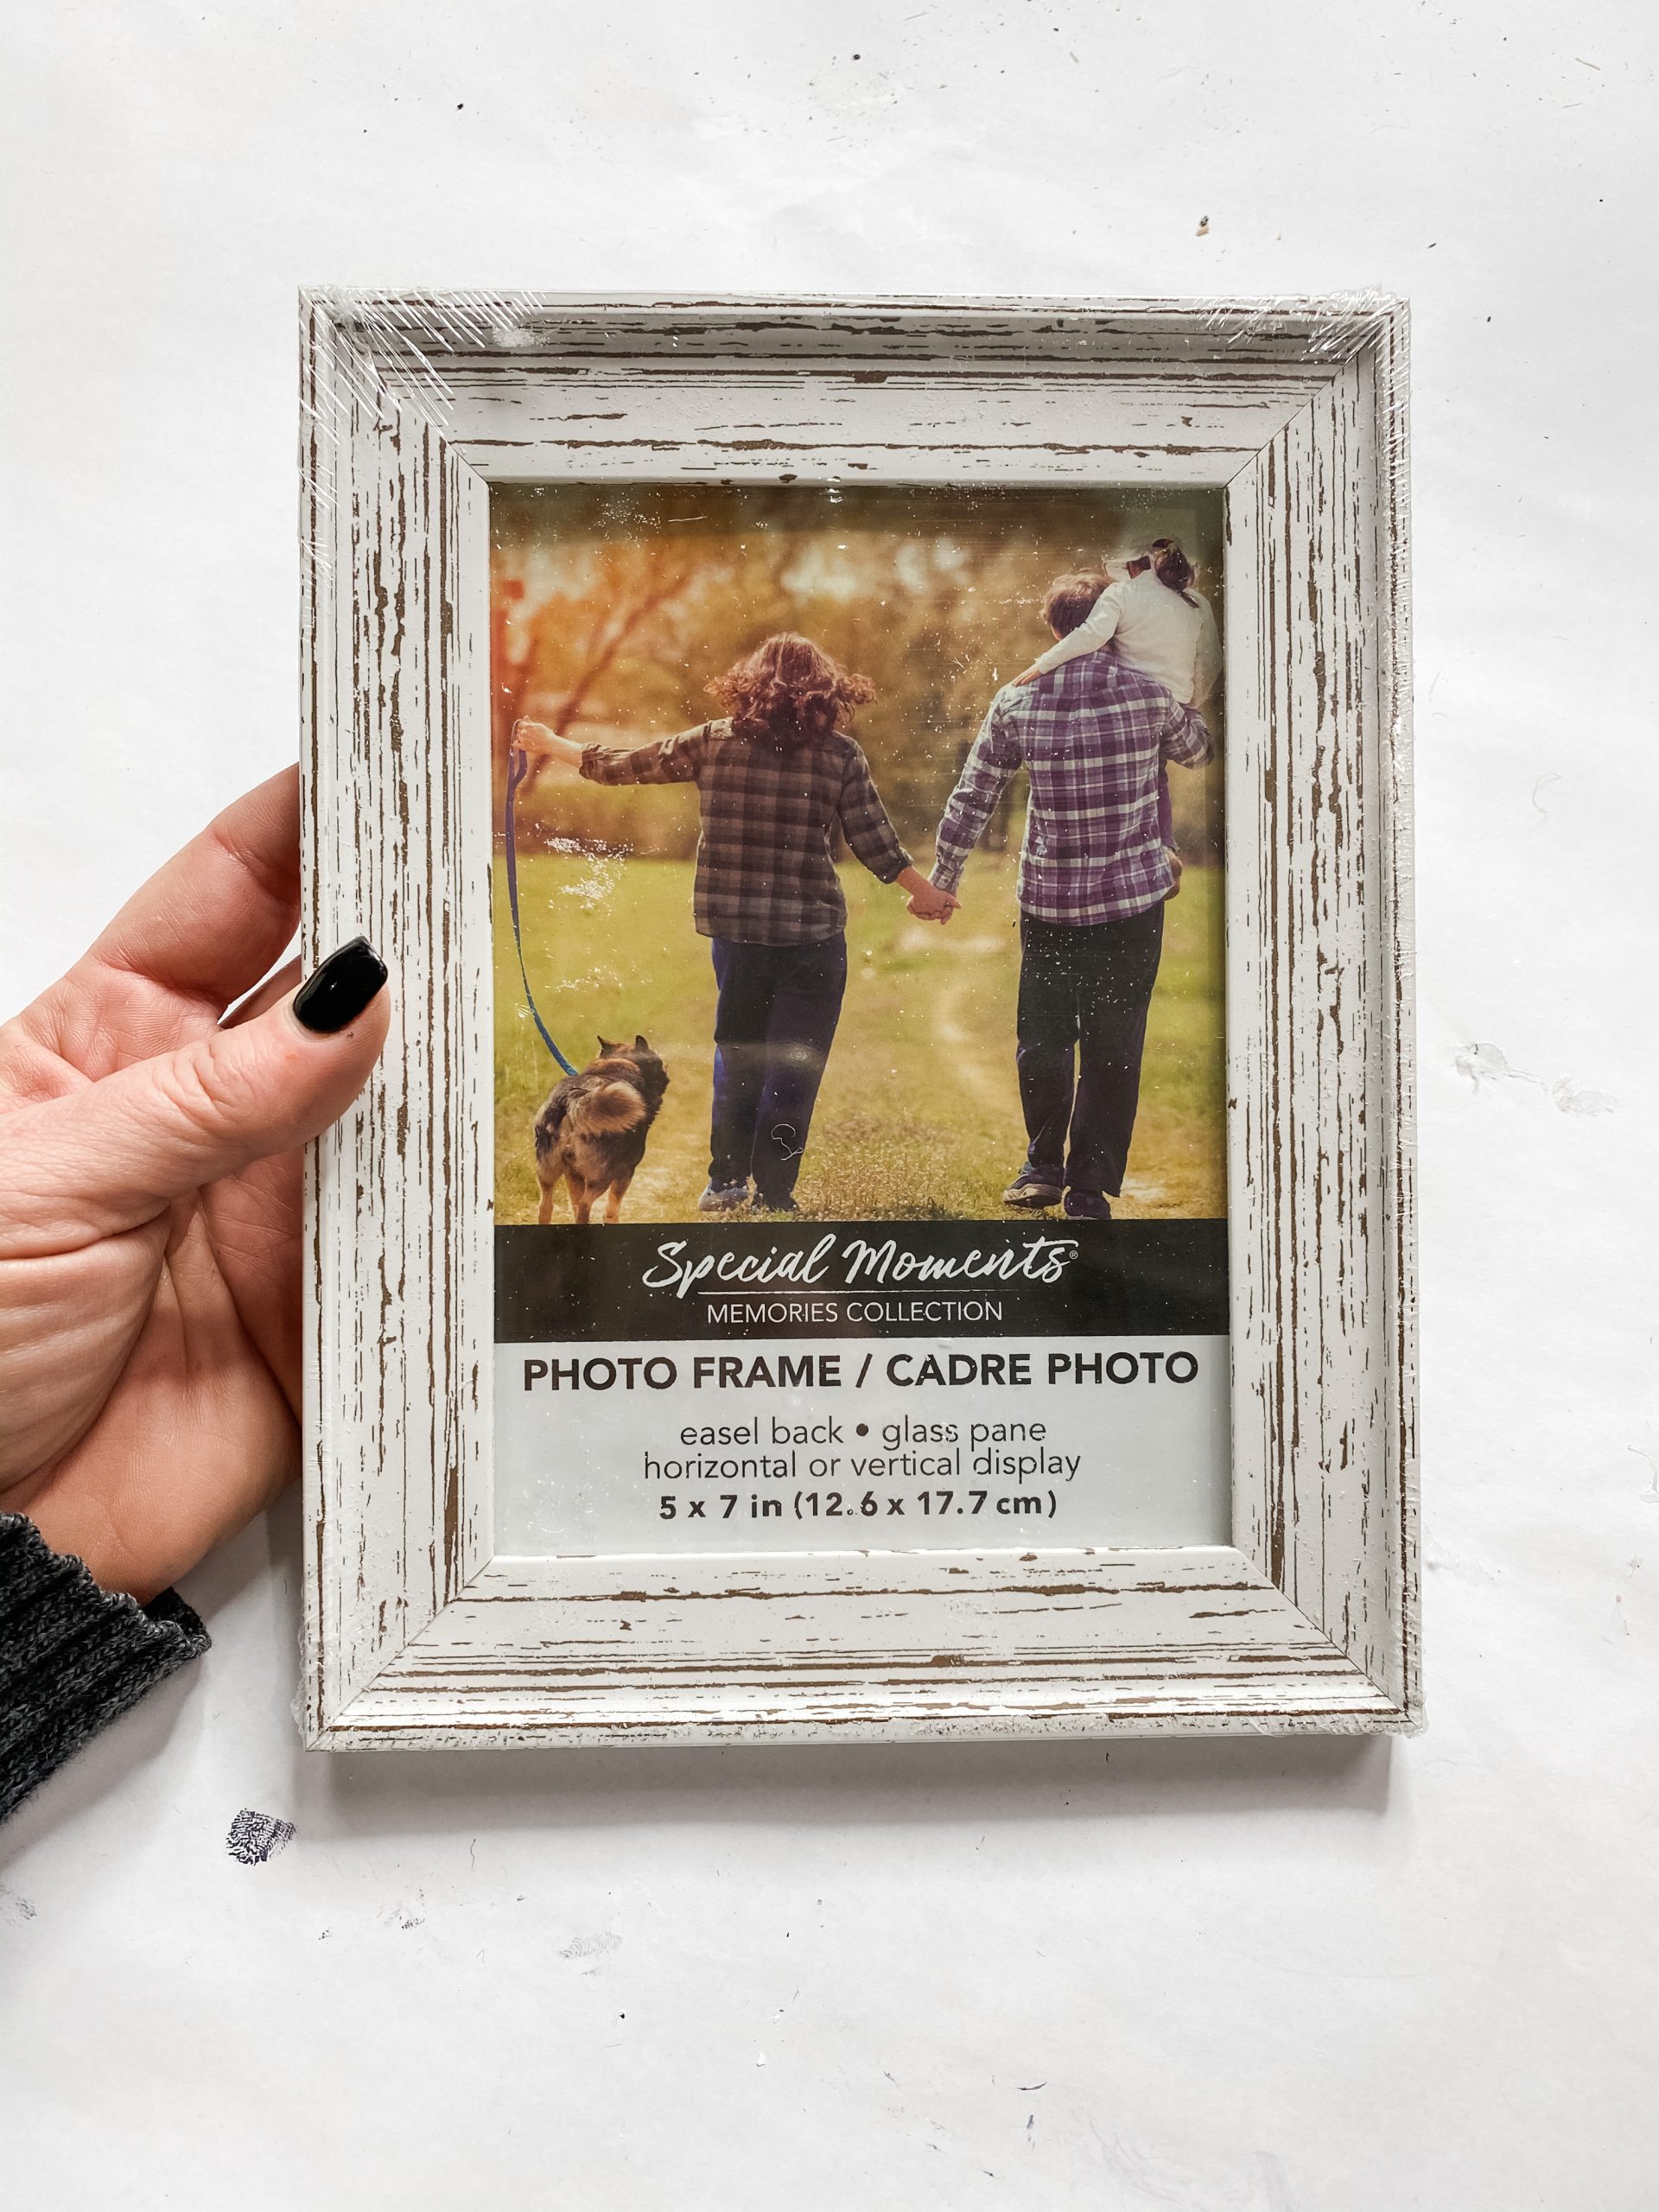
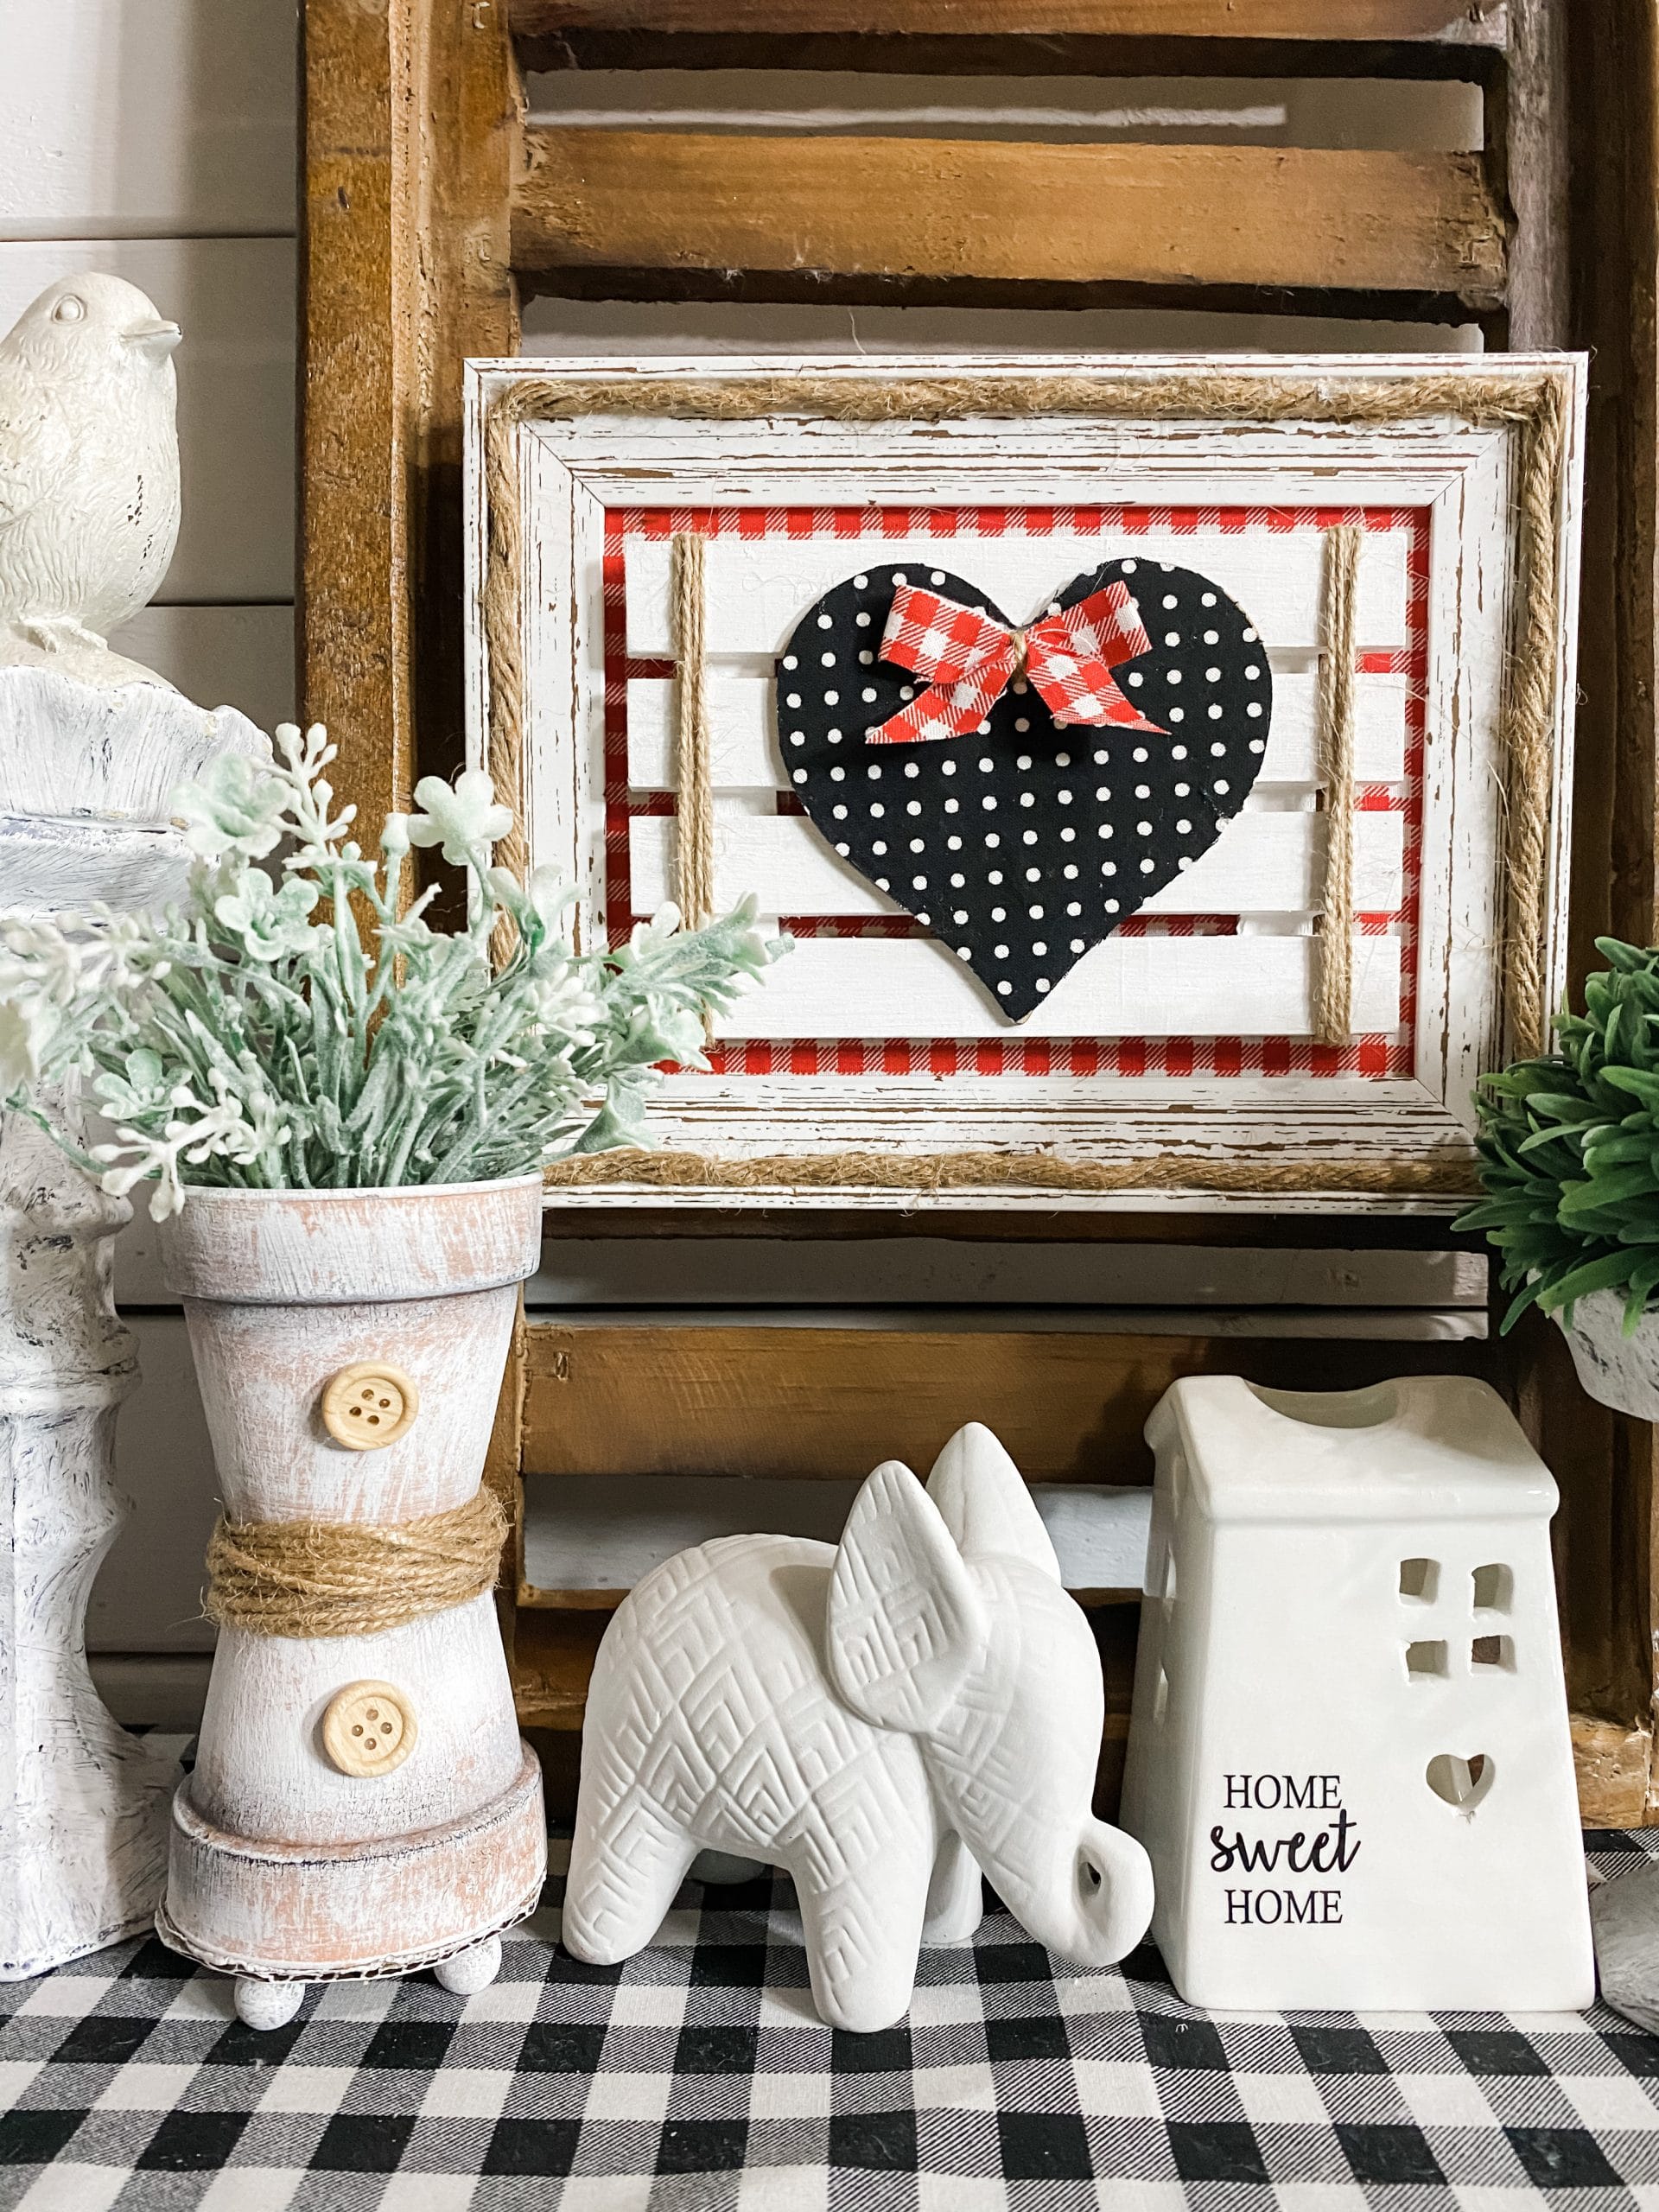
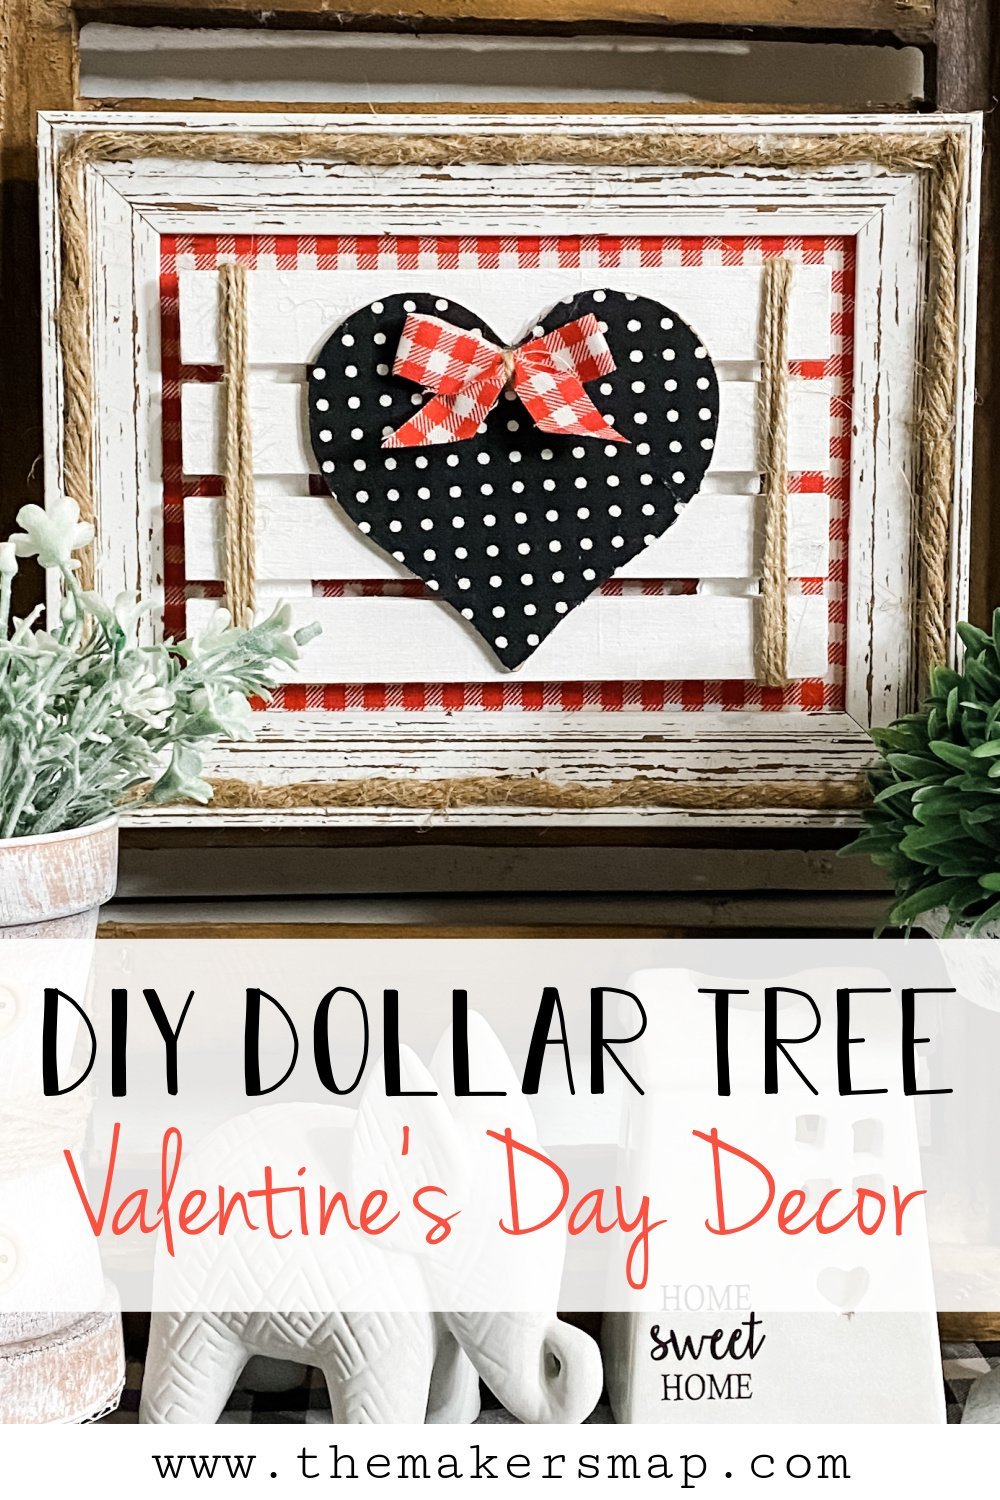
Making this adorable Valentine’s Day decor is so simple, and it all starts with a Dollar Tree picture frame! I used a 5×7 in. plastic picture frame that already had a distressed finish.
If you can’t find this specific picture frame, you can always create your own distressed finish as I did for my Valentine’s Day DIY Love Sign!
Remove the backing and glass insert from the Dollar Tree picture frame, and set the frame to the side. You’re going to decoupage the glass insert of the frame with the red buffalo check fabric.
Next, cut the Dollar Tree fabric to the same size as the picture frame’s glass insert. If the fabric is a little bit too big, don’t panic! It’s easy to take a pair of scissors and trim the edges up after we decoupage the fabric onto the glass.
How to decoupage
To decoupage the red buffalo check fabric onto the picture frame’s glass insert, you’re going to need to apply a coat of Mod Podge to the glass.
Then, carefully place the Dollar Tree red buffalo check fabric cutout onto the glass.
Try to prevent any wrinkles or creases from forming. If there are any wrinkles or creases in the fabric, you can use a rolling pin to smooth them out!
Once the Mod Podge has dried, place the decoupaged glass insert and the backing into the Dollar Tree picture frame.
You can set the frame to the side for now. Next, we are going to work on the Dollar Tree mini pallet.
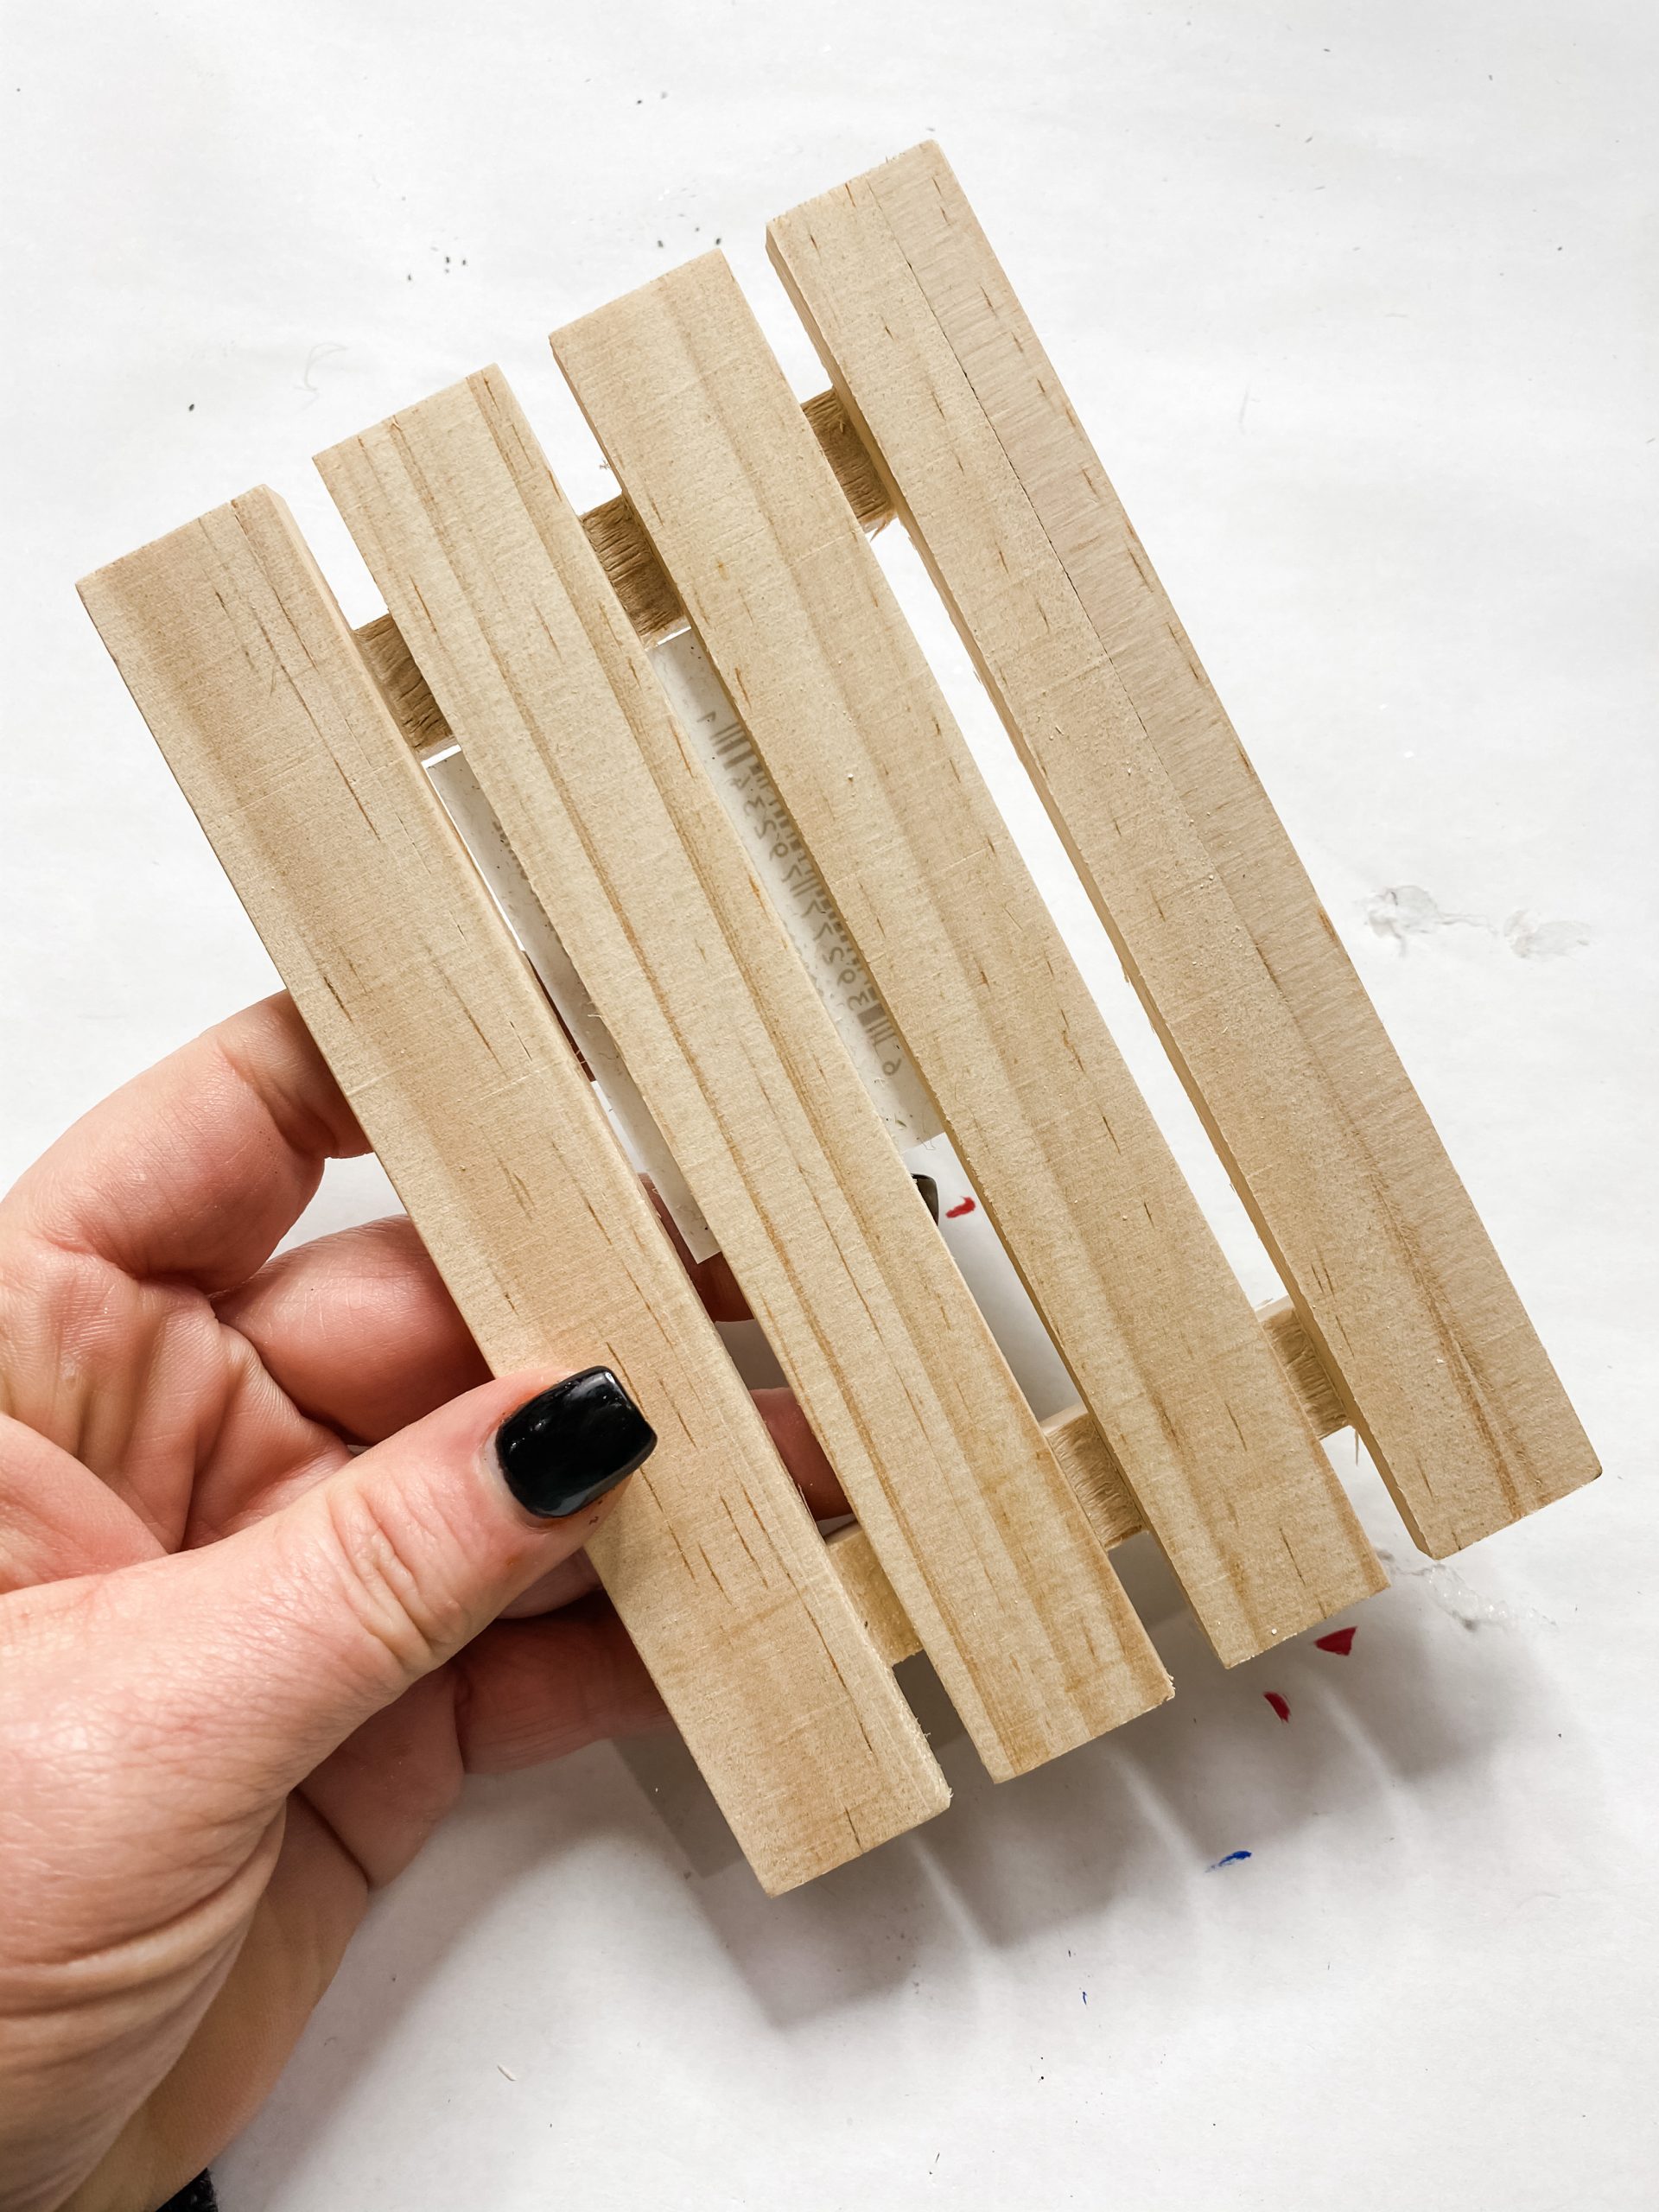
Dollar Tree Mini Pallet
The first thing I did to this cute mini pallet was removed the barcode sticker from the back. If you have trouble pulling the sticker off, you can use a heat gun to melt the adhesive and help the sticker pull off the wood.
Then, I used Folkart White Chalk Paint to paint the Dollar Tree mini pallet white.
If you wanted, you could stain the pallet brown first and then dry brush the white paint across to get a distressed finish that matches the Dollar Tree picture frame.
Decoupaged Wooden Heart
Now, you’re going to decoupage the Dollar Tree wood heart ornament. I decided to decoupage Walmart’s black and white polka dot fabric to the heart.
I felt it complimented the red buffalo check fabric well without being too matchy.
Use the same technique you used when you decoupaged the glass insert. Apply a coat of Mod Podge to the wooden heart and carefully place a piece of black polka dot fabric cut to the size of the wood heart.
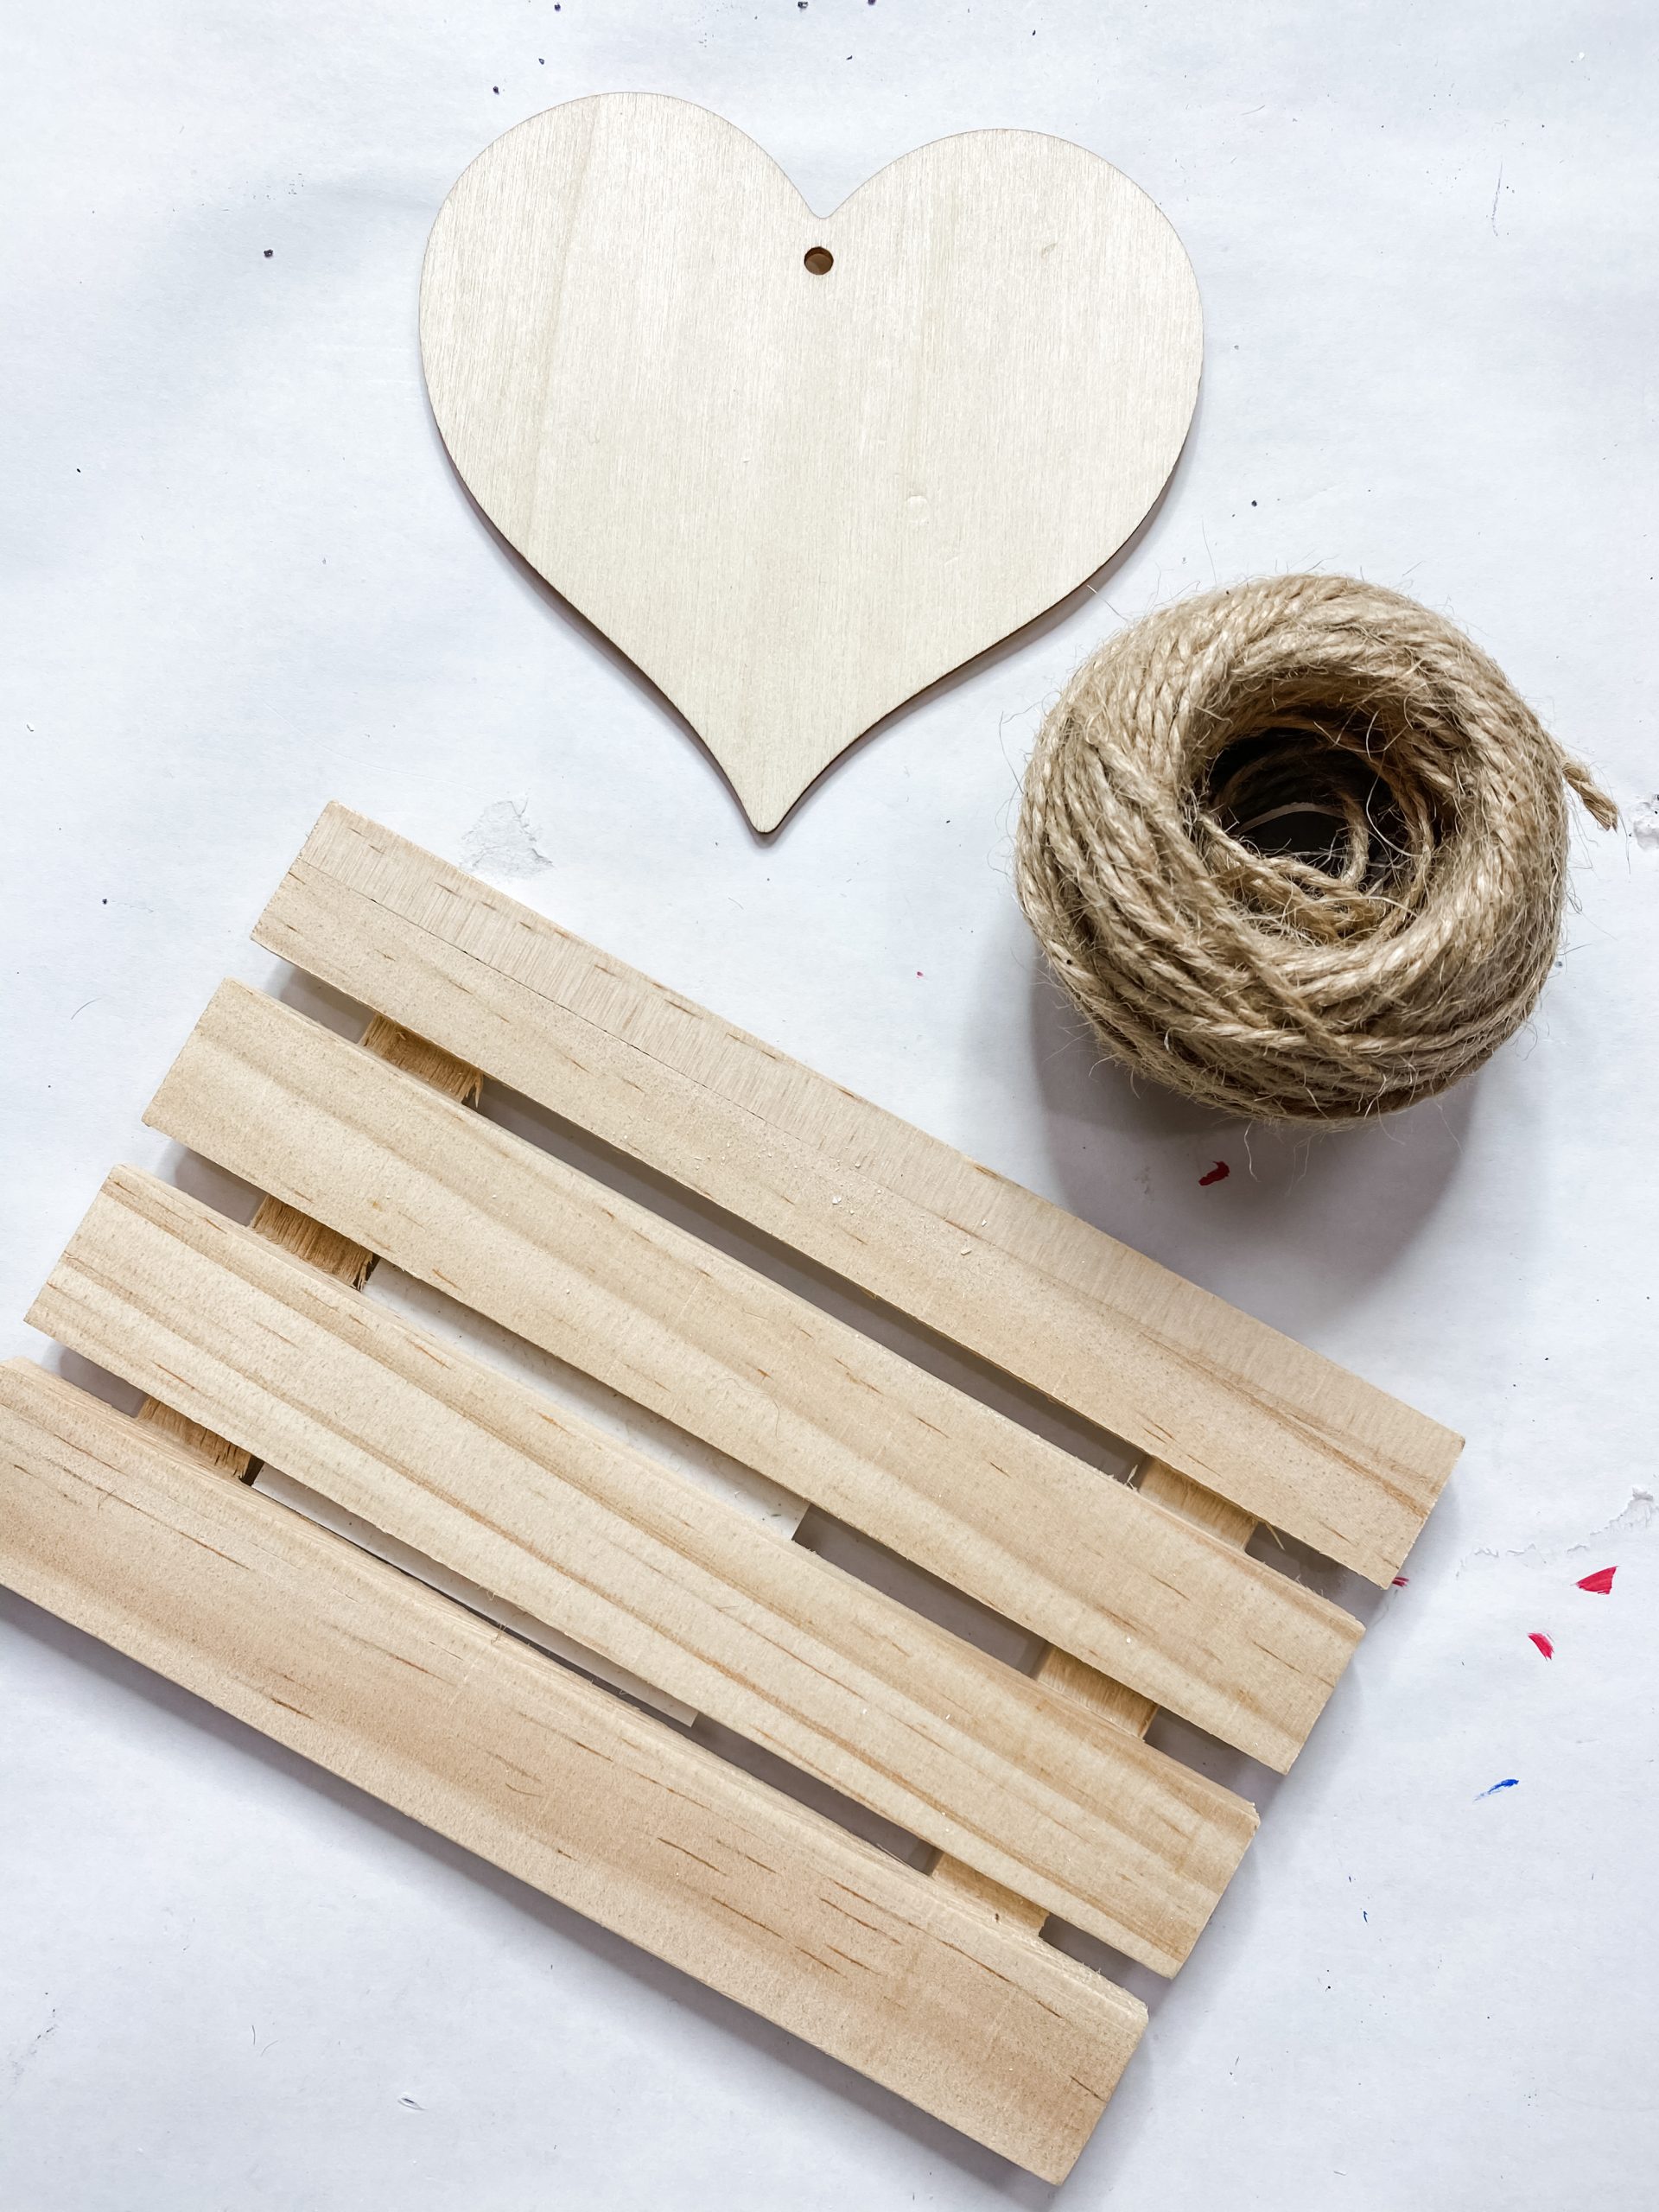
Next, I wrapped some jute twine vertically around the sides of the painted Dollar Tree mini pallet.
You can secure the jute twine with some hot glue once you’re happy with how many times you’ve wrapped it around the pallet.
Once the jute twine is secure on the left and right sides of the mini pallet, I simply hot glued the pallet to the center of the Dollar Tree picture frame.
Then, hot glue the decoupaged wood heart onto the center of the painted Dollar Tree mini pallet.

The finishing touches
We are almost done creating this adorable DIY Dollar Tree Mini Pallet Valentine’s Day Decor! The next thing I did to this simple Valentine’s Day DIY was added Dollar Tree nautical rope to the Dollar Tree picture frame.
I hot glued a piece of nautical rope onto the face of the picture frame to add to the dimension of this easy DIY decor.
The final thing I did for this cute Valentine’s Day decor was made a bow from the Dollar Tree red buffalo check fabric and jute twine. Cut a thin strand of the fabric, and fold it into the shape of a bow.
Pinch the center and secure it with a piece of jute twine. Finally, trim the tails, and hot glue the DIY fabric bow onto the decoupaged Dollar Tree wood heart!
I hope you enjoyed this DIY Dollar Tree Mini Pallet Valentine’s Day Decor as much as I did and decide to make one for yourself! I would love to see how yours turns out!
You should totally join my FREE Facebook group called On A Budget Crafts! It is a judgment-free community for DIY crafters to show off their projects and ideas.
Tell me what you want!
I want your suggestions/requests for printable designs or ideas! Fill out the form below with your requests!
If you loved this DIY you might also like this DIY Home Decor with FREE Valentine’s Day Printable!
Thanks for stopping by! XOXO Amber
You can also shop my ENTIRE AMAZON Favorites shop just click here! It’s packed full of all the things I use and love. Here is the supply list I highly recommend every creative have on hand!!
Would you also pin my blog for later and get on my newsletter alerts? I would love to have you join my #craftycrew.
Inspired? Leave me a comment below! I love hearing from my readers!

Join my free “ON A BUDGET CRAFTS” Facebook group!


What size picture frame?
That is so cute! Trying it real soon with my granddaughter!
So darling