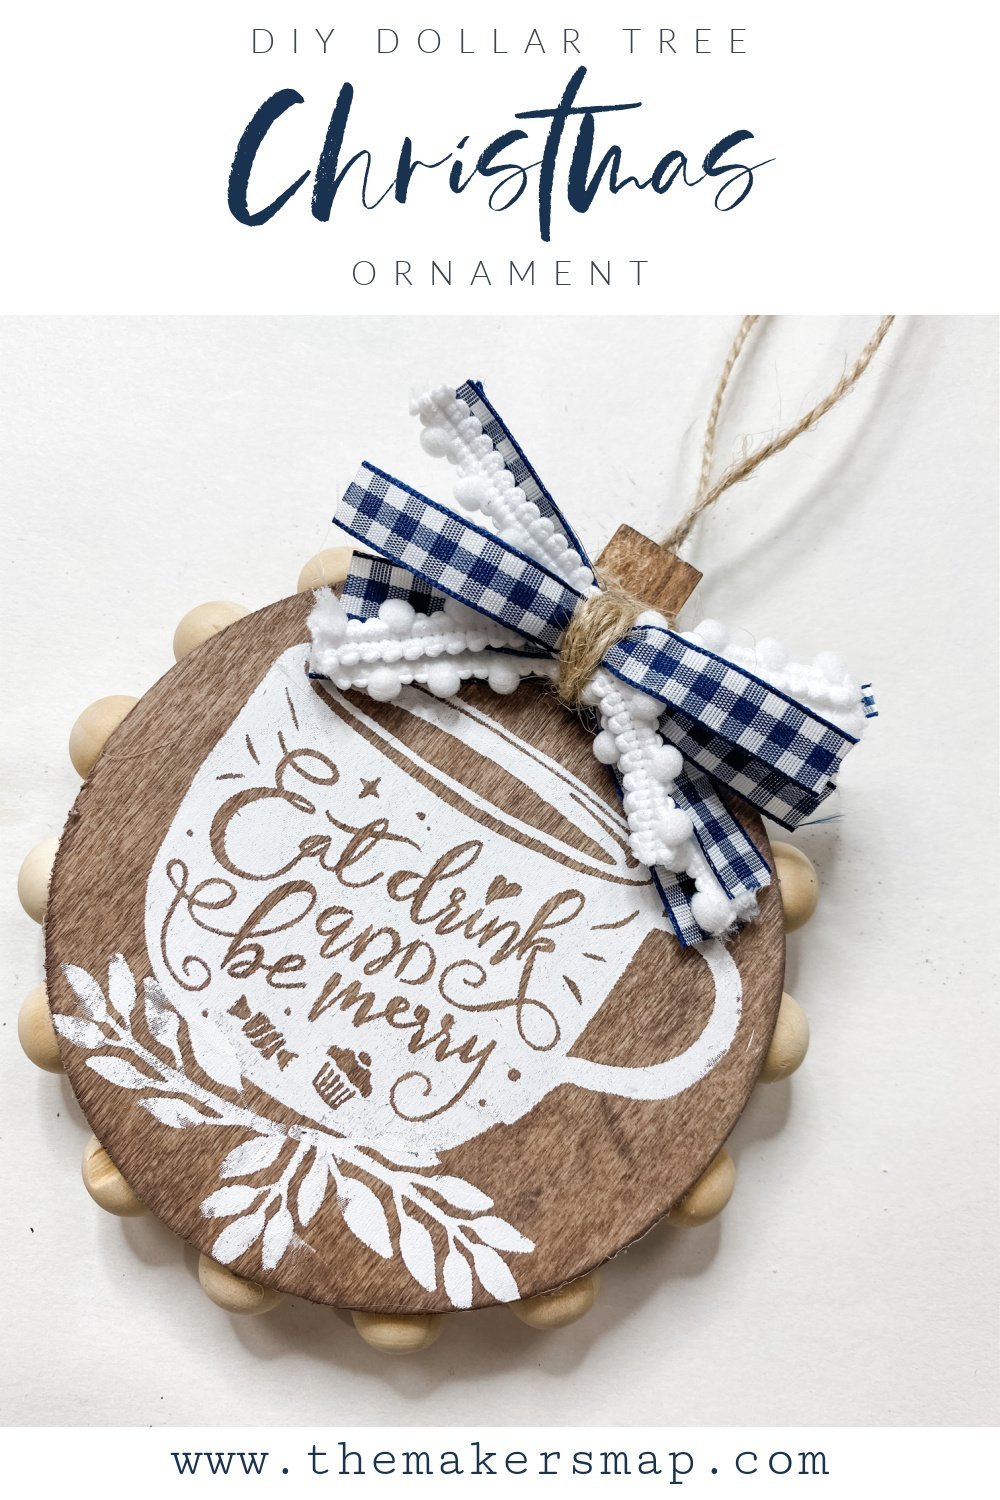
DIY Dollar Tree Christmas Stencil Ornament
If you know me you know that I’m crazy about both Christmas and coffee! That’s why I’m so excited to combine both of them with this DIY Dollar Tree Christmas Stencil Ornament! It is easy to make and looks super cute hanging on any tree!
Watch the replay
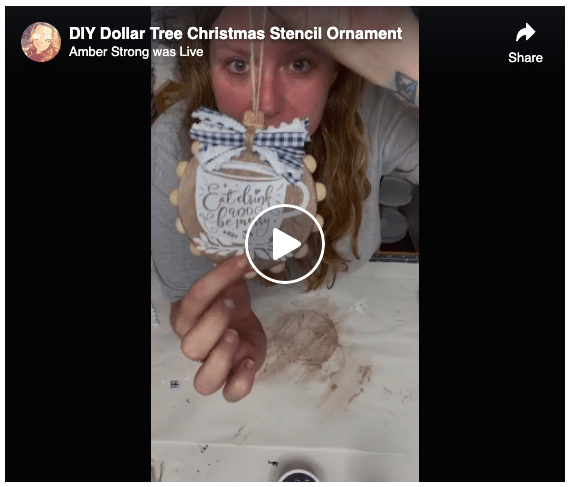
If you want to see the step by step tutorial of how to make this super cute DIY Dollar Tree Christmas Stencil Ornament, you can watch the Facebook Replay! I love doing crafts on Facebook Live so y’all can watch and craft along with me!
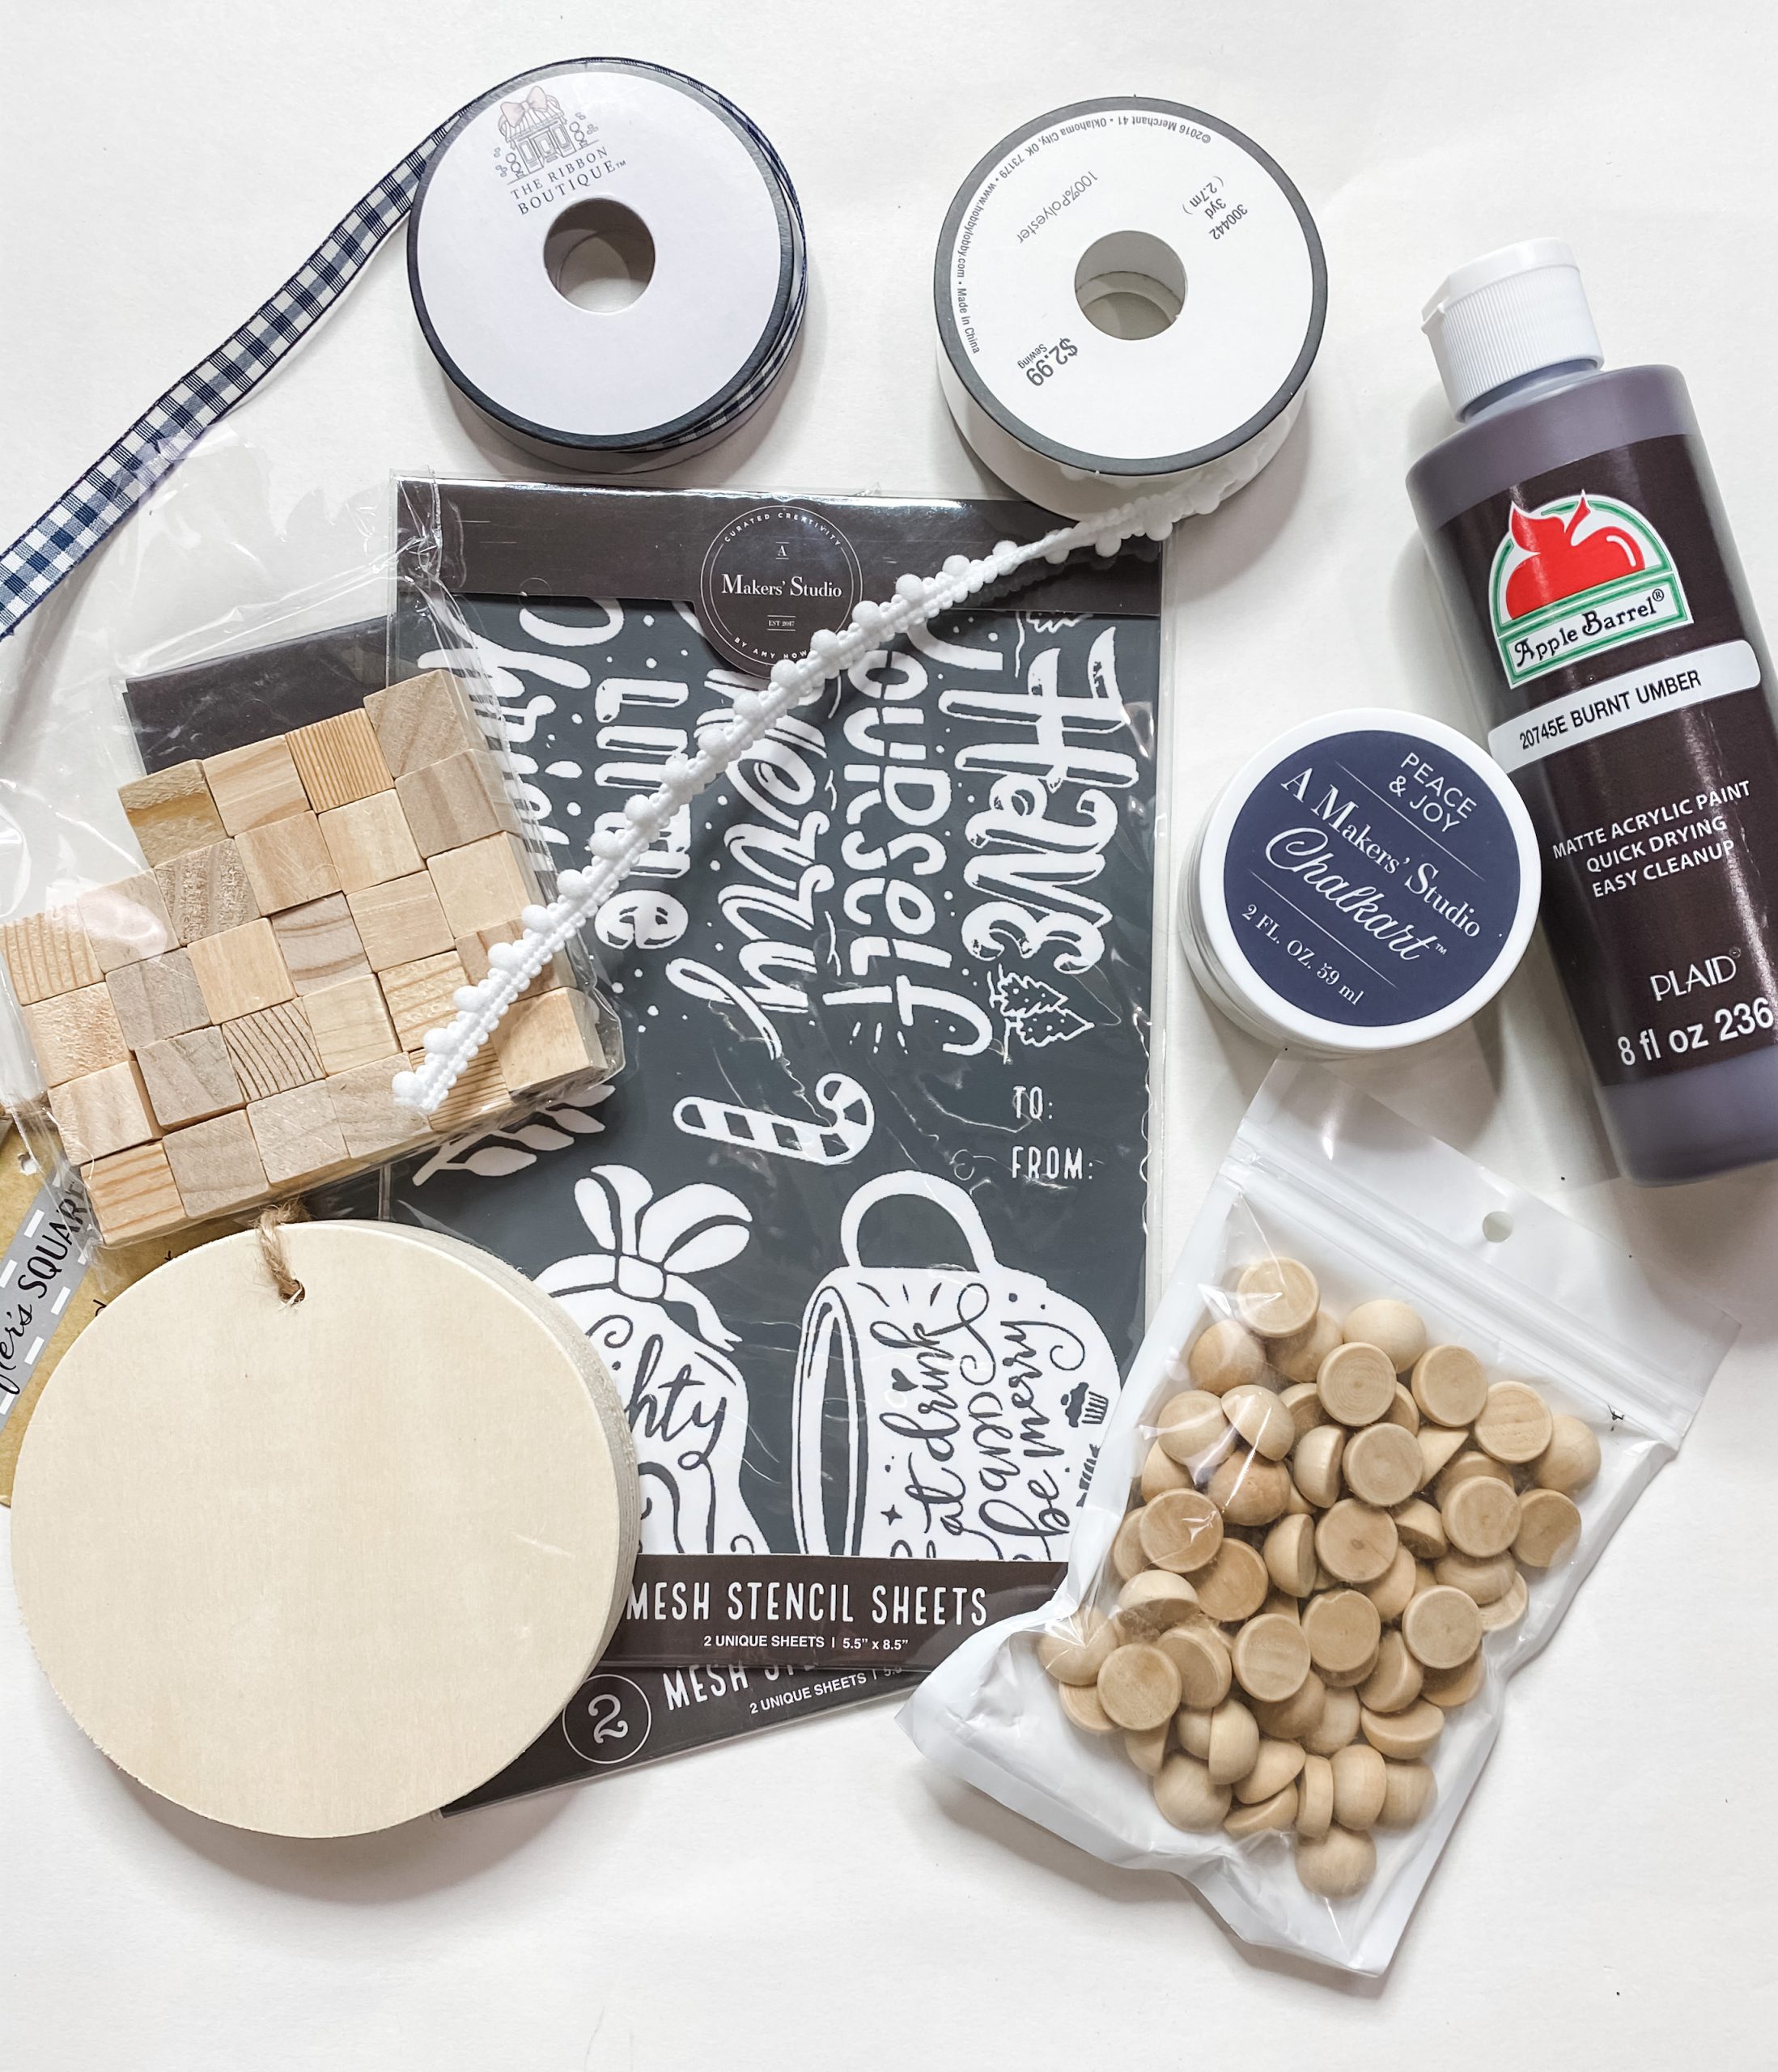
For this project, I will be using these items but you can substitute where you want.
“As an Amazon Associate, I earn from qualifying purchases.”
- Apple Barrel Burnt Umber Acrylic Paint
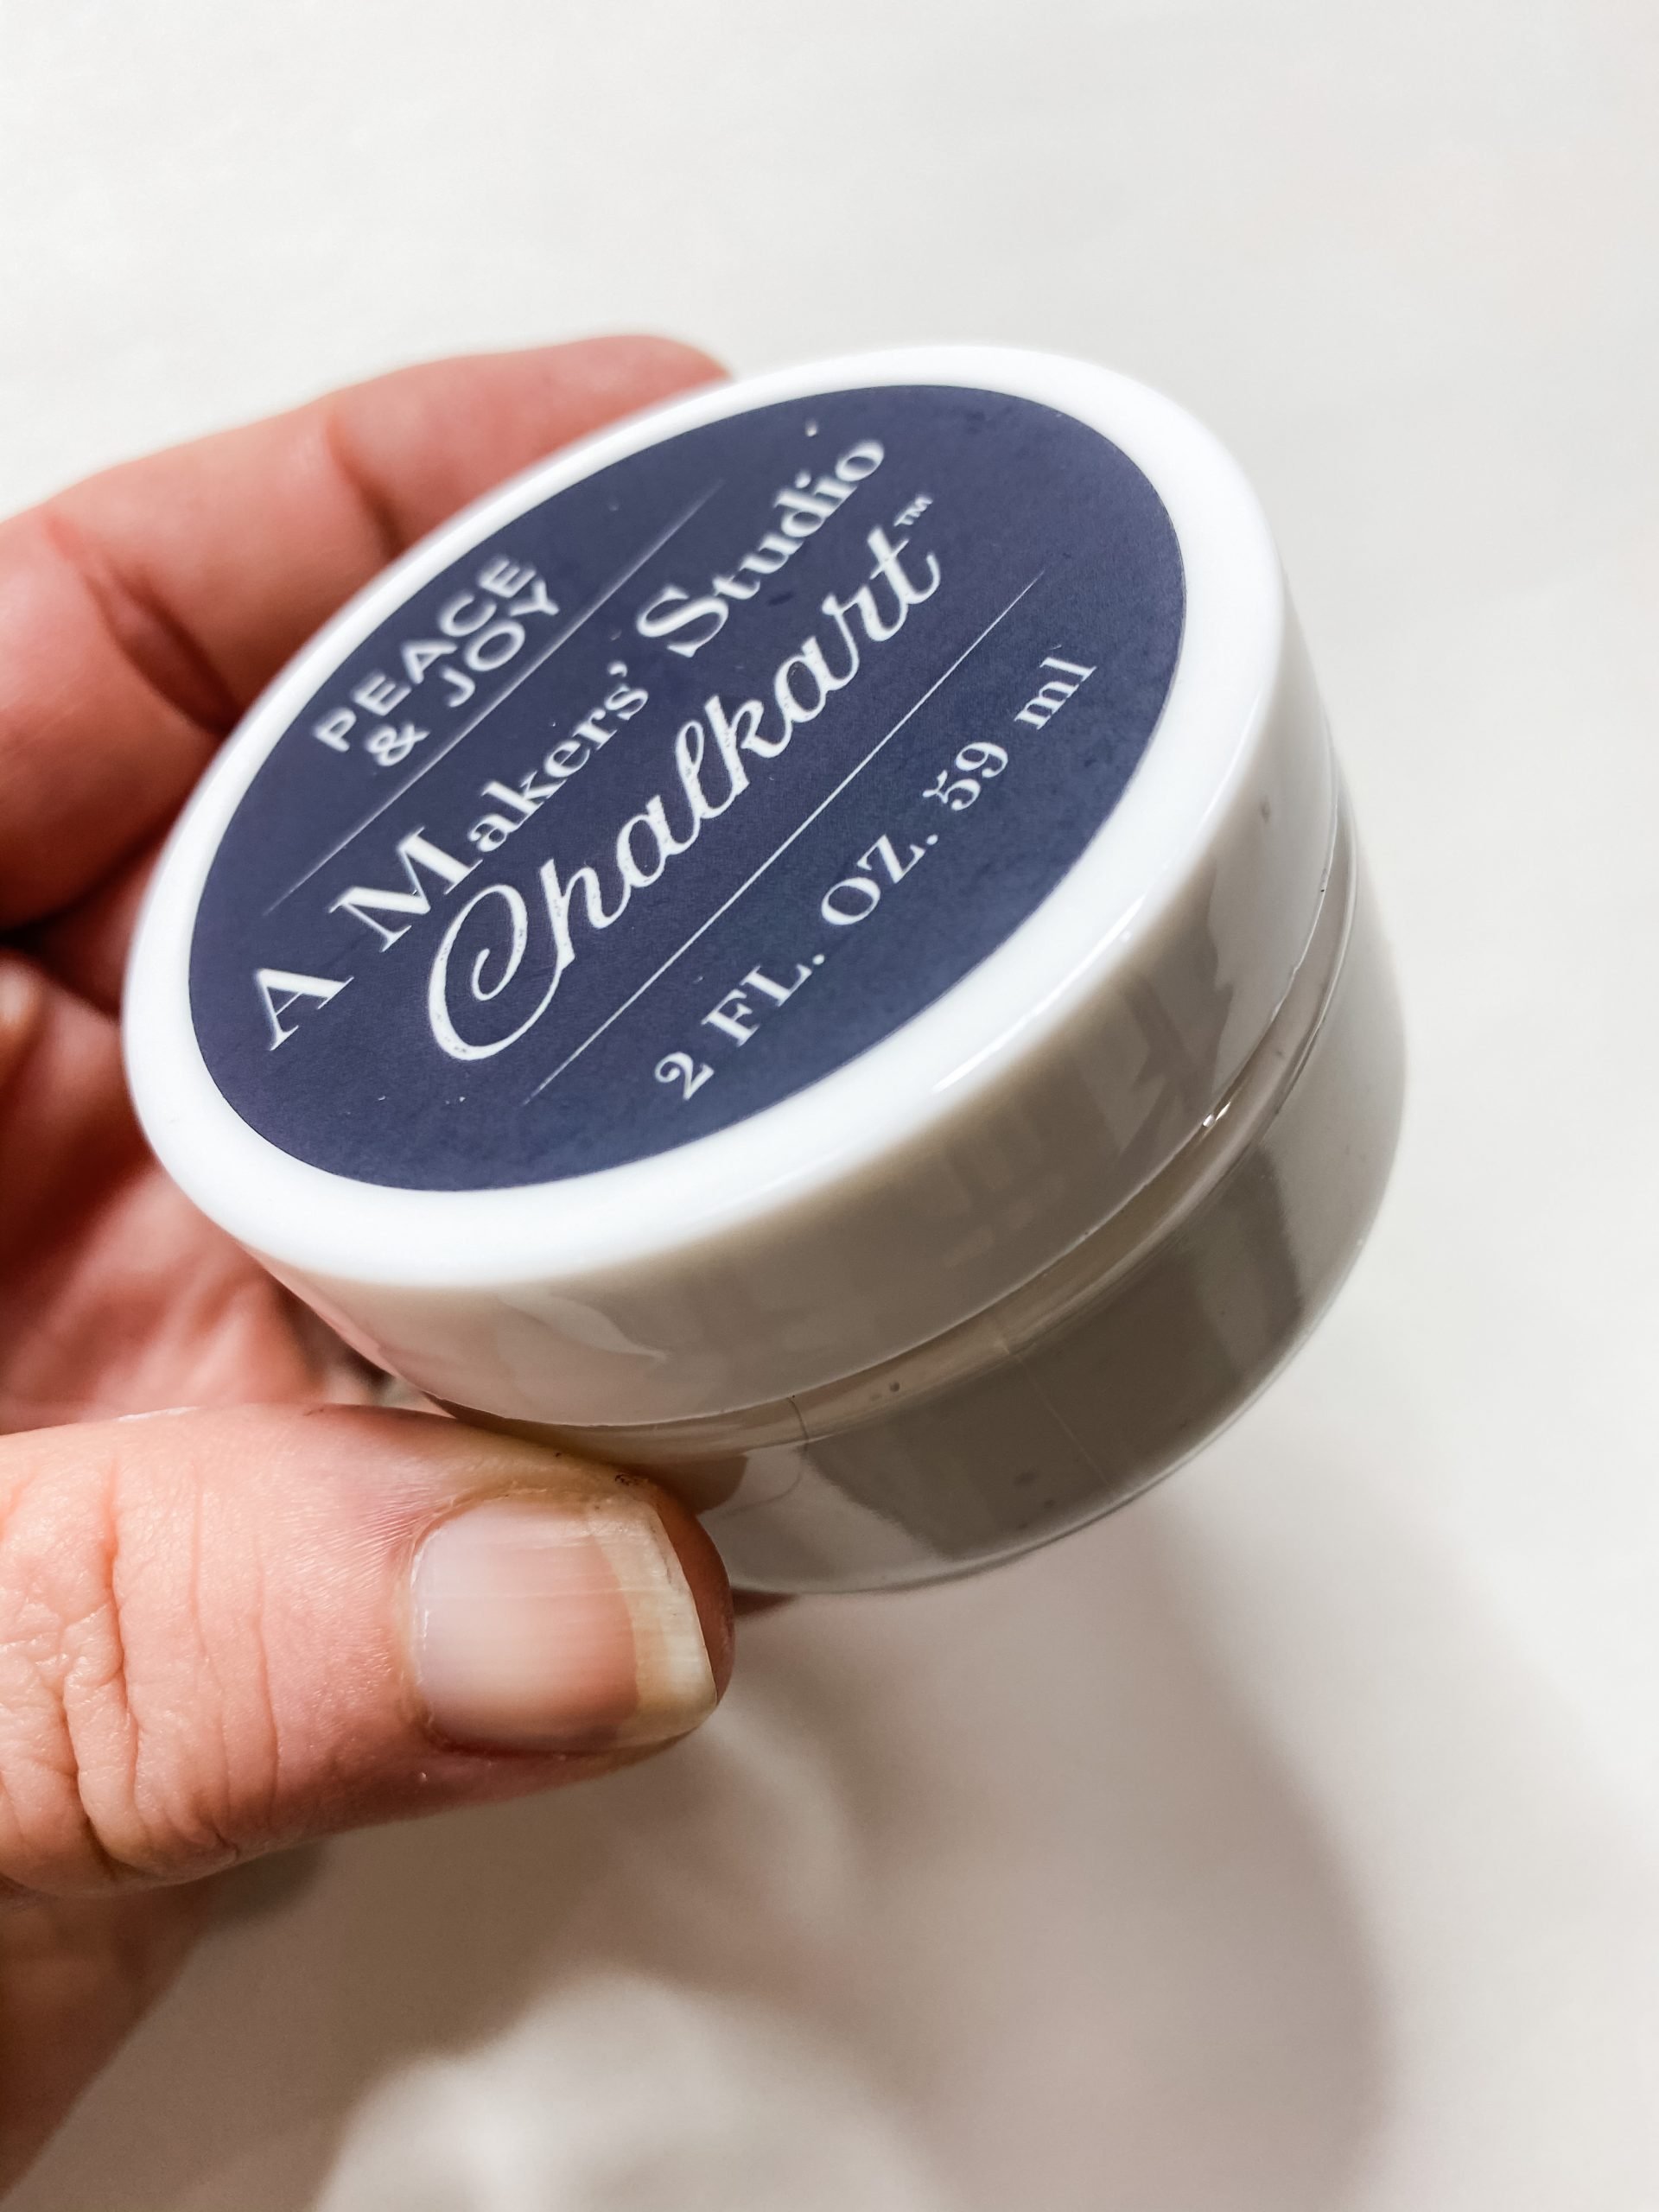
- A Maker’s Studio White Chalk Paste
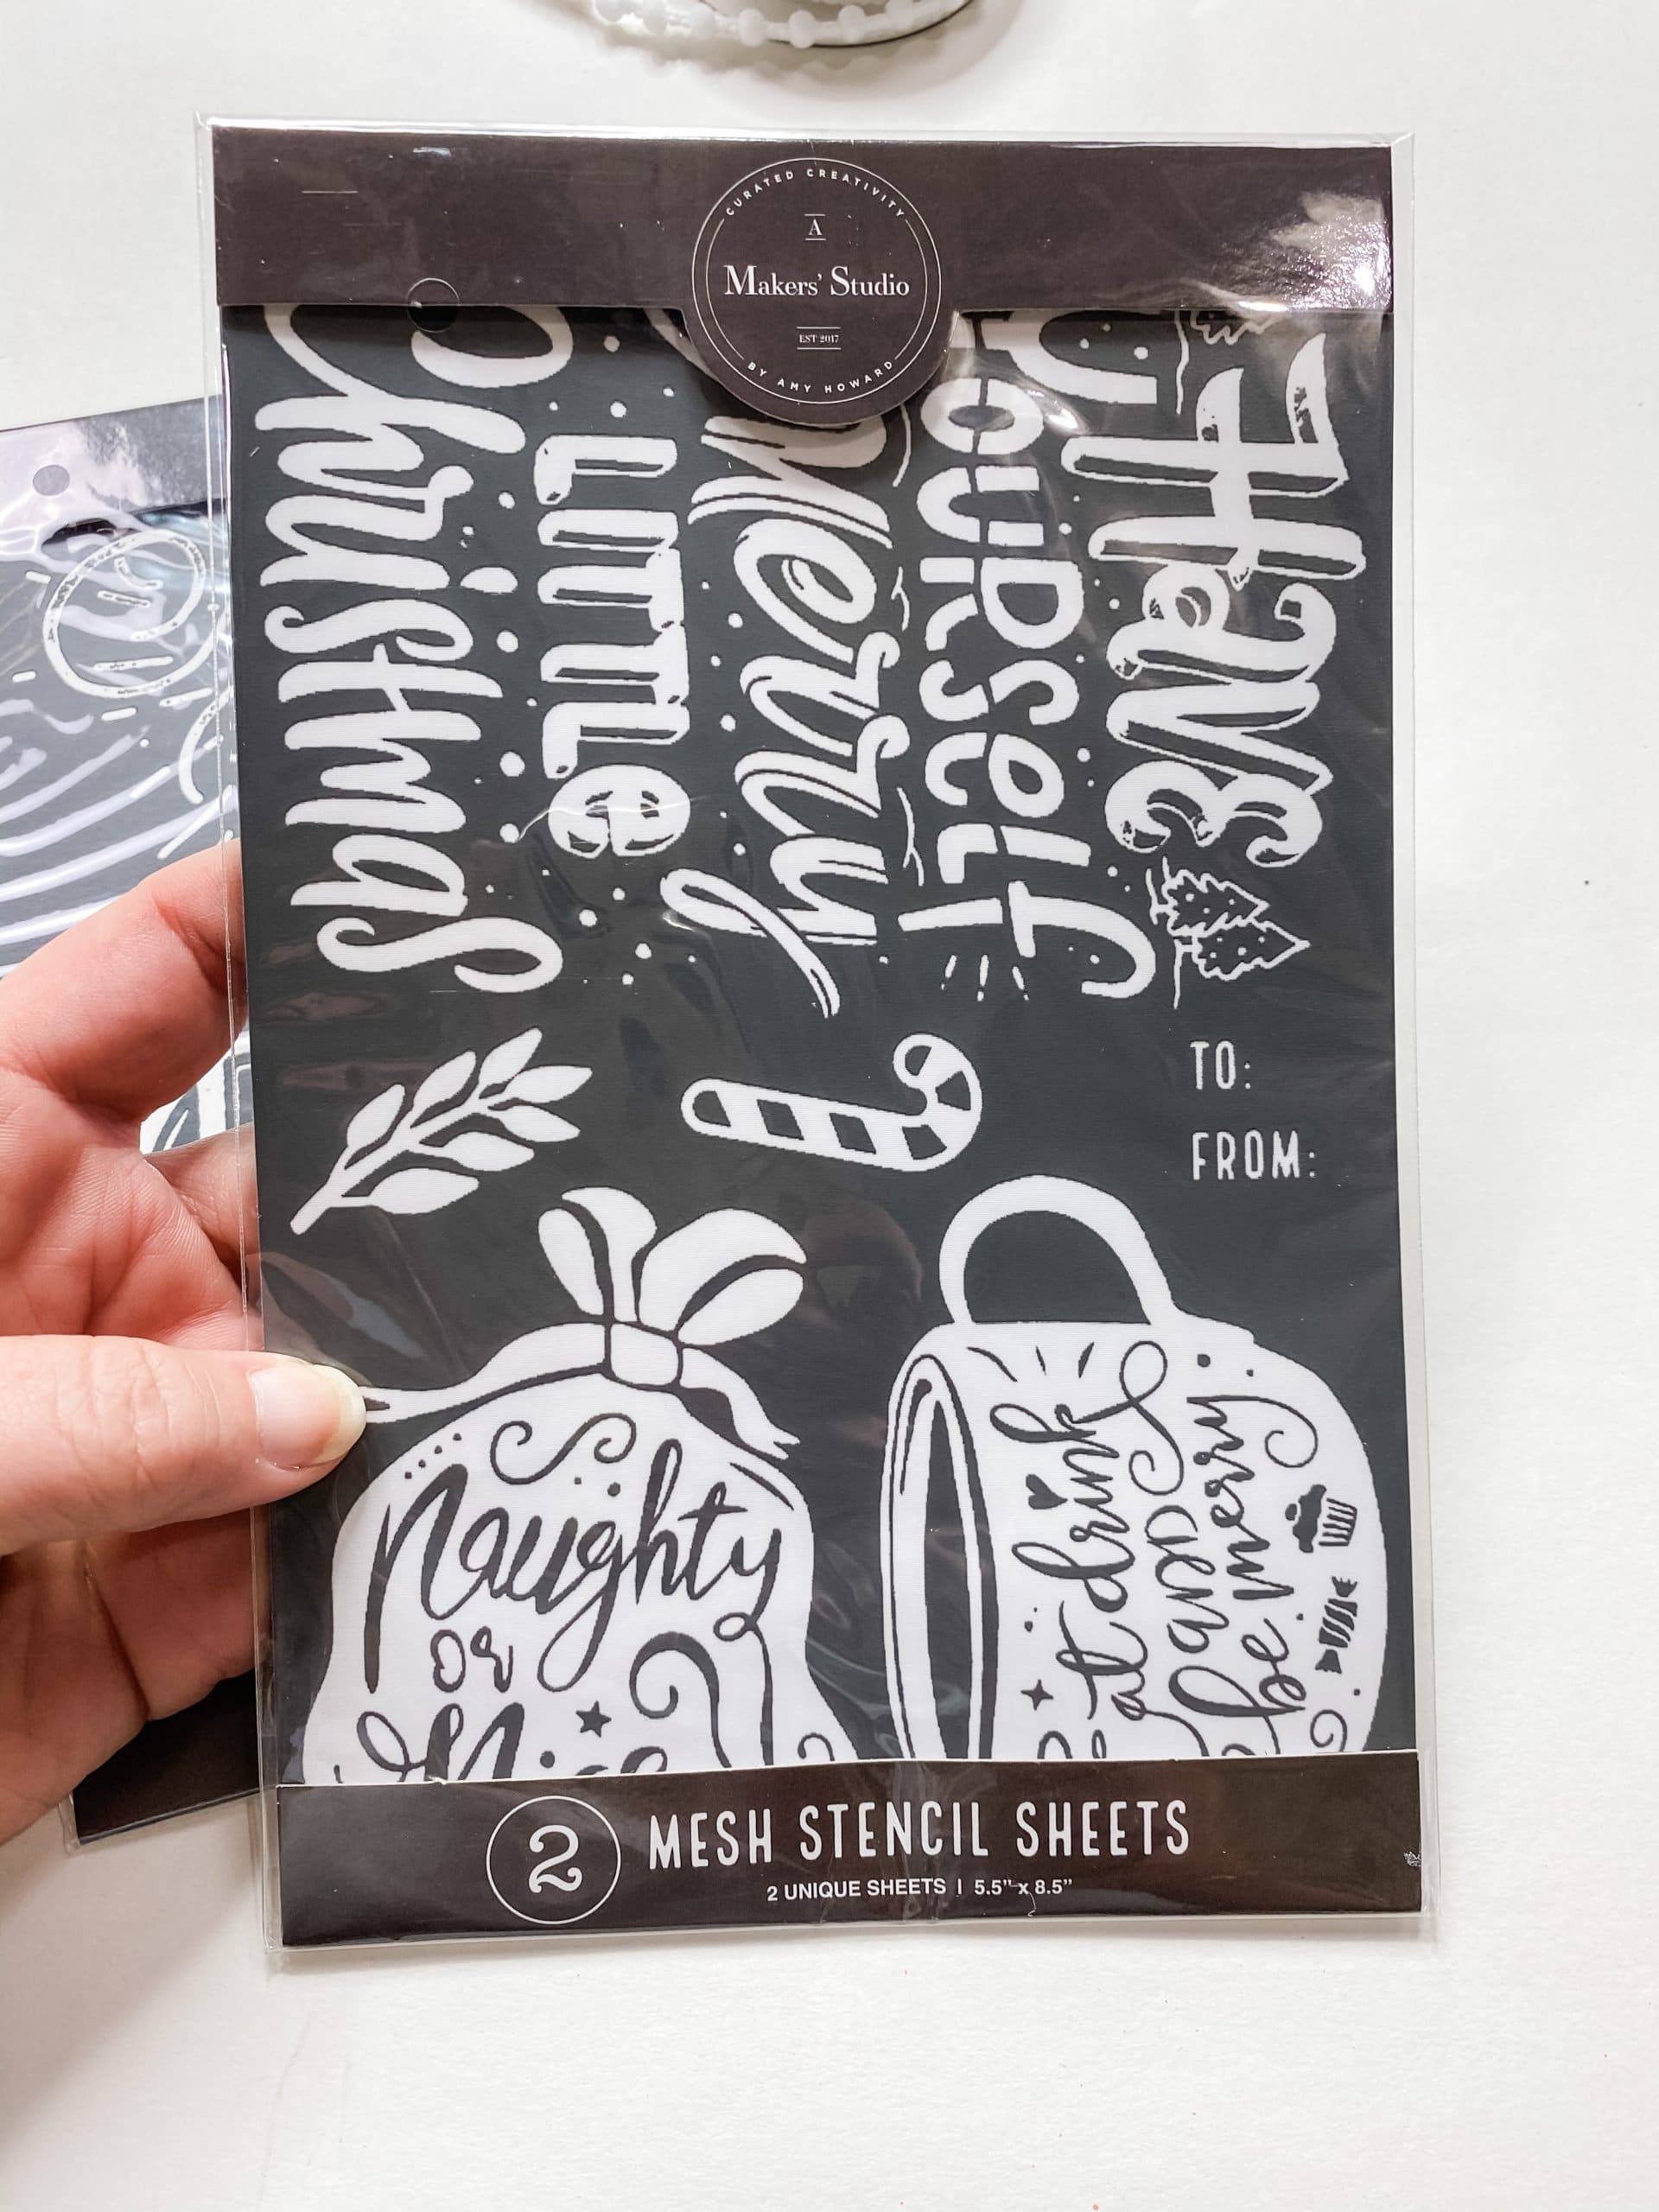
- A Maker’s Studio Stencil
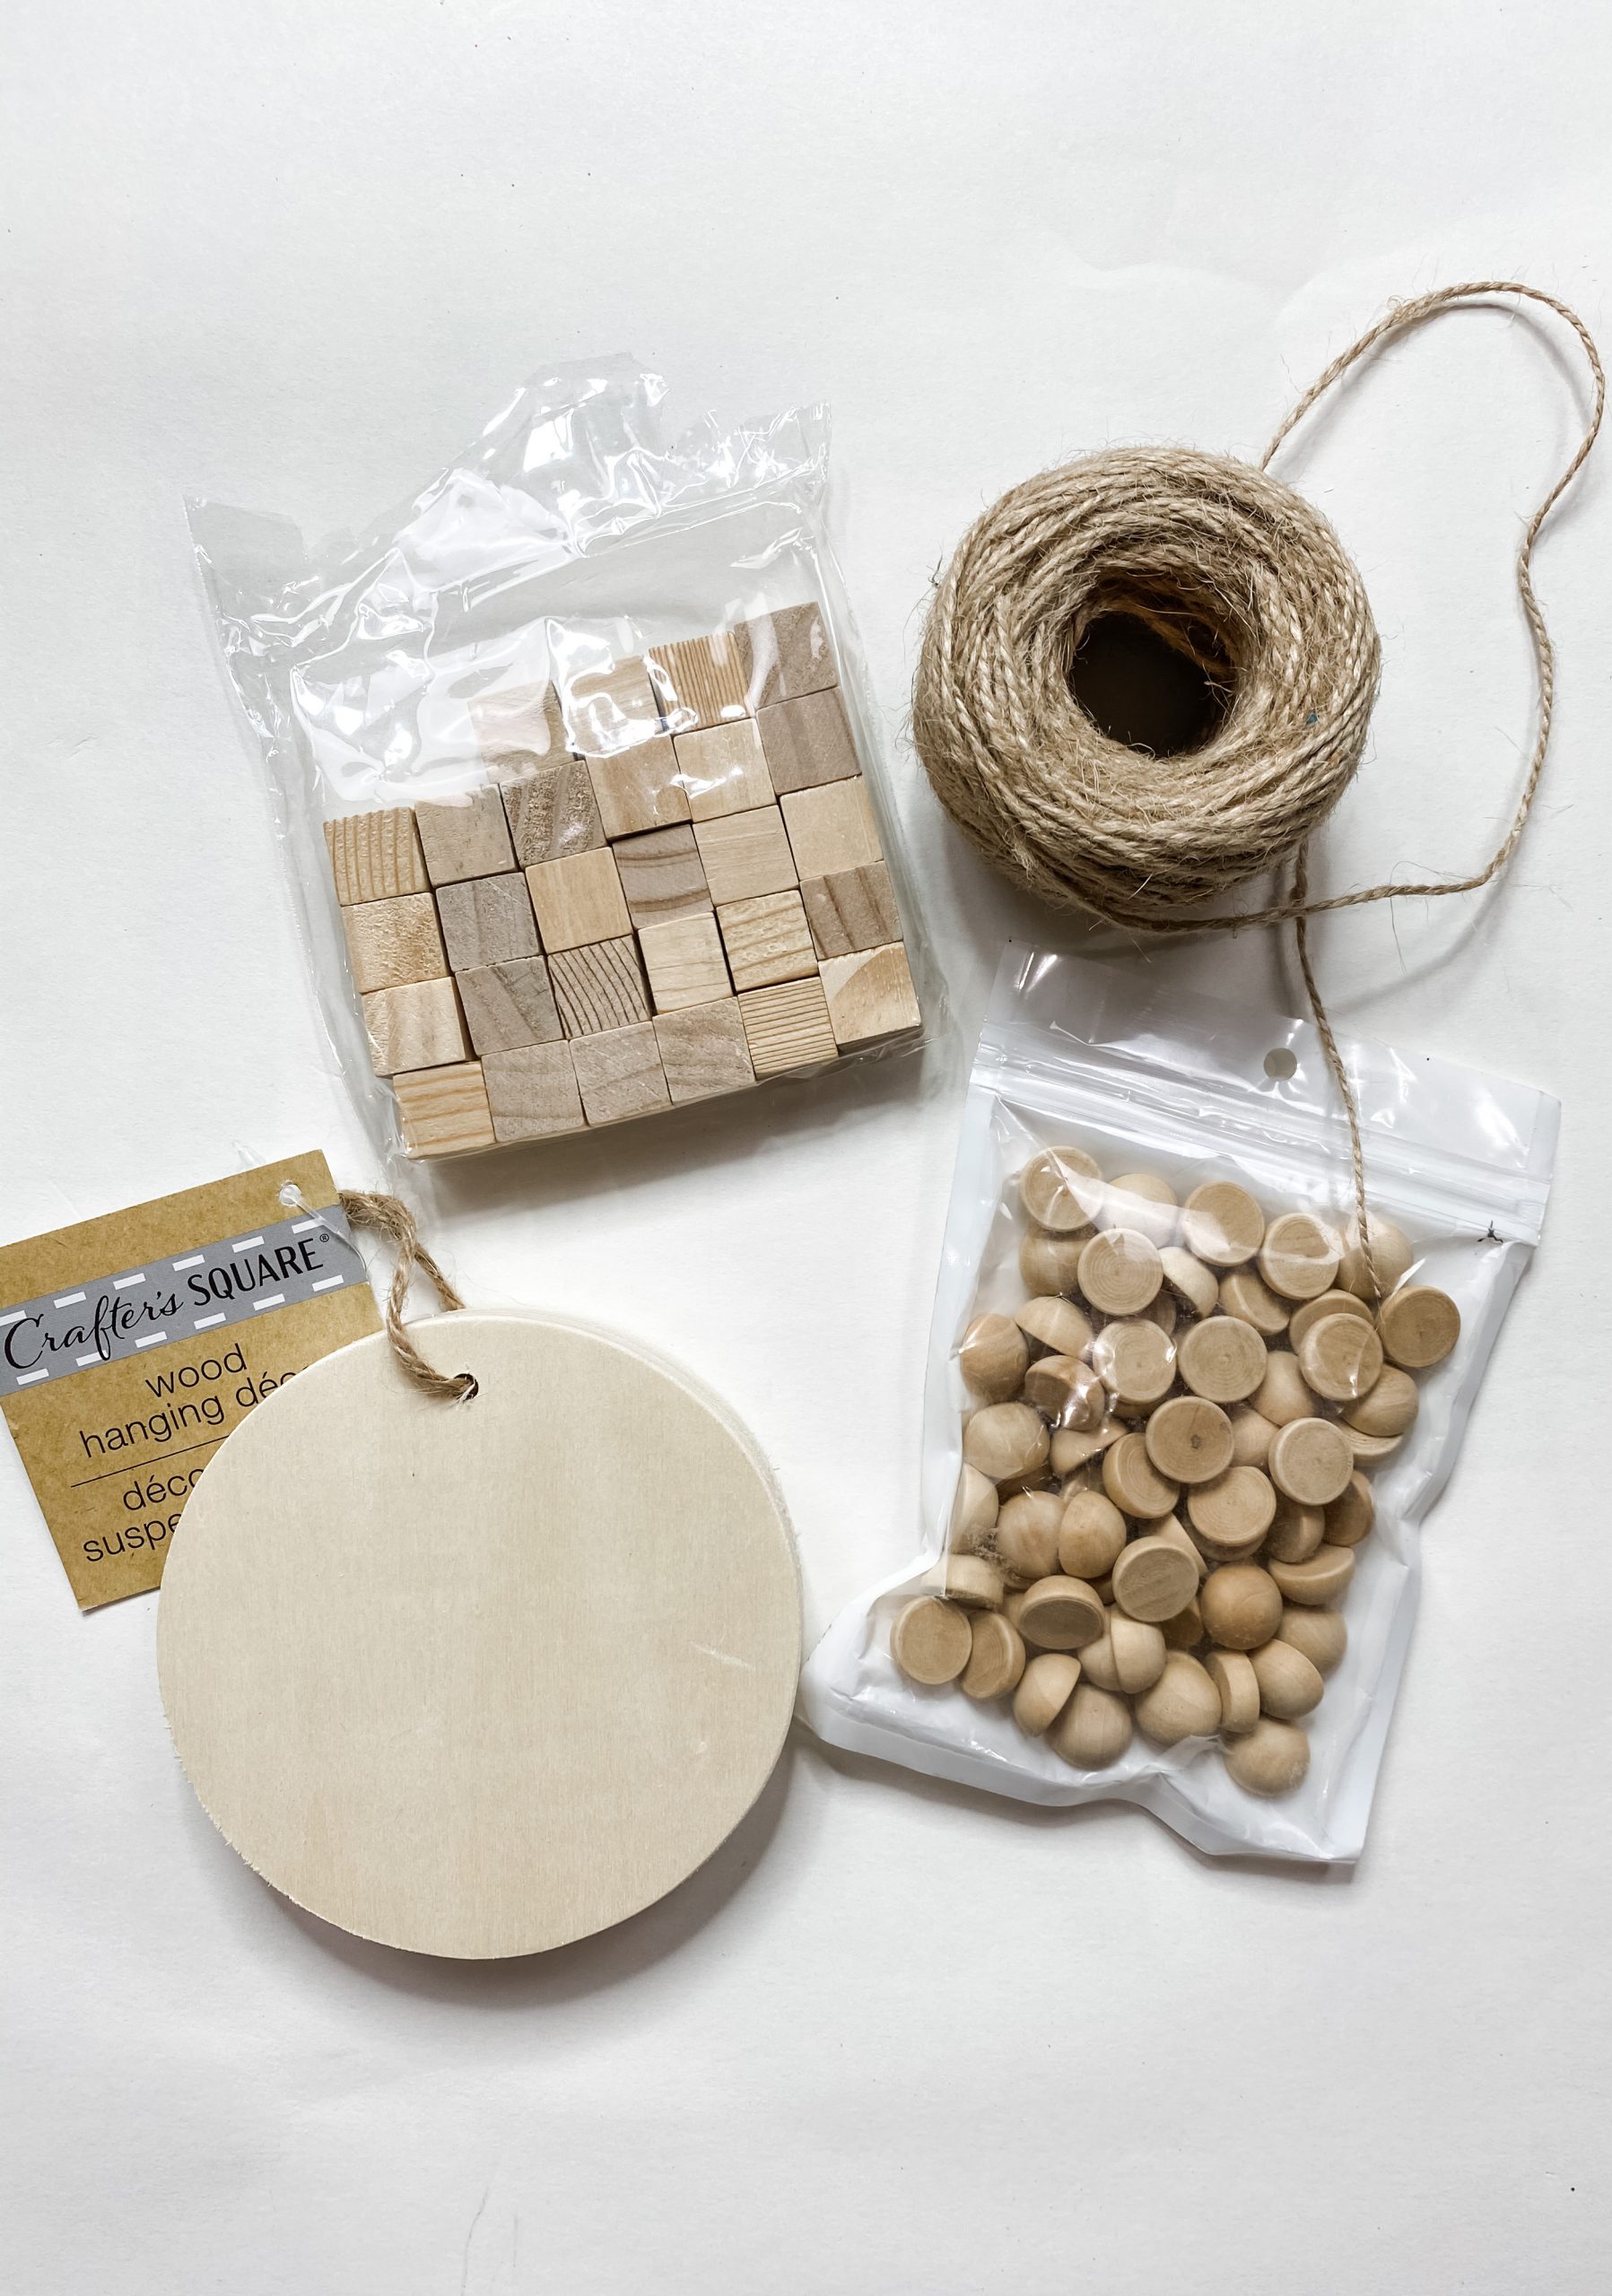
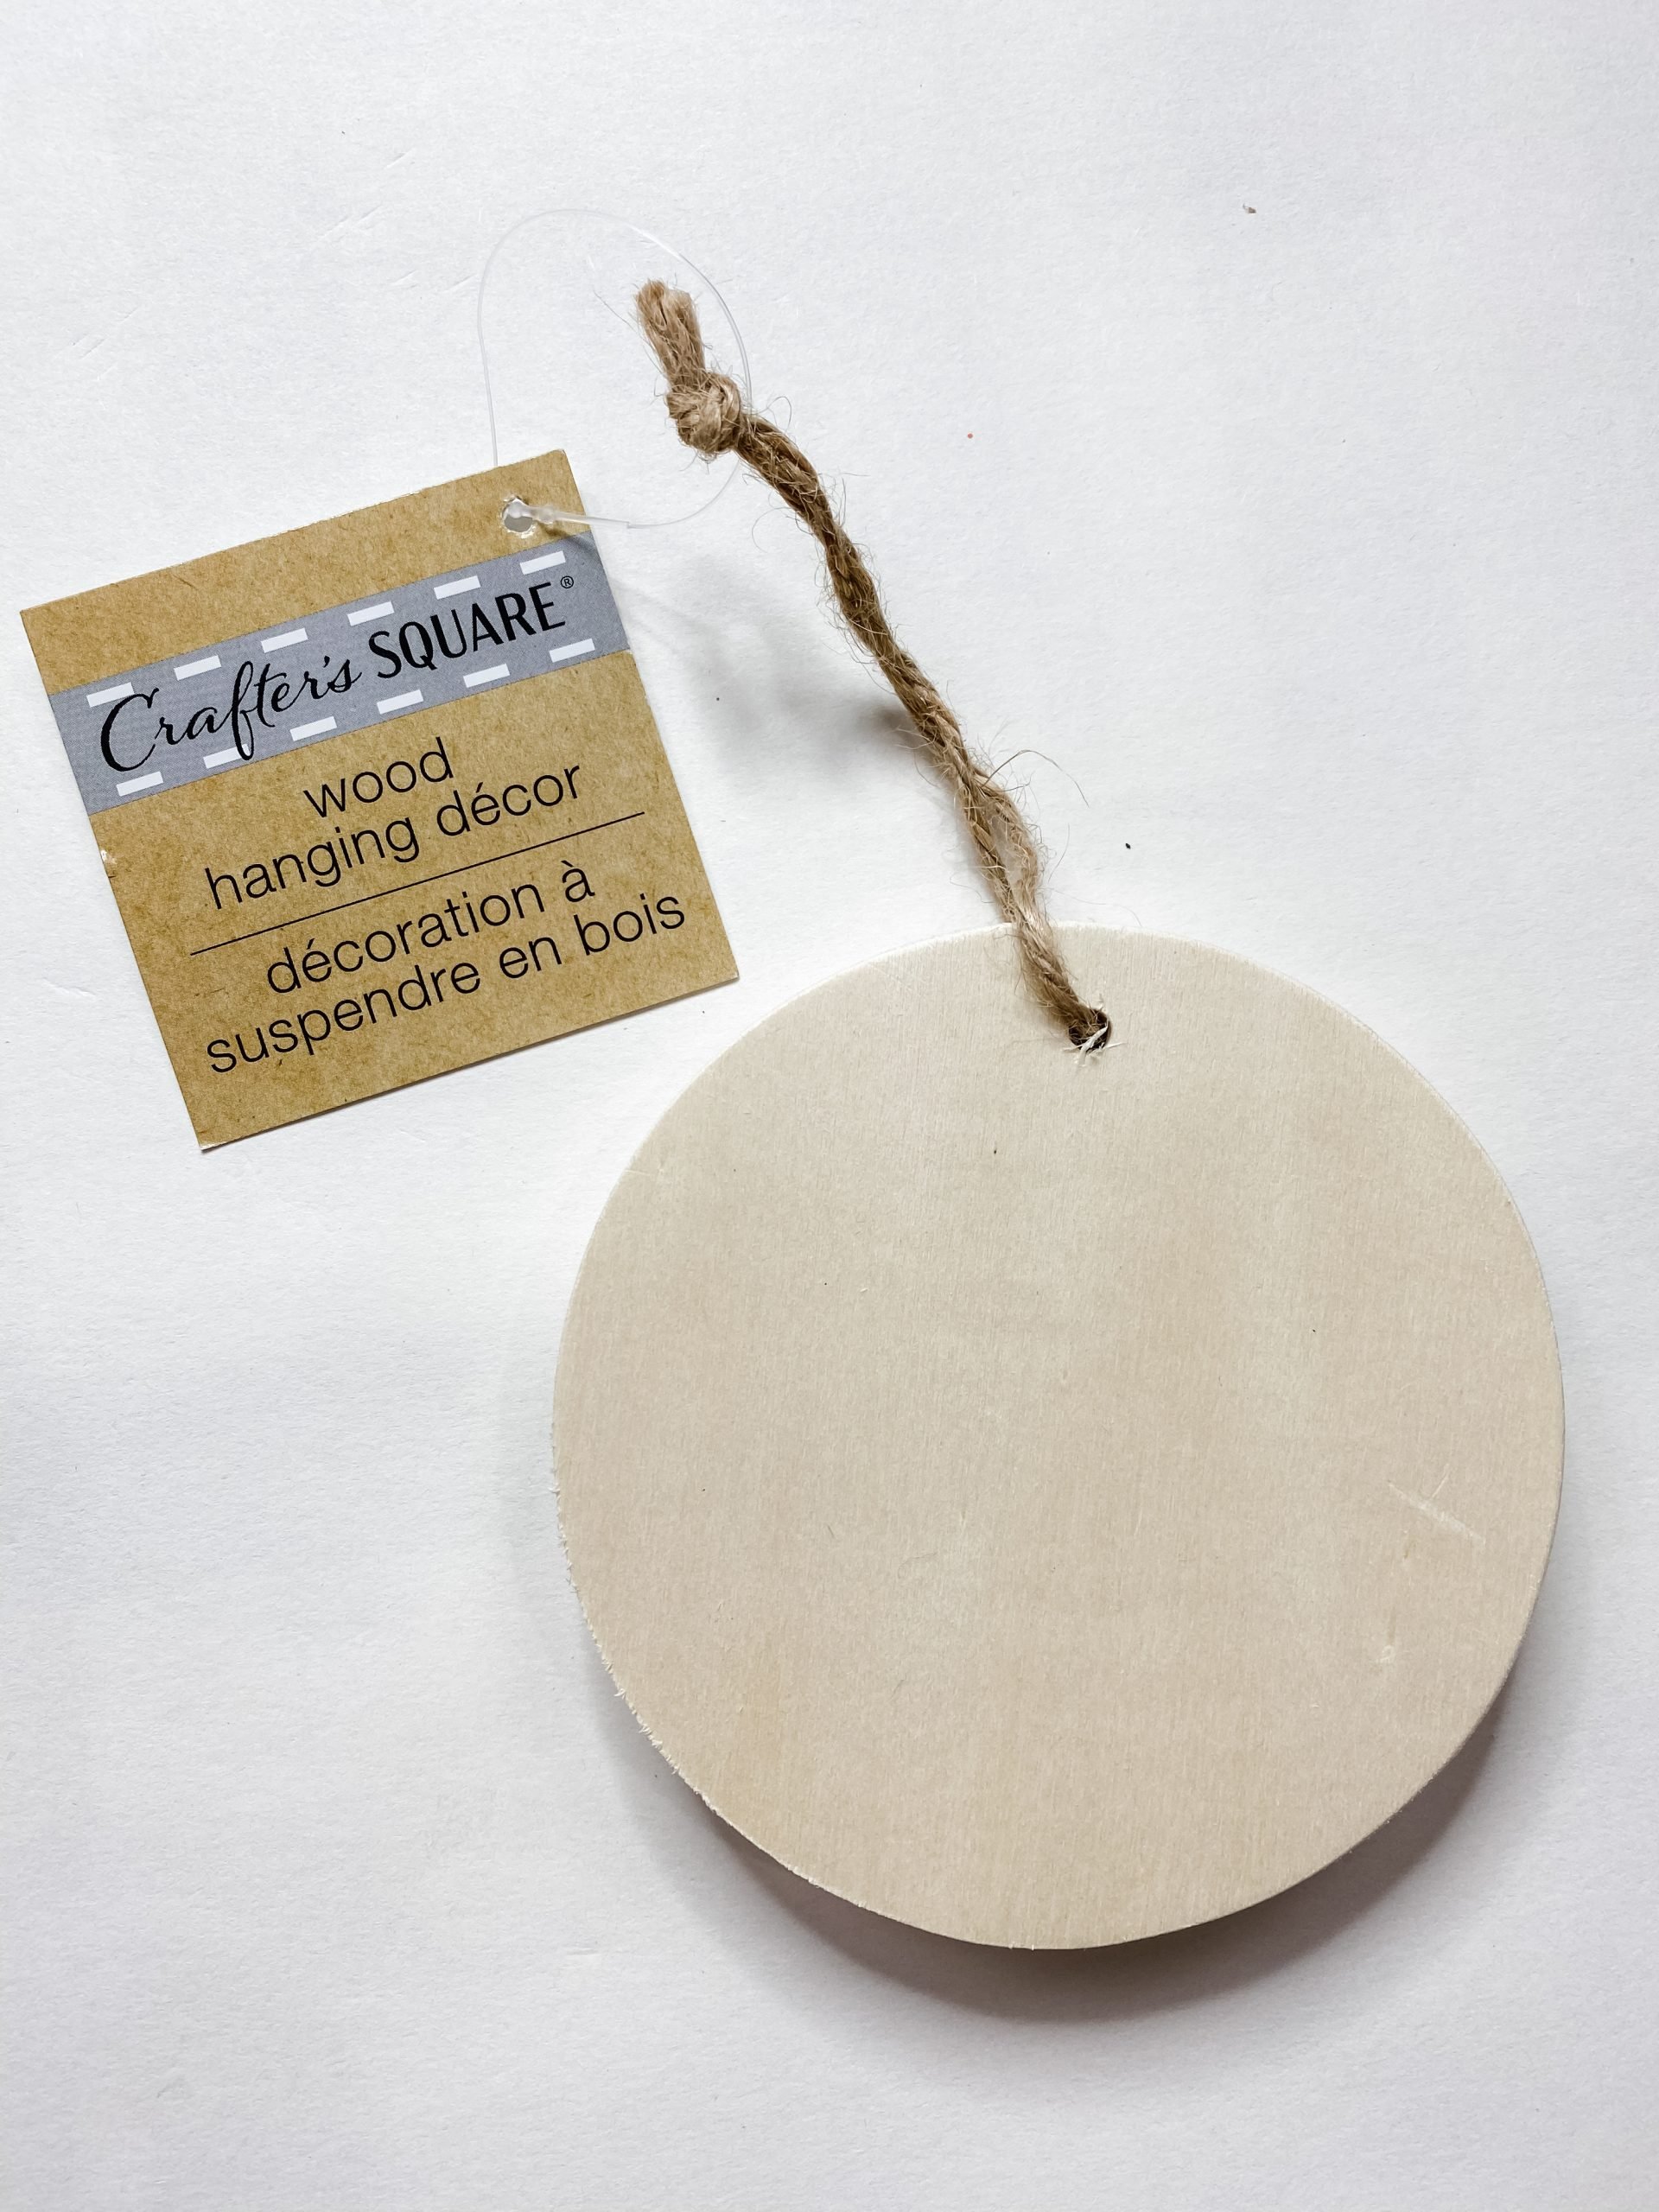
- Dollar Tree Crafter’s Square Wood Blocks
- Dollar Tree Wood Circle
- 1/2 Wood Beads
- Navy Buffalo Check Ribbon
- White Pom Pom Ribbon
- Jute twine
- Glue Gun and Glue Sticks
- Heat gun
Let’s get started
This first step might be one of the hardest- you have to pick out which stencil design to use for your DIY ornament!
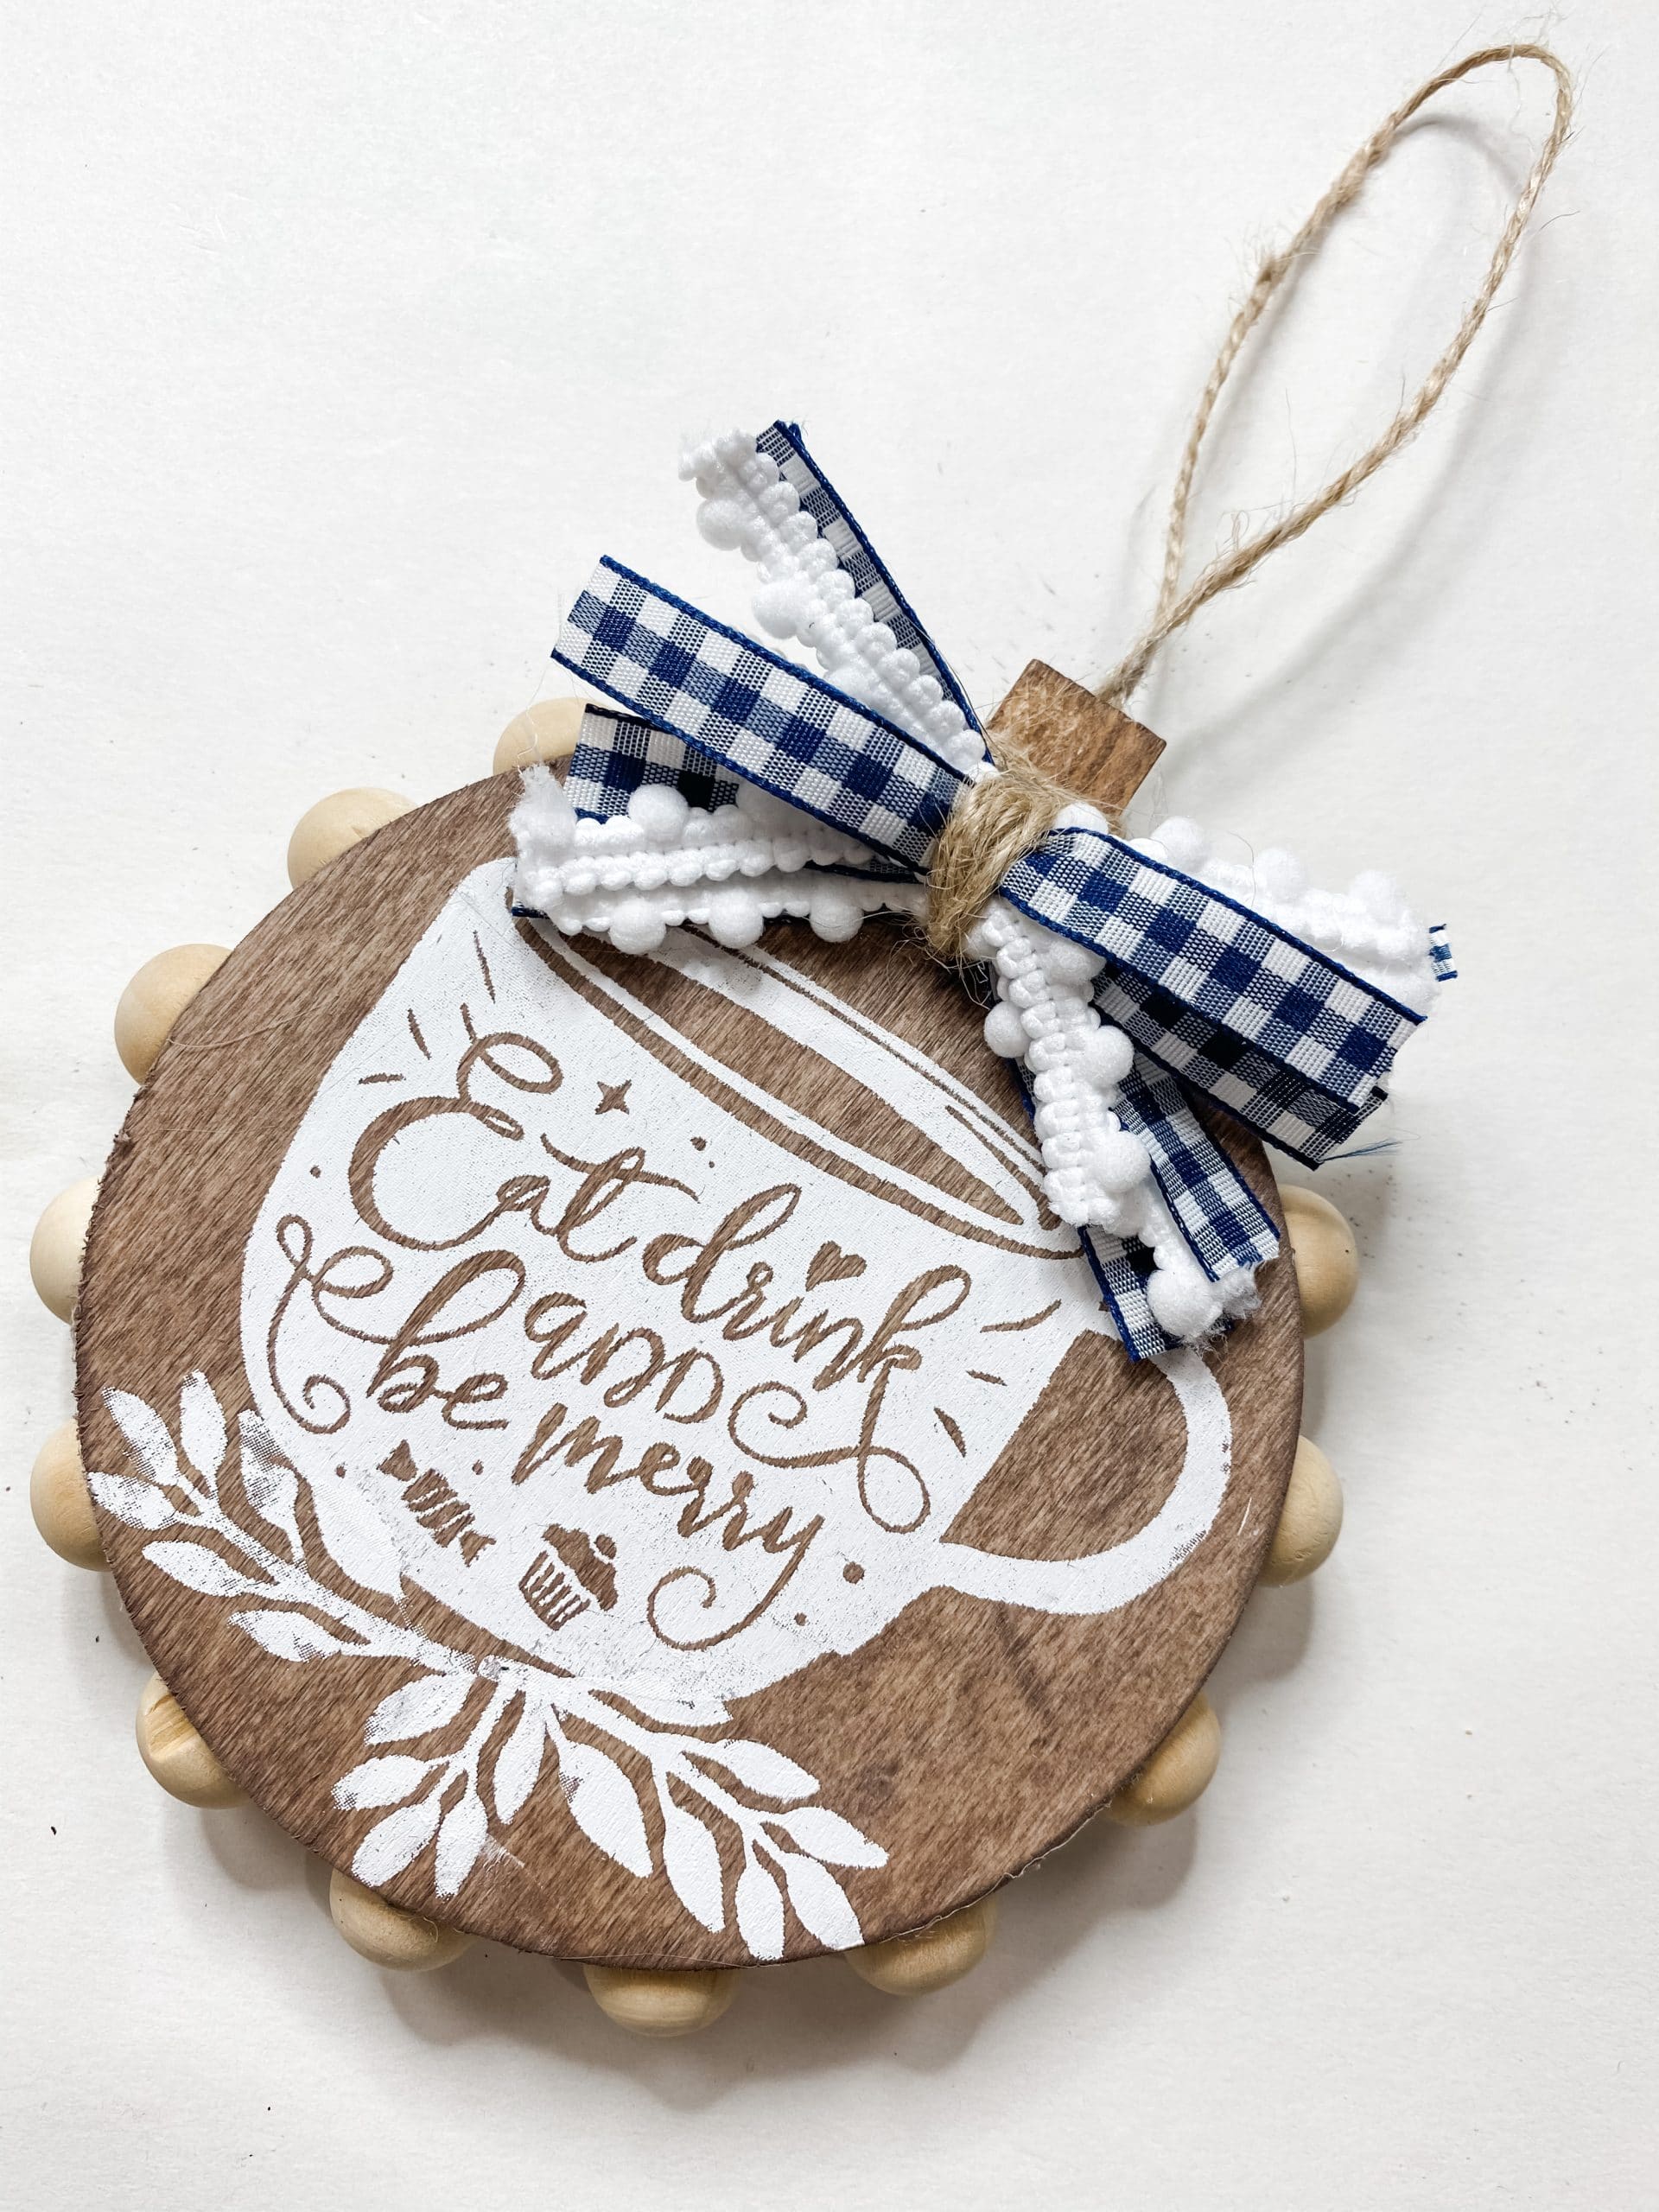
There are so many fun designs to choose from! I chose the coffee cup stencil along with the smaller stencil of the leaf from A Maker’s Studio. This turned out super cute, but if this design isn’t for you, this DIY Christmas project will work with any other stencil design!
Once you’ve chosen your stencil, go ahead and cut it out. Try your best not to cut too close to the edge of the stencil! Since I wanted to use two different stencils, I cut both of them out individually.
How to stain wood
To stian the Dollar Tree wood circle, I first sprayed it with water. Next, I poured the Apple Barrel Burnt Umber Acrylic Paint directly onto the wood circle. Use a paper towel or baby wipe to spread the paint around the entire wood circle.
The water helps the wood absorb the paint and gives it a stained finish rather than a painted look.
How to stencil
A Maker’s Studio’s stencils are adhesive. So, you’re going to want to peel the plastic backing off the stencil and place the stencil on the Dollar Tree wood circle.
Next, use one of A Maker’s Studio’s stencils to spread the white chalk paste across the stencil. Make sure you evenly coat the stencil so you get the entire design on the surface of the ornament.
Let the chalk paste dry (I like to use my heat gun to speed up the drying process), and go ahead and peel off your stencil! How cute is that!
If you are using a second stencil as I did, go ahead and repeat the process as many times as you need to! I added three little leaves underneath the bottom of the coffee mug.
Make sure to clean all your stencils and supplies after you use them! There is nothing worse than not being able to reuse an adorable stencil because it wasn’t cleaned properly.
Time for the finishing touches
I added one of the Dollar Tree woodblocks to the top of my wood circle to create a little stem for the ornament. Use the same technique that you used on the Dollar Tree wood circle to stain the woodblock.
Once the woodblock was dry, I hot glued it to the top of the ornament. Next, I used my drill to create a small hole in the top of the block. The wood on the block was a little tough to drill through so don’t get discouraged if it takes a while!
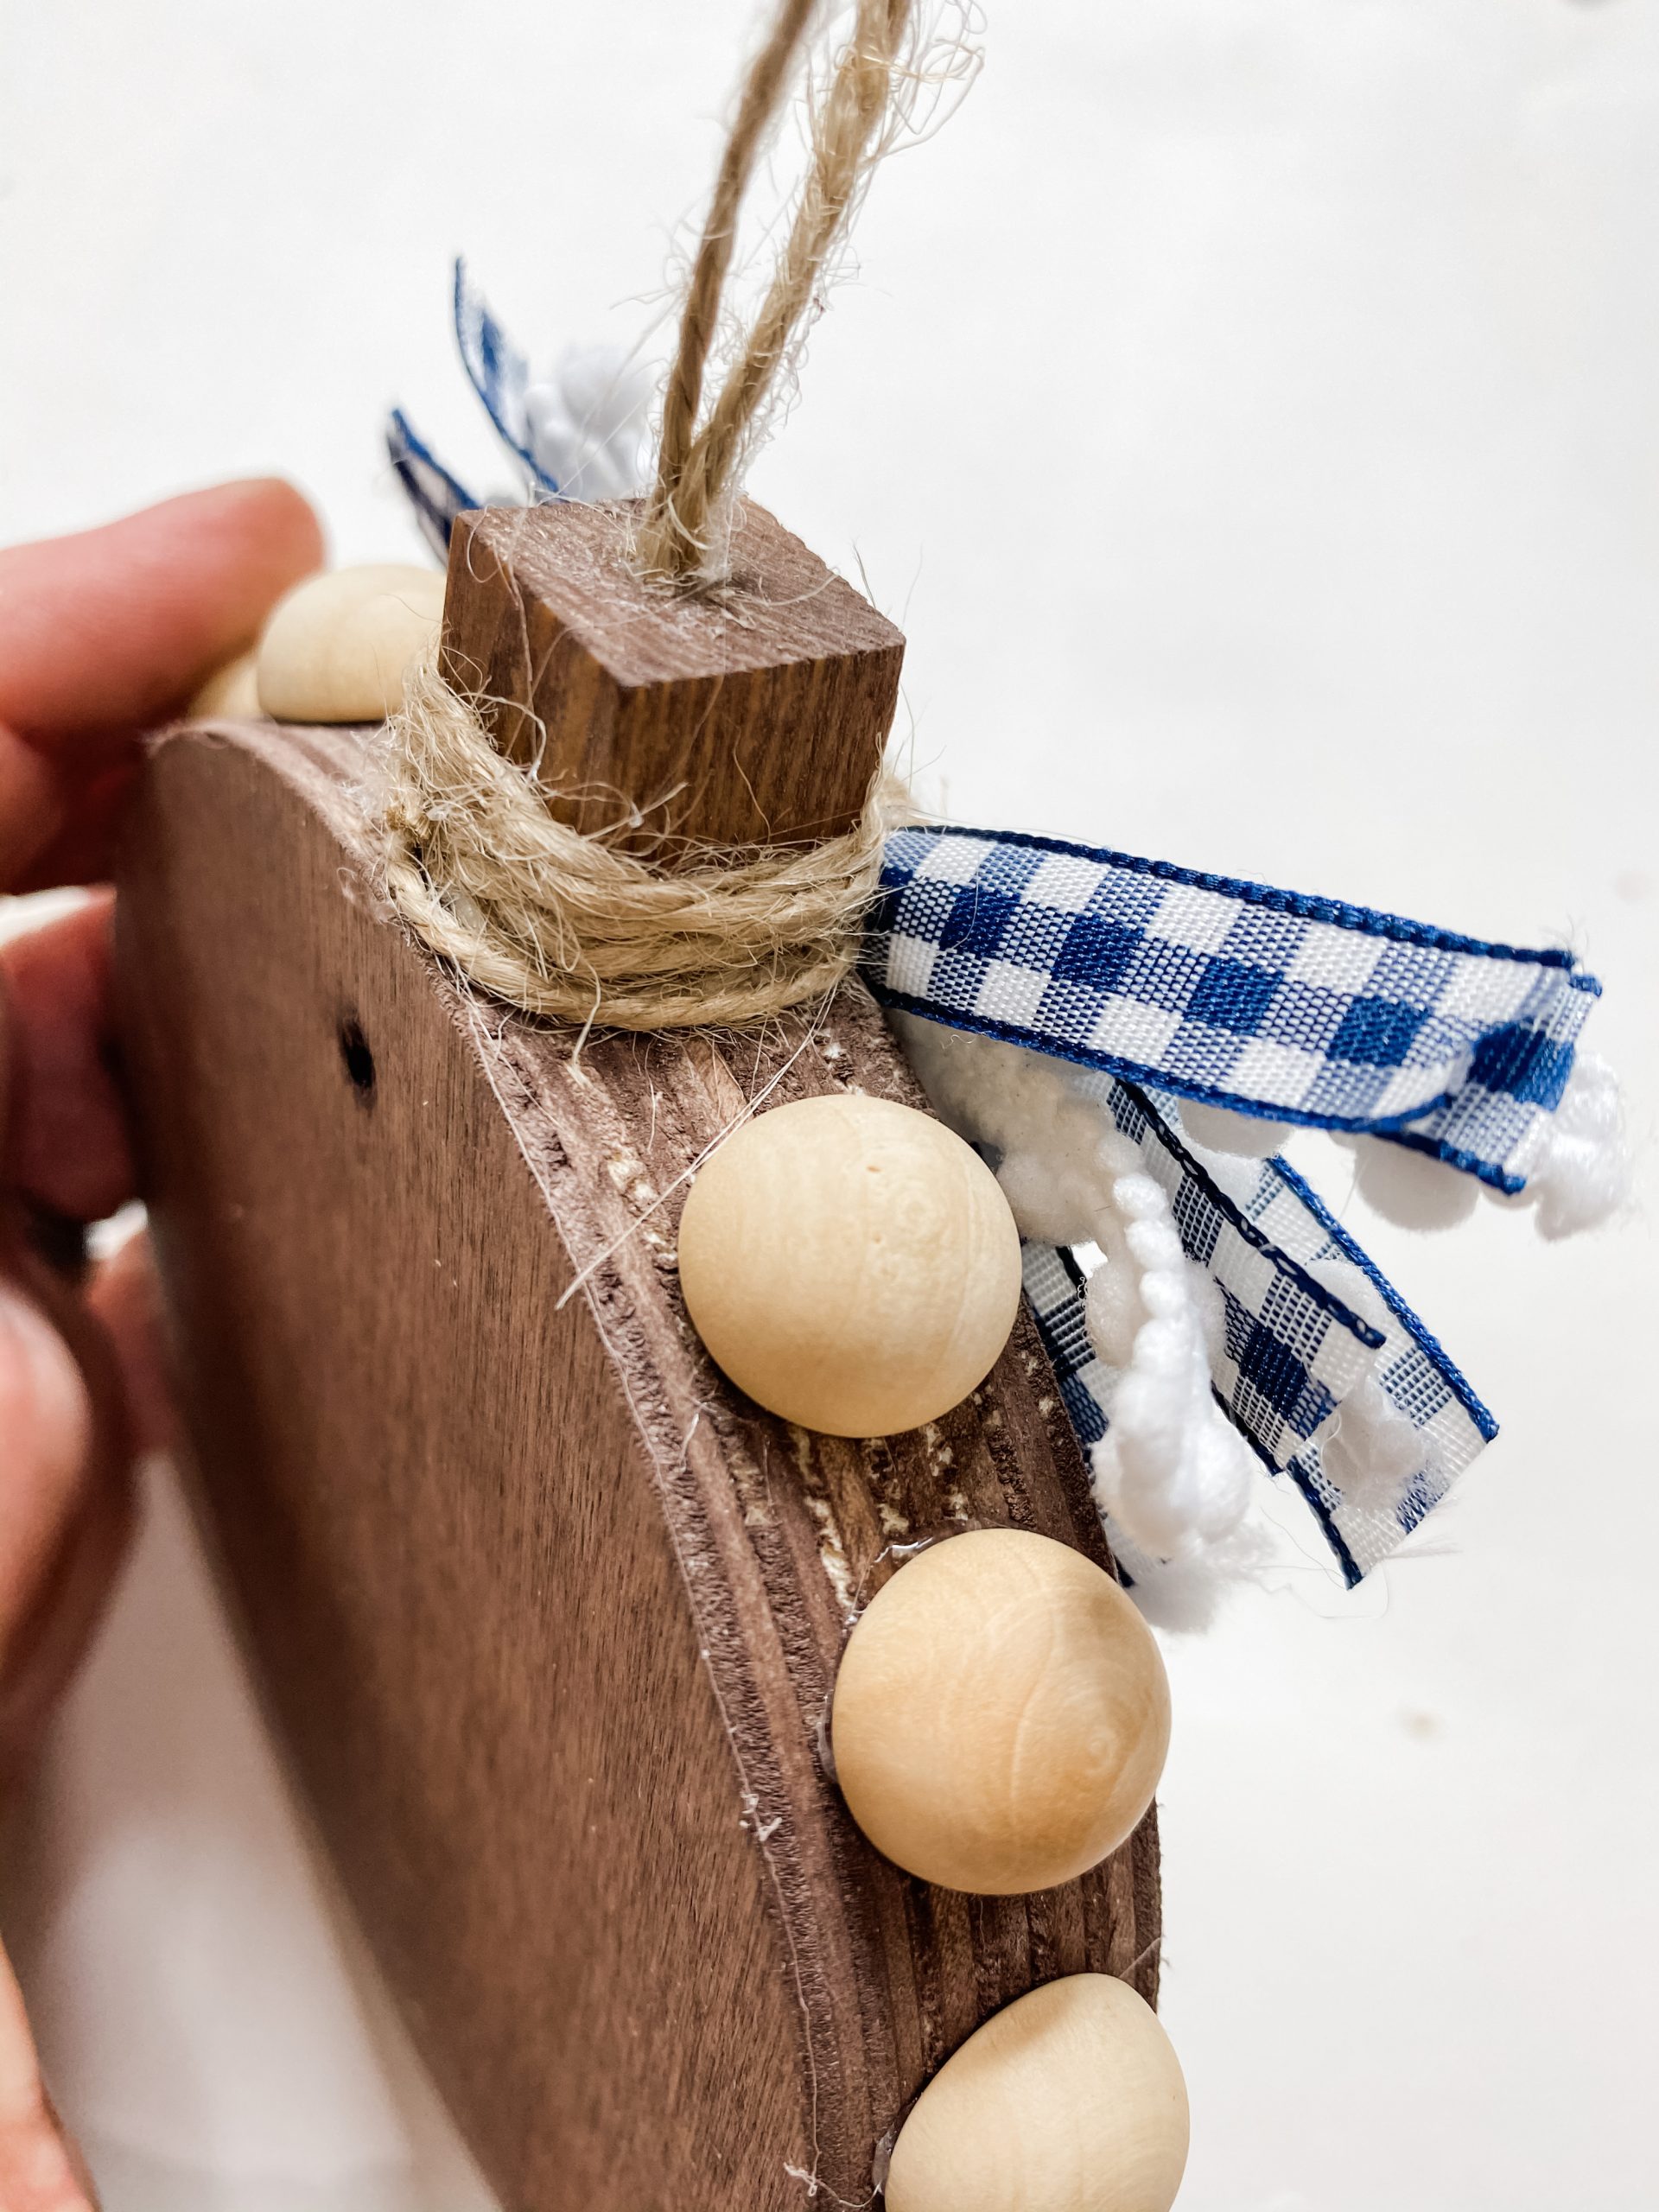
Once you’ve made your hole, cut a small piece of twine to be your hanger. Cut a small piece of twine and hot glue the ends to form a circle.
Next, insert the hot glue ends into the hole in the woodblock and use just a little more hot glue to attach the twine hanger.
I also decided to add some twine to where the bottom of the block meets the top of the wood circle and used hot glue to keep it in place. I felt like this helped the ornament look a little more put together!
To embellish my ornament more, I added some half wood beads! All I did was hot glue them all around the edges of the wood circle. I love the way these looked, but this step is totally optional!

How to make an x bow
I created an x bow for the ornament using buffalo check ribbon and white pom pom ribbon! Adding a bow is a great way to add a little bit of contrast to your crafts! To make an x bow, I cut off several strips of each ribbon that were about three inches.
All I did was place two strips of the buffalo check ribbon in an X pattern, then I added two strips of the white pom pom ribbon right on top of them. I kept adding ribbon and alternated the patterns until the bow was as big as I wanted it.
Secure the center of your bow with a piece of twine or ribbon.
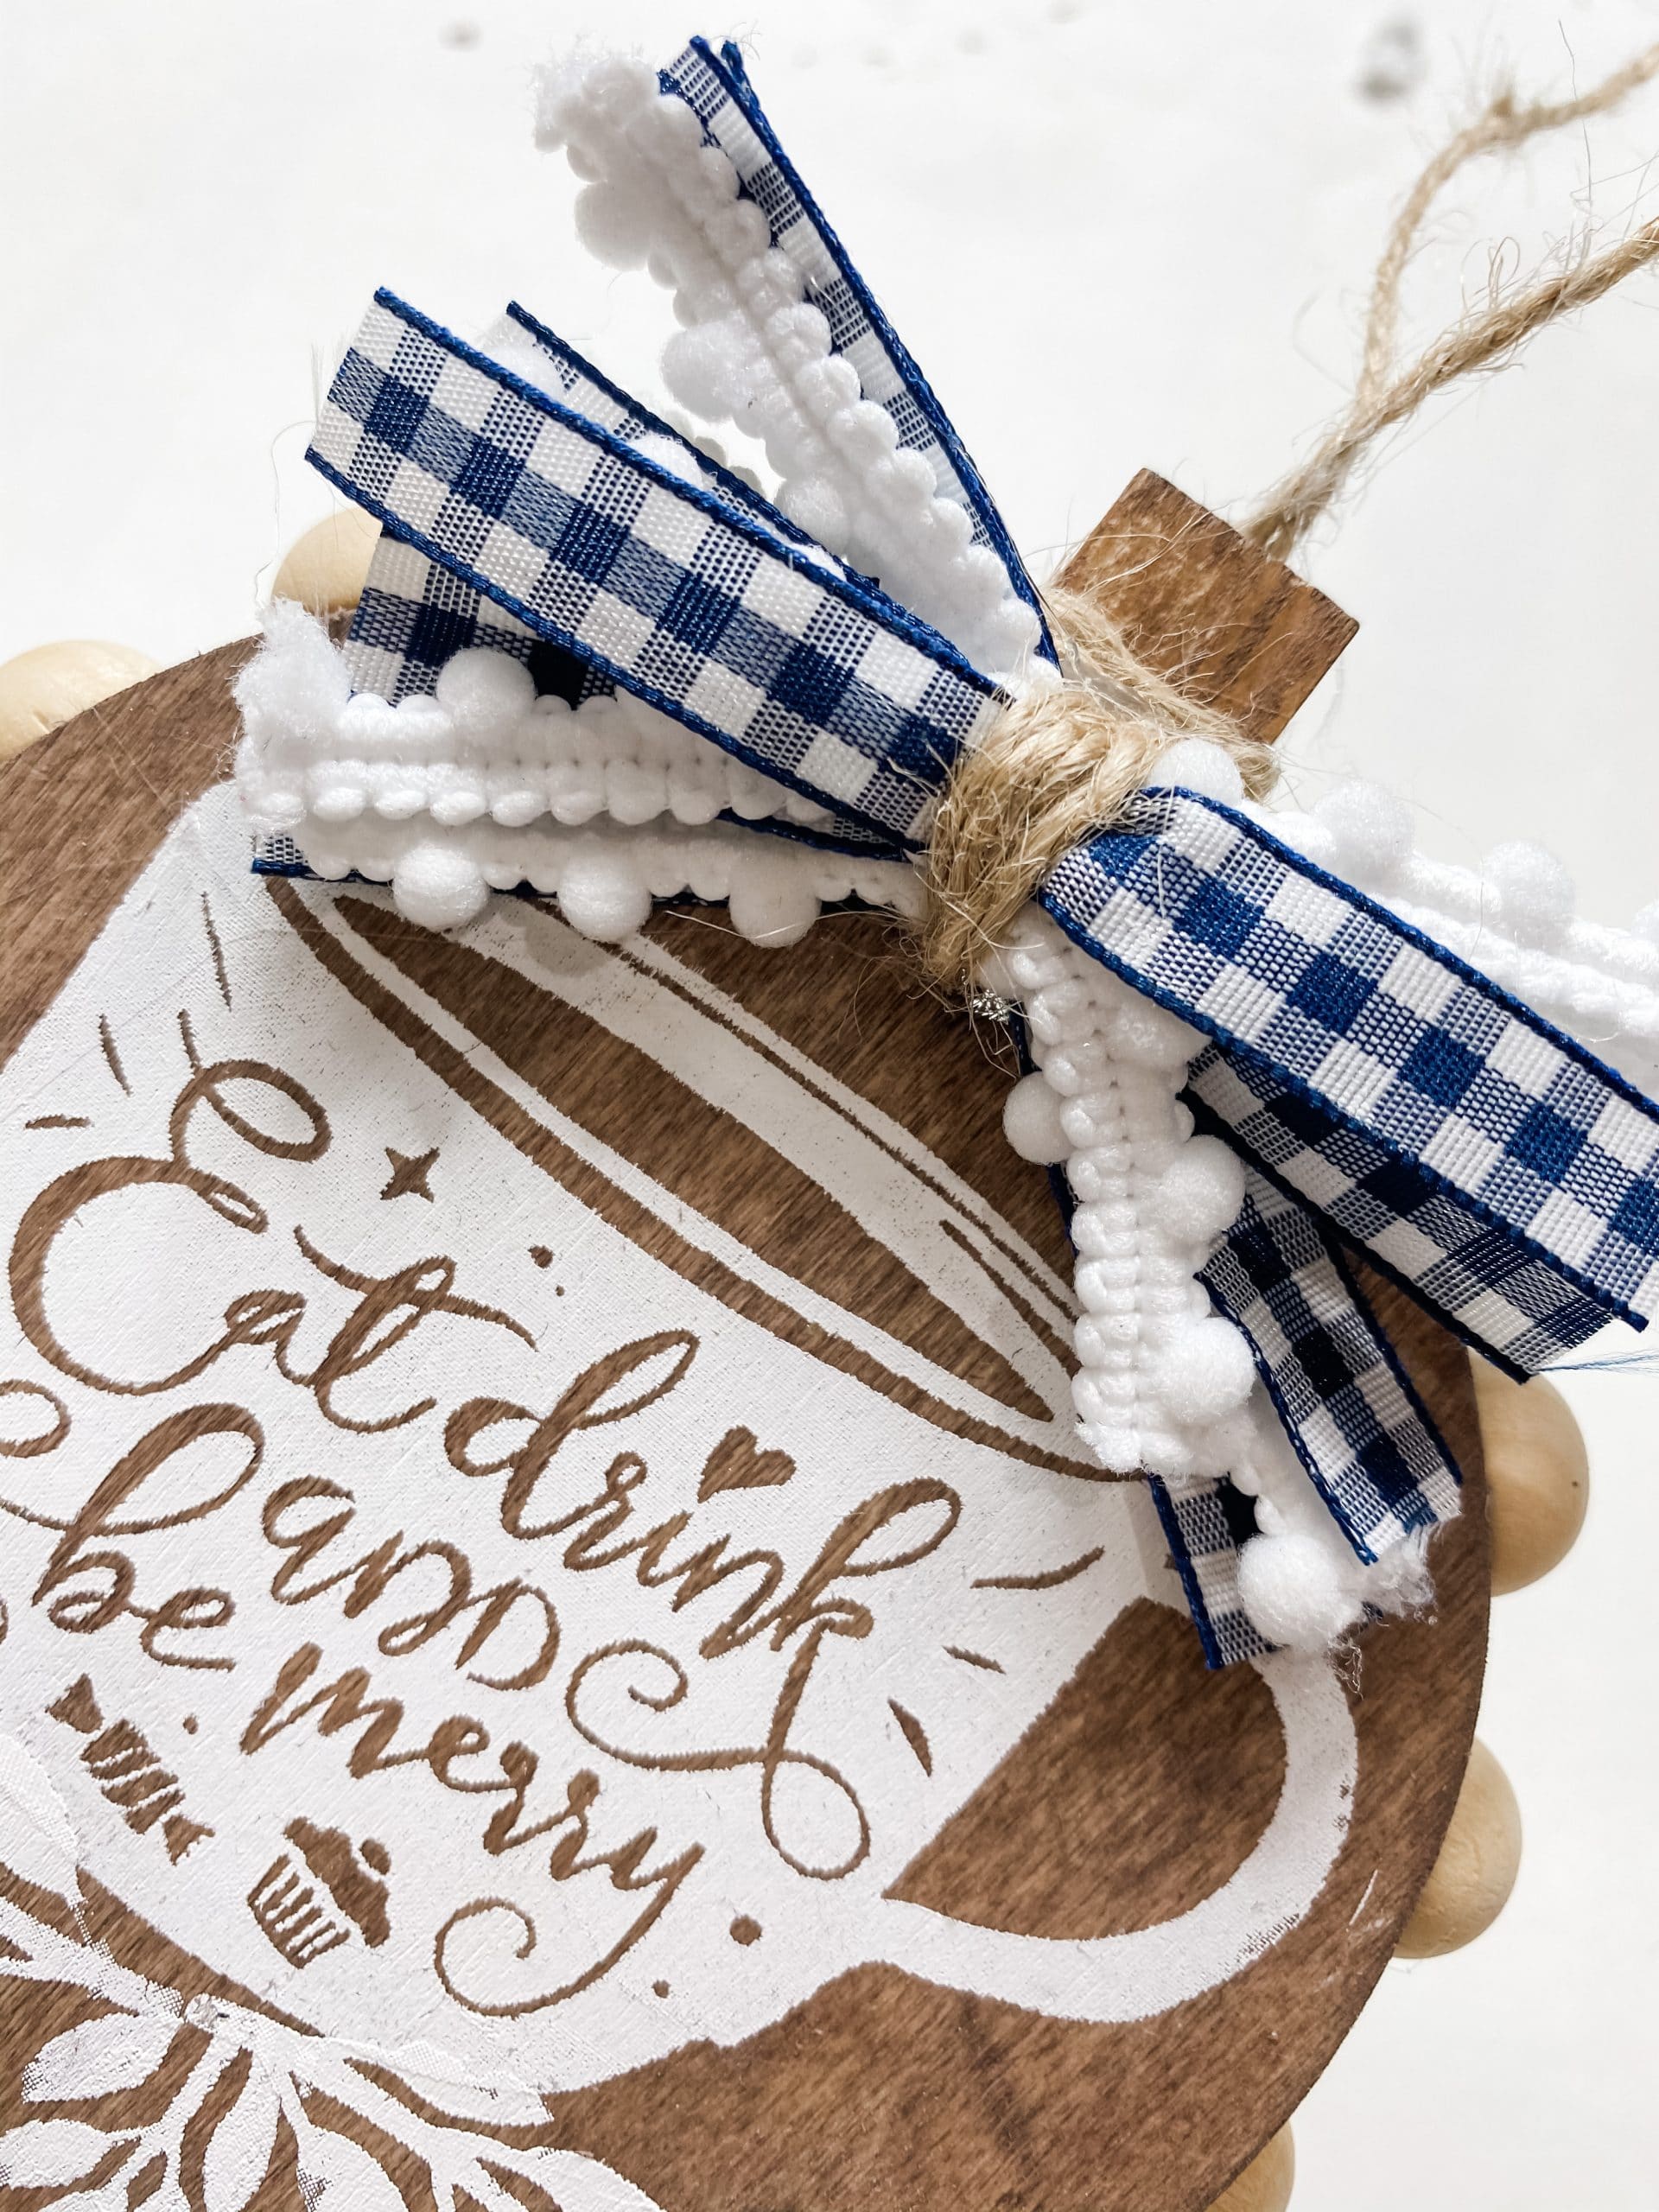
After securing the x bow, I just used my scissors to trim and tidy up the edges of the bow to create an even look. Then I hot glued the bow right above the stencil design to create the finished ornament!
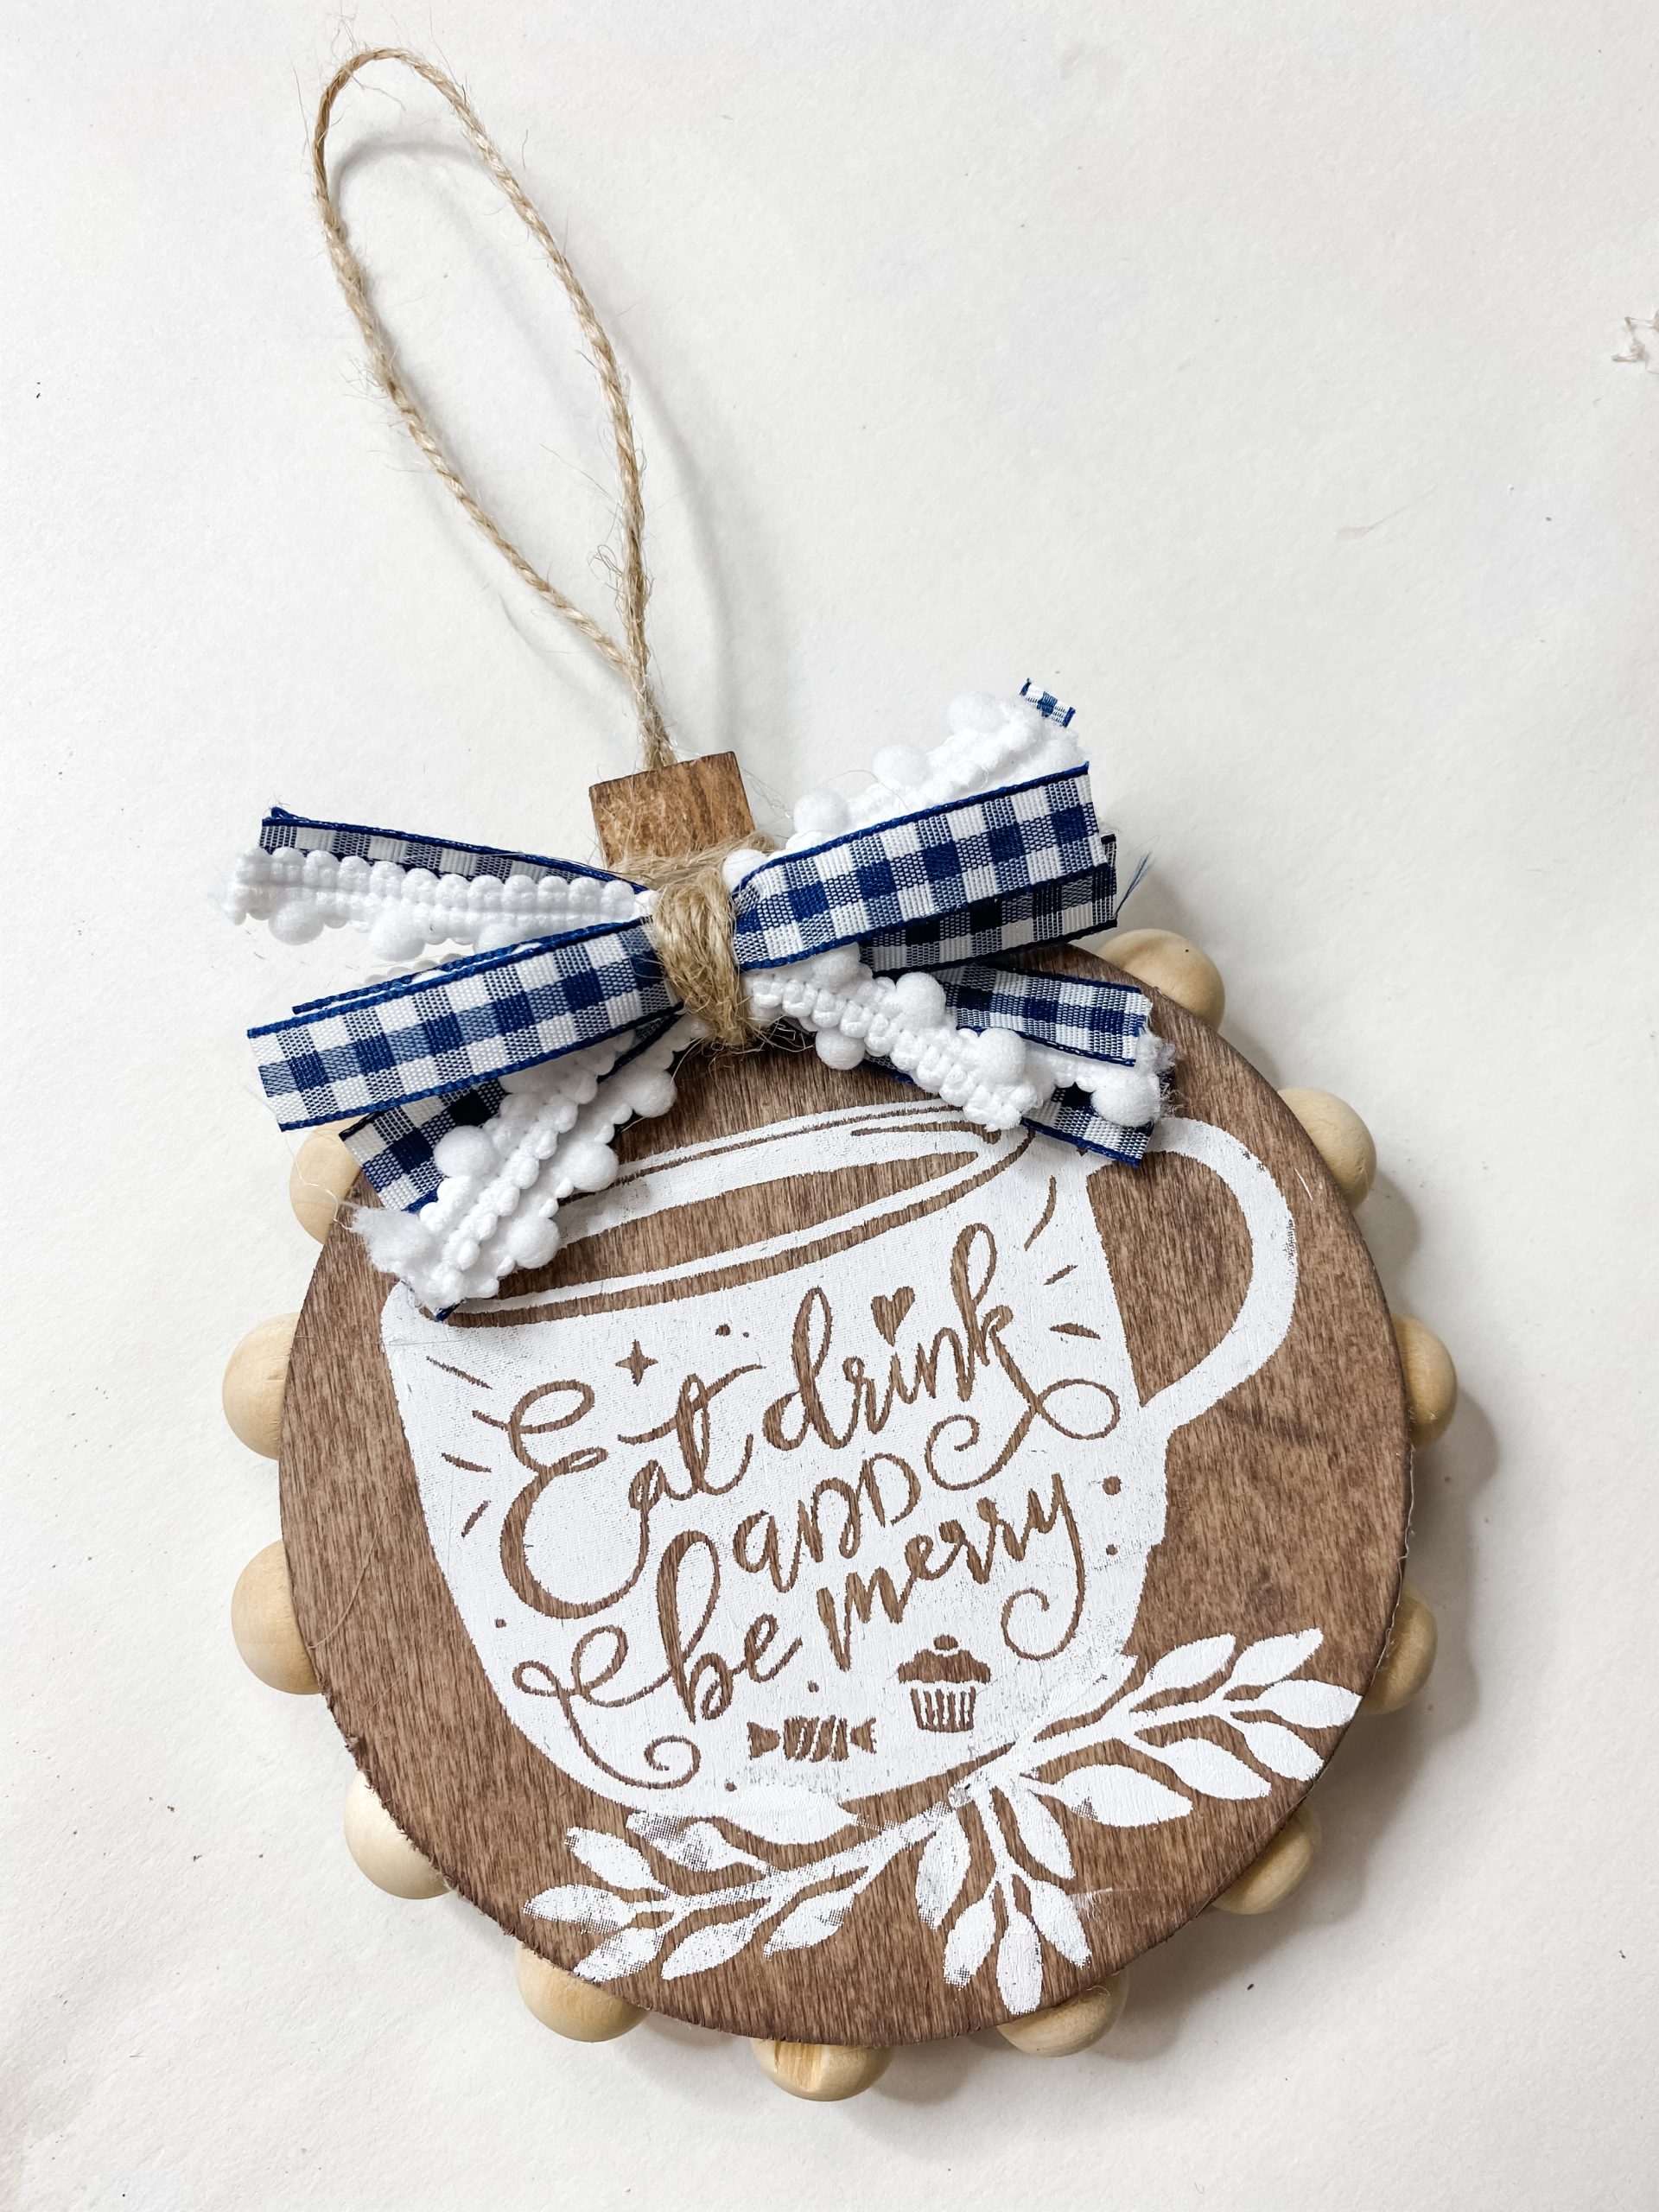
How cute is that! If you wanted to, you could keep going and add a half bead to the center of your bow! Either way, this is a super cute and easy DIY Dollar Tree Christmas Stencil Ornament!

I hope you had as much fun learning how to make this DIY Christmas Stencil Ornament as much as I did and decide to make it for yourself! I would love to see how yours turns out!
You should totally join my FREE Facebook group called On A Budget Crafts! It is a judgment-free community for DIY crafters to show off their projects and ideas.
If you loved this DIY you might also like these 3 Christmas DIY Ornaments!
Thanks for stopping by! XOXO Amber
You can also shop my ENTIRE AMAZON Favorites shop just click here! It’s packed full of all the things I use and love. Here is the supply list I highly recommend every creative have on hand!!
Would you also pin my blog for later and get on my newsletter alerts? I would love to have you join my #craftycrew.

Join my free “ON A BUDGET CRAFTS” Facebook group!
PIN THIS POST FOR LATER!

2 Comments