How to Decoupage Wood Christmas DIY Decor Ideas
I am always looking for creative new DIY projects to make, and when I think of something I think is cute, I just can’t wait to share it with my #craftycrew! I hope you enjoy How to Decoupage Wood Christmas DIY Decor Ideas!
Decoupaging is probably one of my favorite DIY techniques! Especially, a good napkin decoupage! It is so easy to learn how to decoupage and you can do it with practically ANYTHING! (check out how I decoupaged a Dollar Tree loot bag!)
Watch the tutorial
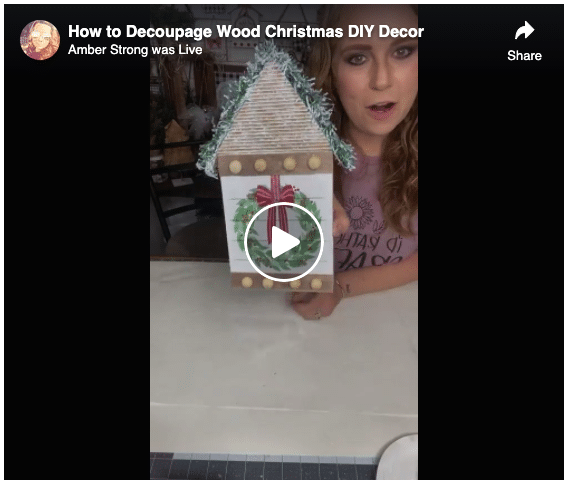
My Facebook page is FULL of DIY tutorials because I record EVERYTHING I make, including this easy Christmas decor DIY!
If you want to see the step-by-step process or hear a special recommendation for items you can substitute with this holiday DIY, check out the replay on my Facebook page!
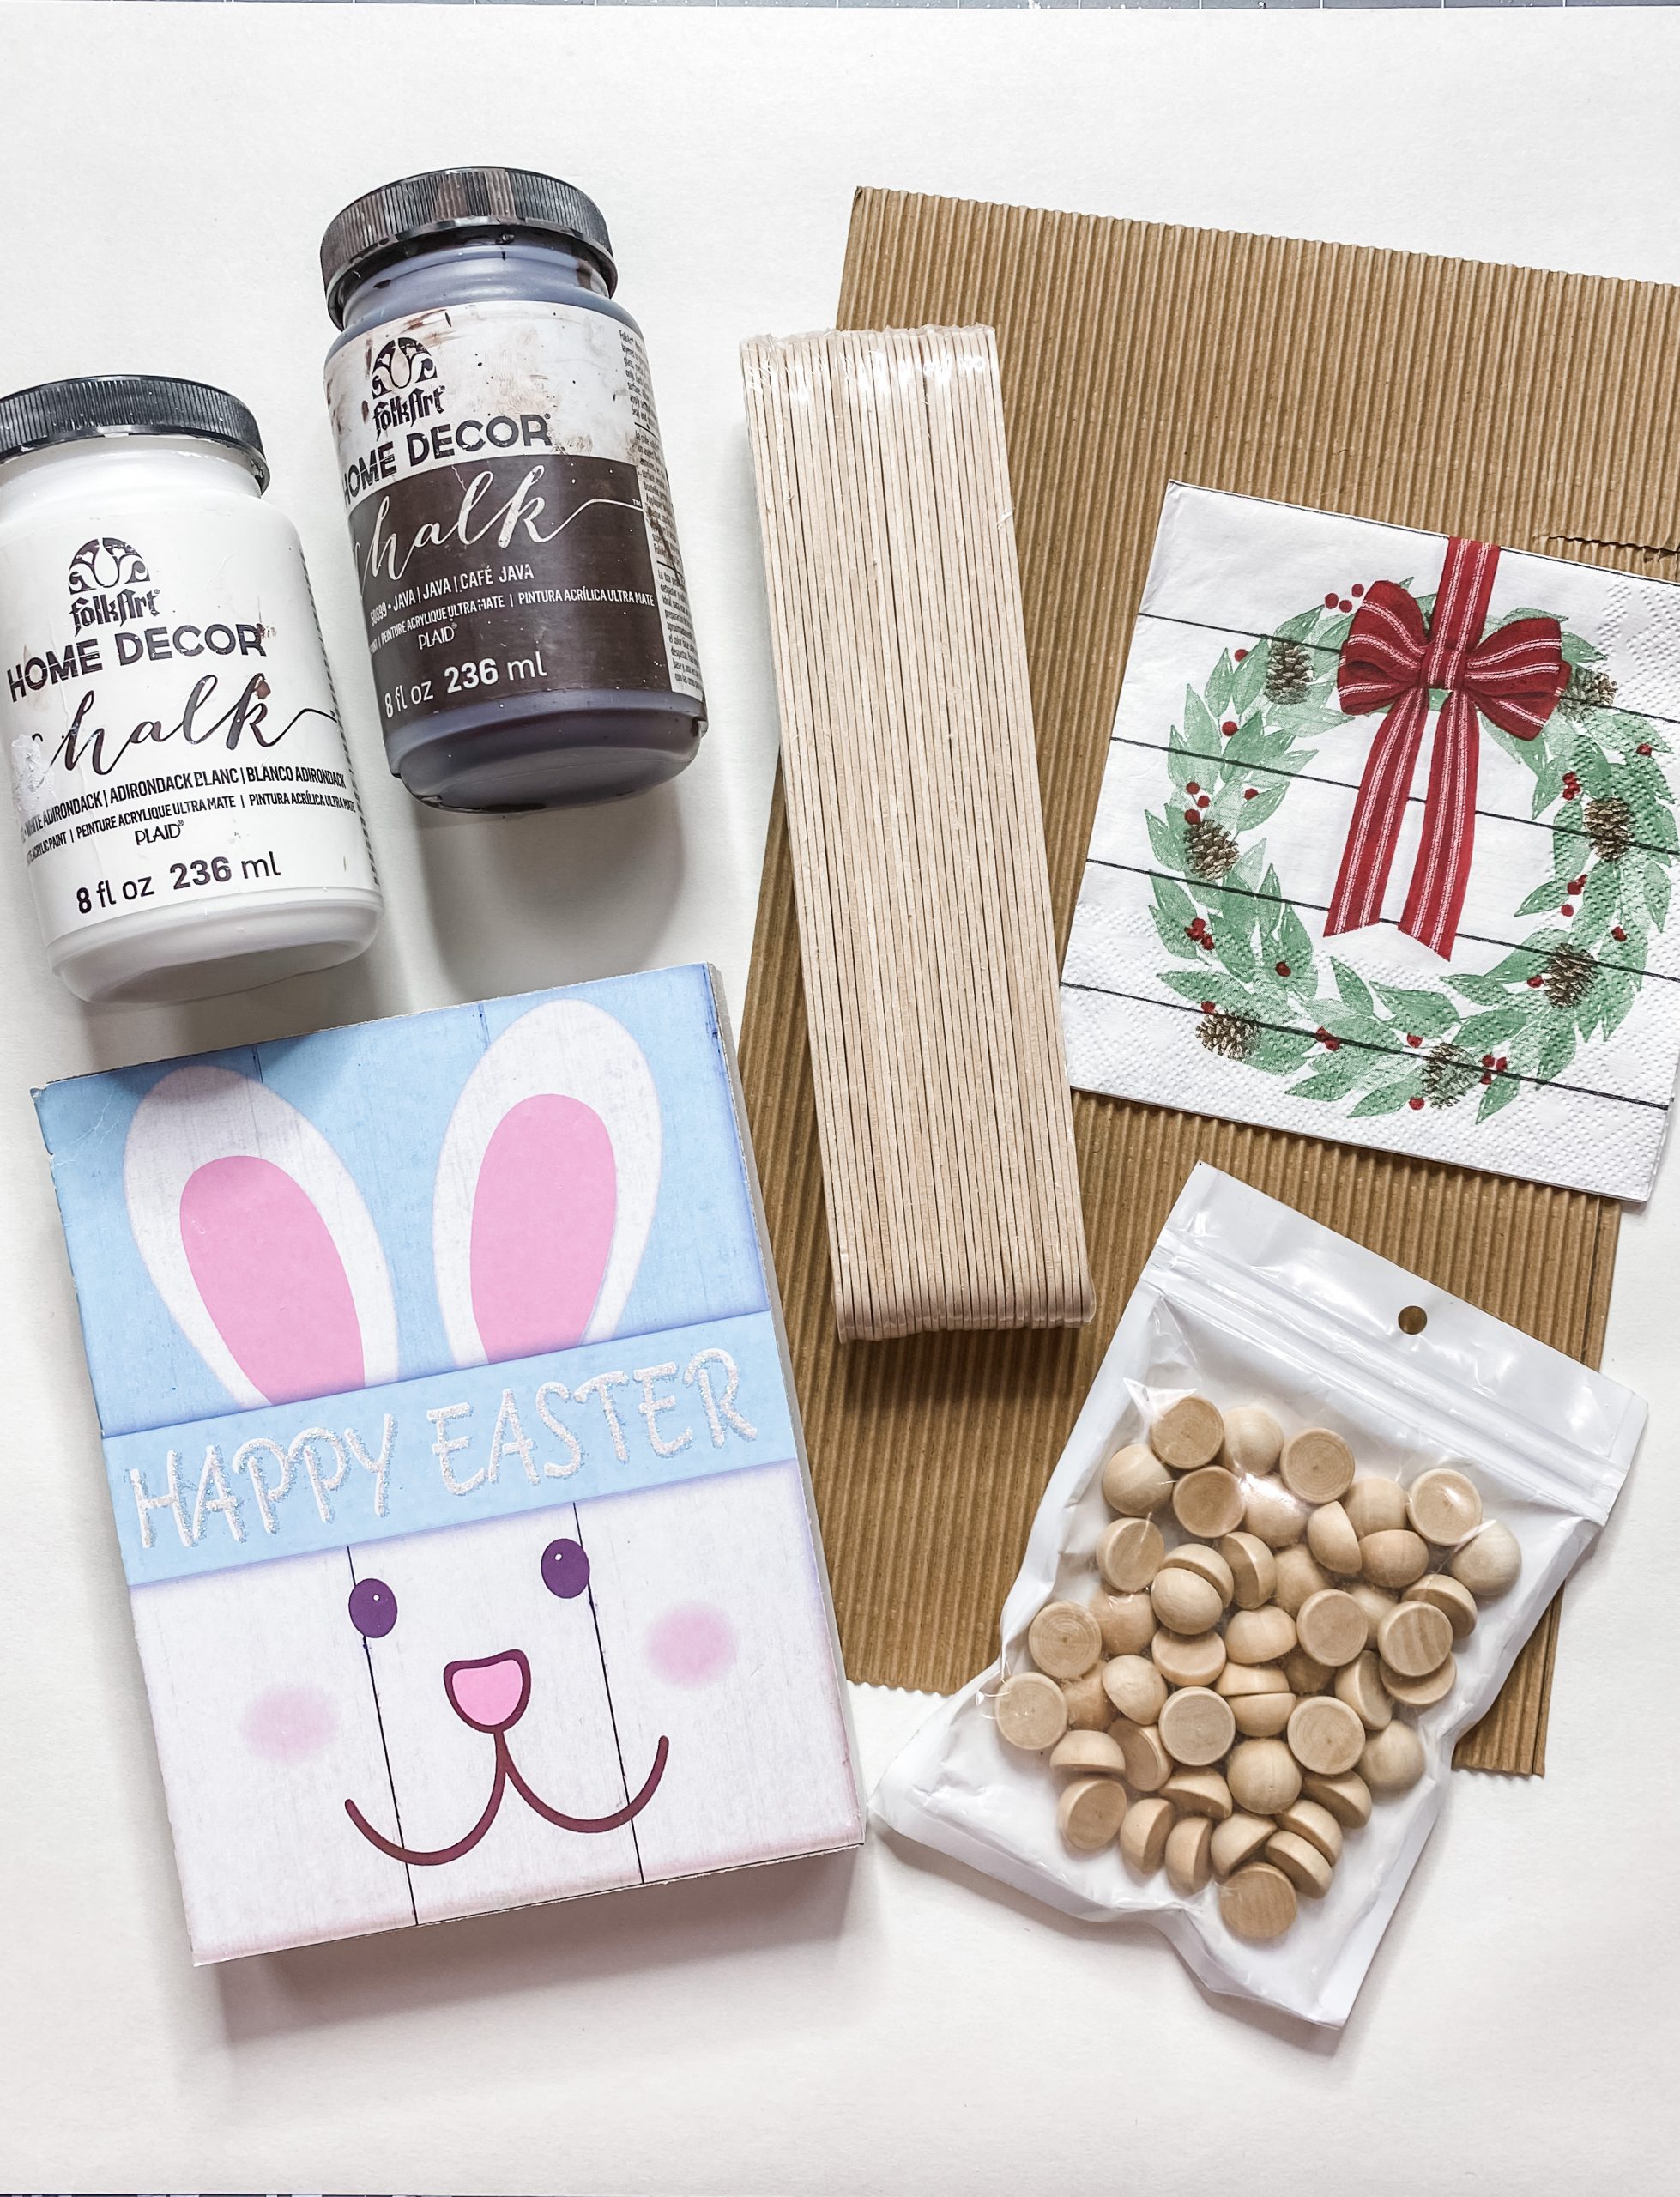
For this project, I will be using these items but you can substitute where you want.
“As an Amazon Associate, I earn from qualifying purchases.”
- Dollar Tree wood sign box
- Dollar Tree wired garland
- 1/2 Wood Beads
- Corrugated cardboard scrapbook paper
- Craft sticks
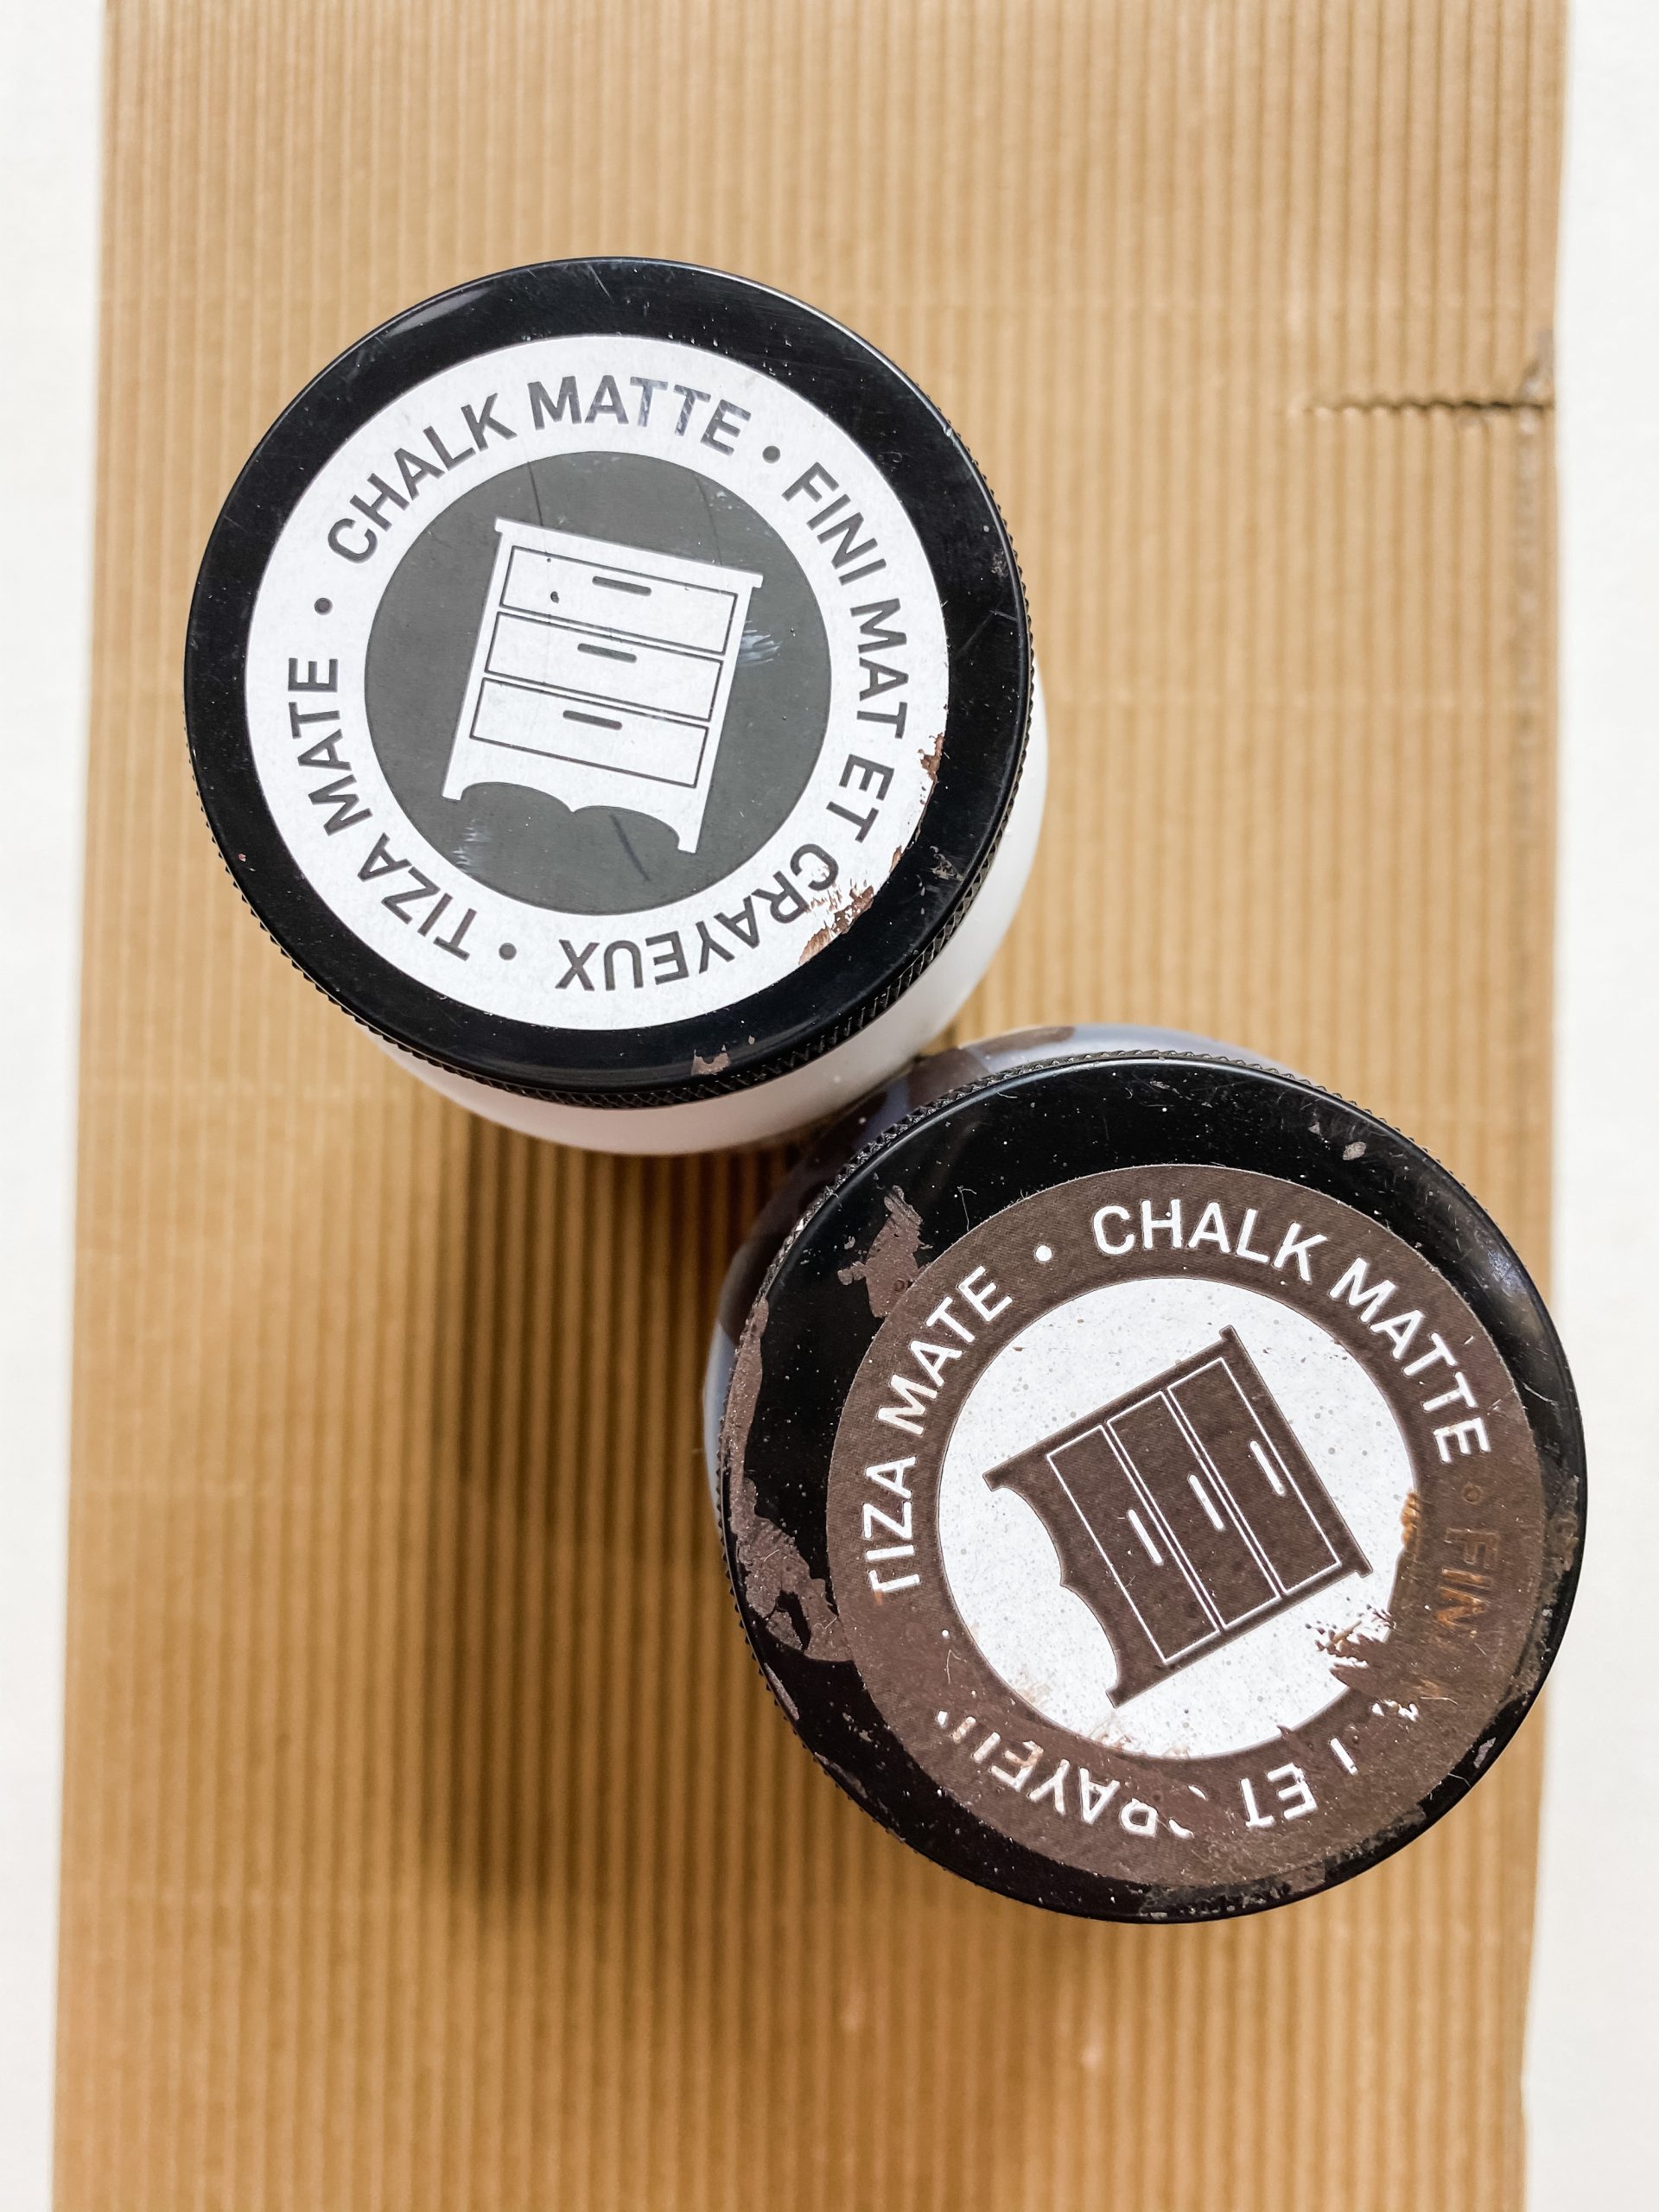
- Folkart Java Chalk Paint
- Folkart White Chalk Paint
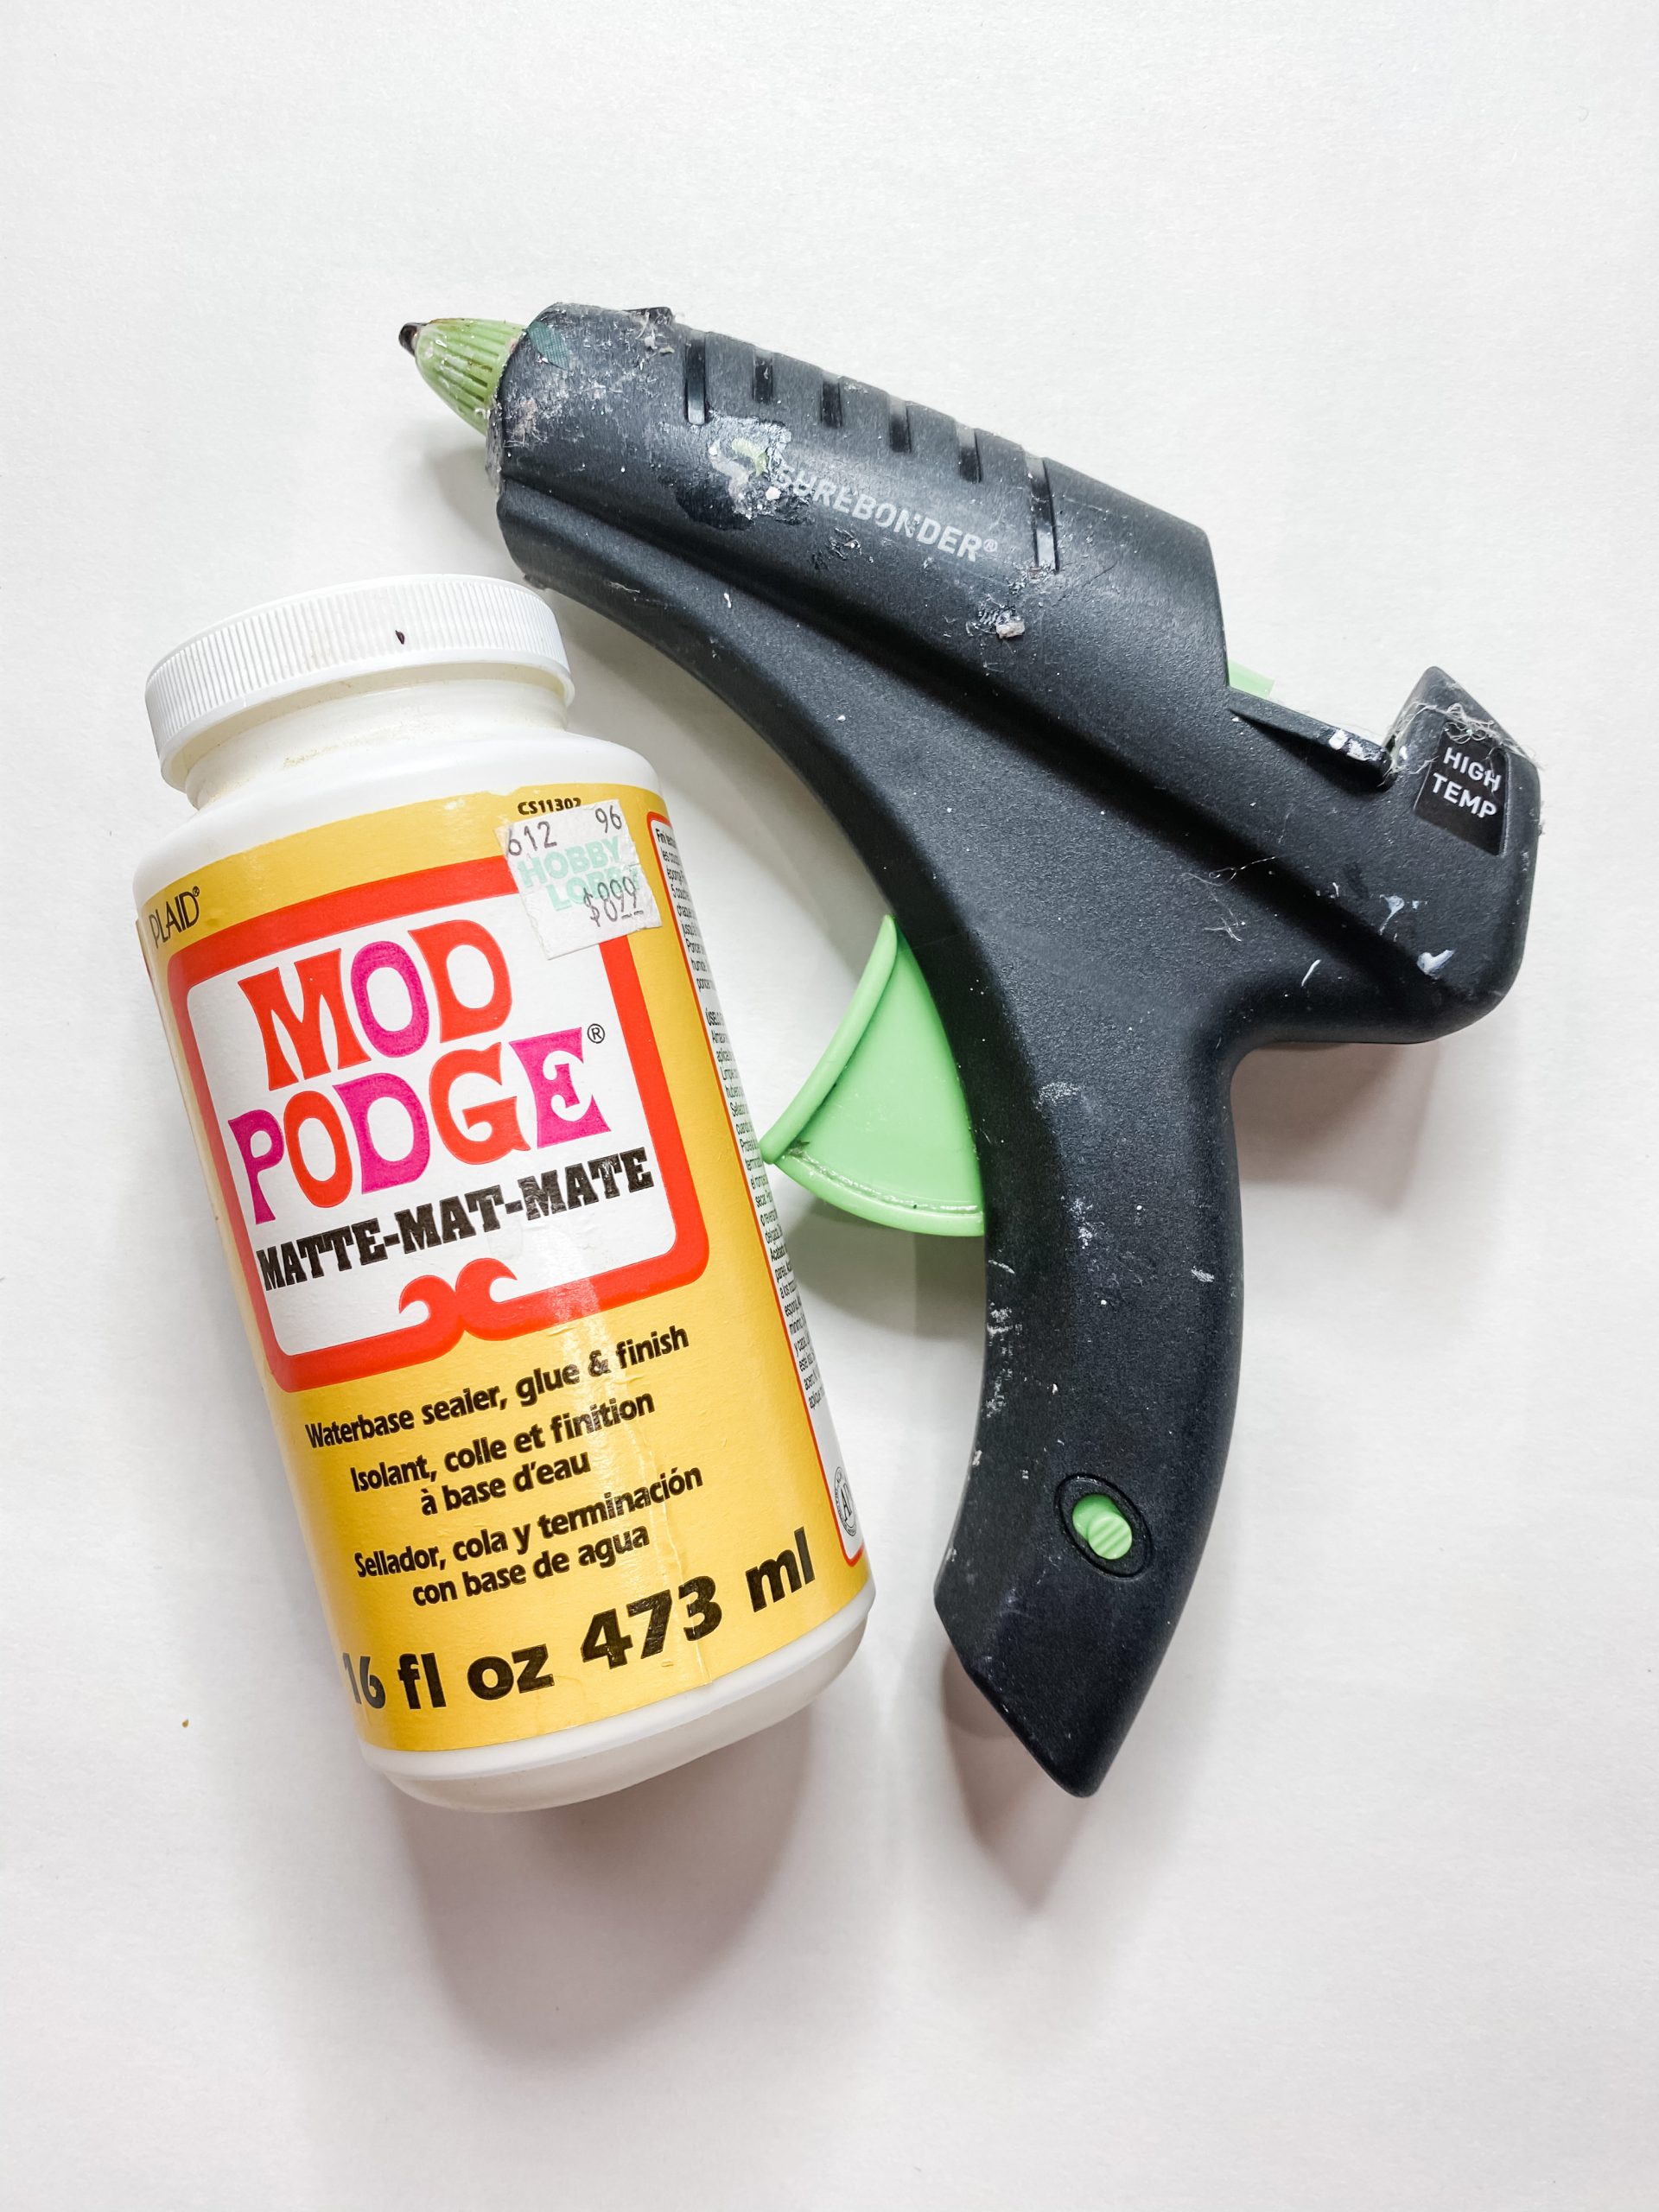
- Mod Podge
- Glue Gun and Mod Podge
- Heat gun
What you’ve been waiting for
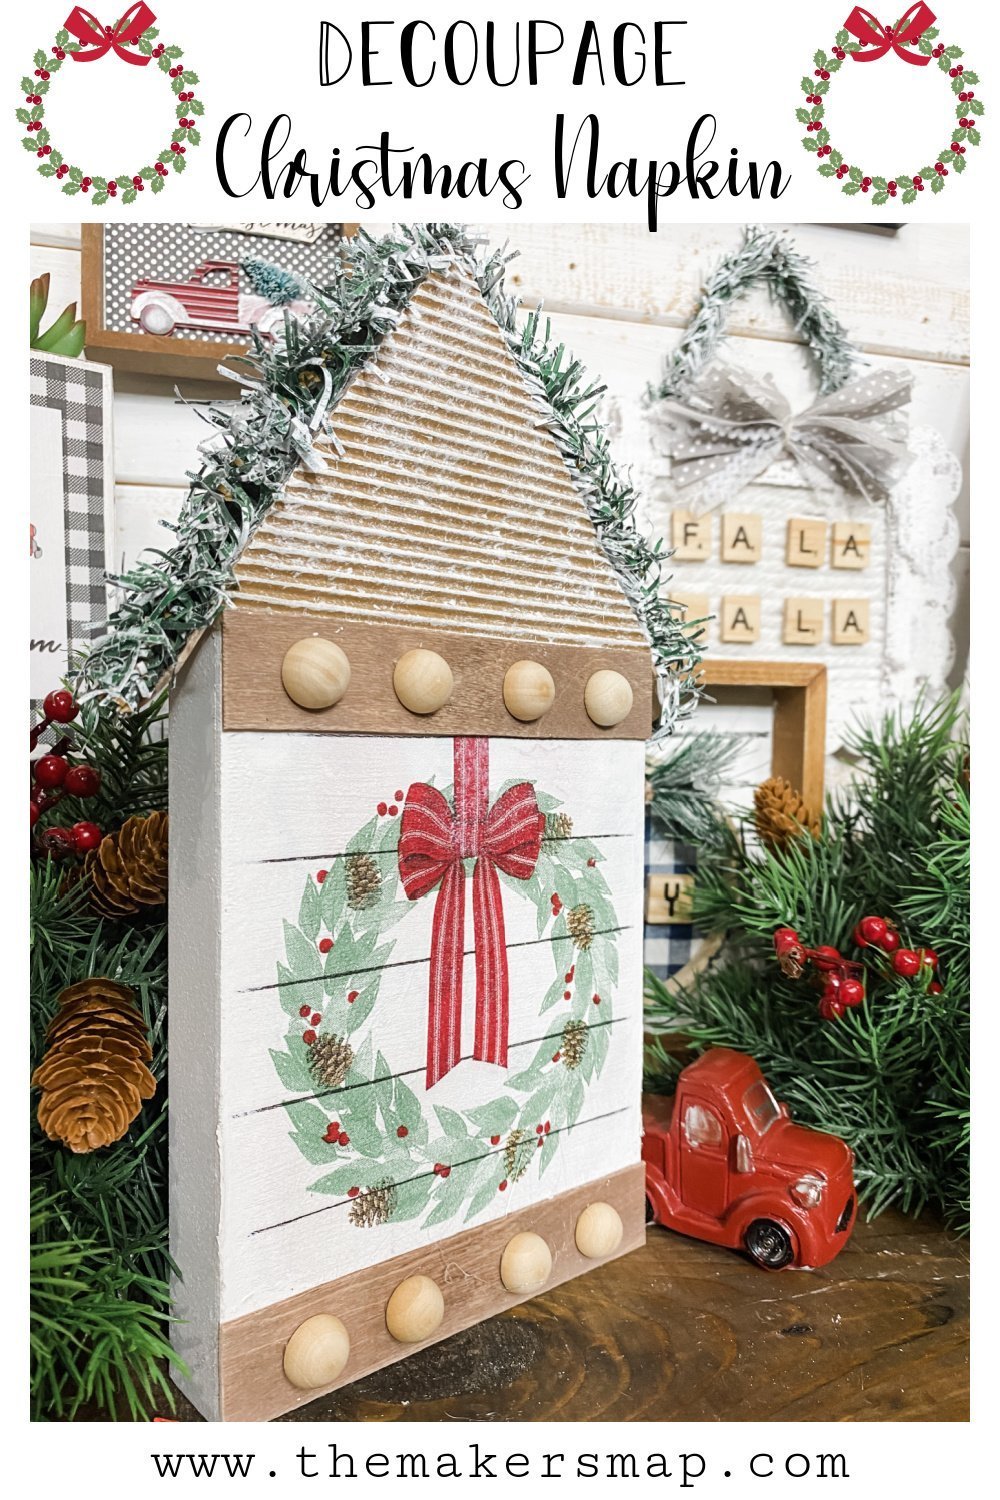
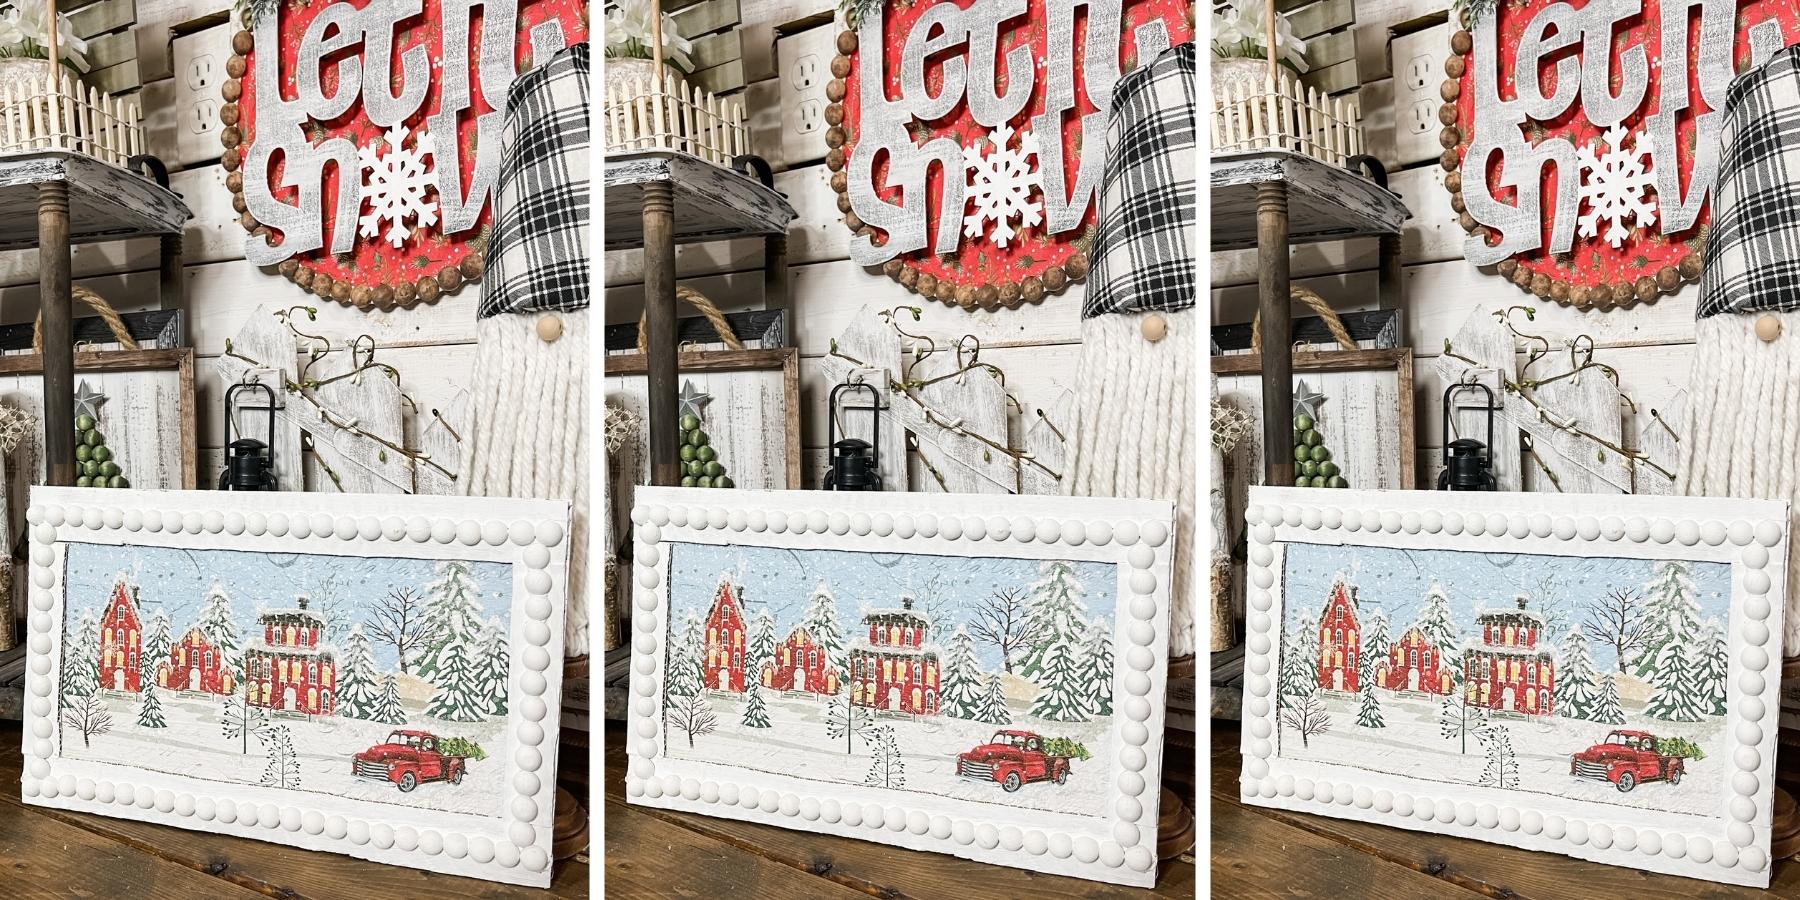
To start making this easy napkin decoupage DIY, I removed the edges of the Dollar Tree sign paper design on the front of my Dollar Tree wood sign box.
It was peeling up around the edges and would have been a problem later.

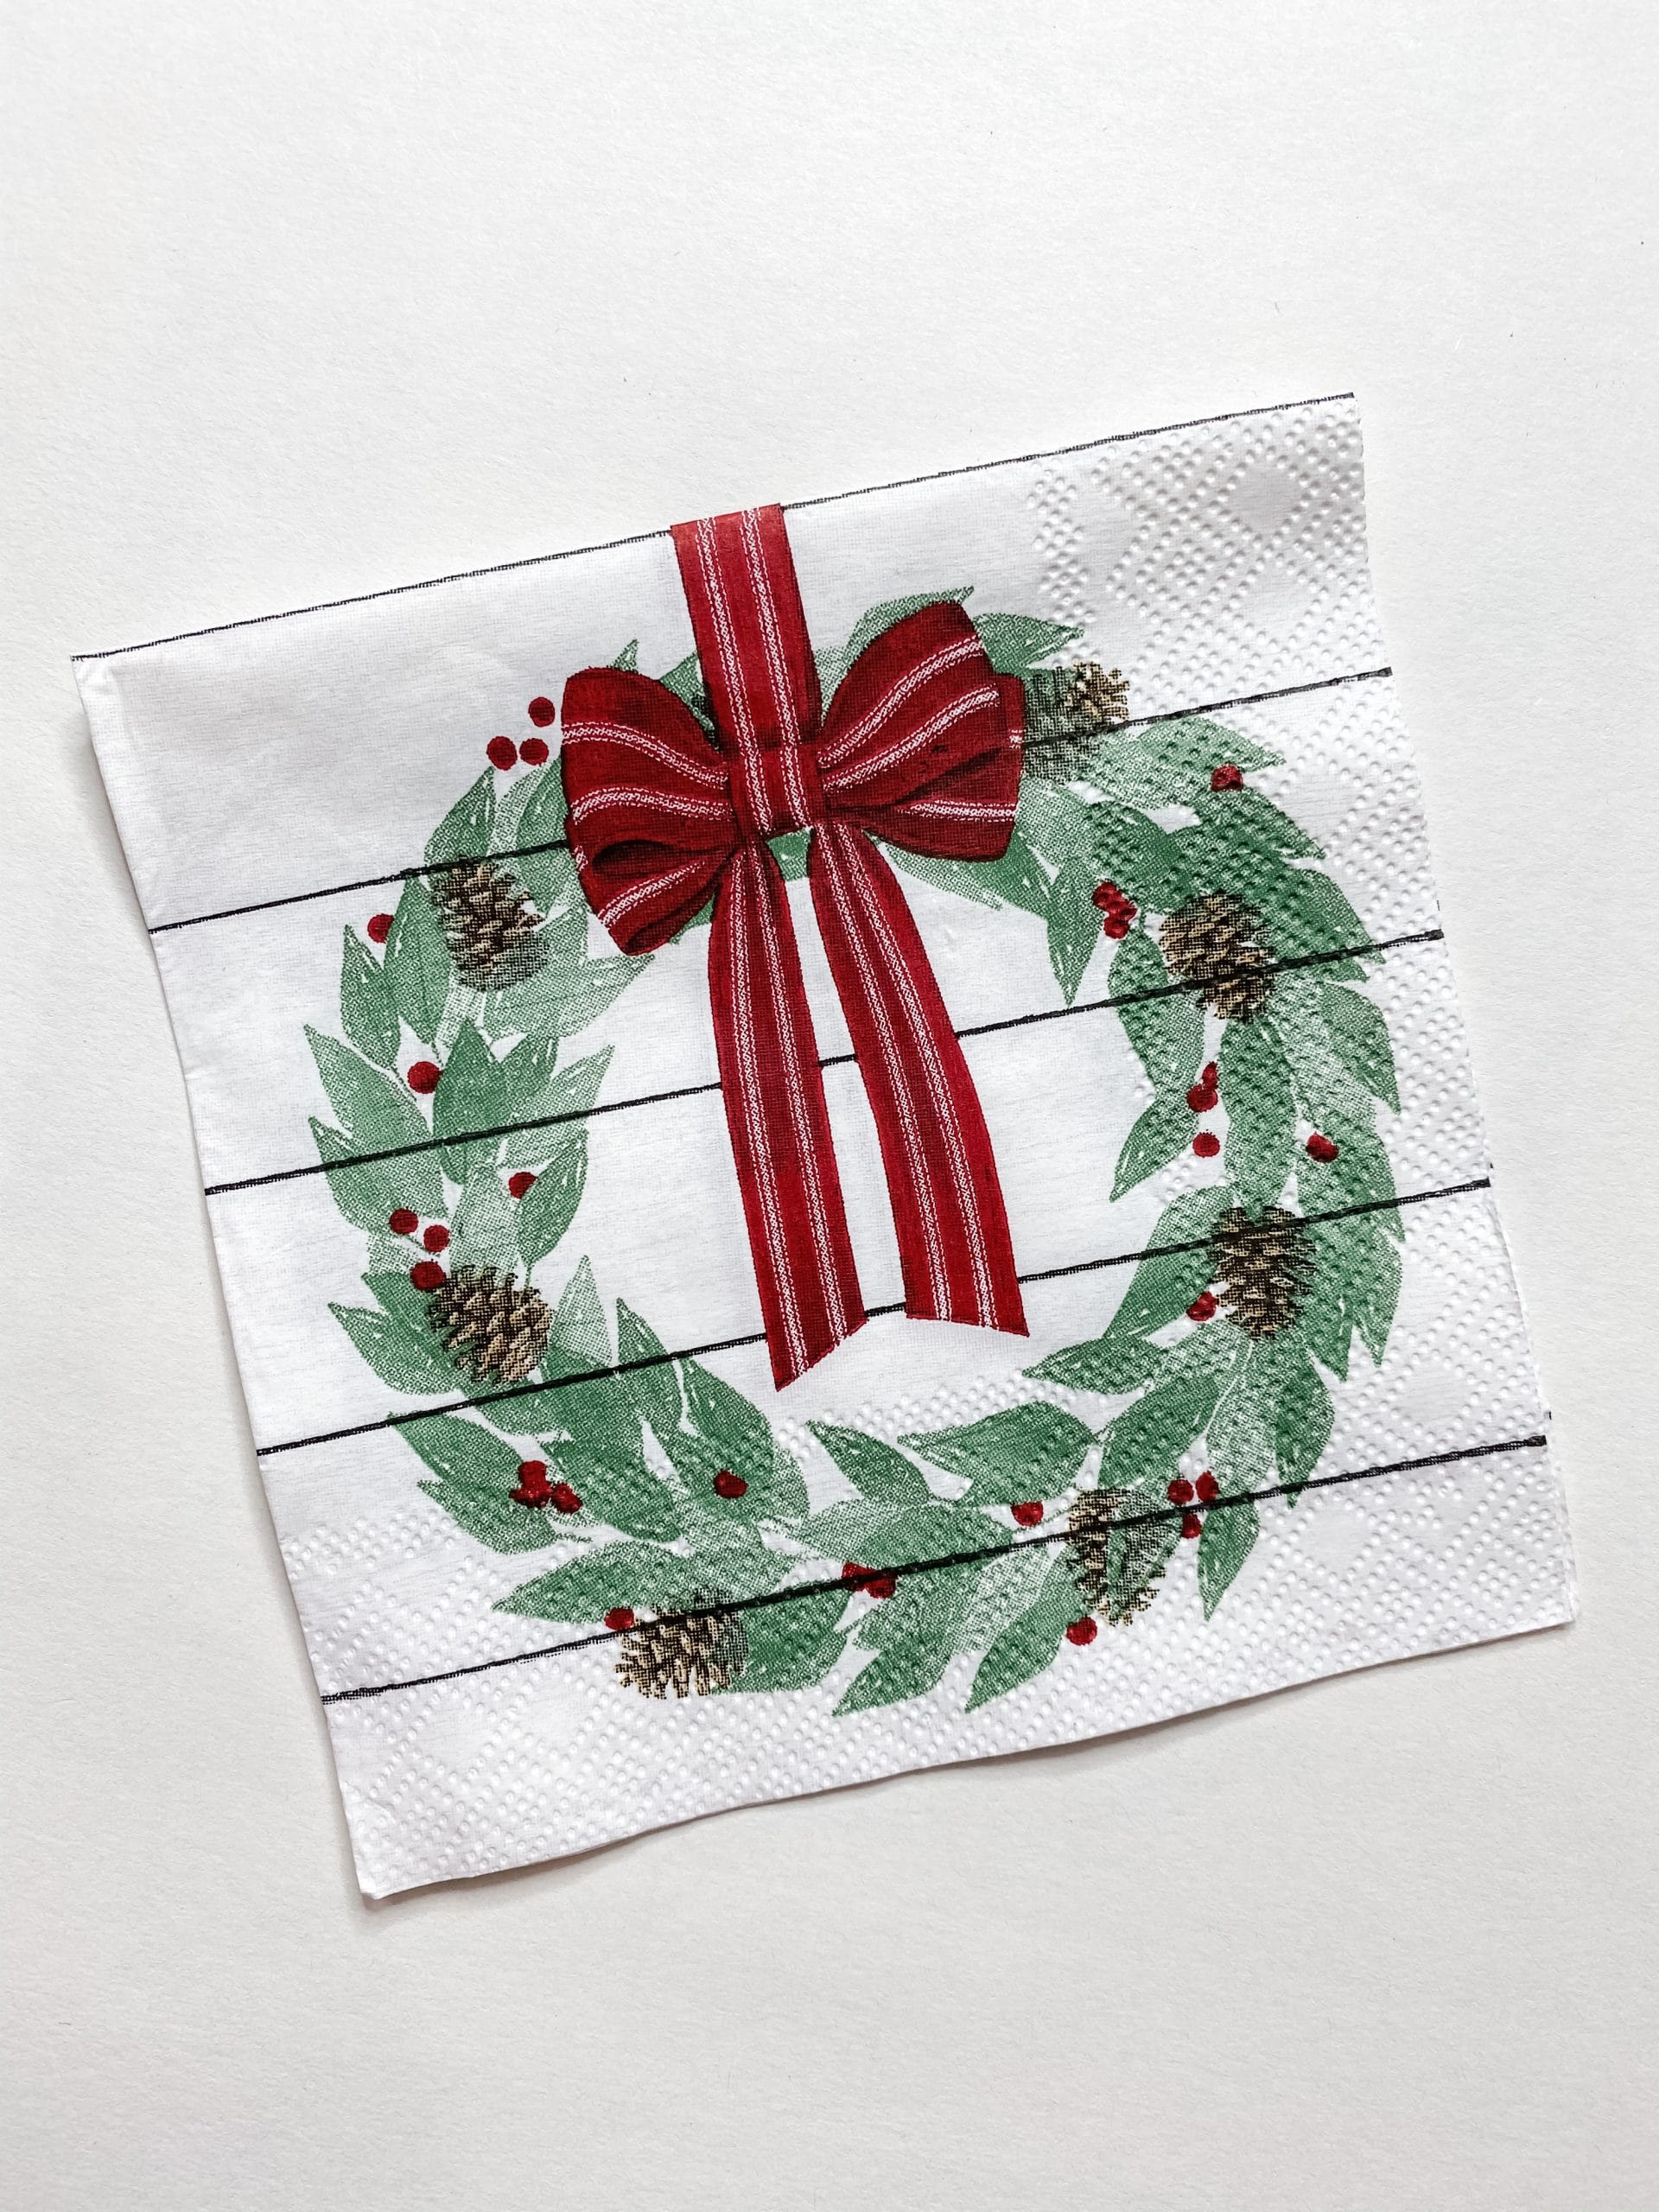
Next, I separated the plies of the Christmas napkin. If you don’t do this, the napkin won’t adhere properly when you decoupage and could pull off or tear later on.
Carefully pull the napkin plies apart starting at the corner.
How to Decoupage
Learning how to decoupage on wood or with napkins is very simple. The key is Mod Podge! I mix a bit of Mod Podge with the Folkart White Chalk Paint and brush a coat onto the surface of the wood.
Make sure you get full coverage. Next, carefully place your Christmas napkin where you want it.
 Stain the wood
To smooth out any wrinkles or creases, lay a piece of plastic Saran wrap over the decoupaged napkin and go over it with a rolling pin.
The plastic Saran wrap protects the decoupaged napkin and prevents it from tearing or pulling up.
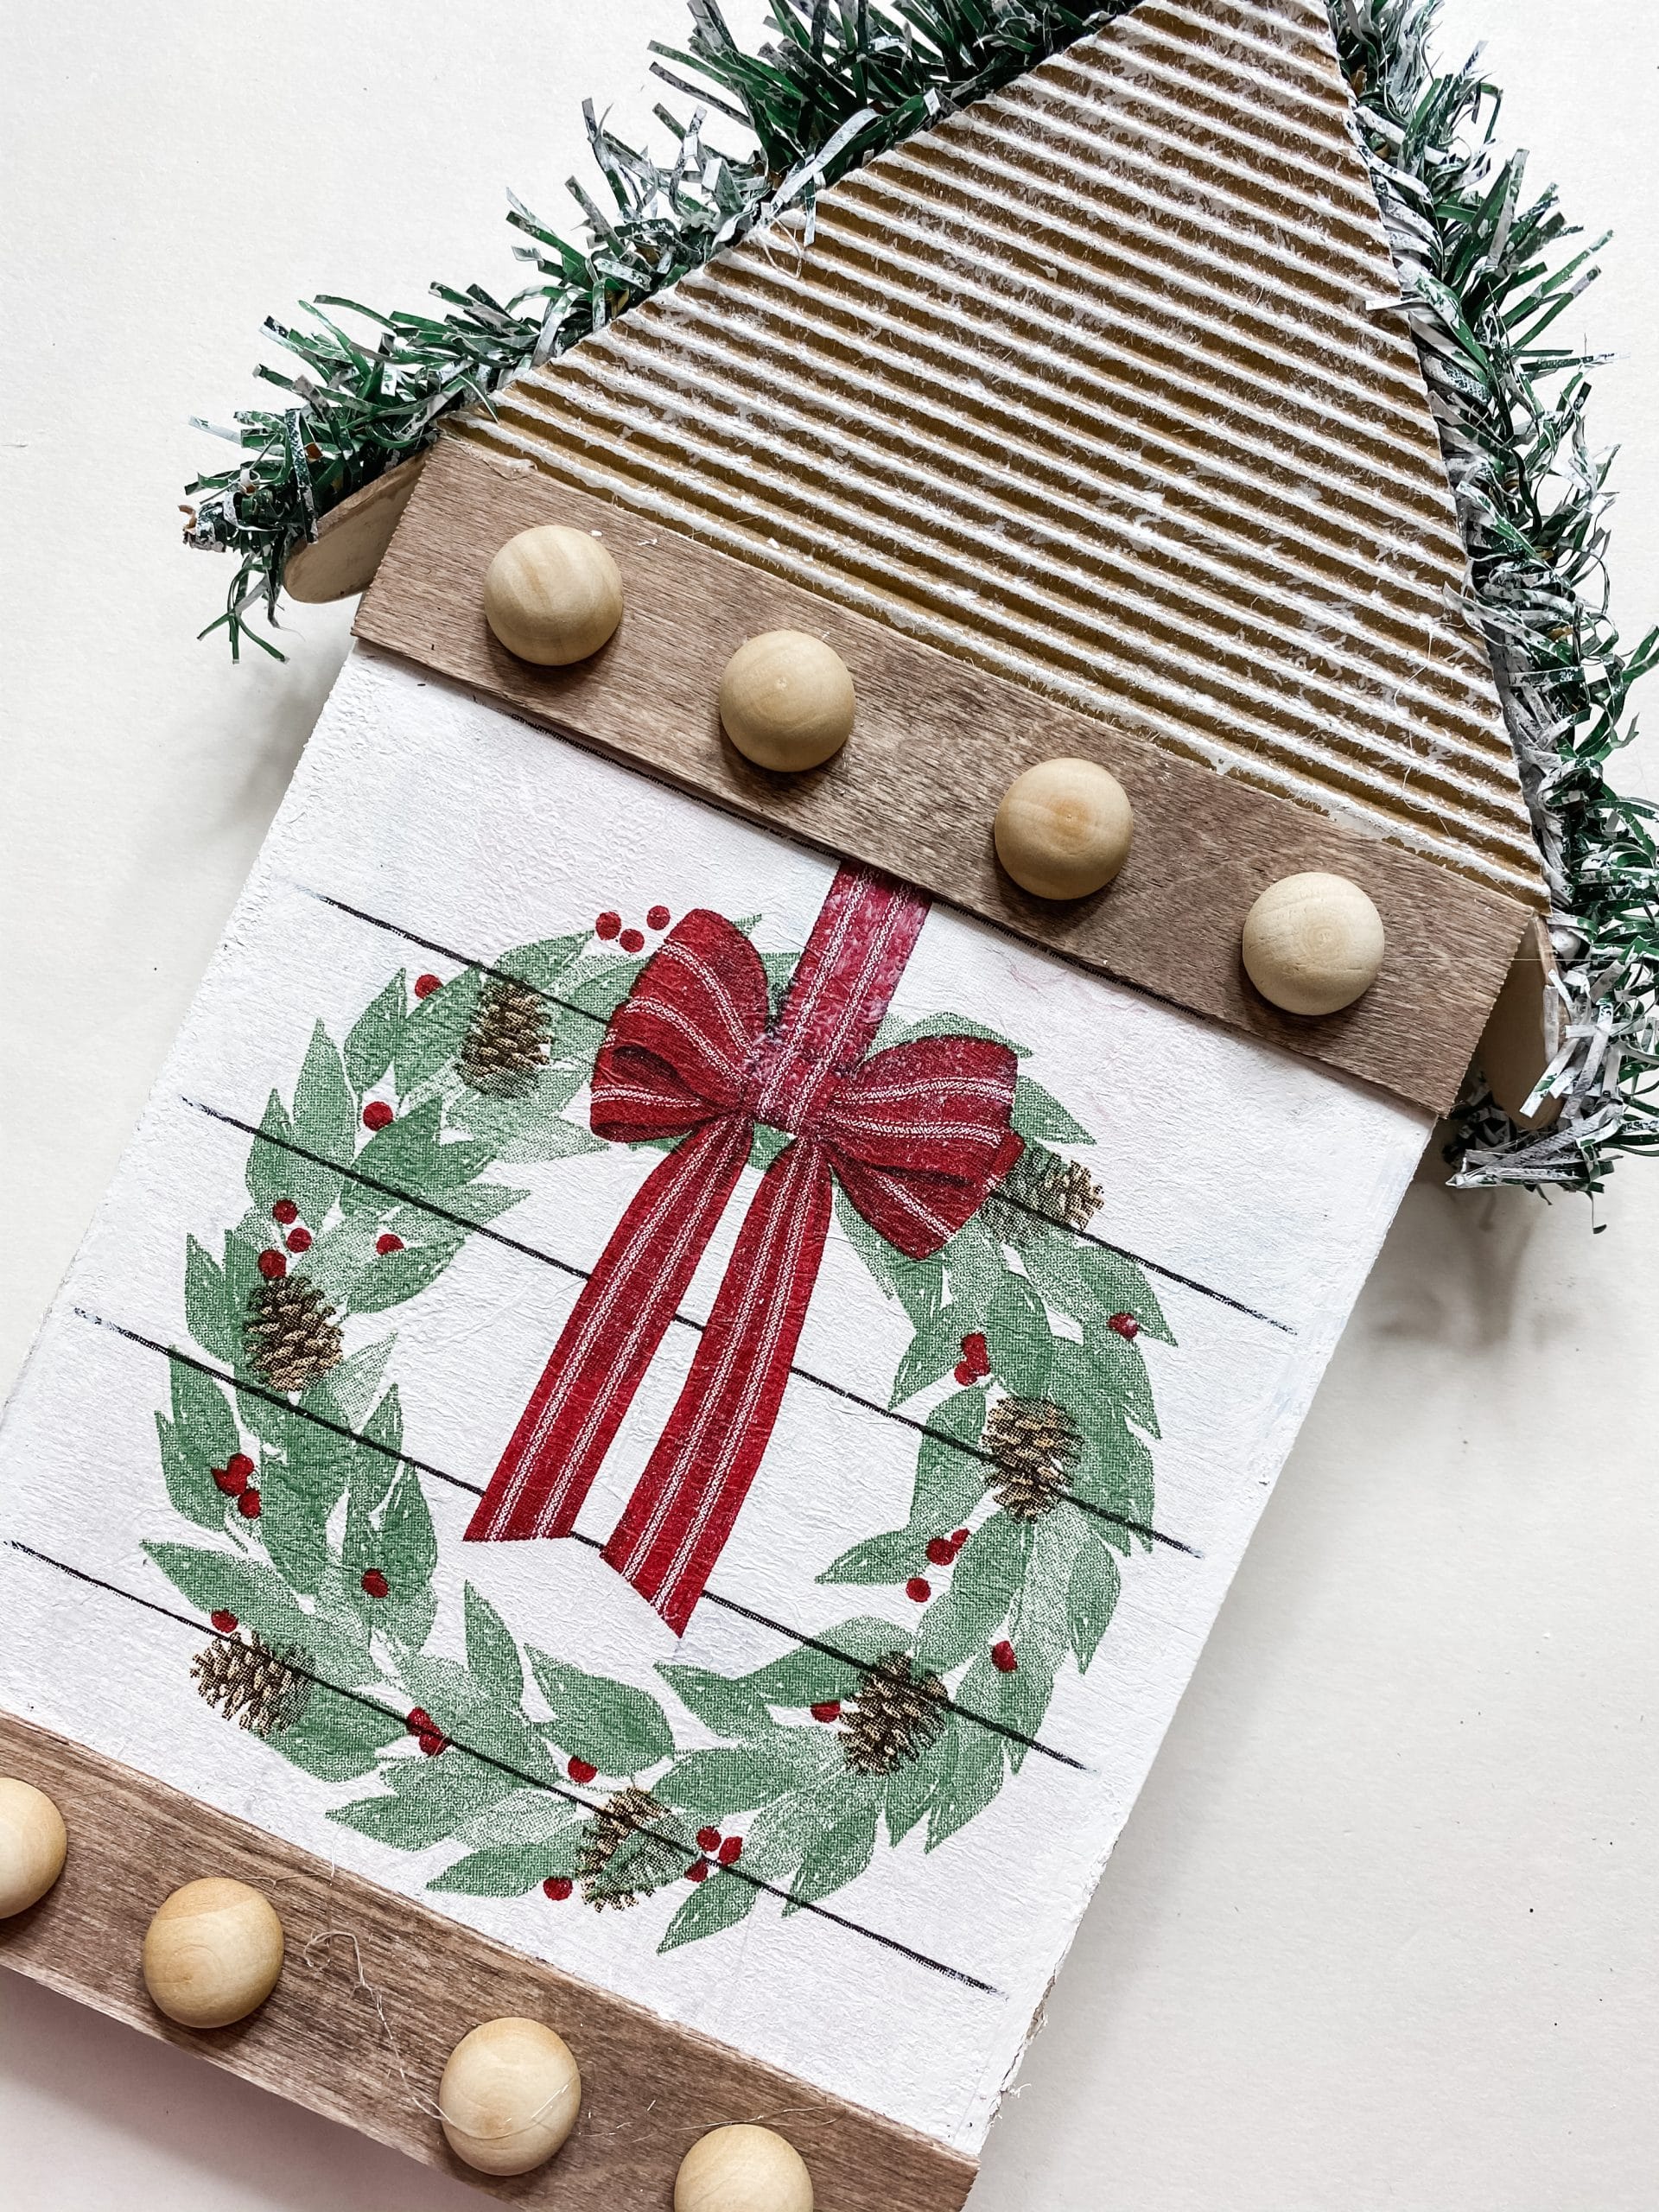
To build the roof for this Christmas decoupage DIY, grab 2 of your craft sticks. Trim them to the size that you want your roof to be.
I typically trim one end of each stick and they will create the point of the roof. I used 2 more craft sticks that I hot glued to the front. First, trim both edges to fit the width of the Dollar Tree wood sign box.
I was trying to recreate those Dollar Tree house shapes we all love!
Next, stain each craft stick brown with Folkart Java Chalk Paint. This easy staining technique helps add the perfect touch of color to any DIY craft!
I always wet the wood that I am staining either with a spray bottle or by mixing the paint with a bit of water. For this Christmas decor DIY, I used my spray bottle and misted each craft stick, then wiped the brown paint across them with a baby wipe.
The water helps the wood absorb the color and gives you the stained finish. This is a great wood stain using paint and water hack.

Put them in their place
Once the paint dries, you can hot glue each craft stick into place. I hot glued one craft stick at the top of the front of the wood sign box and one at the bottom.
Then, I hot glued the 2 other craft sticks into a triangle shape on top of the wood sign box.
Corrugated cardboard scrapbook paper
Make sure your craft stick roof is secure, and then trace the triangle shape they form onto a piece of corrugated cardboard scrapbook paper. Cut this out and lightly dry brush white chalk paint onto it.
Remember, it is better to cut it larger rather than smaller. You can always trim it down, but it is much harder to fix if the piece of corrugated cardboard scrapbook paper is too small.
Allow the paint to dry and hot glue the triangle into place.
Decorate the roof
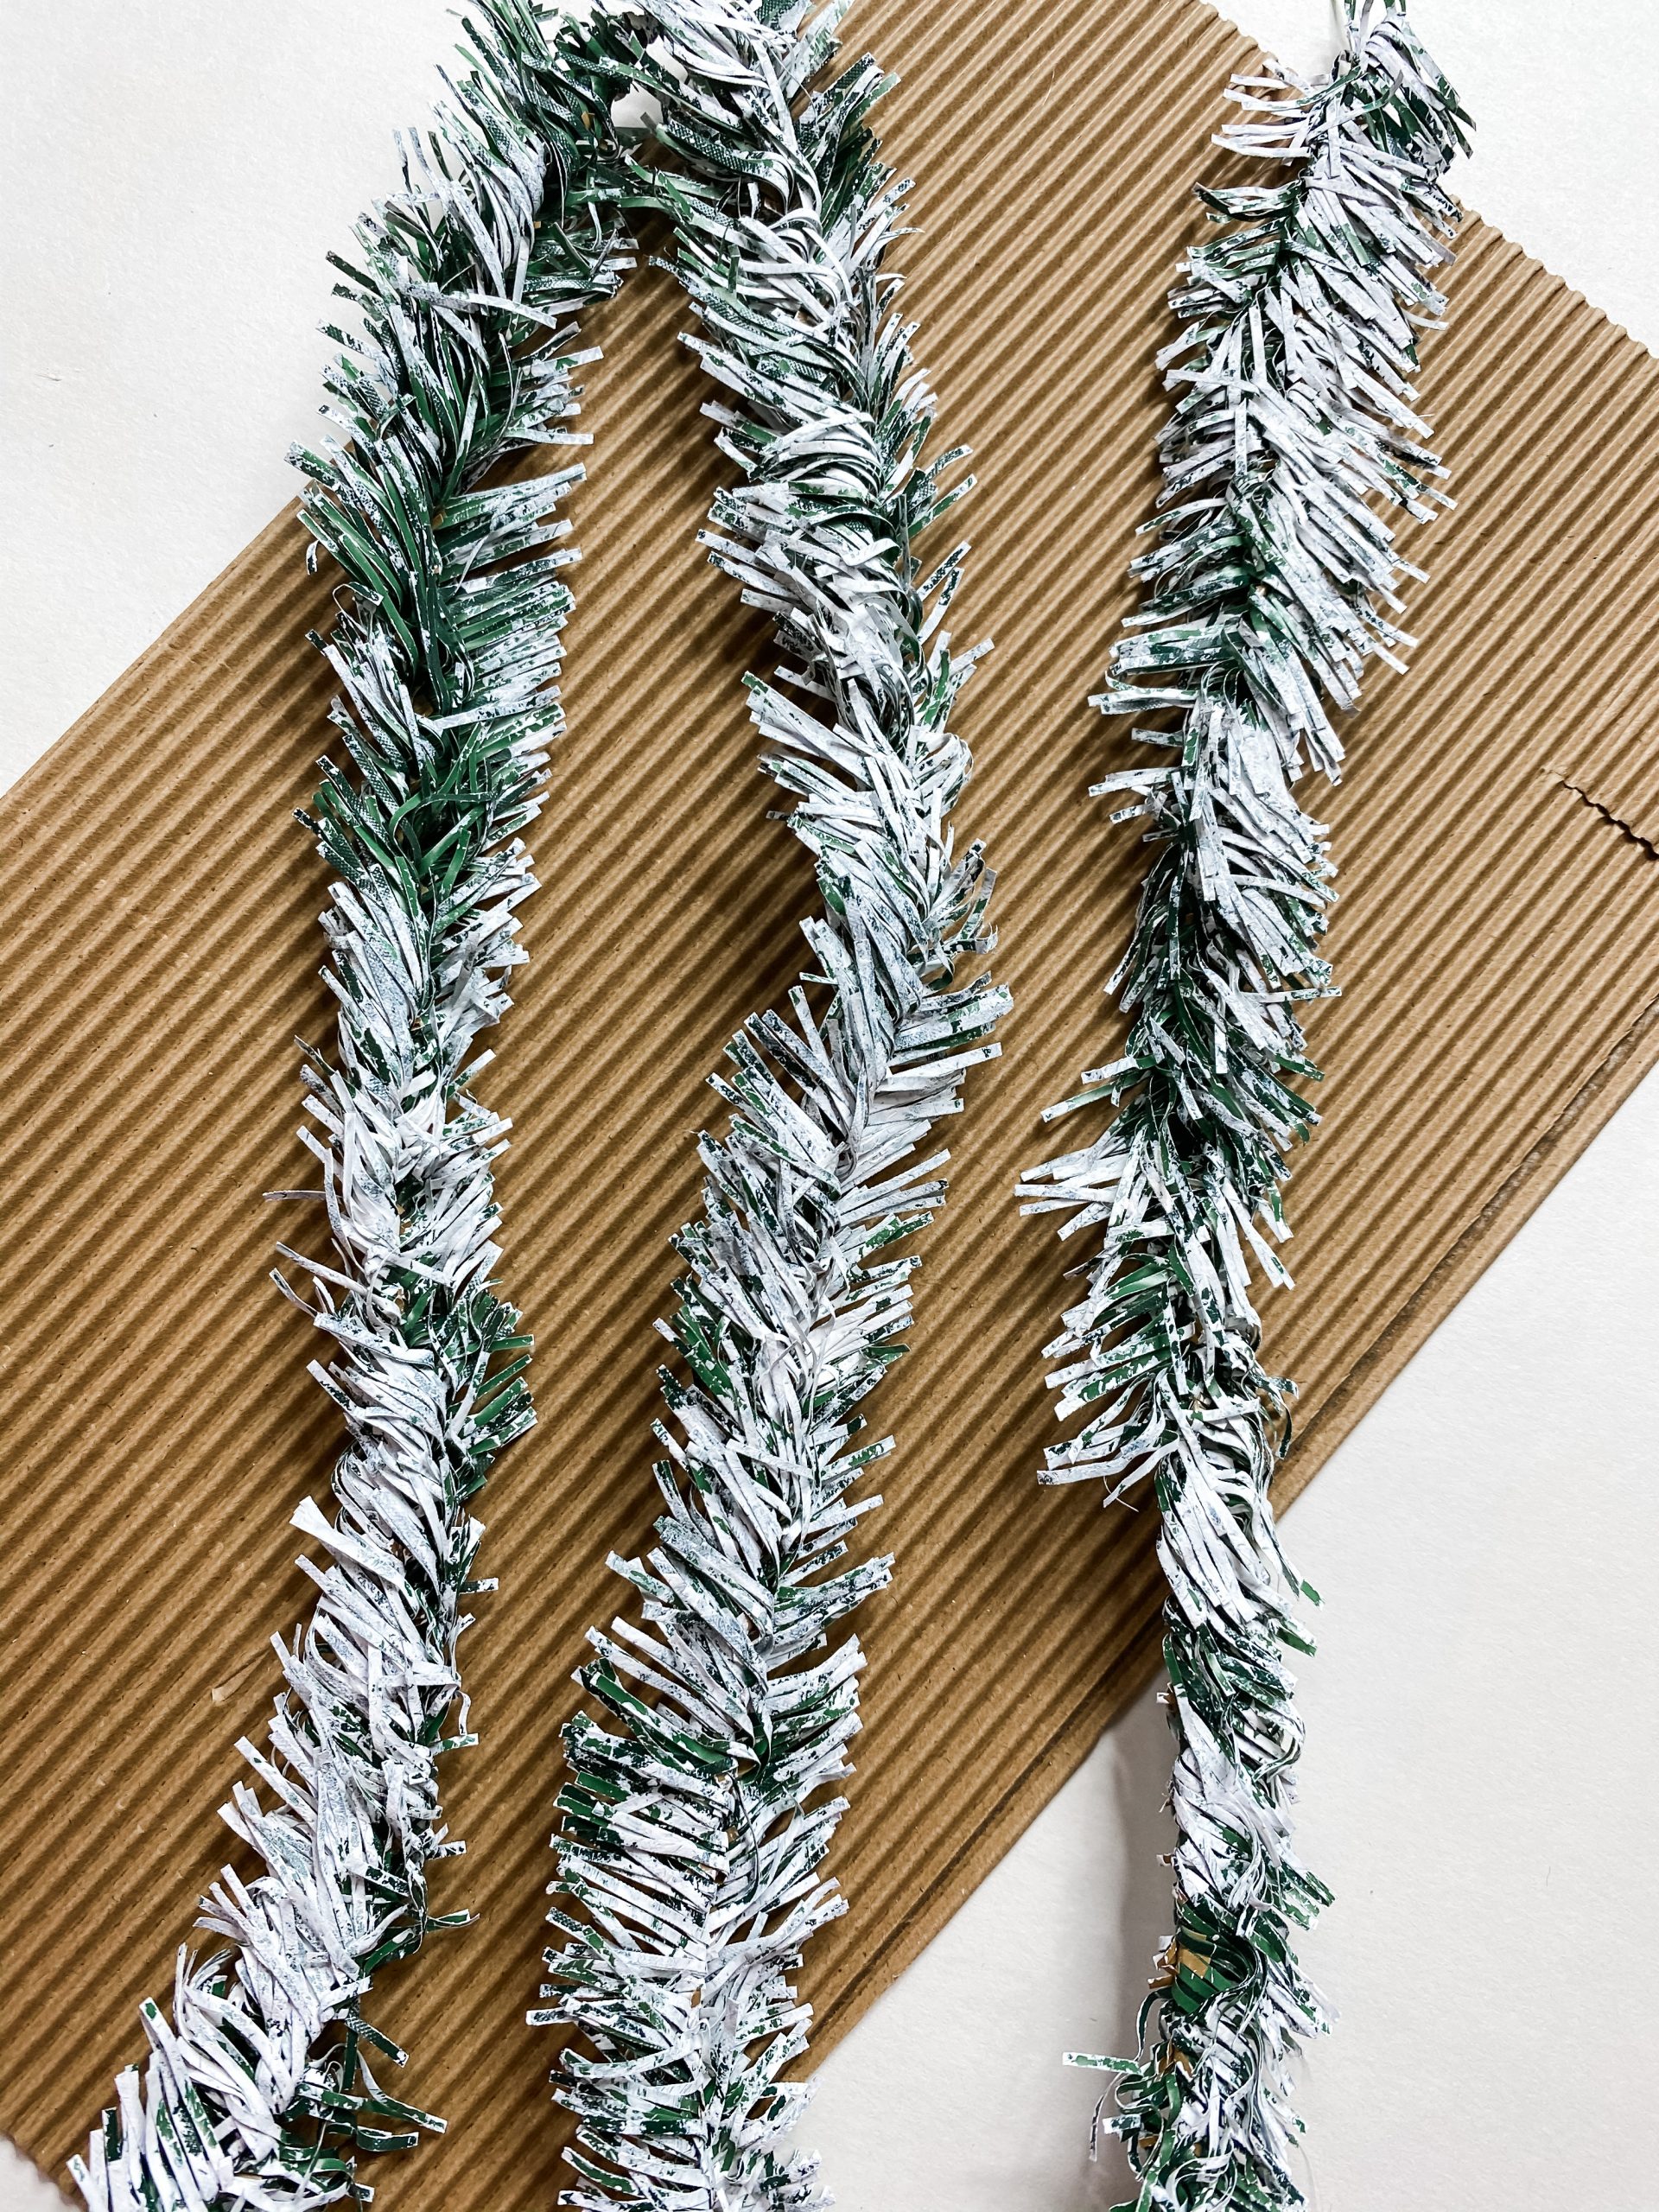
I had 2 Dollar Tree garland ties leftover from another project, so it was already painted white. To make your garland look like mine, just dry brush some white chalk paint onto the needles.
Allow it to dry, then fold each piece of garland at the center to form a V-shape. Next, hot glue each piece of painted garland to the craft stick roof.
The finishing touches
Finally, you’re going to hot glue 8 half wood beads. I did 4 half wood beads on the top craft stick and 4 half wood beads on the bottom craft stick.
I didn’t stain or paint the wood beads, but I think this Christmas decor DIY would be super cute with white half wood beads! Let the glue dry, and you’re done!
I hope you enjoyed learning How to Decoupage Wood Christmas DIY Decor Ideas as much as I did and decide to make it for yourself!
I would love to see how yours turns out! You should totally join my FREE Facebook group called On A Budget Crafts! It is a judgment-free community for DIY crafters to show off their projects and ideas.

If you loved this DIY you might also like this Christmas Ornament DIY with Cardboard!
Thanks for stopping by! XOXO Amber
You can also shop my ENTIRE AMAZON Favorites shop just click here! It’s packed full of all the things I use and love.
Here is the supply list I highly recommend every creative have on hand!! Would you also pin my blog for later and get on my newsletter alerts? I would love to have you join my #craftycrew.

Join my free “ON A BUDGET CRAFTS” Facebook group!
PIN THIS POST FOR LATER!


Great idea on making the house. I would have never thought that. Your so creative. This is so stinking ADORABLE