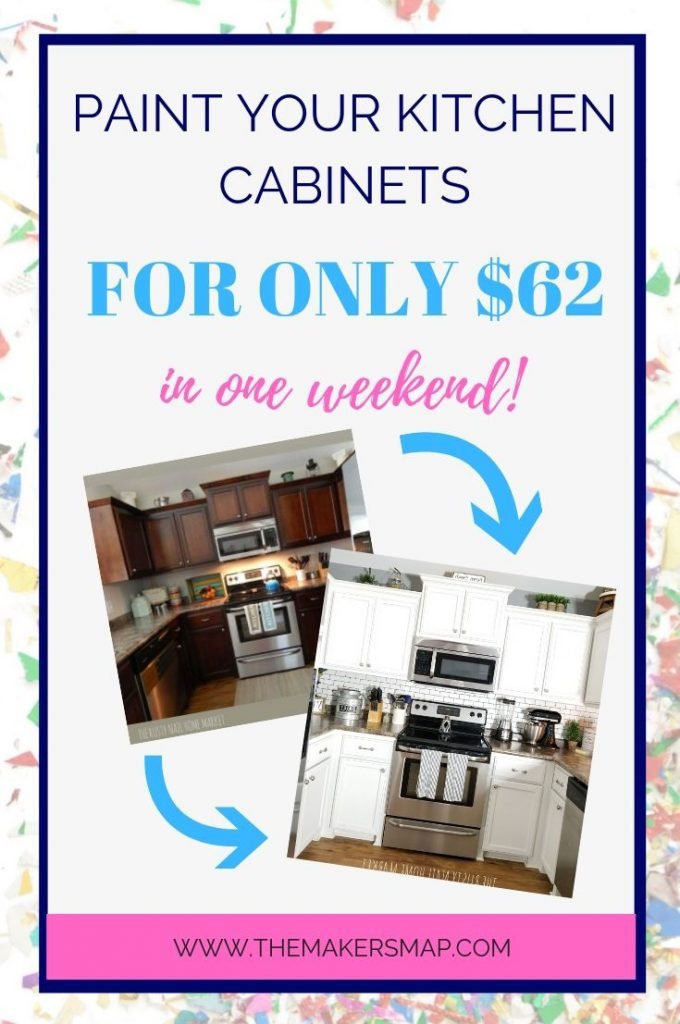
$62 Painted Kitchen Cabinets Makeover
One of the most asked questions I get is about redoing a kitchen! I have an answer! Here is a $62 Painted Kitchen Cabinets Makeover that anyone can do! Seriously!
Back in March of 2018, I decided that after 4 years of being in our custom built home with the boring custom wood kitchen cabinets (actually, they are the standard ones for our custom home) it was so time to DIY our kitchen cabinets and give them a makeover! When we purchased our house, we always planned to paint the cabinets.
Our builder thought we were crazy but he was like “hey, it’s your house”. Shortly after purchasing our home, my business took a huge shift! And the time required to DIY our kitchen was just not there! So 4 years went by! BORING Chocolate Brown Cabinets! (I know some of y’all are like WHY DID YOU PAINT THOSE? My response is paint is not permanent!)
You do what you love!
If you want to check out the HOW TO BACKSPLASH POST after reading this one just go here! It’s NOW ON THE BLOG too!
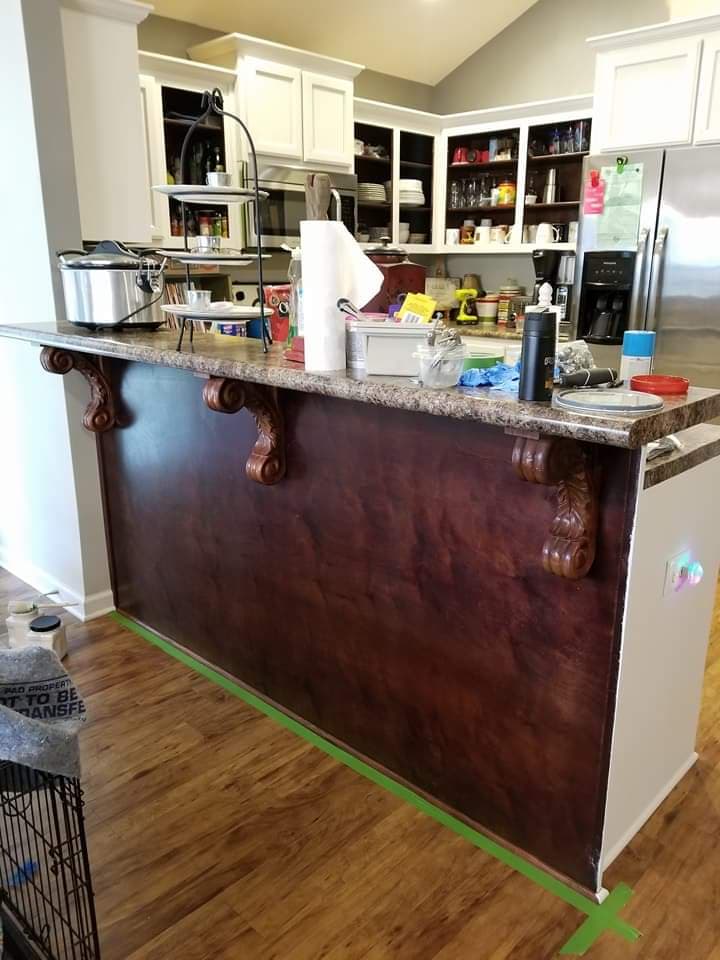
Before I painted my kitchen cabinets:
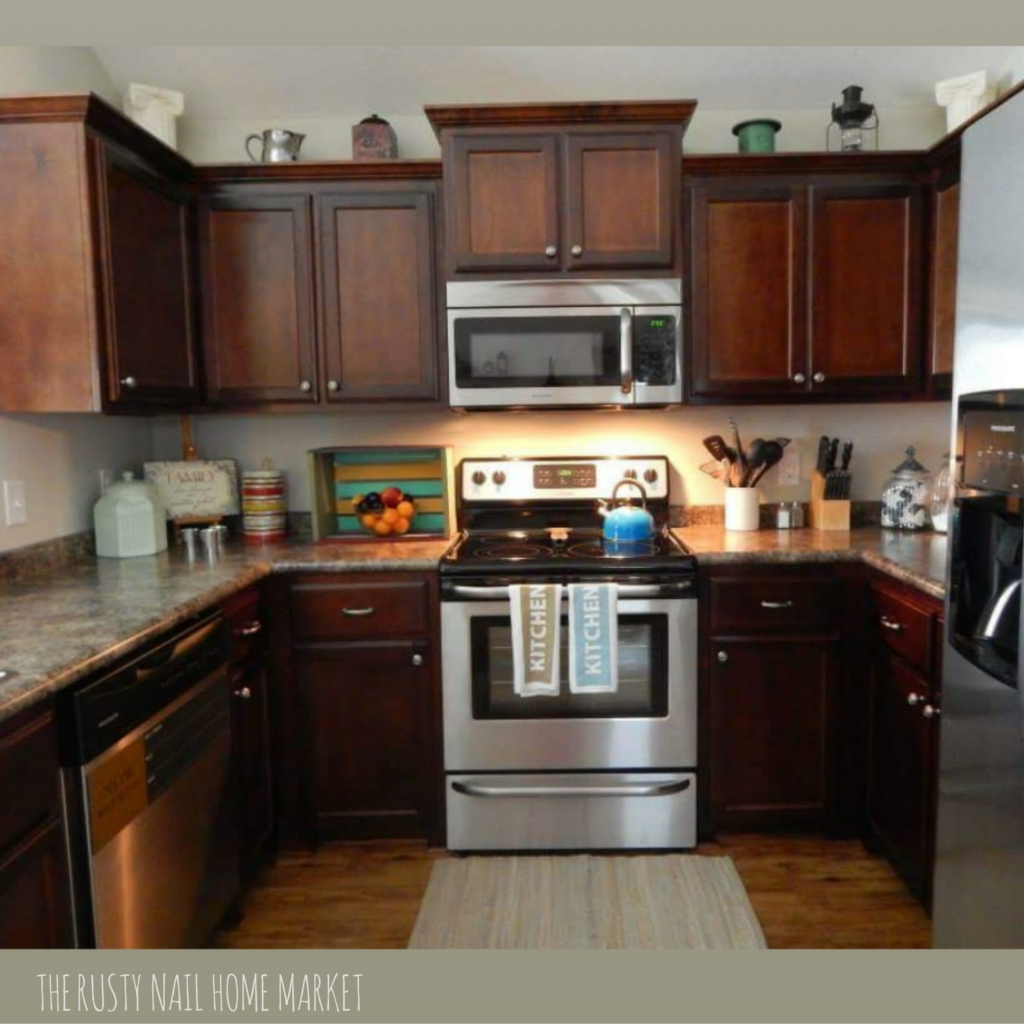
Enough is enough!
Finally, I had enough! I decided, it is the time! So in early March of 2018, I planned the whole kitchen makeover project. Quickly my plans went out of control, not only did I plan to paint our kitchen cabinets white, I then added on to my list a subway tile backsplash and a fresh coat of paint throughout the kitchen, dining, living room, entryway, and hall! YEAH!
Beware, home update projects can get out of hand QUICK! But hey, It was totally time for a fresh look in our home. So, I told the “HUBS” I want to finally paint our kitchen cabinets (and all the other things). Per usual, he was like whatever you want to do. Happy wife, Happy Life right!
Clean and Prep
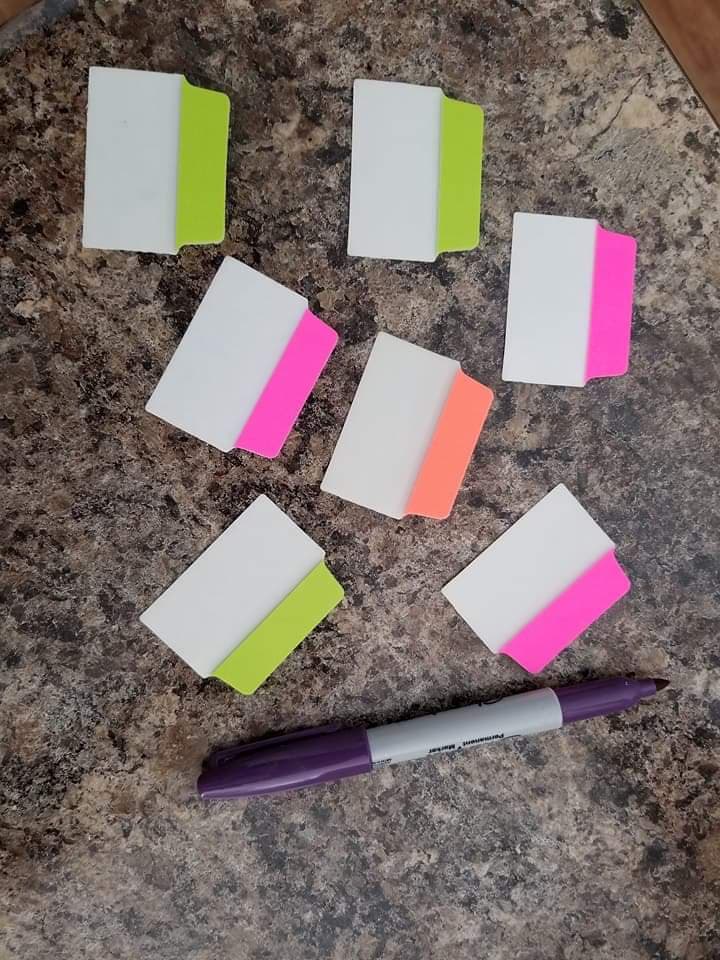
So I gave him the task of cleaning the kitchen cabinets with my go-to cleaner Sprayway Glass Cleaner, Paper Towels, and good old Clorox Wipes! And then taking off all the kitchen cabinet doors. Prior to the doors and drawers coming off I used some sticky tabs to label them on the inside of the cabinets so that I knew where they went when I was done with the painting. EASY!
Kitchen makeover ideas on a budget
You can find them by just clicking through! (affiliate links also listed below!)
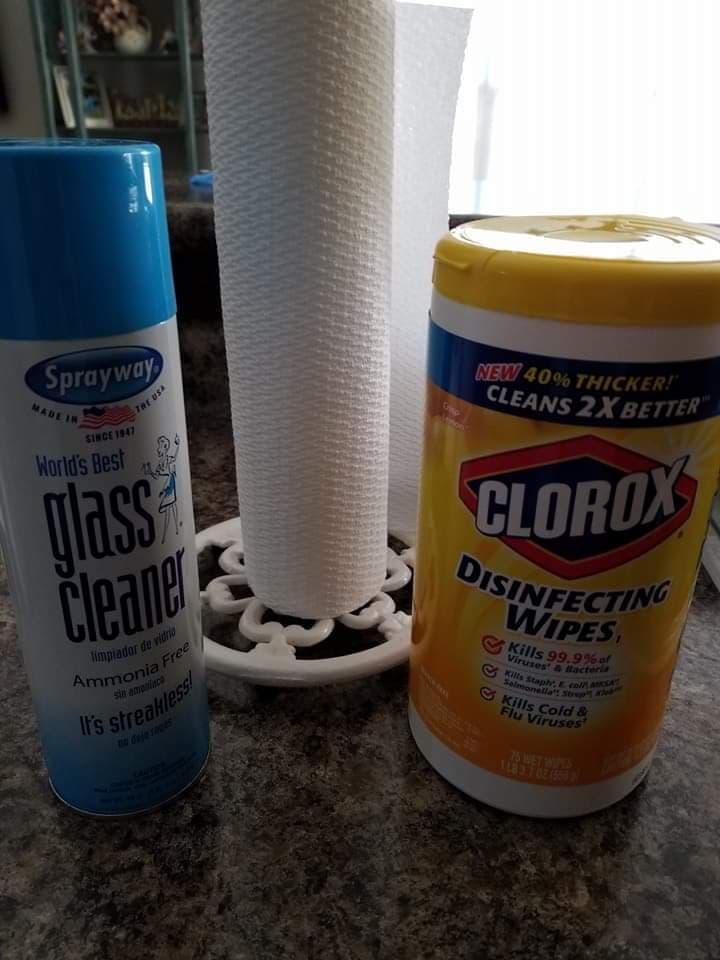
Sprayway glass cleaner is my go-to cleaner! I also used the Clorox wipes to disinfect any areas that might have something I didn’t want to just paint over. Do not be intimidated, I know this looks like an episode of Kitchen nightmares! lol But it really is an easy kitchen remodel. Kitchen cabinet paint cost can be very costly! But you can do it yourself for much less.
How to paint kitchen cabinets like a pro!
Labeling the kitchen cabinet doors and drawers is a must! This makes the “putting it all back together” part a breeze! You can always, add new hardware and change up the cabinet locations if you want to do a full kitchen remodel. This will vary on how kitchen cabinets are installed by your builder, or if you are adding in new ones. Set aside your kitchen knobs and pulls or you can paint over them too.
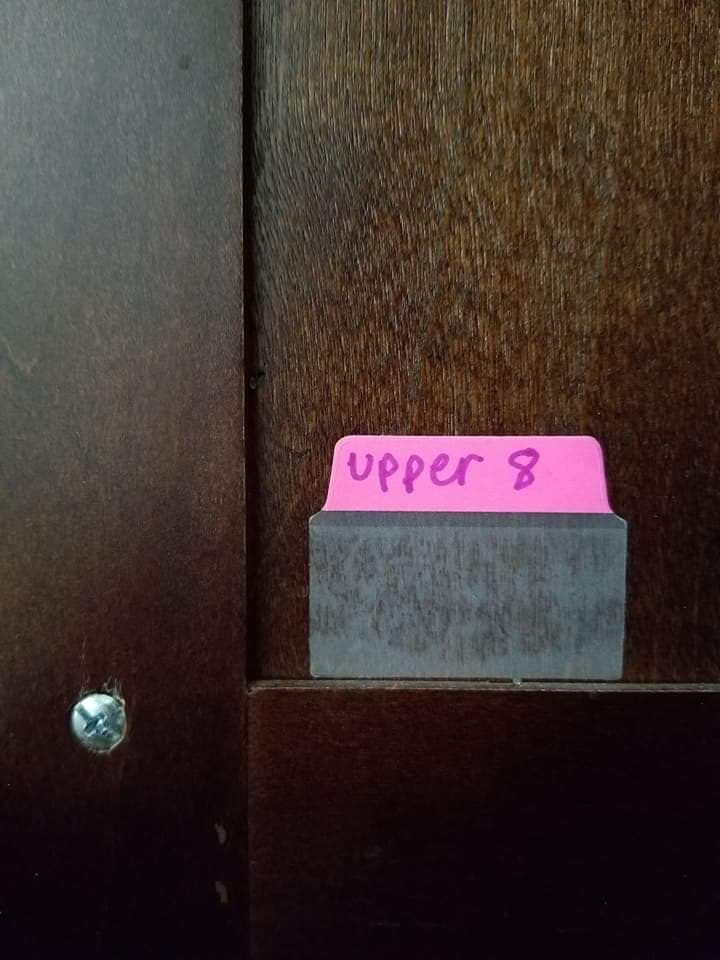
Don’t laugh but some of my cabinets may or may not still have labels on them!
Kitchen cabinet makeover anyone can do!
Once we got everything cleaned and prepped, I got the flu! Yes, the flu! I was miserable, but I forged onward! Nothing was going to stop me from FINALLY getting this project done! Not to mention my kitchen was already torn apart! Fun story, (well, not really) A few years ago, when we were renters, we painted our kitchen cabinets at our apartment. AND WOULD YOU KNOW…… FLU then too! What is it with me and the flu and kitchen projects! Between the fever relief, I painted! Is what it is! But I am a persistent person I guess! Nothing will stop me!
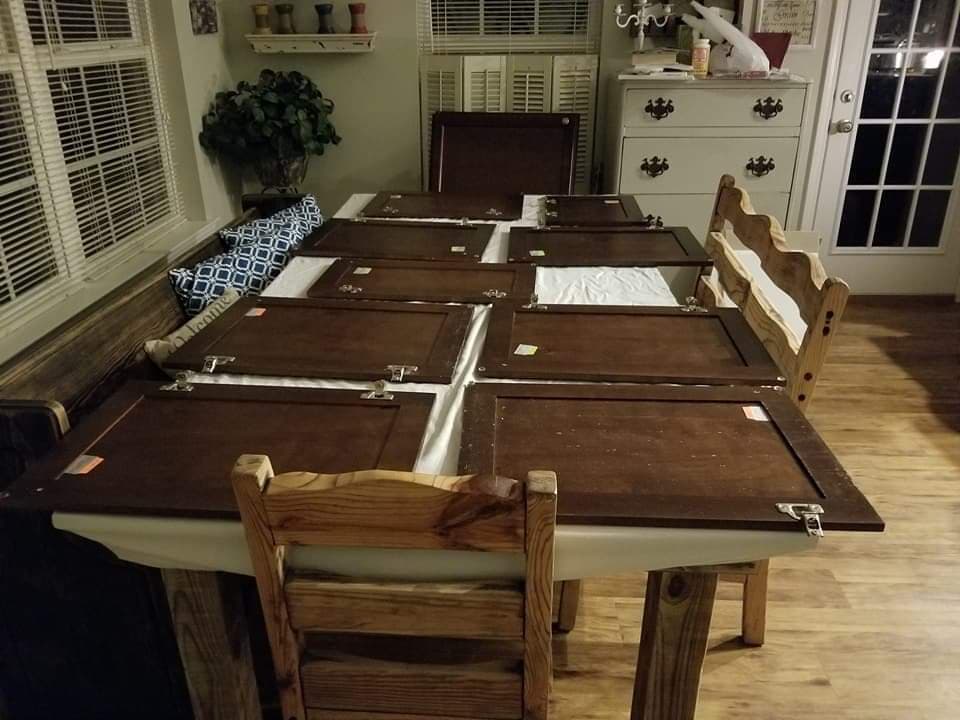
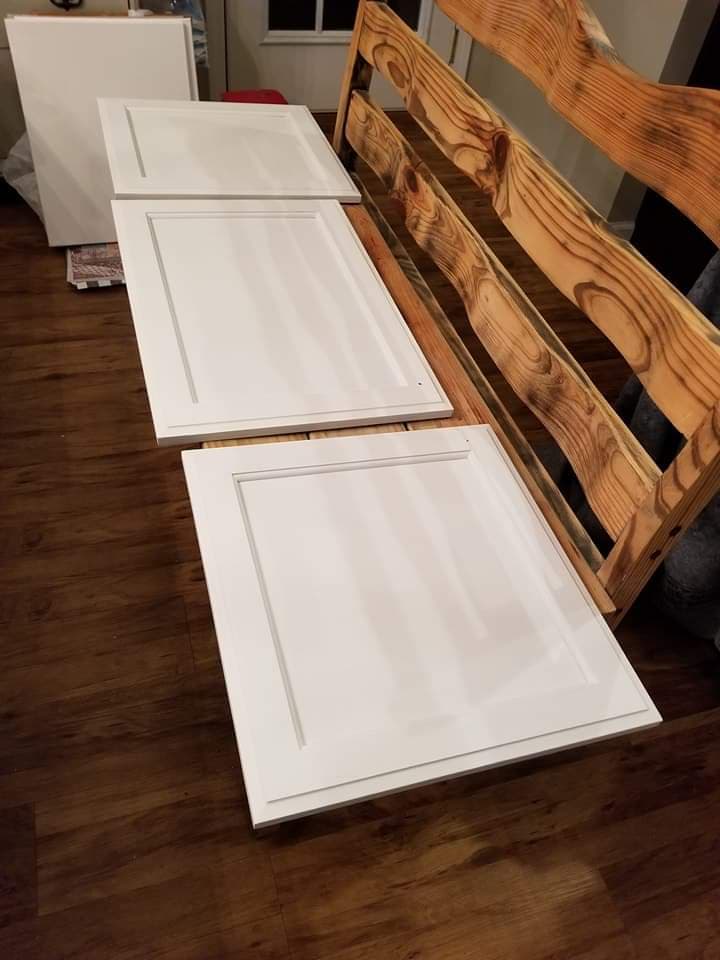
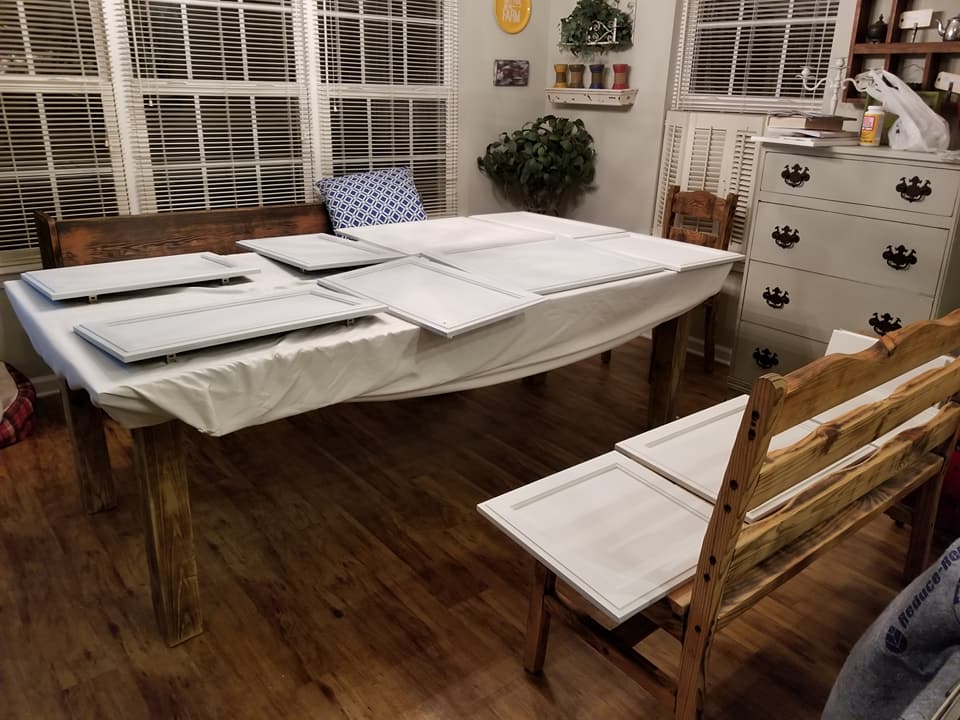
This was my farmhouse kitchen table I built with my dad covered with a twin sheet and my kitchen cabinet doors!
We have an 8-foot farmhouse table, and my husband got extra clever (yeah, he has good ideas sometimes too, SHHH) He got one of our twin-fitted sheets and put it over our farmhouse table to protect it. CLEVER RIGHT? That’s a free bonus lol! Note that we left the hinges on the cabinet doors so that I could prop the doors up on them when I painted. In the photo, the doors are upside down, I did flip the hinges then flip the doors over to paint.
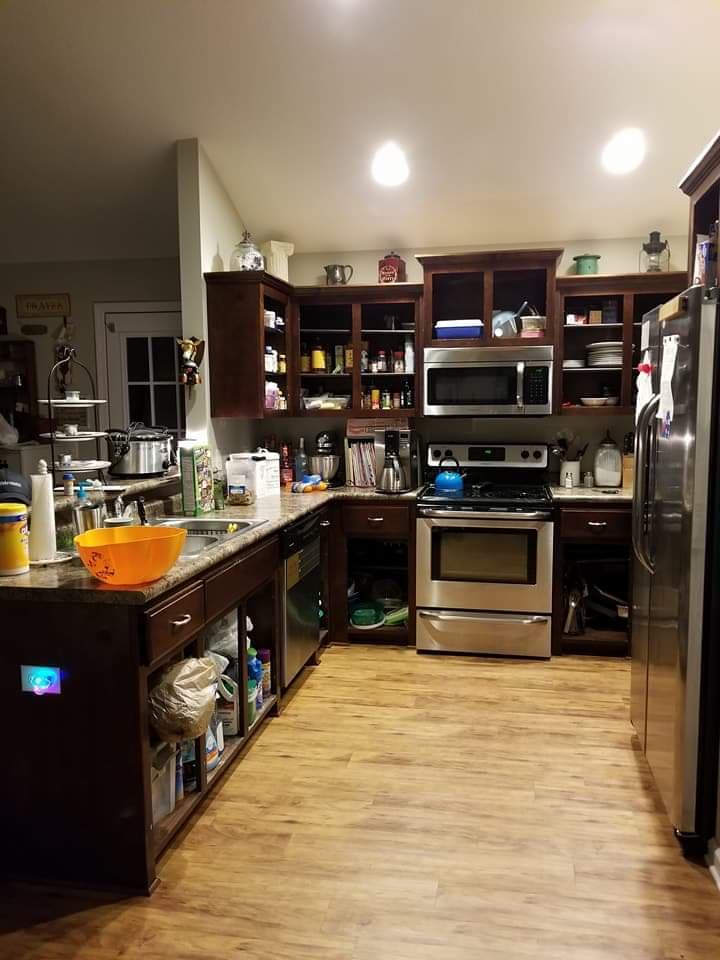
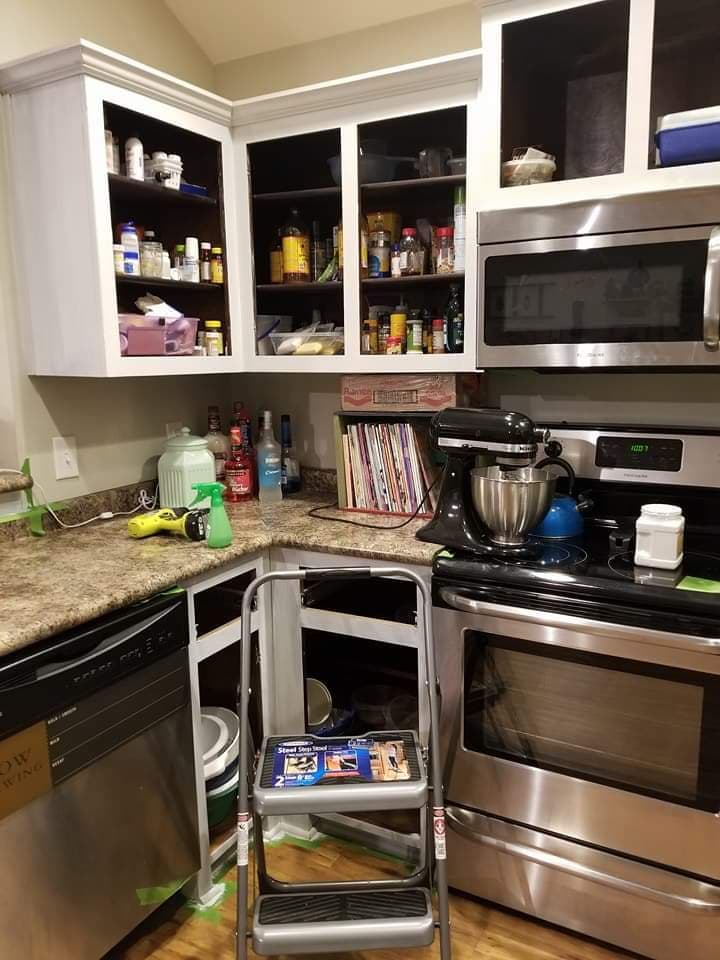
Be prepared!
Note that our kitchen without doors it really looks like we have a serious case of hoarding and zero organization. Be prepared for your kitchen to be a total disaster while you DIY your project. But that part is motivating I guess, sorta ensures you get the job done! You can take the time to re-organize your kitchen at this point if you want.
The Prep
I DID NOT SAND or PRIME! I never sand down or prime when I paint. Honestly, I have been painting long enough to have “super tricks” so that I do not have to use extra products or time to sand or prime! I am all about the paint techniques and tricks.
$62 Painted Kitchen Cabinets Makeover Fast Time Lapse Videos are below!
TIME TO PAINT!
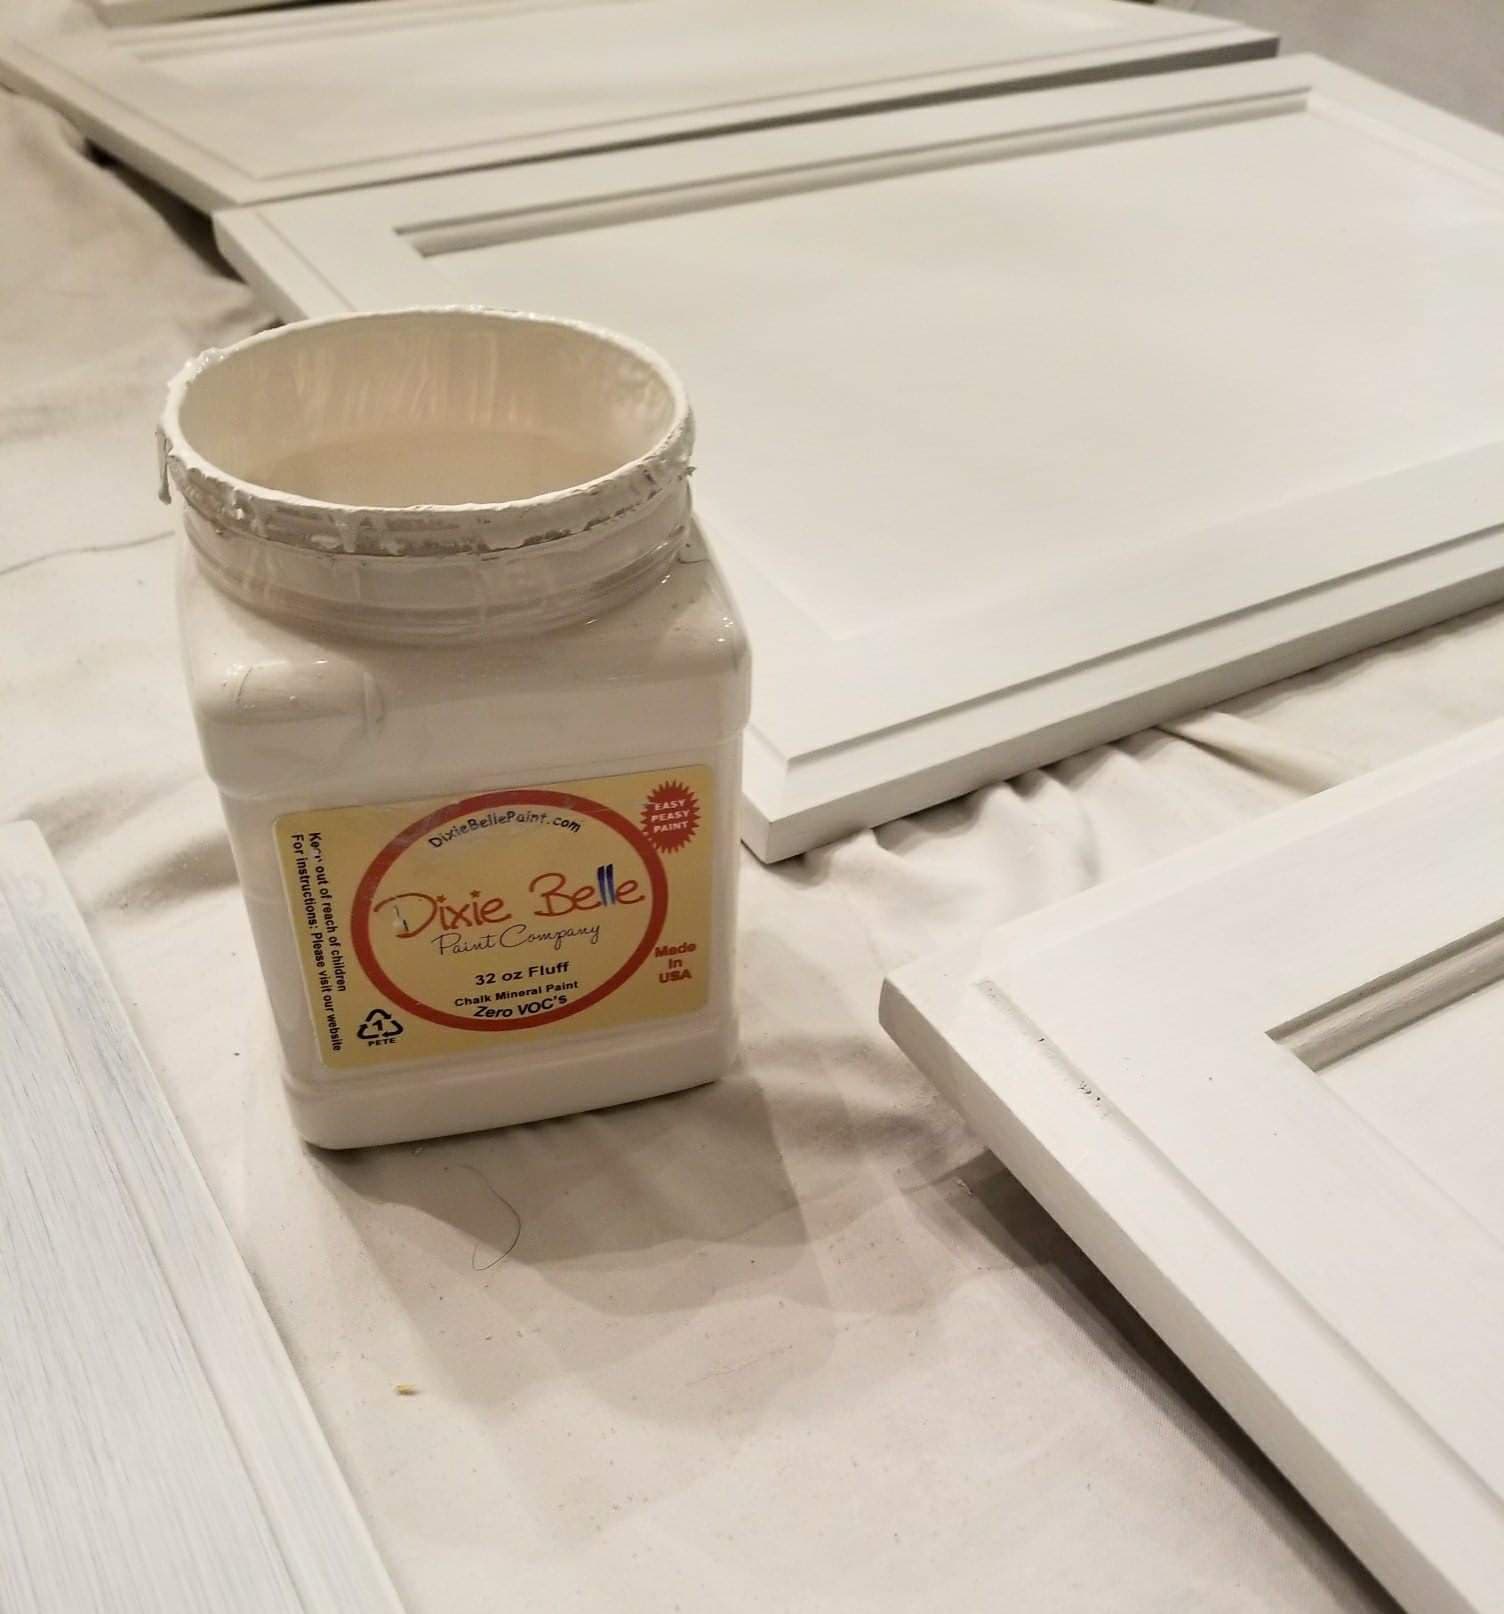
If you didn’t know, I HAD a successful brick and mortar store, and I was a proud premier retailer for Dixie Belle Paint Company. Regardless of my store closing, I am still a lover of DB Paint and all their products. So, for my kitchen makeover, it was a no brainer. DIXIE BELLE IT IS! We went with the color Fluff!! I used 2 – 32-ounce containers that are $62 retail when purchased in my store. (online and in-store prices will vary) (your supply amount may vary based on your kitchen size)
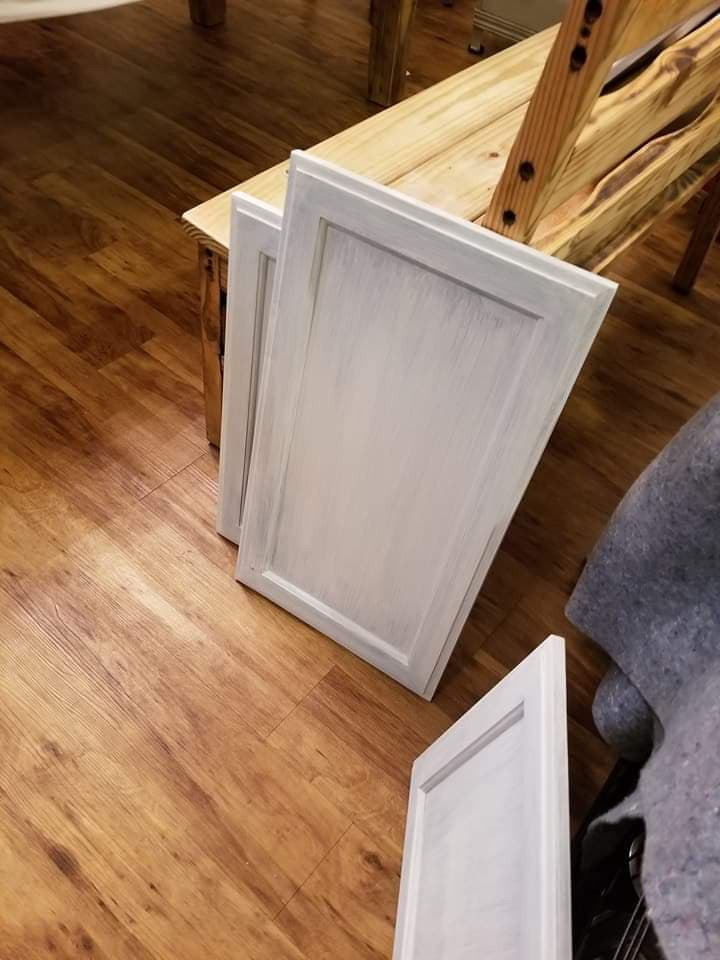
I almost forgot to mention, It is normal for there to be streaking with the paint on your first coat.
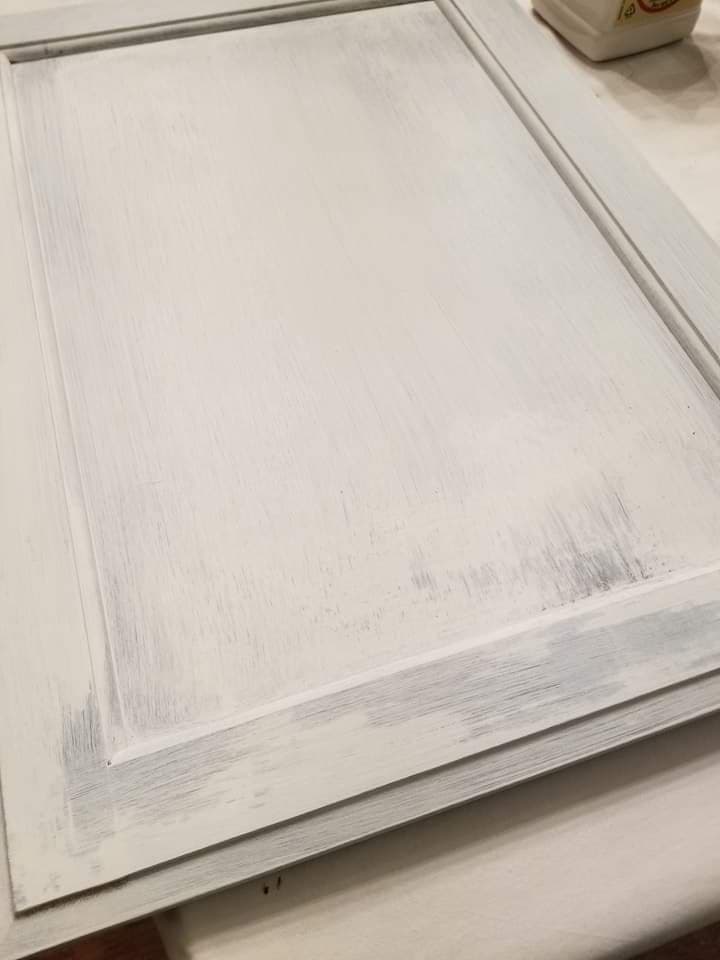
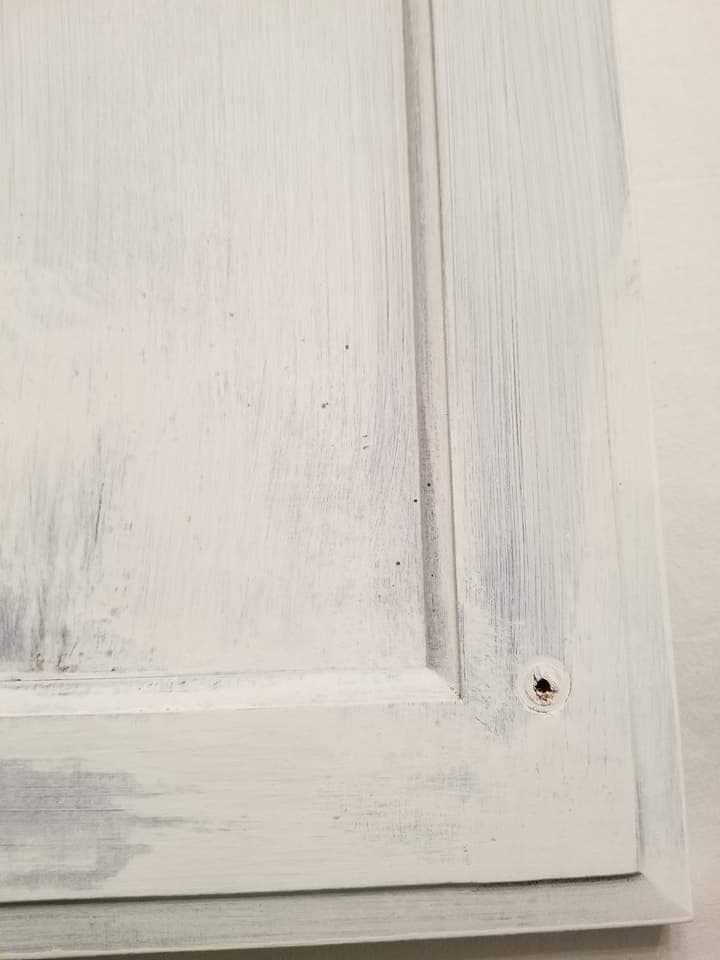
You can see here lots of streaks! But as you add paint they will go away.
Like I said, As you can see in the photos, one coat may not look the greatest, but keep going. Once you get going and you go coat by coat the coverage will be fine. In some areas of my cabinets, the paint did not want to stick evenly. Again, keep going. Leave it be. Let it dry then go on to coat number 2. For my cabinets, I applied 3 coats of paint.
THIS IS IMPORTANT!
For the 1st coat, I used only paint. For coats 2 and 3, I used my fine mister spray bottle to lightly apply water to the paint to help eliminate brush strokes and to evenly thin the paint. To do this you lightly mist the kitchen cabinet, dip your brush in paint and then add a thin coat of paint over the kitchen cabinets. DO NOT SATURATE! Your goal is to keep the strokes to a minimum visibly! There really isn’t a right or wrong way to paint kitchen cabinets.
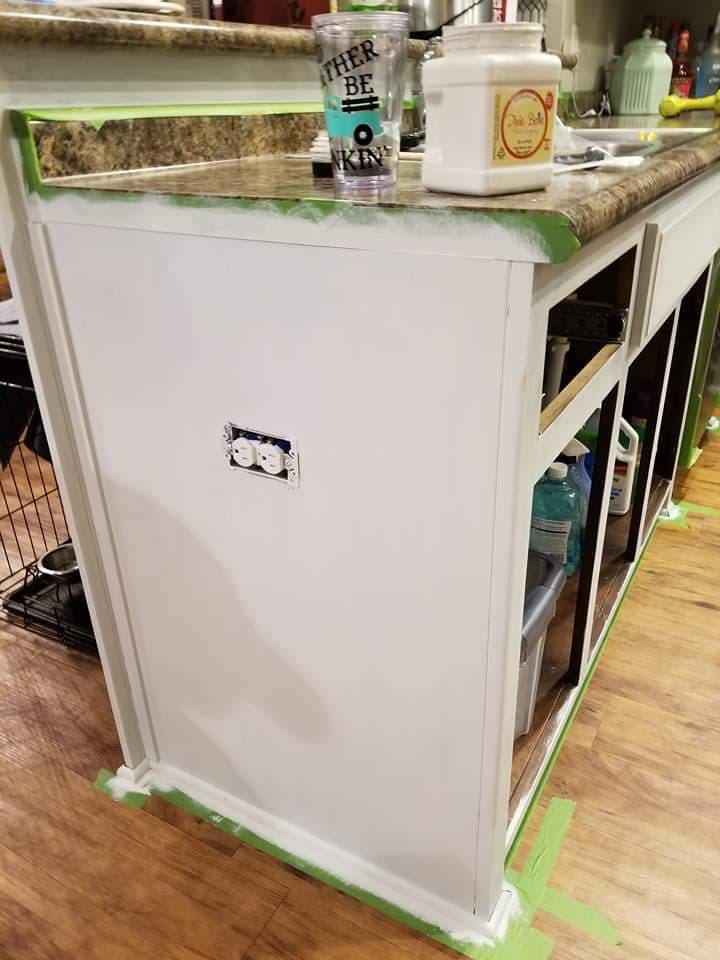
Tape it off!
I want to mention that around the floor and wall areas we did use the Frog Tape (green roll) to tape off the floor. We also used the Frog Tape (green) around our countertop. So easy to get that clean line too.
Notice in the side photo of my cabinets that is 2 full coats. The coverage is amazing! What if it gets streaky? I thought you might ask. Just keep going. The paint will even out coat by coat. But too much paint will lead to brush marks. Oh brushes, I forgot to share that. I used my Paint Pixie Brushes (#12, #8, and Wax Brush) too from Paint Pixie to apply the Waverly Wax sealer.
Are you loving this $62 Painted Kitchen Cabinets Makeover so far? Pin it!
Are you wondering should I paint my kitchen cabinets or replace them!
I know it seems intimidating but honestly, it’s not that bad. Remember, I did this entire kitchen makeover project with my husband and I had the flu! (I used my step stool to get the upper cabinets and we would cycle through stages and allow to dry and loop back around. Next, I took on the cabinet doors while the husband (Mark) painted the uppers and lowers. This allowed us to get the project done over the weekend.
(We started Friday night around 7 pm and finished Sunday evening around 9 pm) We painted 3 coats, sanded smooth, sealed the paint with Waverly or Plaid Wax (Matte Finish), buffed and added the hardware back on. 2 days’ time! WITH THE FLU!
LISTEN, FRIENDS, you got this! You can do this too!
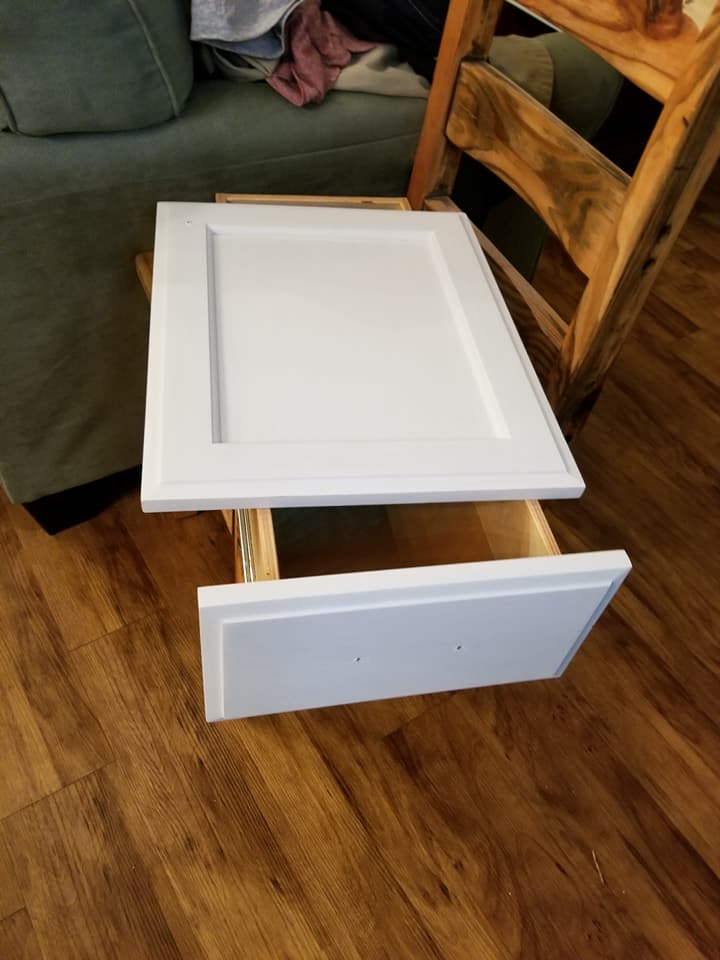

Prepare yourself to have cabinet doors and drawers drying where ever you can find a place to put them. We had stuff literally drying everywhere. (btw, see those 2- 32-ounce containers) I am not lying when I tell you we used 2 containers and that is it!
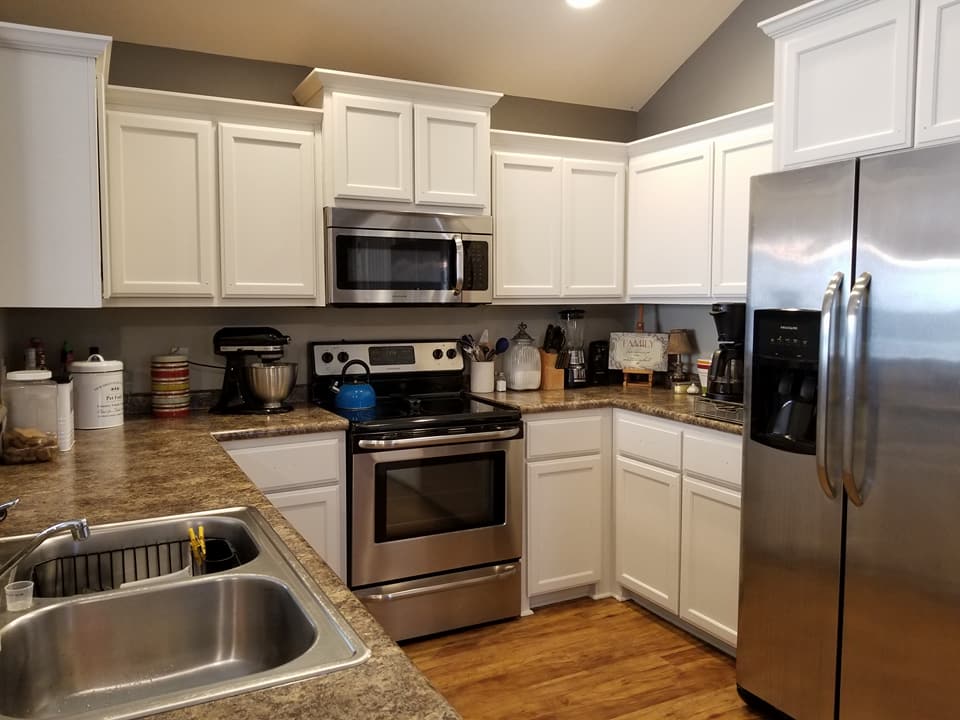
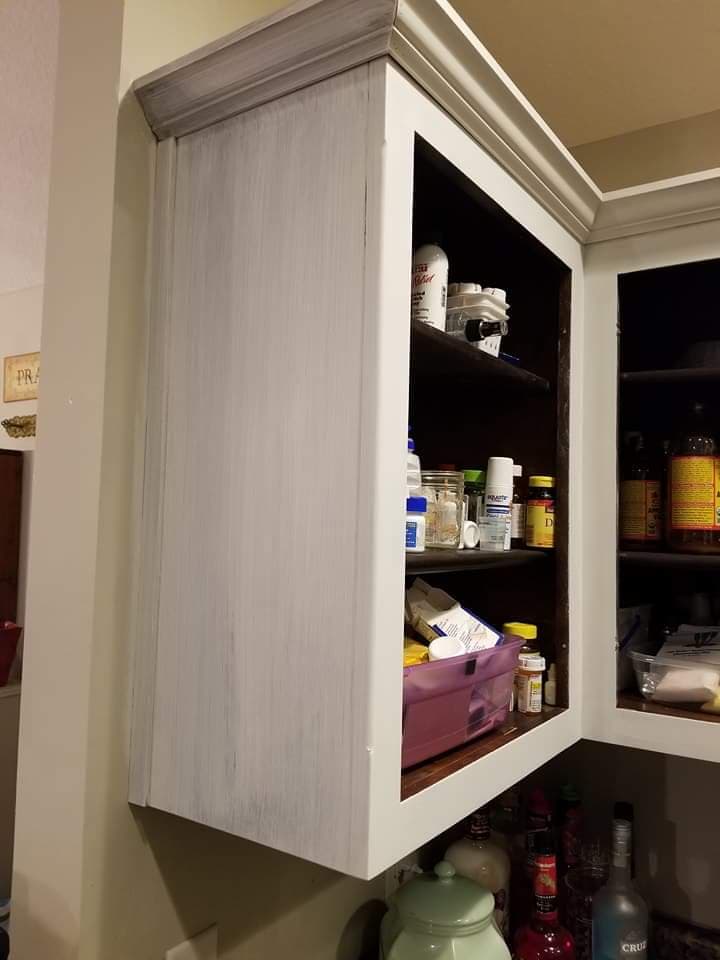
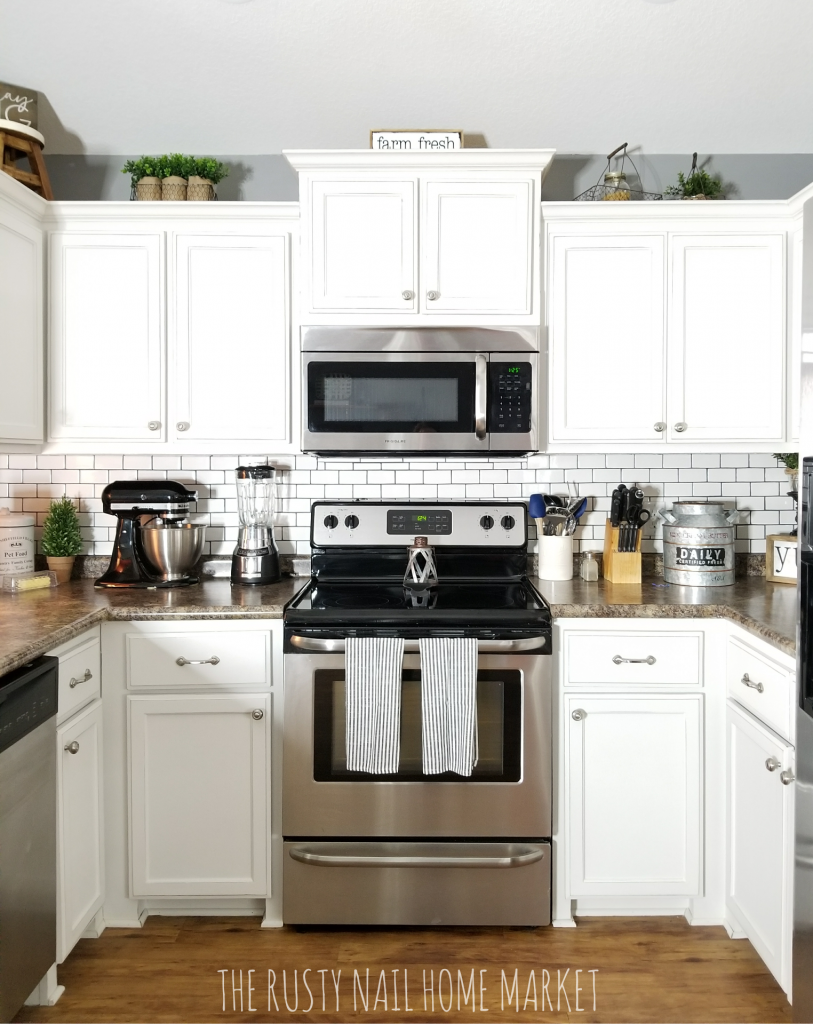
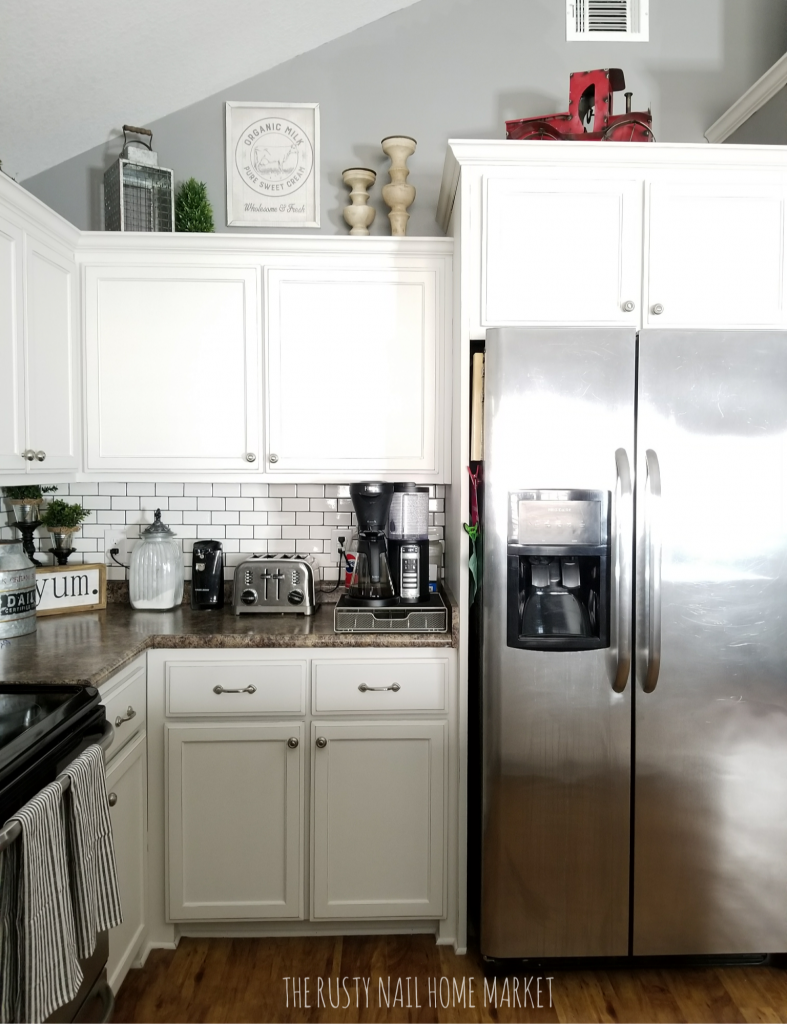
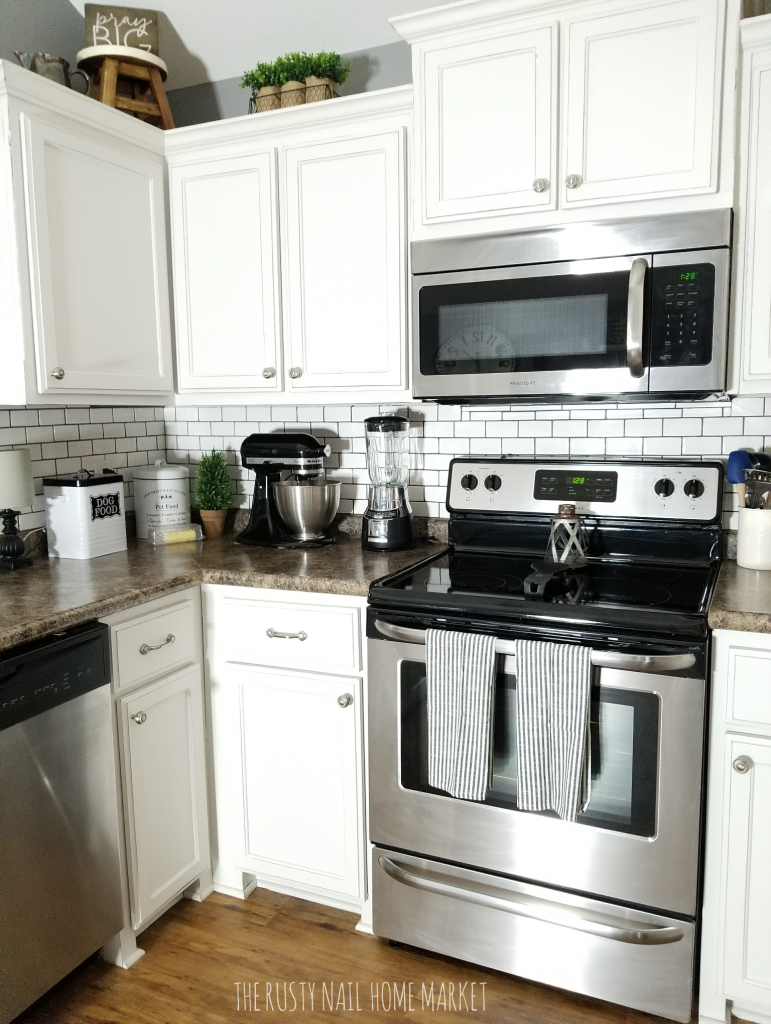
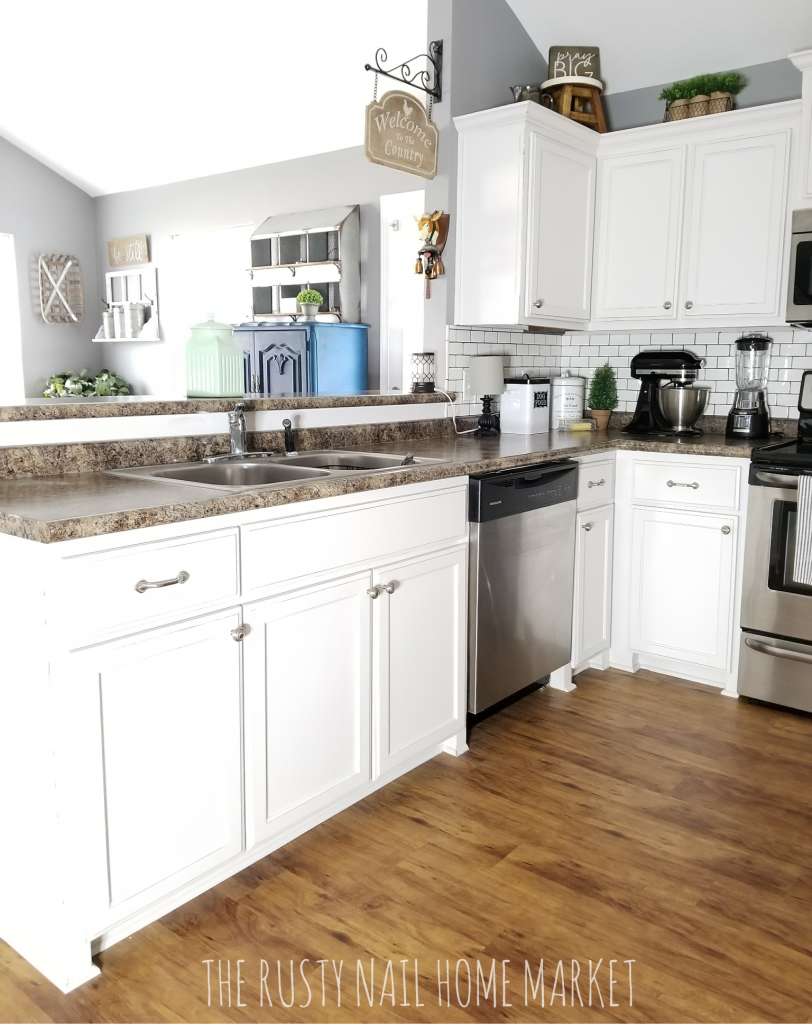
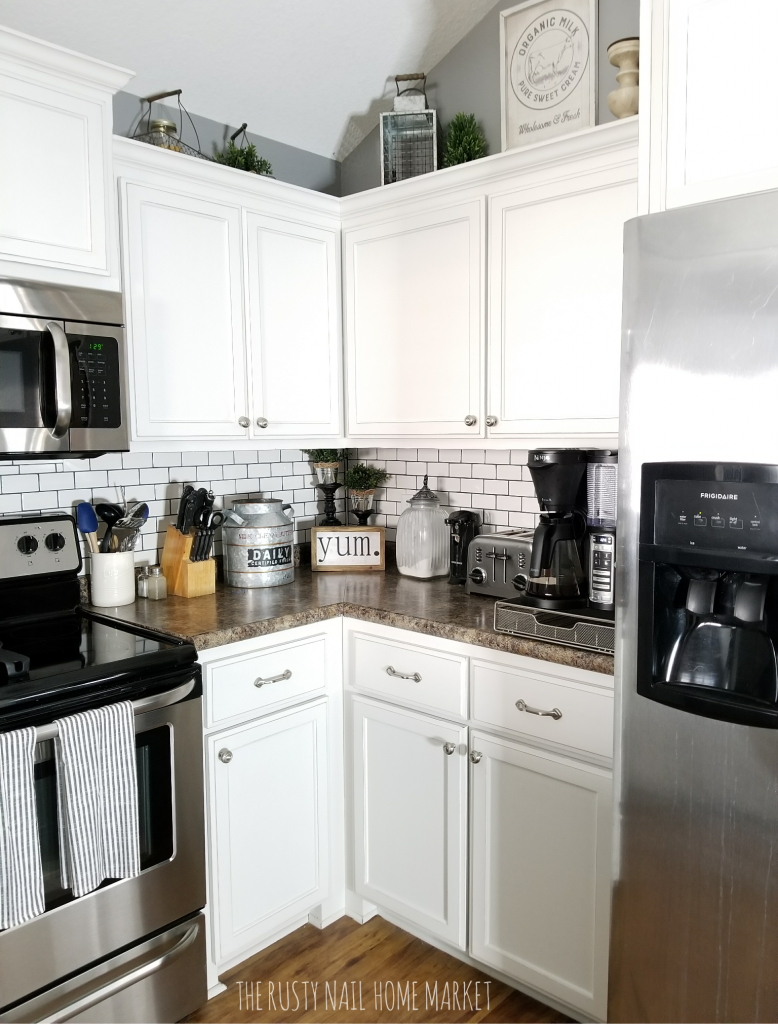
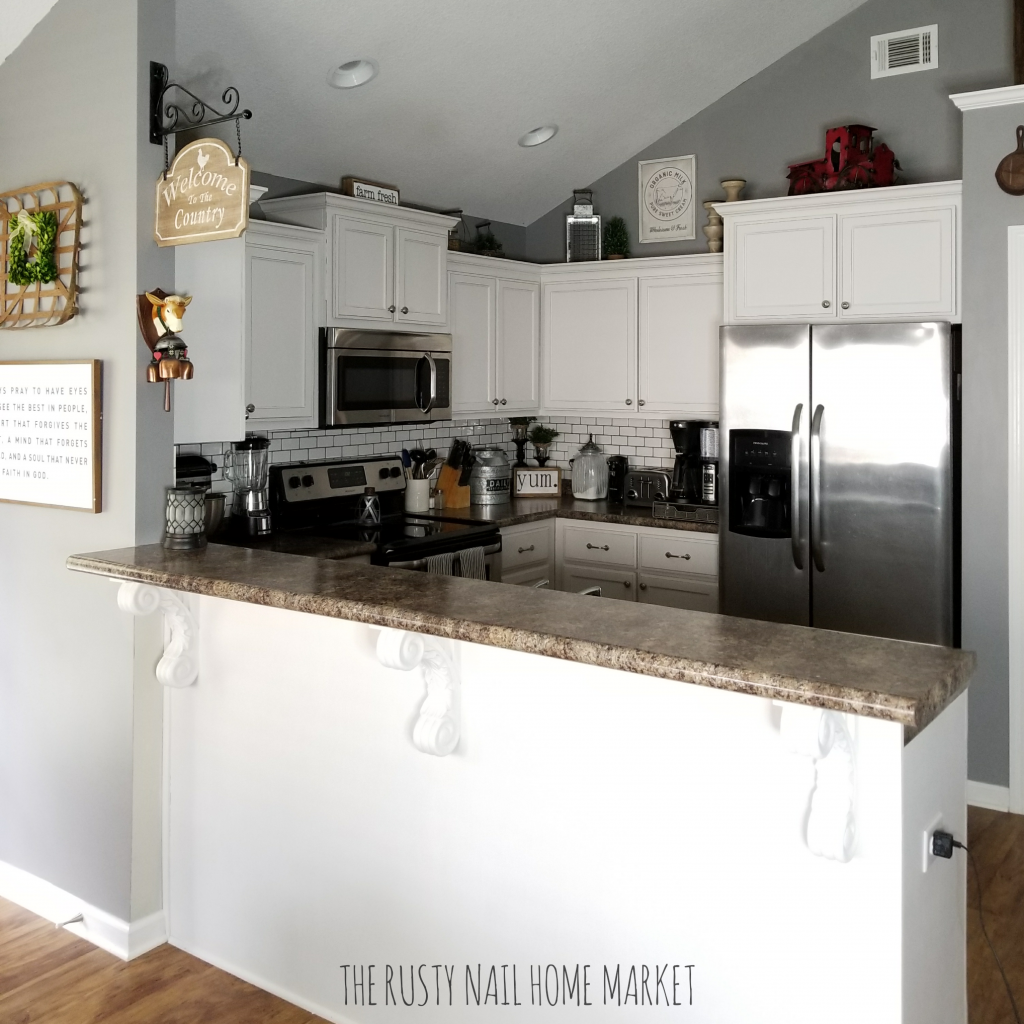
THE AFTER!
Alright, now to see the finished kitchen cabinet makeover look! (remember, I also painted my walls (the color is Shark Fin by Behr) and added a backsplash, that blog post can be read here!

The final touches
Once we re-attached the kitchen cabinet doors and put the drawers back in we did use 220 sandpaper (sponge type) to sand the surfaces smooth. We dusted off with a simple dry large paintbrush and we added 1 coat of Waverly Wax (matte finish) with a Paint Pixie Wax brush. We allowed to dry and we buffed with a t-shirt rag. Re-attached hardware and DONE!
I can not shout to the rooftop much louder that I had the flu (hubs didn’t).
As you see this is the finished project. (we painted the kitchen one weekend and I did the wall color and backsplash the next) It really was a huge project.
Totally worth it! We decided not to switch out our countertops. I was trying to do this whole project for under $300 which we did!
I hope this inspires you to take on your own kitchen or maybe your bathrooms.
Be inspired! Pass this on and be sure to pin it to your boards for future reference! 🙂 SCROLL DOWN FOR THE PRODUCTS I USED!

Follow us on Pinterest! Be sure to pin our images too! (We appreciate the love)

Products used:
Paint Pixie Brushes (#12, #8, and Wax Brush)
Waverly or Plaid Wax (Matte Finish)

To collaborate please email us to info@themakersmap.com
Do not copy or use photos or blog posts without permission. Thank you

Amber,
I absolutely love the color and how you painted your kitchen cabinets! The color fluff with the shark fin made your kitchen look bigger and brighter. Thank you for your tip on how to get even coverage and no streaks.
You have a very interesting blog. Cheerful too!
One last comment before I close. I want to thank you again for all the time and effort you put in to designing the Creative Haven Hub. It is so easy to navigate and it is a breeze to find and print the printables.
May God continue to shower his many blessings upon Mark and you as you journey in your new home build and eventually the selling of your current home. Mark and you are an inspiration to many regardless young or old (me) LOL!
I hope someday to meet you in person so that I may hug the “youngin” who has taught this
old lady a lot of new things. You are a real joy to watch!!
Thank you for being you. So glad I came across your page when I was exploring craft sites. You were the first one I fell in love with and enjoyed watching, You have been my favorite from the get go.
Take care and God bless you always.
Debbie Horn
Muncie Indiana
It has been a while since you did this project…How is the finish holding up? I was quoted $5500 for a professional to paint my kitchen cabs with a Sherwin Williams Emerald trim paint. Just wondering how well this holds up with chalk paint & wax finish?
The paint has held up great! Even with a toddler around, they’re still white and looking good!
The cherry cabinets and island in this kitchen receive a fresh coat of paint in this renovation that cost under $100.
Want the benefits of open shelving while still keeping your doors? Try this clever DIY cabinet idea.
Thanks for the great idea! My wife and I are in the process of doing this to our cabinets now, as a temporary upgrade until we can afford new cabinets in a few years. All for less than the cost of 1 cabinet door! So far they are looking great, hopefully, we will have them done by the weekend.
I want to use a high gloss white paint on my cupboard doors. Does your misting trick work with latex-based gloss paint?
Typically with gloss latex the water creates separations I would not recommend it. But if you want a gloss you could go with a chalk paint and clear coat with a gloss top coat.
Beautiful job!
I’m confused about the water misting, though. I want to be sure before I start…
Do you spray after each coat? Or after each brush stroke? How much do you spray each time?
I’ve never tried using water techniques so I’m very confused!
Thanks!
I spray as I am painting. I have a few how to videos on my facebook page from my furniture painting days! You are welcome to scope them out. https://wwww.facebook.com/therustynailga It really is easy!
I really want to try this but it would be my first painting project and I’m totally intimidated. I guess I need encouragement!
Hey! I am no longer painting full time but I have a whole variety of PAINT videos on my facebook page, like probably 100 of them! You can totally check them out and get your motivation and encouragement going! I love to show the how to stuff. So pop over and check my videos playlist tab on my facebook https://www.facebook.com/therustynailga (I have shifted my business to full time business coaching but I teach a ton of creatives) 🙂
What do you mean you used a spray mister? Like, you sprayed water after you painted and let it sit on there or you mixed the paint and water in the mister?
As you paint you use a fine mist spray of water, this helps thin the paint out, and you keep painting. You dont let it set no.
So if it’s been a year how are the cabinets holding up, especially around the knobs. My builder grade cabinets show scratches and nicks around the knobs and I am afraid they will look worse if I paint. Does the wax help prevent this. I’m excited we have the same cabinets!
My cabinets are perfect! NOT ONE SINGLE ISSUE! I will try to get a new blog post up with an update! I think what has mattered most is the paint itself. But then top coating with Waverly wax really sealed it! I have no wear at all around our hardware either!
I’ve been wanting to paint my kitchen cabinets for over a year and have been afraid to begin. Your description makes it seem that I could really do it myself (probably take more than a weekend!). Thank you for your detailed steps. Please tell me, did you paint the insides of the doors?
Hey Barbara! I did not paint the inside! At the time for obvious reasons THE FLU! But I do intend to paint them eventually! With just us in the house and no potential to sell at the moment we have not really worried much with the insides but YES I do plan to paint the insides SOME DAY! But honestly, its really not that hard to do, it seems intimidating but it really isnt as bad as you think! I would love to see your before and afters when you take on your kitchen project!
We’re currently looking at re-doing and designing our kitchen, so this post is fab, as it isn’t all that big. I’m looking to completely change the styling and these are right up my street! Thank you so much for sharing so many amazing ideas.
So much great info in this post.
I just love the outlook.. Absolutely beautiful stunning I have been wanting to do my kitchen cabinets. My kitchen is very small not a lot of counter tops, not many cabinets. I’m wondering if I can paint over this hard surface under the cabinets. Its hard to explain looks like a wall don’t know the proper word Could be a backslash I want to paint this too. my cabinets are wood light wood. You did awesome job. You and your hub did awesome job!! Been wanting to do my kitchen for years. Now I’m able too! Thank you.! Amazing outlook!!
Hey! I strongly encourage you to give it a try! Trying rather than a full reno is better than anything! I am working on my backsplash post too. I shared in my instagram stories how I did it but I have yet to post the blog directions. So look for that soon! Let me know how your project goes!
I used a charcoal chalk on my bittom cabinets ..i had a lasp in weeks due to interruption. I now gave the 2 coats on but have water spots! Was i supposed to add water to chalk paint? Or apply as is …its thick but goes a lonk way …Will another coat cover yhe water spots ? Im new to redo furniture ..cabinits..an other projects…New to using chalp as well ..im sure you can tell ! I should have utubed it i guess .
HelP needed in S.C
What was the brand of charcoal paint you used? you add the water as your painting when paint is wet. You fine mist the water over to spread the paint smooth. Once done sand your paint with a 220 sanding sponge and seal with whatever you prefer. I used waverly wax. I have a ton of HOW TO paint videos on my facebook page under the playlist tab. Check them out. I hope something I have painted previously will help you! https://www.facebook.com/therustynailga (I no longer teach how to paint) I full time business coach but the video resources are all on my playlist, probably 100 how to videos! 🙂 Let me know how your project turns out.
This looks lovely. Thanks for the blog. My sister recently remodeled her kitchen by the professional Home Quality Remodeling contractors in CA and they did an amazing work. It was expensive though but it was really worth it. But I cannot afford that much rate and that is why I was thinking of DIY’ing. Didn’t know where to start till now but now I know. Thank you so much for the blog.
Thank you so much for your quick response on my questions regarding my kitchen project!! I’m excited to start!! I’ve never painted or really tackled any projects on my own..so this is the FIRST! I don’t think I can do this without you..I had no idea where to start..but I do now!!
I love everything you do. You make it look so easy. I am a clutz about everything.