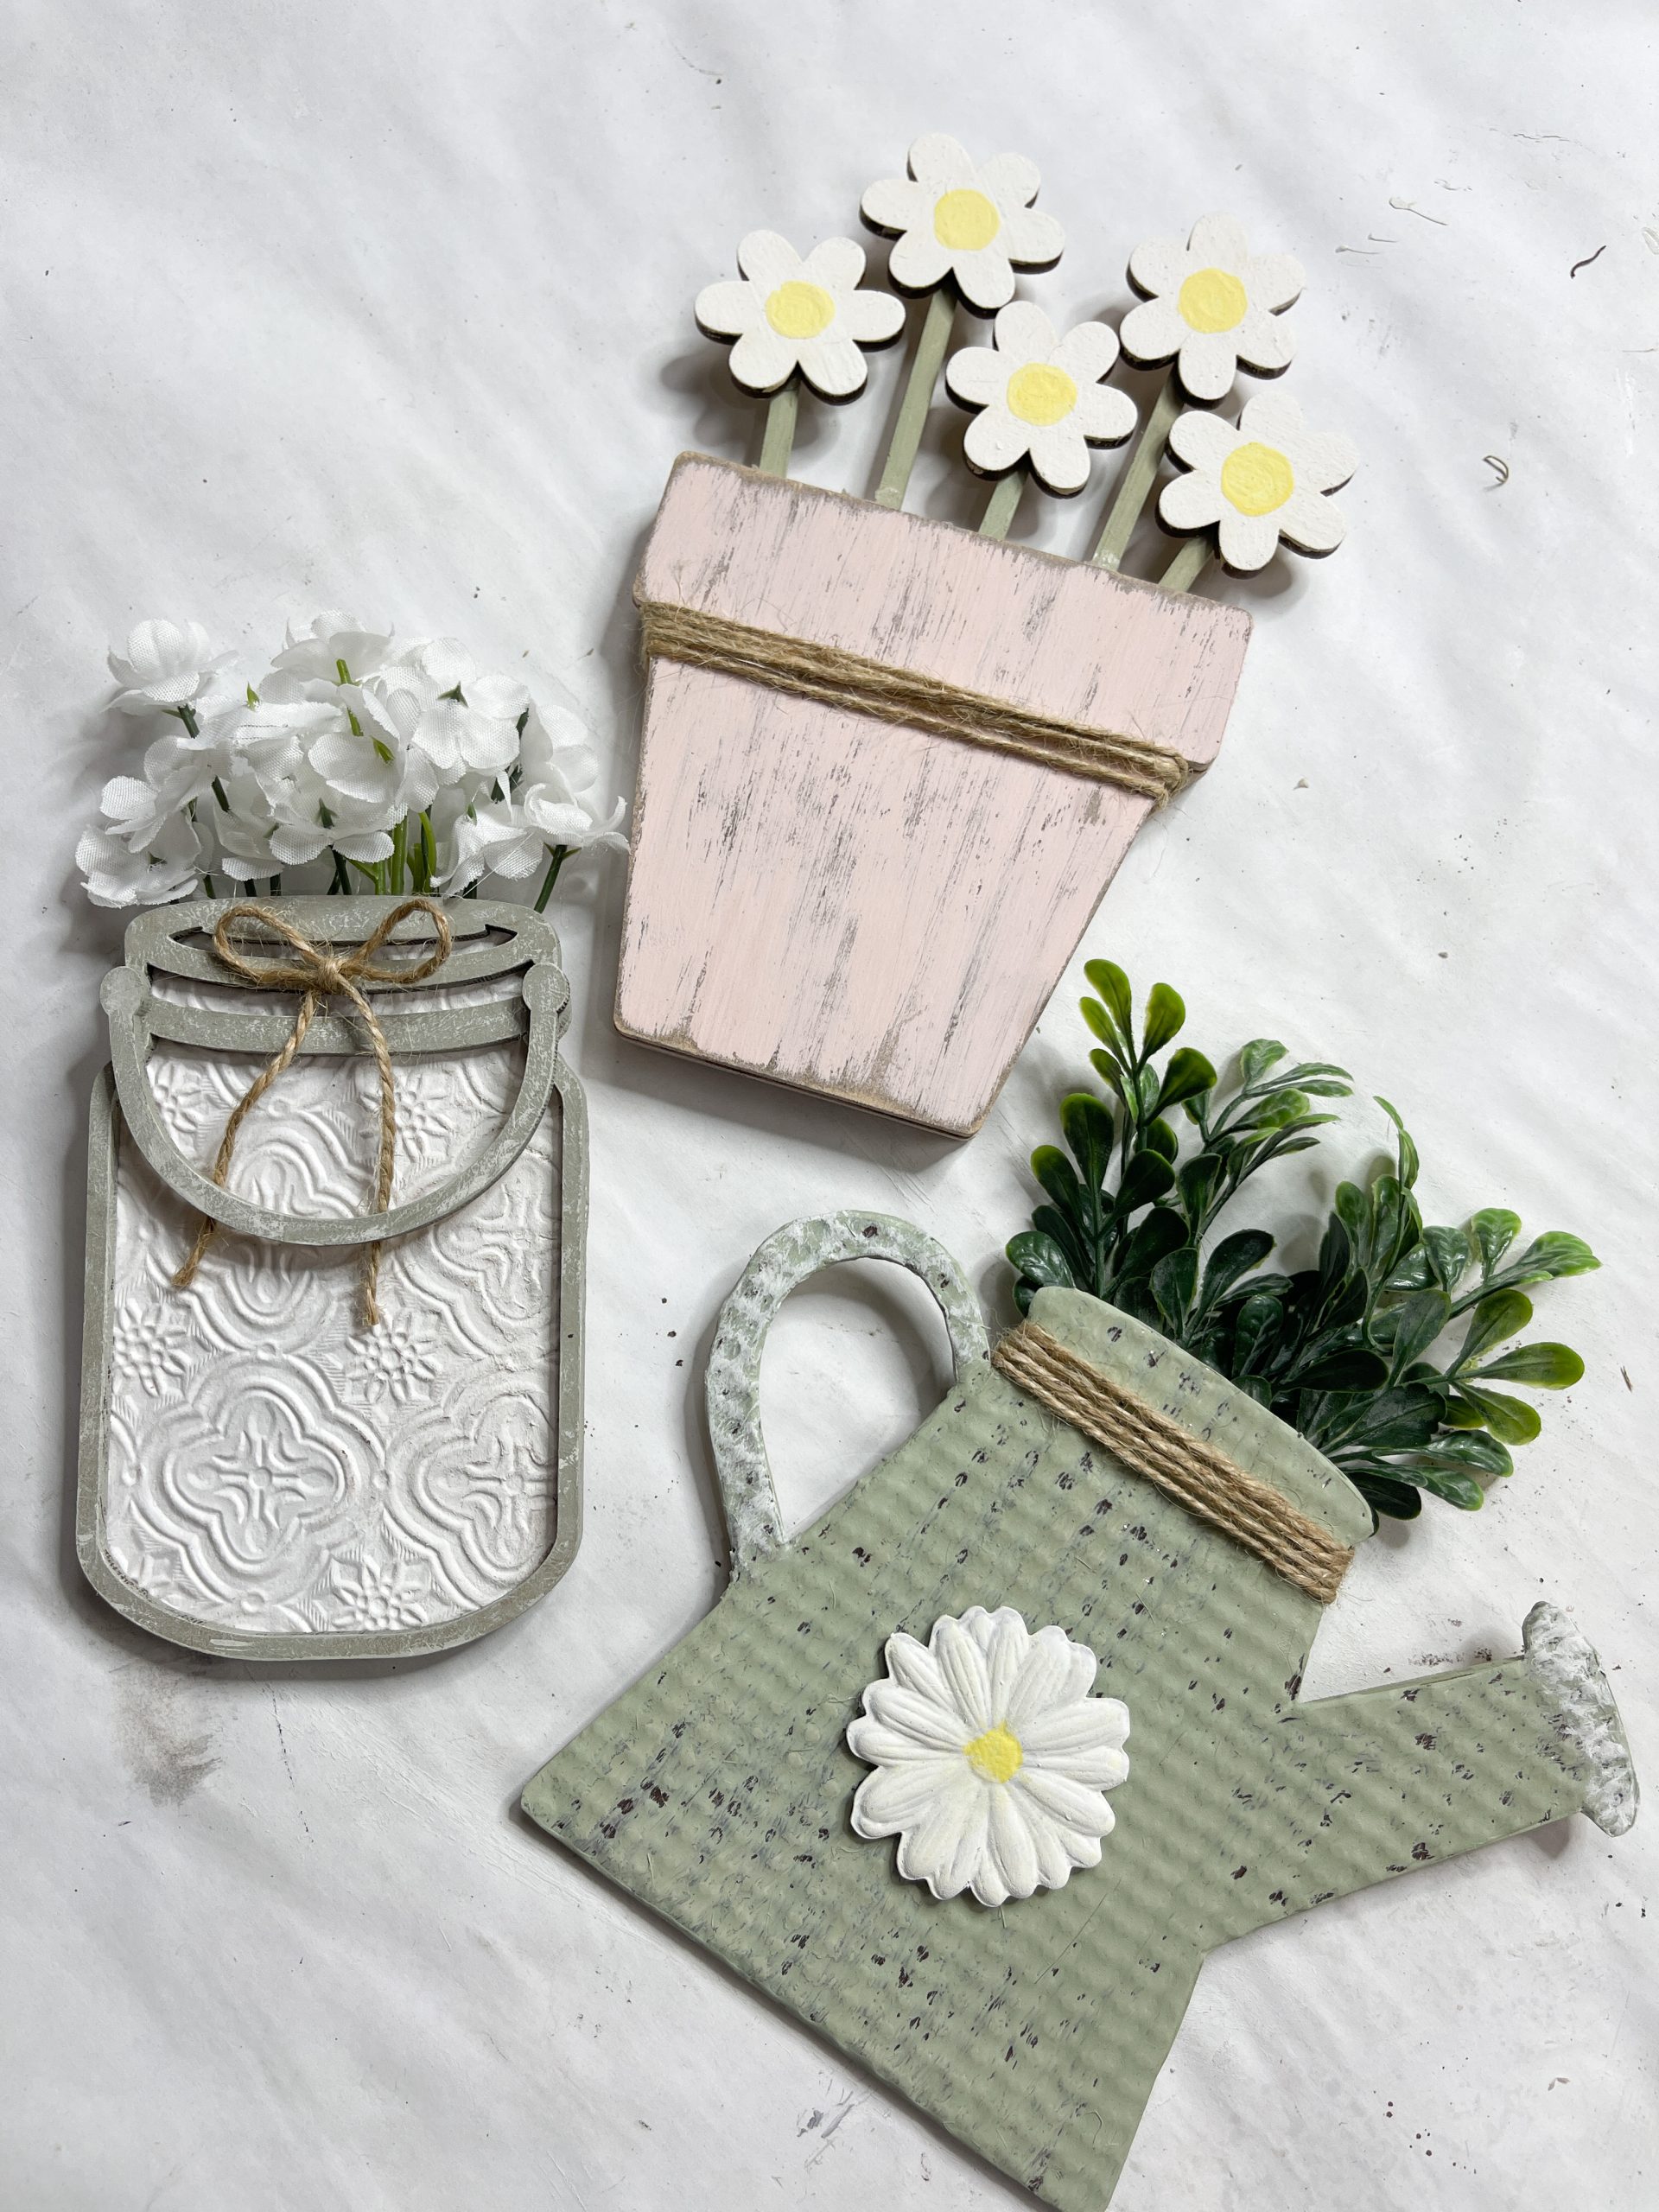
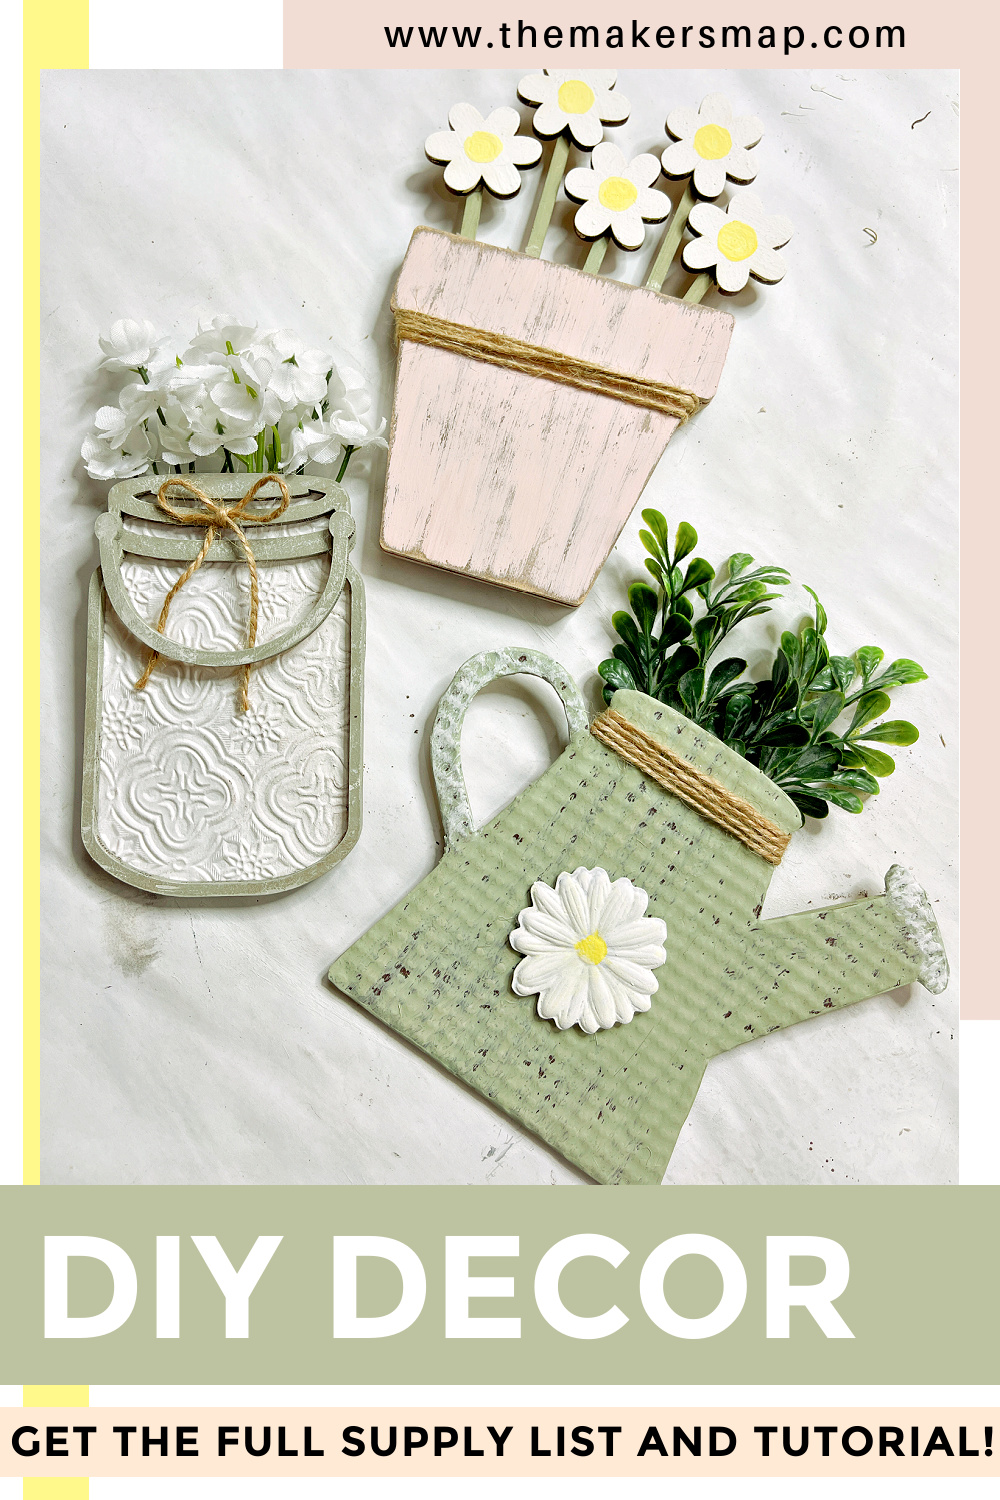
Spring Containers DIY Decor
I really love these spring containers DIY decor because 1. they are so easy to customize and personalize 2. they turned out ADORABLE and 3. they are a DIY craft kit from my shop!
I cut and sell wooden craft kits for everyday and seasonal home decor! They are unfinished, unassembled kits that you get to customize and decorate for your own style!
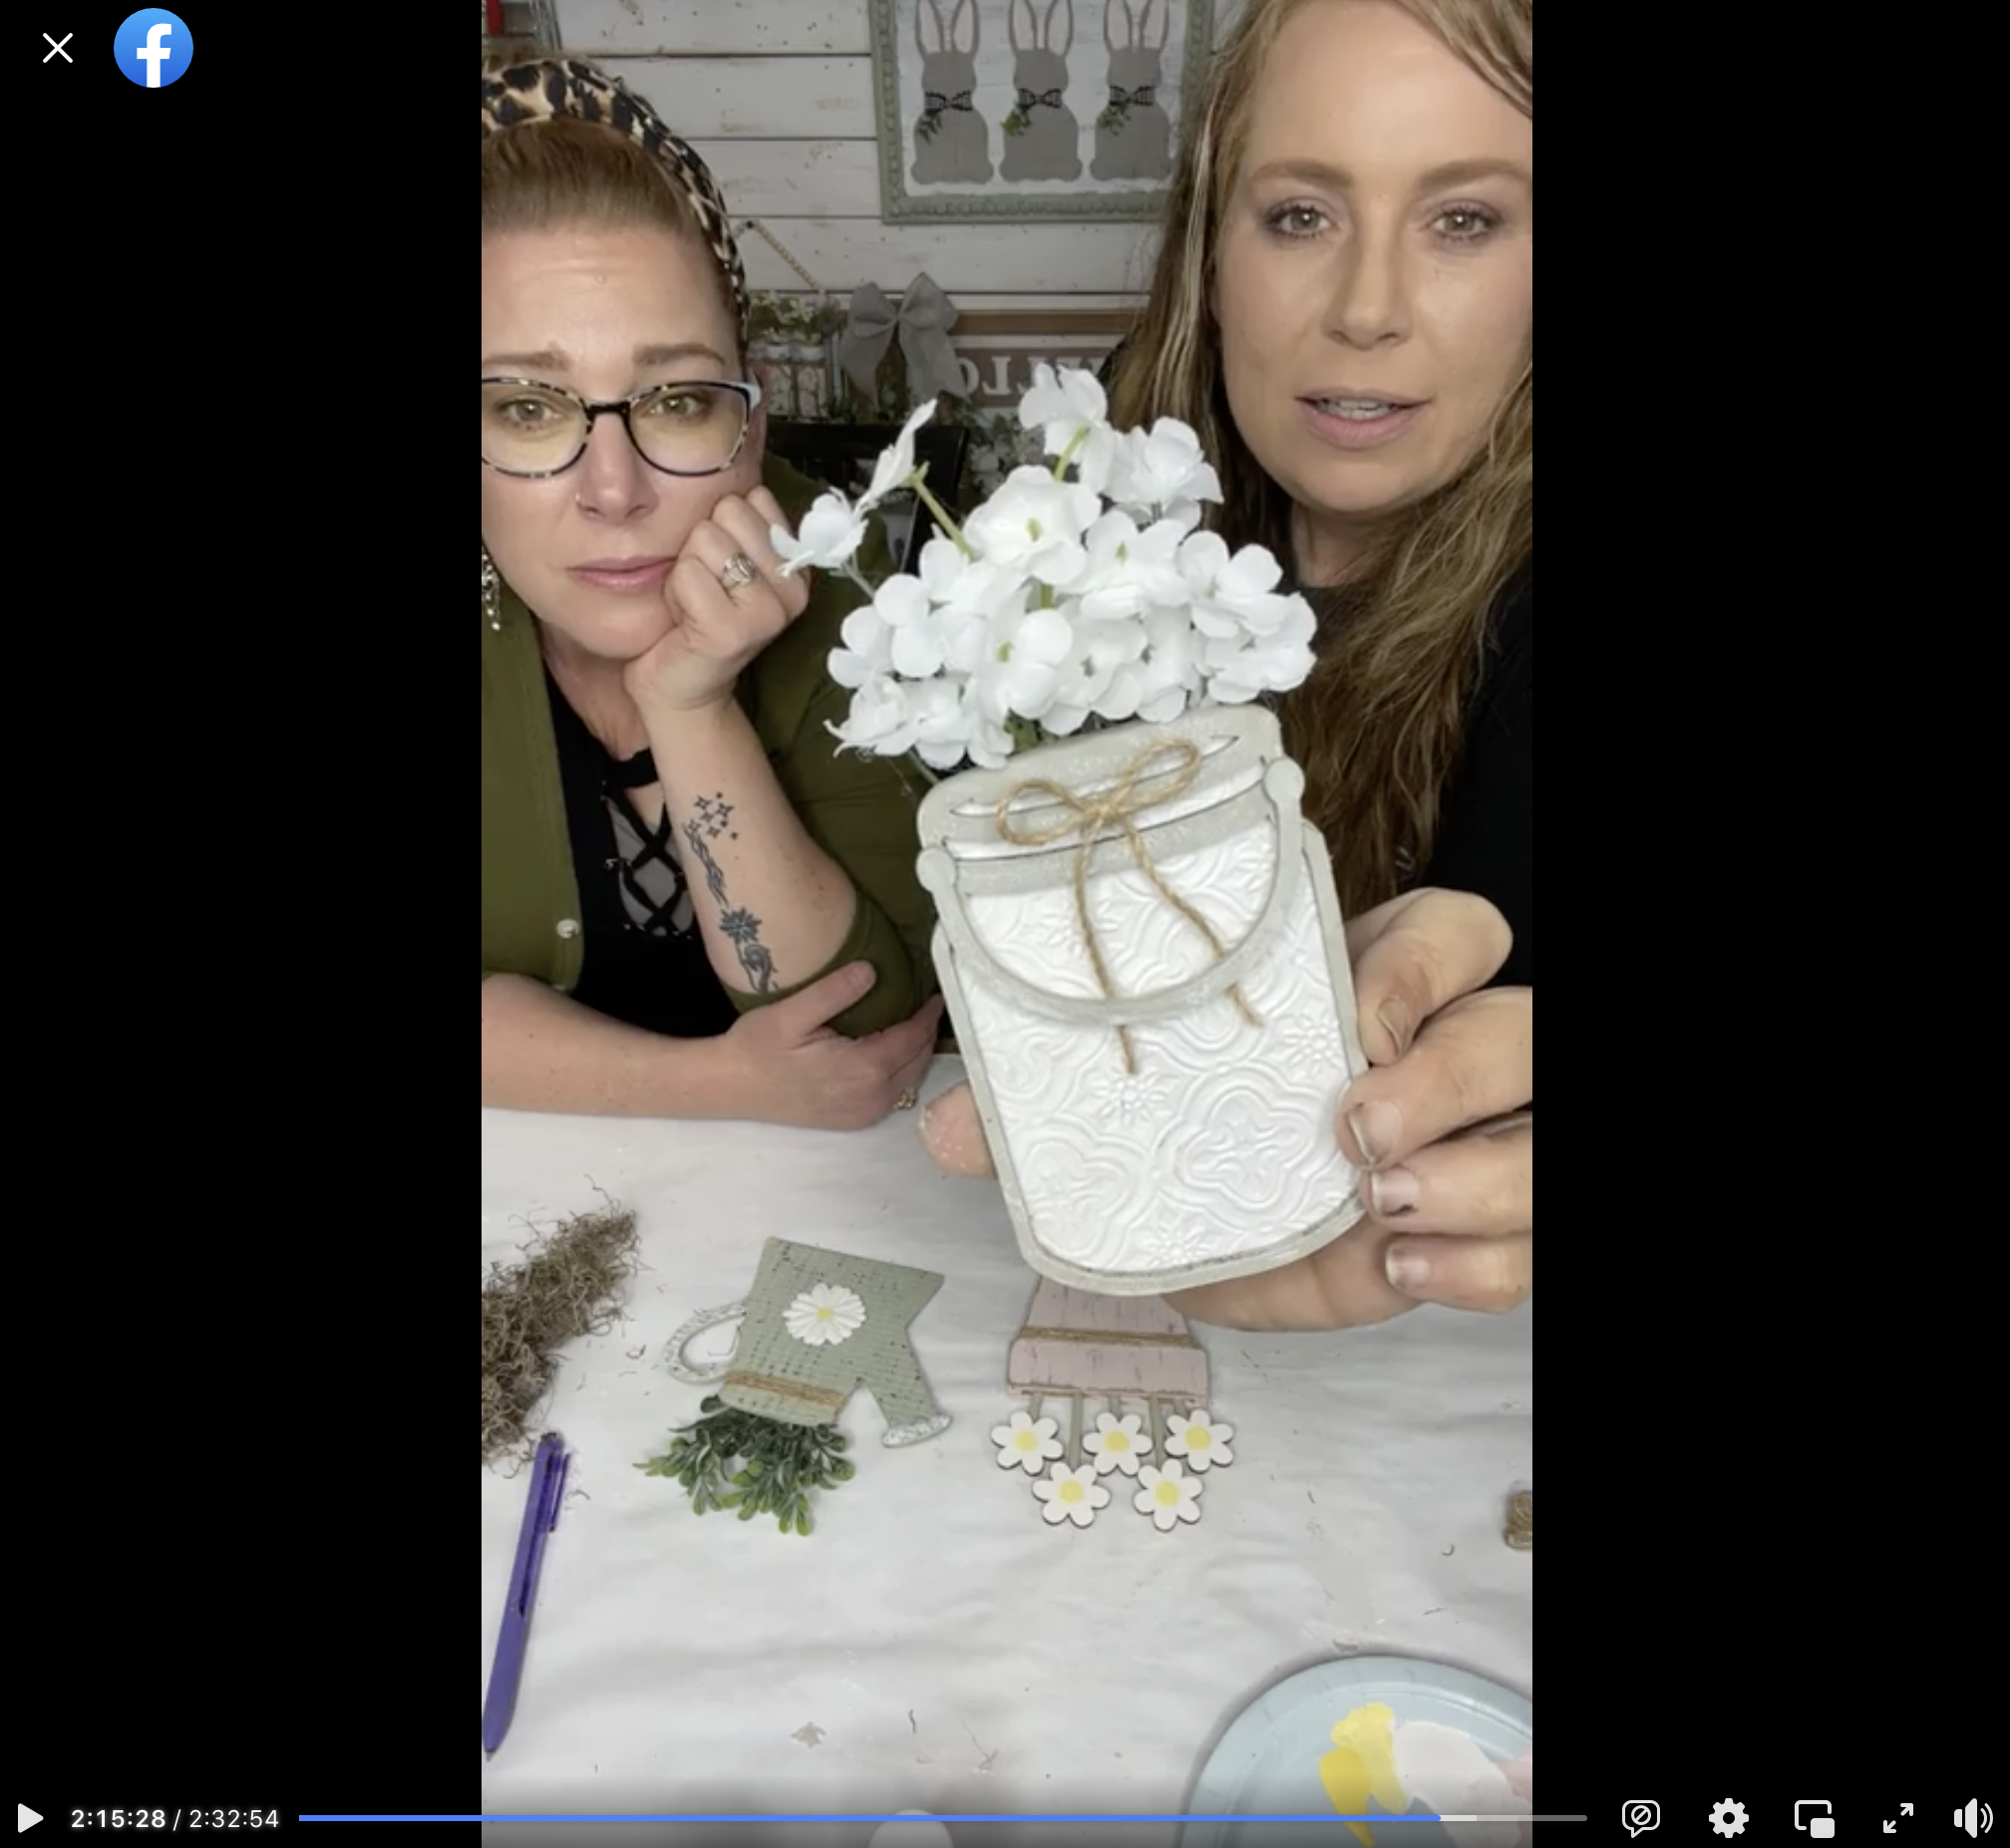
Watch the DIY tutorial
I recorded how to make this Spring Containers DIY Decor with my craft kit during a LIVE video on my Facebook page.
If you want to see the DIY process, craft along, or just join in on the fun conversations, you can watch the DIY tutorial video on Facebook!
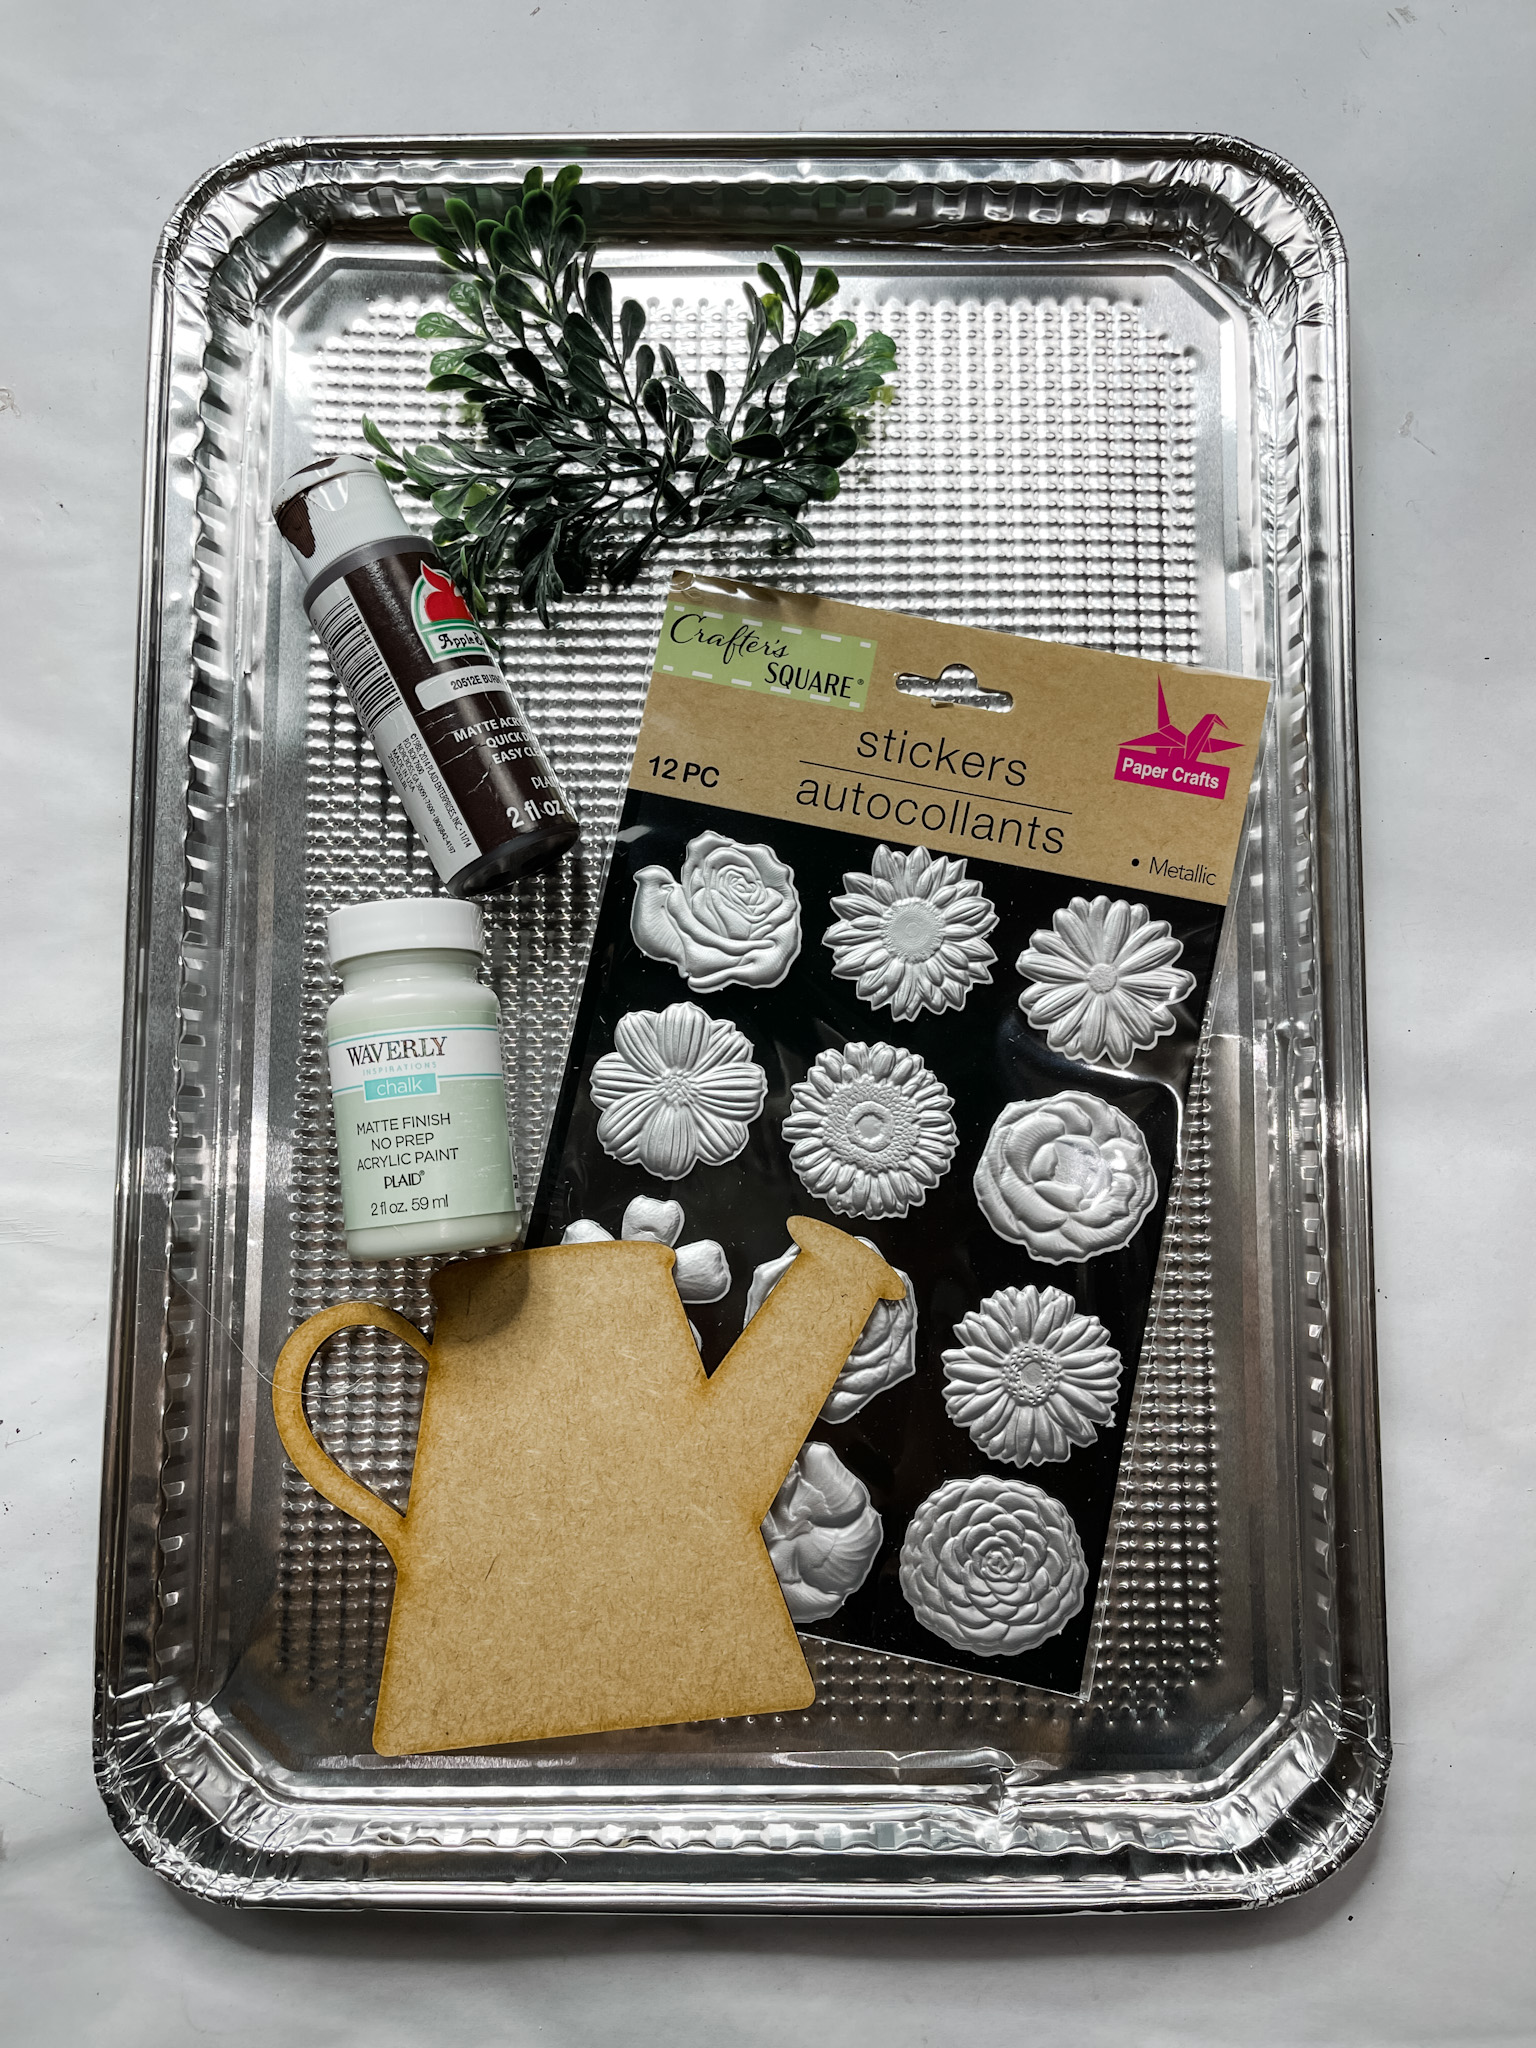
DIY Spring Watering Can
For this project, I will be using these items but you can substitute where you want.
“As an Amazon Associate, I earn from qualifying purchases.”
- Spring Containers Craft Kit
- Dollar Tree Cookie Tin
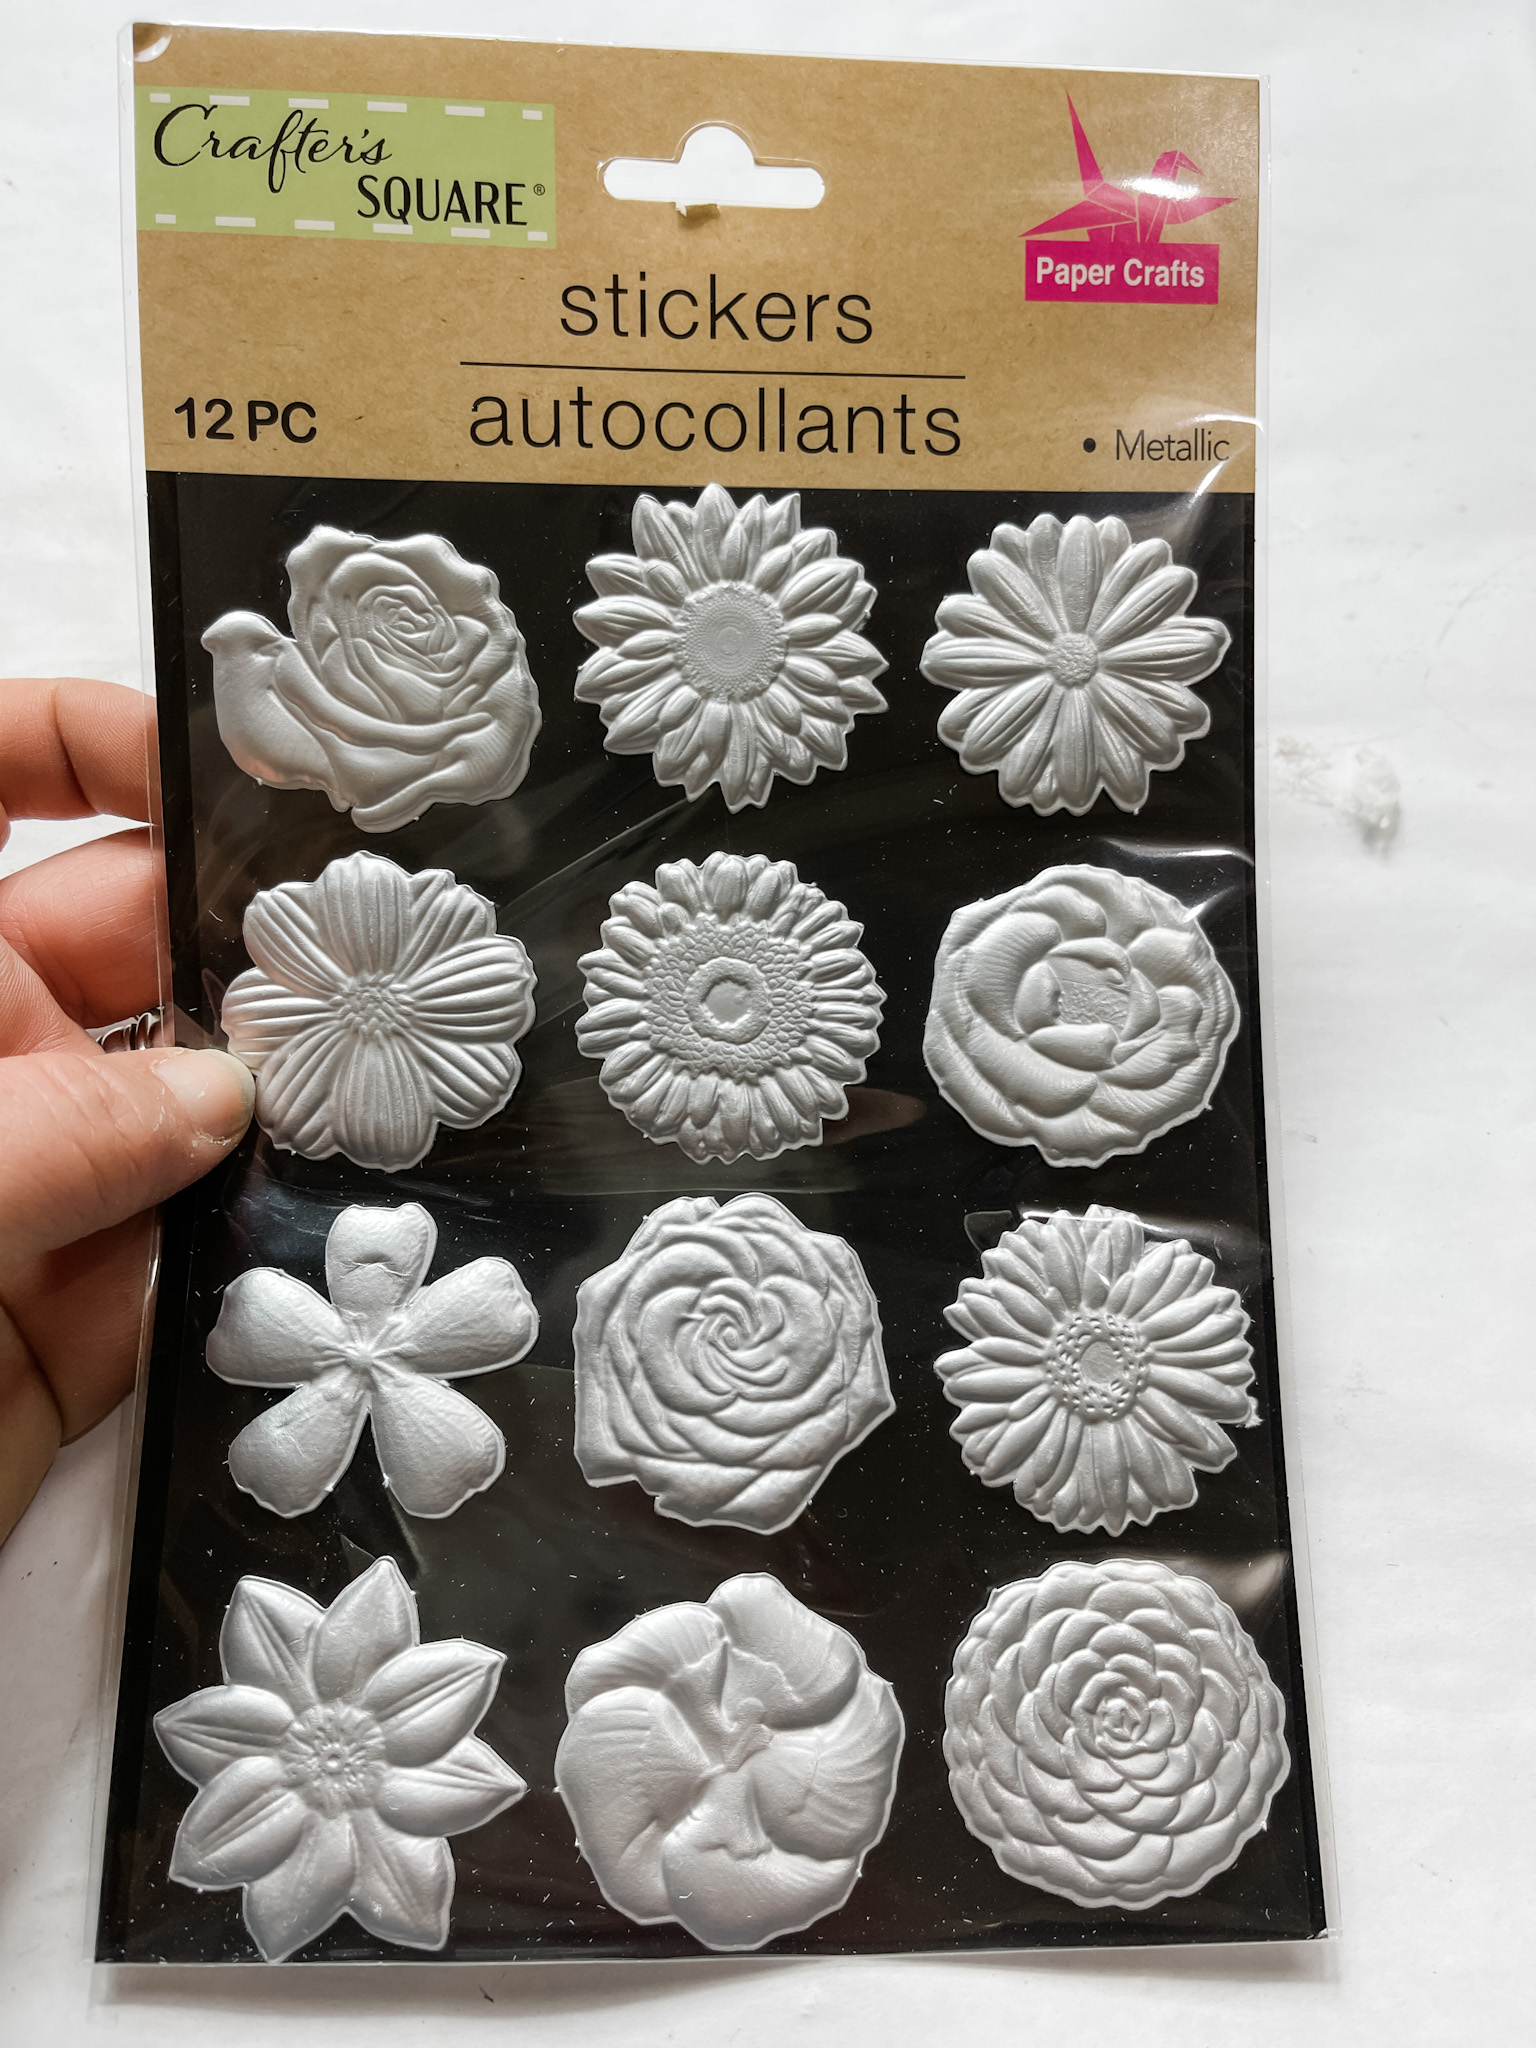
- Dollar Tree Floral Stickers
- Greenery
- Dollar Tree Jute Twine
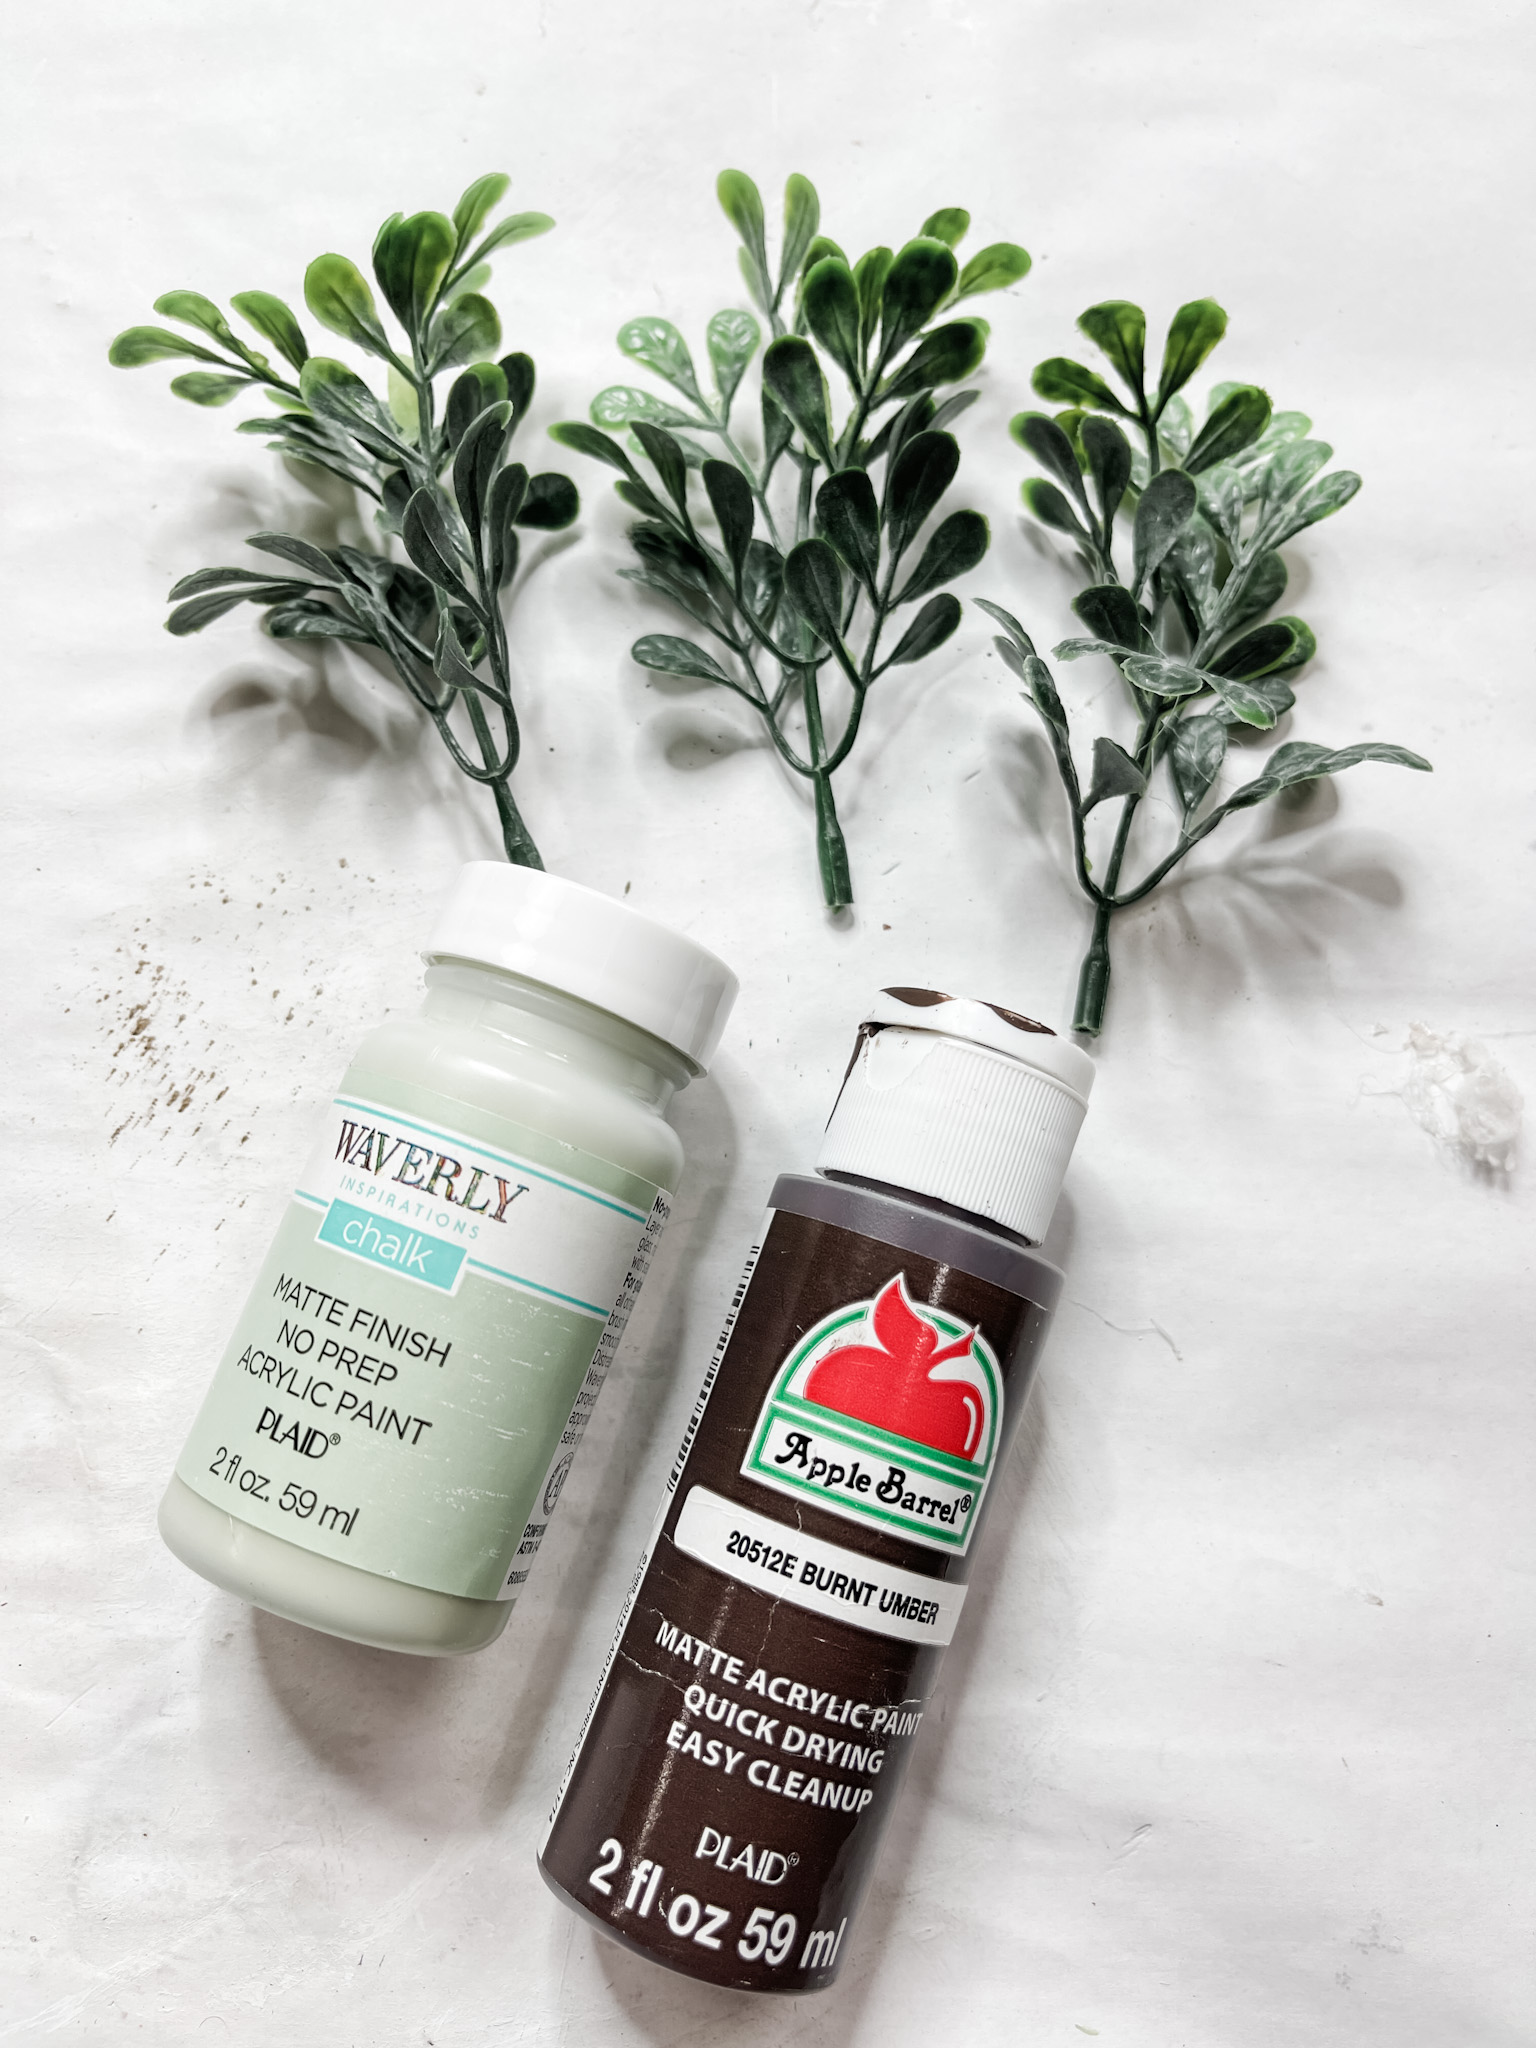
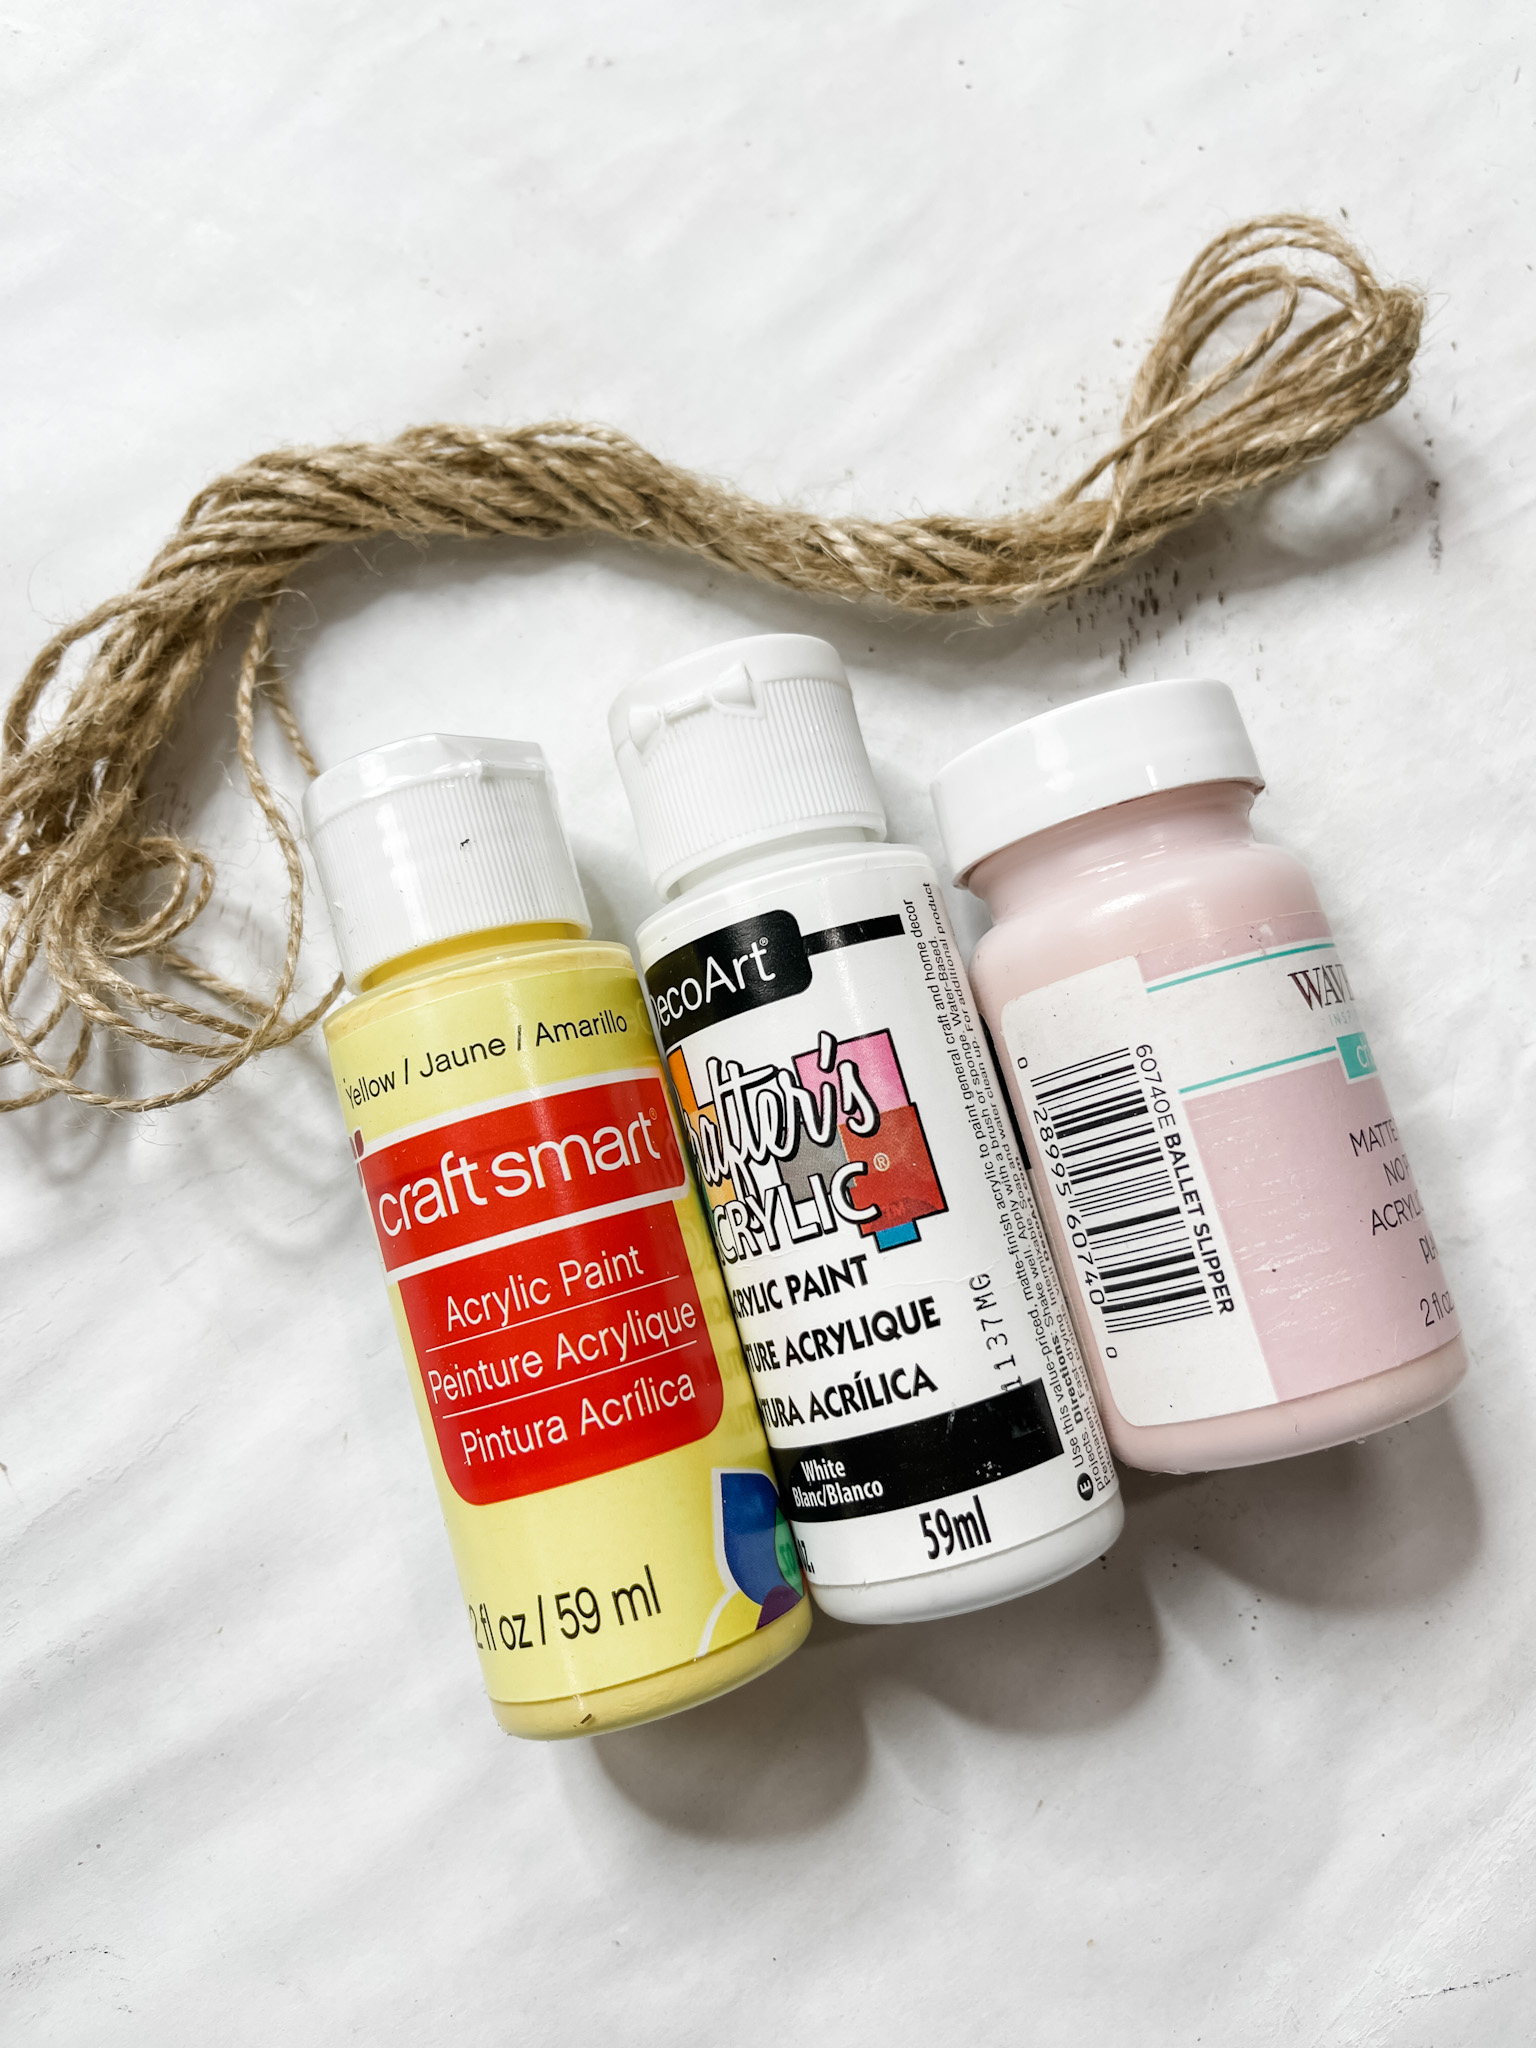
- Apple Barrel Burnt Umber Acrylic Paint
- Waverly Celery Chalk Paint
- Craftsmart Yellow Acrylic Paint
- Hot glue gun and glue sticks
How to make the spring watering can
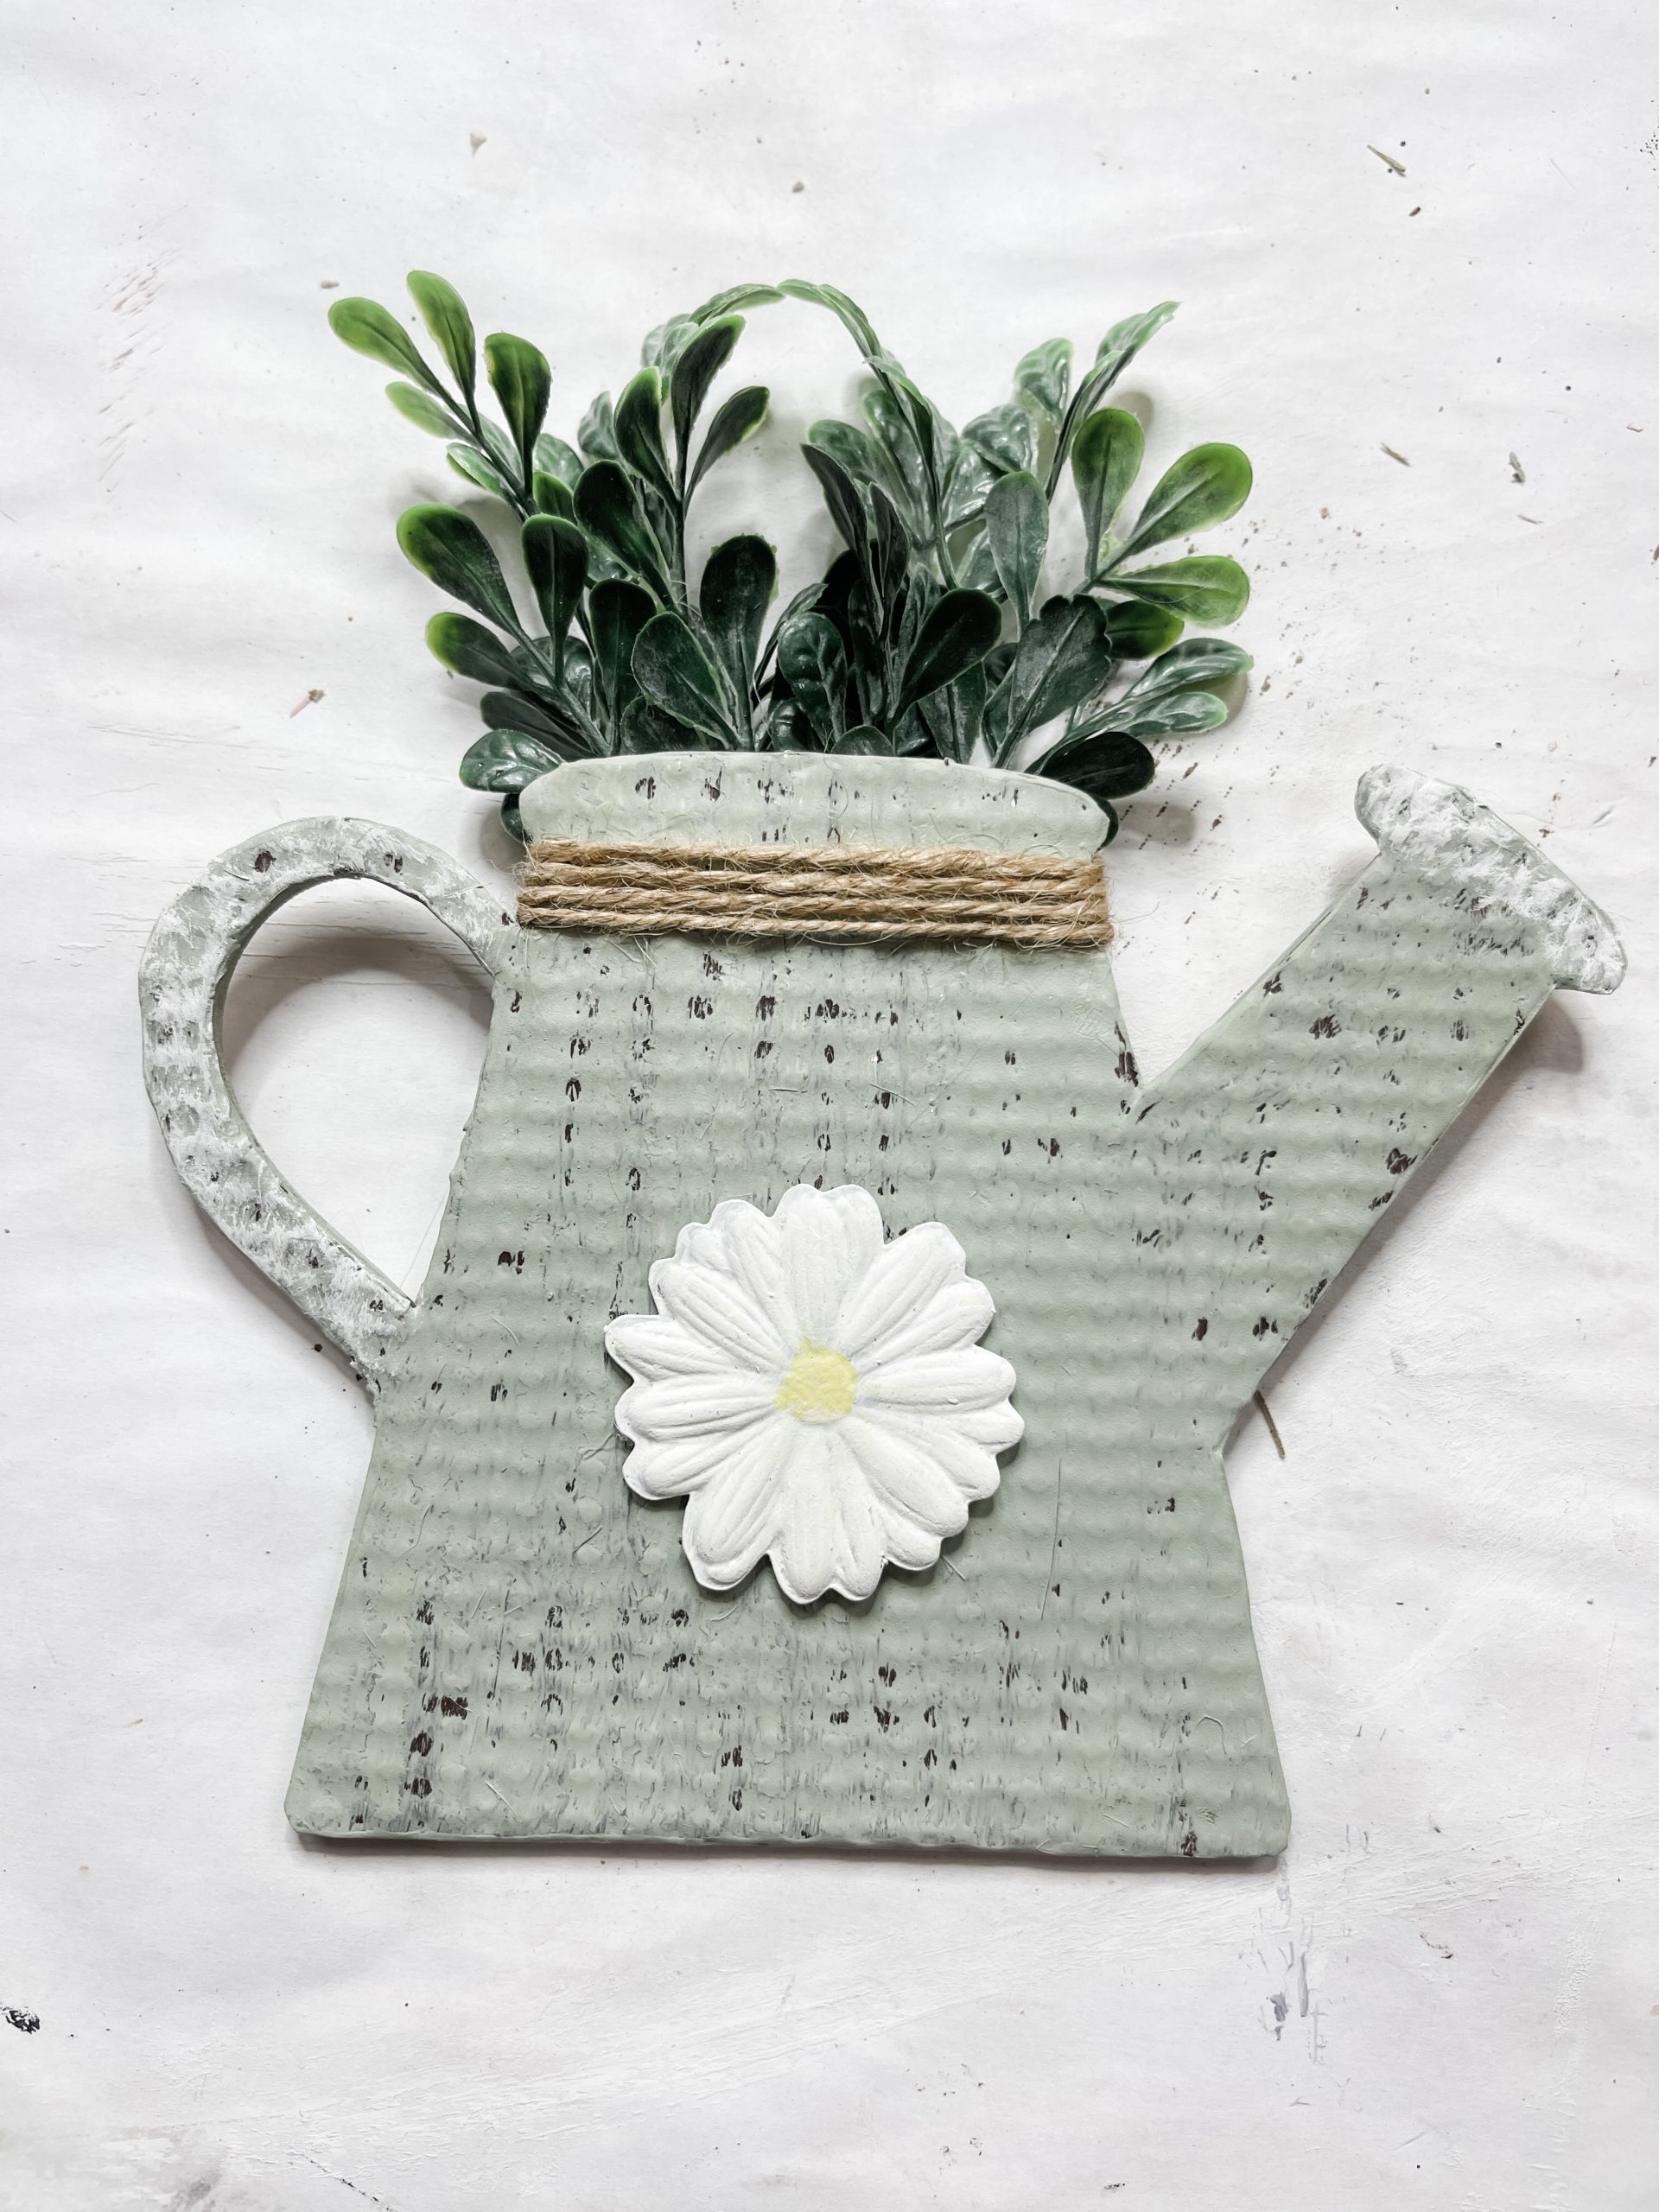
I started decorating the watering can from the spring containers craft kit by tracing the shape of the watering can on the Dollar Tree cookie tin.
Cut the shape of the watering can out of the cookie tin and glue it onto the wooden watering can. Be careful not to cut yourself on the edges of the cut cookie tin.
Brush Apple Barrel burnt umber acrylic paint onto the cookie tine. Allow the paint to dry, then lightly sand the tin with a sanding sponge.
Next, lightly apply a coat of the Waverly celery chalk paint onto the cookie tin. Next, I painted one of the flower stickers with white paint and a dab of yellow on the flower’s center.
Let the paint dry completely on the watering can and the flower sticker, then glue the flower onto the watering. Wrap jute twine around the top of the watering can and glue it in place
Lastly, glue your greenery/floral spray of choice to the back of the watering can.
DIY Spring Mason Jar
For this project, I will be using these items but you can substitute where you want.
“As an Amazon Associate, I earn from qualifying purchases.”
- Spring Containers Craft Kit
- Dollar Tree White flowers
- Dollar Tree Floral Stickers
- Embossed Scrapbook Paper
- Dollar Tree Jute Twine
- Craftsmart Grey Acrylic Paint
- Hot glue gun and glue sticks
*I did not use Apple Barrel Lavender Sachet Acrylic Paint*

How to make the spring mason jar
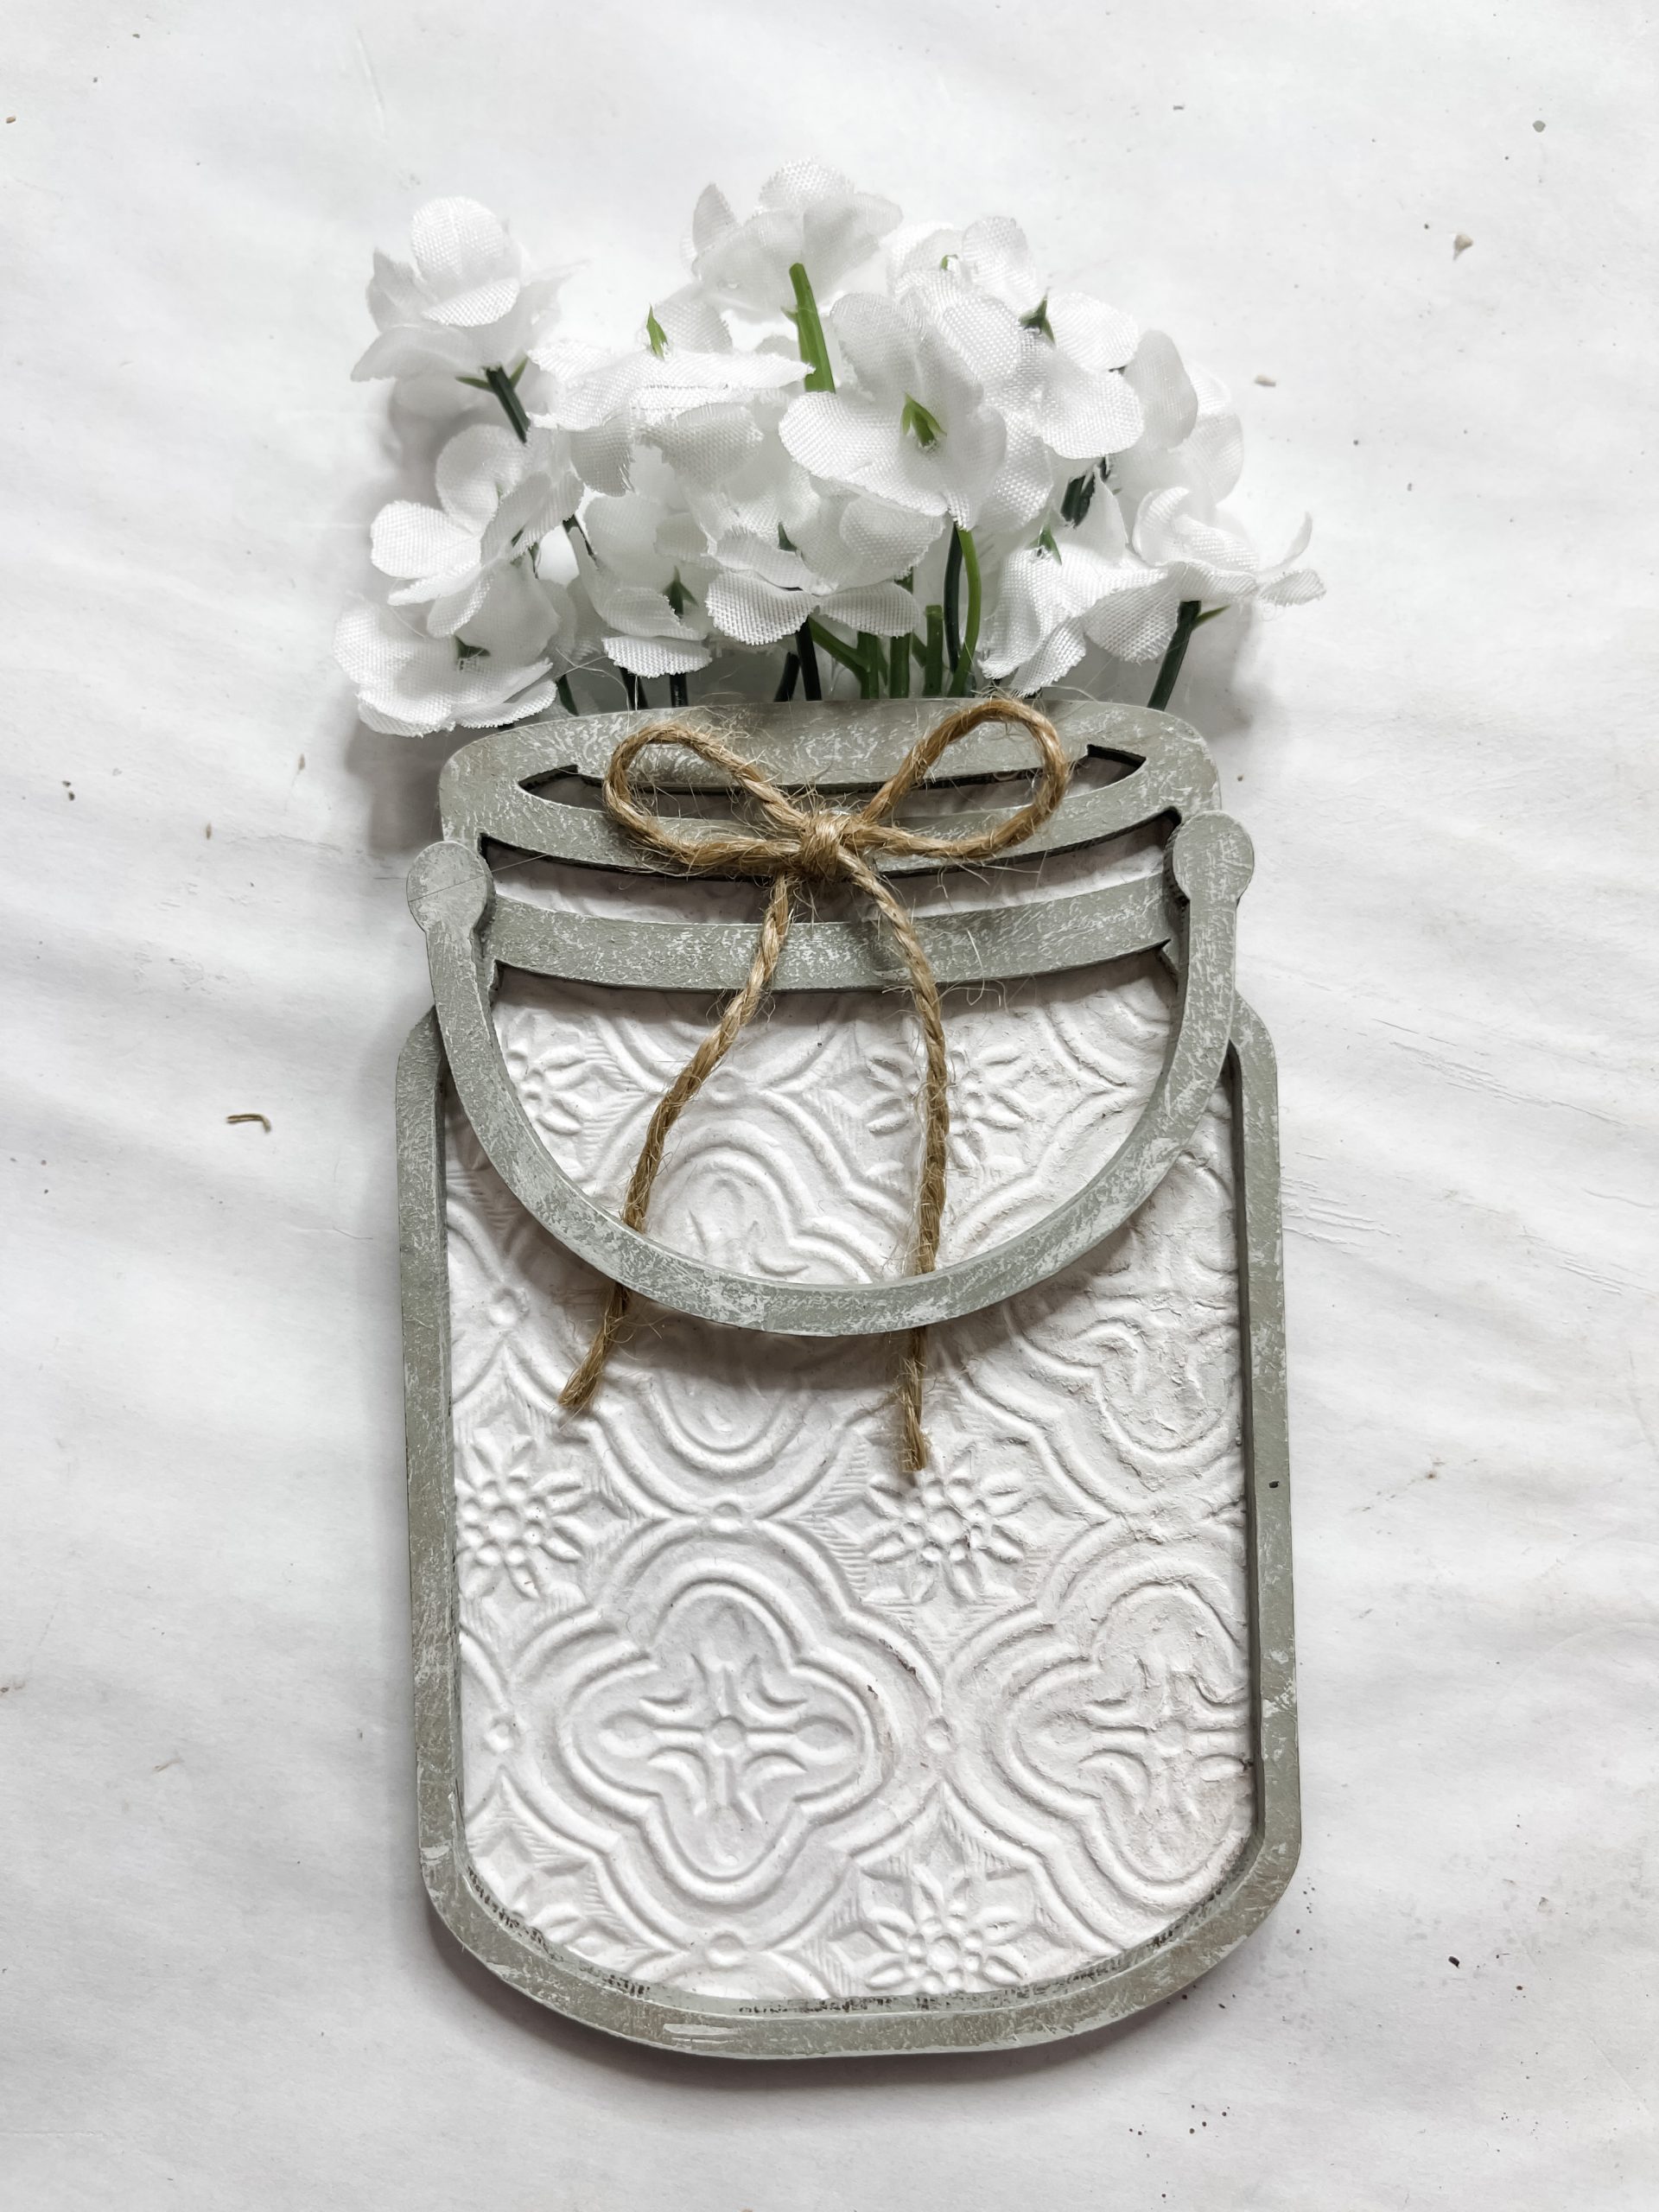
Start decorating the mason jar from the spring containers craft kit by tracing the shape of the mason jar on the embossed scrapbook paper.
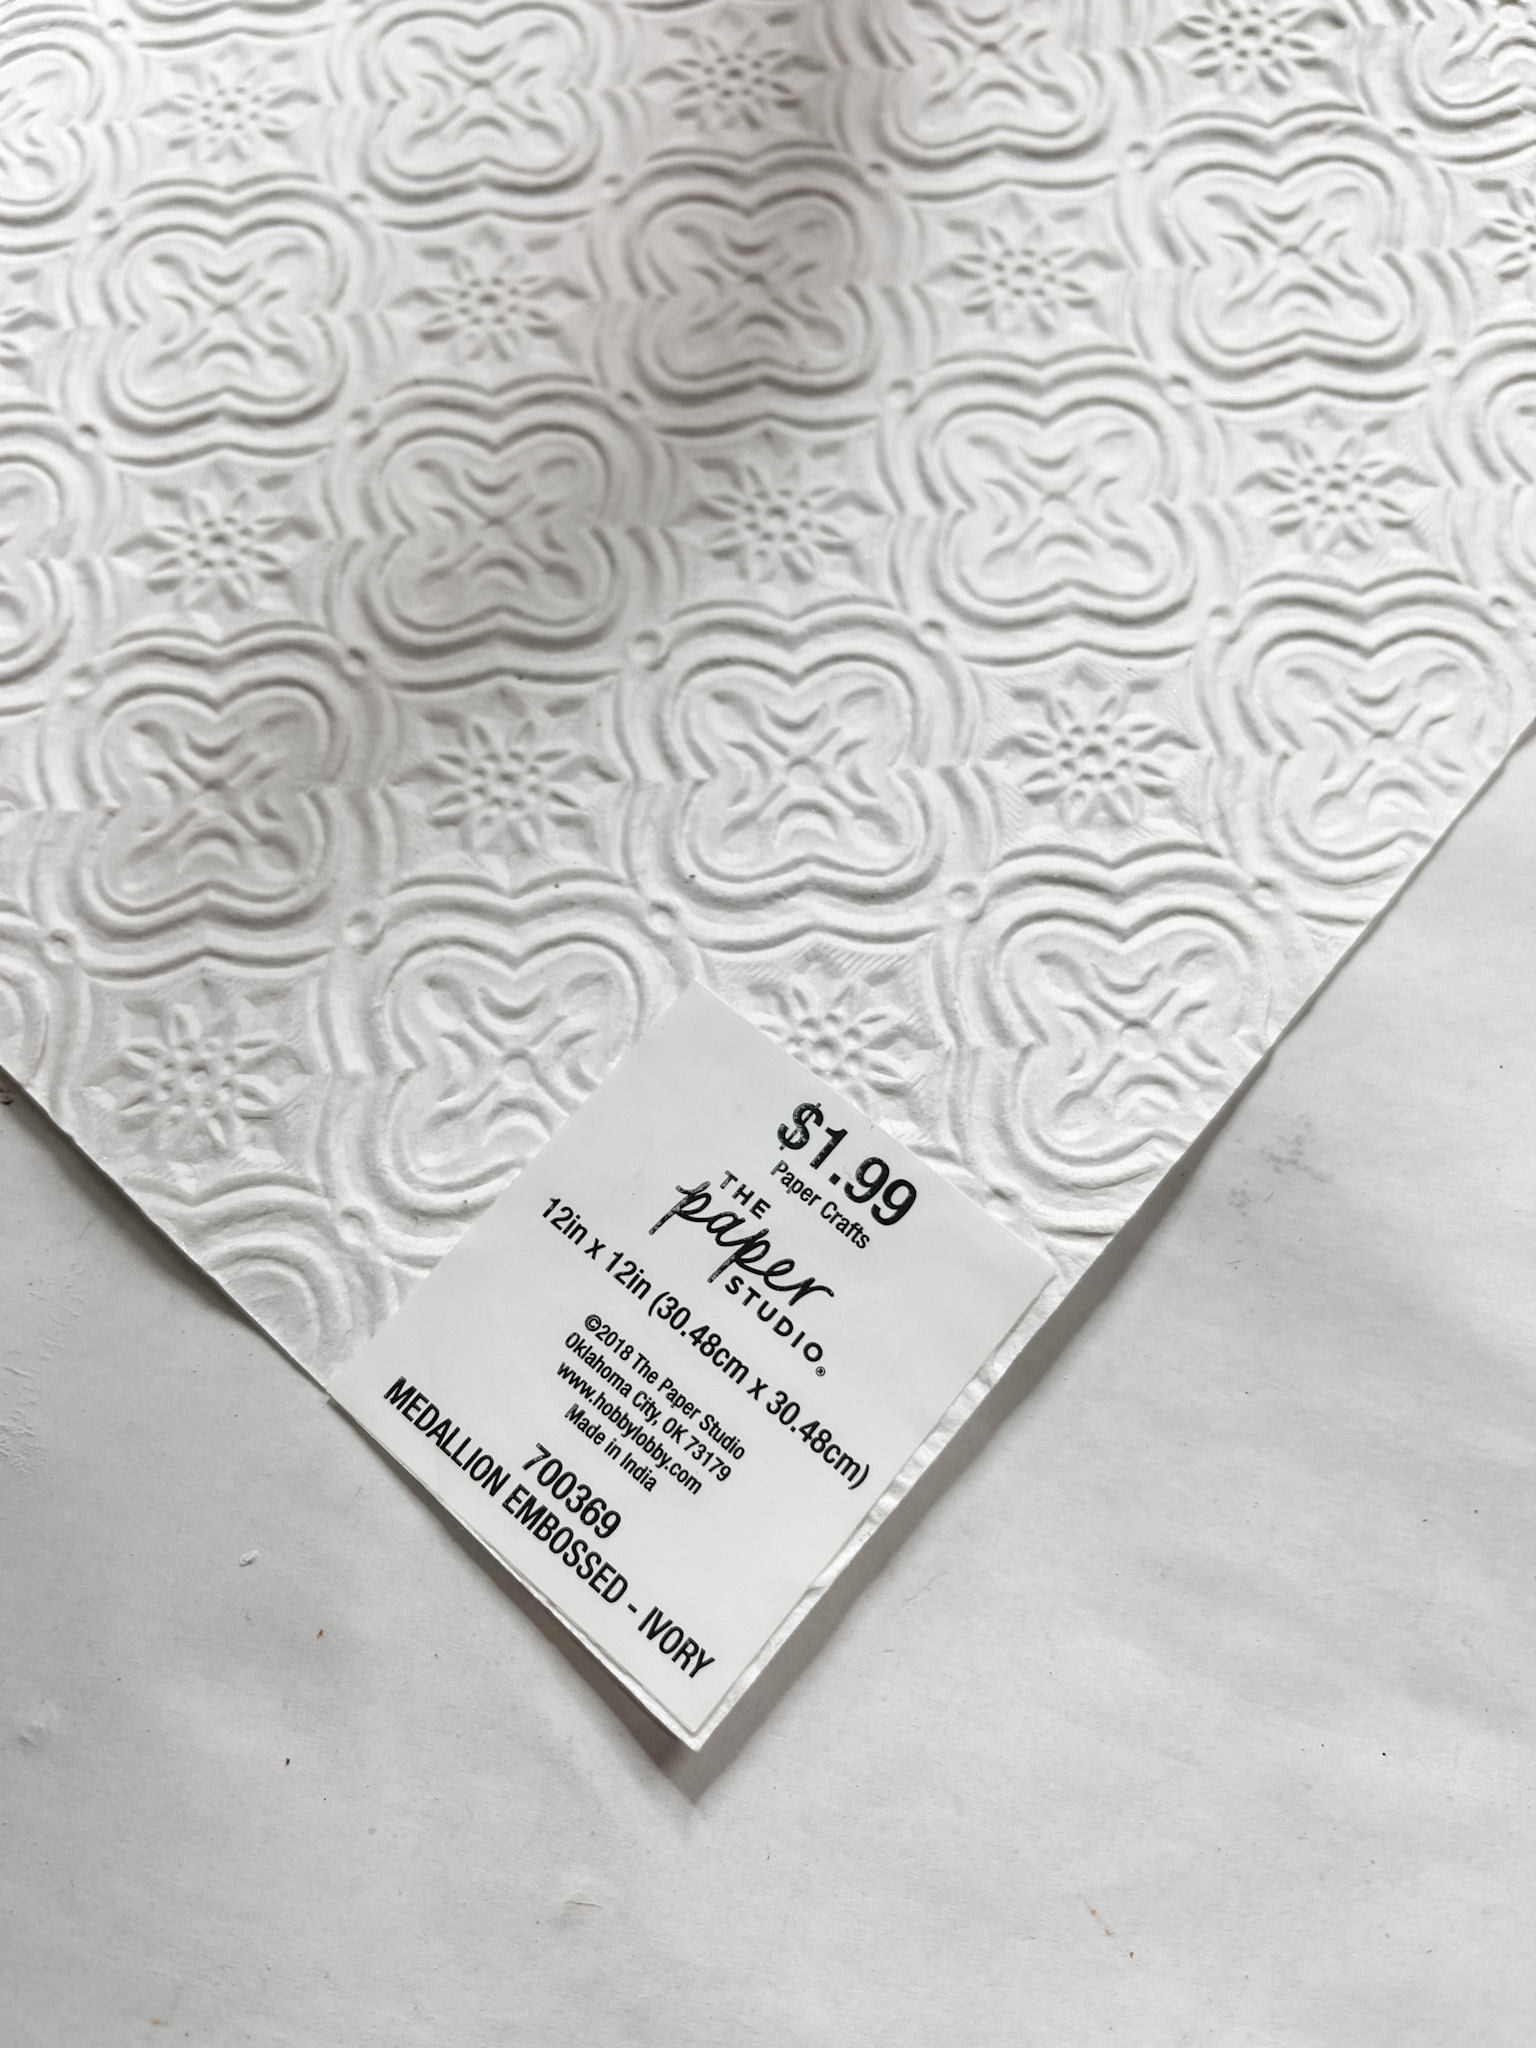
Cut the shape out of the scrapbook paper. Lightly brush the lavender paint onto the scrapbook paper, then lightly brush white paint over the lavender paint.
Next, I painted the frame and handle from the mason jar with grey paint. Once the paint is dry, I lightly brushed white paint onto the wood.

Allow all the paint to dry on the scrapbook paper and wood pieces, then it’s time to assemble! Glue the scrapbook paper onto the mason jar.
Then, glue the frame and handle onto the scrapbook paper. Glue your flowers of choice to the back of the mason jar. Lastly, tie a little bow out of jute twine and glue it to the front of the mason jar!
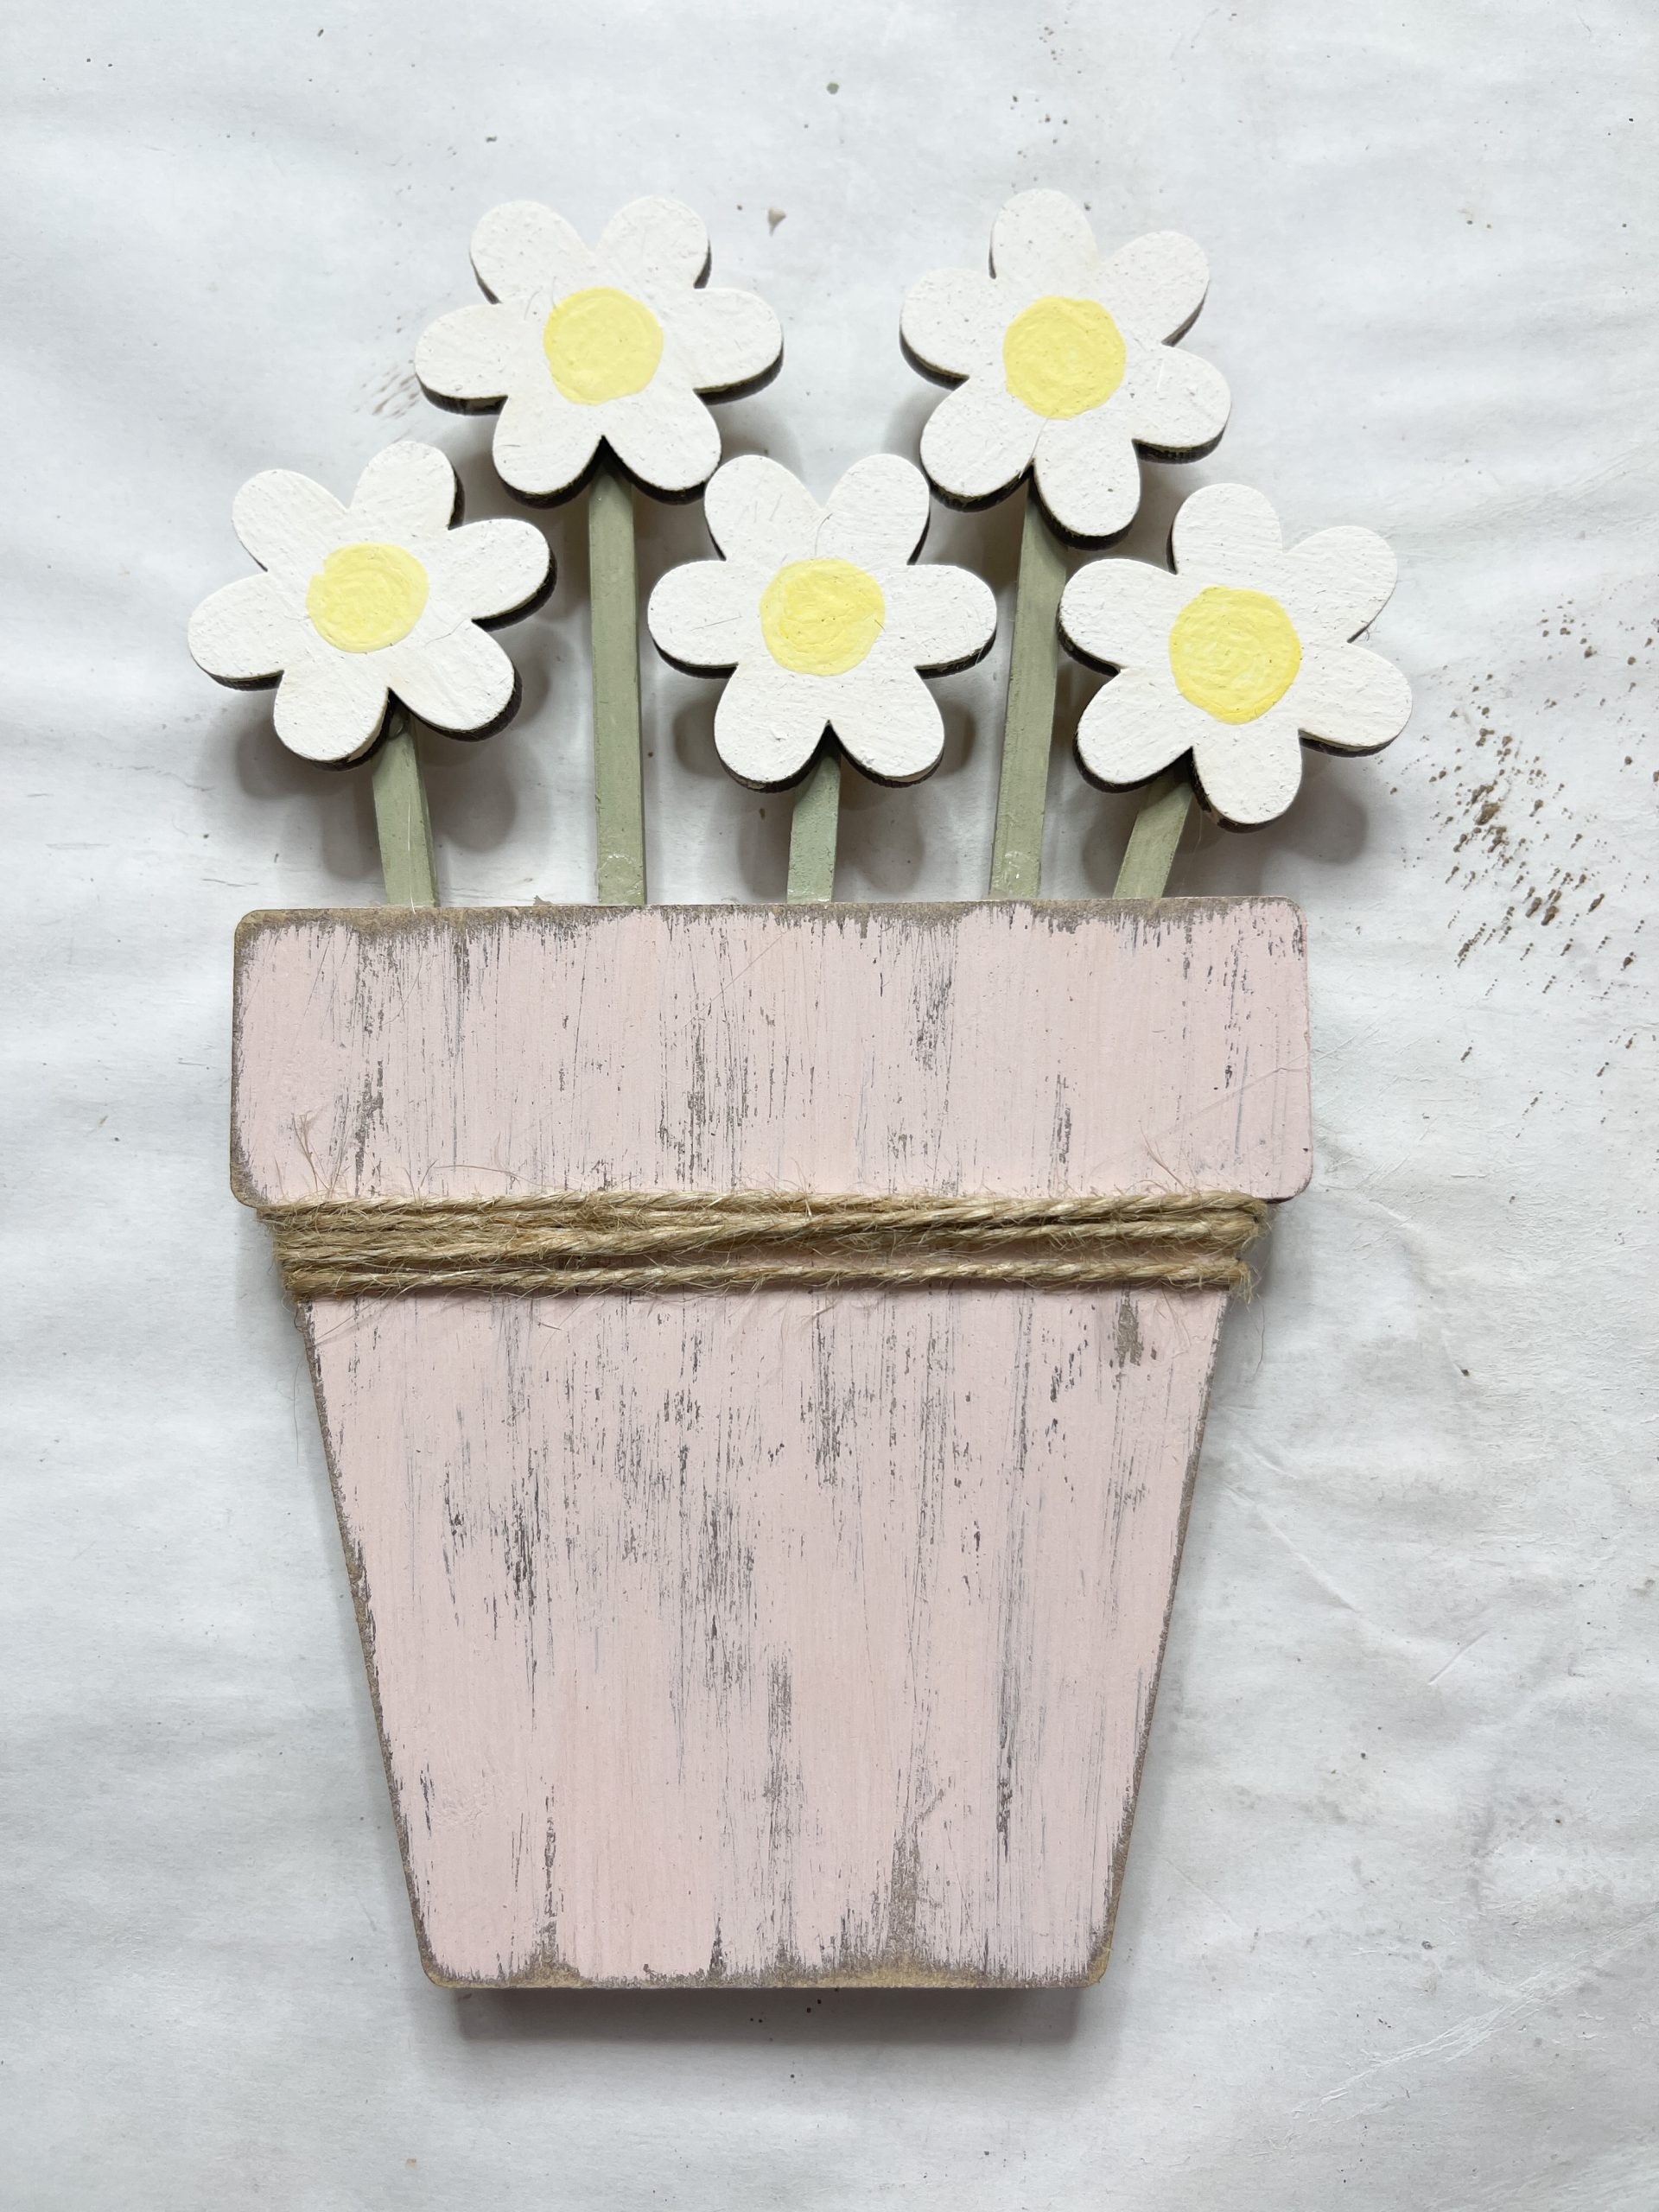
DIY Spring Potted Flowers
For this project, I will be using these items but you can substitute where you want.
“As an Amazon Associate, I earn from qualifying purchases.”
- Spring Containers Craft Kit
- Dollar Tree Spanish Moss
- Dollar Tree Jute Twine
- Craftsmart Yellow Acrylic Paint
- DecoArt White Acrylic Paint
- Waverly Pink Chalk Paint
- Hot glue gun and glue sticks

How to make the spring potted flowers
Last up from the spring containers craft kit are the potted flowers! Start by applying a coat of brown paint to the front piece of the pot. Use a wet wipe to remove the excess paint from the surface.
Allow the paint to dry, then glue the three pieces of the pot together. There is a frame piece that goes between the front and back to create an opening at the top of the pot.
Next, apply a coat of pink paint over the brown. Allow the pink paint to dry, then lightly distress the surface with a sanding sponge.
Paint the stems of the flowers with the Waverly celery chalk paint. Then, paint each of the flowers white with a yellow circle in their centers.
Let the paint on all the pieces dry completely, then you can start assembling the pieces! Glue the flowers onto each stem, then glue the end of the stems inside the top of the pot.
Lastly, I wrapped twine around the pot and secured it in place with glue!
I hope you enjoyed this Spring Containers DIY Decor as much as I did and decide to make one for yourself! I would love to see how yours turns out!
You should totally join my FREE Facebook group called On A Budget Crafts! It is a judgment-free community for DIY crafters to show off their projects and ideas.
If you loved this DIY you might also like this DIY topiary!
Thanks for stopping by! XOXO Amber
You can also shop my ENTIRE AMAZON Favorites shop just click here! It’s packed full of all the things I use and love. Here is the supply list I highly recommend every creative have on hand!!
Would you also pin my blog for later and get on my newsletter alerts? I would love to have you join my #craftycrew.
Inspired? Leave me a comment below! I love hearing from my readers!

Join my free “ON A BUDGET CRAFTS” Facebook group!

These are so stinking cute