DIY Project: Mini Subway Tile Backsplash
Affordable How to Subway Tile Kitchen Backsplash Makeover!
WOW! Y’all totally loved my $62 kitchen makeover blog post! If you missed it you can find it here! And in this week’s post, I think you are going to absolutely love my affordable how-to subway tile kitchen backsplash makeover that I completed in 1 weekend! (By the way, this post was featured on hometalk)
This is yet another LONG OVERDUE blog post! March 2018 I decided to give my kitchen a total makeover that quickly spread to my living room, dining room, entryway, and hall! Funny how those DIY projects somehow multiply! But it was time for something new! This is an EASY AND AFFORDABLE KITCHEN MAKEOVER!
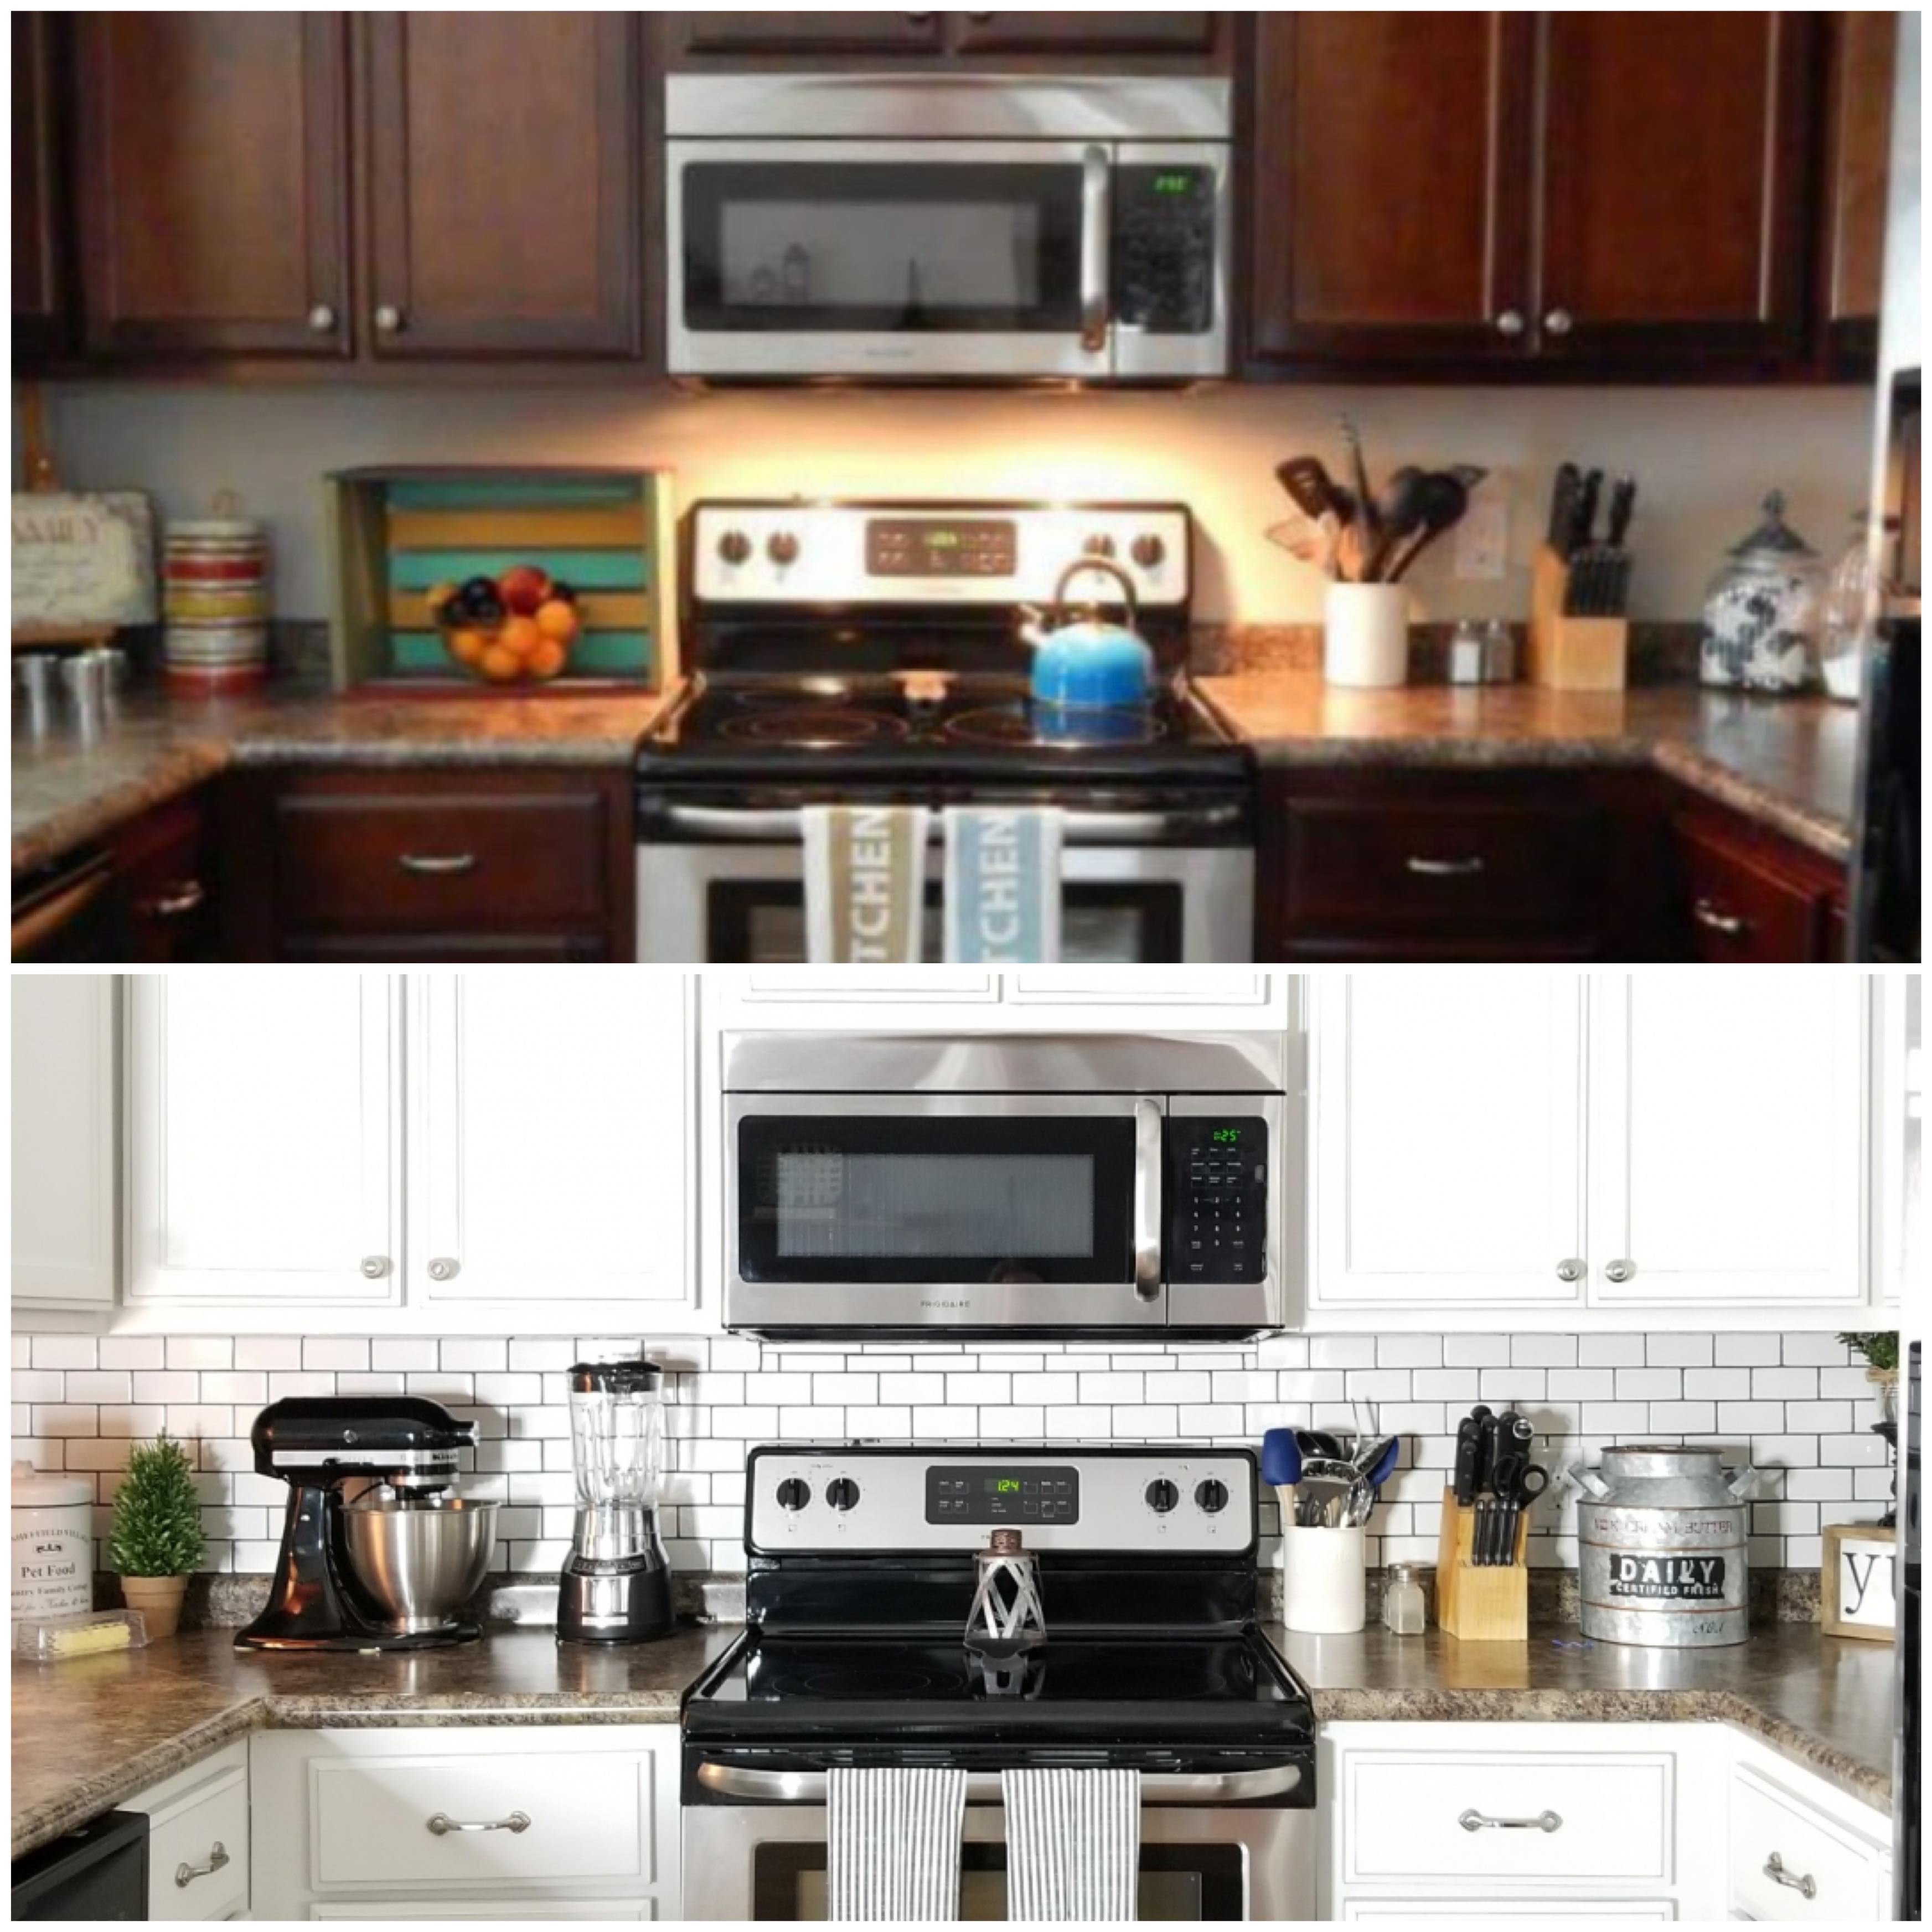
Before and After
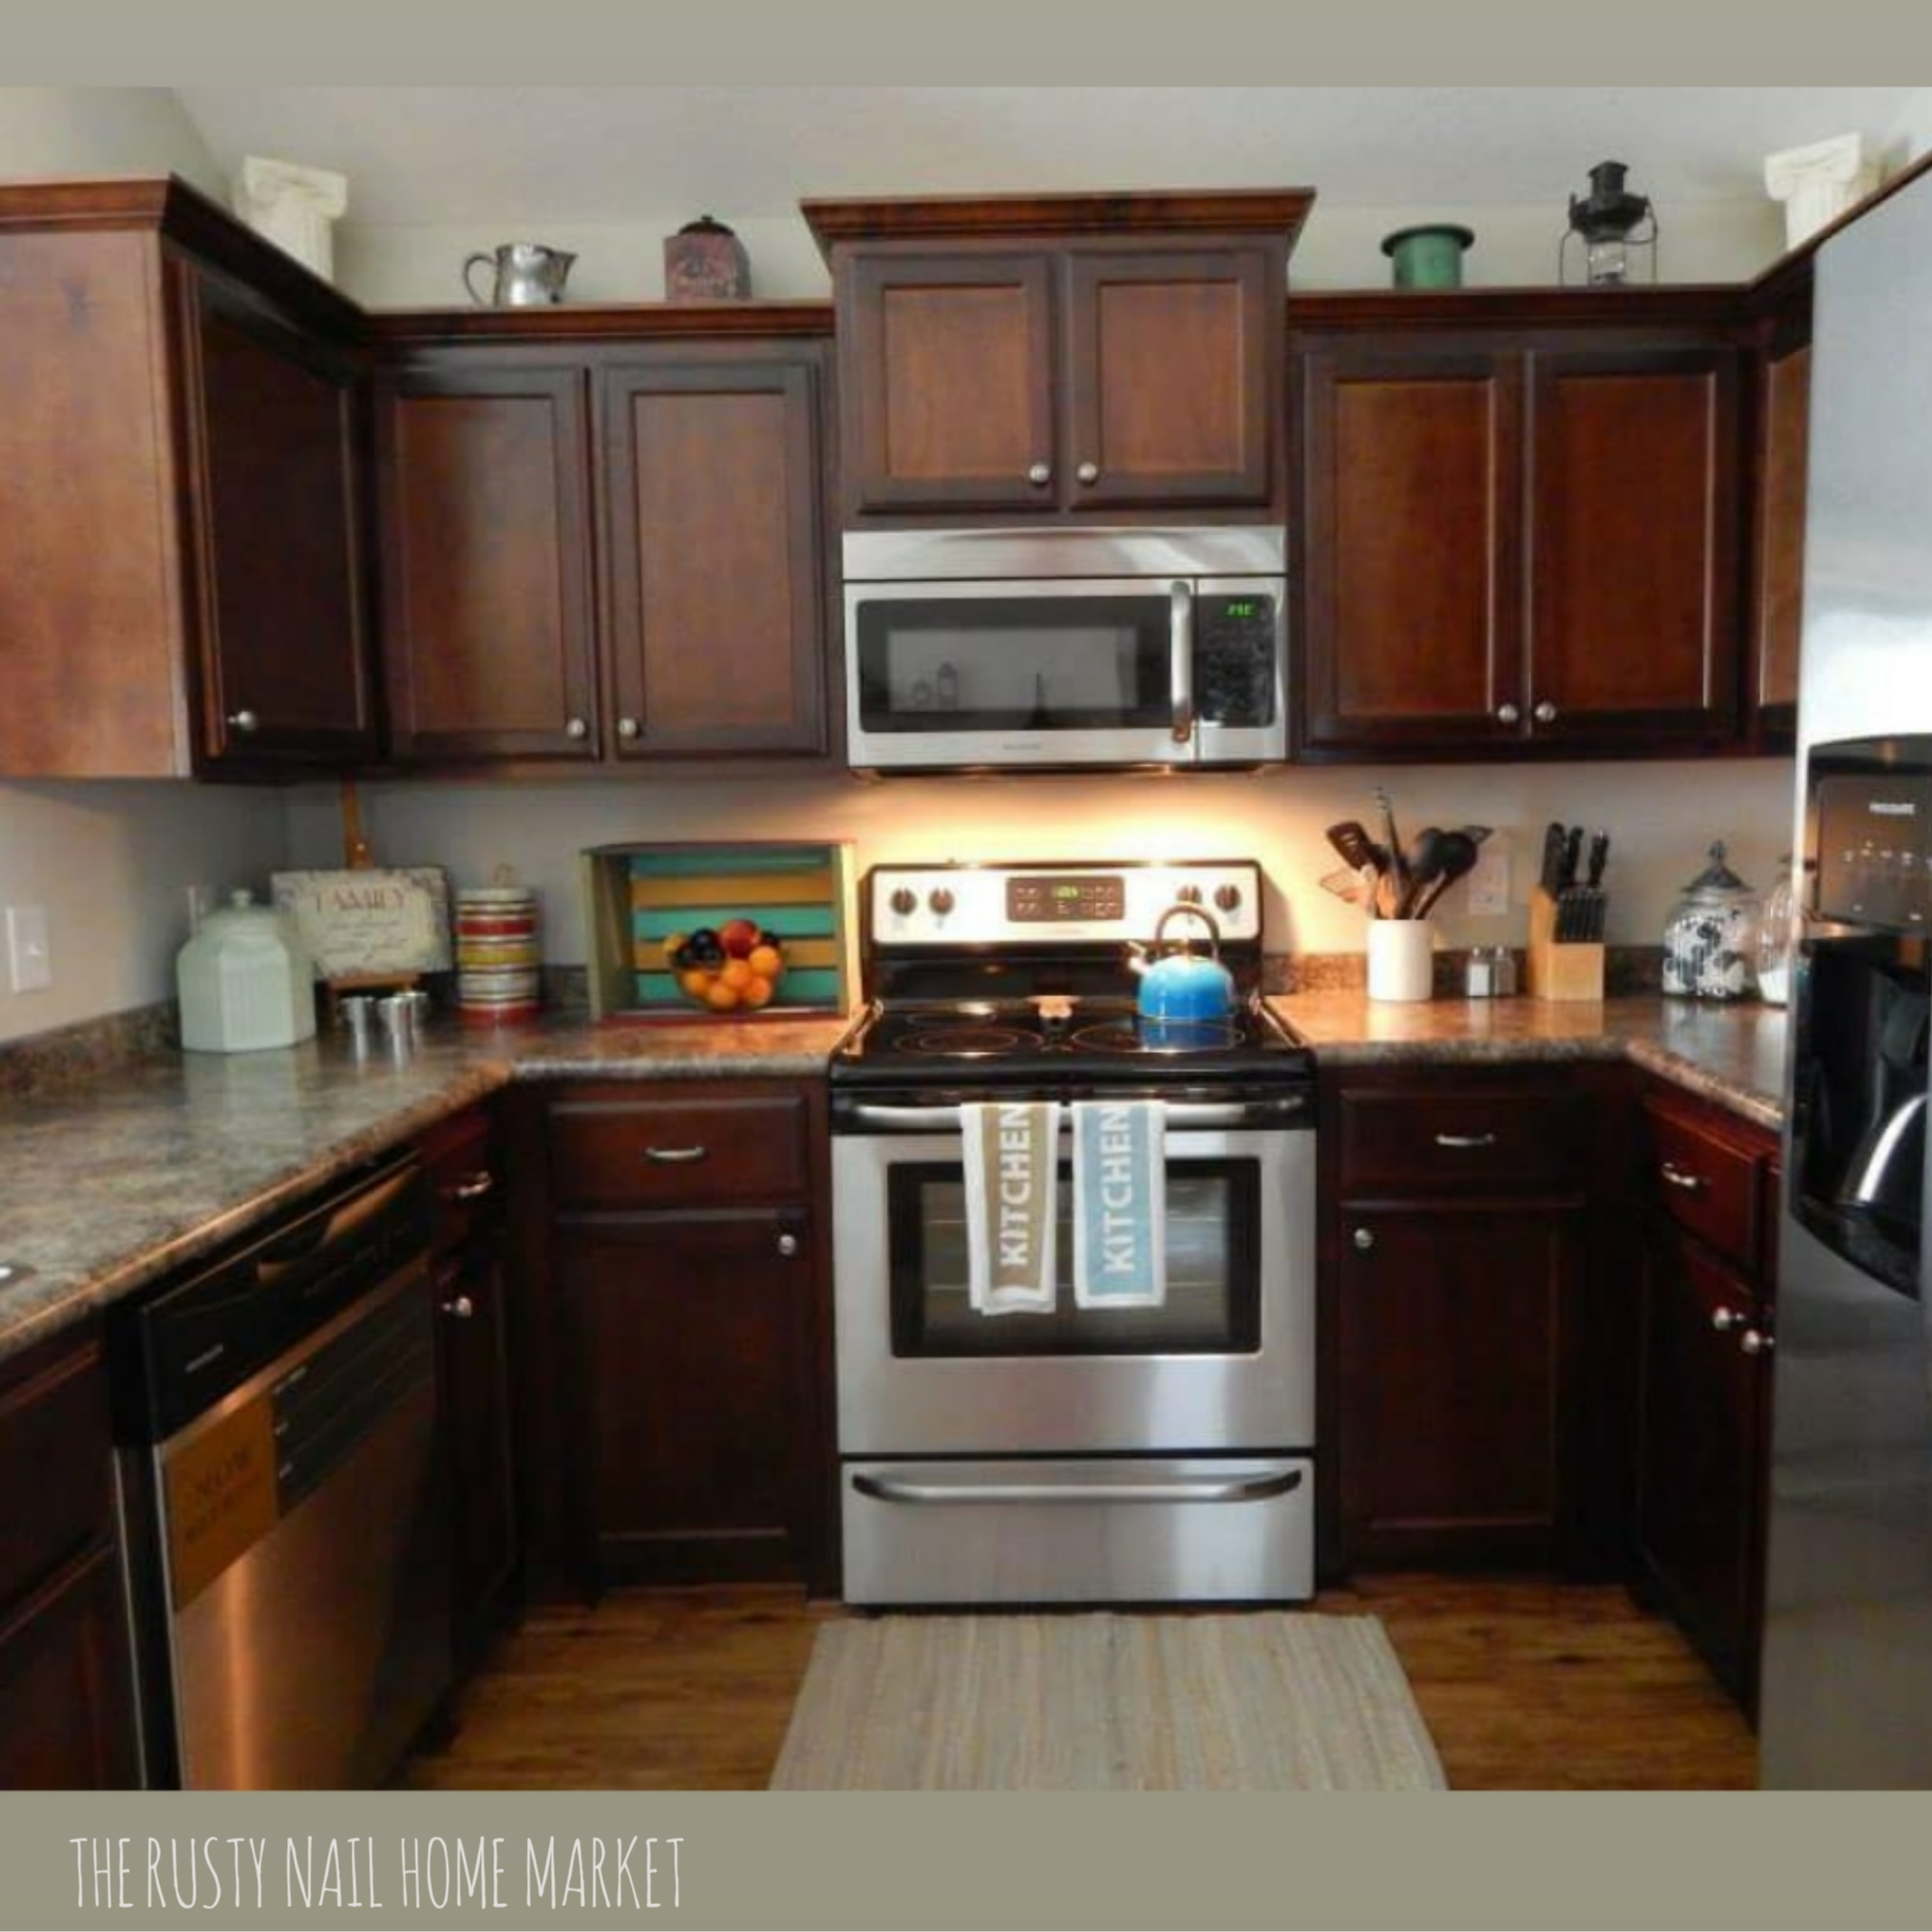
So, Here is the kitchen BEFORE! This means before I added the chalk paint on the cabinets, the Behr wall paint update, and the subway tile backsplash! Can you even believe the transformation?
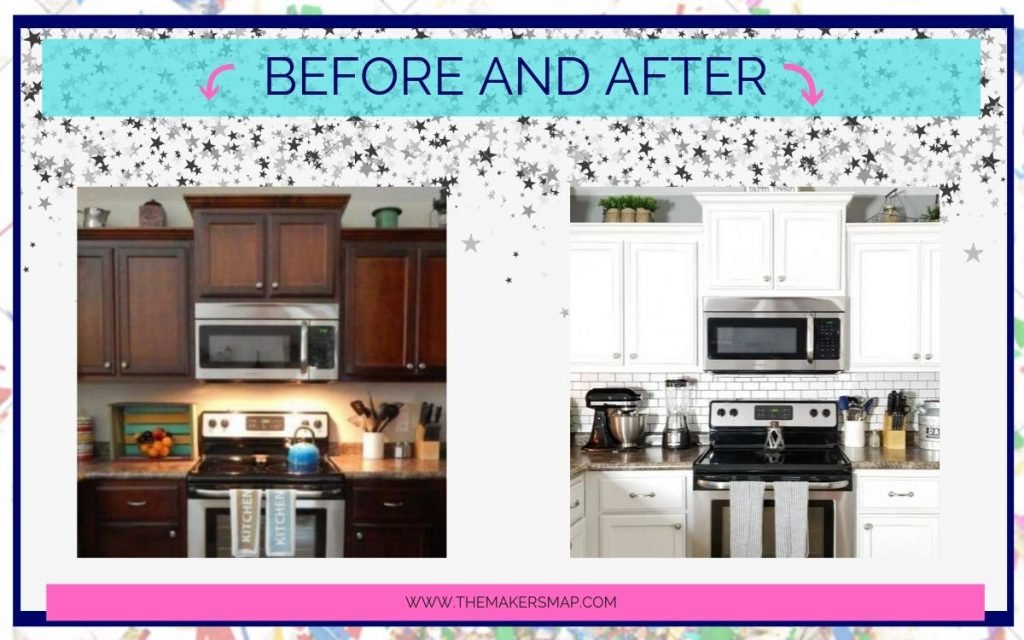
Super boring right!
The subway tiles backsplash project wasn’t all that hard or expensive. I posted a poll asking my friends on my Facebook page of over 303,000 followers 🙂 to help me decide! It was a no-brainer. THE MINI SUBWAY TILE BACKSPLASH WHITE WAS THE WINNER!
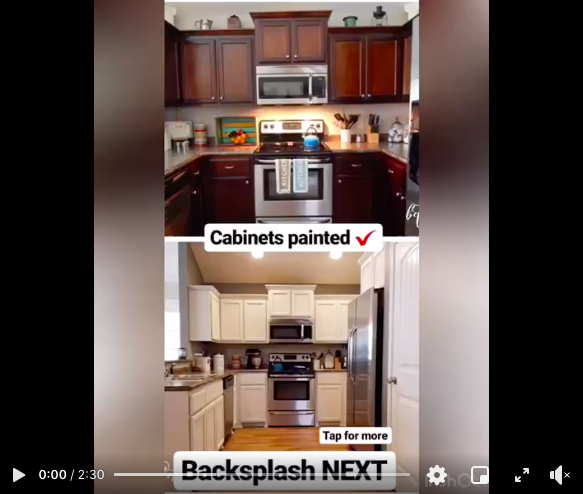
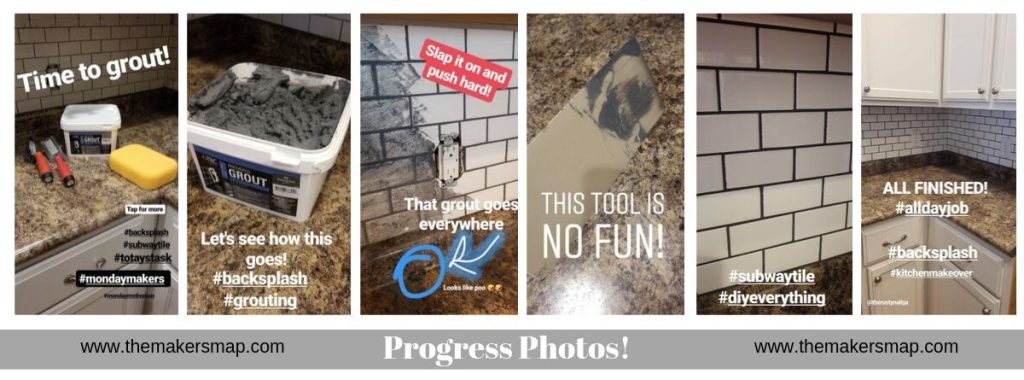
Shame on me for not taking better photos OR FILMING IT! I can not believe I did not film this in detail!
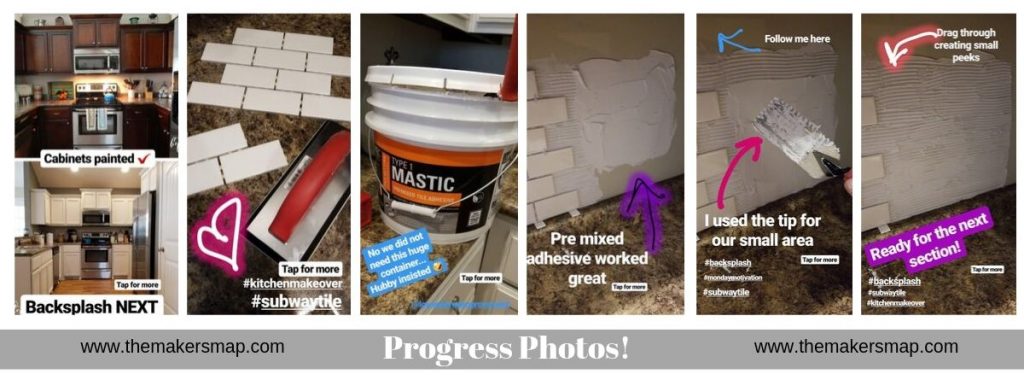
The entire cost for the subway tile backsplash for my size kitchen makeover was around $100, including the mini white subway tile sheets that I got at Lowes. The subway tile backsplash sheets were 12×12 in size, I also used the trim pieces, subway tile spacers, the adhesive, and the grout. (the tile work tools we had already)
These photos are from that video above. Again, pulled from my Instagram stories! I really am so disappointed I didn’t document this entire DIY project more in-depth! Honestly, I had the flu at the time, so it makes sense! I just wasn’t thinking clearly!

Follow me on Pinterest!
(I hope you come follow me over on Pinterest, I pin tons of awesome things. Yes, I am totally addicted to Pinterest)
I had never done a kitchen backsplash in my entire life, so if this girl can do it so can you! (If you missed it on my KITCHEN post, I had the flu during this whole project) THE FLU! But I was determined not to be defeated lol! I got it done! I know it seems intimidating but honestly, it’s not that bad.
If you mess up, the great thing is nothing is FULLY set yet. You can still move things around.
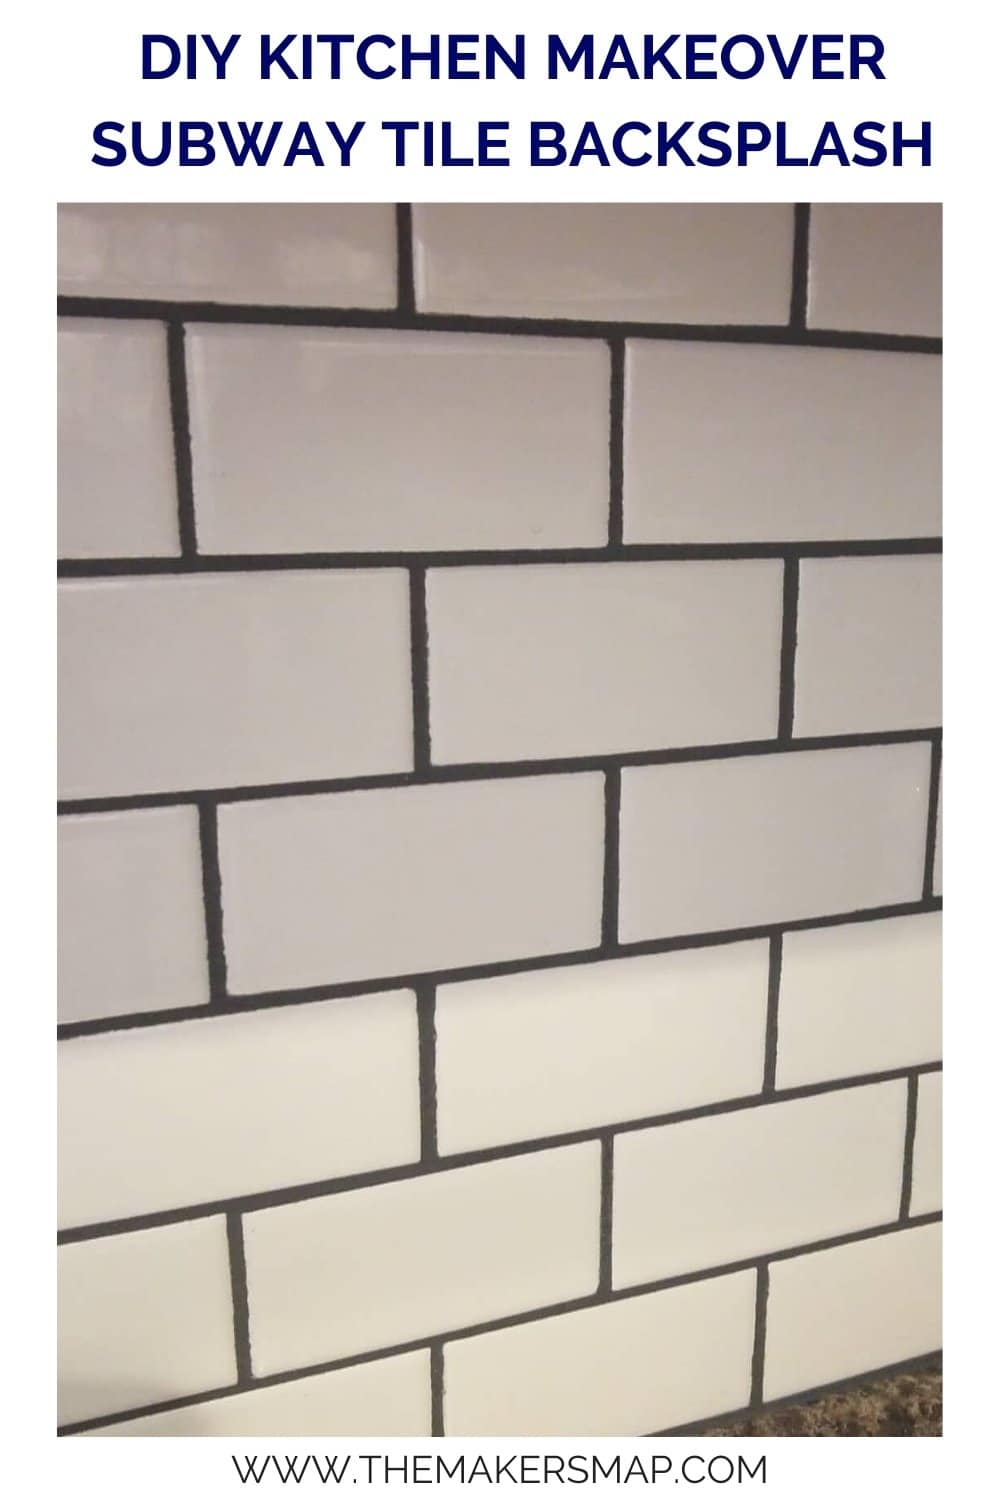
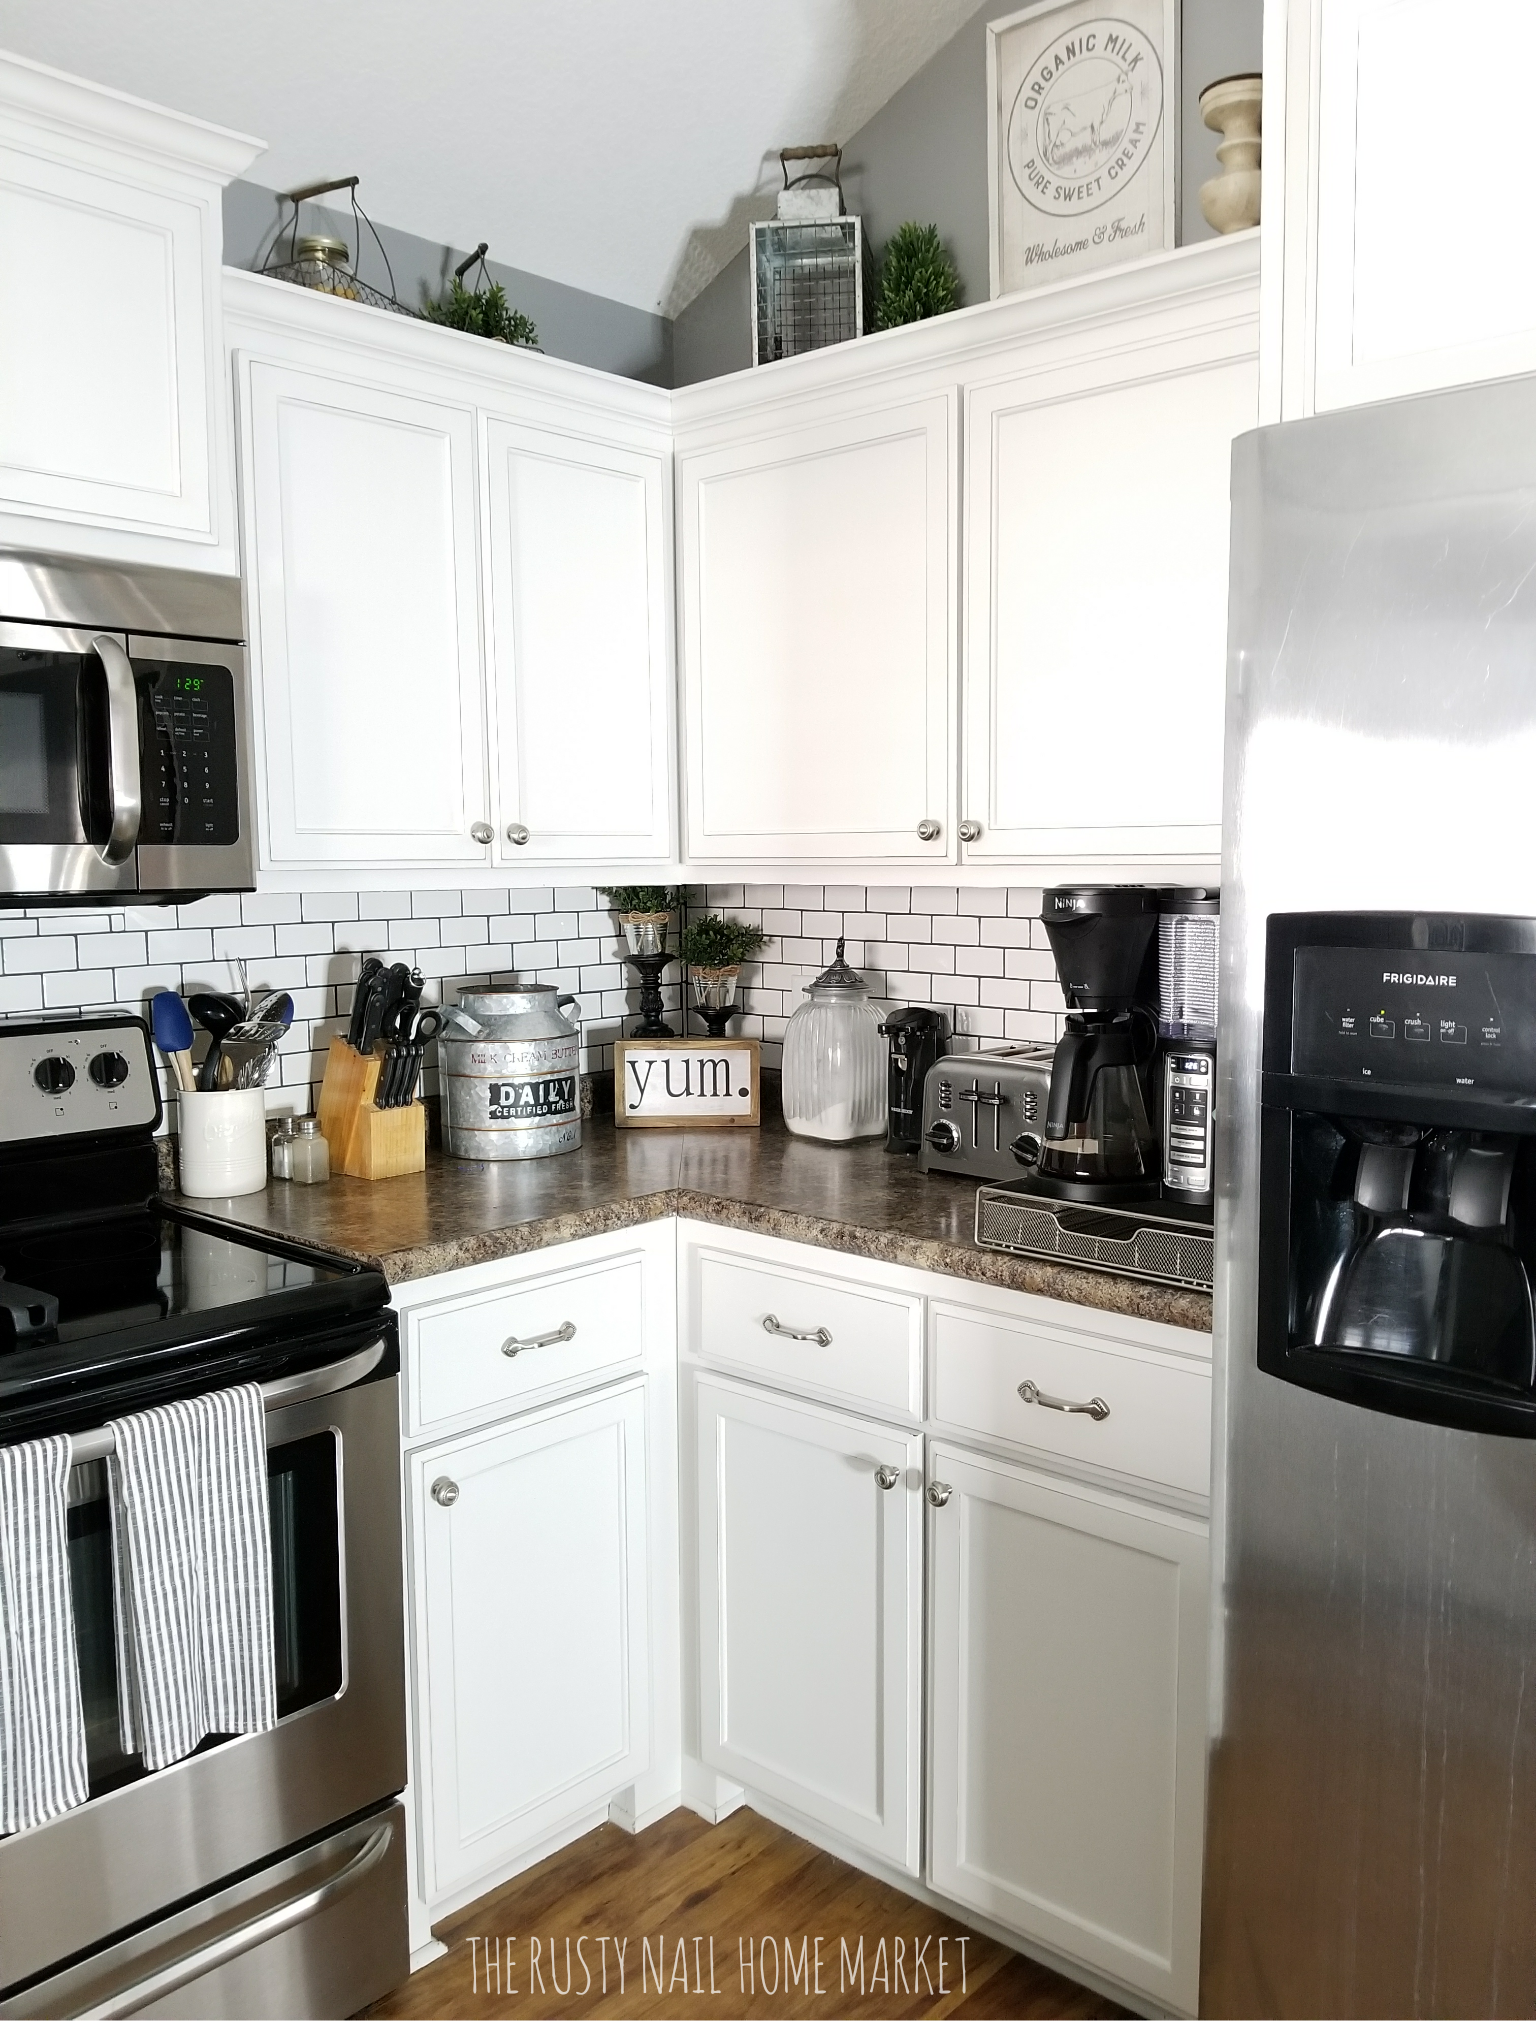
(A little UP CLOSE SHOT of my SUBWAY TILE KITCHEN BACKSPLASH) 🙂
How to install a subway tile backsplash
USE A TILE CUTTER, either a hand tool or a saw. and work around your outlet covers, you might also need to get longer screws since your faceplates will sit farther away once you install the subway tile. We took our current screws to the hardware store to get longer ones and the proper threading.
Apply the subway tiles to the adhesive. Apply the adhesive with this tool! You want to make sure you have enough adhesive on the wall and butter the back of your subway tile sheets to ensure they are secured to the wall.
USE SPACERS and LEVEL! This doesn’t need to be completely perfect but watch for your tiles to slip and you may need to go in and add more spacers. I didn’t use spacers in all areas. Just where needed. Just make sure to level off the subway tiles individually.
Finishing steps to installing a subway tile backsplash
Allow your adhesive to set overnight. This is really important when installing a backsplash. Once the tile adhesive is set and dry you can add the tile GROUT! I waited overnight! I used the grout float to help me then wipe the excess away with a sponge! That is it.
Prepare for a mess!
I made sure my kitchen counters were fully cleared off! This stuff is messy. Also, have on hand a few wet towels you will be wiping and rinsing! A LOT!
Make sure you MOVE OUT ANY kitchen APPLIANCES in your way.
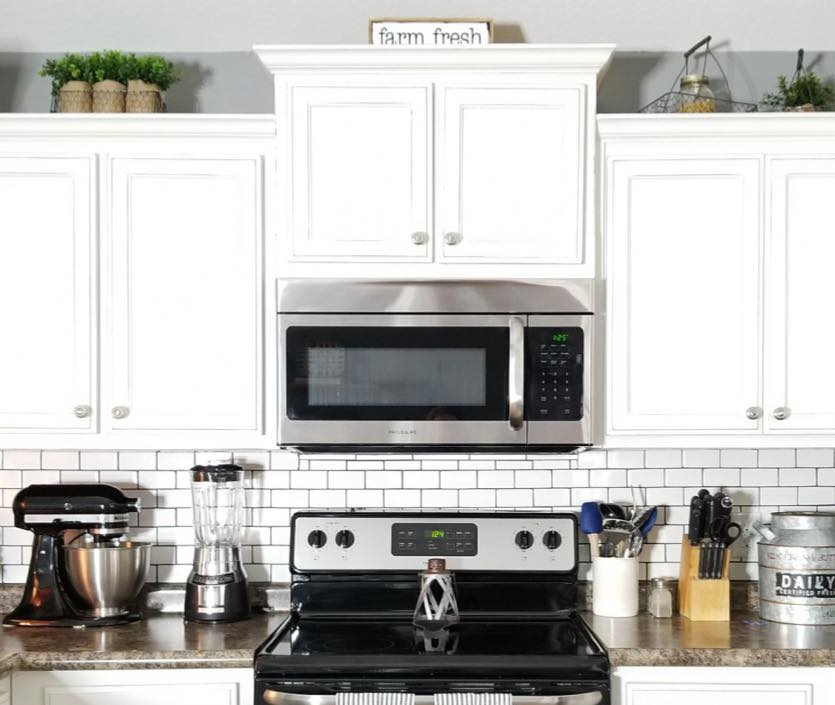
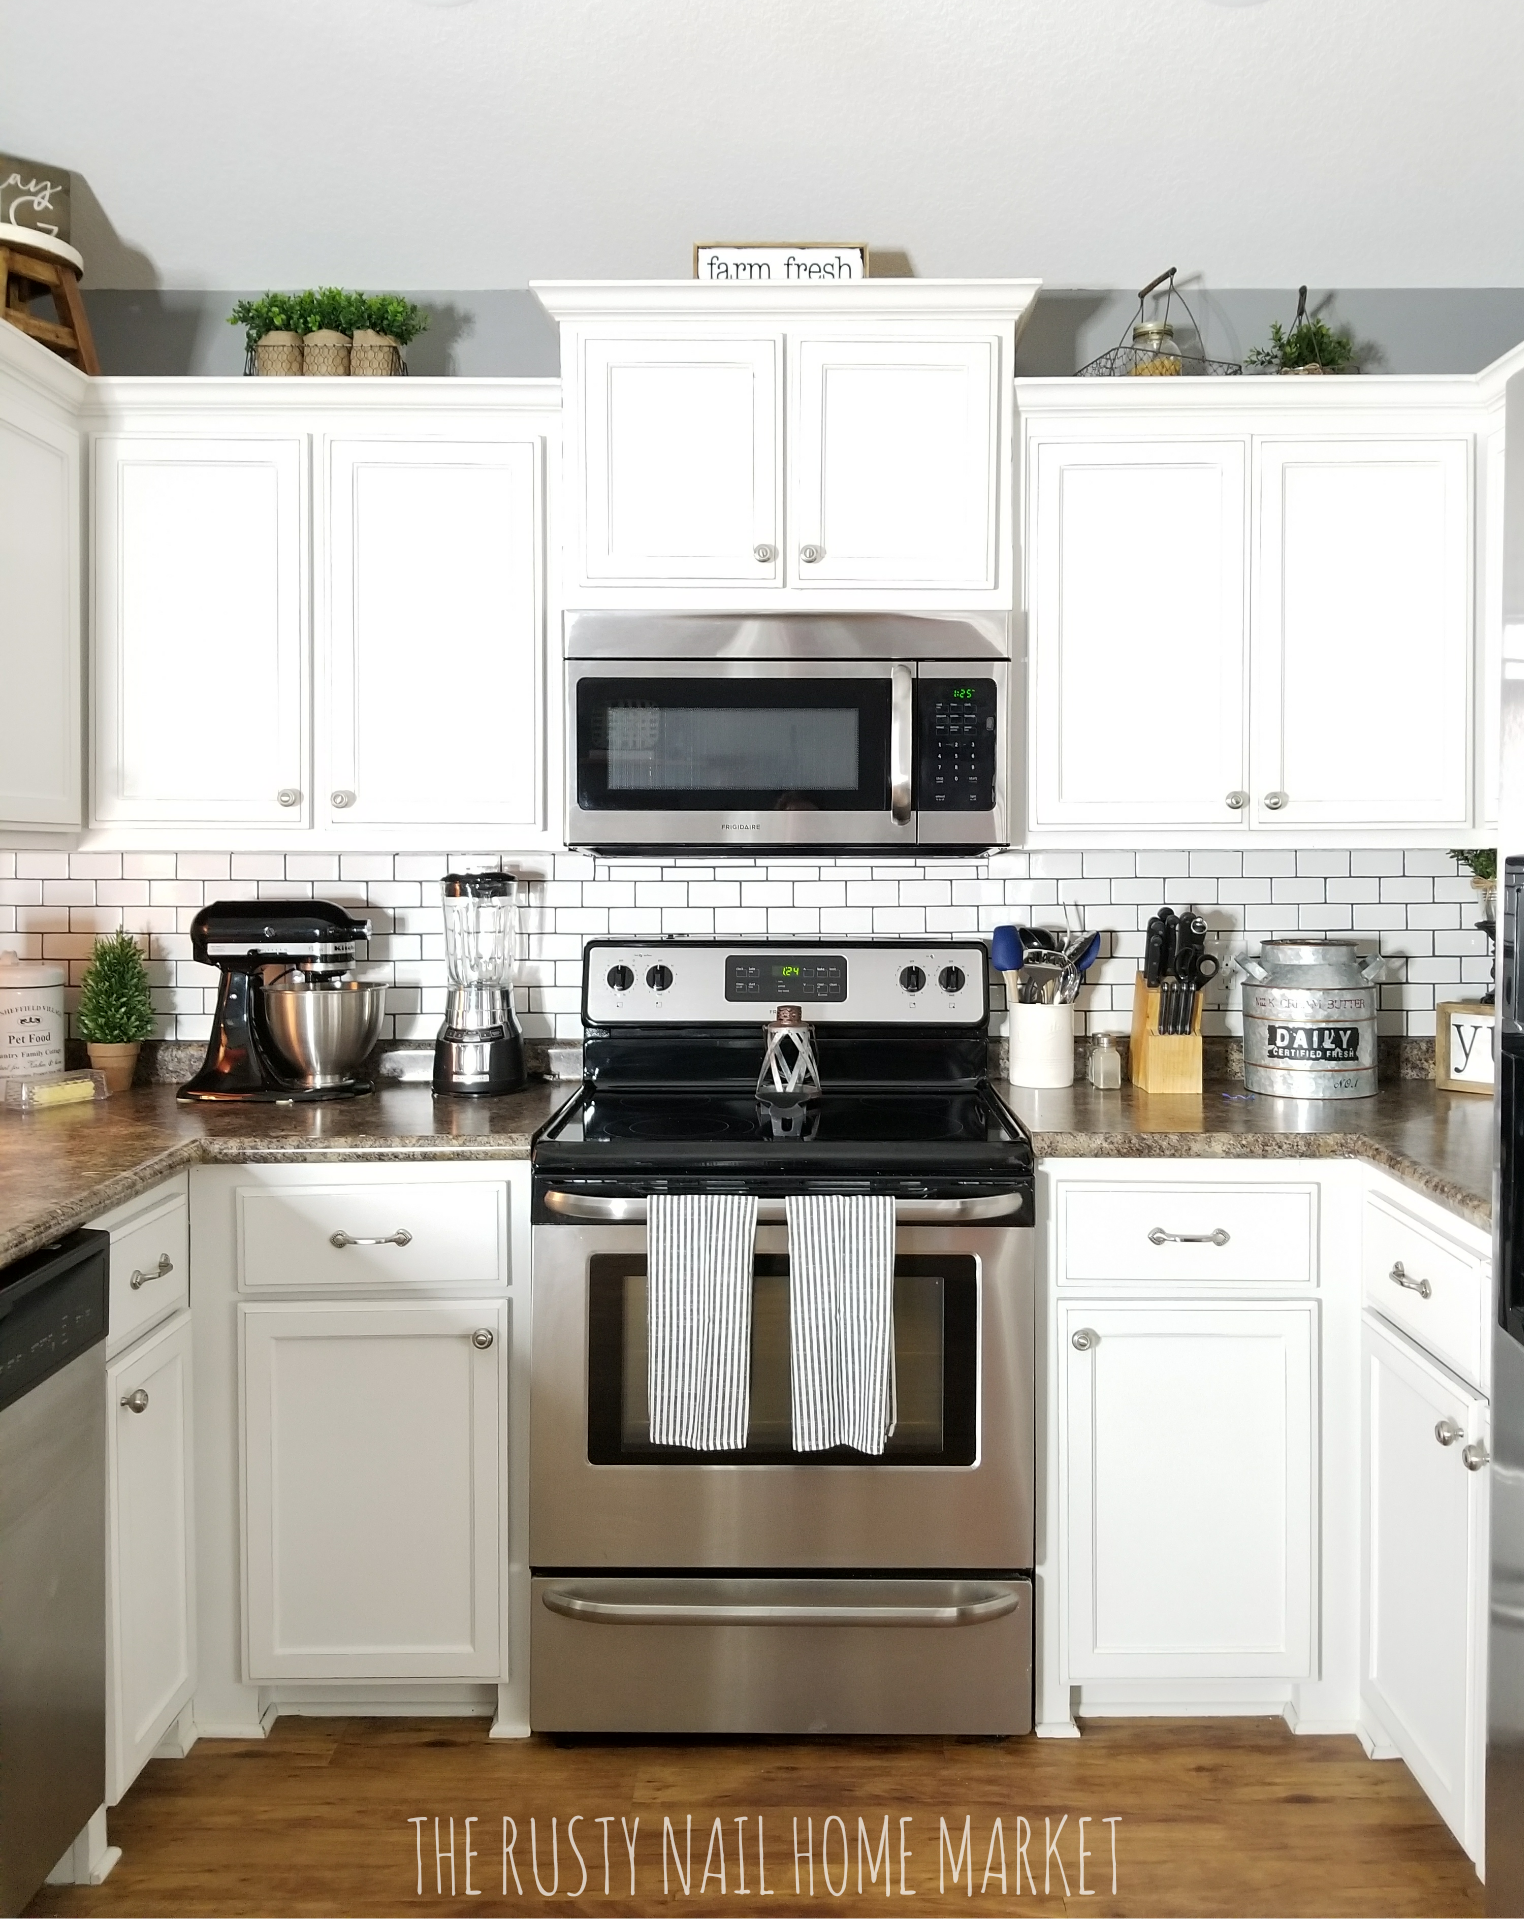
LET DRY and ADMIRE YOUR NEW BEAUTIFUL BACKSPLASH! YOU DID IT!
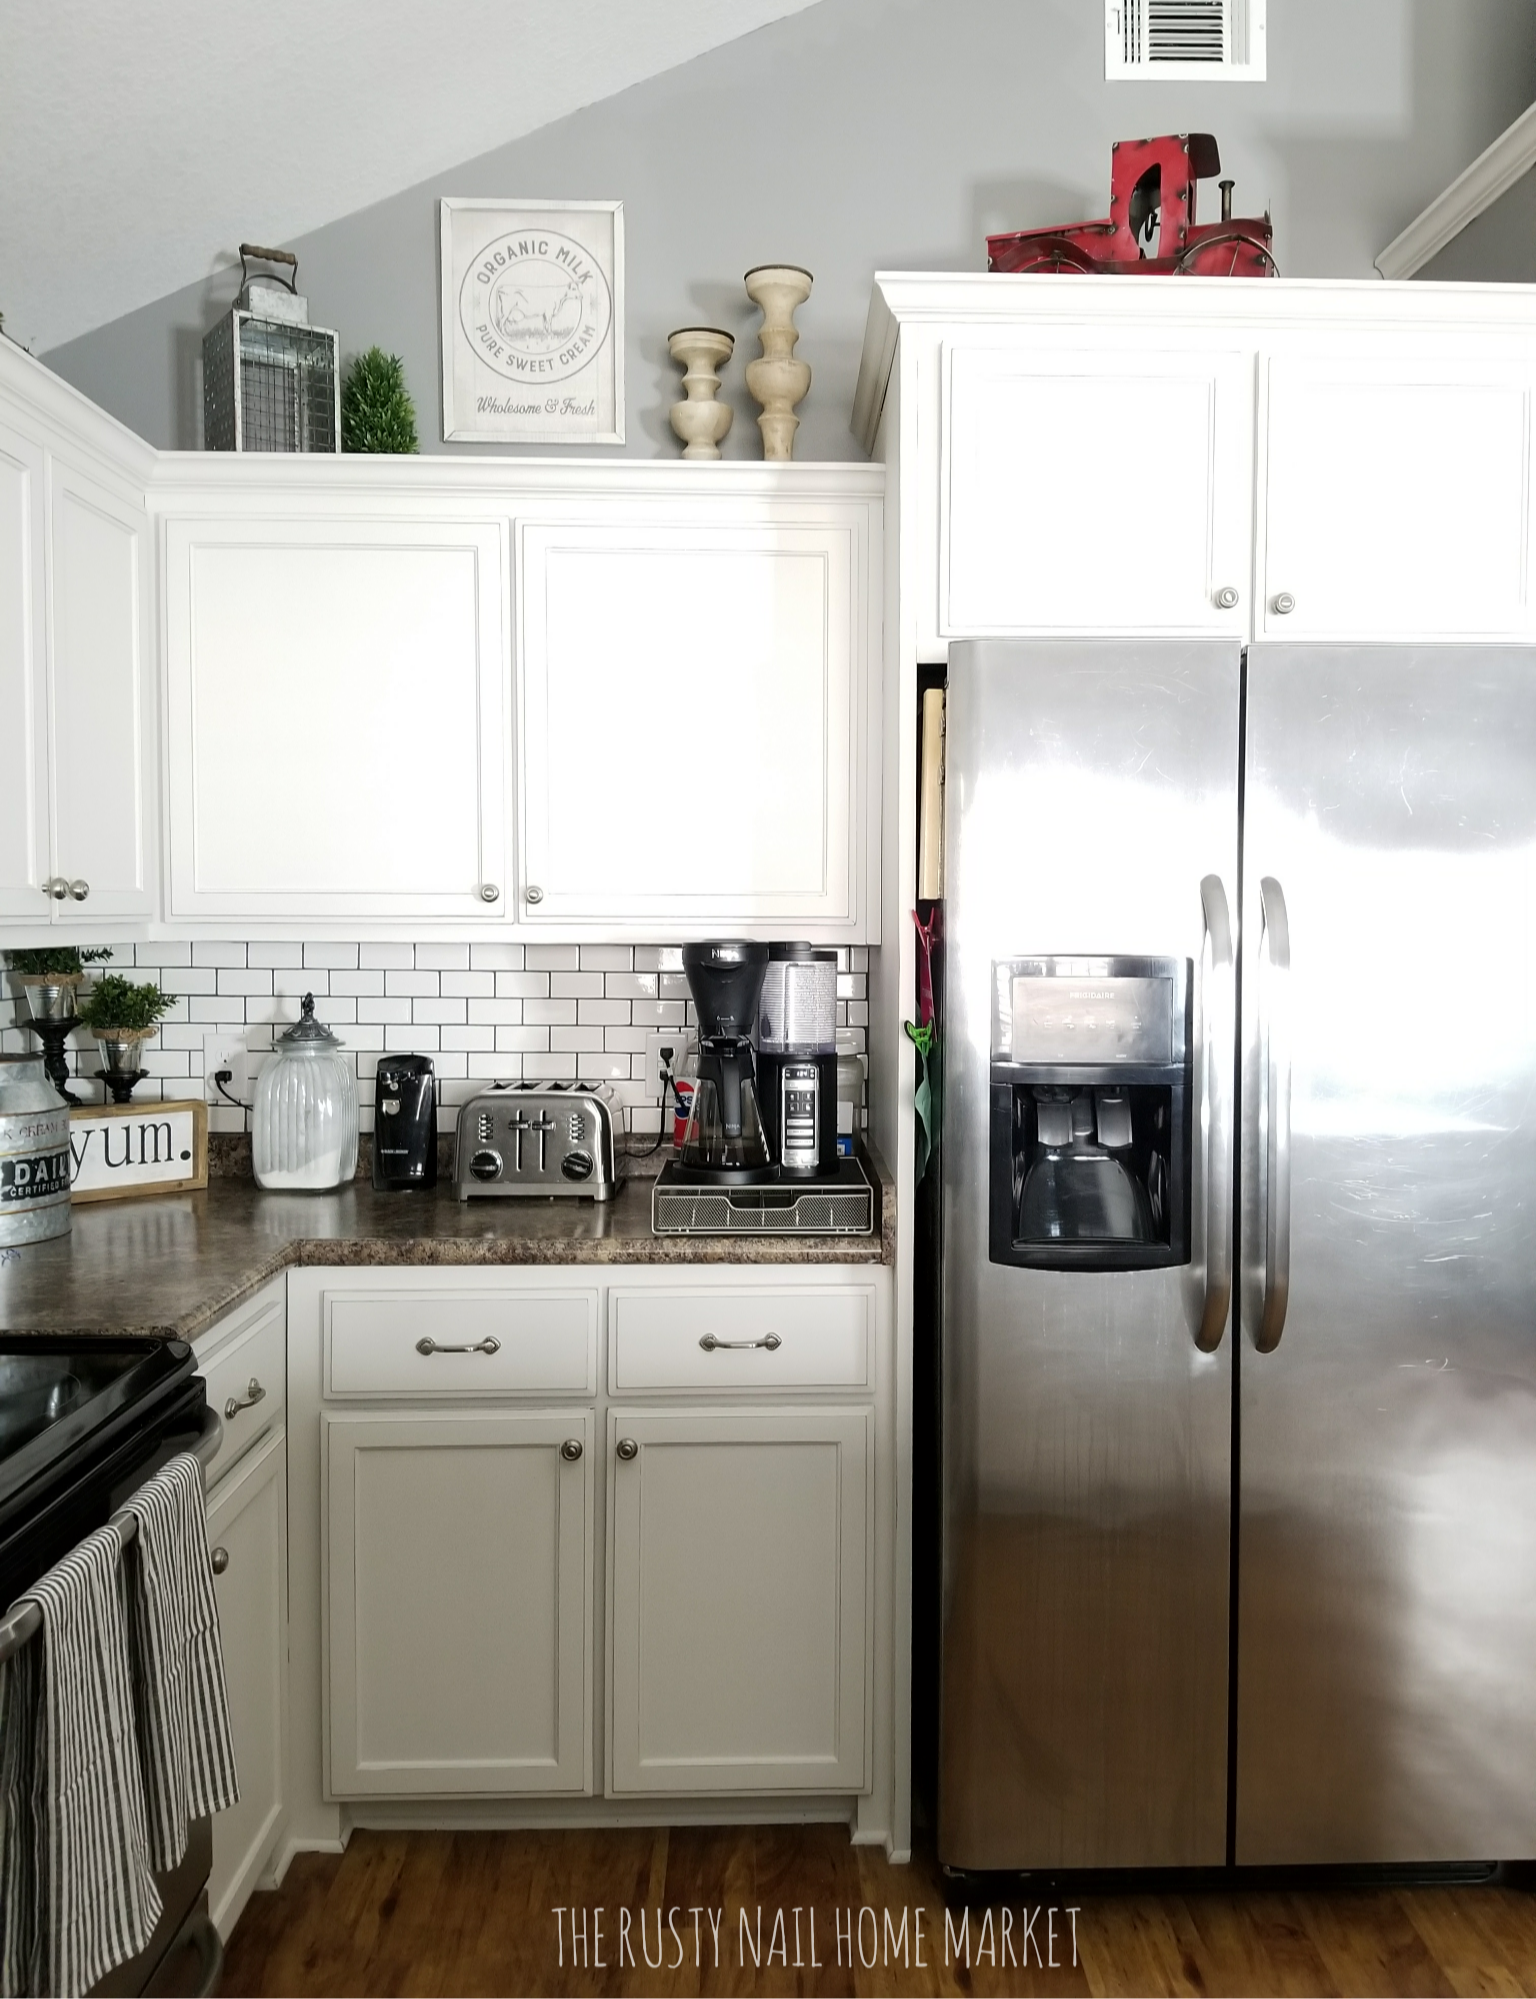
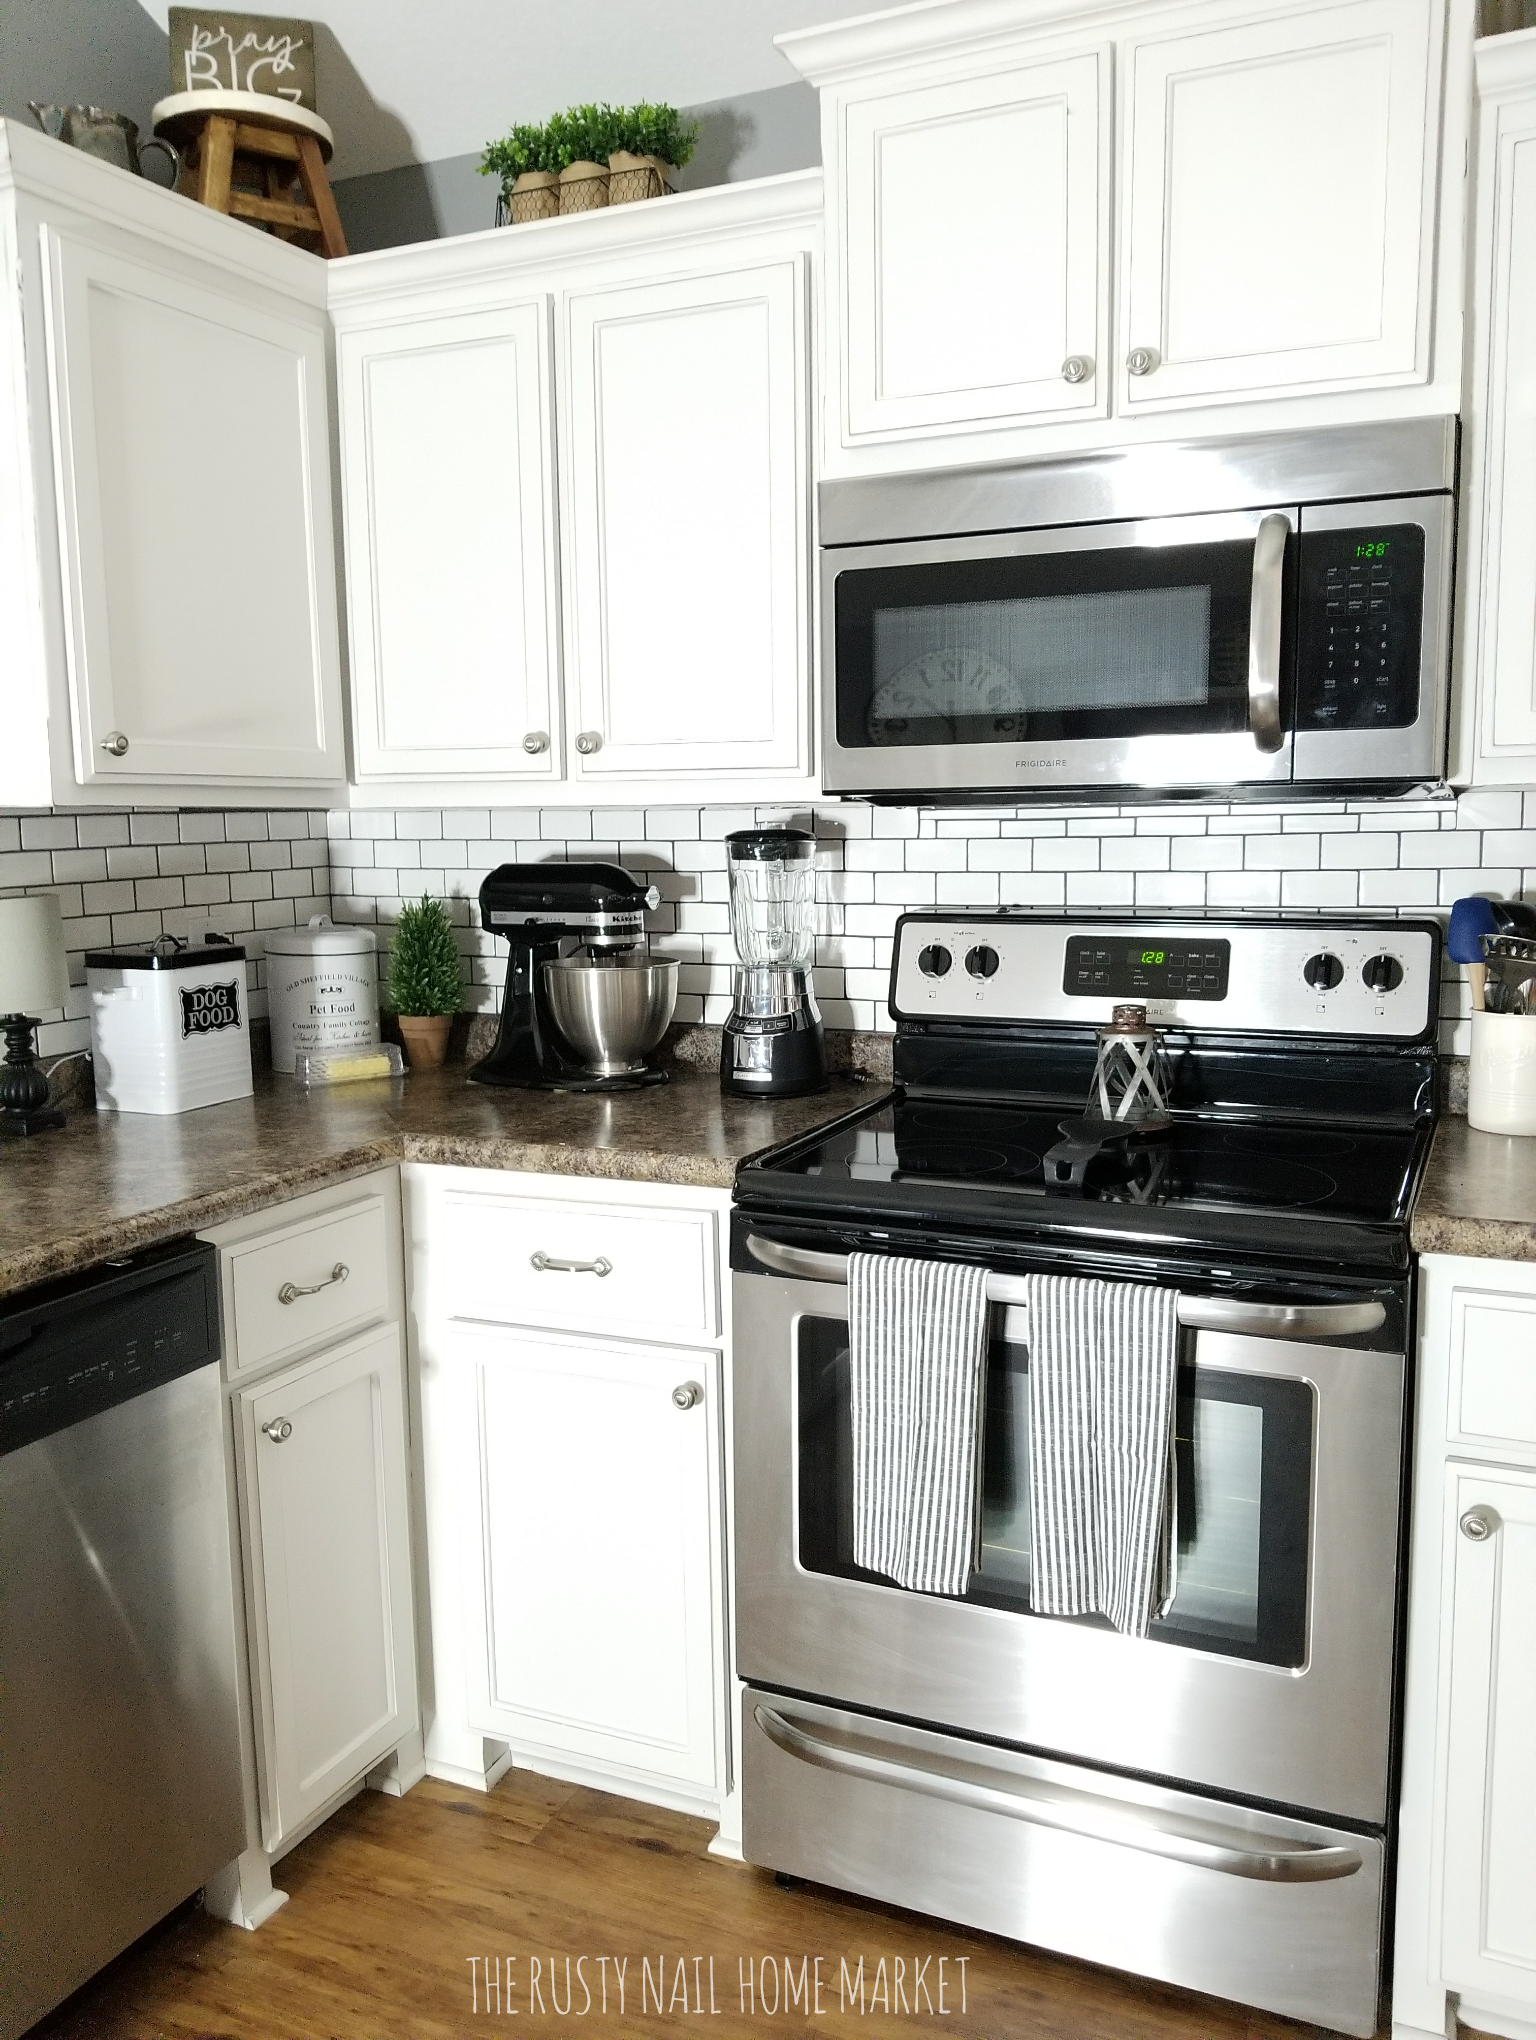
Pretty impressive! I am absolutely in love with how this project turned out. (by the way, the photos are watermarked from when I owned my brick and mortar store The Rusty Nail Home Market. It has since closed)
Easy Home Updates!
That paint color I mentioned in my home is Behr Sharkfin. It is a blue-gray color. It is one of my favorite Behr paint colors. Very neutral and has a beautiful farmhouse feel. I learned so many paint techniques from this huge kitchen makeover project. This is the perfect example of how to update a home.
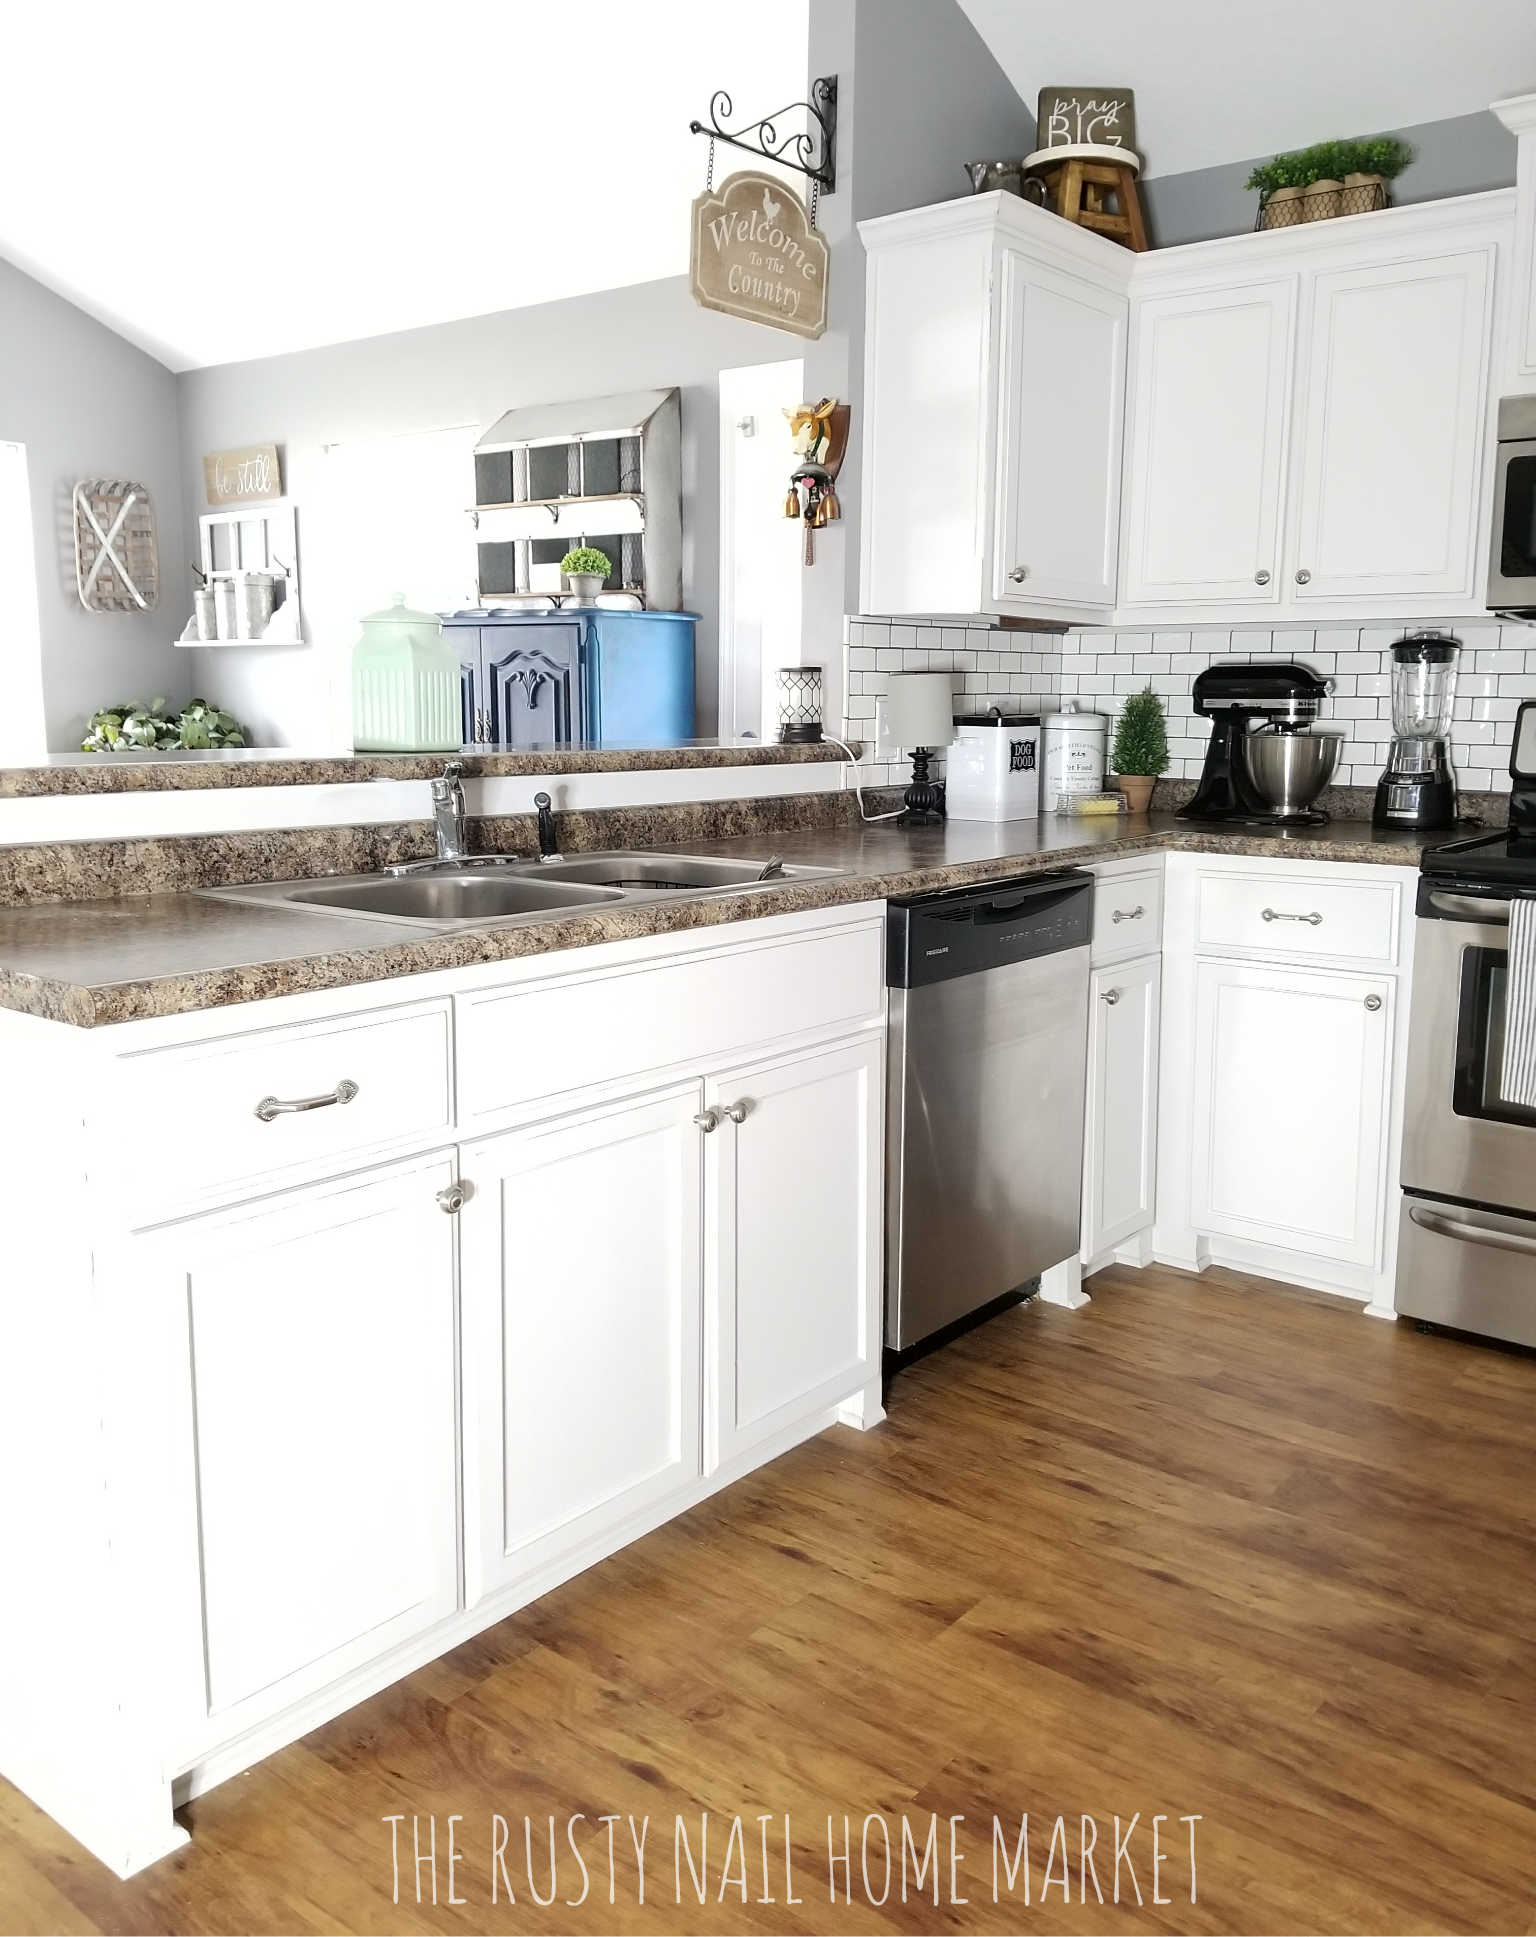
That subway tile backsplash just pops! An amazing kitchen transformation!
The easiest subway tile backsplash how to ever!

Kitchen makeover ideas!
I hope this inspires you to take on your own DIY kitchen makeover! I painted my kitchen cabinets in 1 weekend and I completed the subway tile backsplash project the next! So over 2 weekends, the kitchen makeover project was DONE!
Be inspired! Pass this on and be sure to pin it to your boards for future reference! 🙂
XOXO- Amber


Follow us on Pinterest! Be sure to pin our images too! (We appreciate the love)


To collaborate please email us at info@themakersmap.com
Do not copy or use photos or blog posts without permission. Thank you


One Comment