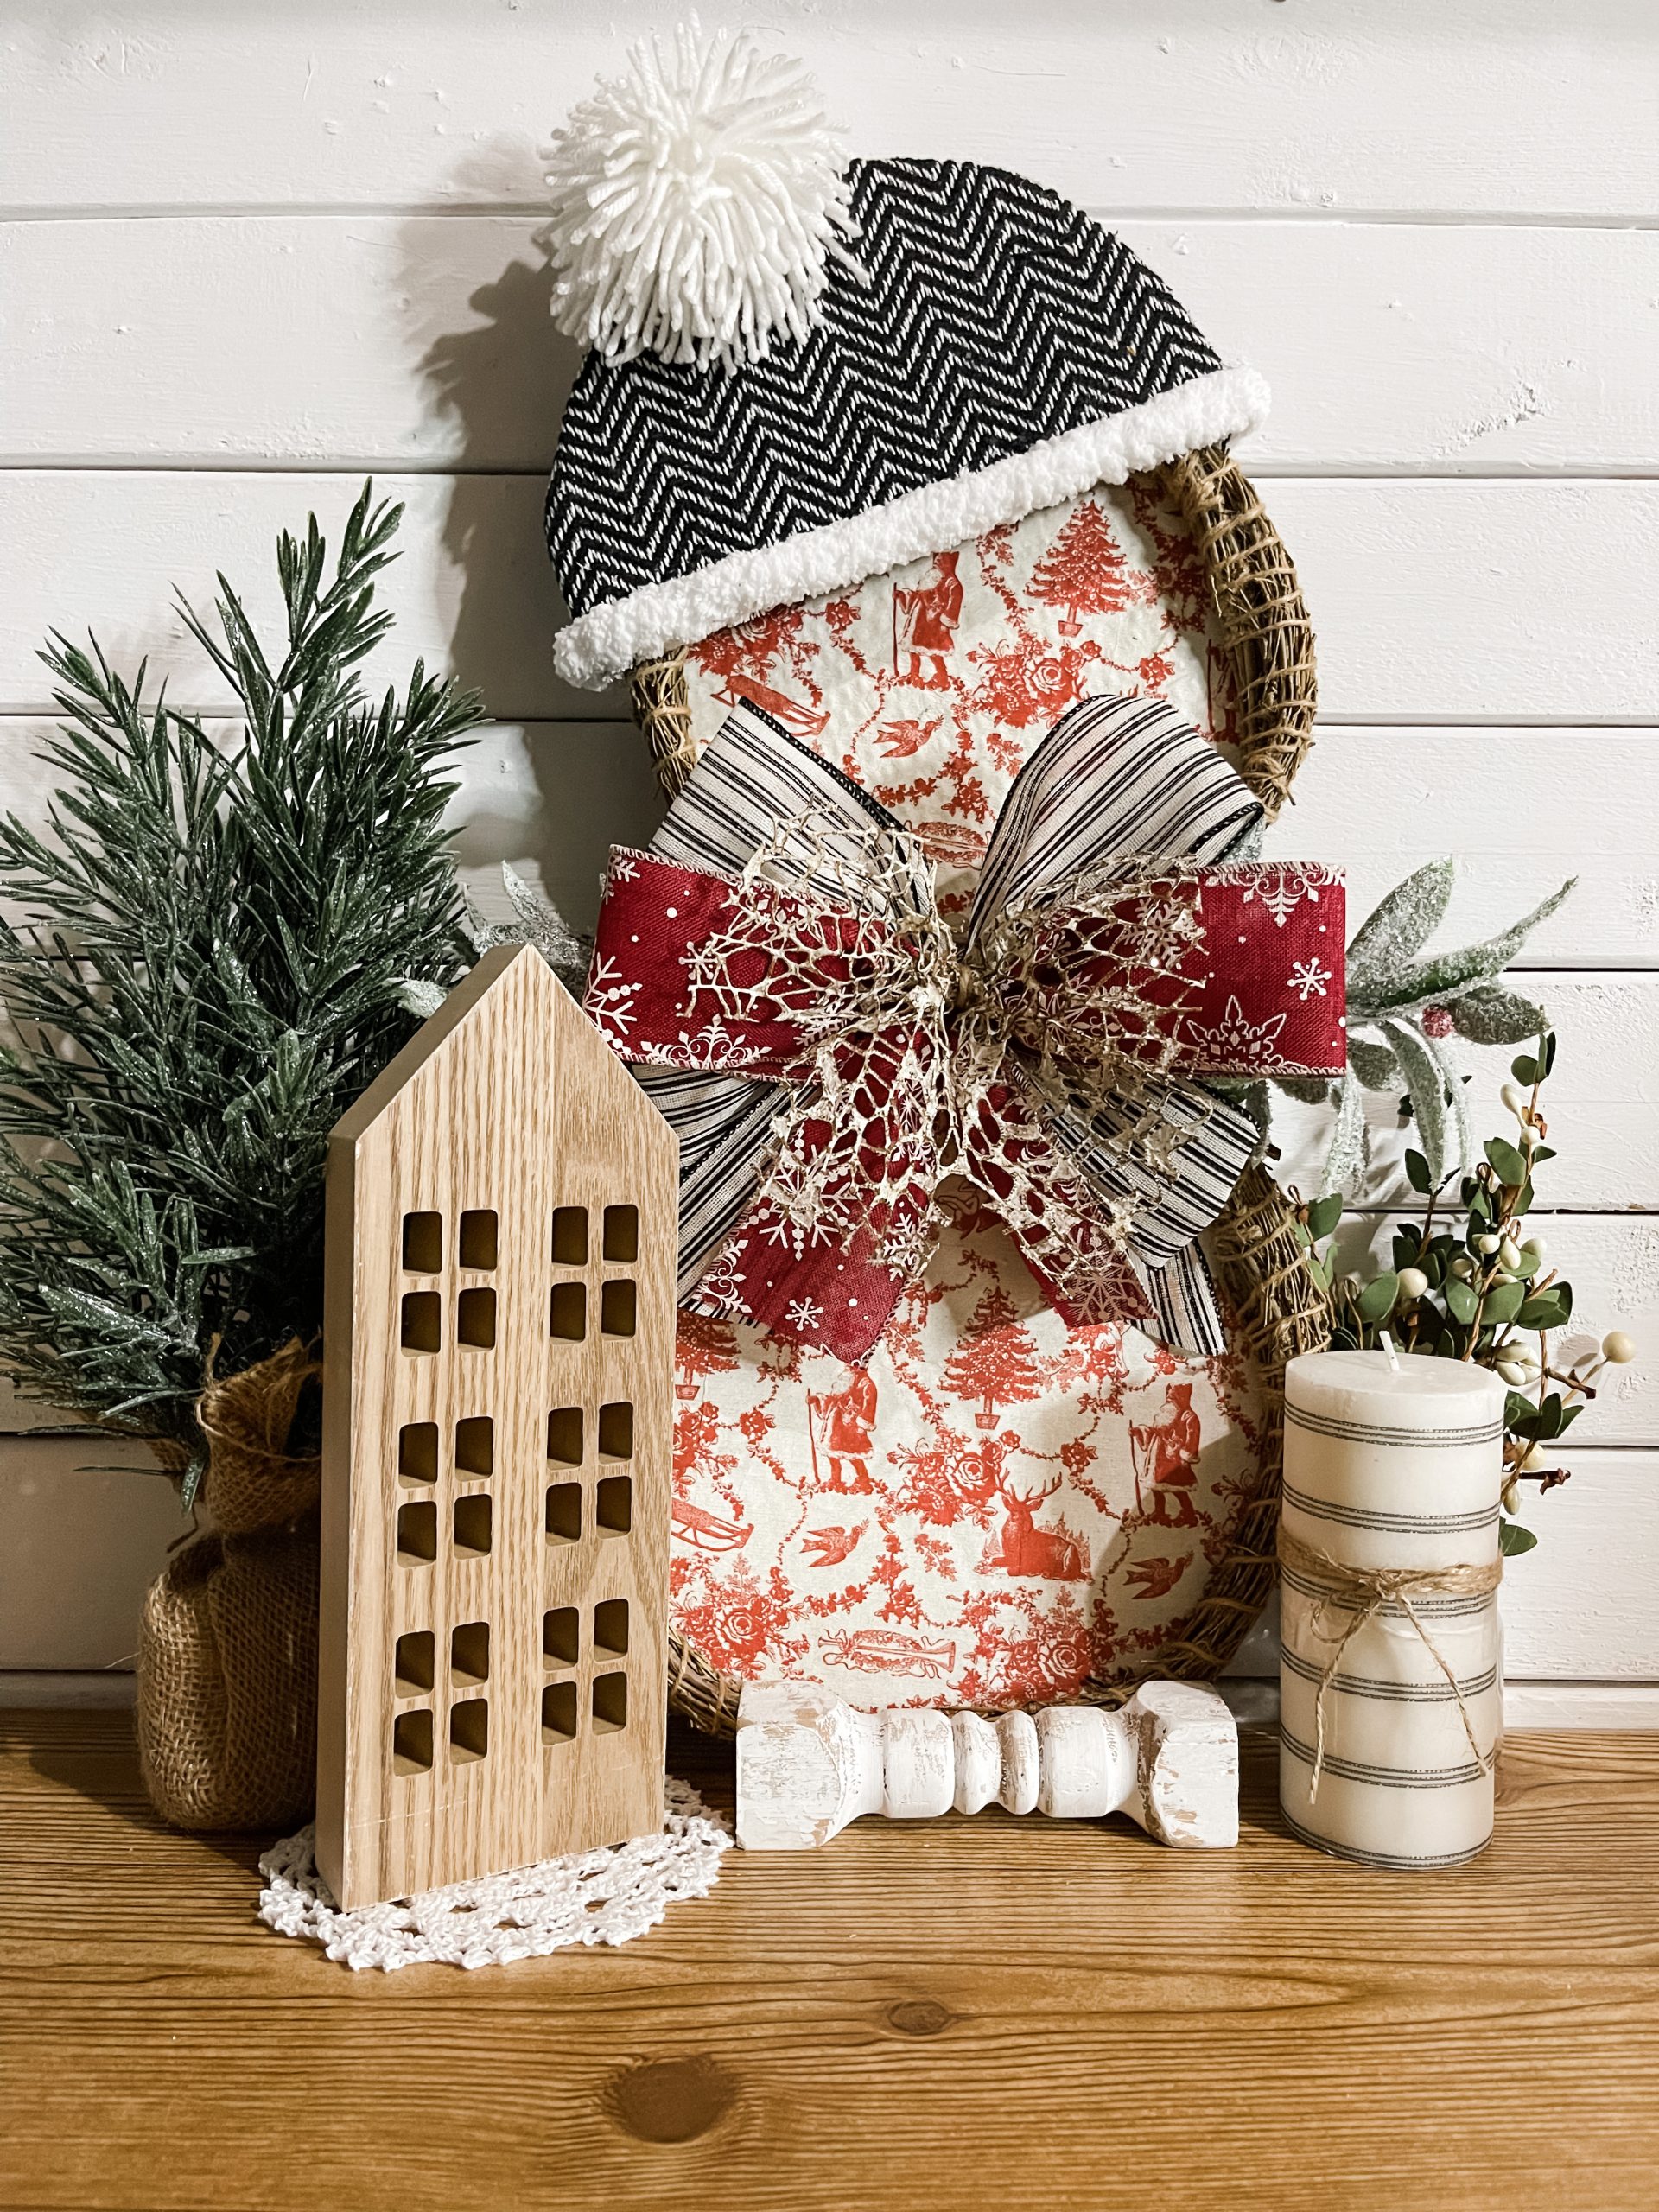
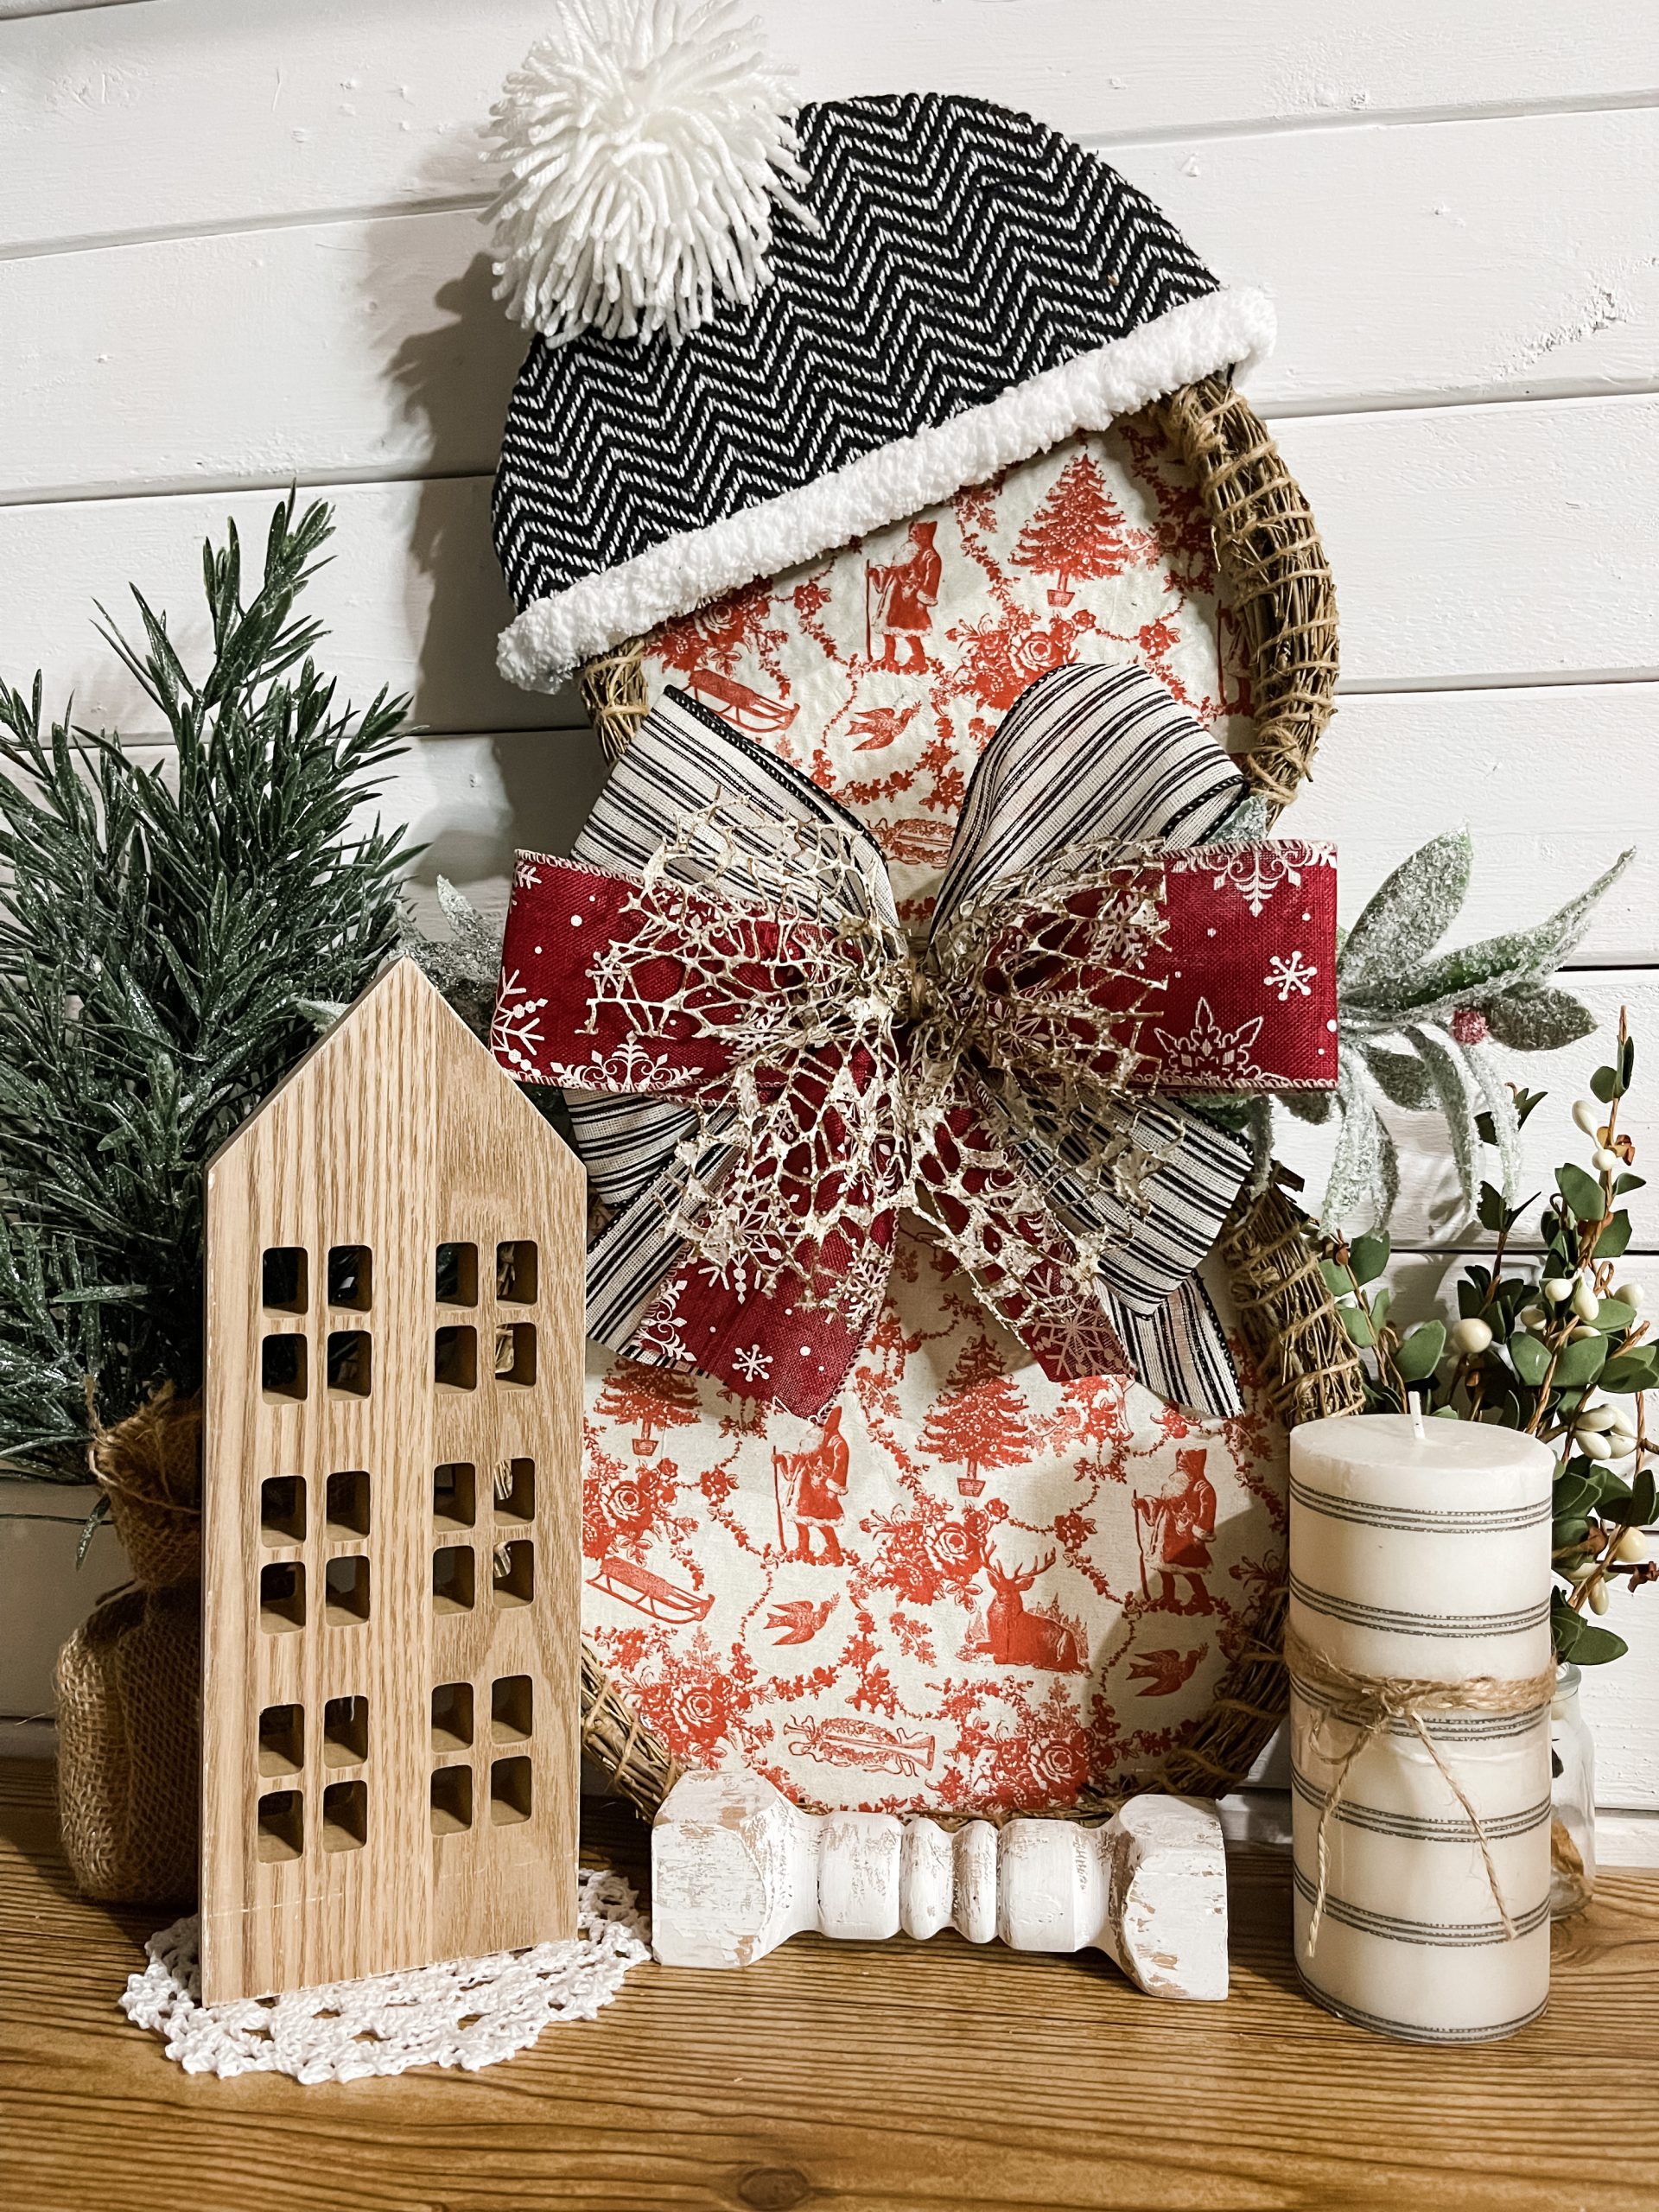
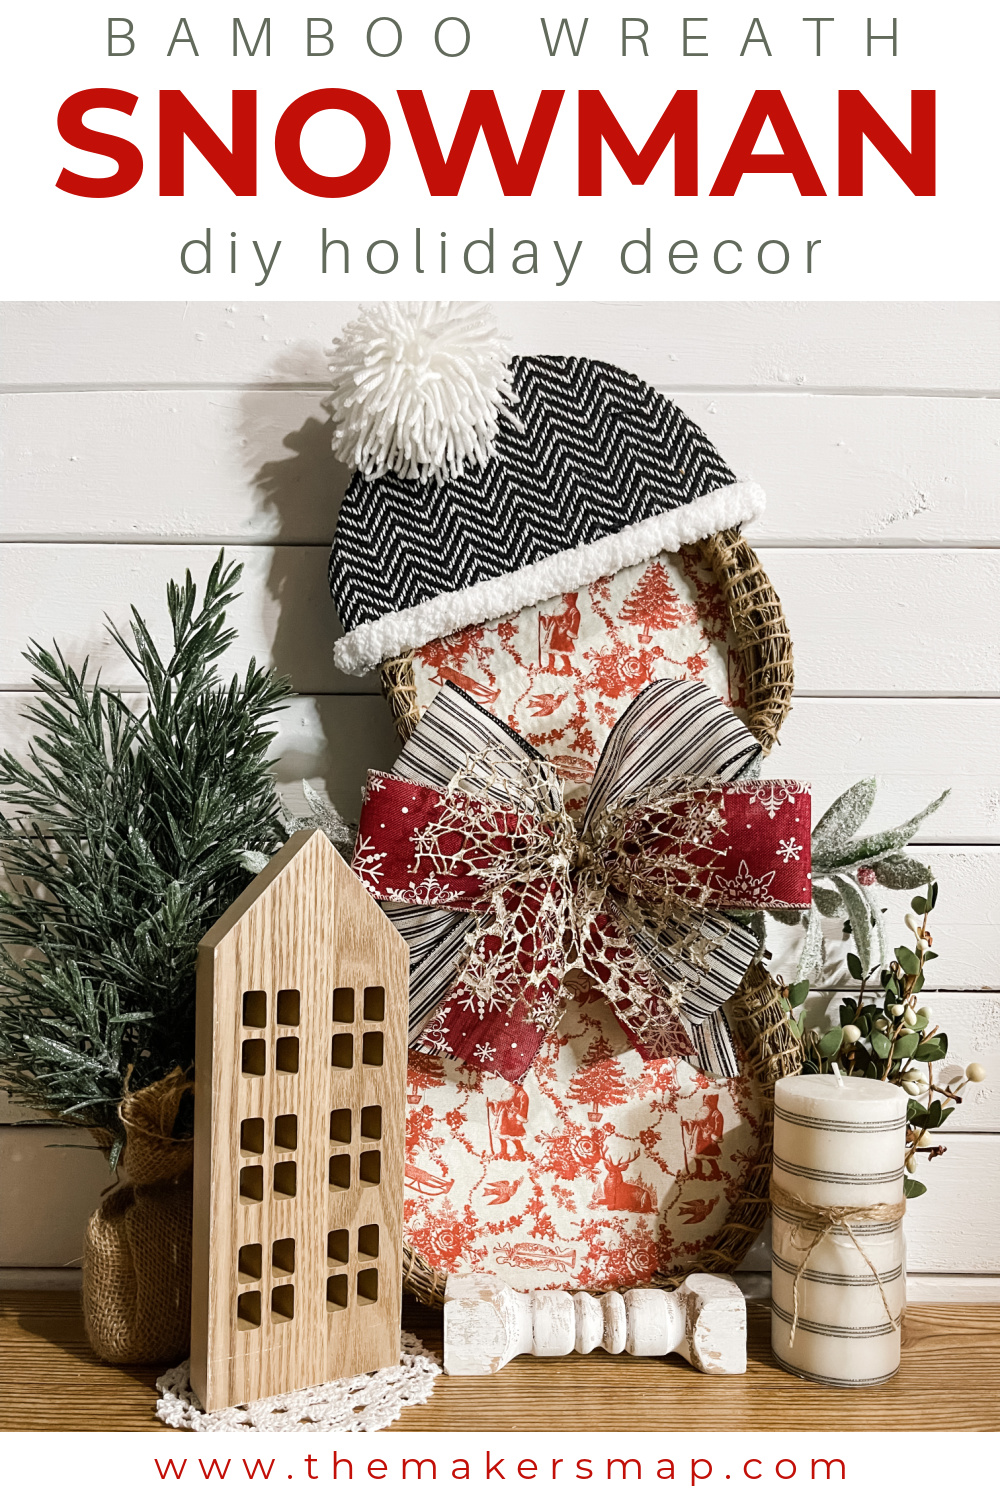
DIY Wreath Snowman
I absolutely love the simplicity of this adorable DIY Wreath Snowman! Who would’ve thought that with some Dollar Tree bamboo wreaths and cardboard you can make your own DIY snowman??
I customized mine with napkins, a hat, and a super cute bow, but you can decorate your snowman however you want! That’s the beauty of DIY’ing!
If you love this winter DIY, you might also love these!
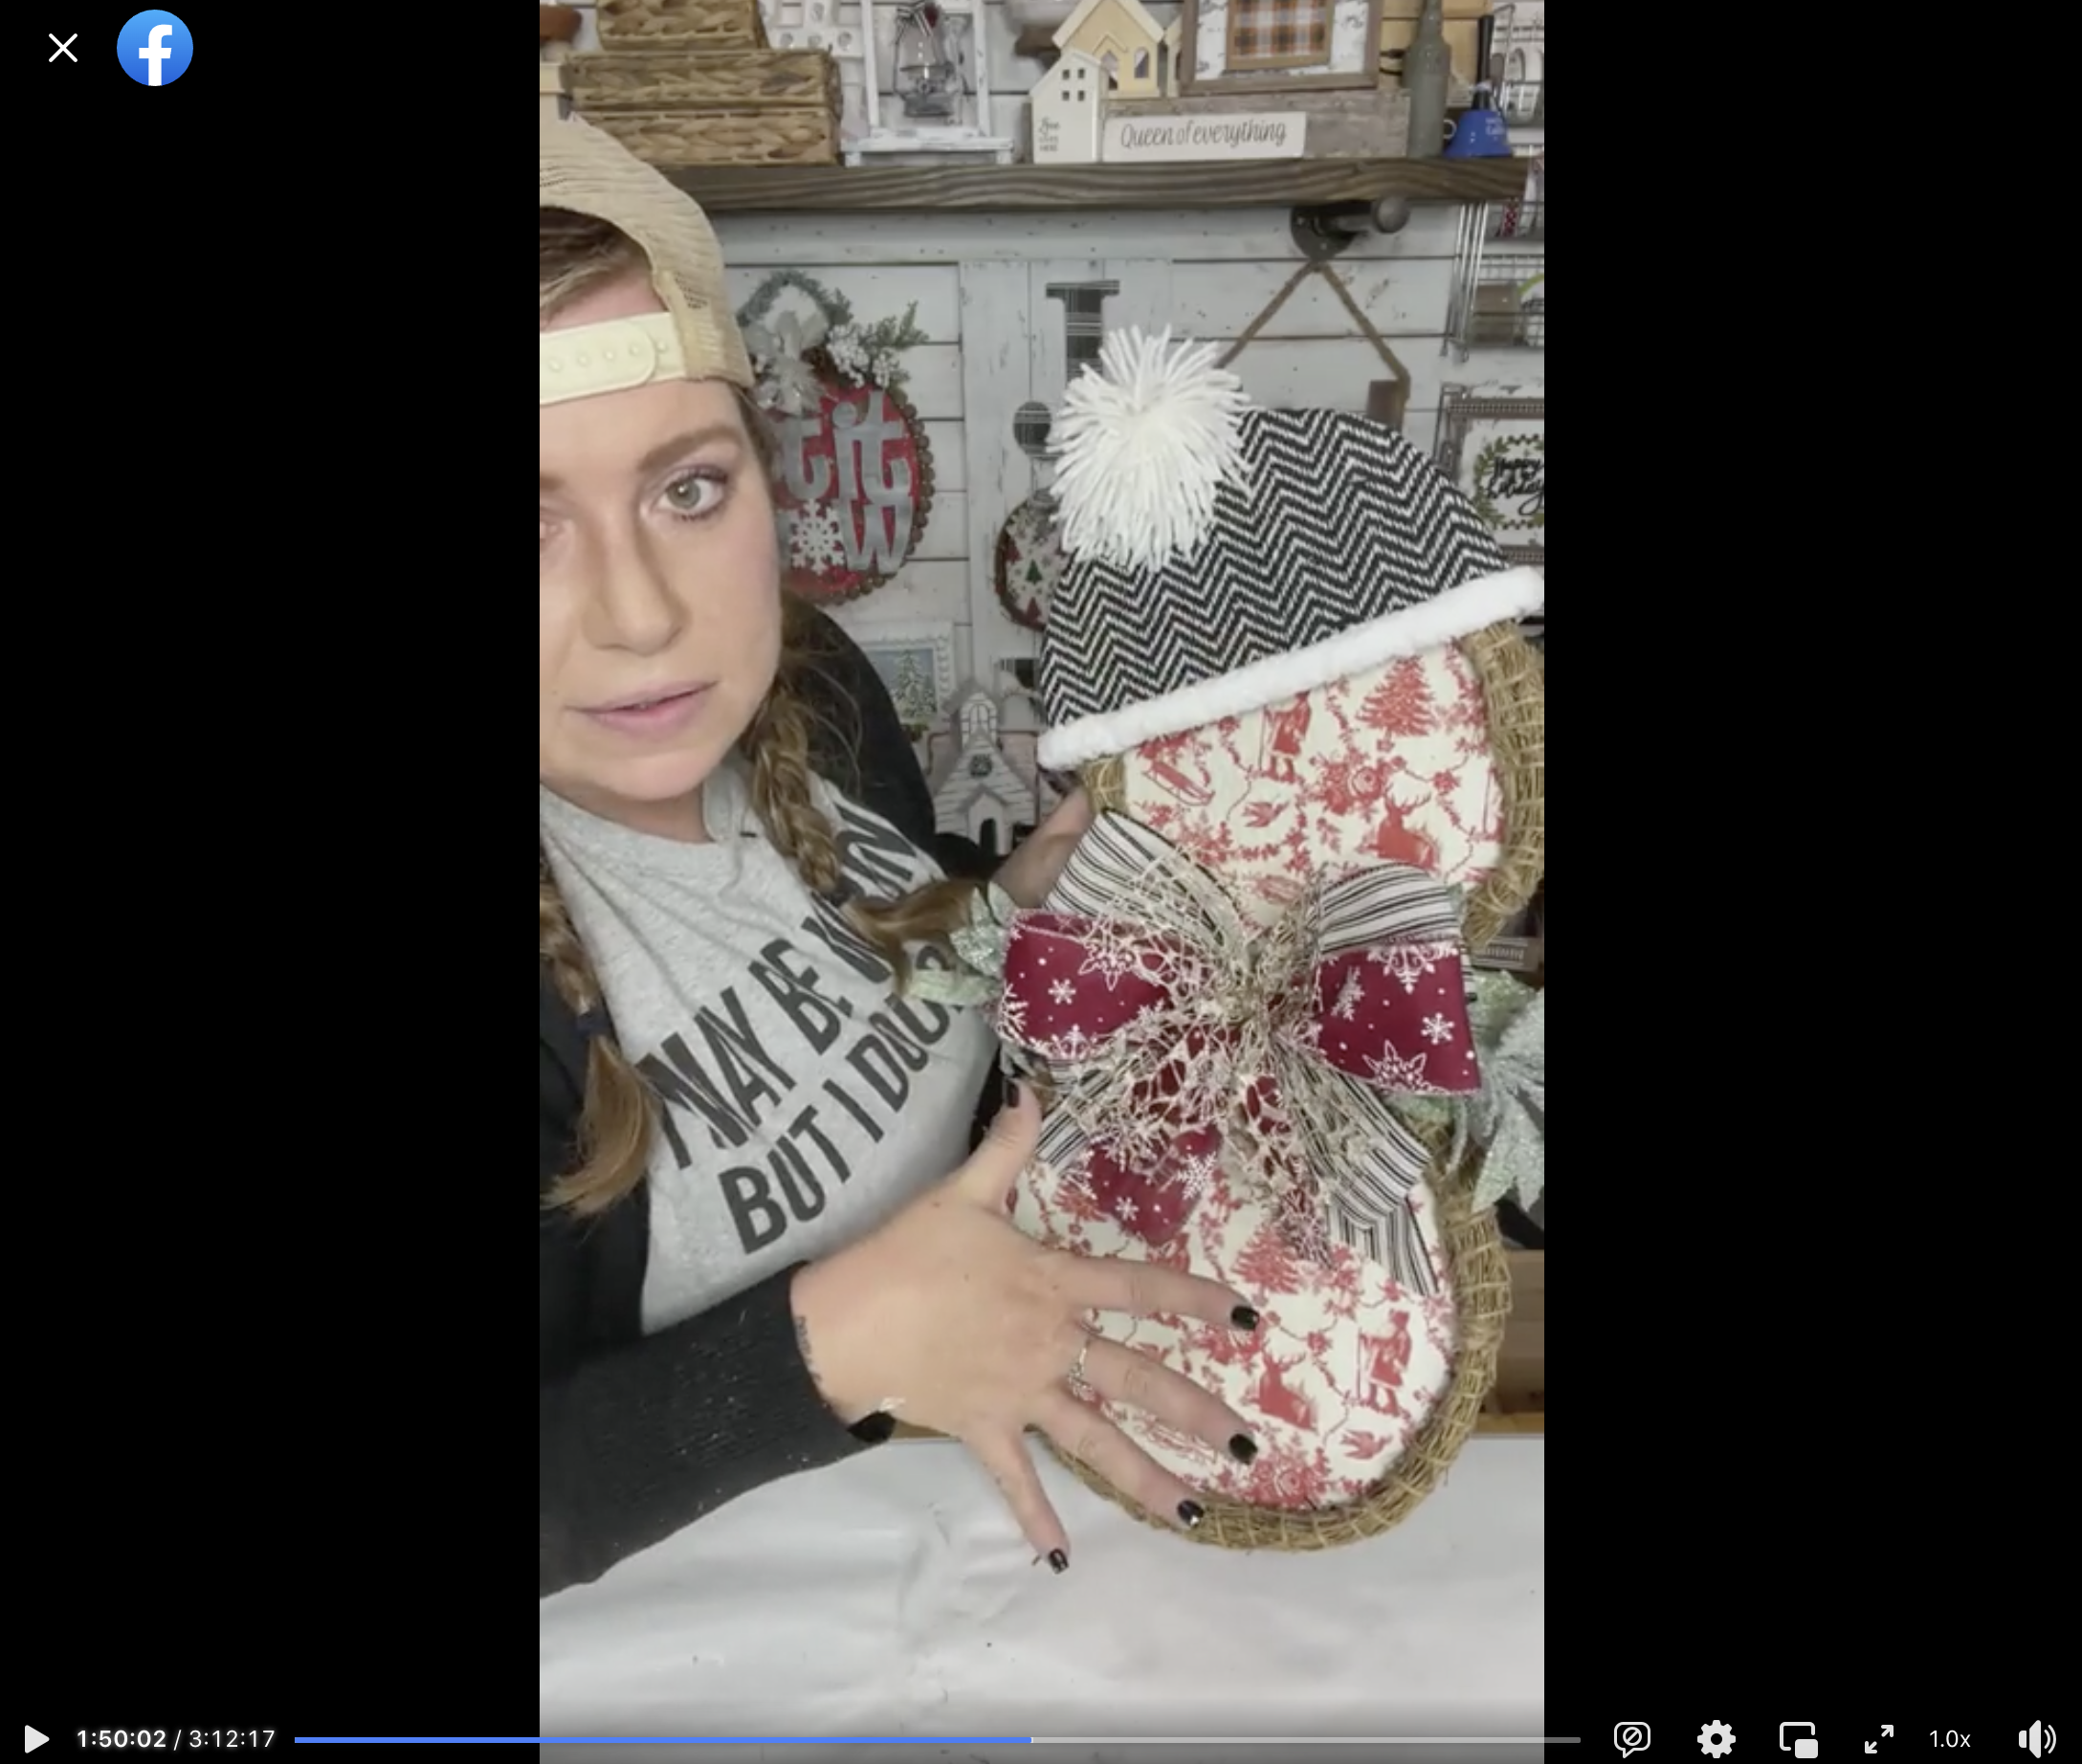
Watch the DIY tutorial
I recorded how to make this adorable DIY Wreath Snowman during a LIVE video on my Facebook page.
If you want to see the DIY process, craft along, or just join in on the fun conversations, you can watch the DIY tutorial replay!
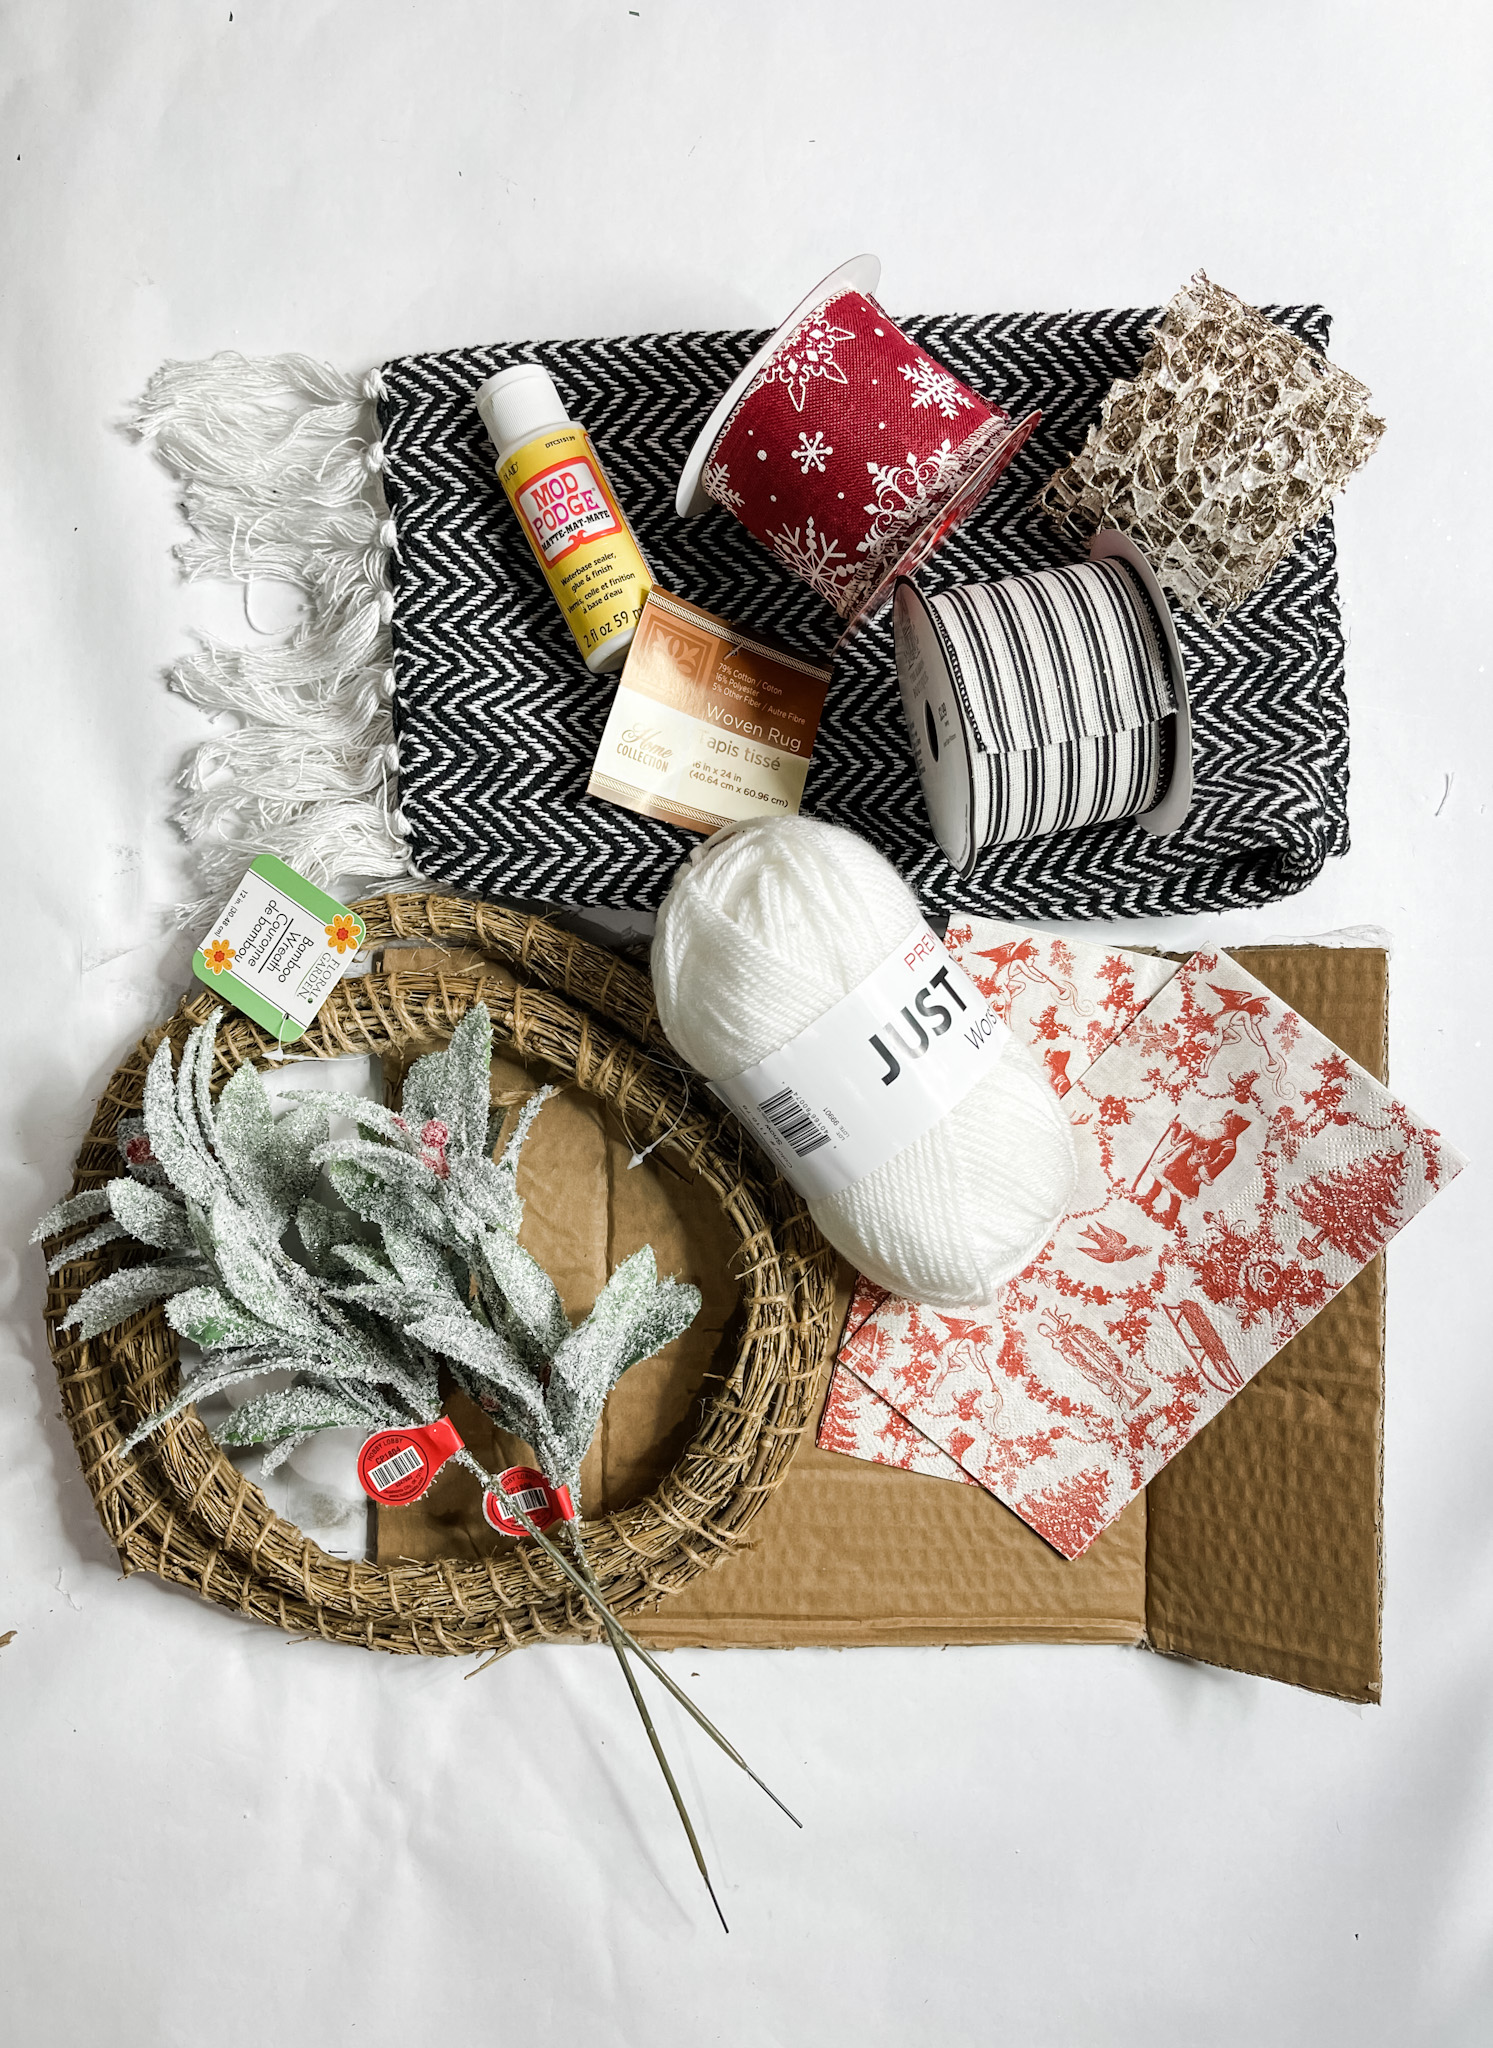
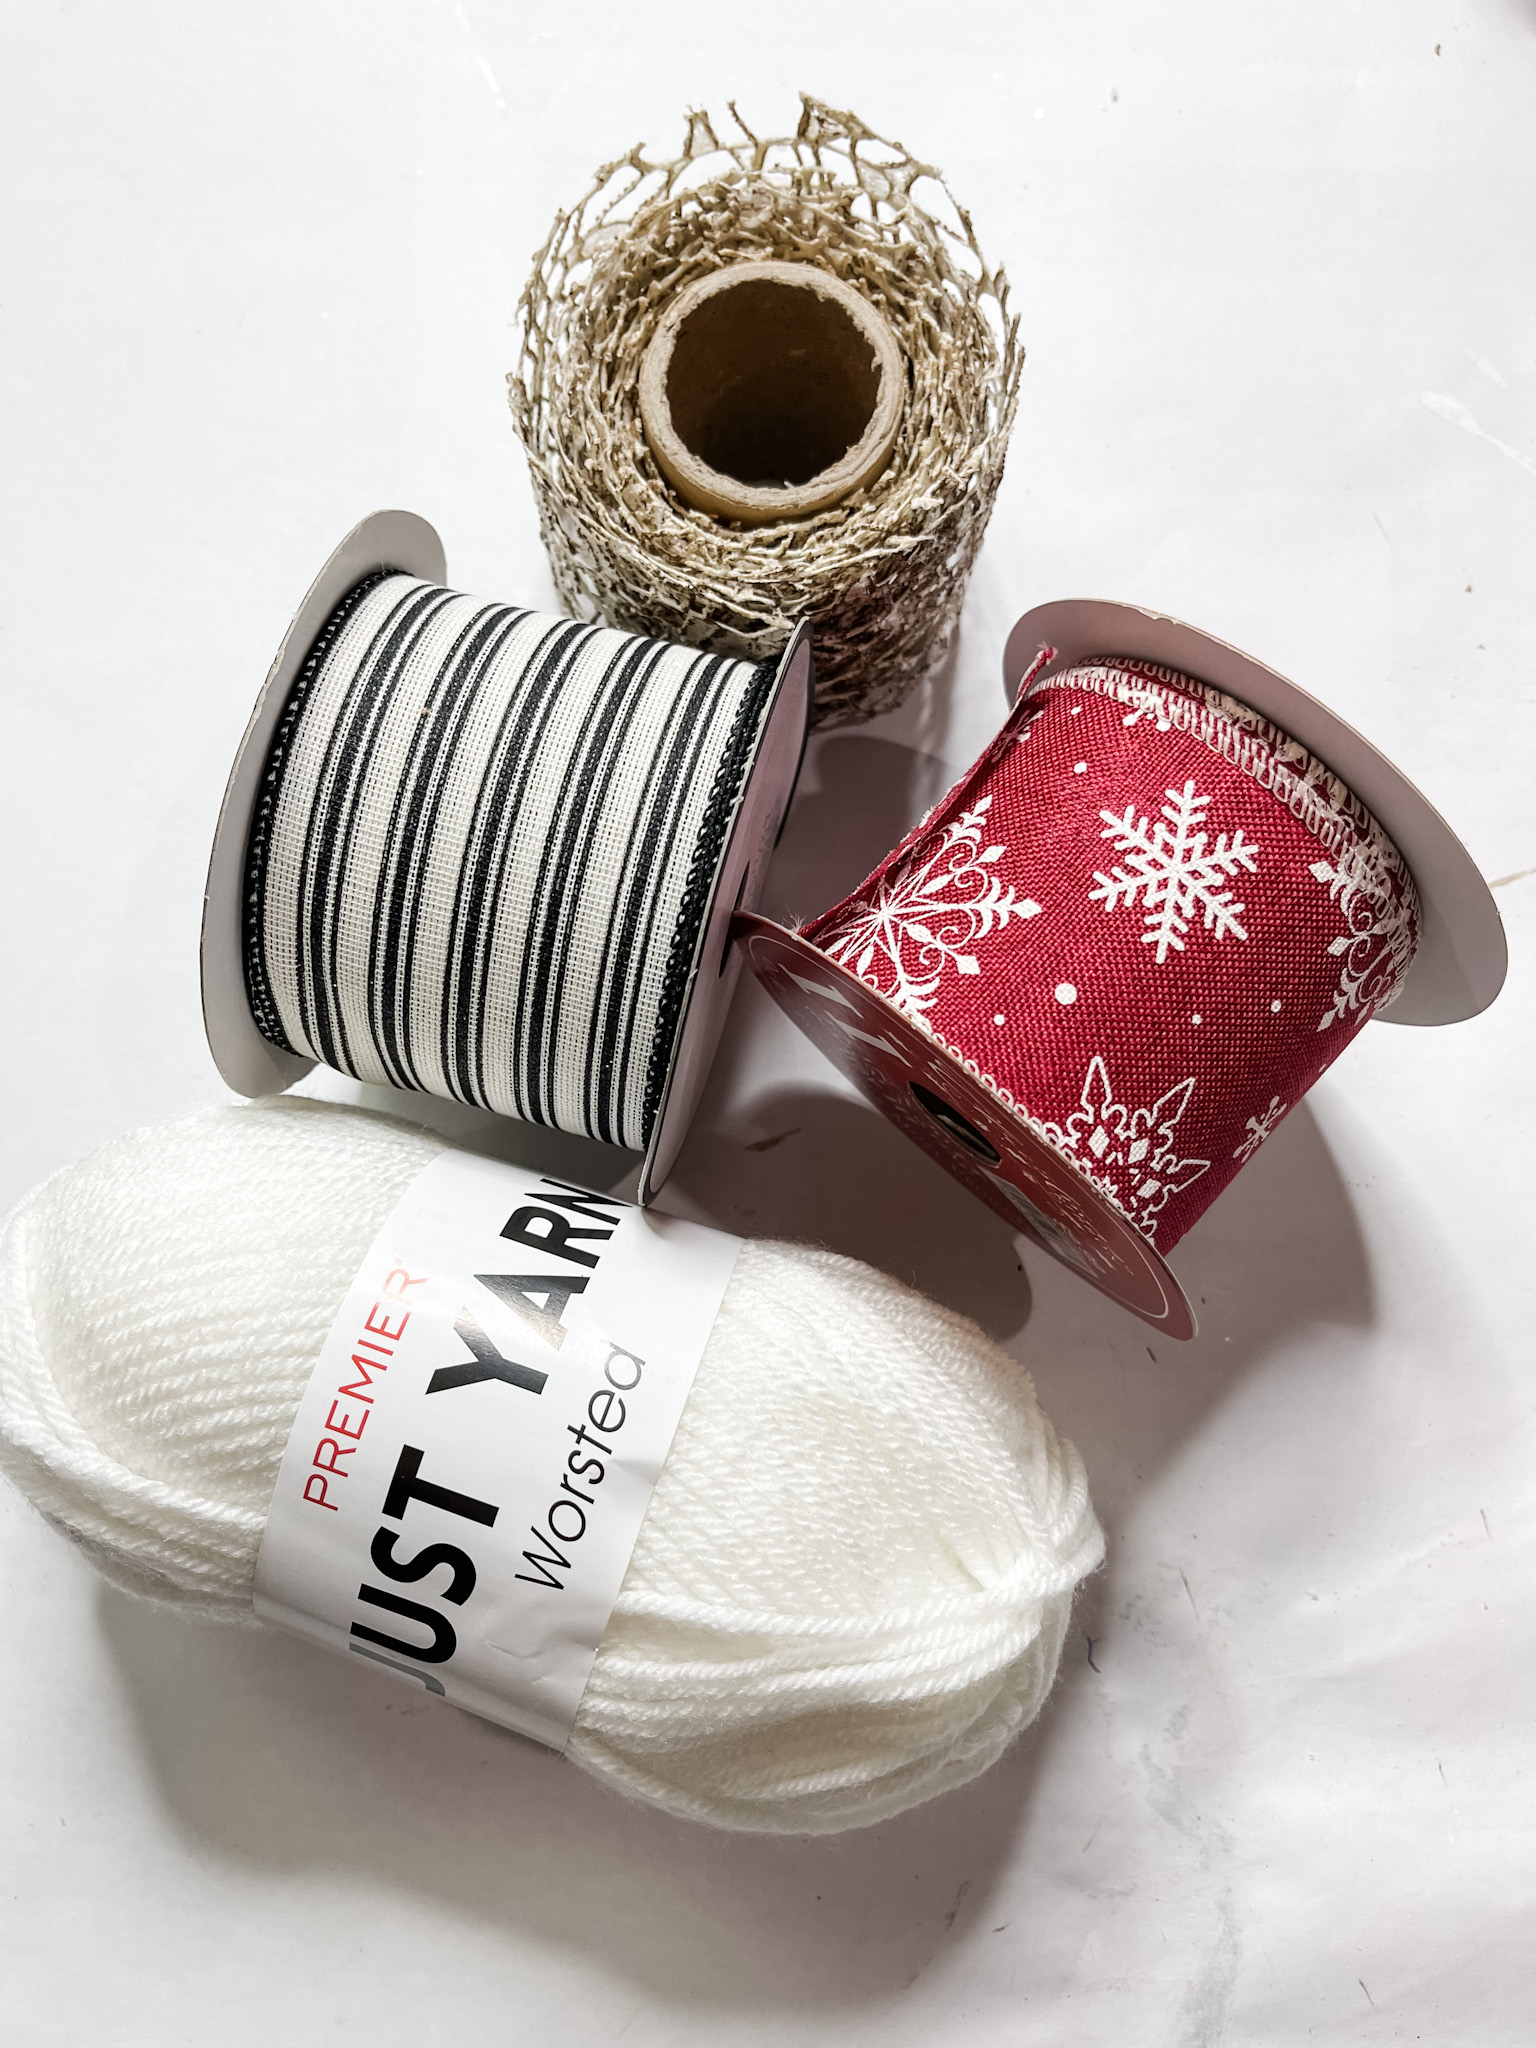
For this project, I will be using these items but you can substitute where you want.
“As an Amazon Associate, I earn from qualifying purchases.”
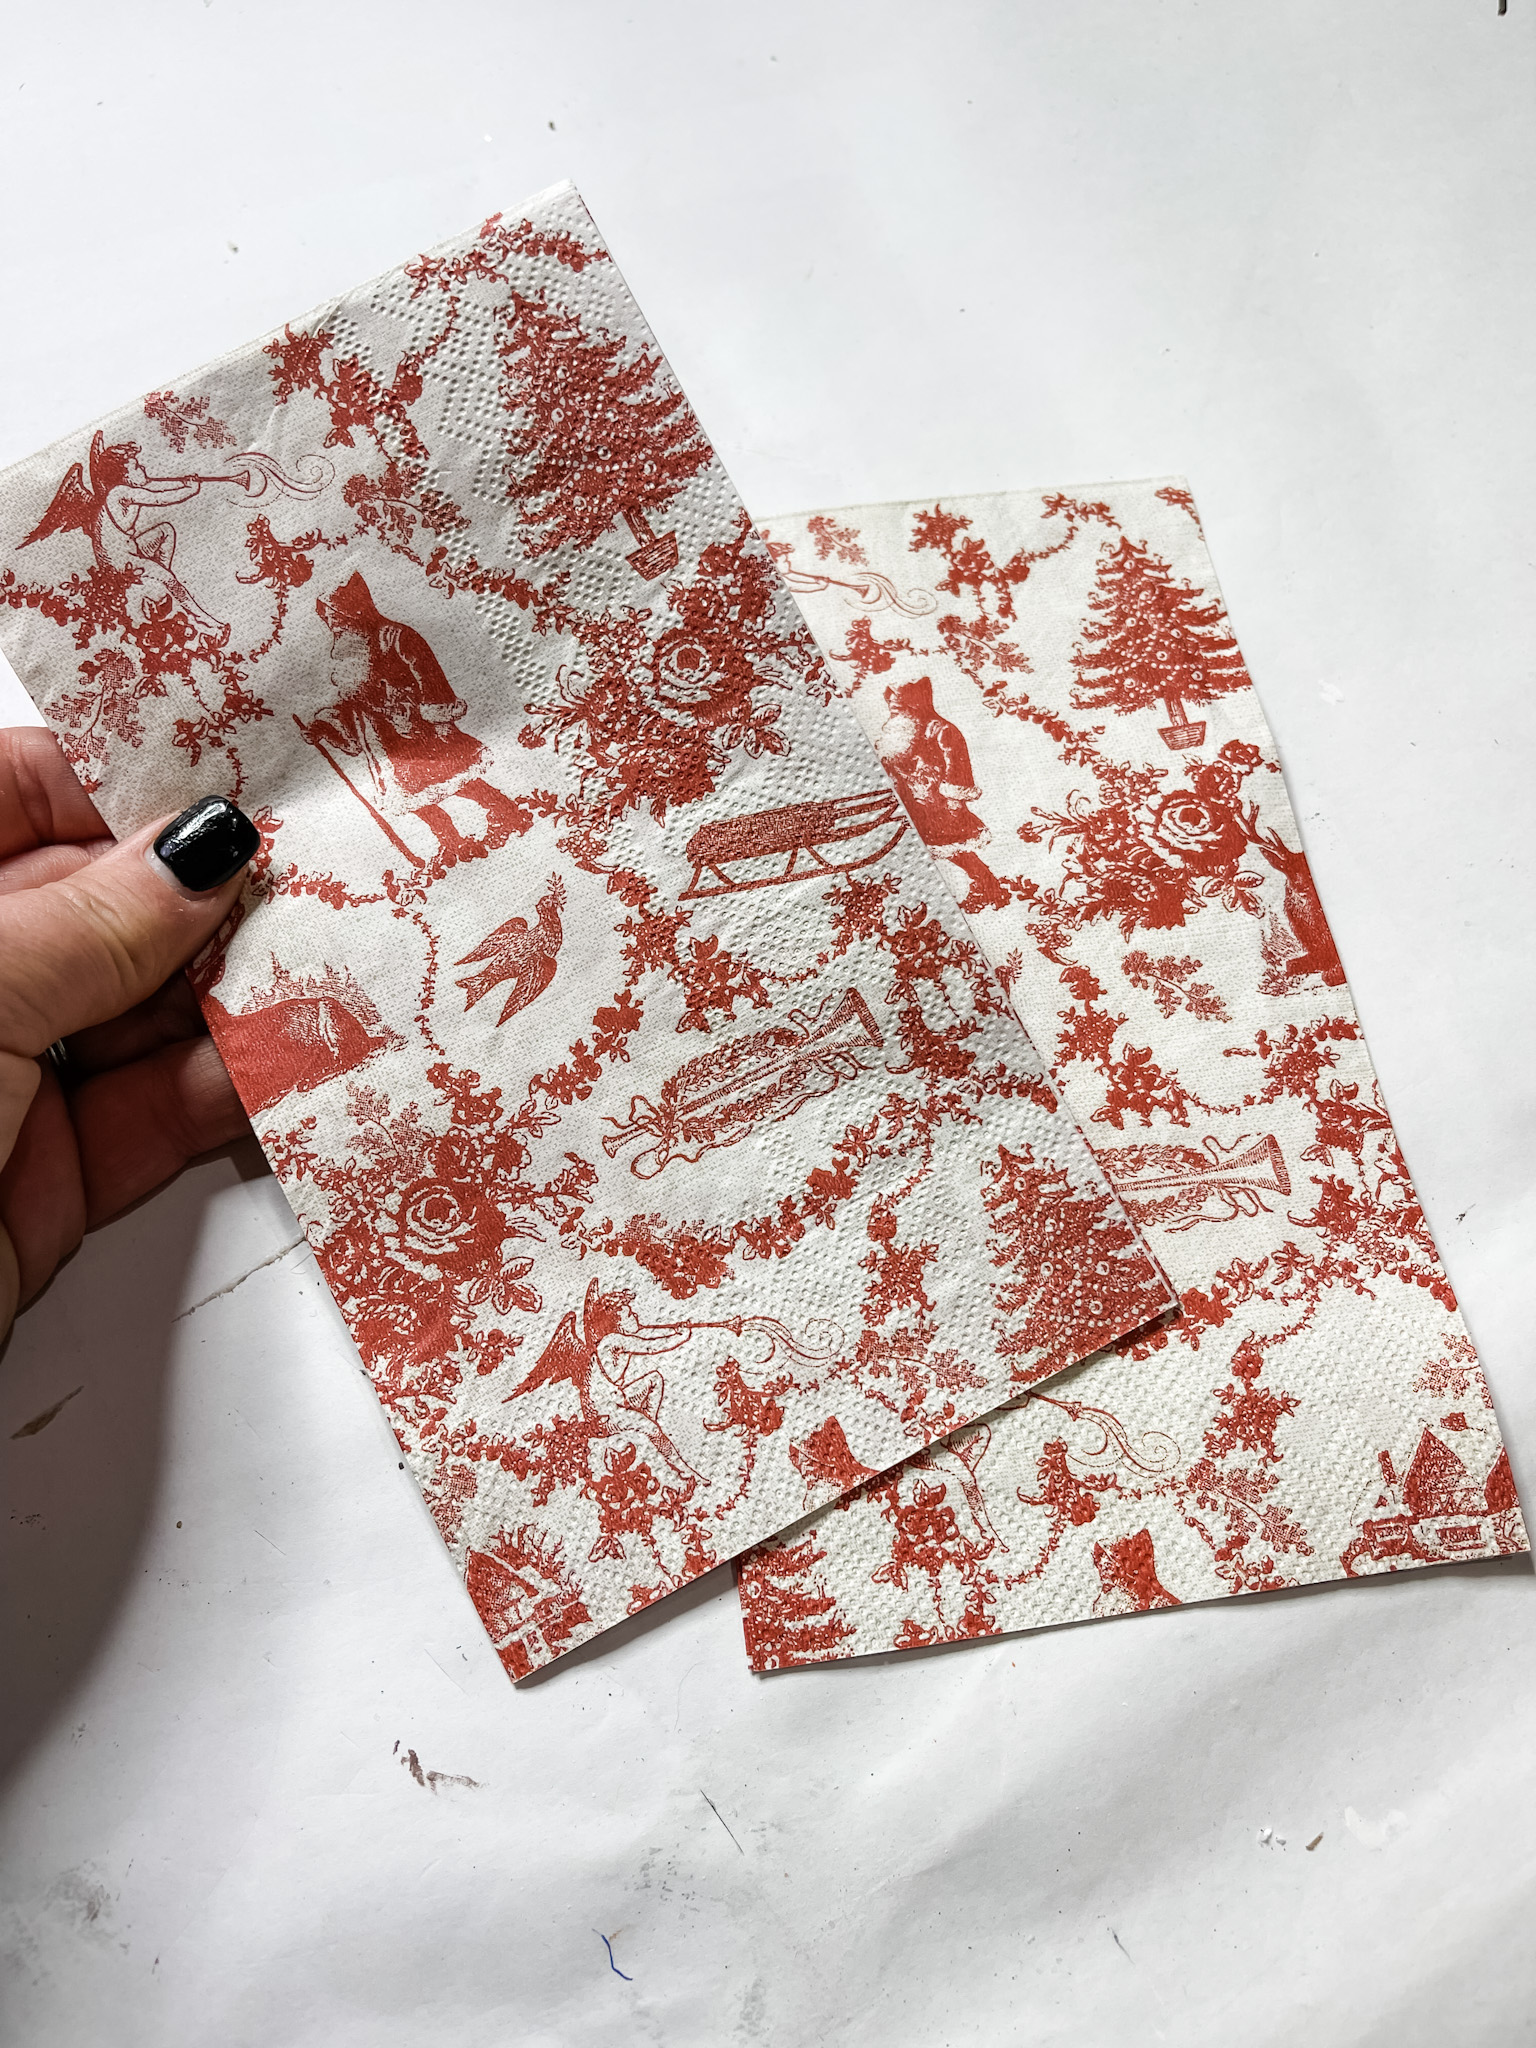
- Red Christmas Napkin
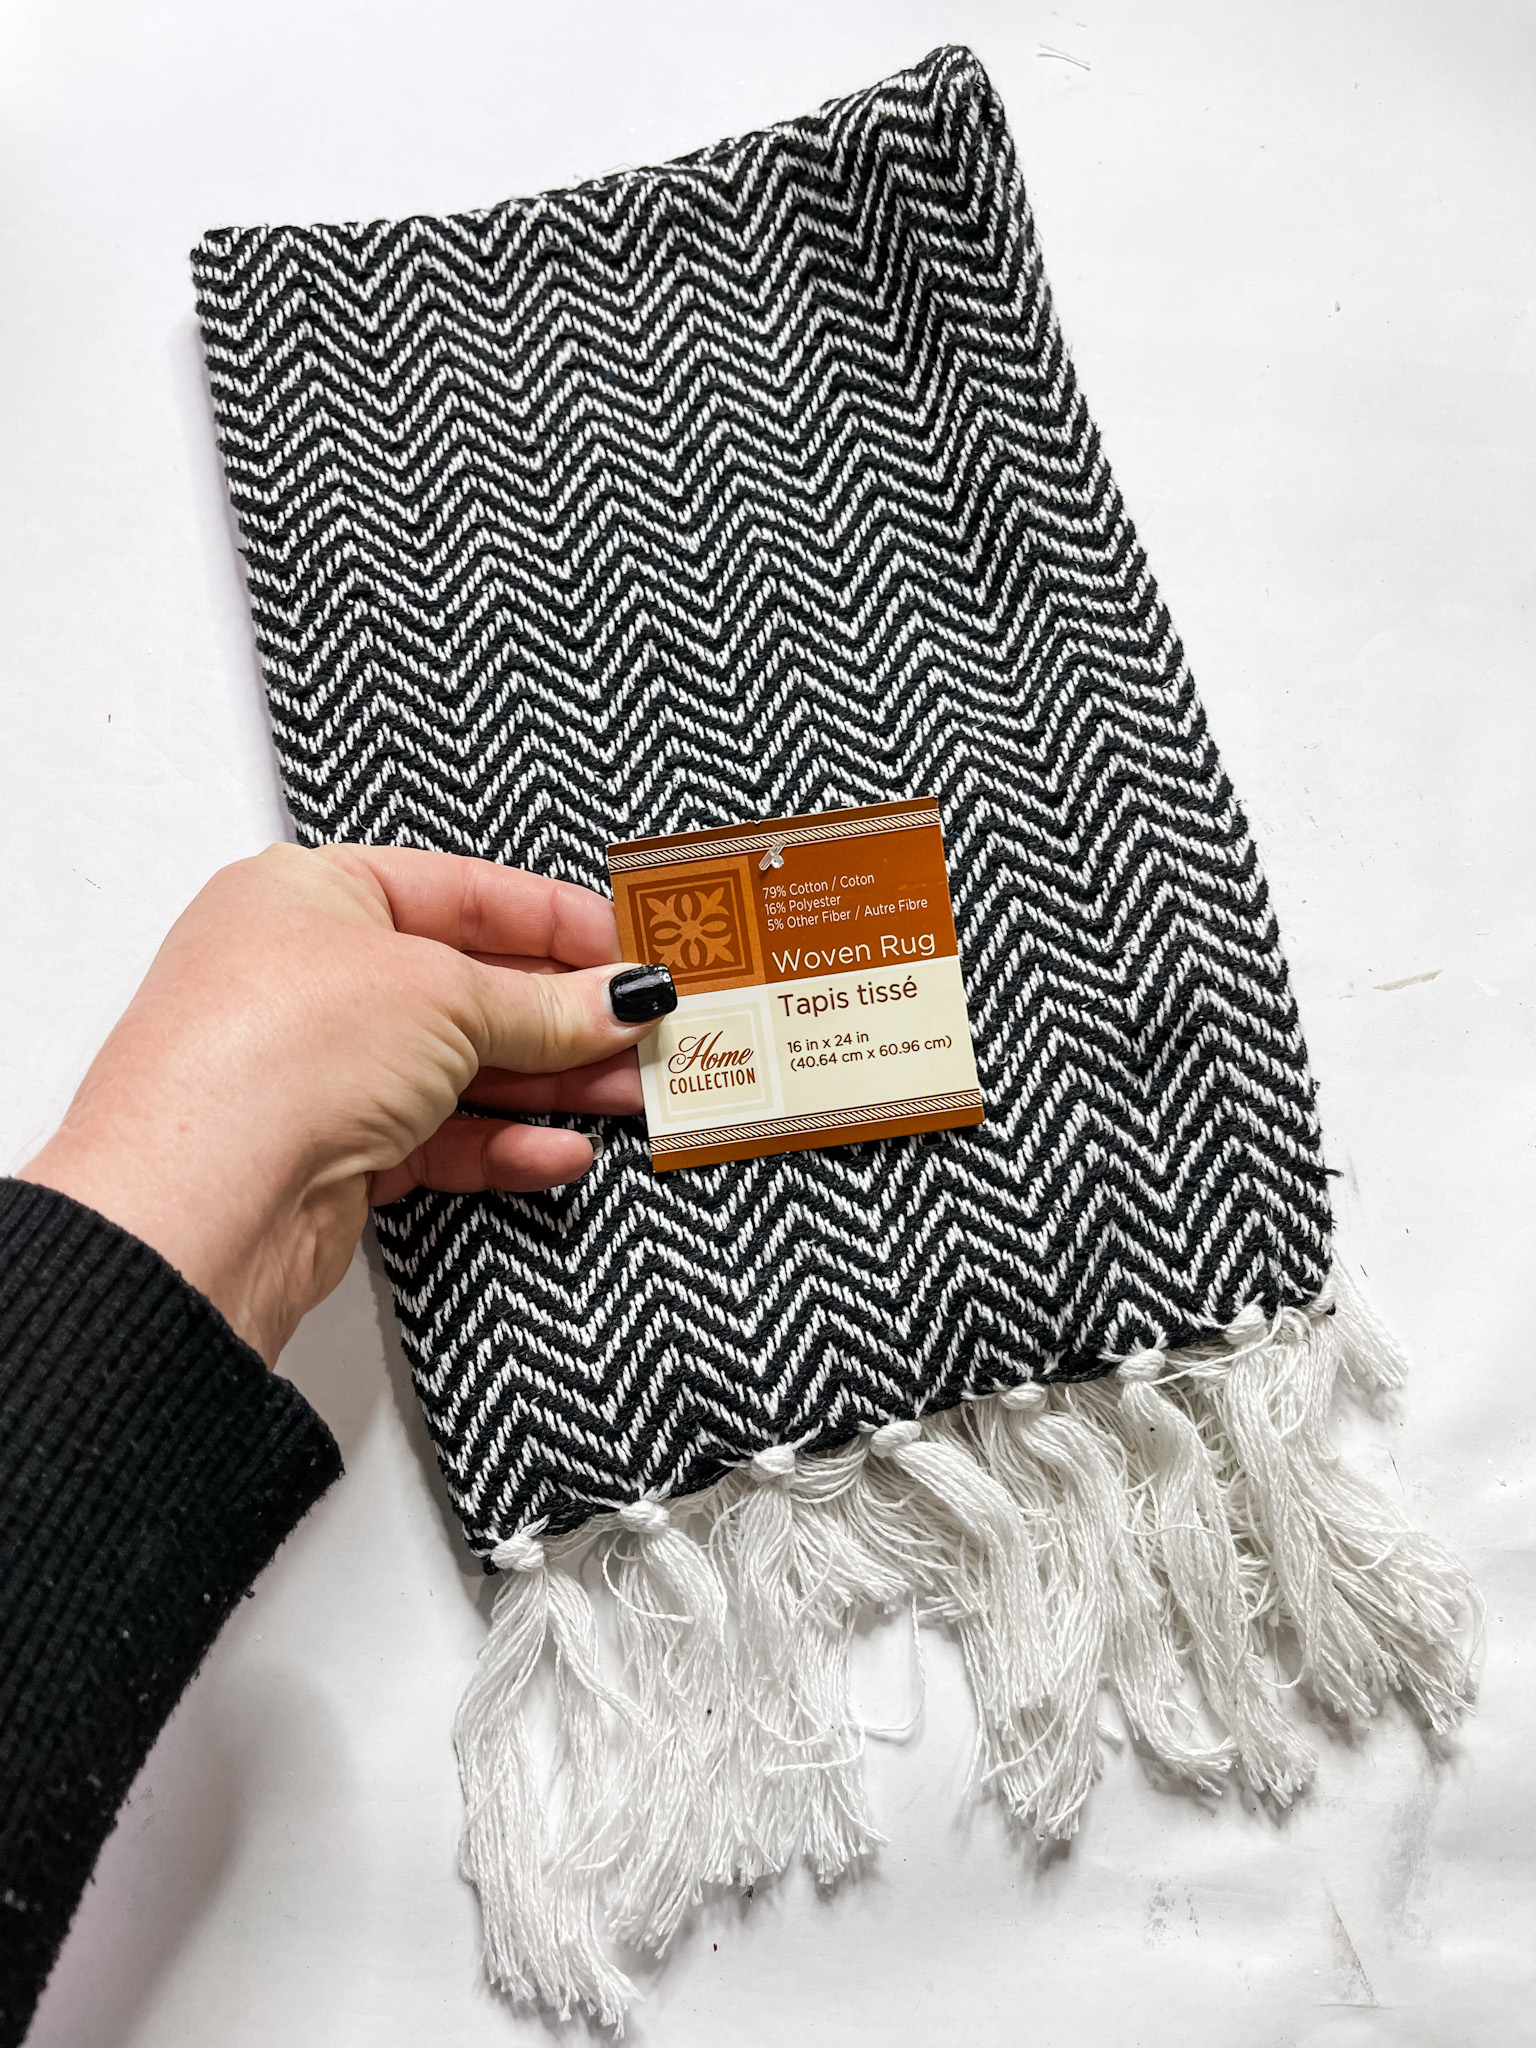
- Dollar Tree Woven Rug
- Dollar Tree White Yarn
- Cardboard
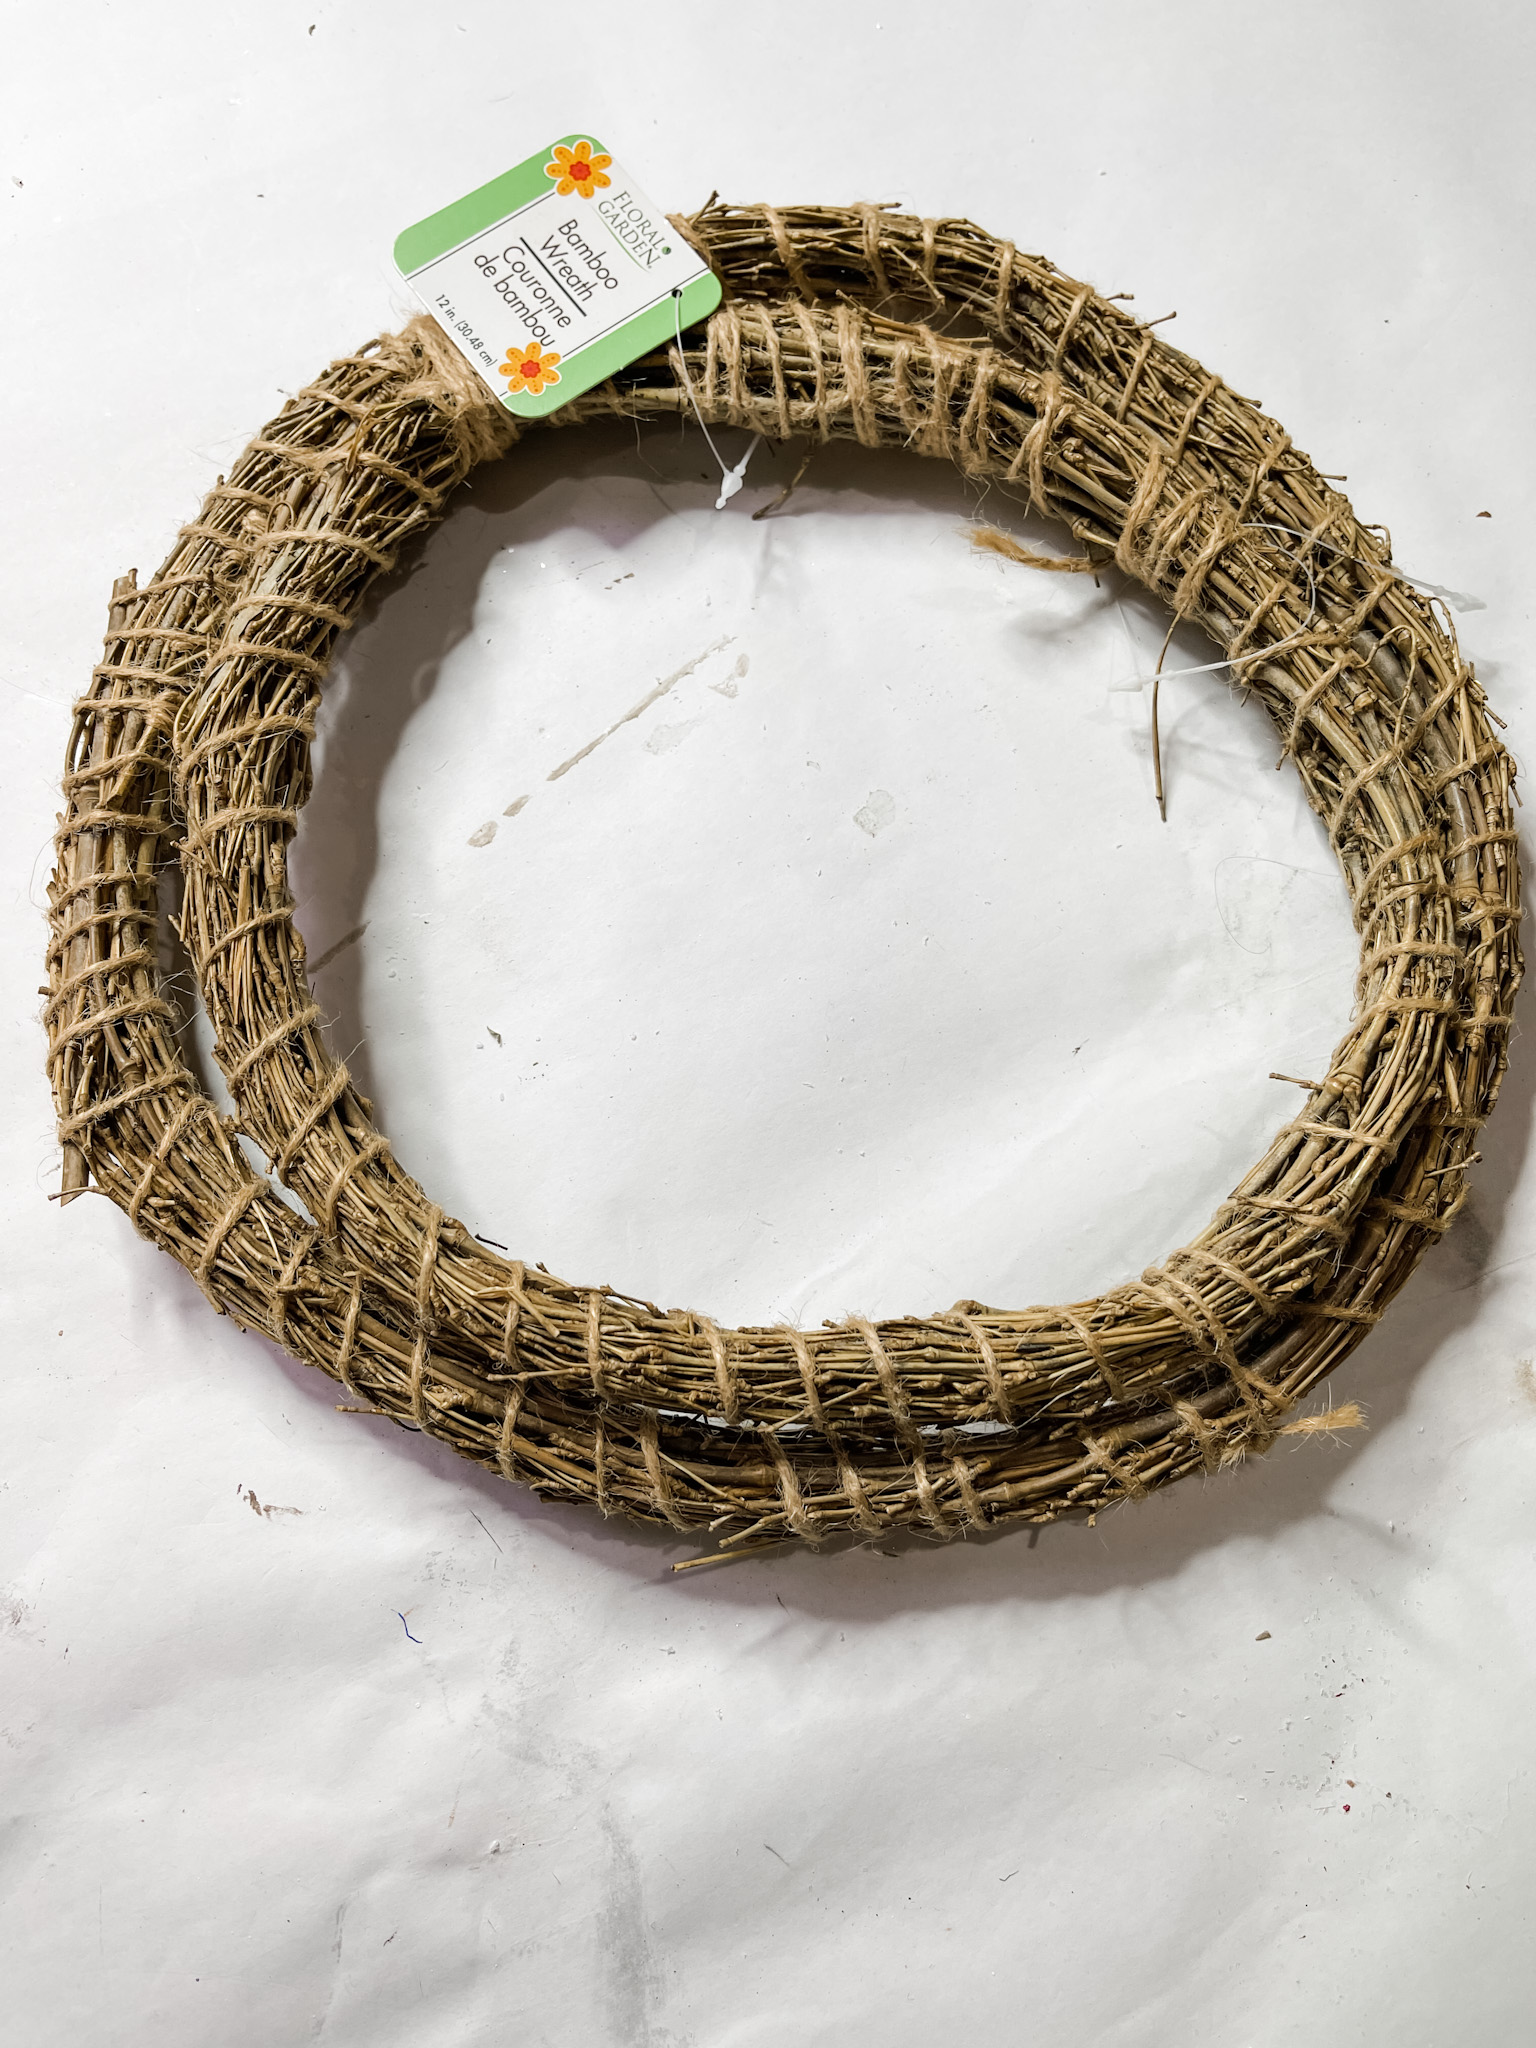
- Dollar Tree Bamboo Wreaths (x2)
- Hobby Lobby Yarn Bee Chunky White Yarn
- Hobby Lobby Icey Christmas Greenery (Clearance)
- Ribbon of choice (3 patterns)
- Zipties
- Giant Craft Stick
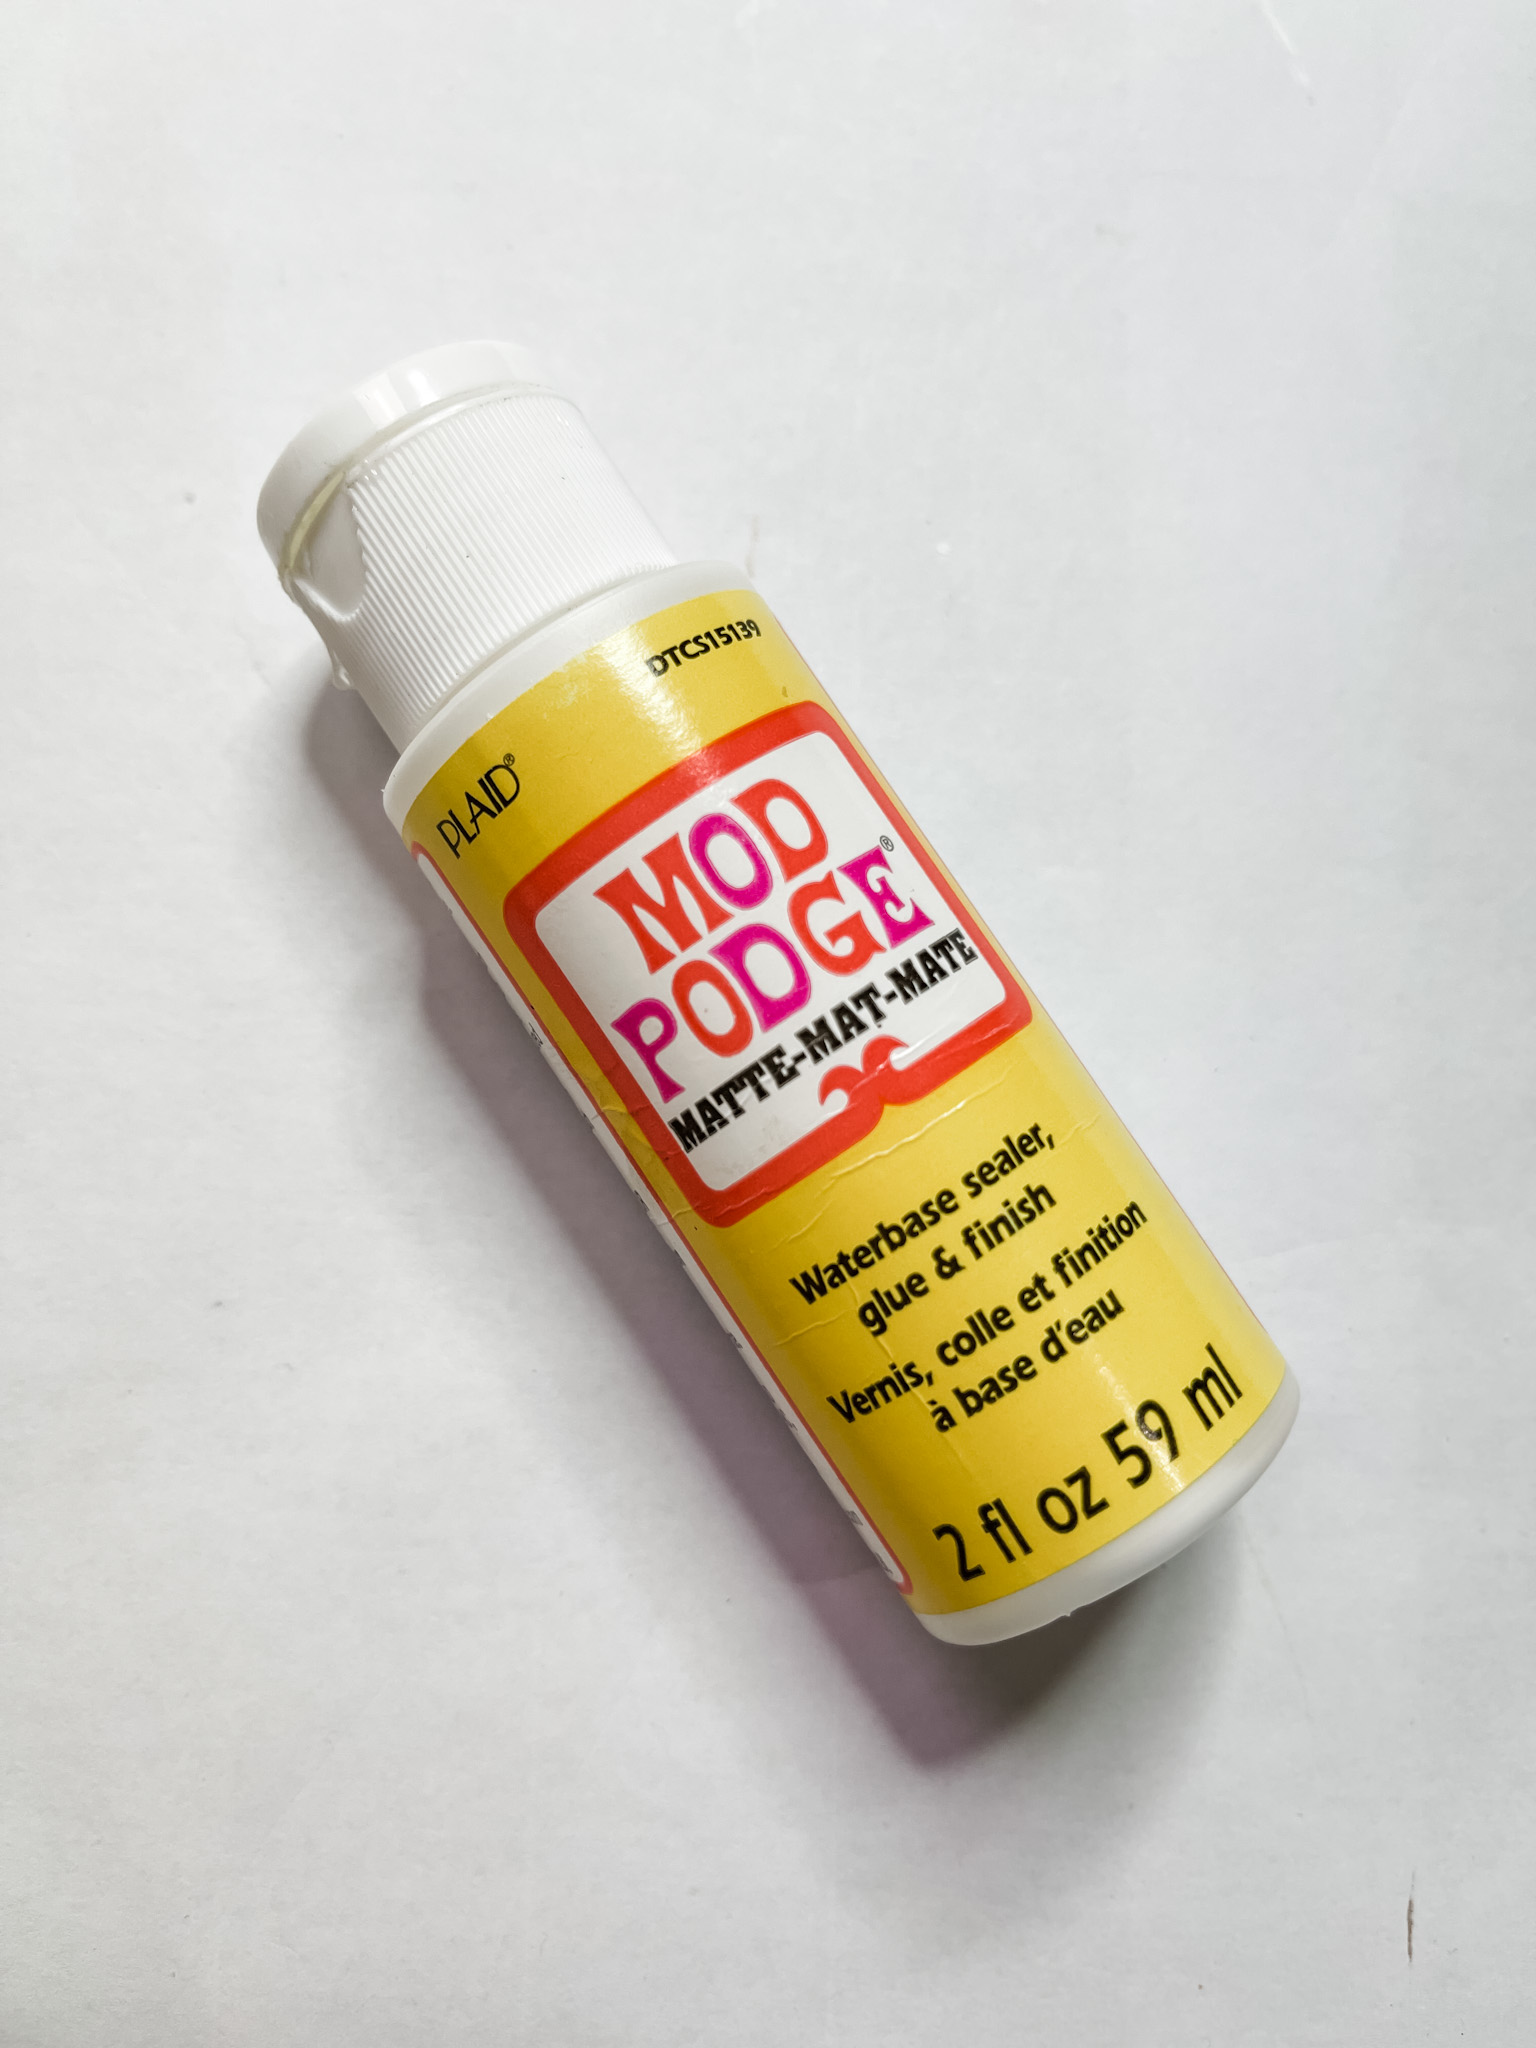
- Mod Podge
- White Paint
- Glue Gun
- Heat gun
How to Make a DIY Wreath Snowman
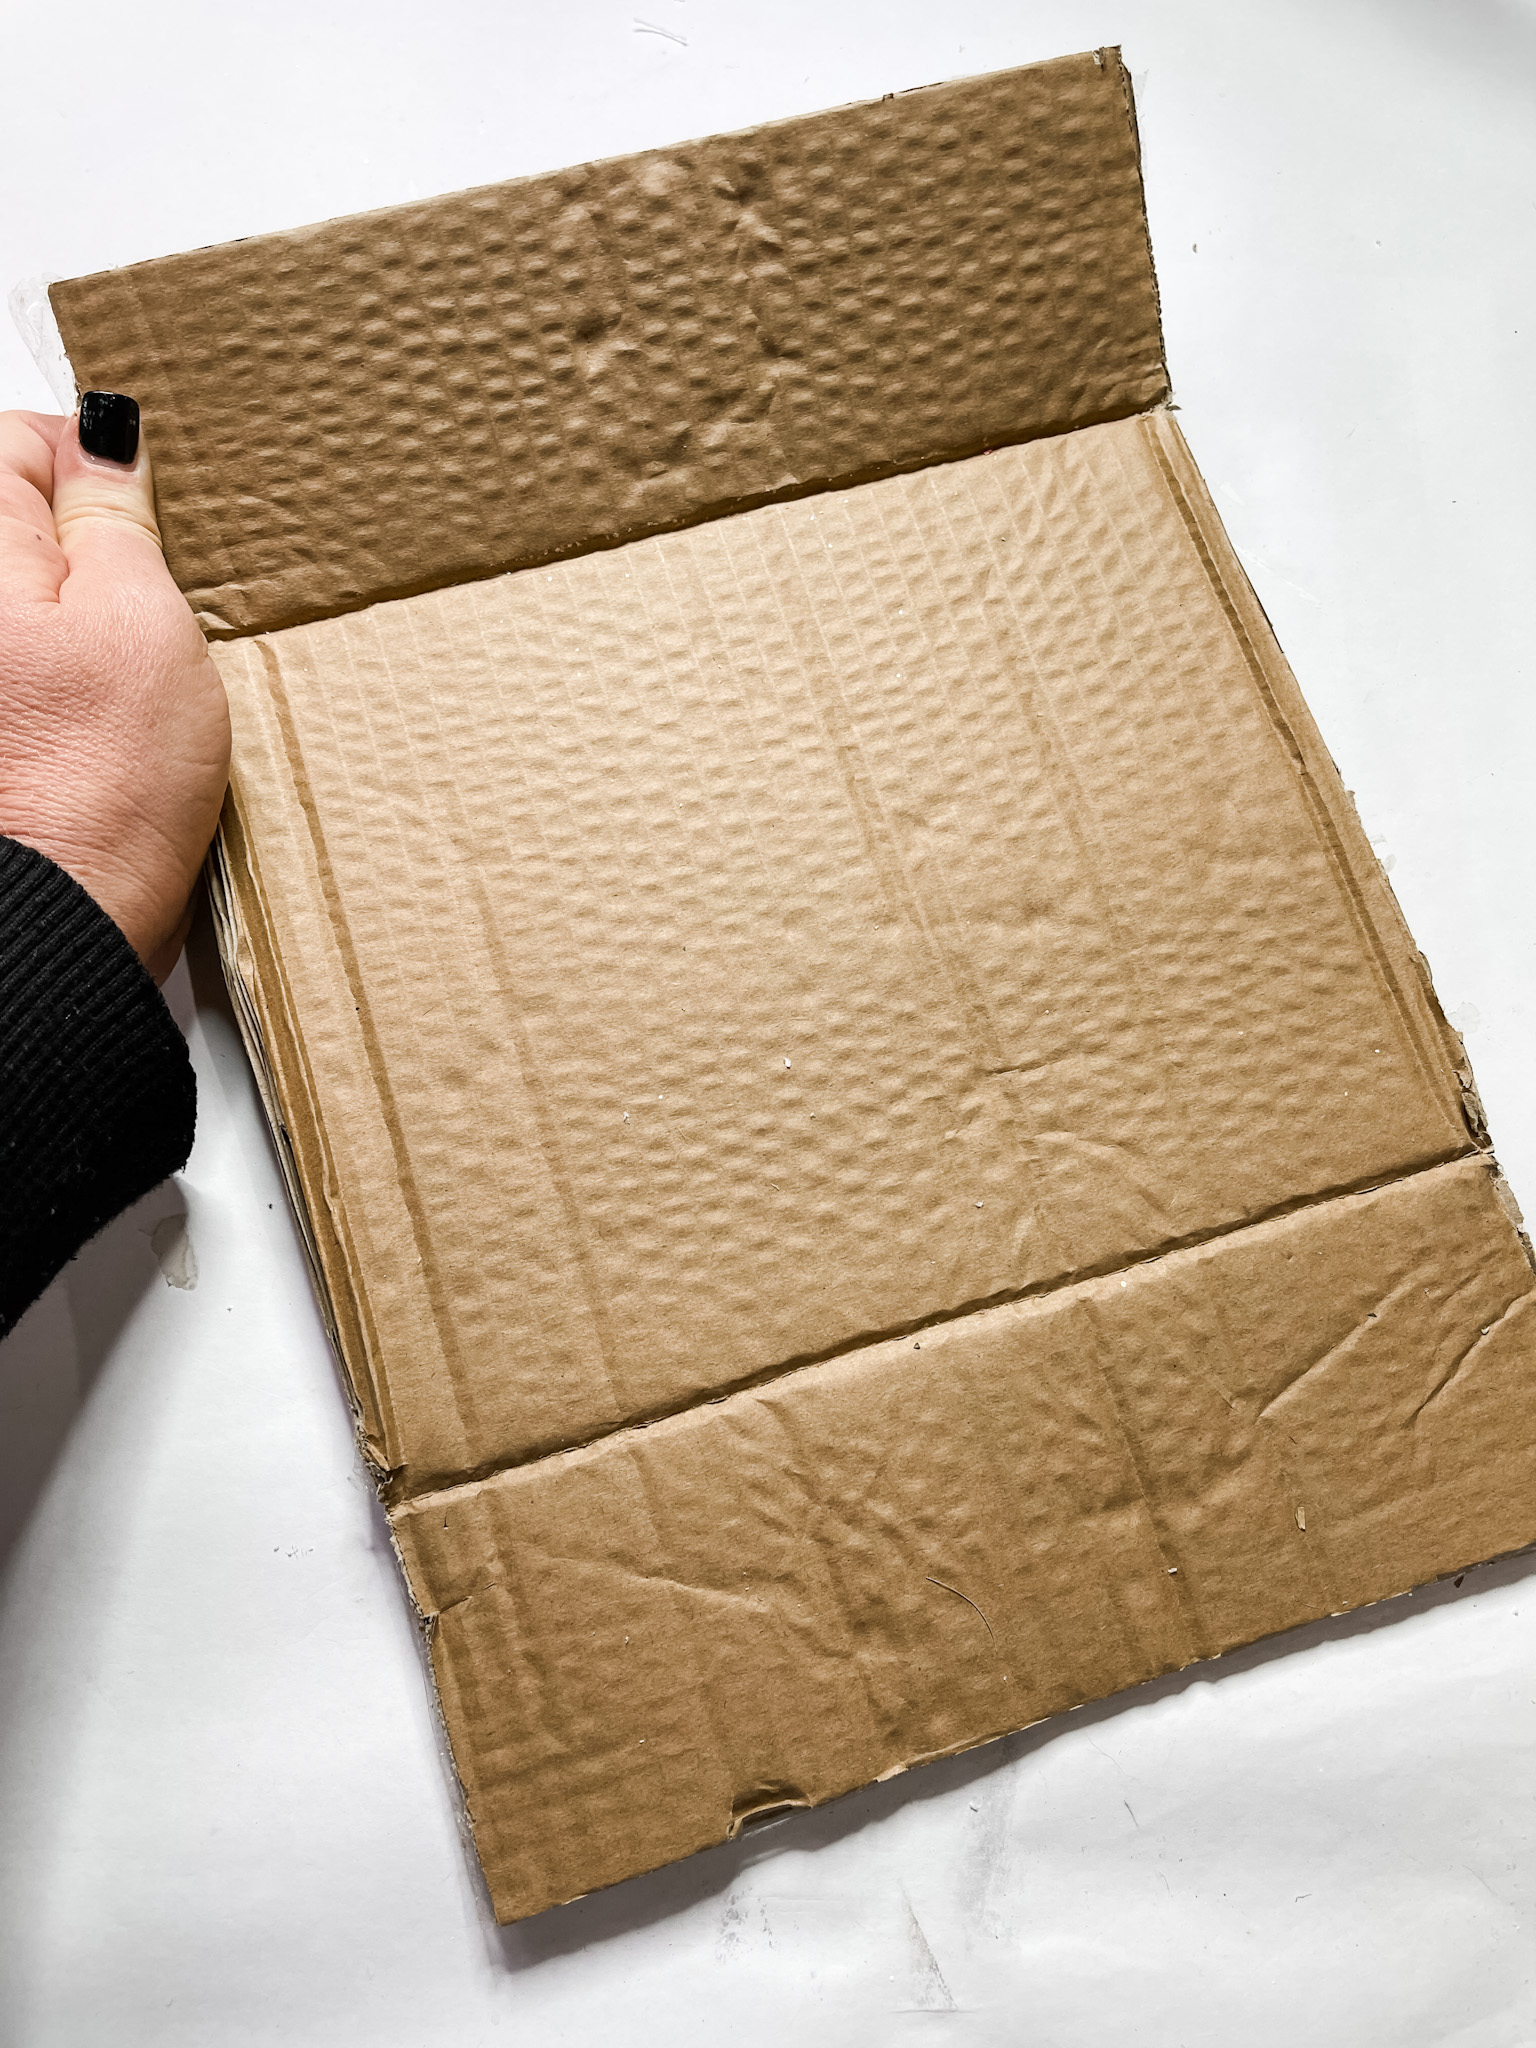
I started by tracing the two Dollar Tree bamboo wreaths on my piece of cardboard and cut the two circles out. You have to make the cardboard circles so you have something to decoupage the napkins on to!
I’ve been on a napkin crafting kick lately, so if you’ve been following along, you should have seen how I decoupage napkins for my projects.
If you’re new to napkin crafting, don’t worry! I’m going to explain my technique for decoupaging napkins! (It’s really simple!)
How to decoupage with napkins
Start by separating the napkin plies for the napkins that you’re going to decoupage. You have to do this or the top ply might not adhere to the surface and could start to pull up later on.

When you’re decoupaging napkins on a surface that isn’t white, you’ll need to paint the surface white. I used Apple Barrel white acrylic paint on my cardboard circles.
The single napkin plies get so thin that the surface color can slightly show through the napkin. You paint the surface white to keep the pattern bright and clear.
Let the white paint dry completely then apply a coat of Mod Podge over the dried paint. Carefully place the patterned napkin plies onto each of the cardboard circles.
Cover them with a piece of plastic saran wrap and use a rolling pin to smooth out any wrinkles or bubbles in the napkins.
You want to let the Mod Podge dry completely (I used my heat gun to speed that up) and then remove the excess napkin from the cardboard.
I like to use a sanding sponge to lightly tear the excess napkin off the surface. As long as the Mod Podge is completely dry, this works like a charm!
Build your DIY Wreath Snowman
Next, I hot glued the bamboo wreaths to their corresponding decoupaged cardboard circles. I used two zip ties to attach the wreaths together.
Poke each one through a hole in the cardboard close to the wreath on each one and secure the zip ties. Pull them tight and cut the excess off with a pair of scissors.
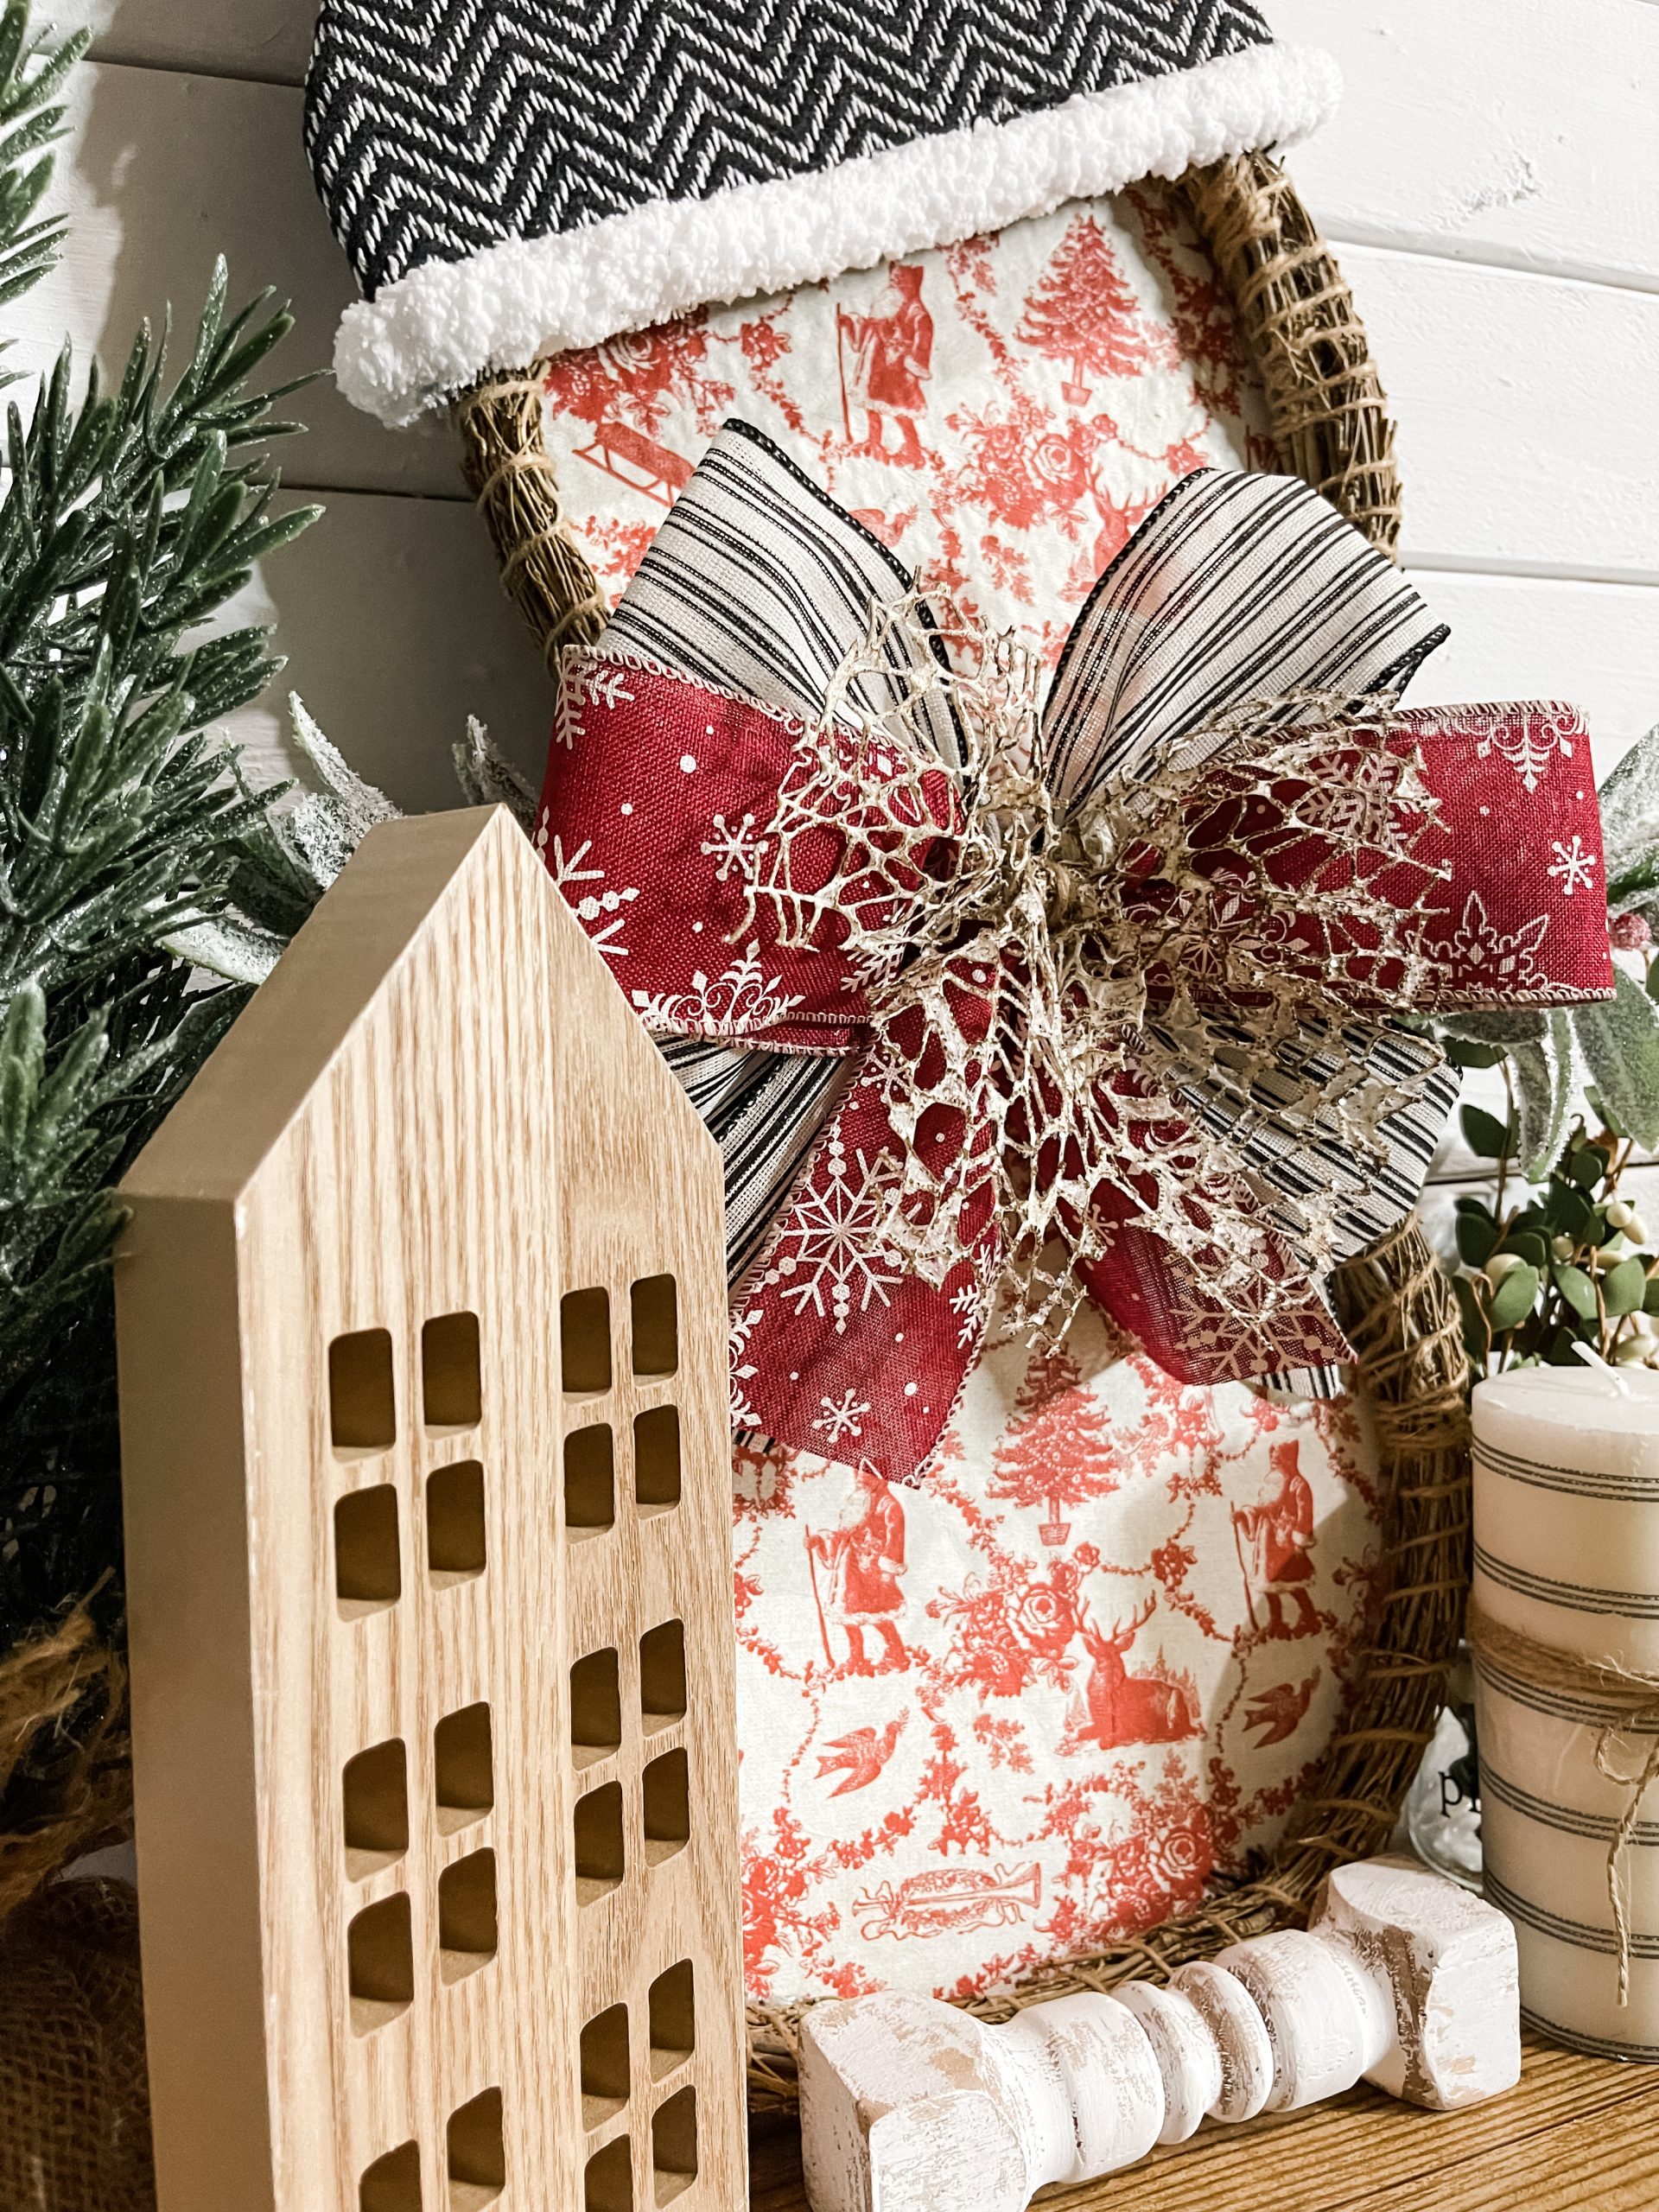
To make the hat for my DIY Wreath Snowman I cut a half circle out of cardboard and hot glued the Dollar Tree woven rug to the half-circle.
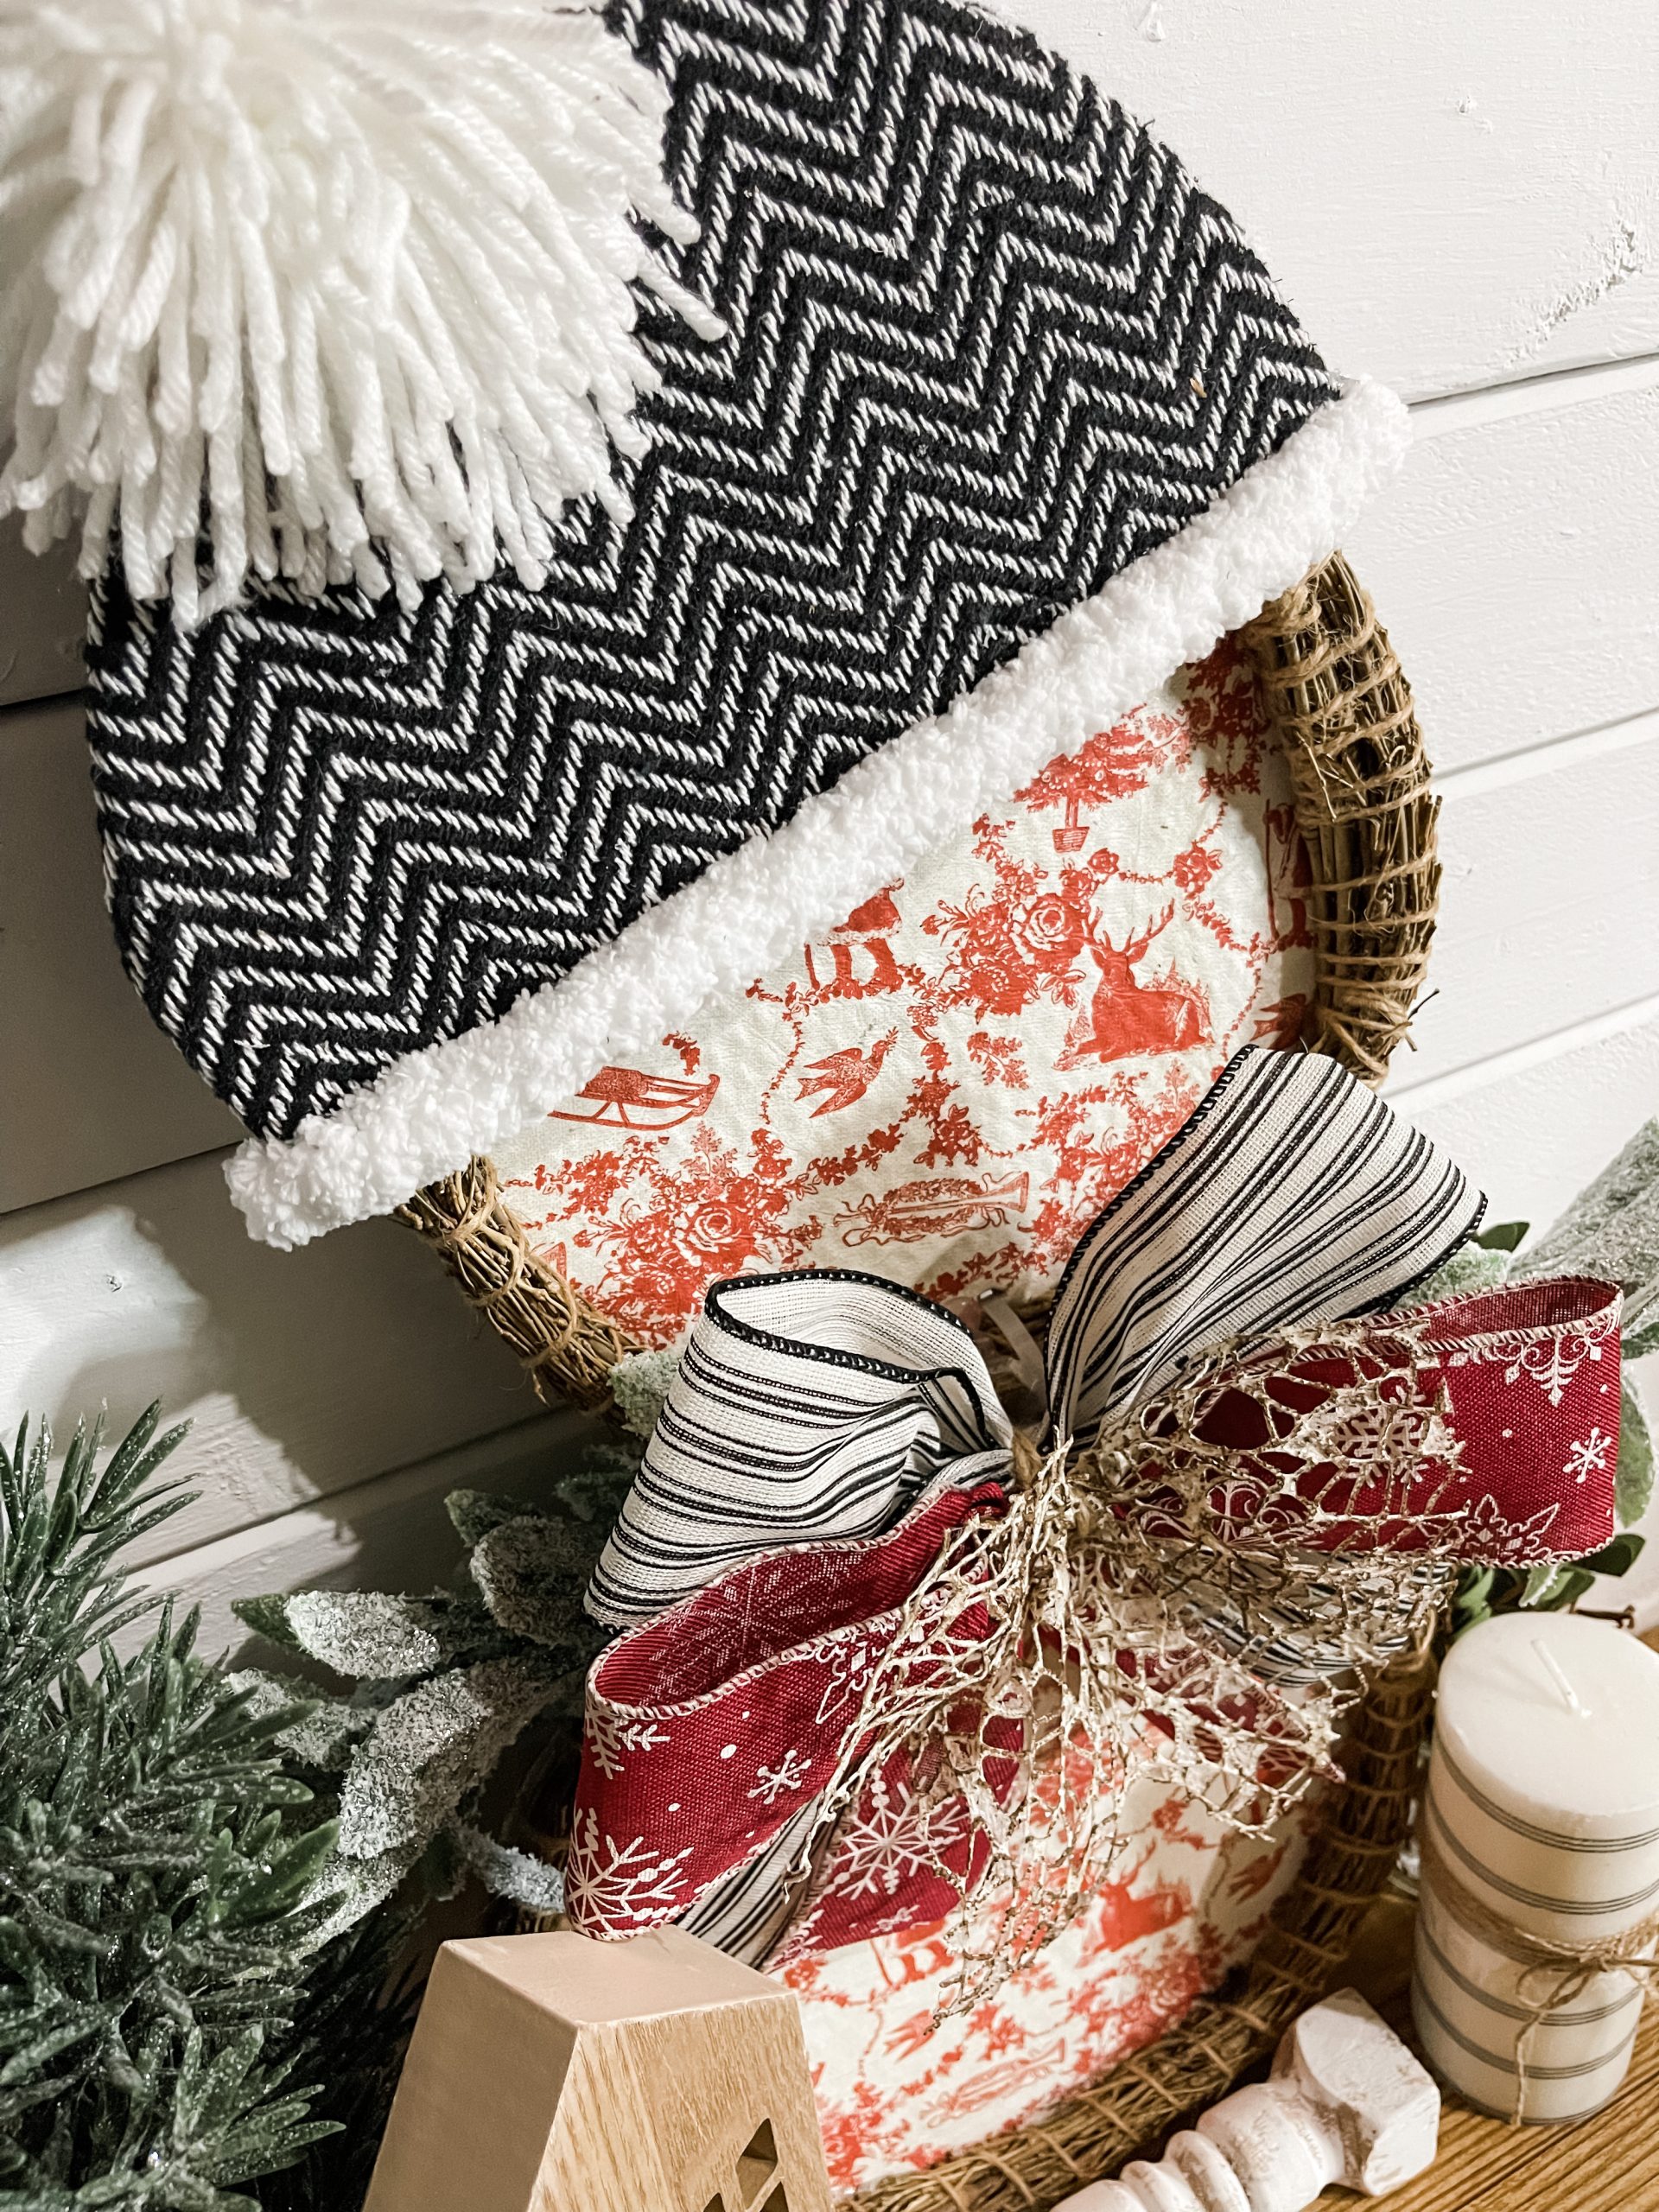
Then, I hot glued the half-circle cardboard to the top half of the top wreath and pulled the excess woven rug behind the half circle and hot glued it in place.
Next, I made a pom-pom out of the white yarn to go on the snowman’s beanie! To make a pom-pom, wrap the yarn around your hand several times.
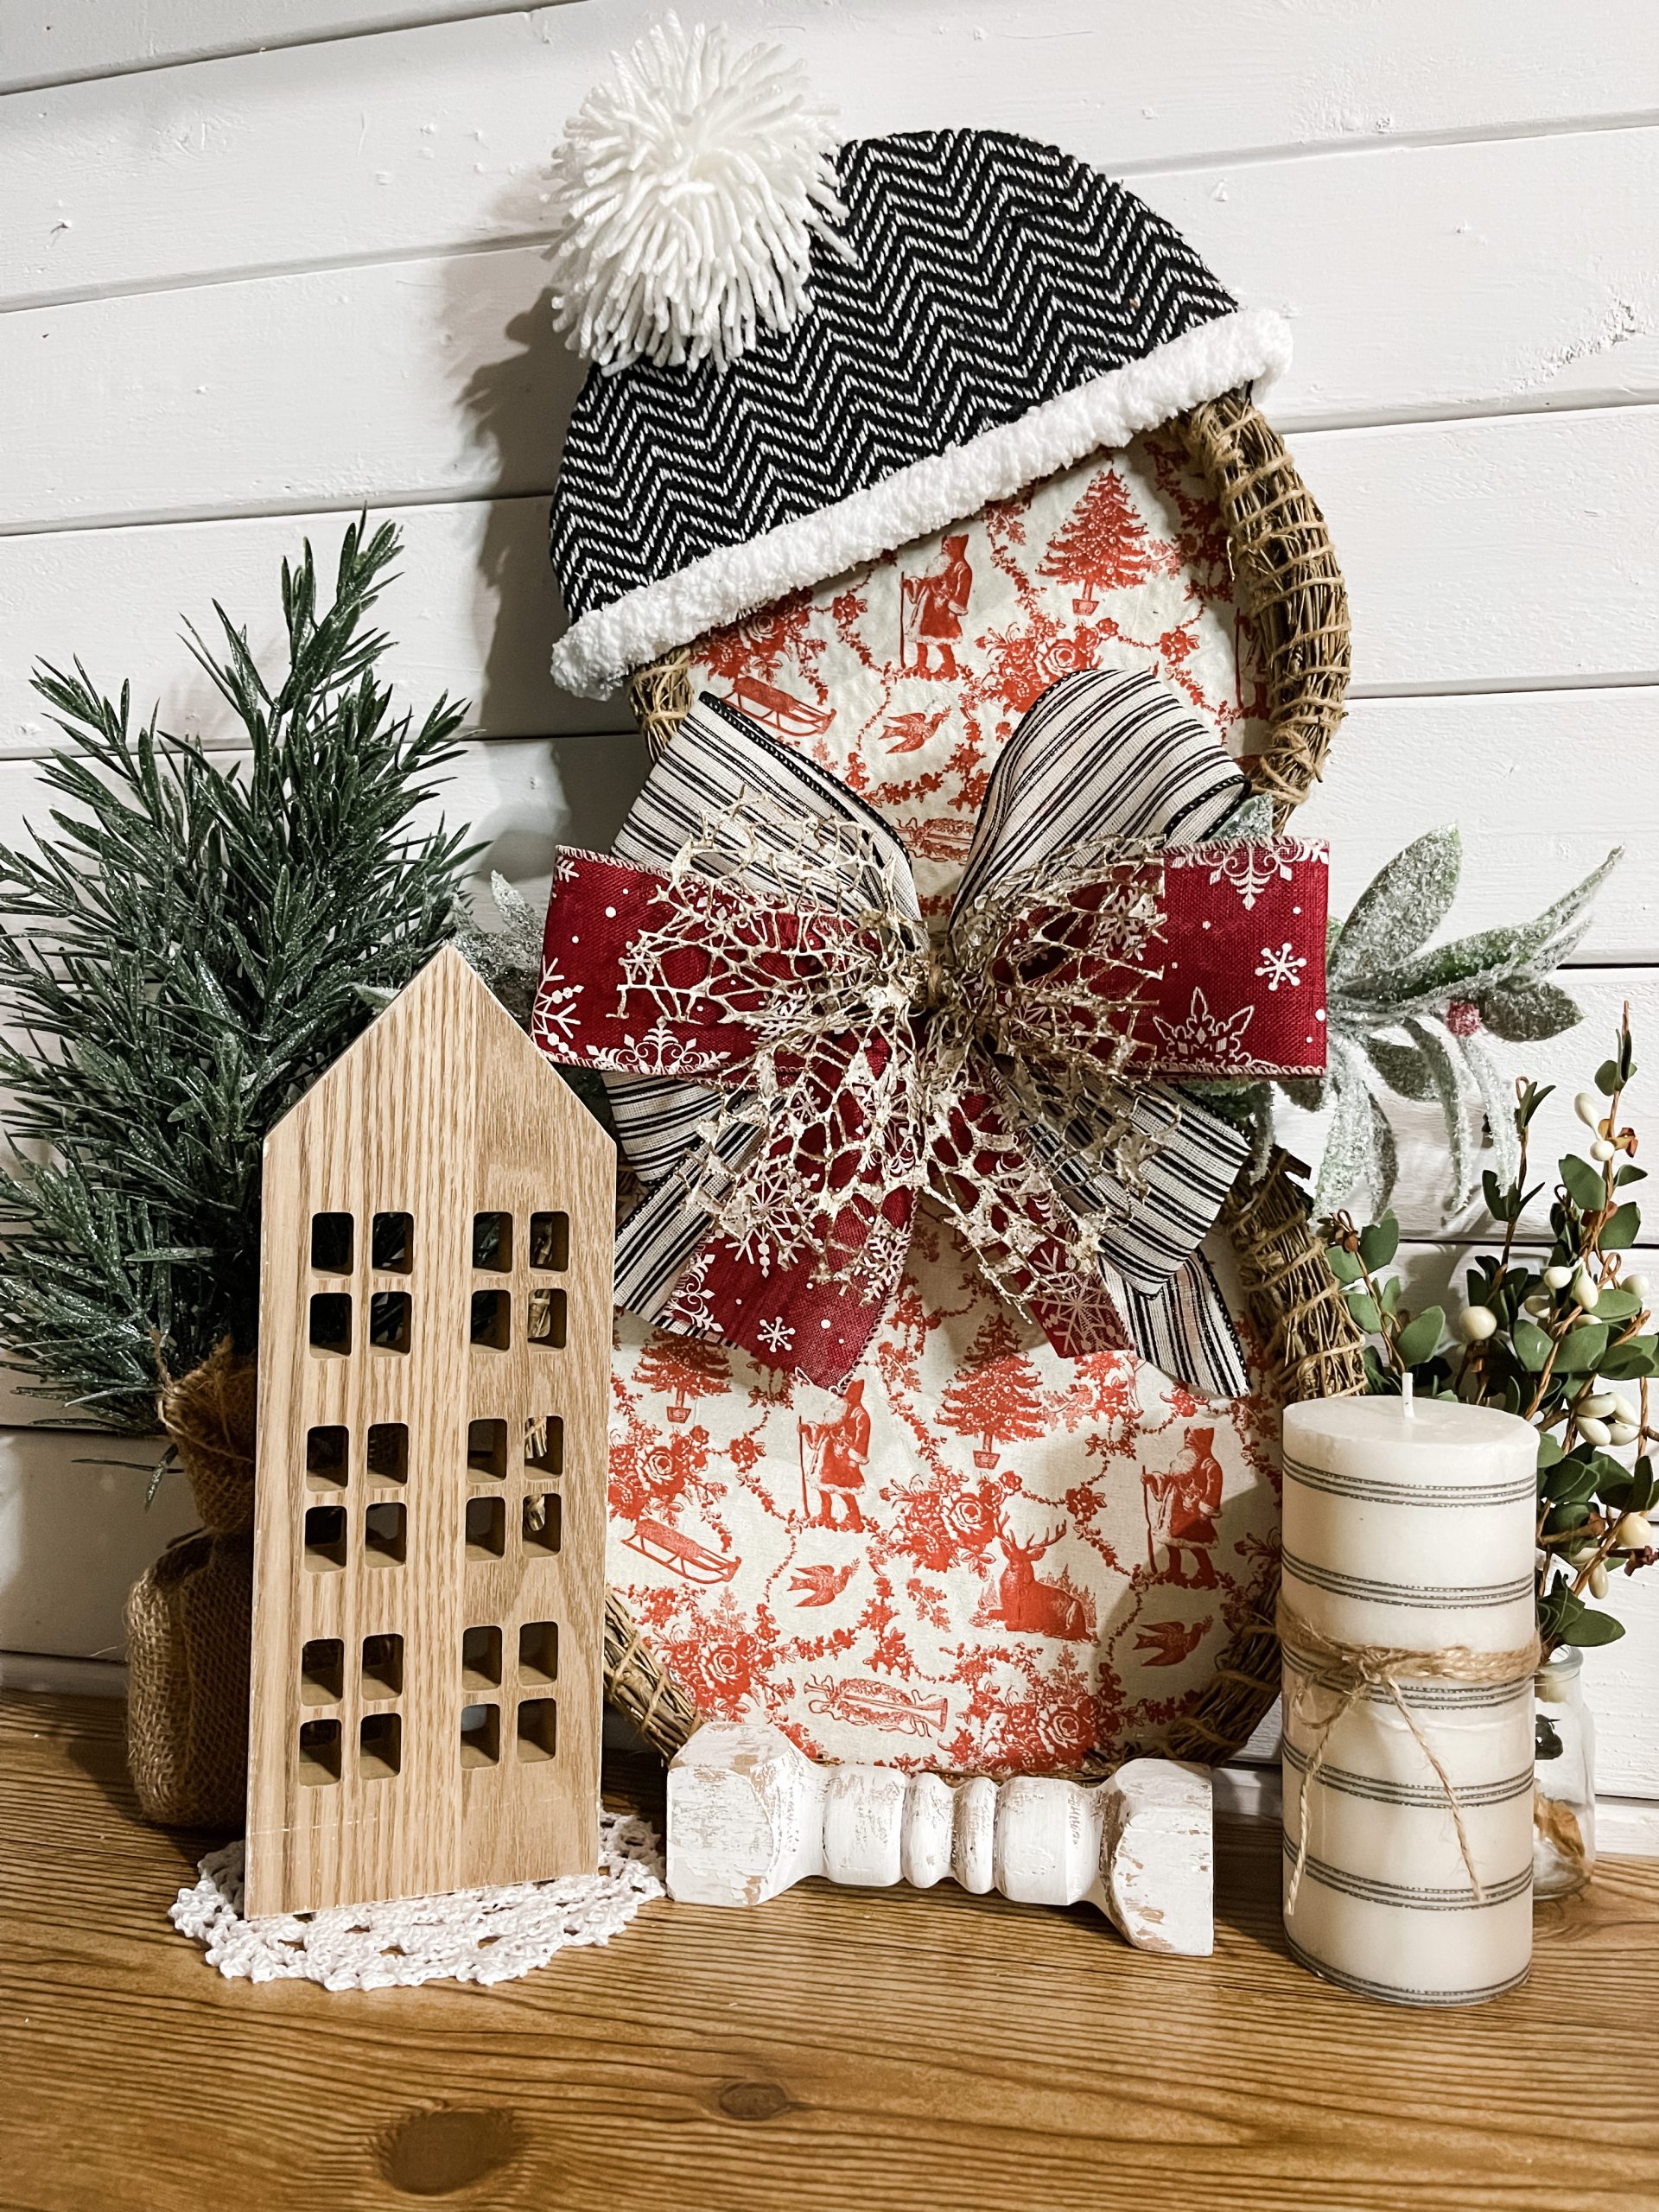
Slip a piece of yarn through the center of the bundle and tie it in a knot. Then, cut the yarn on the other side from where you tied the piece in a knot.
Fluff out your pom-pom and trim the ends of the yarn pieces to create a more uniform sphere. Once you’re happy with the pom-pom, hot glue it to the top of the snowman’s hat.
Next, I hot glued a piece of the Hobby Lobby Yarn Bee chunky white yarn across the bottom of the hot to create the trim.
Bring you DIY Wreath Snowman together
Now it’s time to cover up those ugly zip ties! I slid two pieces of the icey Christmas greenery through the zip ties, then I made my bow!
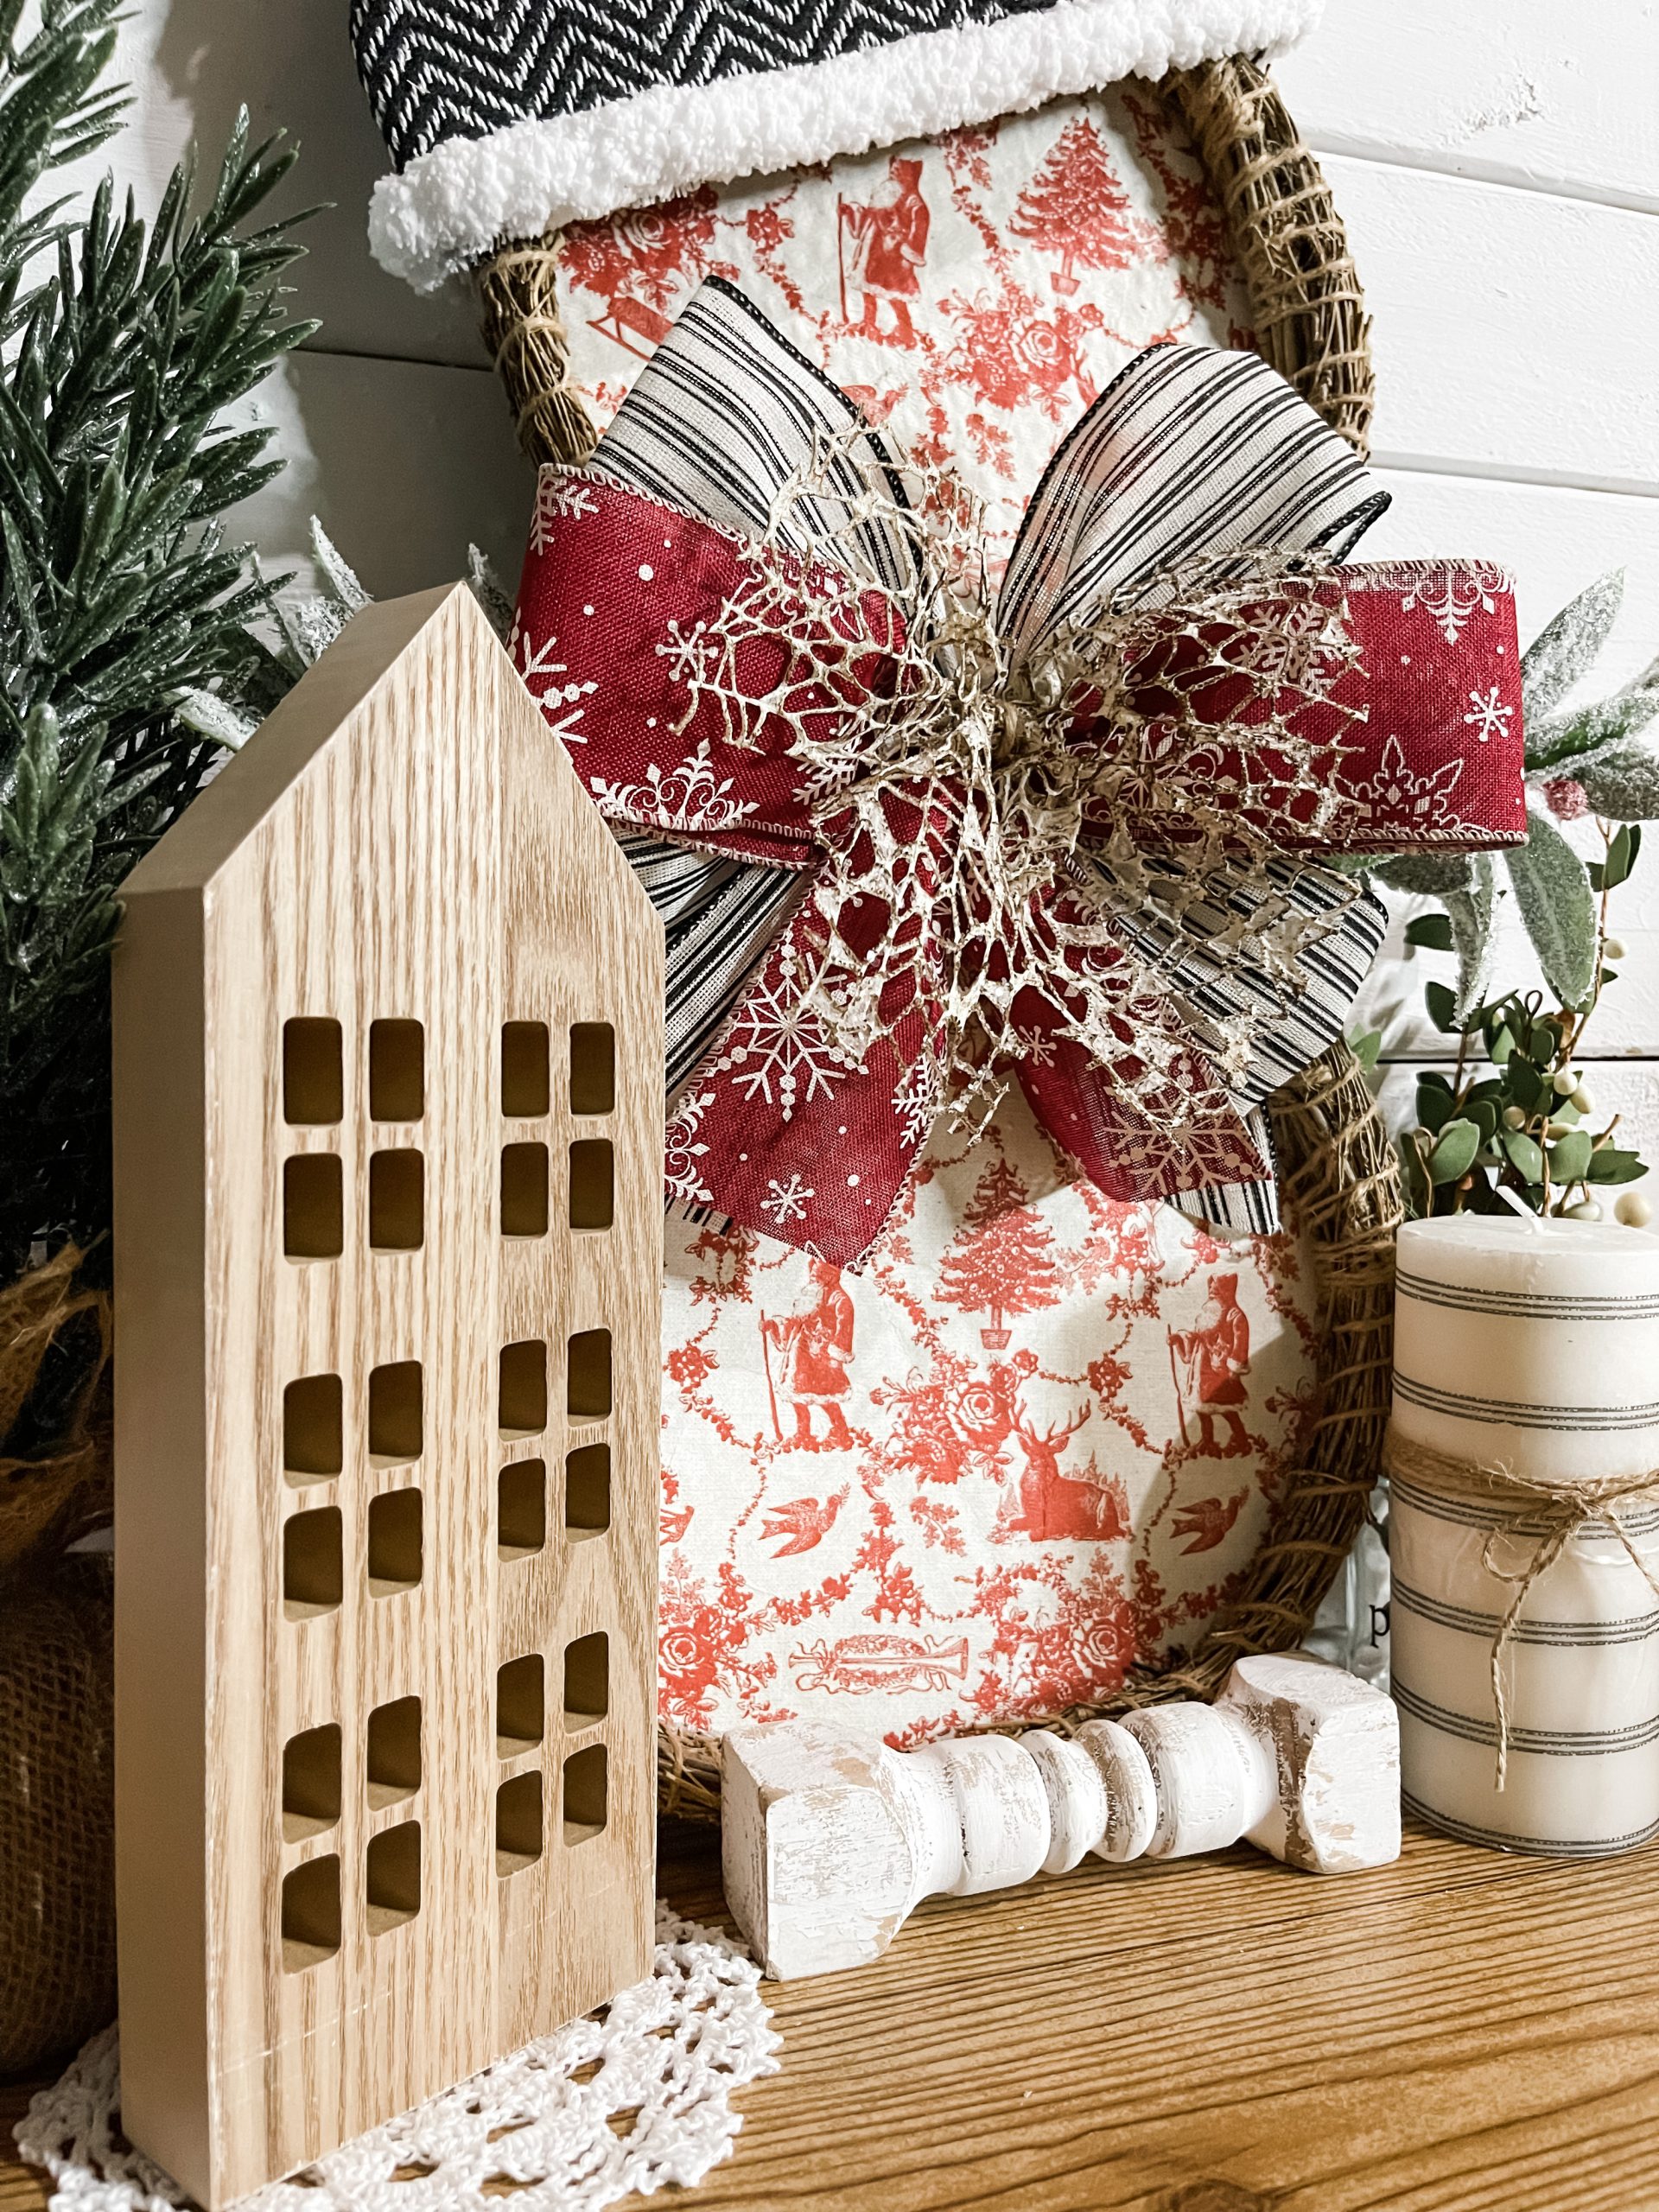
You can see exactly how I did that by watching the tutorial video on Facebook! Just skip ahead to the 1:30:00 mark! Once your bow is made, just hot glue it over the zip ties and you’re all done!

I hope you enjoyed this DIY Wreath Snowman as much as I did and decide to make one for yourself! I would love to see how yours turns out!
You should totally join my FREE Facebook group called On A Budget Crafts! It is a judgment-free community for DIY crafters to show off their projects and ideas.
If you loved this DIY you might also like this DIY Christmas Tree Shelf Decor!
Thanks for stopping by! XOXO Amber
You can also shop my ENTIRE AMAZON Favorites shop just click here! It’s packed full of all the things I use and love.
Here is the supply list I highly recommend every creative have on hand!! Would you also pin my blog for later and get on my newsletter alerts? I would love to have you join my #craftycrew.

Join my free “ON A BUDGET CRAFTS” Facebook group!
PIN THIS POST FOR LATER!
I love the snowman. You often mention that you aren’t a bow maker. You cannot say that anymore. You’ve definitely gotten the hang of it. That bow is beautiful. Thanks for sharing this great idea.
ADORABLE snowman