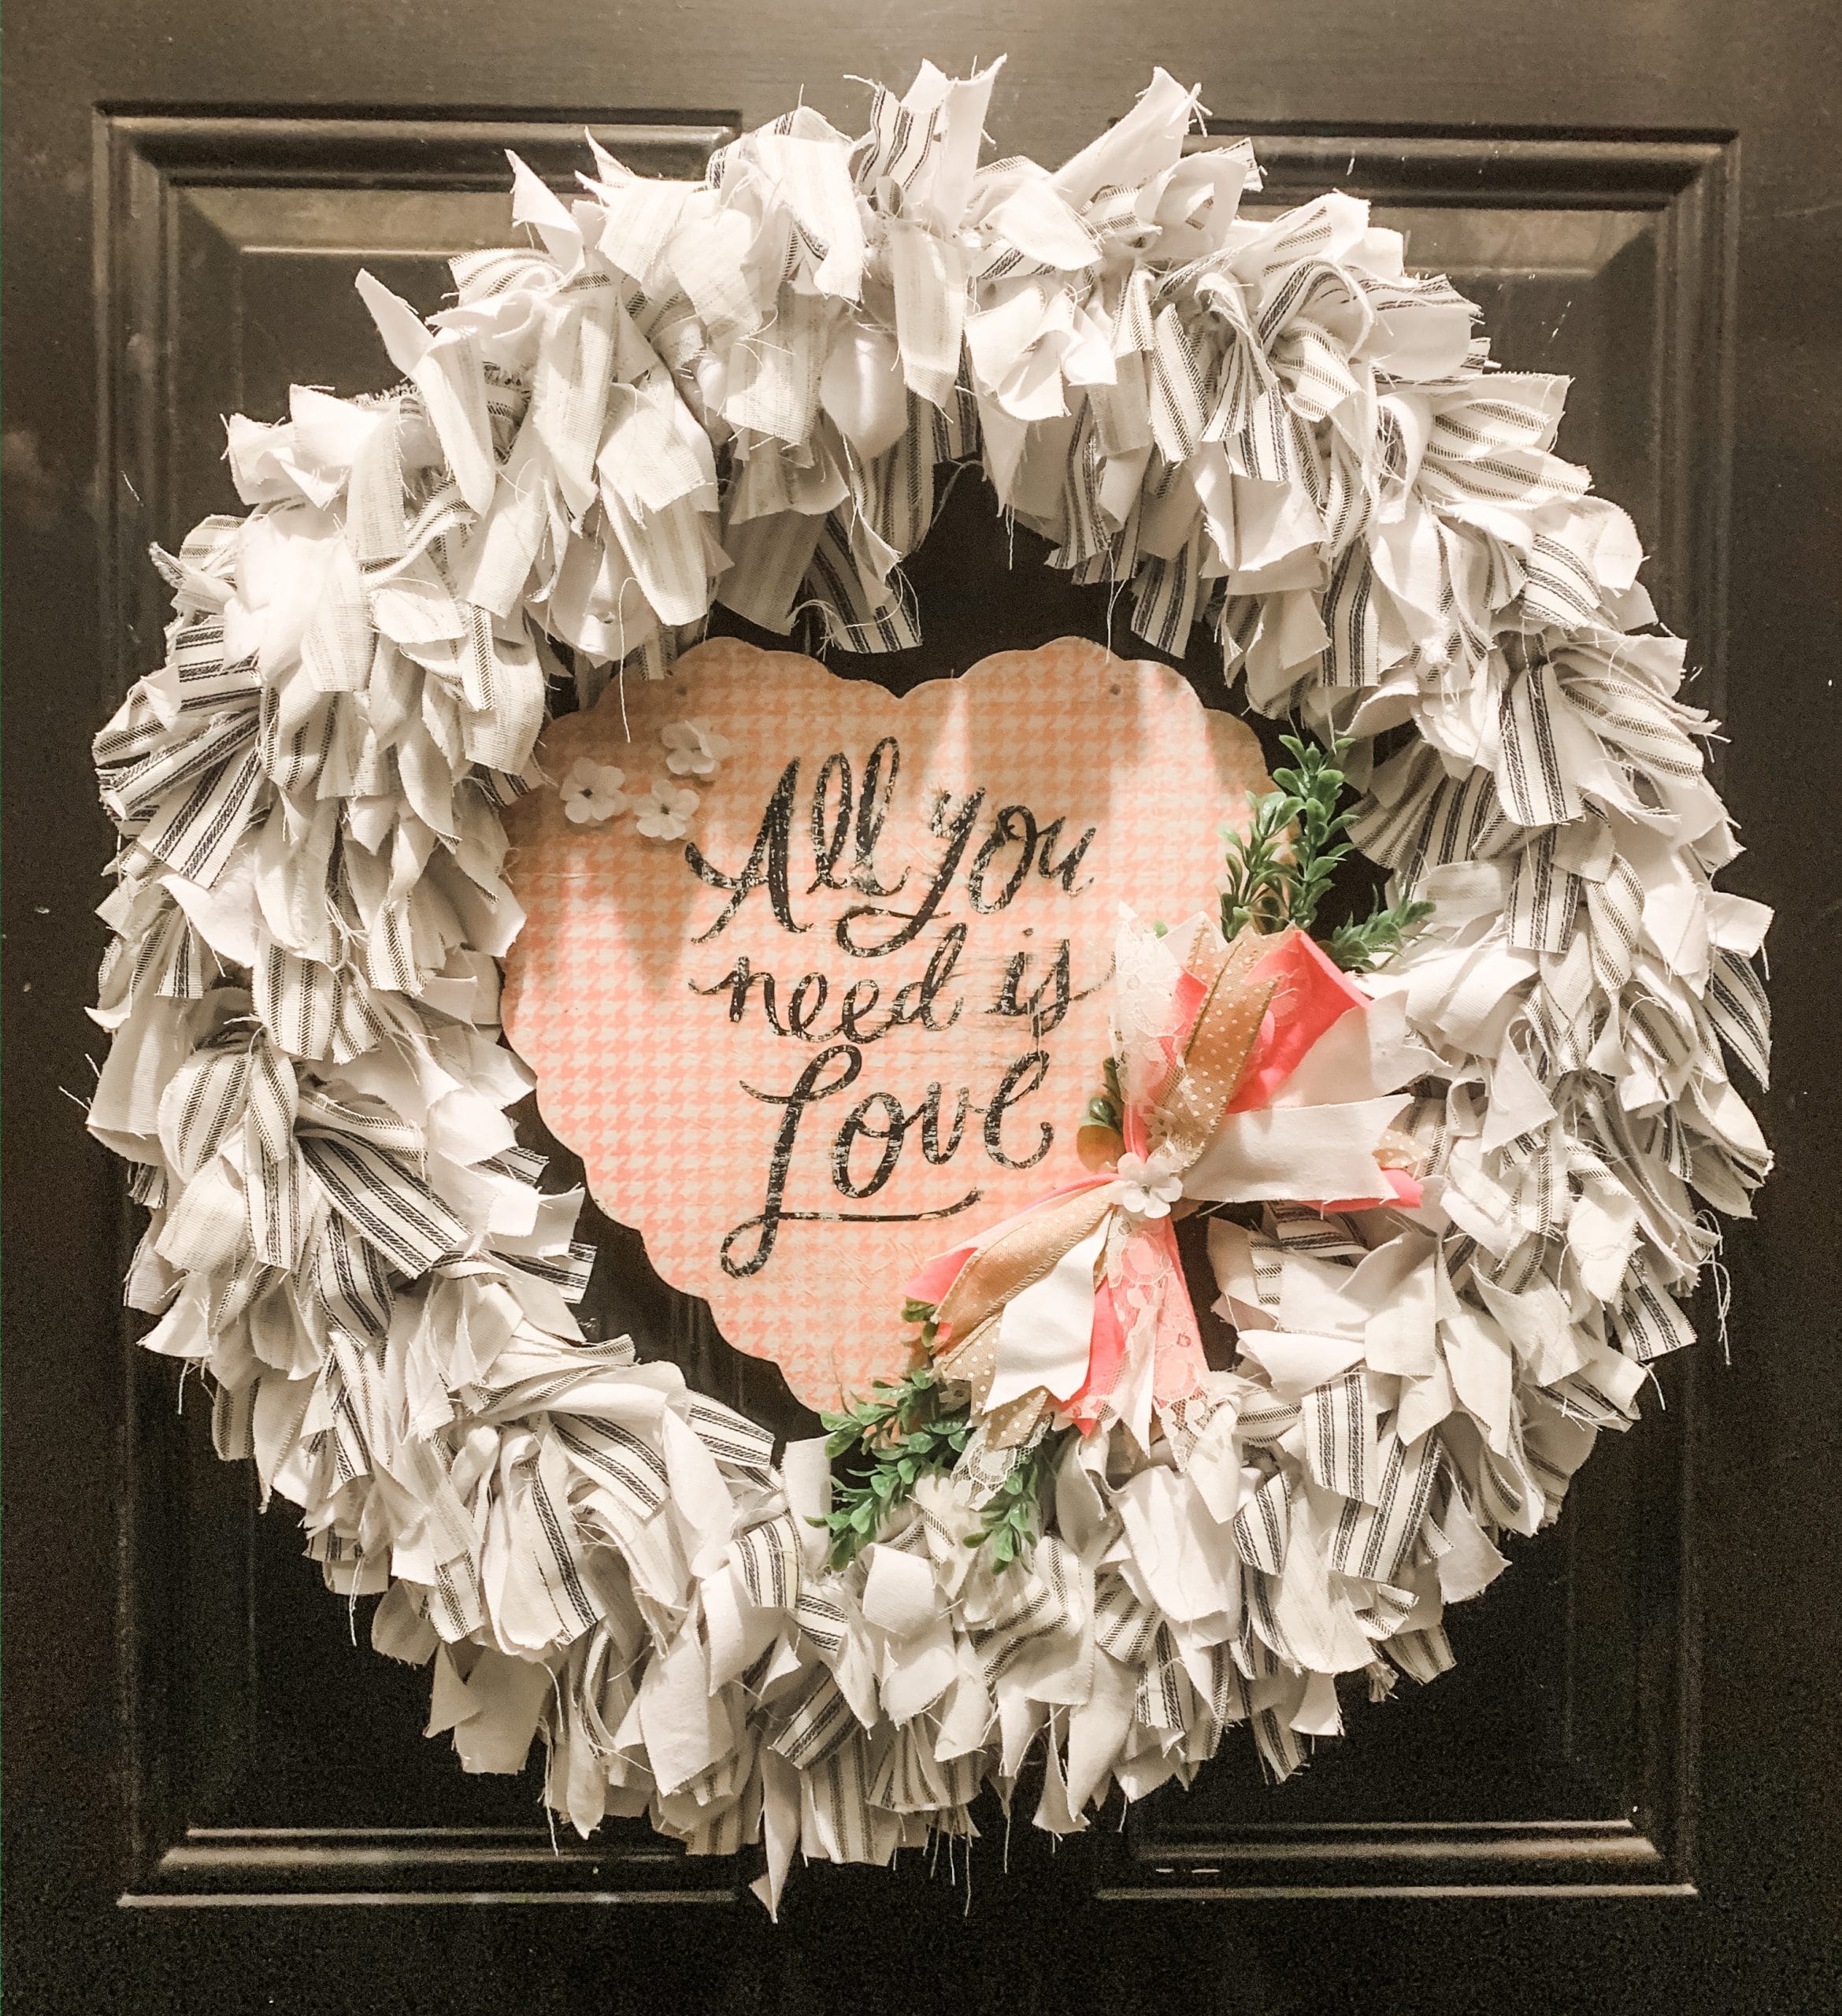
DIY Valentine’s Day Magnetic Door Decor
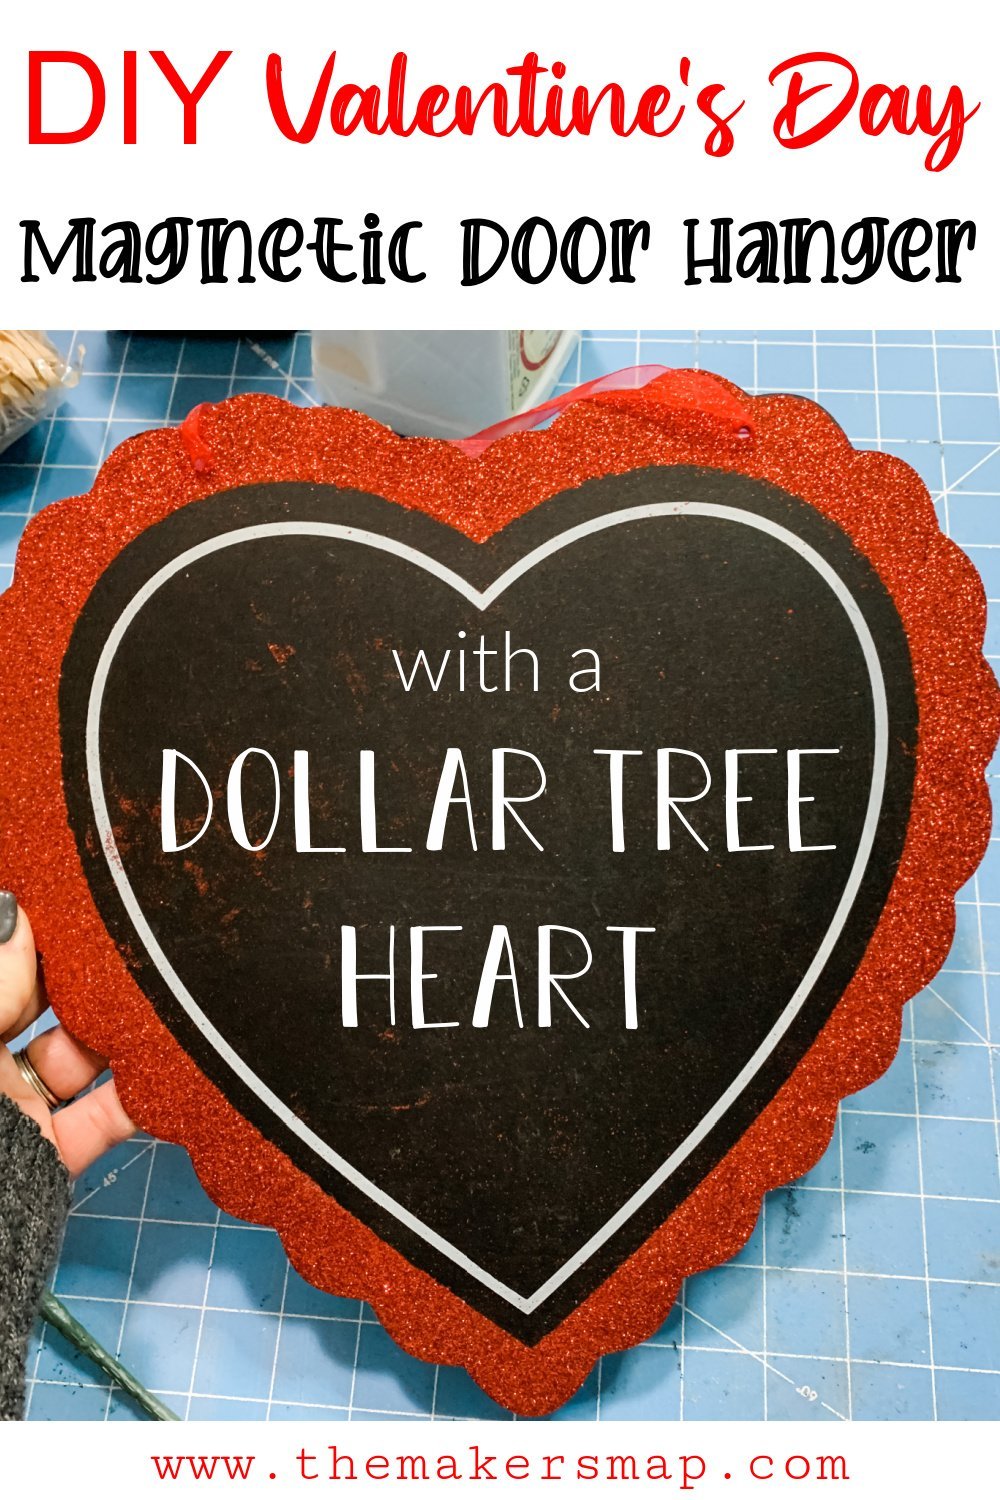
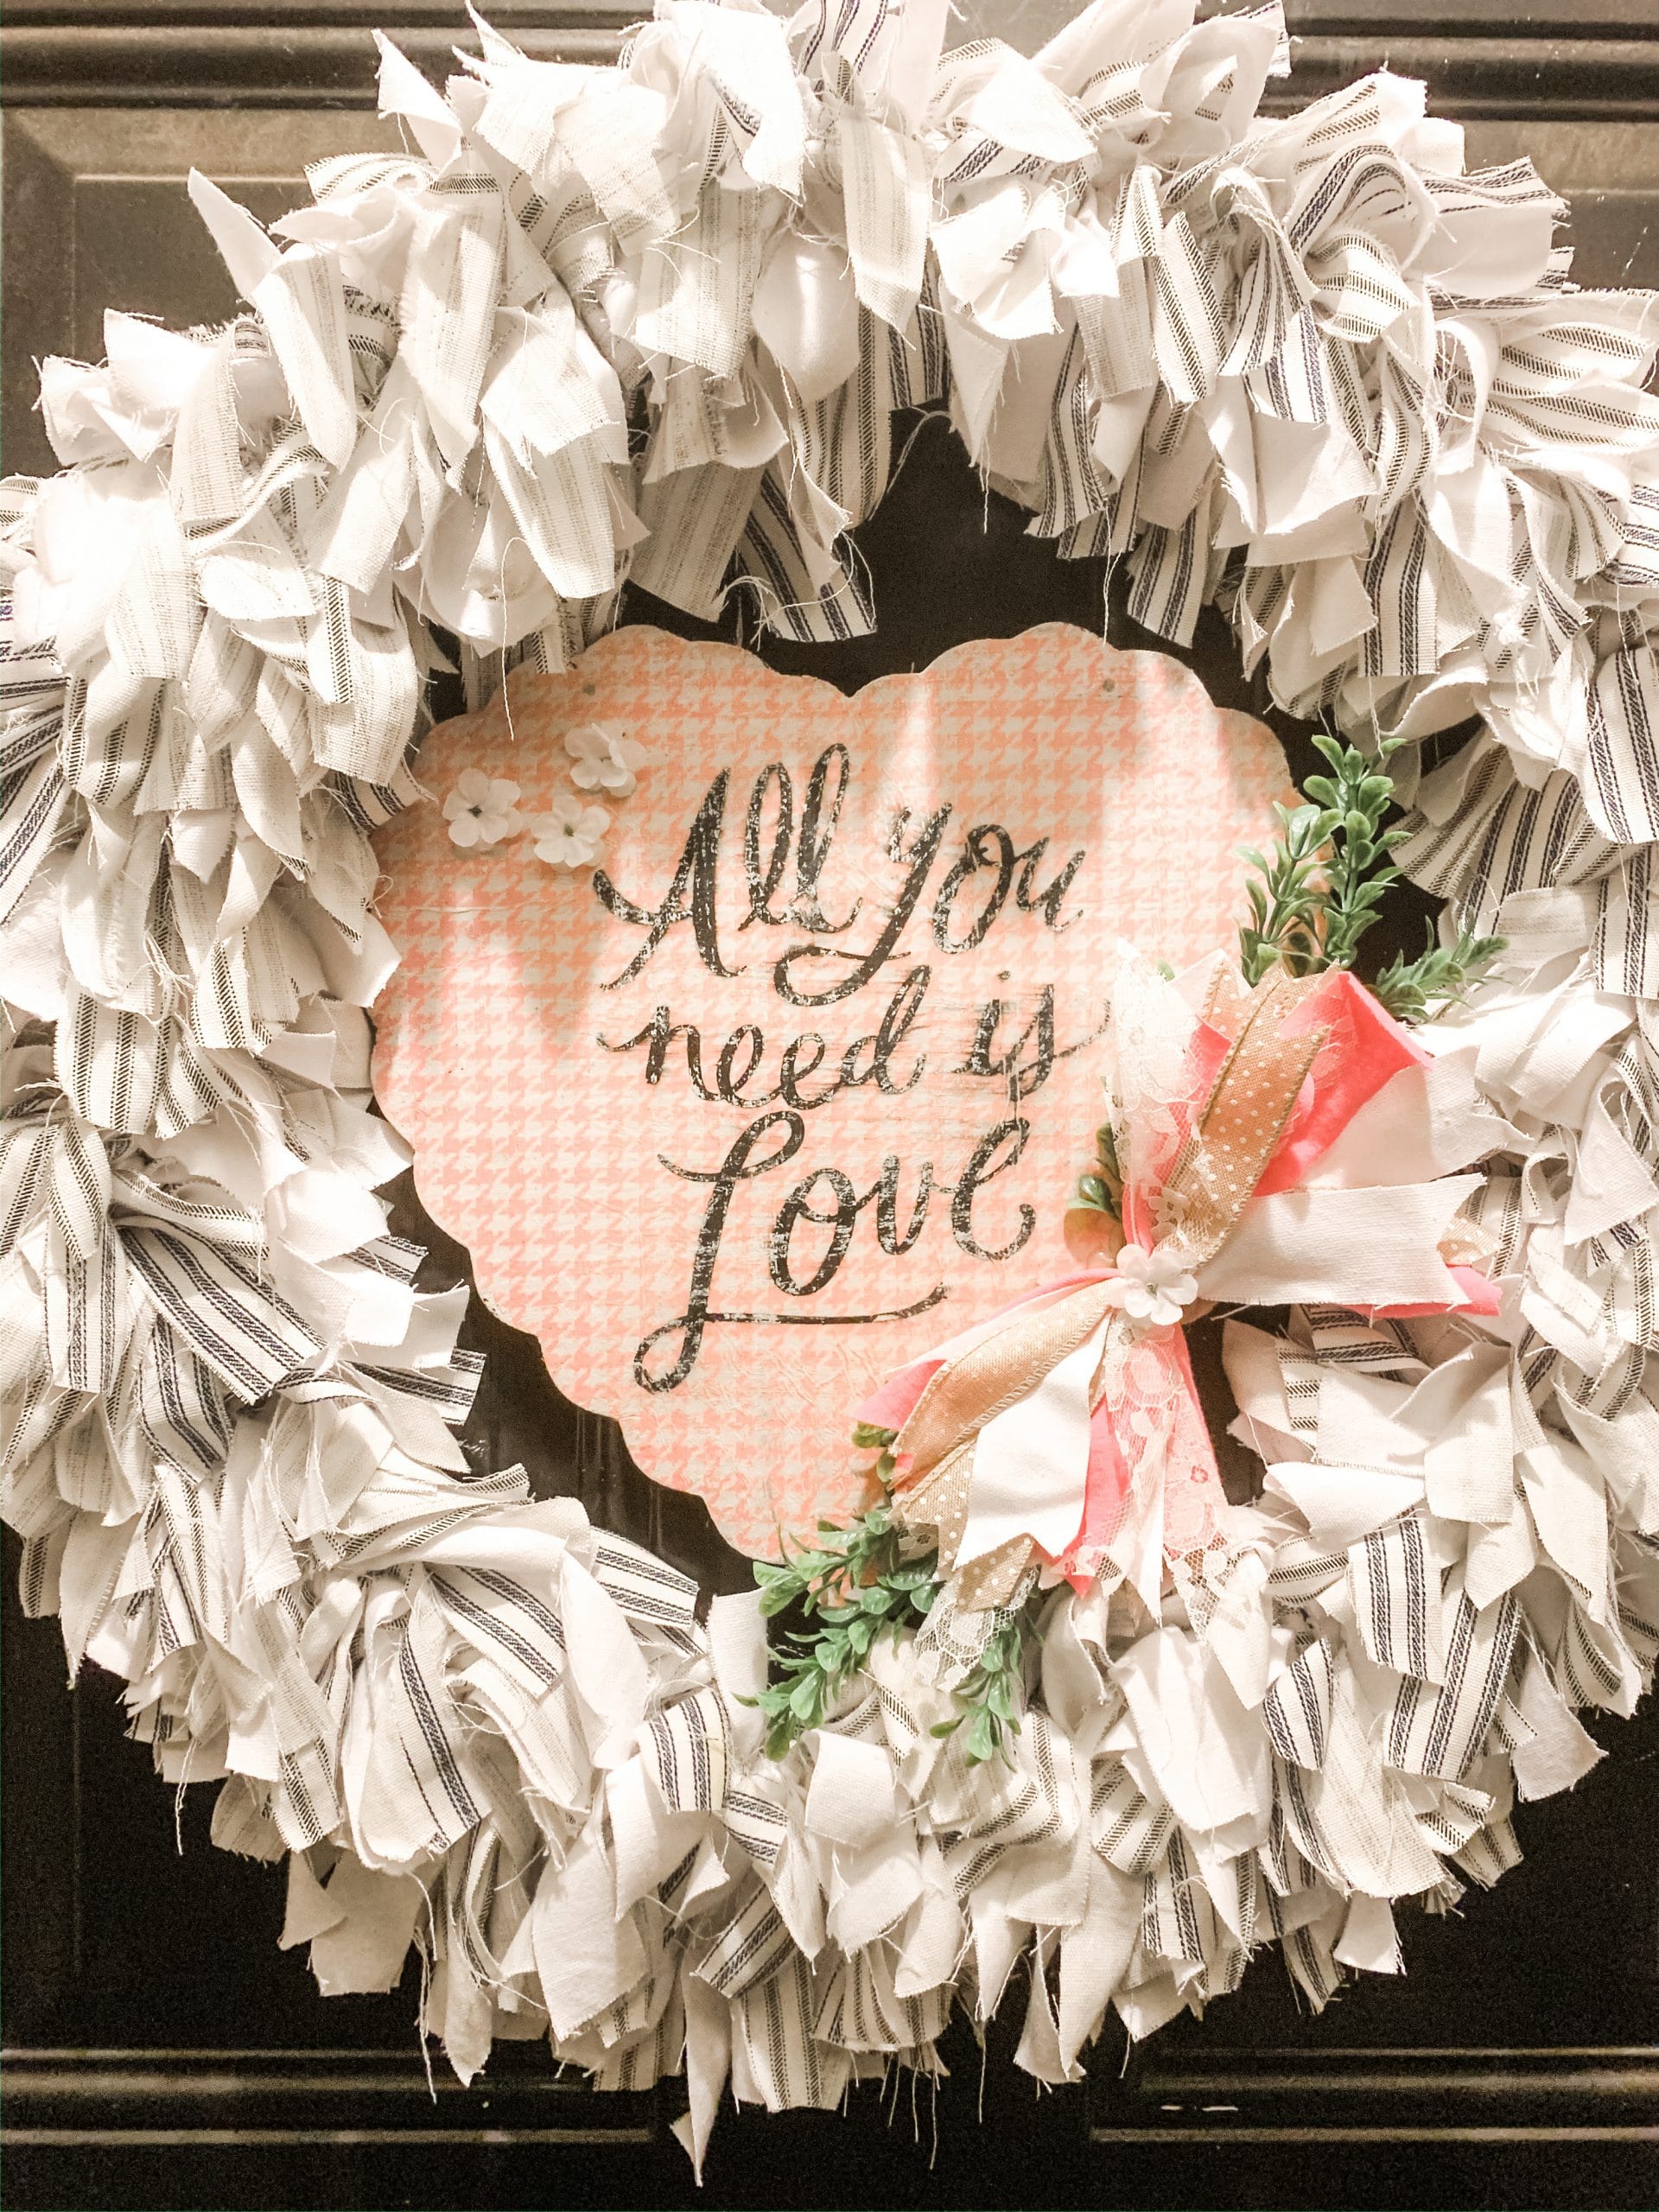
This adorable DIY Valentine’s Day Magnetic Door Decor is honestly so cute by itself, but I absolutely love how great it goes with the rag wreath I made for my front door! Everything I make is for my home, and this sweet DIY is no different.
This post will focus on how to make the magnetic heart to go in the center of the rag wreath. Stay tuned for a blog tutorial on how to make the incredibly easy rag wreath!
Watch the replay
Want to see exactly how I made this DIY Valentine’s Day Magnetic Door Decor? I recorded the process during a LIVE video on my Facebook page!
You can watch the replay to craft along or see my crafting techniques!
For this project, I will be using these items but you can substitute where you want.
“As an Amazon Associate, I earn from qualifying purchases.”
- Dollar Tree Chalkboard Heart cutout
- Dollar Tree magnets
- Mod Podge
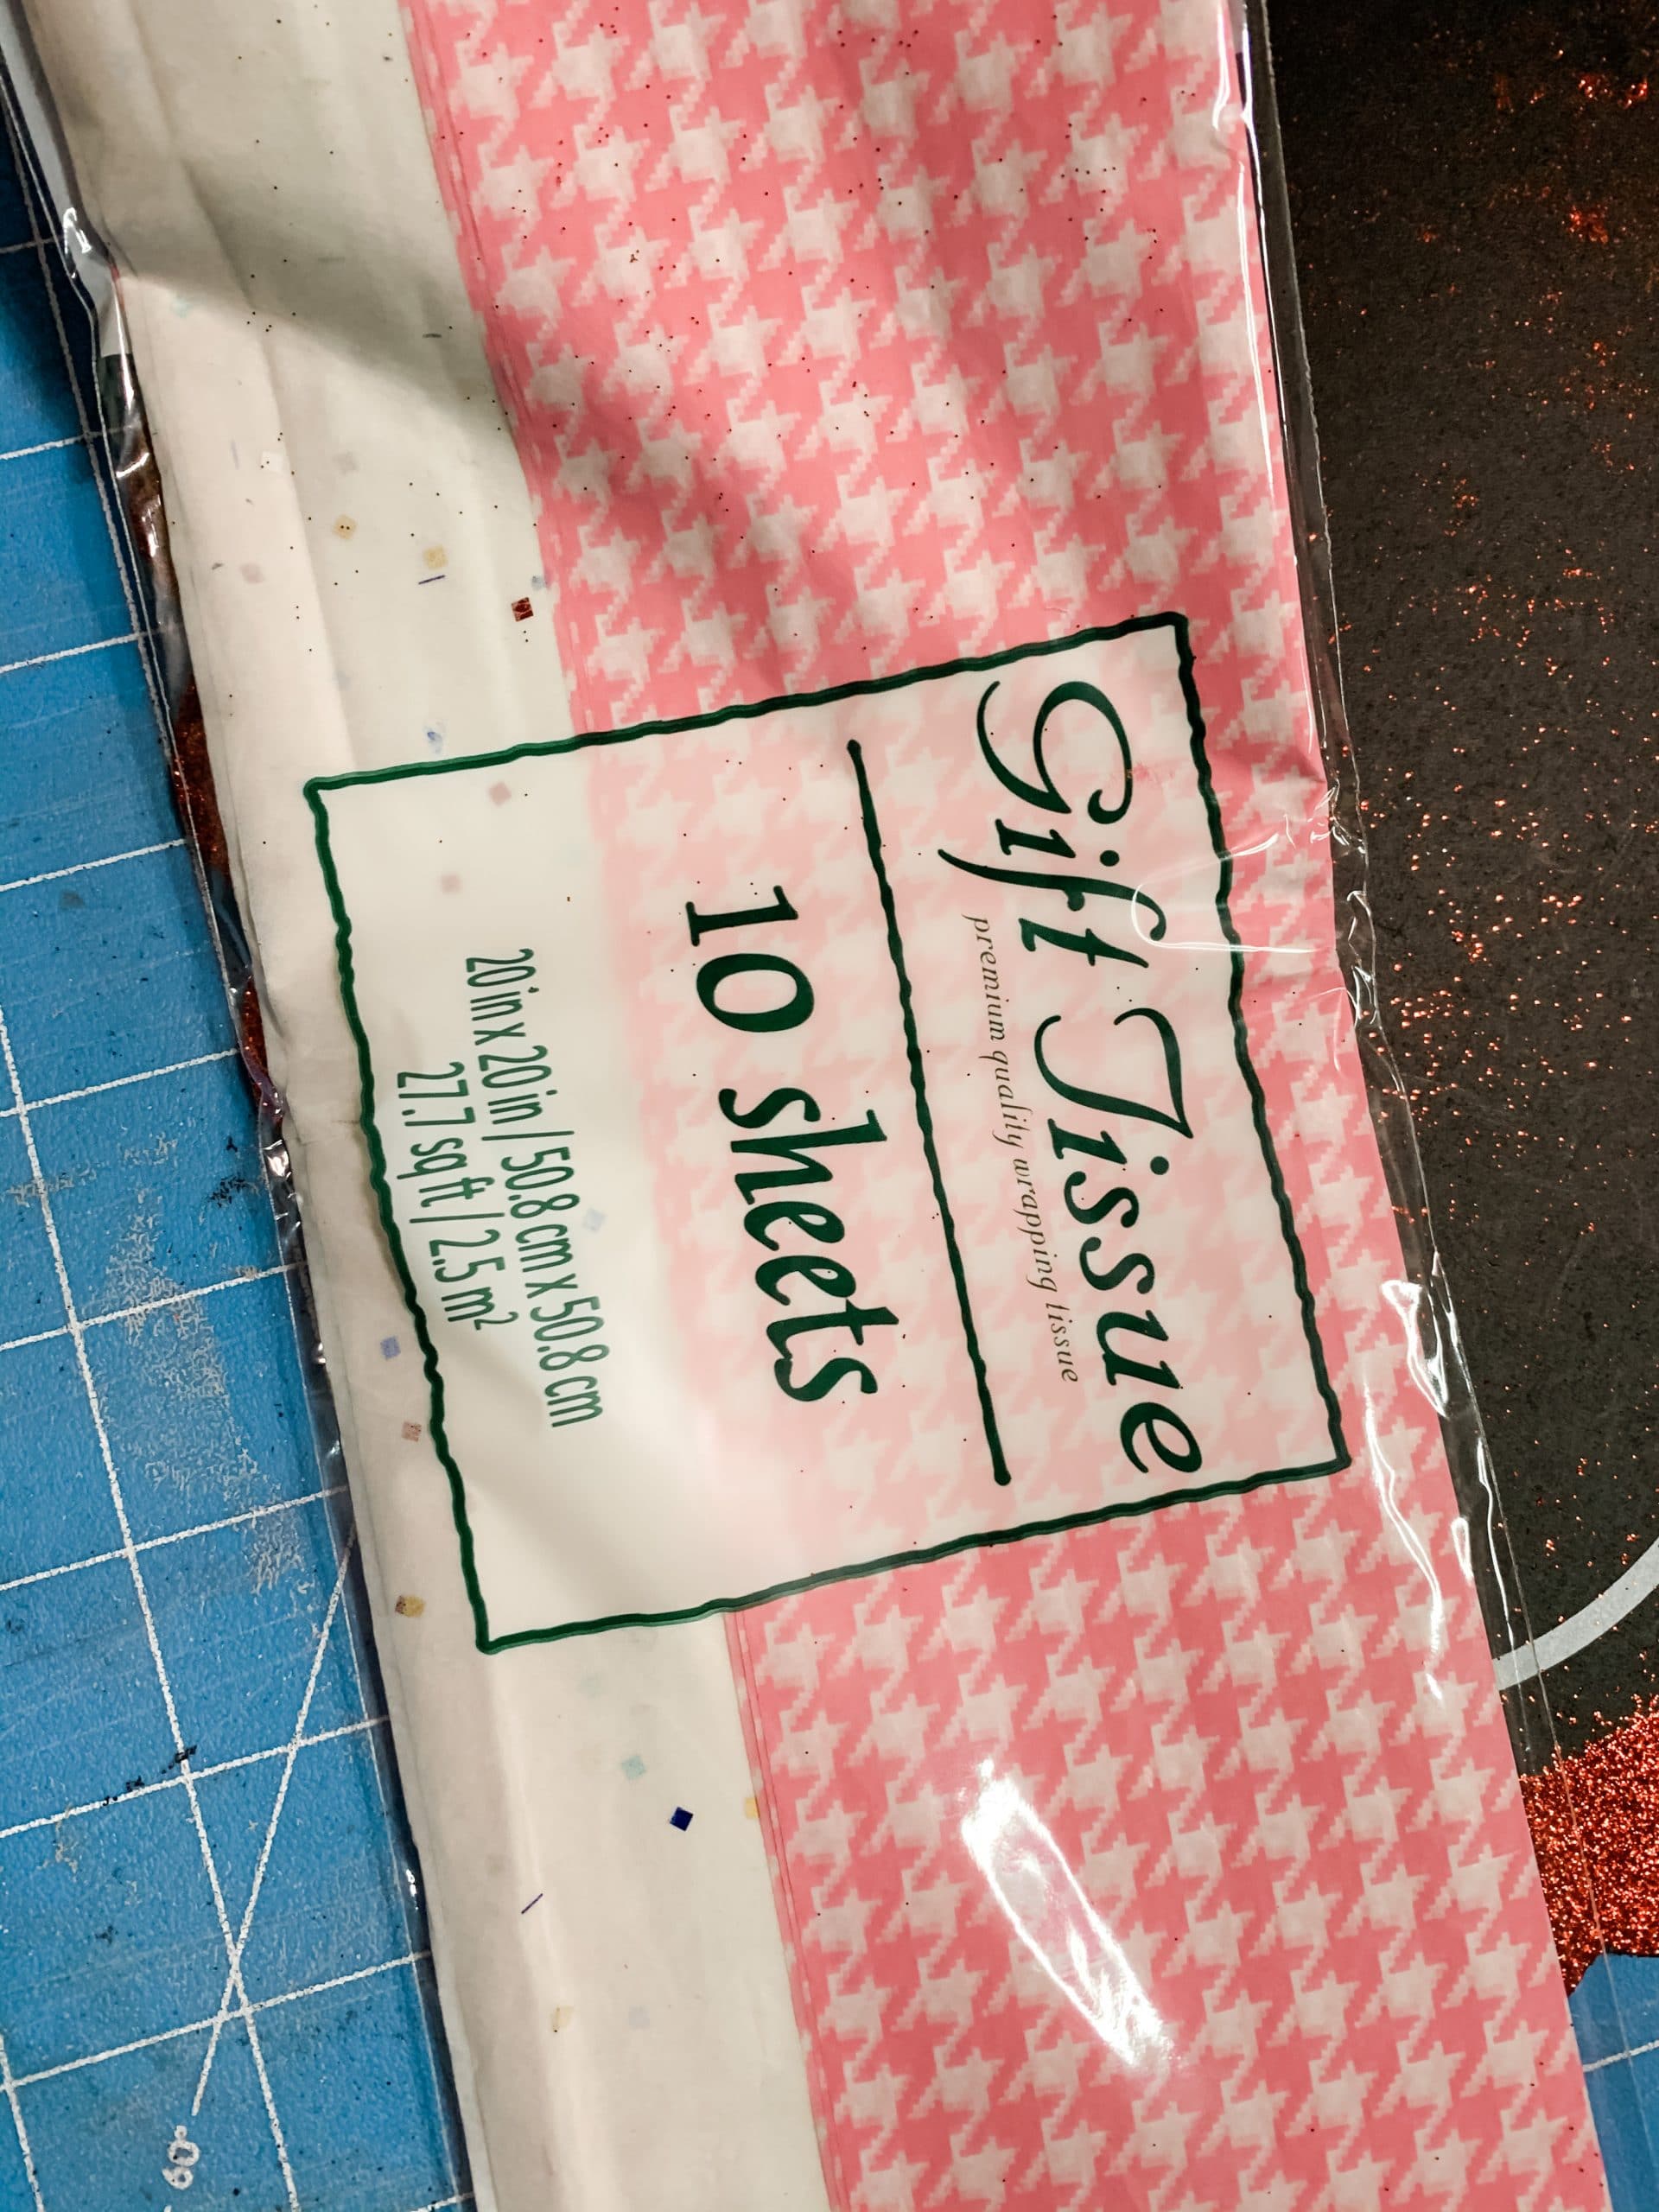
- Dollar Tree Pink Buffalo Check tissue paper
- Dollar Tree white flower spray
- Boxwood greenery spray
- Lamb’s ear greenery spray
- Pink fabric (I used an old t-shirt)
- White fabric
- White lace ribbon
- Tan polka dot ribbon
- wired burlap ribbon
- Dixie Belle Midnight Sky Paint
- Dixie Belle Fluff Paint
- Stencil
- Hot Glue gun
- Glue Sticks
- Scissors
- rotary cutter
Let’s get started
We are going to kick off making this adorable DIY Valentine’s Day Magnetic Door Decor by painting the Dollar Tree chalkboard heart with Dixie Belle Midnight Sky paint.
This particular Dollar Tree heart has a bunch of glitter around the edges, so you could start by sanding off as much of the glitter as you can. You could also flip the heart cutout over and use the back surface for this project.
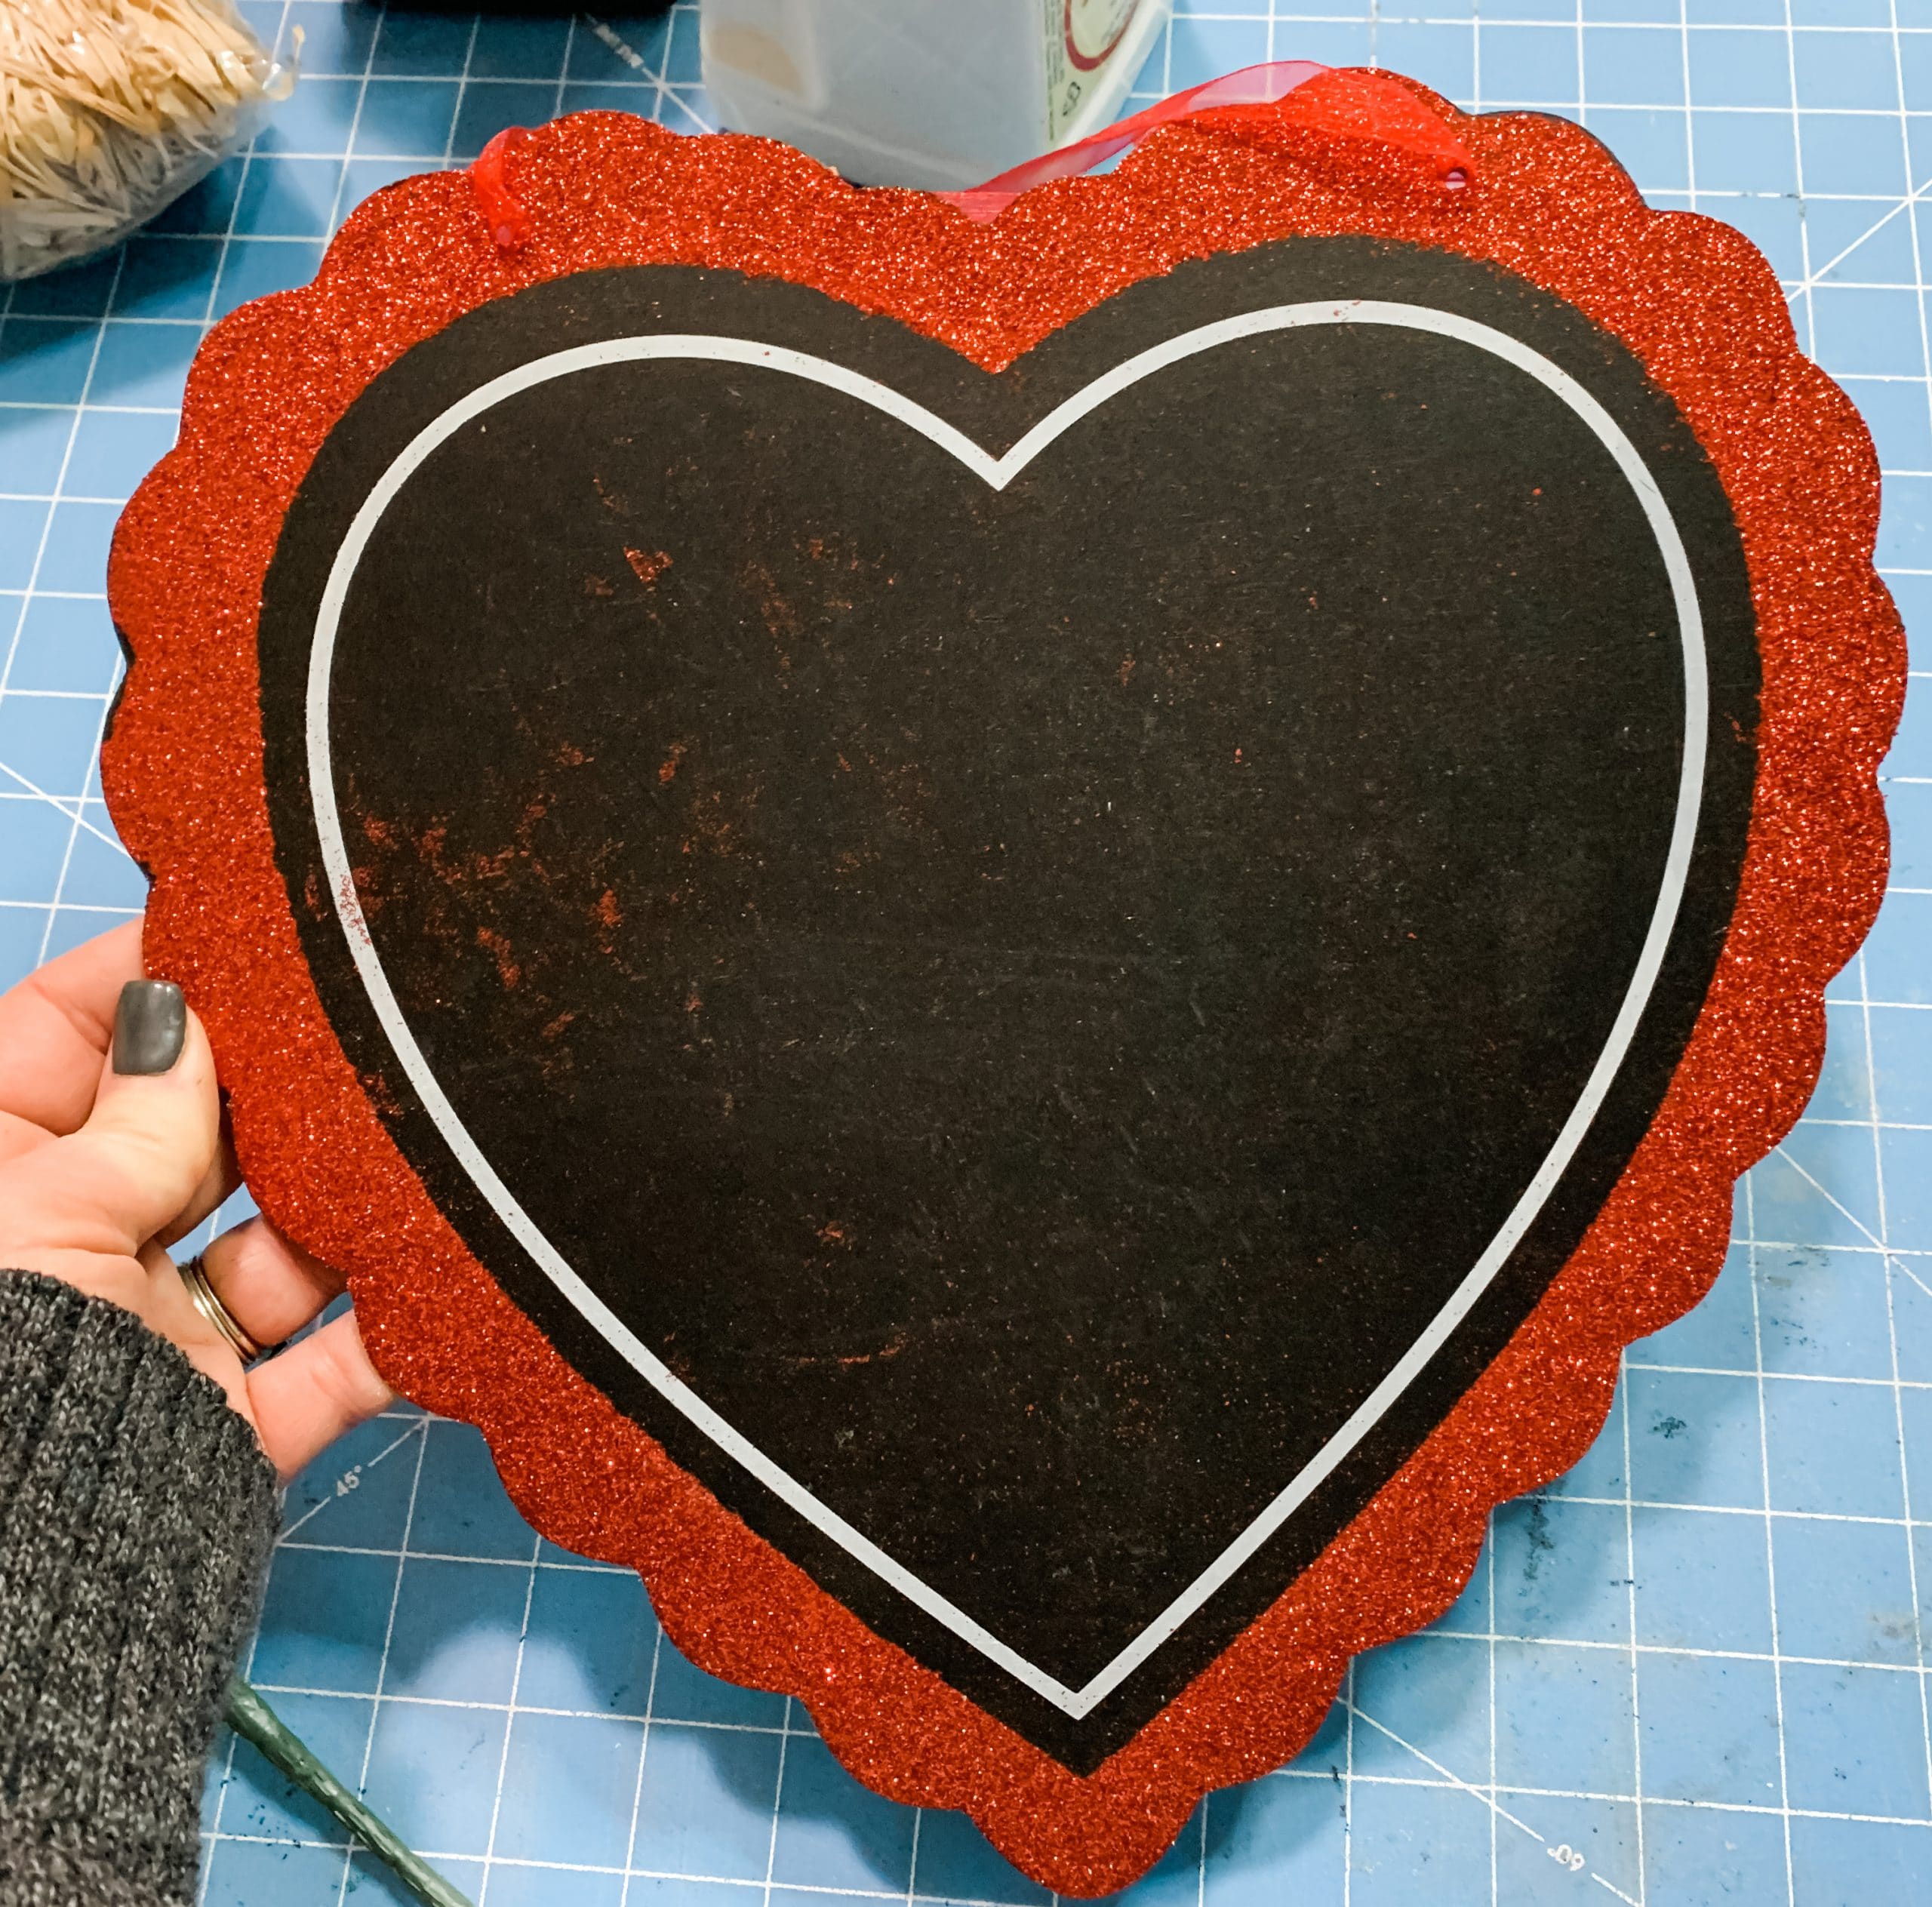
Either way, get an even coat of black paint across the entire surface of the heart. Allow the black paint to dry before moving to the next step. I like to use my heat gun to speed up the drying process.
If you don’t have a heat gun, you can also use a hairdryer on the low cool setting!
Next, paint over the black painted heart with Dixie Belle Fluff white paint. Again, get even coverage over the surface of the heart. We are painting the heart before we decoupage because otherwise, the color of the heart would peek through the thin tissue paper.
That would just ruin this project!
Again, allow the white paint to dry before moving on. Once the paint is completely dry, grab your tissue paper and Mod Podge because it is time to decoupage!
How to decoupage
Get a single piece of tissue paper that you want to decoupage. I used a piece of Dollar Tree’s pink buffalo check tissue paper. Next, use a chippy paintbrush to apply an even coat of Mod Podge across the entire surface of the heart.
You want very full coverage to ensure the tissue paper properly adheres to the surface of the Dollar Tree heart cutout.
Once the entire heart is covered in Mod Podge, carefully place the tissue paper directly onto the Mod Podged heart. Try your best not to allow any wrinkles or creases to form when you are placing the tissue paper.
If you find any wrinkles or creases in the tissue paper, you can place a piece of plastic saran wrap over the decoupaged tissue paper and use either your hands or a rolling pin to smooth out the imperfections.
The saran wrap will protect the tissue paper and prevent it from tearing, but it will also keep the tissue paper from sticking to your fingers and pulling up from the surface.
Allow the decoupaged tissue paper to dry completely before moving on. You don’t want to keep going with wet Mod Podge!
Now, remove the excess tissue paper from around the heart. I used an Exacto knife because the edge of this heart is patterned and I didn’t want to accidentally pull the tissue paper off the surface by just tearing the excess off.
Once you’ve removed the extra tissue paper, you can go back with a piece of sandpaper or a sanding sponge, and lightly sand the edges of the heart. This will help get the tissue paper right to the edge of the surface of the heart.
This DIY magnetic door hanger was going on my front door, so I applied a second coat of Mod Podge to the front of the tissue paper. This was purely a protective layer to make it more durable to be outside.
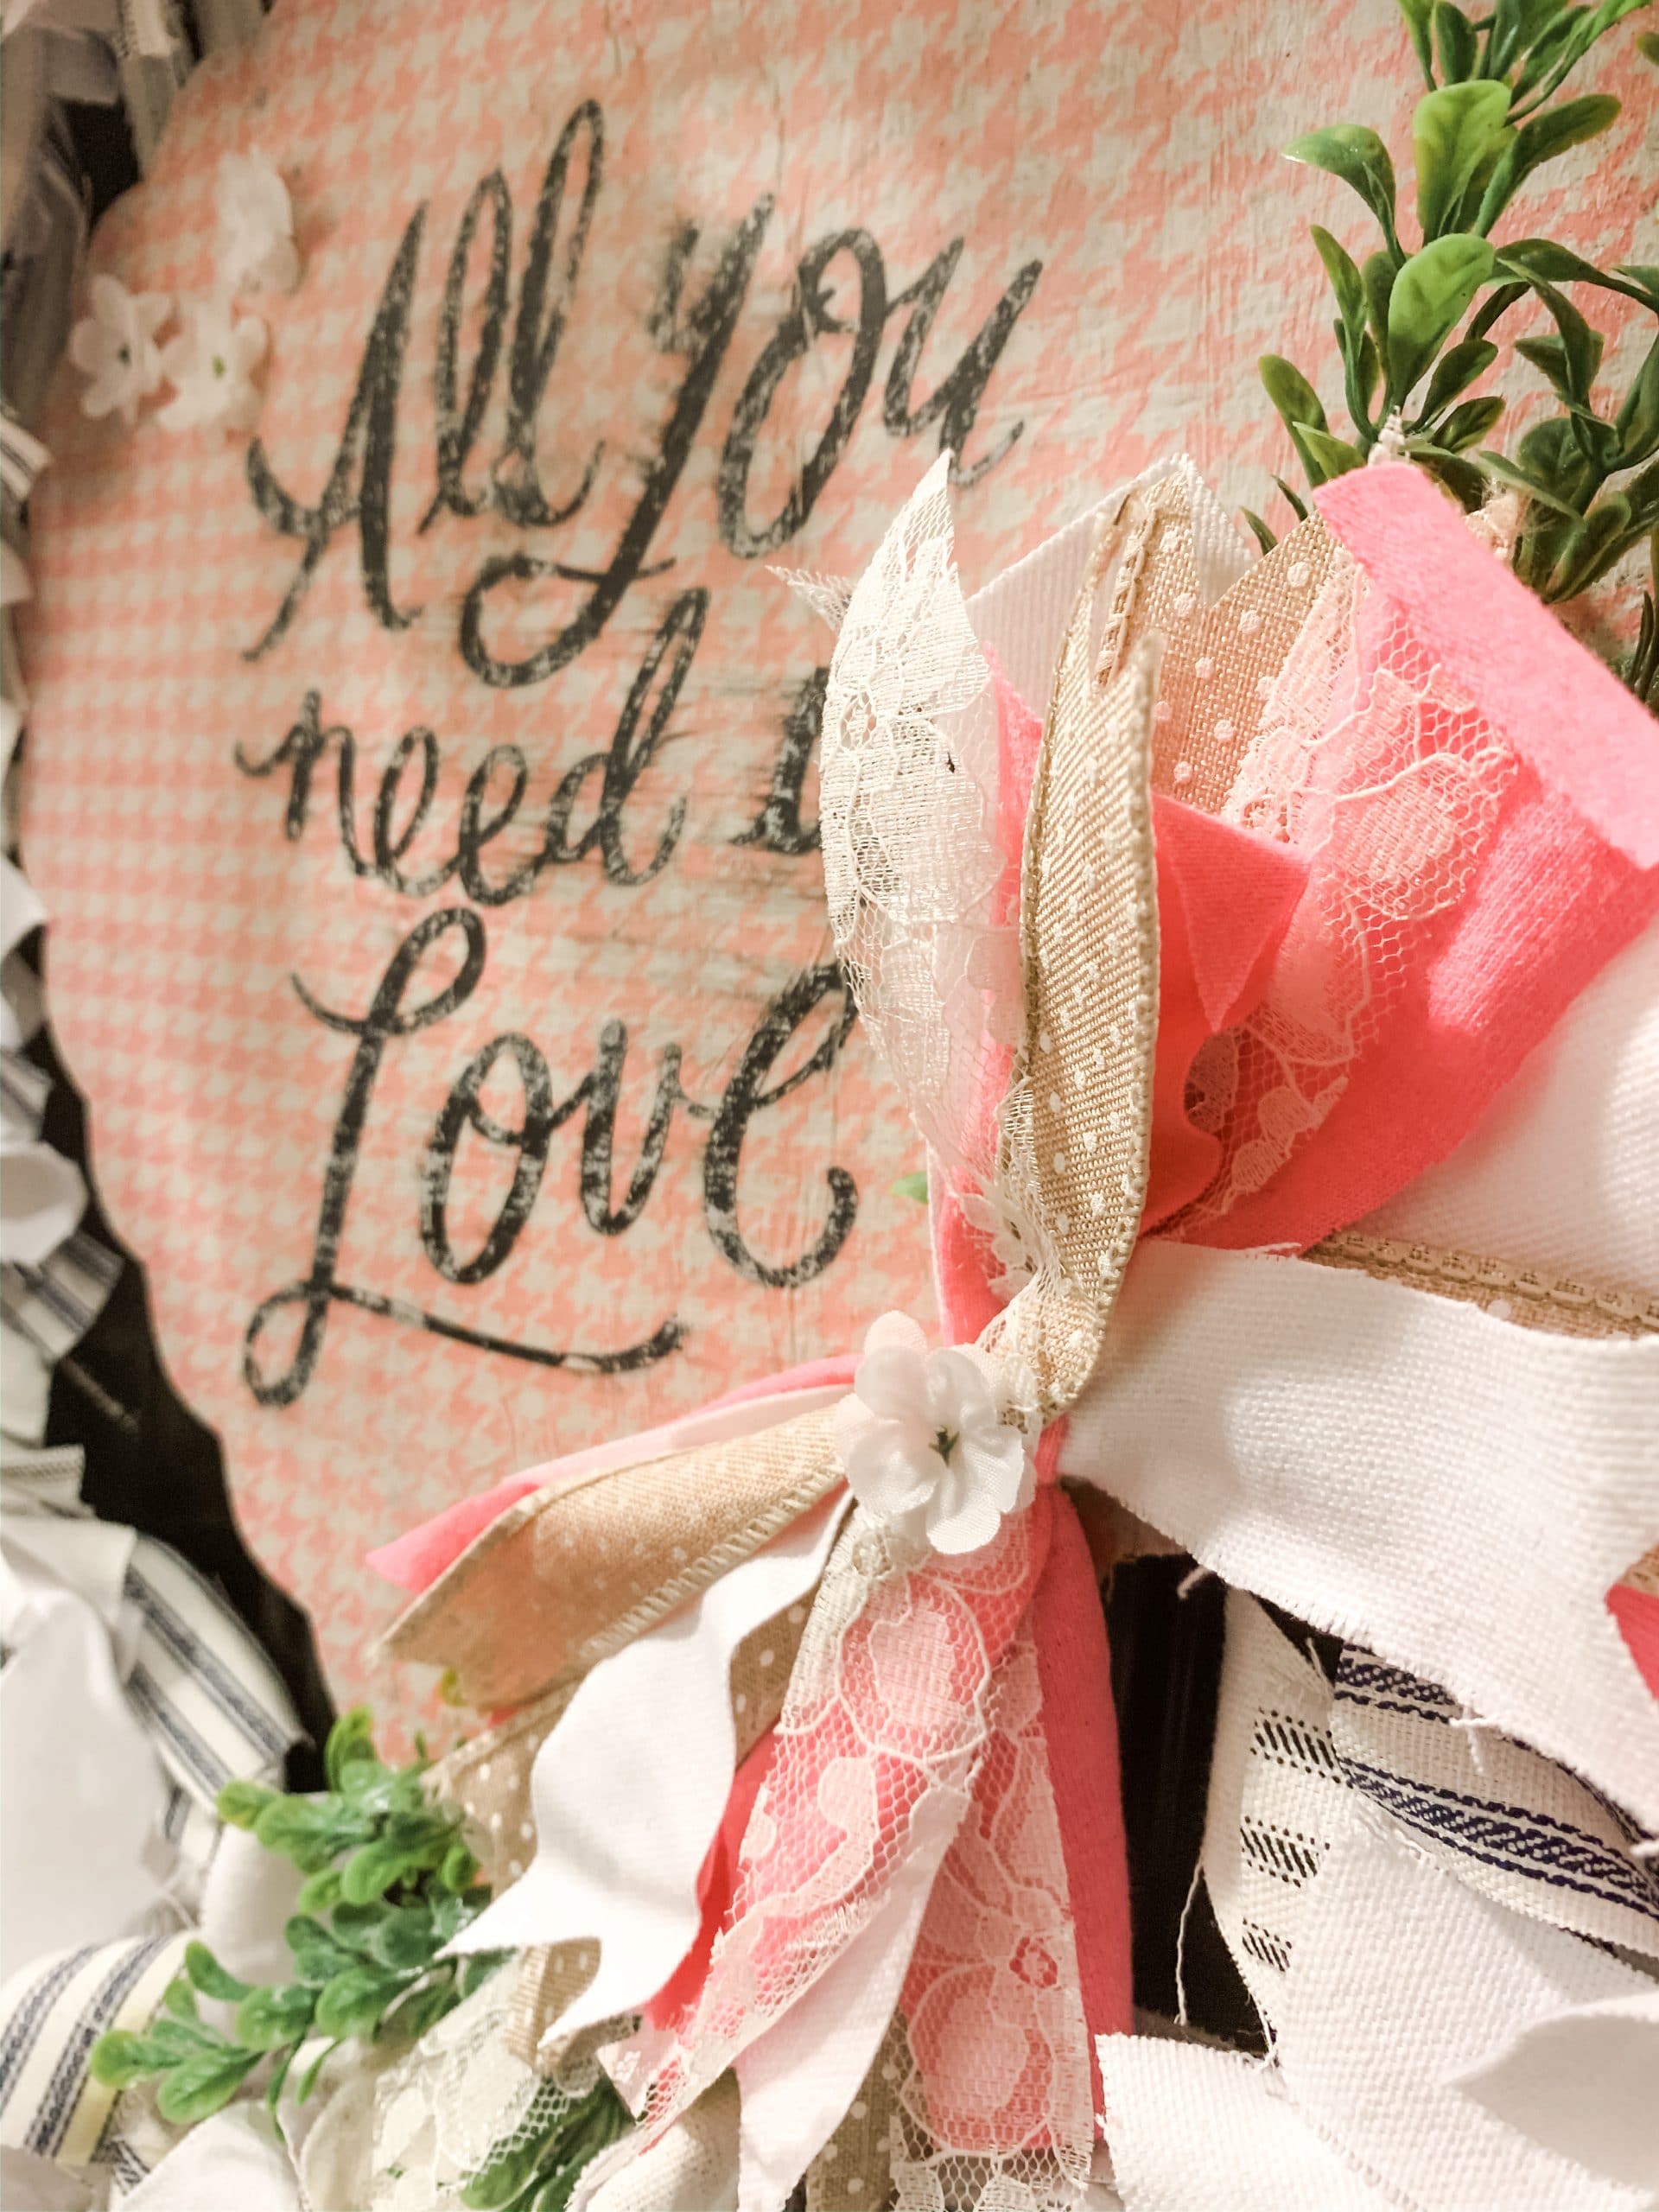
Pick your stencil
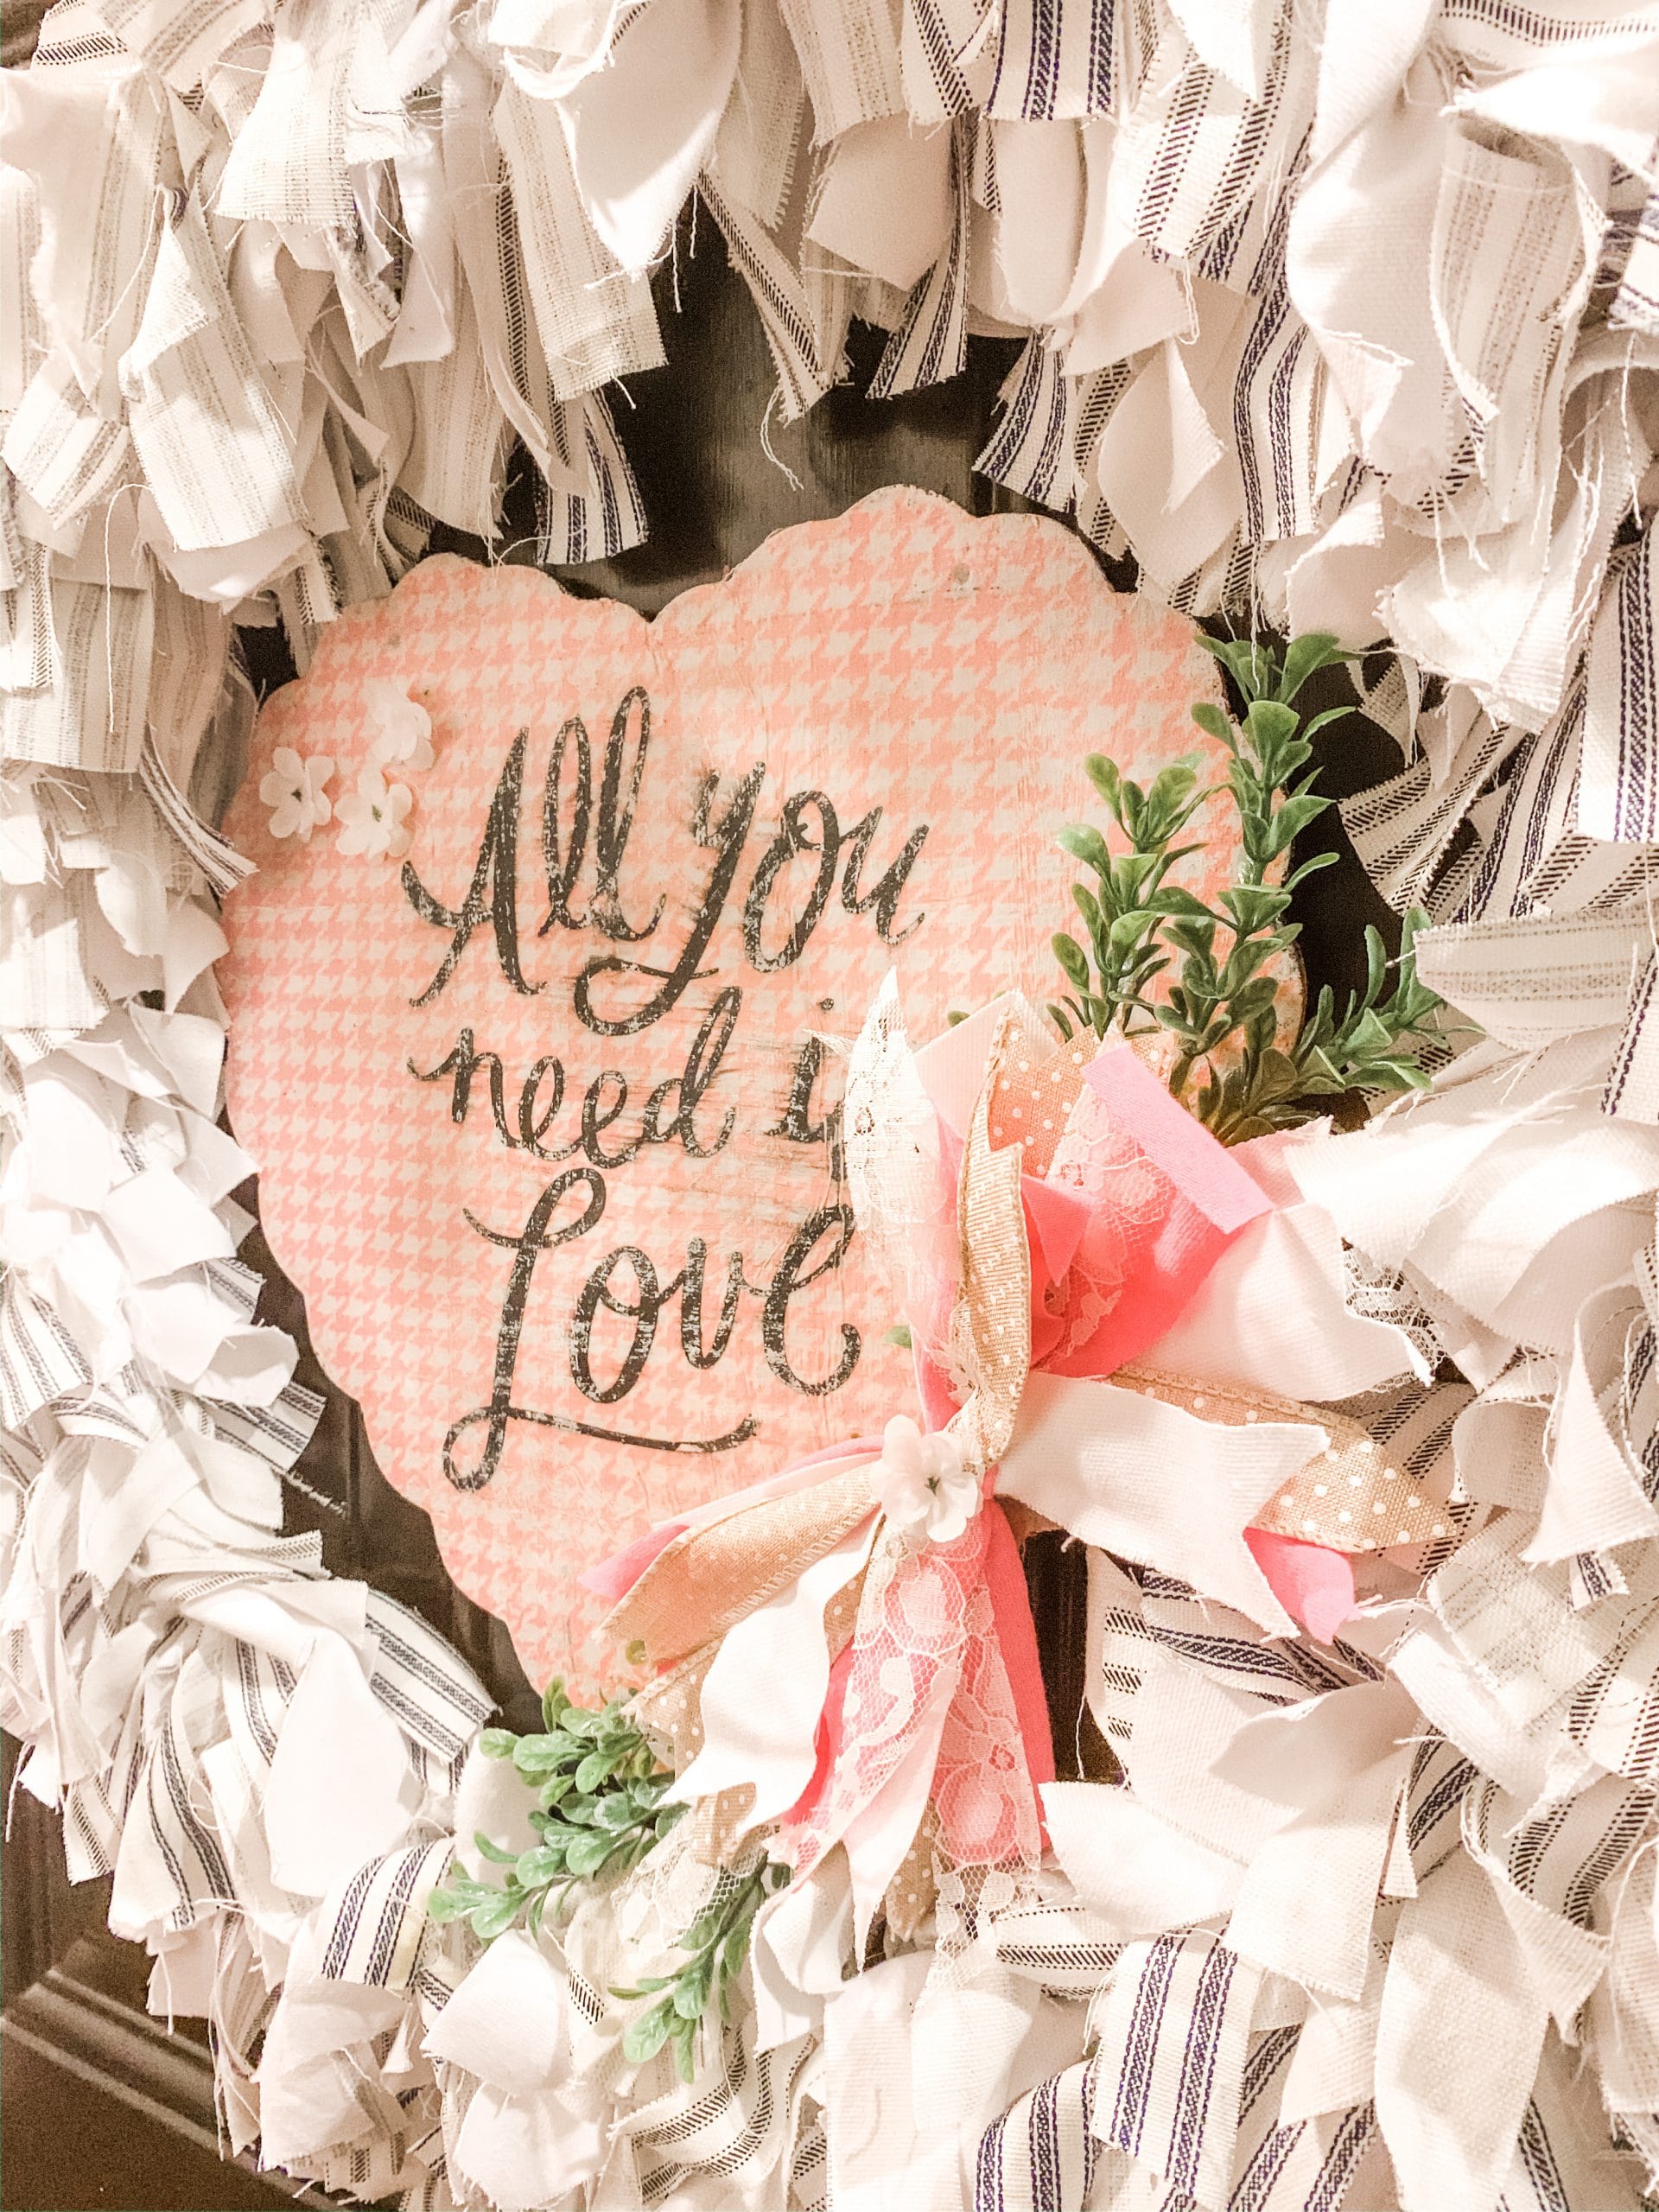
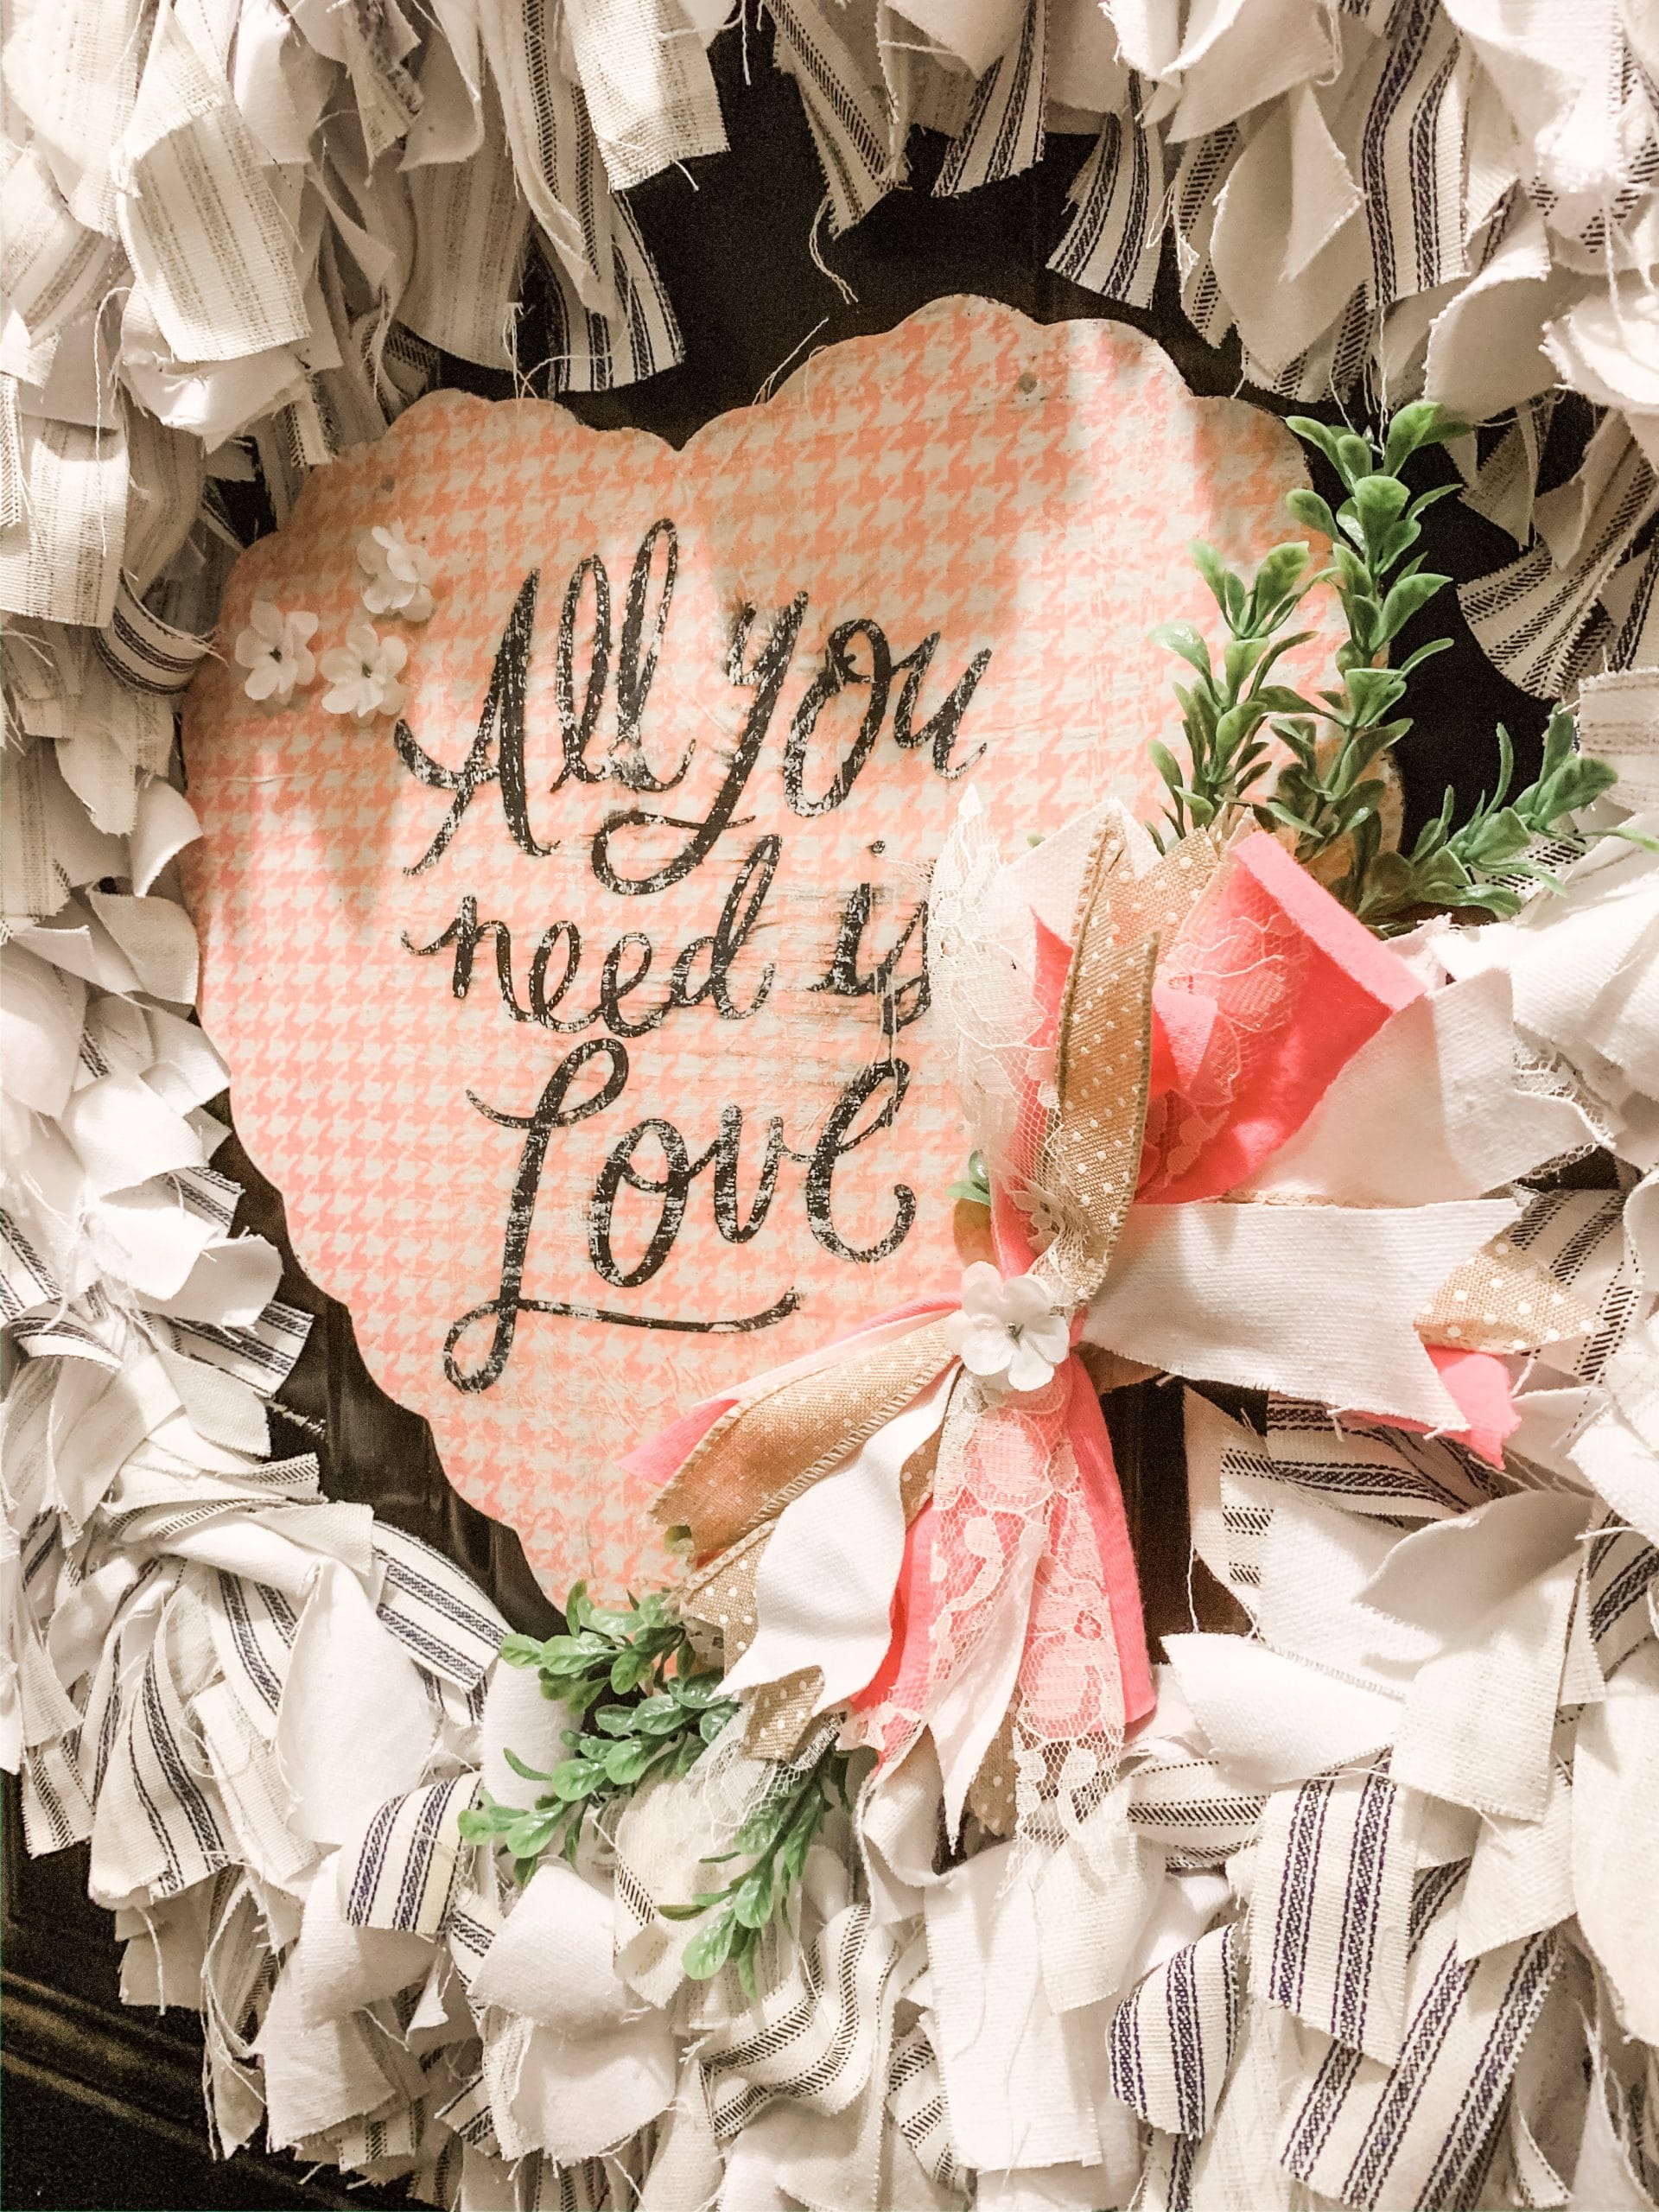
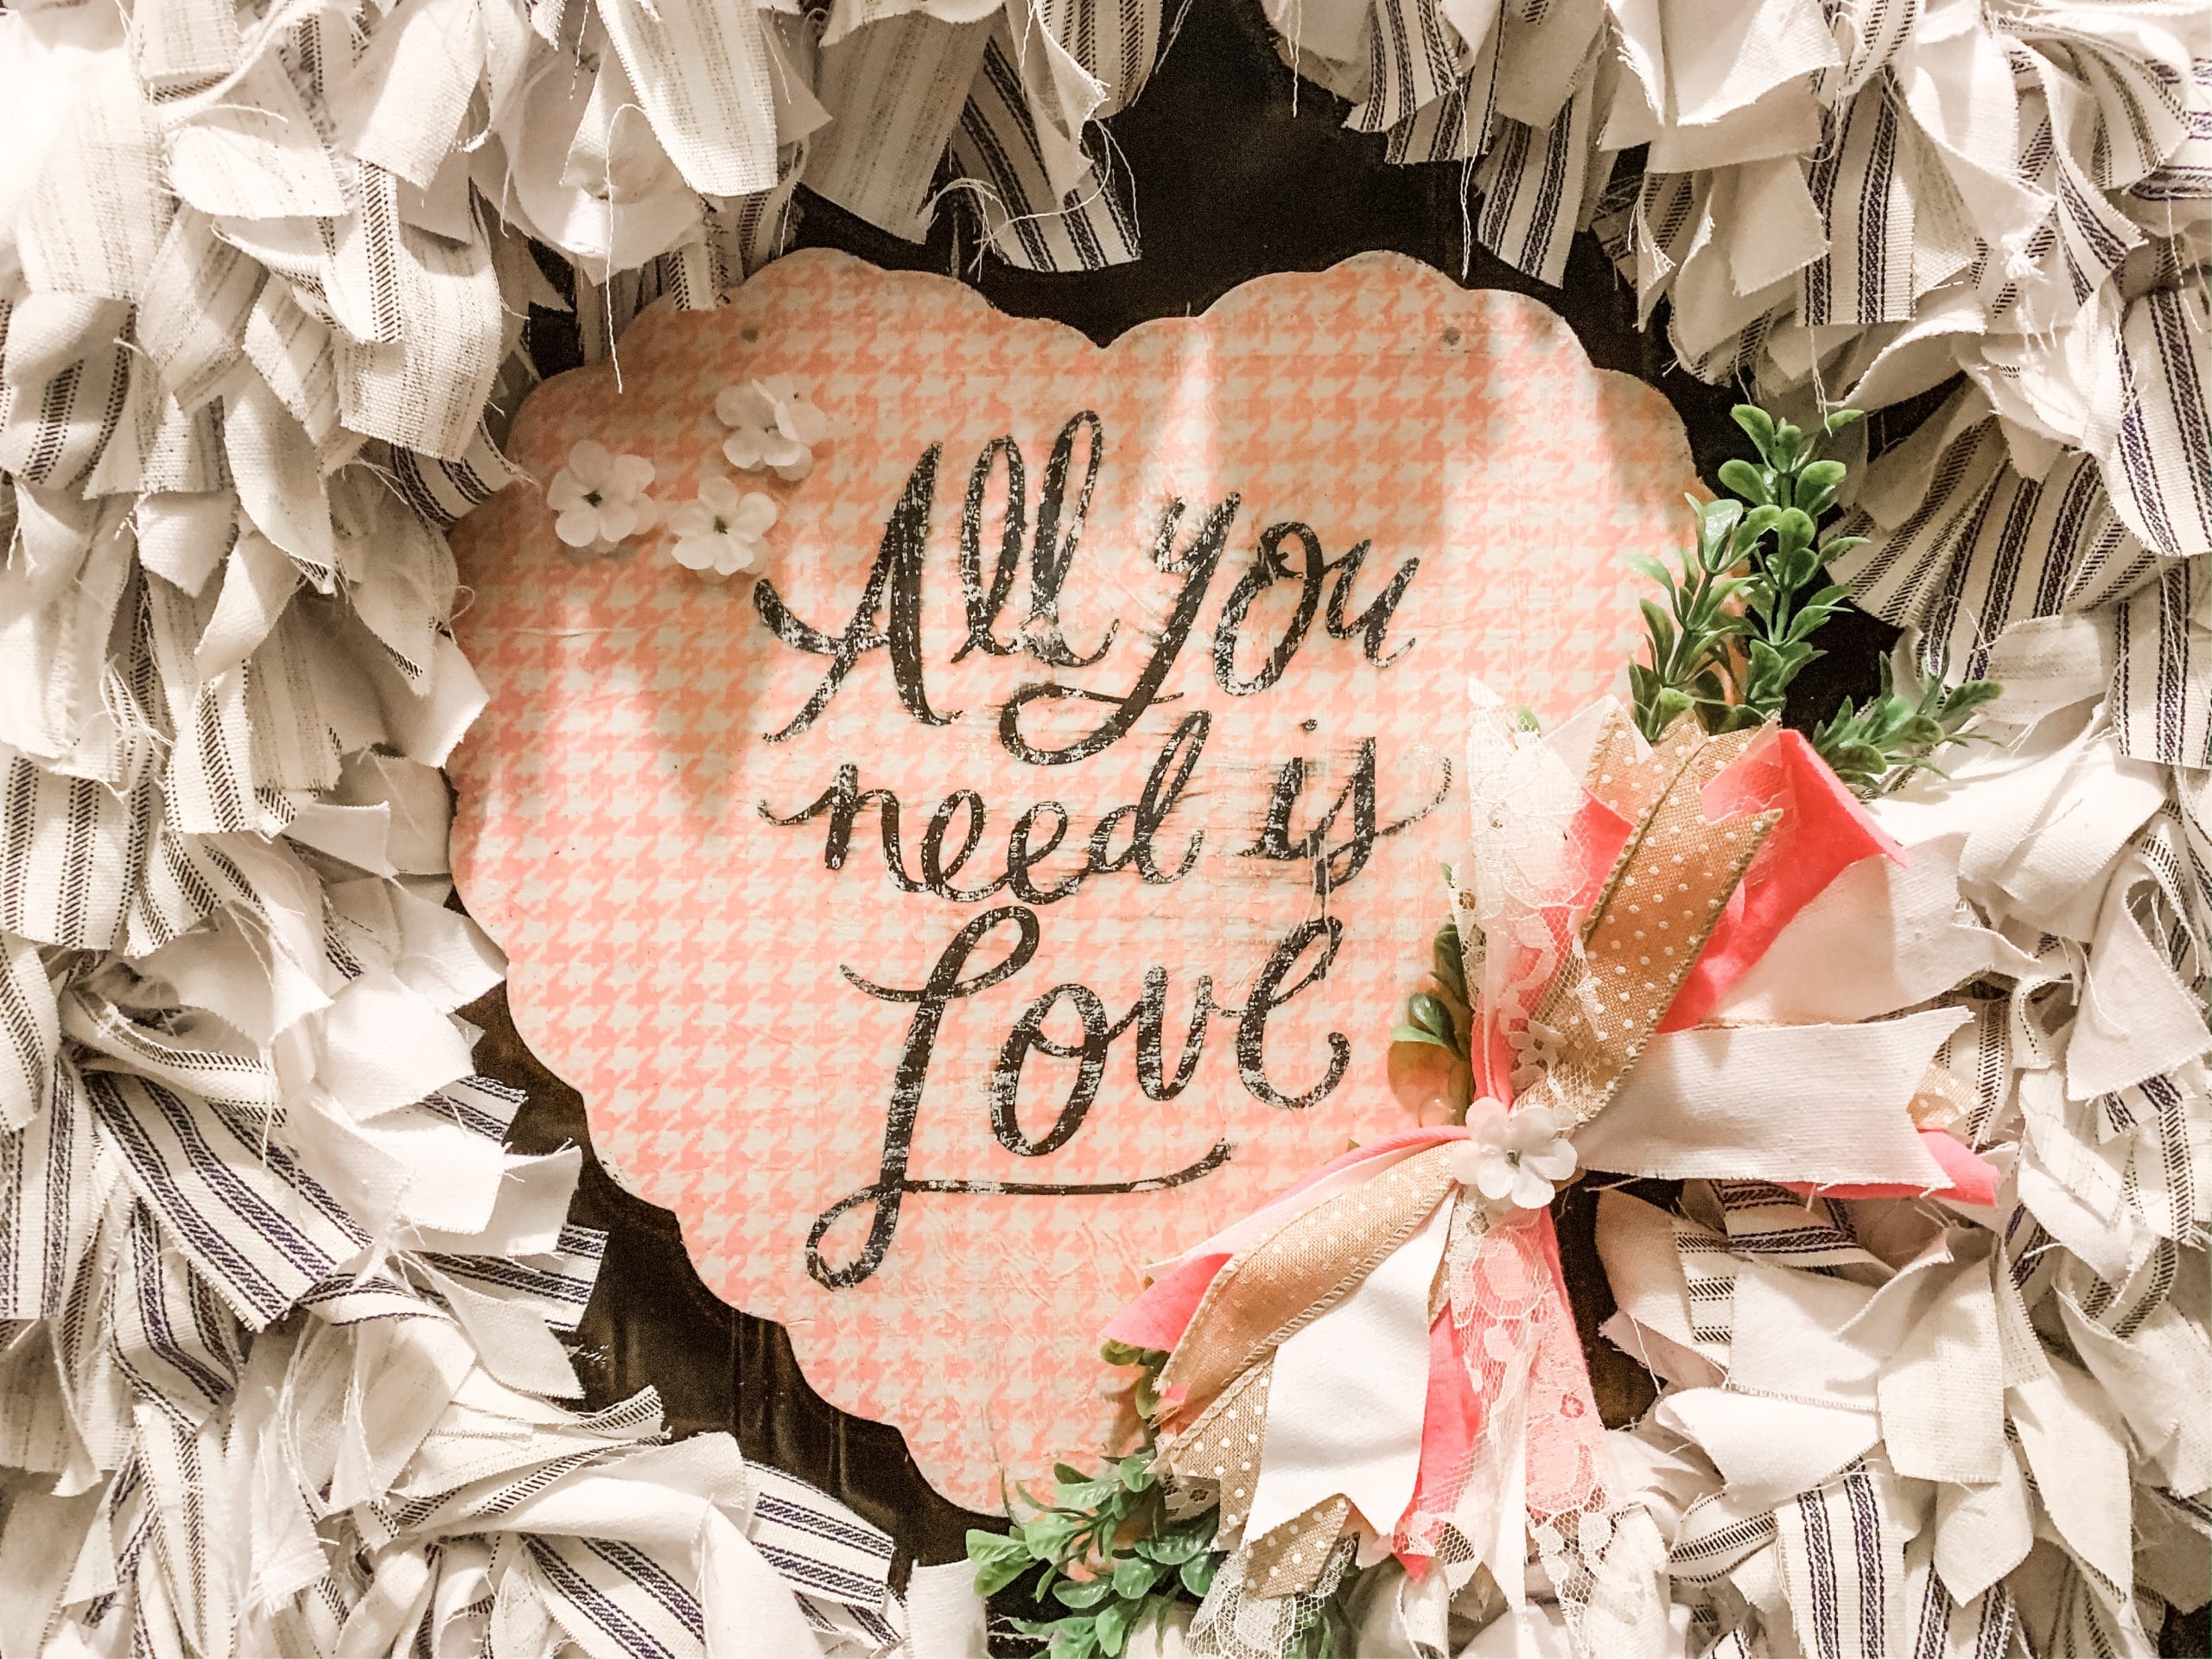
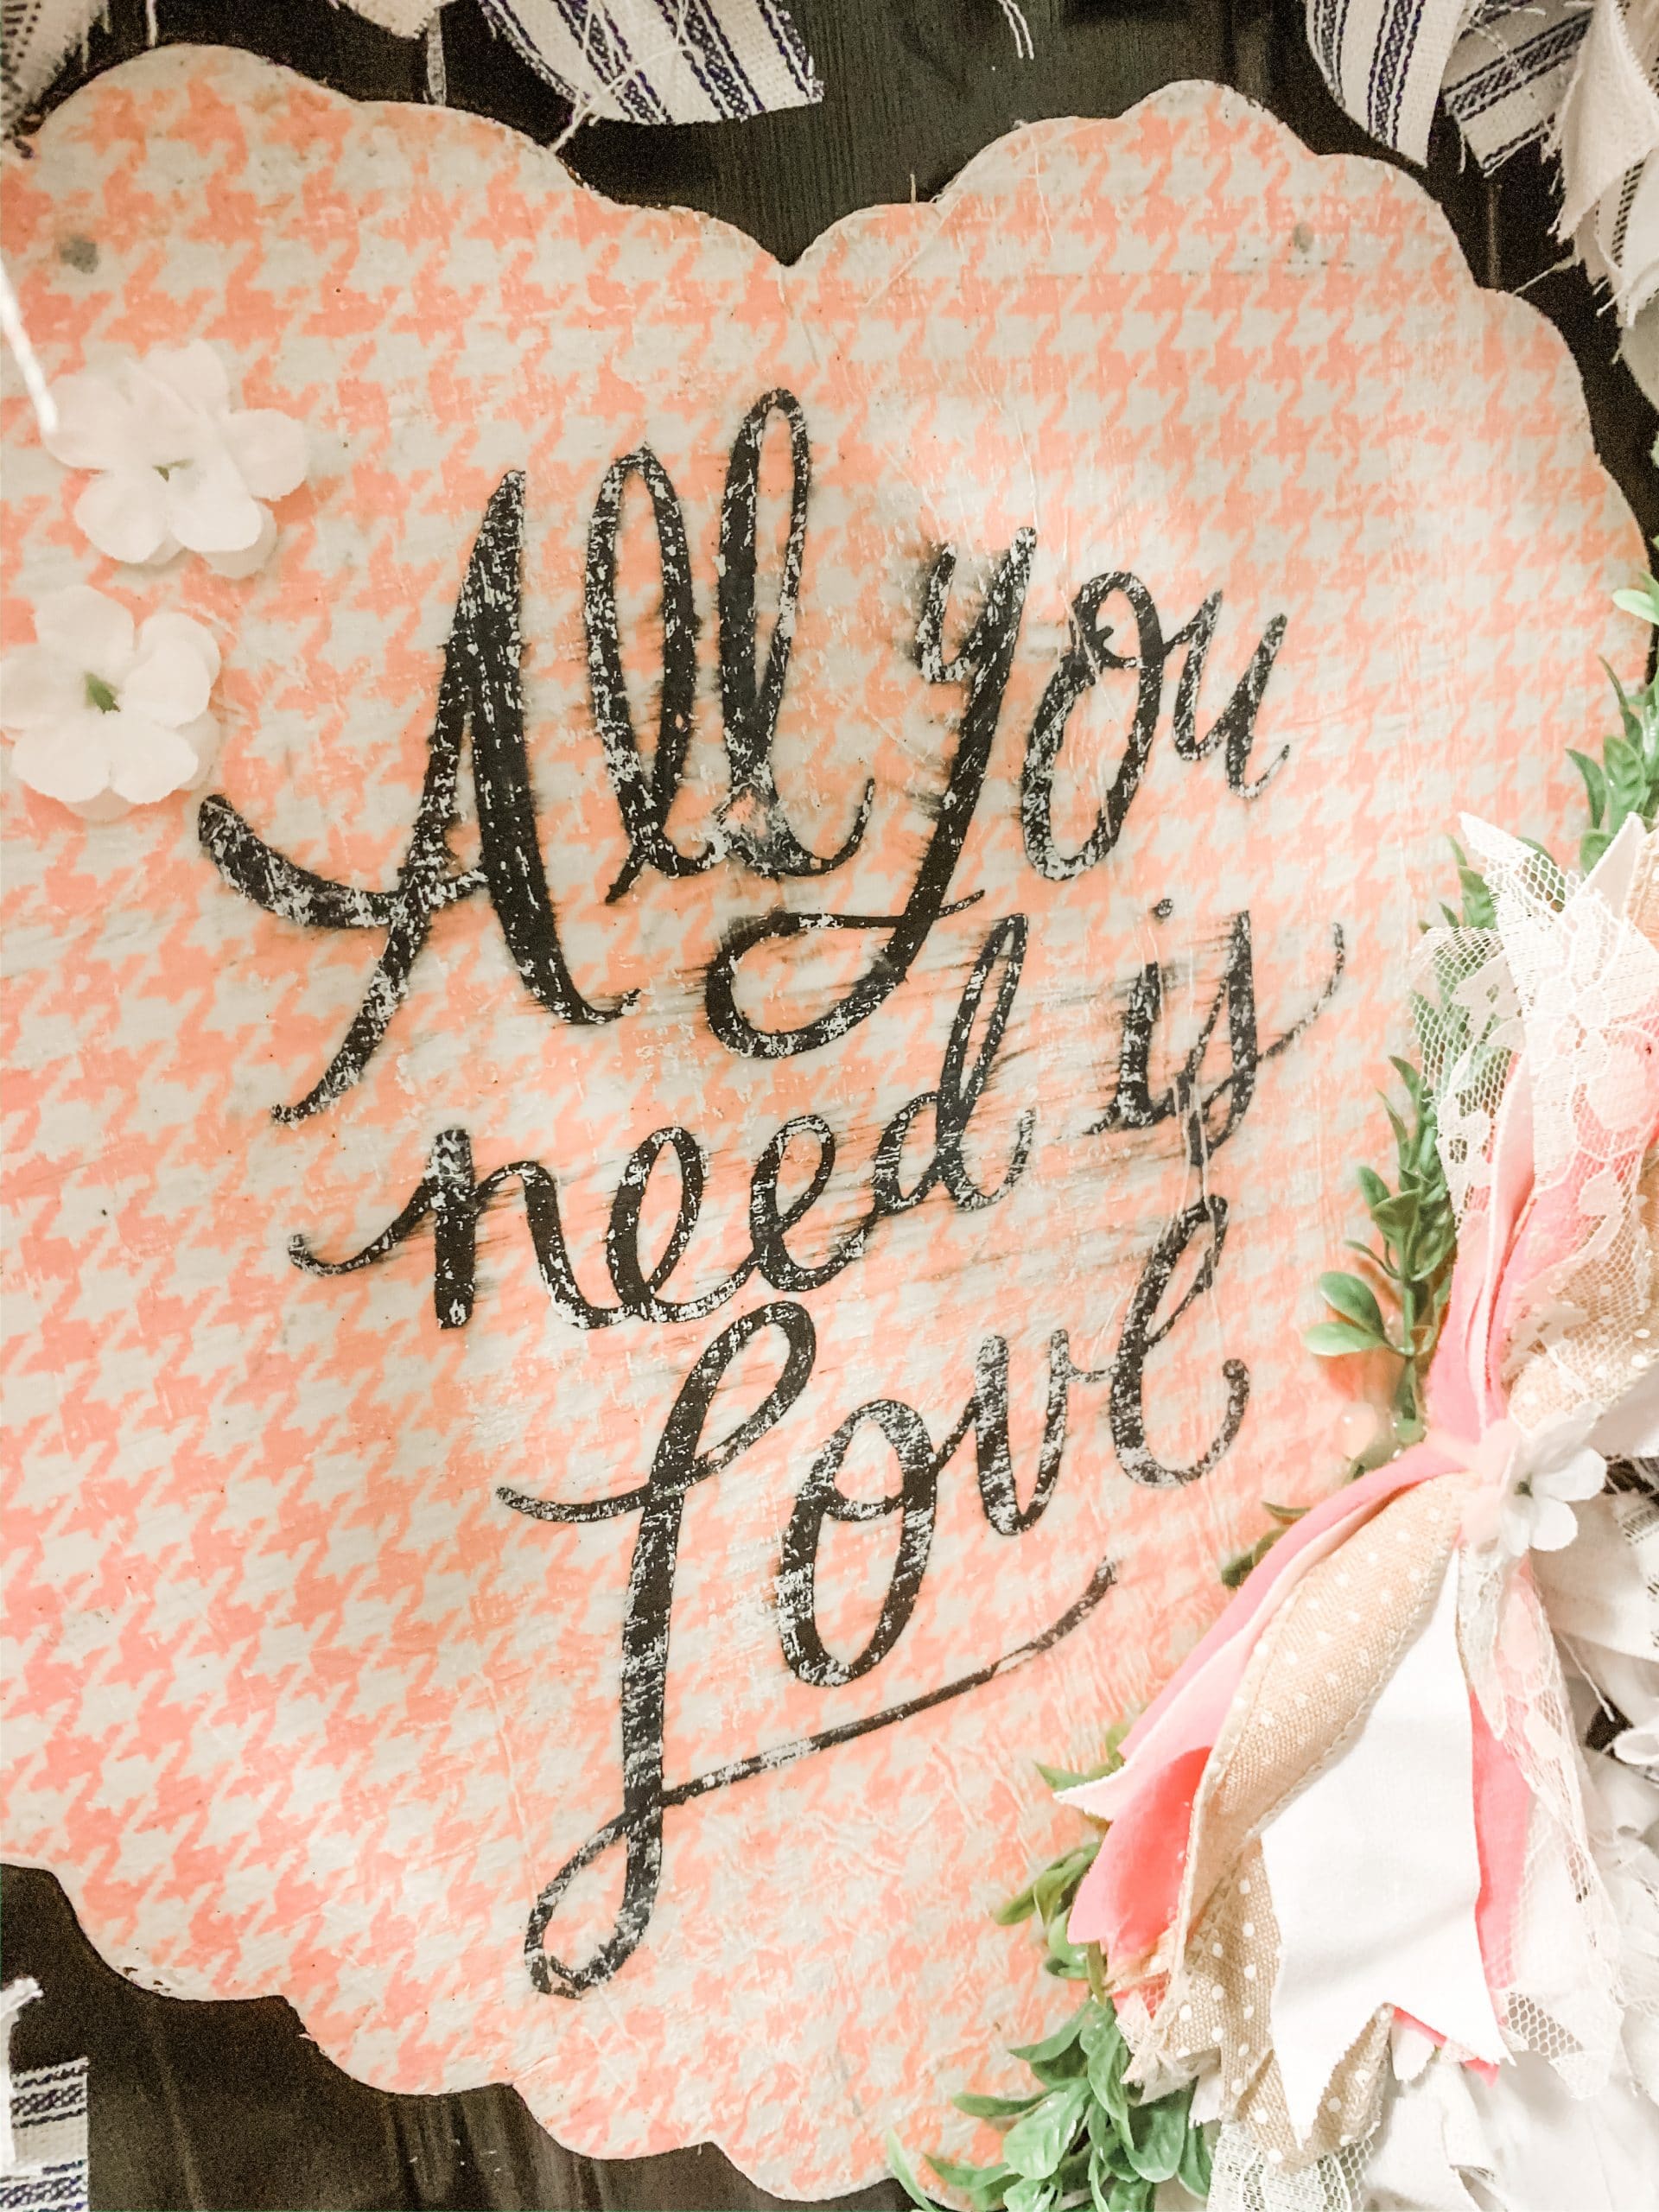
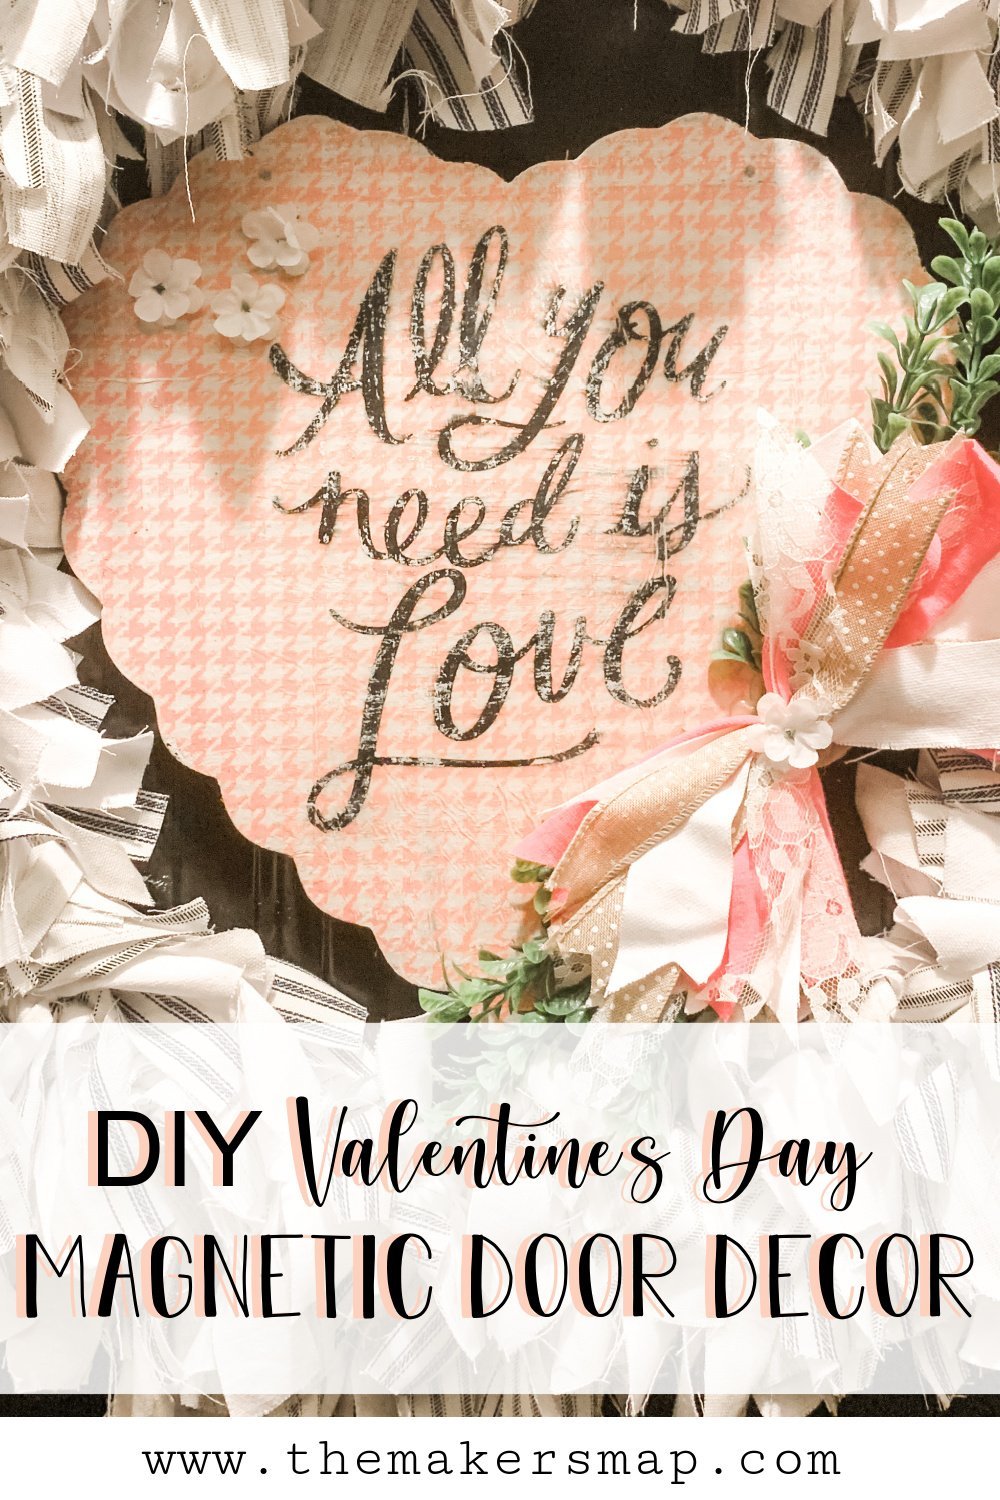
Now that you’ve decoupaged the heart, it is time to pick your stencil! I chose a stencil that said “All you need is love” from a company I used to use, but you can choose any stencil that you want! I love the selection of stencils that A Maker’s Studio has to offer.
My stencil was adhesive, so I removed the backing and carefully placed it onto the decoupaged heart. Try and get the stencil as centered as possible so you aren’t having to pull it up and reposition it over and over again.
Once the stencil is in place, it is time to add the chalk paste. Again, A Maker’s Studio has a great selection of paints and chalk paste!
Use a scraper to spread the black chalk paste across the stencil and get good coverage. Be sure not to pull the chalk paste off the outer edge of the stencil!

While the chalk paste is still wet, go ahead and slowly pull the stencil off and clean it. Now, dry the painted stencil. I used my heat gun again for this. Be sure that the stencil is completely dry, or the next step could cause some serious smudging!
Once the painted stencil was dry, I went over the design with another coat of Mod Podge. This will just help protect the project from the weather and damage that can come from hanging on my front door.
Add your greenery
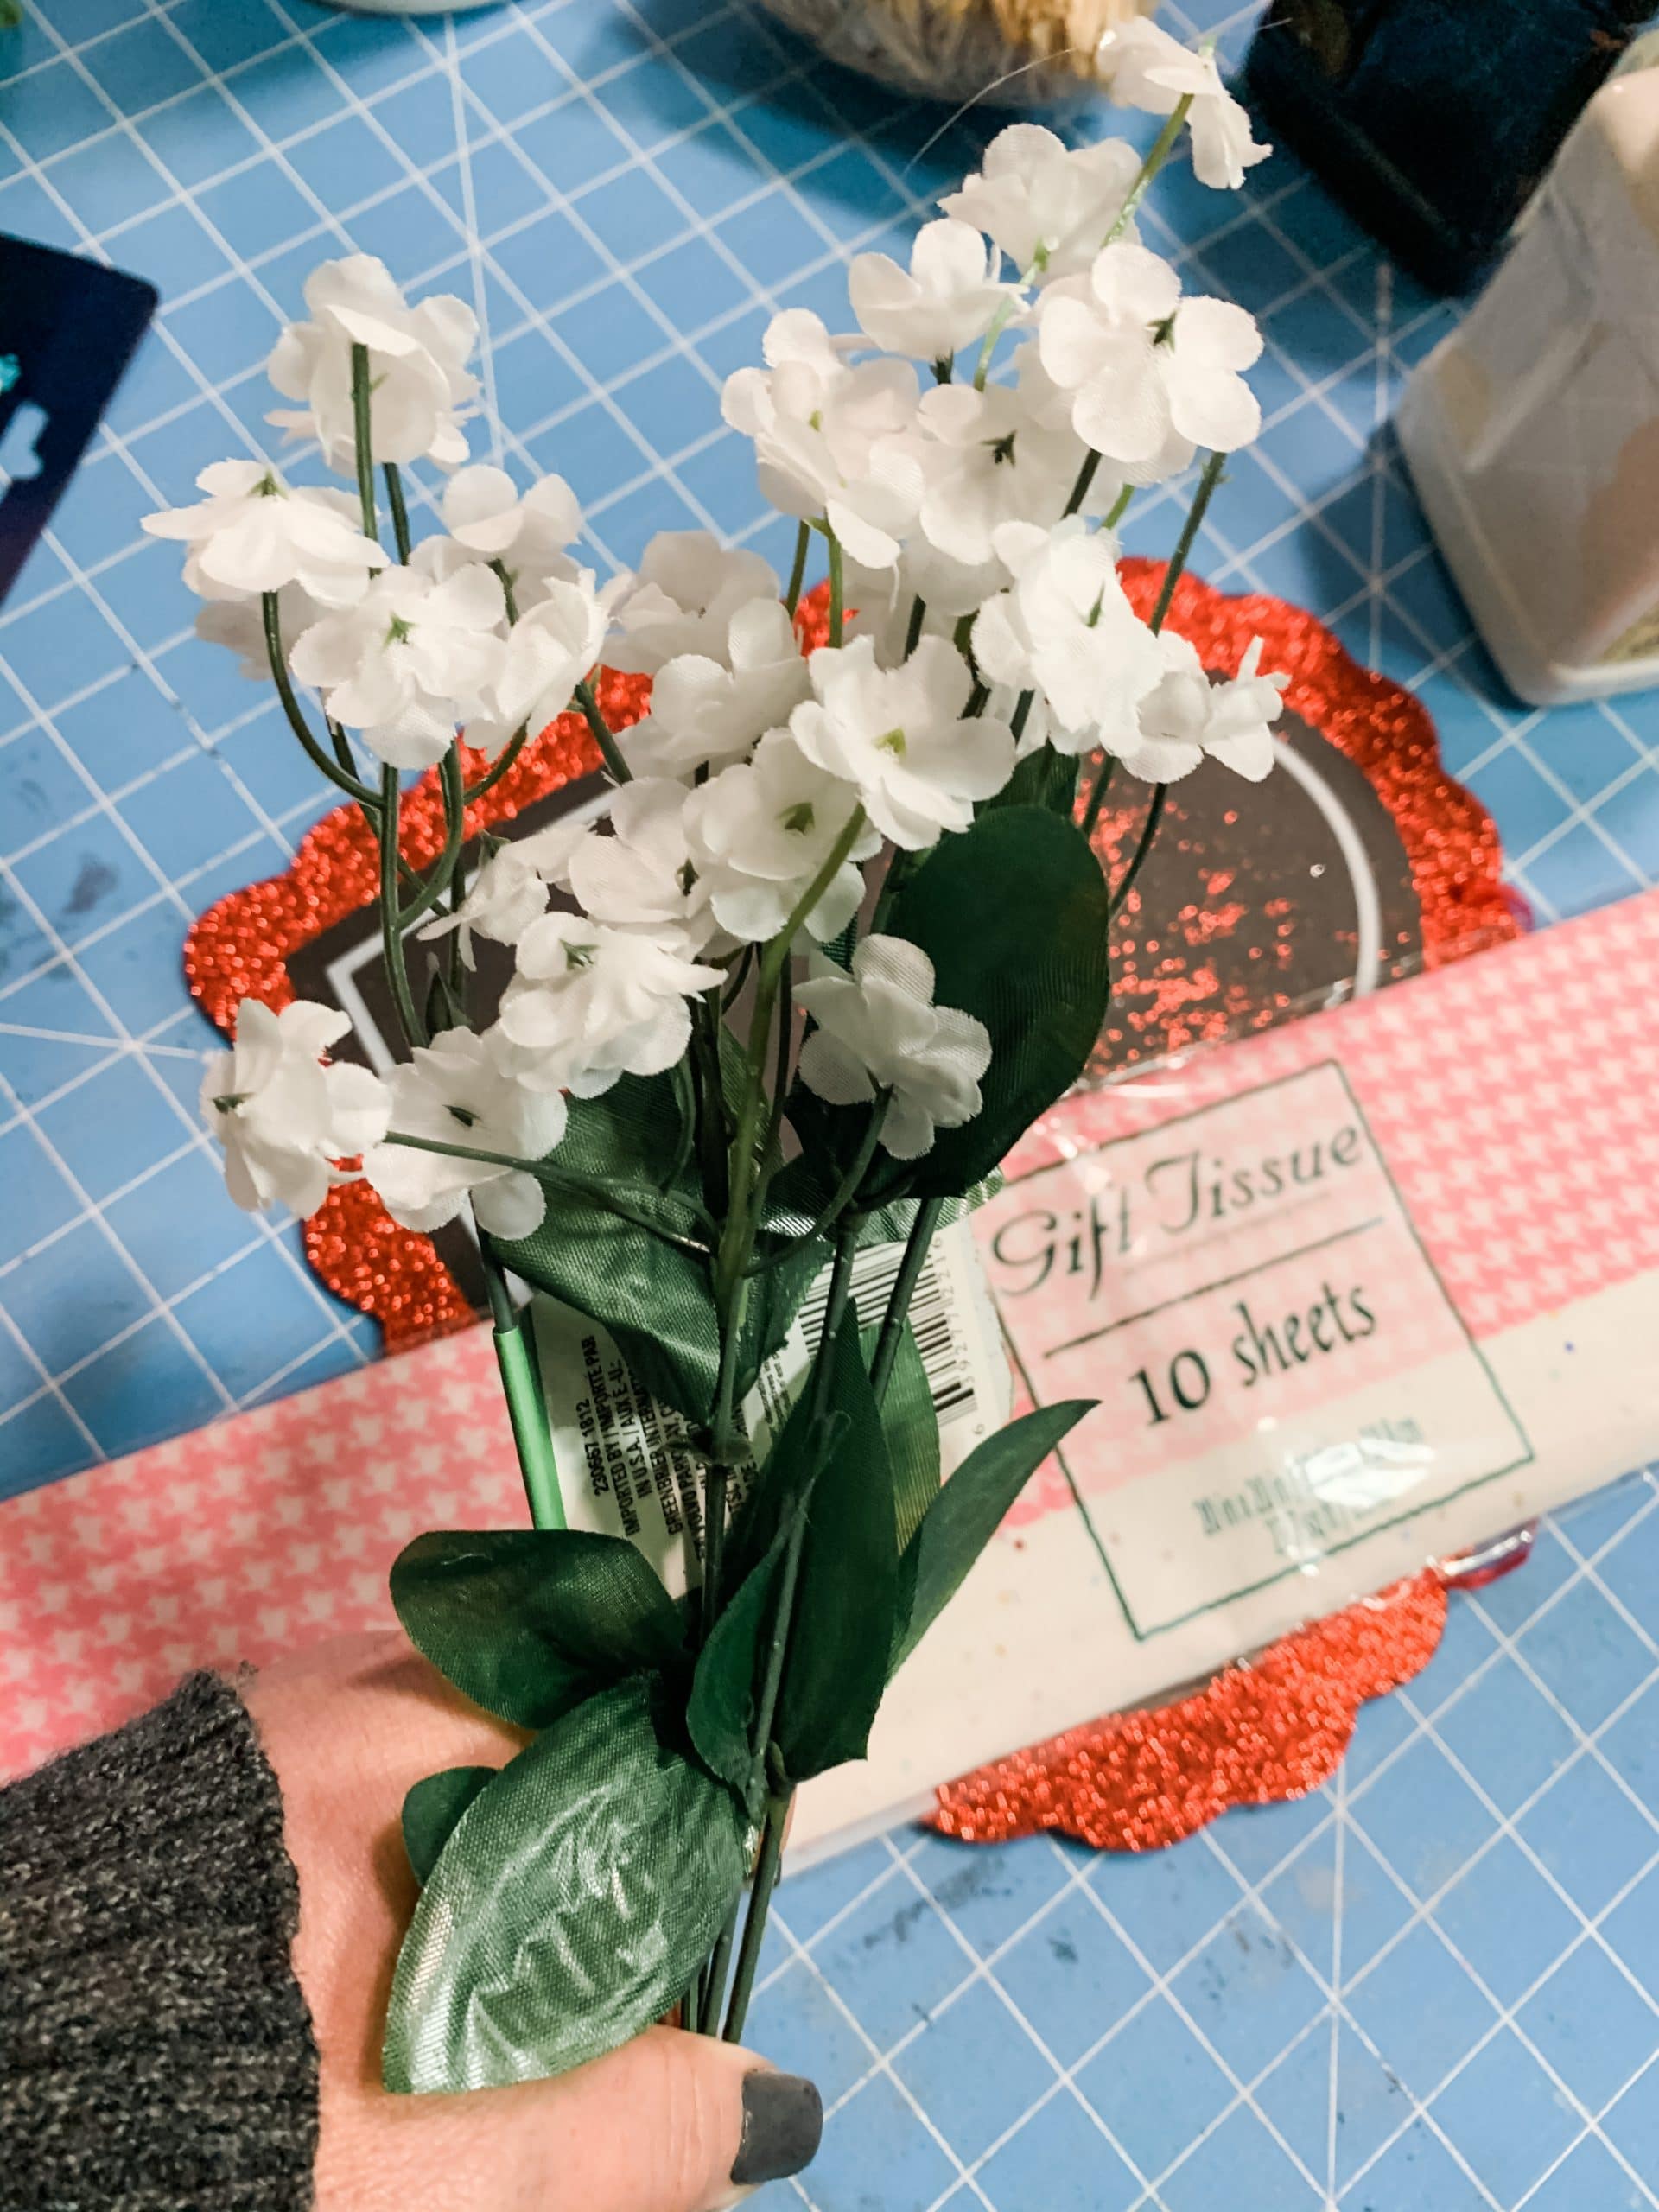
When I started formulating the idea for this Valentine’s Day decor, I wasn’t completely sure which greenery sprays I would use.
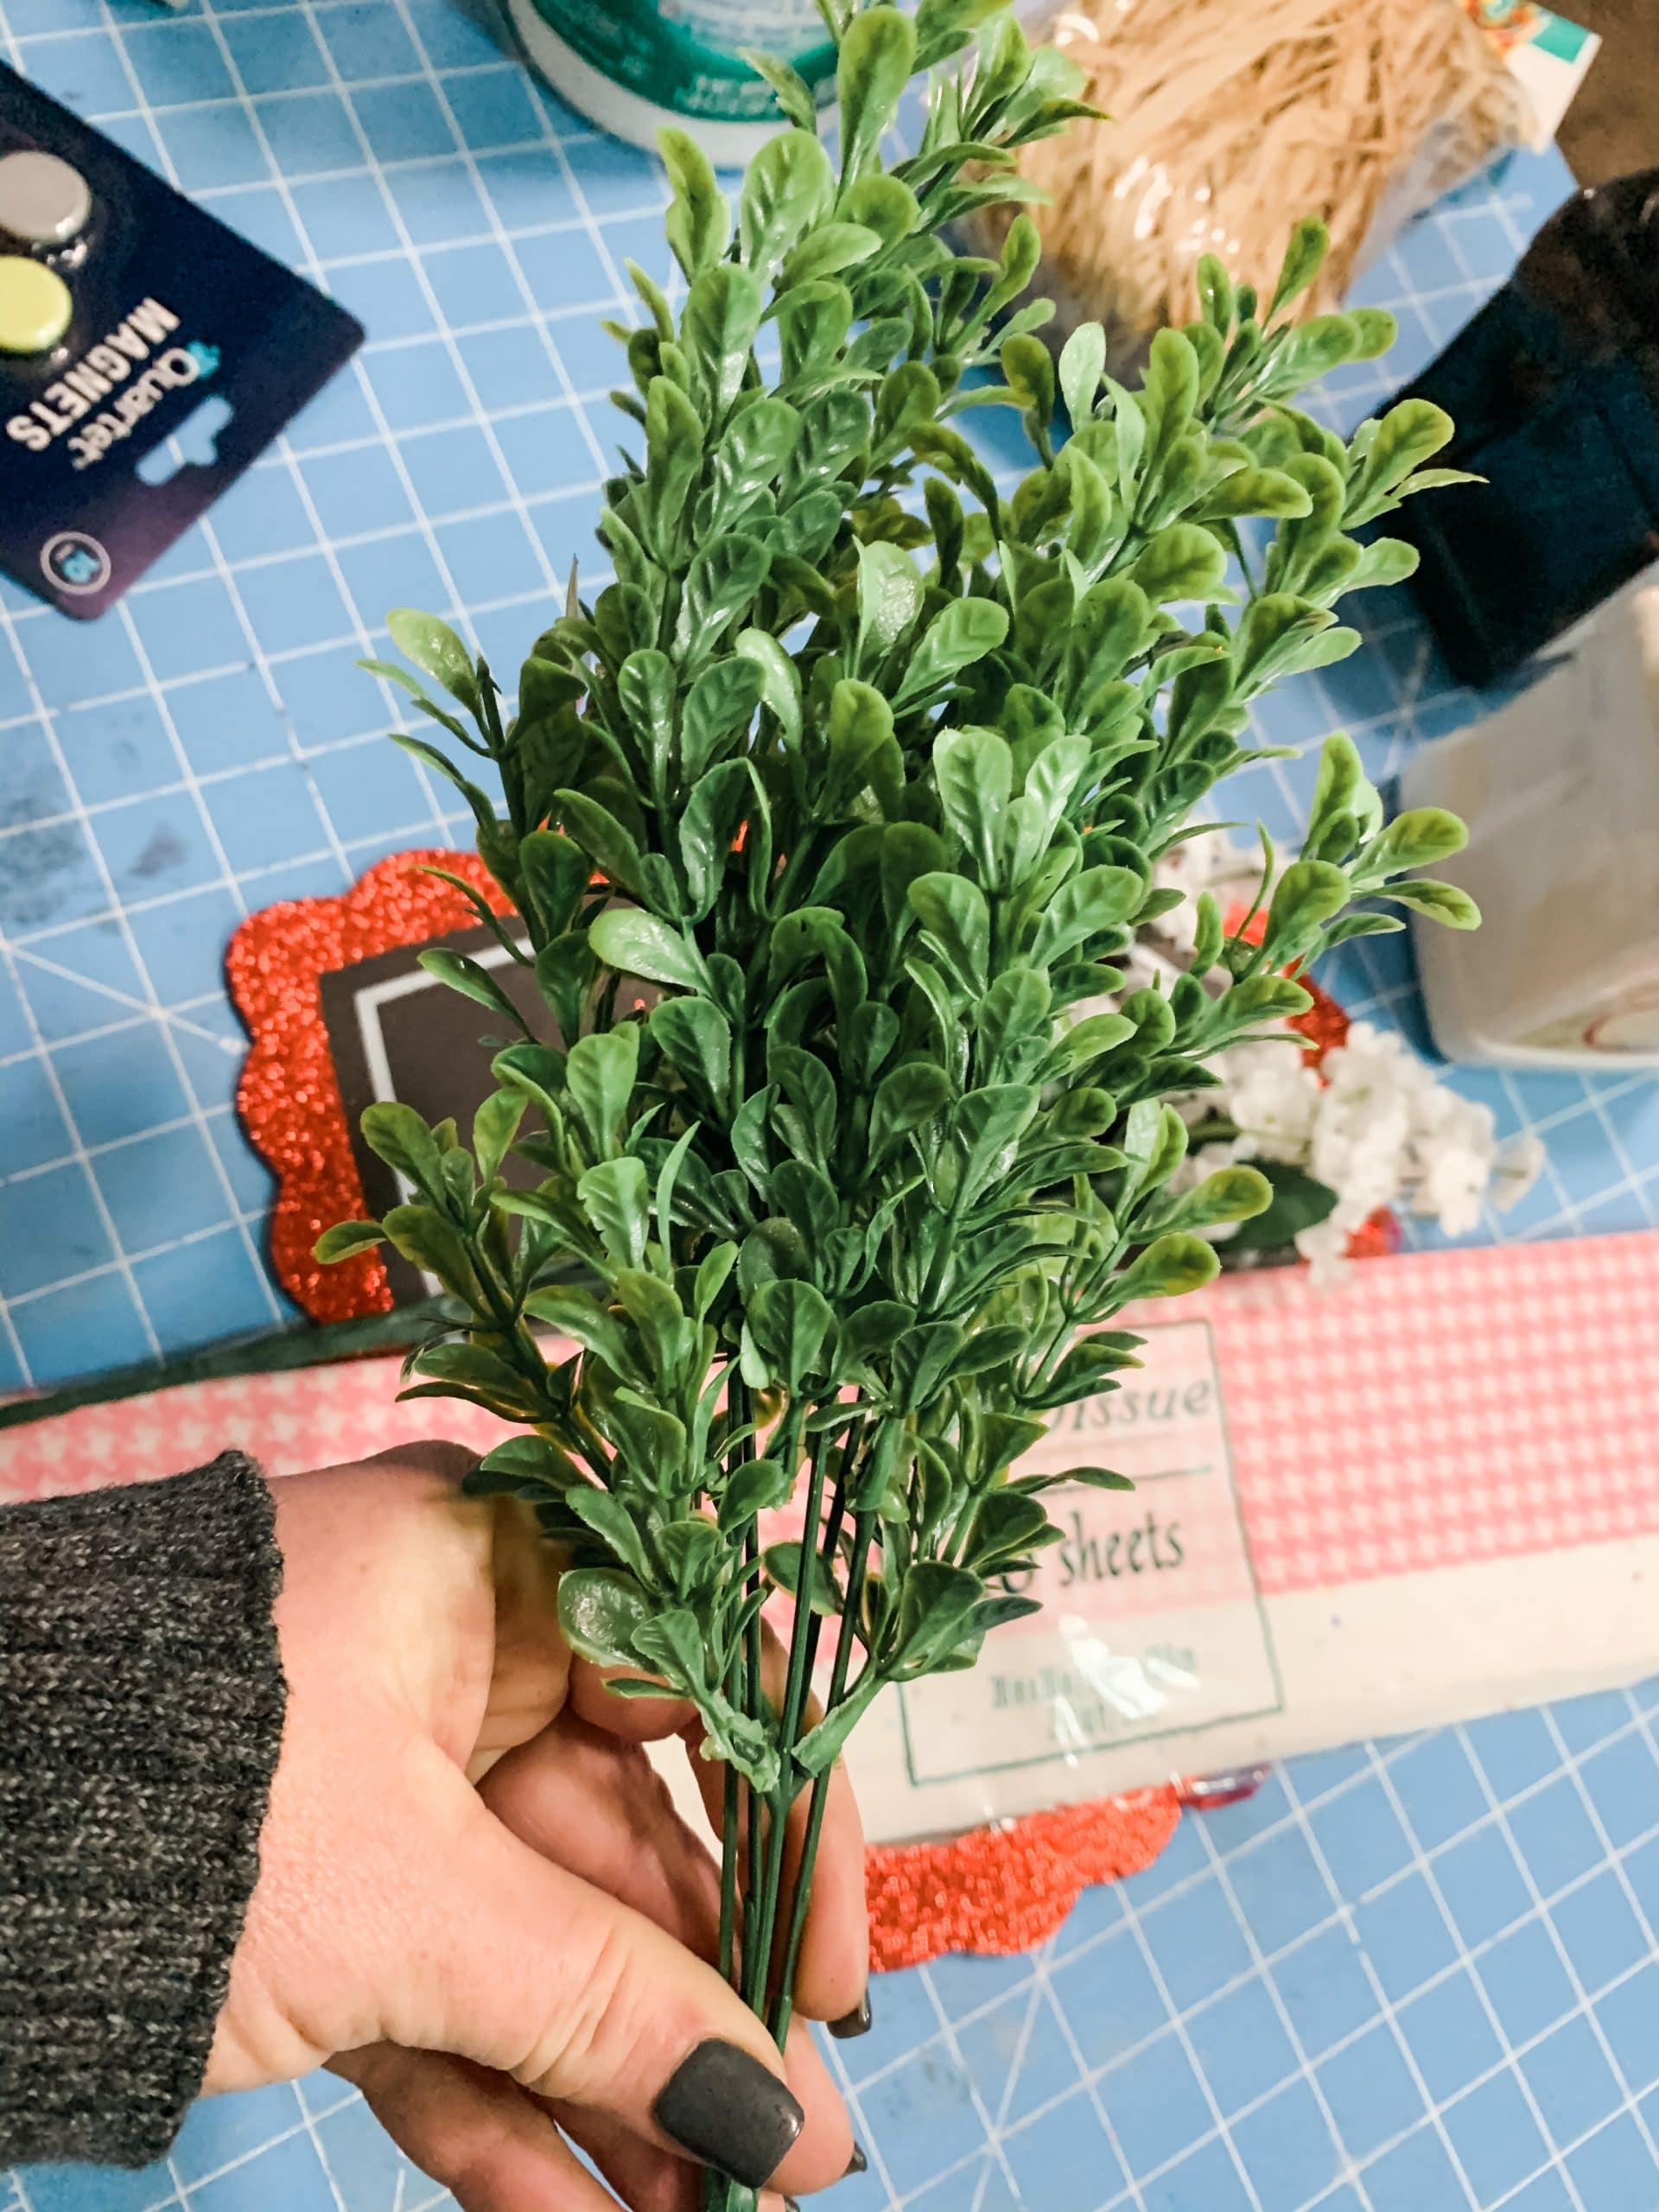
I knew I wanted to use a white flower greenery spray from Dollar Tree, but I had a Boxwood greenery spray and Lamb’s Ear greenery spray.
When it came time to add the greenery to my decor, I decided to use the Walmart Boxwood greenery spray. All that was left to do was decide where to place it!
I used two pieces of the Boxwood greenery spray and hot glued them to the left side of the heart. Don’t worry about the ends of the sprays showing, we will cover them with a hot mess bow!
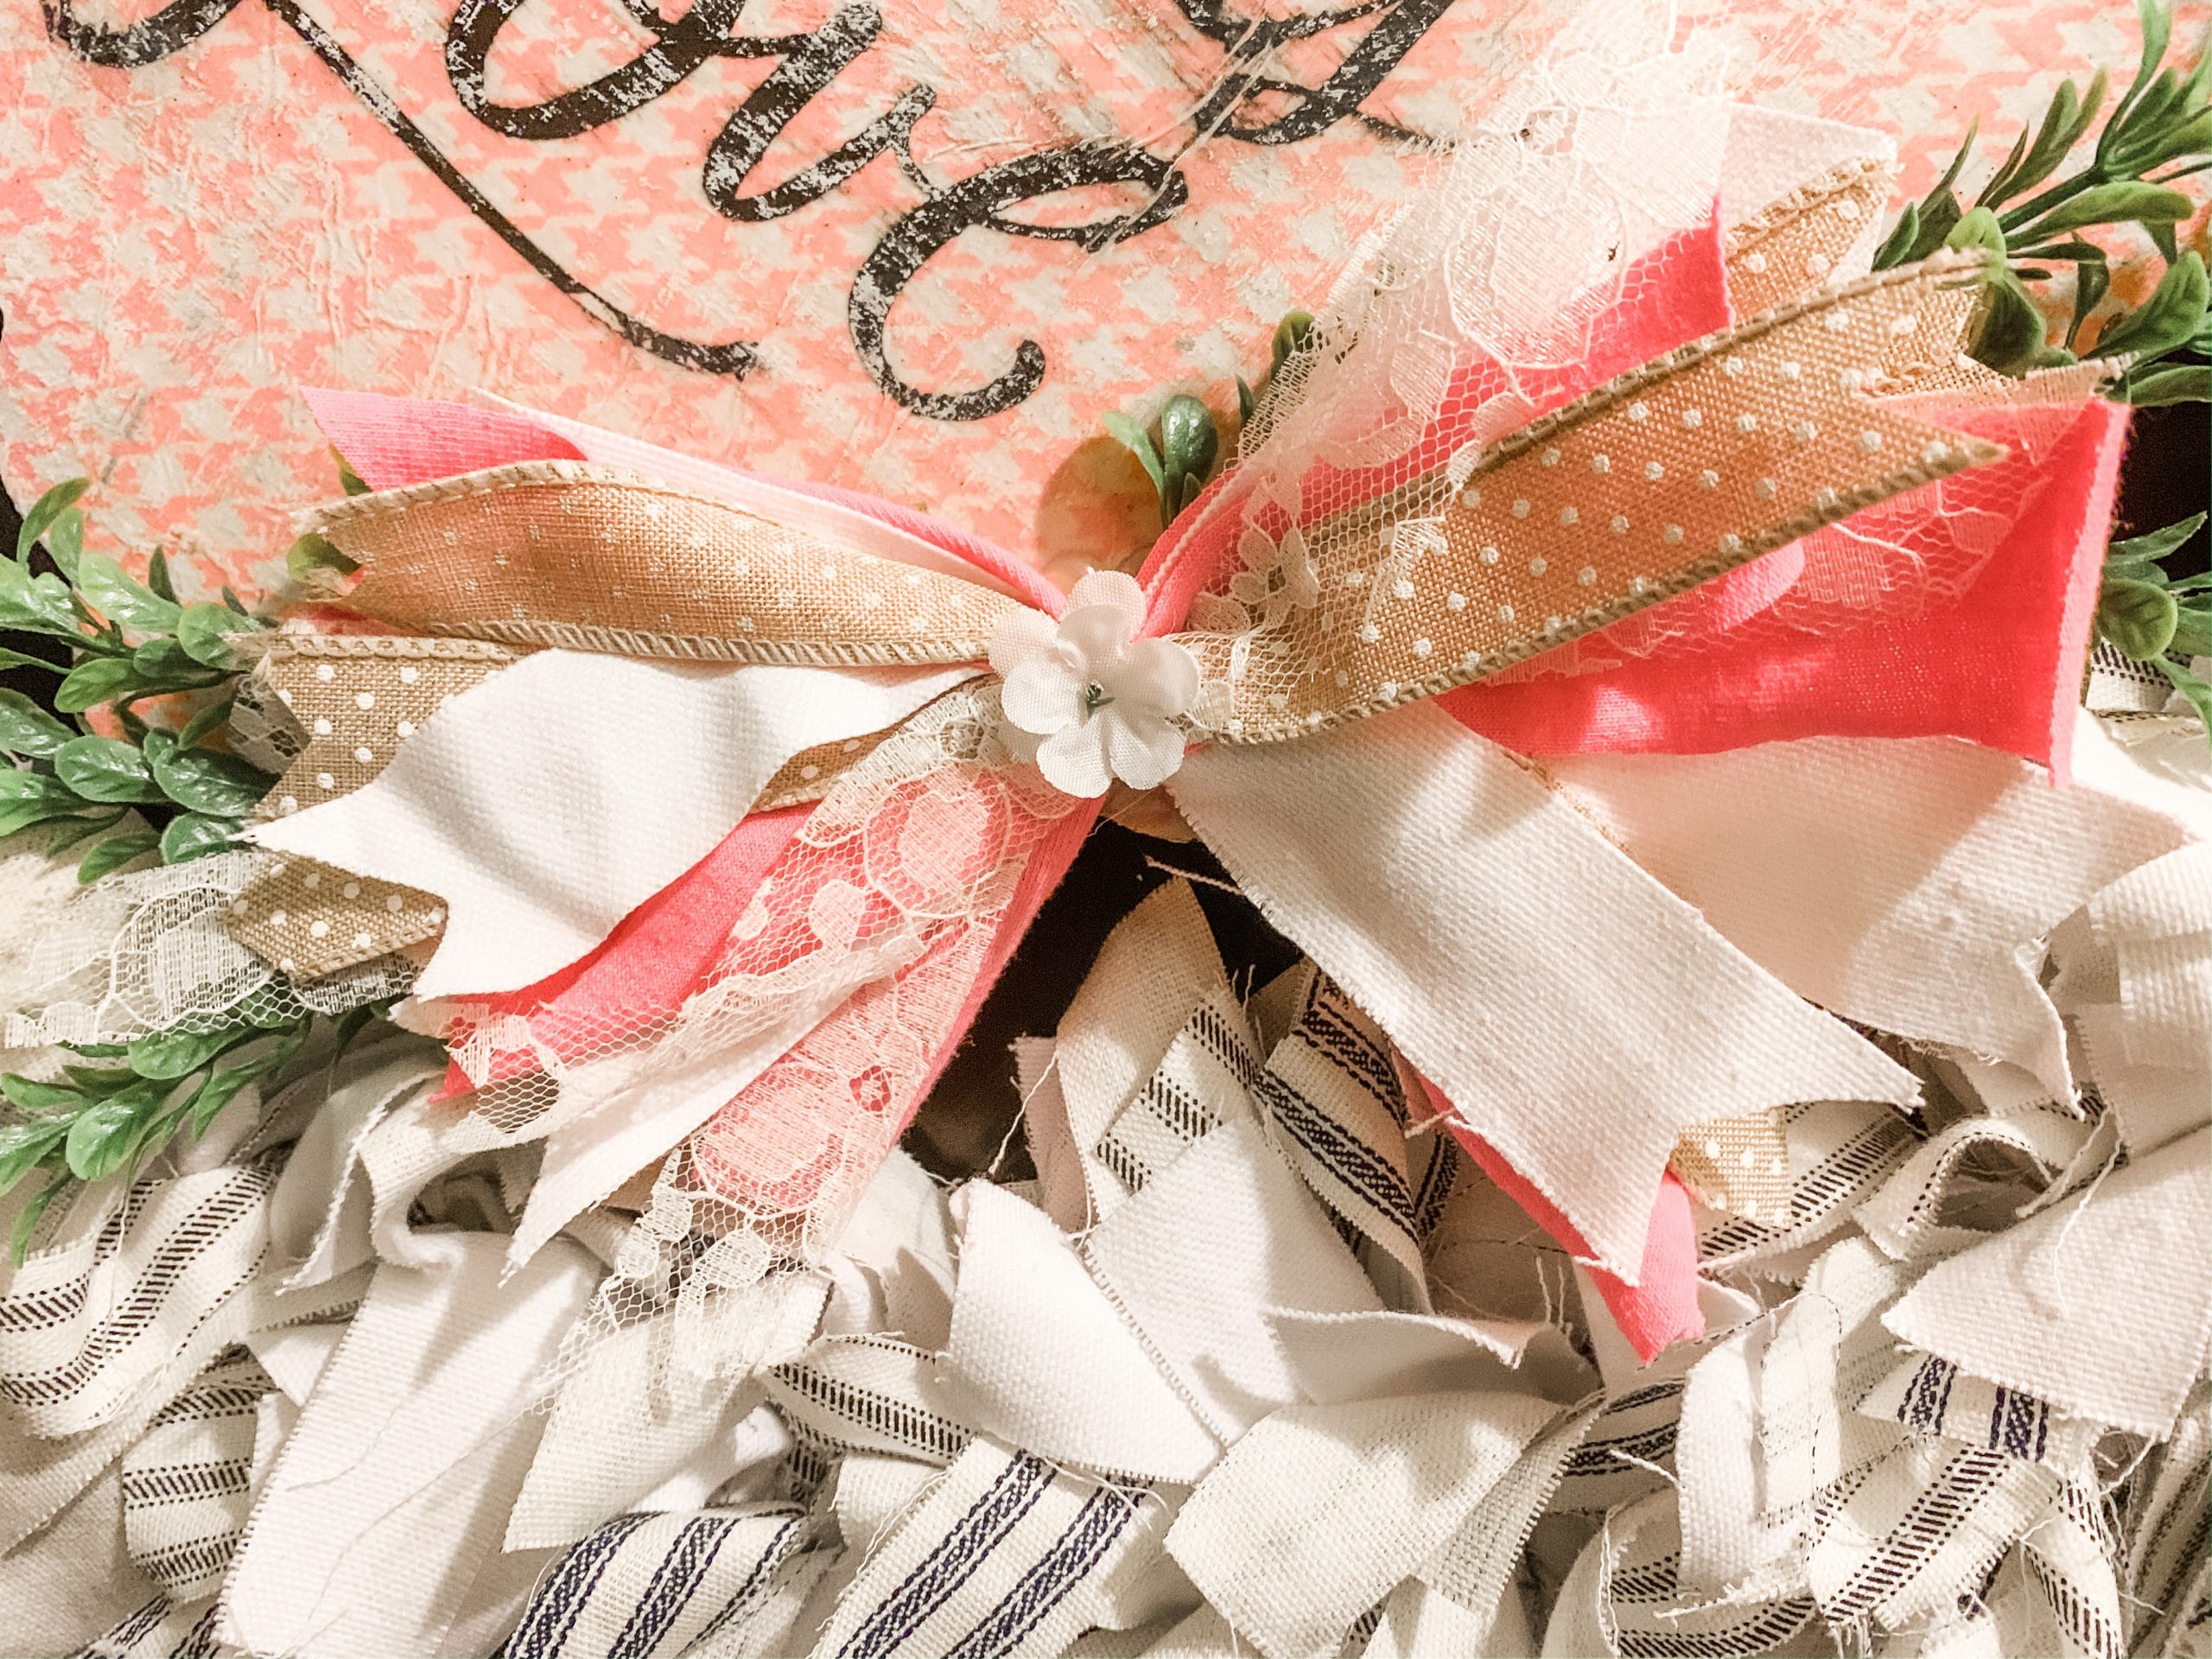
How to make a hot mess bow
Set the Dollar Tree heart to the side, and let’s start working on the bow! I had 9-inch strips of the old pink t-shirt, and then I cut several strips of each of the ribbons and fabrics.
Here are the details of how I cut each ribbon/fabric:
- Lace ribbon: 10 inches / 3 strips
- Tan polka dot ribbon: 10 inches / 4 strips
- White fabric: 1 inch thick / 10-11 inches long / 4 strips
Once you have the strips cut, lay them in an x-pattern alternating the patterns as you go (pink fabric, lace ribbon, white fabric, etc.)
Do this until you’ve used all your strips, or you get the thickness and Messines you want for your bow. Finally, secure the center of the bow with a zip tie or a piece of fabric.
Once my bow was secured, I dovetailed the ends of the fabric and ribbon strips. Fluff your bow, and it is ready to go on the heart!
The finishing touches
Alright, go ahead and hot glue the messy bow over the ends of the boxwood greenery sprays on the side of the decoupaged Dollar Tree heart cutout.
Next, I cut four of the flowers off of the Walmart flower spray. I hot glued one of them over the center of my hot mess bow to cover up the zip tie.
Then, I hot glued the other three little white flowers on the right side of the decoupaged Valentine’s Day decor.
I didn’t like how there was so much empty space on the right side of the heart and wanted to balance out the project, so that is why I added the three little white flowers to the right side.
Finally, all you have to do is add the magnet to the back! I used Dollar Tree magnets and hot glued them to the back of the Dollar Tree heart cutout.
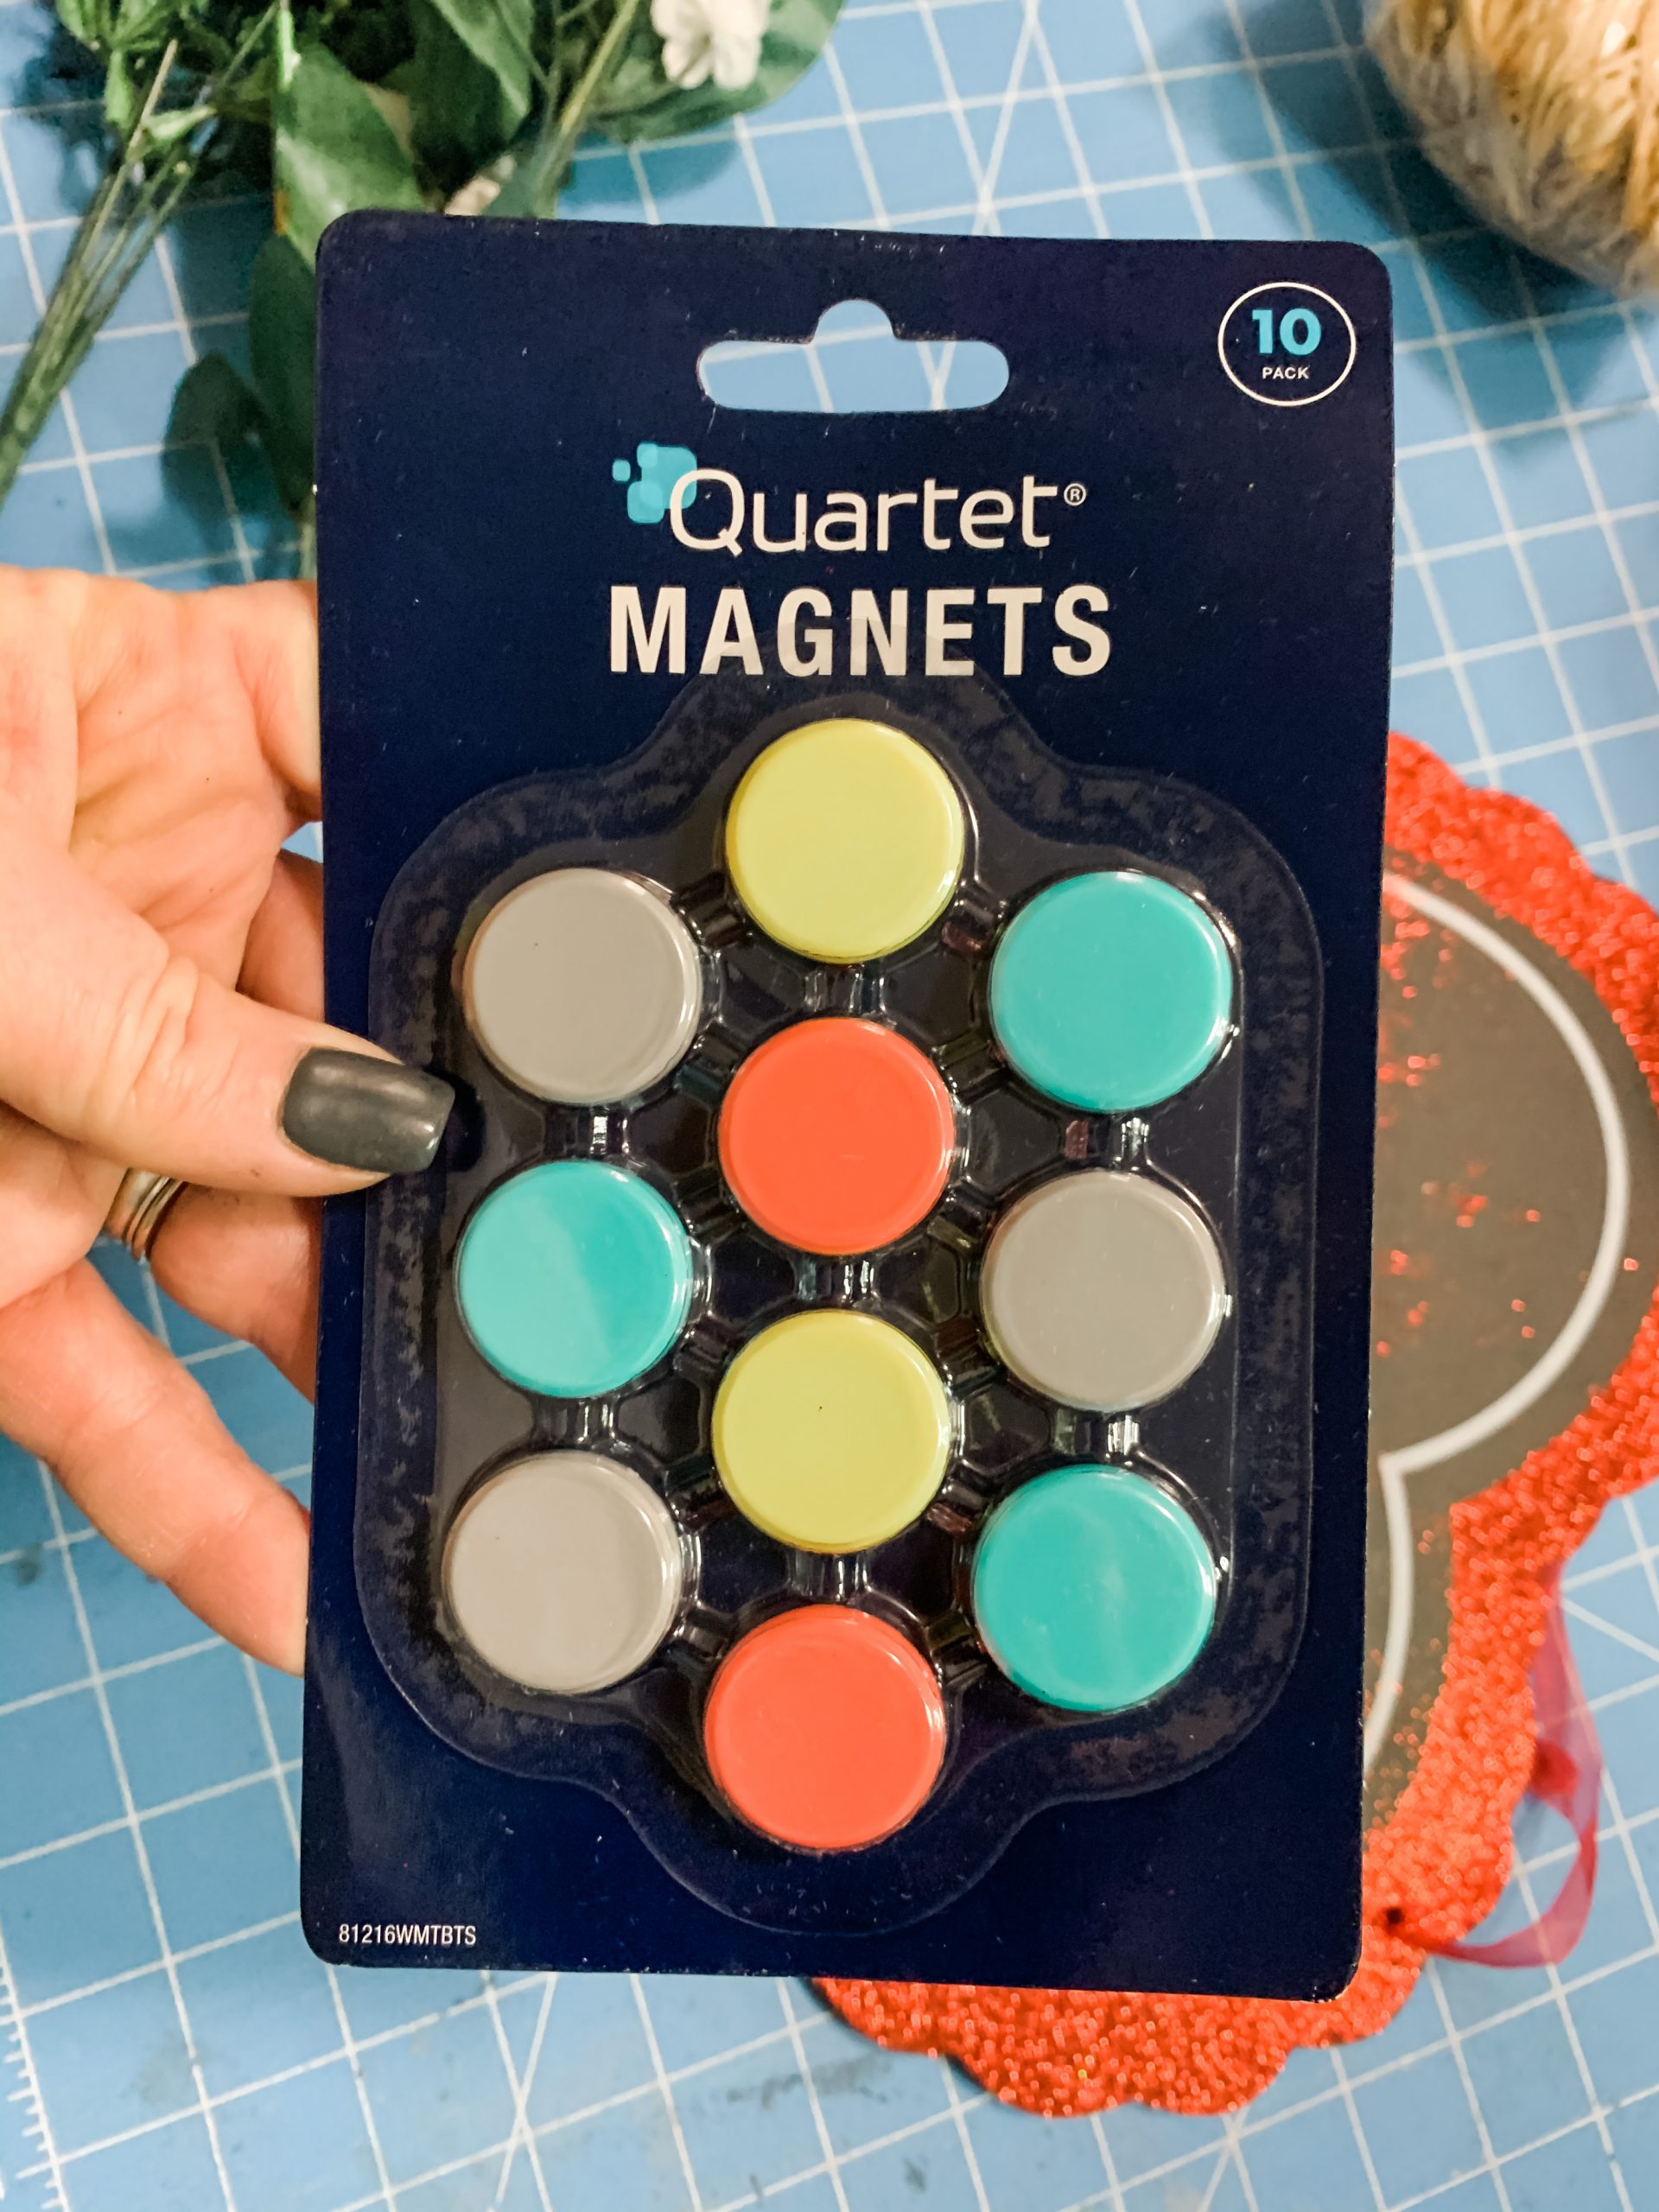
Add as many magnets as you think you’ll need to get a secure bond onto the surface you plan to hang this adorable Valentine’s Day decor on.
I hot glued three of the magnets onto the back of my decoupaged heart. I planned for this adorable heart to go in the center of a rag wreath I made for my front door! Stay tuned for details on how to make the super-easy rag wreath!
I hope you enjoyed this DIY Valentine’s Day Magnetic Door Decor as much as I did and decide to make one for yourself! I would love to see how yours turns out!
You should totally join my FREE Facebook group called On A Budget Crafts! It is a judgment-free community for DIY crafters to show off their projects and ideas.
If you loved this DIY you might also like this Fun and Easy DIY Spring Door Hanger!
Thanks for stopping by! XOXO Amber
You can also shop my ENTIRE AMAZON Favorites shop just click here! It’s packed full of all the things I use and love.
Here is the supply list I highly recommend every creative have on hand!! Would you also pin my blog for later and get on my newsletter alerts? I would love to have you join my #craftycrew.
Inspired? Leave me a comment below! I love hearing from my readers!

Join my free “ON A BUDGET CRAFTS” Facebook group!

Love the magnetic wreath for door! I have a metal door for first time and can’t put in a nail like a wood door. This is awesome idea! Love the pink background too!