Happy Haunting Pumpkin House DIY: Easy Halloween Craft for Fall Decor
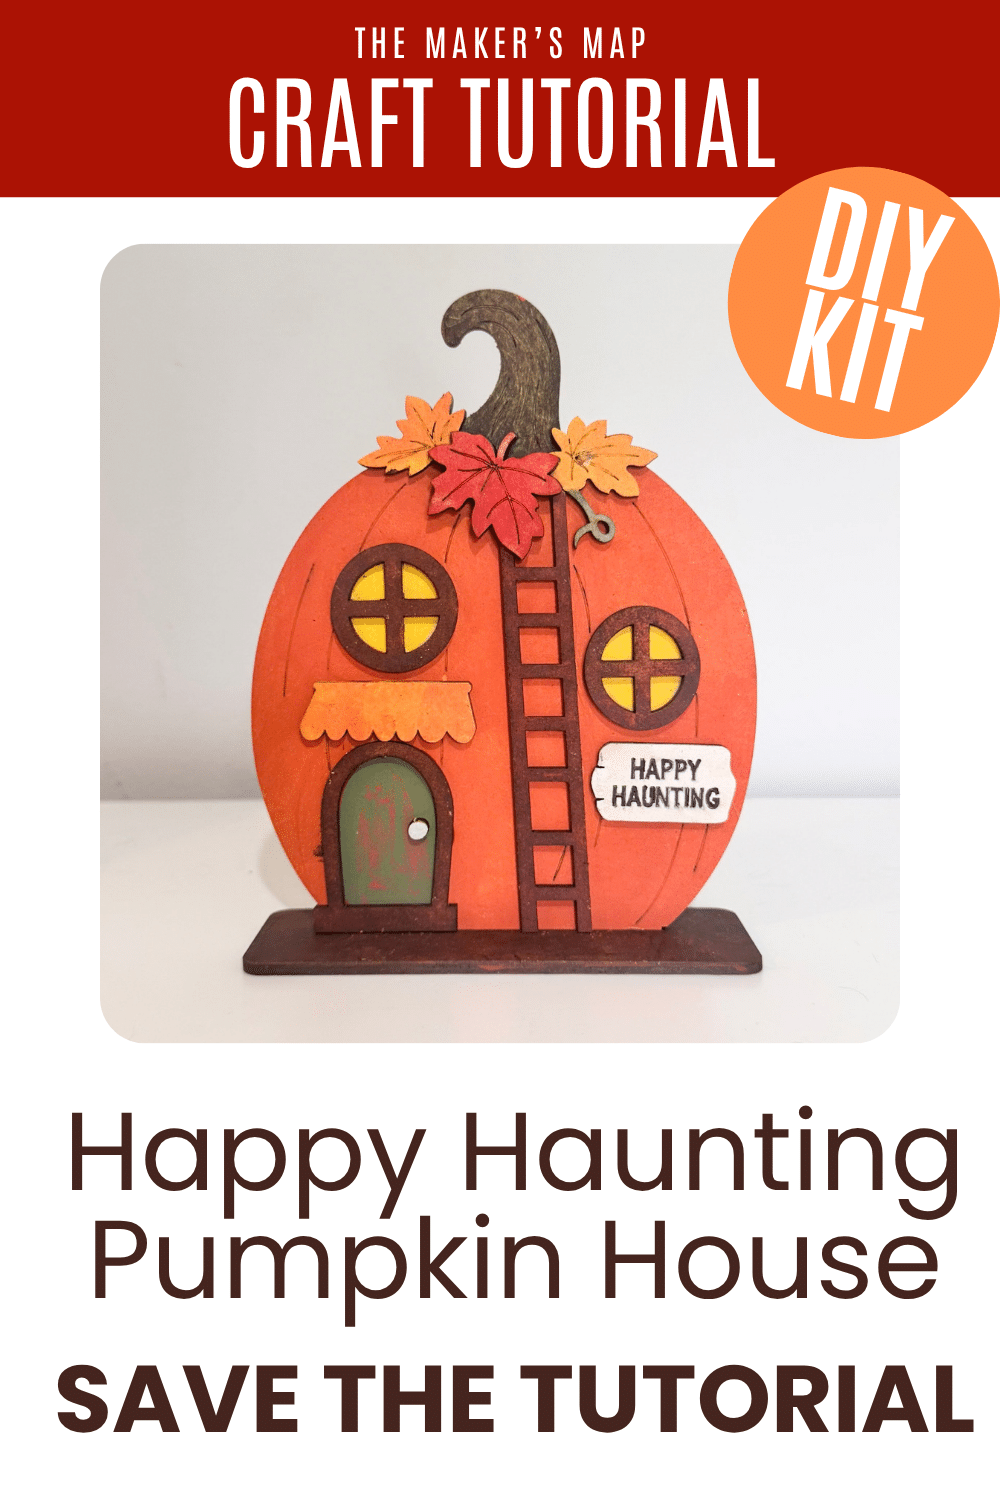
If you love creating your own Halloween home decor, this Happy Haunting Pumpkin House is such a fun project for the fall crafting season. I painted and assembled our Happy Haunting Pumpkin House Sitter DIY Kit using warm fall colors, distressed paint techniques, weathered wood details, and a mix of classic Halloween and autumn colors.
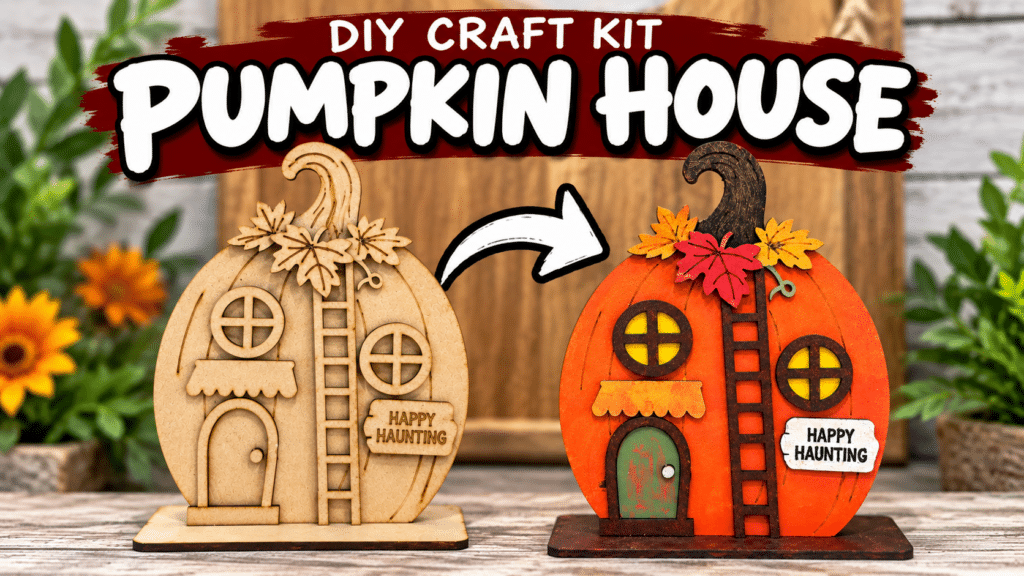
This unfinished wood DIY craft kit starts as individual laser-cut pieces that you can paint and customize to fit your own style. I turned mine into a rustic little pumpkin house with an aged green door, glowing yellow windows, a weathered ladder, colorful fall leaves, and a Happy Haunting sign.
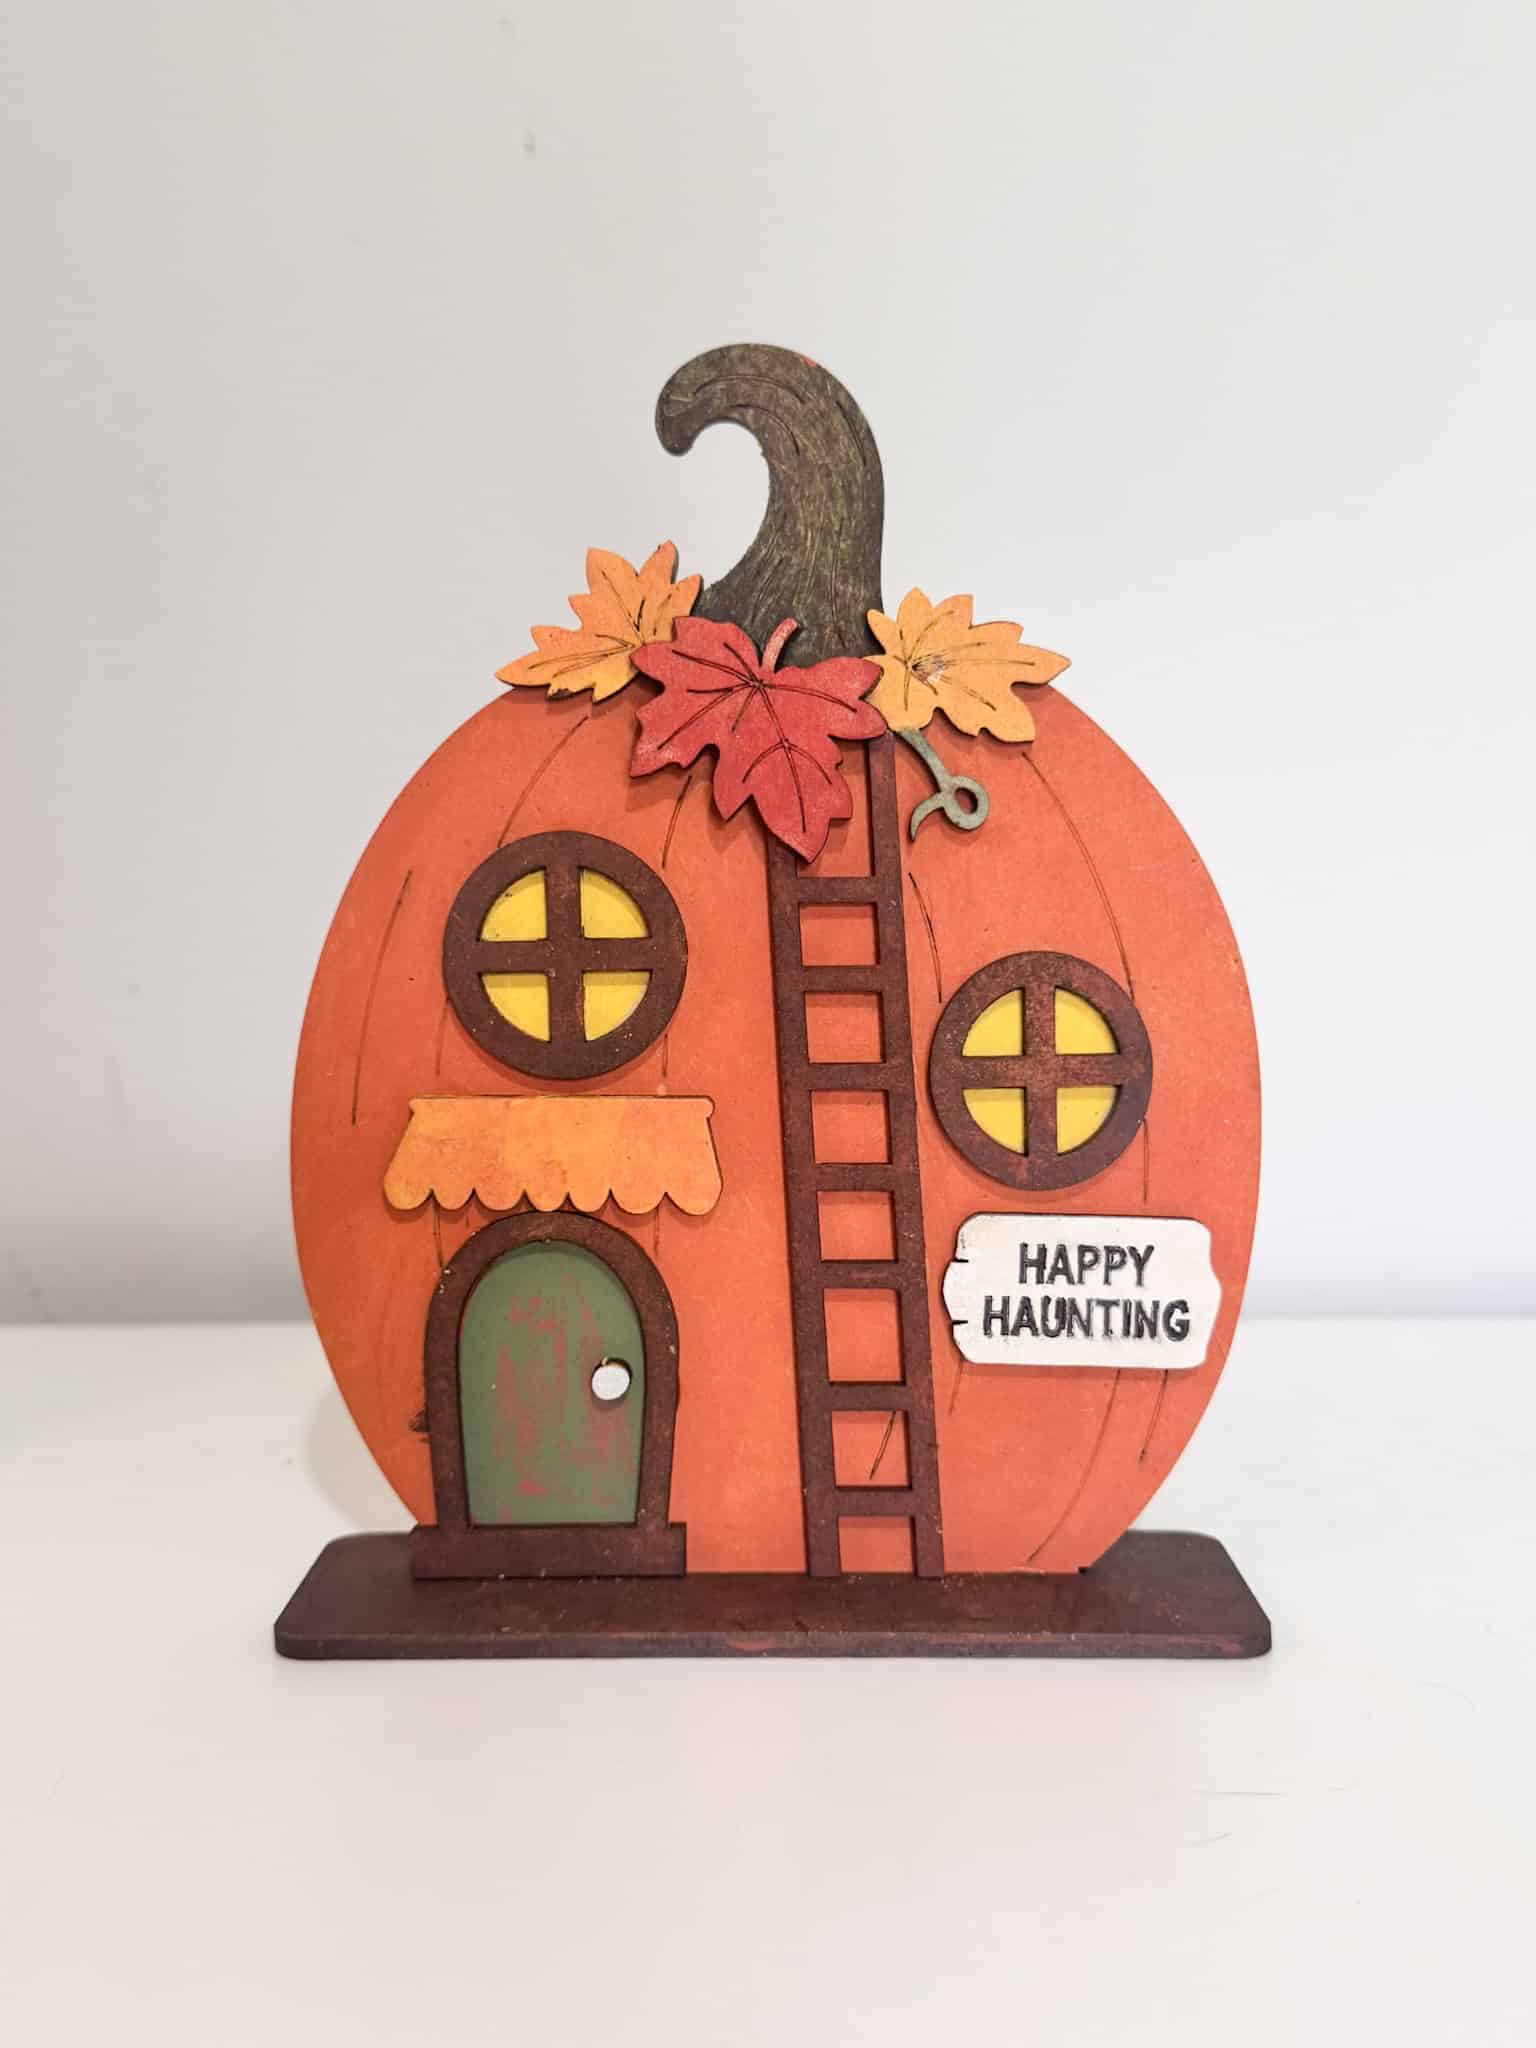
One of my favorite things about this Halloween DIY craft is that you don’t need advanced painting skills to create all of the texture you see in the finished project. I used simple techniques like sanding damp paint, layering colors, and dabbing paint with a sponge.
I even changed my mind halfway through painting the front door, and that mistake ended up creating one of my favorite details.
Whether you’re looking for a new Halloween craft idea, handmade fall decor, or a DIY pumpkin decoration you can bring out year after year, I’ll show you how I created mine.
Happy Haunting Pumpkin House DIY Craft Kit
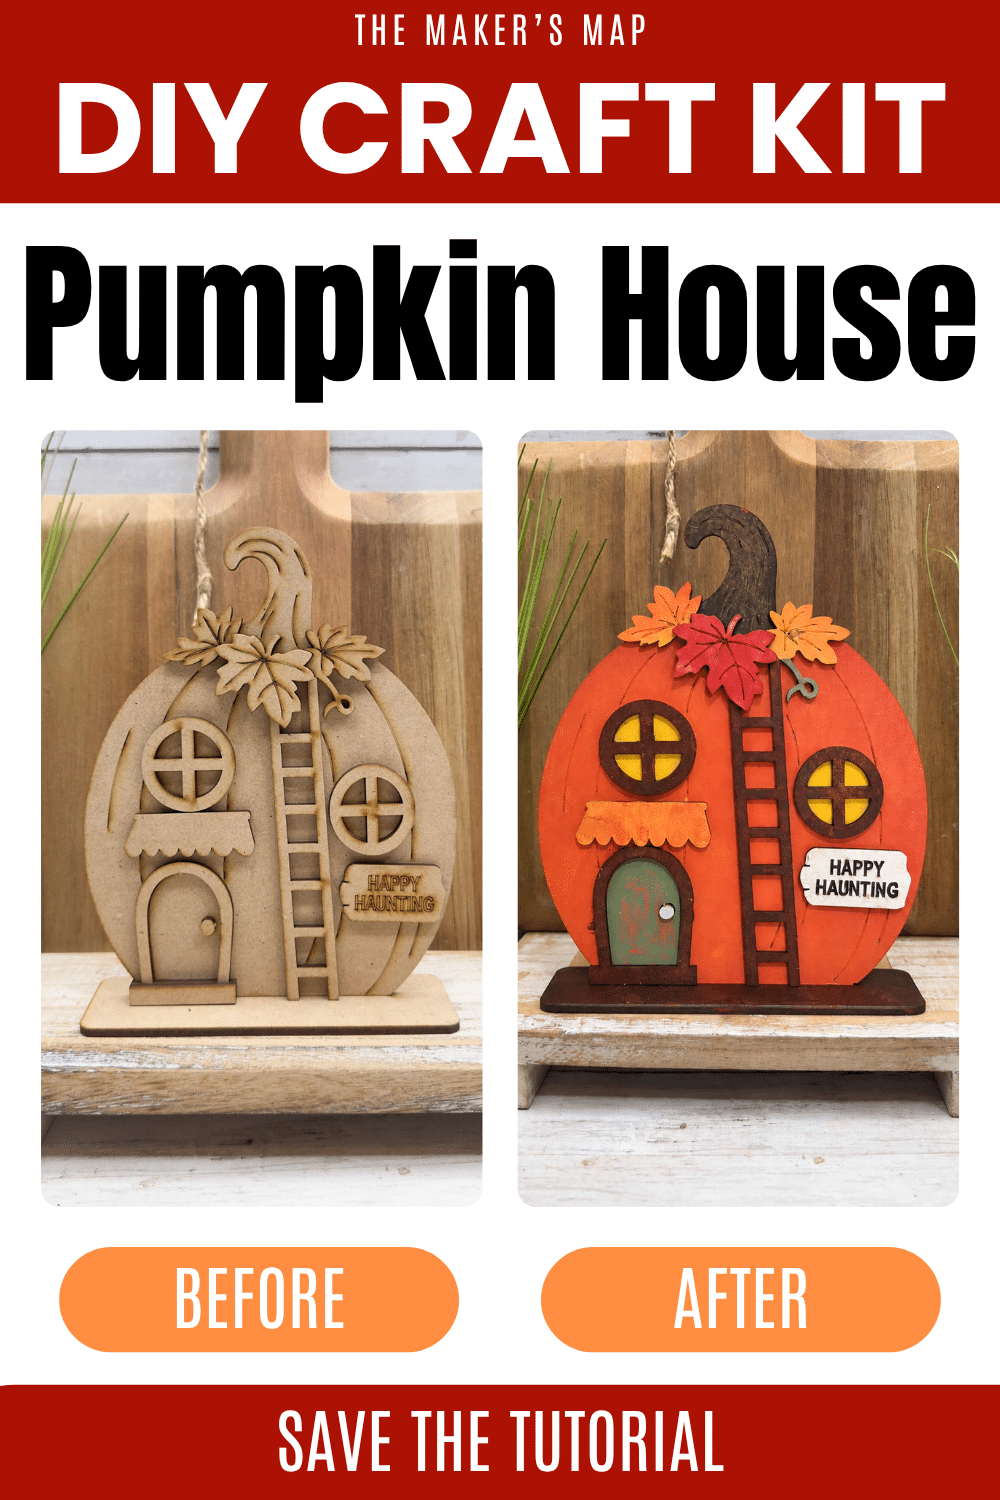
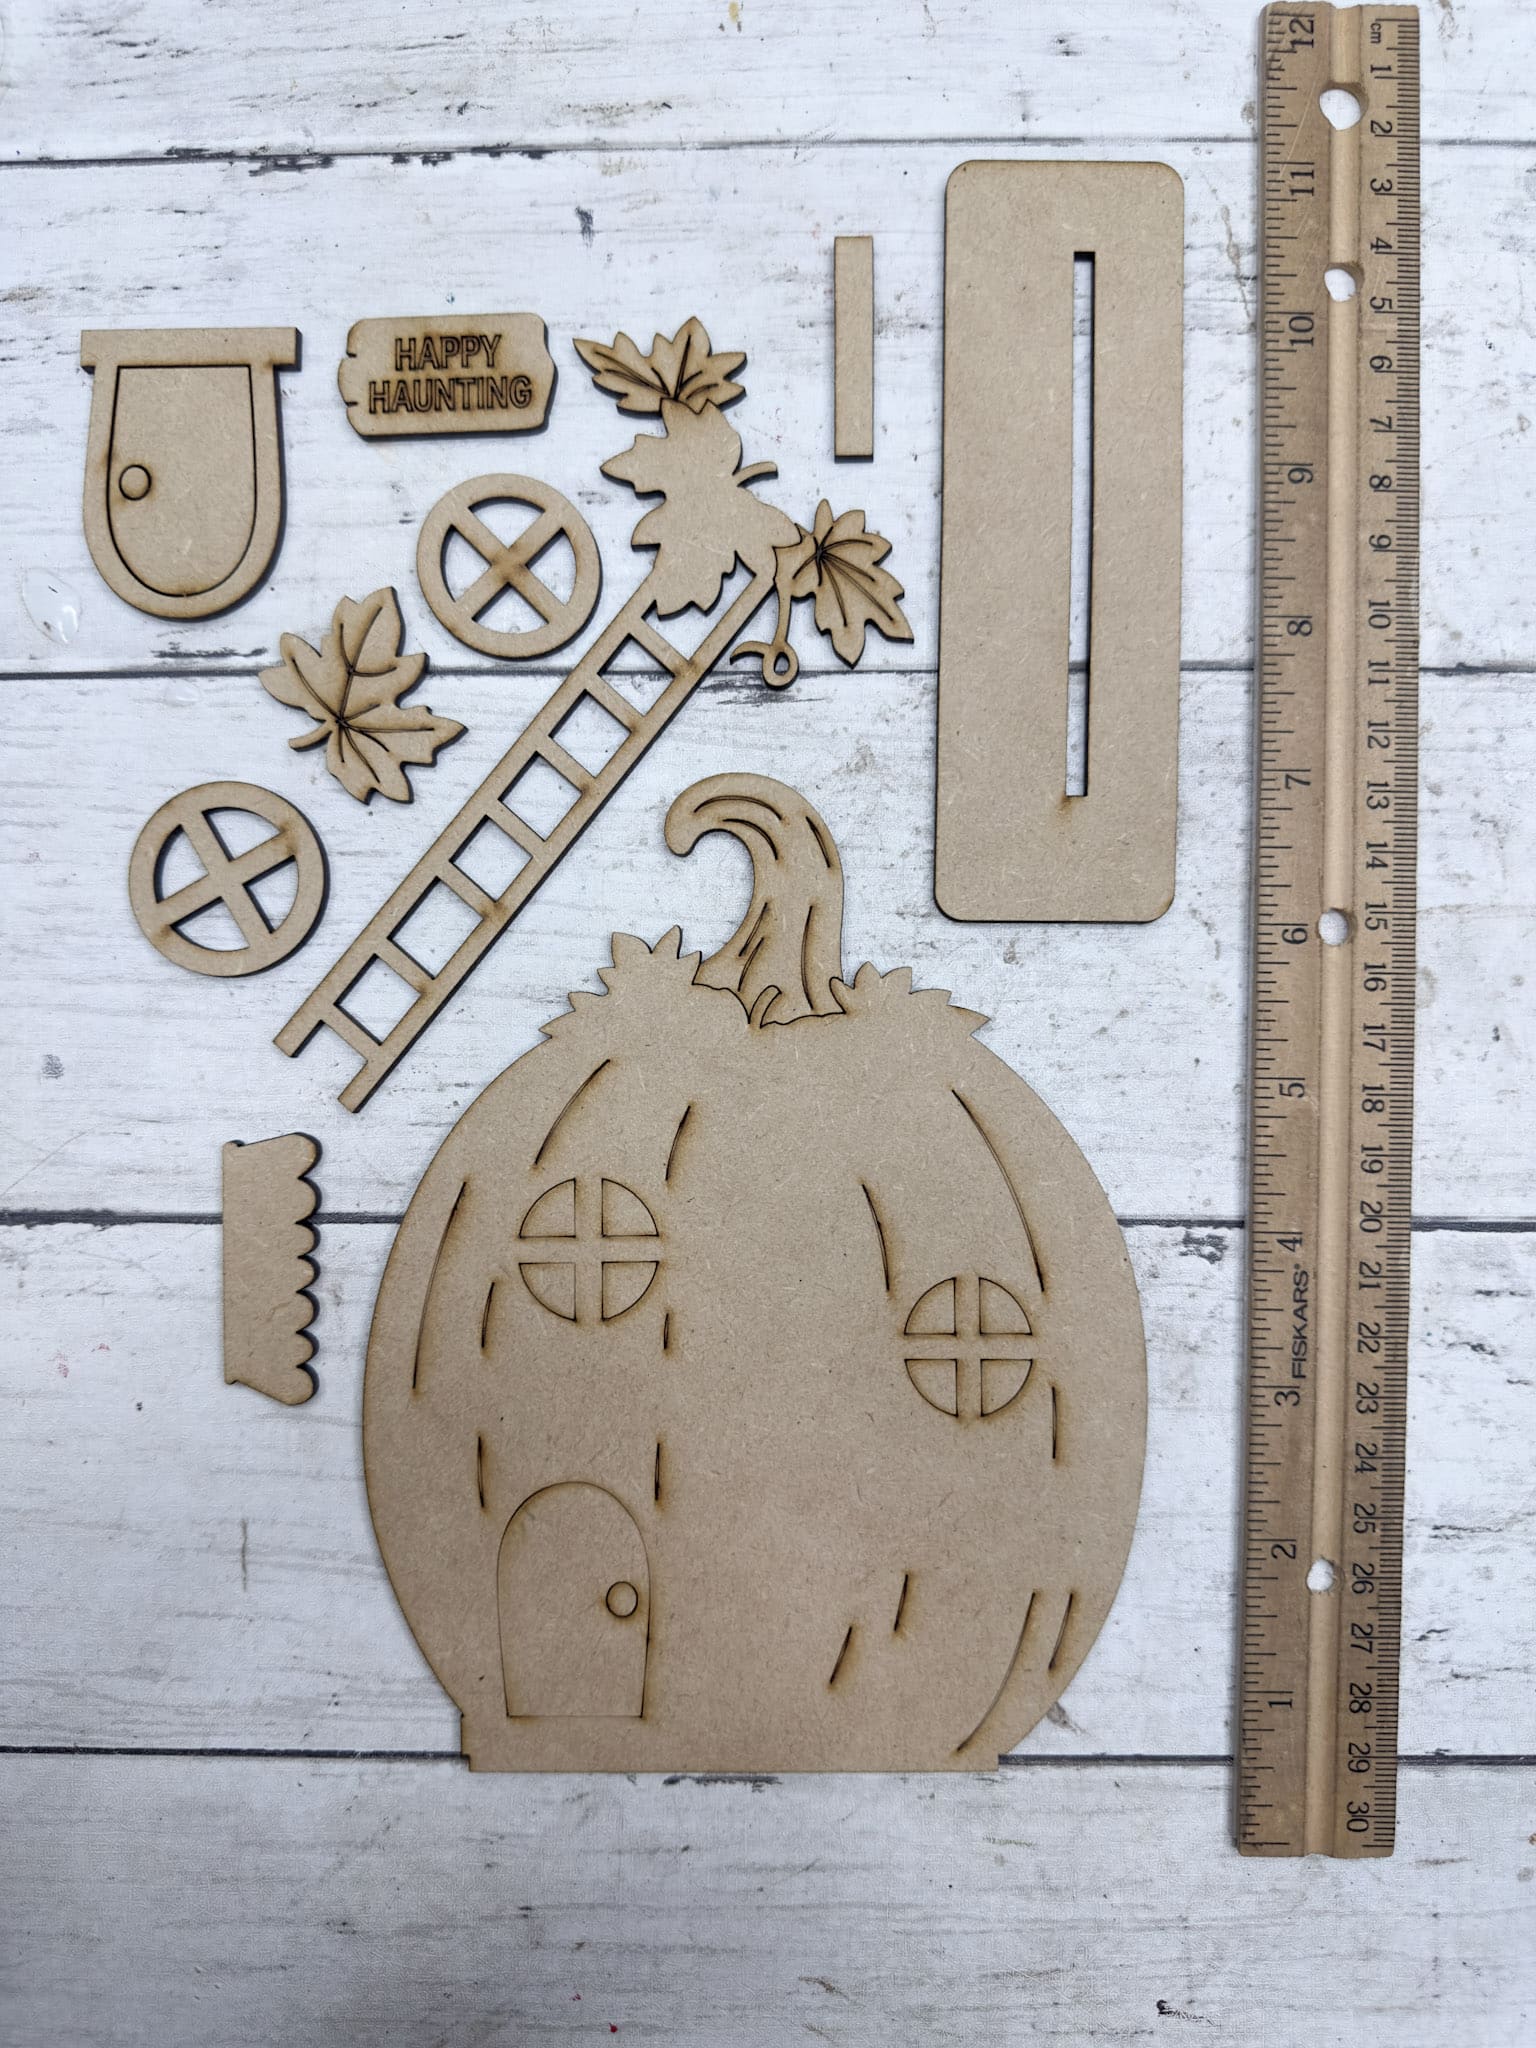
I started this project with our unfinished Happy Haunting Pumpkin House Sitter DIY Kit.
Shop the Happy Haunting Pumpkin House Sitter DIY Kit
The unfinished wood pieces let you choose your own paint colors and finishing techniques, so you can make your pumpkin house decor as colorful, rustic, whimsical, or spooky as you want.
I went with a warm fall color palette for mine and added several distressed finishes to give the wood more character.
Supplies for This Halloween DIY Craft
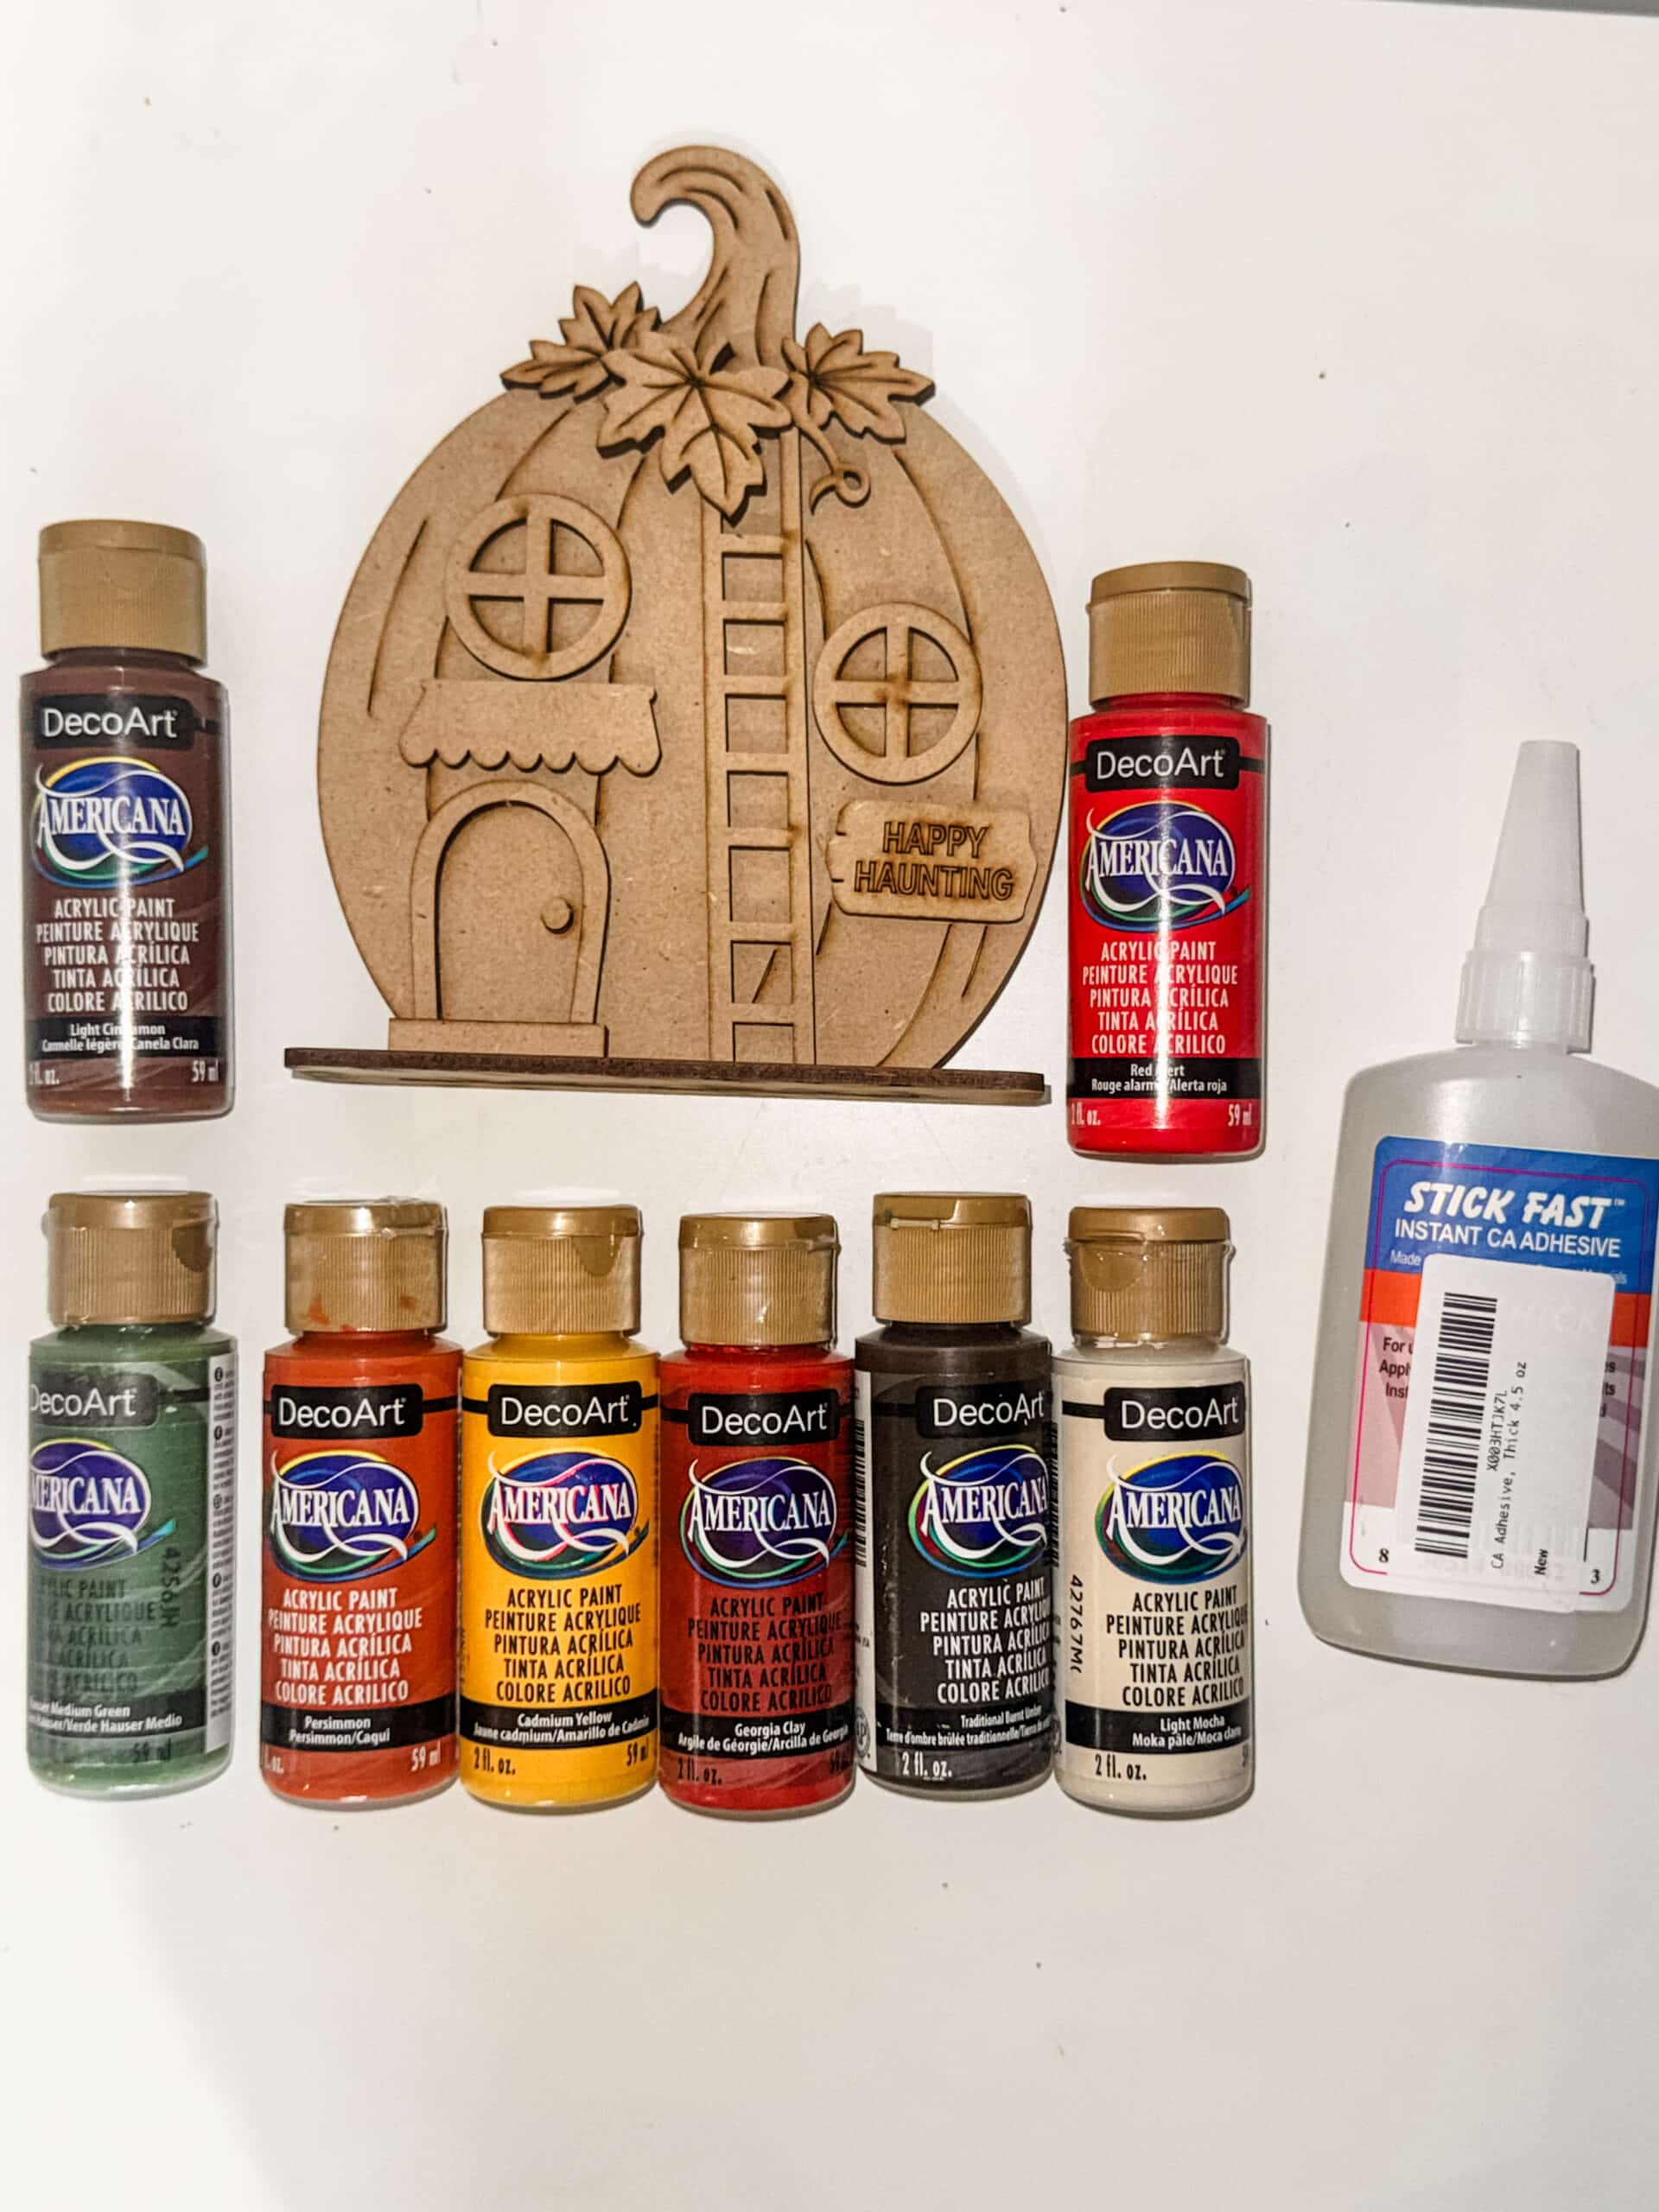
For my pumpkin house, I used the Happy Haunting Pumpkin House Sitter DIY Kit, Stick Fast Instant CA Adhesive, sandpaper, paintbrushes, a sponge, and DecoArt Americana acrylic paint.
My paint colors included:
- Light Cinnamon
- Red Alert
- Hauser Medium Green
- Persimmon
- Cadmium Yellow
- Georgia Clay
- Traditional Burnt Umber
- Light Mocha
- Dark Chocolate
You do not need these exact colors to make this DIY Halloween decoration. Use the paints you already have or change the color palette to coordinate with your existing fall and Halloween home decor.
Step 1: Paint the Pumpkin House
I started with the largest piece of the pumpkin house DIY kit, which is the pumpkin itself.
I wanted a warm orange finish that would work with the traditional fall colors I planned to use throughout the rest of the project, so I painted the main pumpkin orange while keeping the engraved lines between the pumpkin sections visible.
Those engraved details already give the pumpkin shape and dimension, so I didn’t want to completely cover them with paint.
I also wasn’t trying to create a perfectly smooth finish. I knew I wanted this DIY pumpkin decor to have a slightly rustic, handmade look, and a little variation in the paint worked well with the other weathered finishes I added later.
Step 2: Create a Weathered Wood Paint Finish
For the window trim, door trim, ladder, and stand, I wanted the wood to look old and weathered instead of simply painted brown.
I started by mixing Georgia Clay with a small amount of Traditional Burnt Umber. This created a warm reddish-brown base color.
While that paint was still damp, I sanded the wood.
Sanding before the paint completely dried did something I really liked. It roughed up the surface and slightly frayed the wood fibers, creating a naturally aged texture.
I wasn’t trying to smooth the wood. I wanted to make it rougher.
After sanding, I dabbed Dark Chocolate paint over the surface, but I intentionally avoided completely covering the reddish-brown layer underneath.
Allowing some of the Georgia Clay and Traditional Burnt Umber mixture to show through gave the pieces more depth and made them look like aged, weathered wood.
I used this distressed wood technique on the:
- Window trim
- Door trim
- Ladder
- Pumpkin house stand
This is an easy technique to use on other wood craft projects, fall DIYs, and rustic home decor crafts too.
Step 3: Distress the Pumpkin Stem
I used a similar layered paint technique for the pumpkin stem, but instead of starting with reddish brown, I started with green paint.
While the green paint was still damp, I sanded the wood to rough up the surface and fray some of the fibers.
Then I dabbed the darker brown paint over the green.
I intentionally left areas of green showing through the darker top layer. The combination of layered paint and rough wood texture gave the pumpkin stem a more aged, natural appearance.
It also tied the stem into the other distressed elements without making every wood detail on the pumpkin house exactly the same color.
Step 4: Create a Marbled Fall Awning
For the small awning above the front door, I wanted to bring several of my fall colors together.
I put small amounts of yellow, red, and orange paint onto a sponge.
Instead of mixing the three colors into one new paint color, I dabbed the sponge directly onto the wooden awning. This allowed the red, orange, and yellow to overlap and blend in some areas while remaining distinct in others.
The result was a simple marbled fall paint effect.
This is an easy way to add visual interest to small pieces of a DIY craft without needing any complicated painting techniques.
The mixture of red, yellow, and orange also helped carry the traditional colors of fall leaves and autumn decor into another area of the pumpkin house.
Step 5: Turn a Painting Mistake Into a Distressed Door
The front door did not turn out the way I originally planned.
I started by painting it red.
Once I put the red door against the orange pumpkin, I didn’t like it. There wasn’t enough contrast between the colors, and the door almost disappeared into the pumpkin instead of standing out as its own feature.
Rather than starting over, I painted over the red with green.
I used a sponge to dab the green paint onto the door instead of applying a perfectly smooth coat with a brush.
As I dabbed, the sponge pulled up paint in a few areas and exposed some of the original red underneath.
That accident created exactly the kind of finish I wanted.
The door suddenly looked like an old painted wooden door that had originally been red, was later repainted green, and had weathered enough for some of the older paint to show through.
I left it exactly like that.
This is also one of my favorite reminders when working on a DIY craft kit. If you don’t like a paint color, you don’t necessarily have to strip the piece or start over. Adding another layer can sometimes create more character than the original plan.
I finished the door with the same weathered trim I used throughout the rest of the pumpkin house.
Step 6: Paint Glowing Pumpkin House Windows
I wanted the little windows to look like there was warm light coming from inside the pumpkin house.
I painted the inside portions yellow, then added my weathered window trim over them.
The contrast between the yellow centers, dark frames, and orange pumpkin creates the appearance of glowing windows.
It’s a small detail, but it makes this Halloween pumpkin house feel much more like a tiny home instead of simply a painted pumpkin.
Step 7: Paint the Fall Leaves and Vine
For the leaves at the top of the pumpkin, I used traditional fall colors including red, orange, and yellow.
Instead of painting every leaf the same color, I varied them so the individual layers would stand out once I assembled the project.
The red especially gives the top of the orange pumpkin some needed contrast.
I also painted the small curling vine green. This brought the green from the distressed front door and pumpkin stem into another area of the design and helped balance the overall color palette.
These little details make the pumpkin house work as both Halloween decor and fall home decor, so it doesn’t have to feel limited to one night of the season.
Step 8: Paint the Happy Haunting Sign
The little Happy Haunting sign is what gives this pumpkin house its Halloween personality.
I kept the sign lighter so it would stand out against the orange background and made sure the engraved Happy Haunting lettering remained dark enough to read.
I like that the sign makes the project clearly Halloween without turning the entire design into something scary.
If your decorating style leans more toward cute Halloween decor, whimsical Halloween crafts, or cozy fall decorations, this is an easy project to customize for that look.
Step 9: Assemble the Pumpkin House DIY Kit
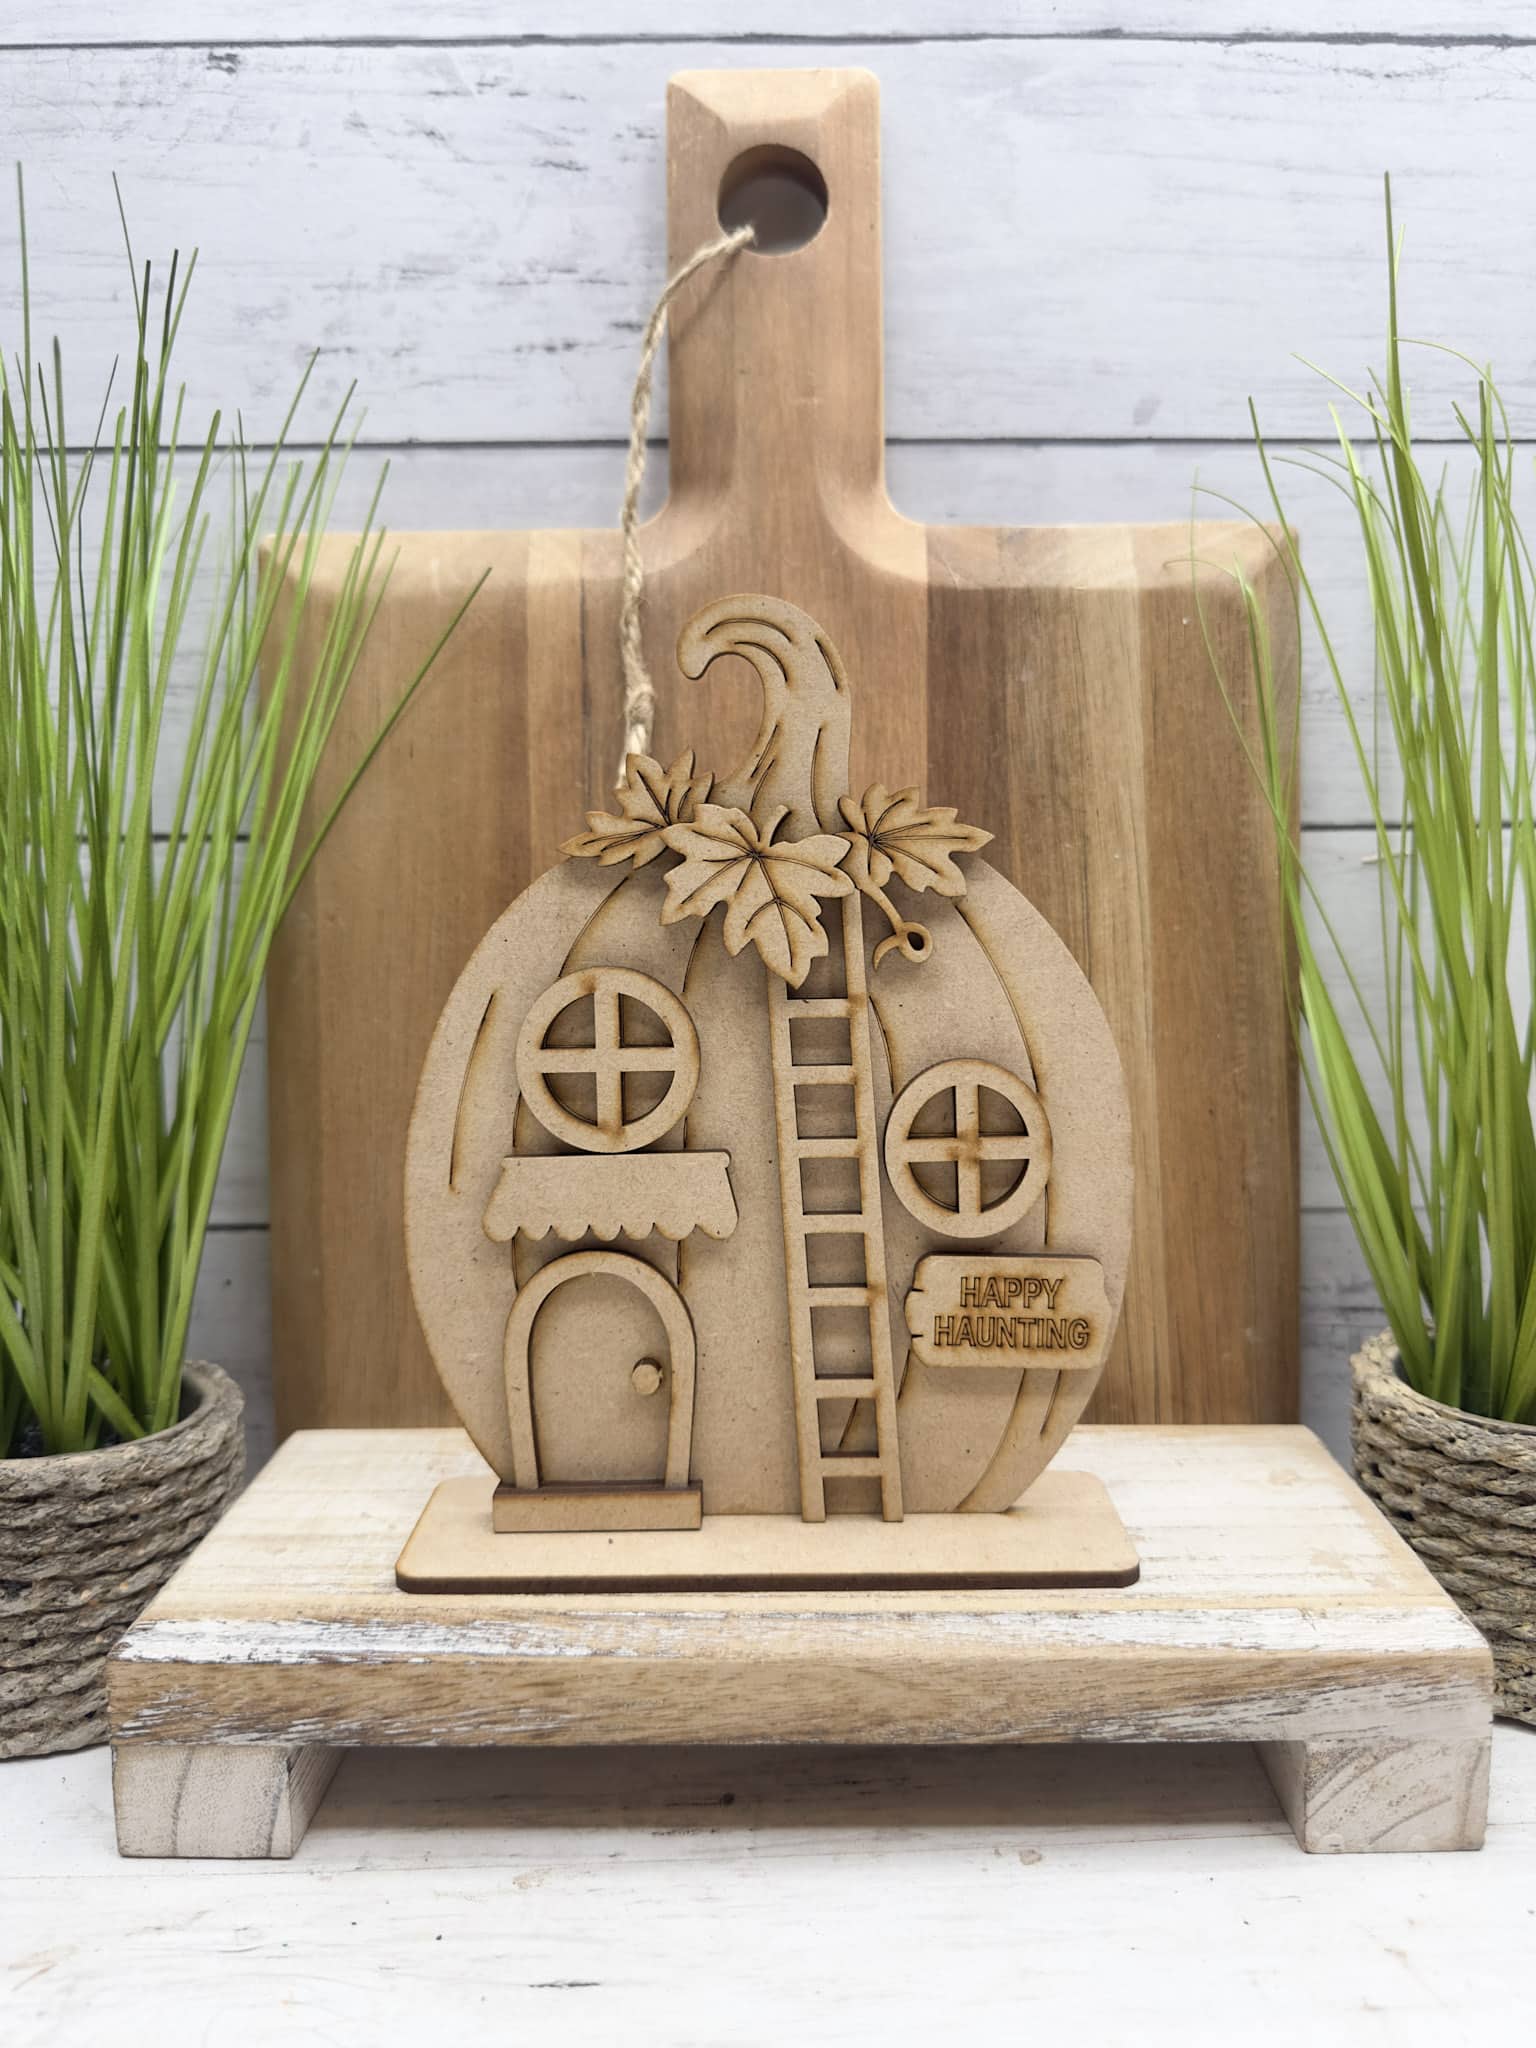
Before gluing anything, I laid all of my painted pieces onto the pumpkin.
I highly recommend doing a complete dry fit first.
It gives you a chance to check your colors and placement together, and you can move anything that doesn’t look quite right before the glue comes out.
I positioned the distressed green door and marbled awning on the lower portion of the pumpkin, added the glowing windows and weathered trim, and placed the ladder vertically through the center.
Next, I added the Happy Haunting sign and layered the colorful fall leaves and vine around the textured stem.
Once I was happy with the placement, I used Stick Fast Instant CA Adhesive to secure the individual pieces.
Finally, I attached the finished pumpkin house to its stand.
Finished Happy Haunting Pumpkin House Fall Decor
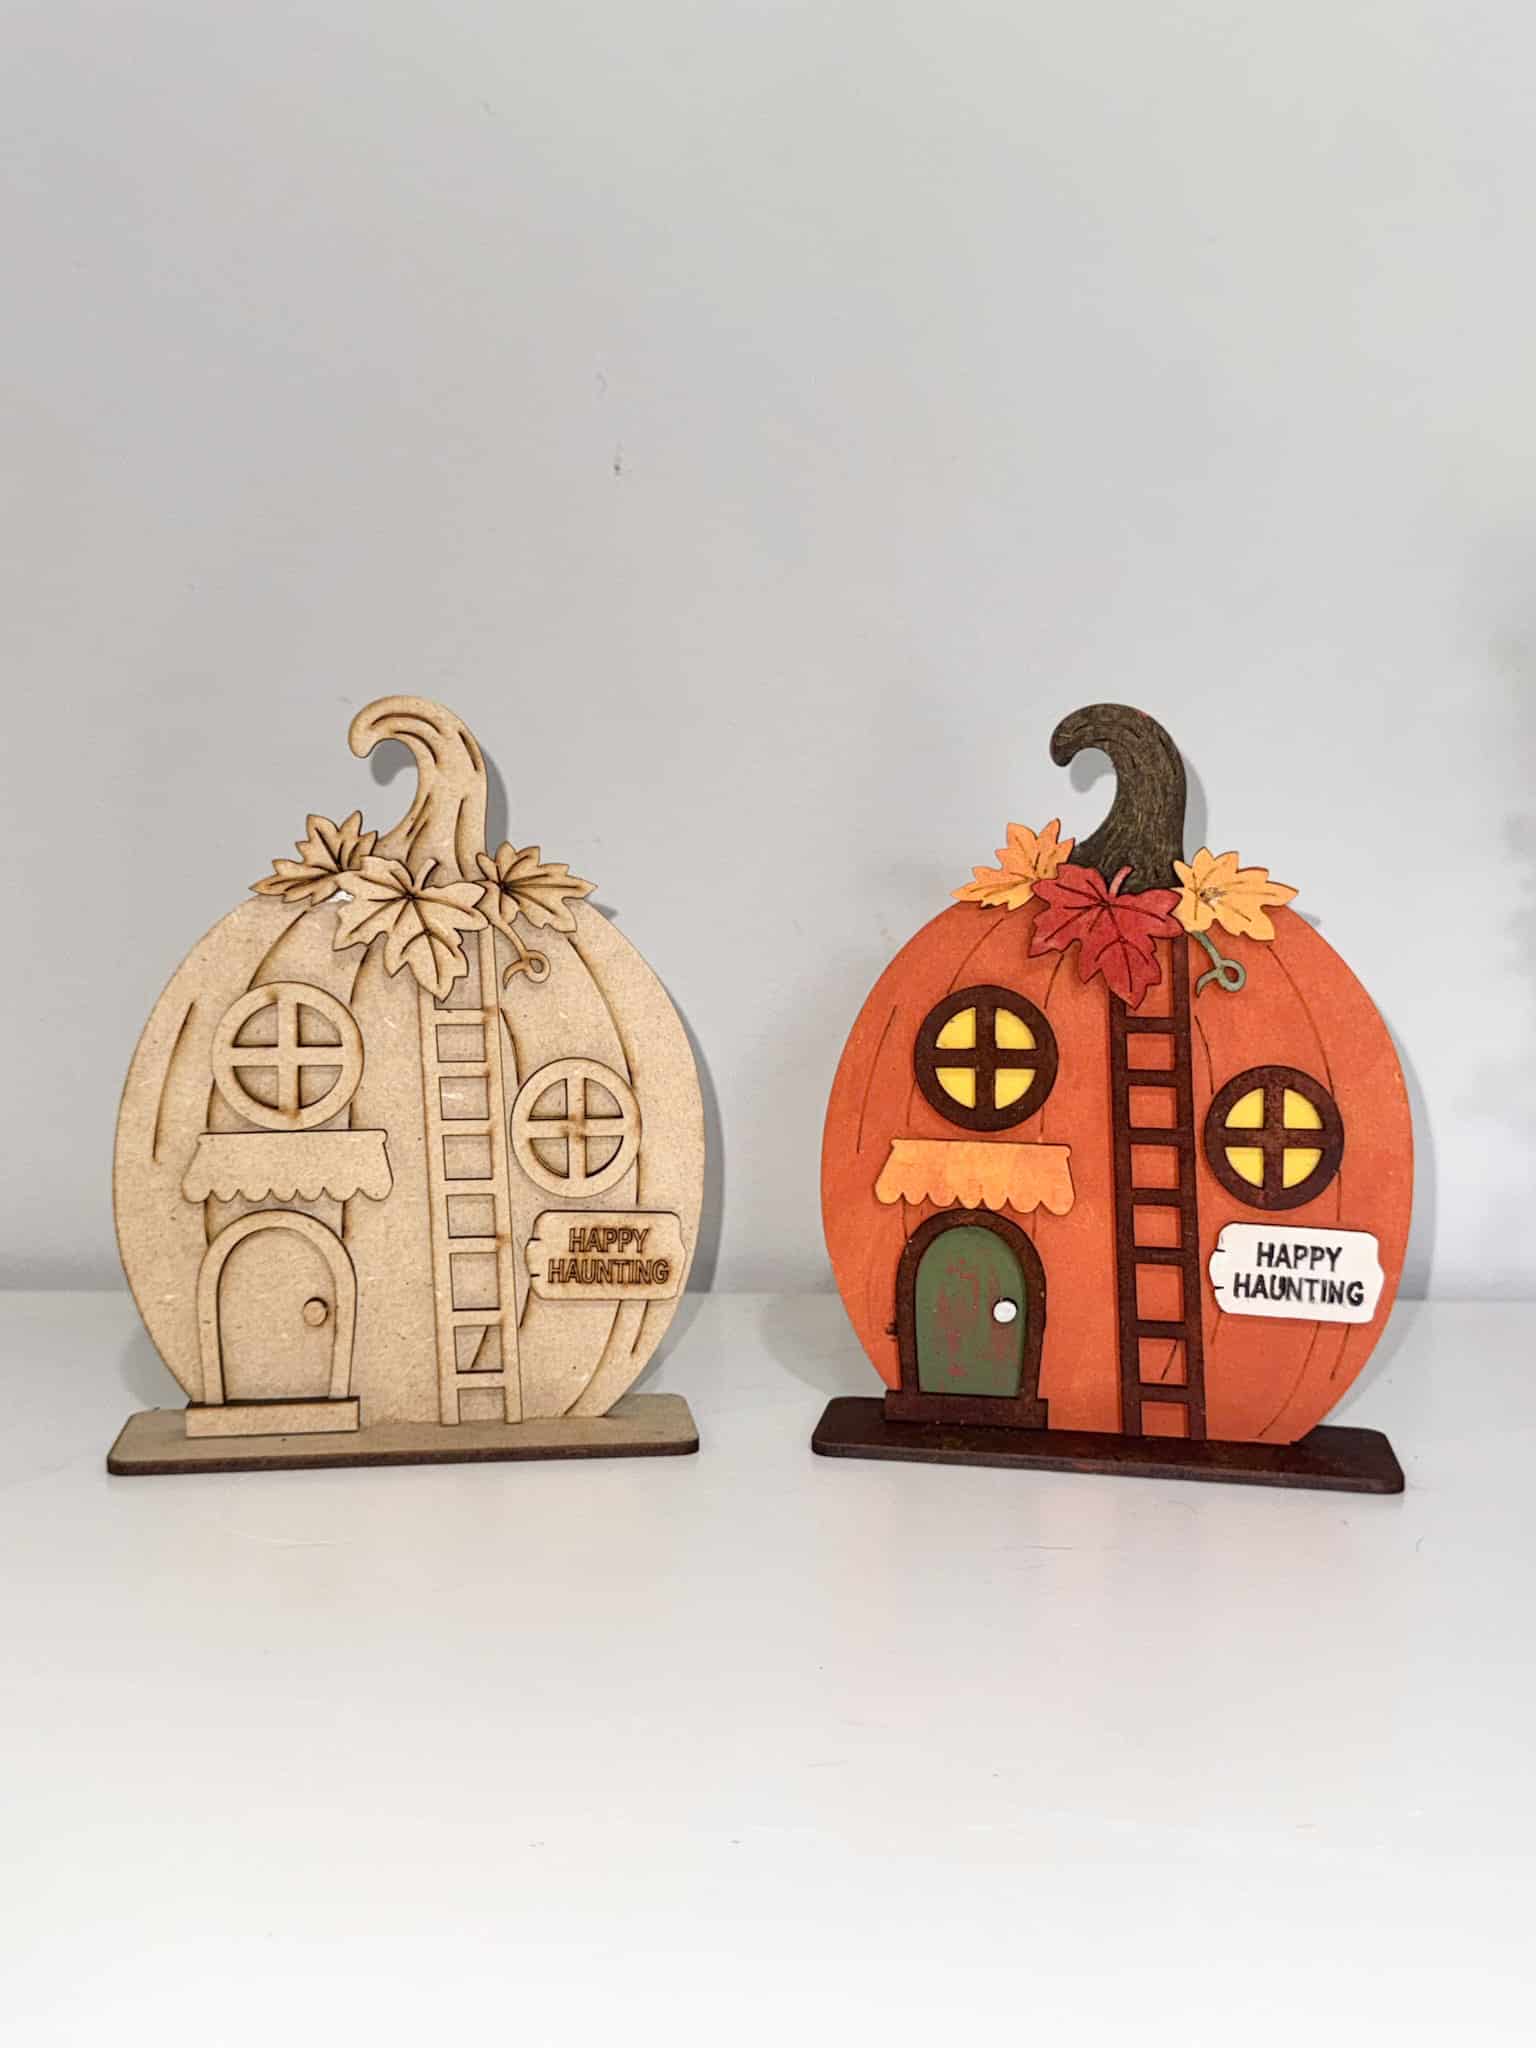
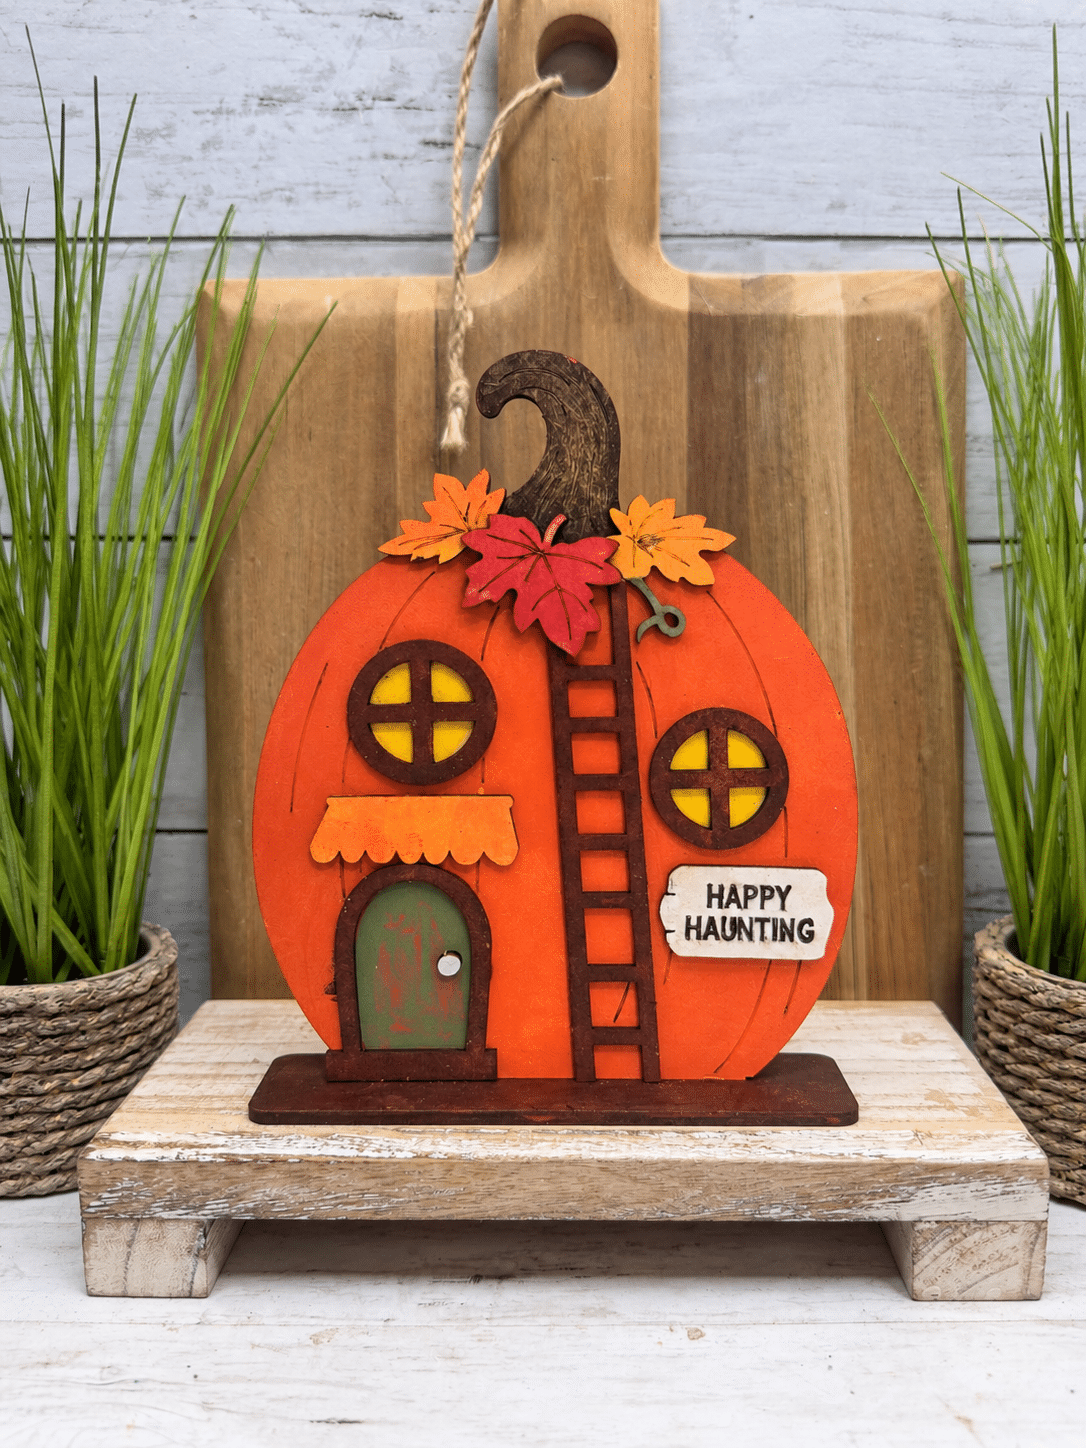
I love how much texture ended up in the finished Happy Haunting Pumpkin House.
The reddish-brown paint peeks through the Dark Chocolate on the ladder, window trim, door trim, and stand. Green shows underneath the darker finish on the stem. The distressed green door still has areas of its original red paint showing through, and the marbled awning brings red, orange, and yellow together.
Then there are the bright yellow windows, which give the pumpkin house that warm, glowing look.
All of those layers keep the finished project from looking flat, even though the techniques themselves were simple.
The completed pumpkin house sitter can stand on a mantel, bookshelf, entryway table, kitchen counter, shelf, or alongside the rest of your Halloween and fall decor.
More Ways to Customize Your DIY Pumpkin House
One of the advantages of starting with an unfinished wood DIY craft kit is being able to completely change the finished look.
For traditional Halloween decor, you could use orange, black, purple, and bright green. For neutral fall decor, try cream, tan, muted orange, brown, and sage. You could also create a pastel Halloween pumpkin house or add glitter and metallic paint for something completely different.
You can also take the techniques from this Halloween DIY and use them on other craft projects.
Try sanding damp paint to create rough, weathered wood. Layer contrasting paint colors so the bottom color shows through. Dab several colors onto a sponge for an easy marbled paint effect.
And if you paint something and immediately decide you hate the color, don’t assume the project is ruined. My red door became one of my favorite parts of this entire Halloween craft once I painted over it.
Make Your Own Happy Haunting Pumpkin House
If you’re ready to add a handmade pumpkin house to your fall decorations, you can start with the same unfinished Happy Haunting Pumpkin House Sitter DIY Kit I used for this project.
Paint it like mine or use the unfinished wood pieces as a blank canvas for your own Halloween decorating style.
Shop the Happy Haunting Pumpkin House Sitter DIY Kit
Watch the Happy Haunting Pumpkin House DIY Tutorial
Want to see the painting and distressing techniques in action?
I originally made this Halloween DIY craft on Live. You can watch the full Happy Haunting Pumpkin House tutorial to see how I painted, distressed, textured, and assembled the DIY craft kit from start to finish.
I cannot wait to see how you paint yours!
XOXO,
Amber

Join my free “Crafting and Sharing” Facebook group!