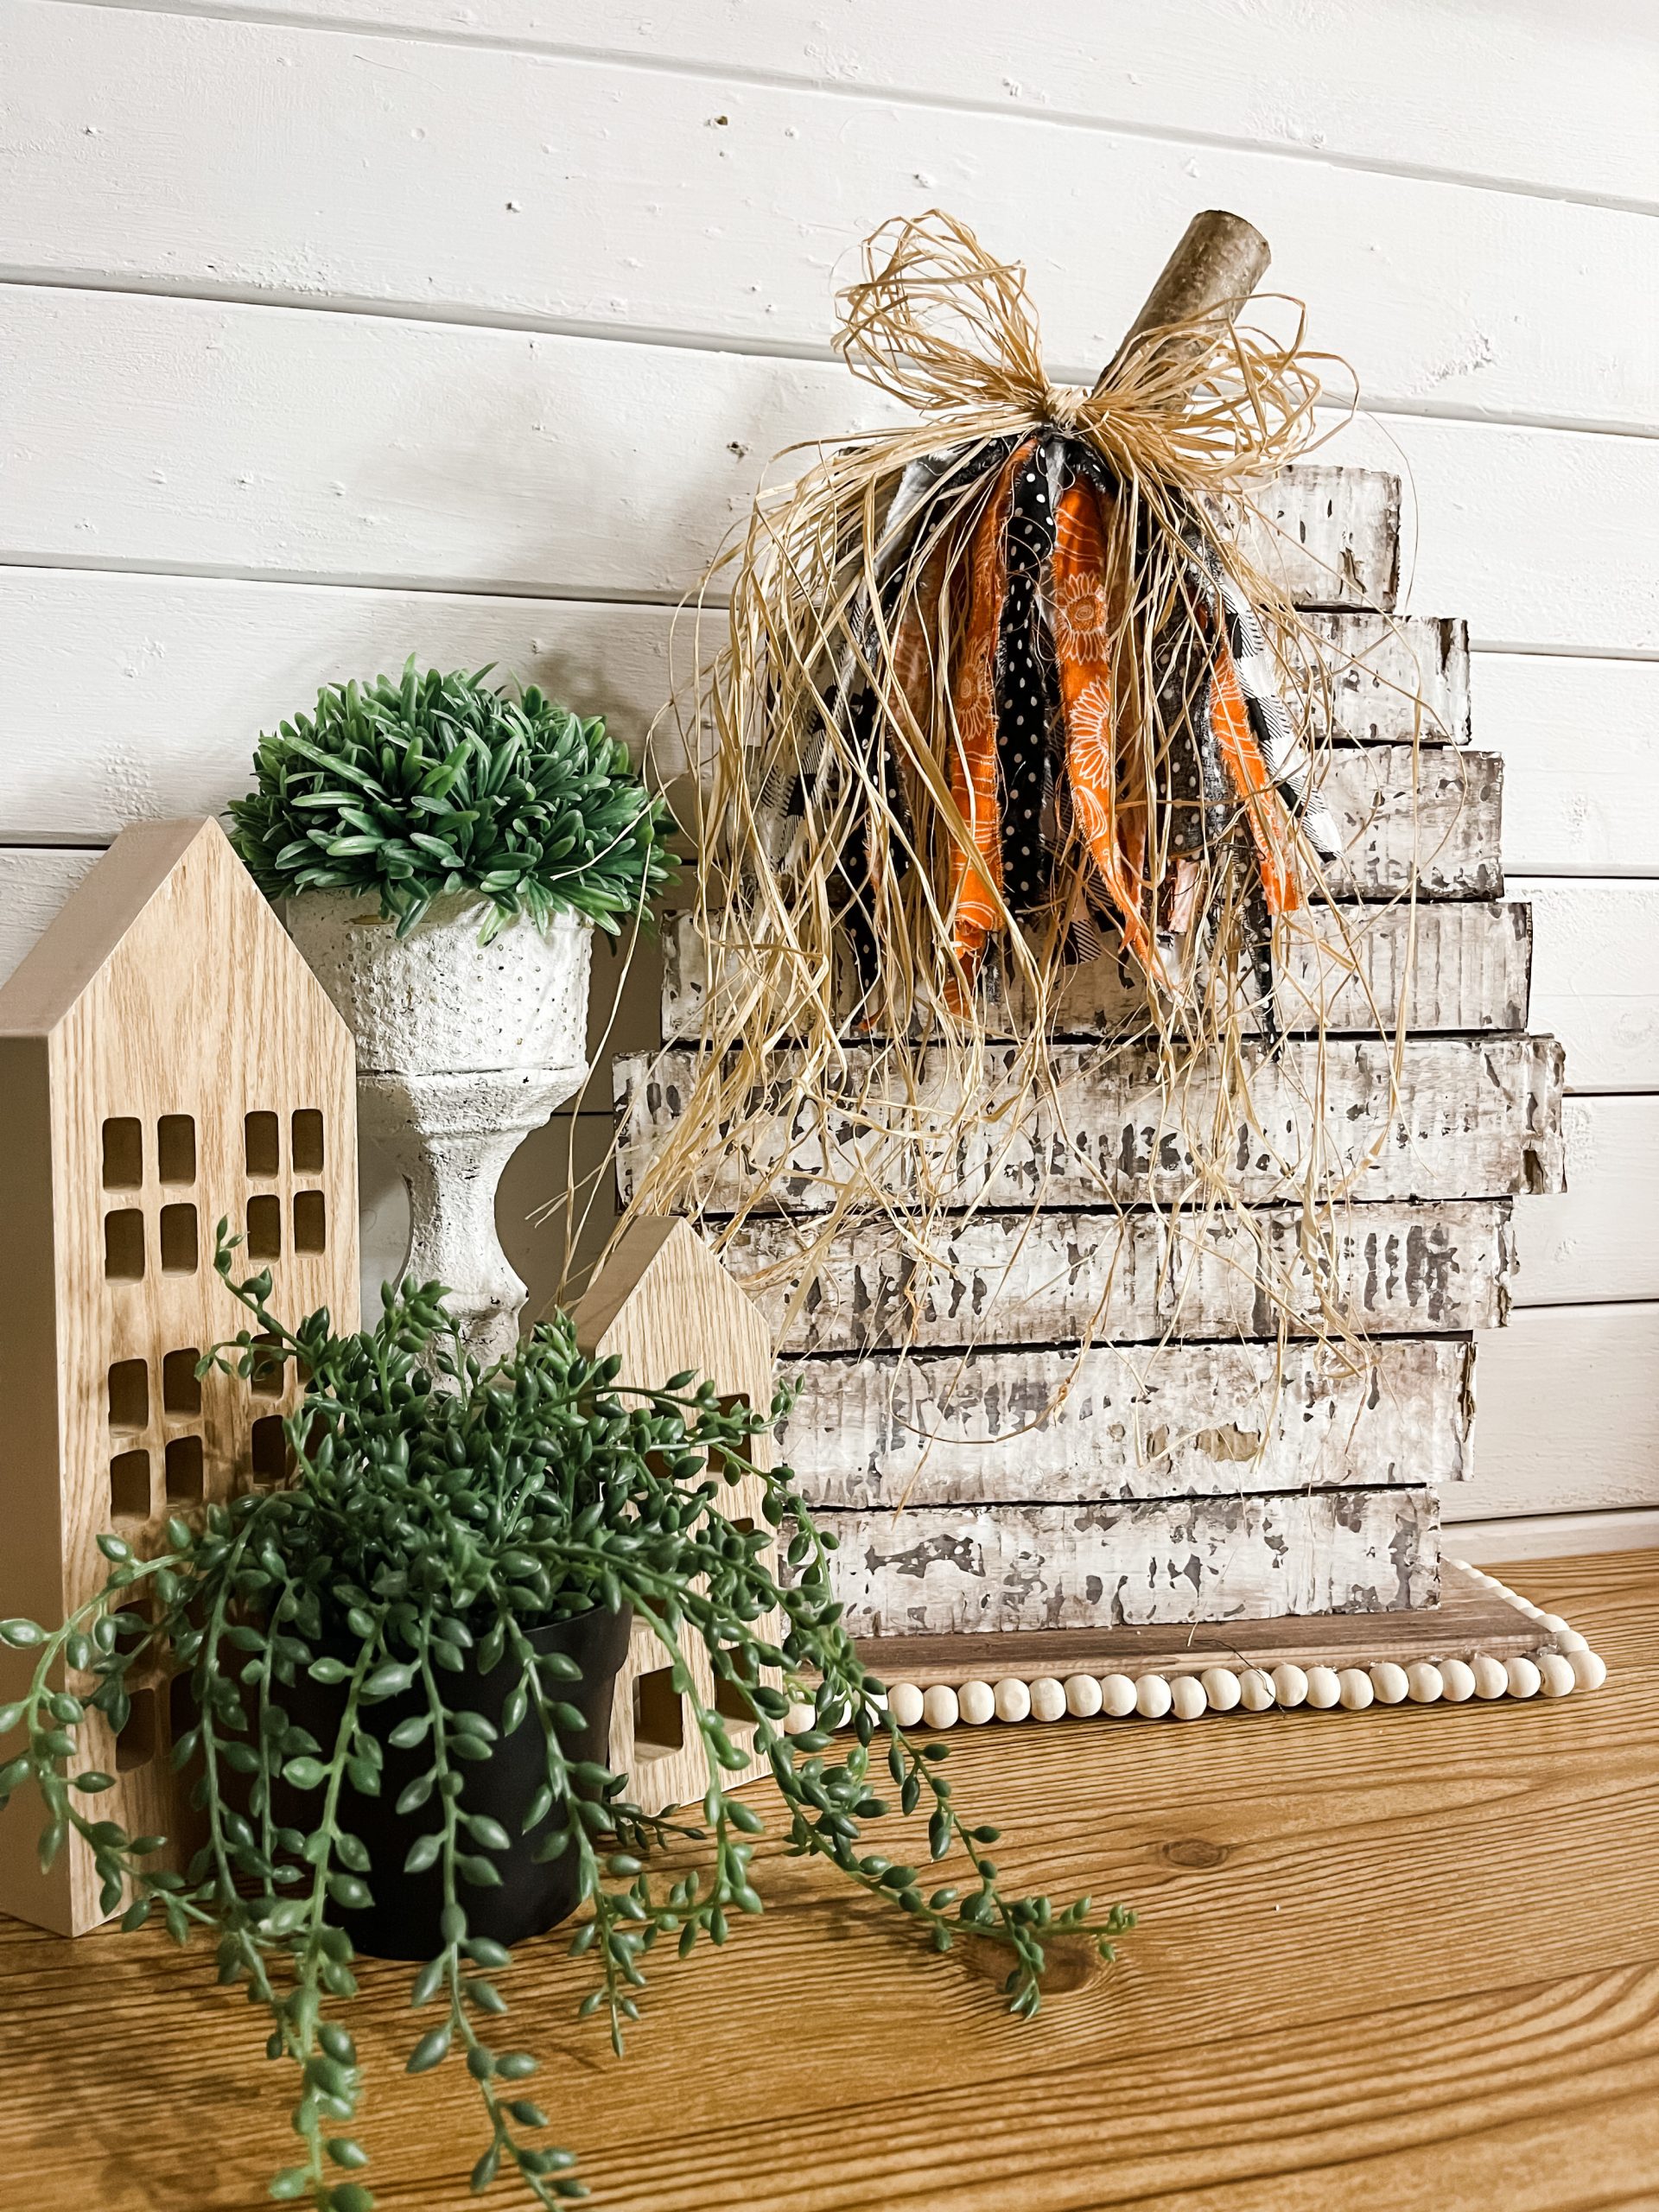
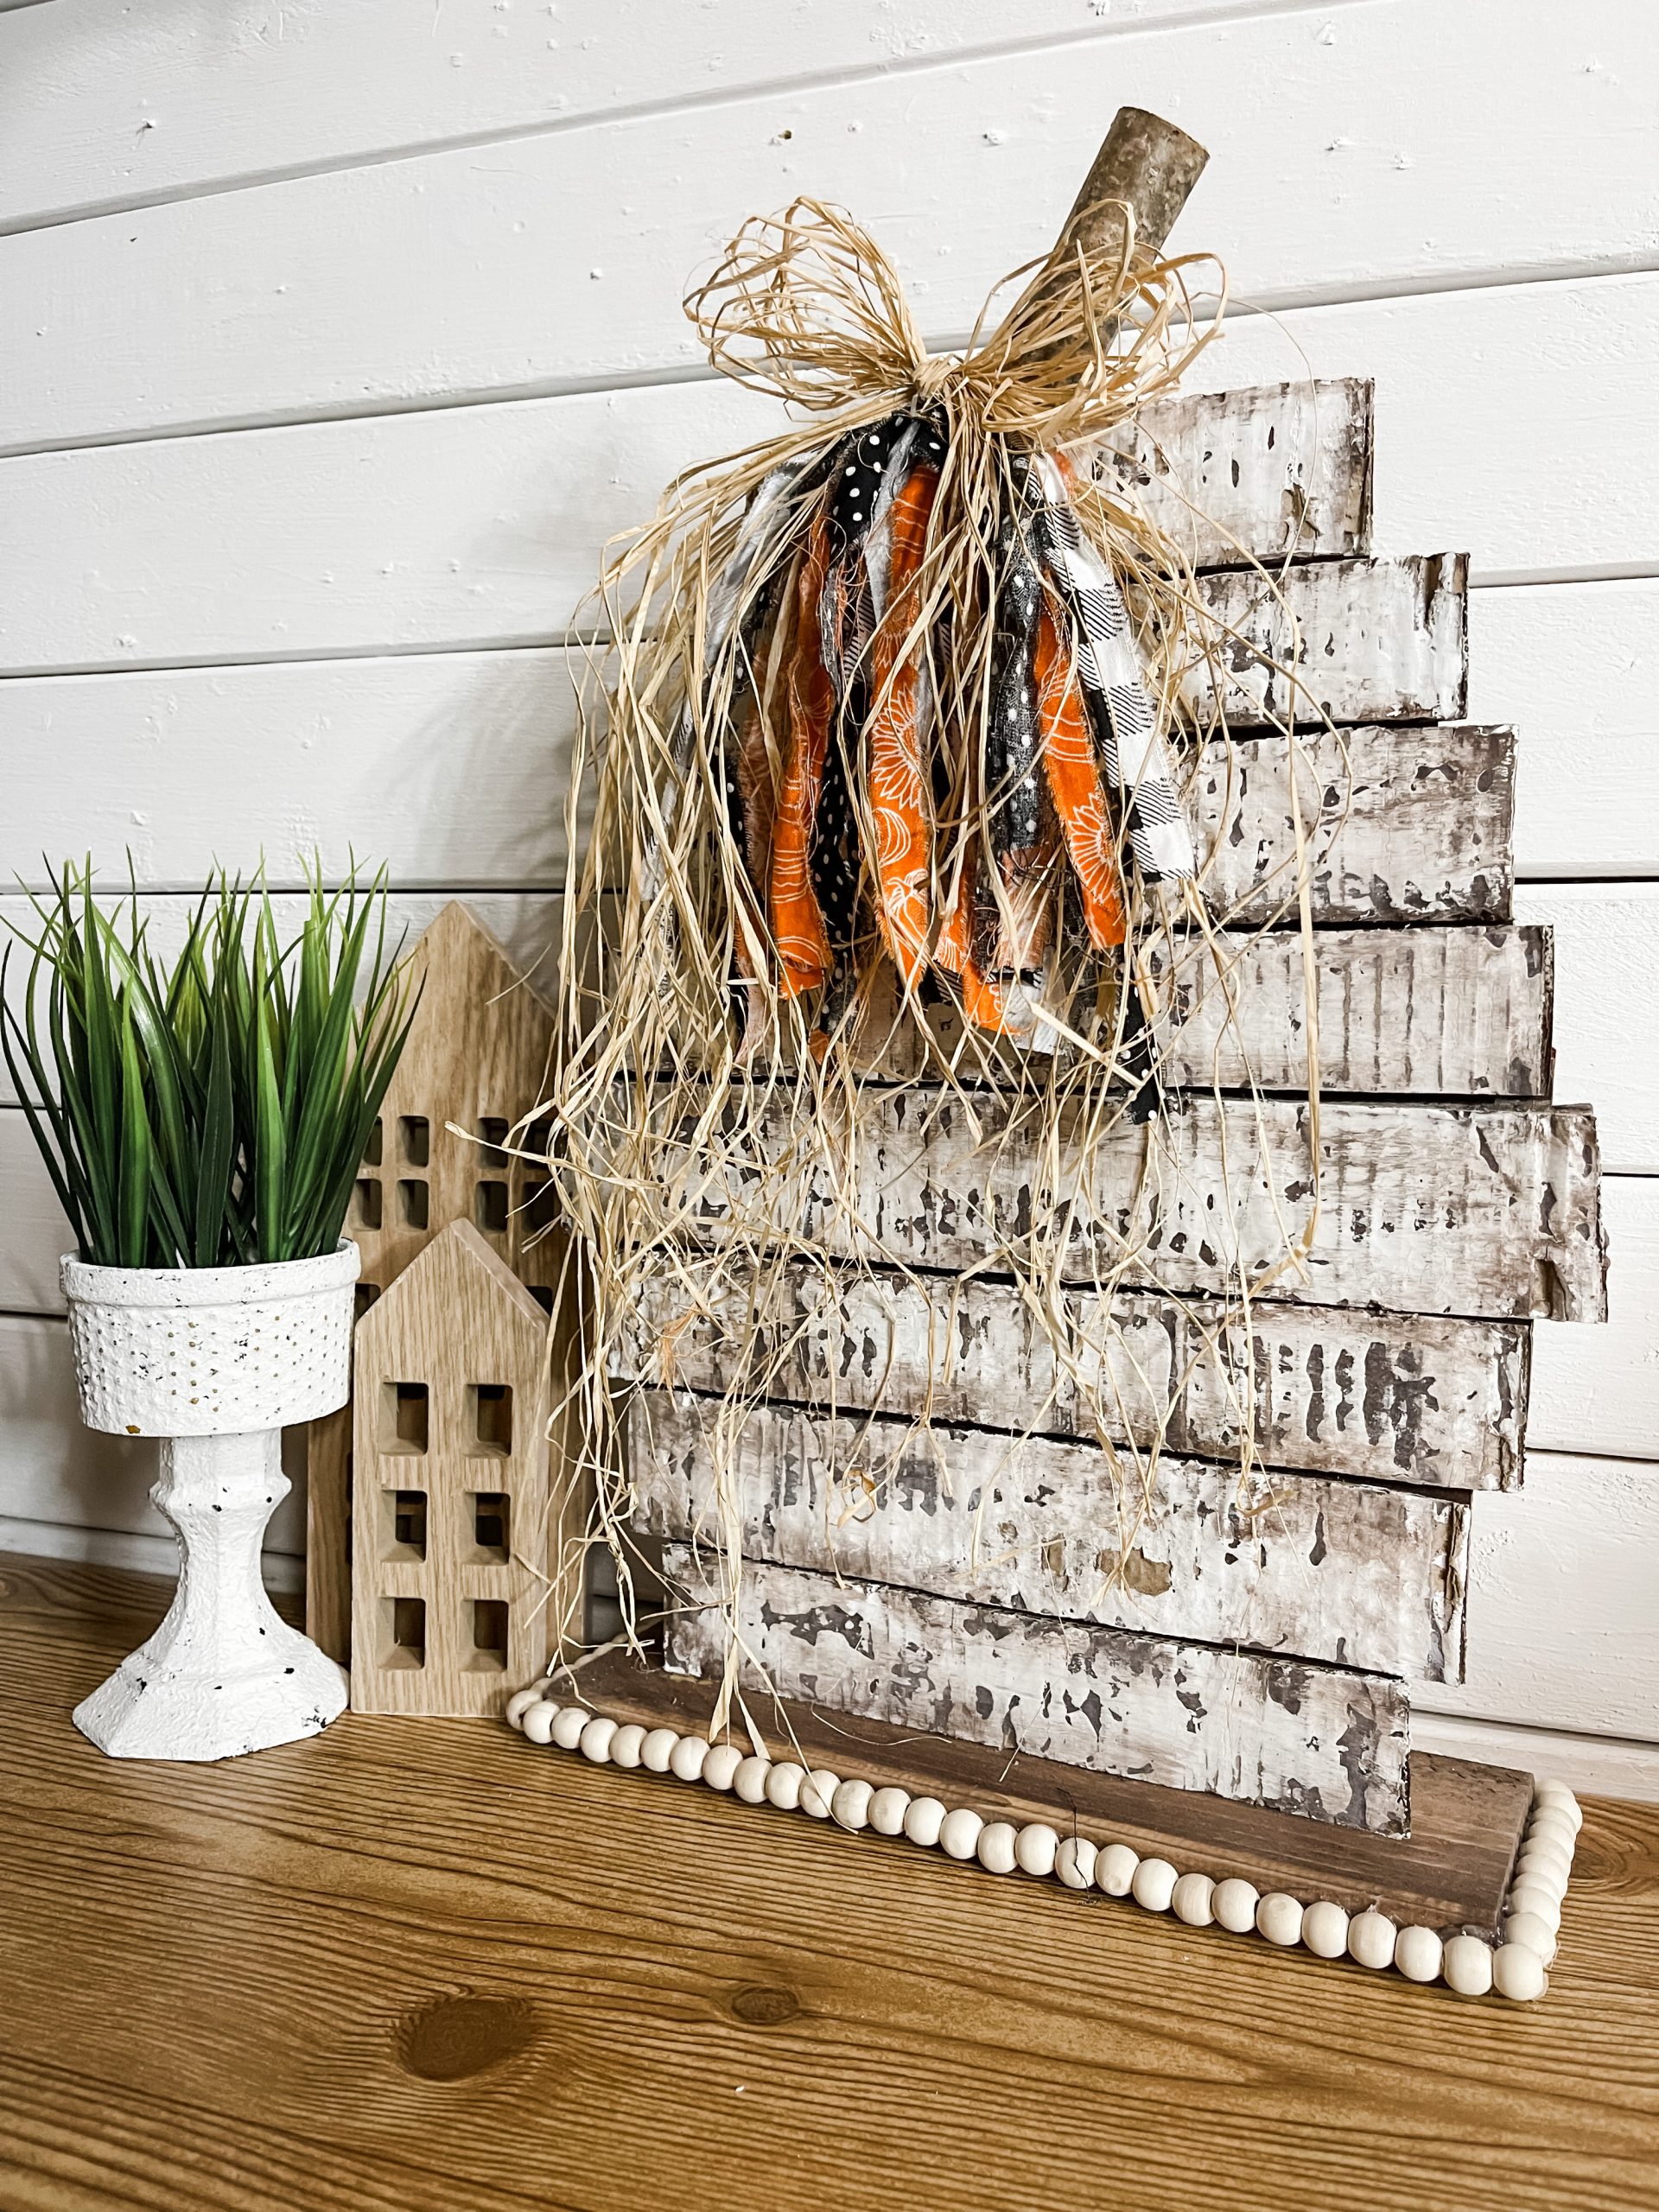
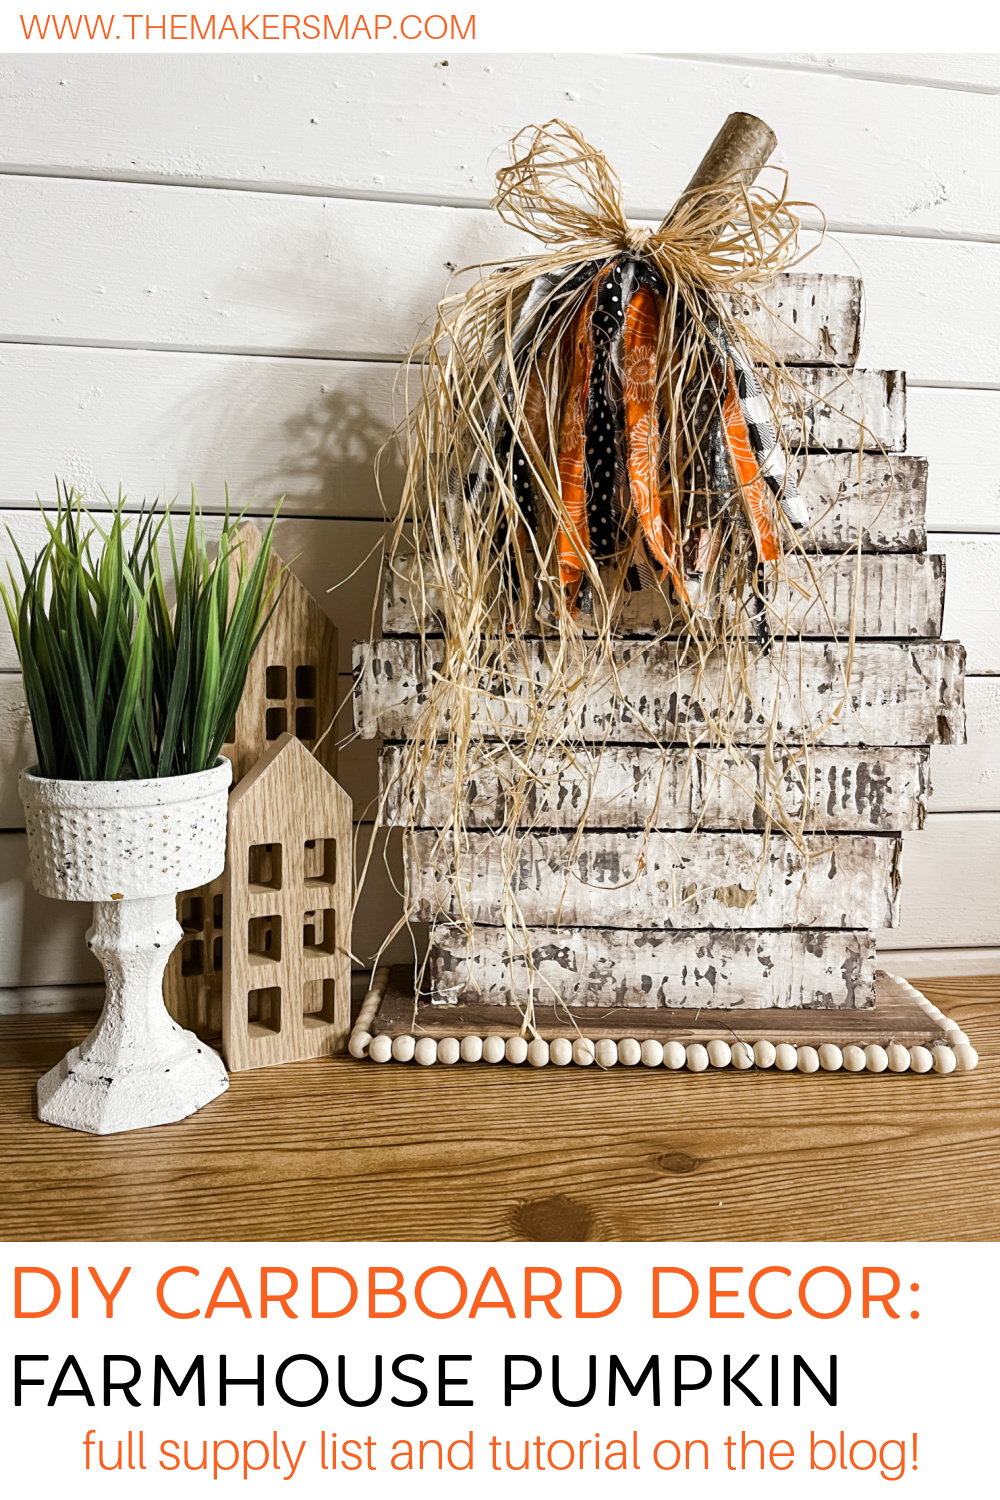
DIY Farmhouse Cardboard Pumpkin
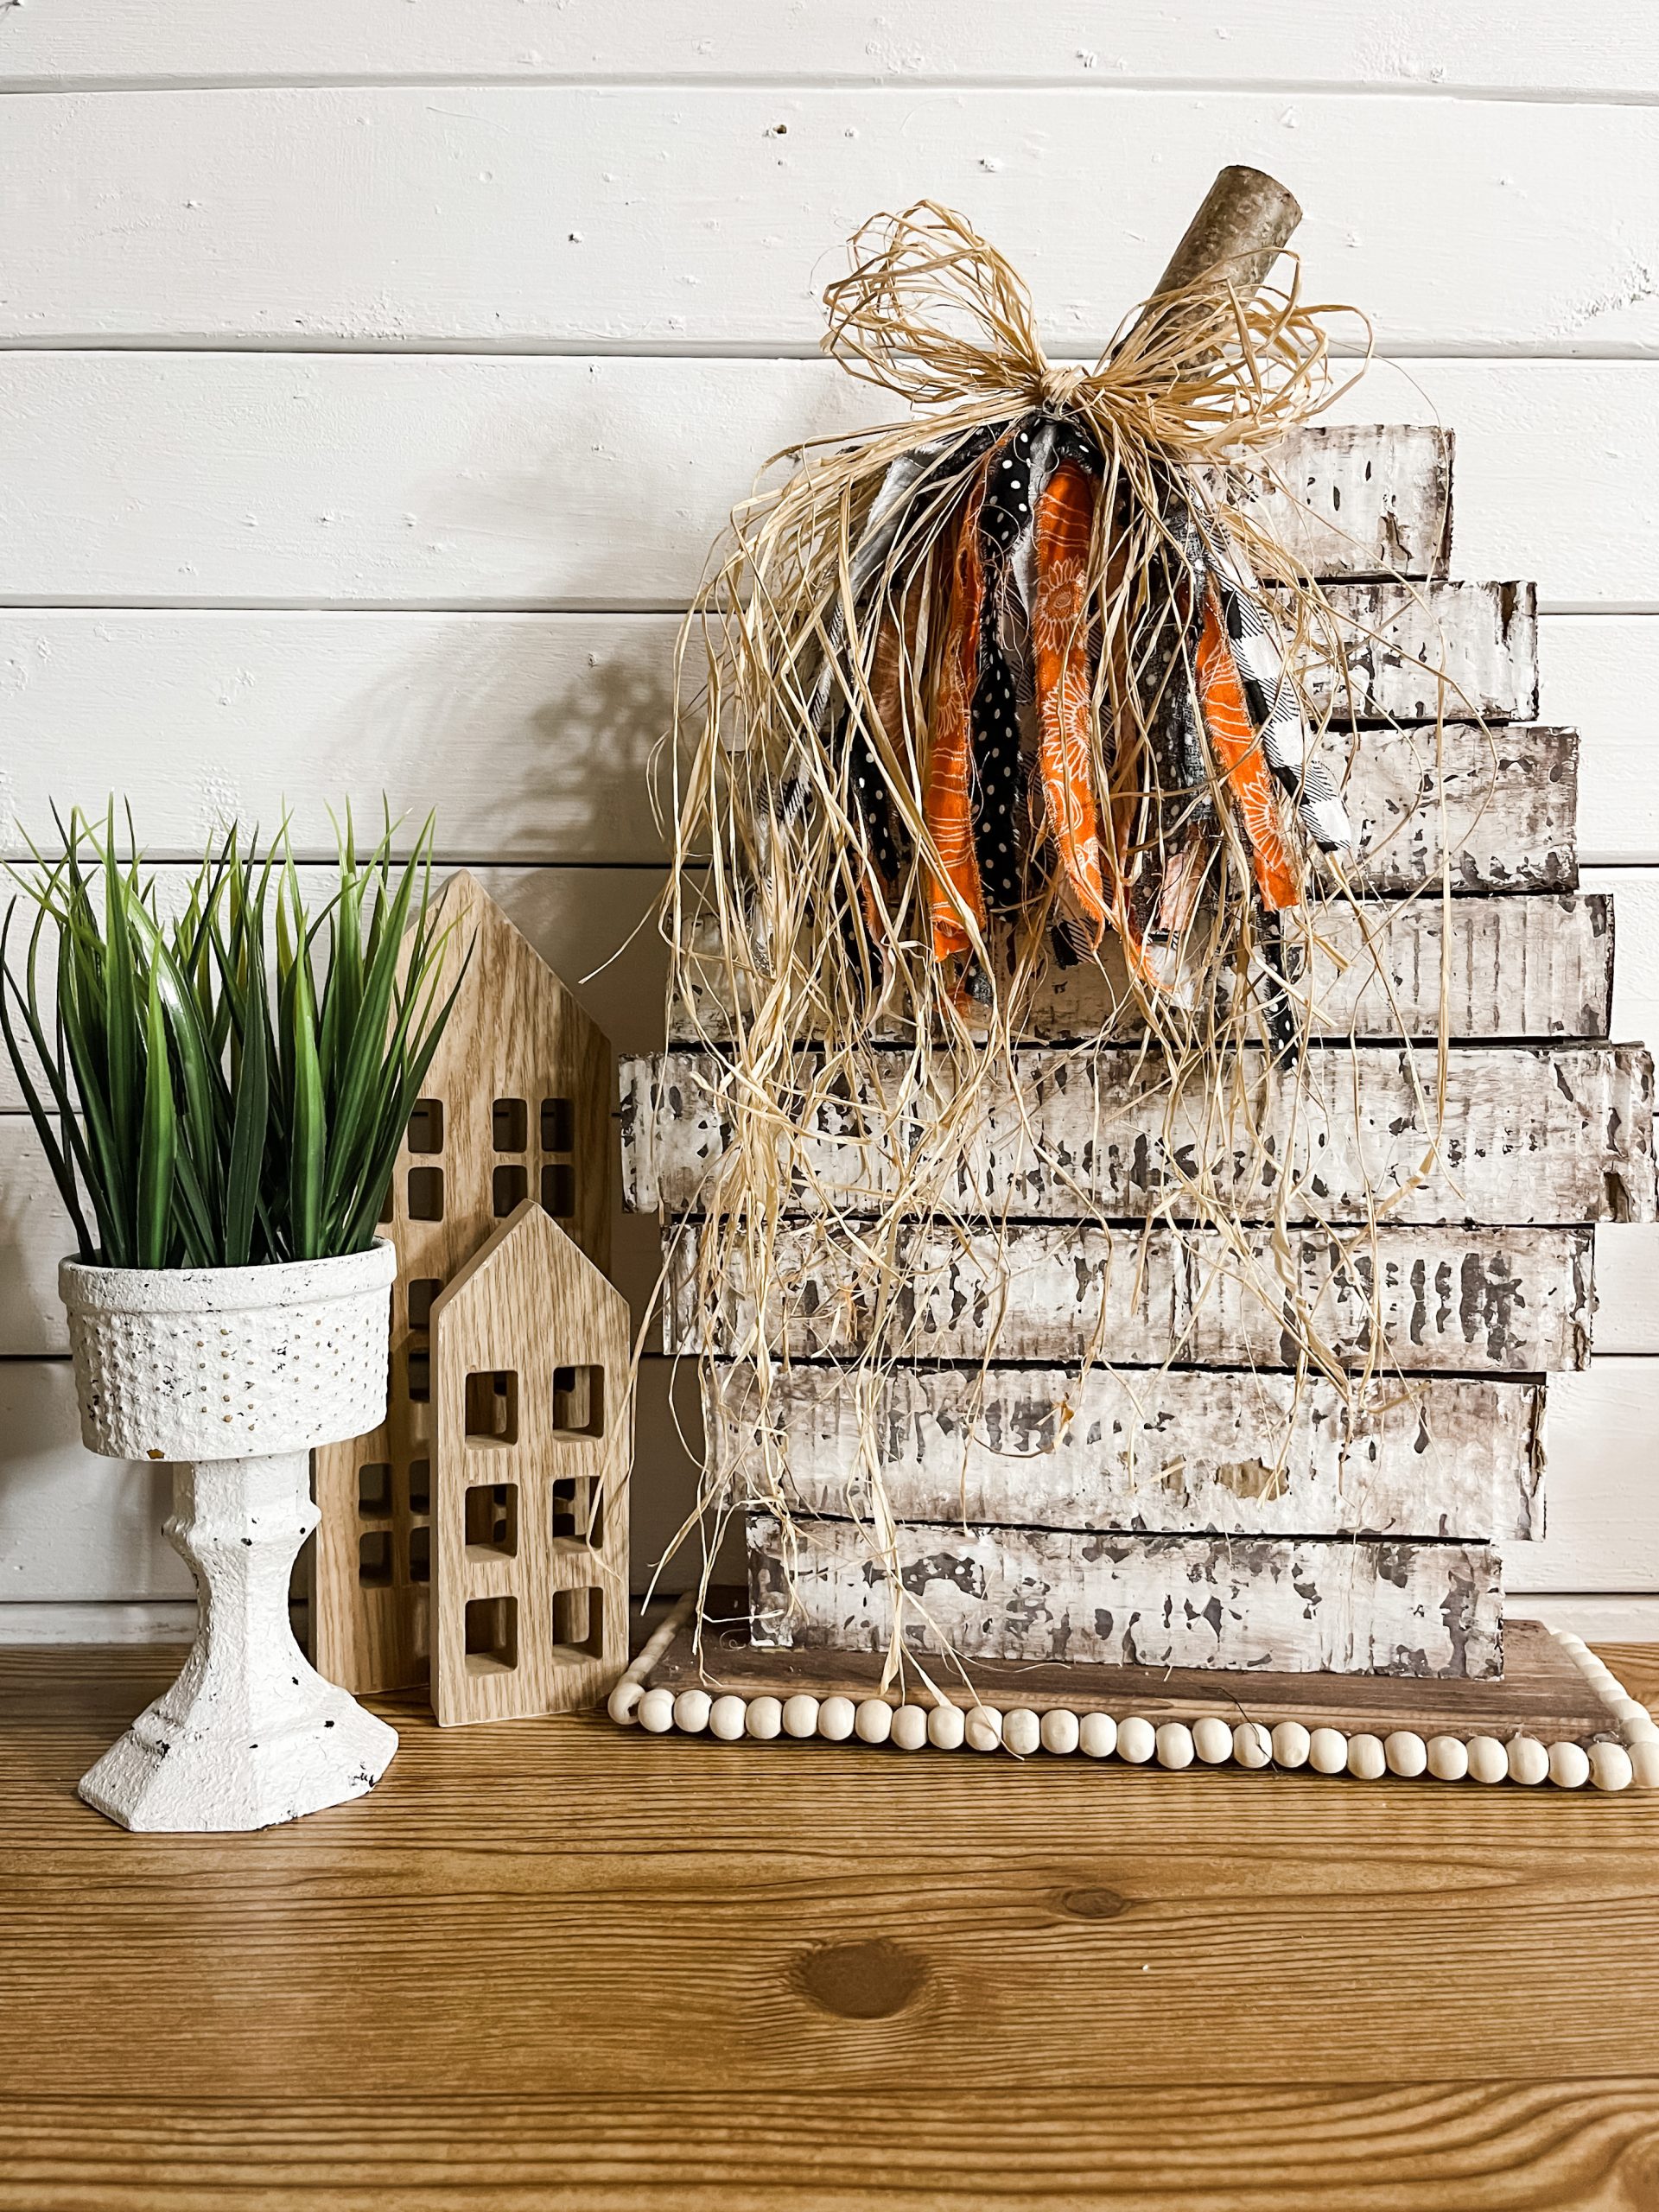
How adorable is this simple DIY farmhouse cardboard pumpkin?? I use a lot of Dollar Tree supplies in my craft projects, but my goal is to show you how to make adorable home decor on a budget.
That’s why one of my favorite supplies to use is cardboard! Everyone has cardboard somewhere in their house that they can use and it is soo versatile!
Even though this is a fall project, you can take the same concept, planked and distressed cardboard, to make a Christmas tree! Just swap out the fall patterned fabrics for ones more festive and you’re good to go!
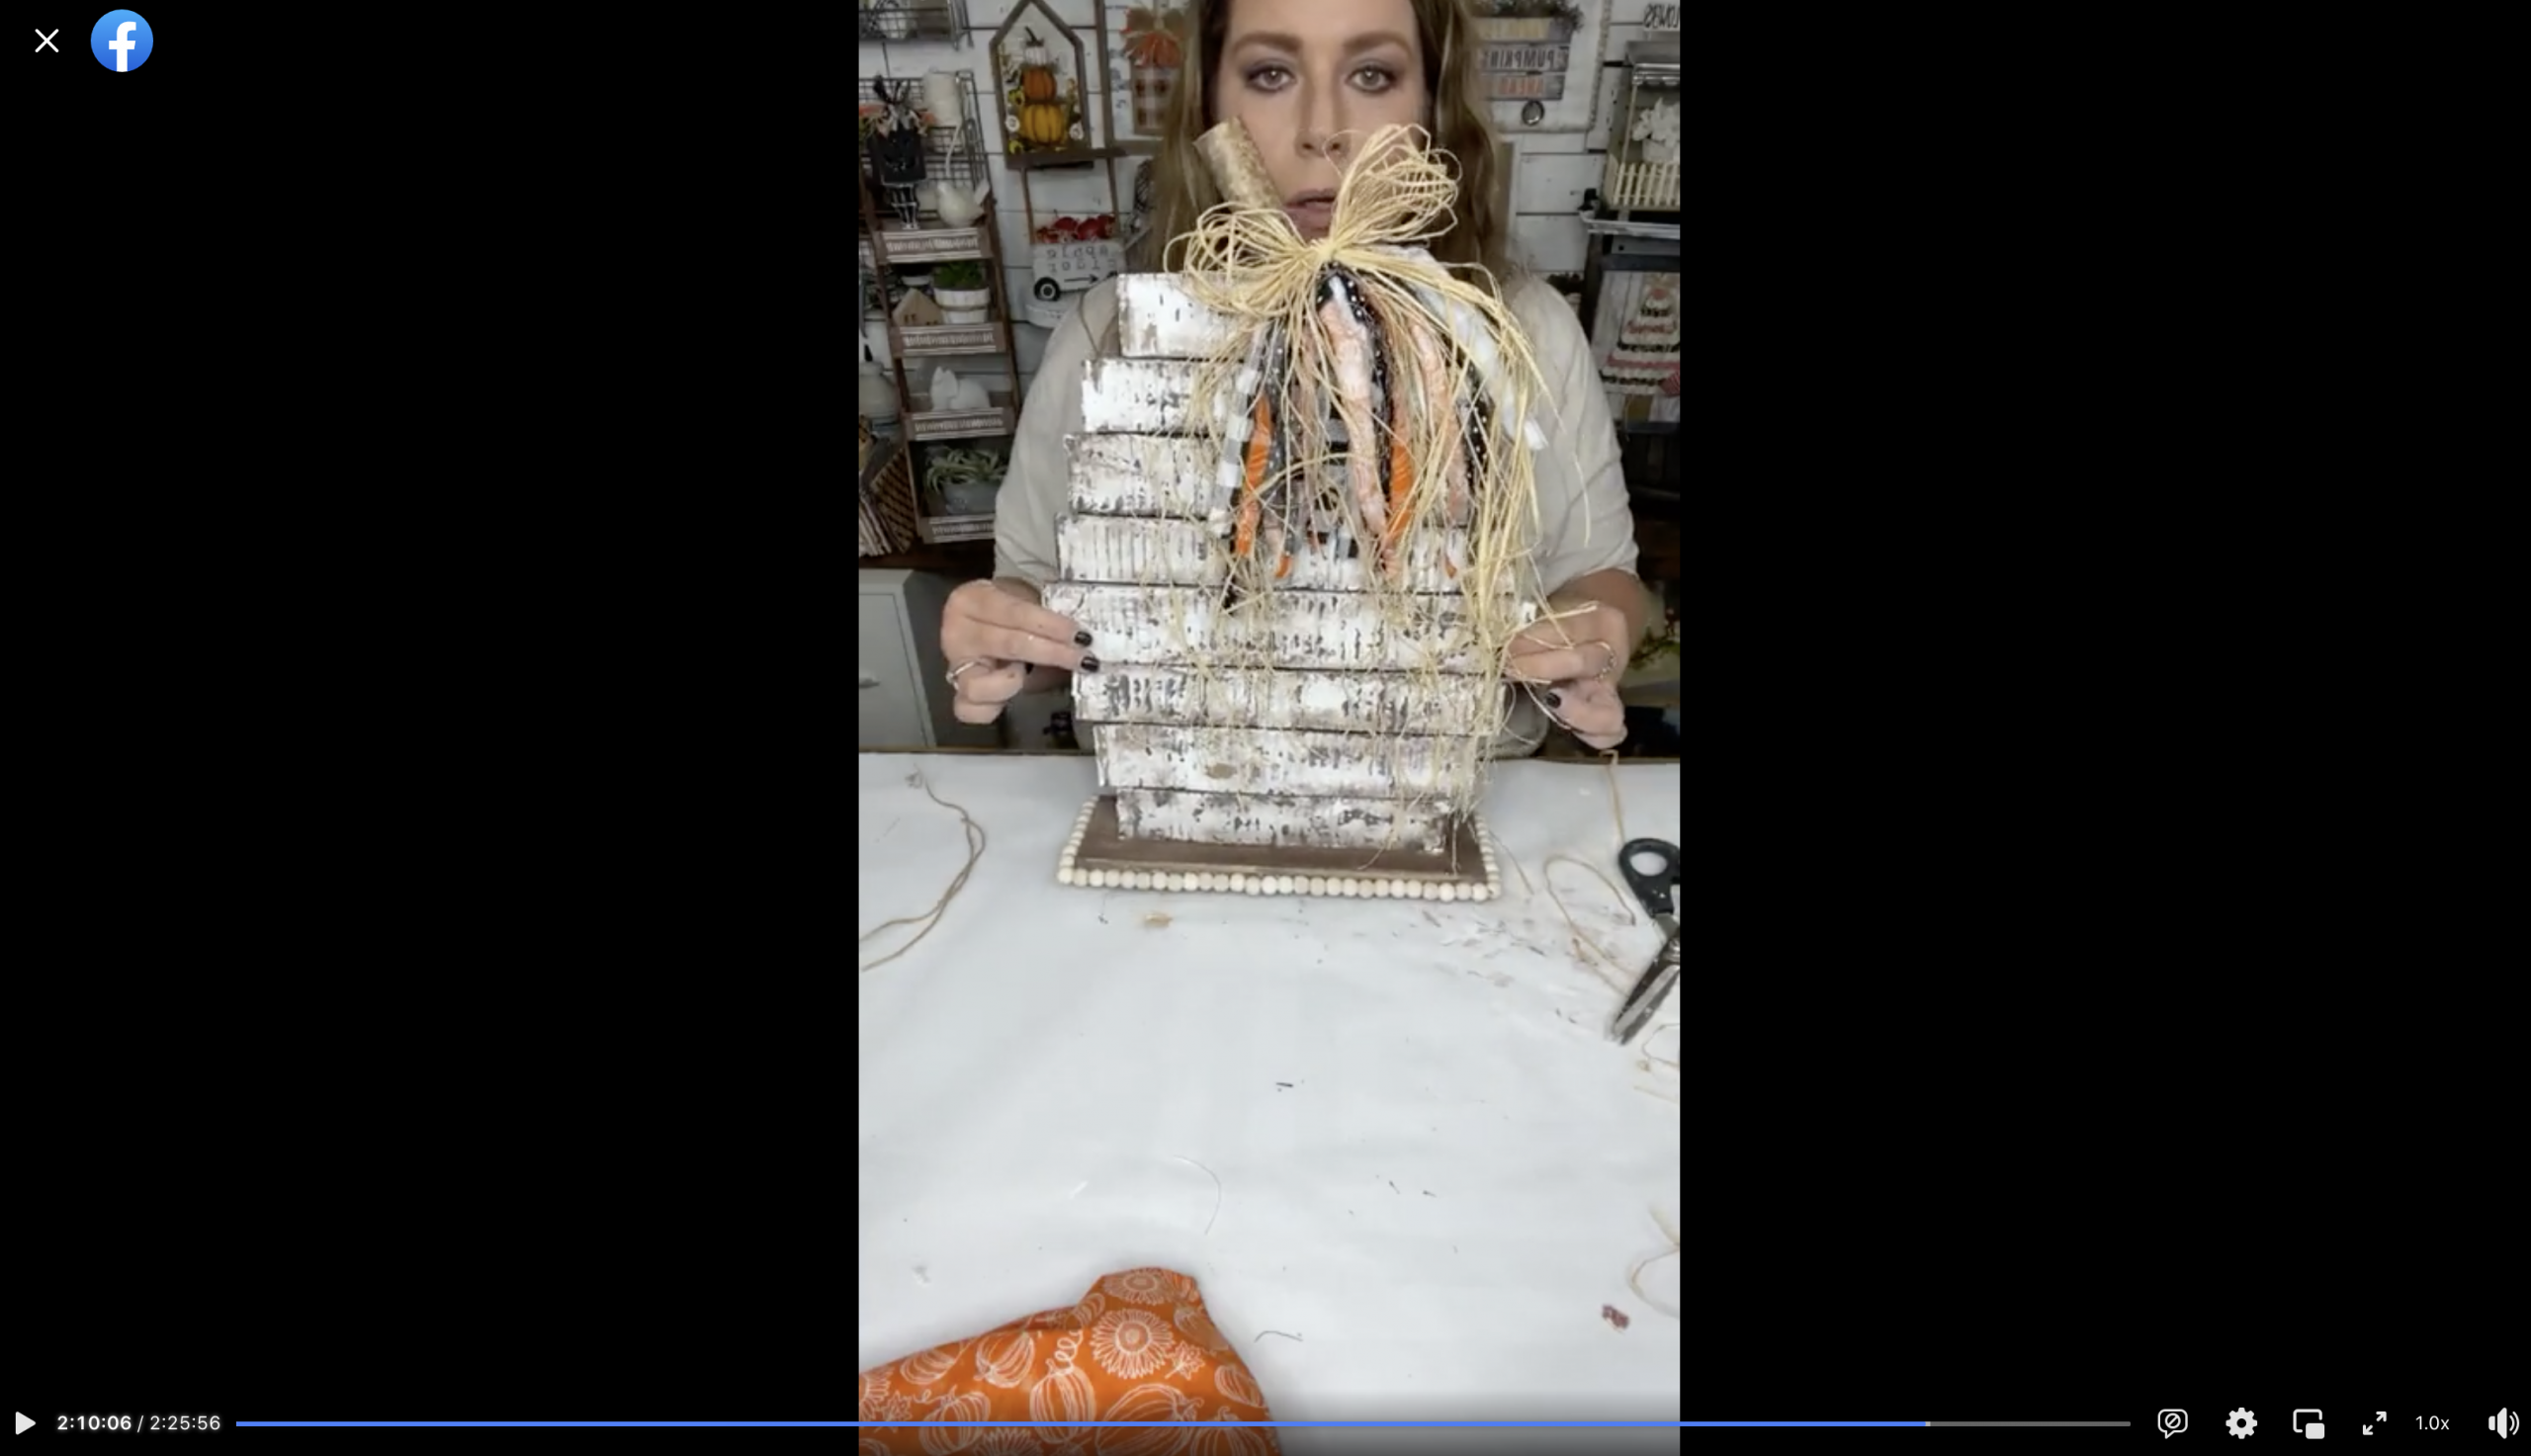
Watch the DIY tutorial
I recorded how to make this adorable DIY farmhouse cardboard pumpkin during a LIVE video on my Facebook page.
If you want to see the DIY process, craft along, or just join in on the fun conversations, you can watch the DIY tutorial replay on Facebook!
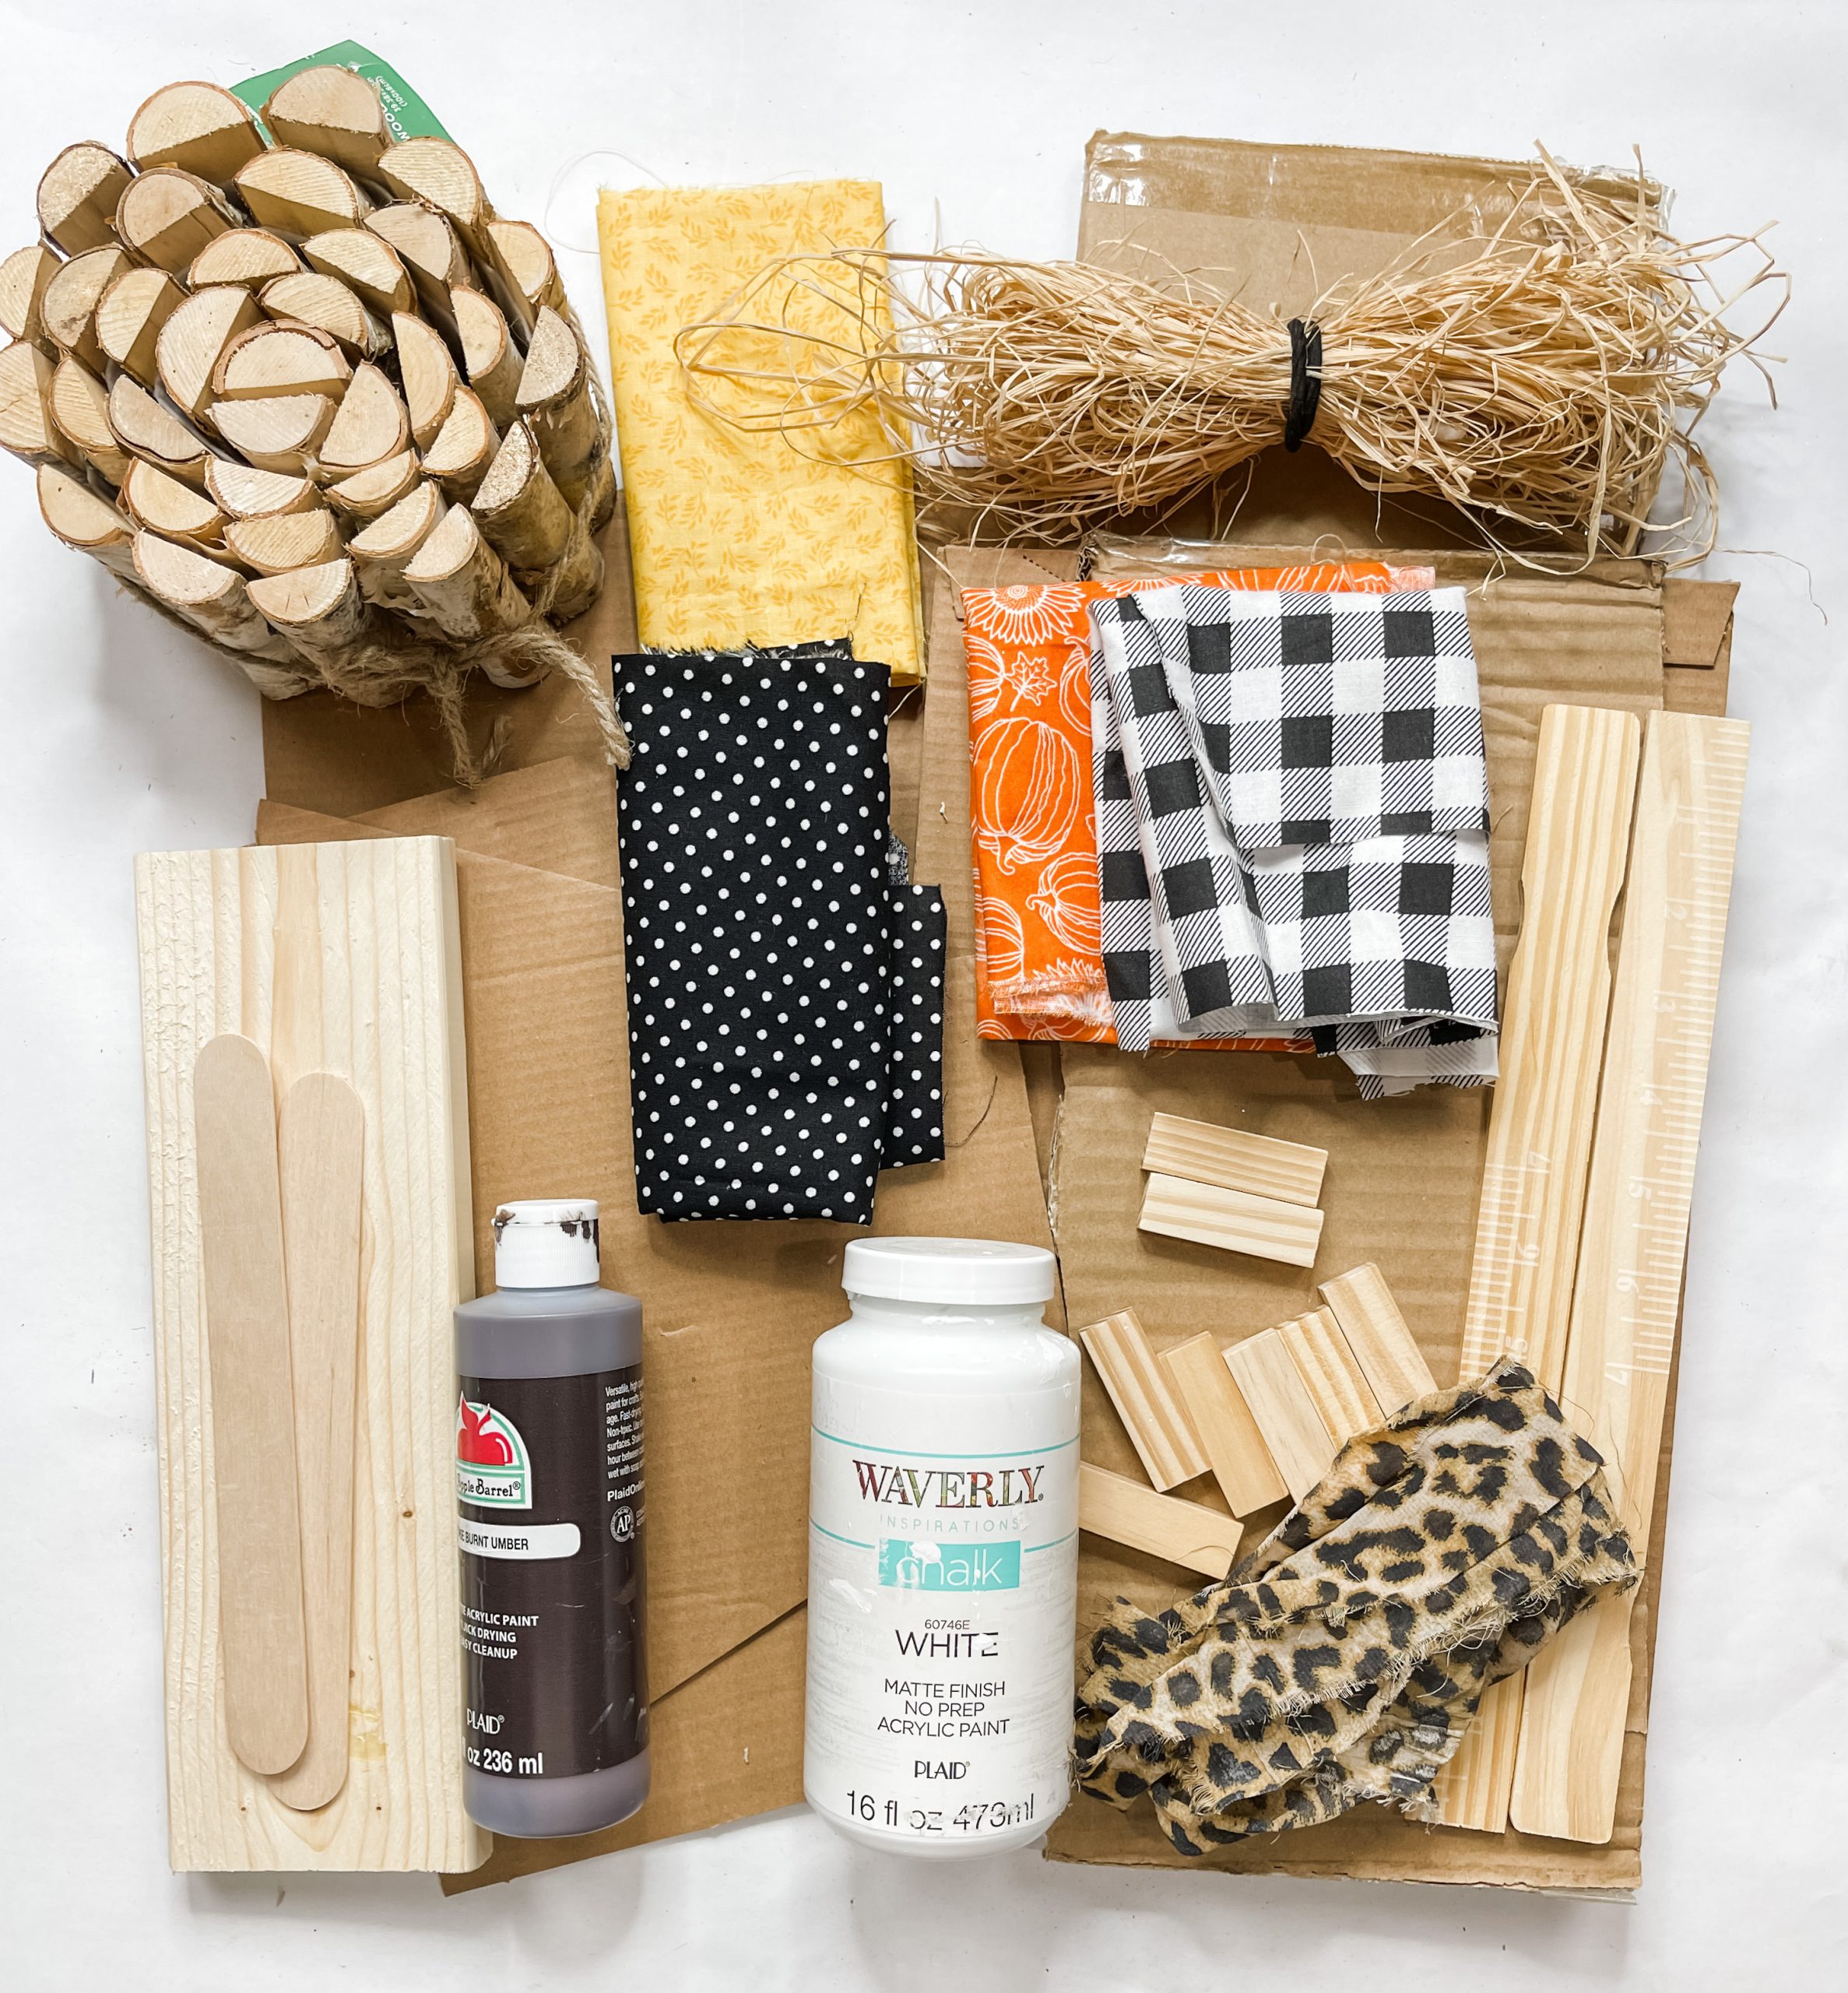
For this project, I will be using these items, but you can substitute where you want.
“As an Amazon Associate, I earn from qualifying purchases.”
- Cardboard
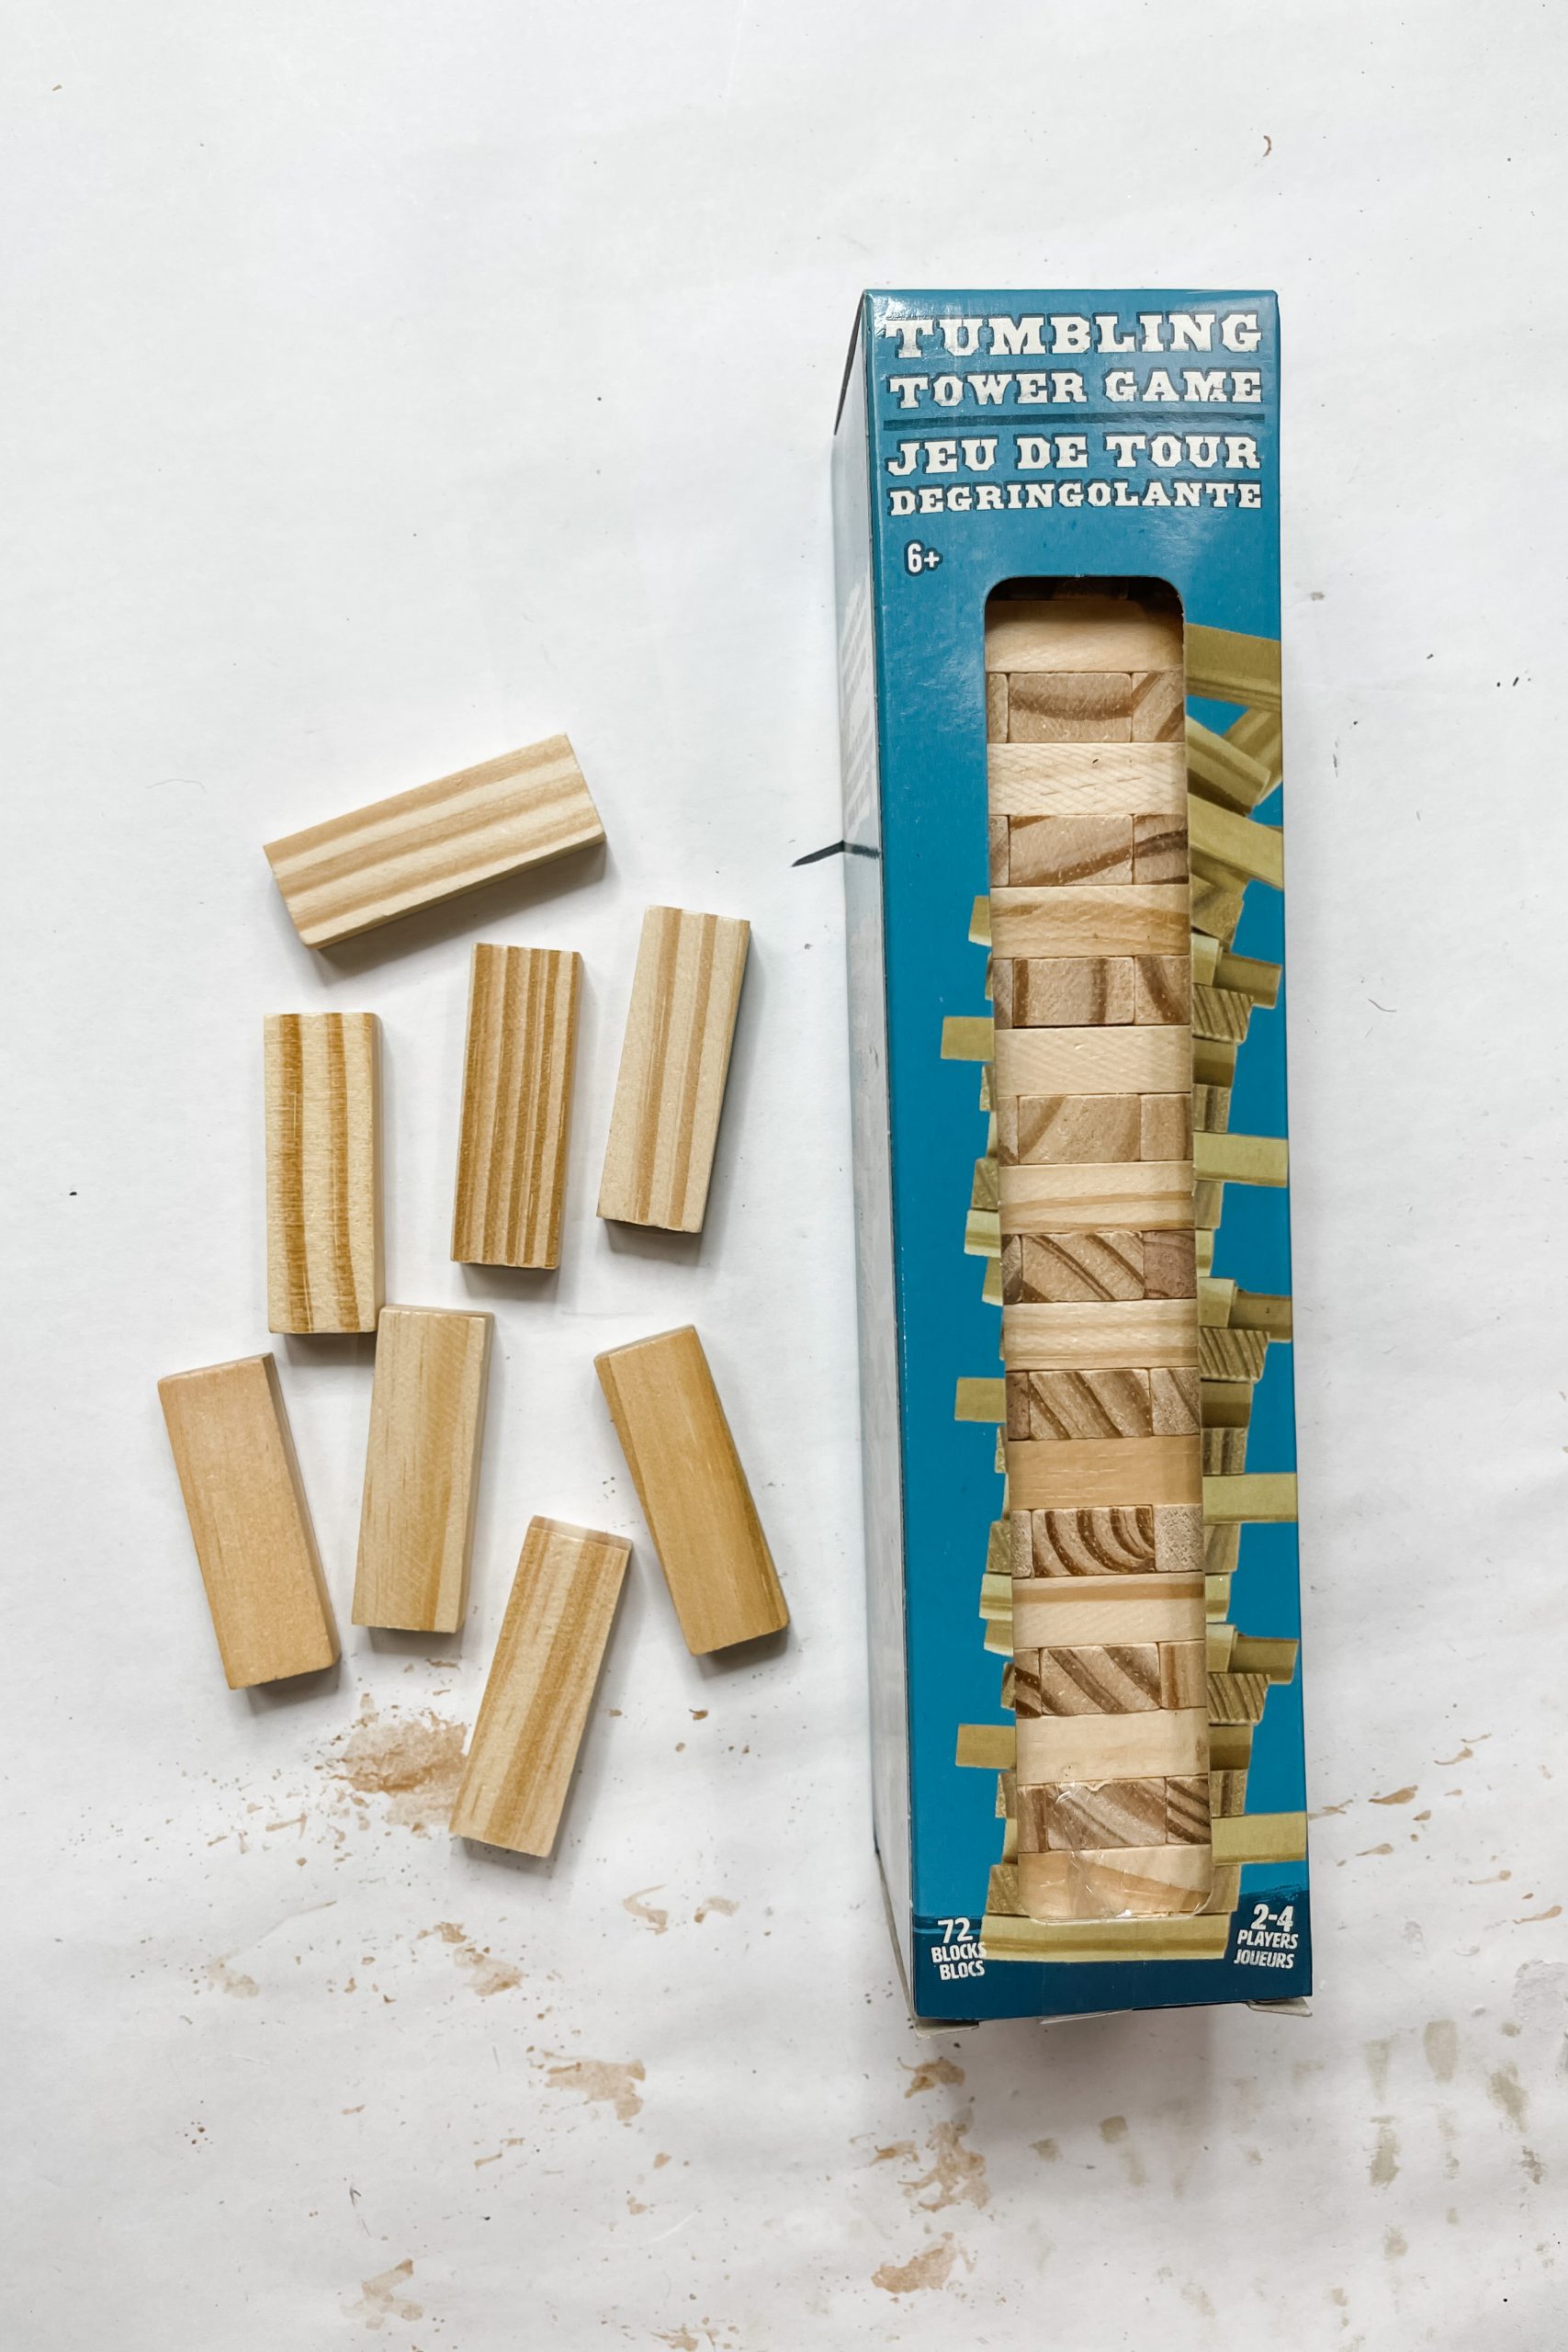
- Dollar Tree Tumbling Tower Blocks
- Dollar Tree Raffia
- Quart Paint Sticks
- Dollar Tree Wood Bead Garland
- Paint Stick Ruler
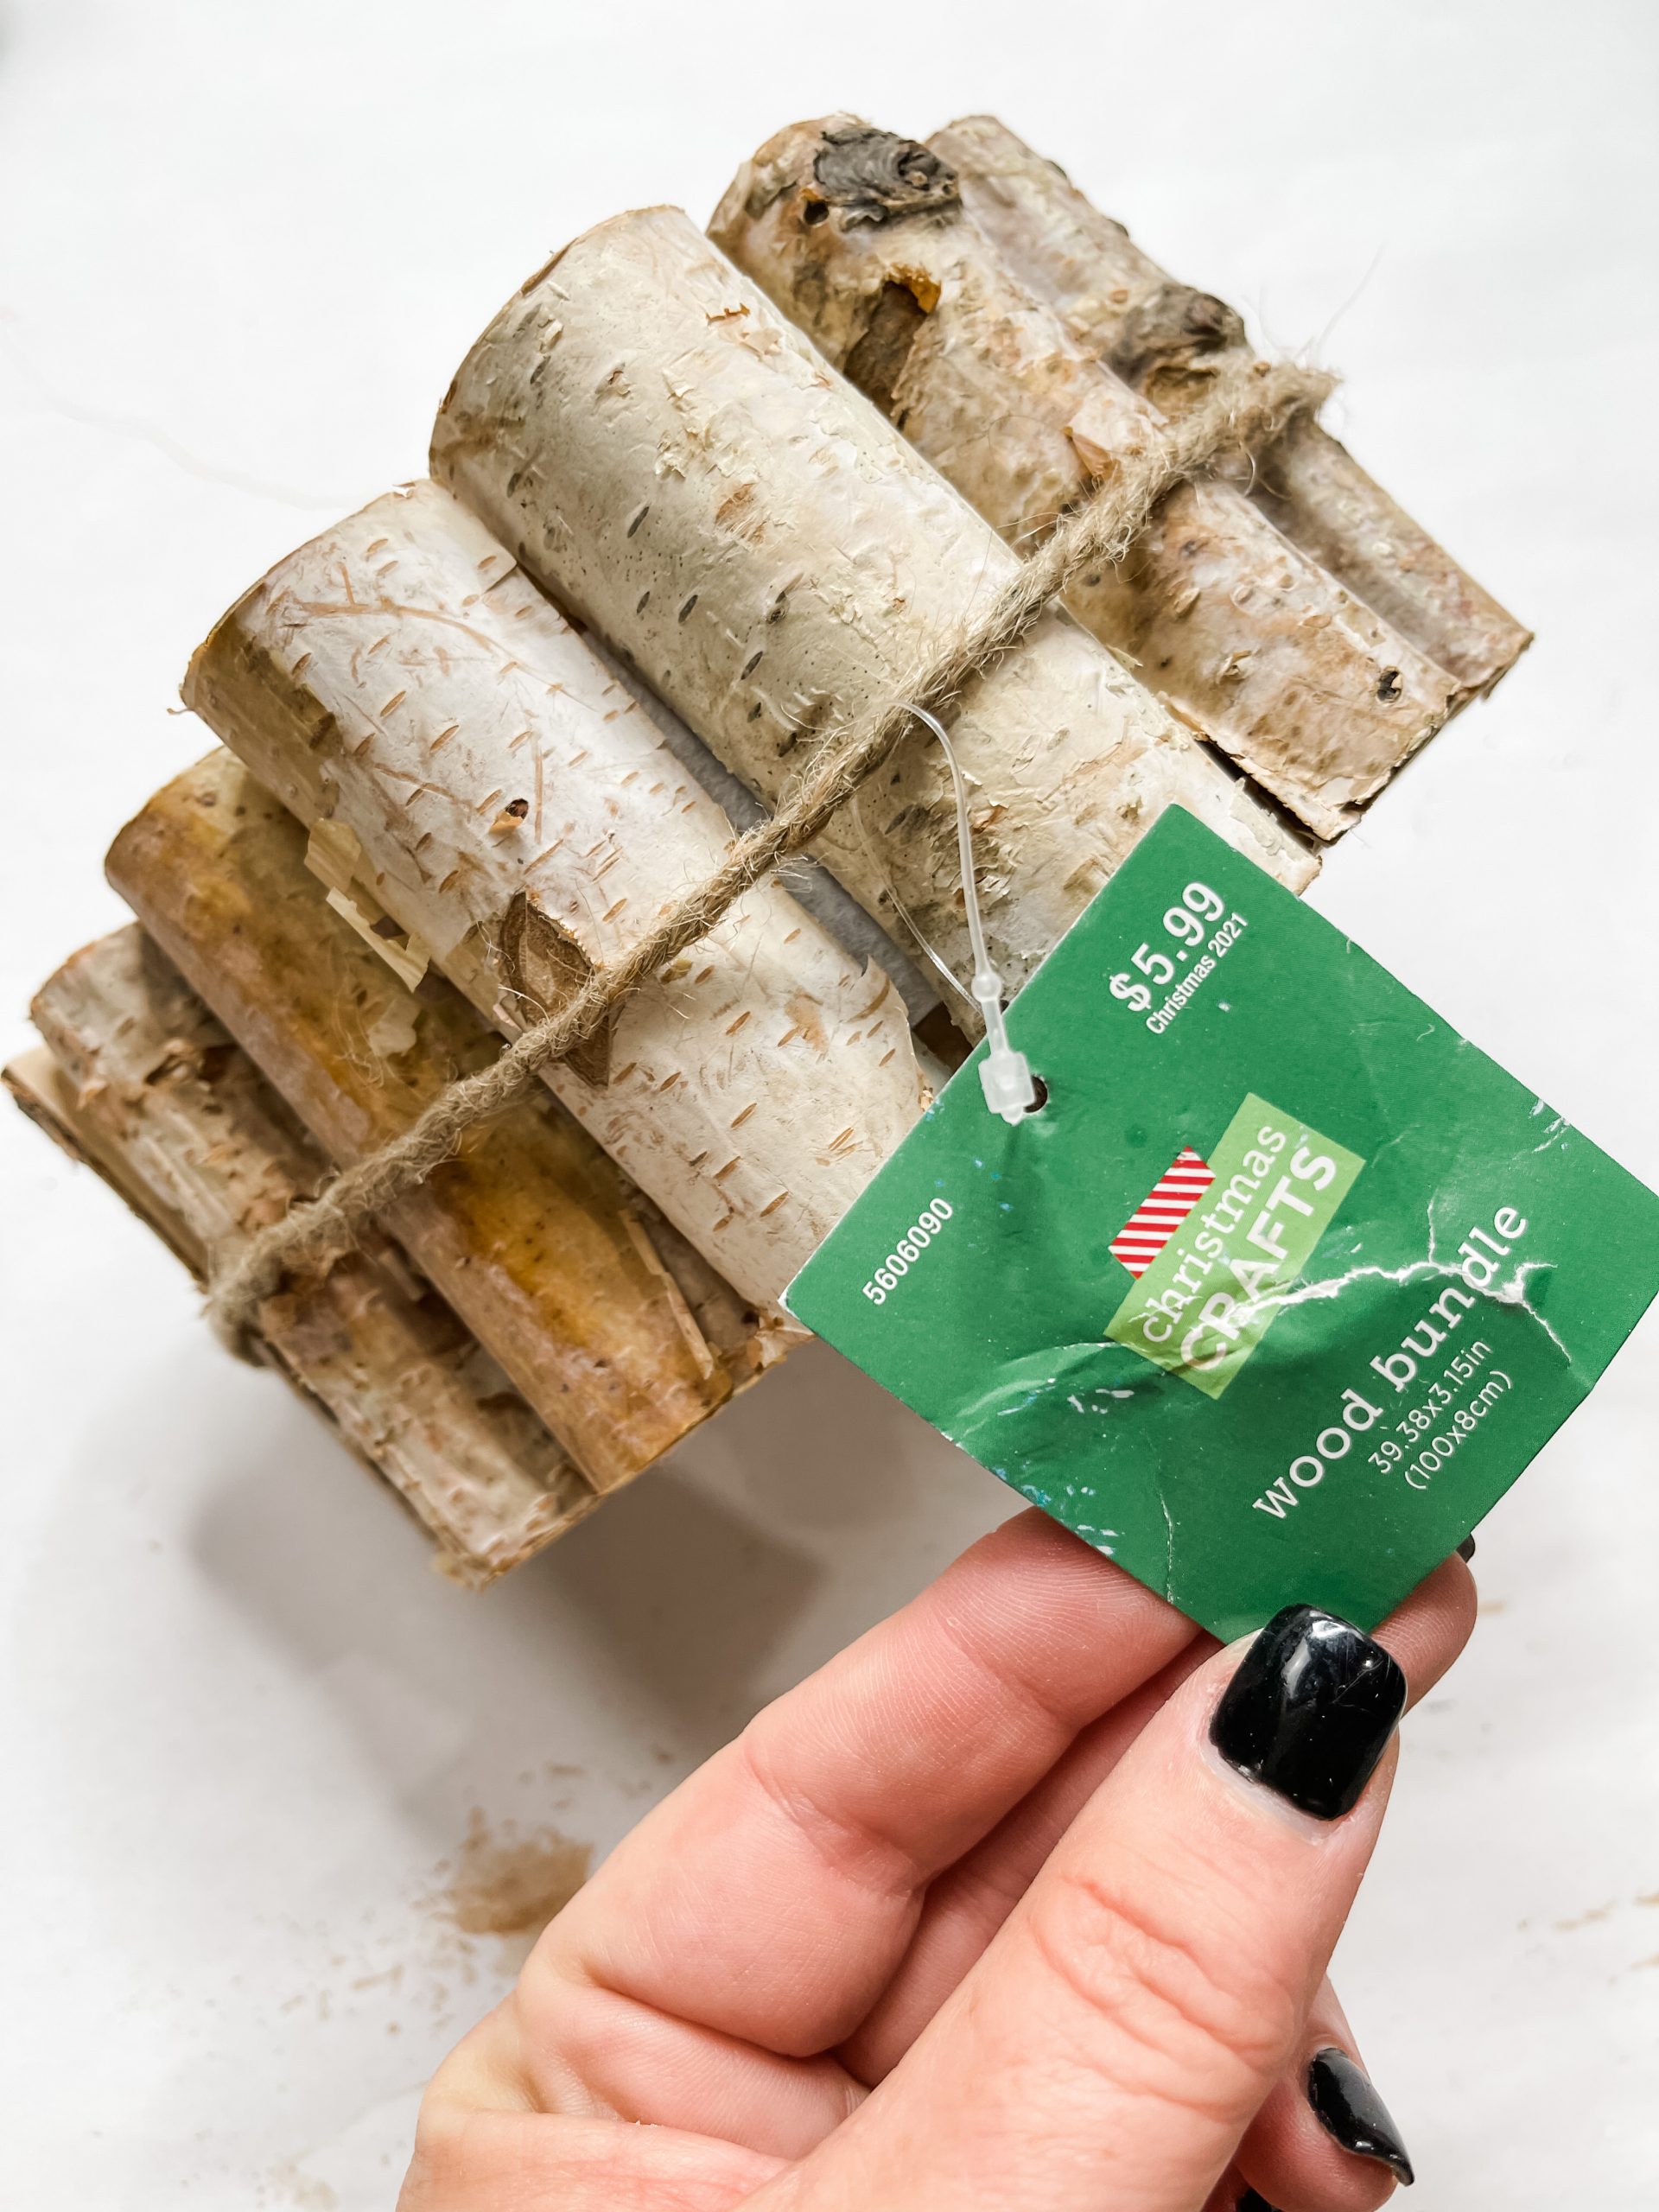
- Wood Stem
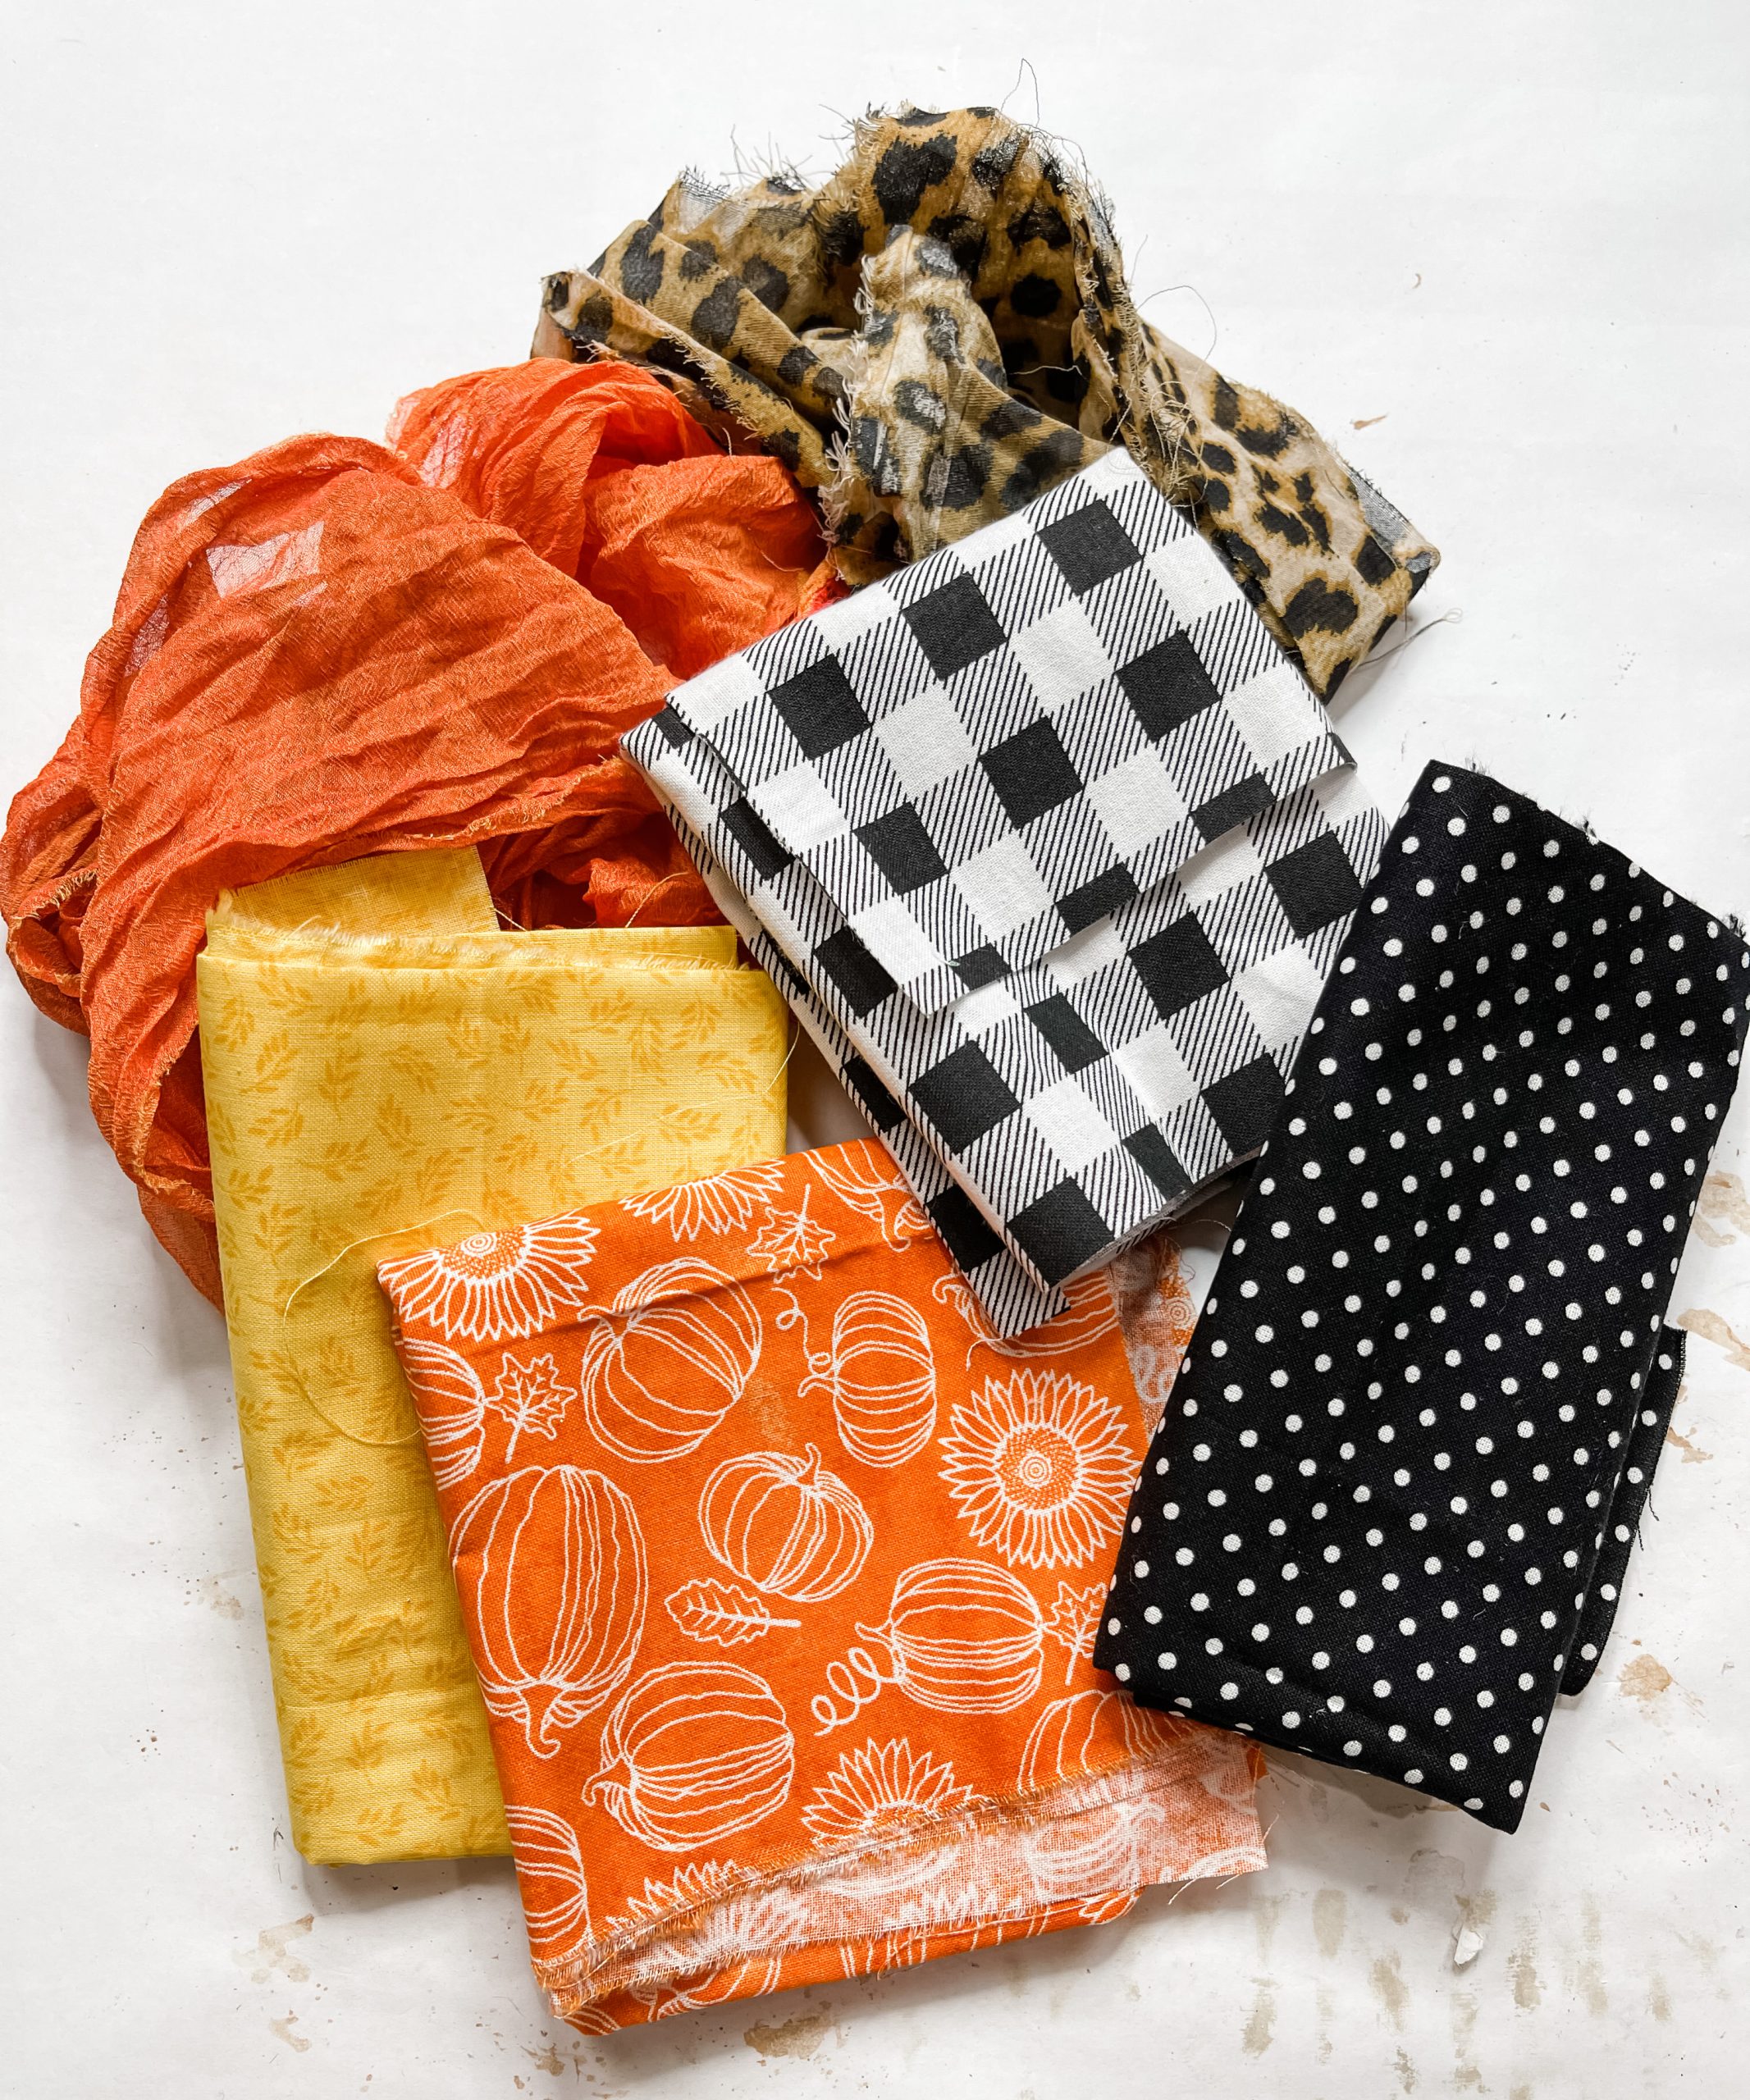
- Variety of fabrics
- Apple Barrel Burnt Umber Acrylic Paint
- Waverly White Chalk Paint
- Hot Glue gun
- Glue Stick
How to Make a DIY Farmhouse Cardboard Pumpkin
I want to start off by saying that how you begin this project will depend on the size of cardboard pieces that you have. I had to secure two pieces of cardboard together to make a larger surface that would work for my vision.
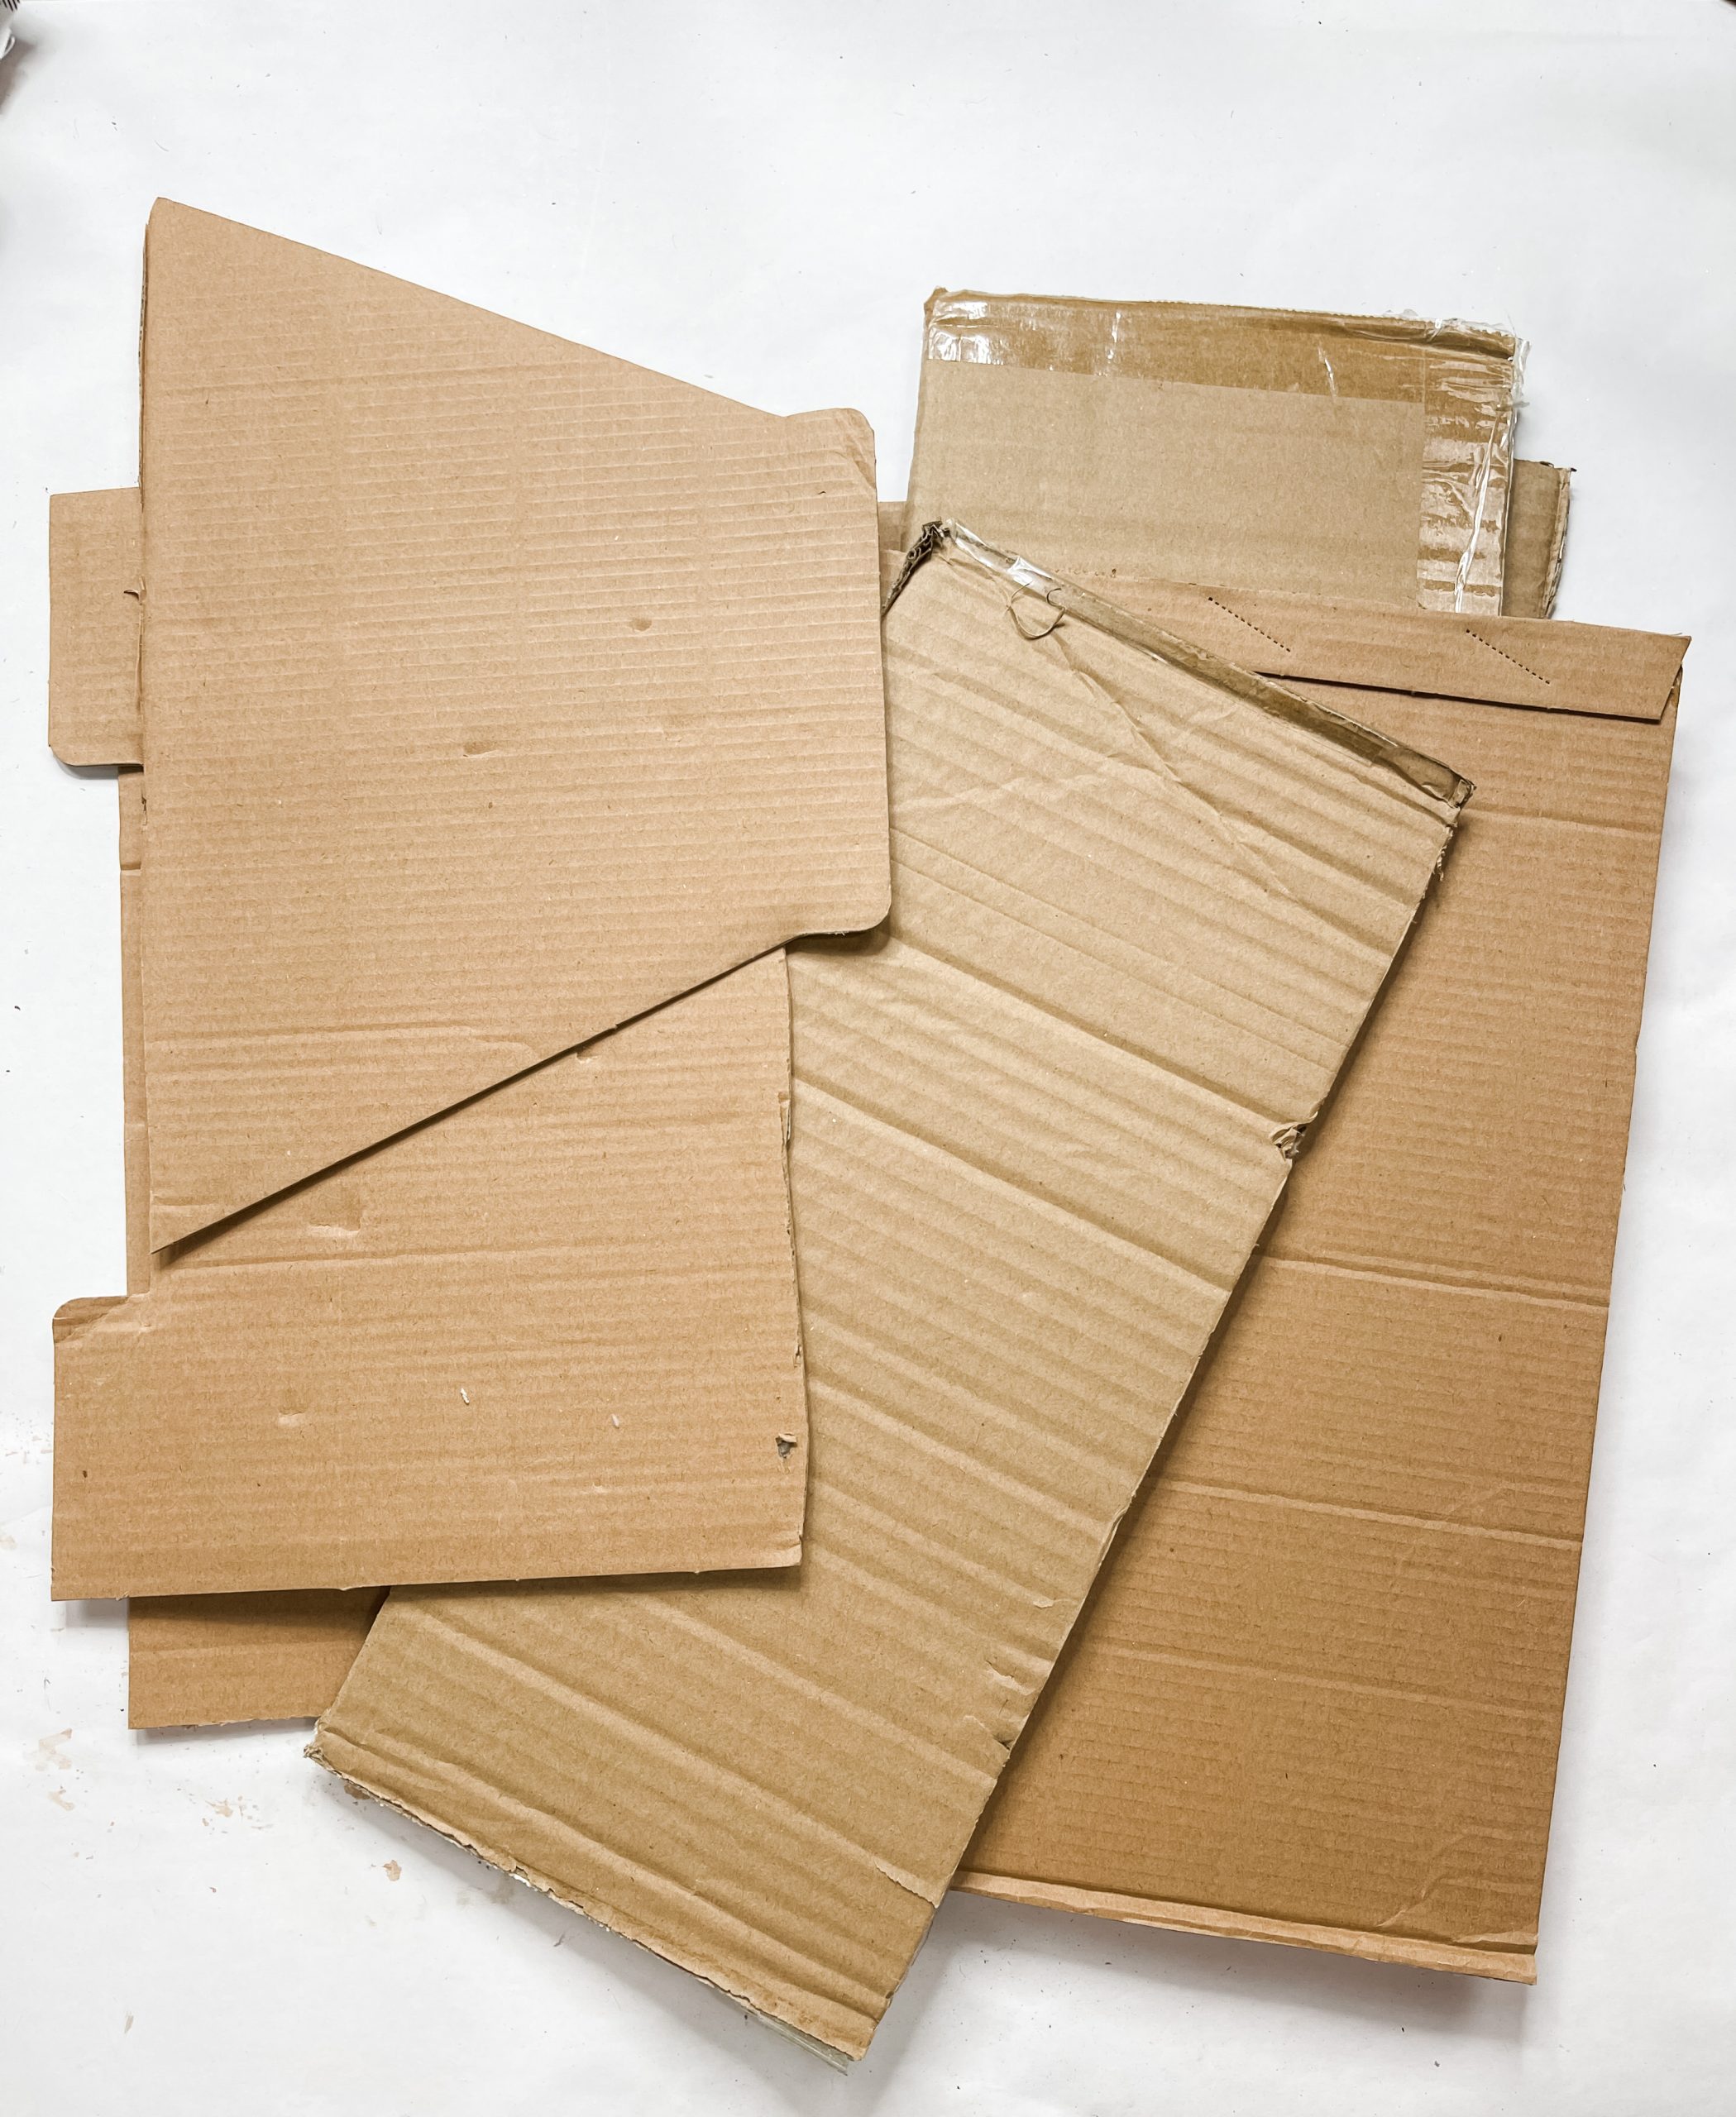
First, cut several strips of cardboard to be the planks of the pumpkin. Then, you’ll need. a larger piece of cardboard to secure those pieces to (this is where I had to secure two pieces together with the paint stick rulers).
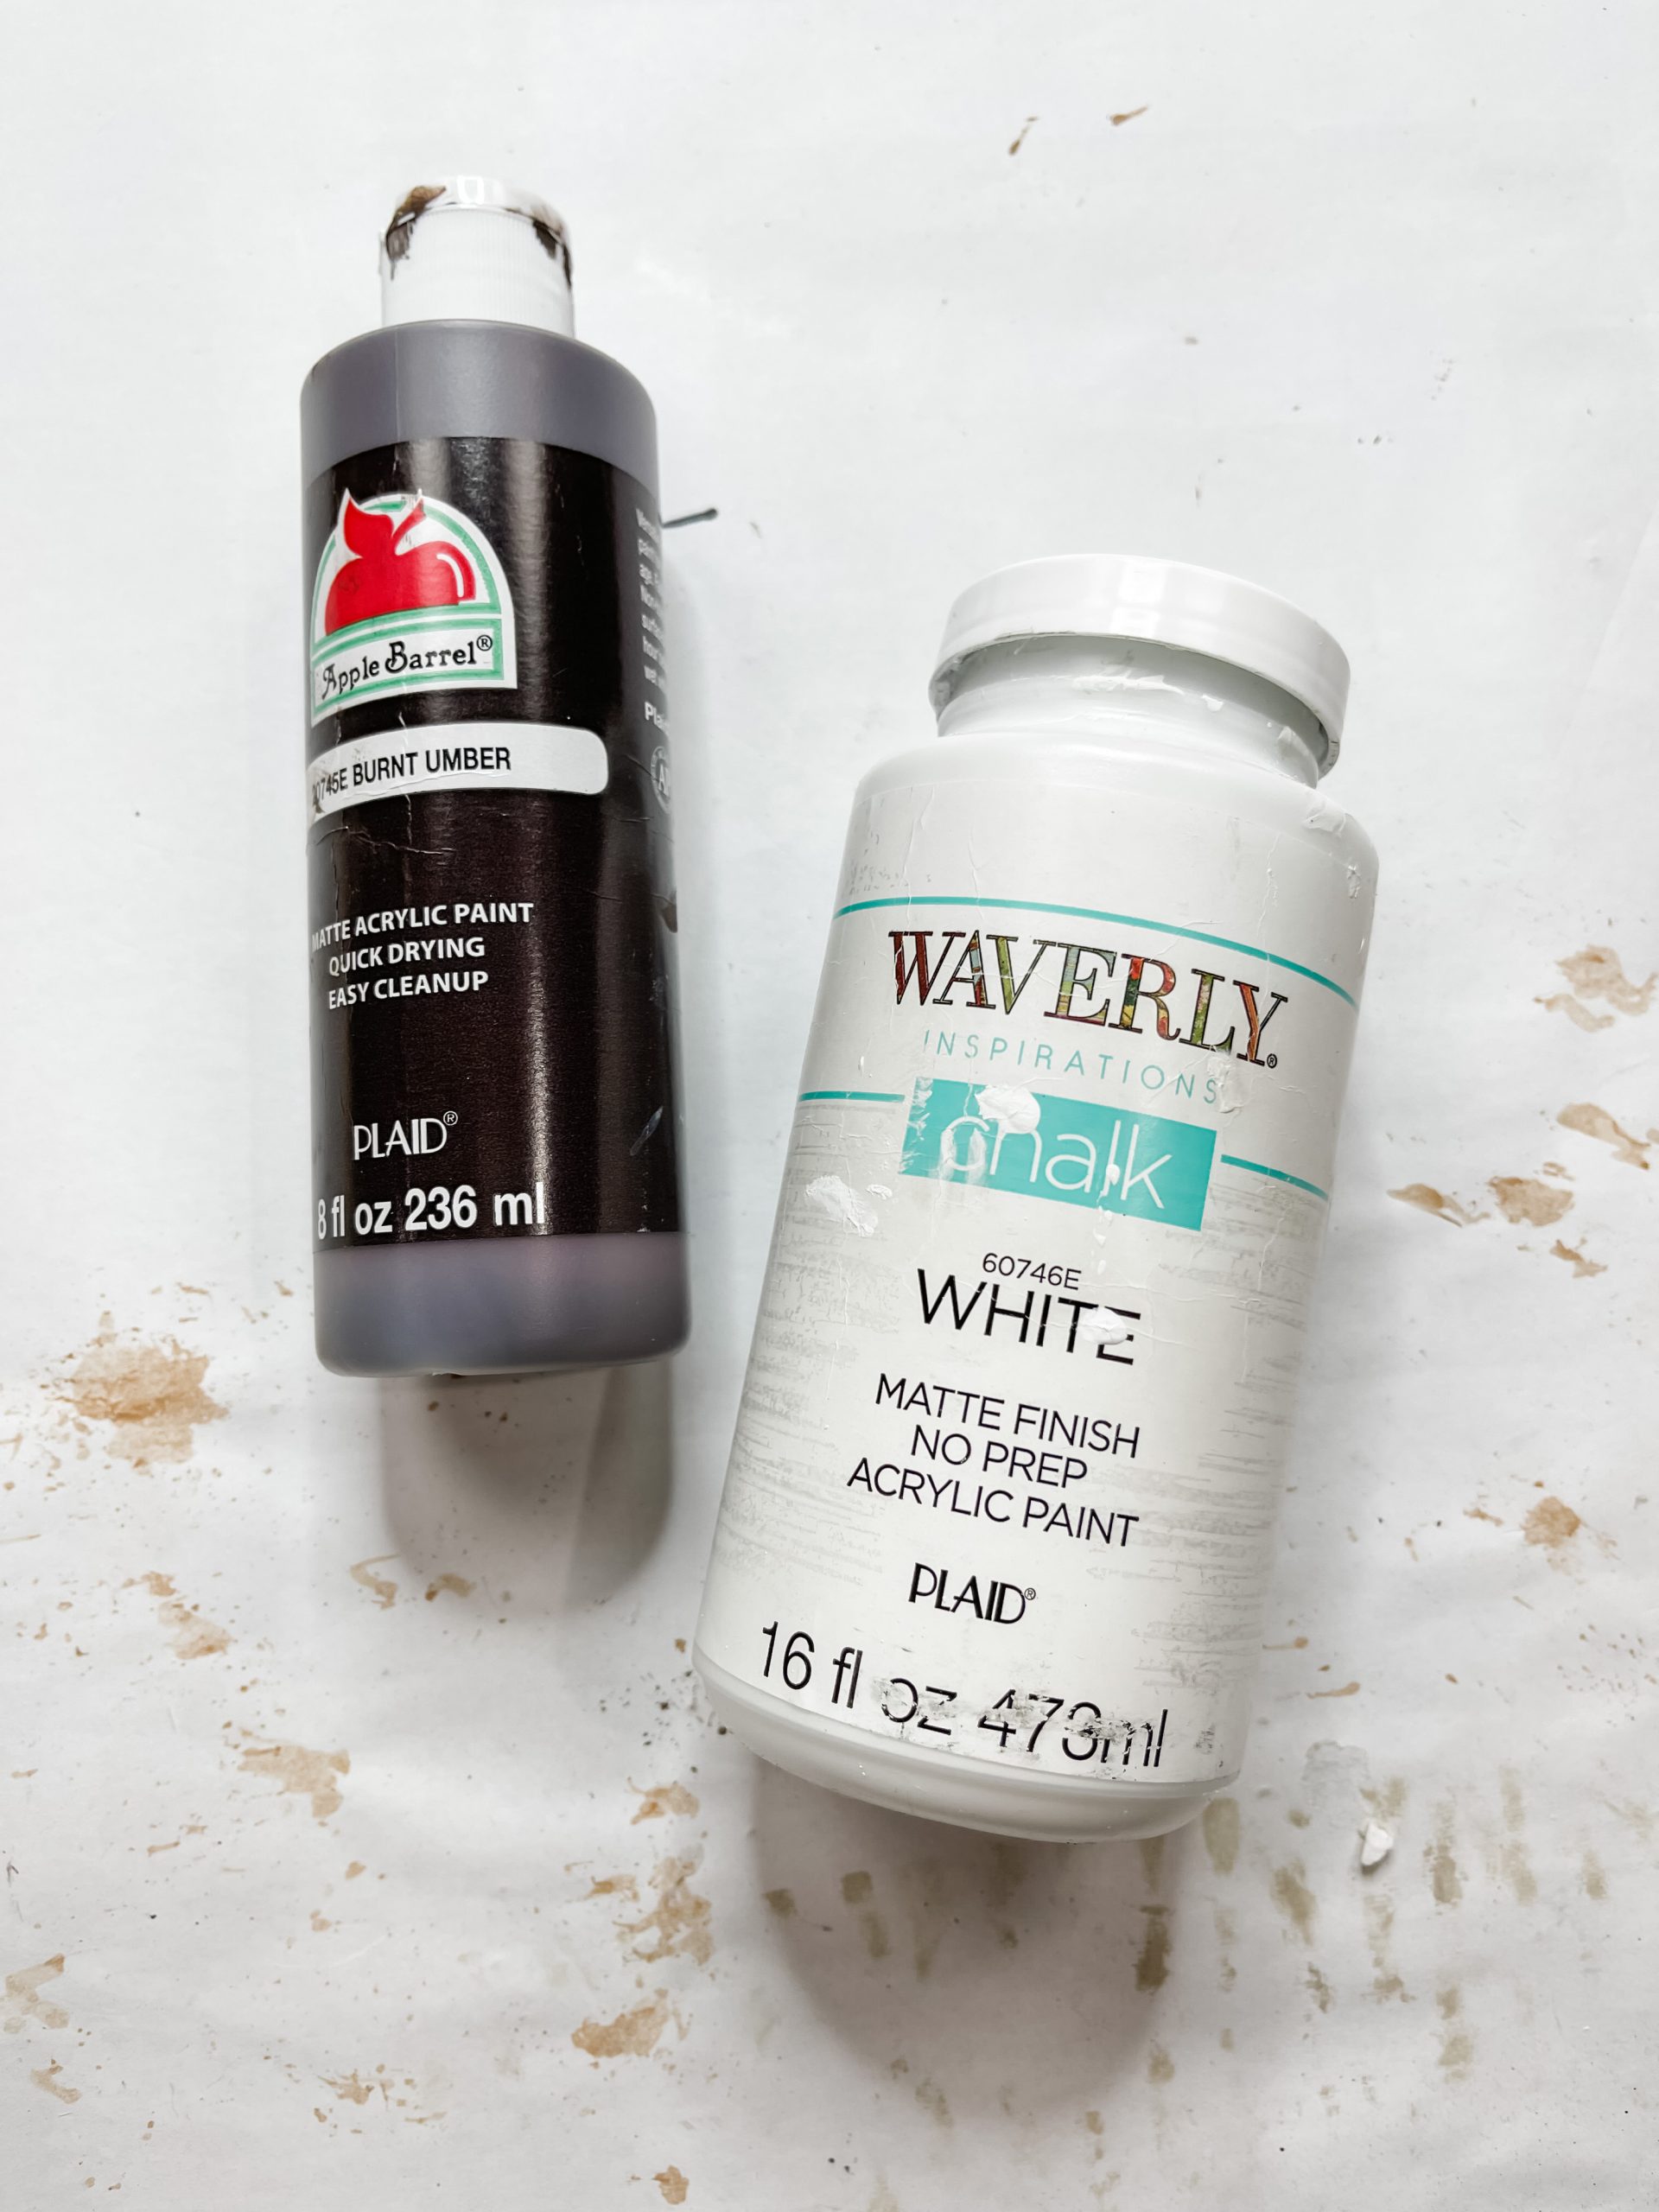
Paint the front of the large piece with brown paint. I used Apple Barrel burnt umber acrylic paint, but the specific paint doesn’t really matter.
Next, take your cardboard strips and trim them so you have a variety of sizes that create a pumpkin shape when positioned next to each other.
Paint each of the cardboard strips with the same brown paint you used to paint the larger piece of cardboard. You only have to paint the front of the strips.
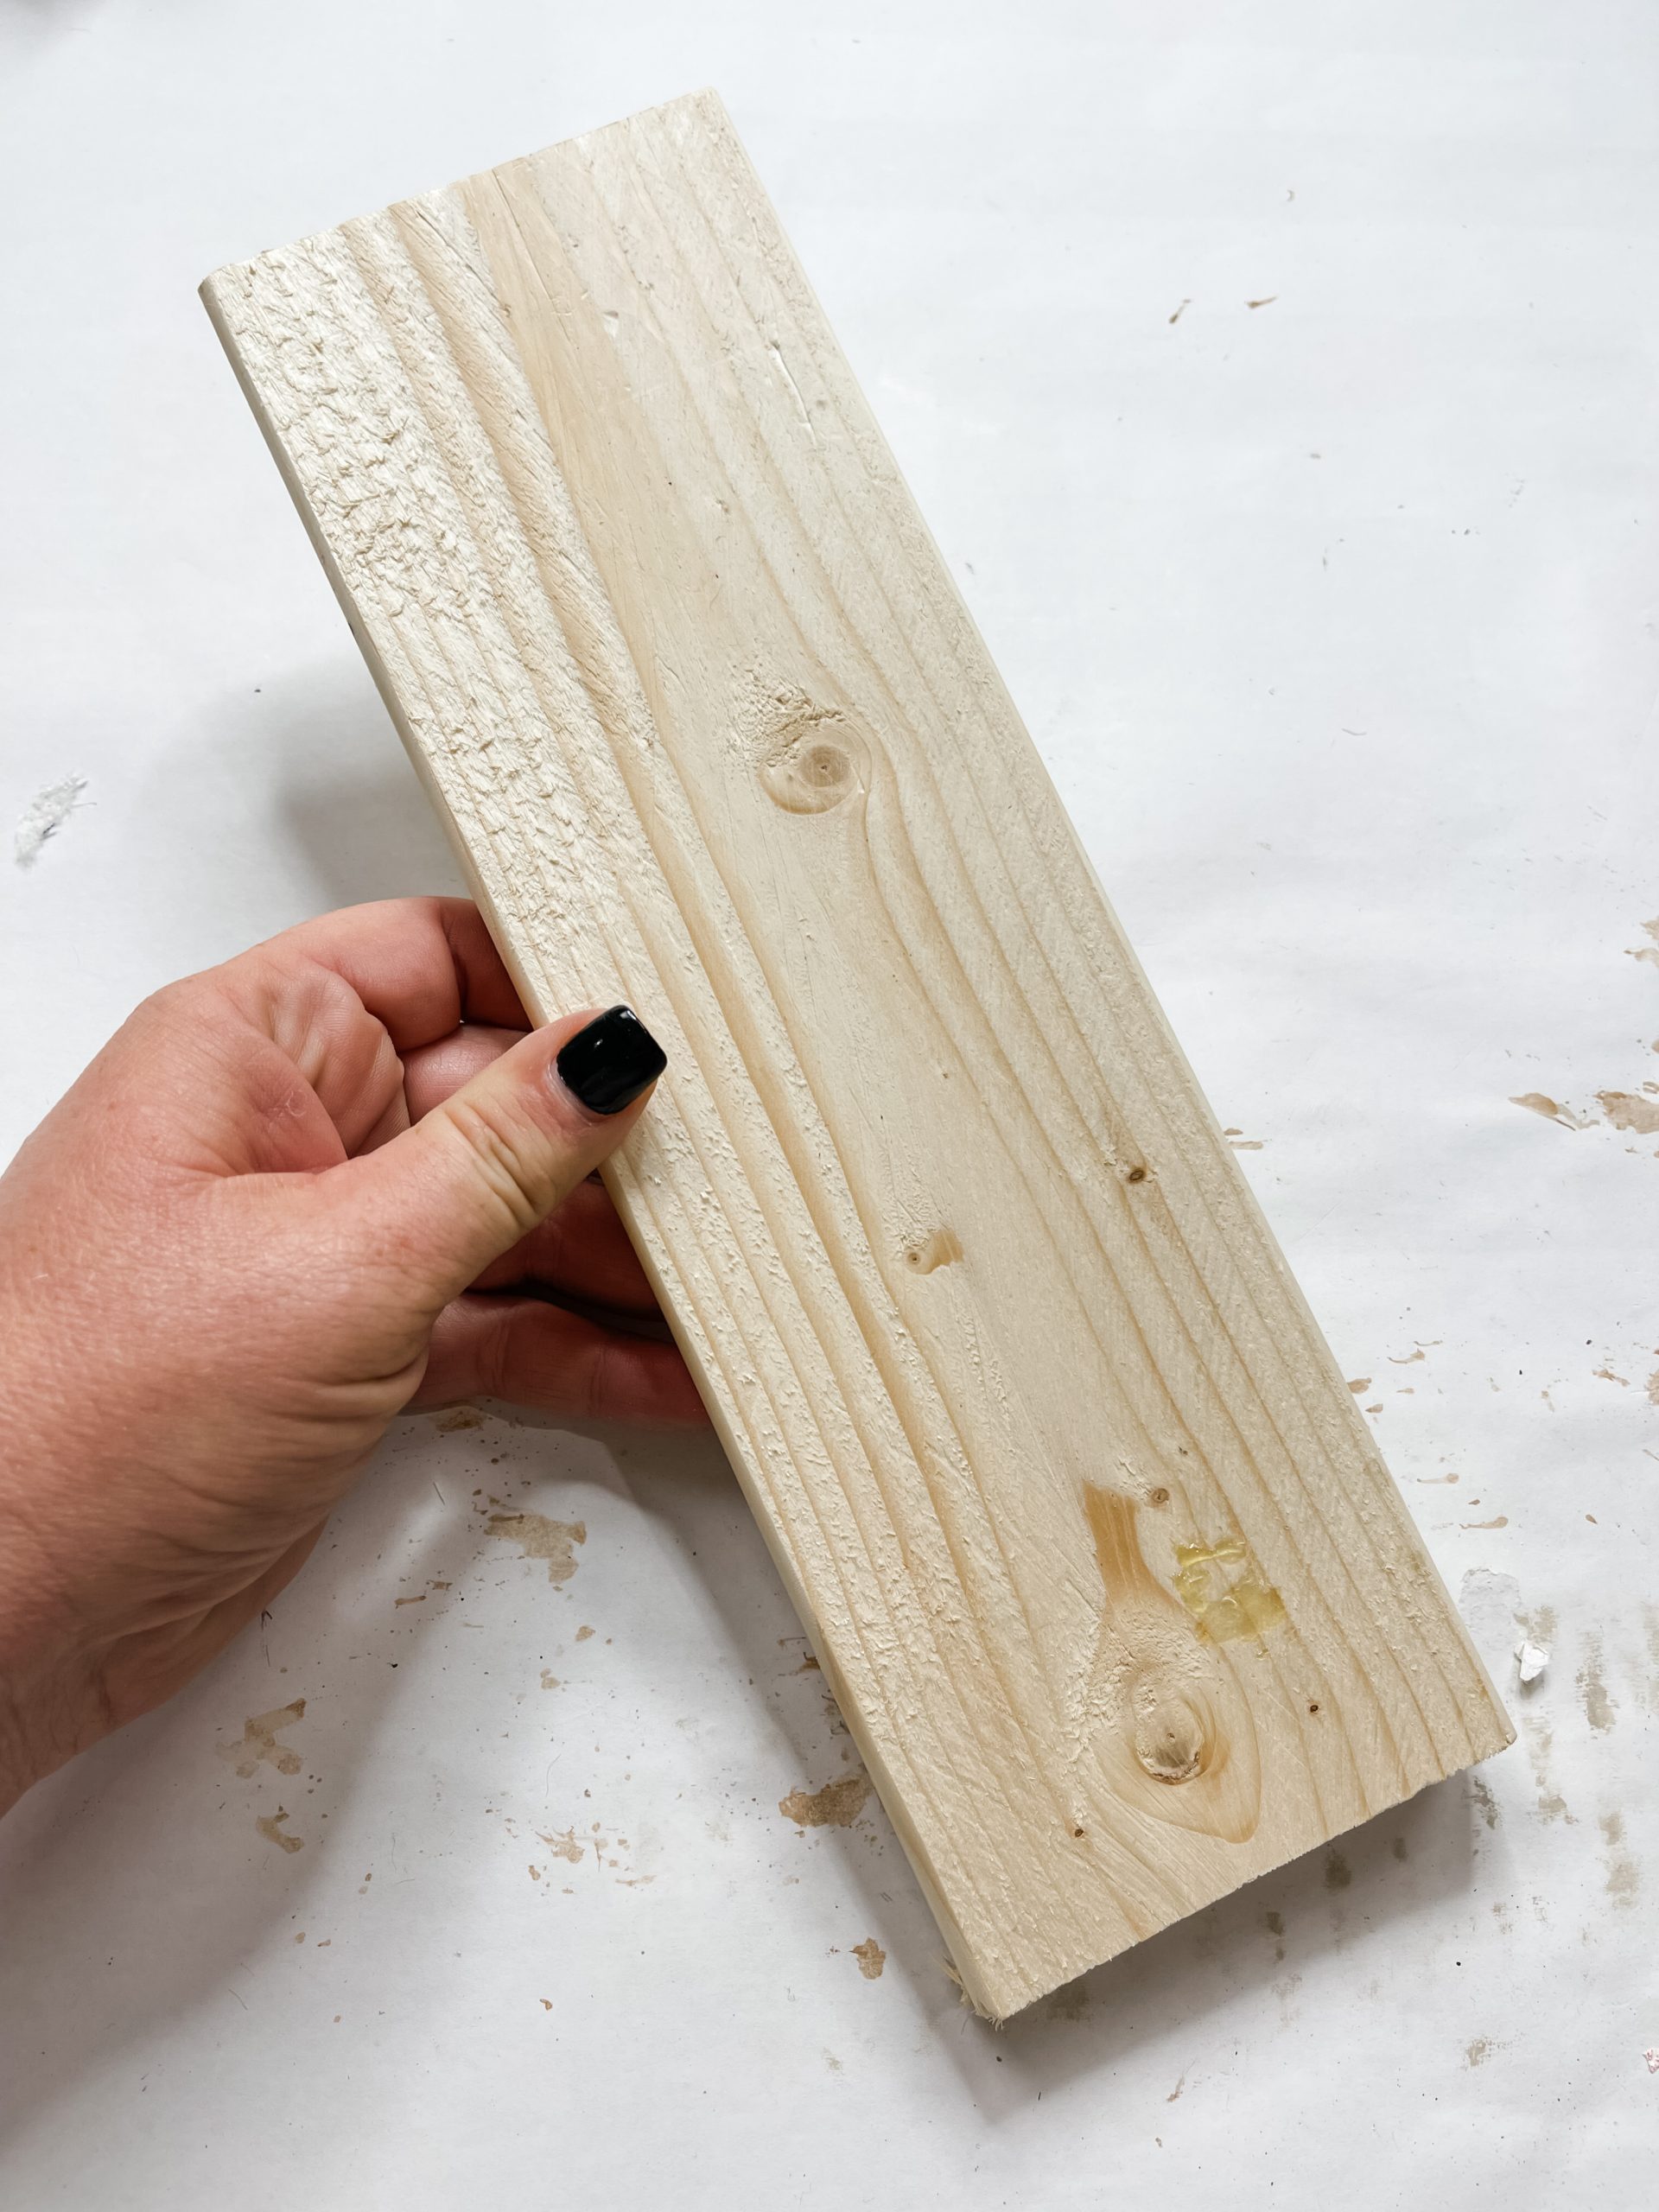
Next, stain the 2×4 piece of wood. To do that with paint, you’re going to spray the wood with water, pour the paint onto the wood, and use a wet wipe to spread the paint across the surface.
Use a clean wet wipe to remove the excess paint from the wood and you’ll be left with an effortlessly (and affordably) stained piece of wood! Repeat the process if you want to go for a darker stain.

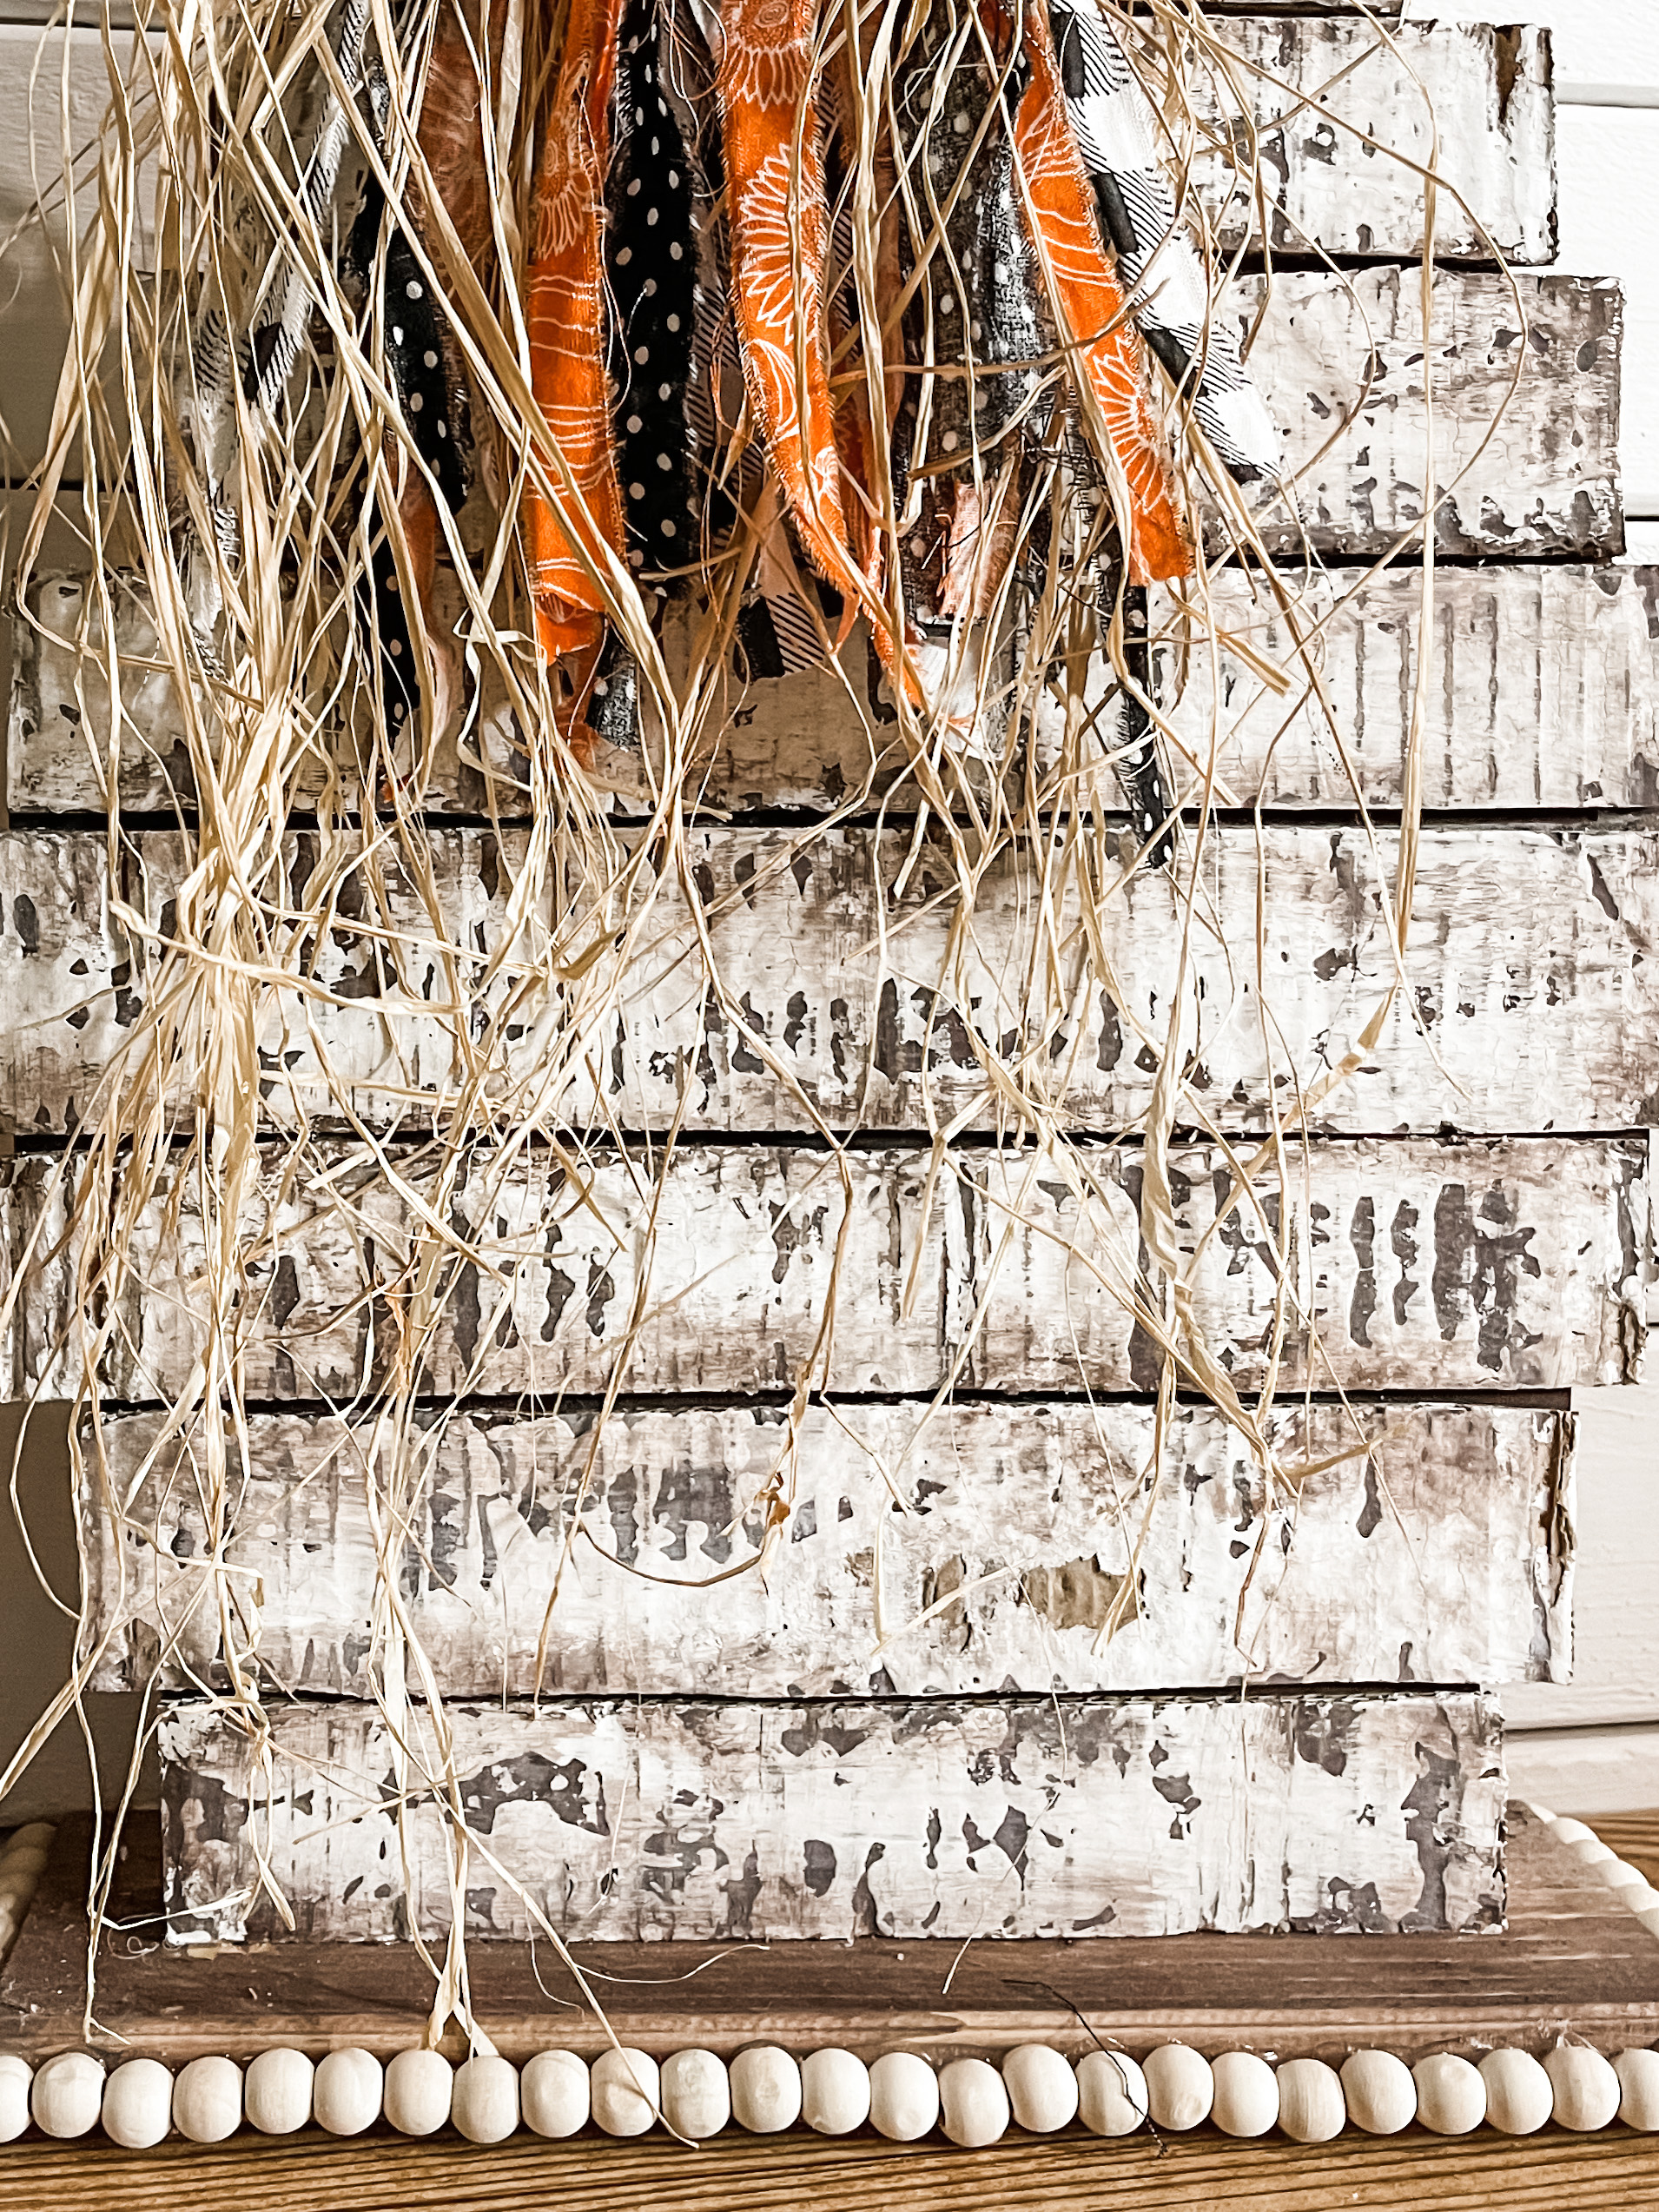
How to distress cardboard
Now it’s time to get the distressed finish on the cardboard. You may be wondering how to do that without using a sanding sponge that could rip and tear up the cardboard.
Well, the answer is craft sticks! I used quart paint sticks from Home Depot. Dip the craft stick into your white paint and then drag it across the surface of the cardboard.
The paint won’t get down into the nooks and grooves of the cardboard, so you are left with an effortless distressed finish on cardboard!
Let the paint dry completely on each of the cardboard strips. I used my heat gun to speed up the drying process. If you don’t have one, you can use a hairdryer on the low-cool setting.
Once the paint was dry, I used a wet wipe to kind of smudge a small bit of brown paint over the white and get a dirtier, aged look for each strip. You can use a sanding sponge, just be careful not to tear up the cardboard.
Now, place each of the strips onto the large piece of cardboard and create your pumpkin shape. Mark on the large piece the edges of each strip and trim it so it is the same shape as your pumpkin.
Then, hot glue each of the strips in their corresponding place on the large piece of cardboard.
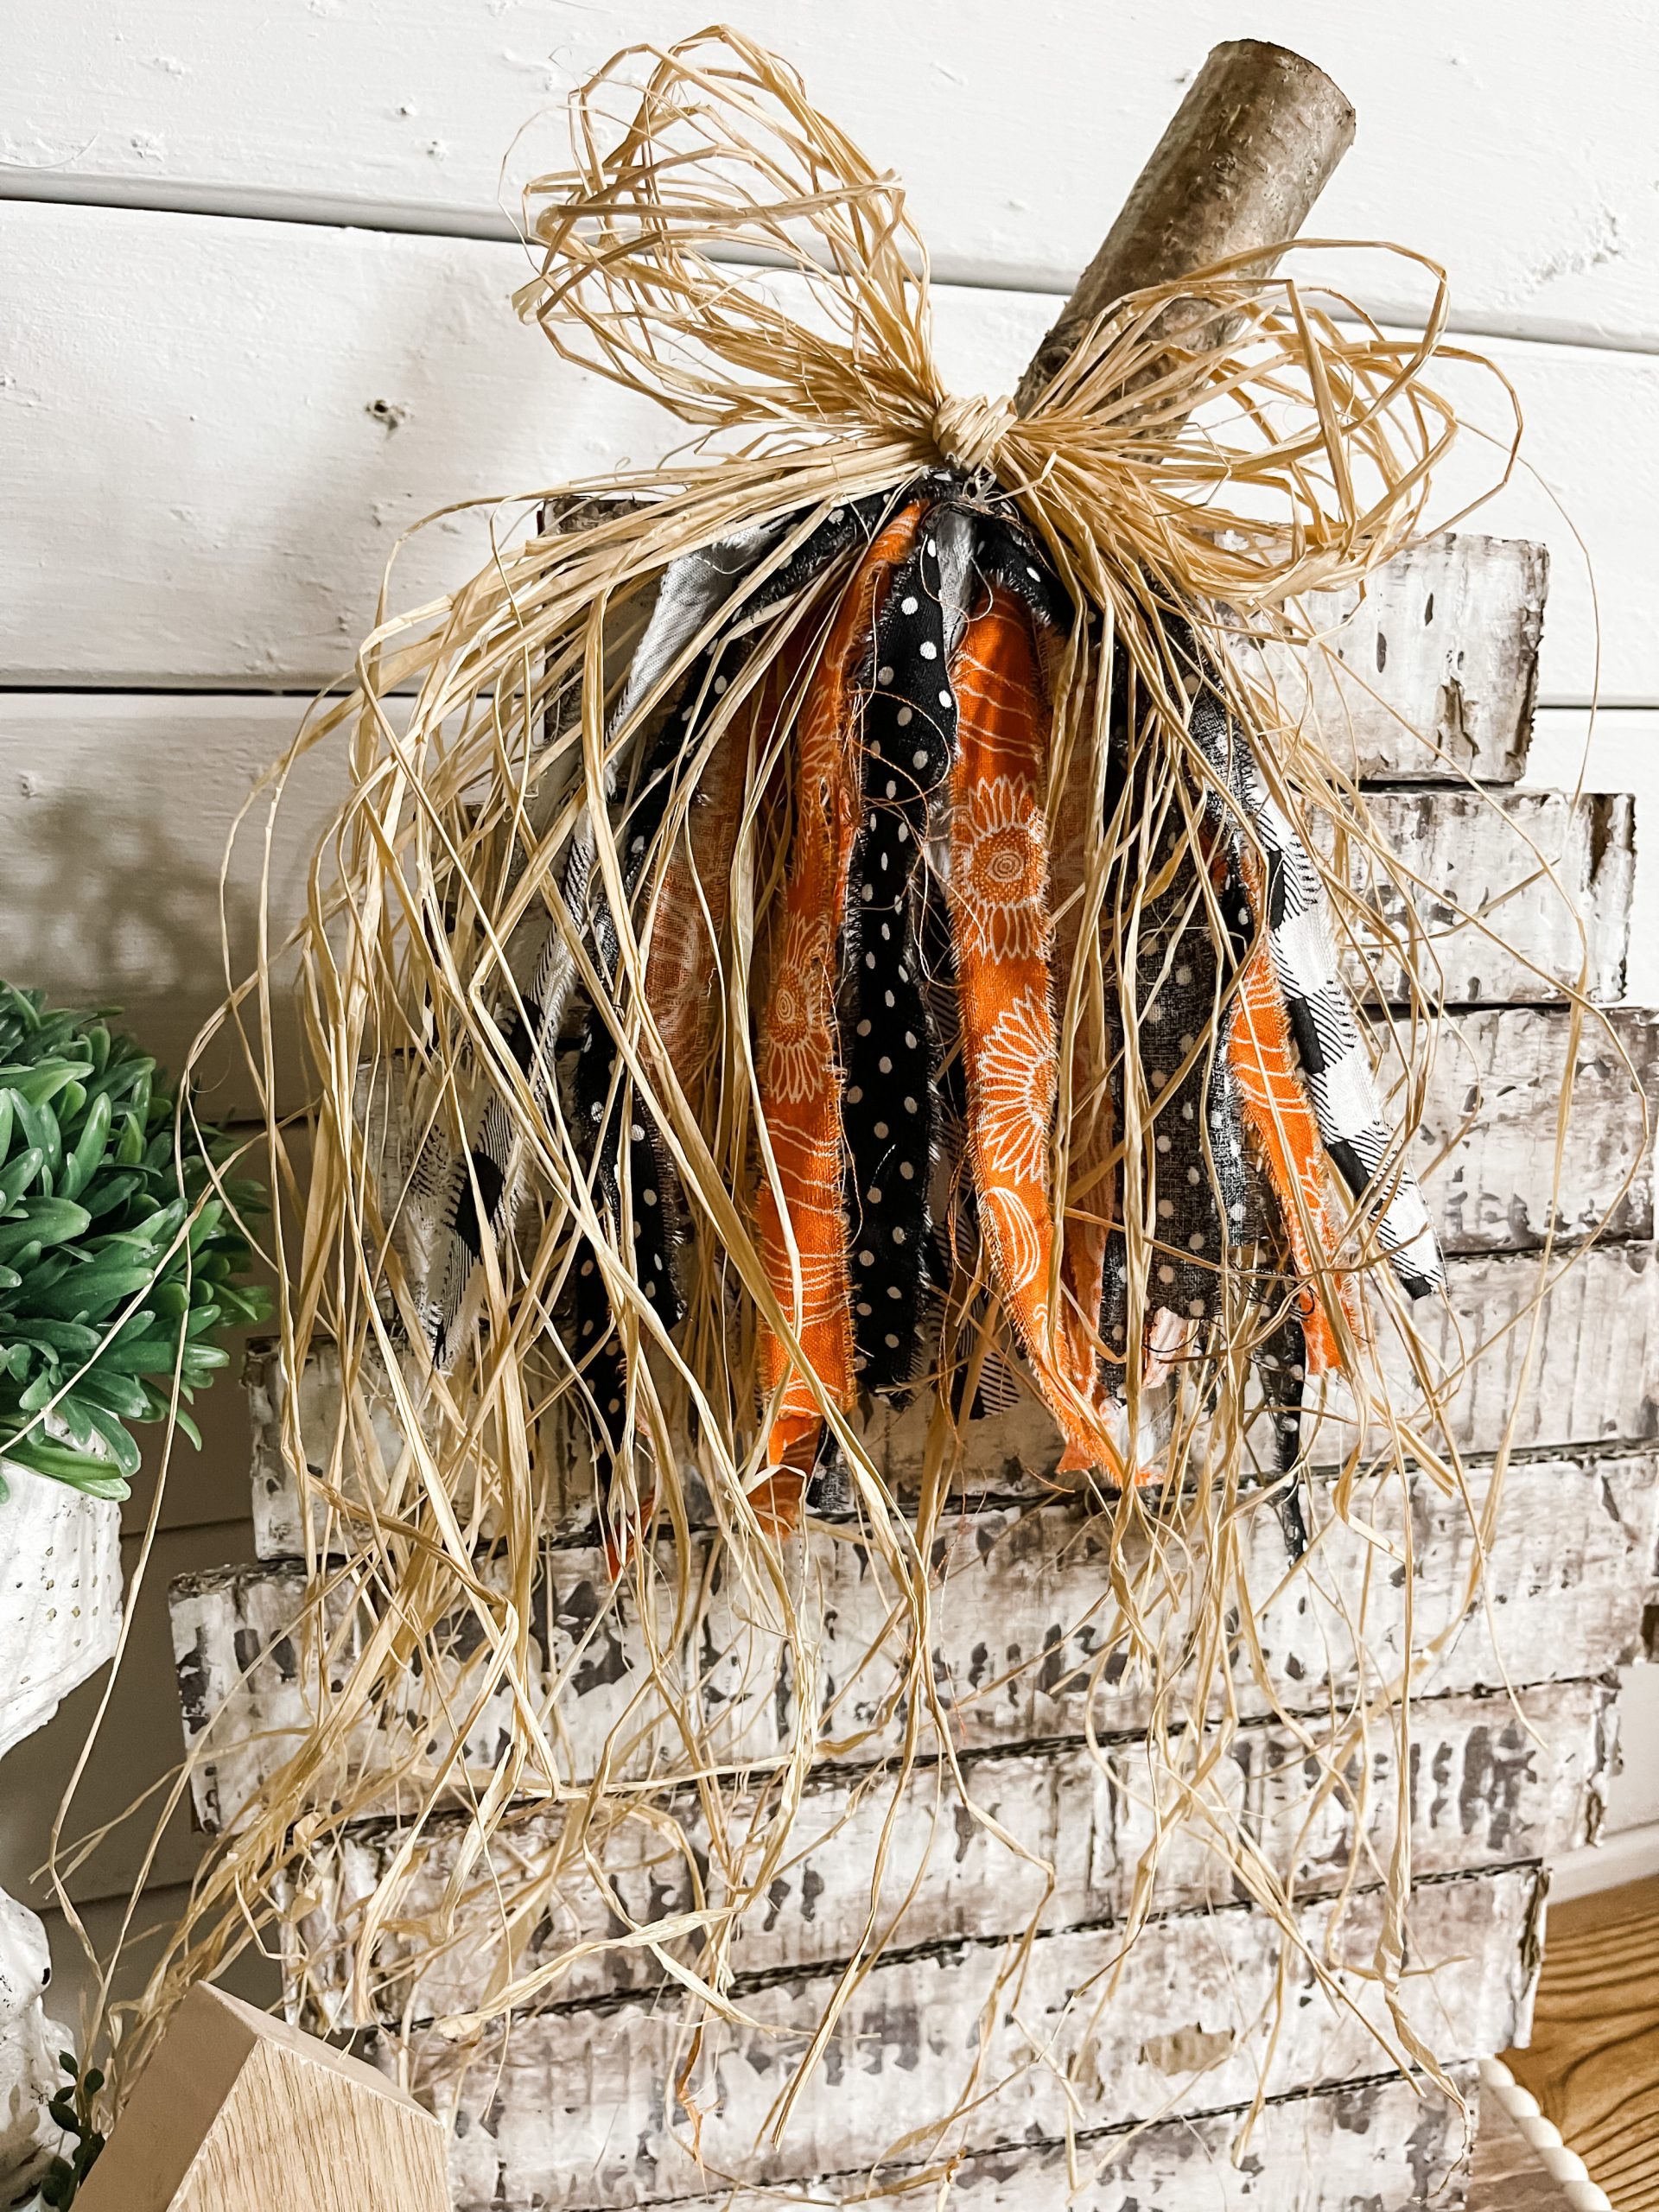
Bring it all together
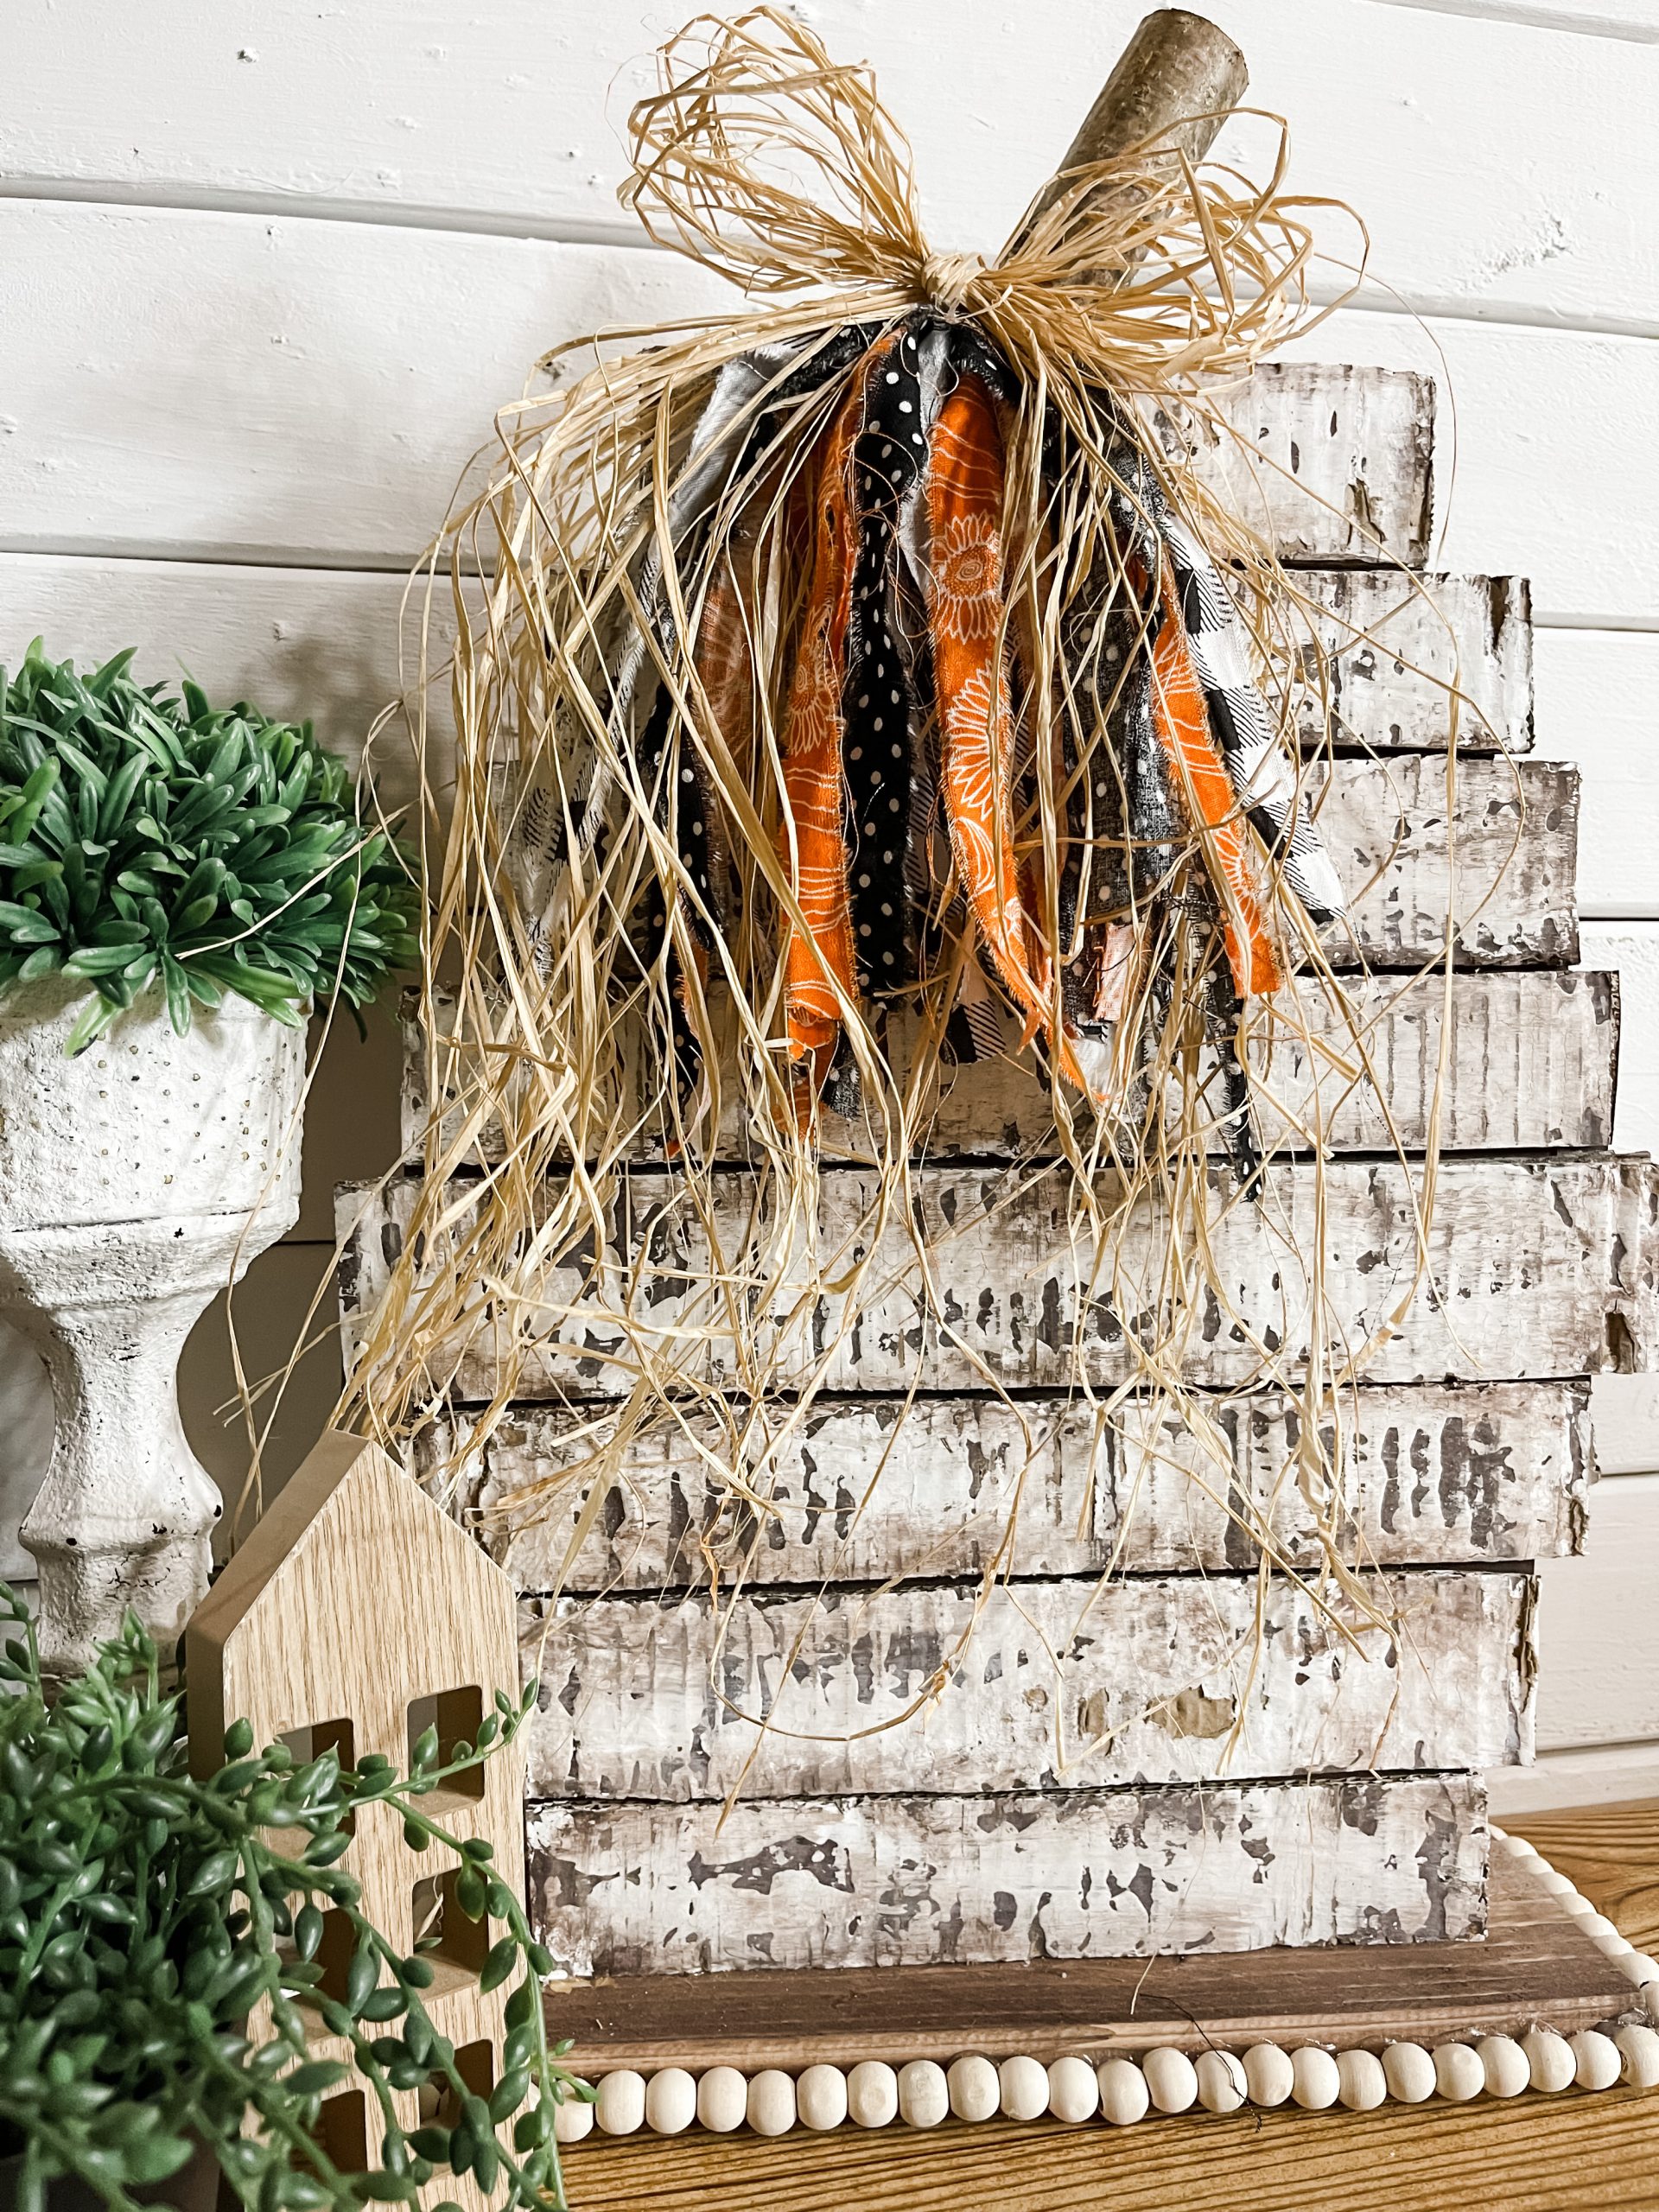
Now it’s time to secure the pumpkin to the piece of wood so it can stand on its own! To do that, you need to first hot glue Dollar Tree Tumbling Tower blocks on the back of the pumpkin at the bottom.
Before you attach the pumpkin to the wood piece, hot glue the Dollar Tree wood bead garland around the edge of the wood piece. You’ll have to trim it to fit.
Then, hot glue the pumpkin onto the wood piece by applying hot glue to the bottom of the Tumbling Tower blocks.
Next, I hot glued the wood stem to the top of my pumpkin. I wanted the stem to be slightly slanted, so I had to cut the bottom of the stem at an angle to make it work.
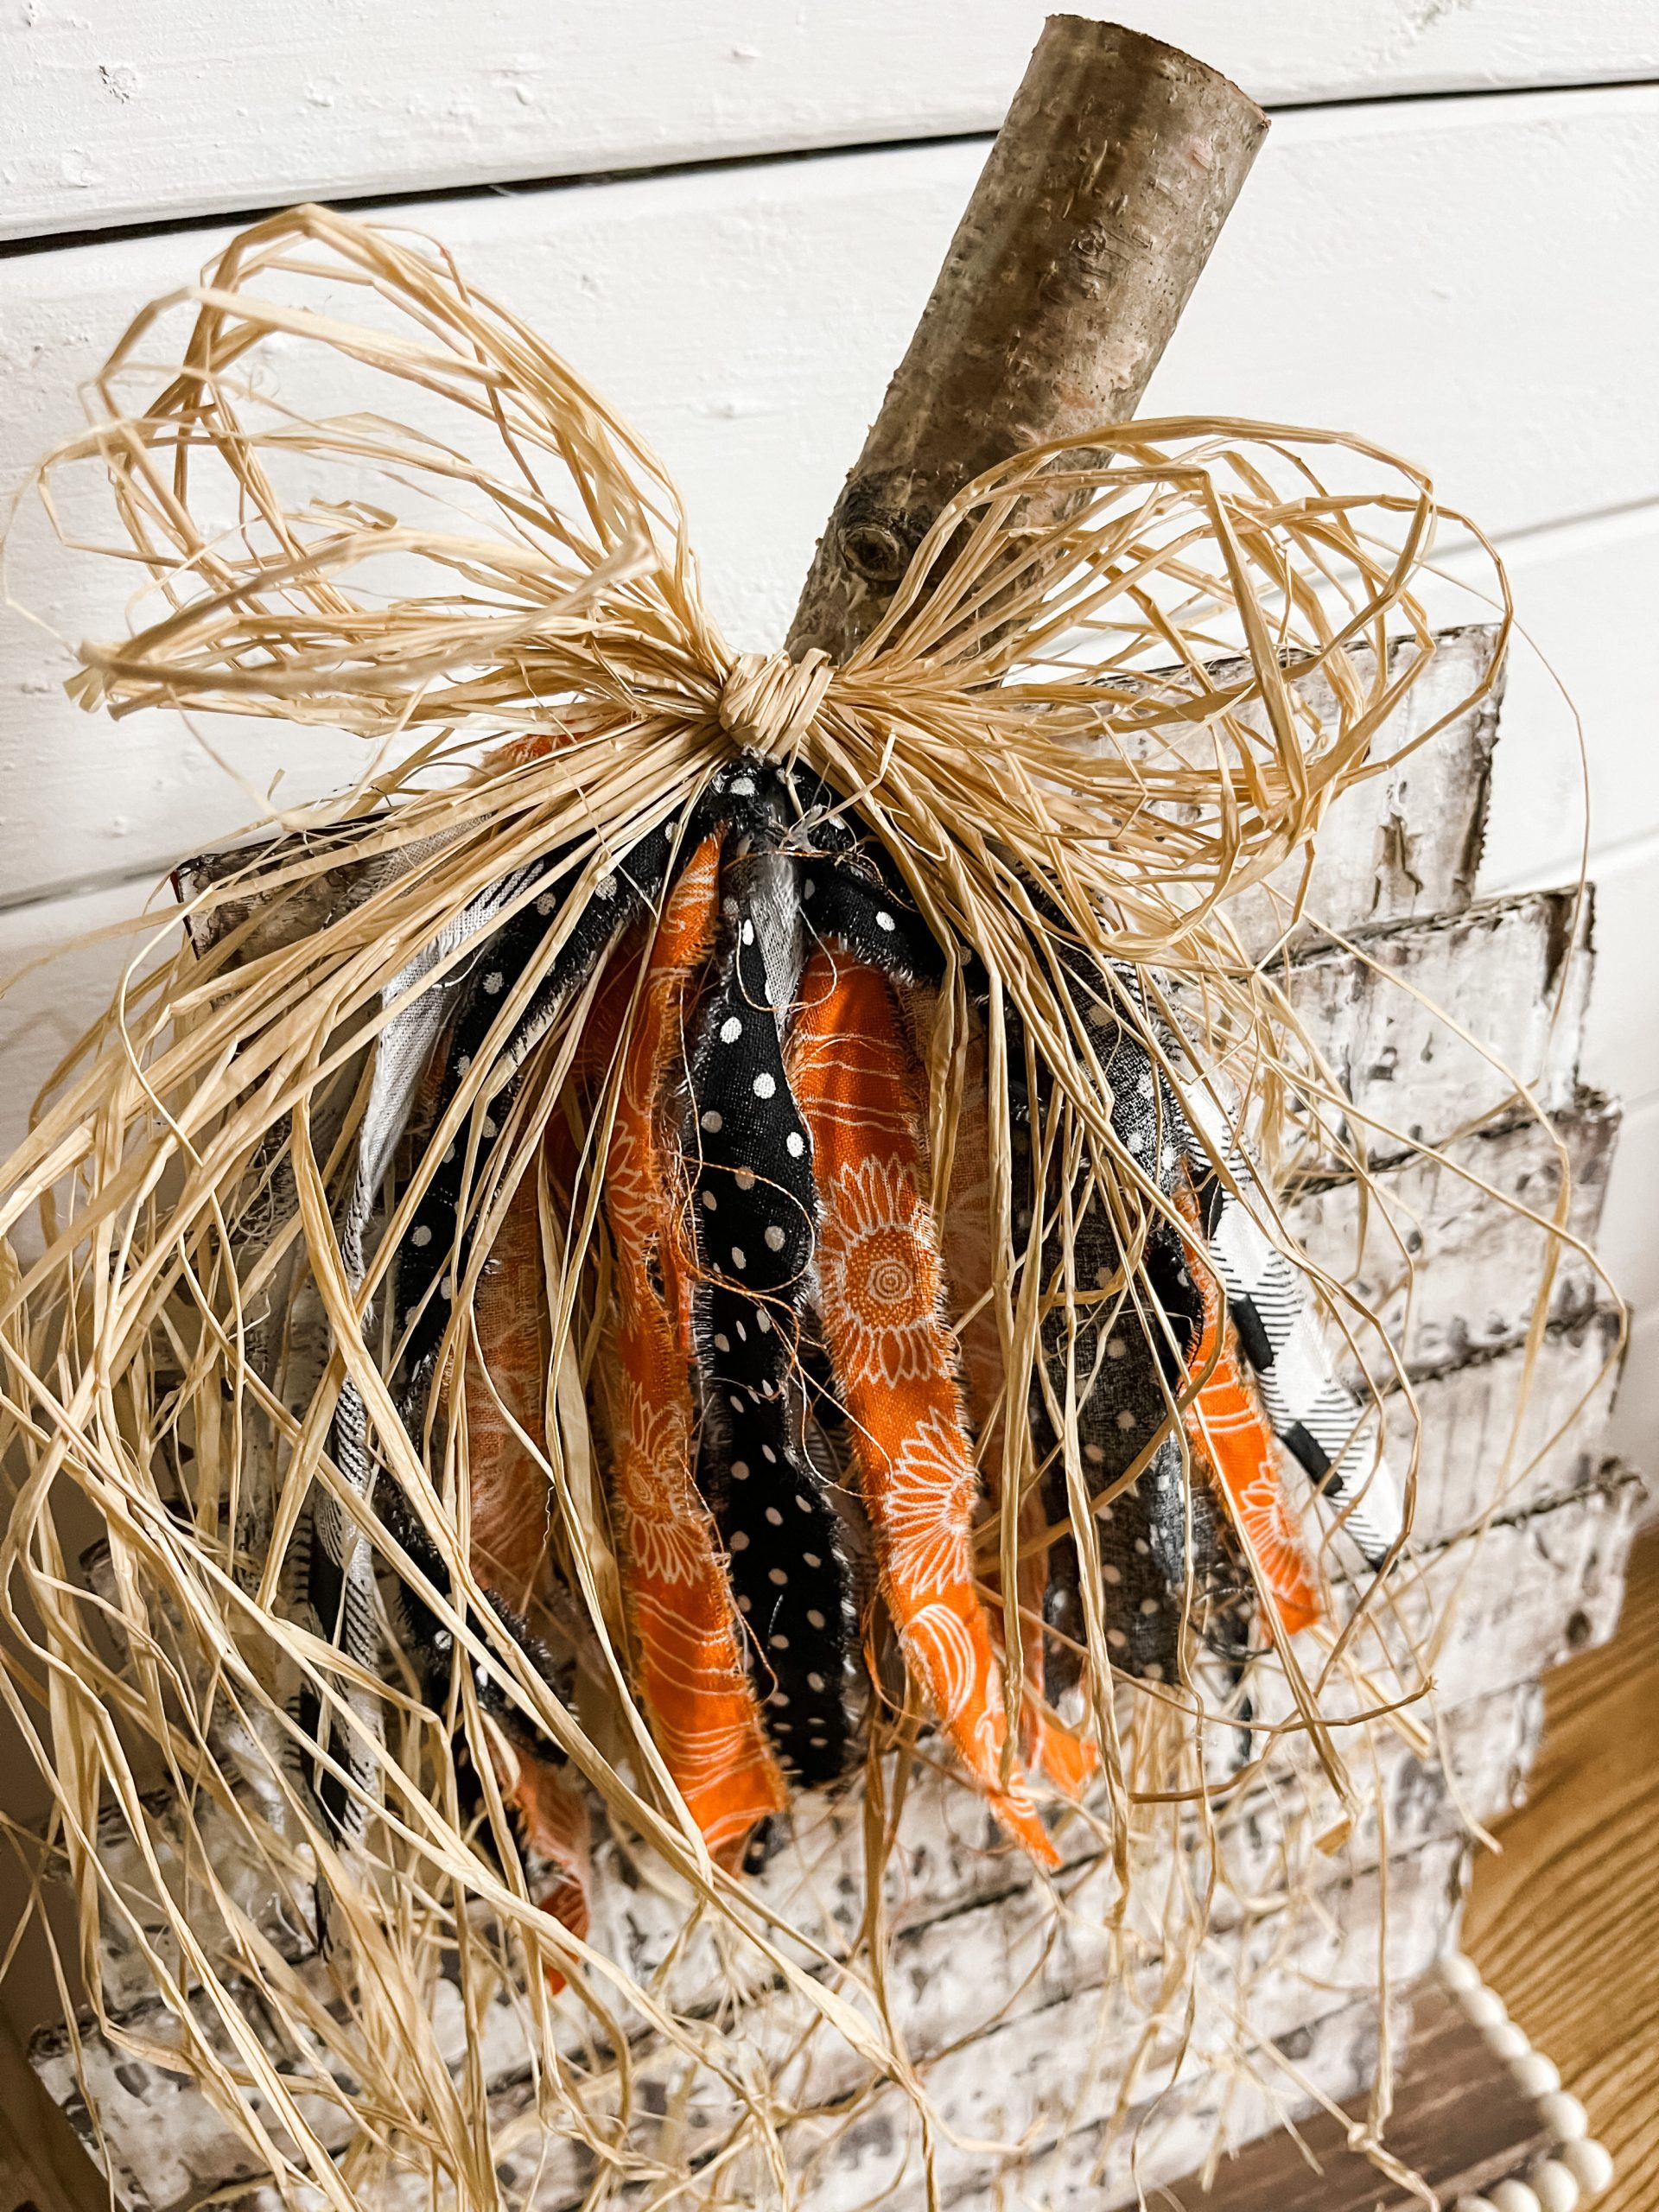
How to make a DIY bow for your pumpkin
The first step of making any bow is picking your patterns. You can use ribbons or fabric, but I went with fabric for this one.
Tear each of the fabric patterns into several thin strips. I like to tear because it gives me a frayed edge on the strips that I feel perfectly matches the feel of the distressed, aged pumpkin.
Once you have all the strips torn, get several strands of raffia and pull them apart. Start laying the fabric strips and raffia in an Xbow pattern, alternating designs as you go.
Once you’re happy with the amount of fabric and raffia you’ve used in your bow, secure the center with a piece of jute twine. You can also use a zip tie, raffia, or a fabric strip, I just prefer the twine for this.
I had to trim my bow just a little bit to make it work for this pumpkin. Trim the ends of the fabric and your raffia until you’re happy with your bow, then it’s time to secure it to the pumpkin!
To do that, I wrapped the ends of the jute twine that I used to secure the bow around the stem and tied the bow in place at the top of my pumpkin.
Lastly, I tied several strands of raffia into the shape of a bow and hot glued it at the top of my messy bow!
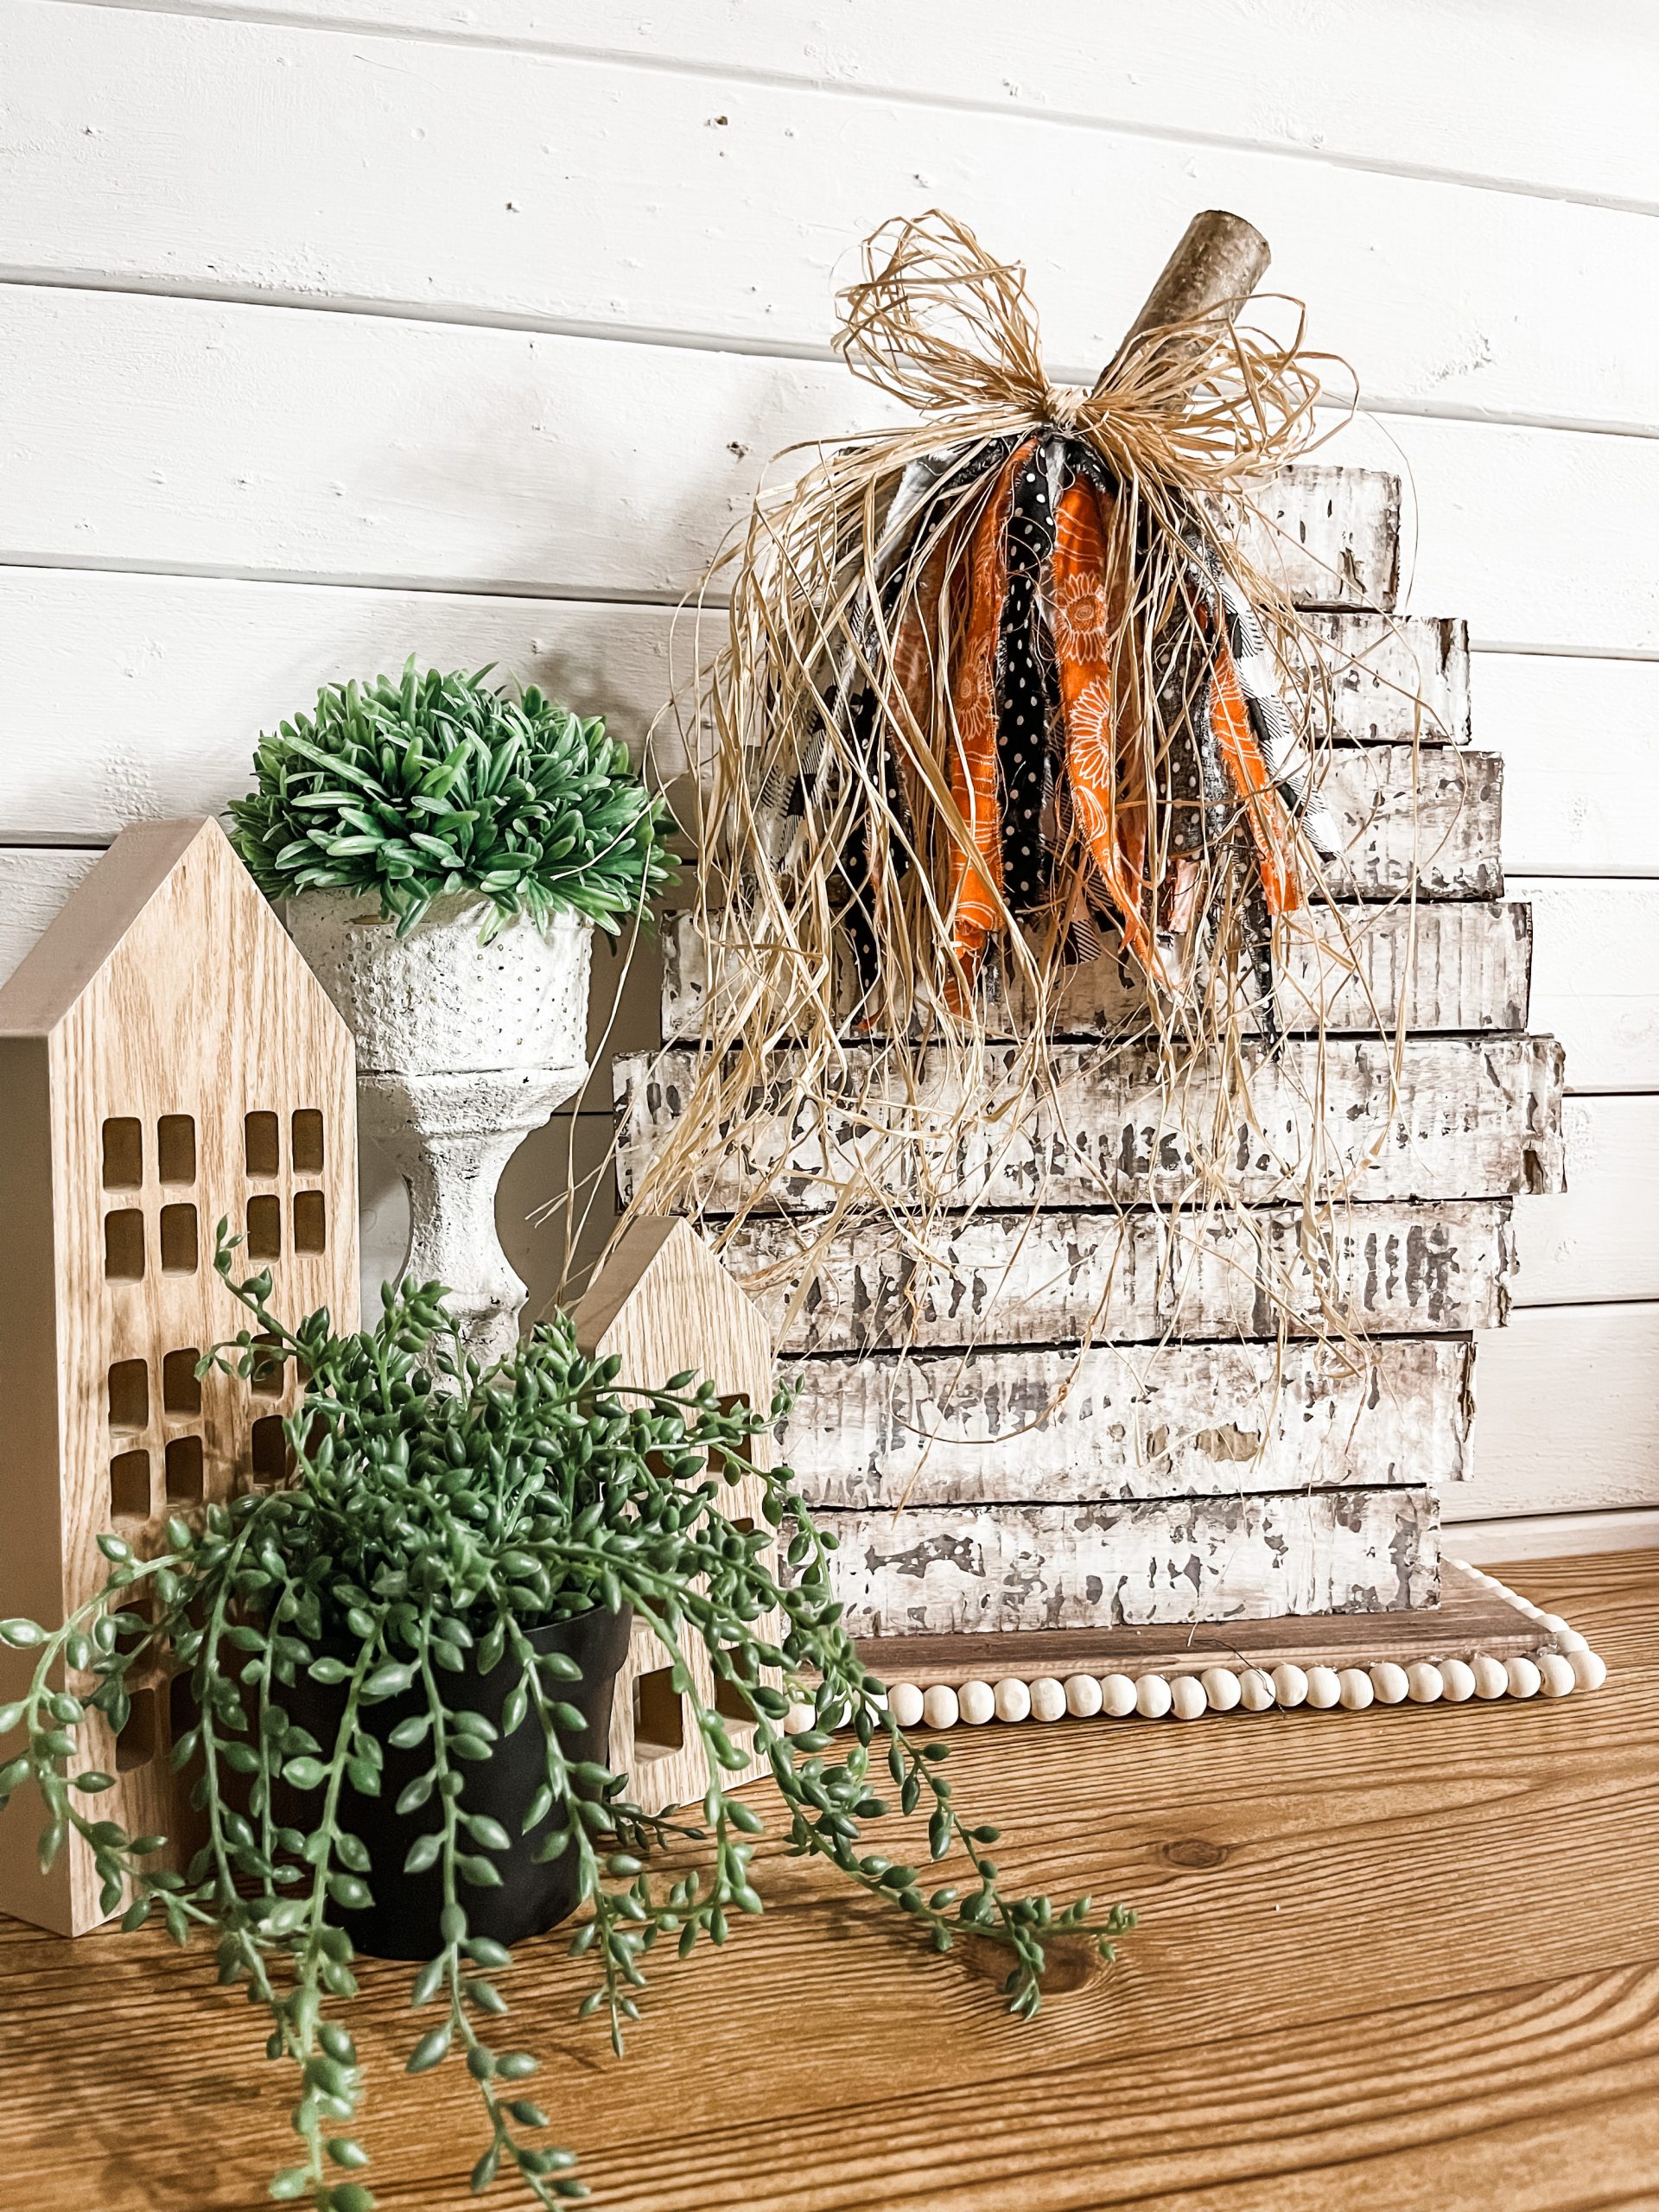
I hope you enjoyed this DIY Farmhouse Cardboard Pumpkin as much as I did and decide to make it for yourself! If you do, I would love to see how yours turns out!
You should totally join my FREE Facebook group called On A Budget Crafts! It is a judgment-free community for DIY crafters to show off their projects and ideas.
If you loved this DIY Farmhouse Cardboard Pumpkin, you might also like these DIY ideas!
Thanks for stopping by! XOXO Amber
You can also shop my ENTIRE AMAZON Favorites shop just click here! It’s packed full of all the things I use and love. Here is the supply list I highly recommend every creative have on hand!!
Would you also pin my blog for later and get on my newsletter alerts? I would love to have you join my #craftycrew.
I email alerts about new blogs like this DIY Farmhouse Cardboard Pumpkin so you’re always up to date on fun, new DIY ideas!
Inspired? Leave me a comment below! I love hearing from my readers!

Join my free “ON A BUDGET CRAFTS” Facebook group!
Hard to believe this is cardboard, but I saw you make it. It’s gorgeous