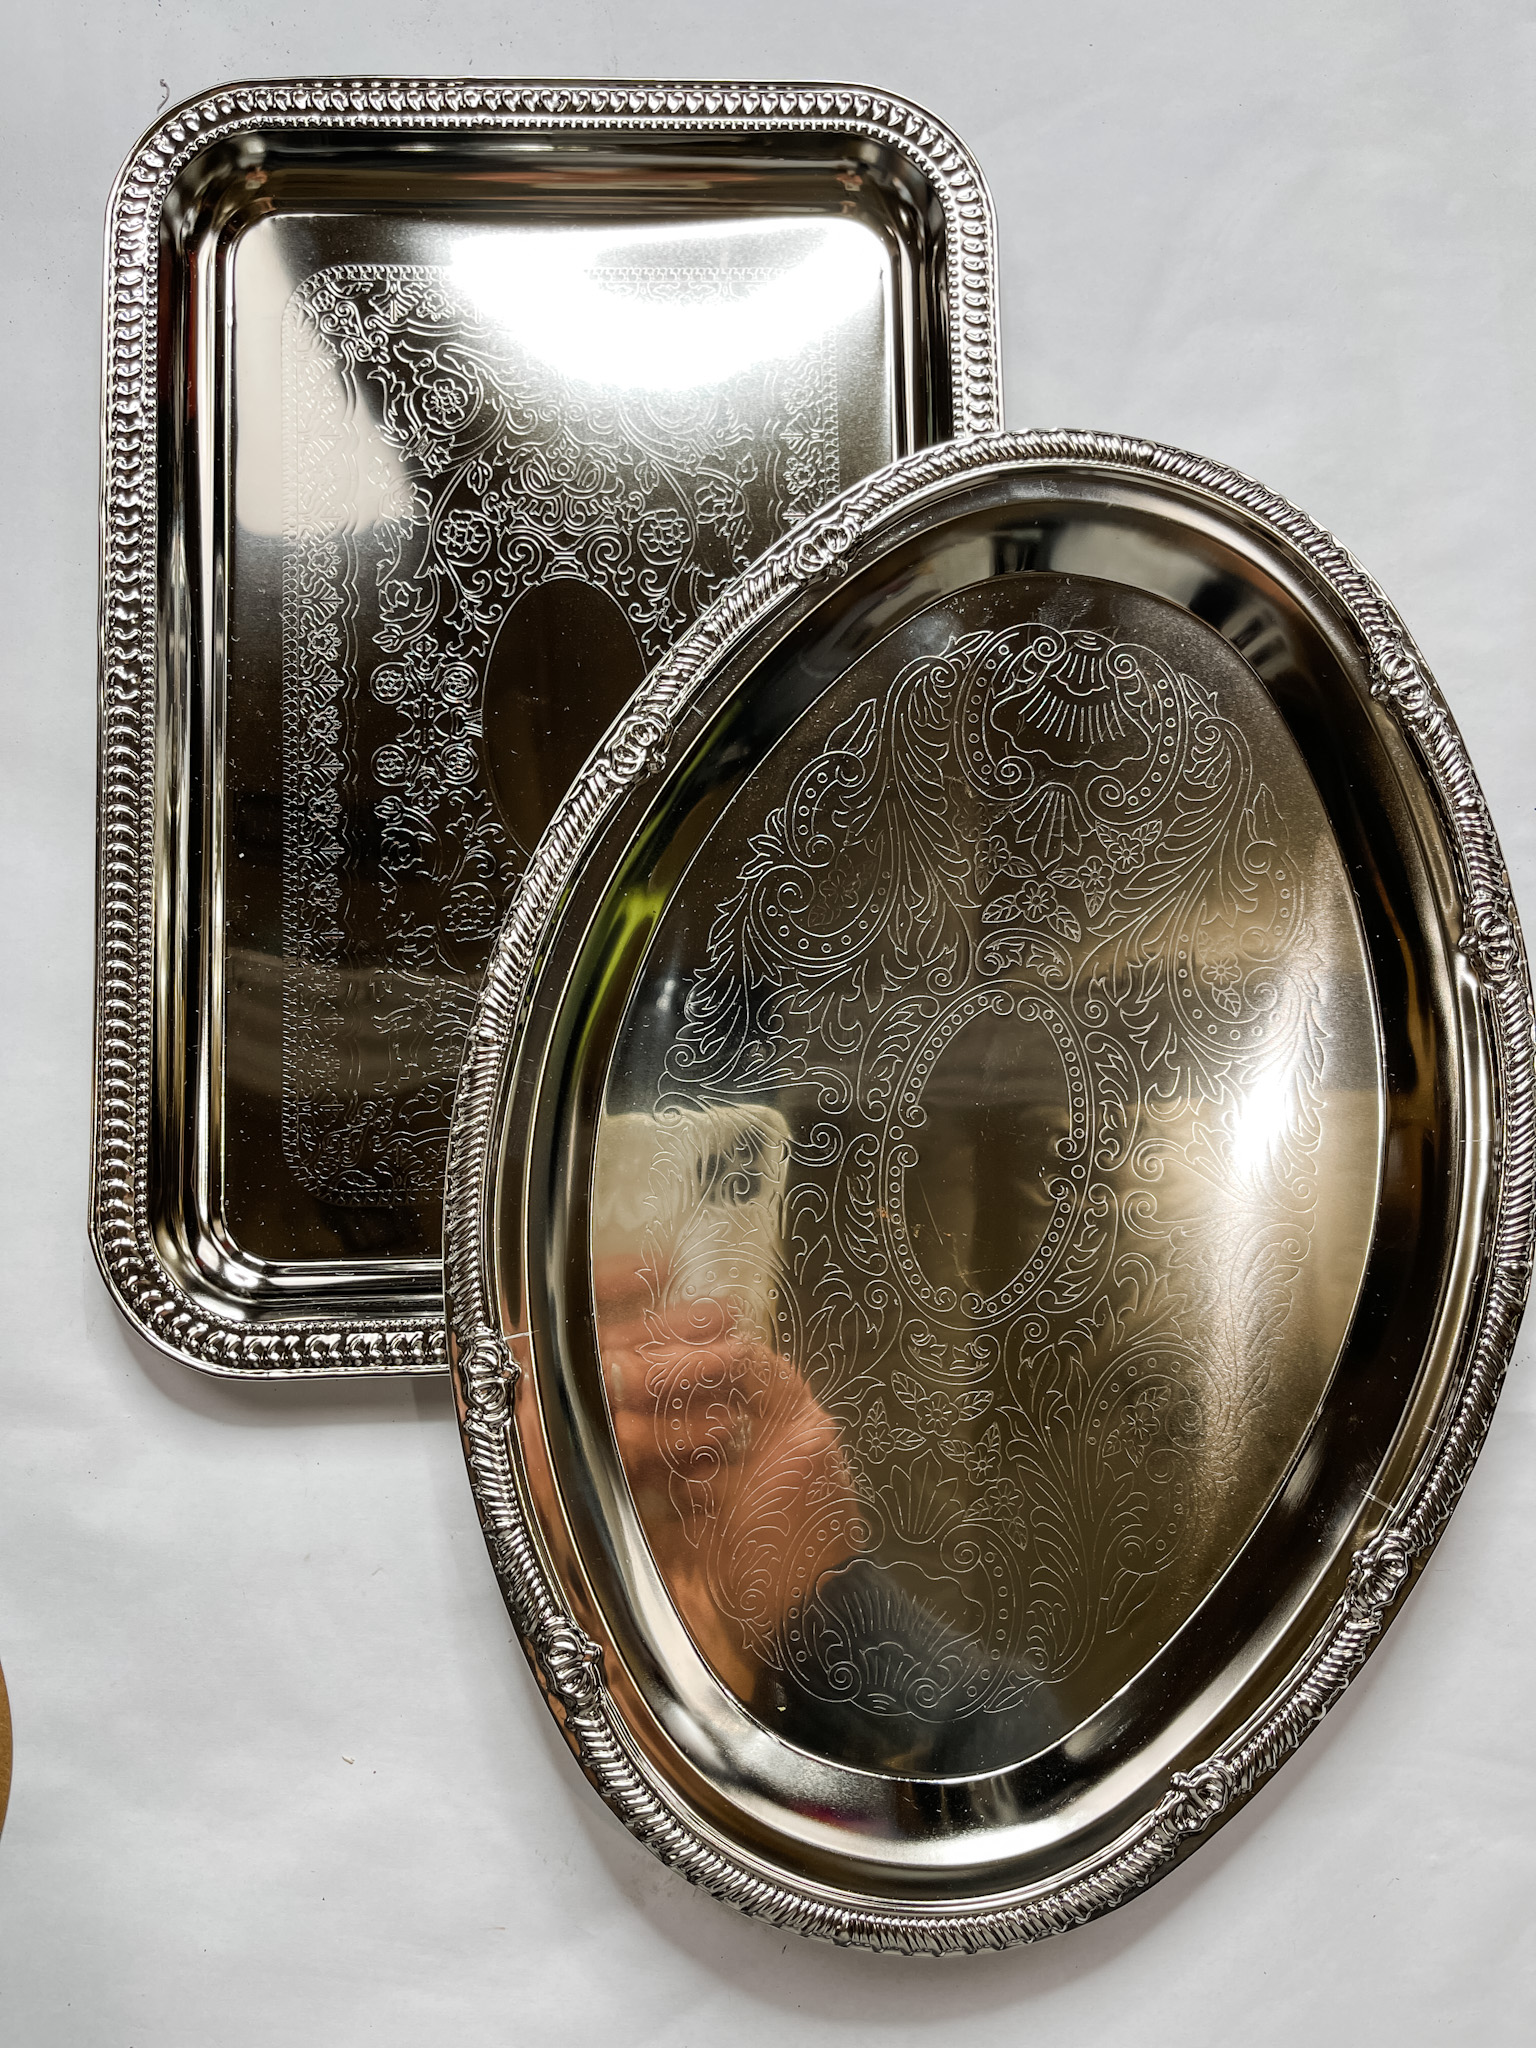
Decorative Vintage Serving Trays
I am so excited to show you these DIY Decorative Vintage Serving Trays that I made with Dollar Tree’s adhesive tiles and serving trays!
If you want to see the full supply list or video tutorial, just scroll to the bottom of this page!
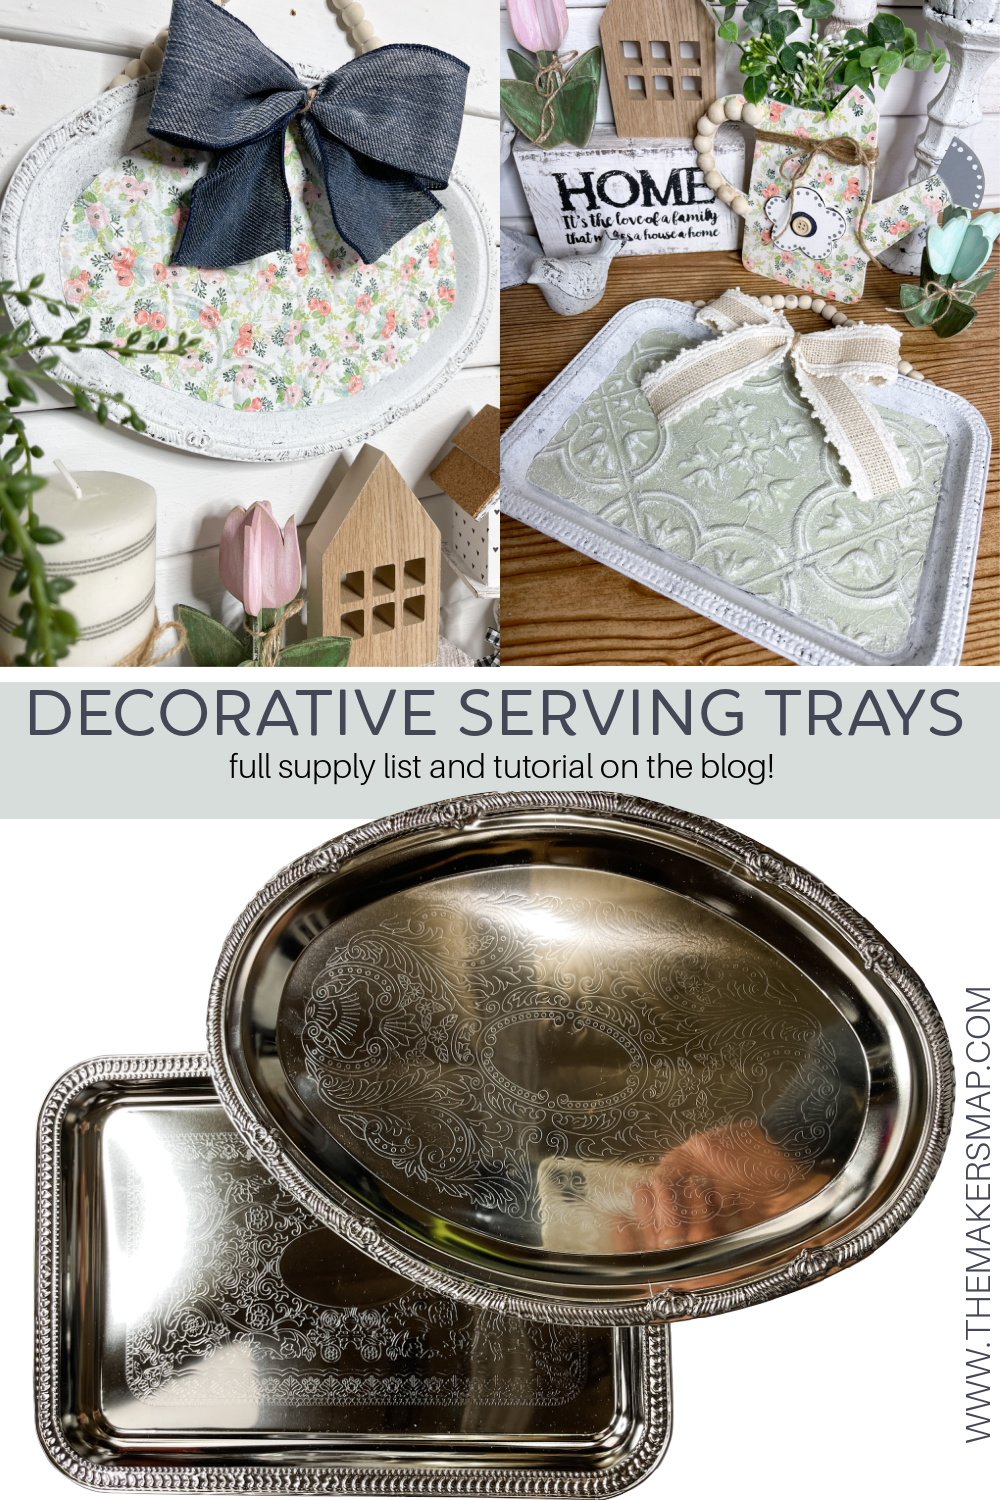
I used almost identical supplies to make two different DIY decor ideas, and I want to show you how I brought both of them to life!
Check out these Farmhouse DIYs!
- DIY Mop String Planter
- Target Tile DIY Farmhouse Decor
- DIY Farmhouse Decor with Corkboard Cow
- Dollar Tree File Folder DIY Toolbox
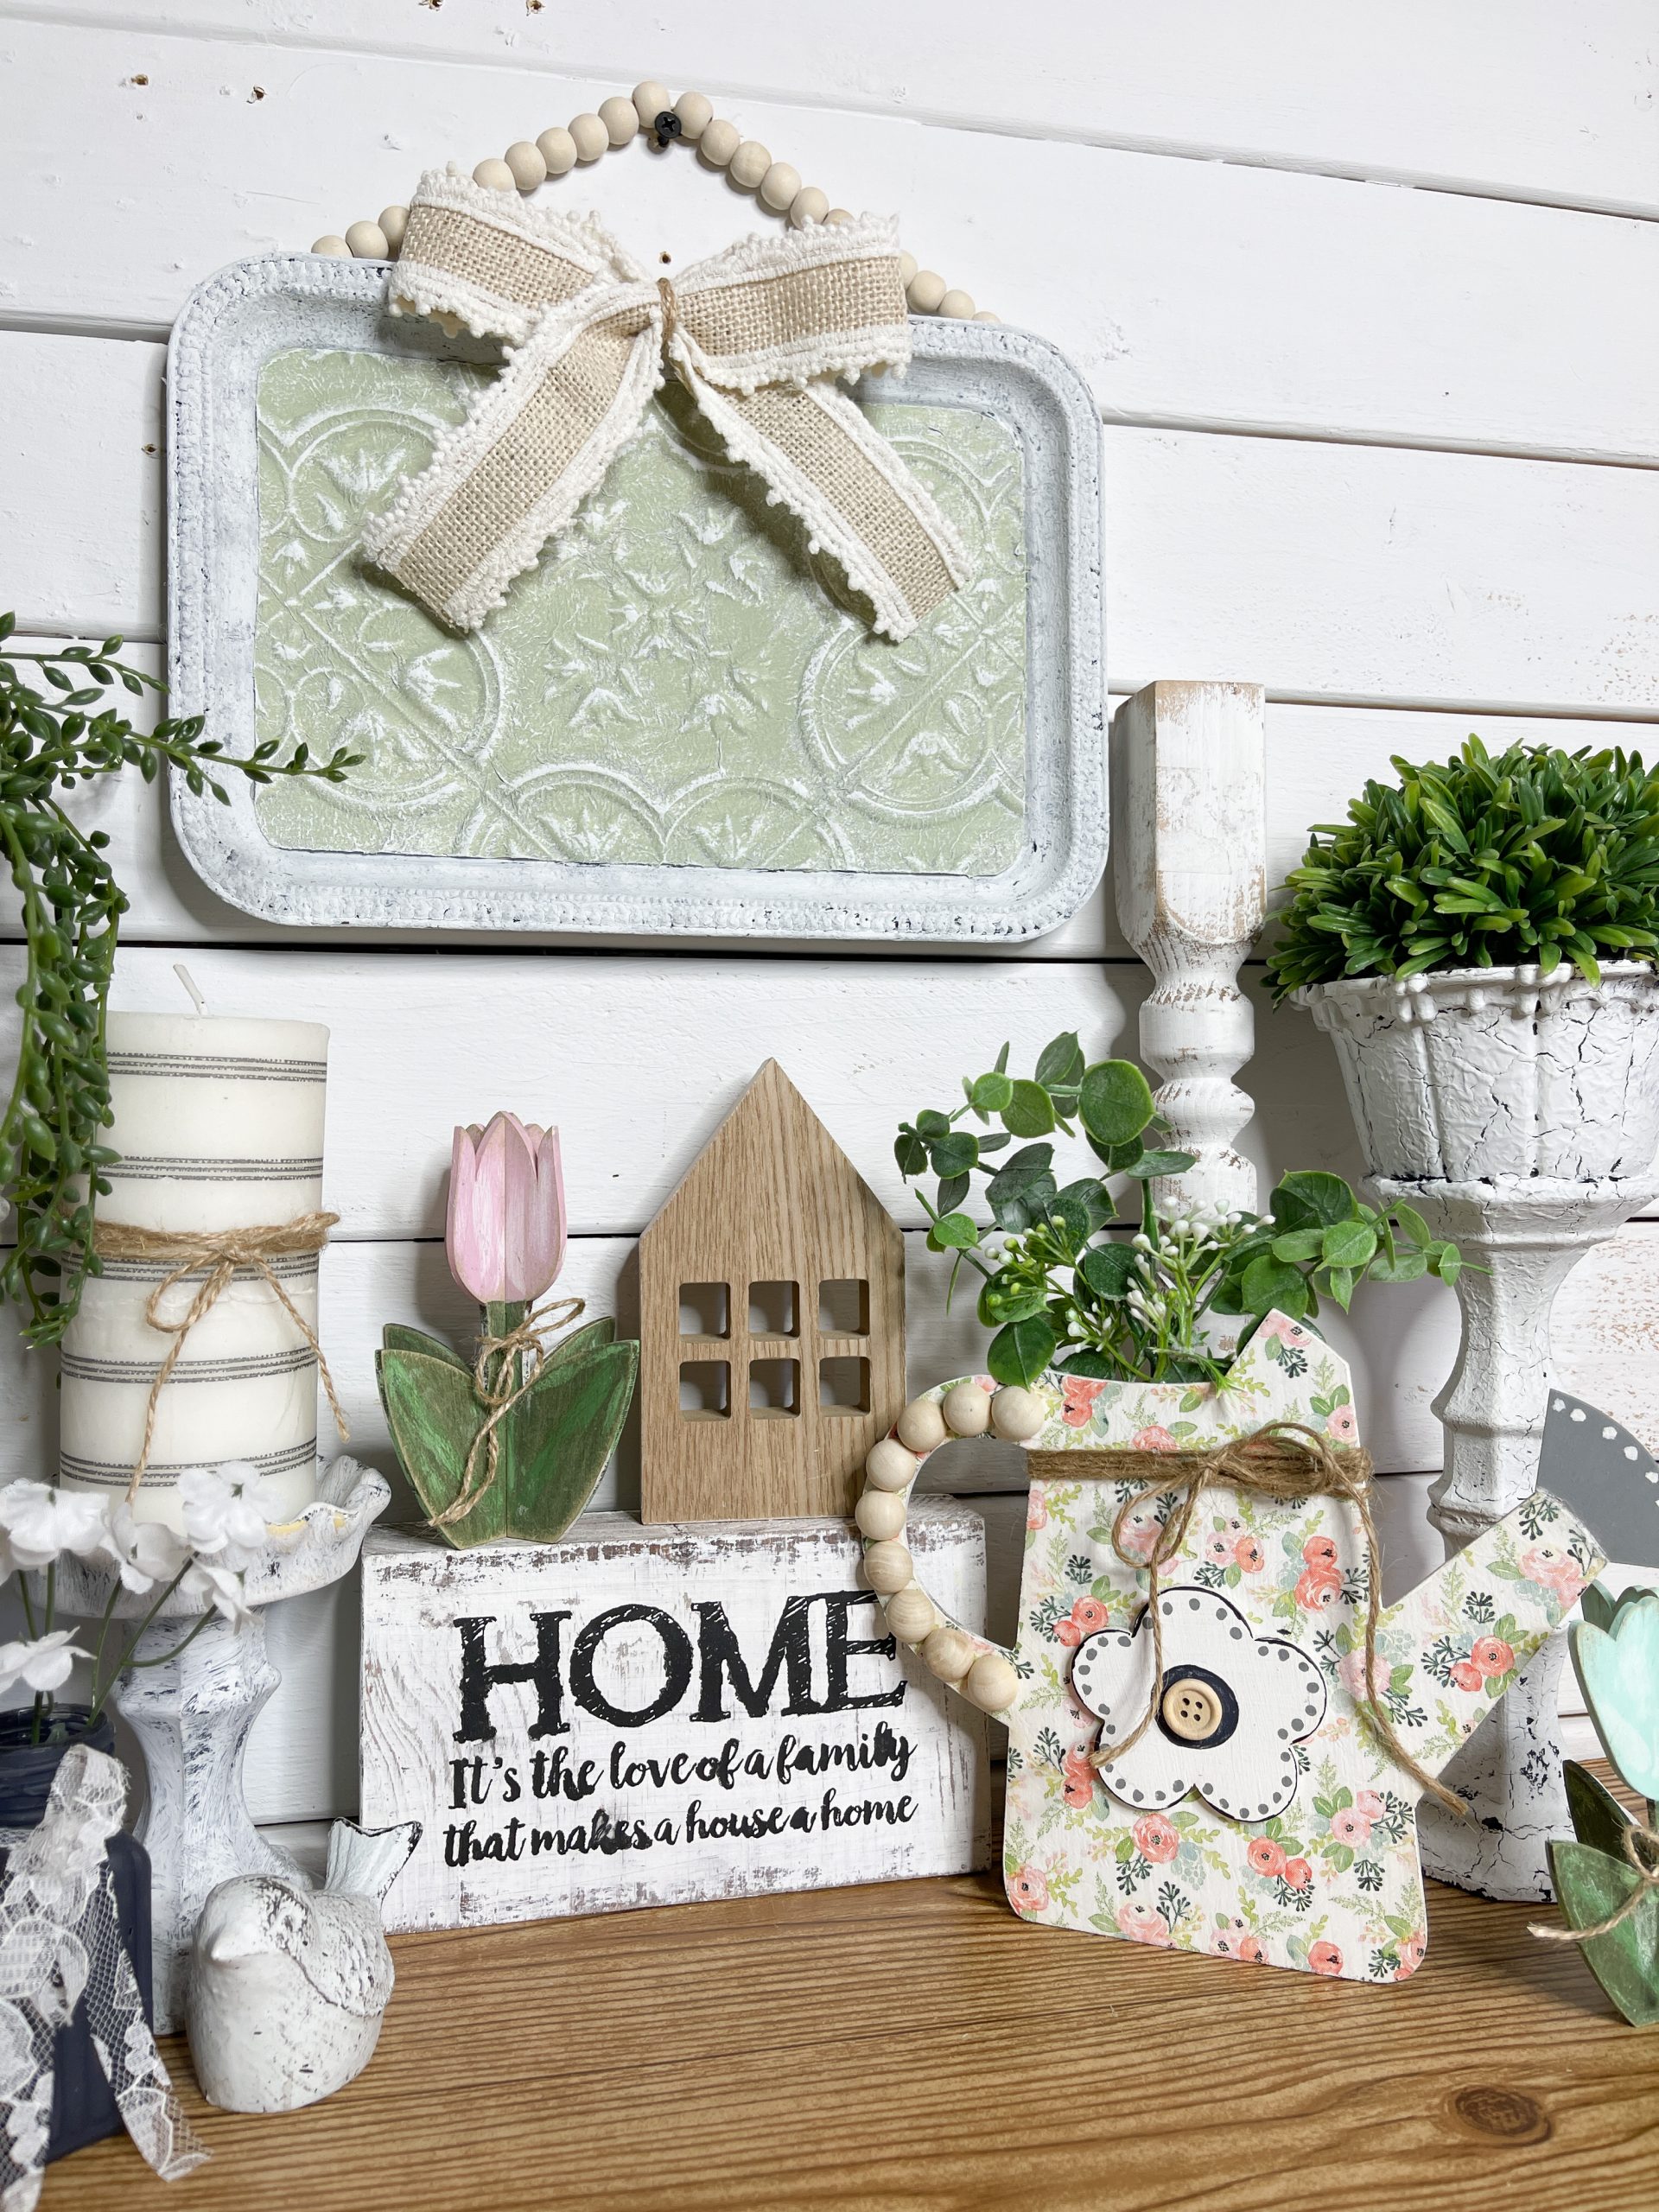
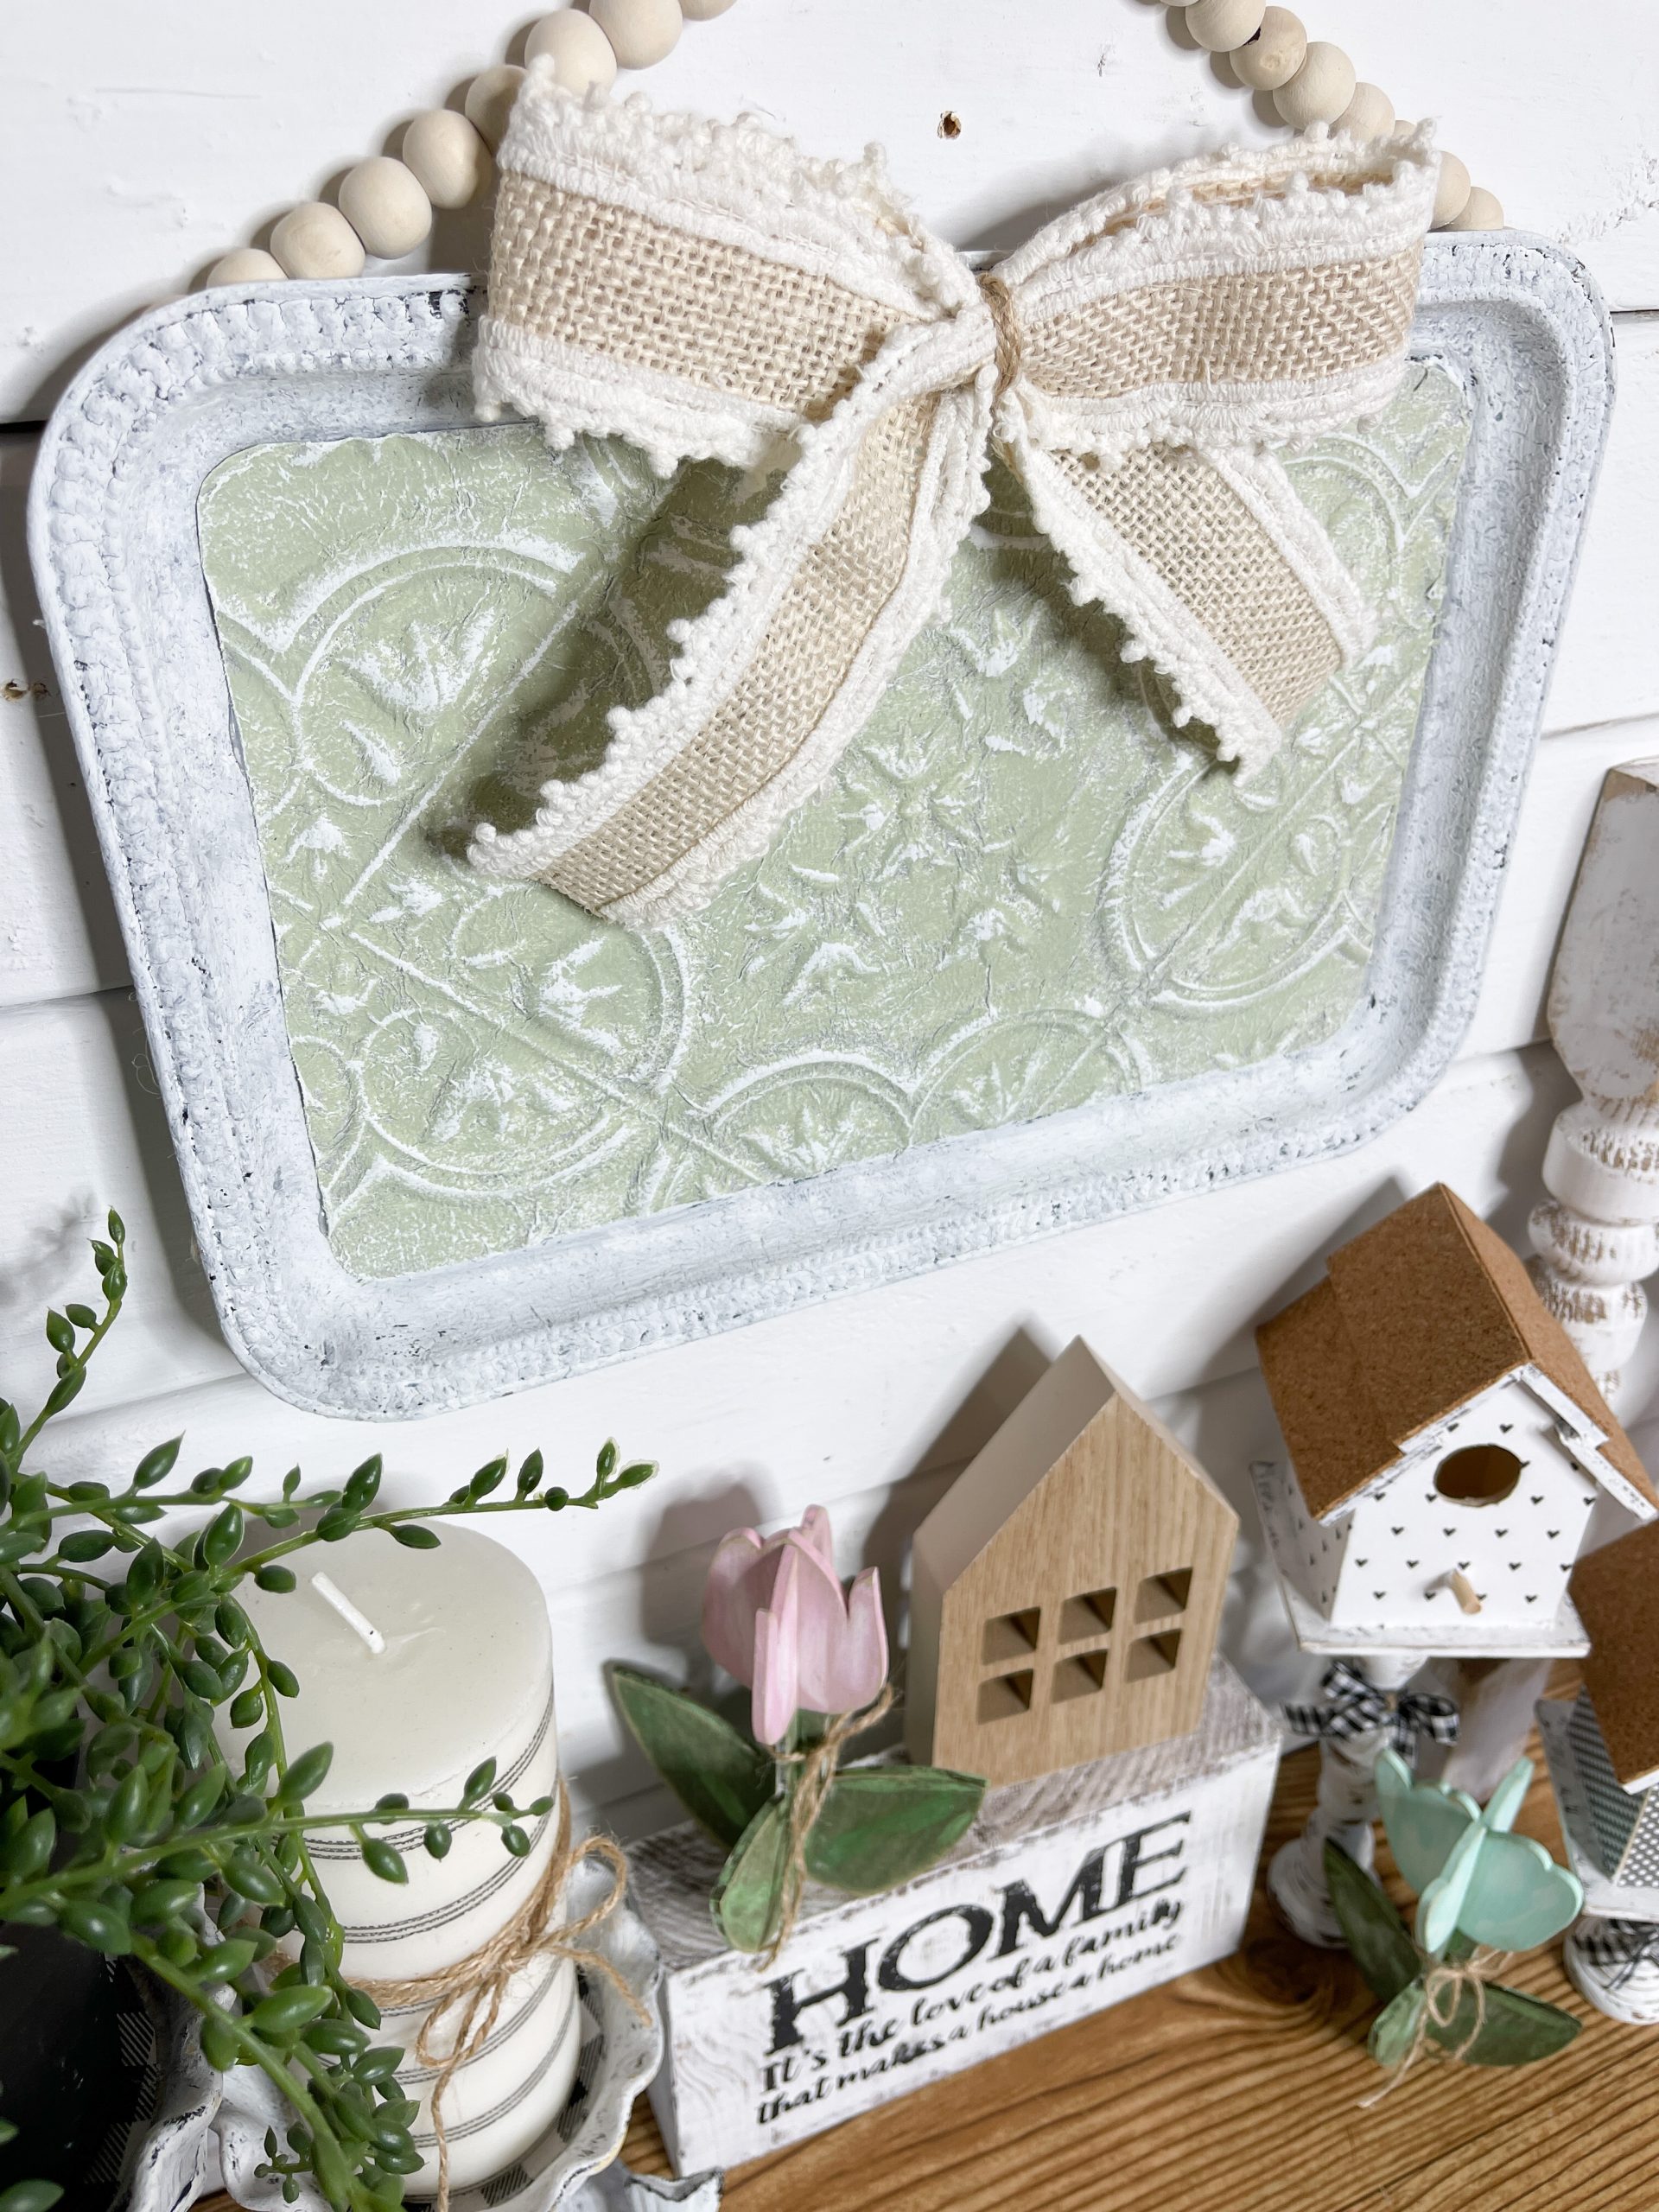
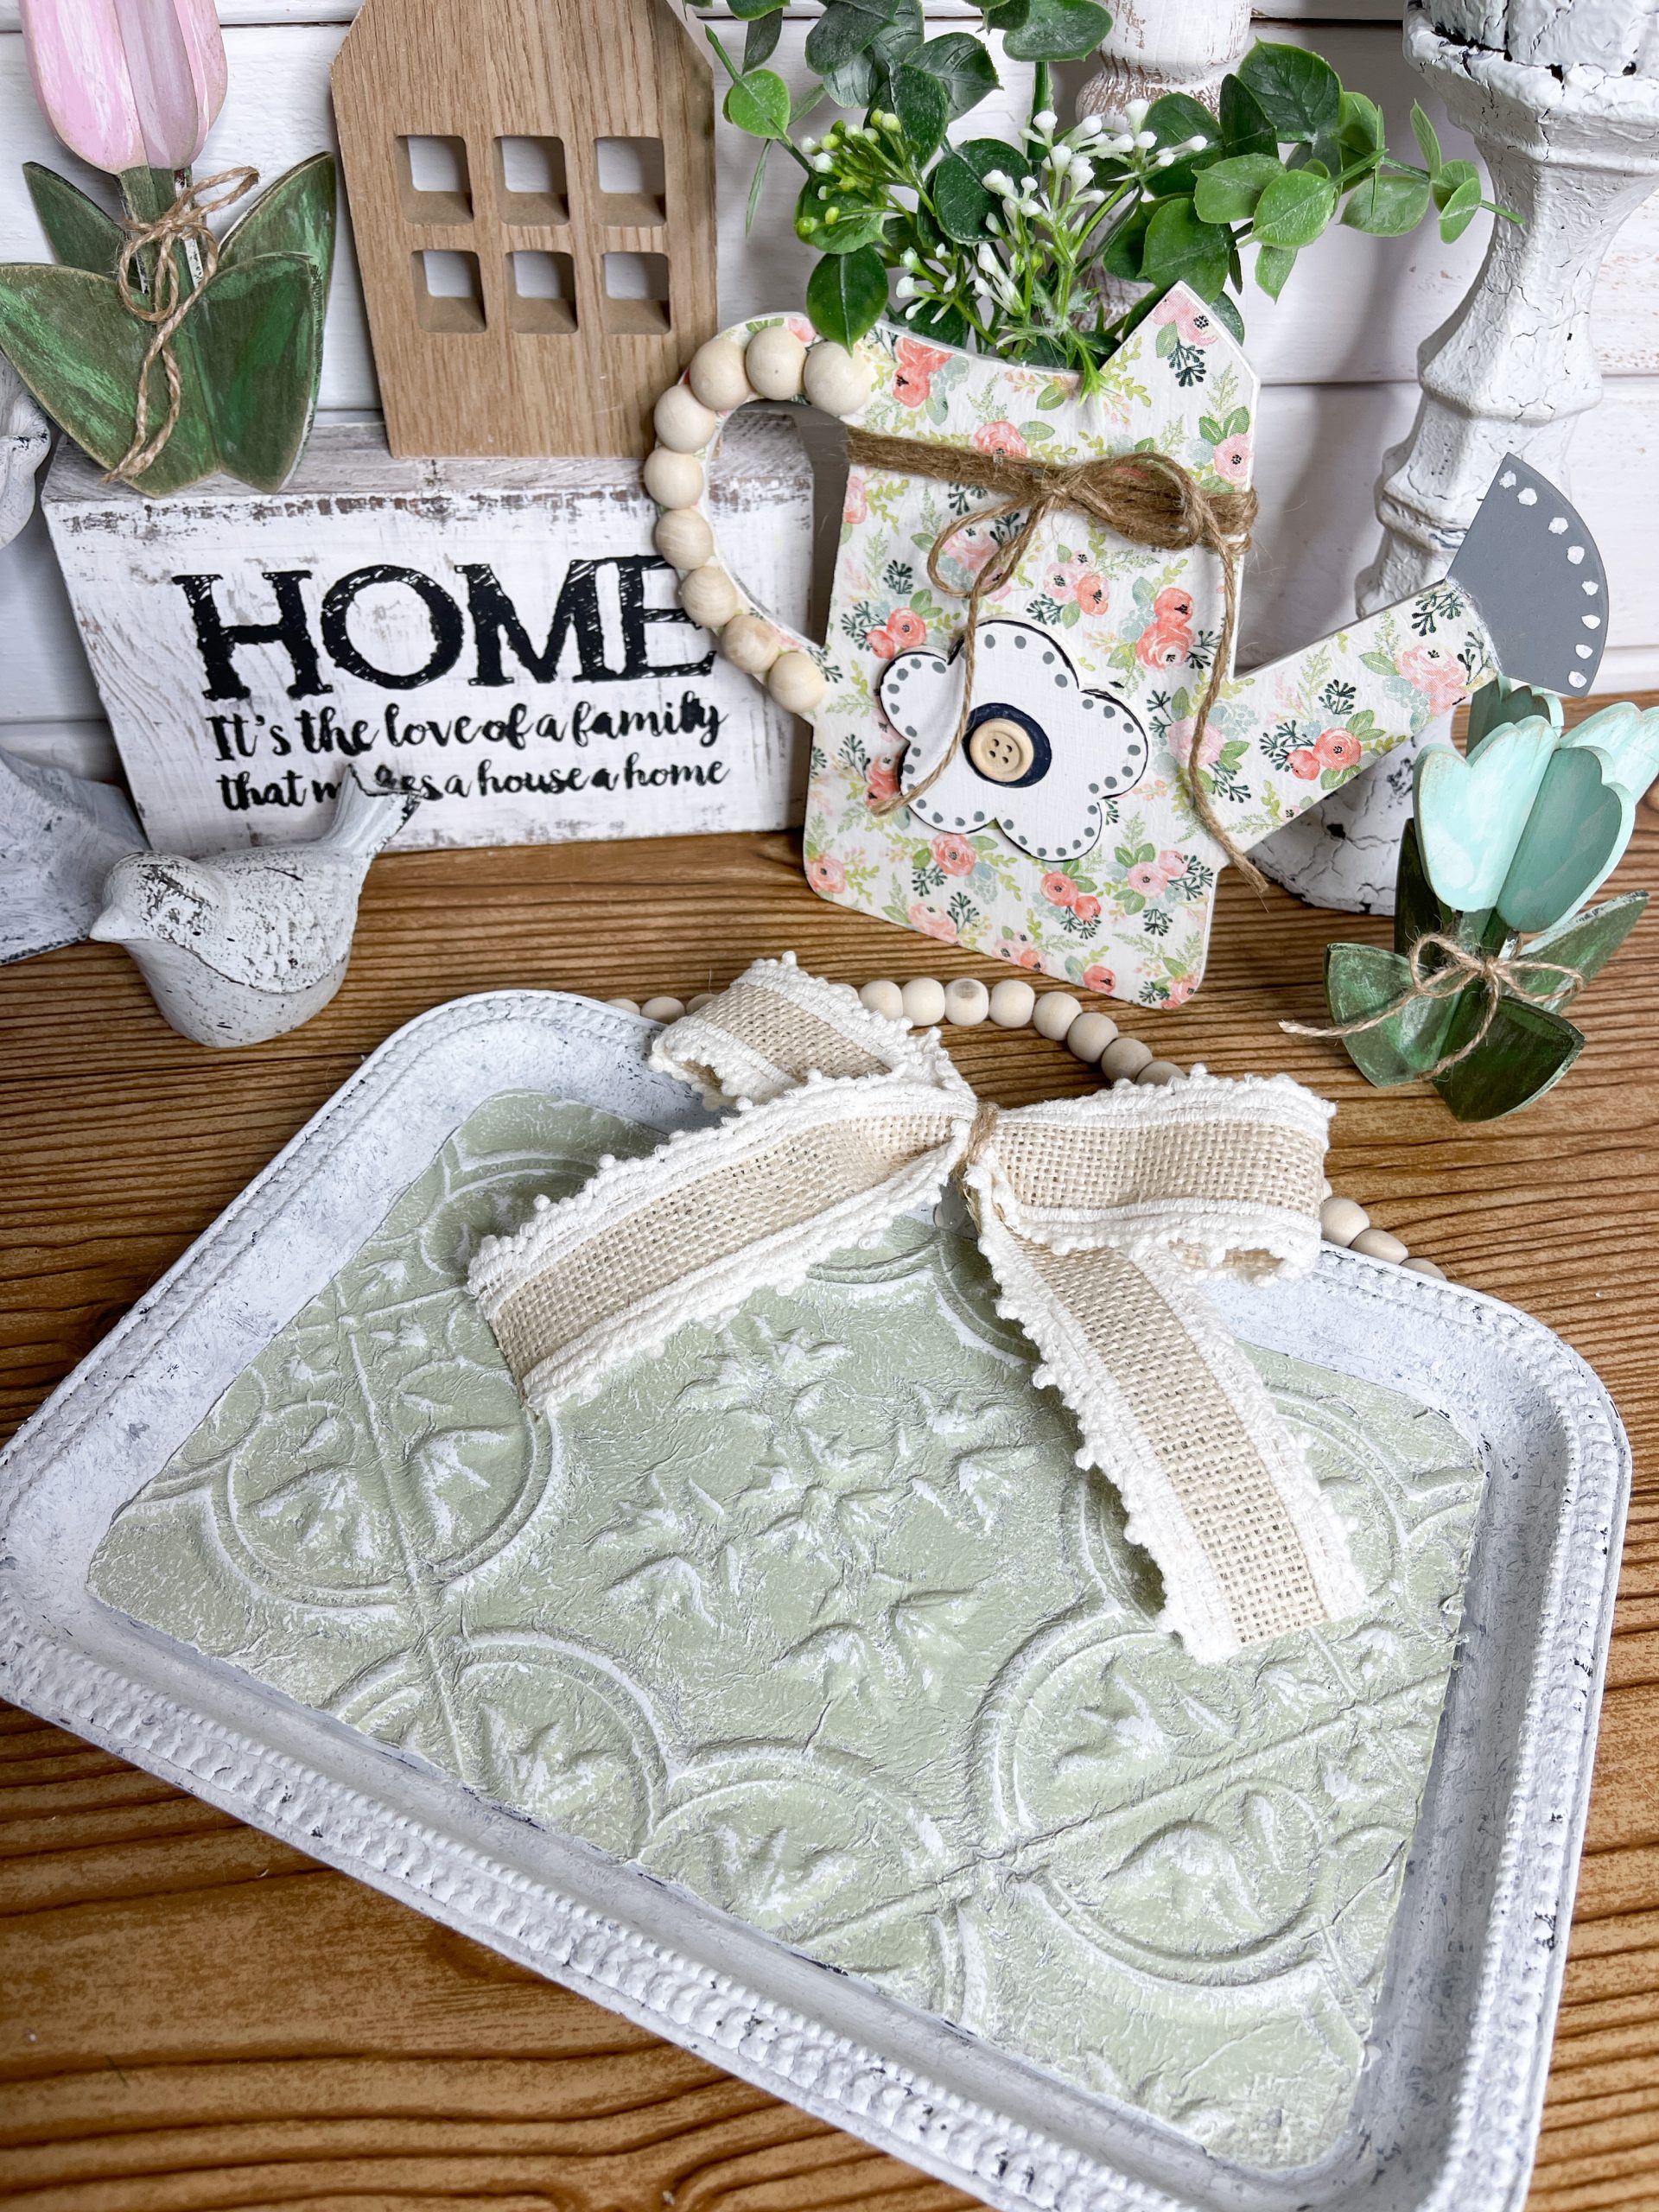
How to make DIY Decorative Vintage Serving Trays
If you want to see the full supply list or video tutorial, just scroll to the bottom of this page!
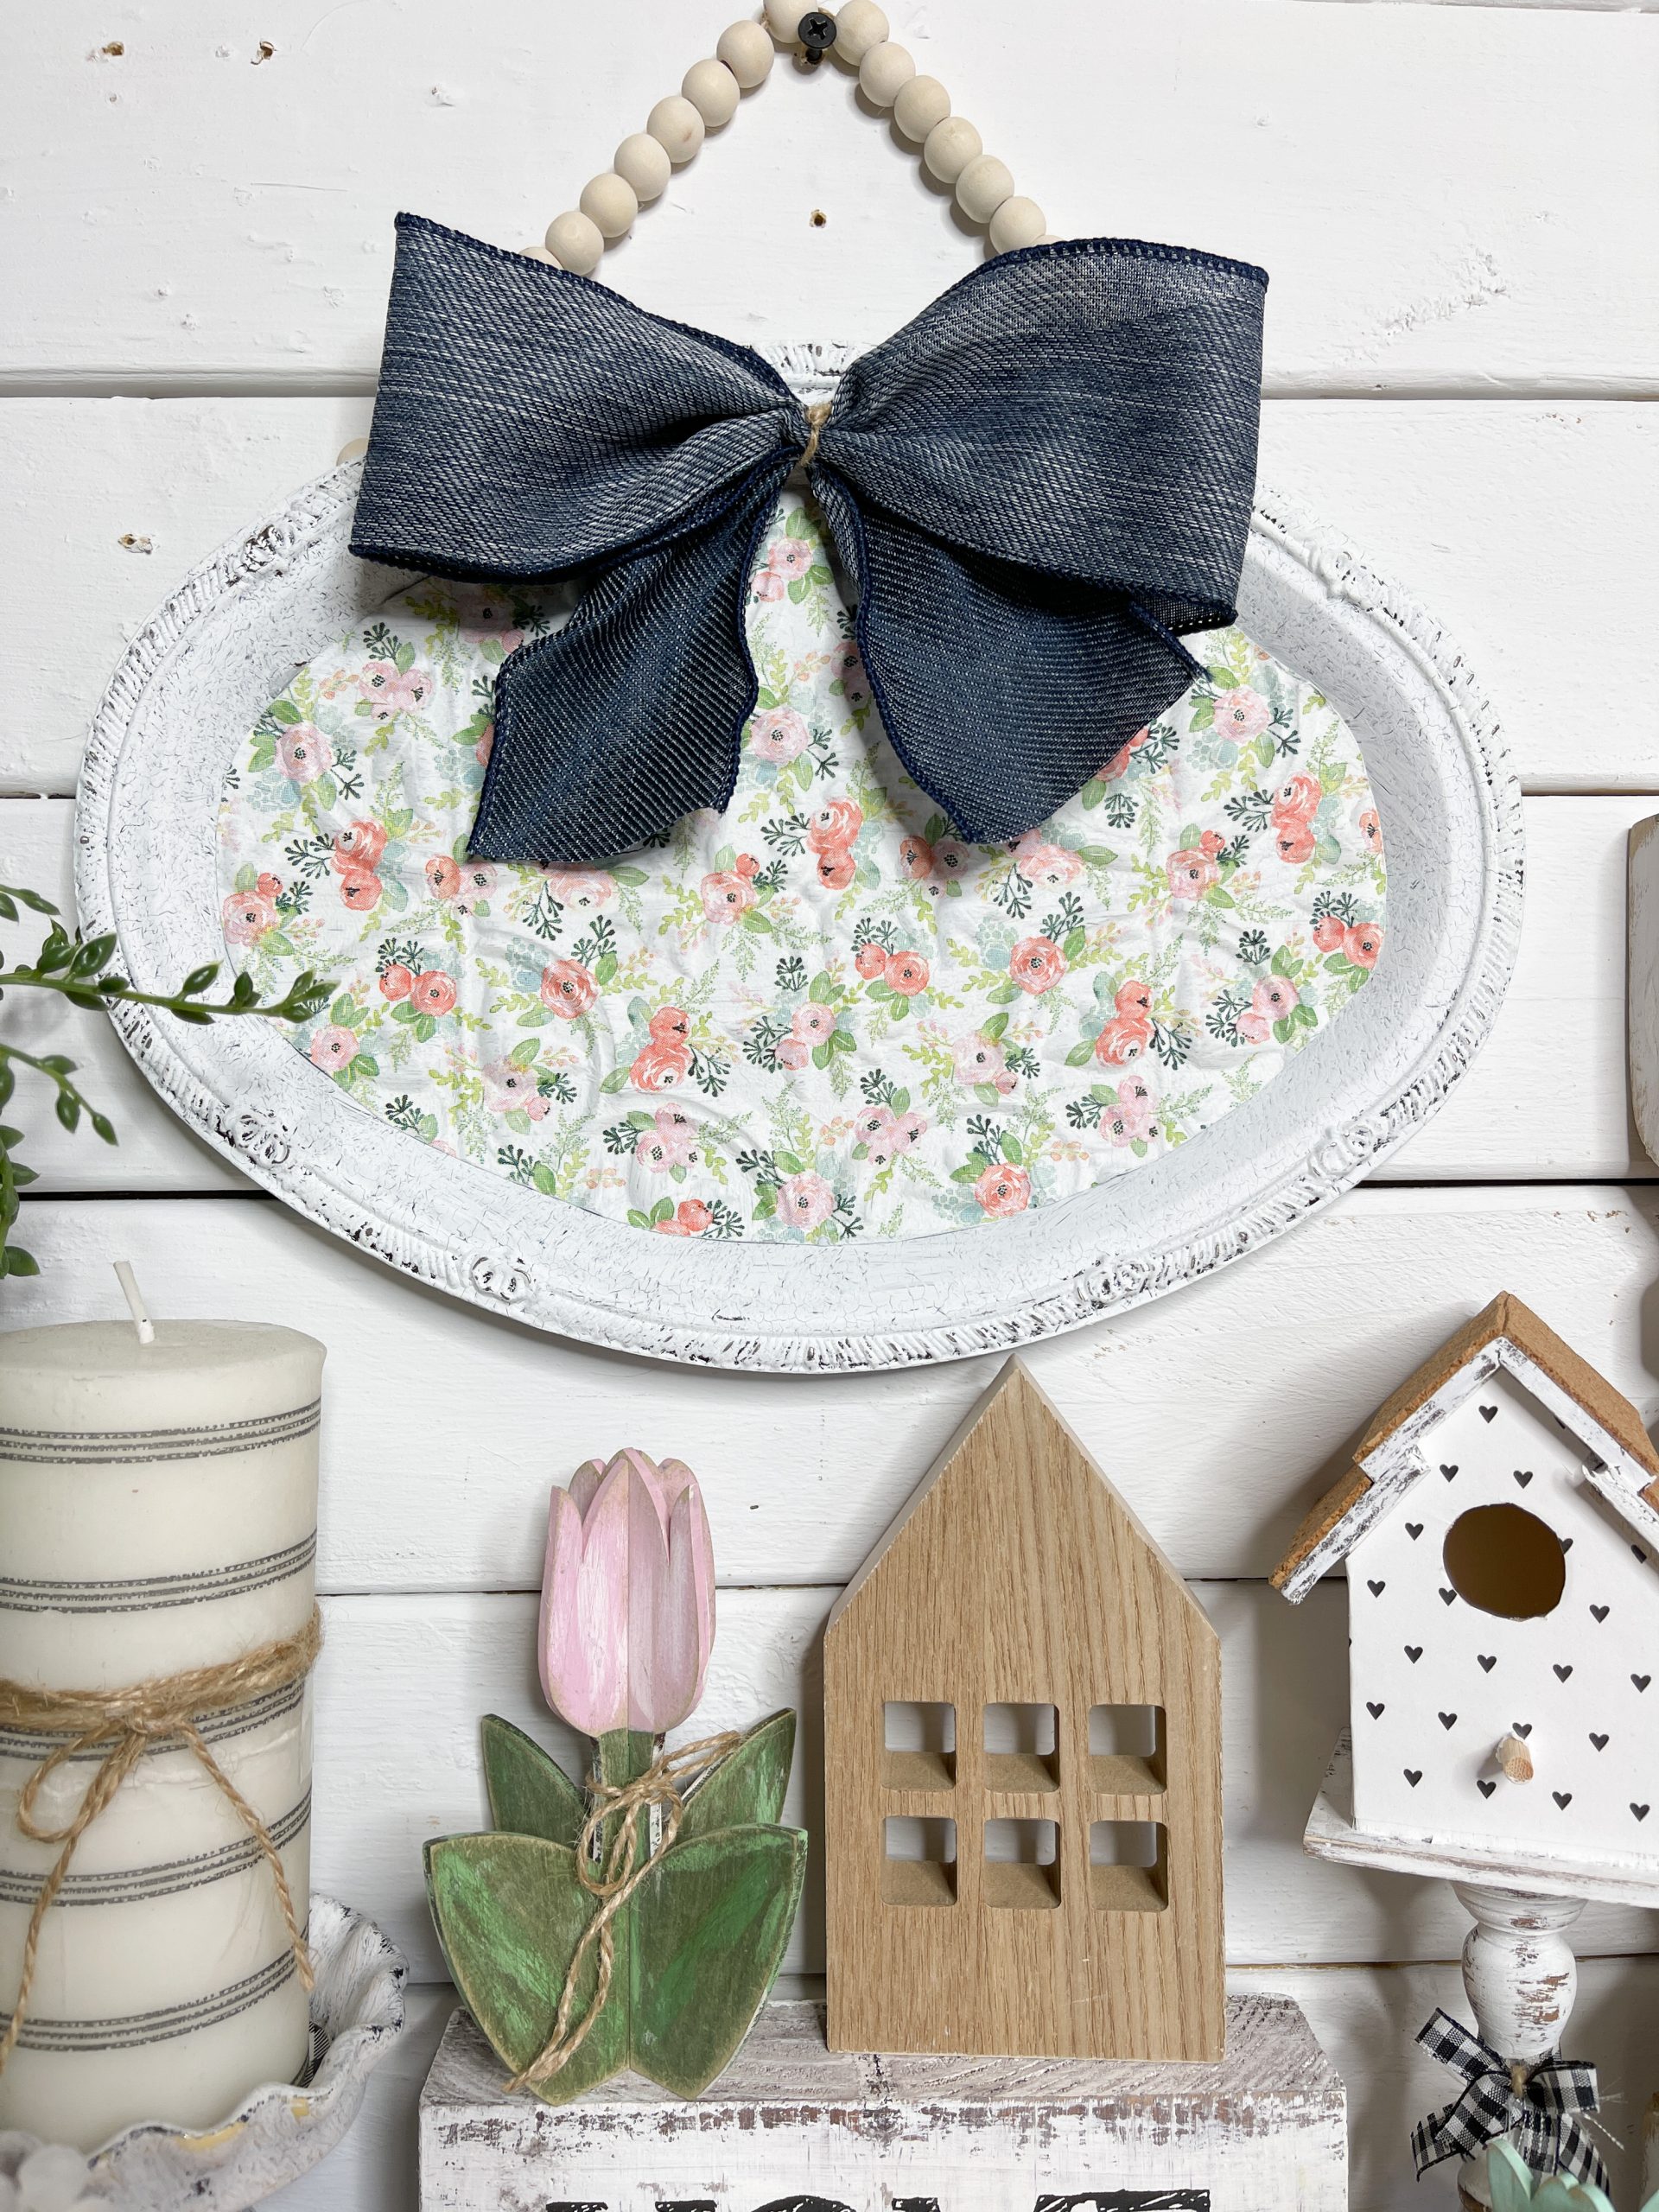
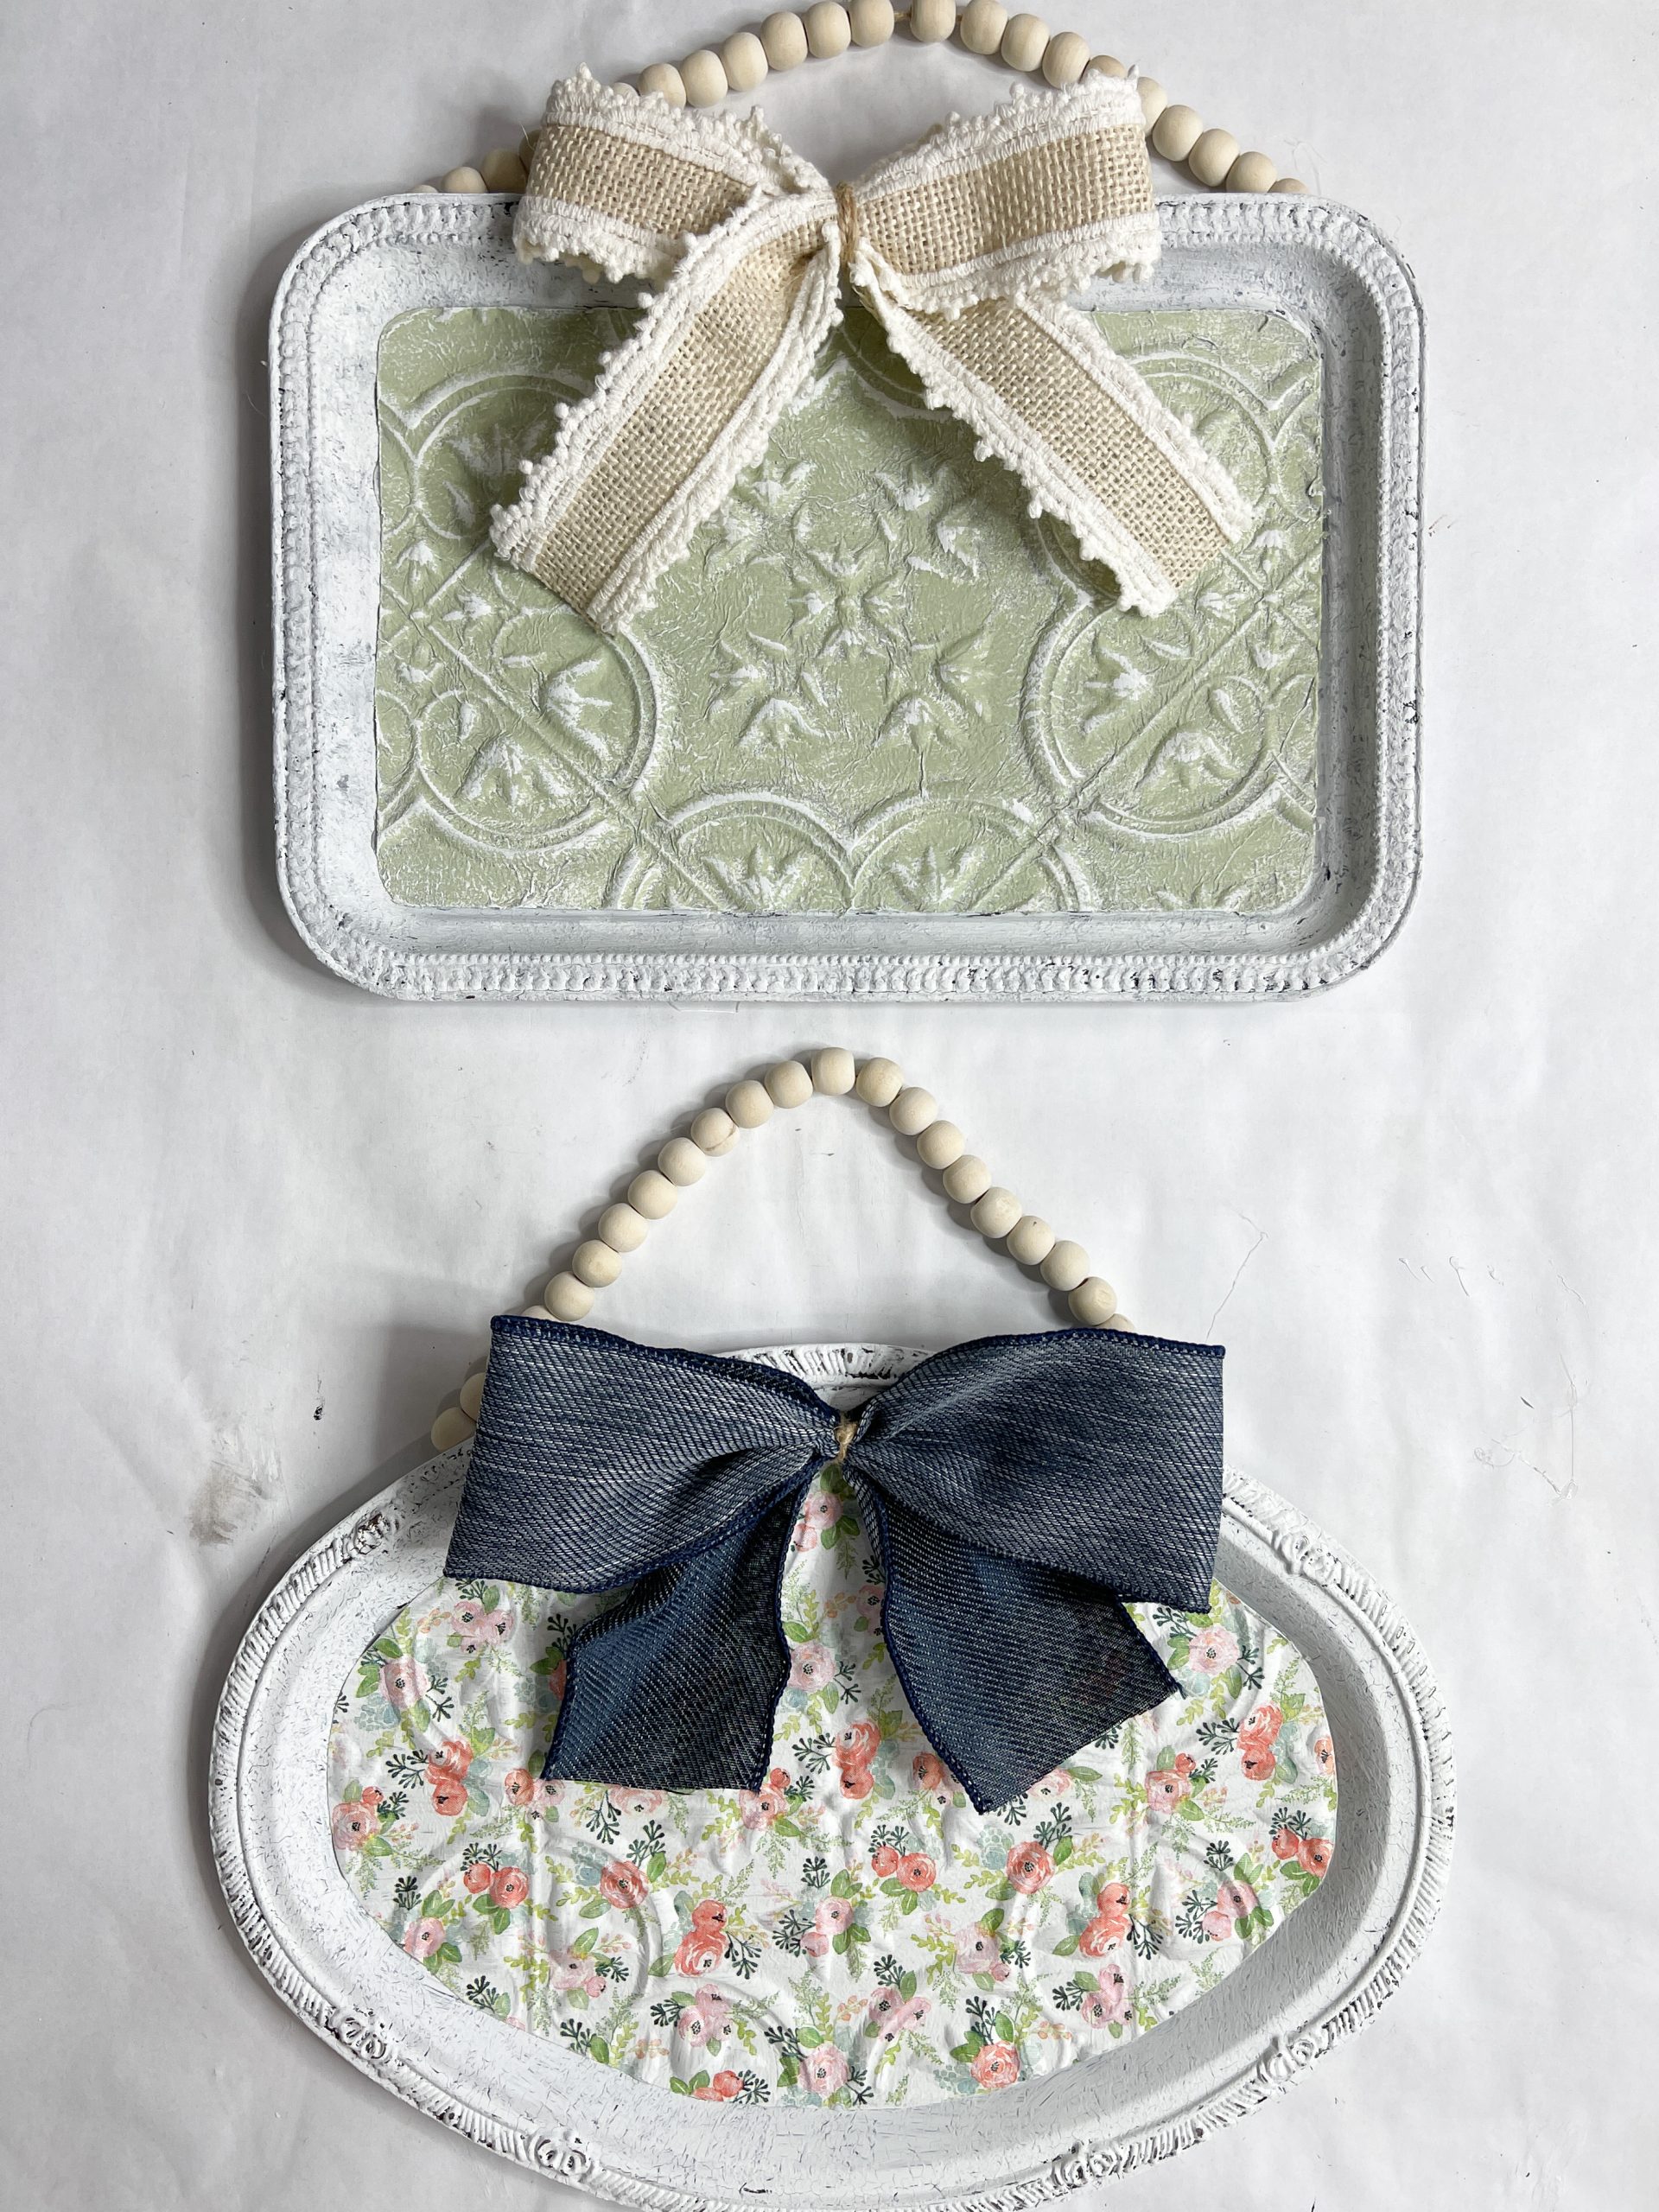
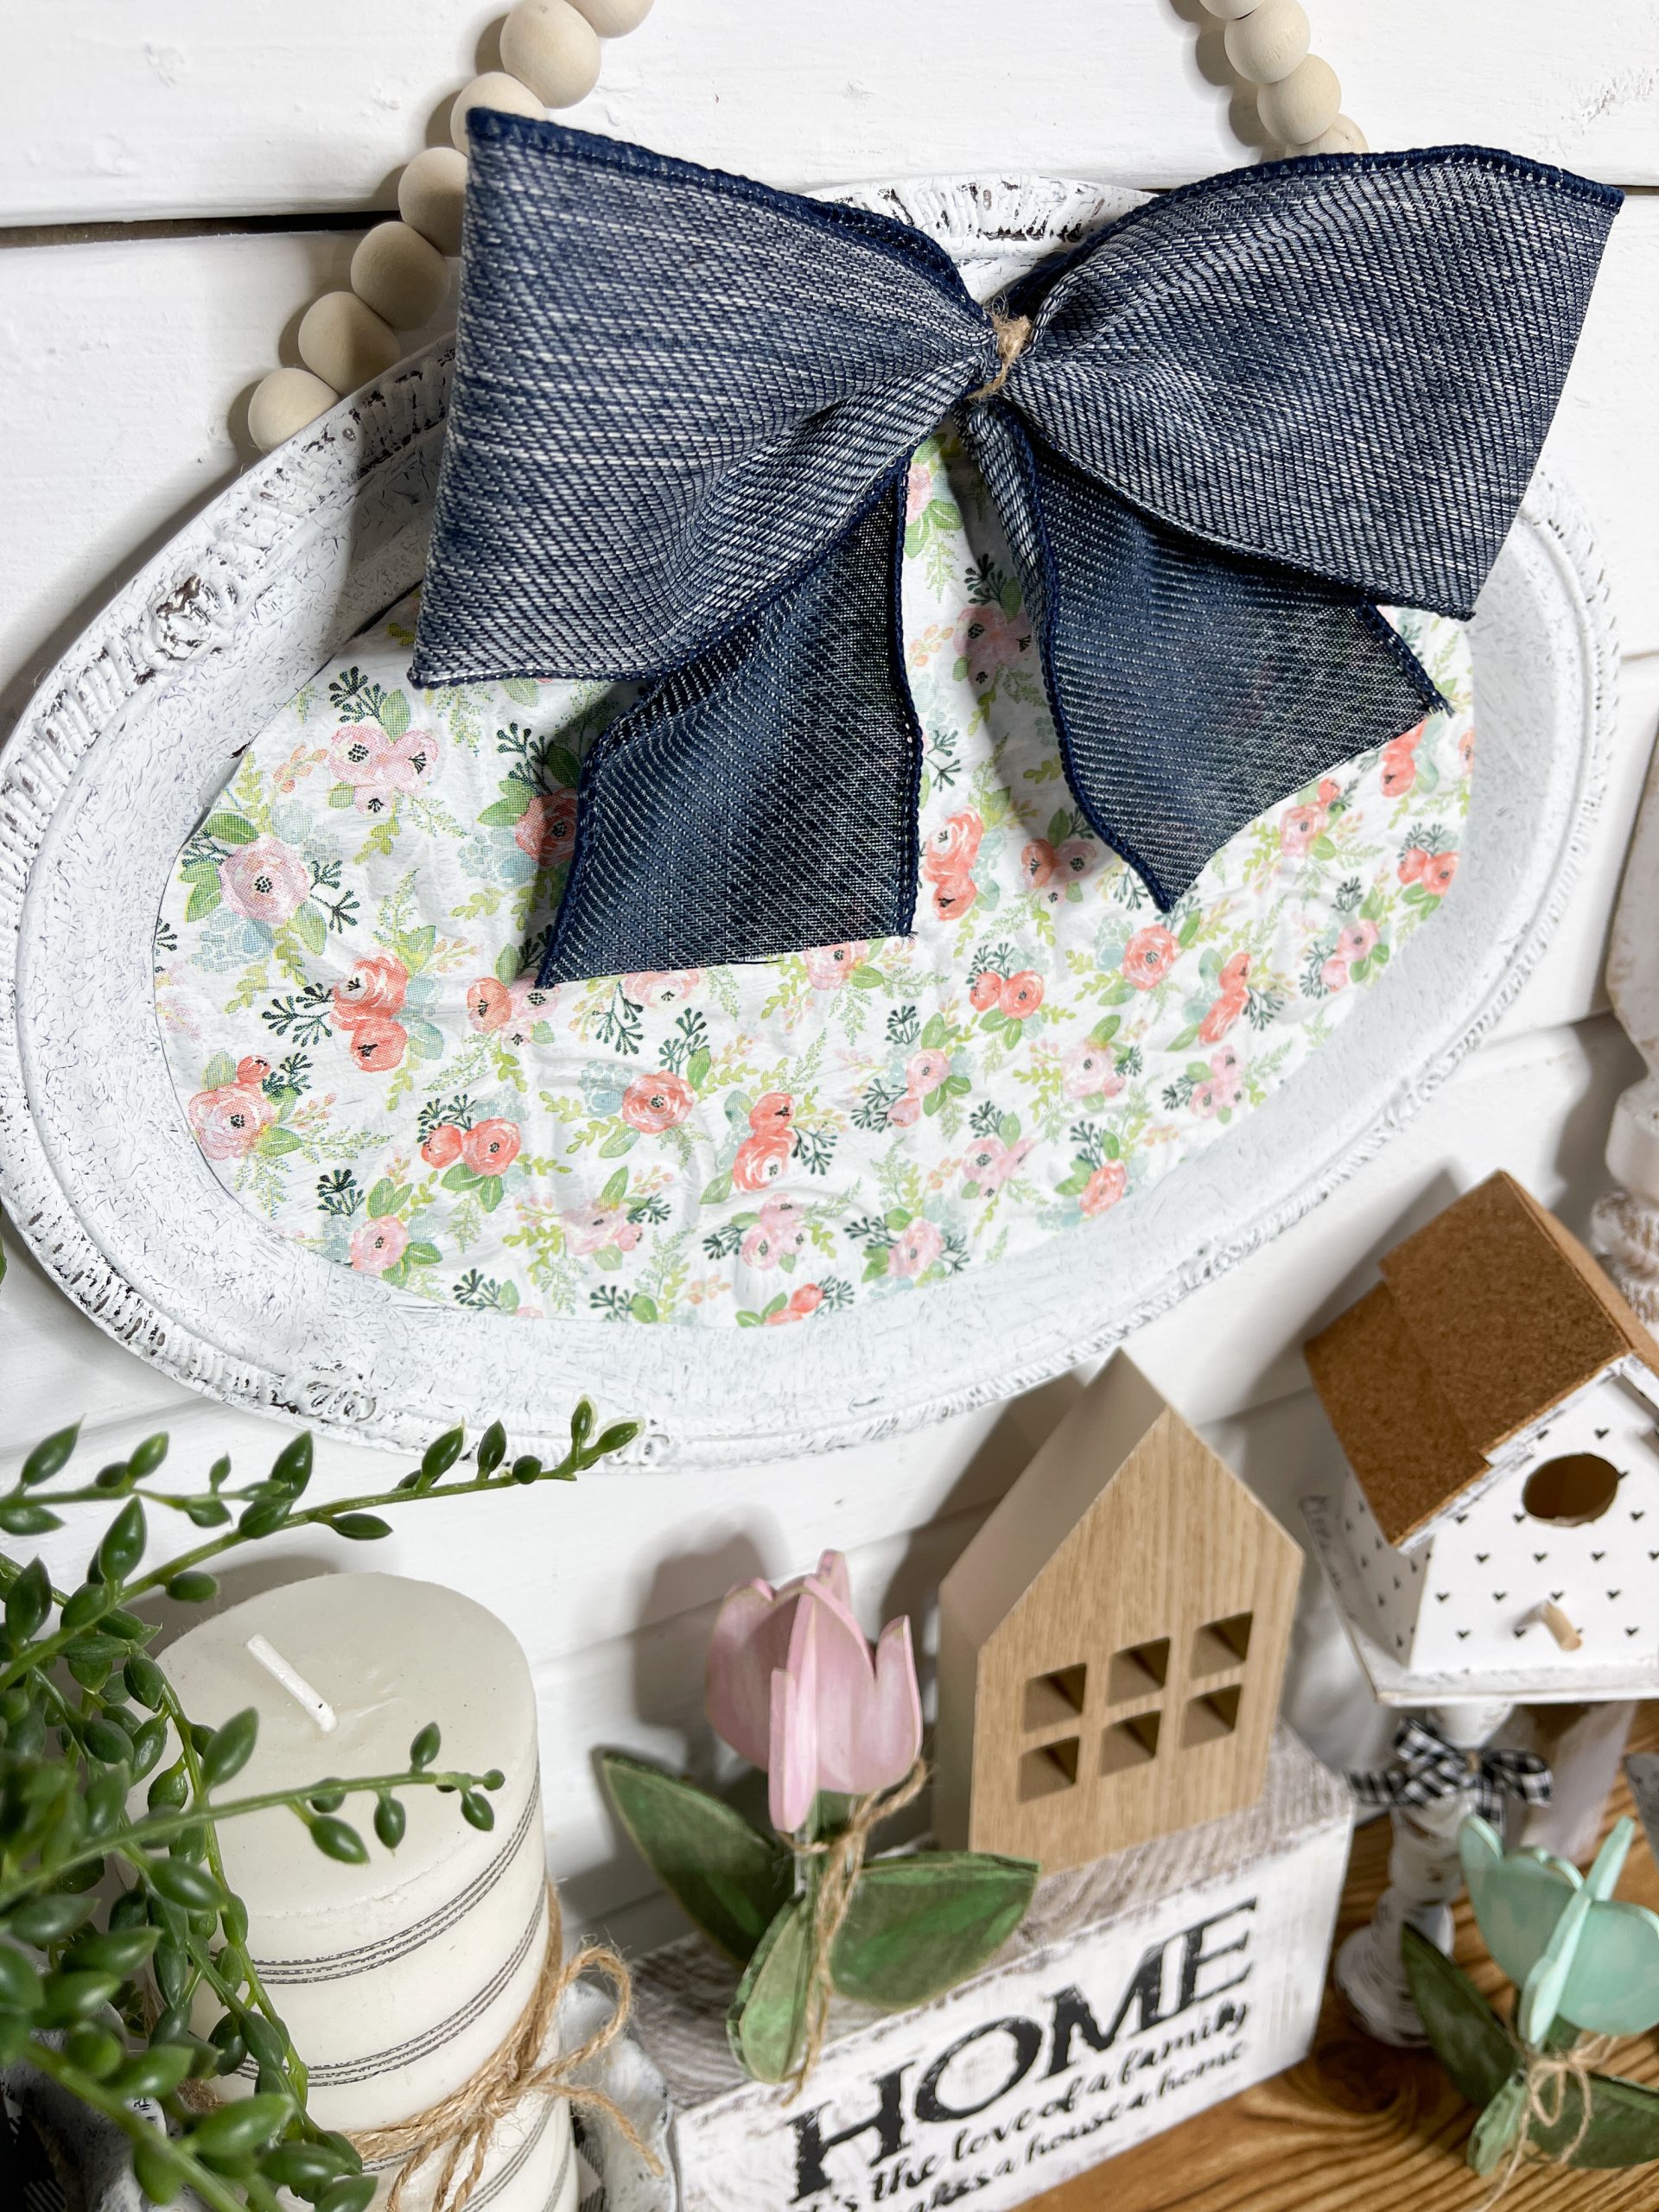
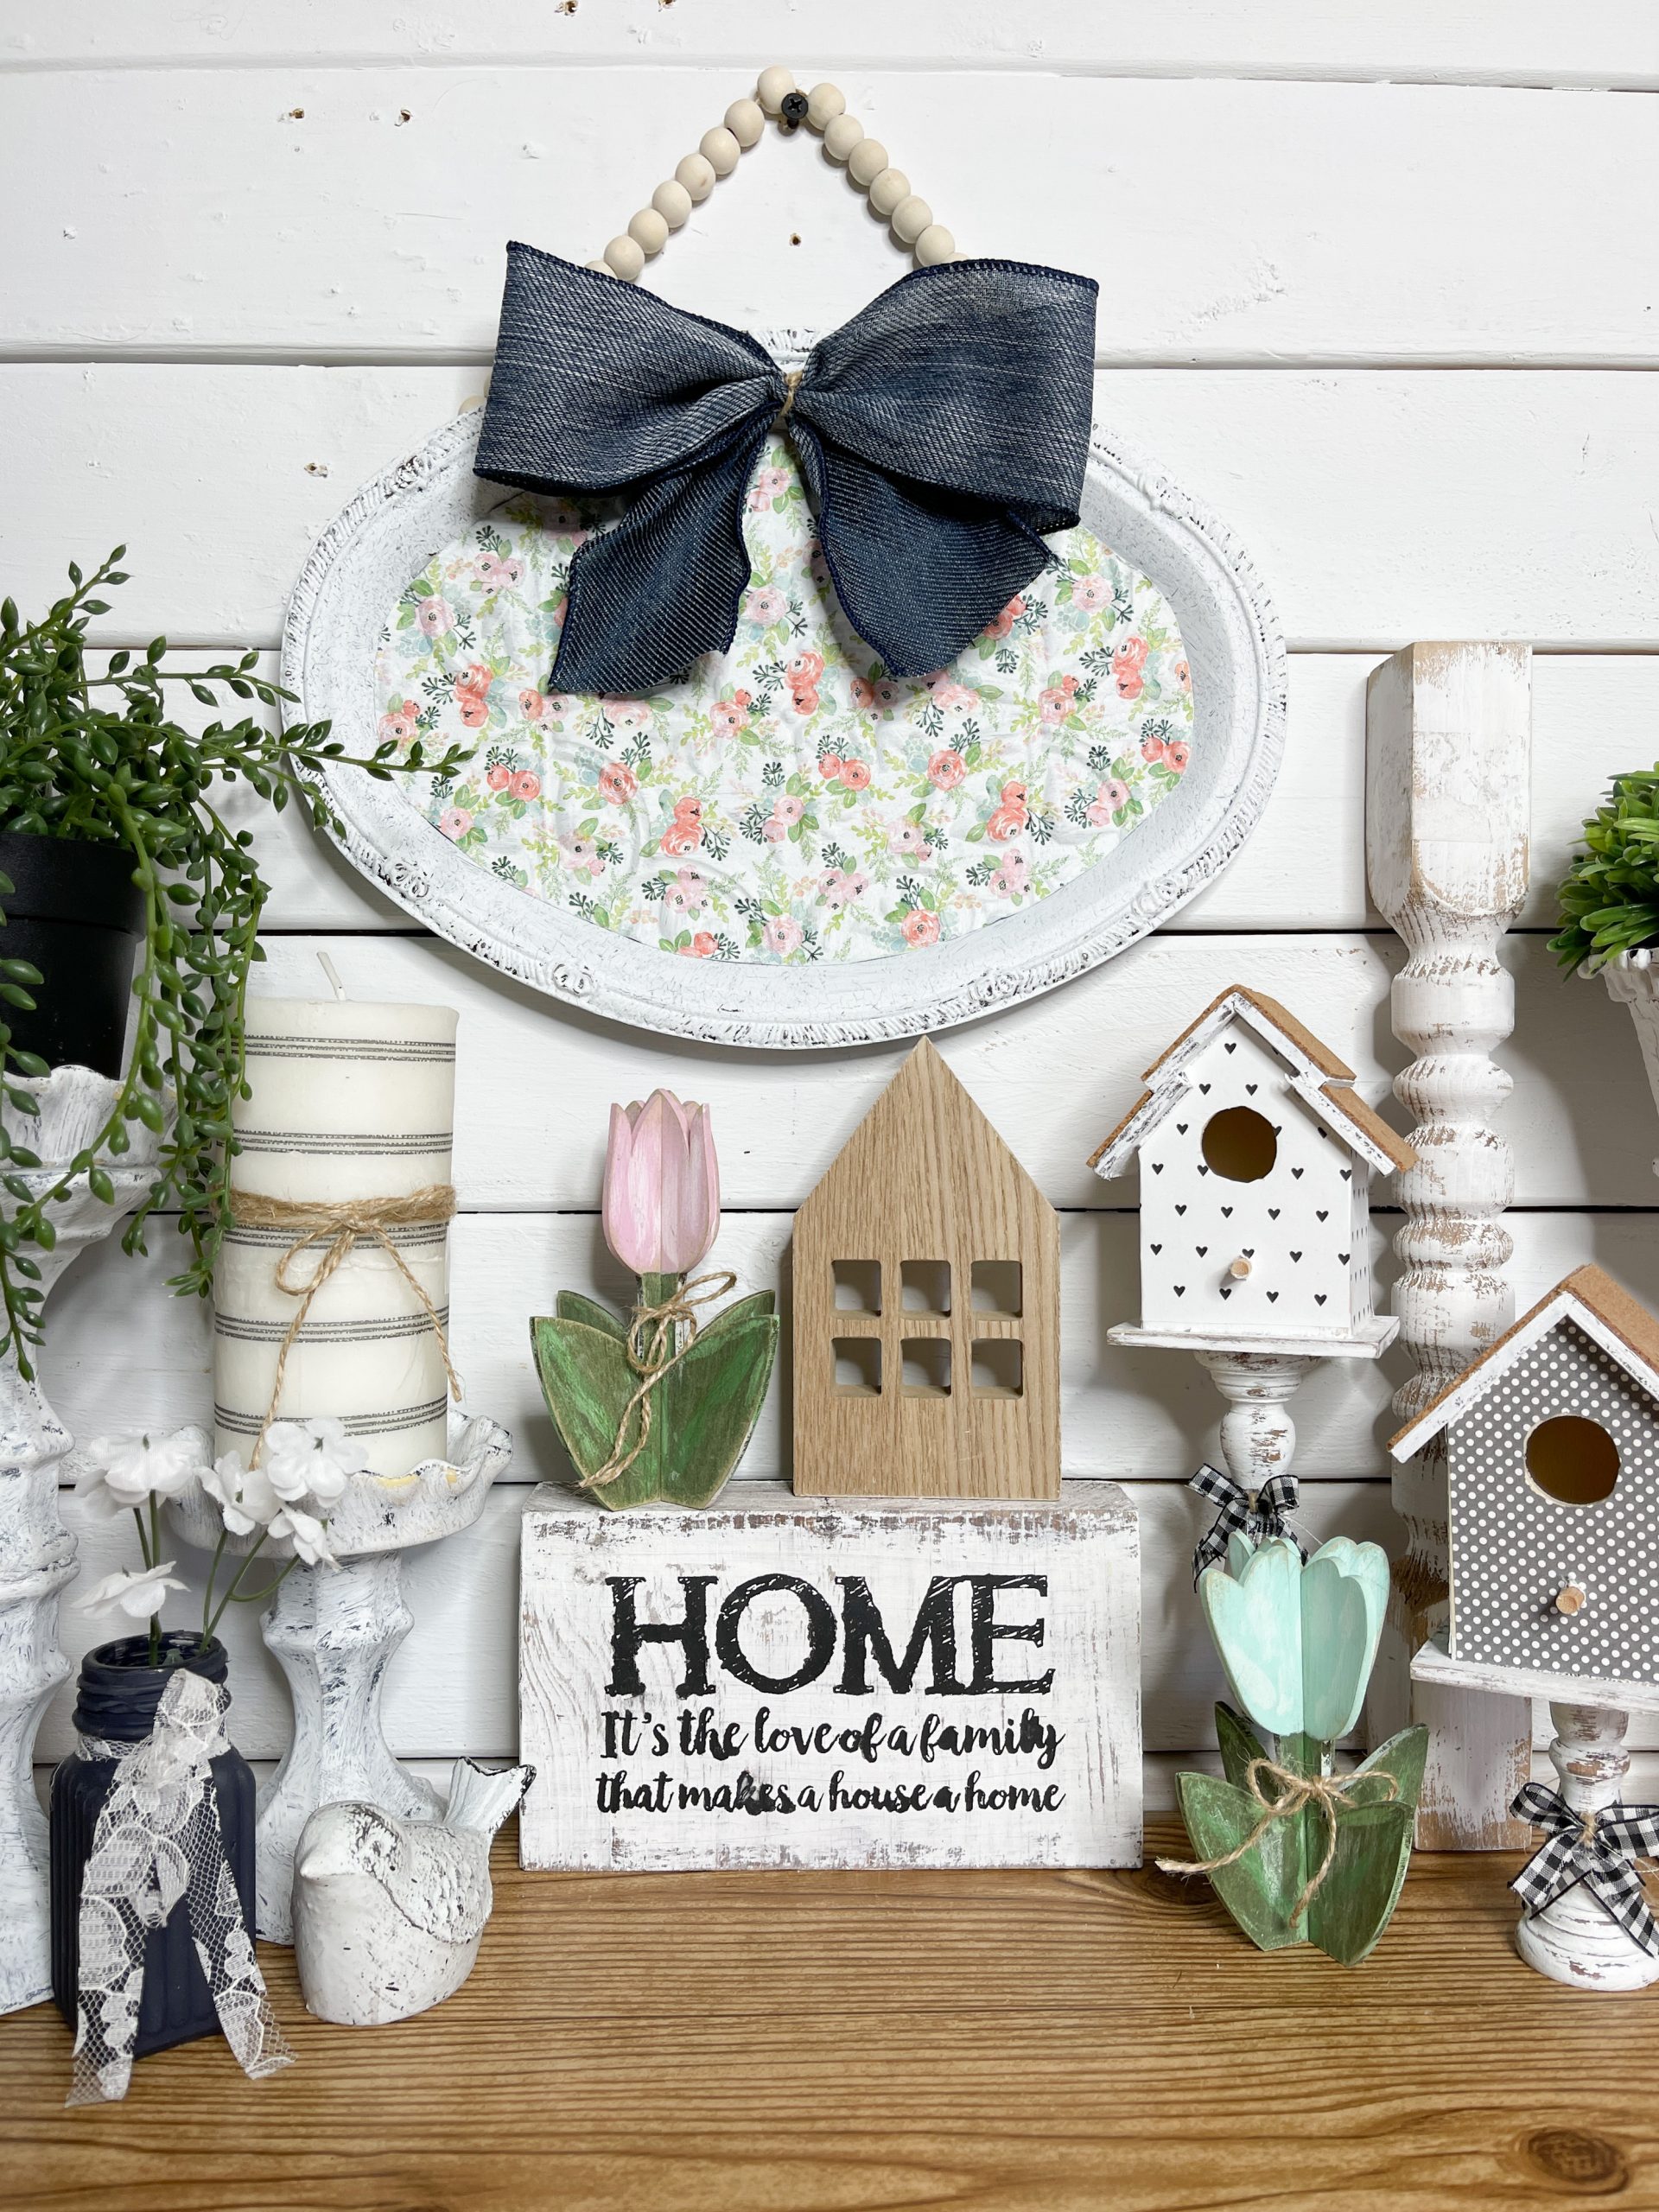
I started with my ovular serving tray first. Spray the ornamental edges of the serving tray with your brown spray paint and allow the paint to dry.
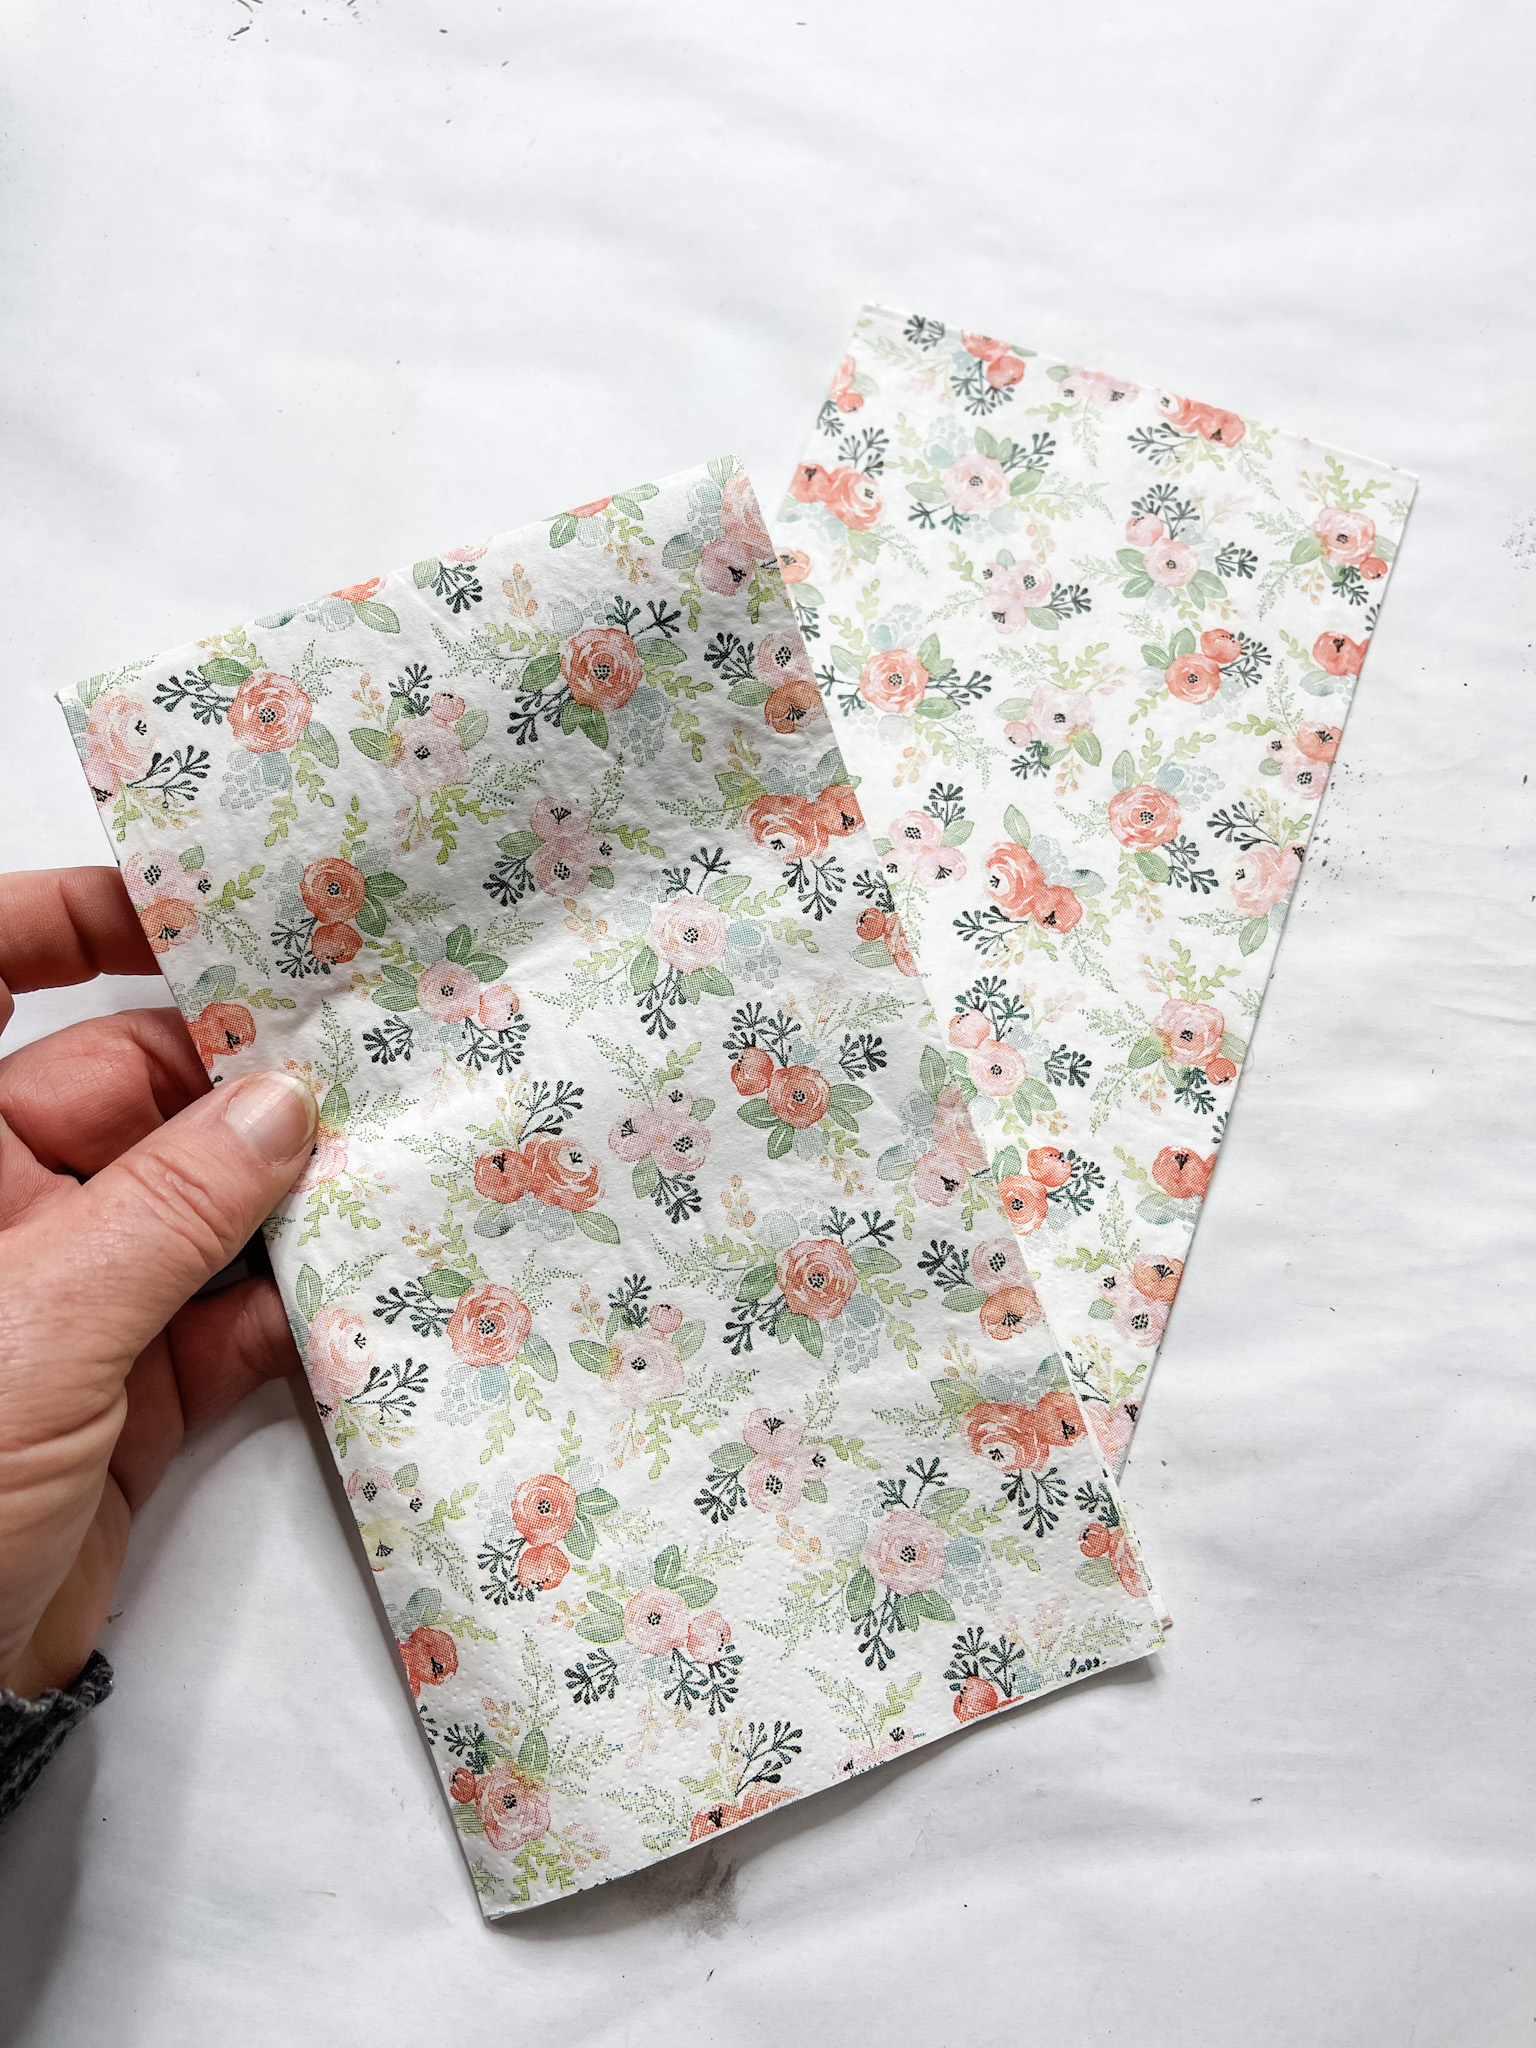
Separate the plies of your floral napkin and keep just the ply with the design handy. Apply a coat of white paint to the front of the adhesive tile.
Make sure the paint on the serving tray is completely dry, then place a piece of wax paper on the serving tray and trace where the inner oval is.
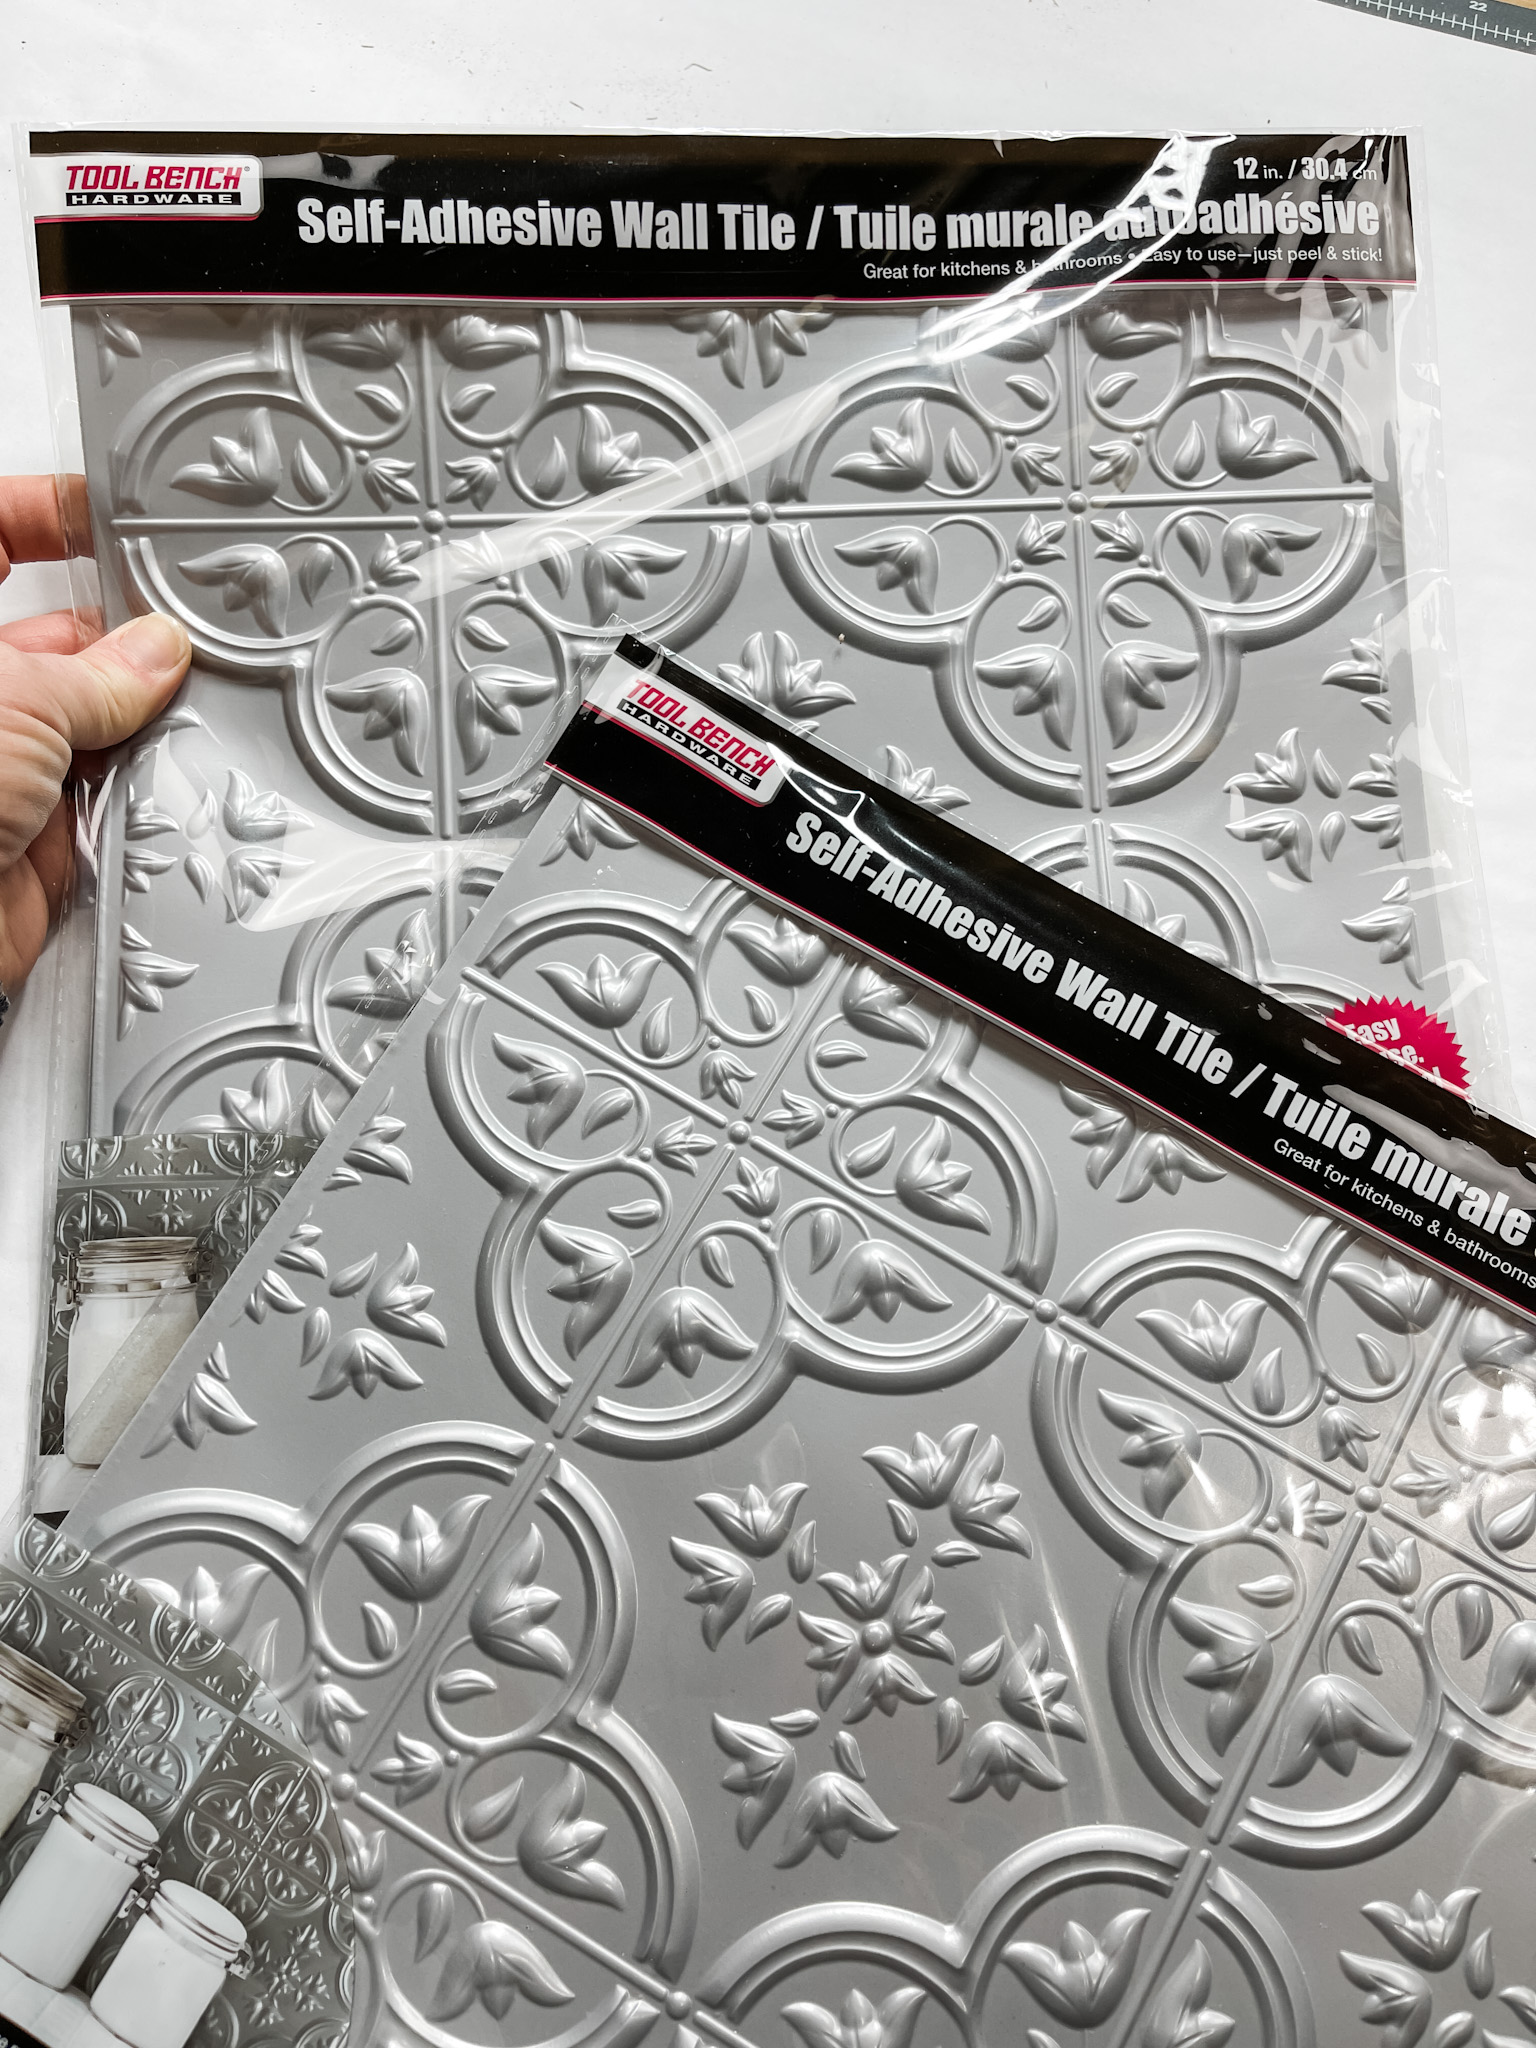
Cut out that oval and trace it on the back of the adhesive tile. Apply a coat of Mod Podge to the front of the painted adhesive tile and place the napkin onto the surface.
If you want to see the full supply list or video tutorial, just scroll to the bottom of this page!
Allow the Mod Podge to dry completely and use a piece of sandpaper to remove the excess napkin from the adhesive tile.
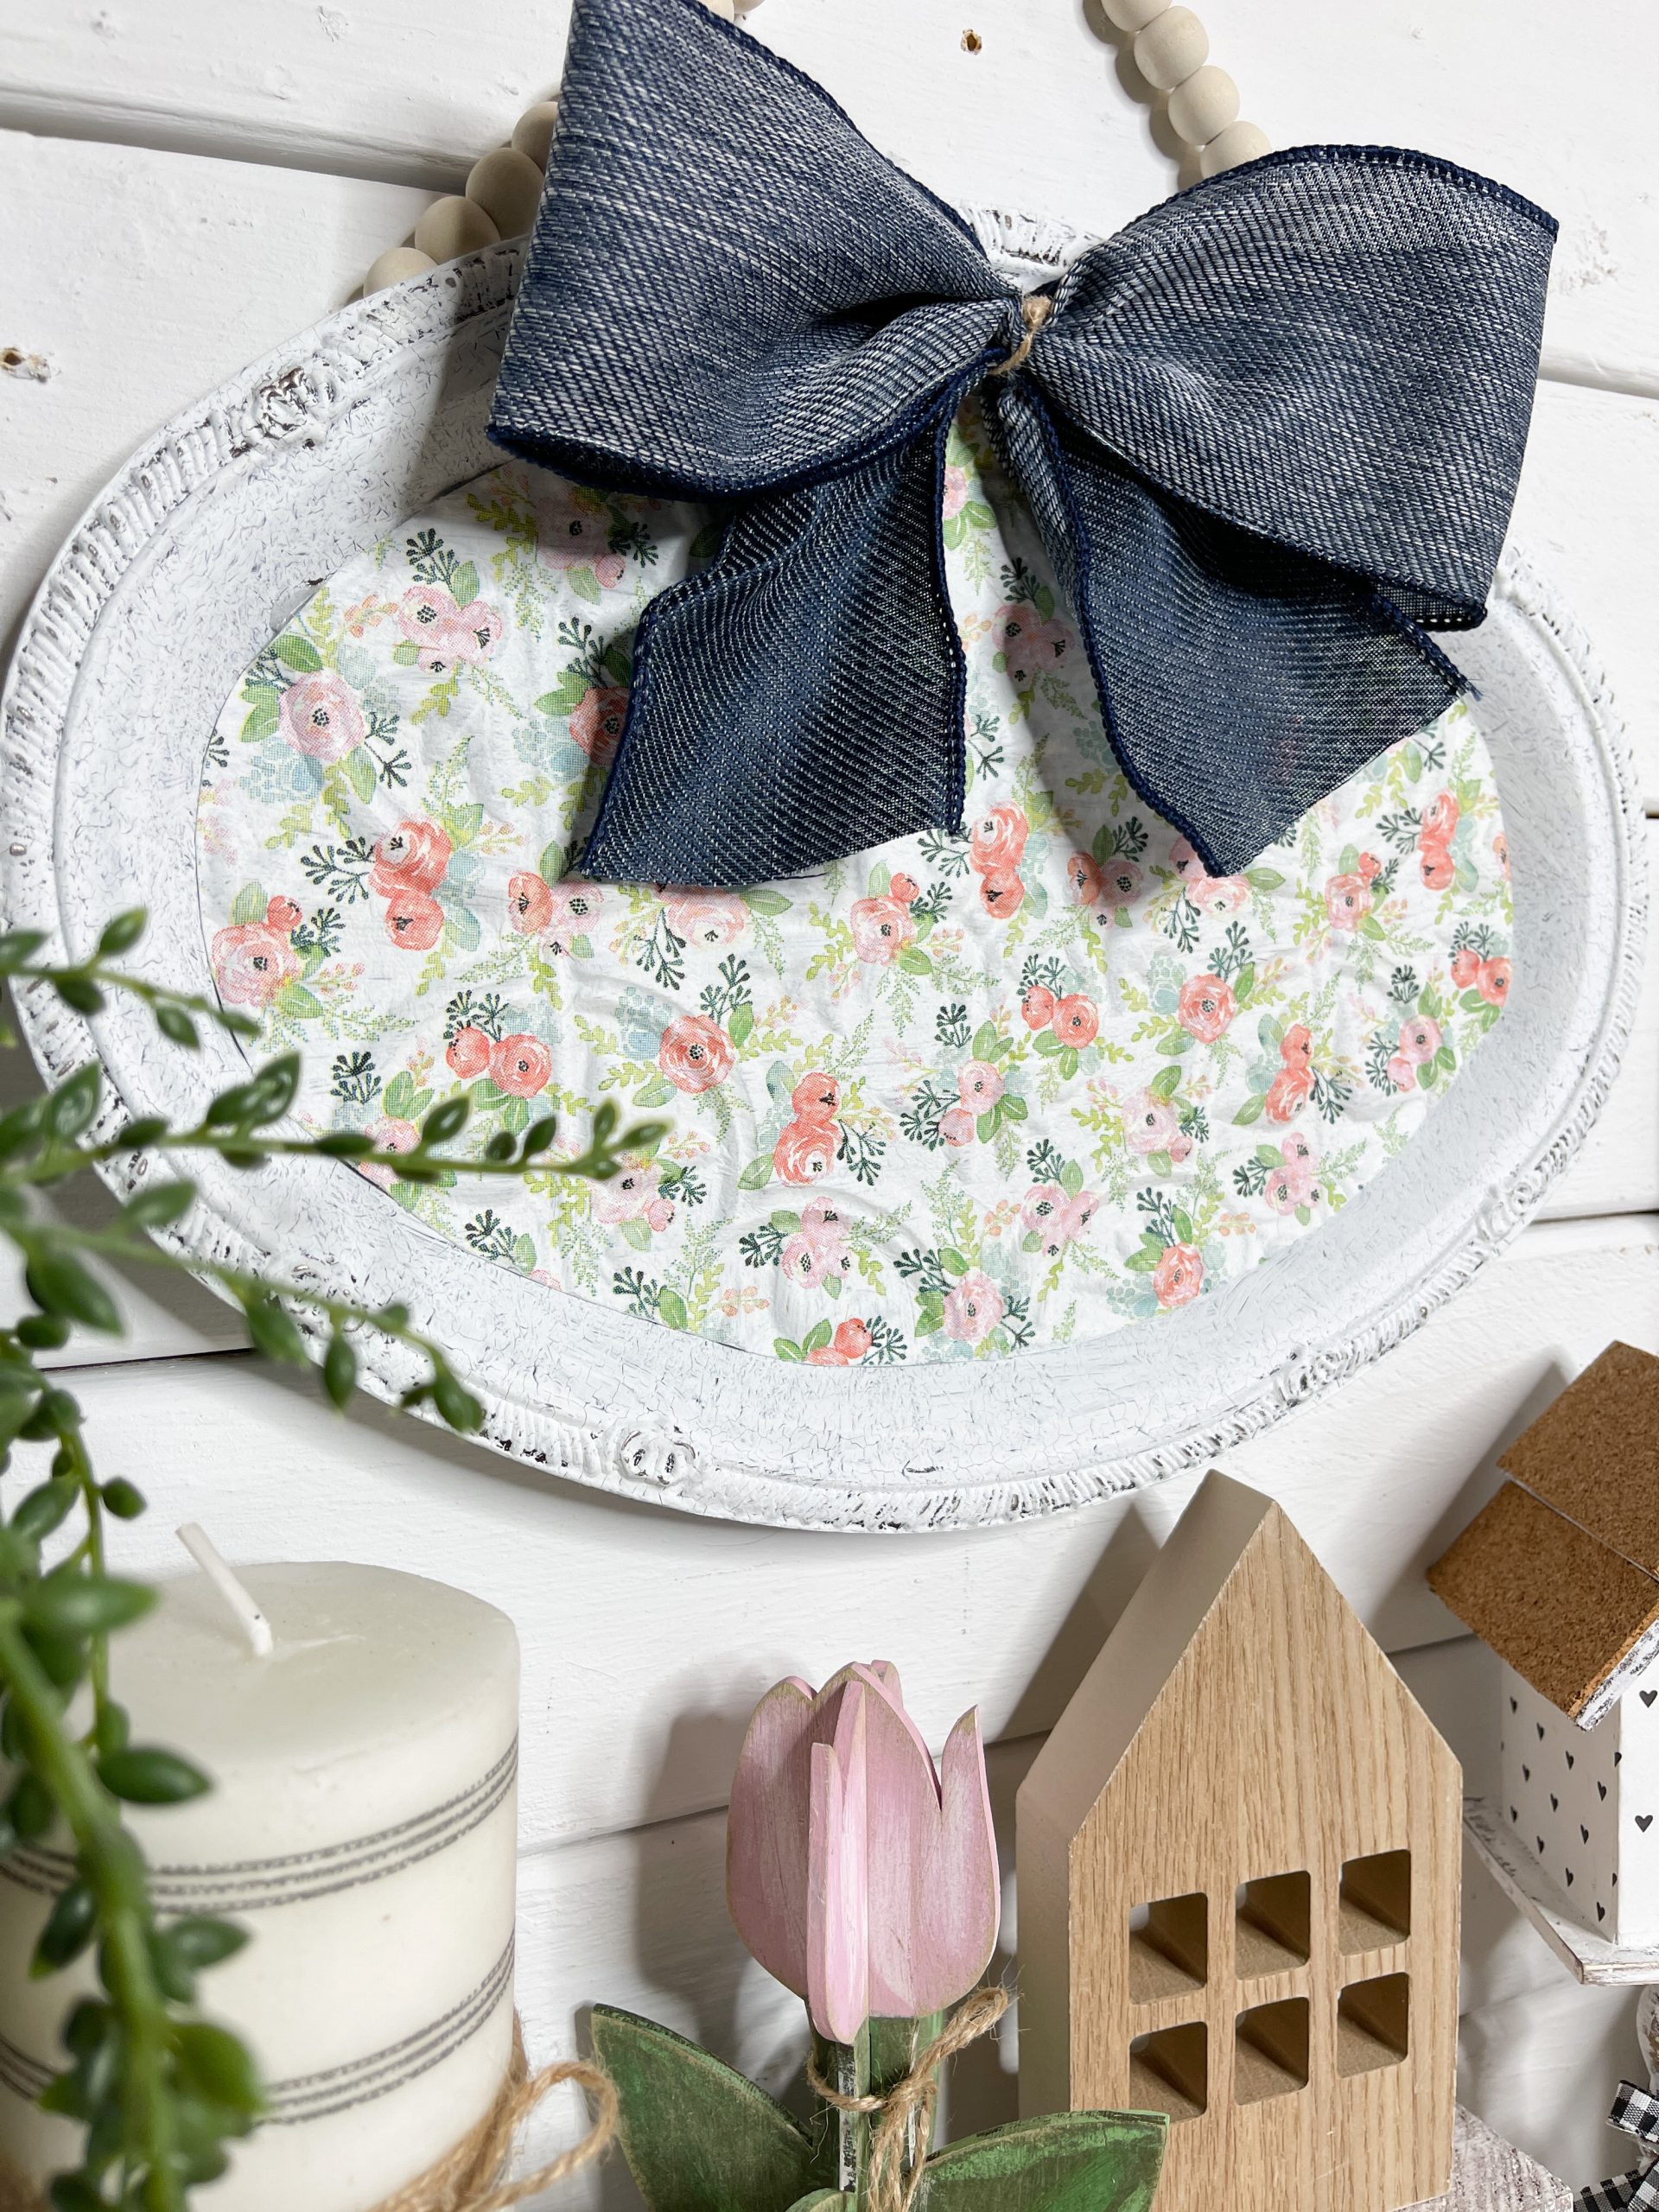
Paint the ornamental edges of the serving tray with white paint. Keep a semi-light hand so some brown paint peeks through the white paint.
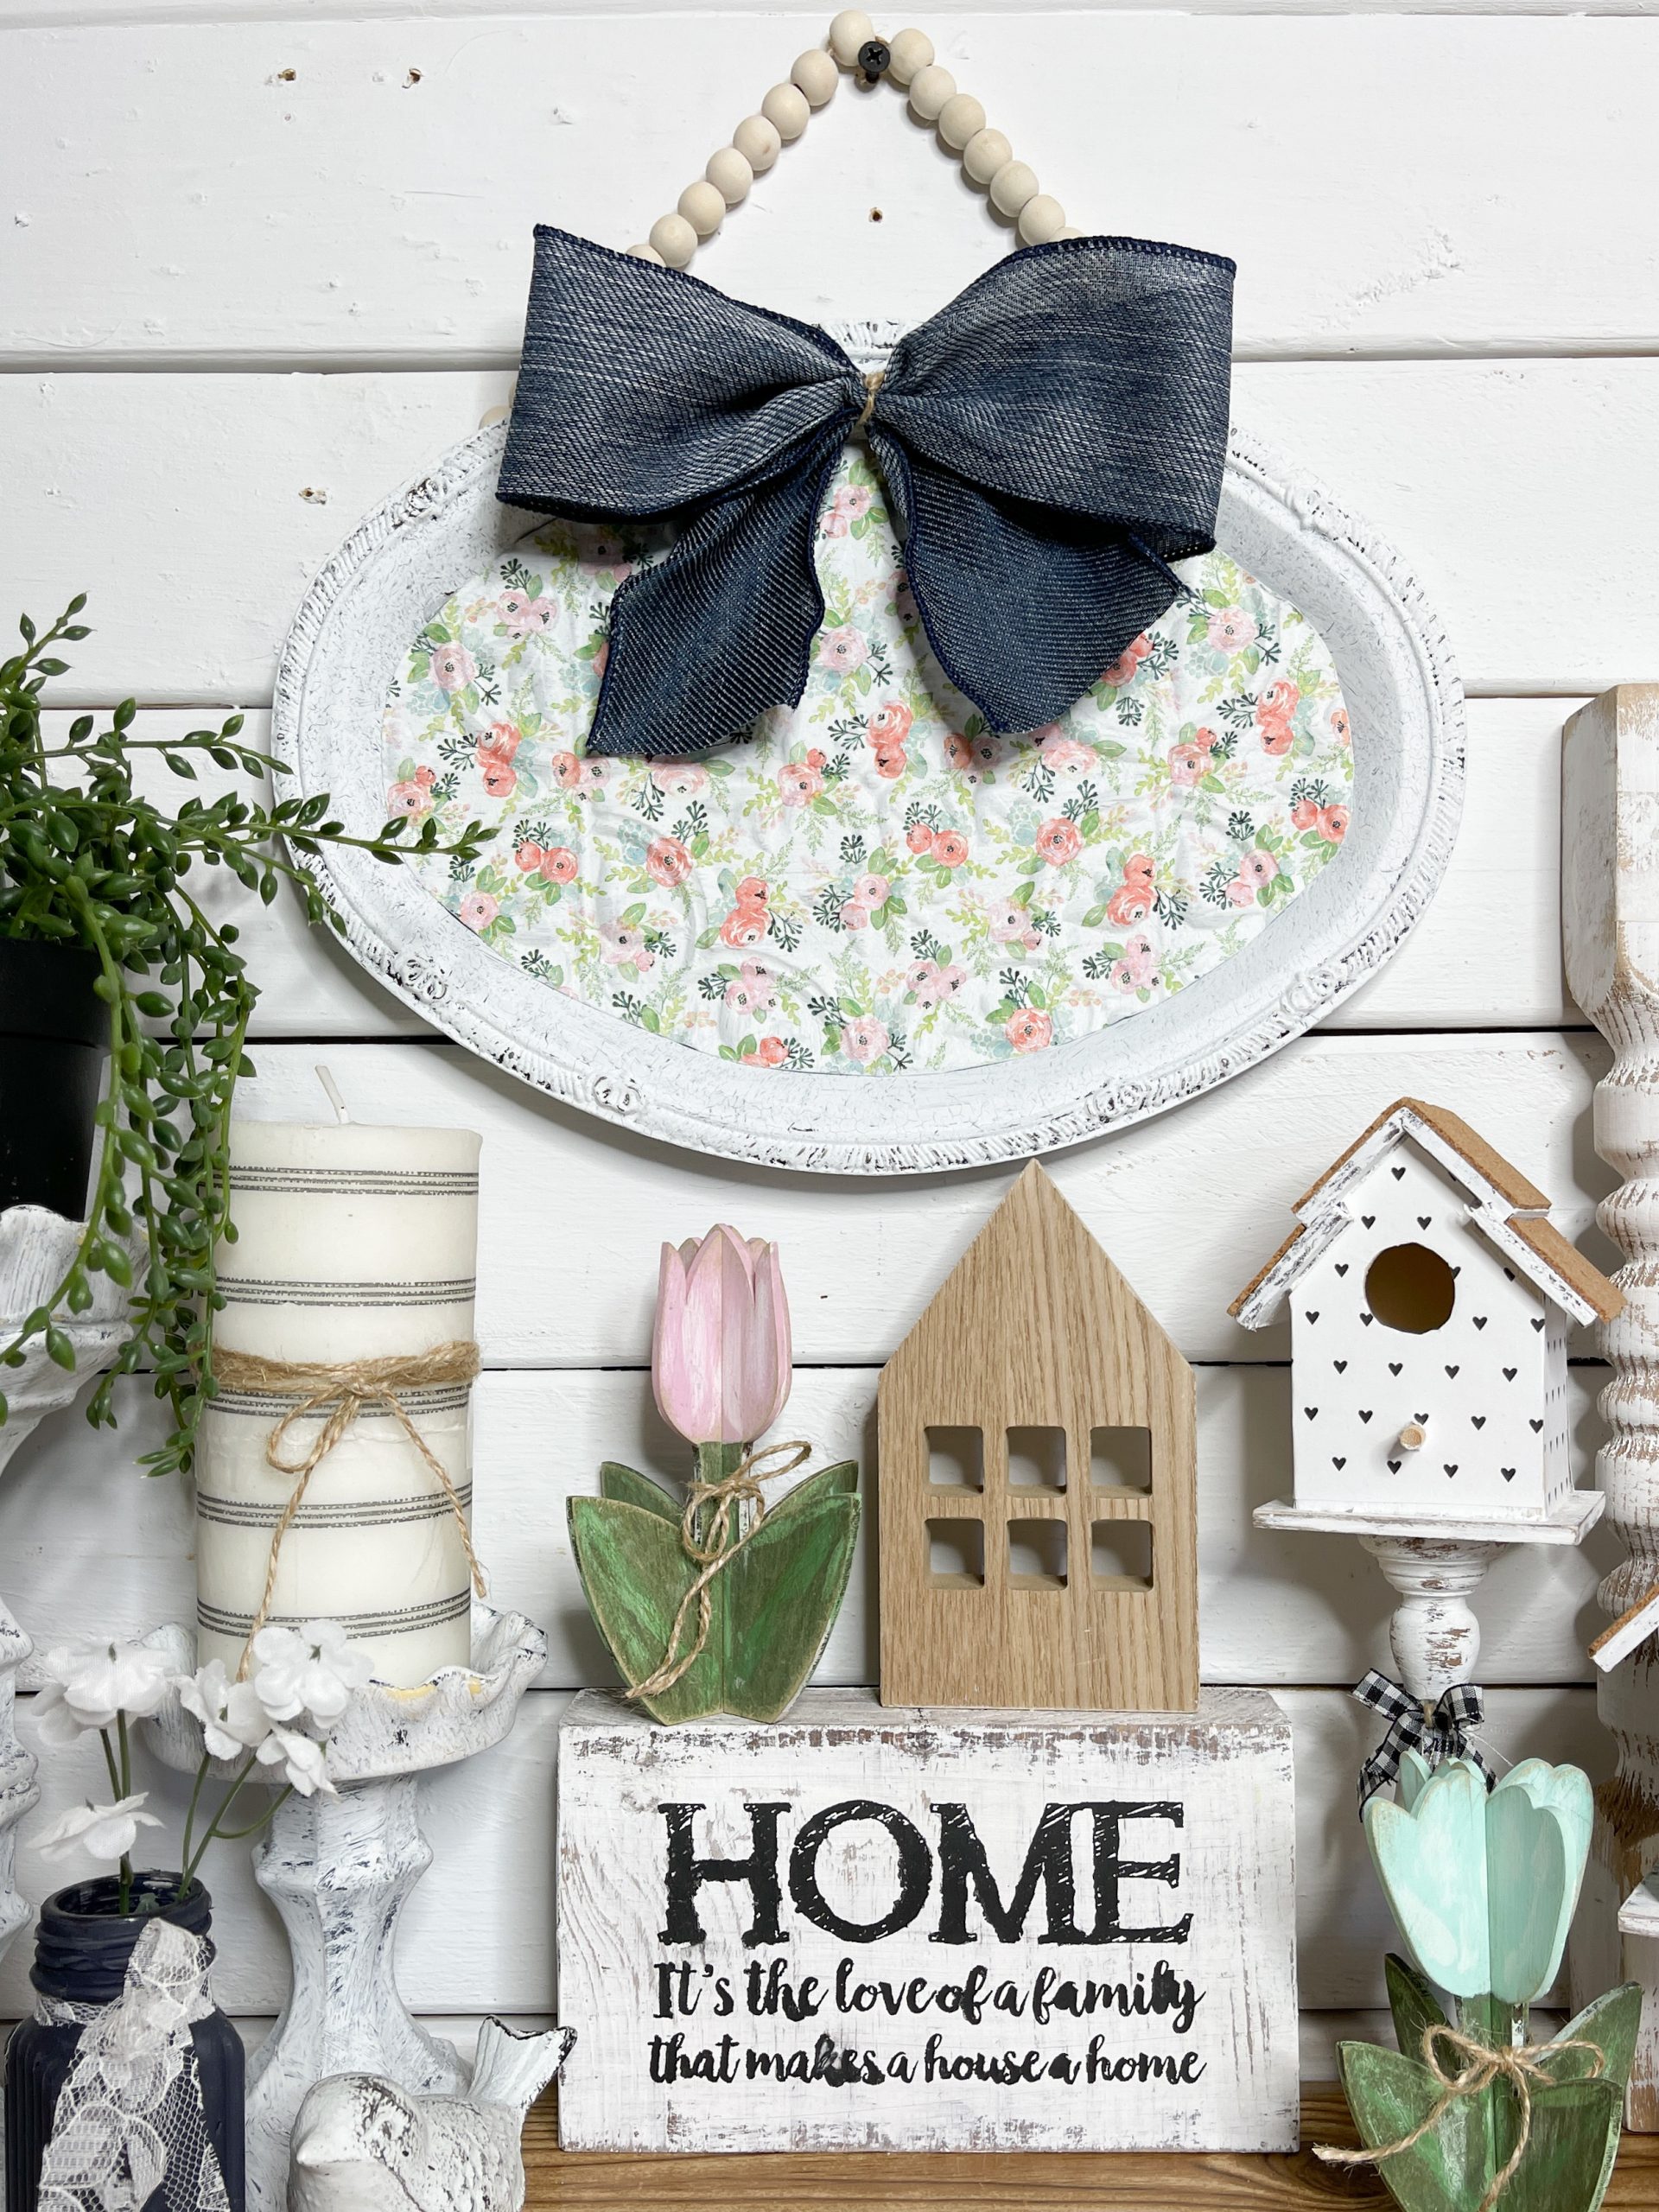
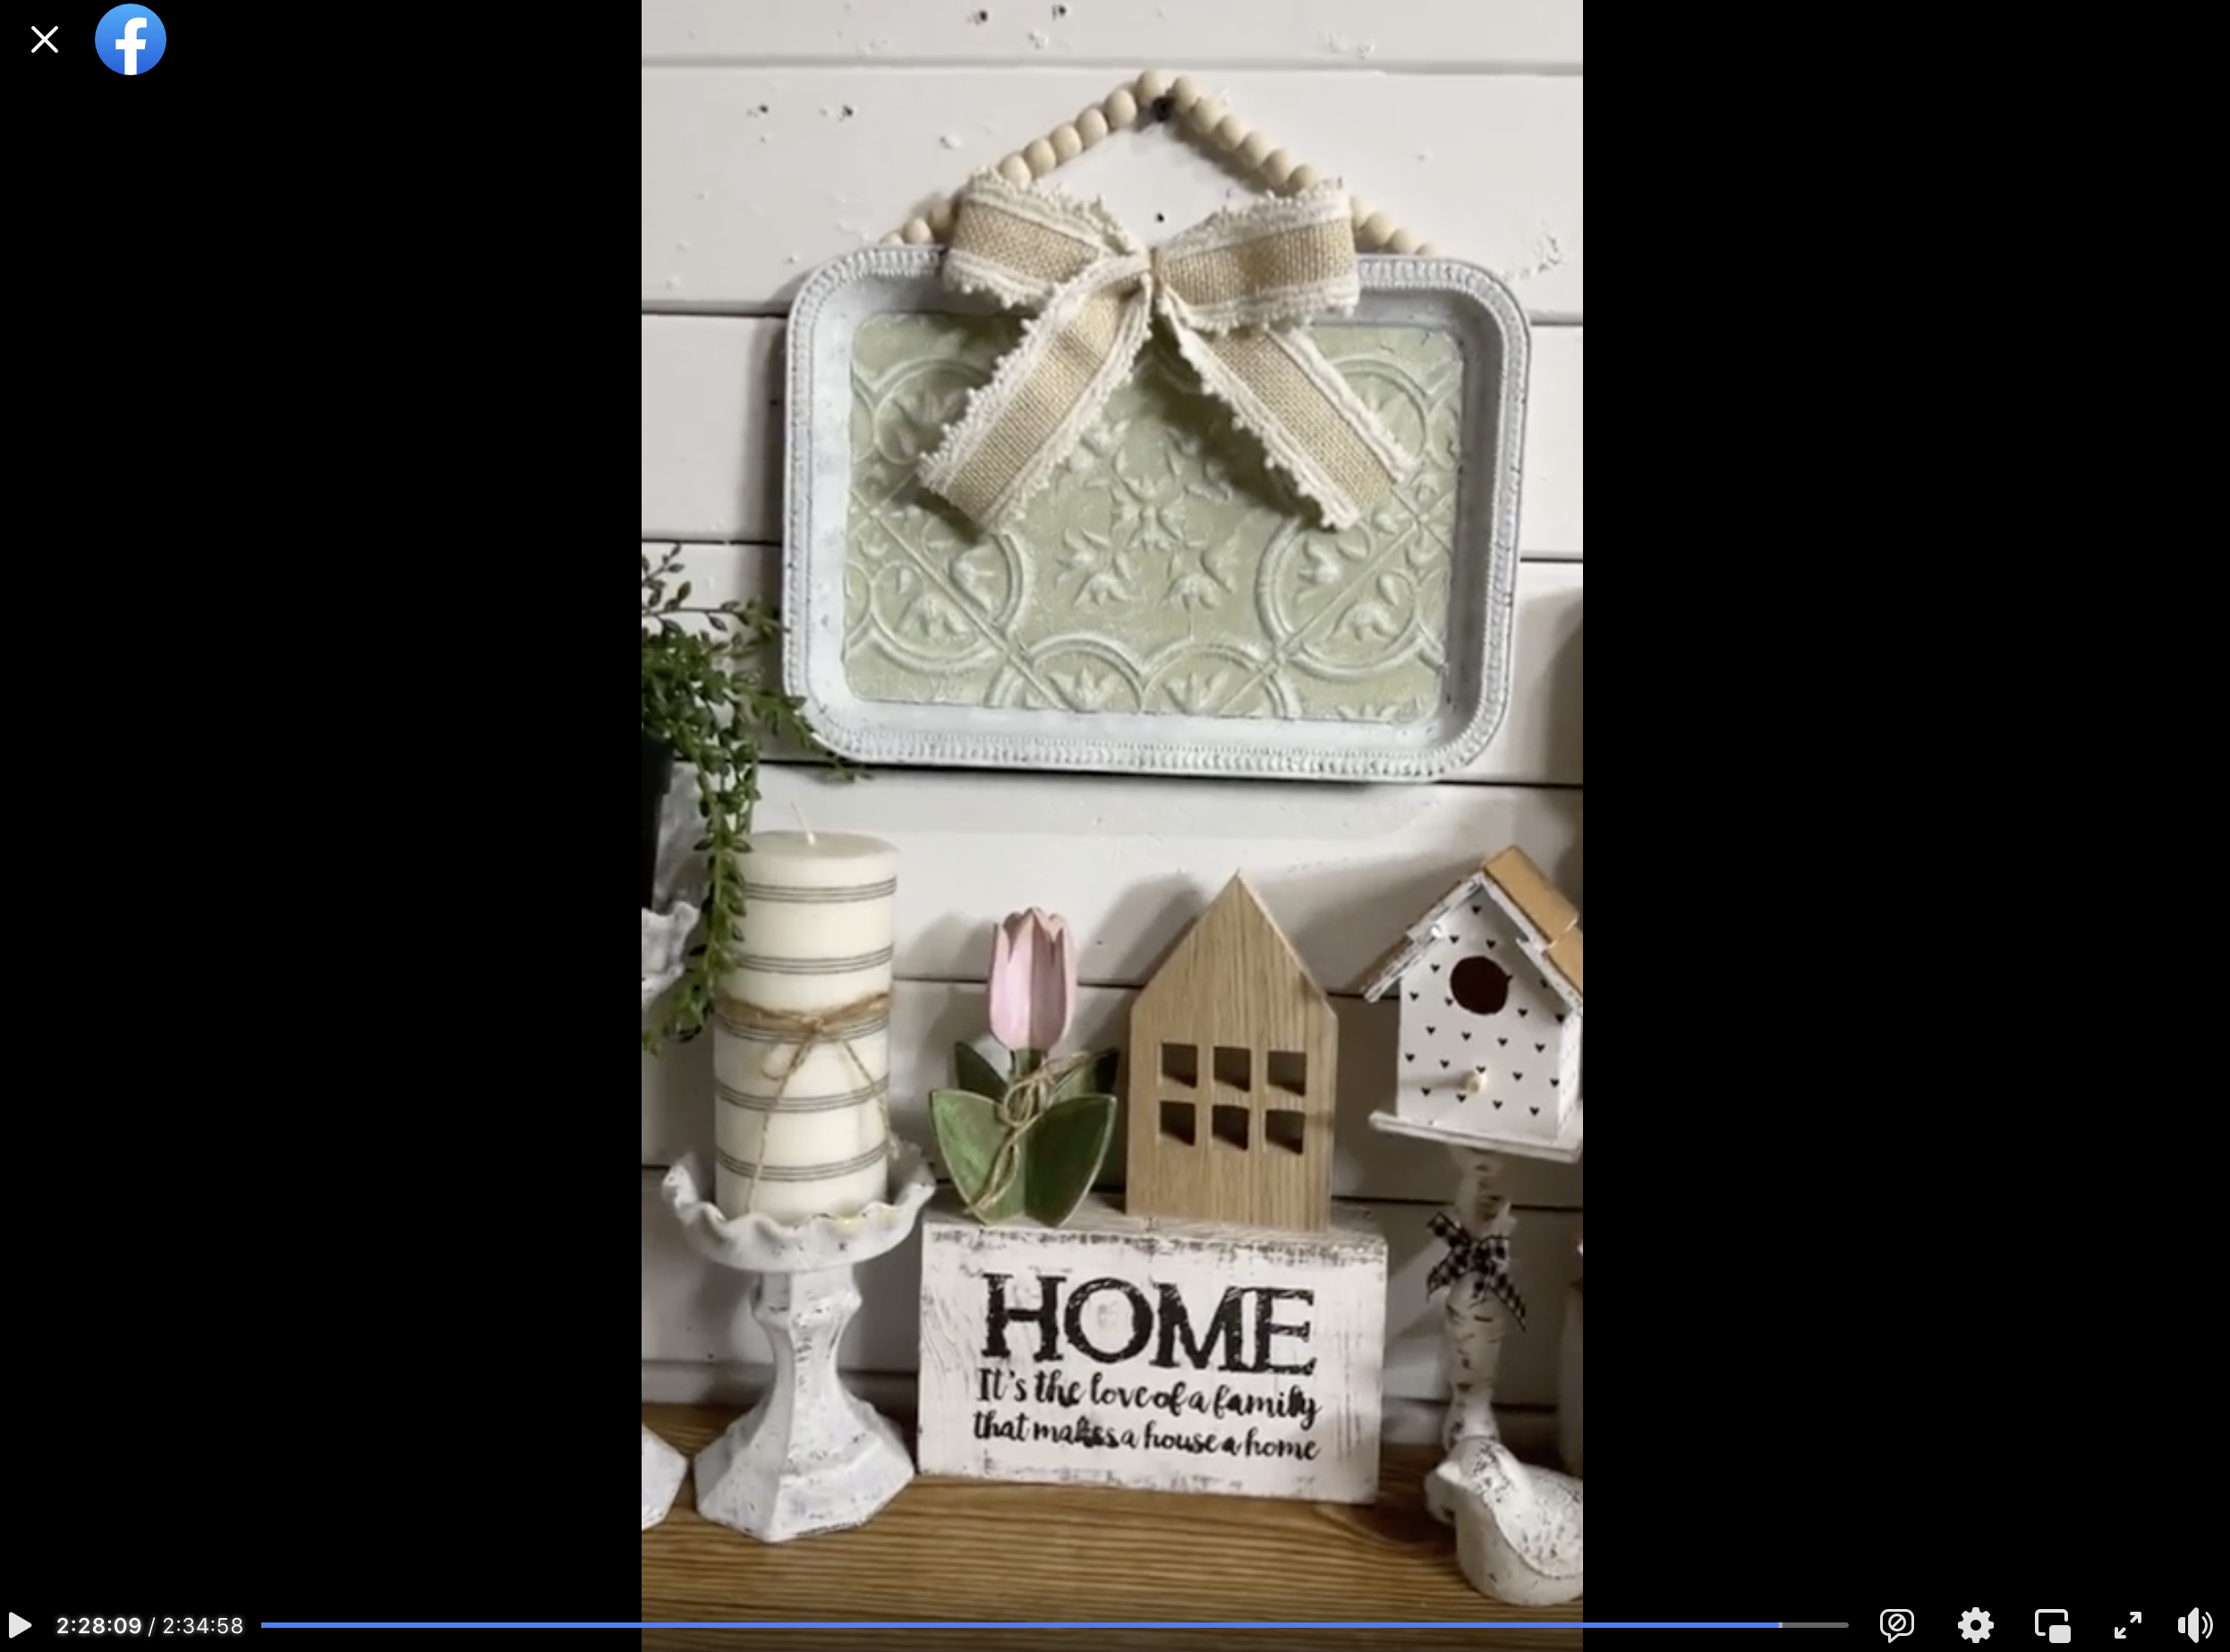
Allow the paint to dry completely, then glue down the decoupaged adhesive tile to the center of the serving tray.
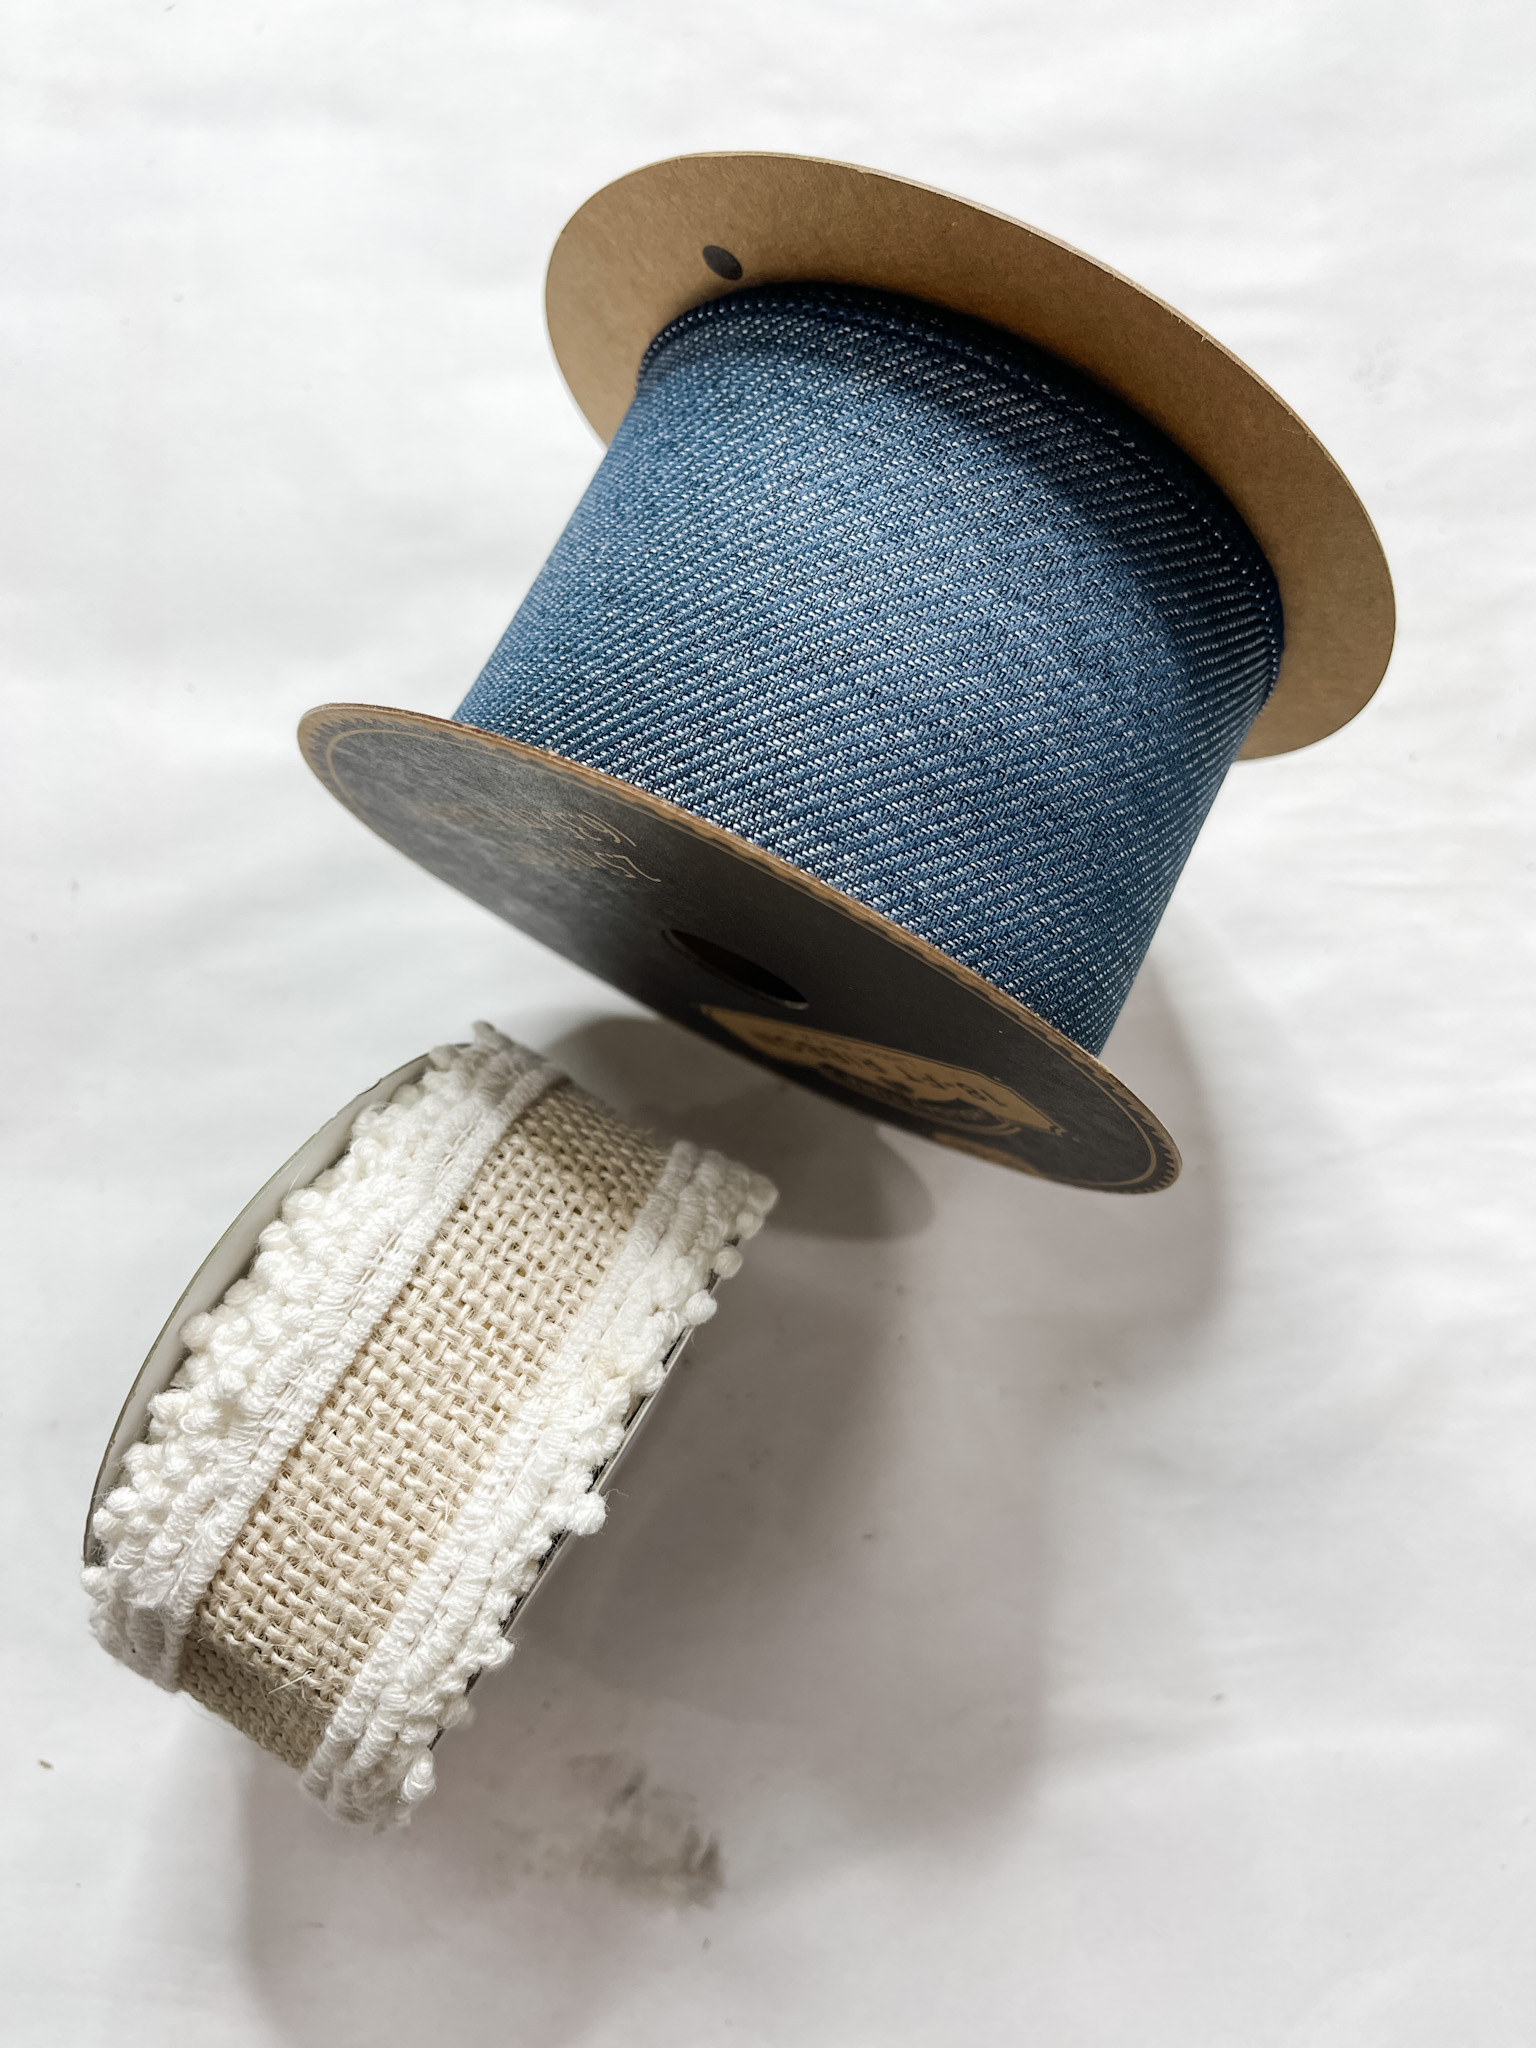
Fold a bow out of the denim ribbon and secure it with a piece of jute twine. Glue your bow onto the serving tray.
If you want to see the full supply list or video tutorial, just scroll to the bottom of this page!
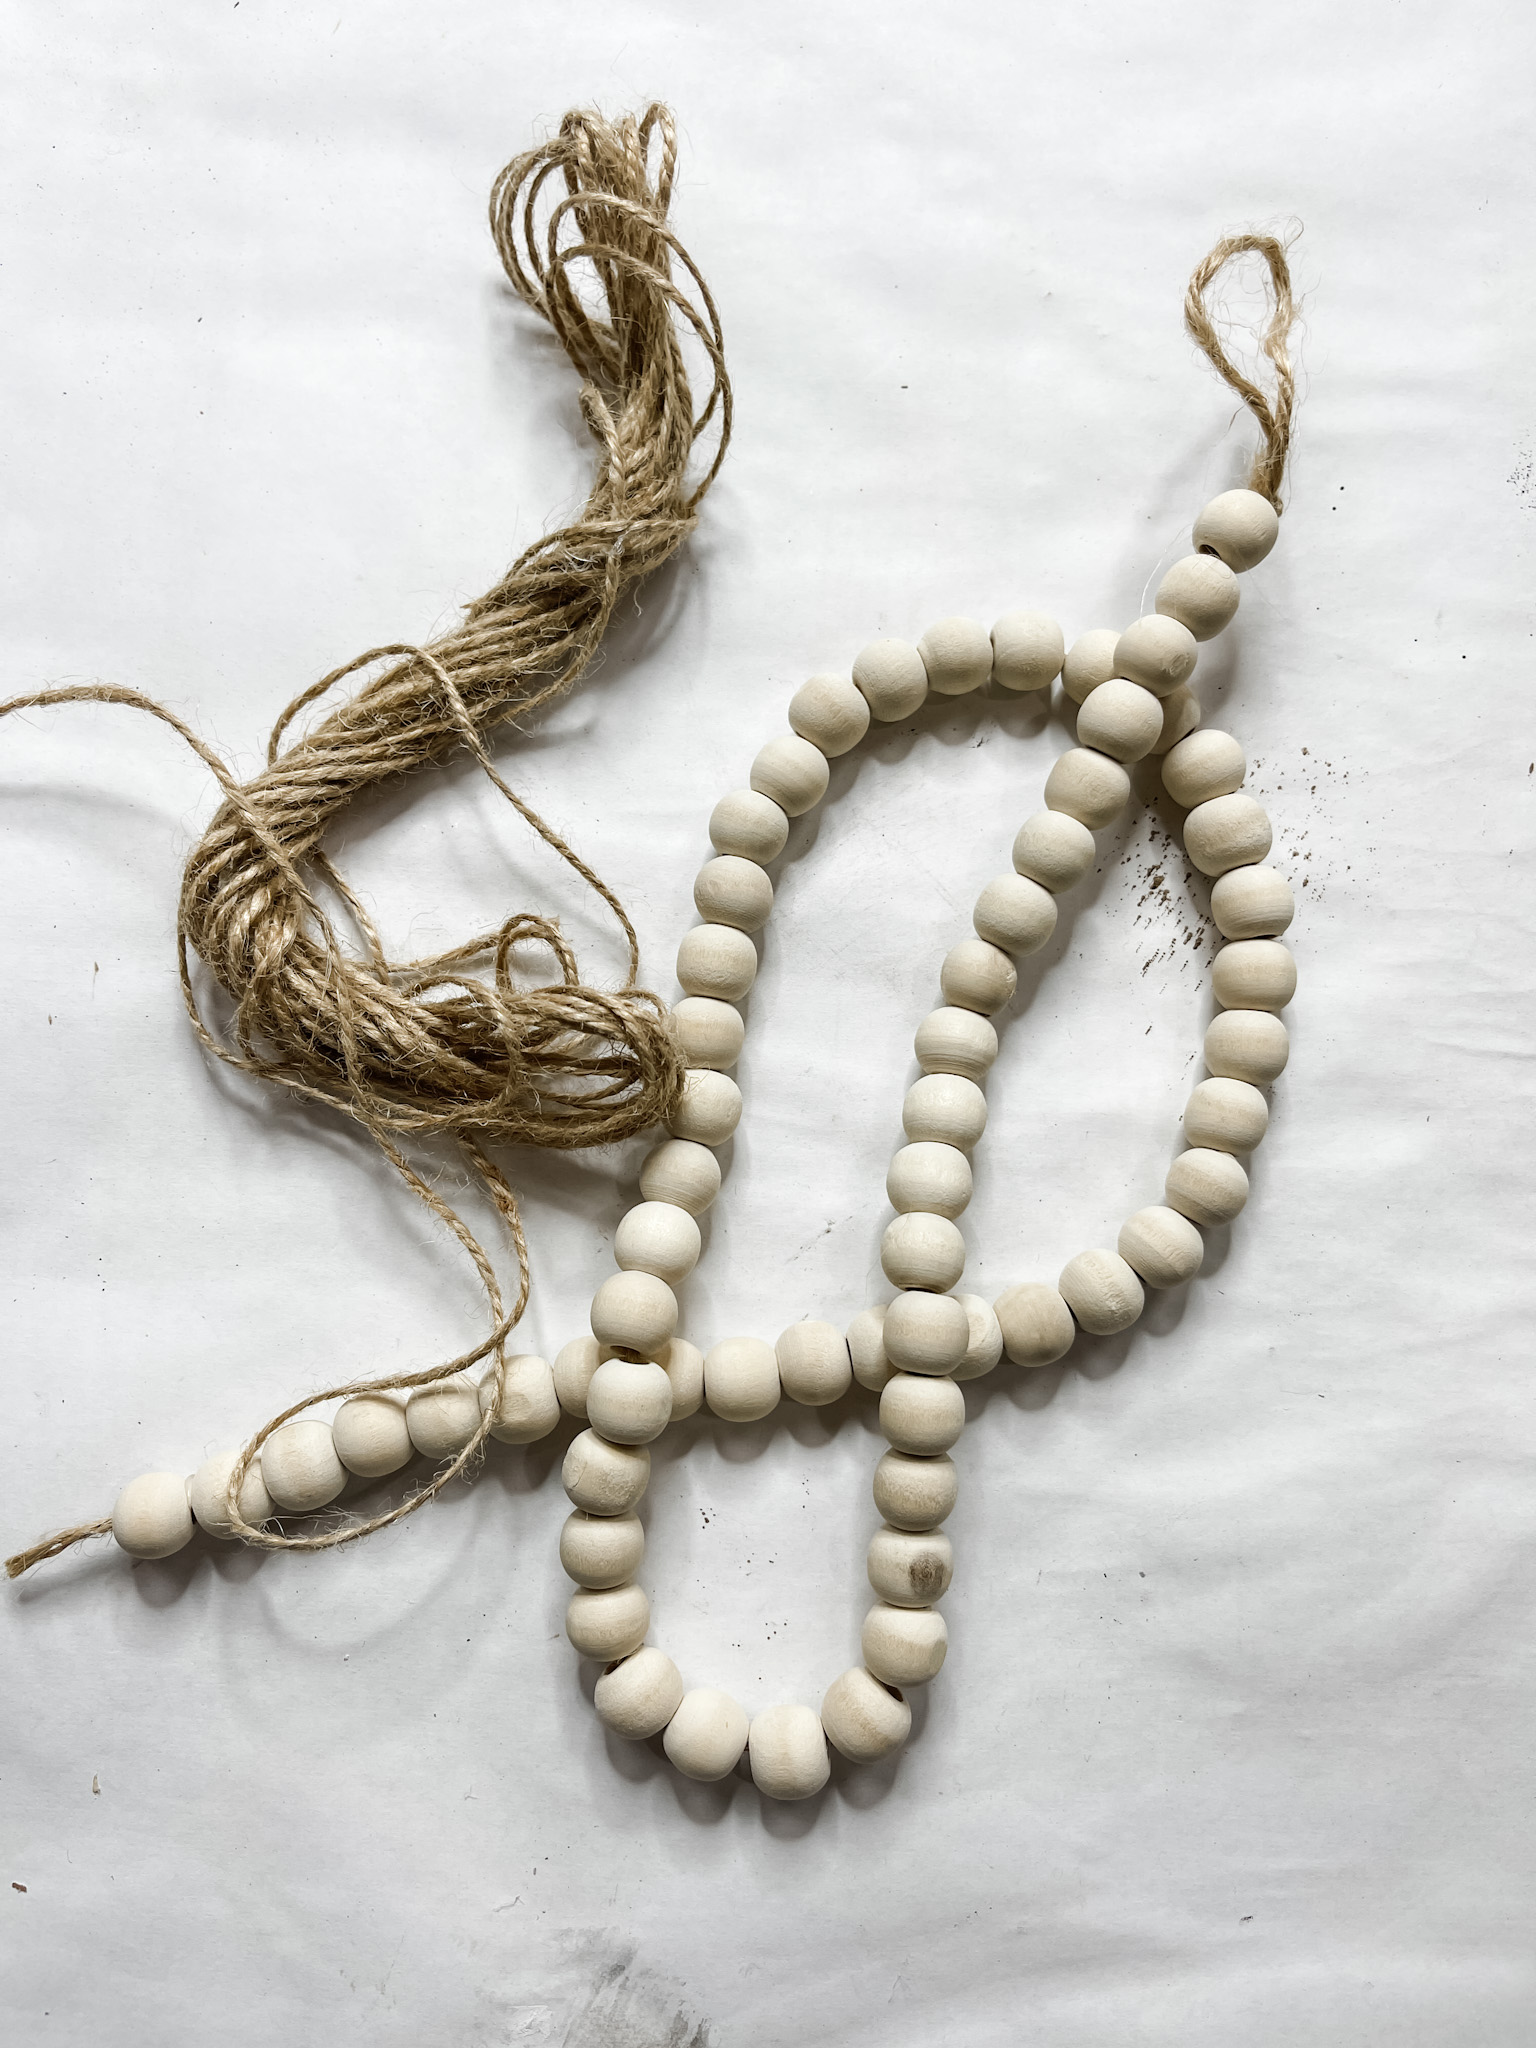
Next, use a wood bead garland from Dollar Tree or thread wood beads on a piece of jute twine to make the hanger for your decorative serving tray.
Lastly, glue the ends of the twine hanger to the back of the serving tray. You can glue a piece of ribbon over each end to secure them more. Once the glue is dry, you’re ready to decorate!
Another decorative serving tray idea
If you want to see the full supply list or video tutorial, just scroll to the bottom of this page!
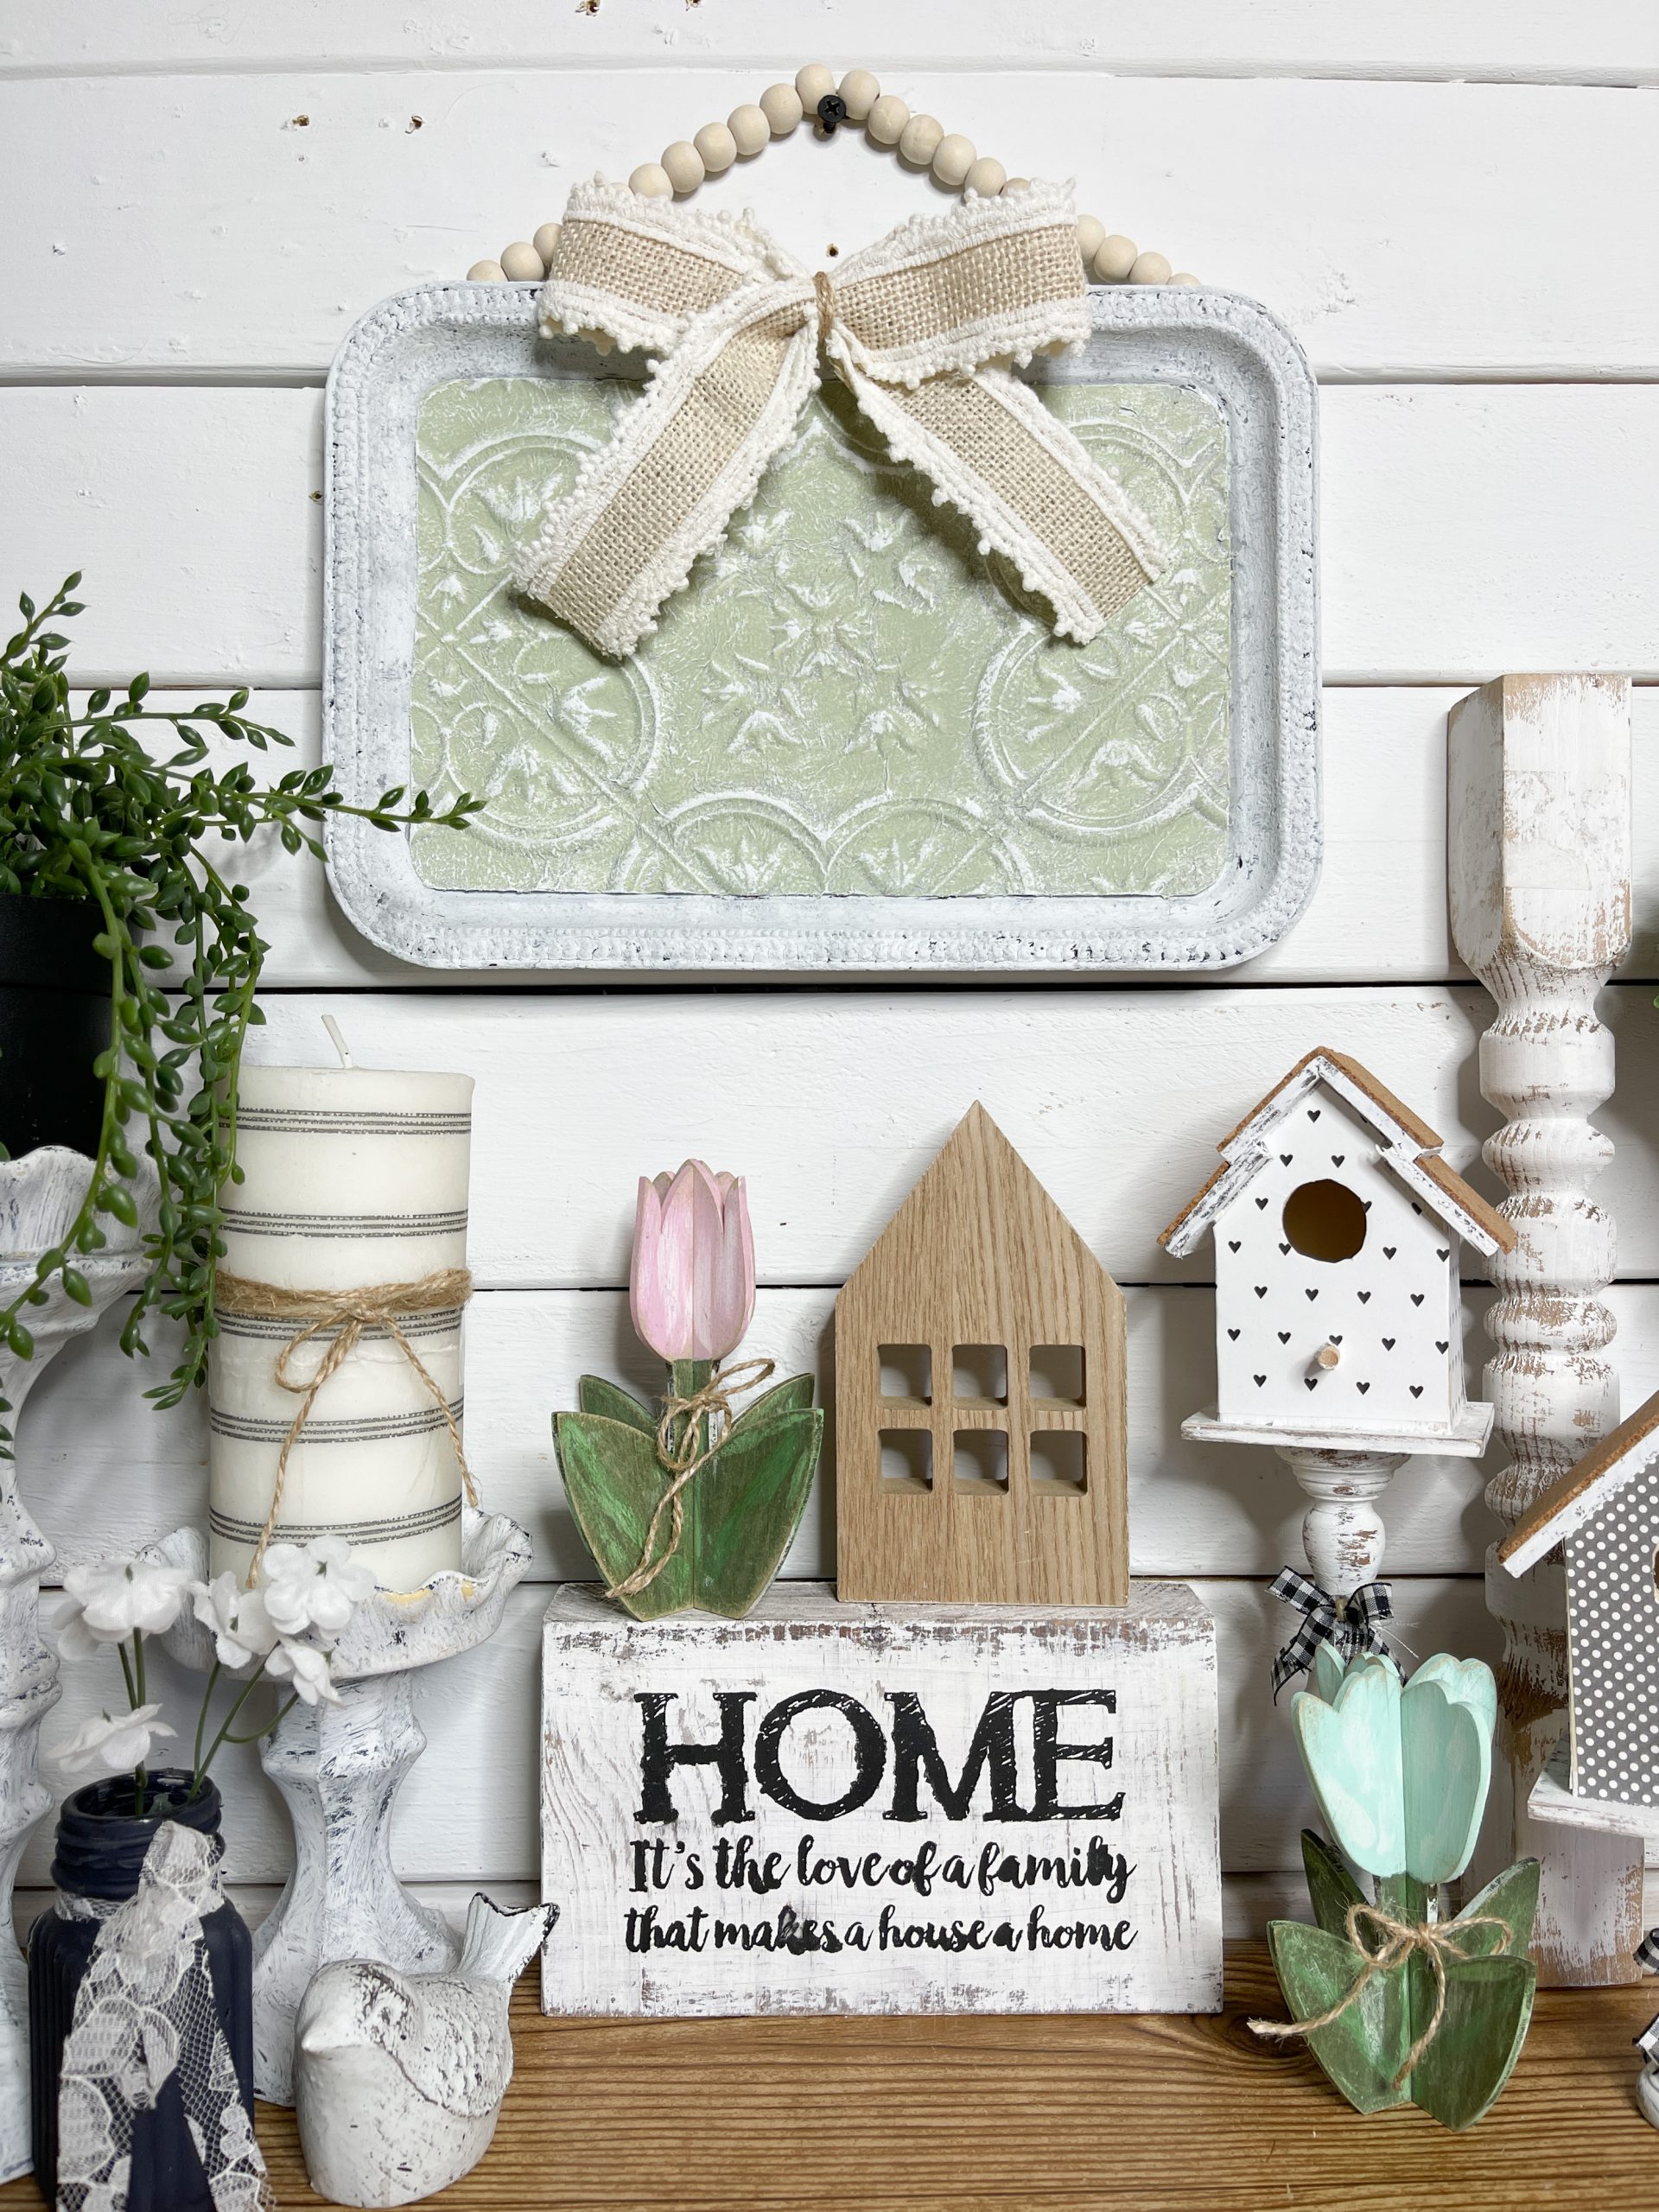
For the second decorative tray, paint the edges with black paint. Allow the black paint to dry, then place wax paper on the serving tray and trace the inner shape of the serving tray.
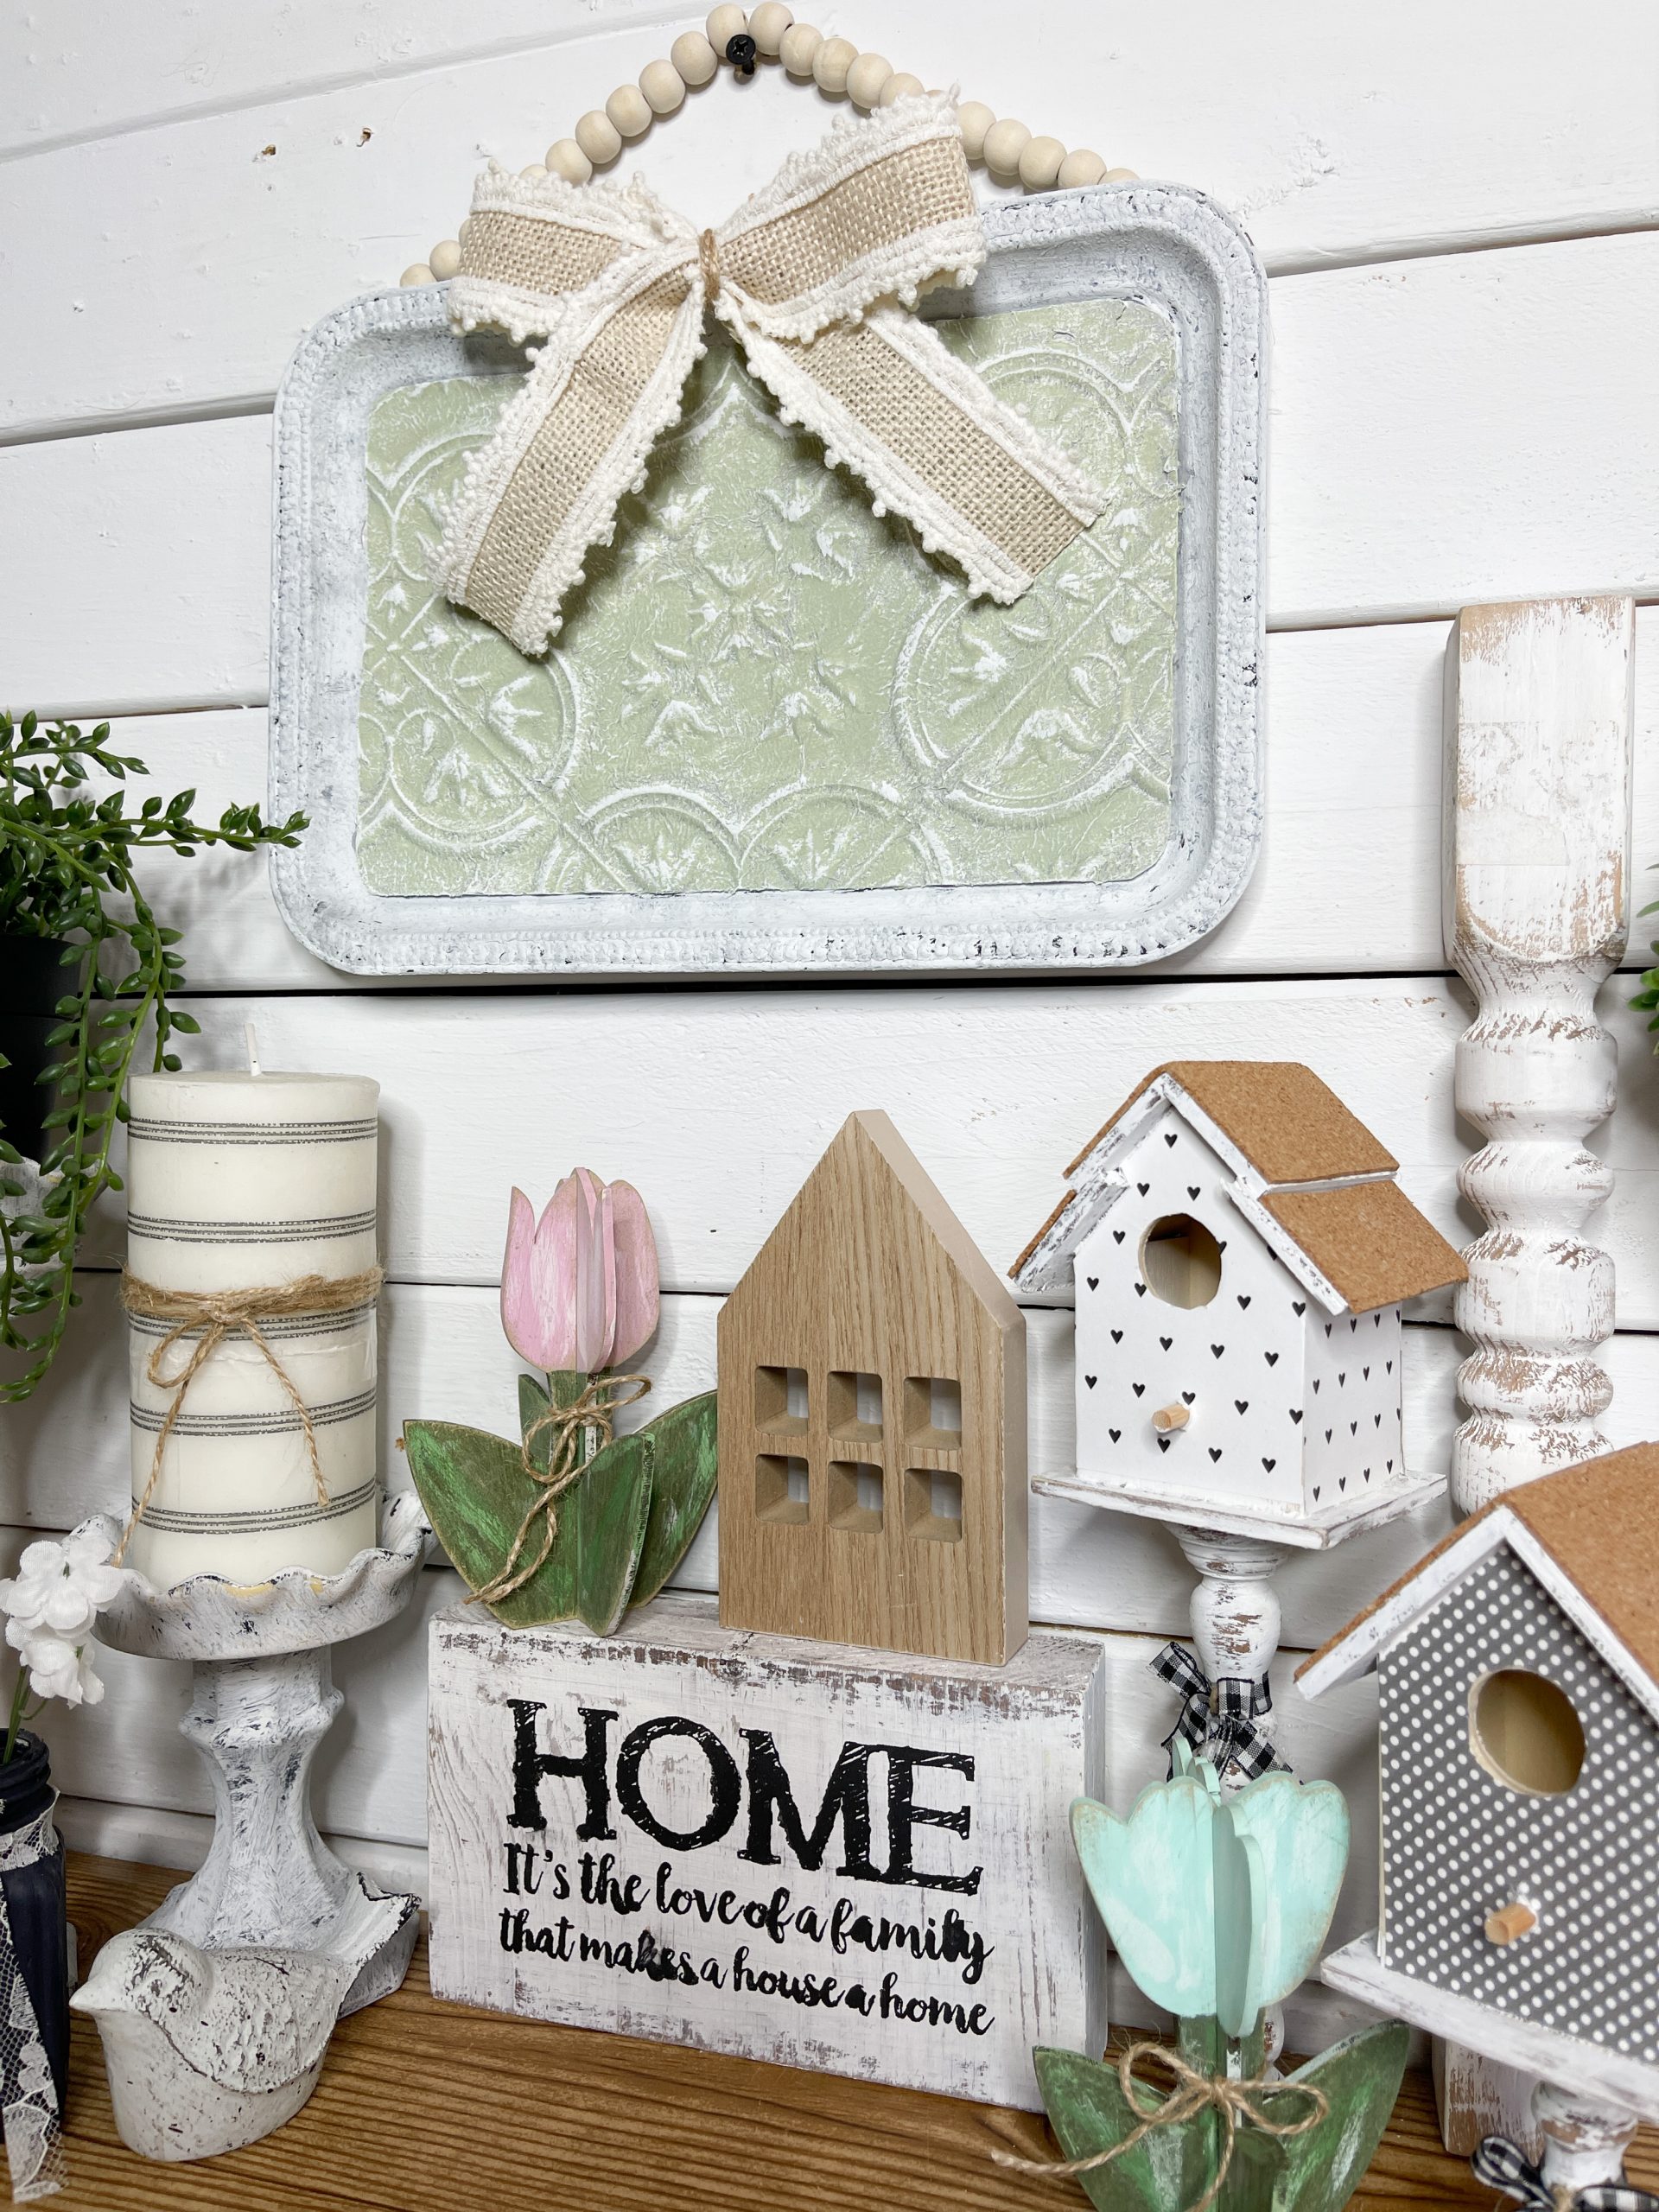
Cut out the rectangle from the wax paper, trace it on the back of the adhesive tile, and cut the rectangle out.
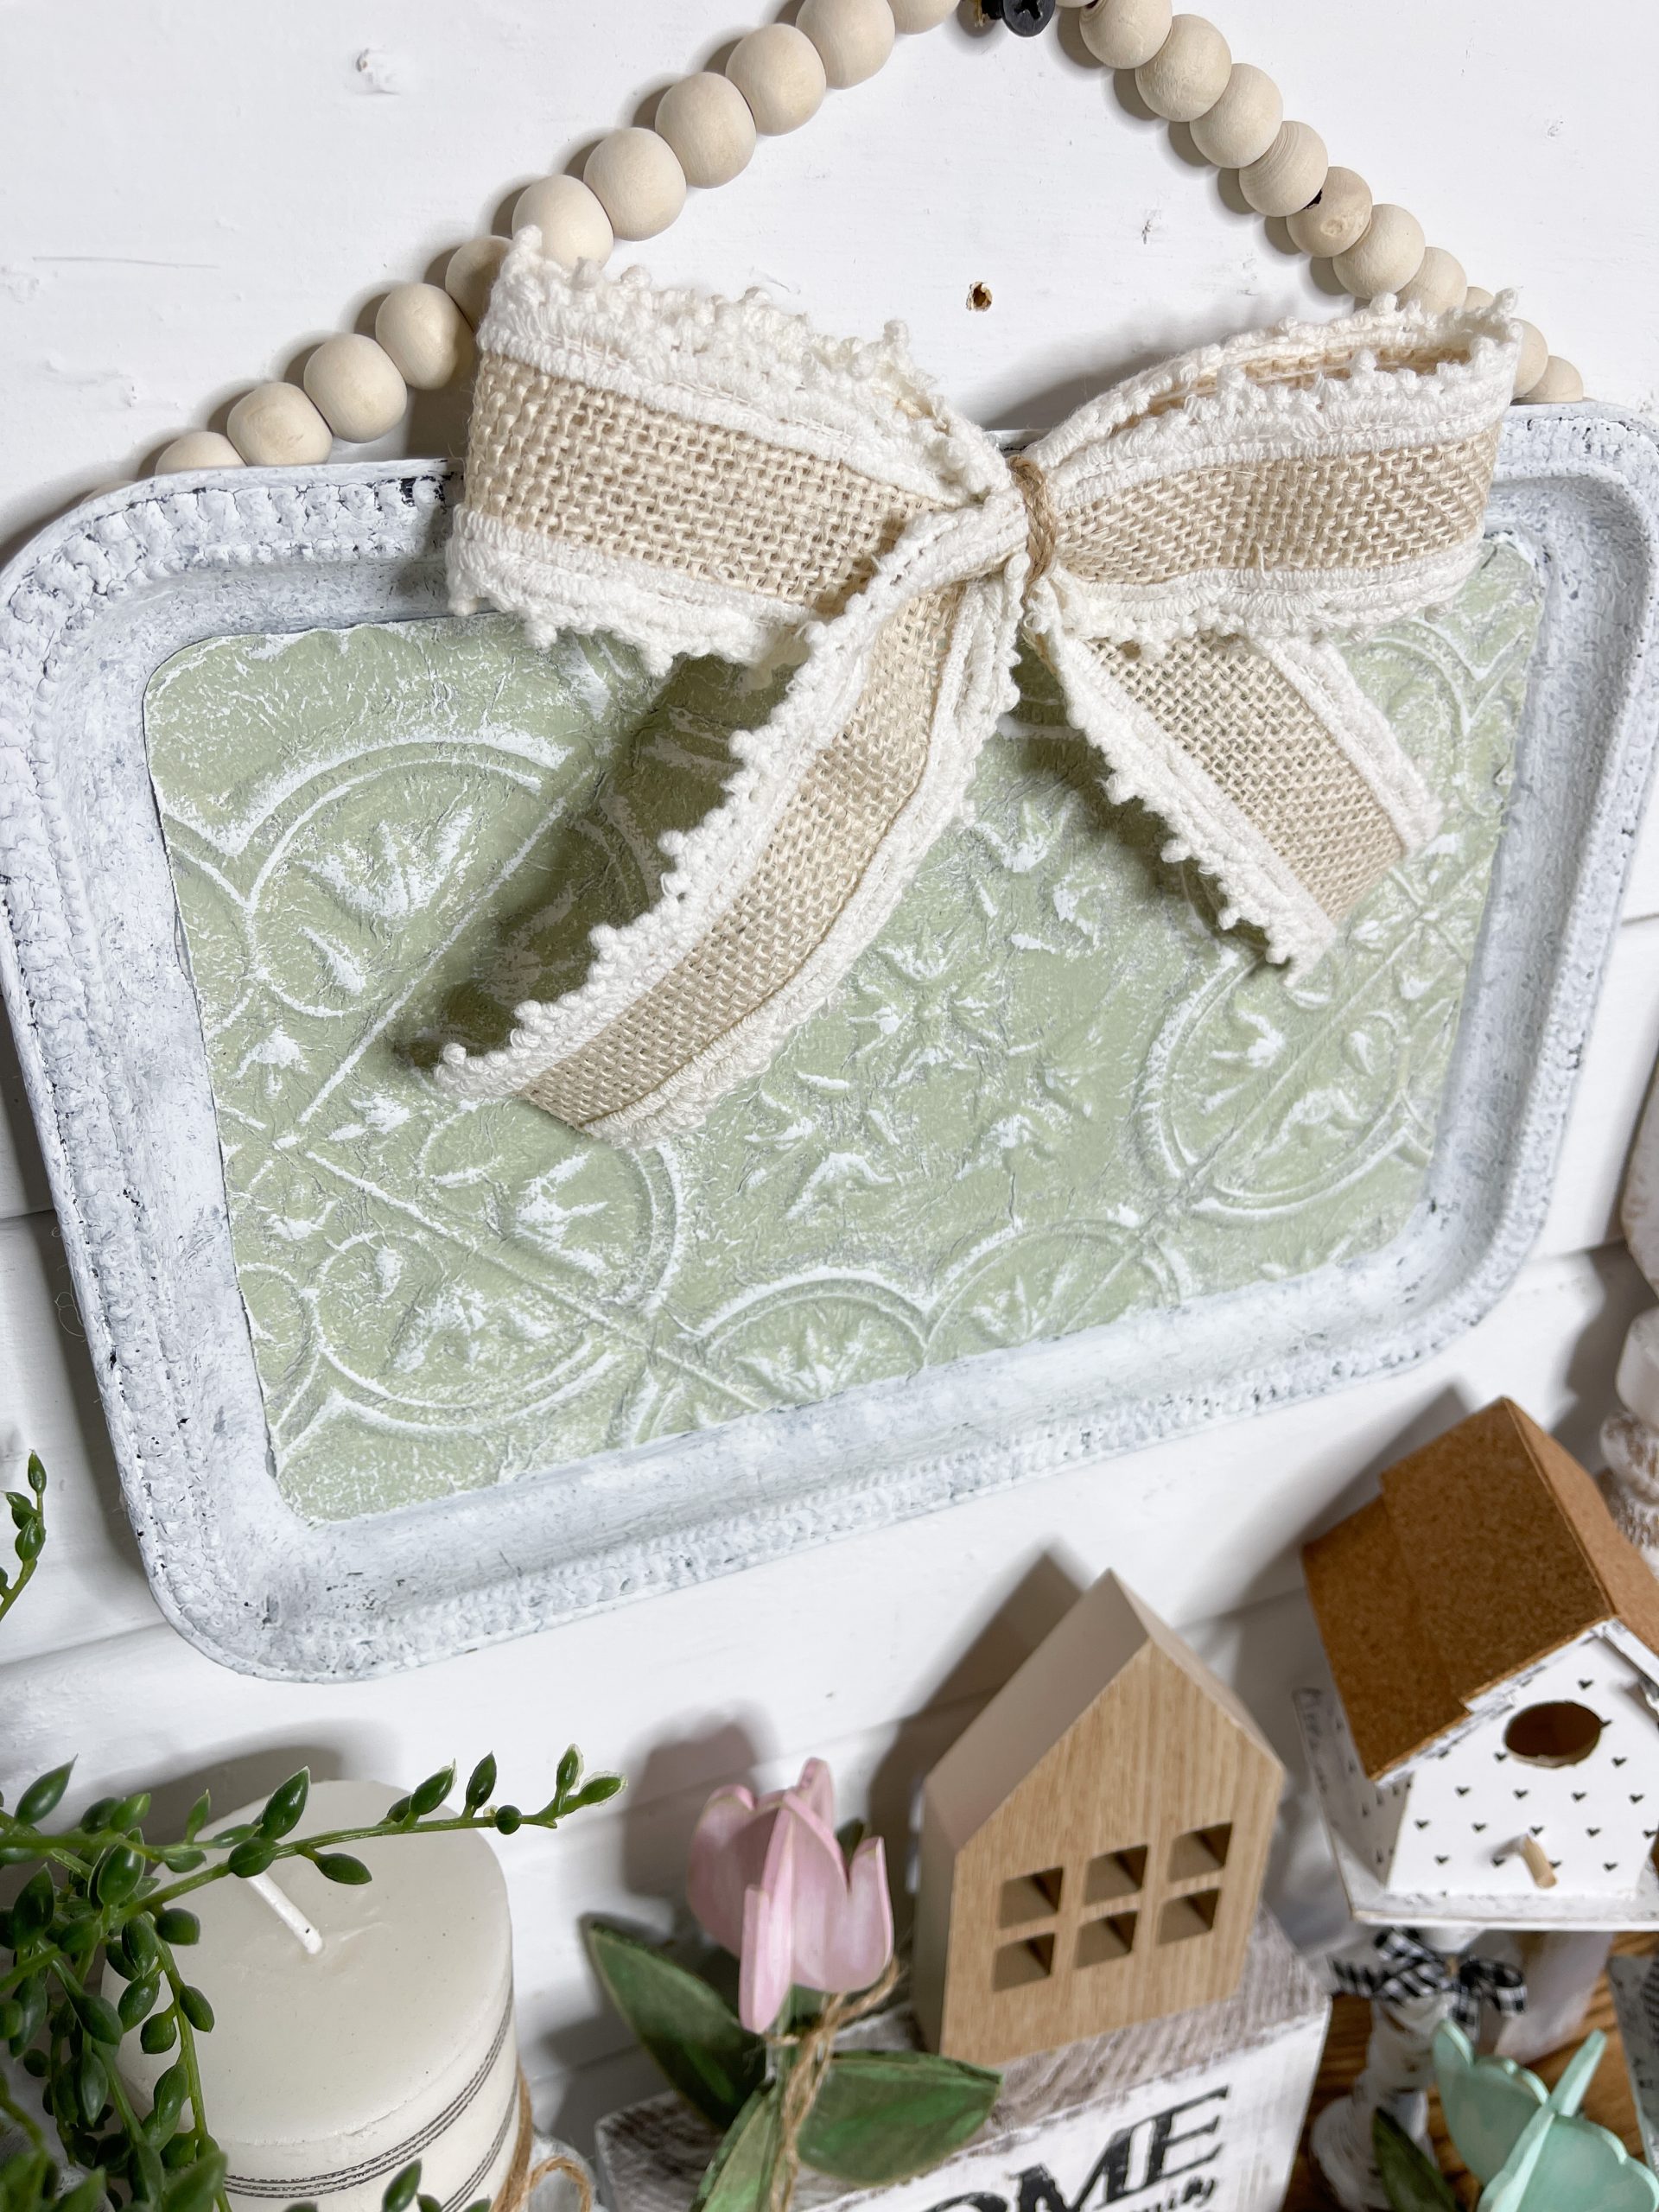
Apply a coat of Mod Podge to the adhesive tile rectangle and place the plain napkin ply from earlier onto the Mod Podge.
Paint the decorative edges of the serving tray with black paint. Allow the paint and Mod Podge to dry completely.
If you want to see the full supply list or video tutorial, just scroll to the bottom of this page!
Paint over the napkin ply with white paint. Allow the white paint to dry, then apply a coat of Waverly celery chalk paint.
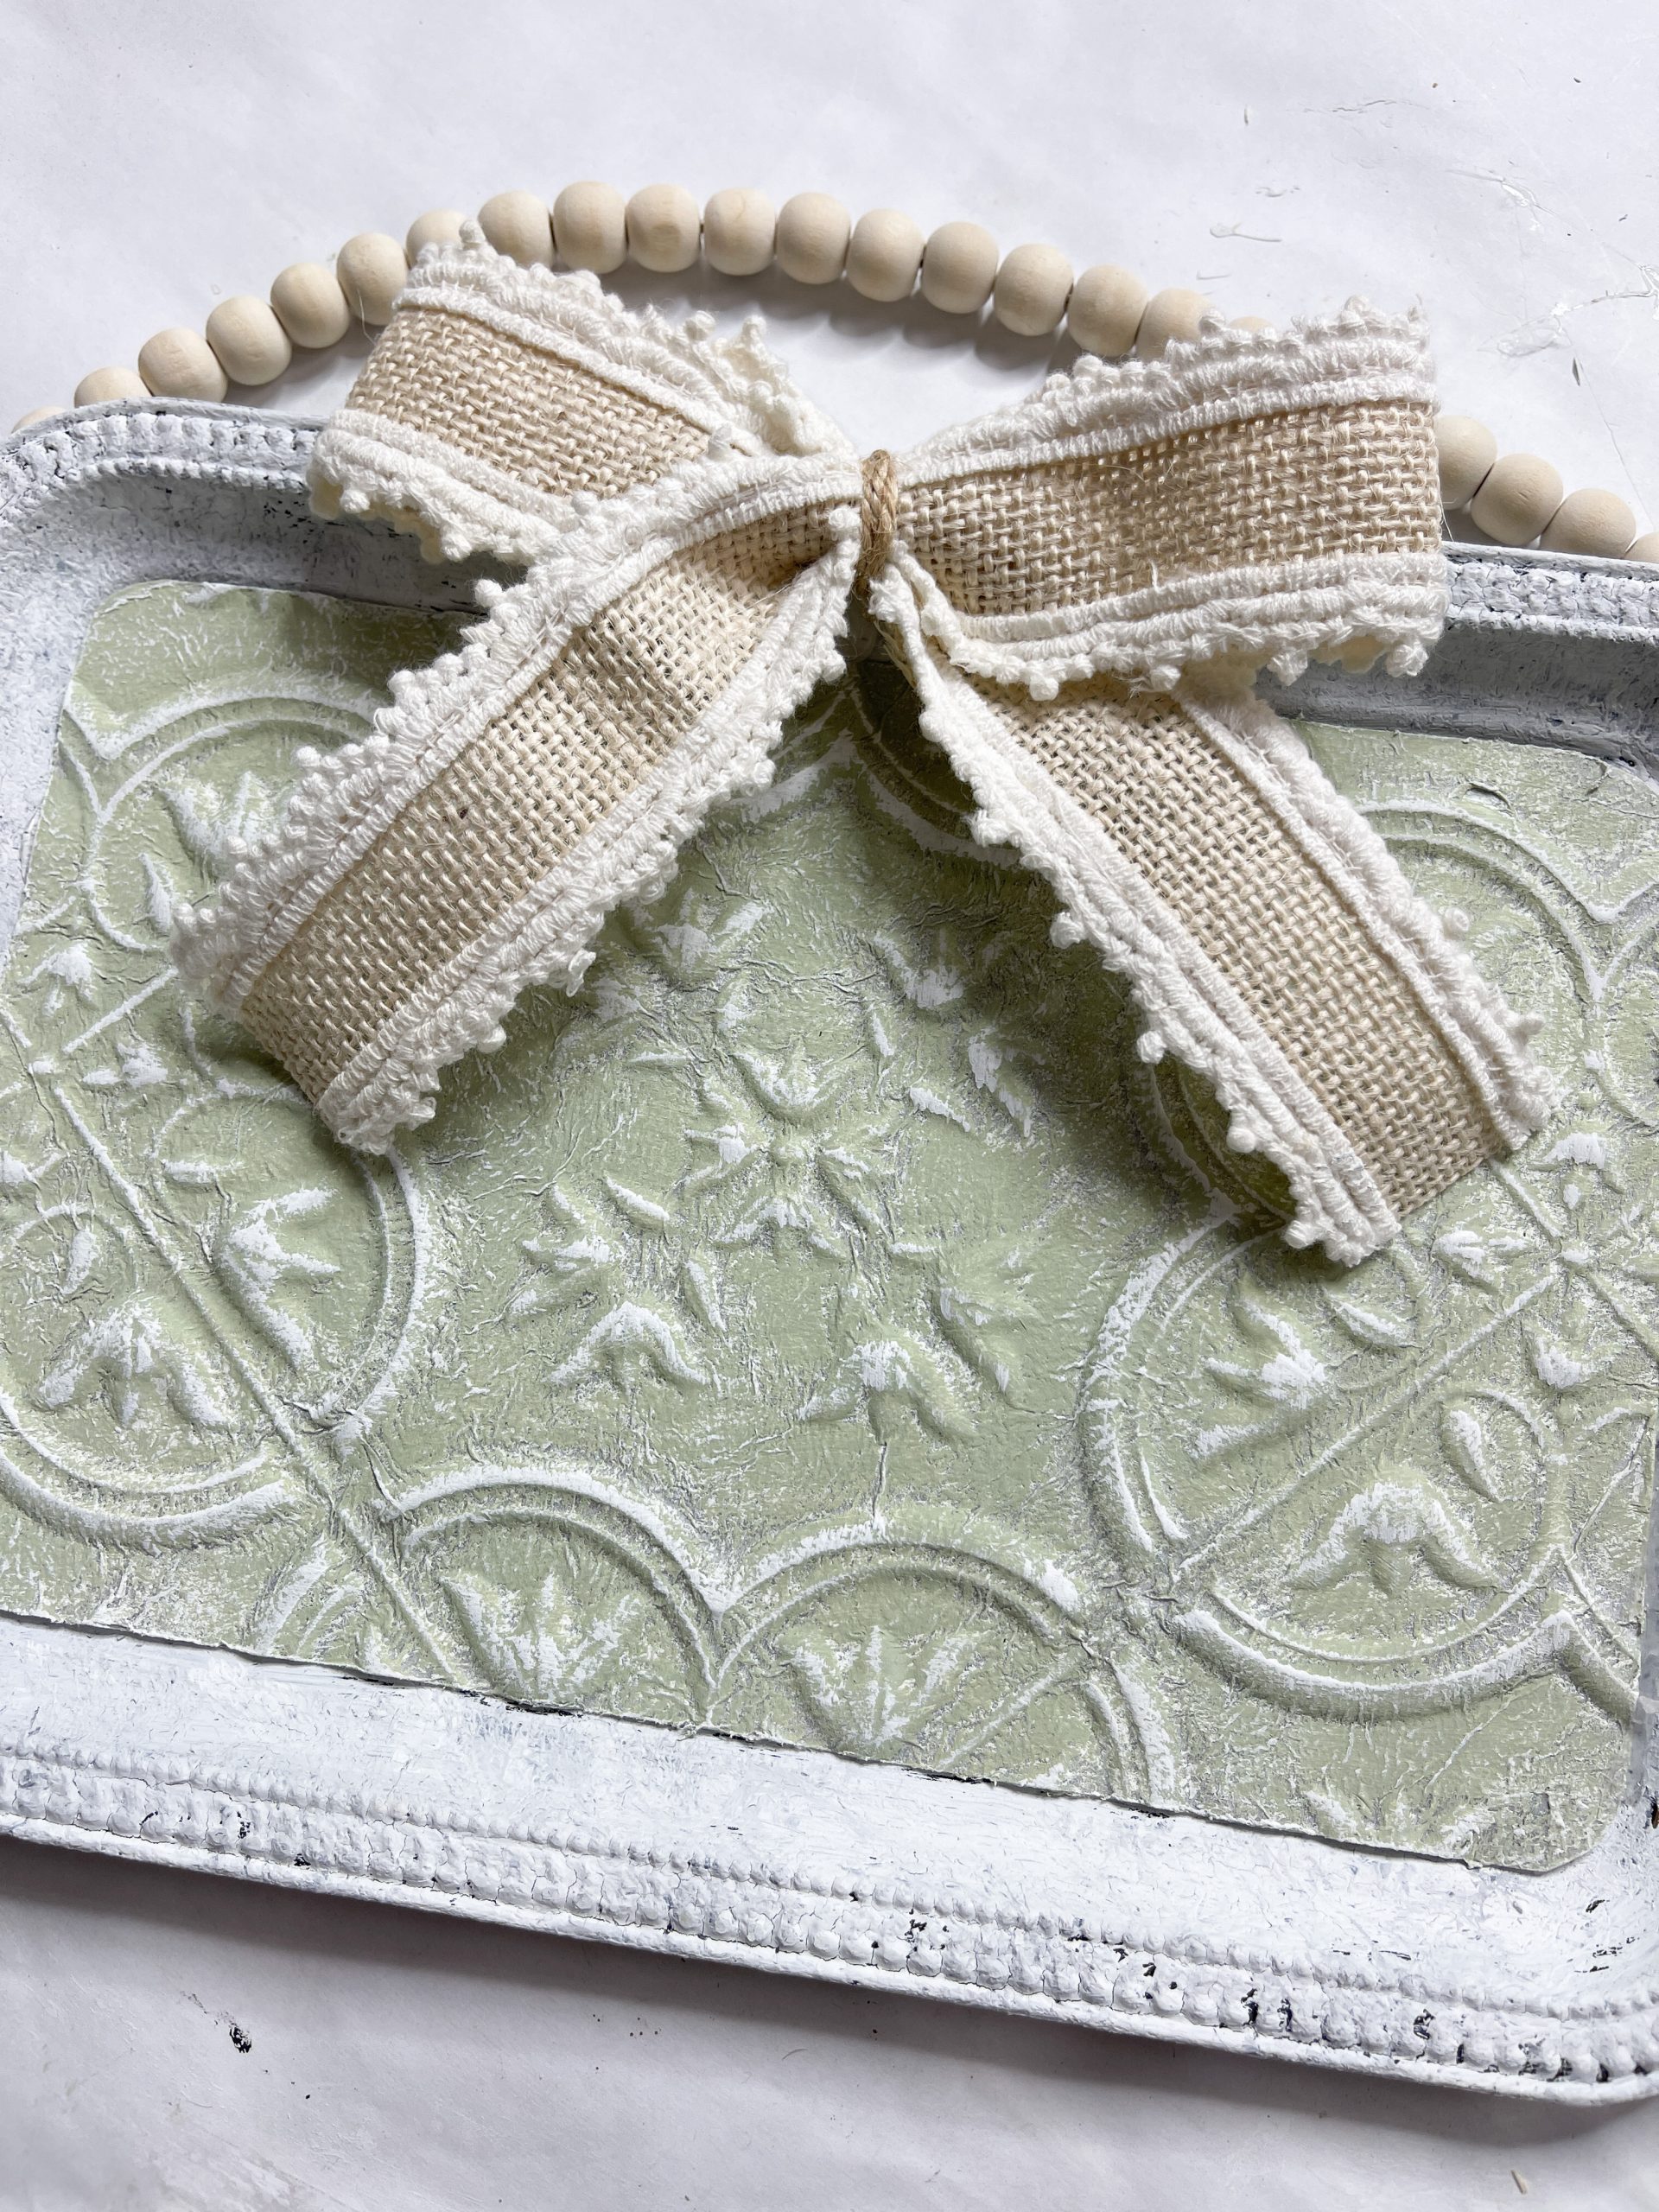
VERY lightly brush white paint across the tile so that it gets on the ridges of the adhesive tile but doesn’t cover up the celery chalk paint.
Apply white paint over the black on the serving tray. Once the white paint is dry, glue the adhesive tile onto the serving tray.
If you want to see the full supply list or video tutorial, just scroll to the bottom of this page!
Next, I folded a bow out of ribbon, secured it with twine, and glued it onto the serving tray. Lastly, glue a wood bead hanger onto the tray just like with the previous serving tray idea!
Watch the DIY tutorial
I shared how to make these adorable DIY decorative vintage serving trays during a LIVE video on my Facebook page.
If you want to see the DIY process, craft along, or just join in on the fun conversations, you can watch the DIY tutorial video on Facebook.
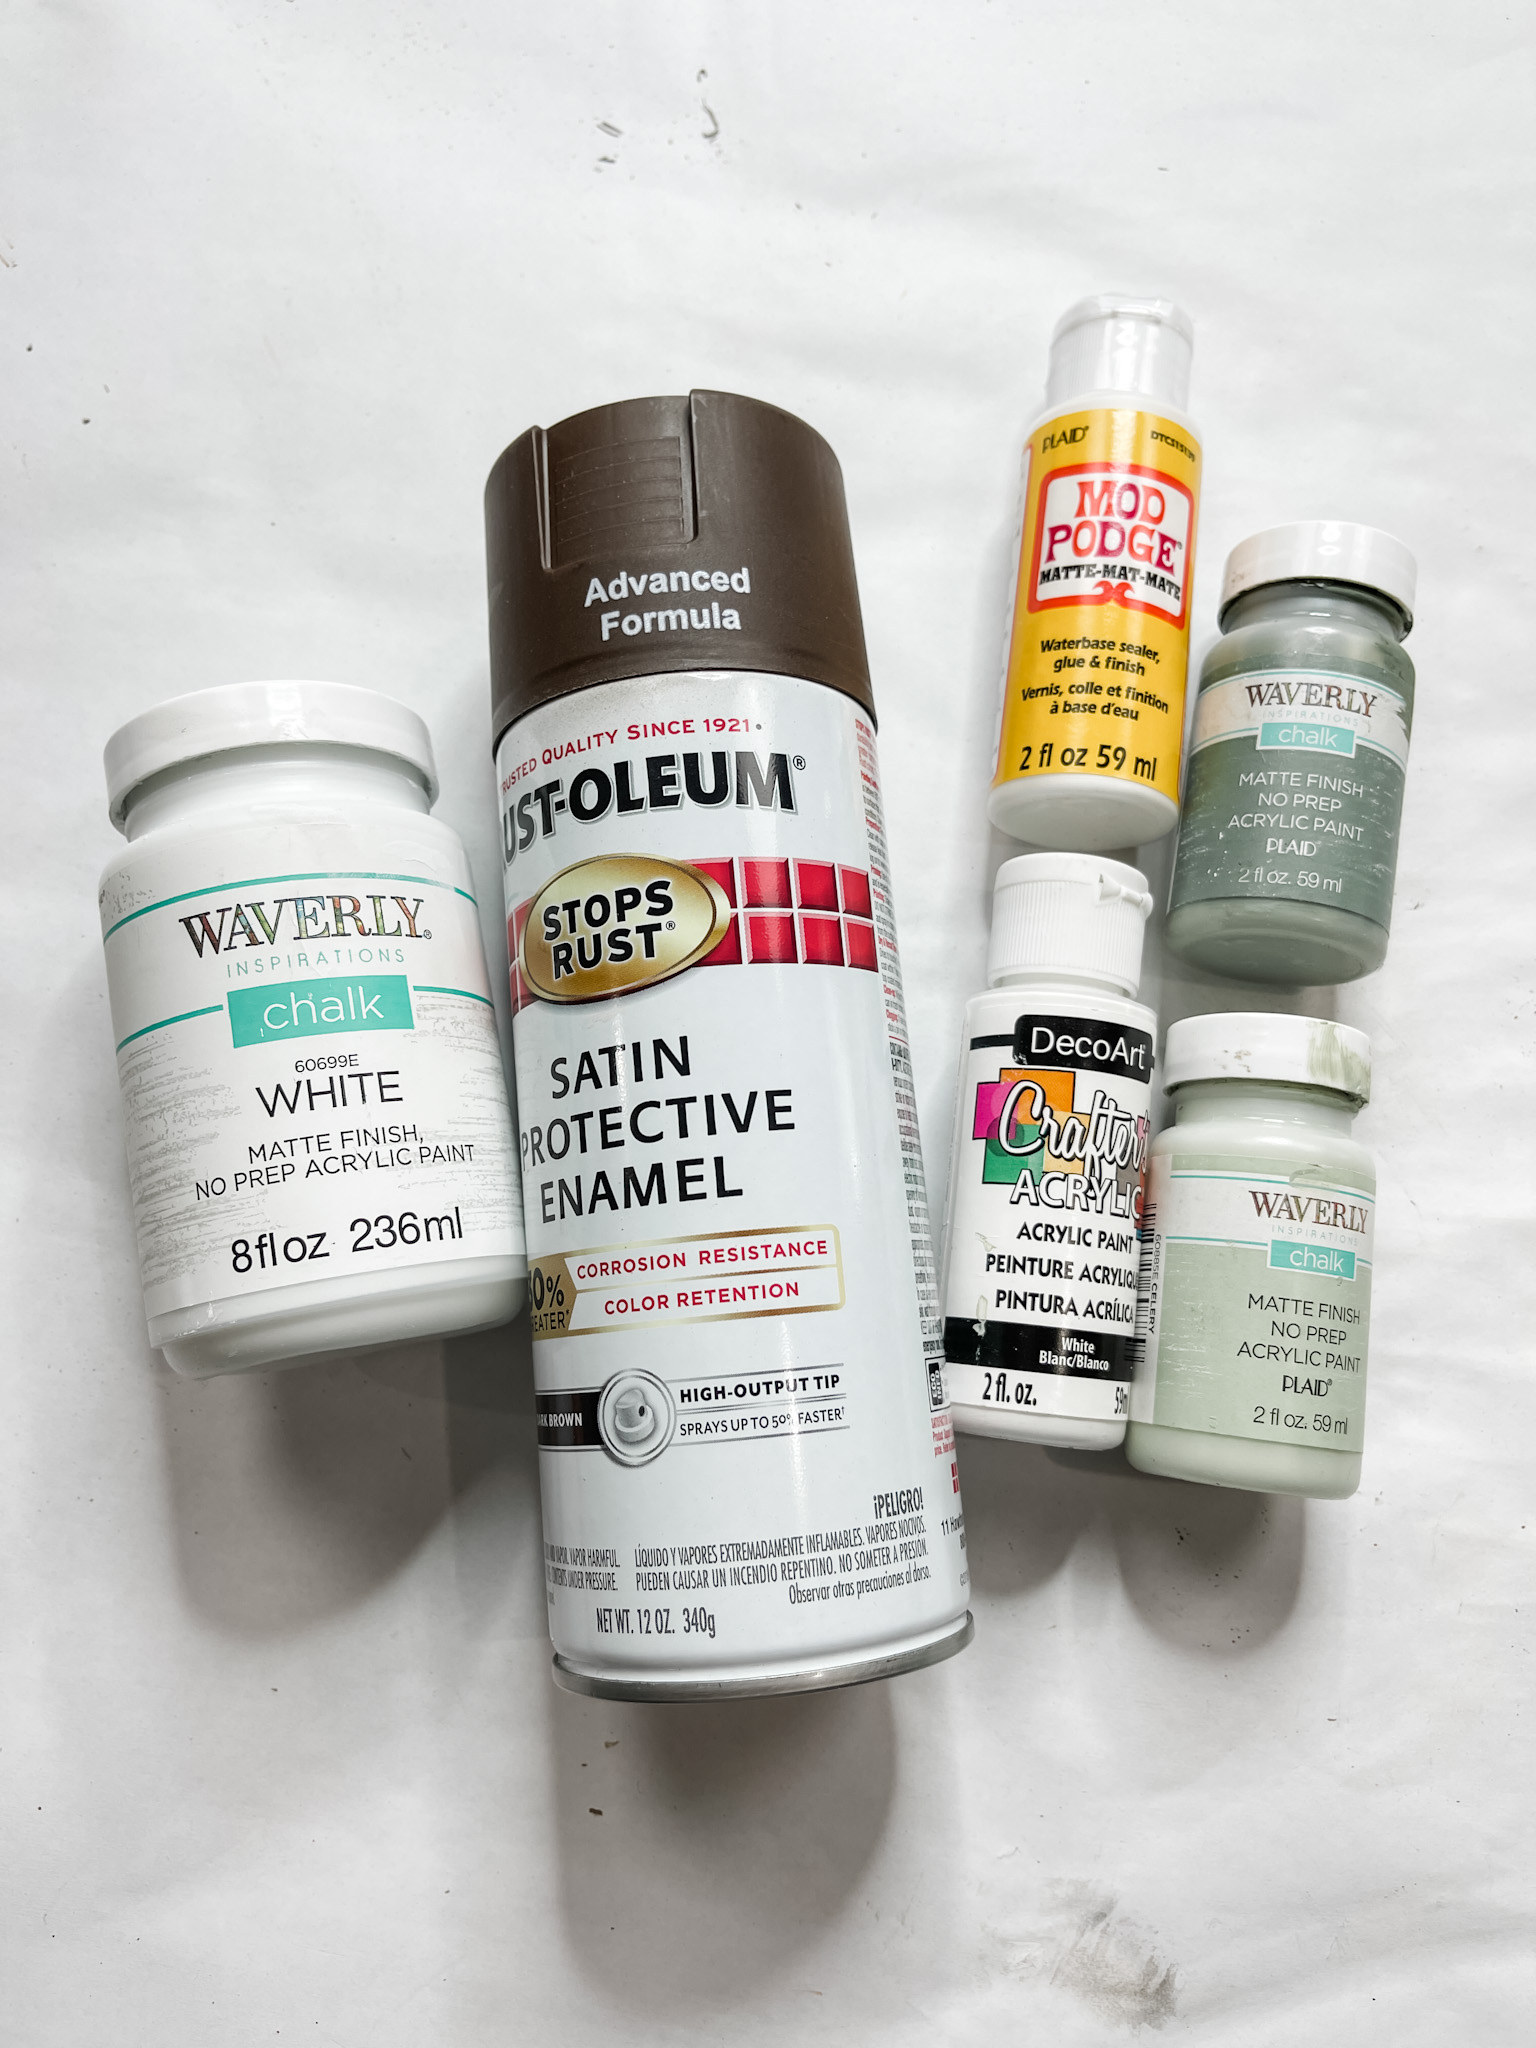
For this project, I used these items but you can substitute where you want.
“As an Amazon Associate, I earn from qualifying purchases.”
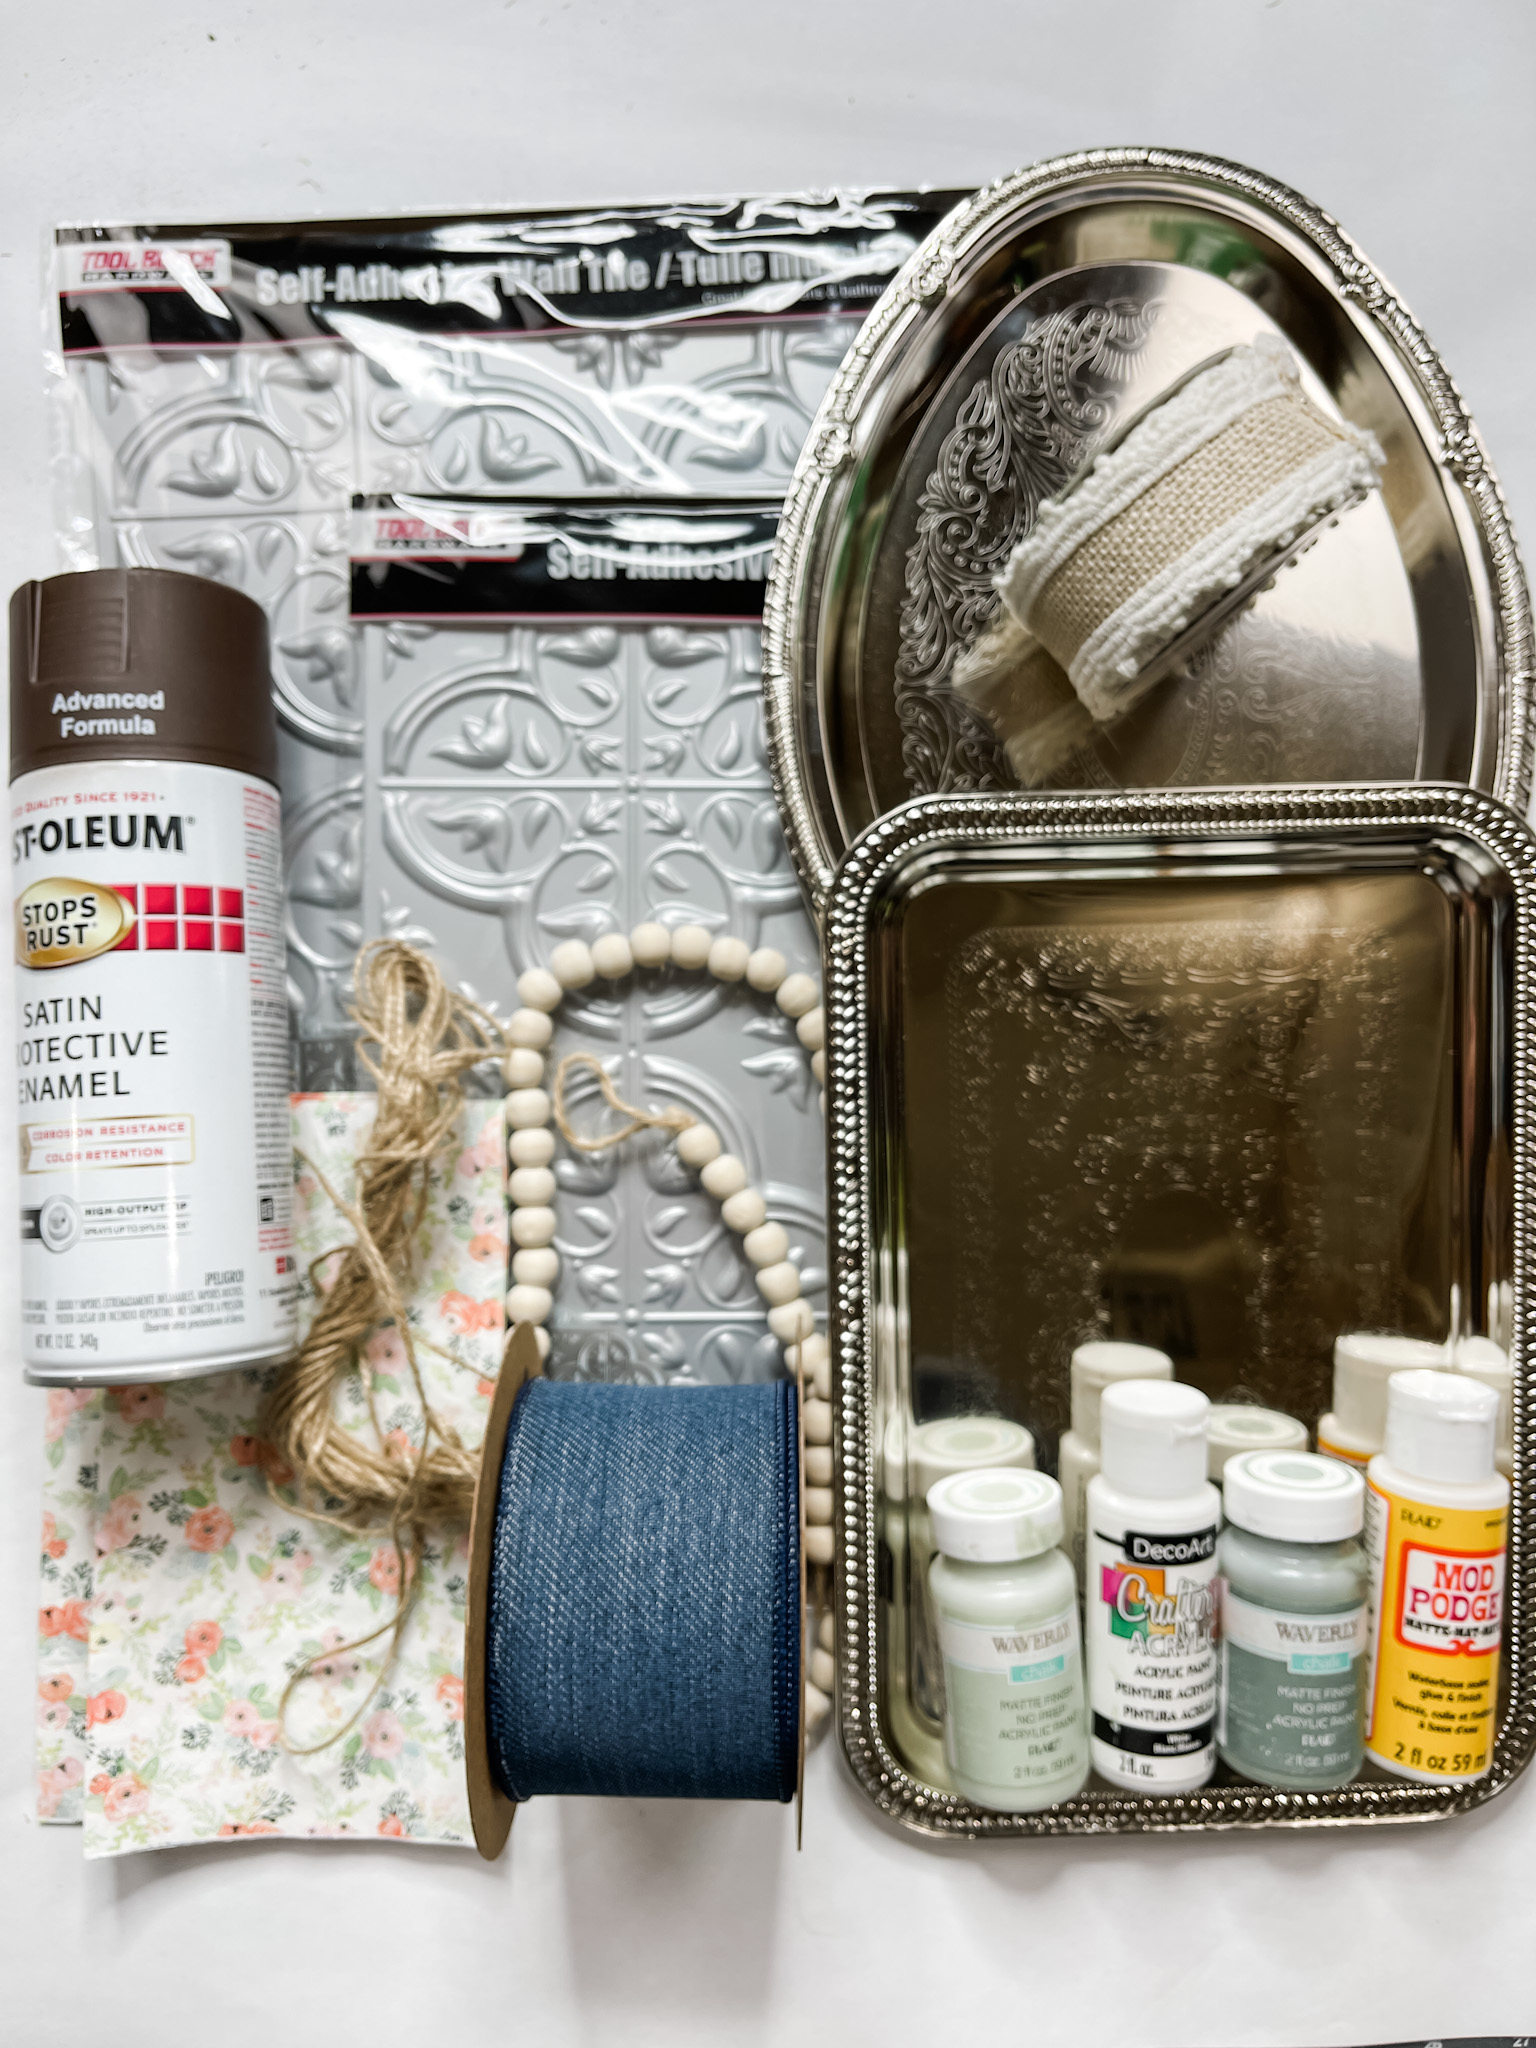
- Dollar Tree Serving Trays
- Dollar Tree Adhesive Tiles
- Floral Shabby Chic Napkin
- Dollar Tree Wood Bead Garland
- Dollar Tree Jute Twine
- Denim Ribbon
- Rustoleum Brown Spray Paint
- Waverly White Chalk Paint
- Mod Podge
- Waverly Celery Chalk Paint
- Hot Glue gun
- Glue Sticks
I hope you enjoyed these DIY Decorative Vintage Serving Trays as much as I did and decide to make them for yourself! If you do, I would love to see how yours turns out!
You should totally join my FREE Facebook group called On A Budget Crafts! It is a judgment-free community for DIY crafters to show off their projects and ideas.
If you loved this DIY, you might also like these DIY ideas!
- Dollar Tree DIY Faux Metal Bucket Spring Decor
- DIY Rustic Decor with Dollar Tree Cactus Succulent Stickers
- How to Make a DIY Rustic Bucket Planter
- DIY Faux Concrete Planter
Thanks for stopping by! XOXO Amber
You can also shop my ENTIRE AMAZON Favorites shop just click here! It’s packed full of all the things I use and love. Here is the supply list I highly recommend every creative have on hand!!
Would you also pin my blog for later and get on my newsletter alerts? I would love to have you join my #craftycrew.
Inspired? Leave me a comment below! I love hearing from my readers!

Hola .
Por favor , en que página web o donde puedo encontrar esas placas stickers.?
Gracias.
Both of these trays are so pretty! Especially love the beautiful napkin.
Hello! Super easy, super cute trays! Enjoy your collab!
I love this idea