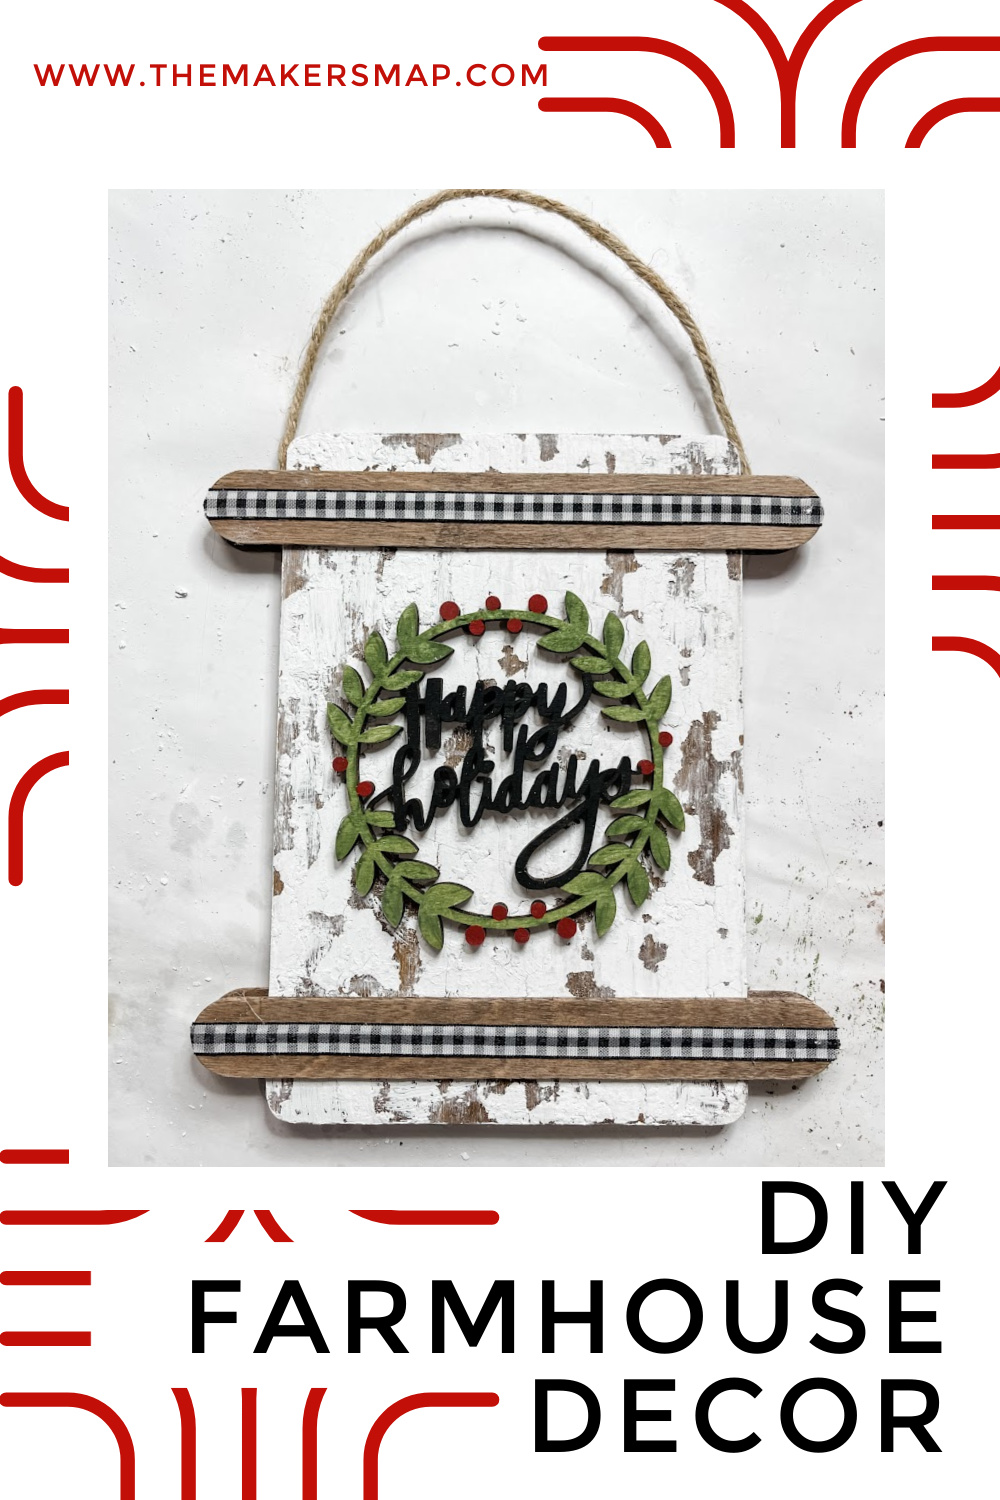
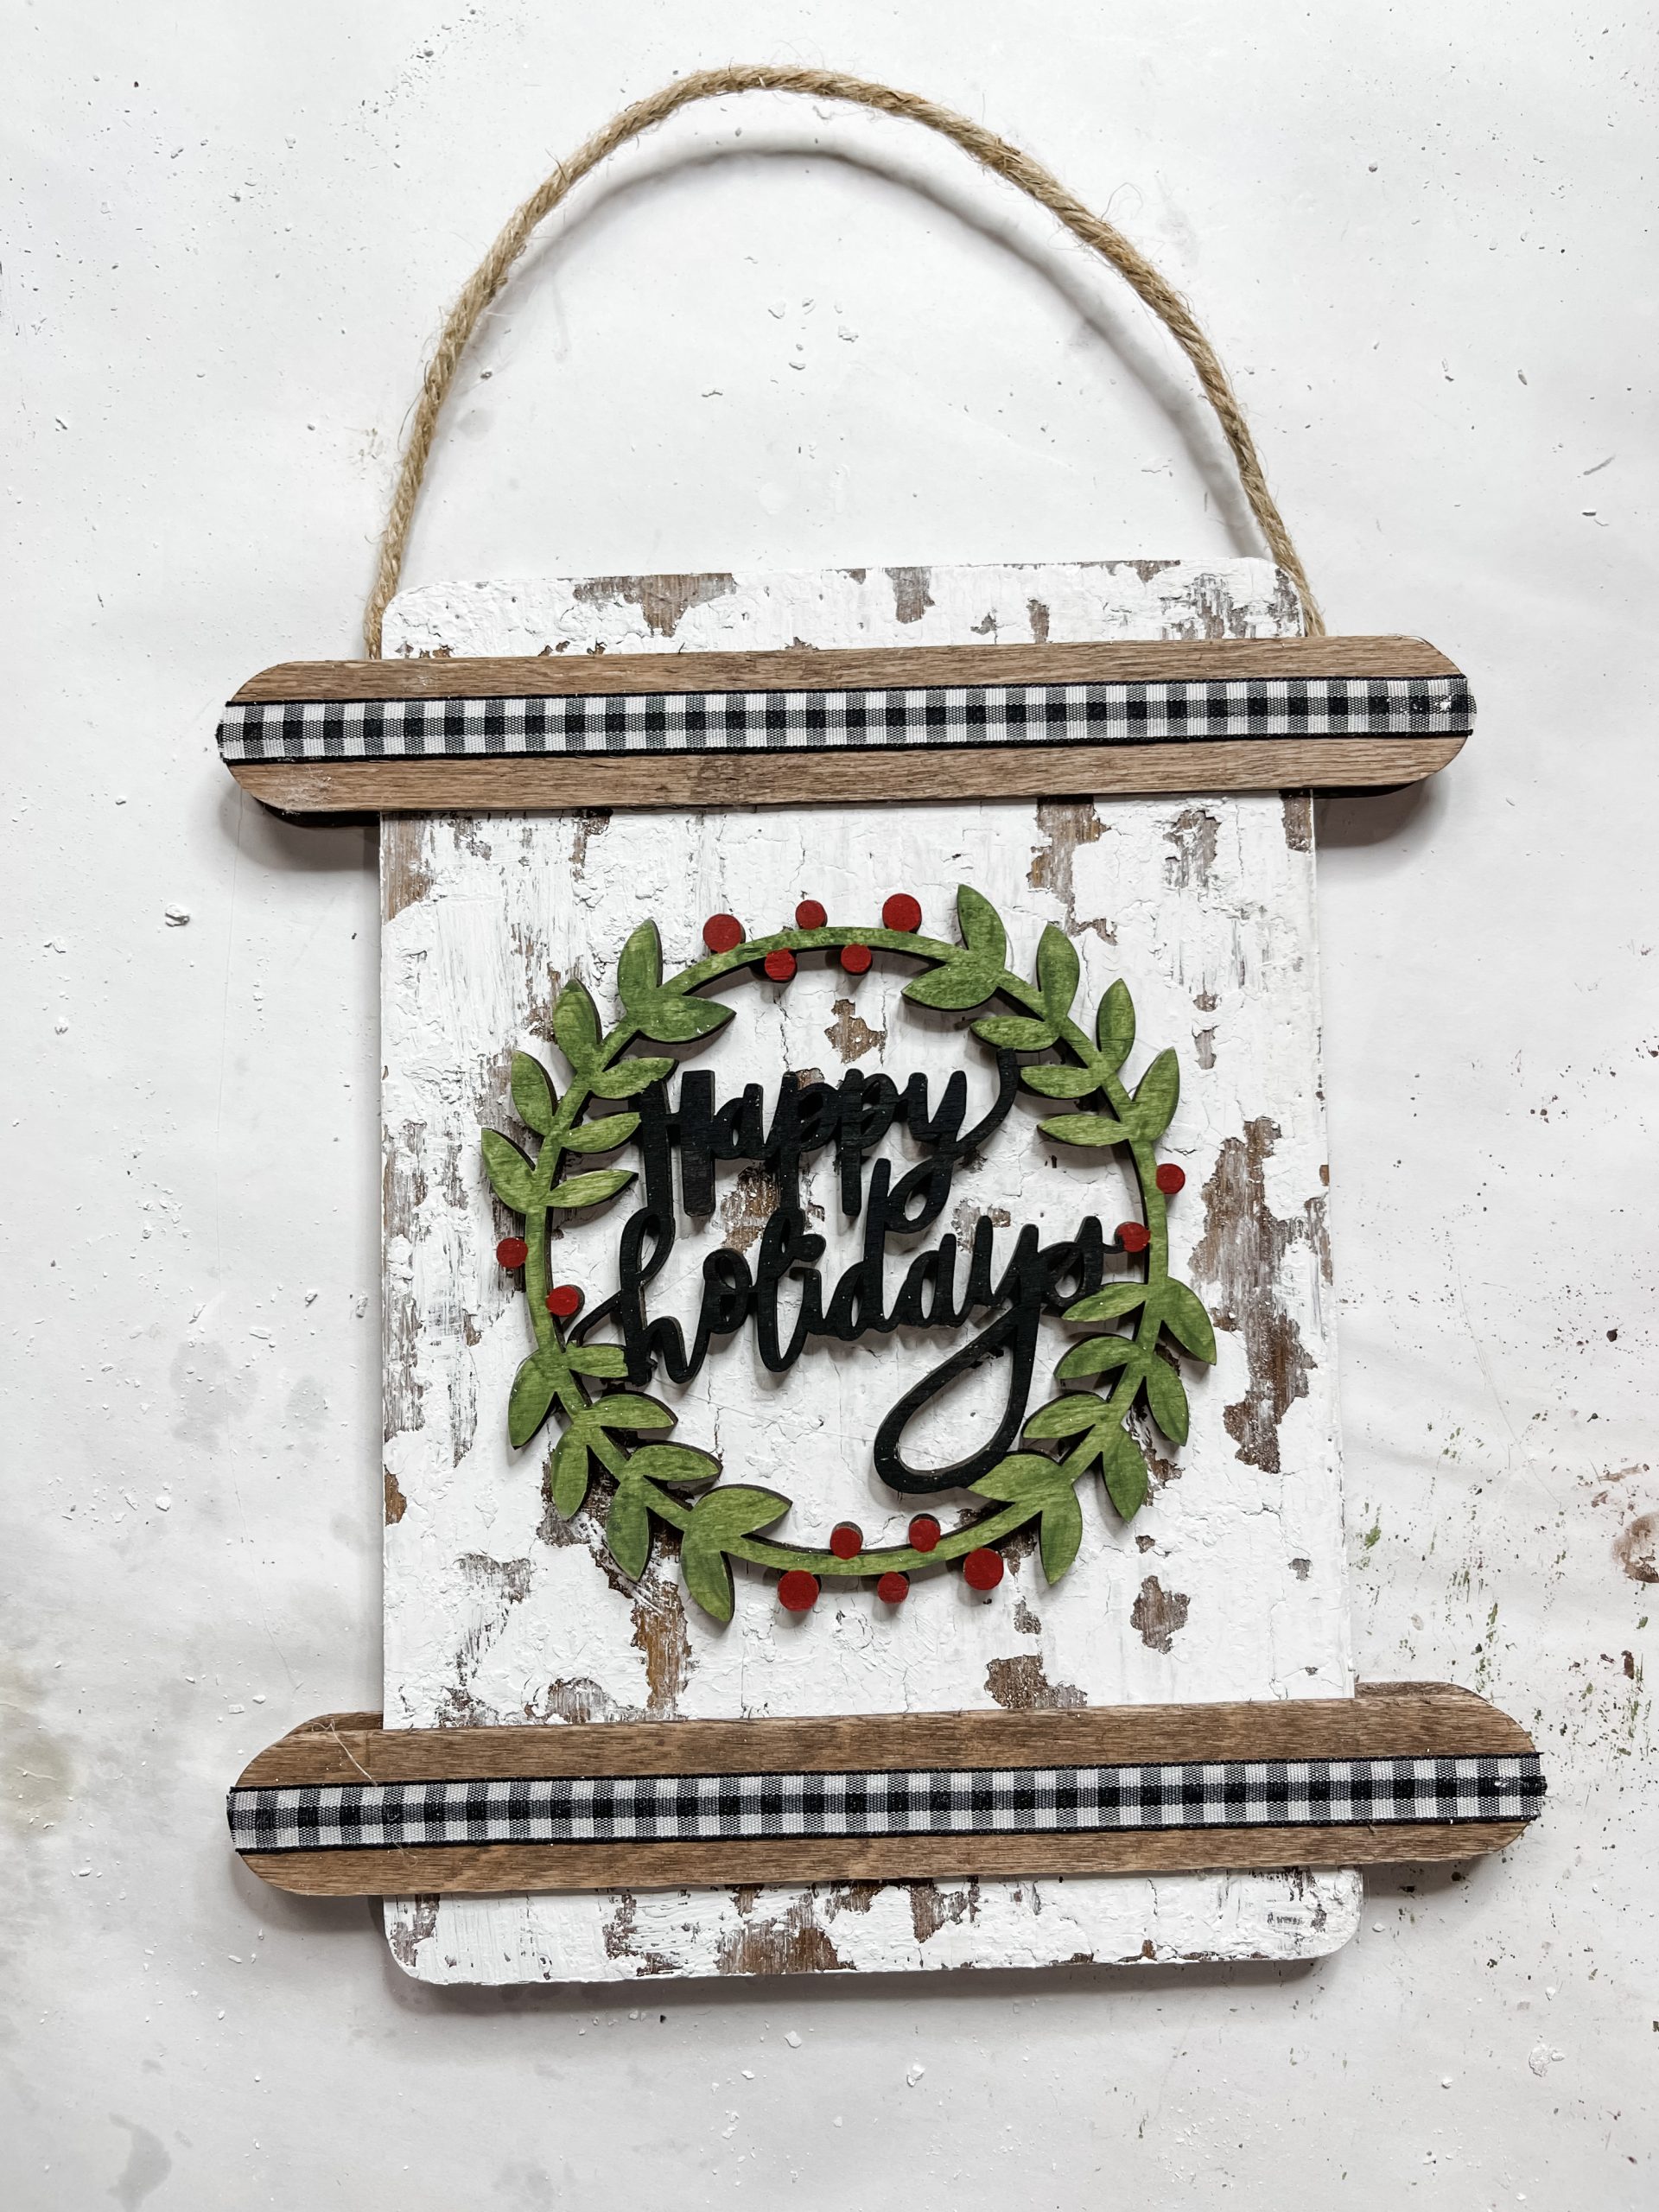
Farmhouse Happy Holidays Sign
I don’t think you can ever go wrong with chippy, so maybe that’s why I love this Farmhouse Happy Holidays Sign so much!
This project is so easy to make, and it is probably one of the most affordable ones too because of how simple it is!
How to Make a Farmhouse Happy Holidays Sign
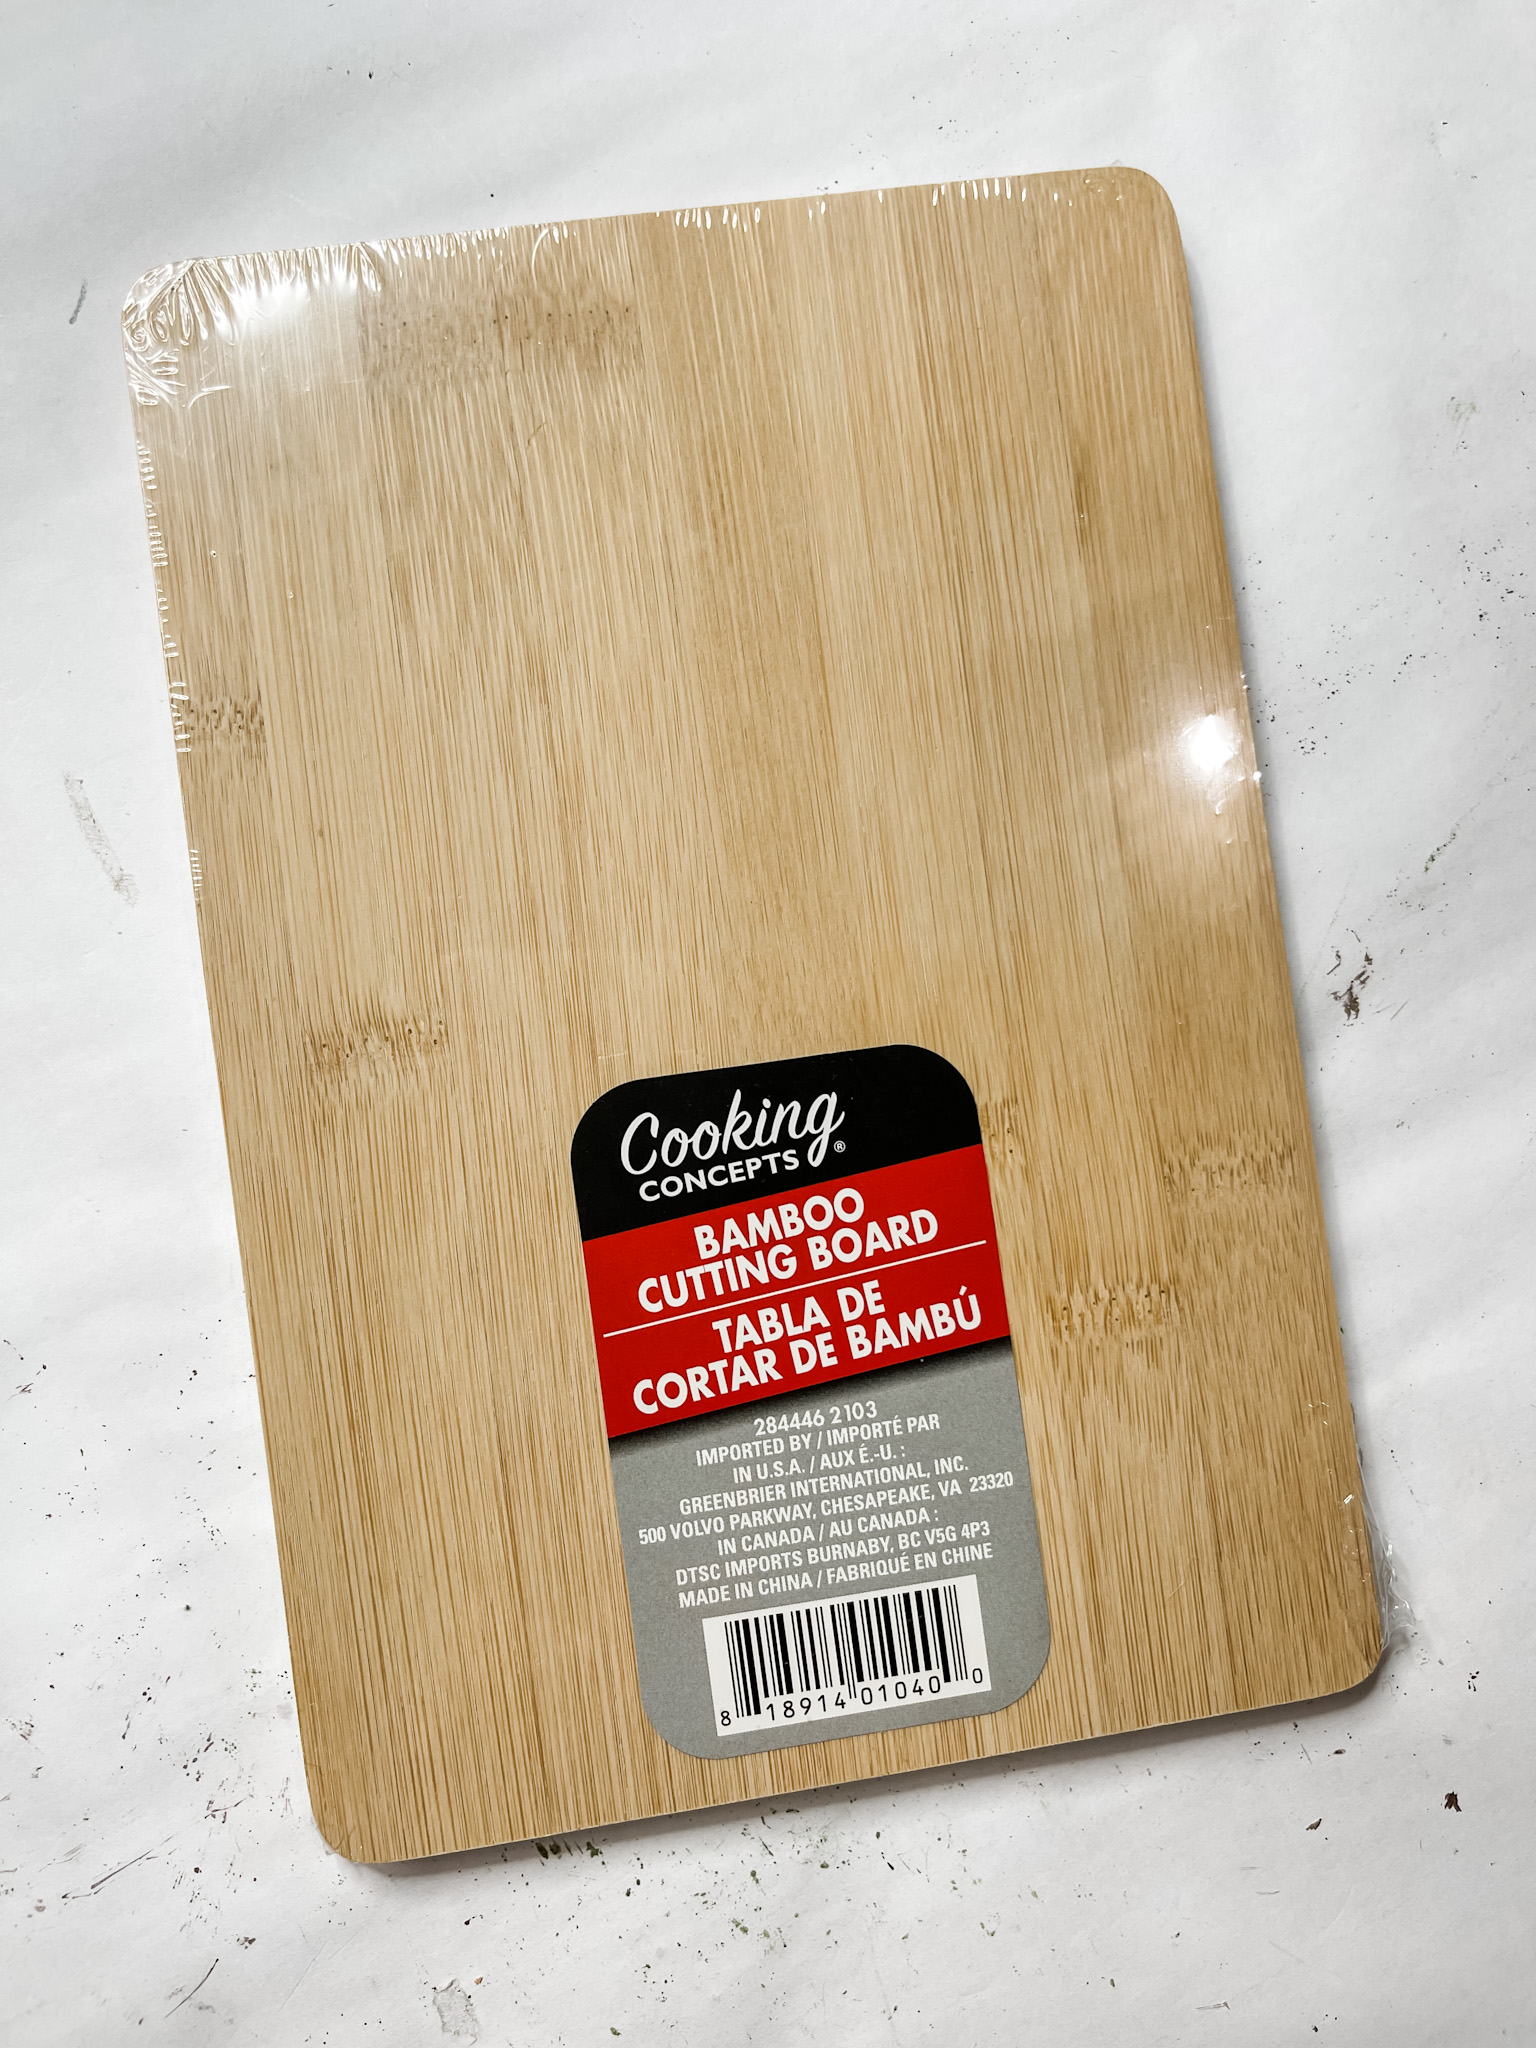
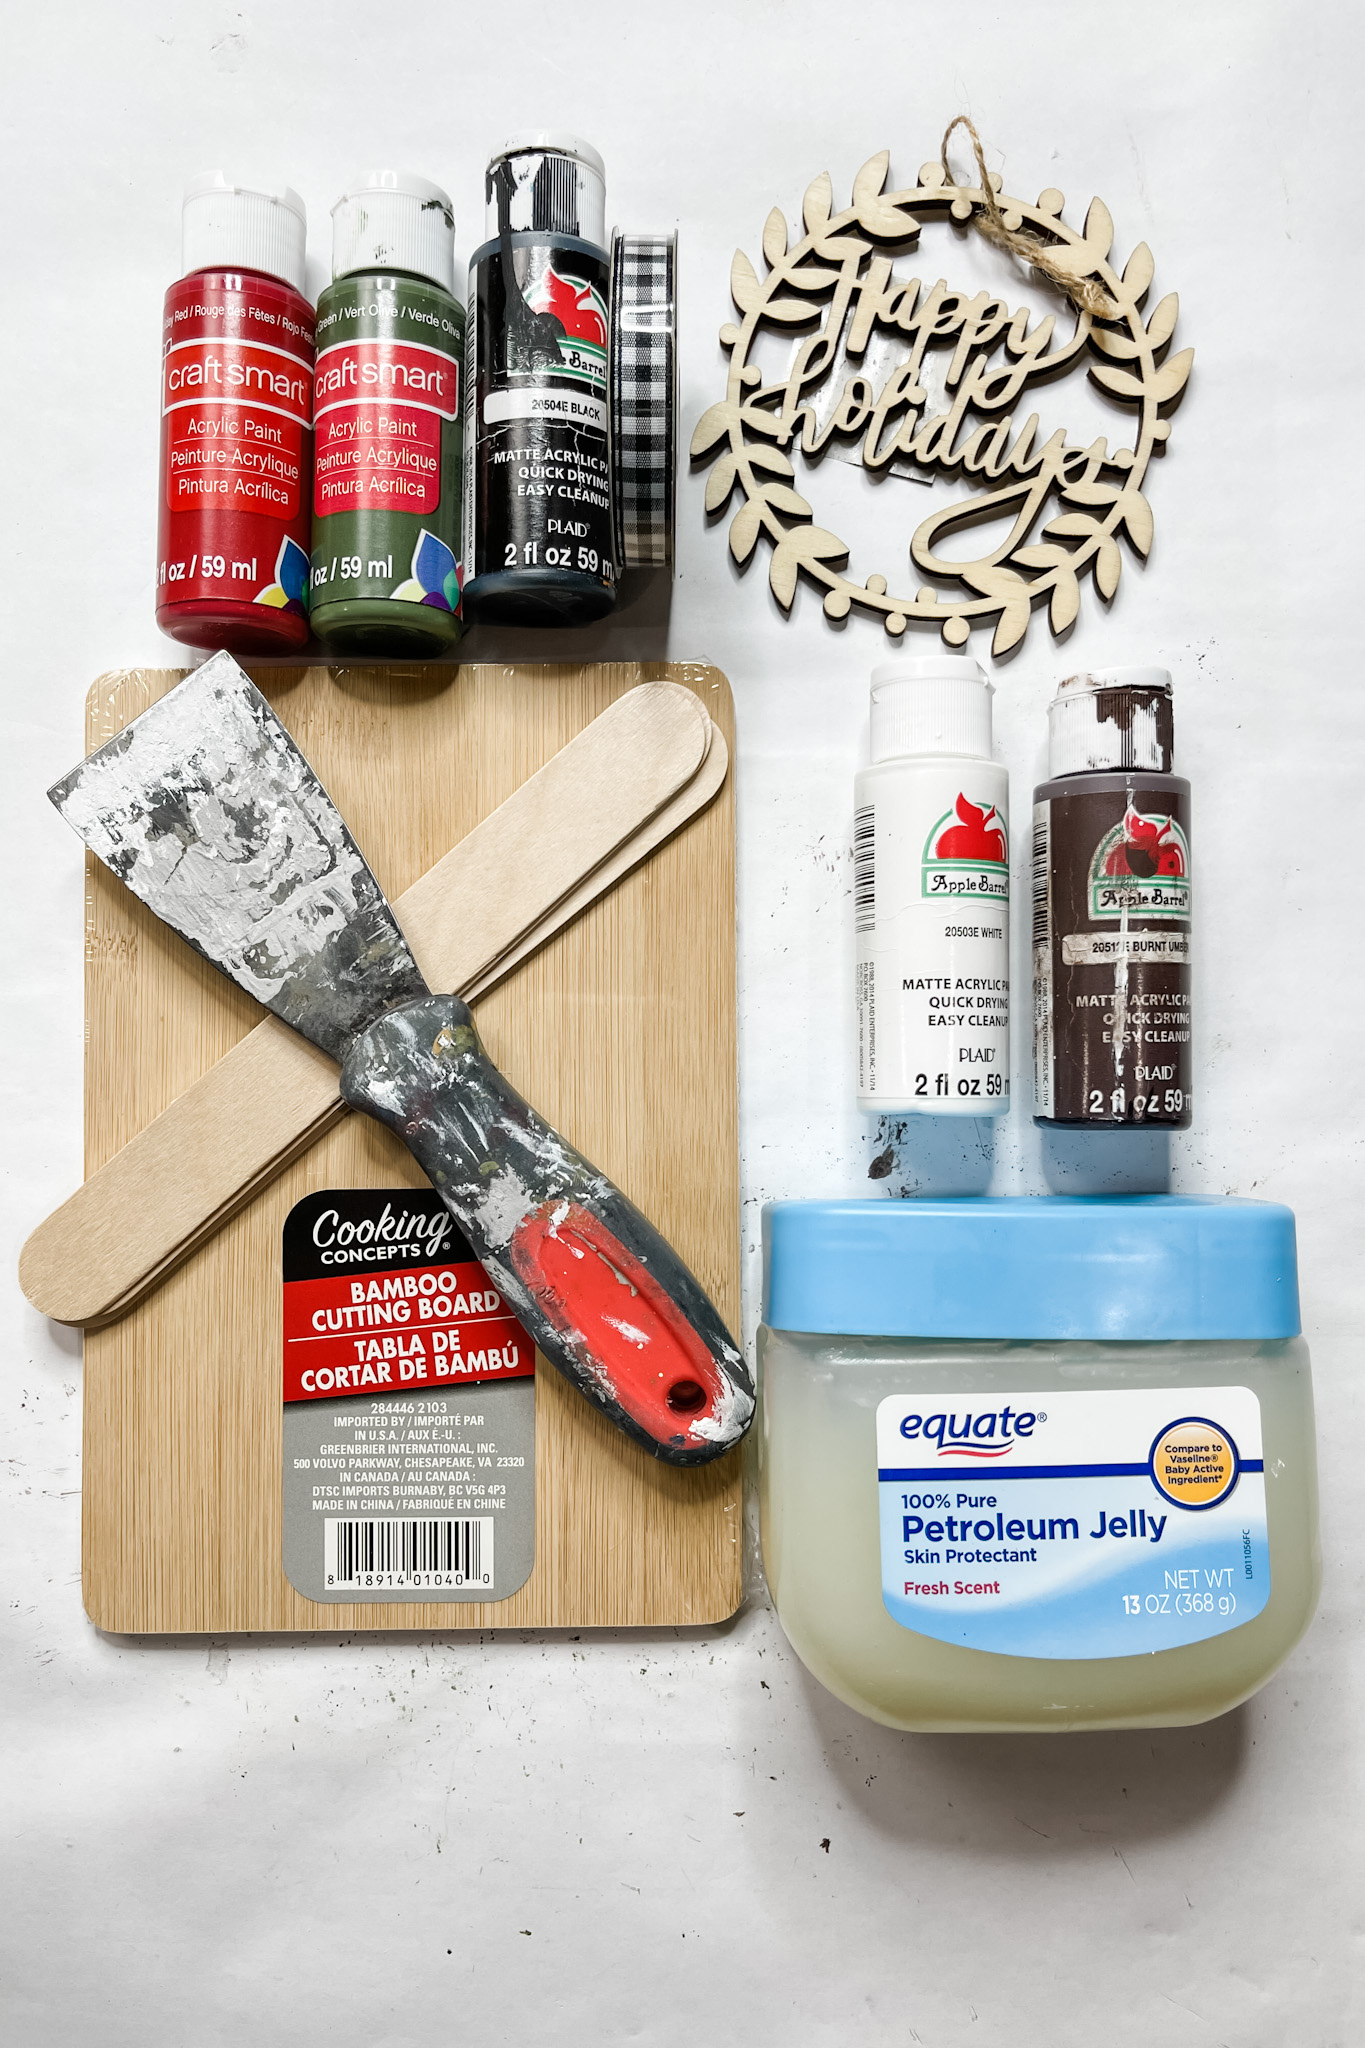
I started this project by staining the Dollar Tree bamboo cutting board with brown paint. I like to use DecoArt or Apple Barrel because they are so affordable but still of great quality!
To stain wood with paint, you’re going to pour the paint onto the surface and use a wet wipe to spread it across. Then, wipe over the surface with a clean wet wipe to remove excess paint.
Repeat to get a darker stain if you want. Then, allow the paint to dry completely. I like to use my heat gun to speed up the drying process!
How to get a chippy paint finish
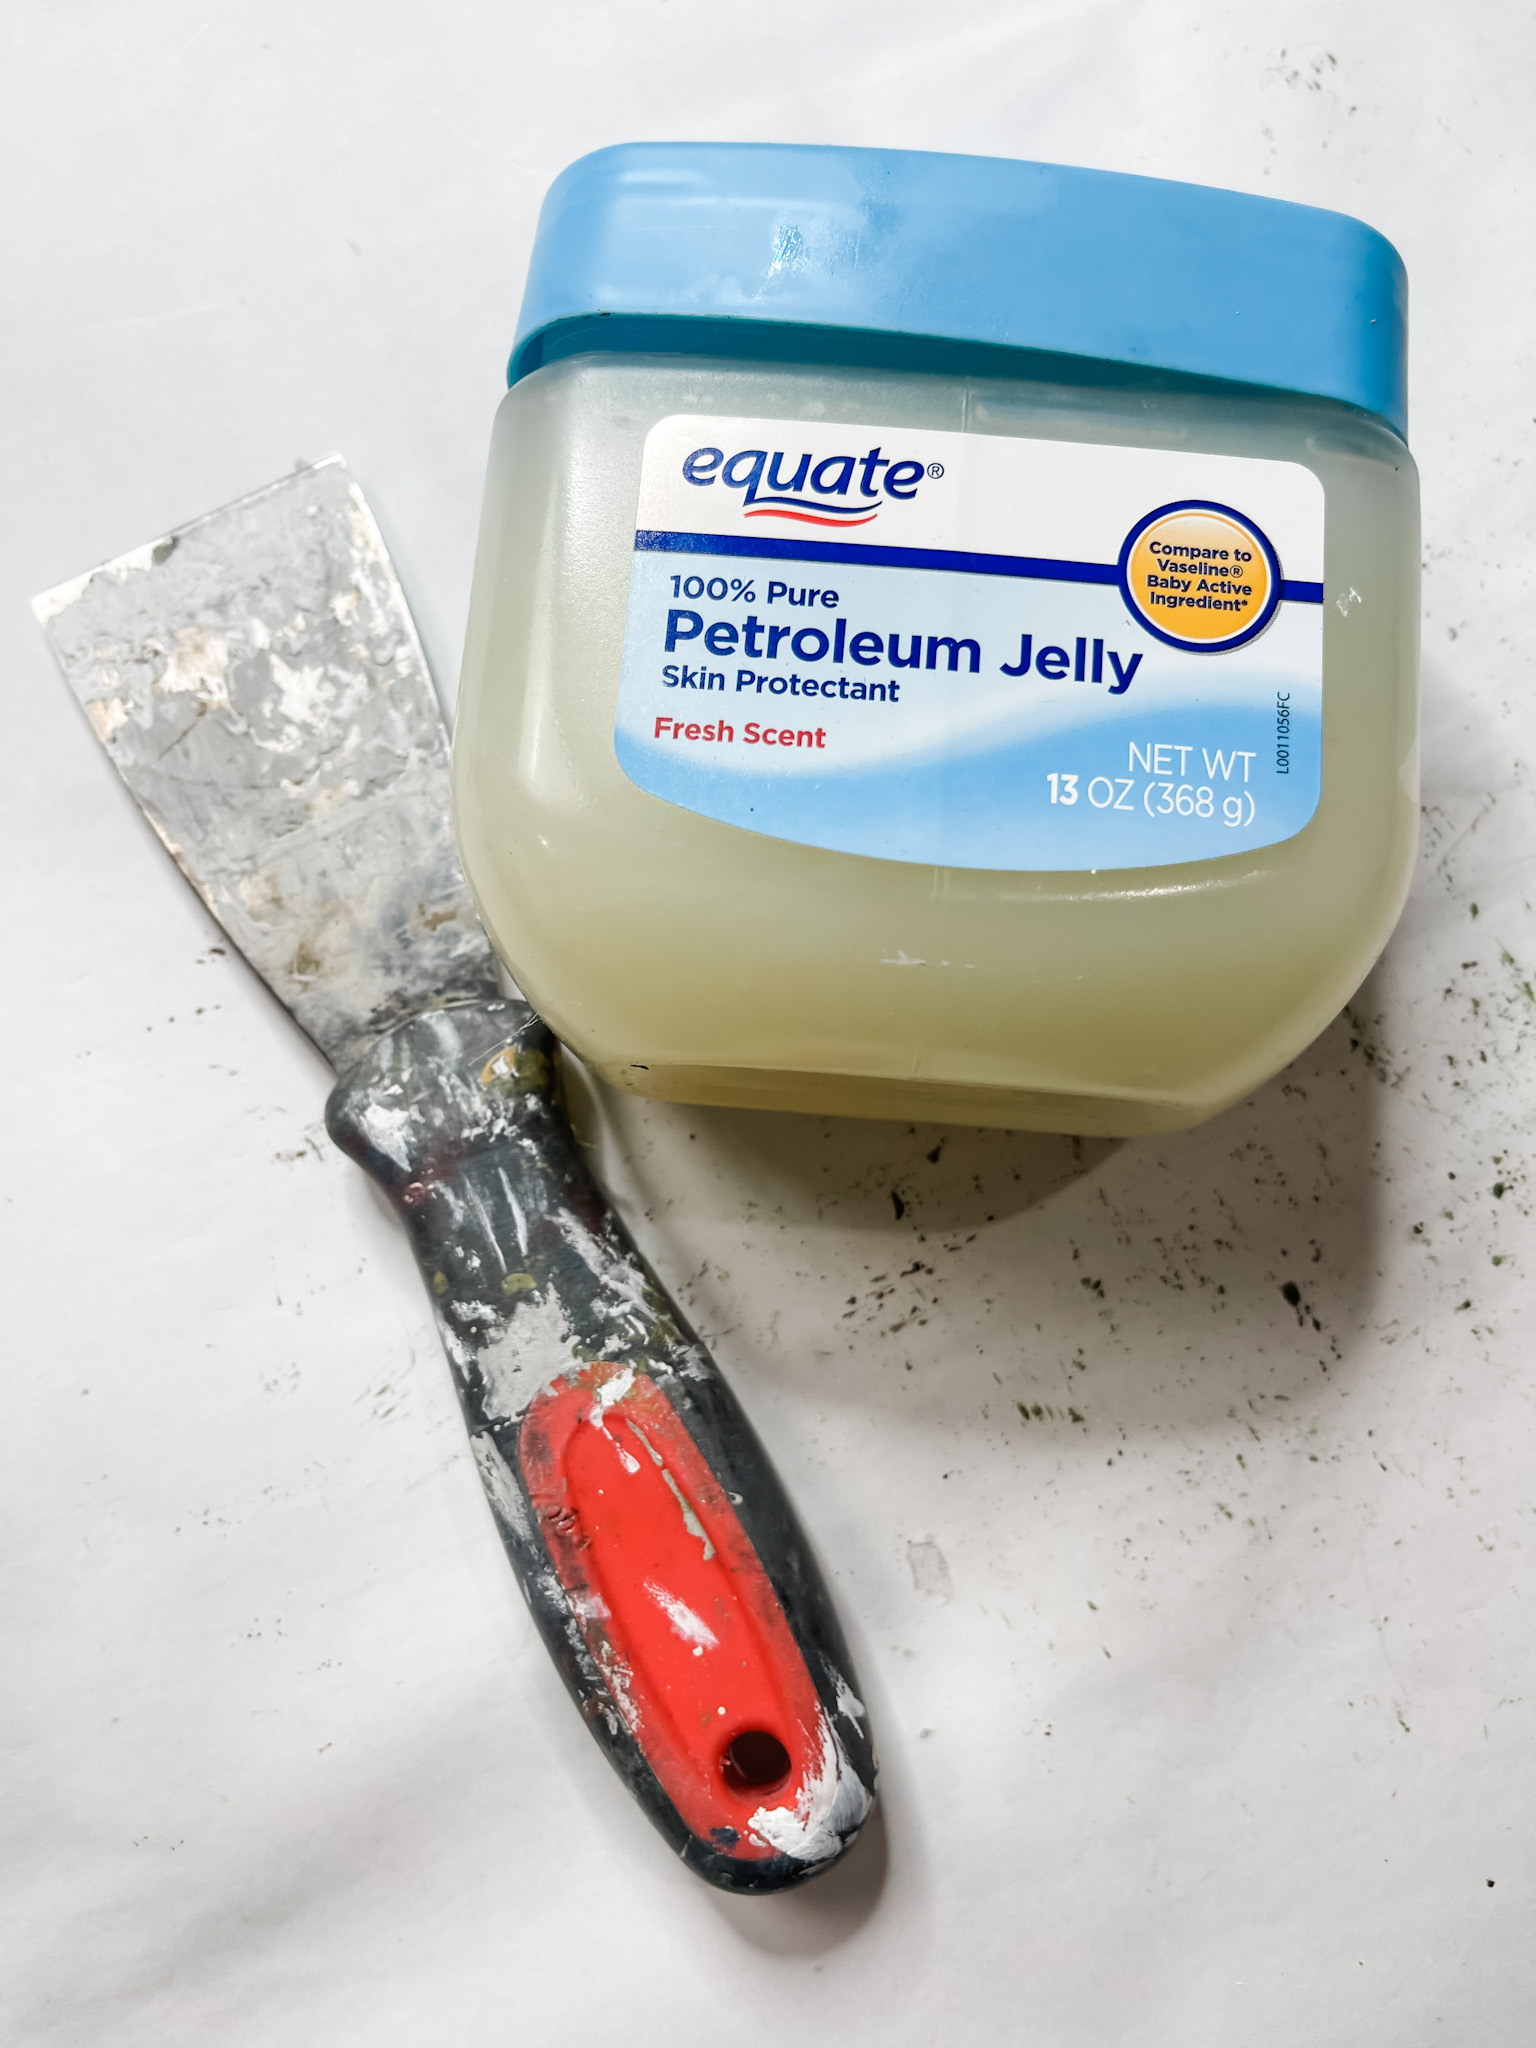
To get the chippy finish on the cutting board, you’ll need petroleum jelly, white paint, and a putty knife.
Apply petroleum jelly to the cutting board with a paintbrush where you want the white paint to have a chippy effect.
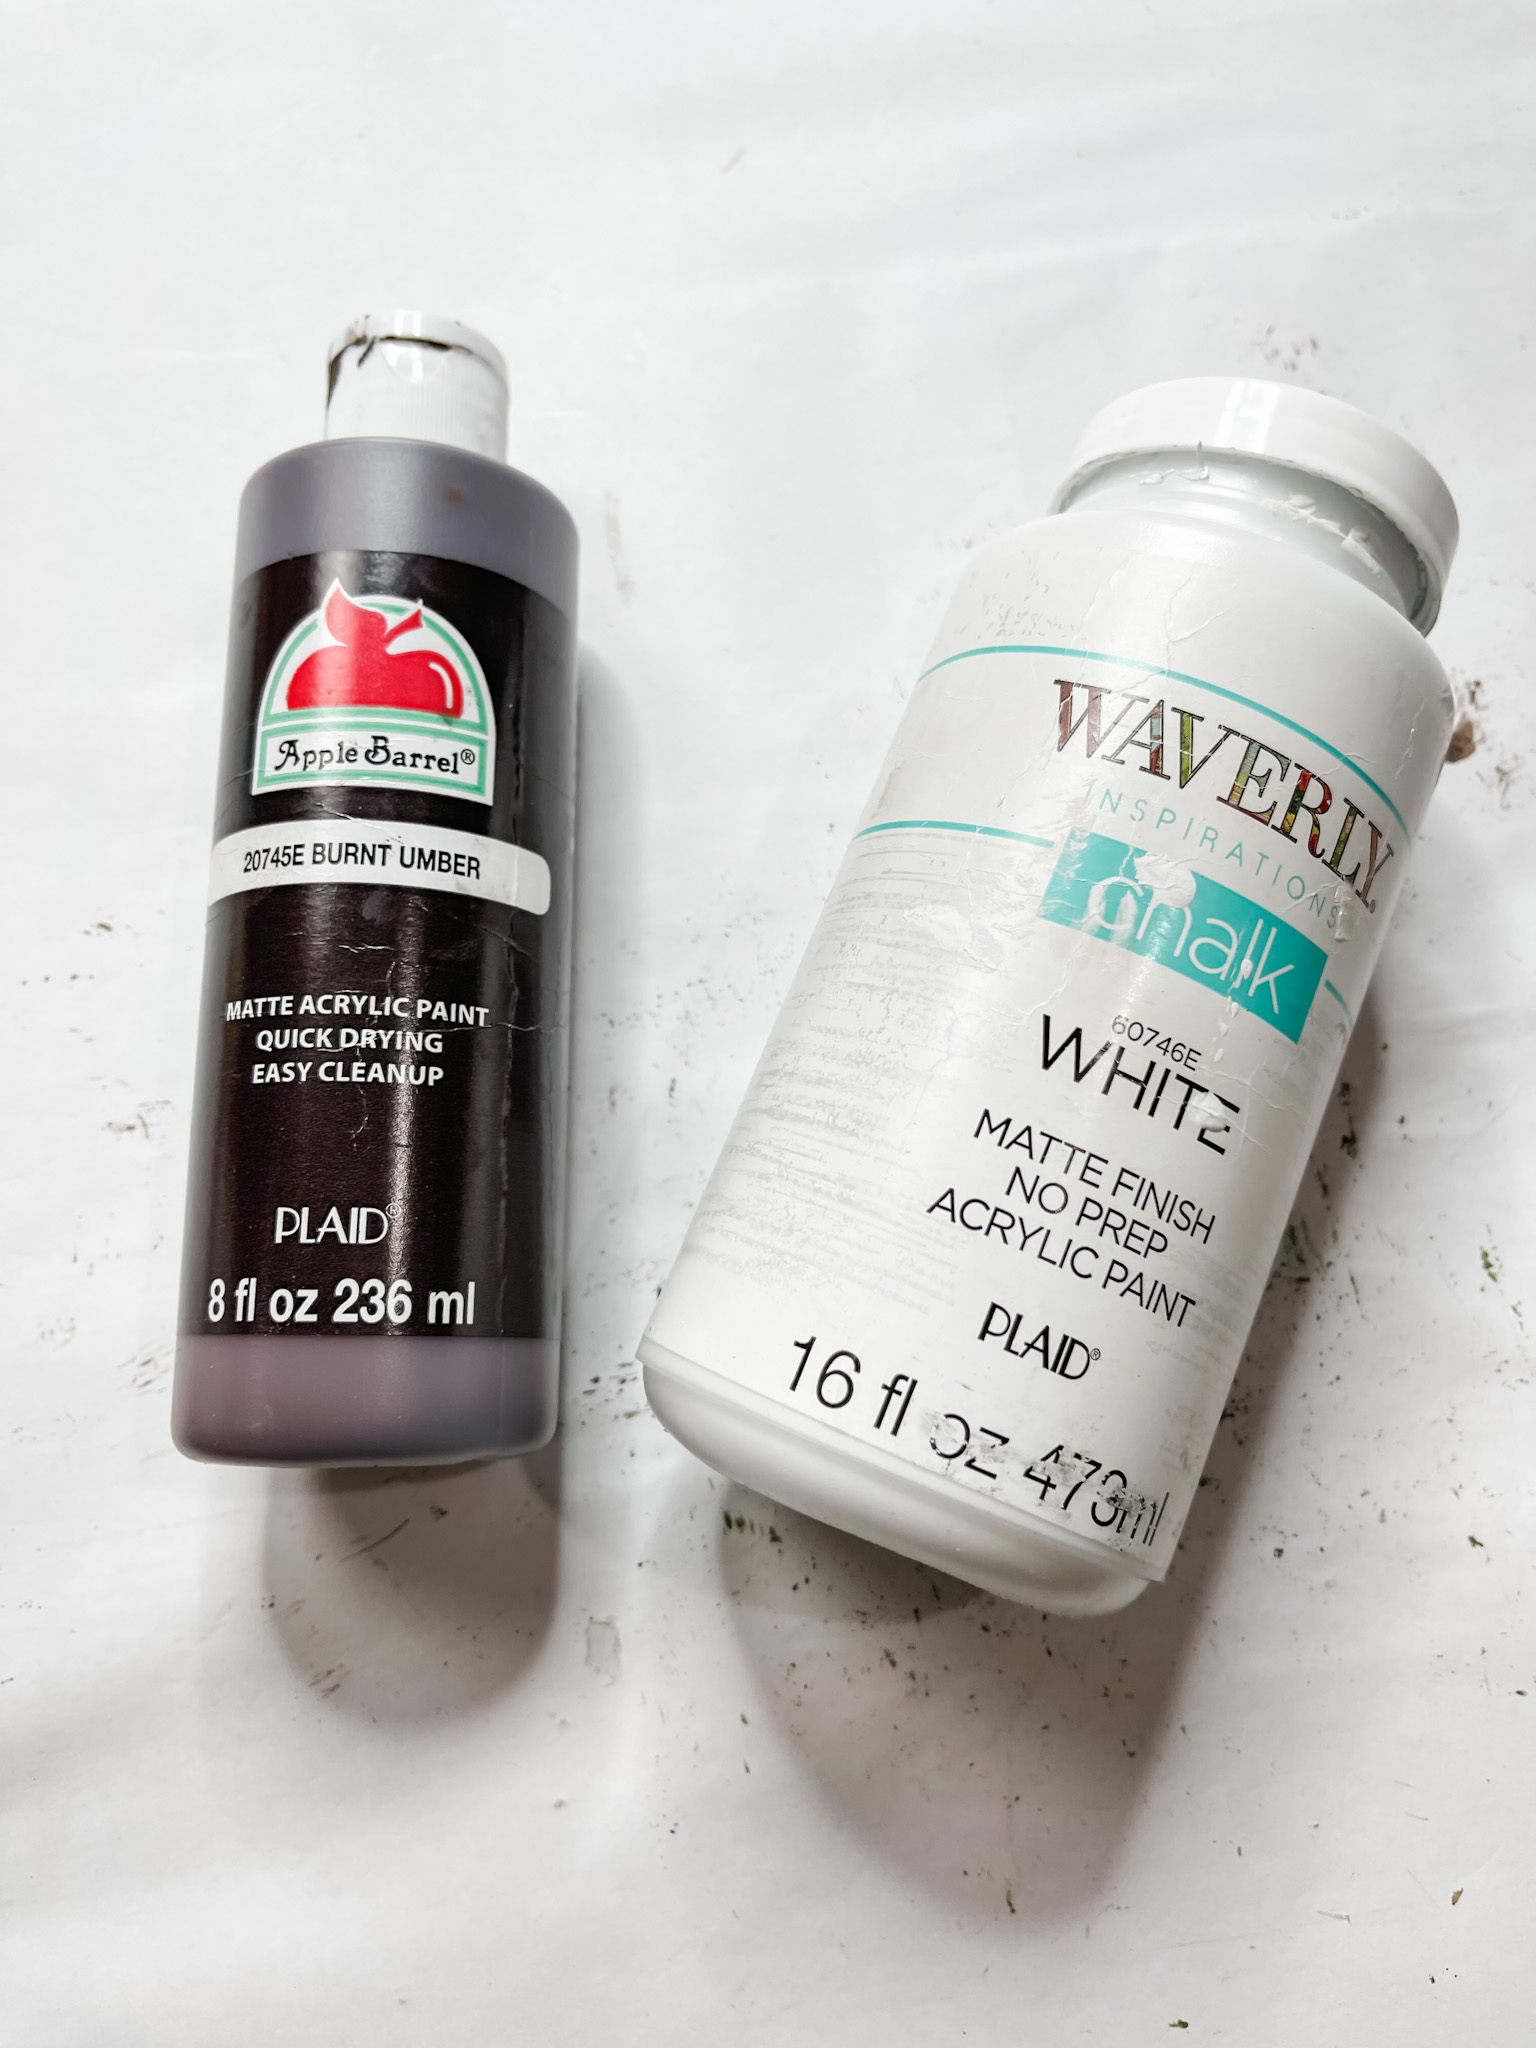
Then, paint over the entire front of the cutting board with your white paint. You can use either acrylic (Apple Barrel/DecoArt) or chalk (Waverly) paint for this.
Let the white paint dry. It’ll dry completely where you didn’t apply the petroleum jelly but will be wet where the jelly is.
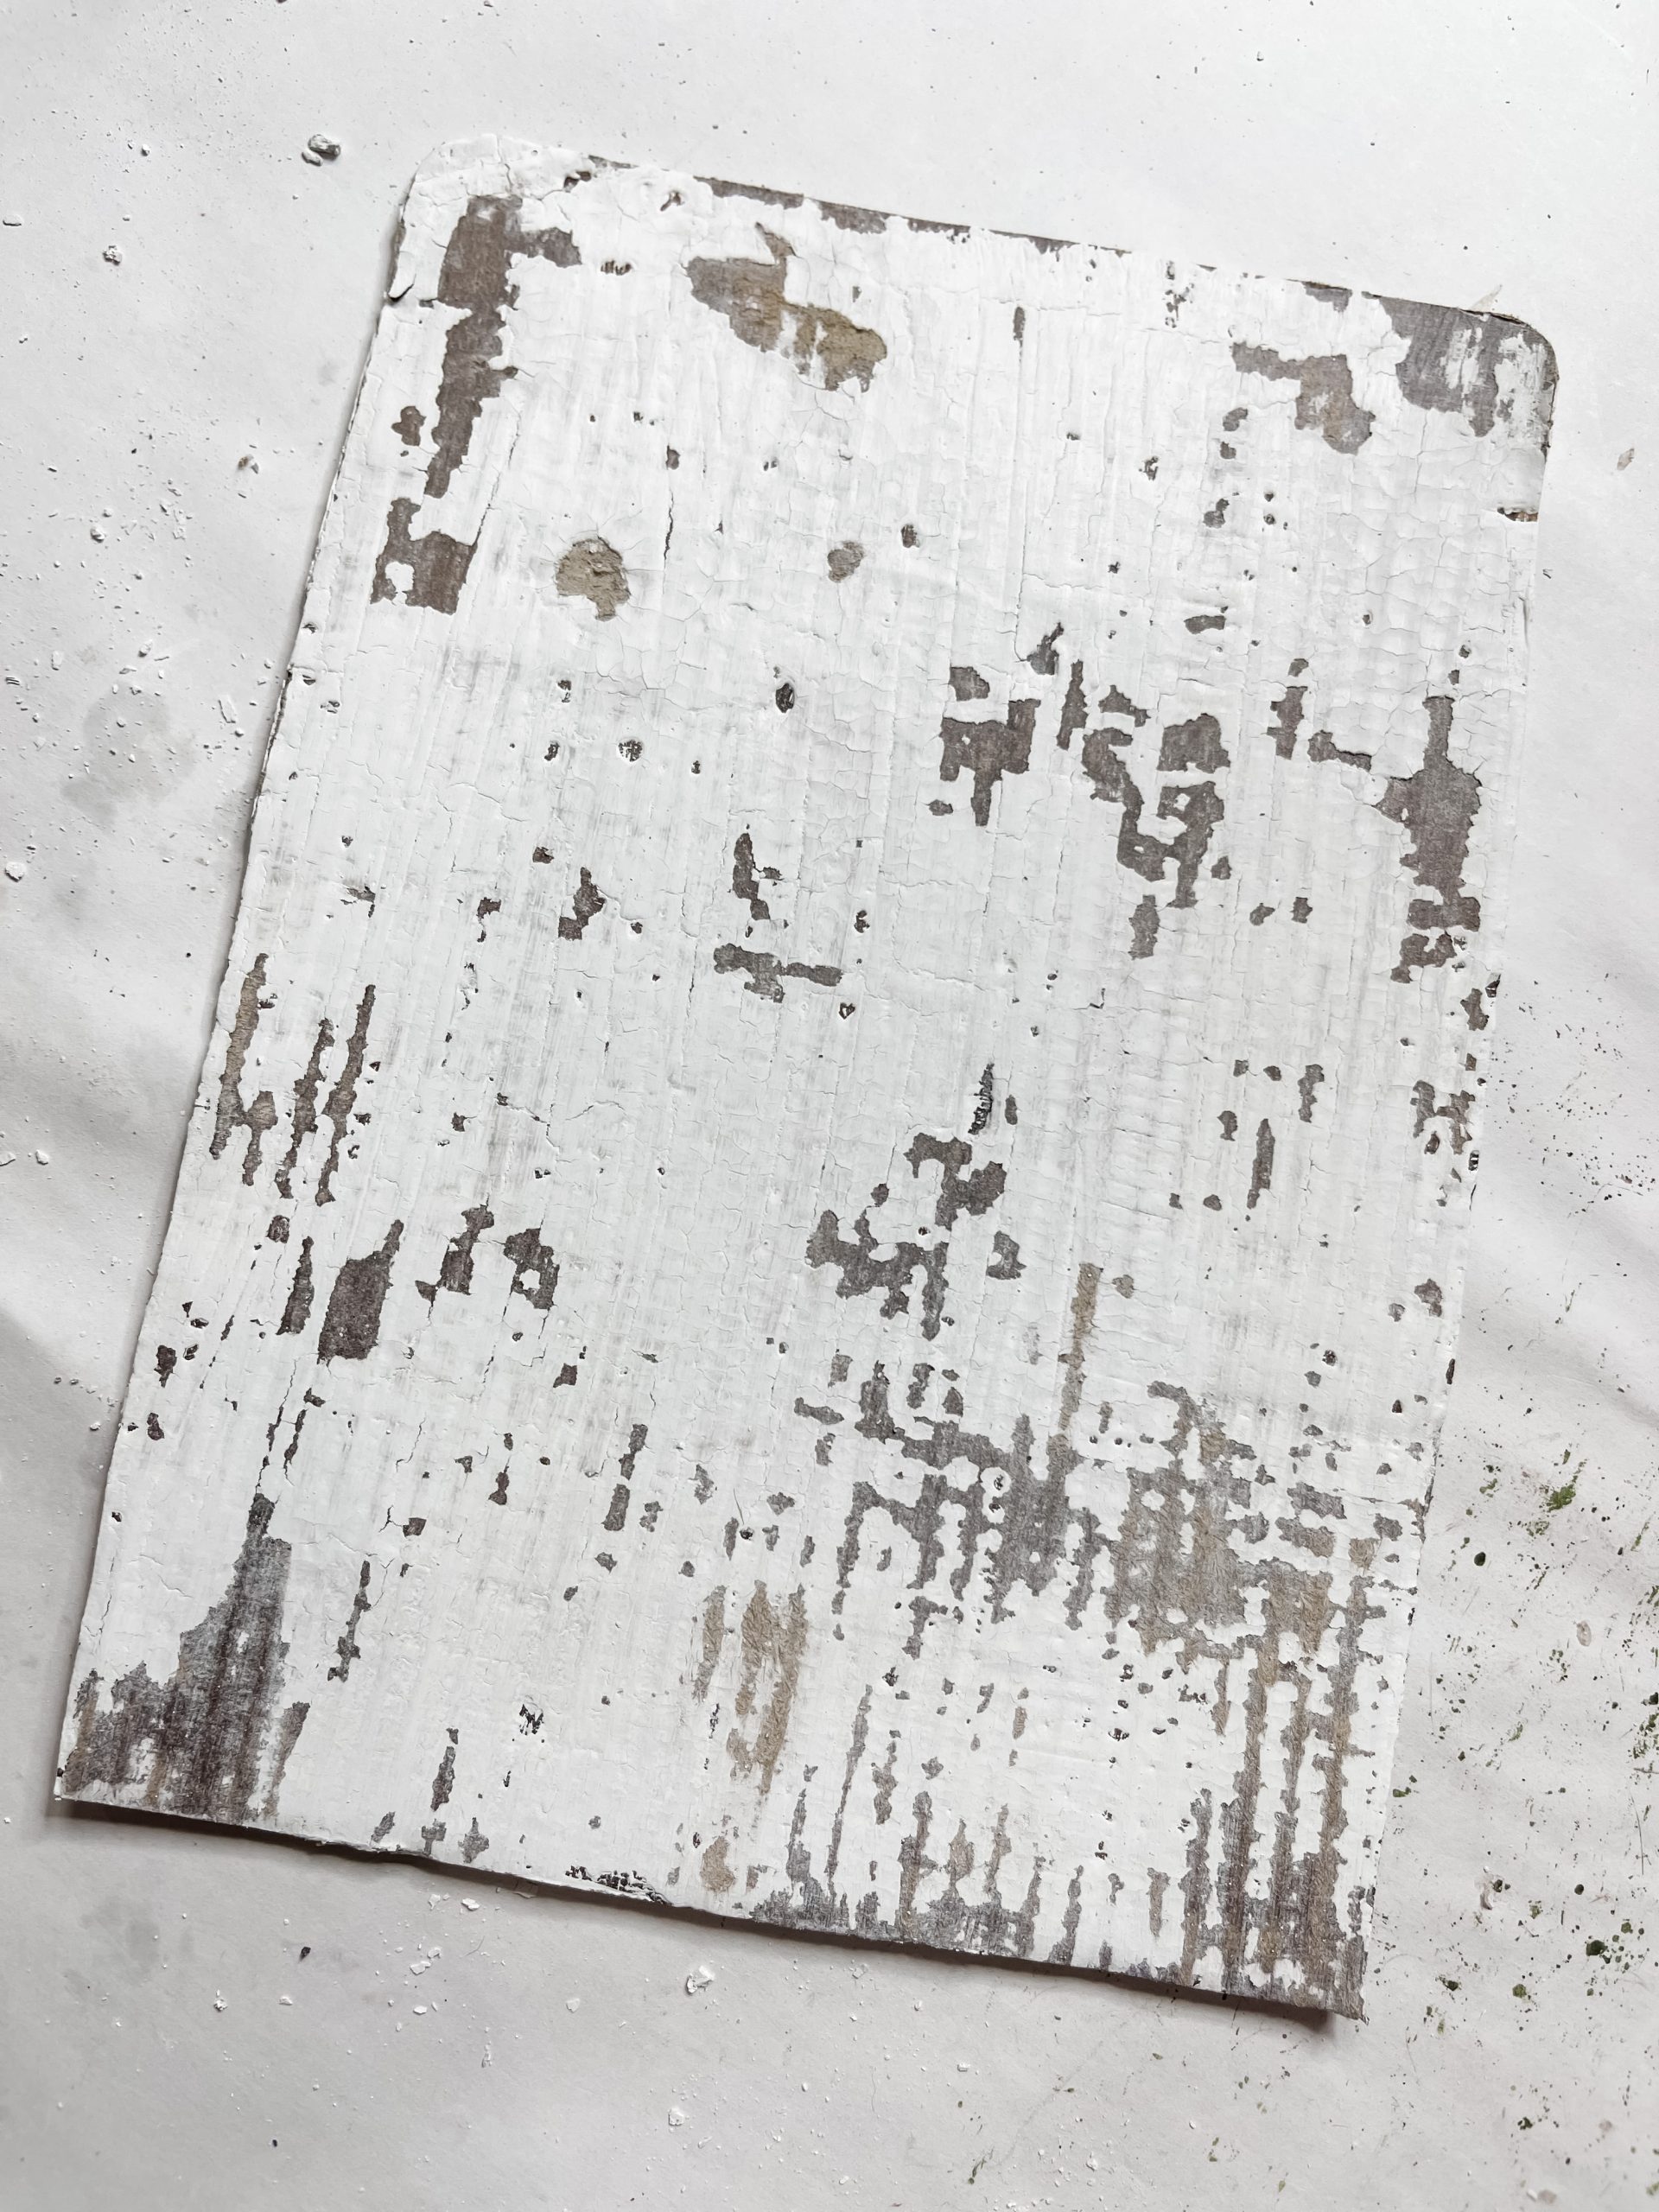
Drag your putty knife across the cutting board in straight lines and you’ll see that it pulls up the jelly and wet paint to expose the stained surface below.
Repeat and you’ll see that as the paint and petroleum jelly mix and the paint dries, it creates the chippy finish!
Happy Holidays
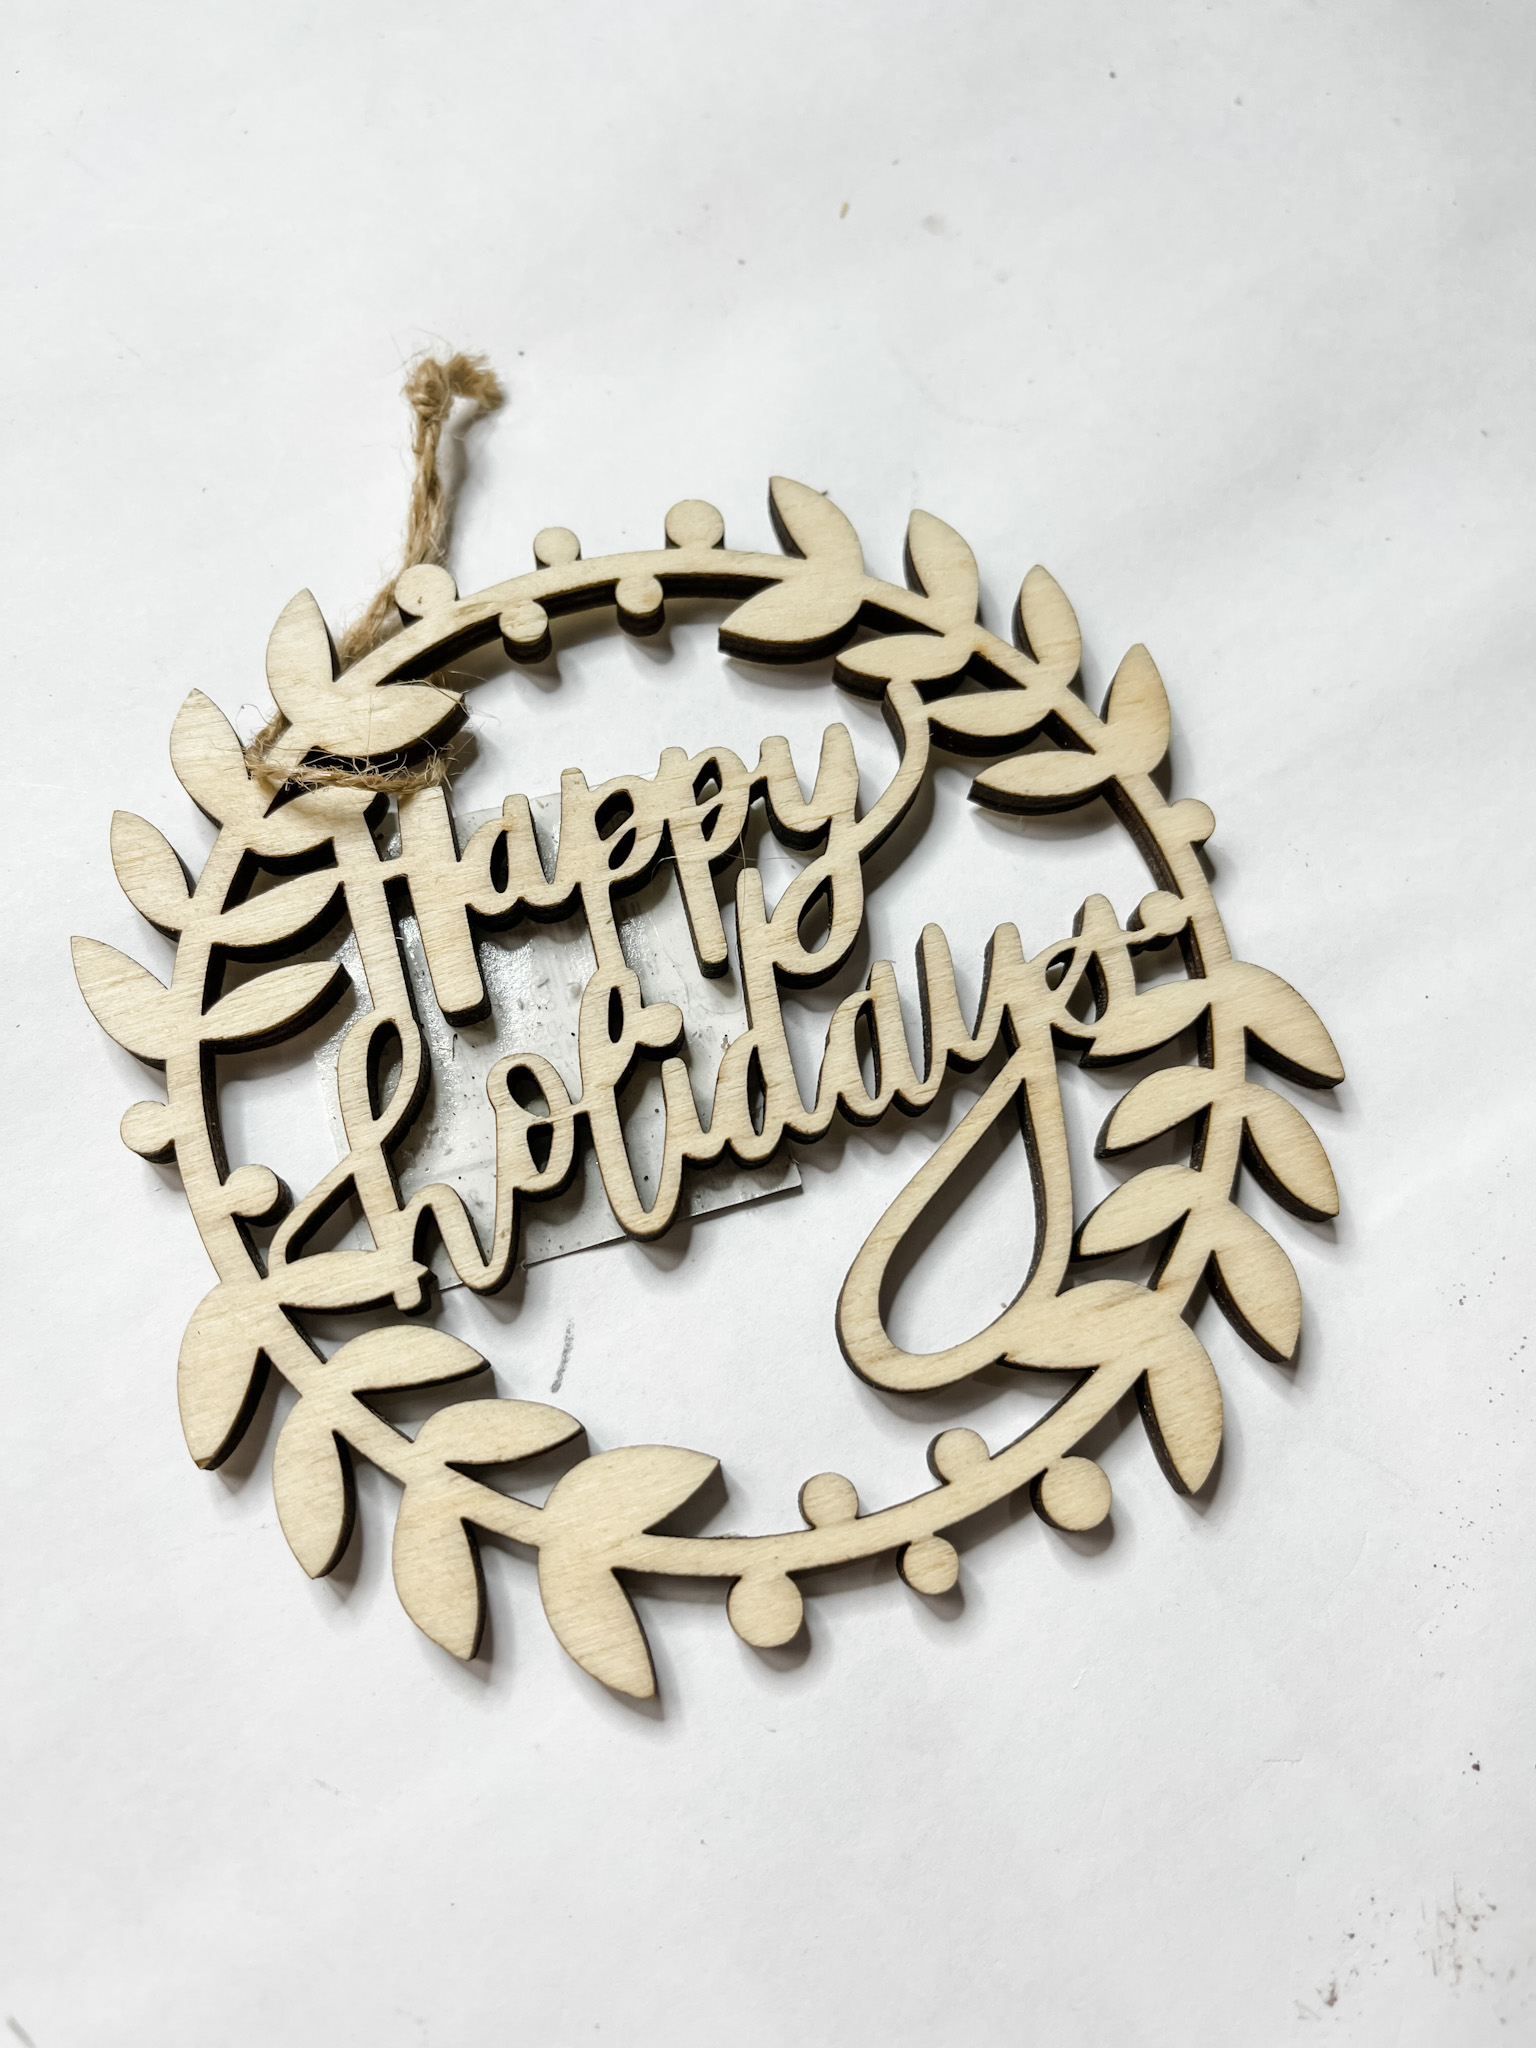
Next up is the happy holidays wood ornament! You can paint and decorate yours however you want, or substitute it with a different ornament.
I painted the wreath around the words with Craftsmart Olive Green paint, the small circles with Craftsmart Holiday Red paint, and the words with Apple Barrel black paint.
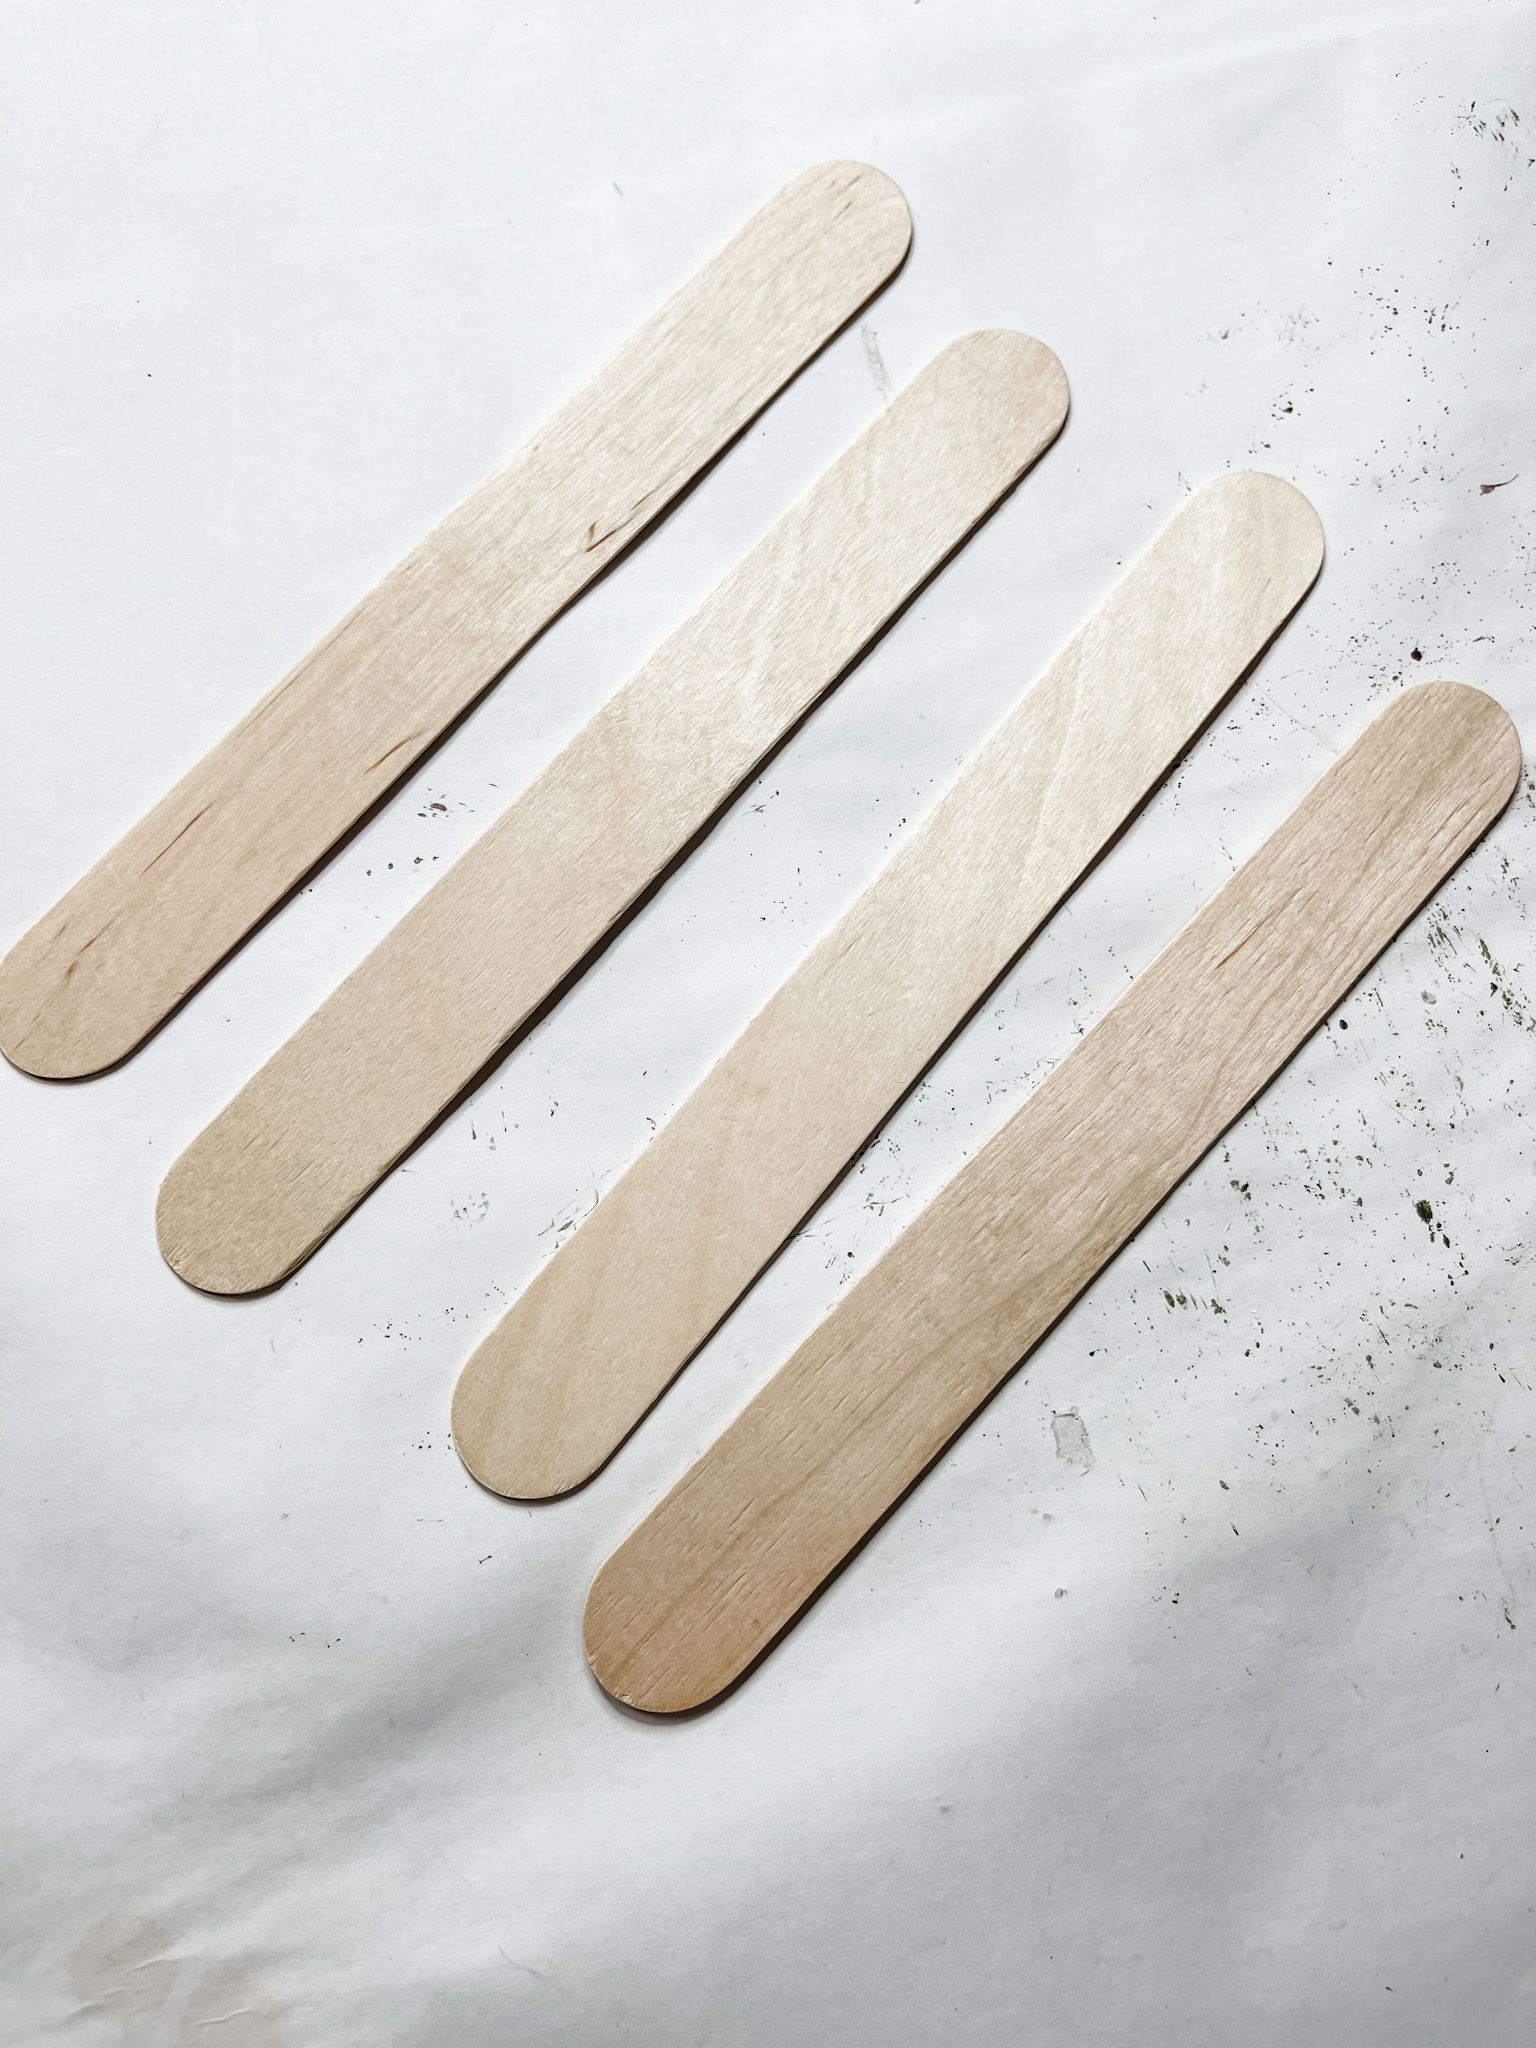
Let the paint dry. In the meantime, go ahead and stain four of the quart paint sticks with the same technique you used to stain the bamboo cutting board. Allow them to dry as well.
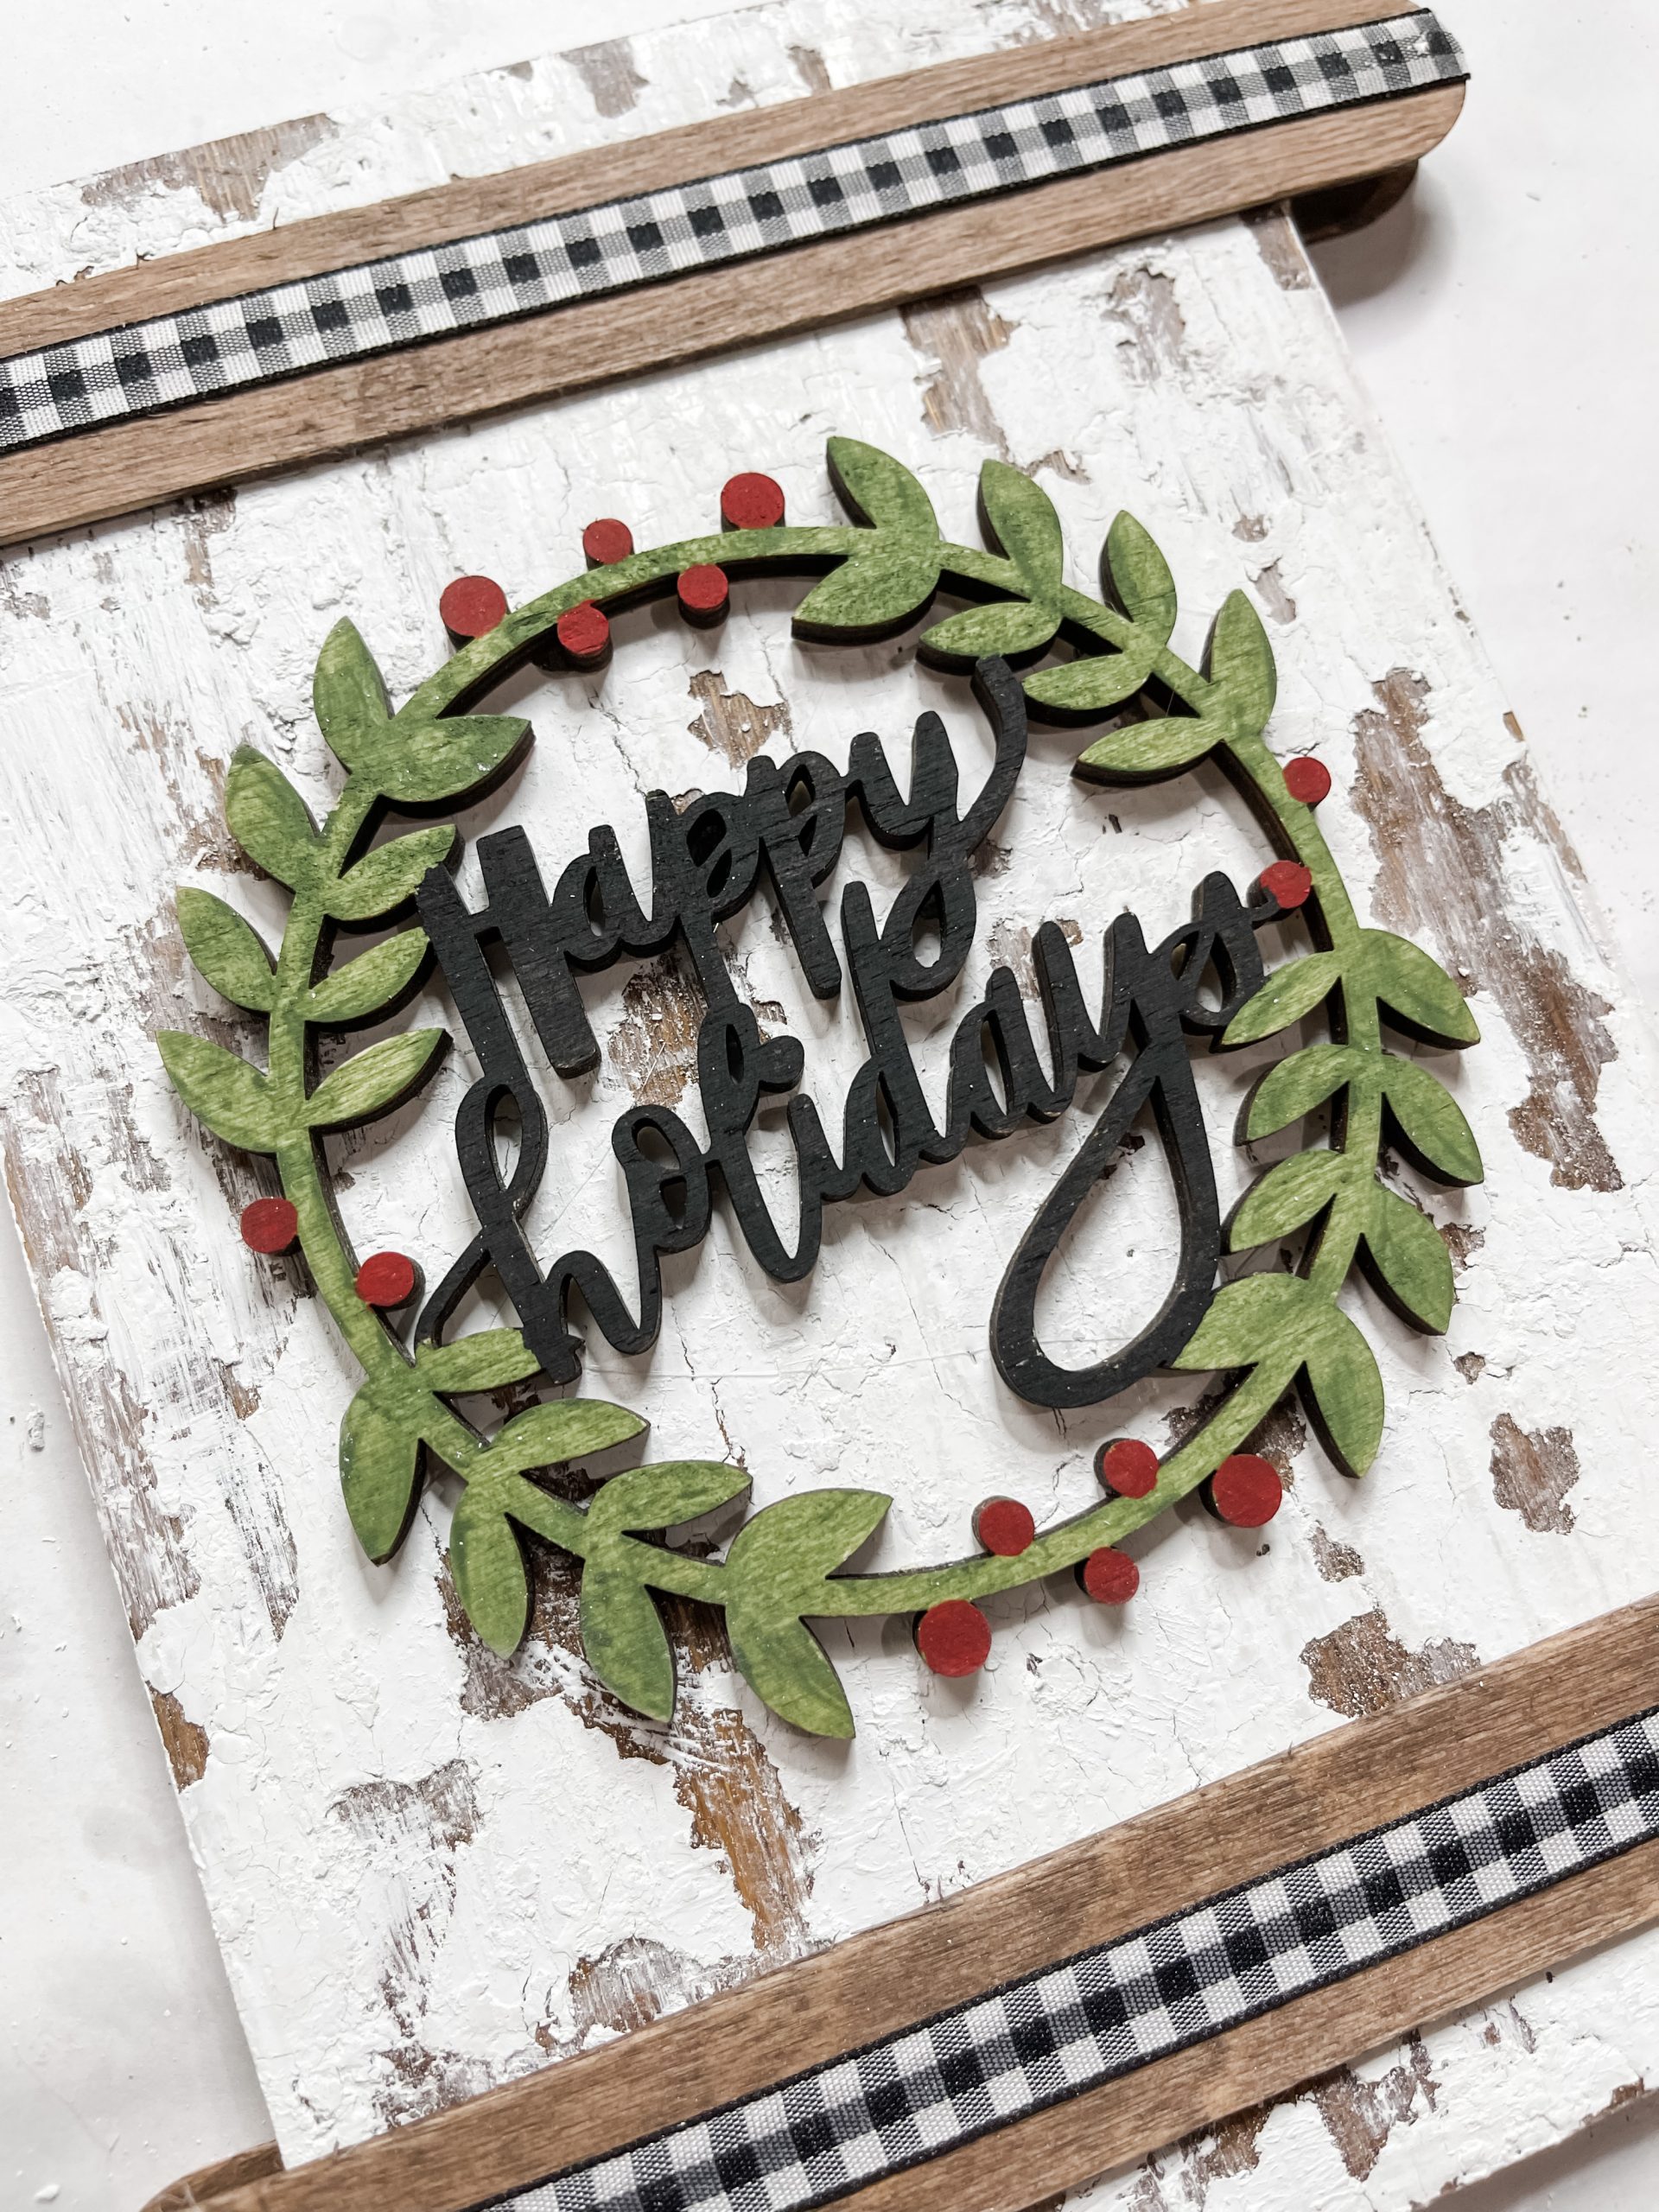
Bring it all together
Once everything is dry, you can start assembling your farmhouse happy holidays sign! Start by hot gluing the stained quart paint sticks across the top and bottom of the cutting board on the front and back.
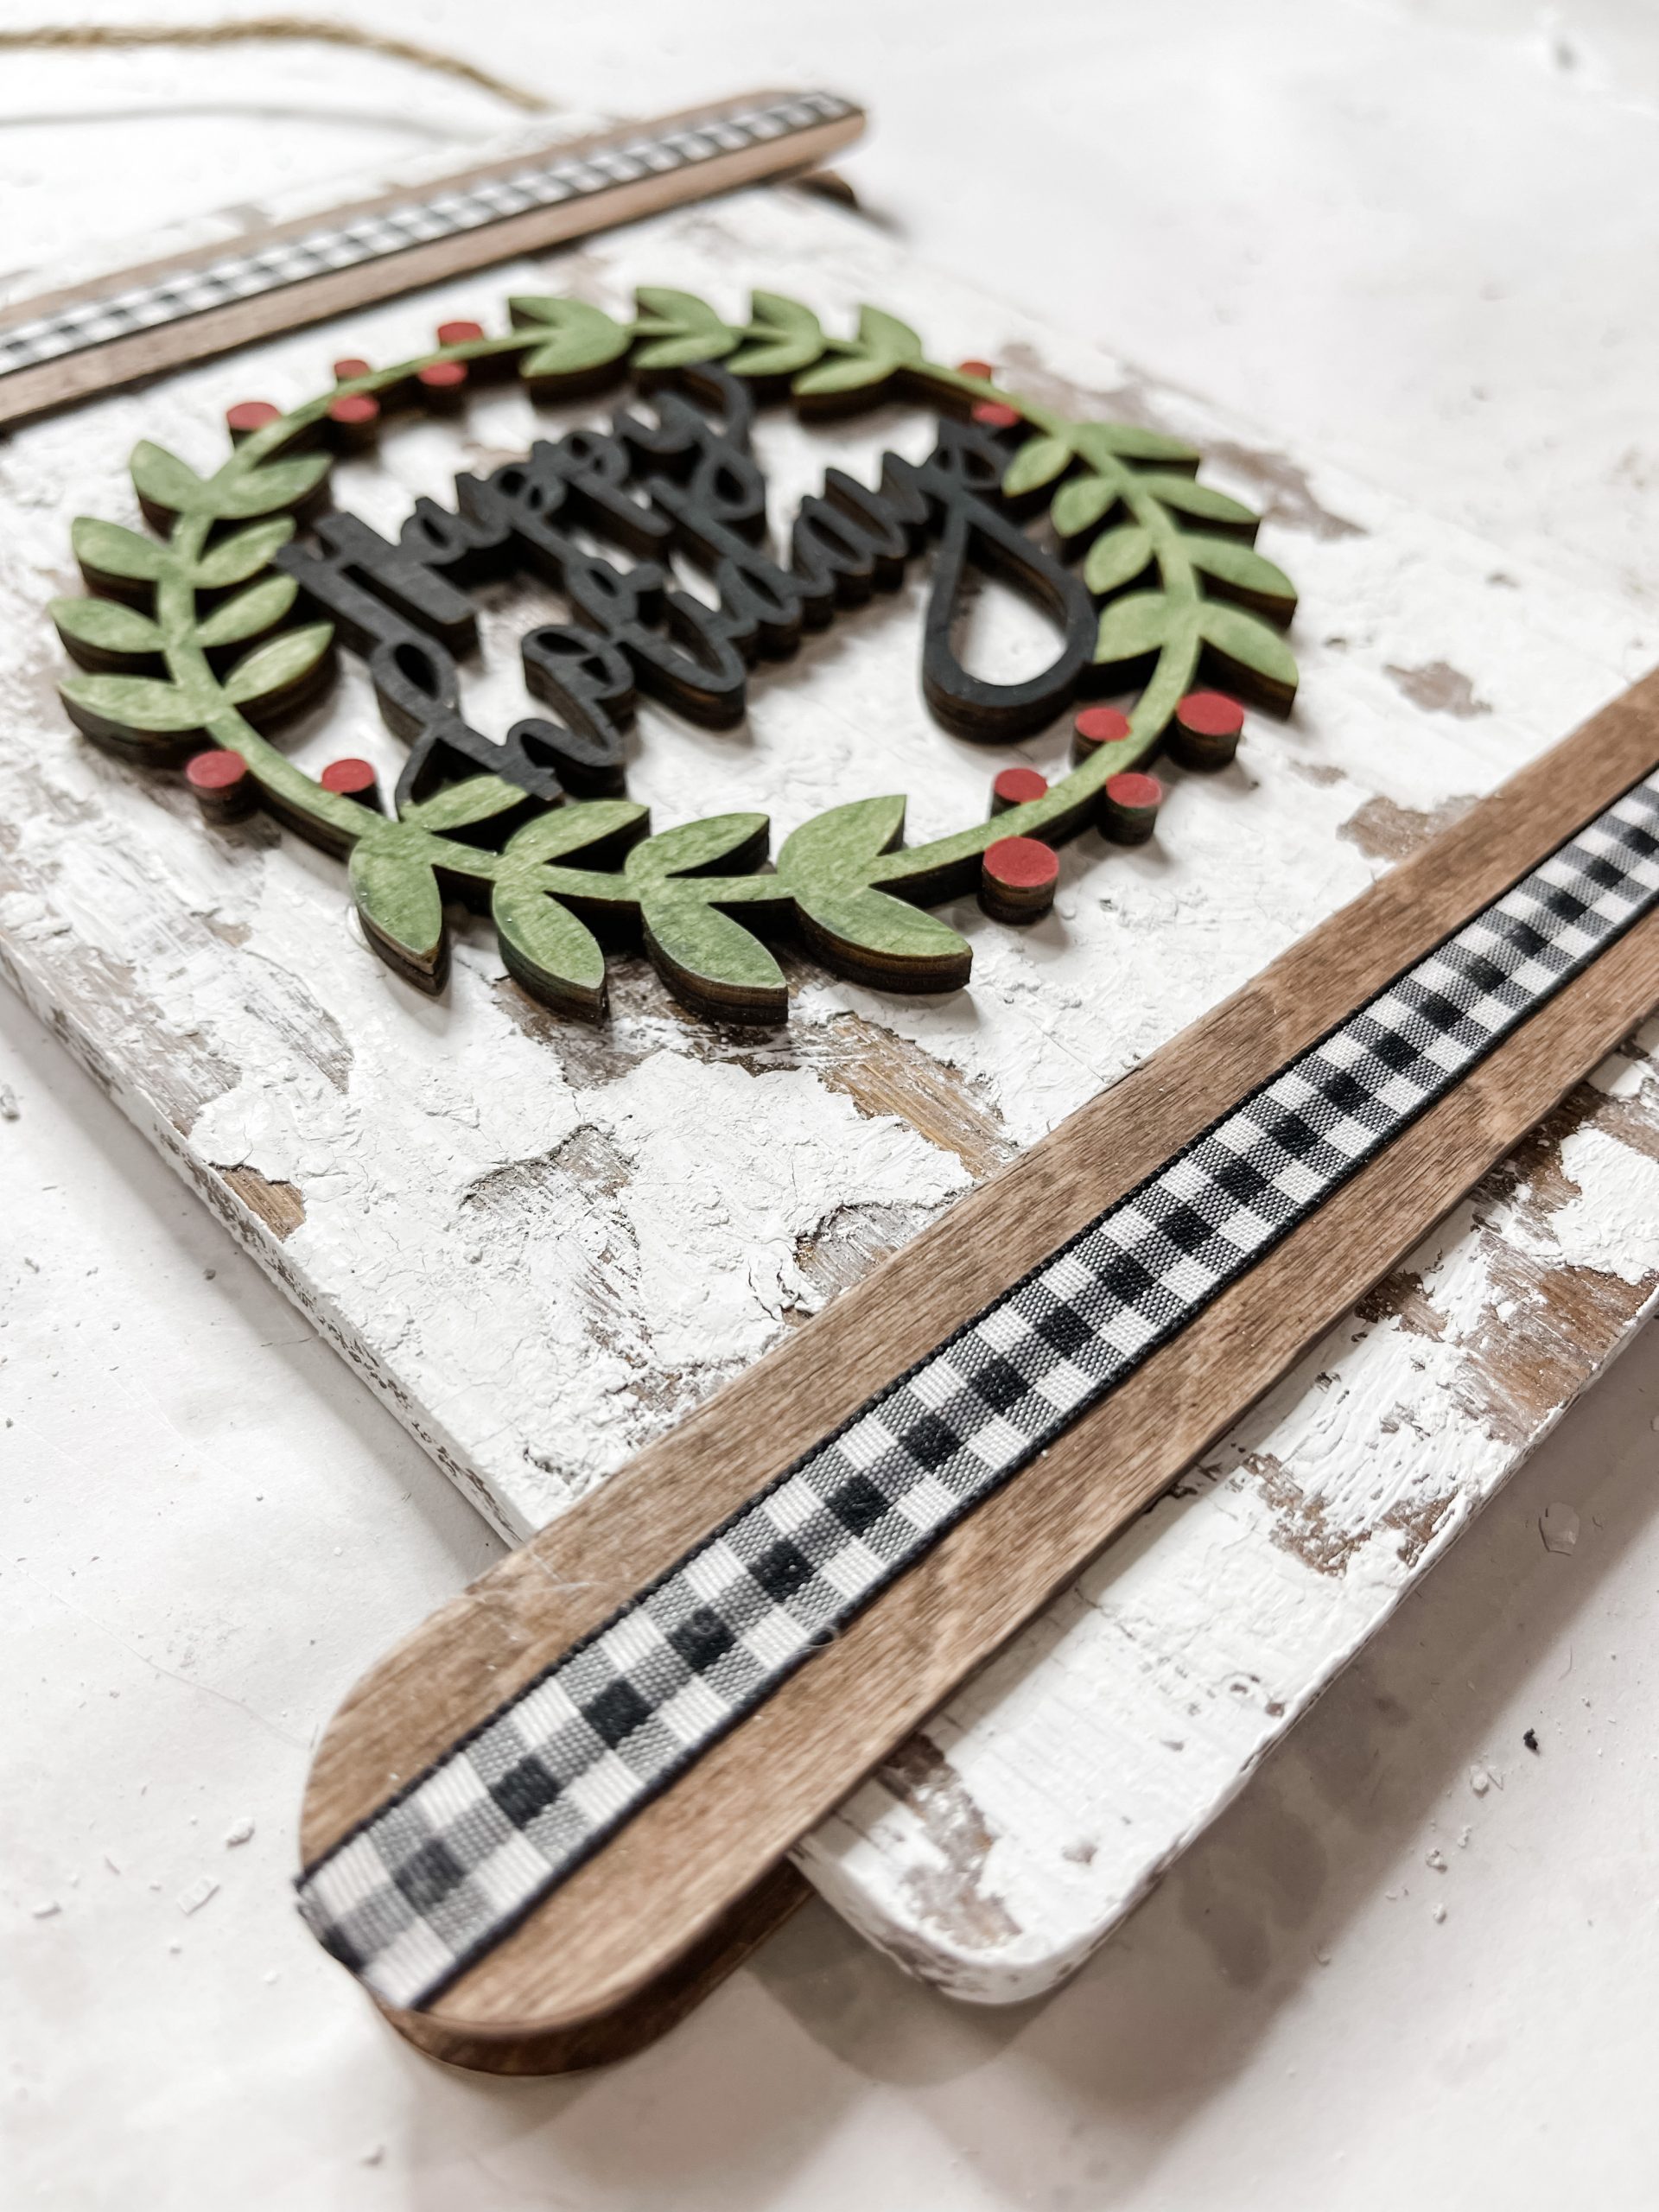
Then, hot glue the painted happy holidays ornament in the middle of the cutting board and hot glue a strip of buffalo check ribbon across each of the paint sticks on the front of the board.
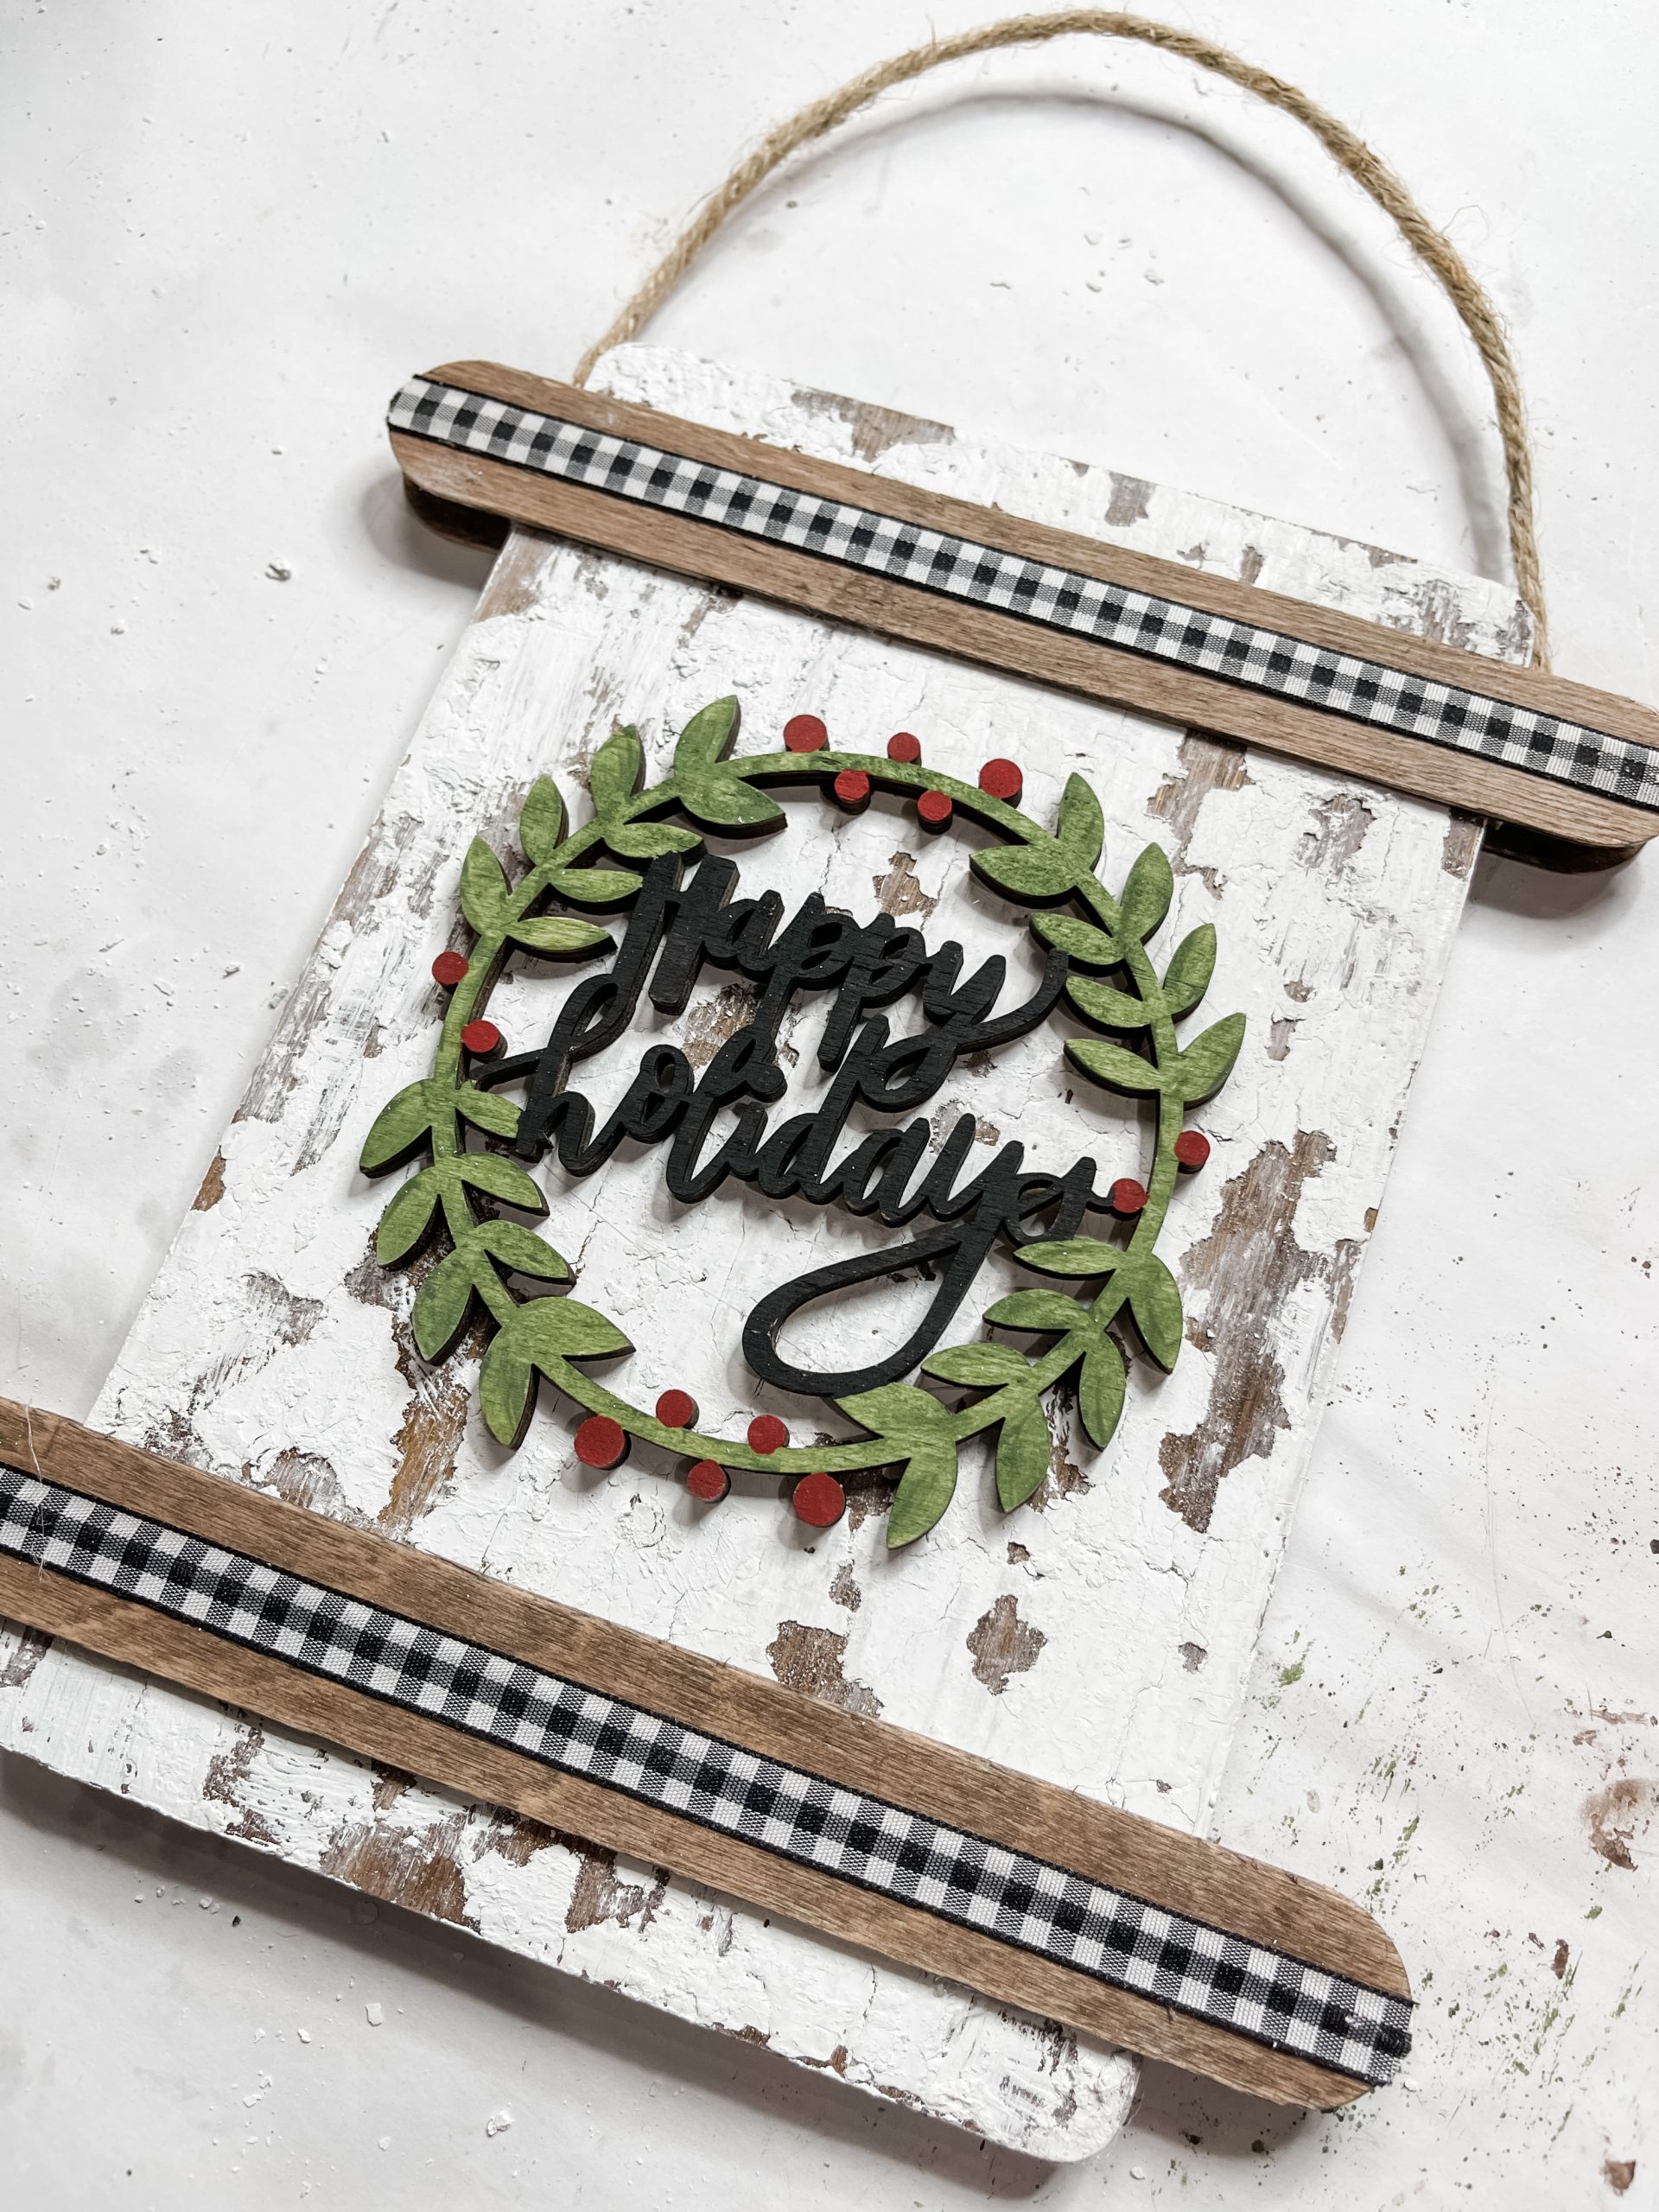
Lastly, hot glue a piece of Dollar Tree wired jute cord at the top of the cutting board to make the hanger for your farmhouse happy holidays sign!
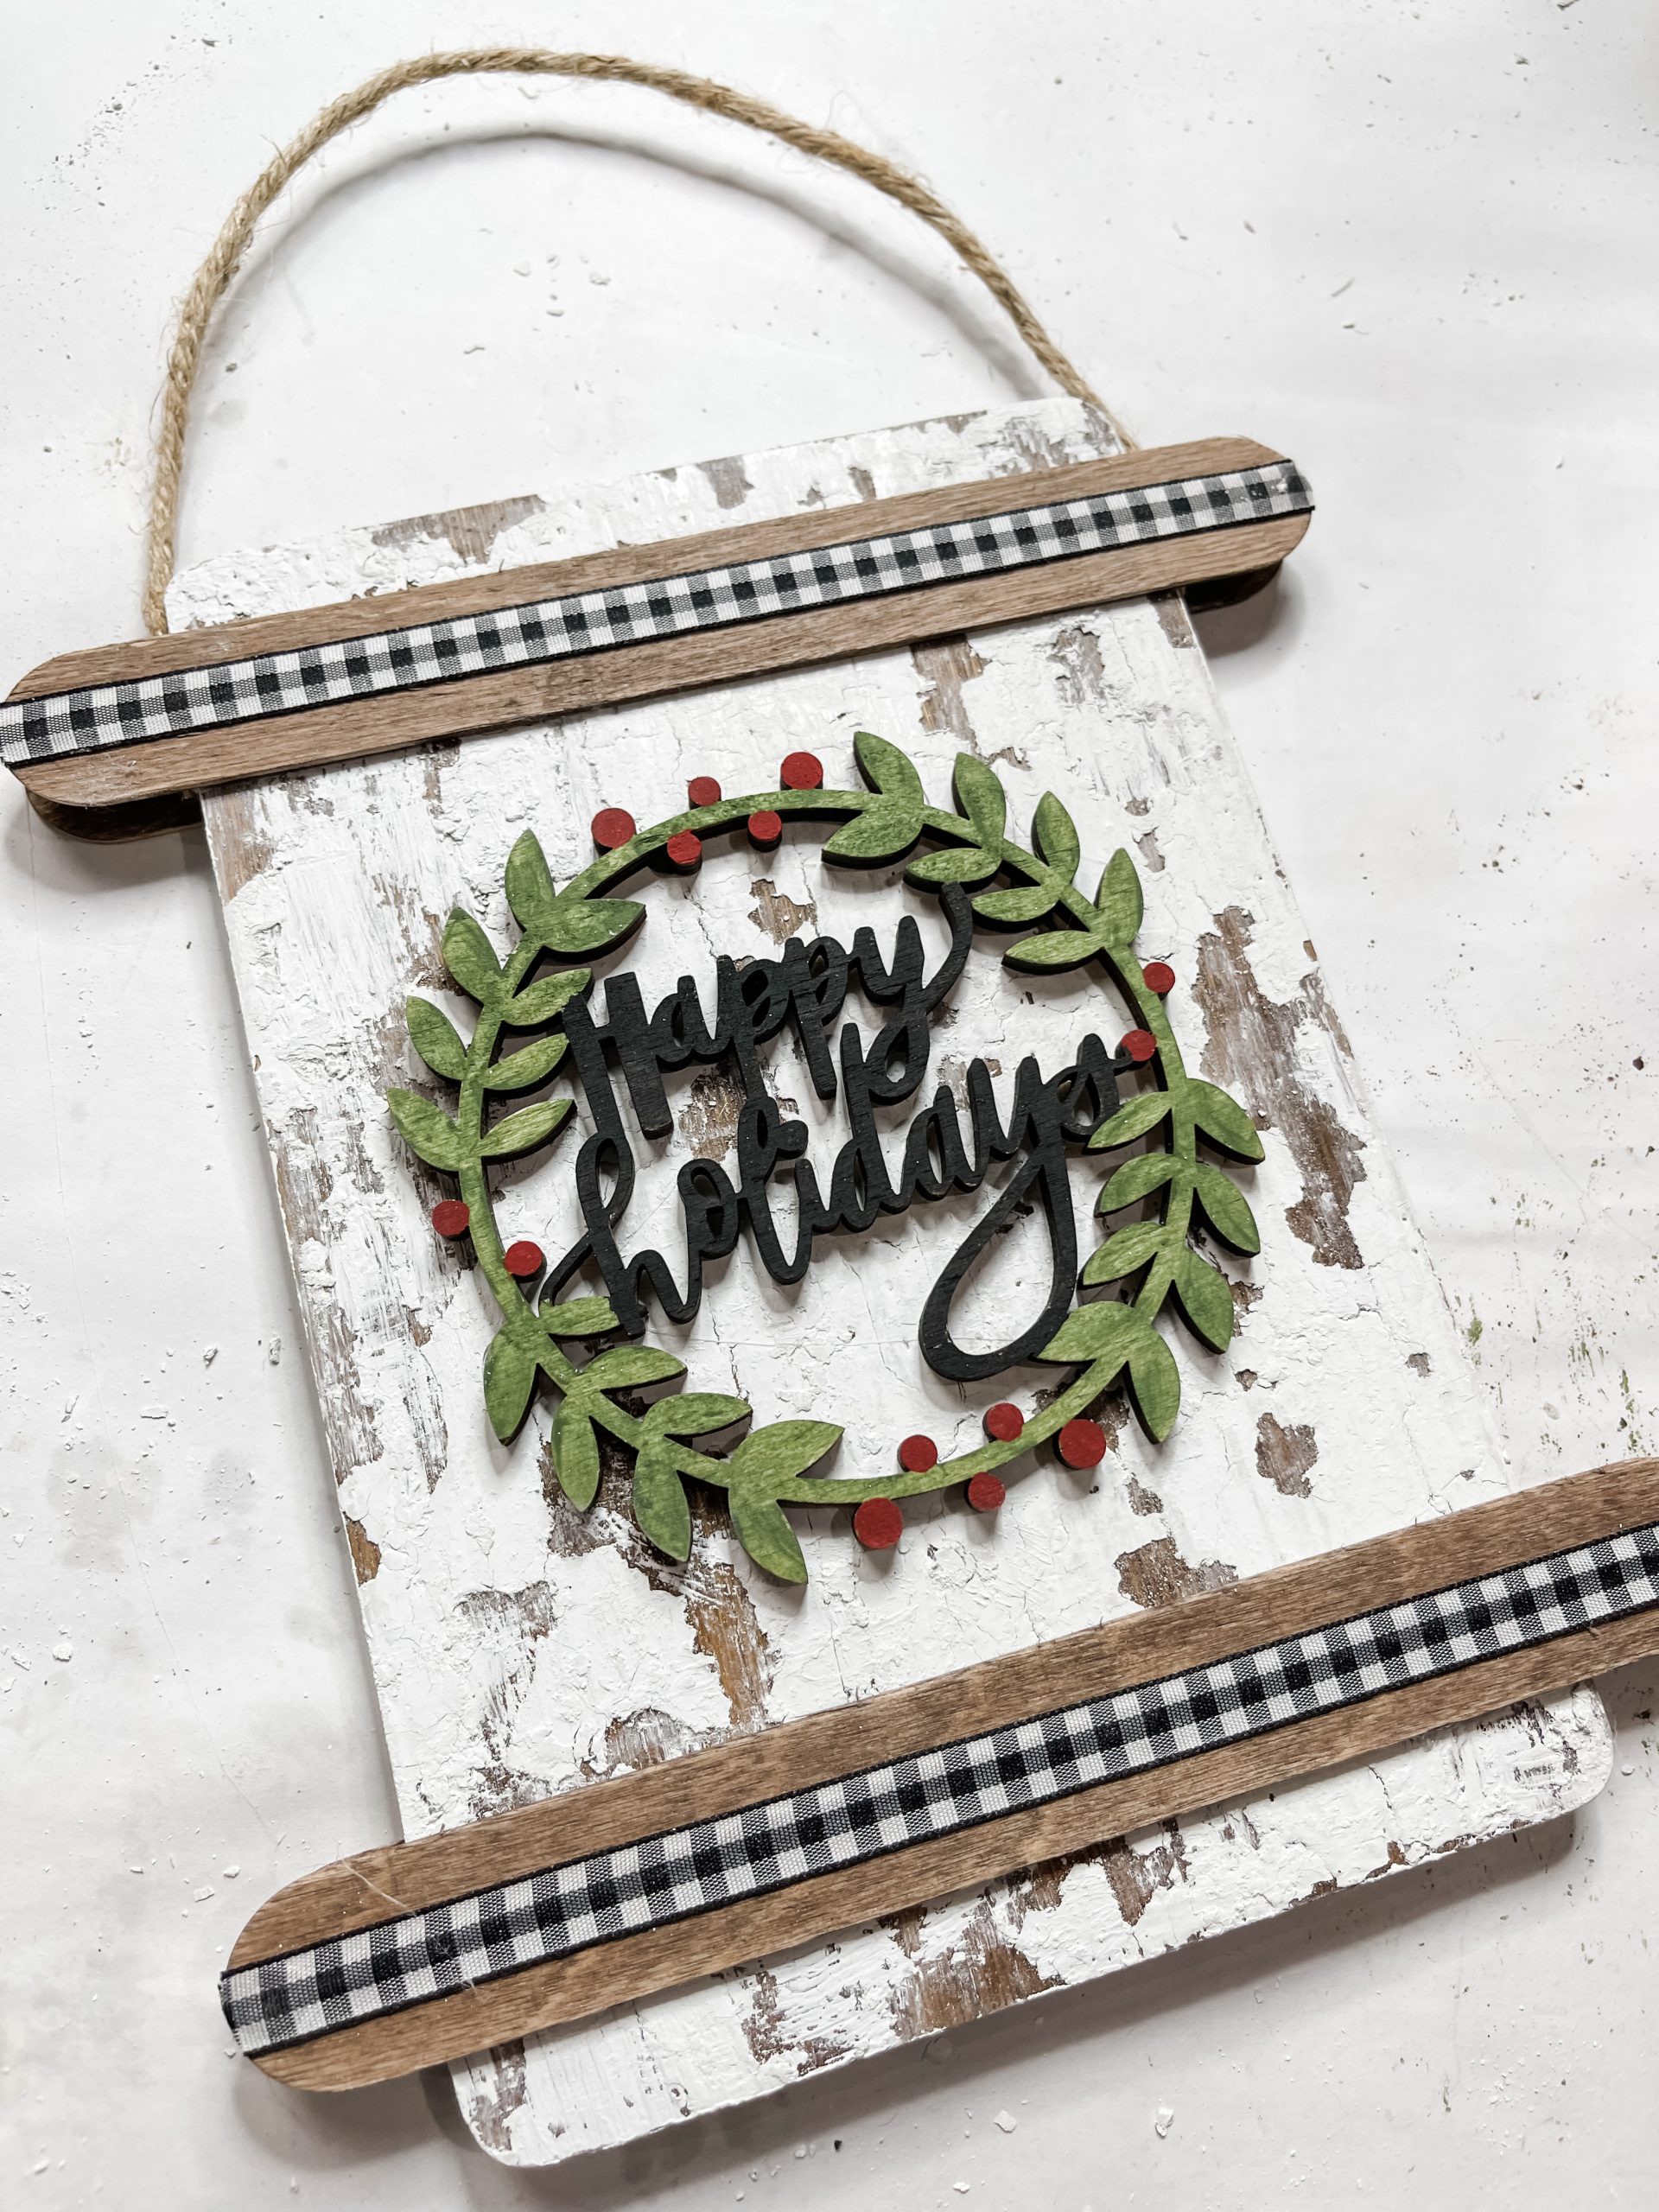
I hope you enjoyed this Farmhouse Happy Holidays Sign as much as I did and decide to make it for yourself! I would love to see how yours turns out!
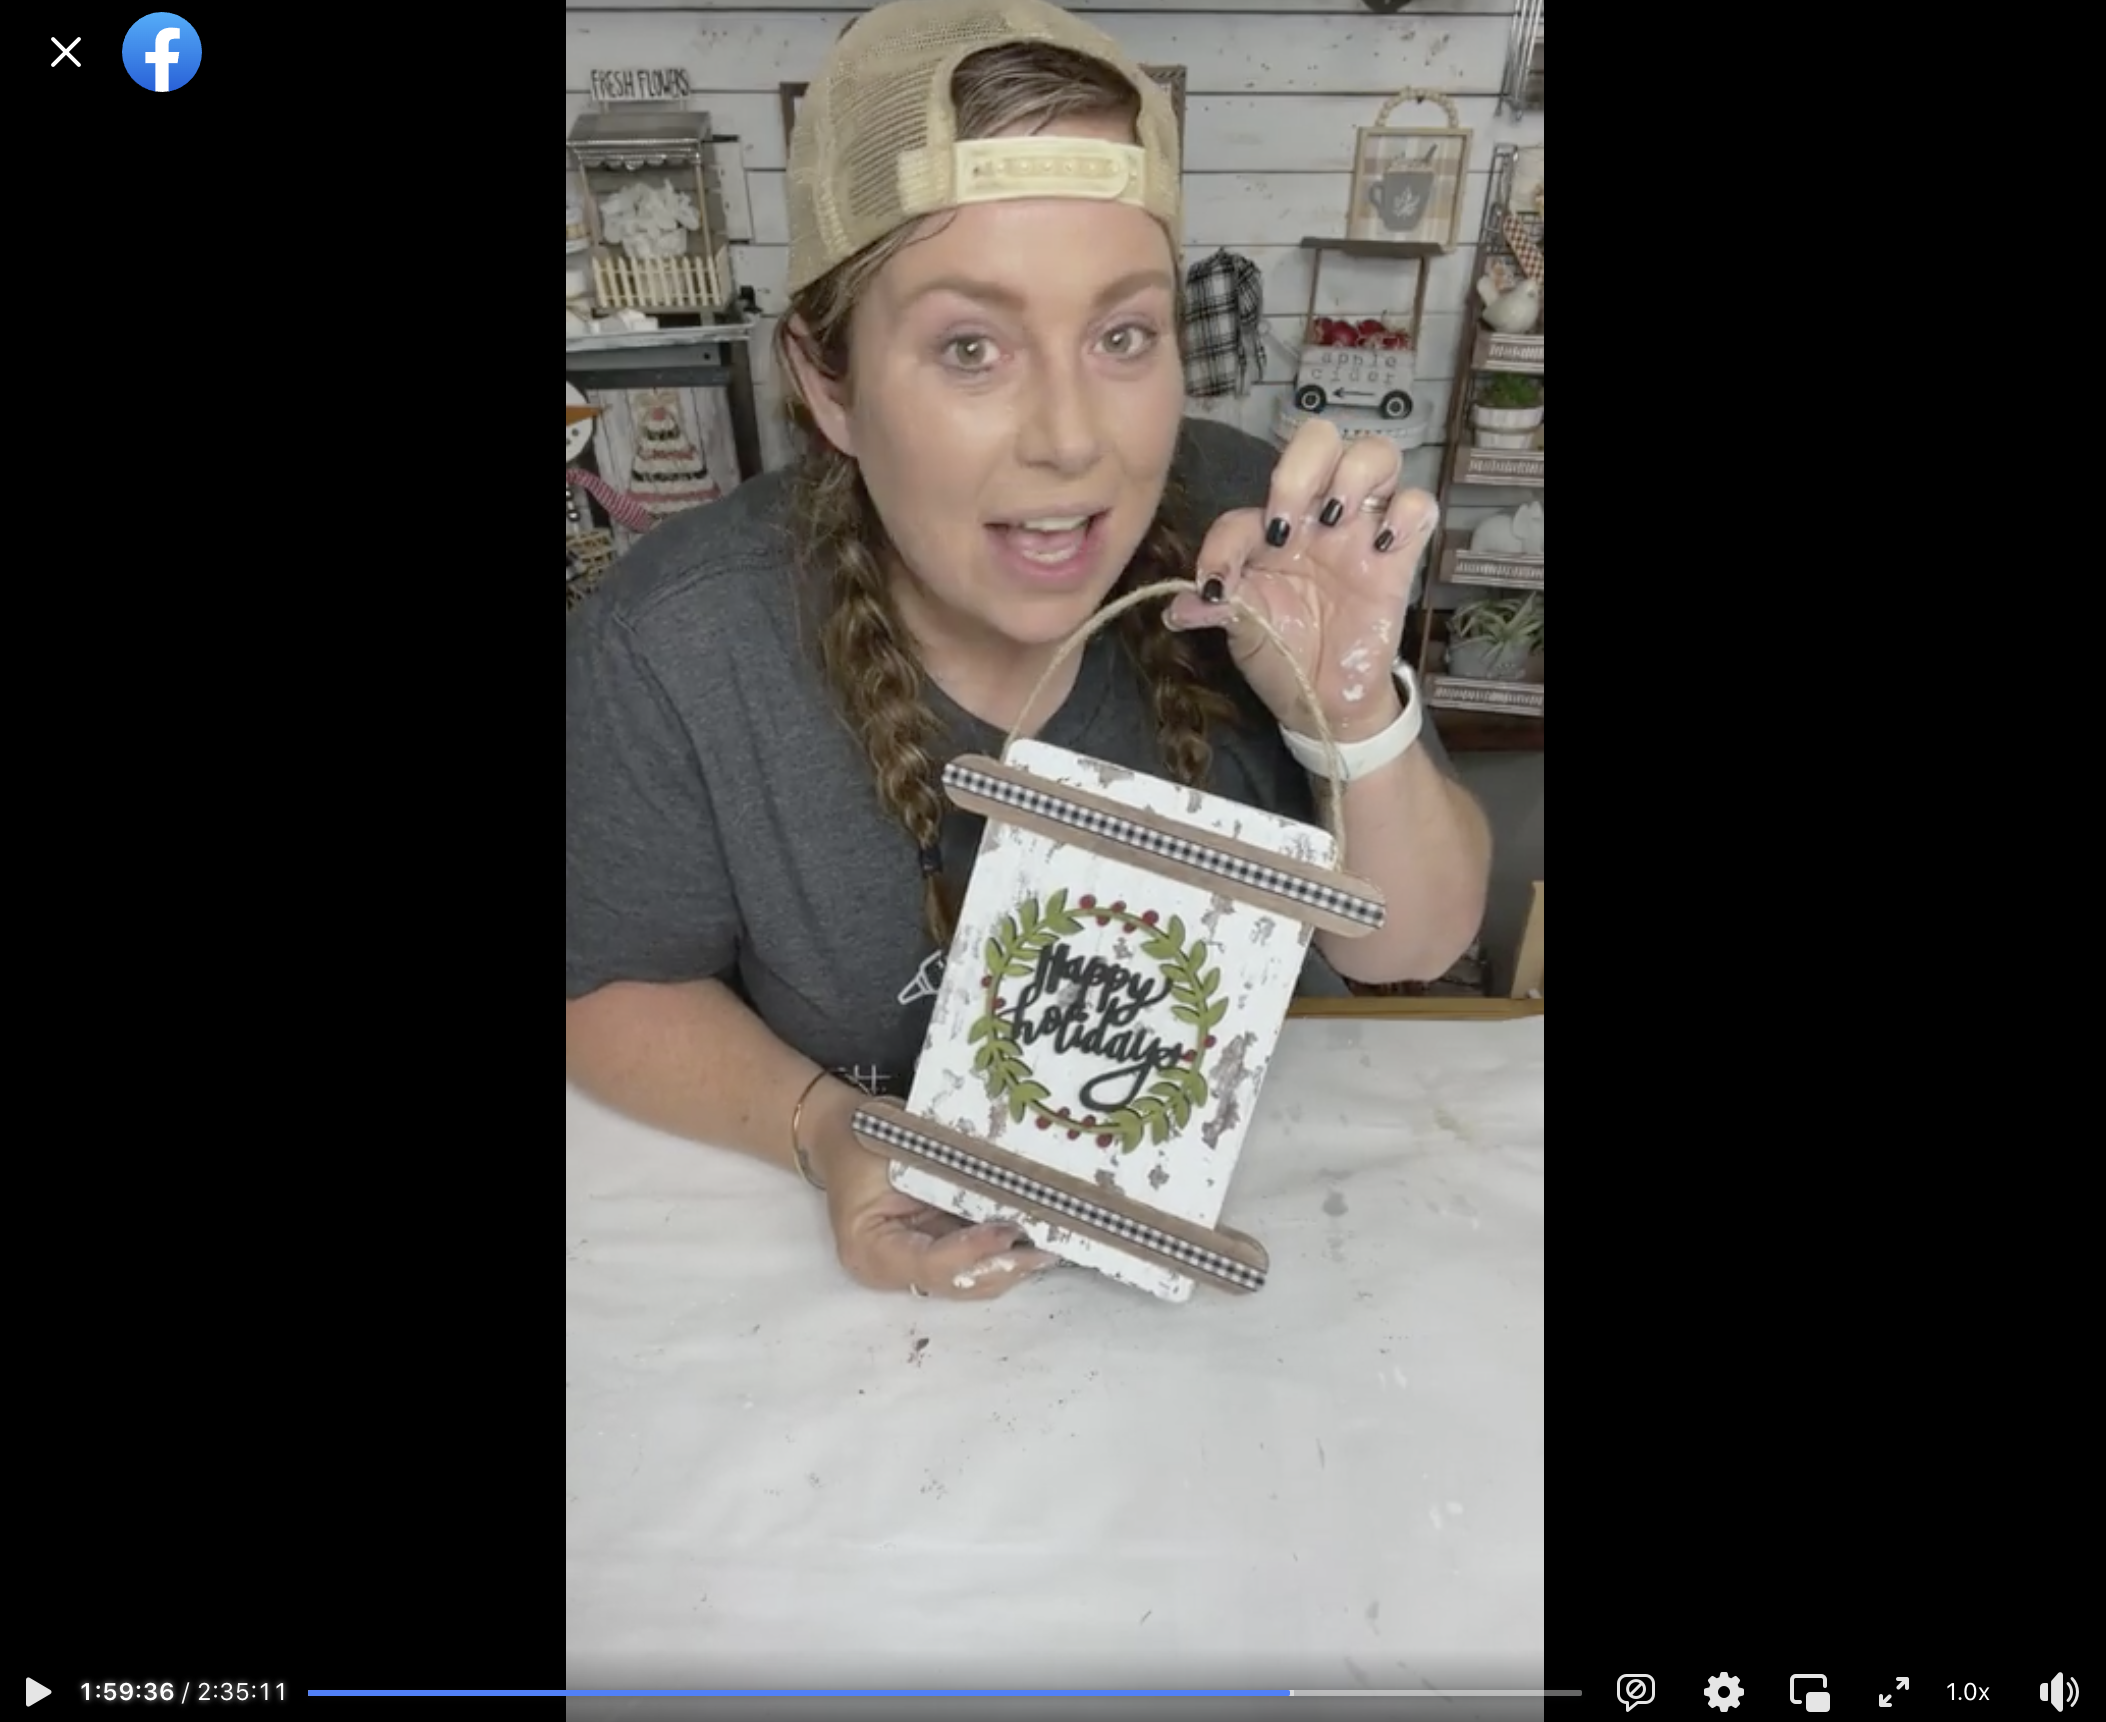
Watch the DIY tutorial
I recorded how to make this super cute Farmhouse Happy Holidays Sign during a LIVE video on my Facebook page!
If you want to see the DIY process, craft along, or just join in on the fun conversations, you can watch the DIY tutorial replay on Facebook!
For this project, I will be using these items but you can substitute where you want.
“As an Amazon Associate, I earn from qualifying purchases.”
- Artminds Happy Holidays Wood Ornament
- Dollar Tree Bamboo cutting board
- Dollar Tree Wired Jute Cord
- Petroleum Jelly
- Buffalo Check Ribbon
- Quart Paint Sticks
- Black Paint
- Red Paint
- Green Paint
- Brown Paint
- White Paint
- Putty Knife
- Glue Gun
- Heat gun
You should totally join my FREE Facebook group called On A Budget Crafts! It is a judgment-free community for DIY crafters to show off their projects and ideas.
If you loved this DIY you might also like this DIY Christmas Tree Shelf Decor!
Thanks for stopping by! XOXO Amber
You can also shop my ENTIRE AMAZON Favorites shop just click here! It’s packed full of all the things I use and love.
Here is the supply list I highly recommend every creative have on hand!! Would you also pin my blog for later and get on my newsletter alerts? I would love to have you join my #craftycrew.

Join my free “ON A BUDGET CRAFTS” Facebook group!
Love the chippy, super cute