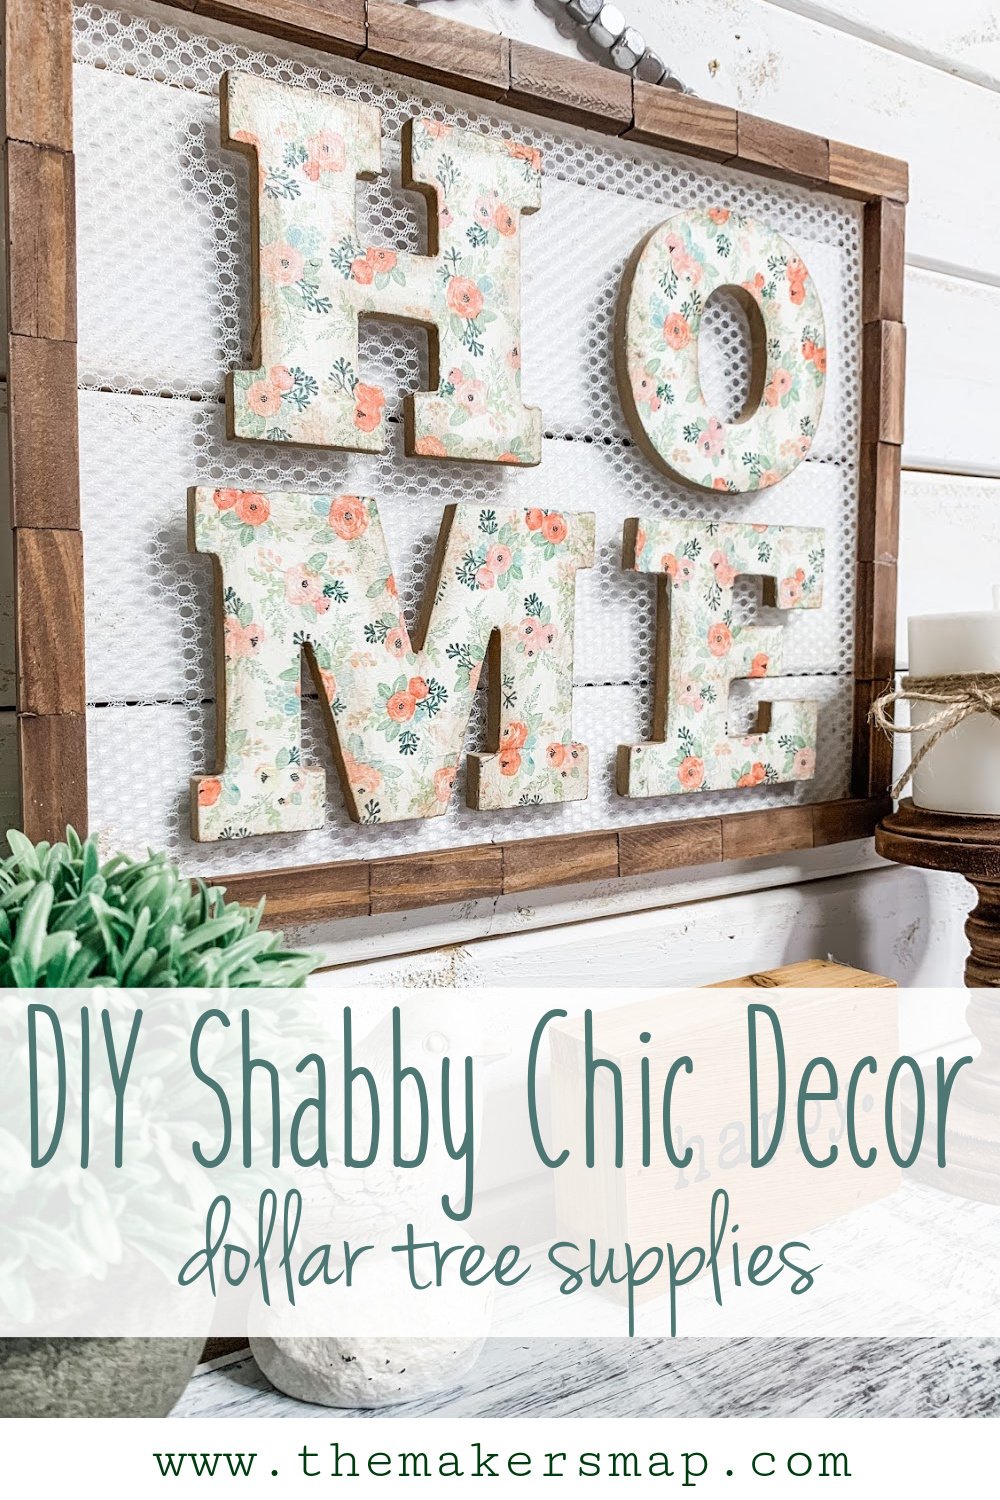
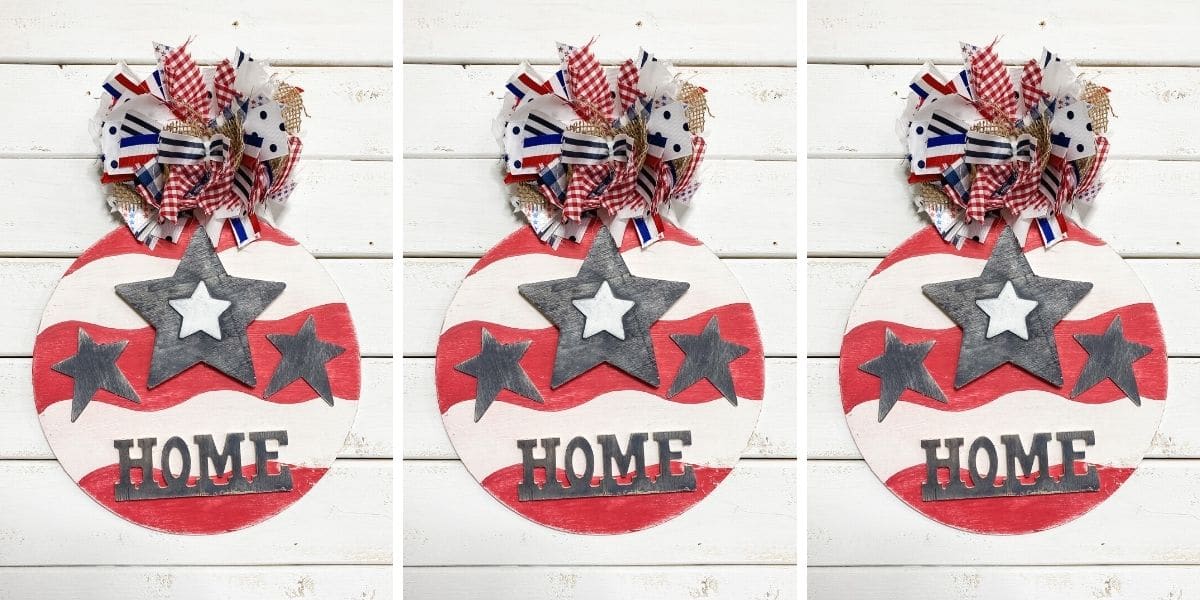
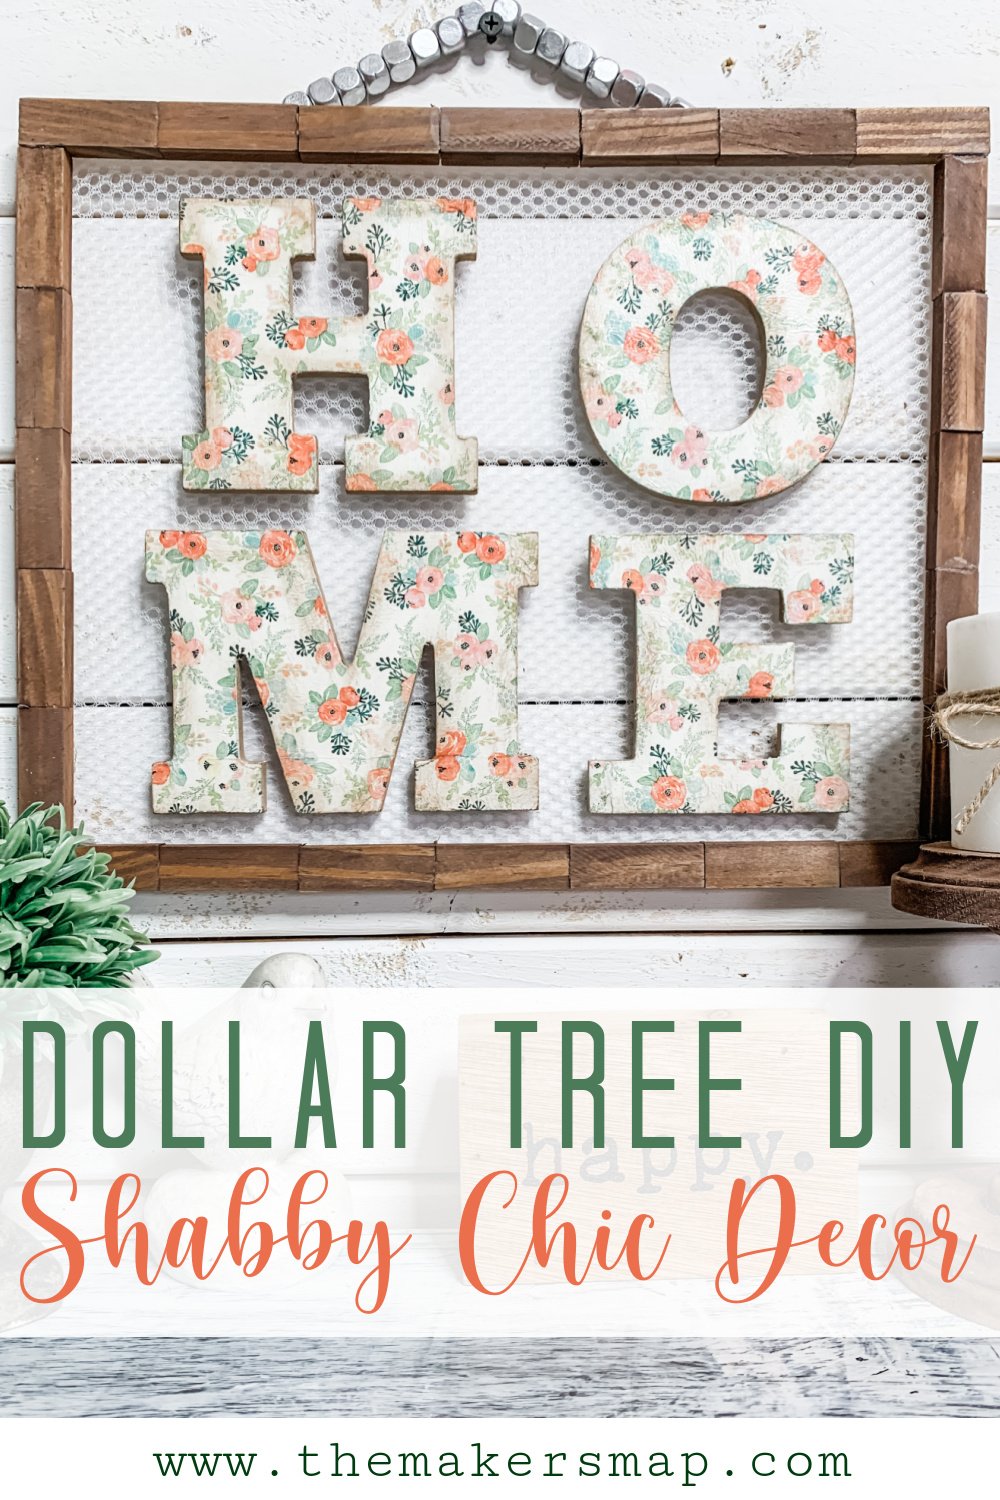
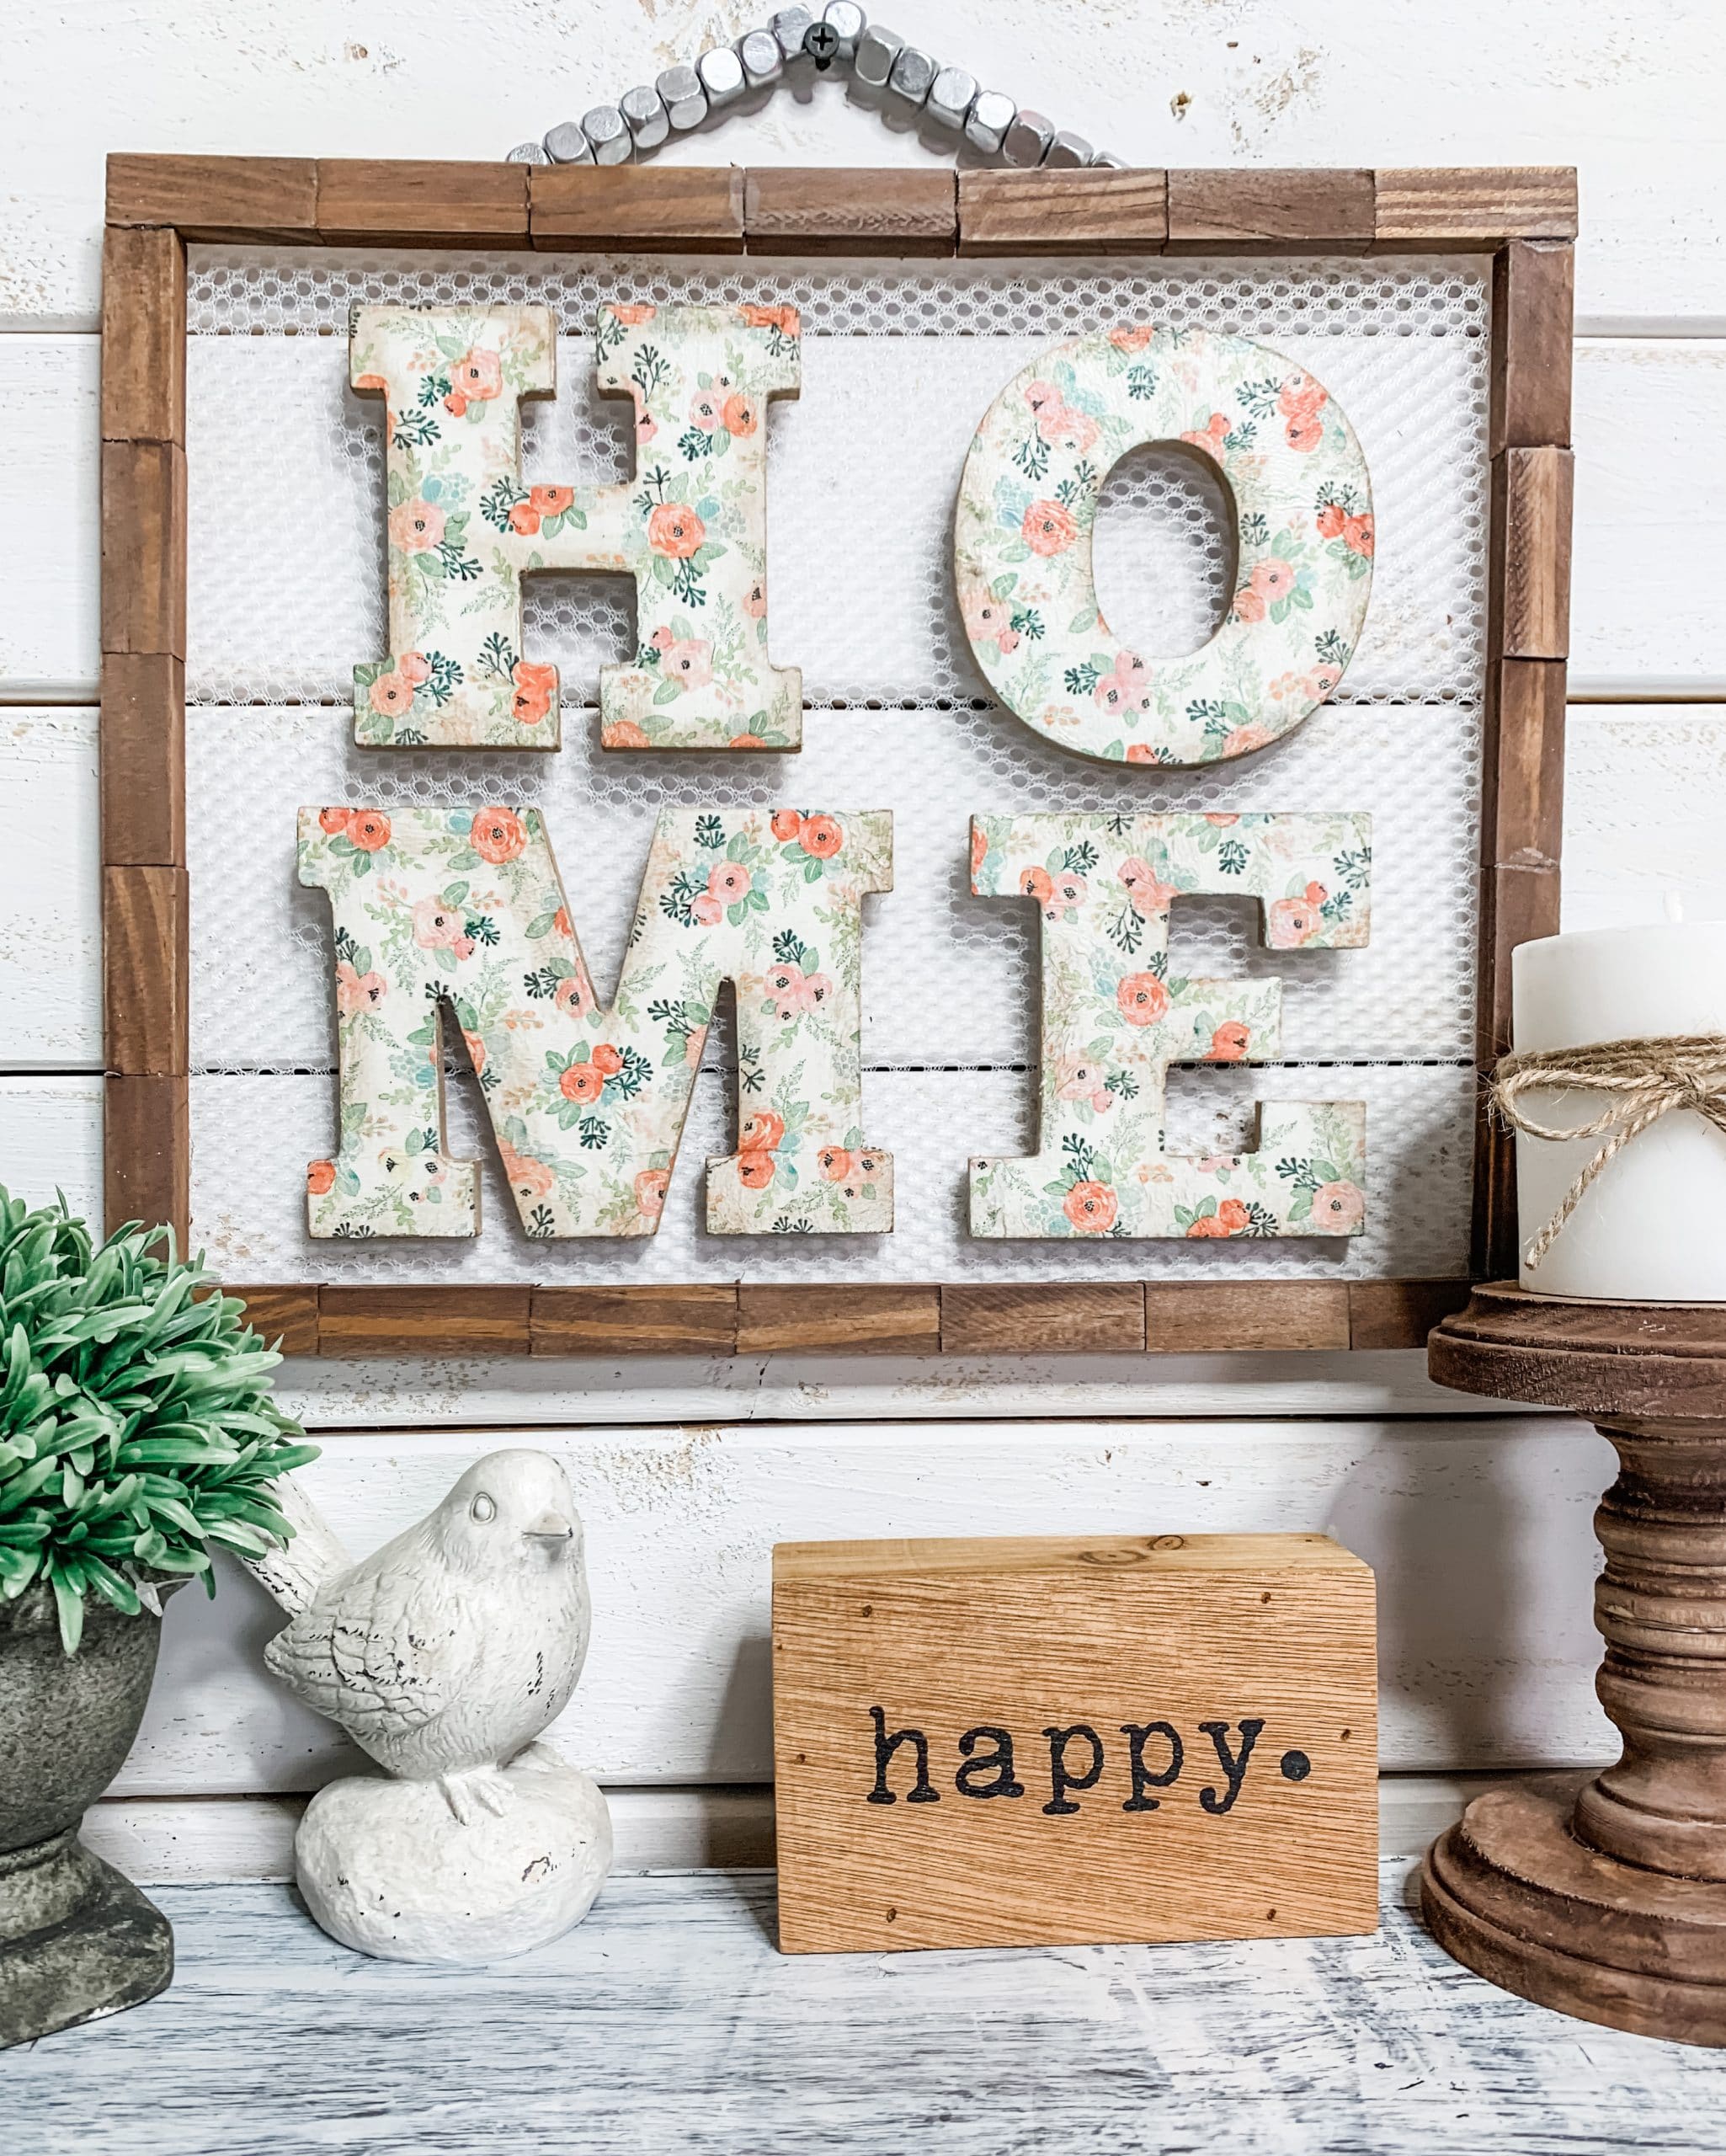
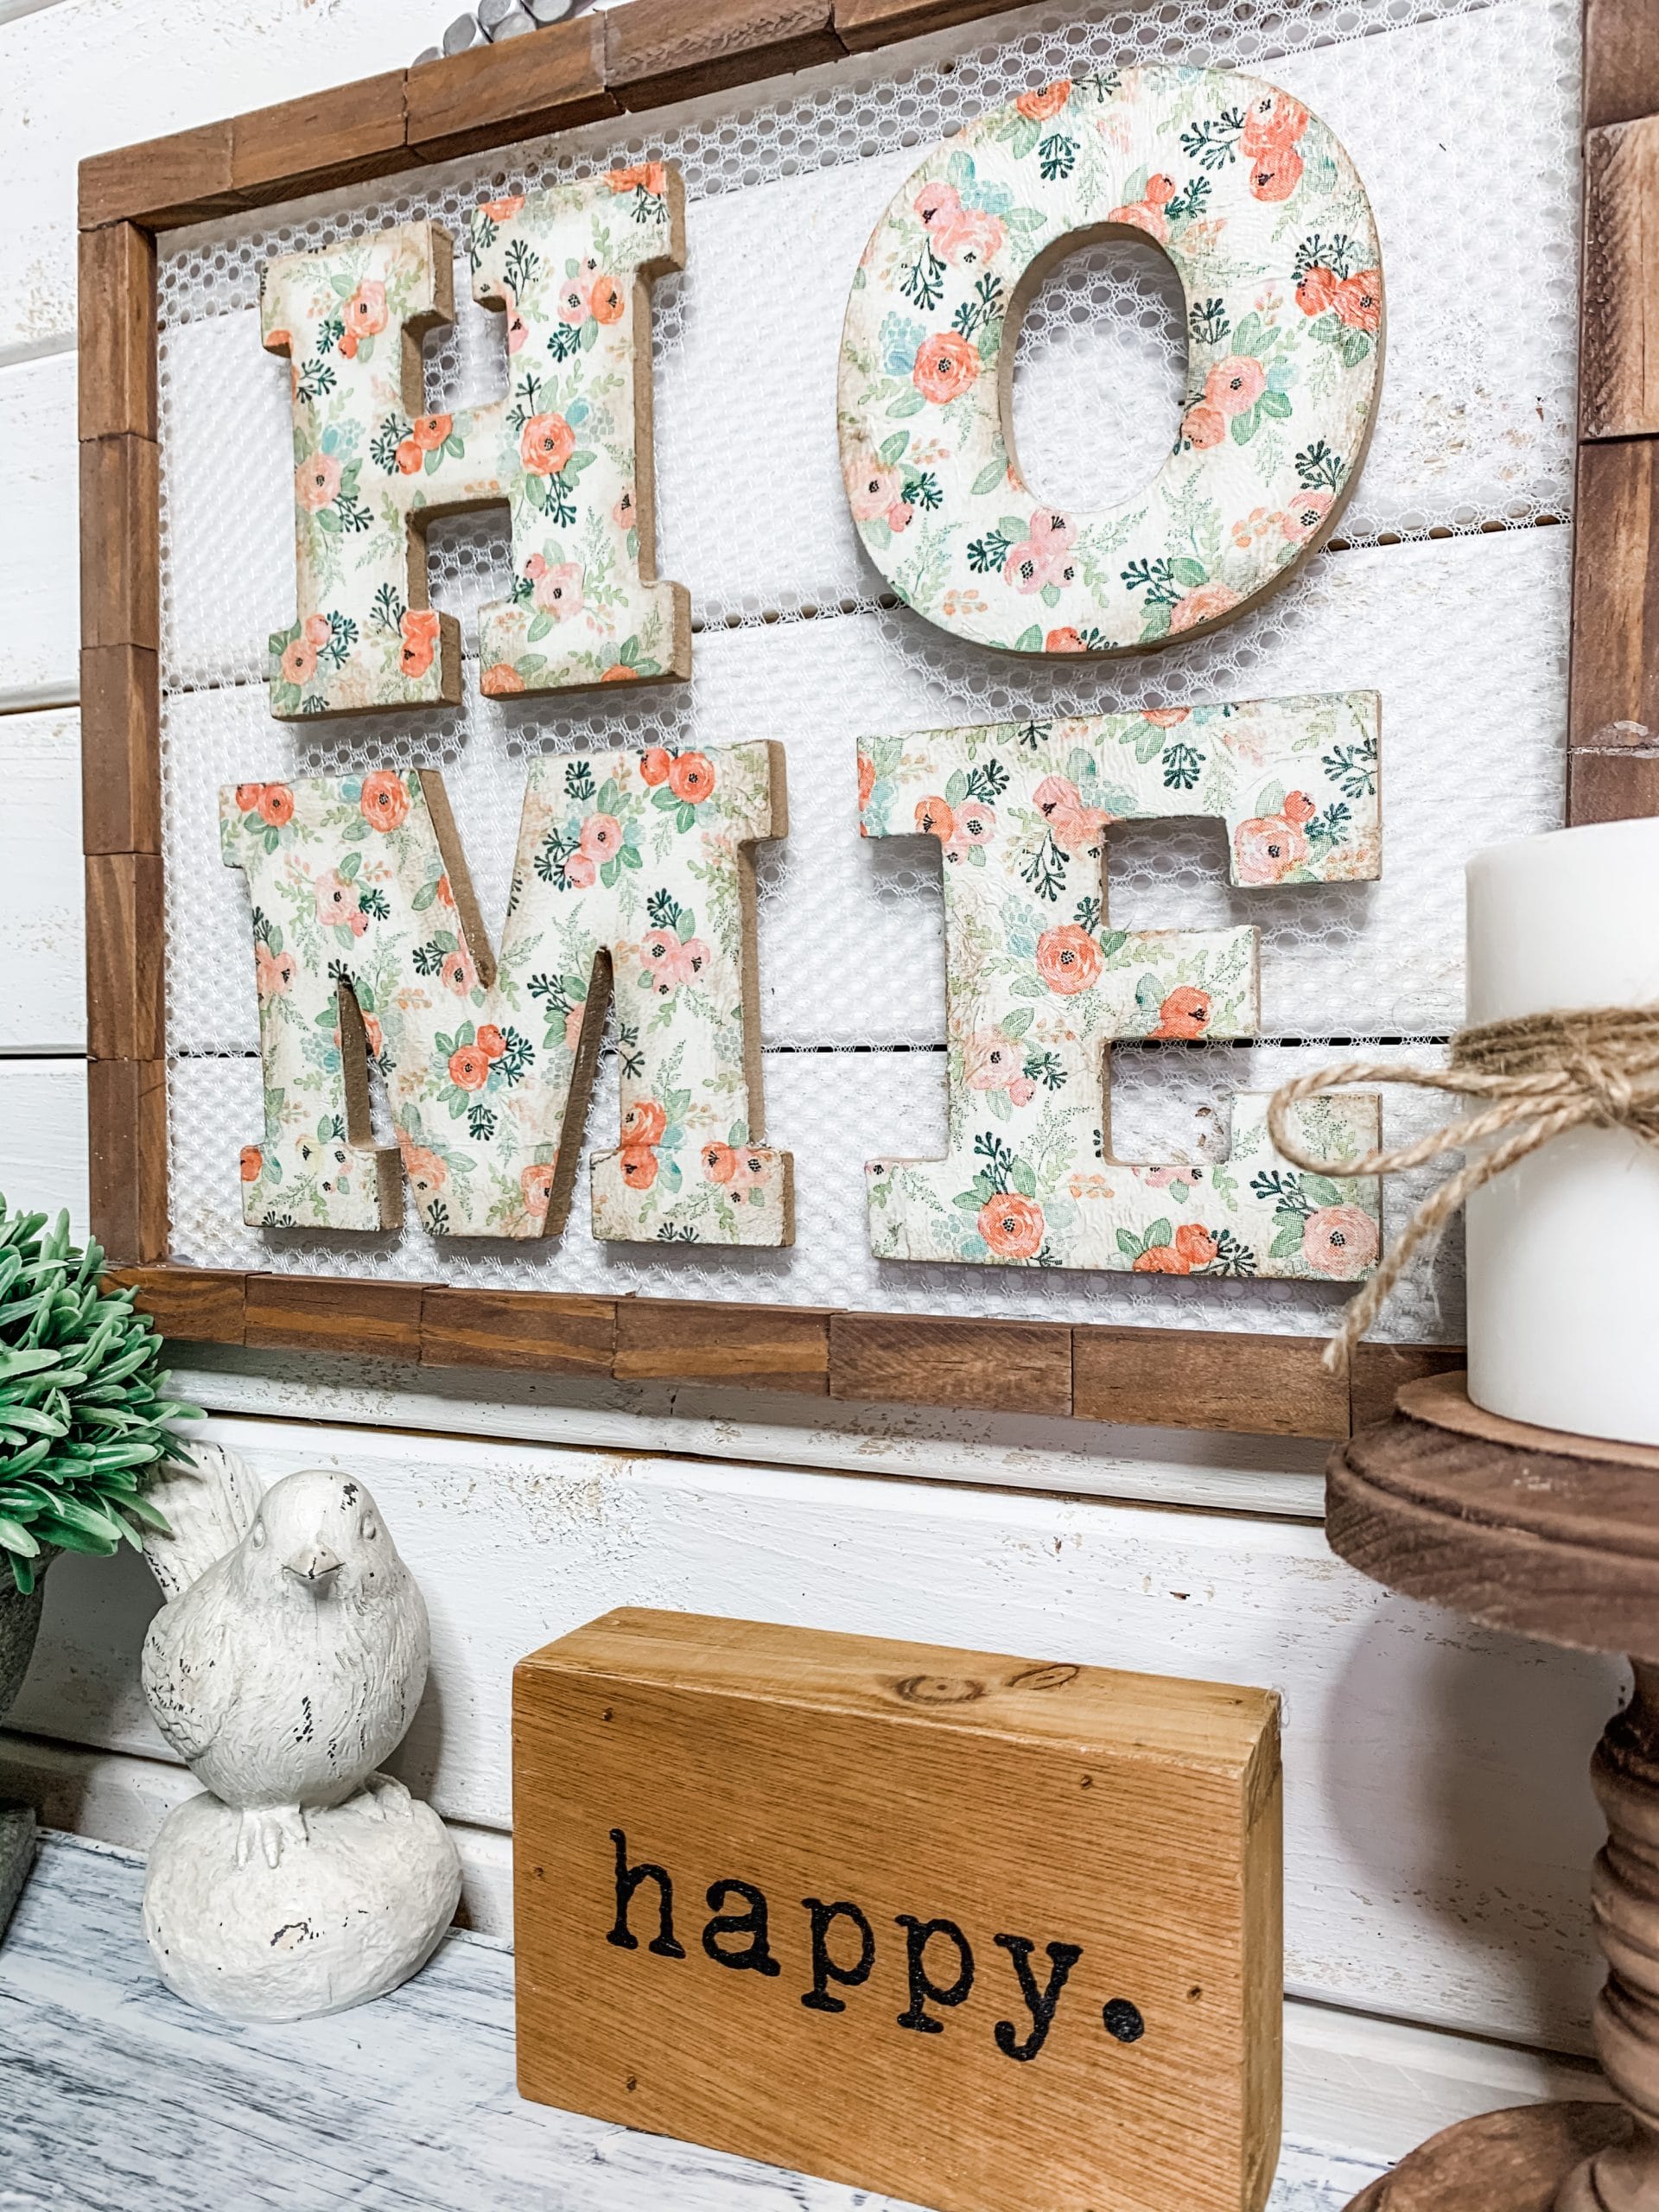
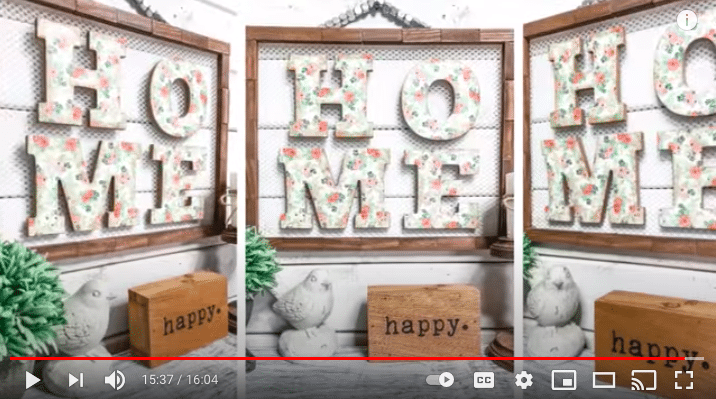
Dollar Tree DIY Shabby Chic Home Sign
I am always looking for ways to repurpose everyday items into adorable and affordable DIY decor, and my use of a Dollar Tree mesh laundry bag in the making of this adorable Dollar Tree DIY Shabby Chic Home Sign is an example of turning a regular household item into great home decor!
If you want to see the full supply list or video tutorial, just scroll to the bottom of this page!
How to Make a Dollar Tree DIY Shabby Chic Home Sign
You’re going to start making this easy shabby chic decor by separating the plies of your napkins so that you can decoupage them onto your HOME letters.
If you don’t separate the plies, when you apply the napkins to the Mod Podge, the top ply might not adhere all the way and could start to peel up later.
Next, I got the Dollar Tree laundry bag ready for this project. I used a pair of scissors to cut around the seams of the bag.
Then, lay your wood letters onto the back rectangle piece of the mesh laundry bag and dry place the Dollar Tree Tumbling Tower blocks around the edge of the mesh.
This will help you decide how many blocks you’ll need to create the frame for this DIY shabby chic home sign. I used 24 blocks to create the frame for my sign.
I hot glued the blocks into four different strips (2 strips of 7 blocks and 2 strips of 5 blocks).
Before I hot glued the strips together, I stained them brown. To do this, I first sprayed the strips with water, then used a wet wipe to spread brown paint (I used Folkart Java Chalk Paint) across the wood blocks.
The water helps the wood absorb the paint and gives it a stained finish rather than a painted look. If you apply too much paint, you can go back over the wood with a clean wet wipe to remove the excess.
How to decoupage
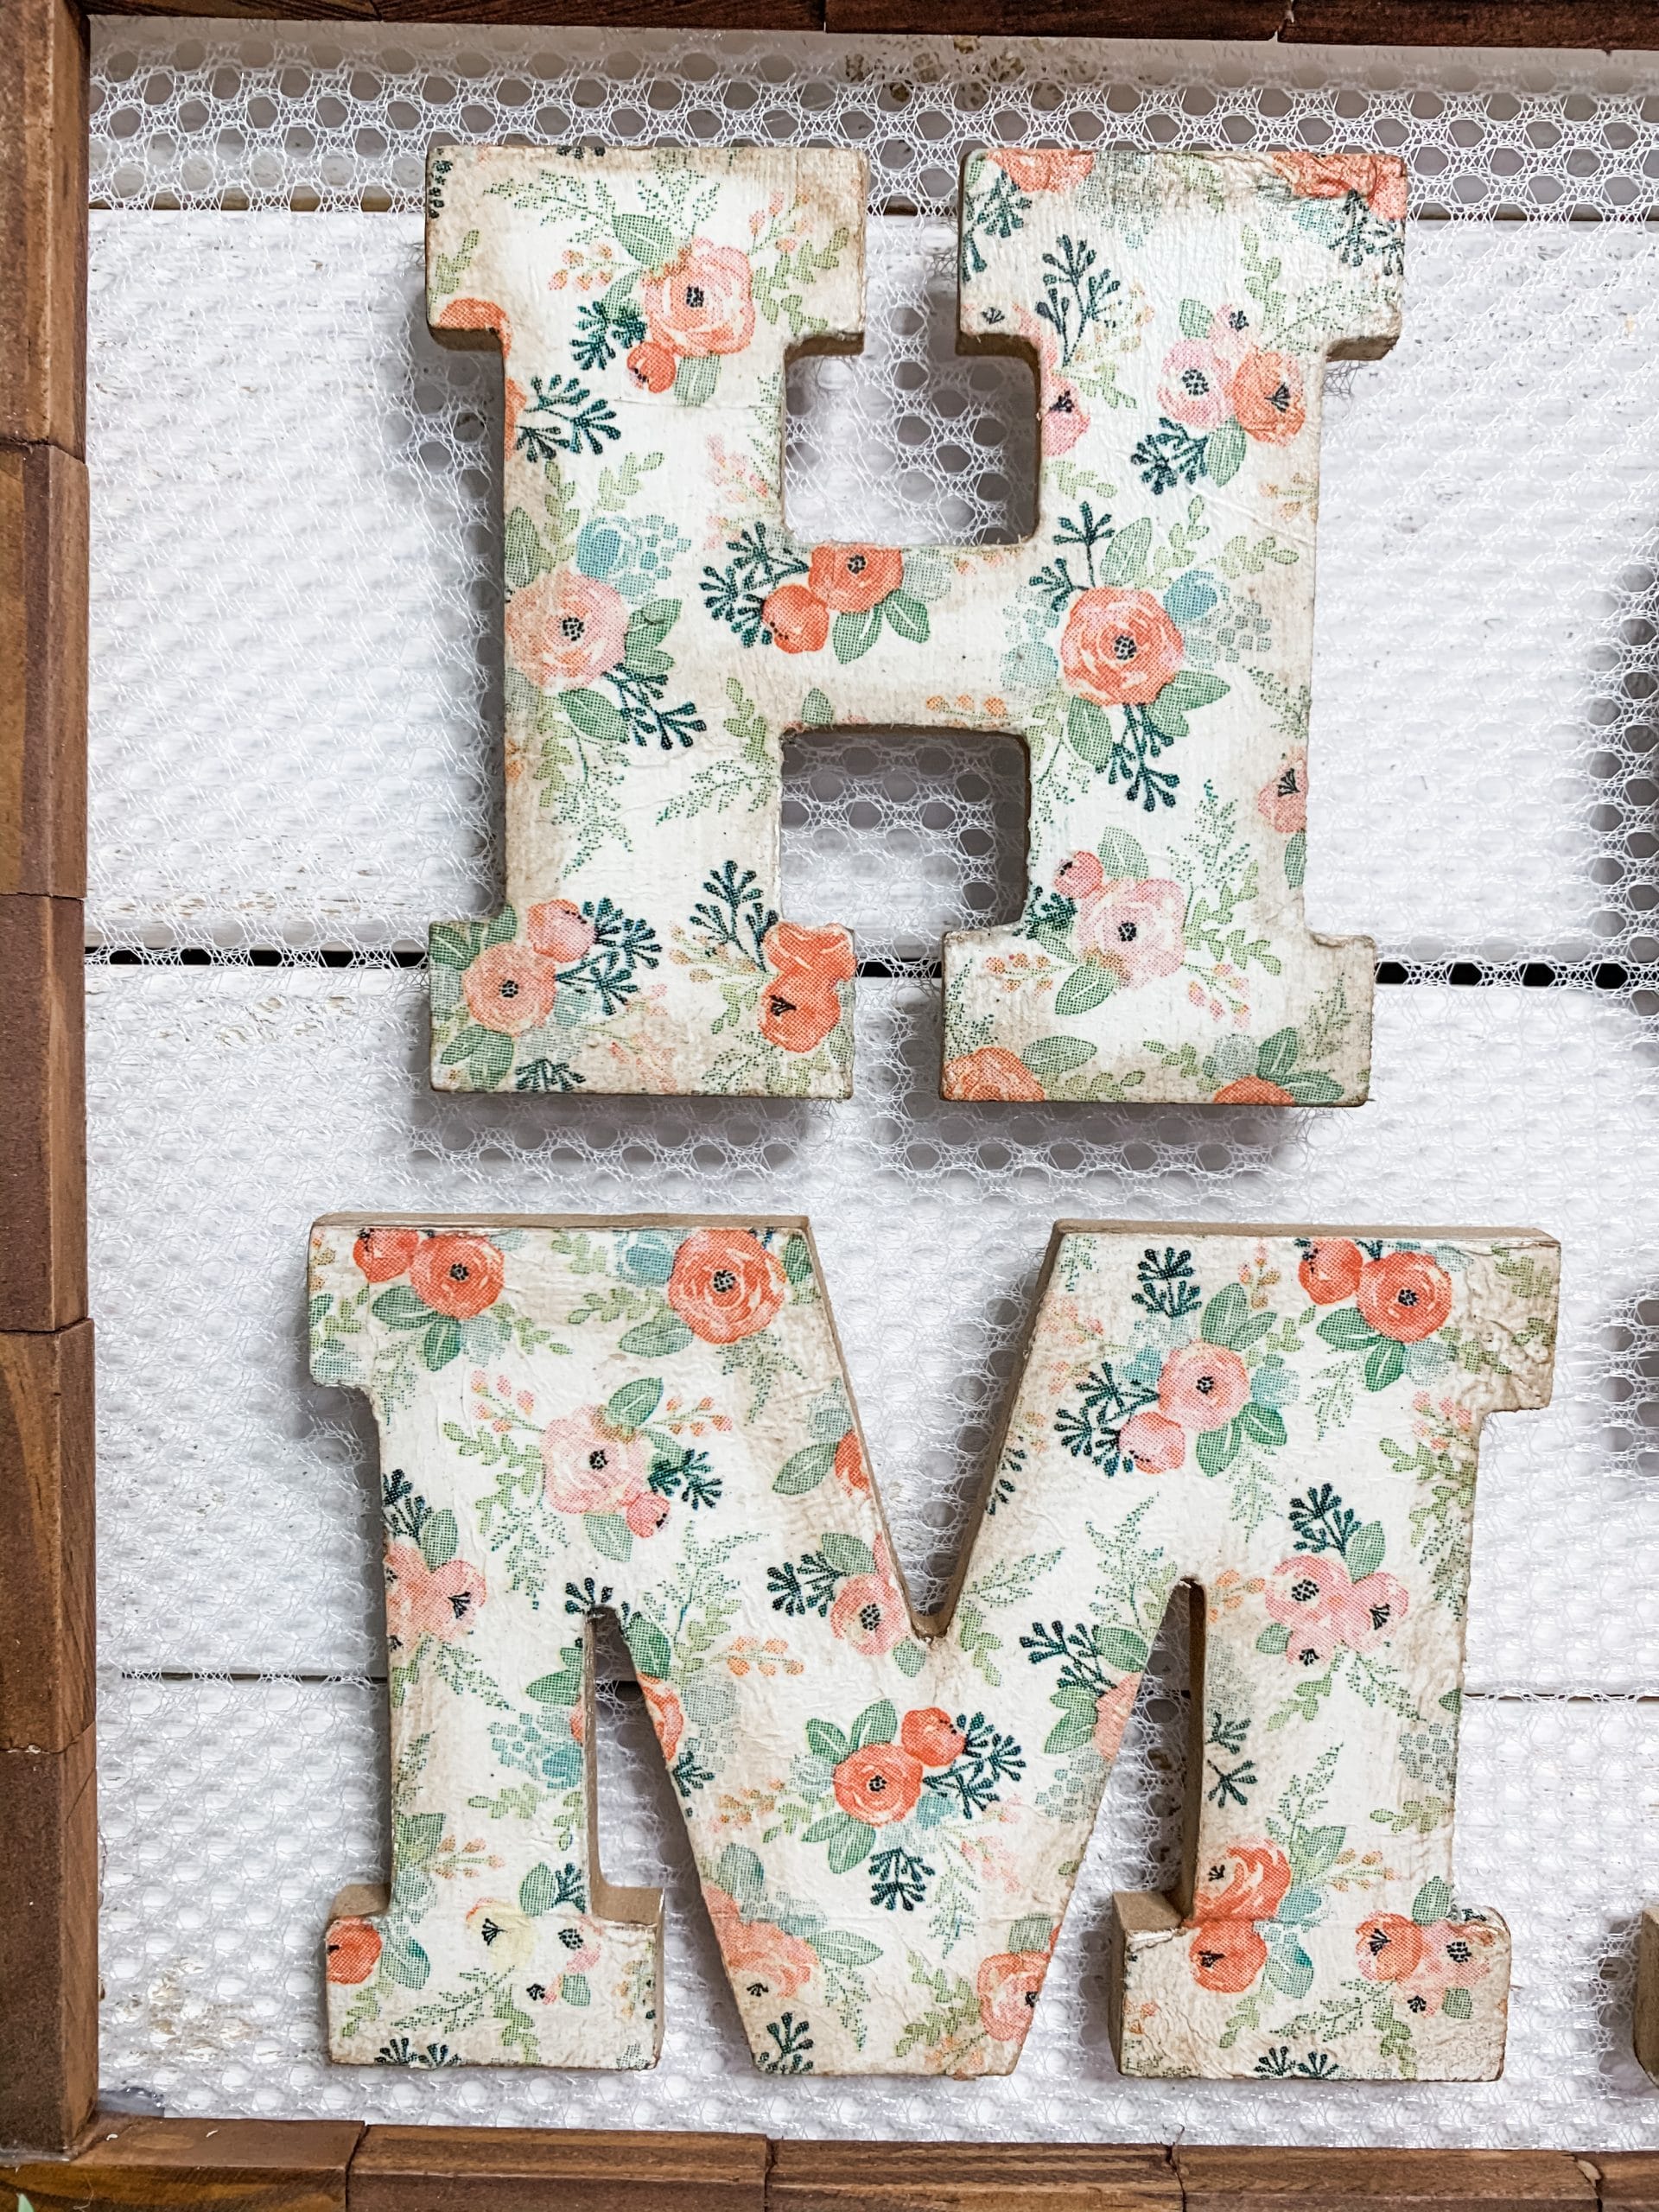
You can set your Dollar Tree Tumbling Tower block strips to the side for now. Unless your wood letters are already white, you’re going to need to paint them white (I used Folkart White Chalk Paint), otherwise you’ll be able to see their color through the napkin when you decoupage it on.
Allow the white paint to dry, then apply a coat of Mod Podge to each of the letters. I went ahead and cut my napkin into smaller pieces so I could apply it to the letters one at a time.
Carefully place the napkin onto the Mod Podge, and try to avoid creating any wrinkles or creases. If any imperfections do form, you can use a rolling pin to smooth them out while the Mod Podge is still wet.
I used a heat gun to quickly dry my decoupaged wood letters. If you don’t have one, you can use a hairdryer on the low cool setting instead.
Once the letters are completely dry, use an Exacto knife to trim the excess napkin from the edges of the letters. I also went around the edges with a piece of sandpaper to get as much of the excess napkin off the letters.
How to use Antique Wax
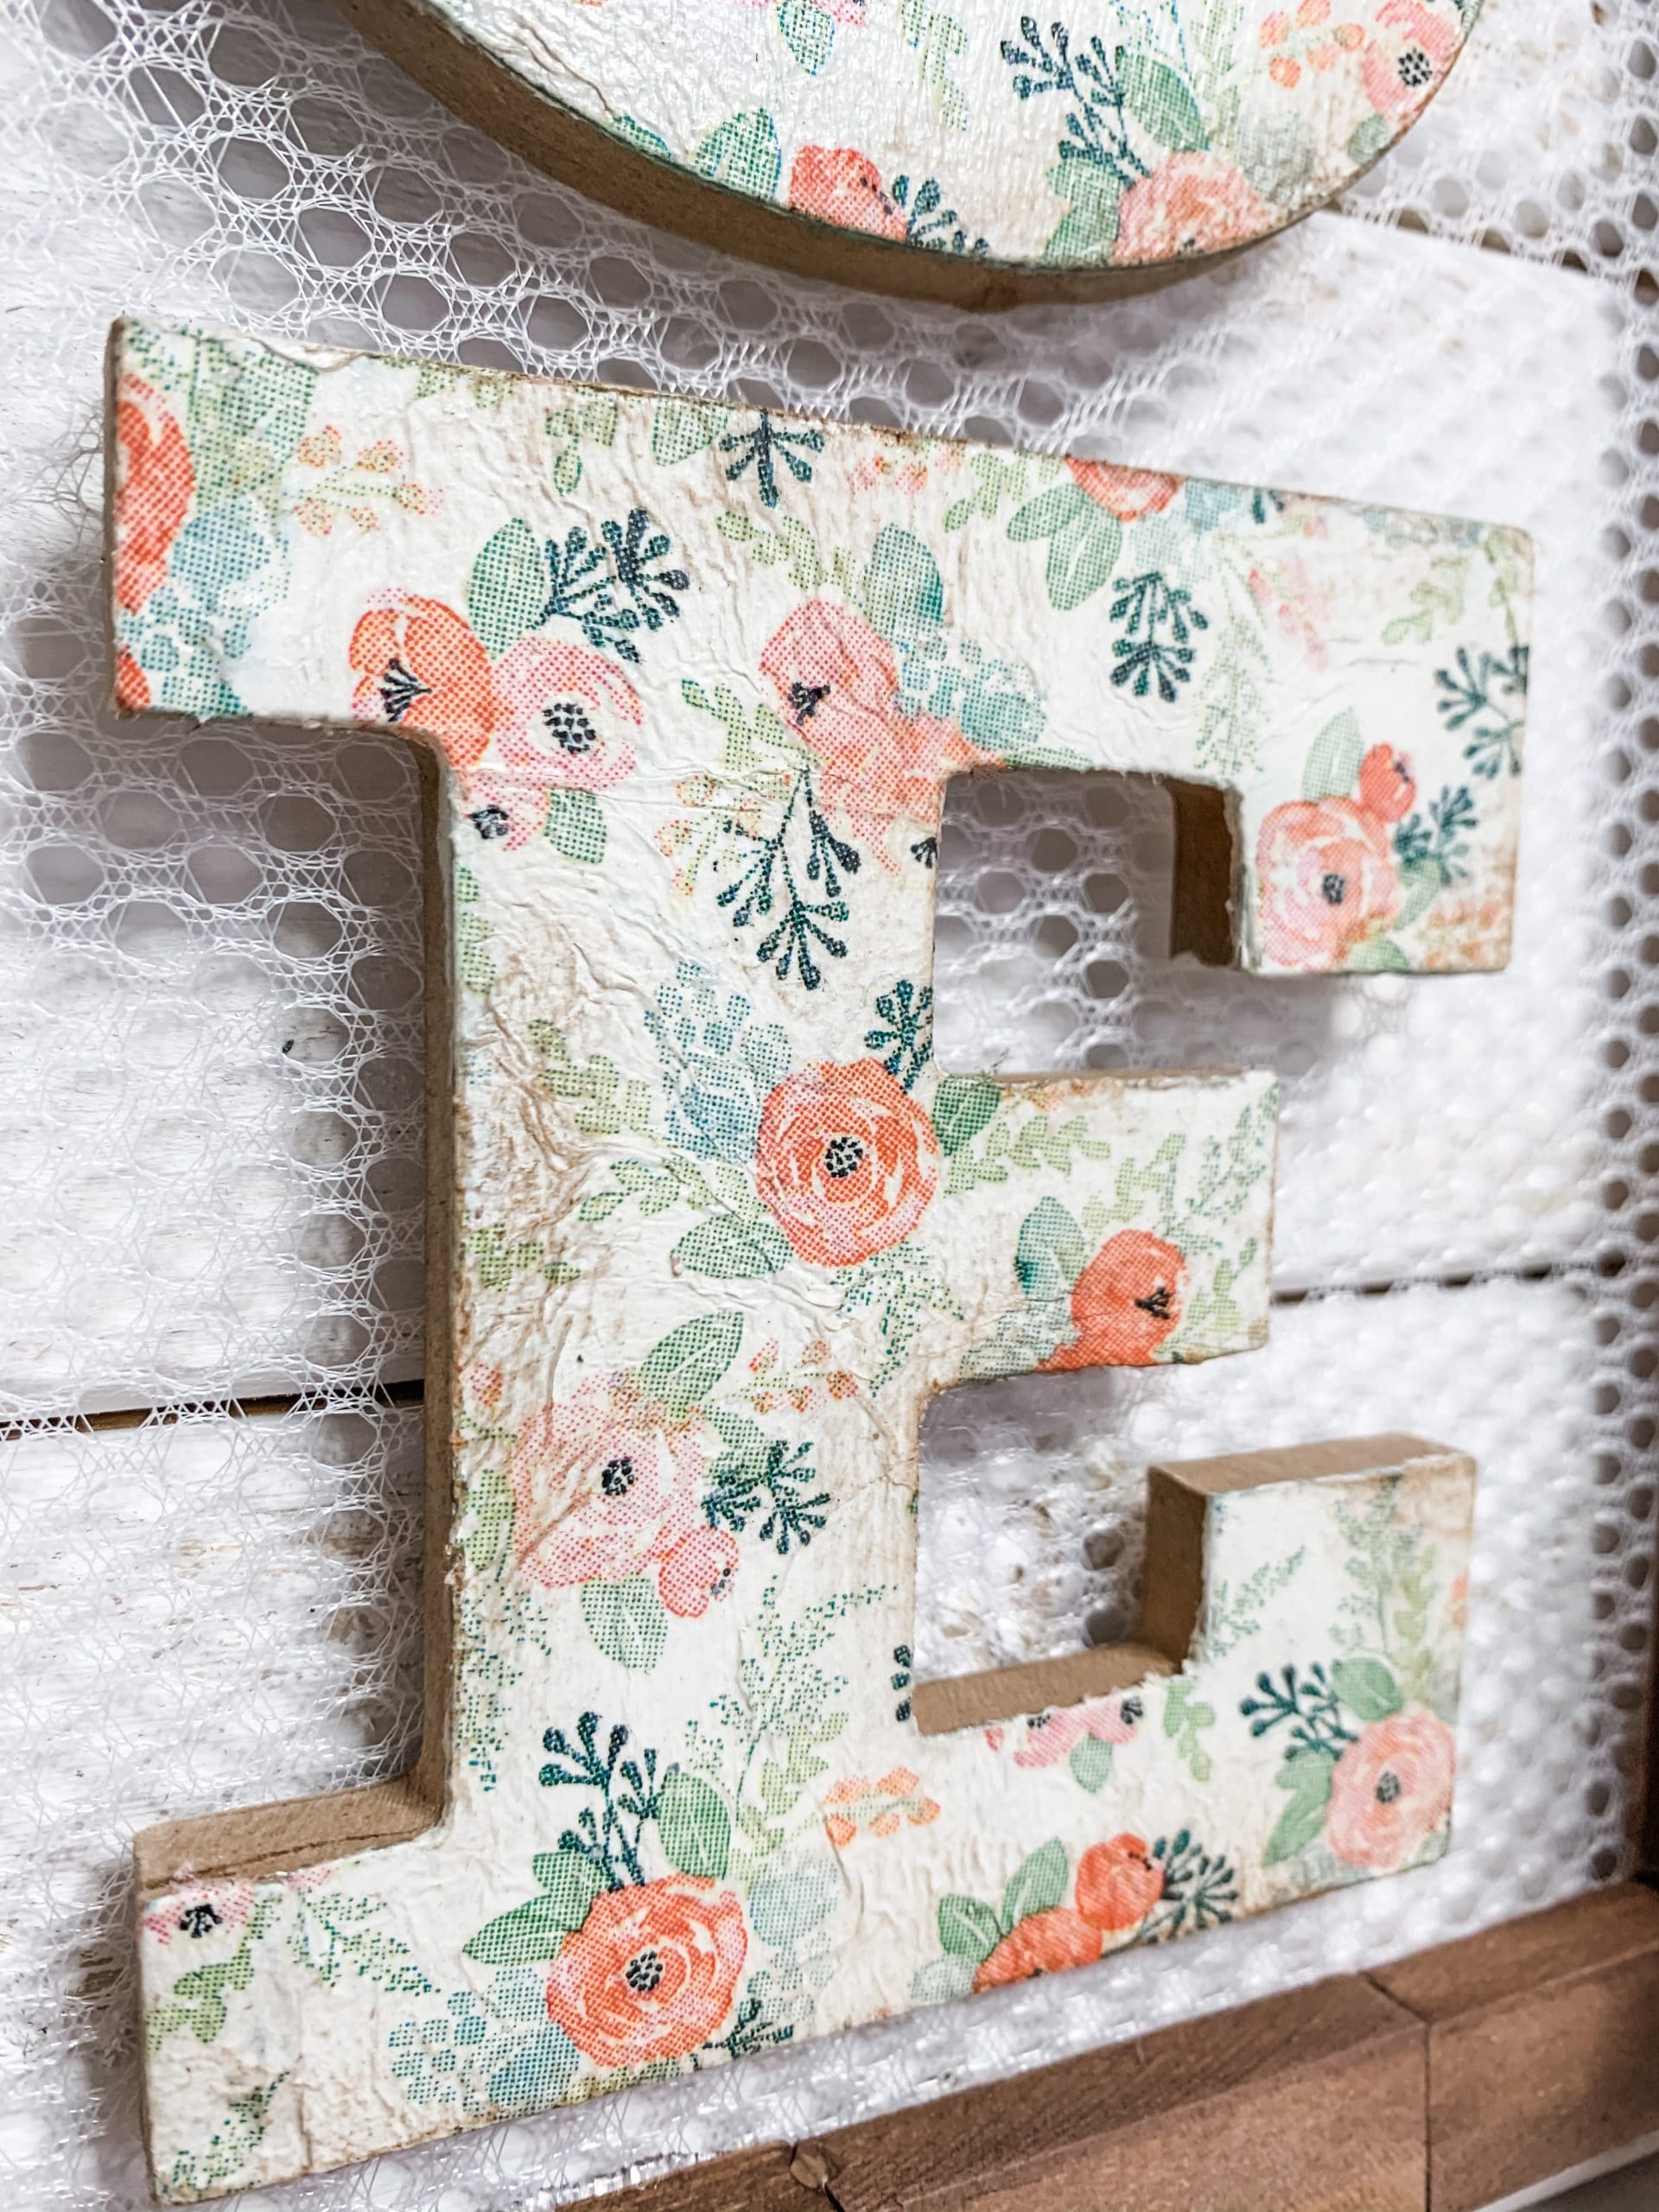
I went back over the top of the napkins with another coat of the Mod Podge because I wanted to age the napkins with Waverly Antique Wax, and if I didn’t use the Mod Podge, the napkins would just absorb the wax and it wouldn’t look right.
Then, I used a chippy paintbrush to lightly brush the antique wax around the edges of each of the letters.
I dabbed the paintbrush in the wax, swirled it on wax paper to make sure there wasn’t too much on the brush, then sprayed the paintbrush with water before brushing it onto the letters.
Next, I had to give the square beads a bit of love before I could add them to this project. I put my beads into a red solo cup and spray-painted them with Rustoleum Metallic Silver Spray Paint.
Bring it all together
It’s time to start bringing all the pieces together! I started by hot gluing the Dollar Tree mesh laundry bag to the Tumbling Tower blocks.
Be careful not to hot glue the mesh or the frame to your crafting surface (I accidentally did, and I had to use a putty knife to separate the craft from the table)!
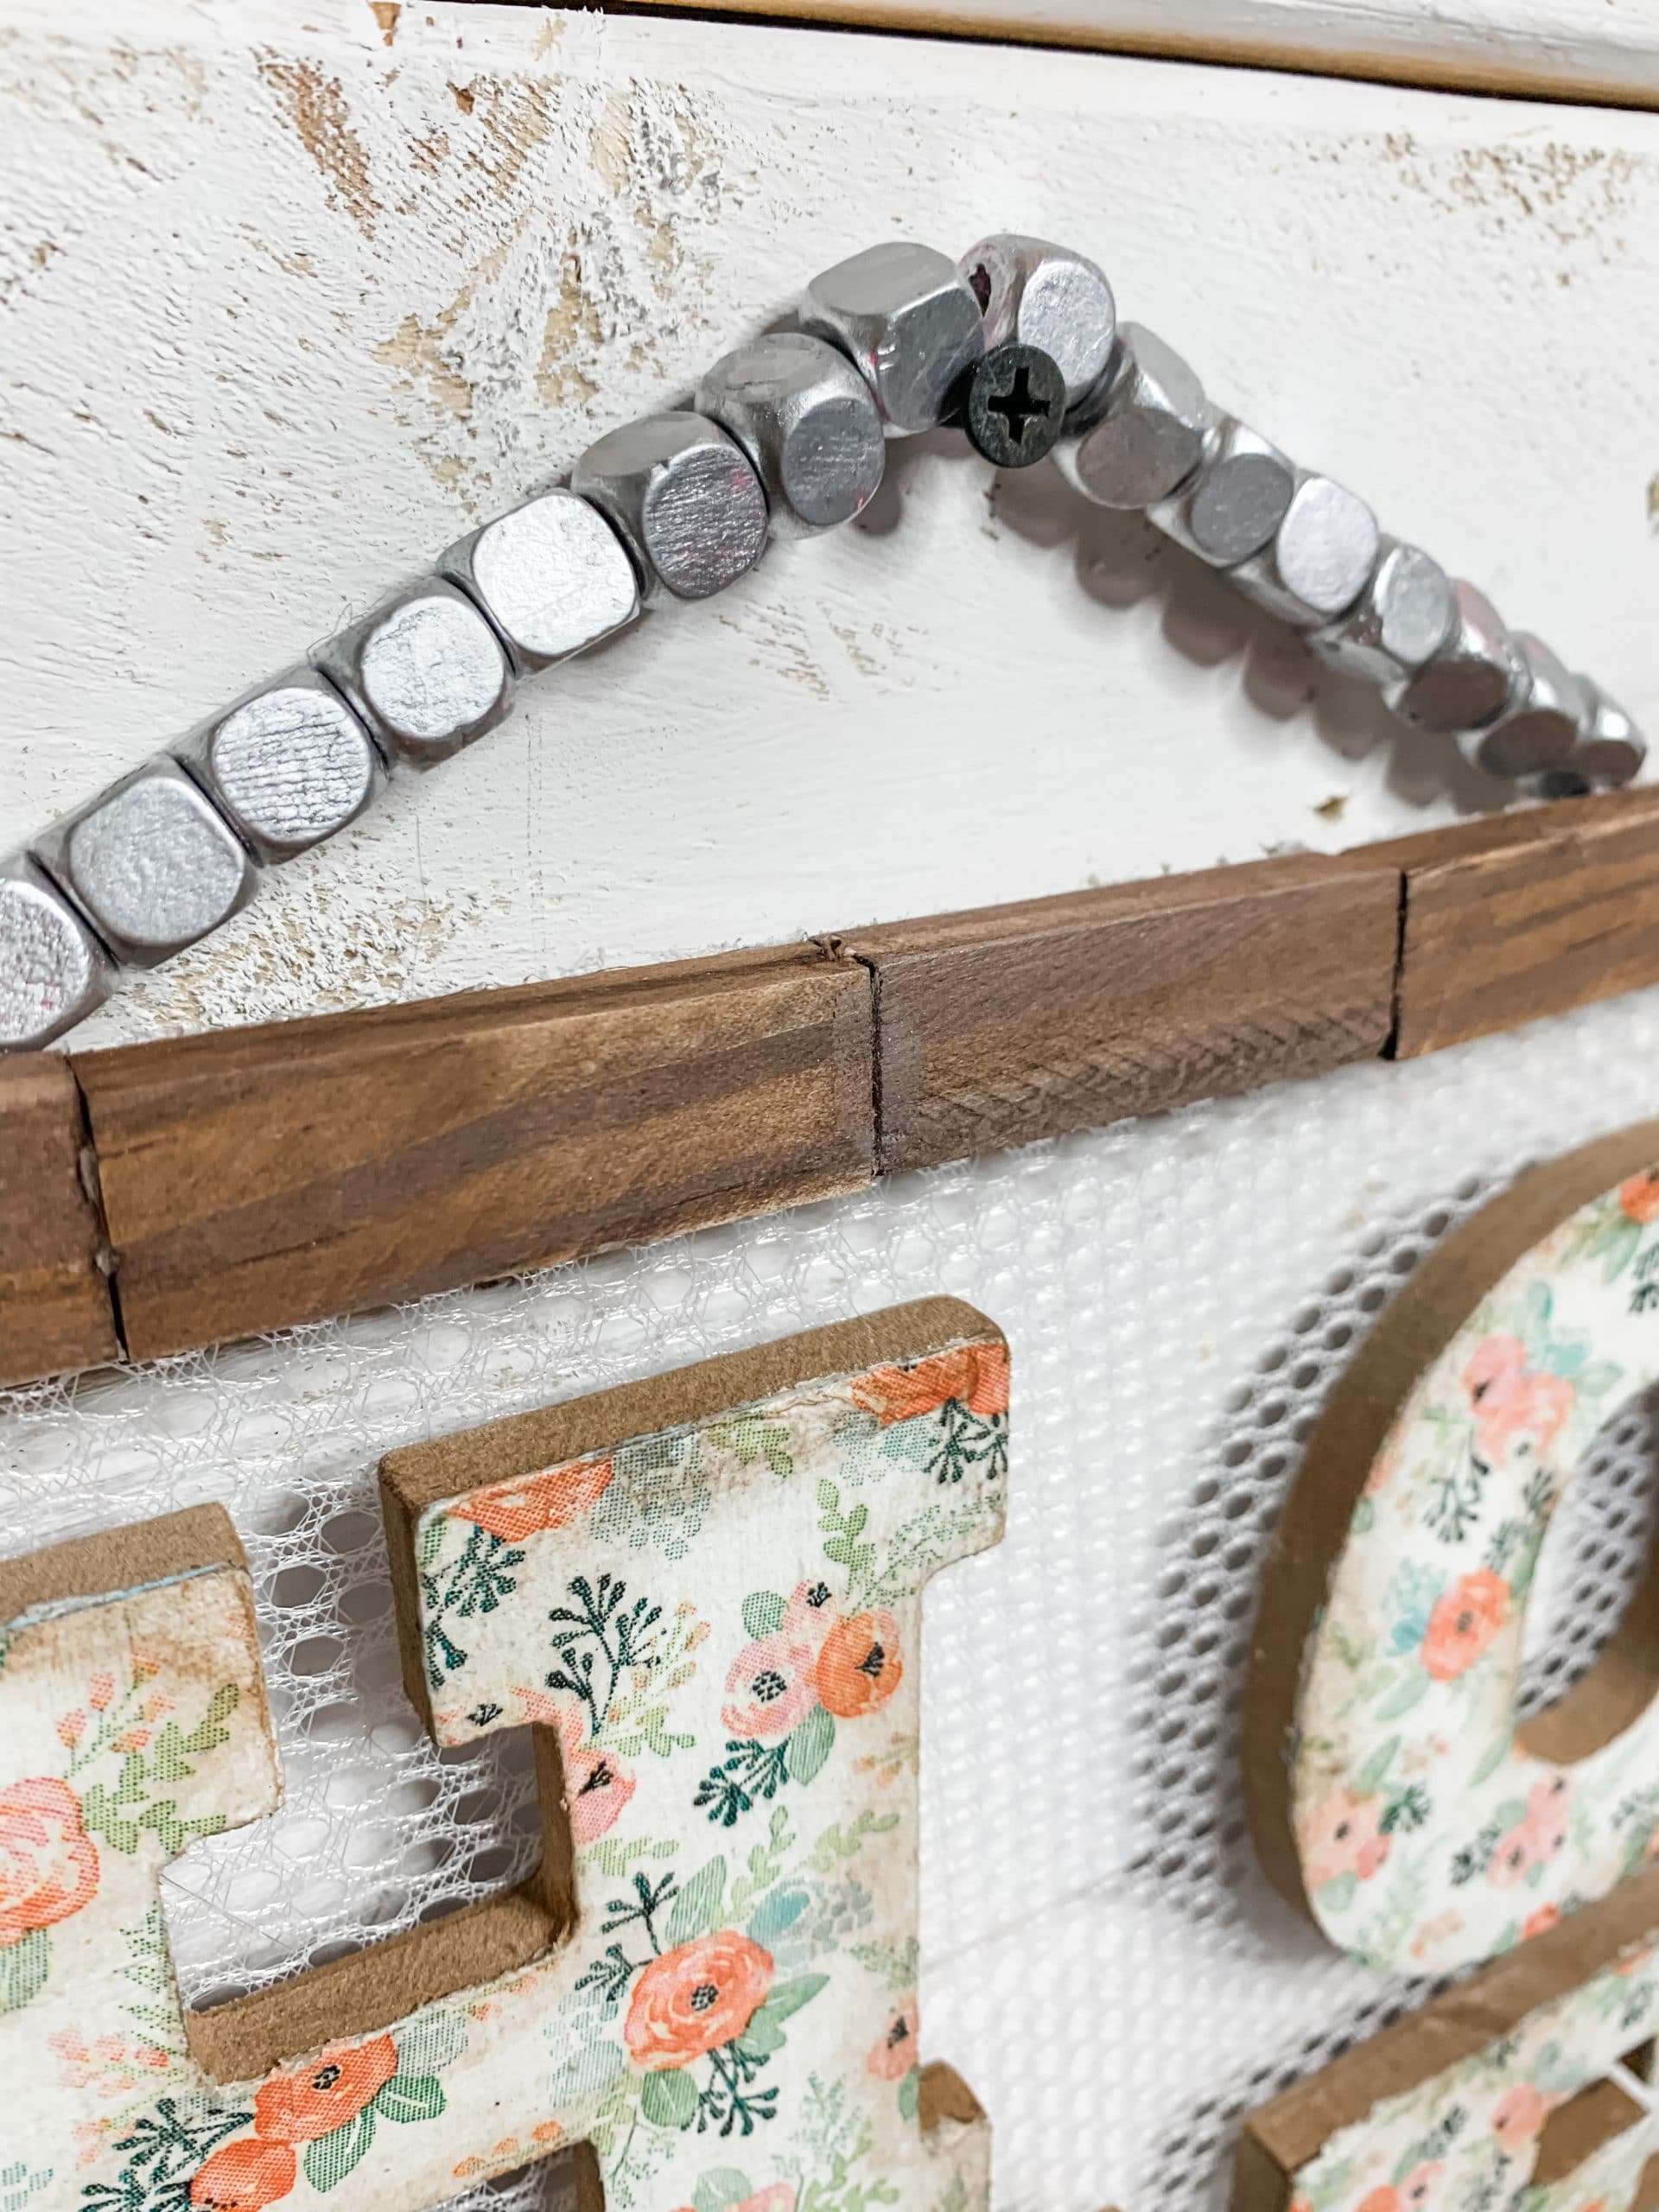
I then hot glued popsicle sticks over the back of the Tumbling Tower block frame to really secure the mesh to the frame.
Next, hot glue the wood letters onto the mesh. Do this carefully, otherwise, you will hot glue them to your crafting surface!
Finally, I created the hanger for this Dollar Tree DIY Shabby Chic Home Sign. I threaded the spray-painted square beads onto a piece of jute twine until I was happy with the length of the hanger.
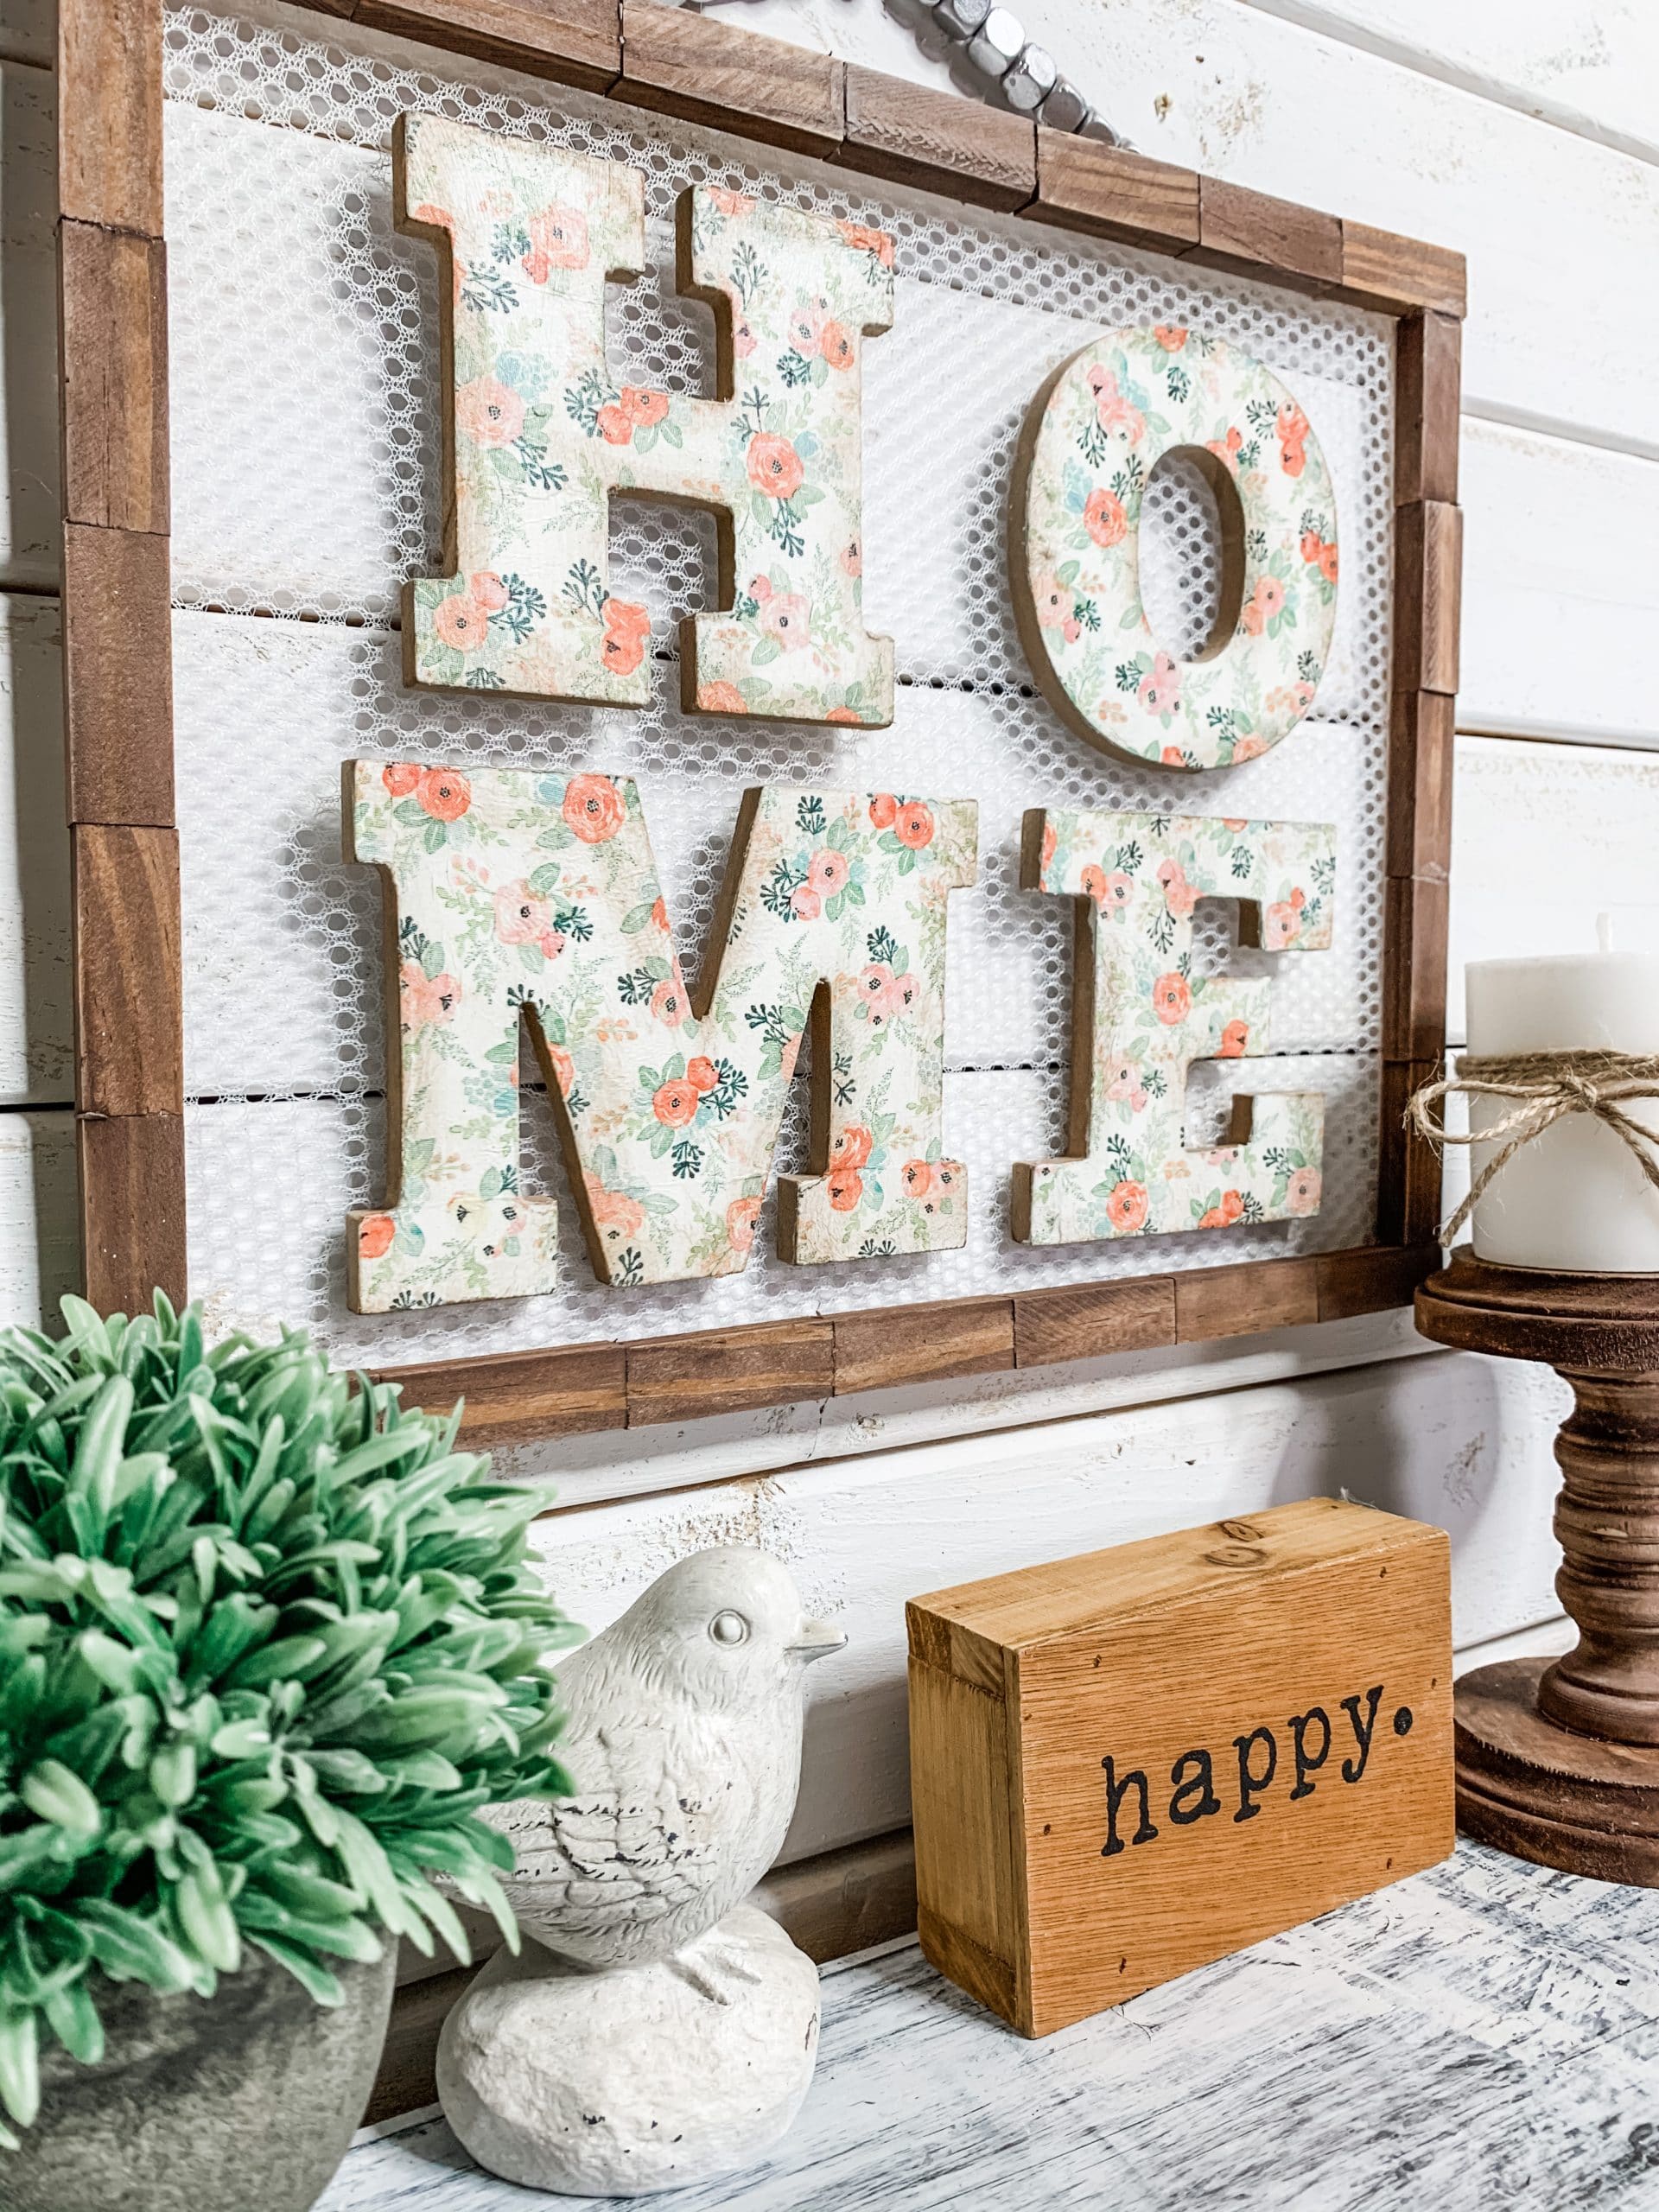
I put a dab of hot glue on the jute twine to keep the end beads in place. Then, I stapled the ends of the jute twine to the back of the top of the Tumbling Tower frame.
WATCH THE DIY TUTORIAL
Unlike most of my DIY tutorials, the how-to video for this Dollar Tree DIY Shabby Chic Home Sign is over on my Youtube channel! For those of you who like the DIY videos to get straight to the crafting and skip all the conversations, this tutorial is for you!
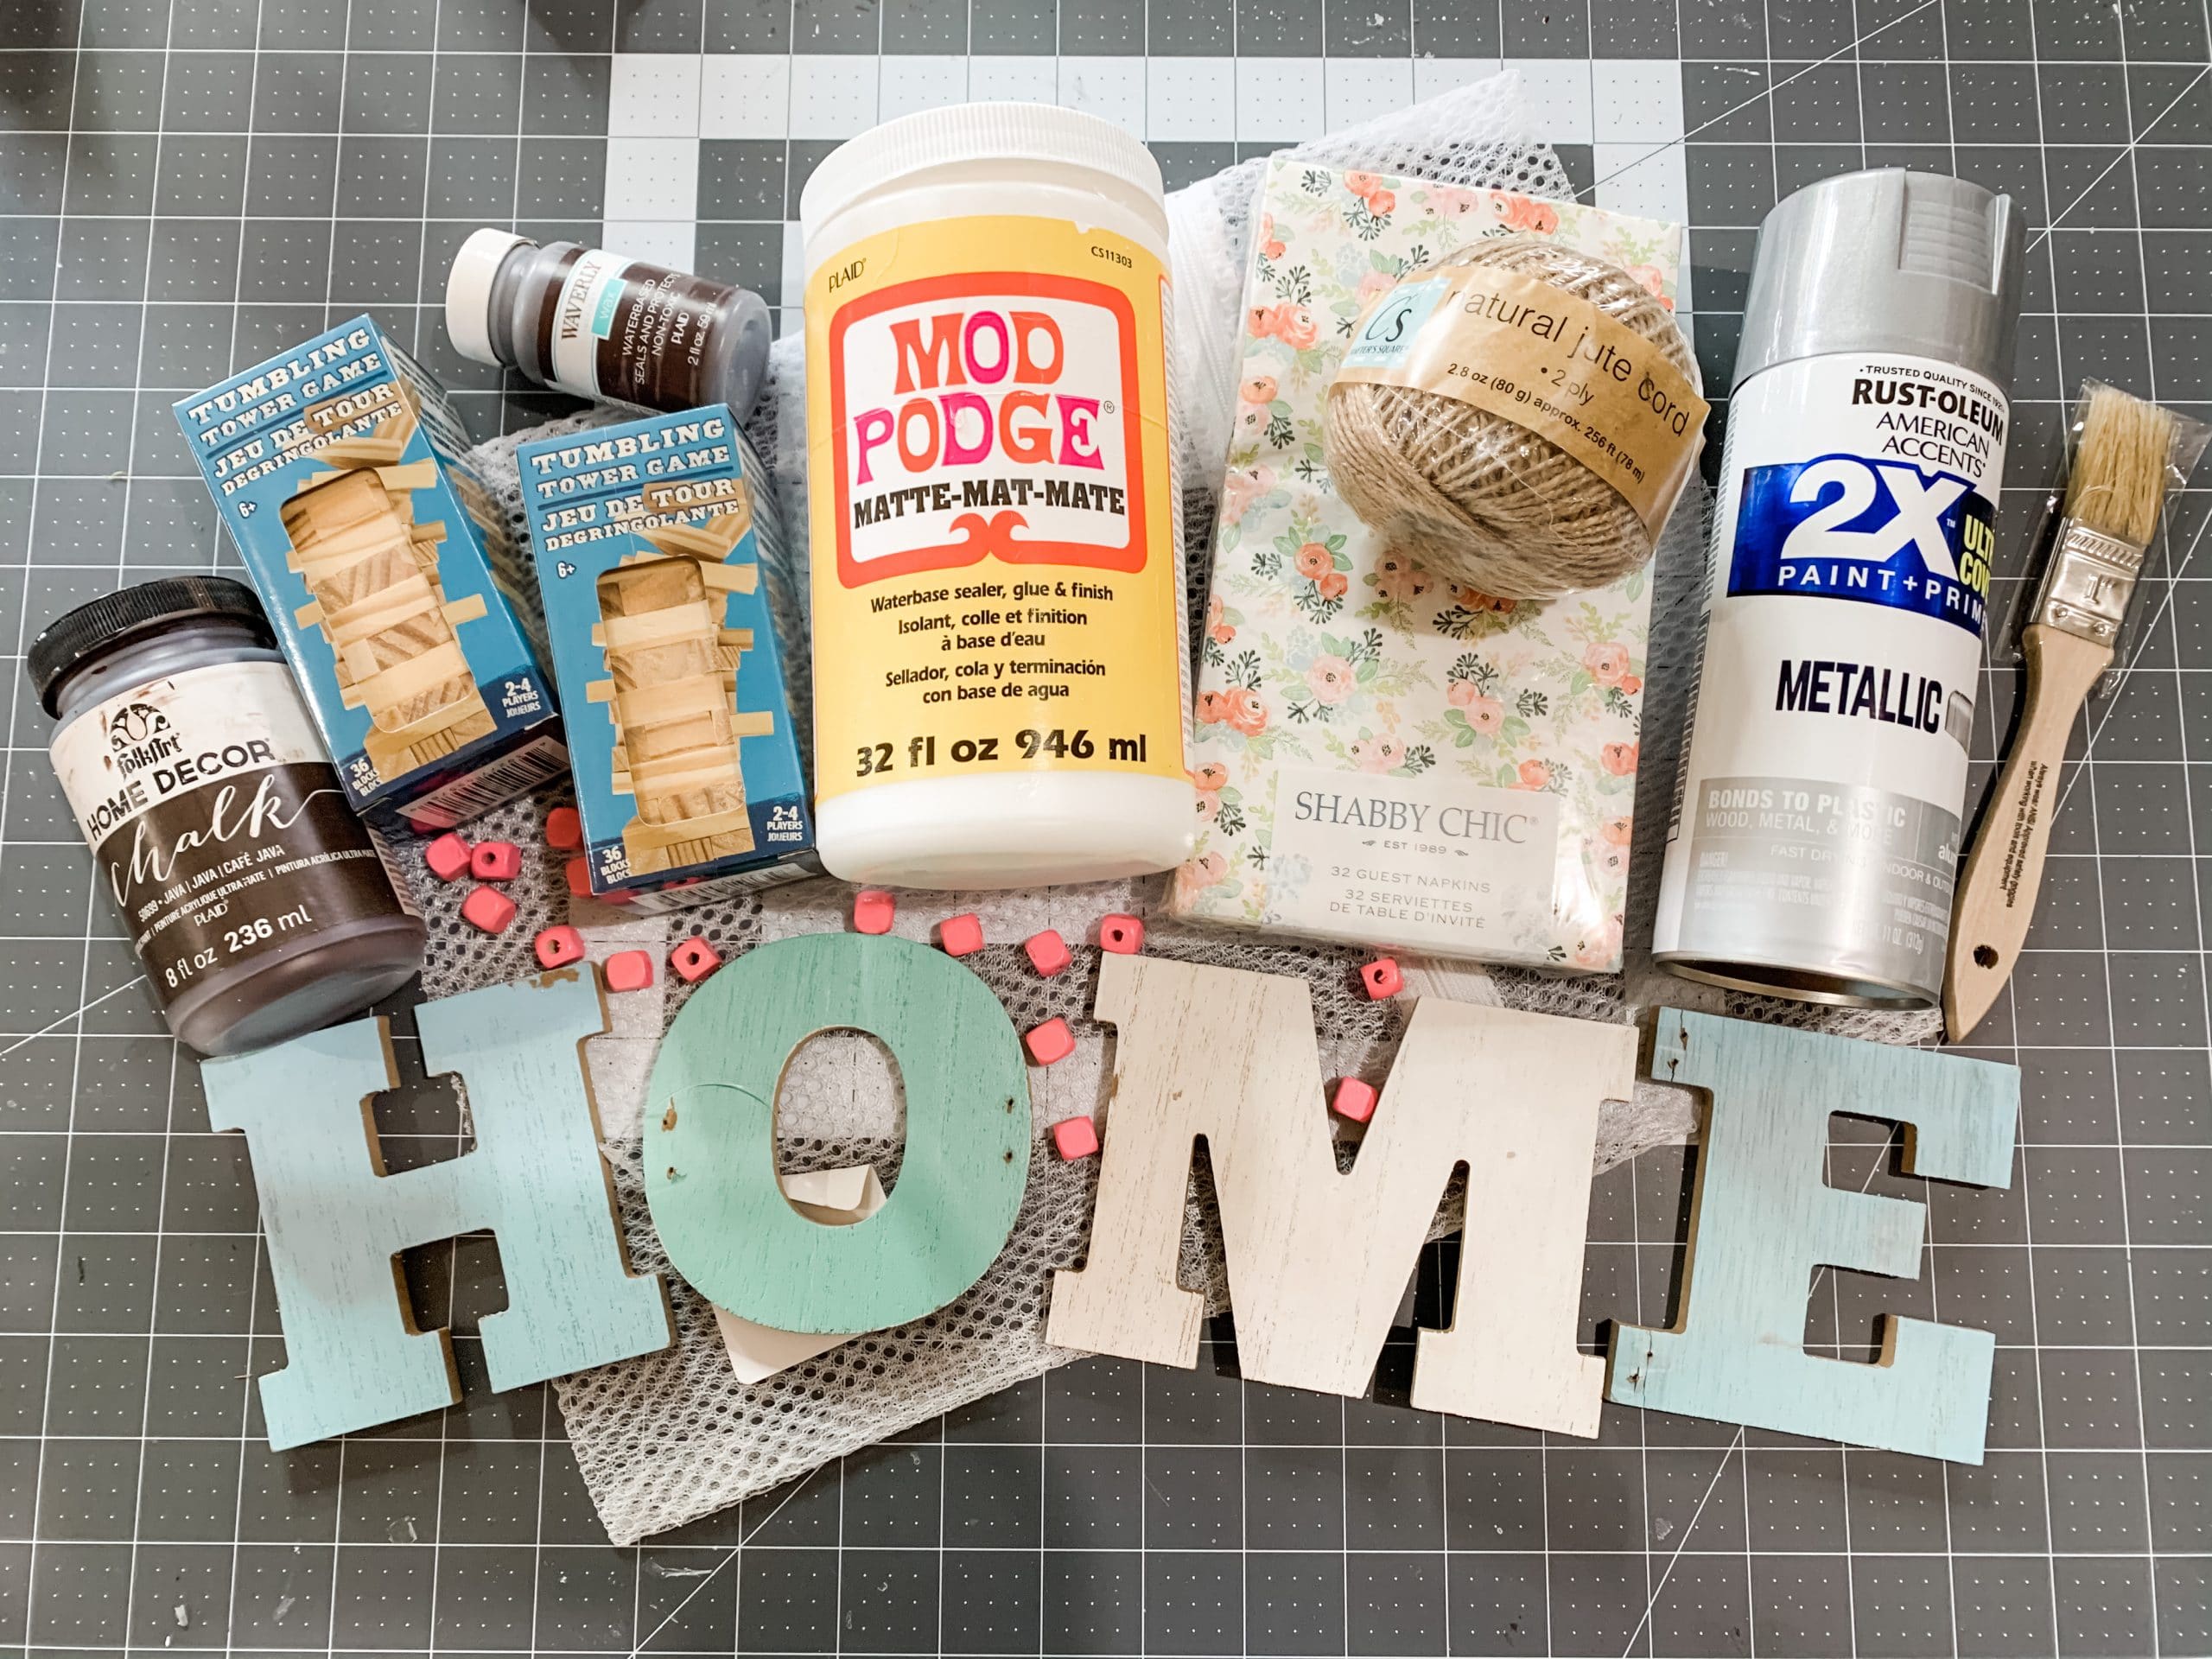
For this project, I will be using these items but you can substitute where you want.
“As an Amazon Associate, I earn from qualifying purchases.”
- Dollar Tree HOME Letters
- Dollar Tree Laundry Bag
- Shabby Chic Napkins
- Dollar Tree Square Beads
- Popsicle Sticks
- Folkart White Chalk Paint
- Folkart Java Chalk Paint
- Antique Wax
- Rustoleum Metallic Spray Paint SILVER
- Darning Needle
- Hot Glue gun
- Glue Sticks
I hope you enjoyed this Dollar Tree DIY Shabby Chic Home Sign as much as I did and decide to make one for yourself! I would love to see how yours turns out!
You should totally join my FREE Facebook group called On A Budget Crafts! It is a judgment-free community for DIY crafters to show off their projects and ideas.
If you loved this DIY you might also like this one too!
Thanks for stopping by! XOXO Amber
You can also shop my ENTIRE AMAZON Favorites shop just click here! It’s packed full of all the things I use and love. Here is the supply list I highly recommend every creative have on hand!!
Would you also pin my blog for later and get on my newsletter alerts? I would love to have you join my #craftycrew.
Inspired? Leave me a comment below! I love hearing from my readers!

Join my free “ON A BUDGET CRAFTS” Facebook group!