Beginner’s Guide to Faux Stained Glass Sun Catchers with Laser-Cut Wood
This is the Beginner’s Guide to Faux Stained Glass Sun Catchers with Laser-Cut Wood frame outline molds, mini crushed glass, and resin. This blog post will feature a playlist of easy to follow step by step tutorials to get you started!
Check out the tutorial playlist below it is the Beginner’s Guide to Faux Stained Glass Sun Catchers with Laser-Cut Wood
A Beginner’s Guide to Faux Stained Glass Sun Catchers
Learn how to Create Faux Stained Glass Sun catchers with Laser Cut Wood, Crushed Glass, and Resin
Have you ever looked at a stained glass window and thought, “I wish I could make something that beautiful”? Good news—you can! Faux stained glass sun catchers using laser-cut wood make it easy for beginners to dive into this vibrant, light-catching craft with confidence. No glass cutting or fancy tools needed.
If you are like me and you are not confident you can cut glass or get great lead bead lines, or solder, then you are in the right place! I am here to help you get started.
This Beginner’s Guide to Faux Stained Glass Sun Catchers with Laser-Cut Wood will show you how to get started step-by-step, even if you’ve never used resin or used shattered or crushed glass before. With just a few materials and a little creativity, you’ll be amazed at what you can make!
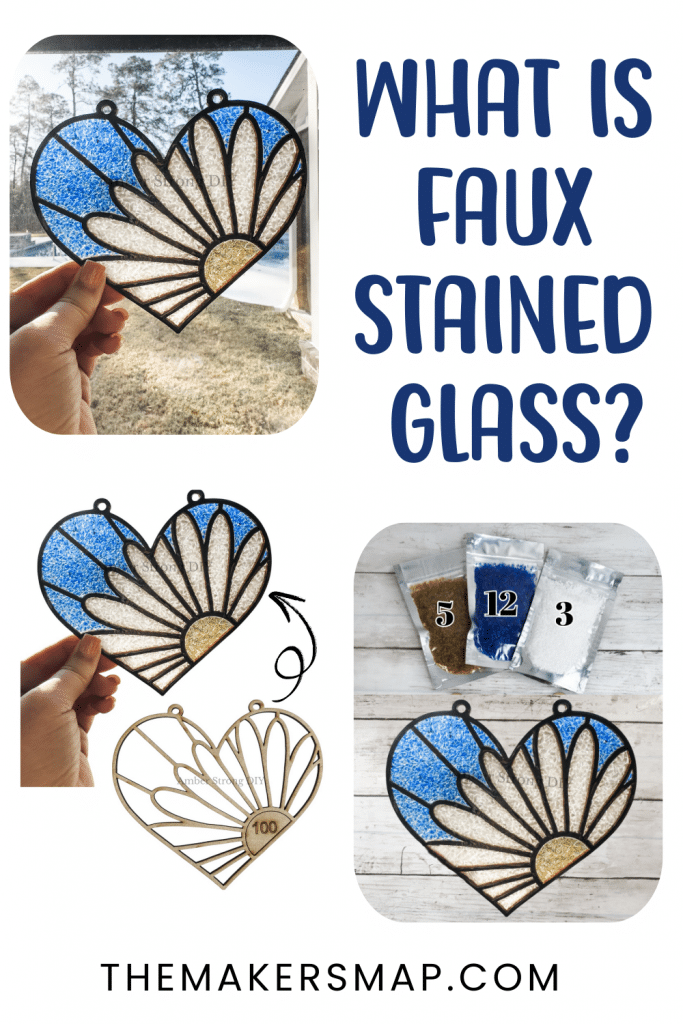
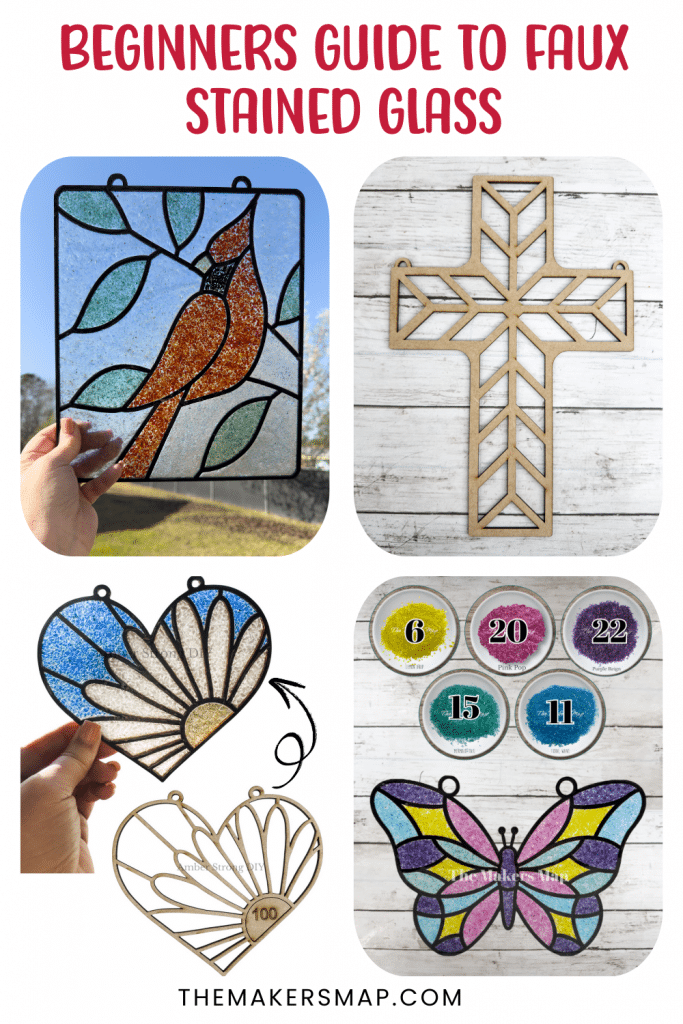
What Is Faux Stained Glass?
Faux stained glass is a beginner-friendly way to create the look of traditional stained glass using crushed glass, resin, and a sturdy wood frame. It still captures sunlight beautifully and adds a handmade charm to your windows, craft room, or patio. And these faux stained glass crafts make a great gift!
Best of all, it’s approachable for all skill levels—especially first-time crafters who want a stunning result without the stress.
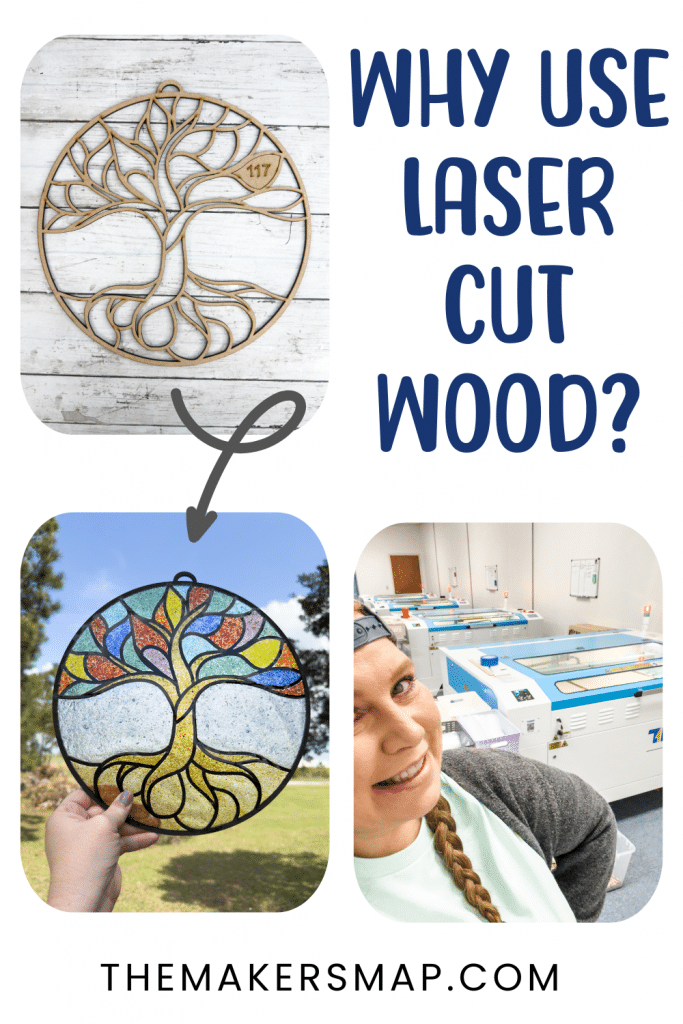
Why Laser-Cut Wood Makes It Easier to create faux stained glass
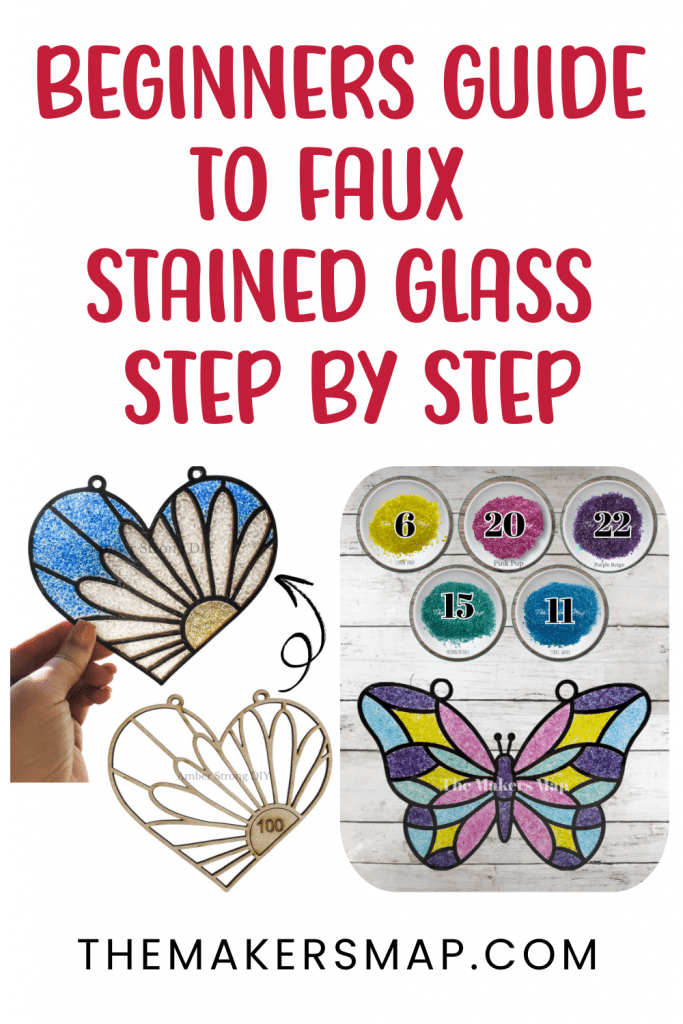
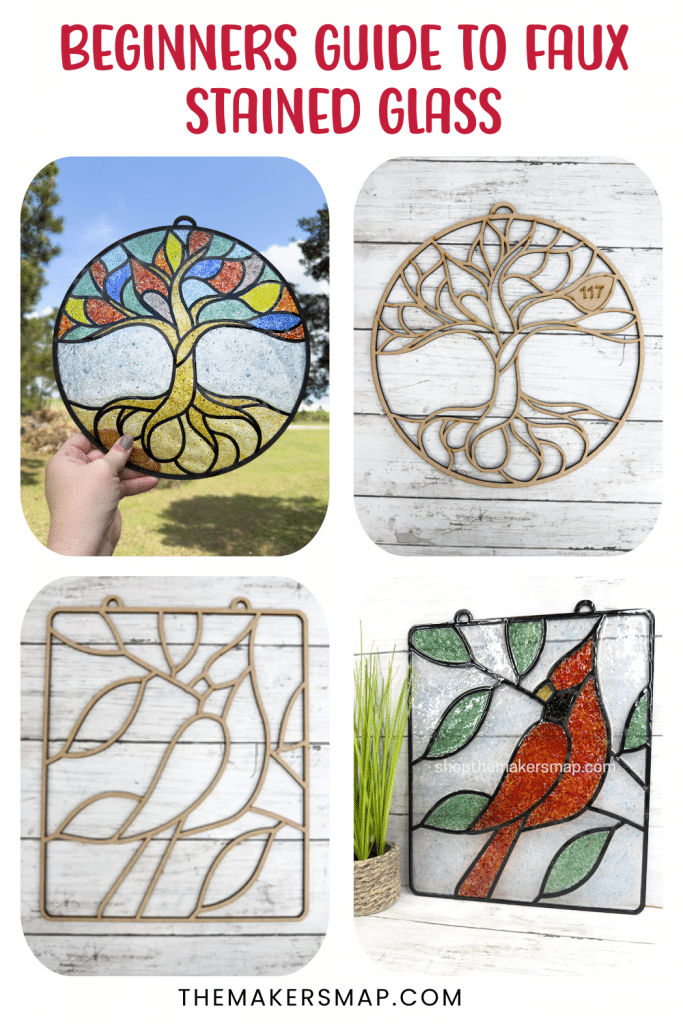
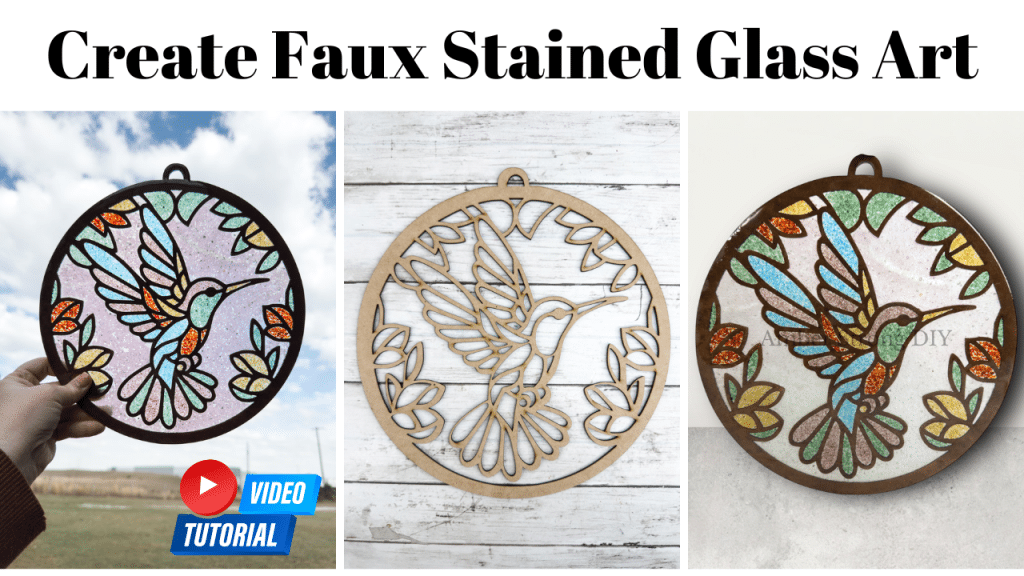
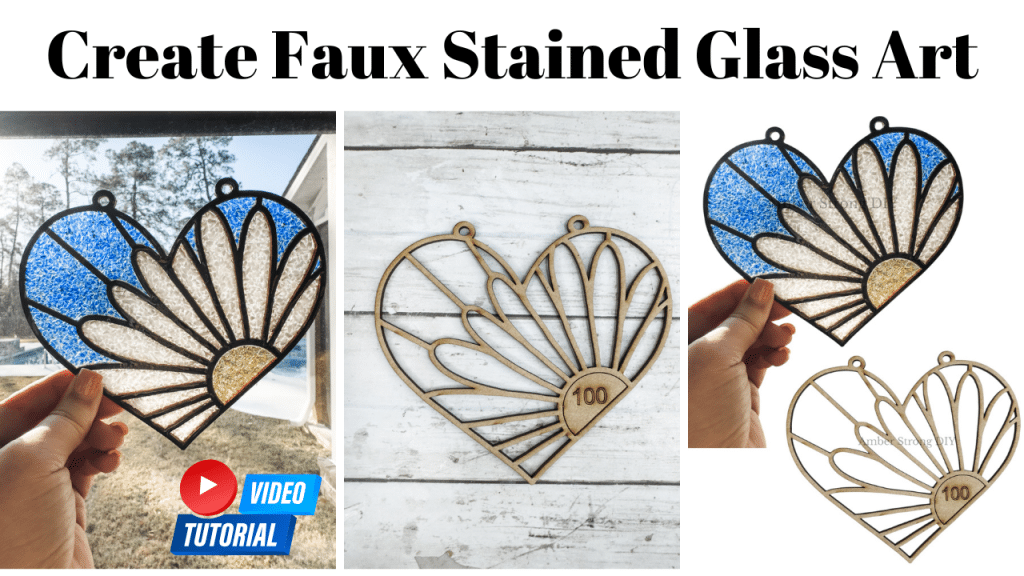
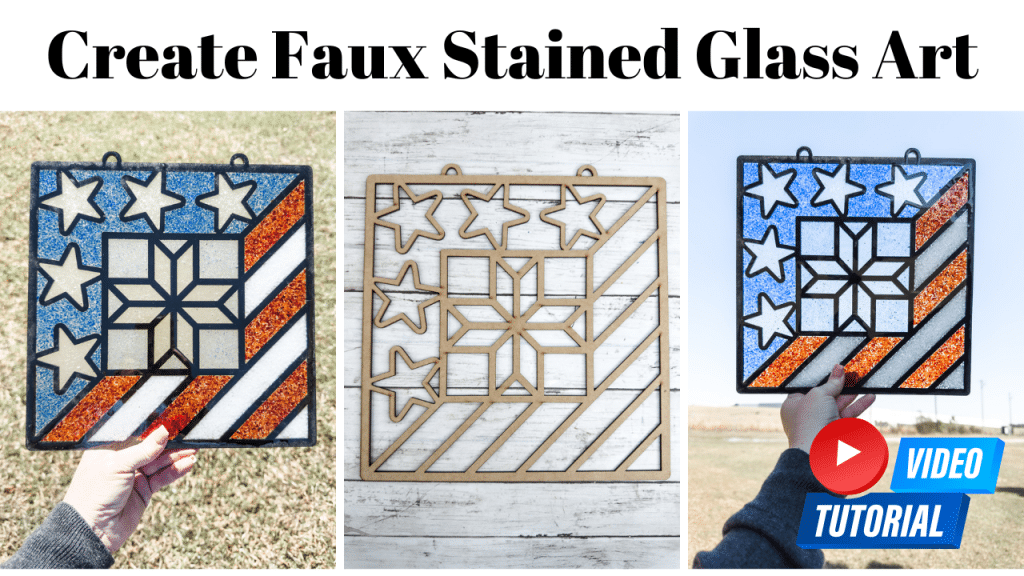
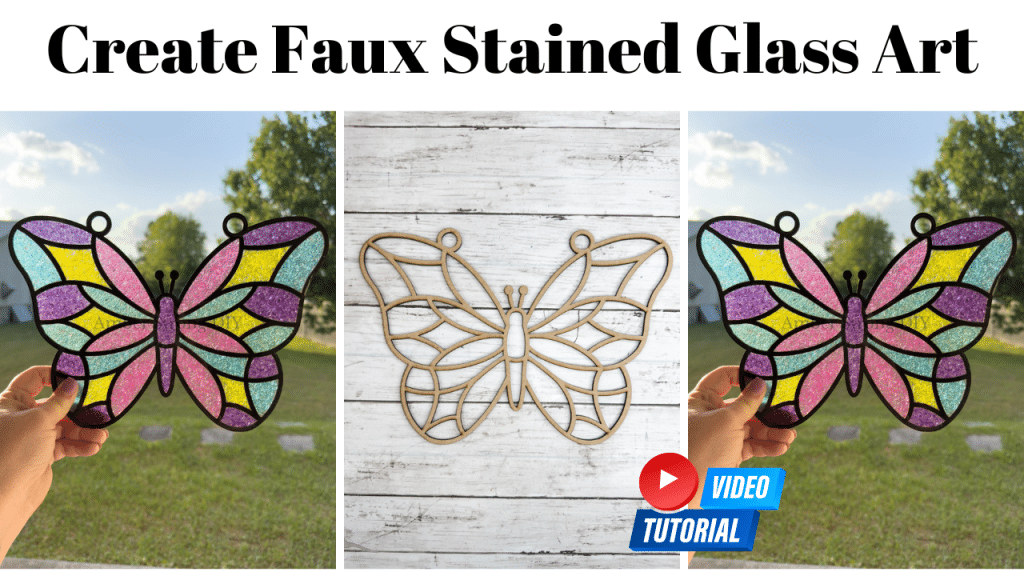
Laser-cut wood outlines act as your guide, making the process simple and satisfying. These laser cut wooden frames are pre-cut into intricate designs—like hummingbirds, butterflies, flowers, and hearts—so you can skip the hard parts and jump right into the fun.
No soldering, lead bead lines. Just paint or stain the wood frame outline and you are ready to fill the openings with shattered or crushed glass.
We cut all our wood outline frames in our warehouse located in Rincon, Georgia. That is right our wood cut outs are made in the USA!
If you’ve ever felt unsure about trying a new craft, these wood frame outlines will give you the structure and support you need to get started with confidence.

“As an Amazon affiliate I may earn a small commission if you make a purchase. There is no additional cost incurred to you!”
Supplies You’ll Need to create faux stained glass sun catchers
- Laser-cut wood outline (choose a beginner-friendly shape)
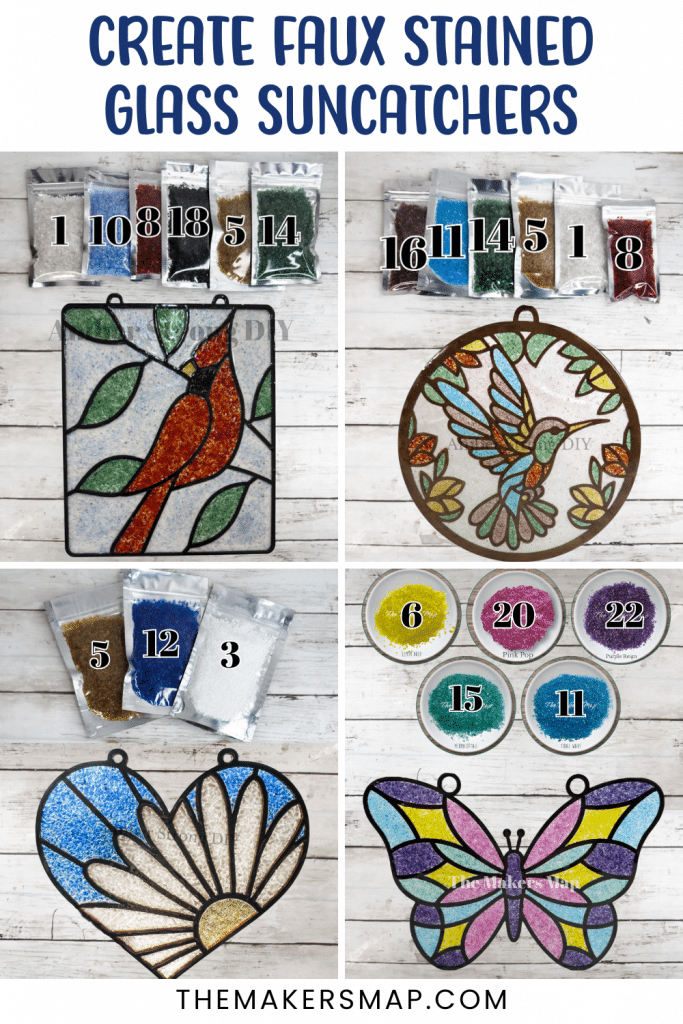
- Crushed glass (kits often come with pre-selected colors)
- Epoxy resin (I really like the KHKD Brand)
- Paper transfer tape (to hold glass in place)
- Wood stain or acrylic paint (I personally use DecoArt)
- Mixing cup & stir stick
- Mask, Gloves & protective surface (I use wax paper on my surface)
- Chain or twine for hanging *you can choose the type of chain you like
See my full Amazon Favorites list here!
Step by step instructions to create sun catchers glass art:
Step By Step – Beginner’s Guide to Faux Stained Glass
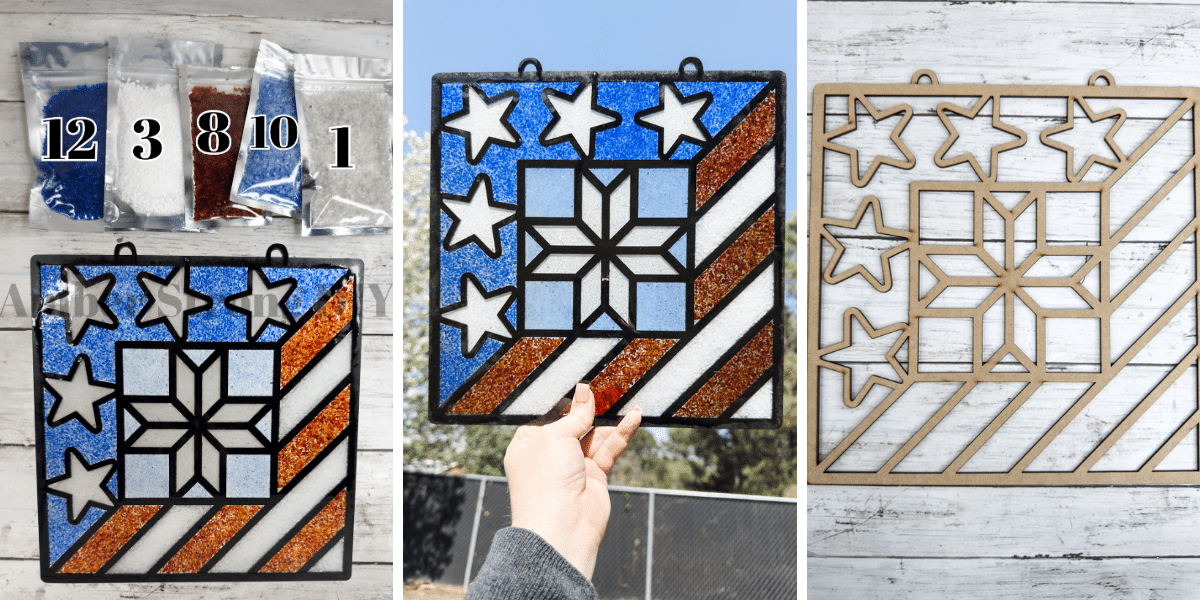
- Start with a laser-cut design – Choose from a wide range of shapes like cardinals, hummingbirds, crosses, flowers and more. You can purchase laser cut wood designs from my shop in 6 inch, 12 inch sizes as well as bulk pack options that are great for craft parties, paint parties, classes and workshops.
- Paint or stain the wood cutout – Before starting, add paint or stain to the wood to give it a finished, polished look. Let it dry completely.
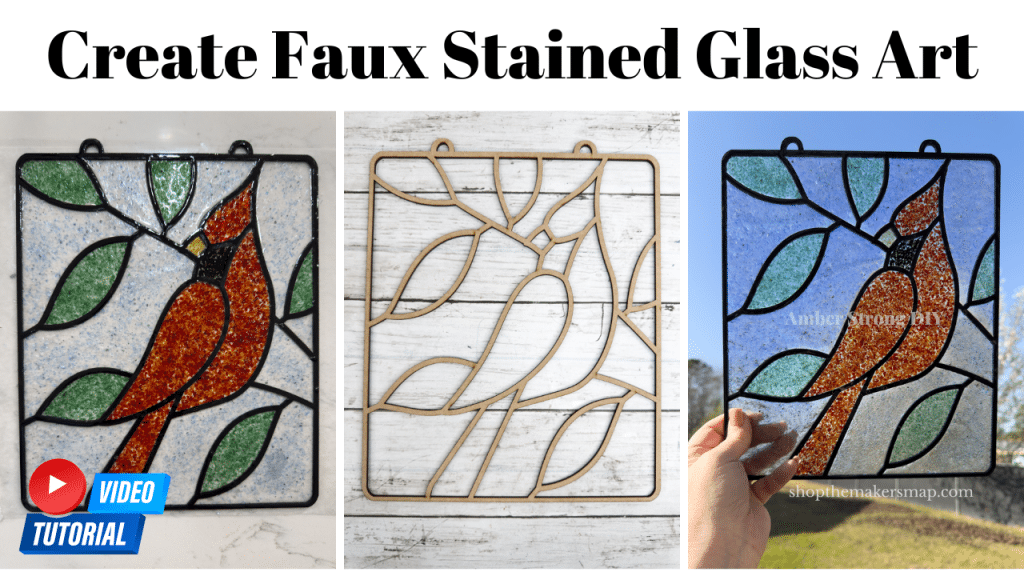
- Next, Add paper transfer tape to the back – You will want to use paper transfer tape. Make sure you have a little off the edge so you have something to use to turn the wood cut out as you fill it with glass. Begin by choosing which side of your wood cut out will be the back. Place that side down on the Sticky side of the paper transfer tape.. This helps hold the crushed glass in place and keeps the resin from leaking through. You may want to use a rolling pin or brayer to help ensure the wood is stuck to the adhesive of the paper transfer tape. This step is called masking.
- Add color with crushed glass – In this step you are going to pick your colors of shattered glass, crushed glass, crushed shell, glitter or mica powders mixed with resin. There are unlimited ways you can create faux stained glass. Once you have made your selections, begin by filling each section with your choice of colored crushed glass to replicate the look of traditional stained glass. This part may require you use some tweezers if glass gets in the other openings.
- Prepare the epoxy resin – Based on the resin you have chose, you will mix the resin according to the manufacturers instructions. Be sure to wear gloves, a mask and make sure you have proteced your working area. Use wax paper or cardboard. You will need mixing cup and something like a popsicle stick to mix the resin. Mix slowly so that you introduce minimal bubbles.
- Add the Resin- Carefully drizzle the resin over the glass sections, making sure everything is covered and evenly coated. Most resin is self leveling. Make sure not to over fill. I like to coat my wood frame outlines. But you may not want to do that. You can also use a dropper to apply the resin over the glass. TIP: Use a heat to help pop bubbles, or spritz the surface with 91% isopropyl alcohol lightly to help pop bubbles. Set aside to cure.
- Let it cure, then peel the tape – Once the resin has cured fully, gently peel off the paper transfer tape from the back. Some transfer tapes can leave a sticky residue. If you have this problem I use mod podge to seal the back. I have only had this happen a couple of times. you can also use isopropyl alcohol to gently wipe and remove the sticky residue.
- Add a chain to hang and display – Now that your faux stained glass sun catcher craft has cured, Finish your sun catcher by attaching a chain or ribbon and hanging it in a sunny window to catch the light beautifully. Remember, all resin can yellow over time. So I recommend displaying your sun catcher in a covered area not in the immediate direct sunlight.
- Clean up- Properly clean up your work area. If you need to clean up resin you can use isopropyl alcohol to wipe it up. If you have left over resin please allow it to cure before disposing of it, or add the left over resin to a small mold to get some use out of the product and create less waste. Dispose of gloves, cups, stir sticks and other items in the trash.
- Wash your hands- It is important to wear proper PPE and gloves. Wash your hands with soap and water after you have completed making the faux stained glass sun catcher using wood frame outlines.
- TIP: Wear a mask- It is recommended that you wear a mask or respirator. And work in a well ventilated area when working with resin.
You Can Do This – Even If You’re New!
Trying a new craft can be intimidating—but this one is designed to build your creative confidence. The steps are simple, the materials are forgiving, and the results are truly rewarding.
Here’s why this Beginner’s Guide to Faux Stained Glass Sun Catchers with Laser-Cut Wood is perfect:
- Quick wins: You can finish a sun catcher in an afternoon.
- Creative freedom: Choose your own colors and styles.
- Minimal tools: No fancy equipment or prior experience needed.
- Room to grow: Once you make one, you’ll be hooked!
- Crafting with Friends: You can craft with friends or family and learn together!
Where to Get a beginner Starter Kit
You can grab your wood outlines and glass that you will need in one place at The Makers Map Shop, where laser-cut wood sun catcher outlines and beginner-friendly kits are available. You can also choose from 120+ single outline designs and and crushed glass made just for crafters like you. NOTE: We do not currently have resin in stock but it is coming soon!
Crushed Glass For Crafting
We use recycled crushed glass to create our faux stained glass art.
Check out the full glass collection here.

We also have natural crushed shell to if you like to add a little coastal nature aesthetic to your sun catcher crafts.
Final Thoughts: Start Today, Shine Tomorrow
Creating your own faux stained glass sun catcher isn’t just about making something pretty—it’s about believing you can. With just a bit of guidance, you’ll gain the confidence to turn simple materials into something you’ll be proud to display or gift. I can not wait to see what you create.
Faux Stained Glass Sun Catchers with Laser-Cut Wood
So go ahead—take that first step, and let your creativity shine.
It’s beginner-friendly, therapeutic to create, and completely customizable for any theme or season.
Be sure to check out the tutorials below to help you get stared!
Check out these beginner faux stained glass tutorials below.
You can also find my tutorials on my youtube channel

Thanks for stopping by! XOXO Amber
You can also shop my ENTIRE AMAZON Favorites shop just click here! It’s packed full of all the things I use and love. Here is the supply list I highly recommend every creative have on hand!!
Would you also pin my blog for later and get on my newsletter alerts? I would love to have you join my #craftycrew.
Inspired? Leave me a comment below! I love hearing from my readers!

Join my free “Crafting and Sharing” Facebook group!