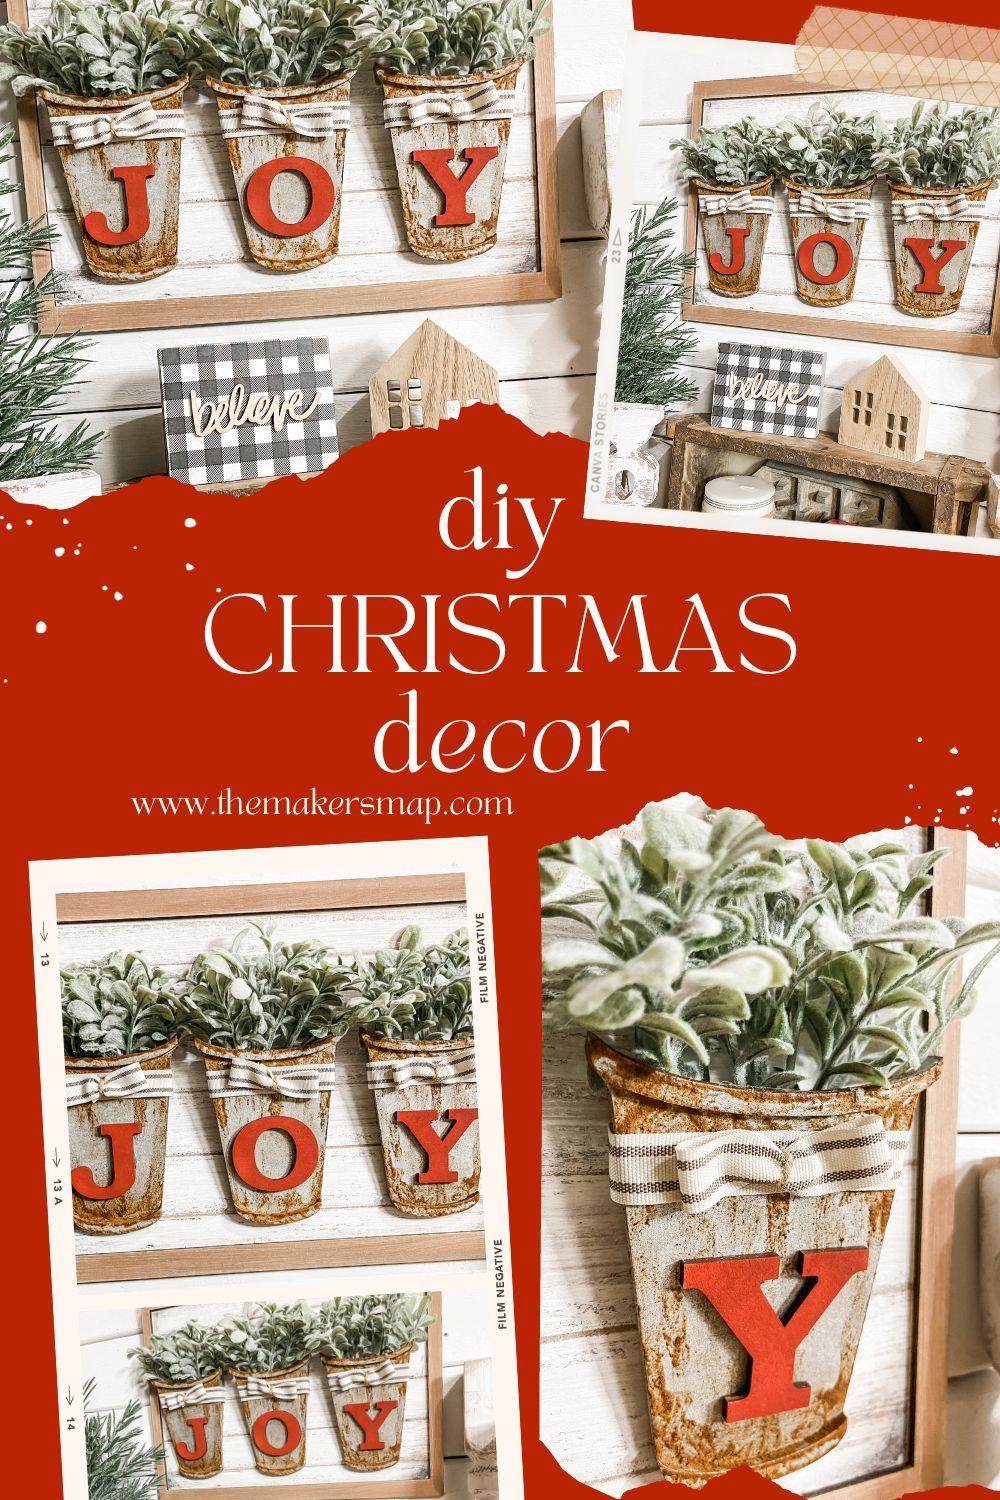
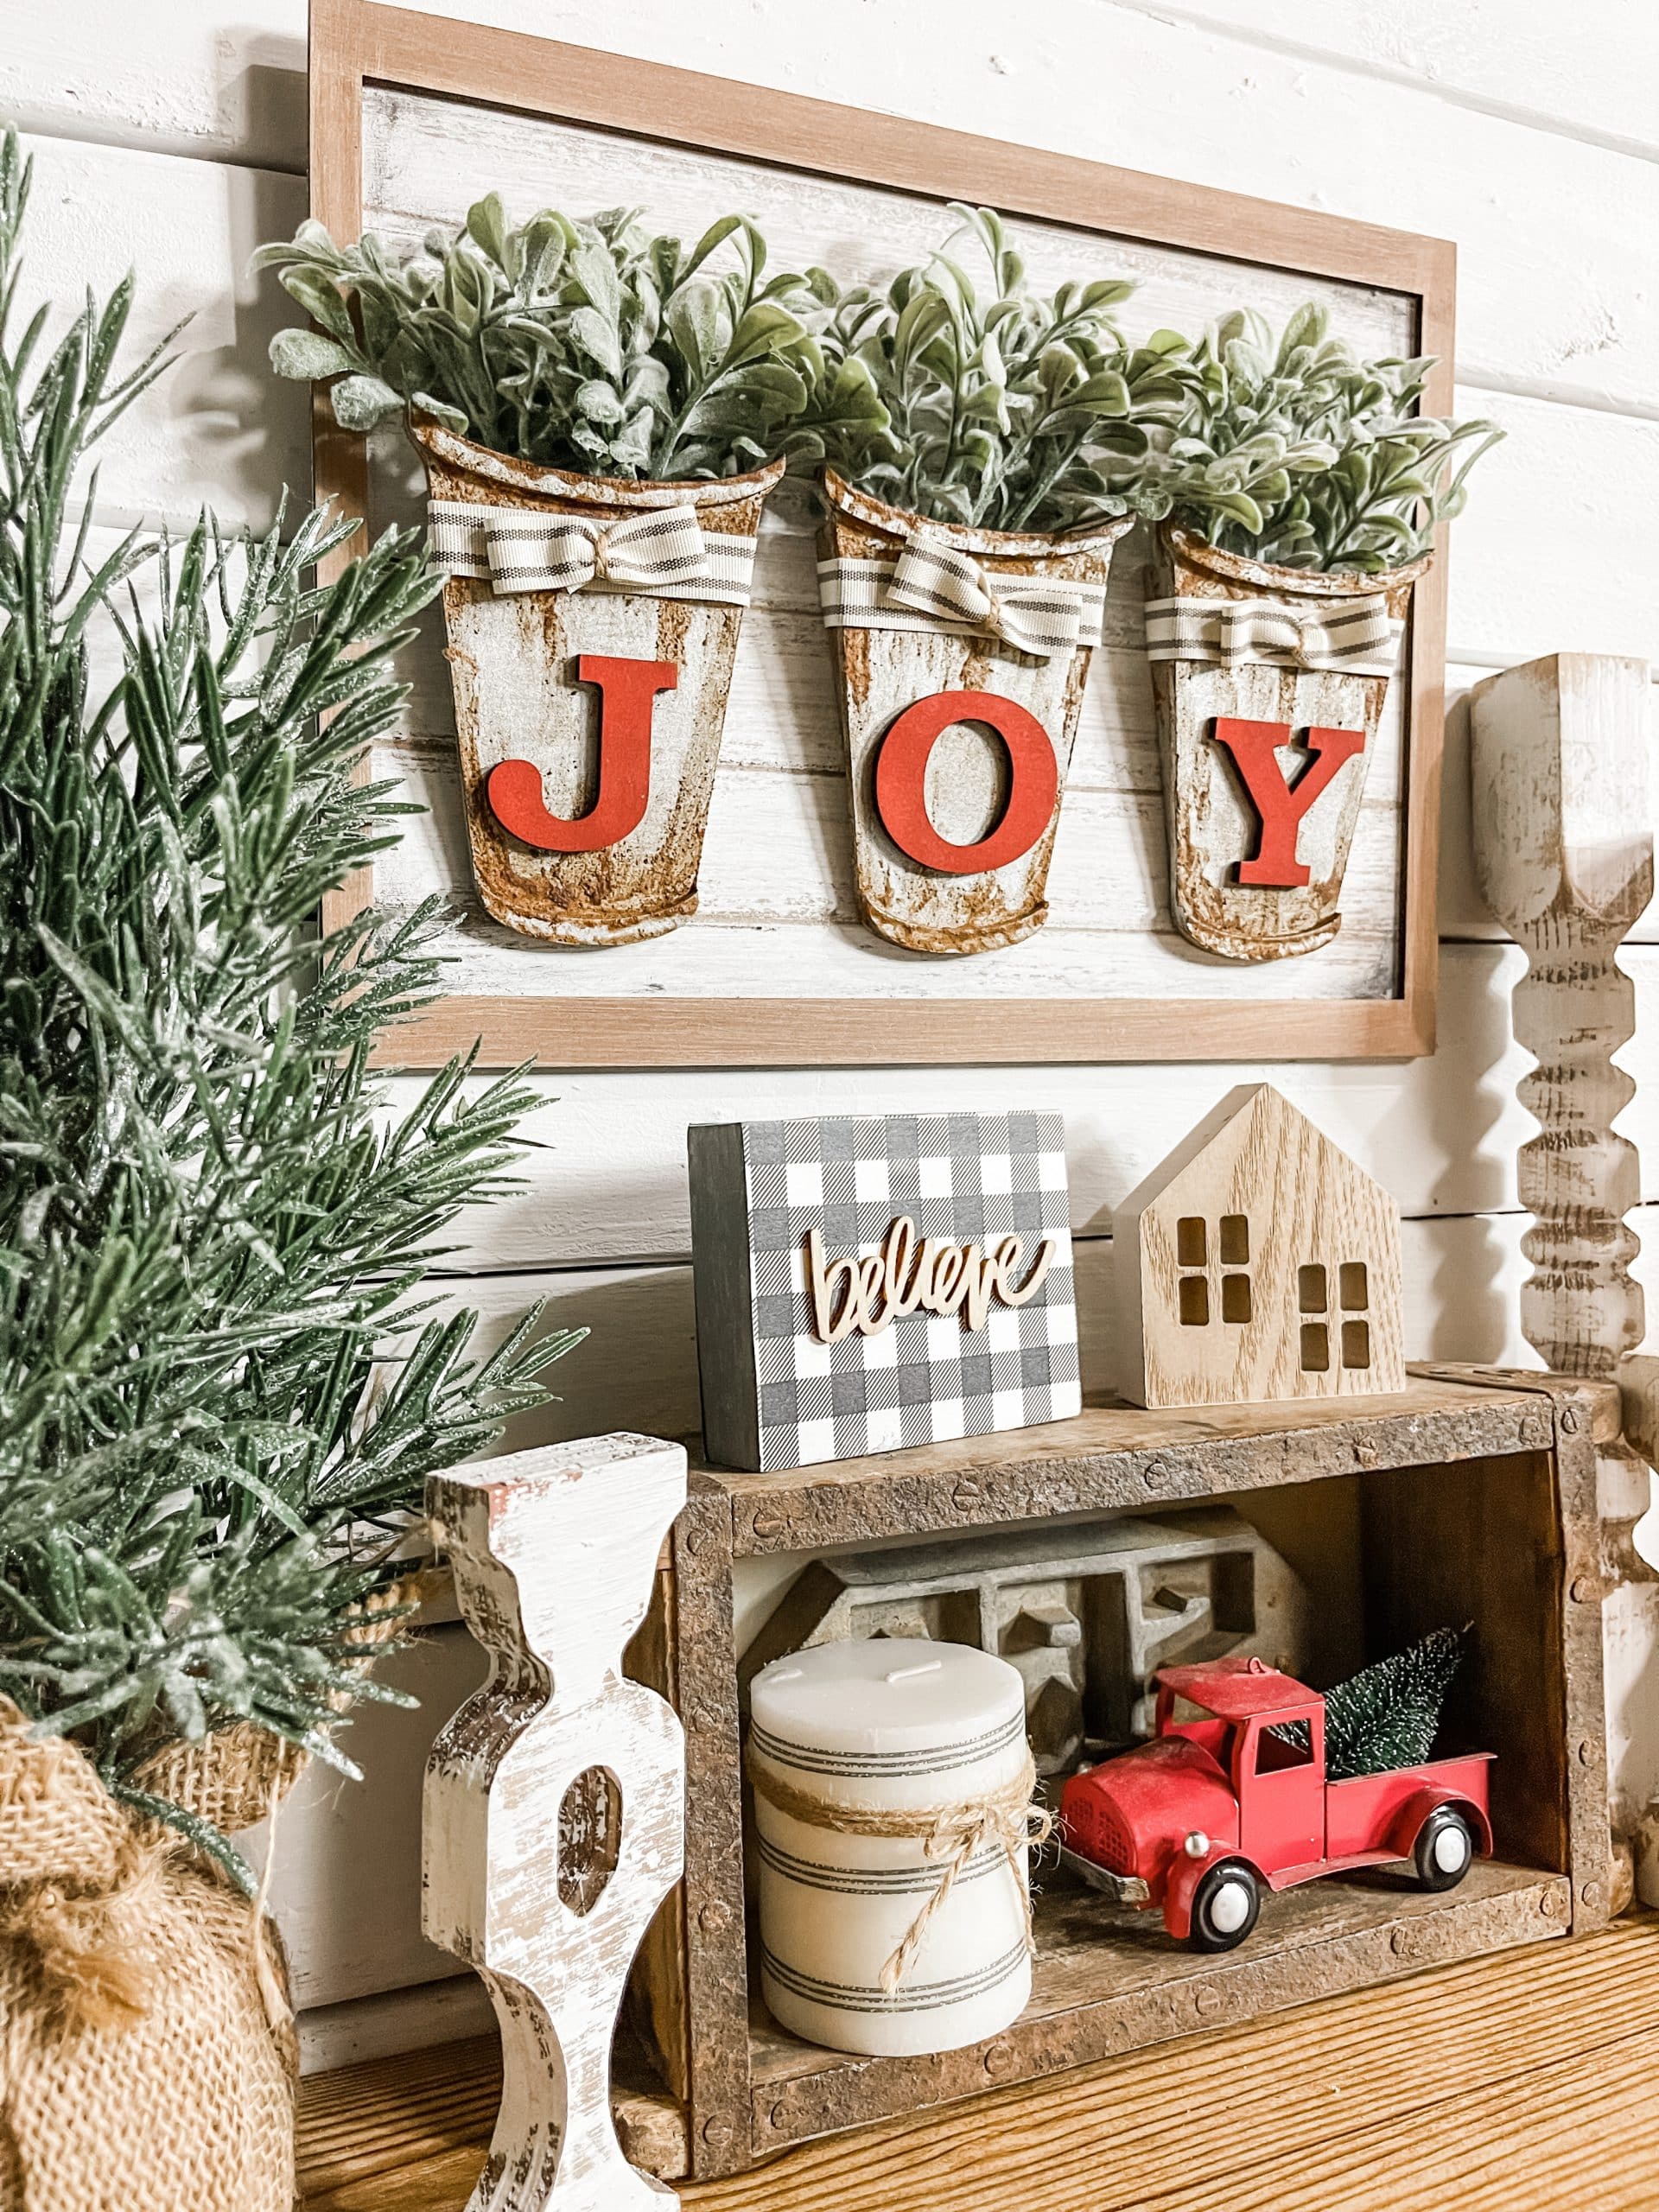
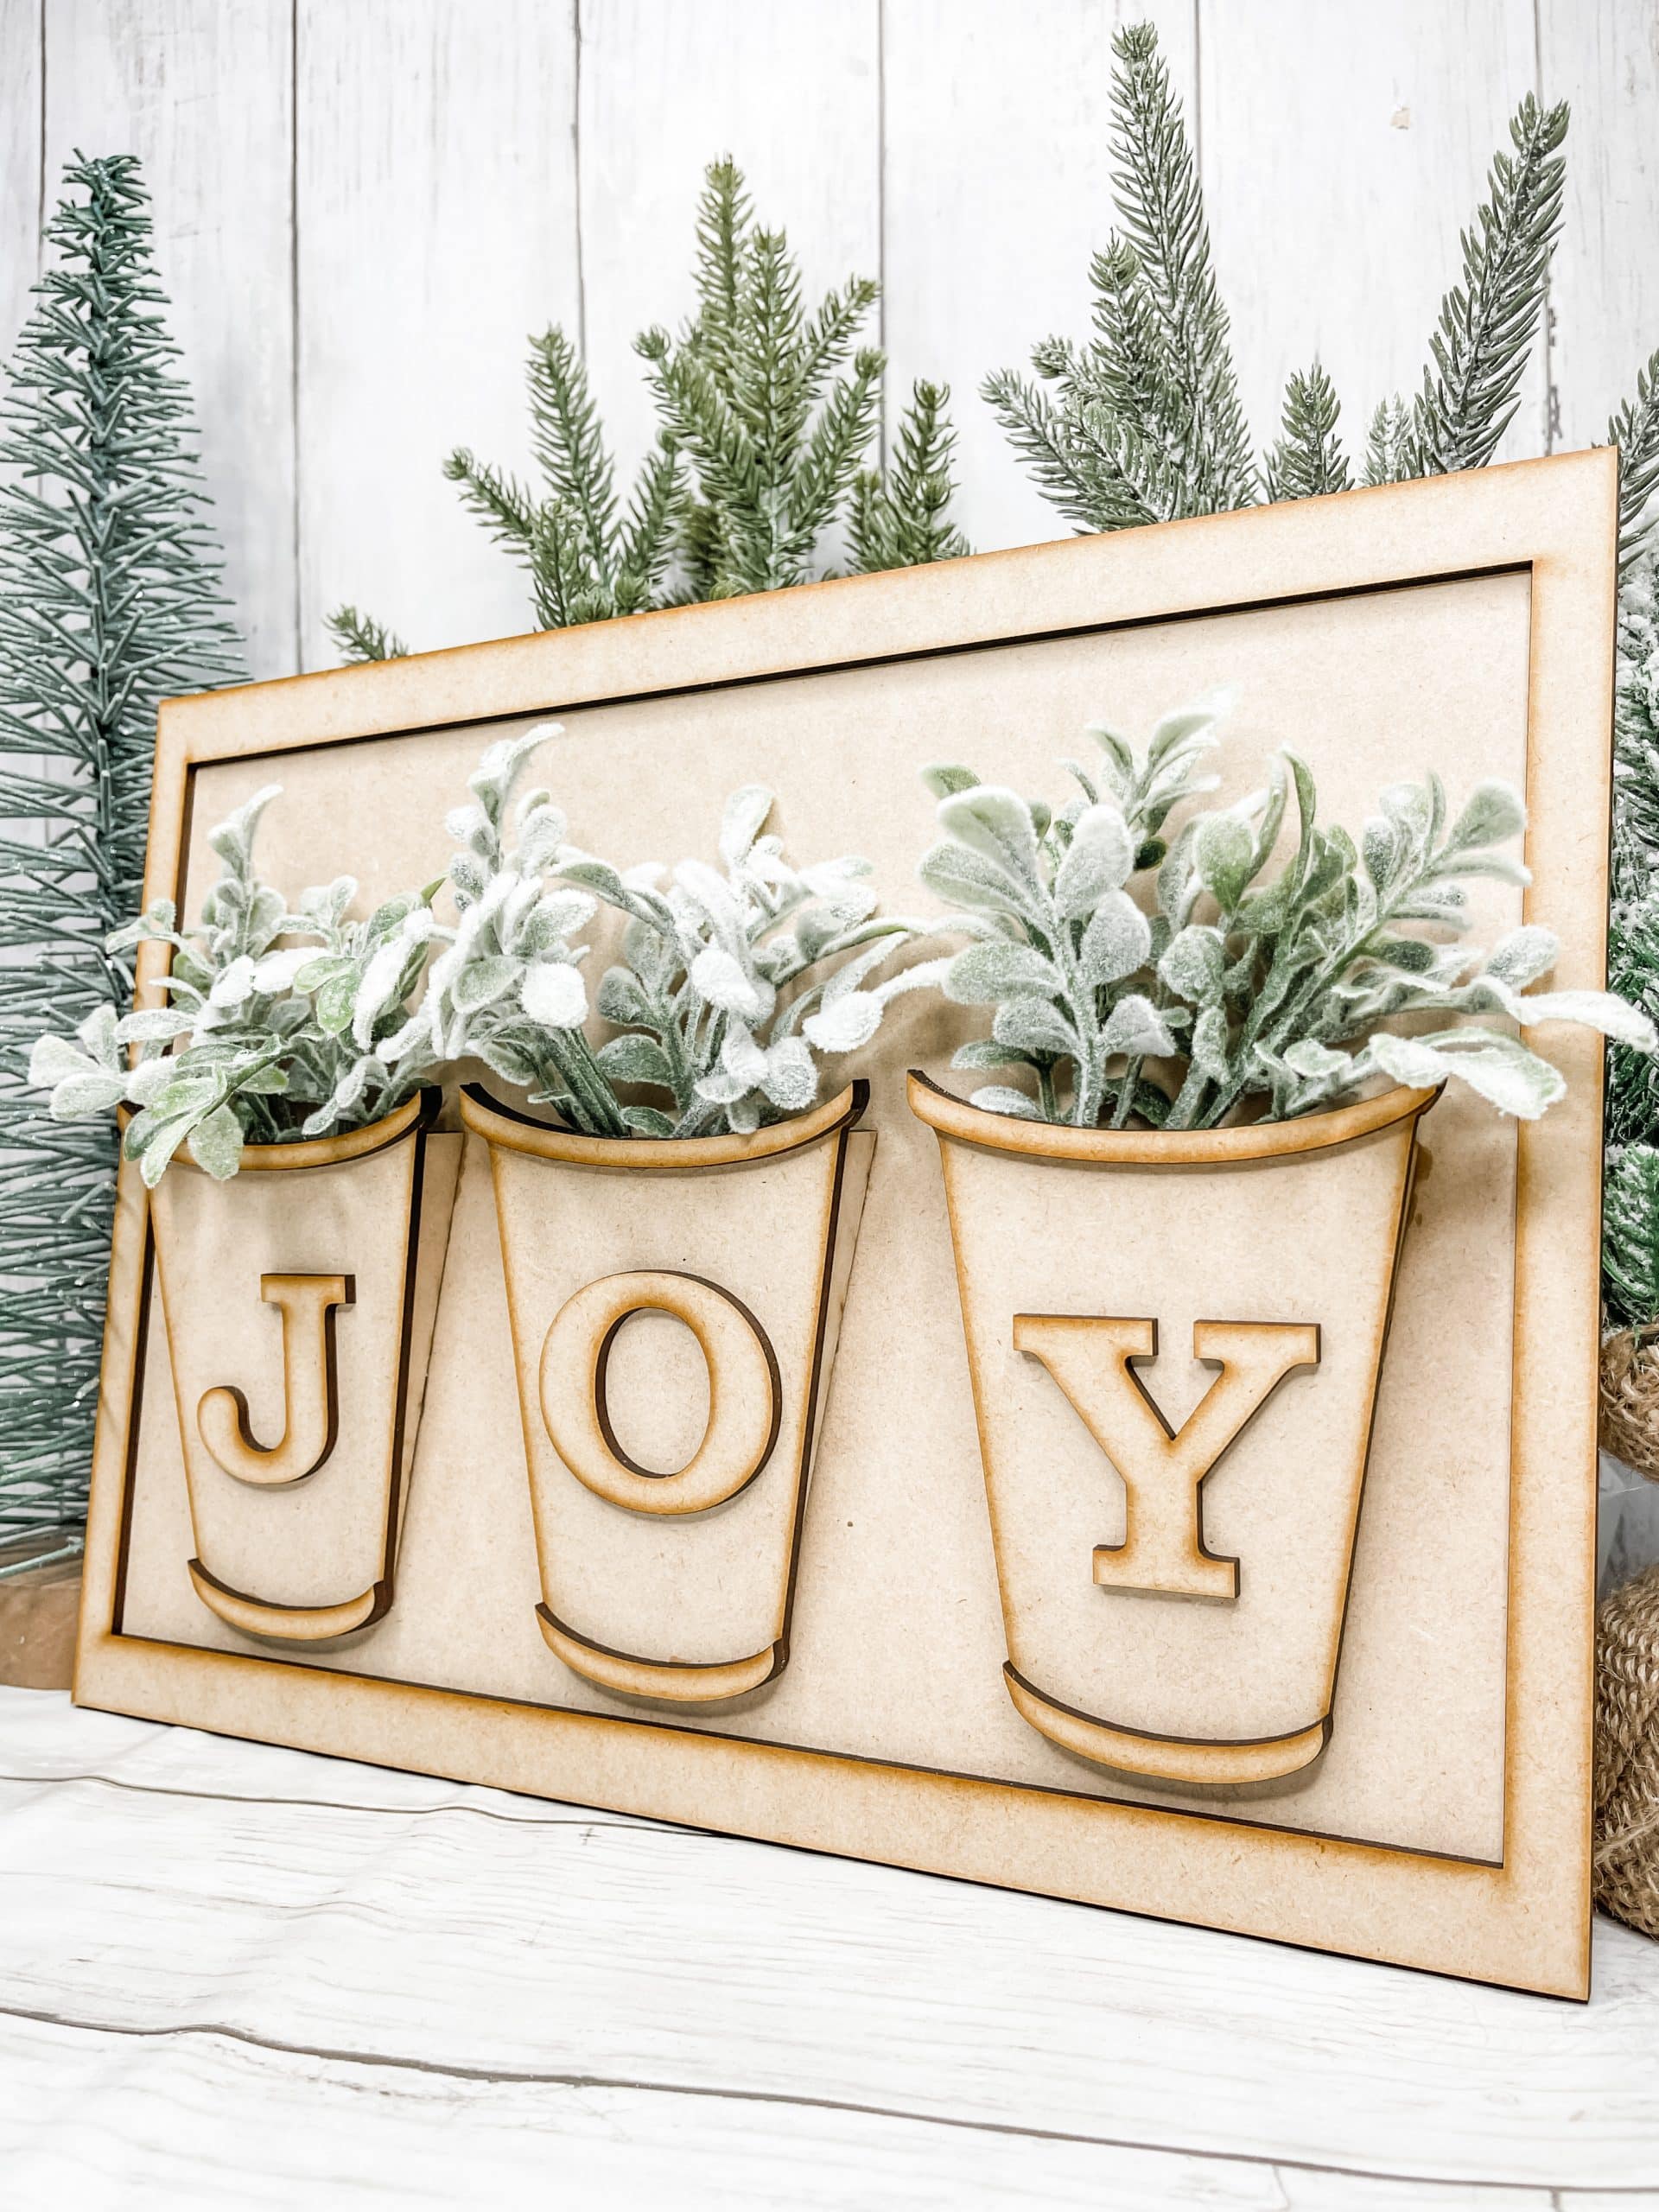
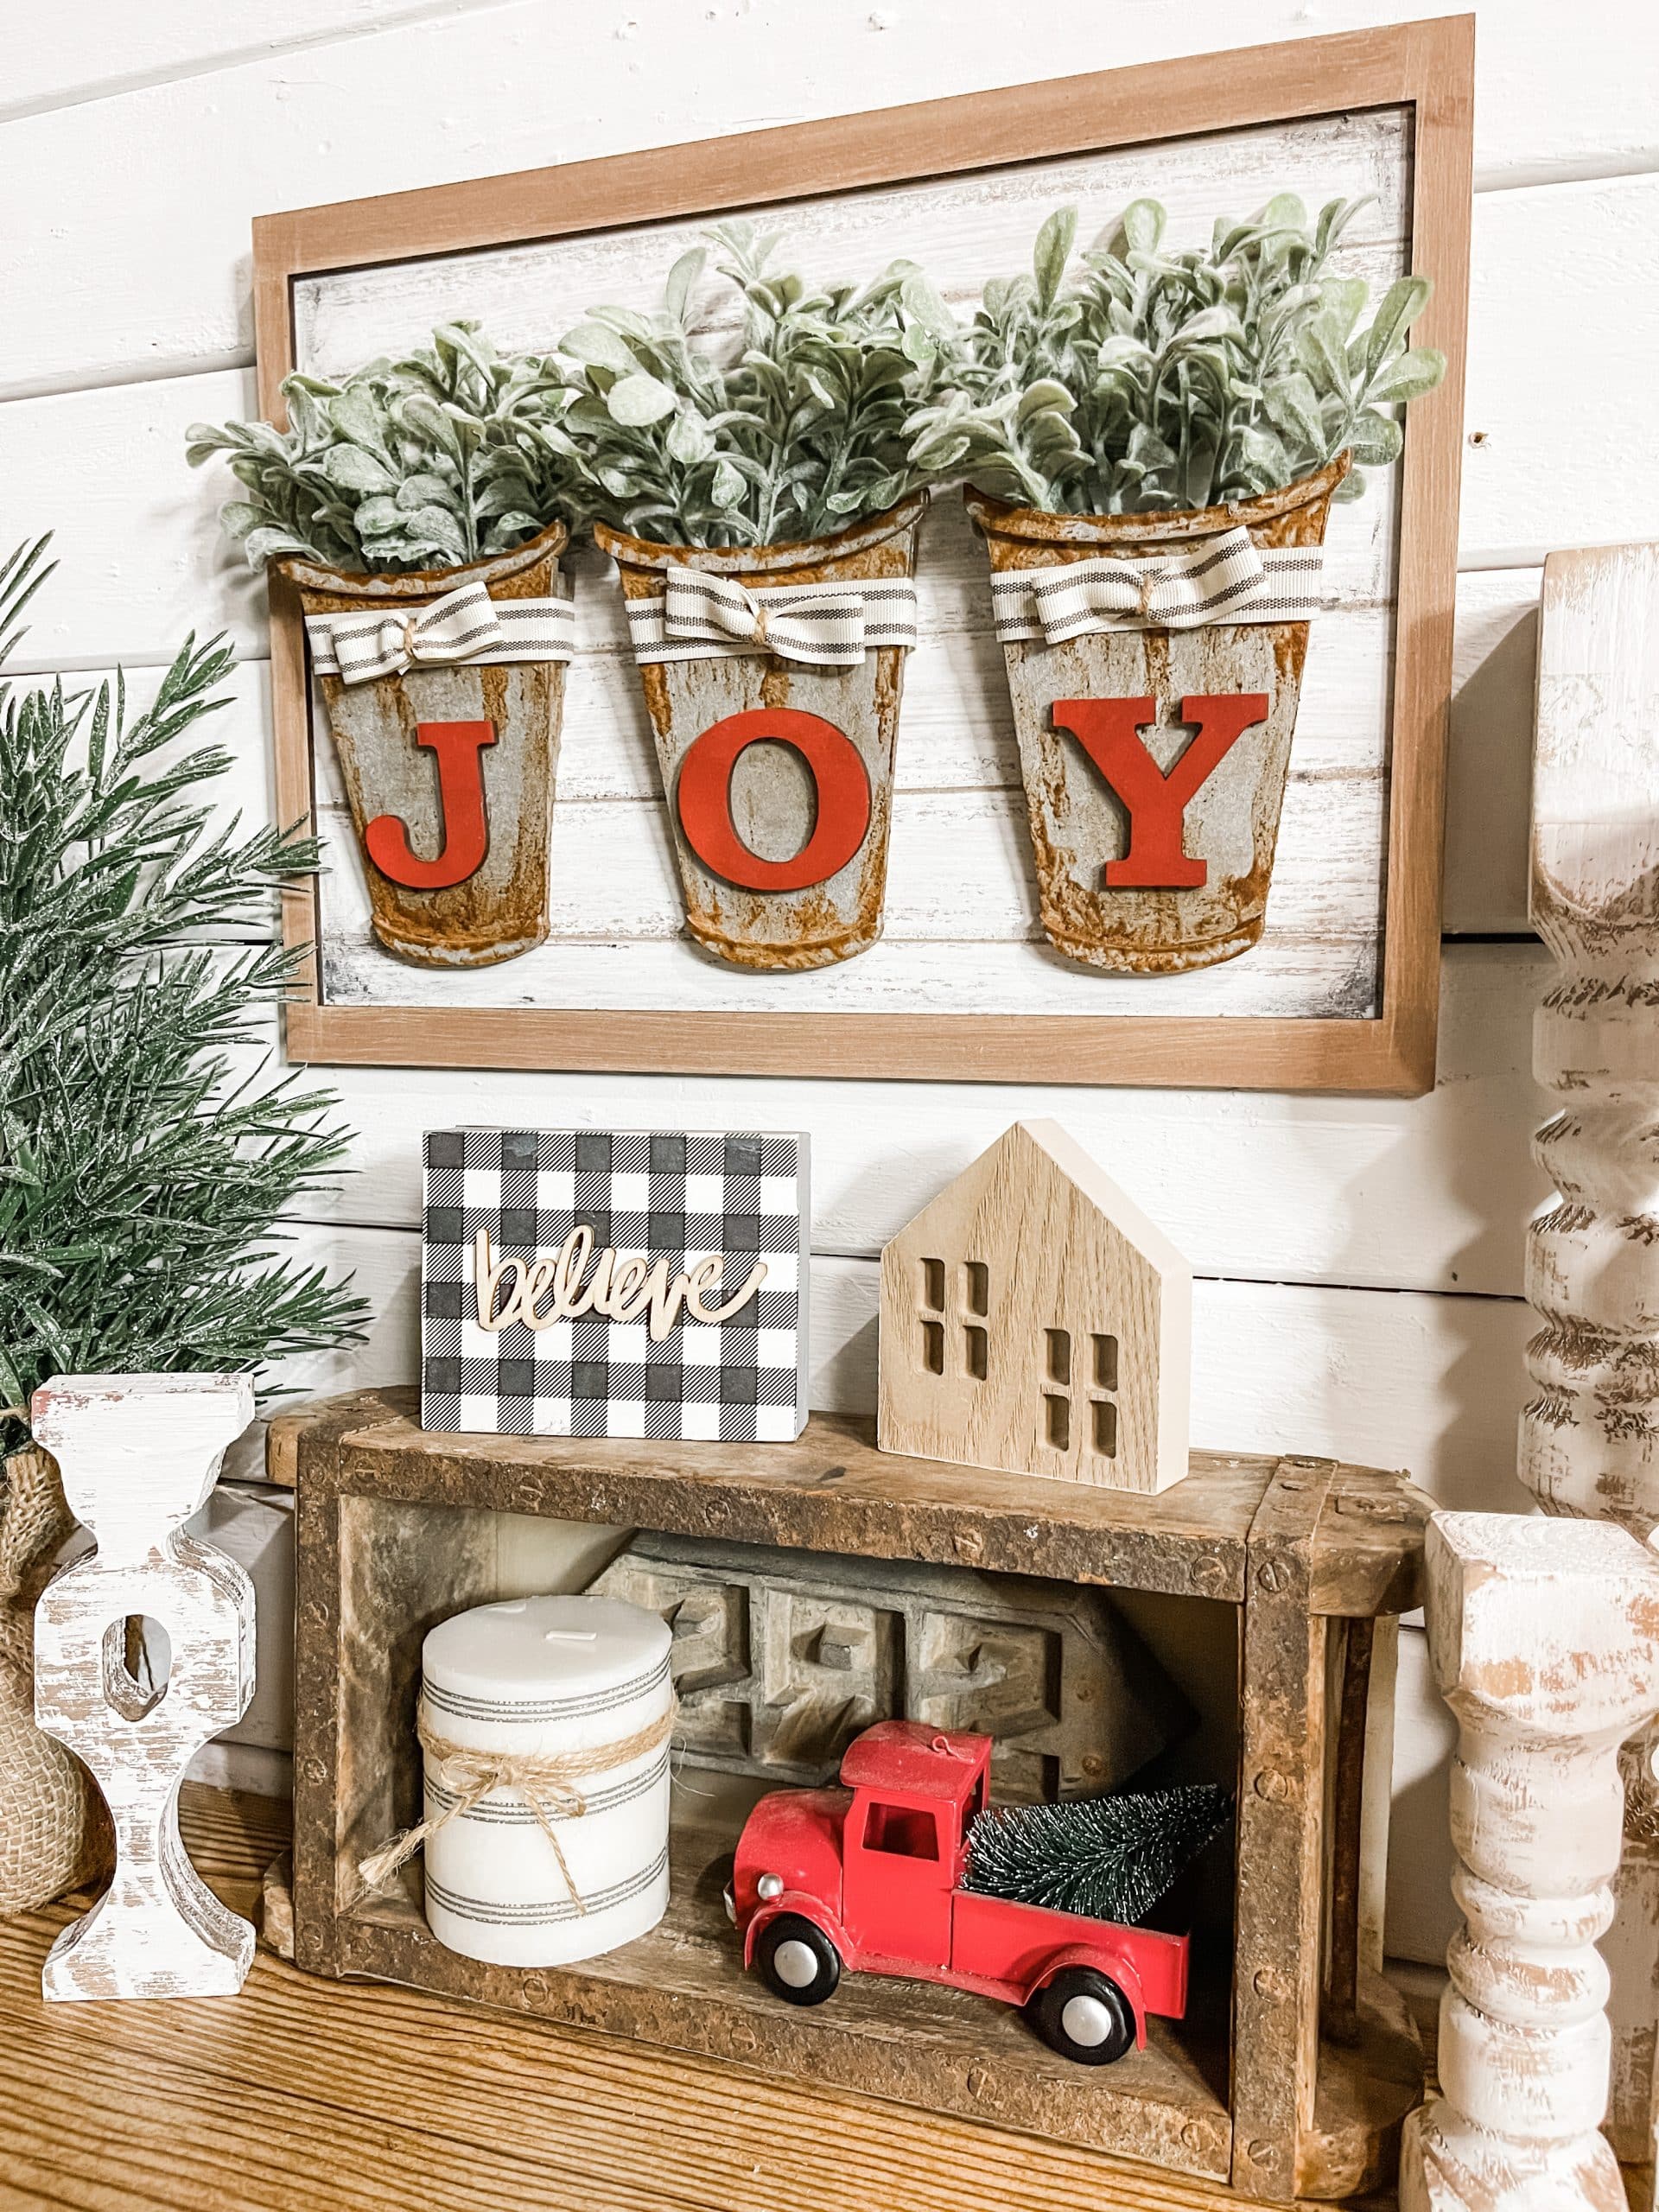
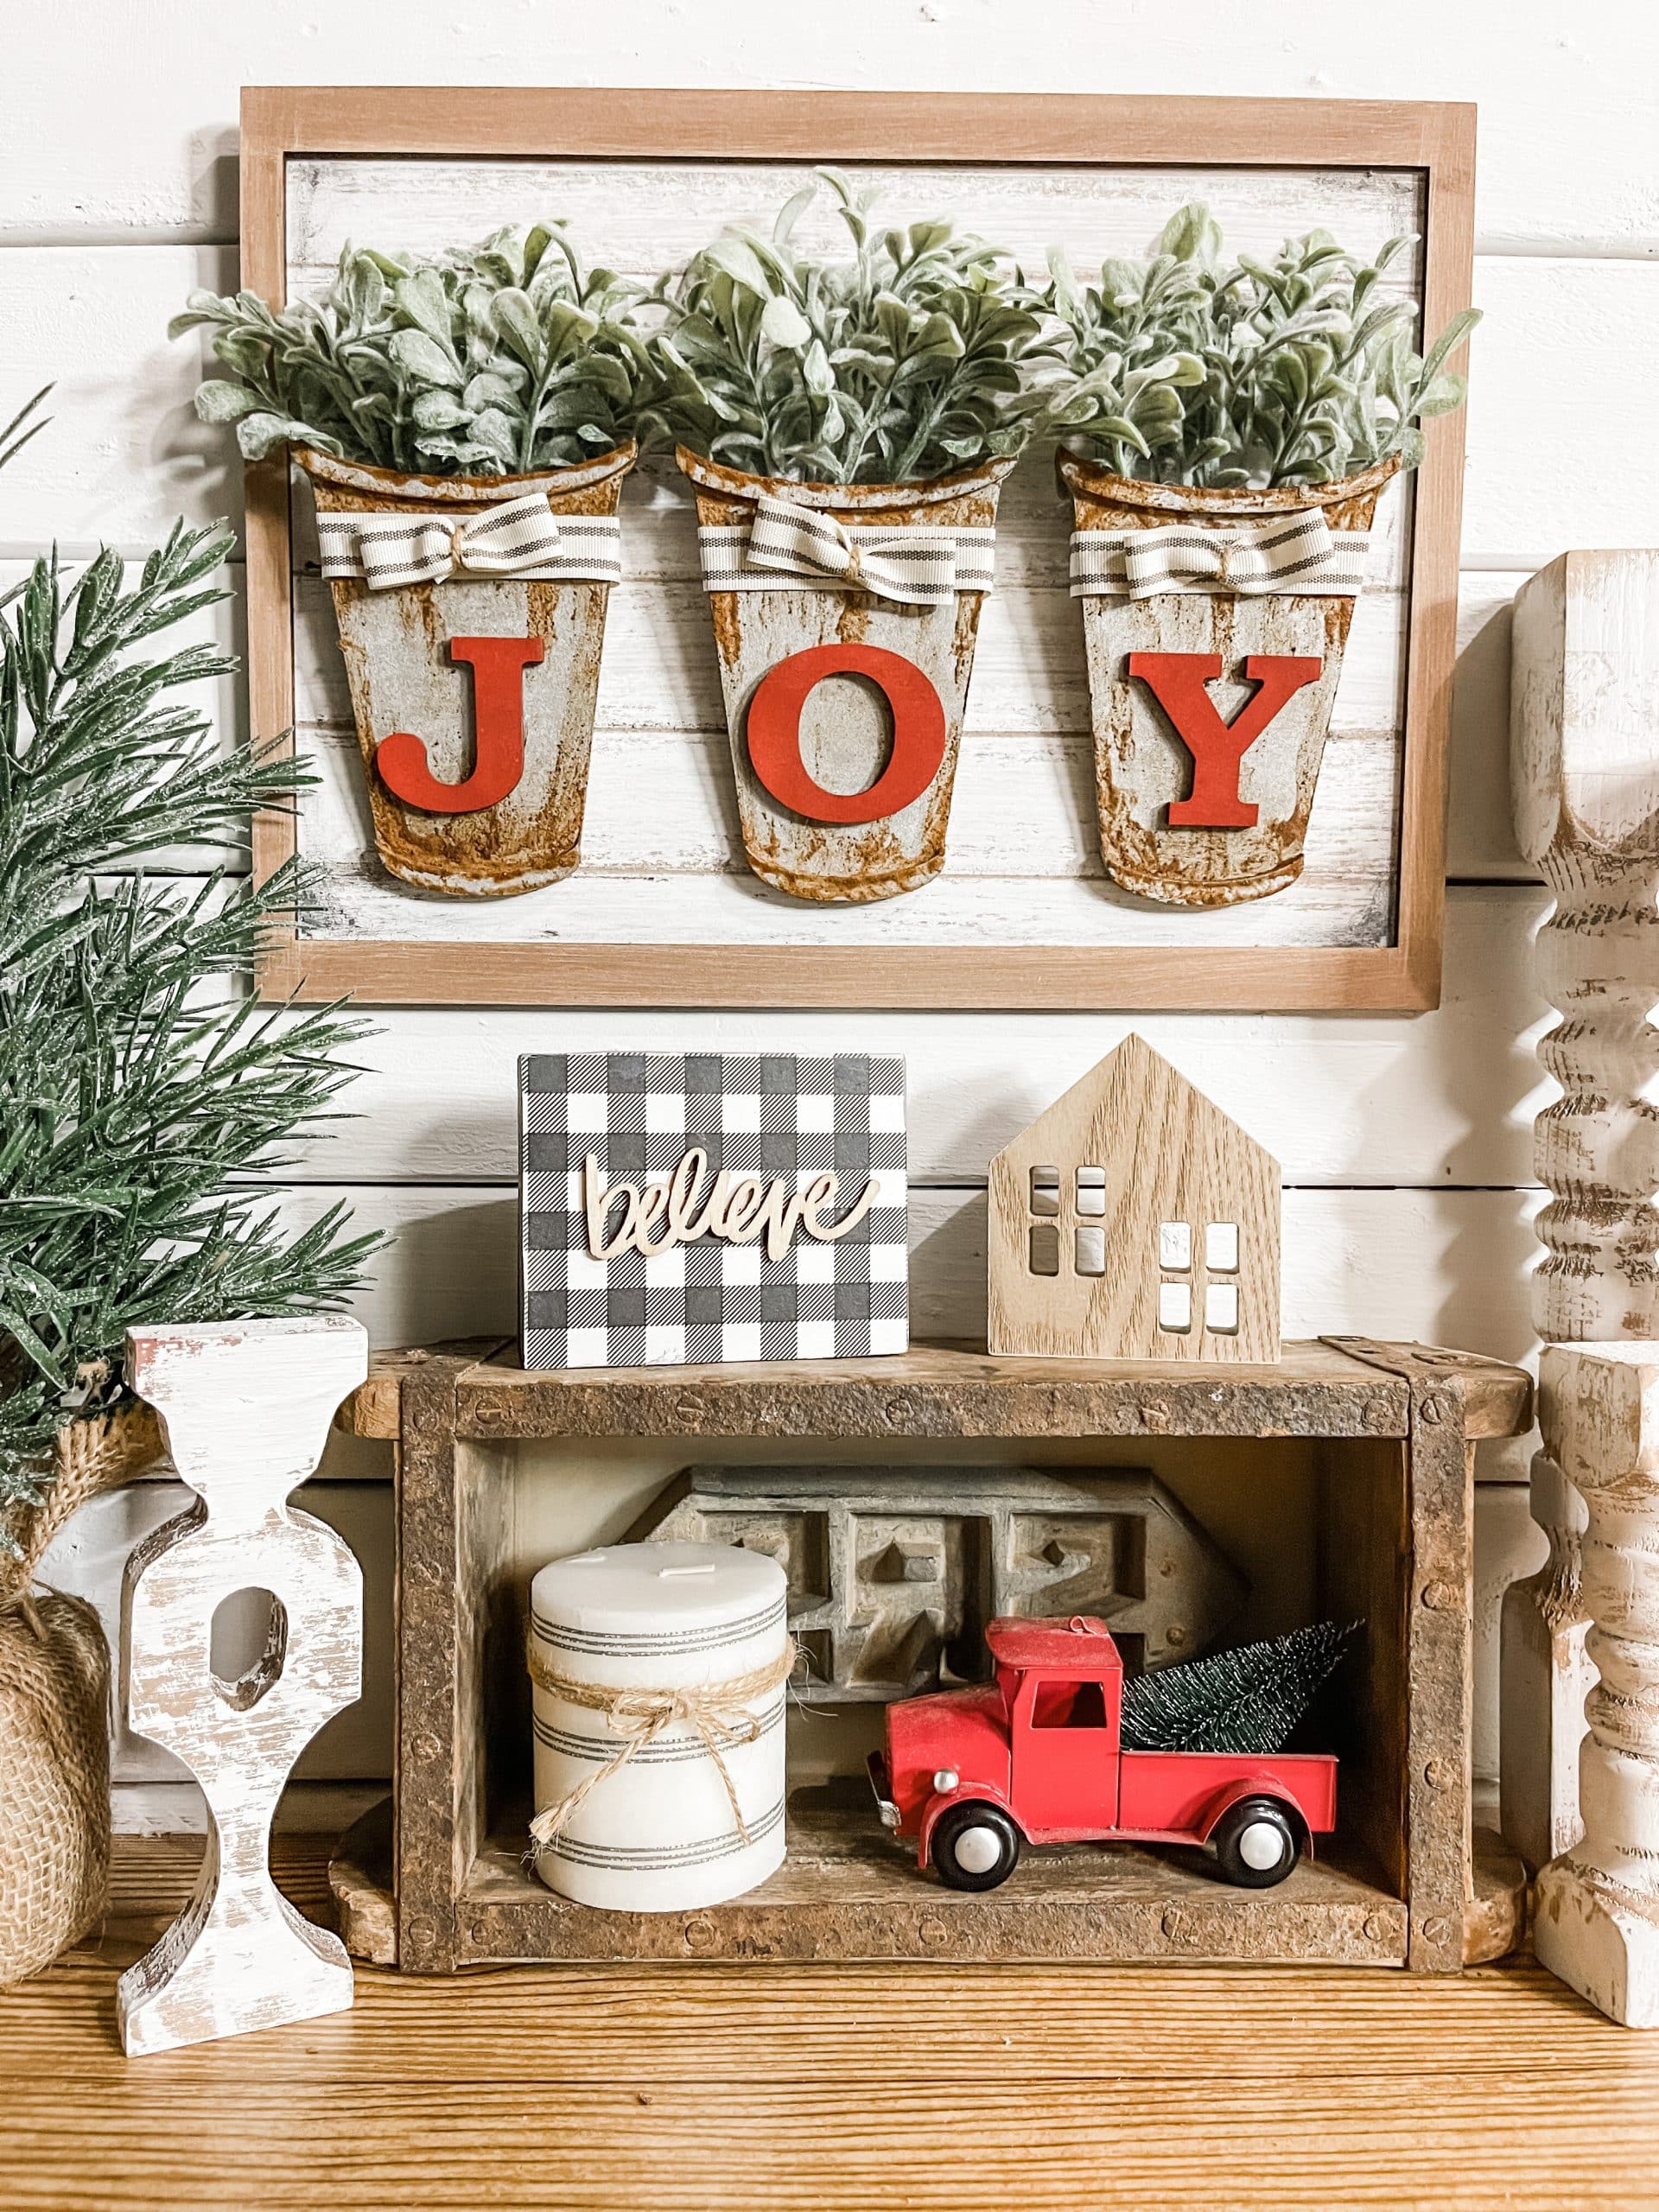
3D Joy Buckets Sign
I first made this 3D Joy Buckets Sign back in October of 2022, and my initial vision was to use it for Christmas. But the truth of this adorable wood craft kit is this – it can be used ALL YEAR!
Joy isn’t something we only need around Christmas. It’s something we should try to create every single day of our lives.
This 3D Joy Buckets Sign is one way I create joy in my life because crafting my own home decor brings me joy!
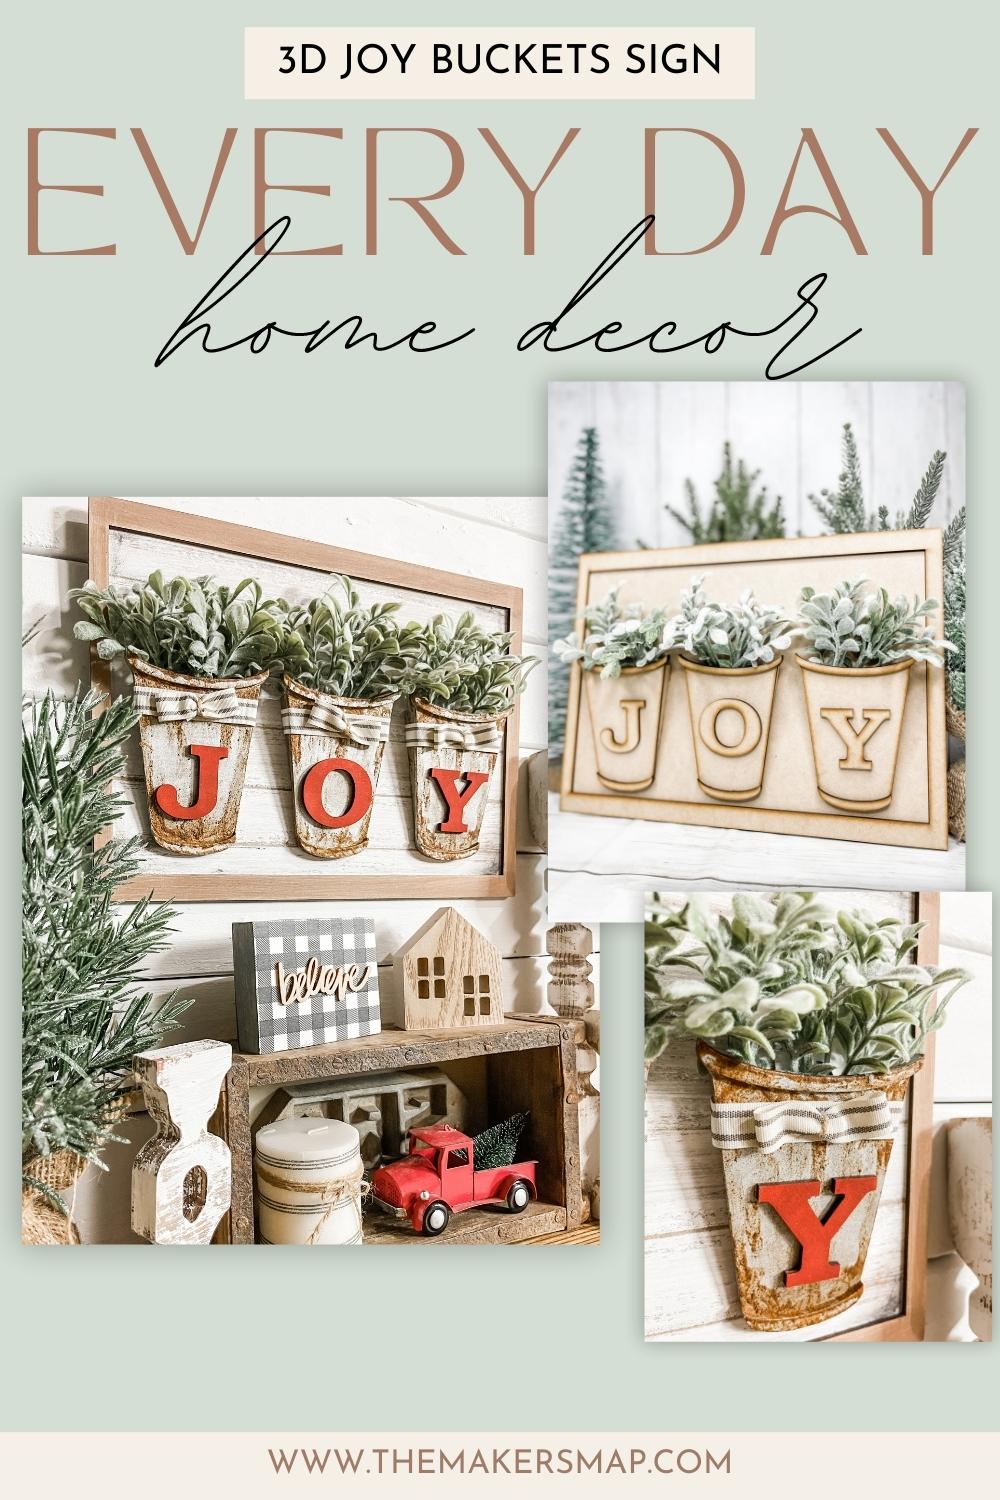
I put my own spin on the sign, but you get to fully customize and personalize the unfinished sign to make it match your vision and decor style!
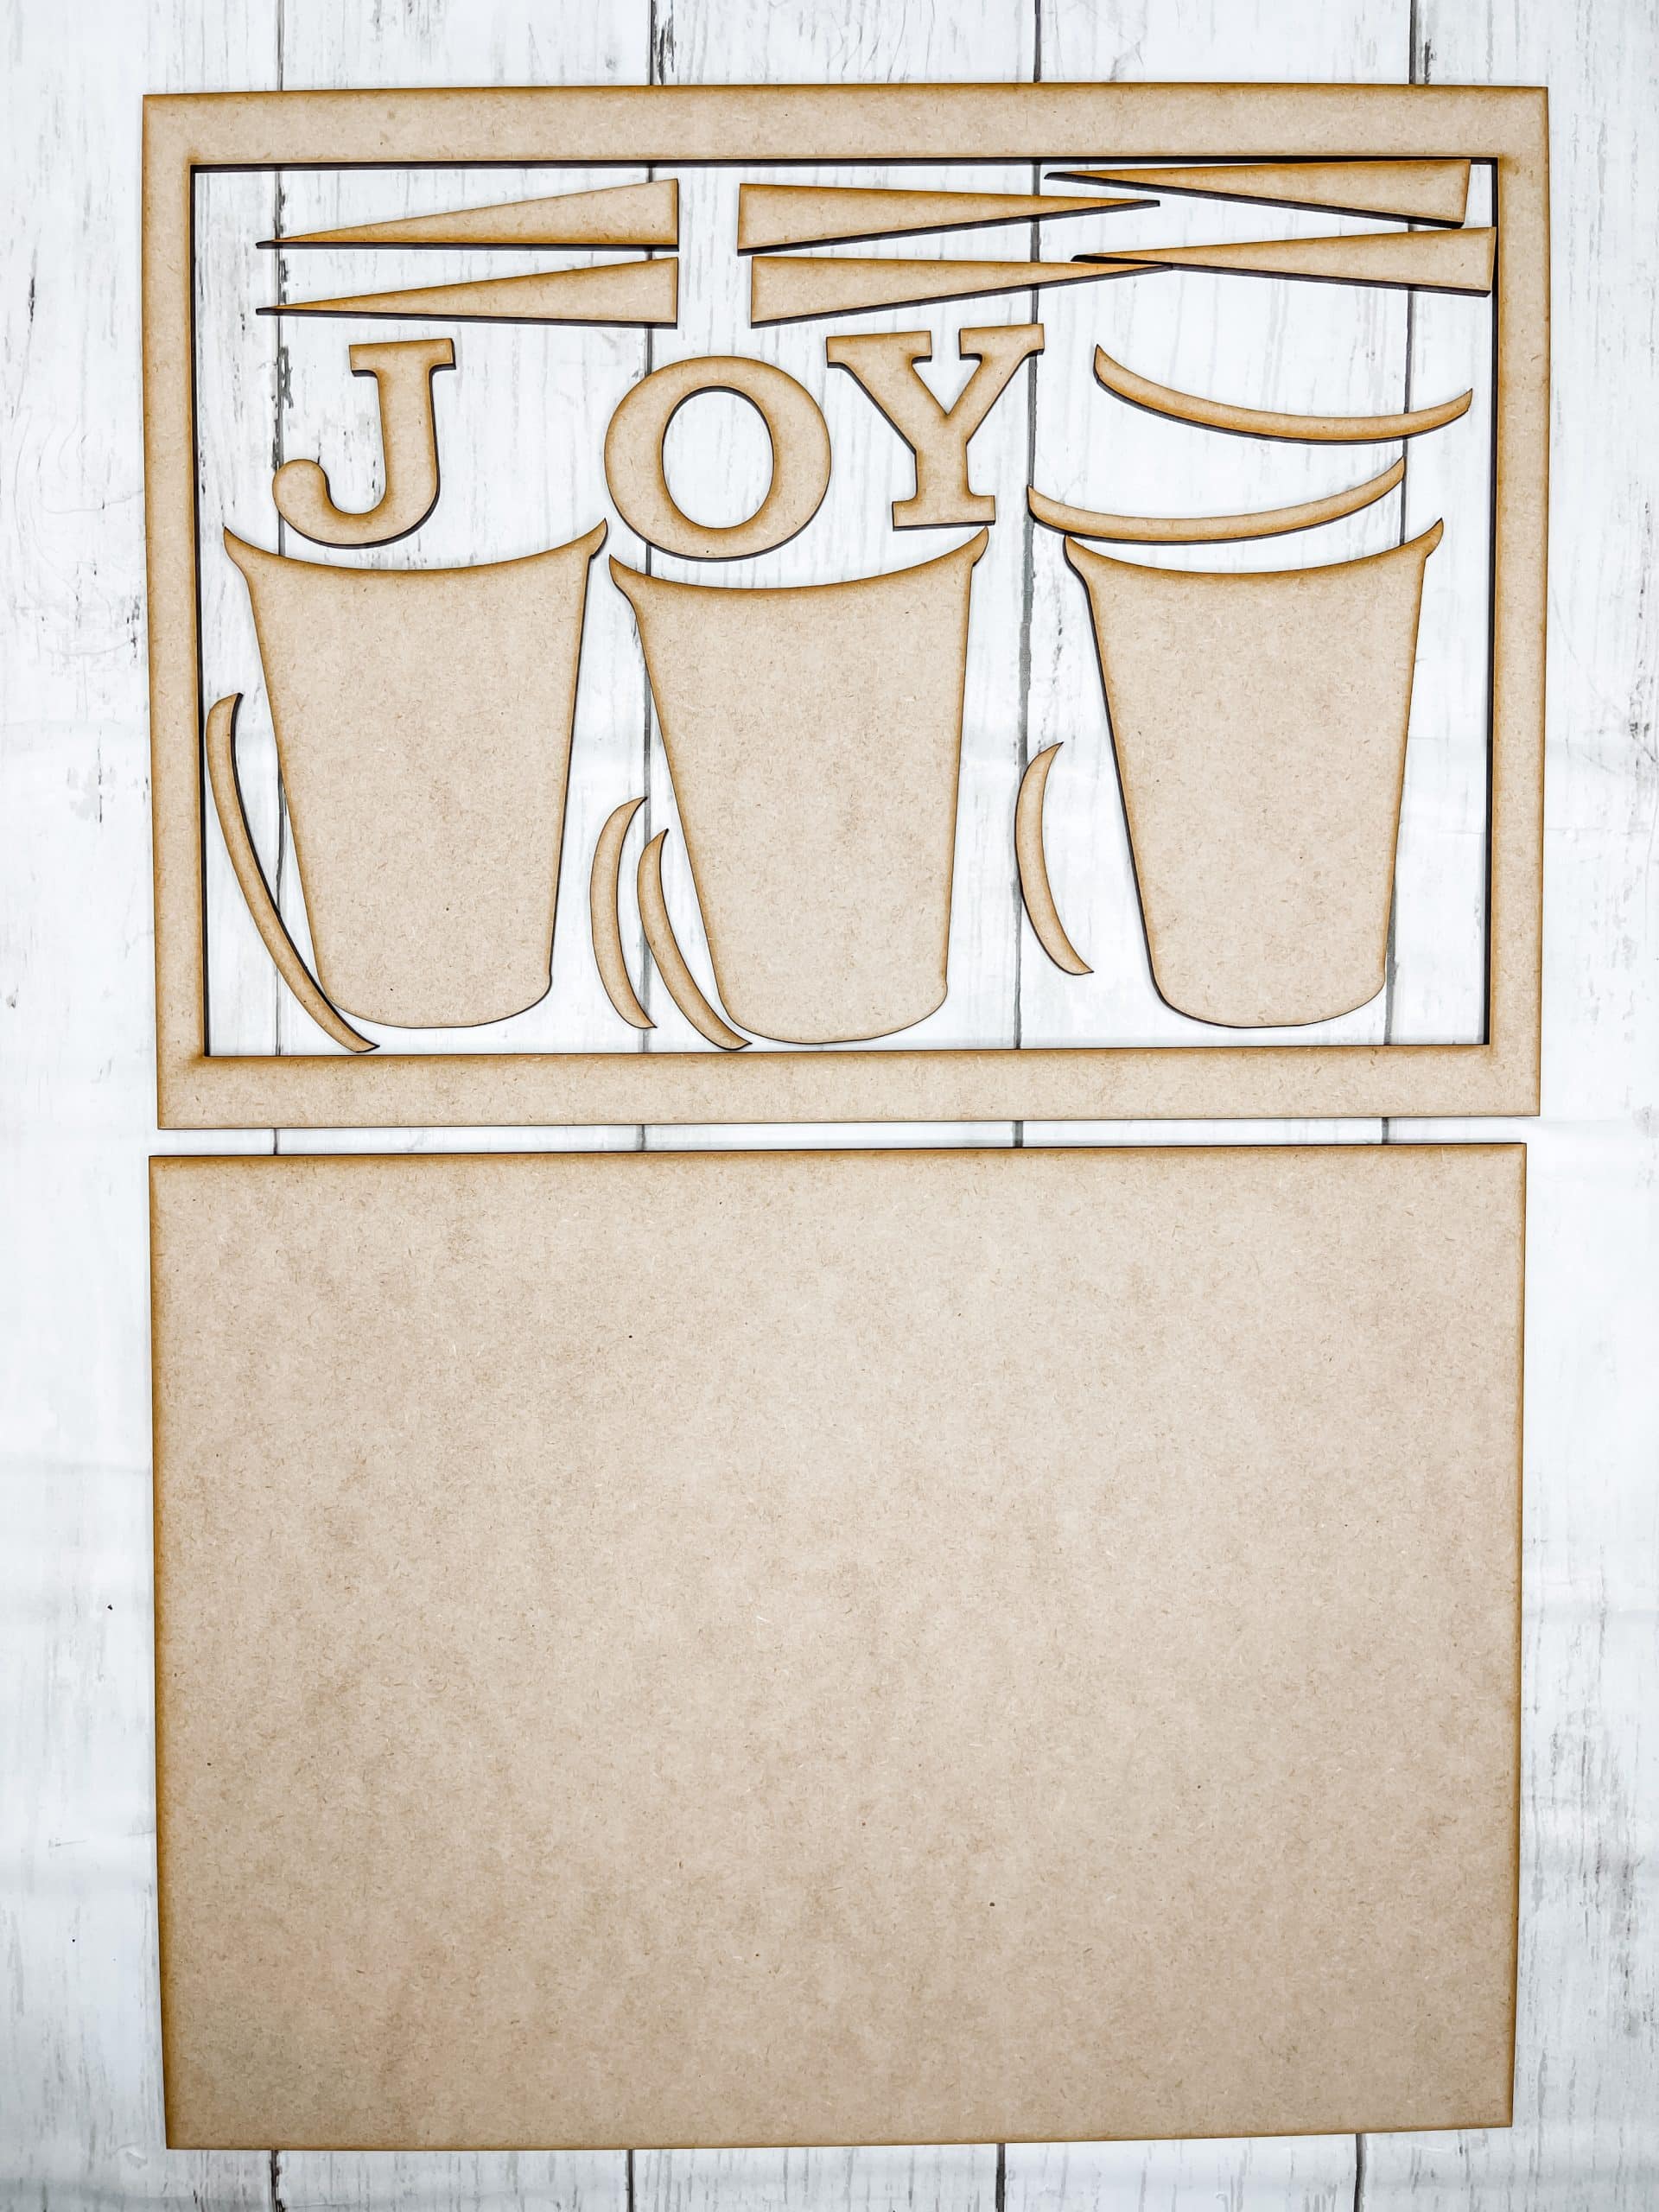
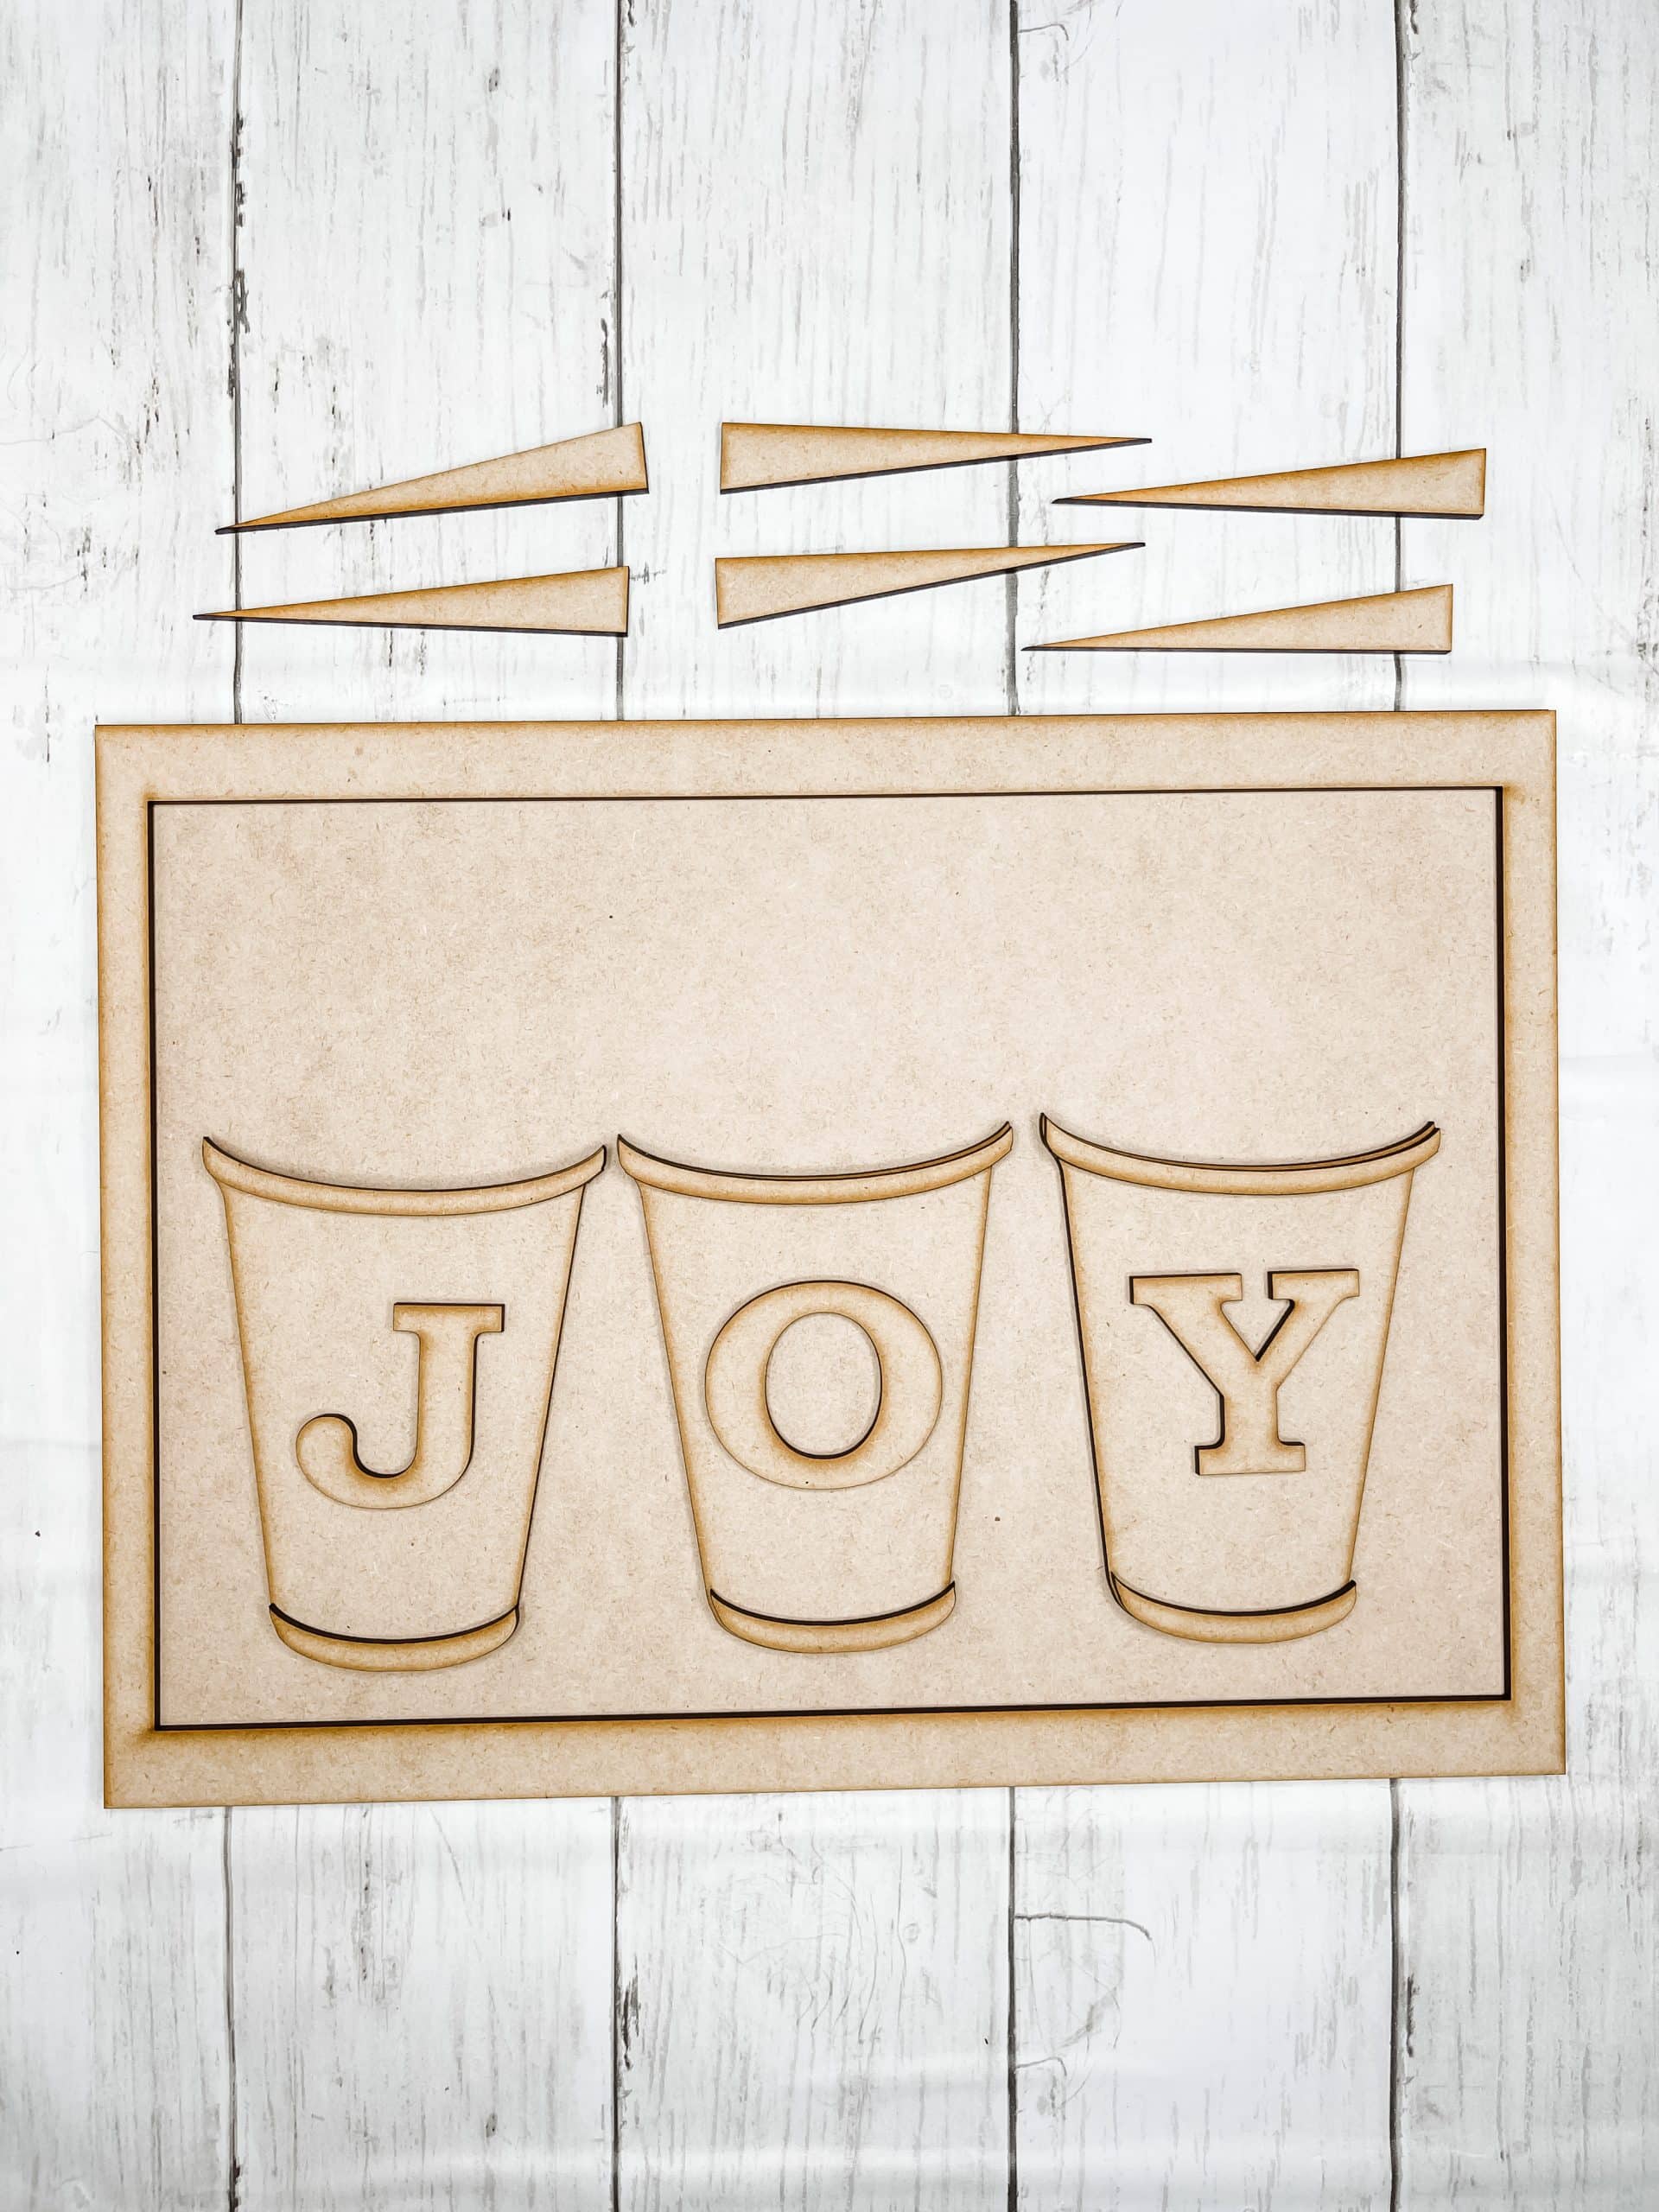
How to make a 3D Joy Buckets Sign
I start everyone of my kits by sanding each piece. When the kits are cutting on our laser machines, they can get a sort of film/residue on the surface and it gets in the way sometimes.
Once each piece is sanded, you can go ahead and stain each of them. I like to use DecoArt raw umber or Apple Barrel burnt umber as my stain color typically.
Mix a bit of your brown paint with water and use a wet wipe, paper towel, or foam sponge to apply the mixture to your pieces. Then use a clean wet wipe to remove any excess from the wood.
Allow the pieces to dry completely. I like to use my heat gun to speed up the drying process. You can use a hairdryer on the low, cool setting as well.
Once the large rectangle piece was dry, I scored it with a ruler and razor blade. You don’t want to go too deep because you don’t want to break the wood.
Next, I dry brushed white acrylic paint horizontally across the wood rectangle. Keep a light hand to get an effortless distressed finish.
Allow the white paint to dry completely and do any touch up sanding you want. Then, I rescored the lines with a ruler and razor blade to make them more noticeable.
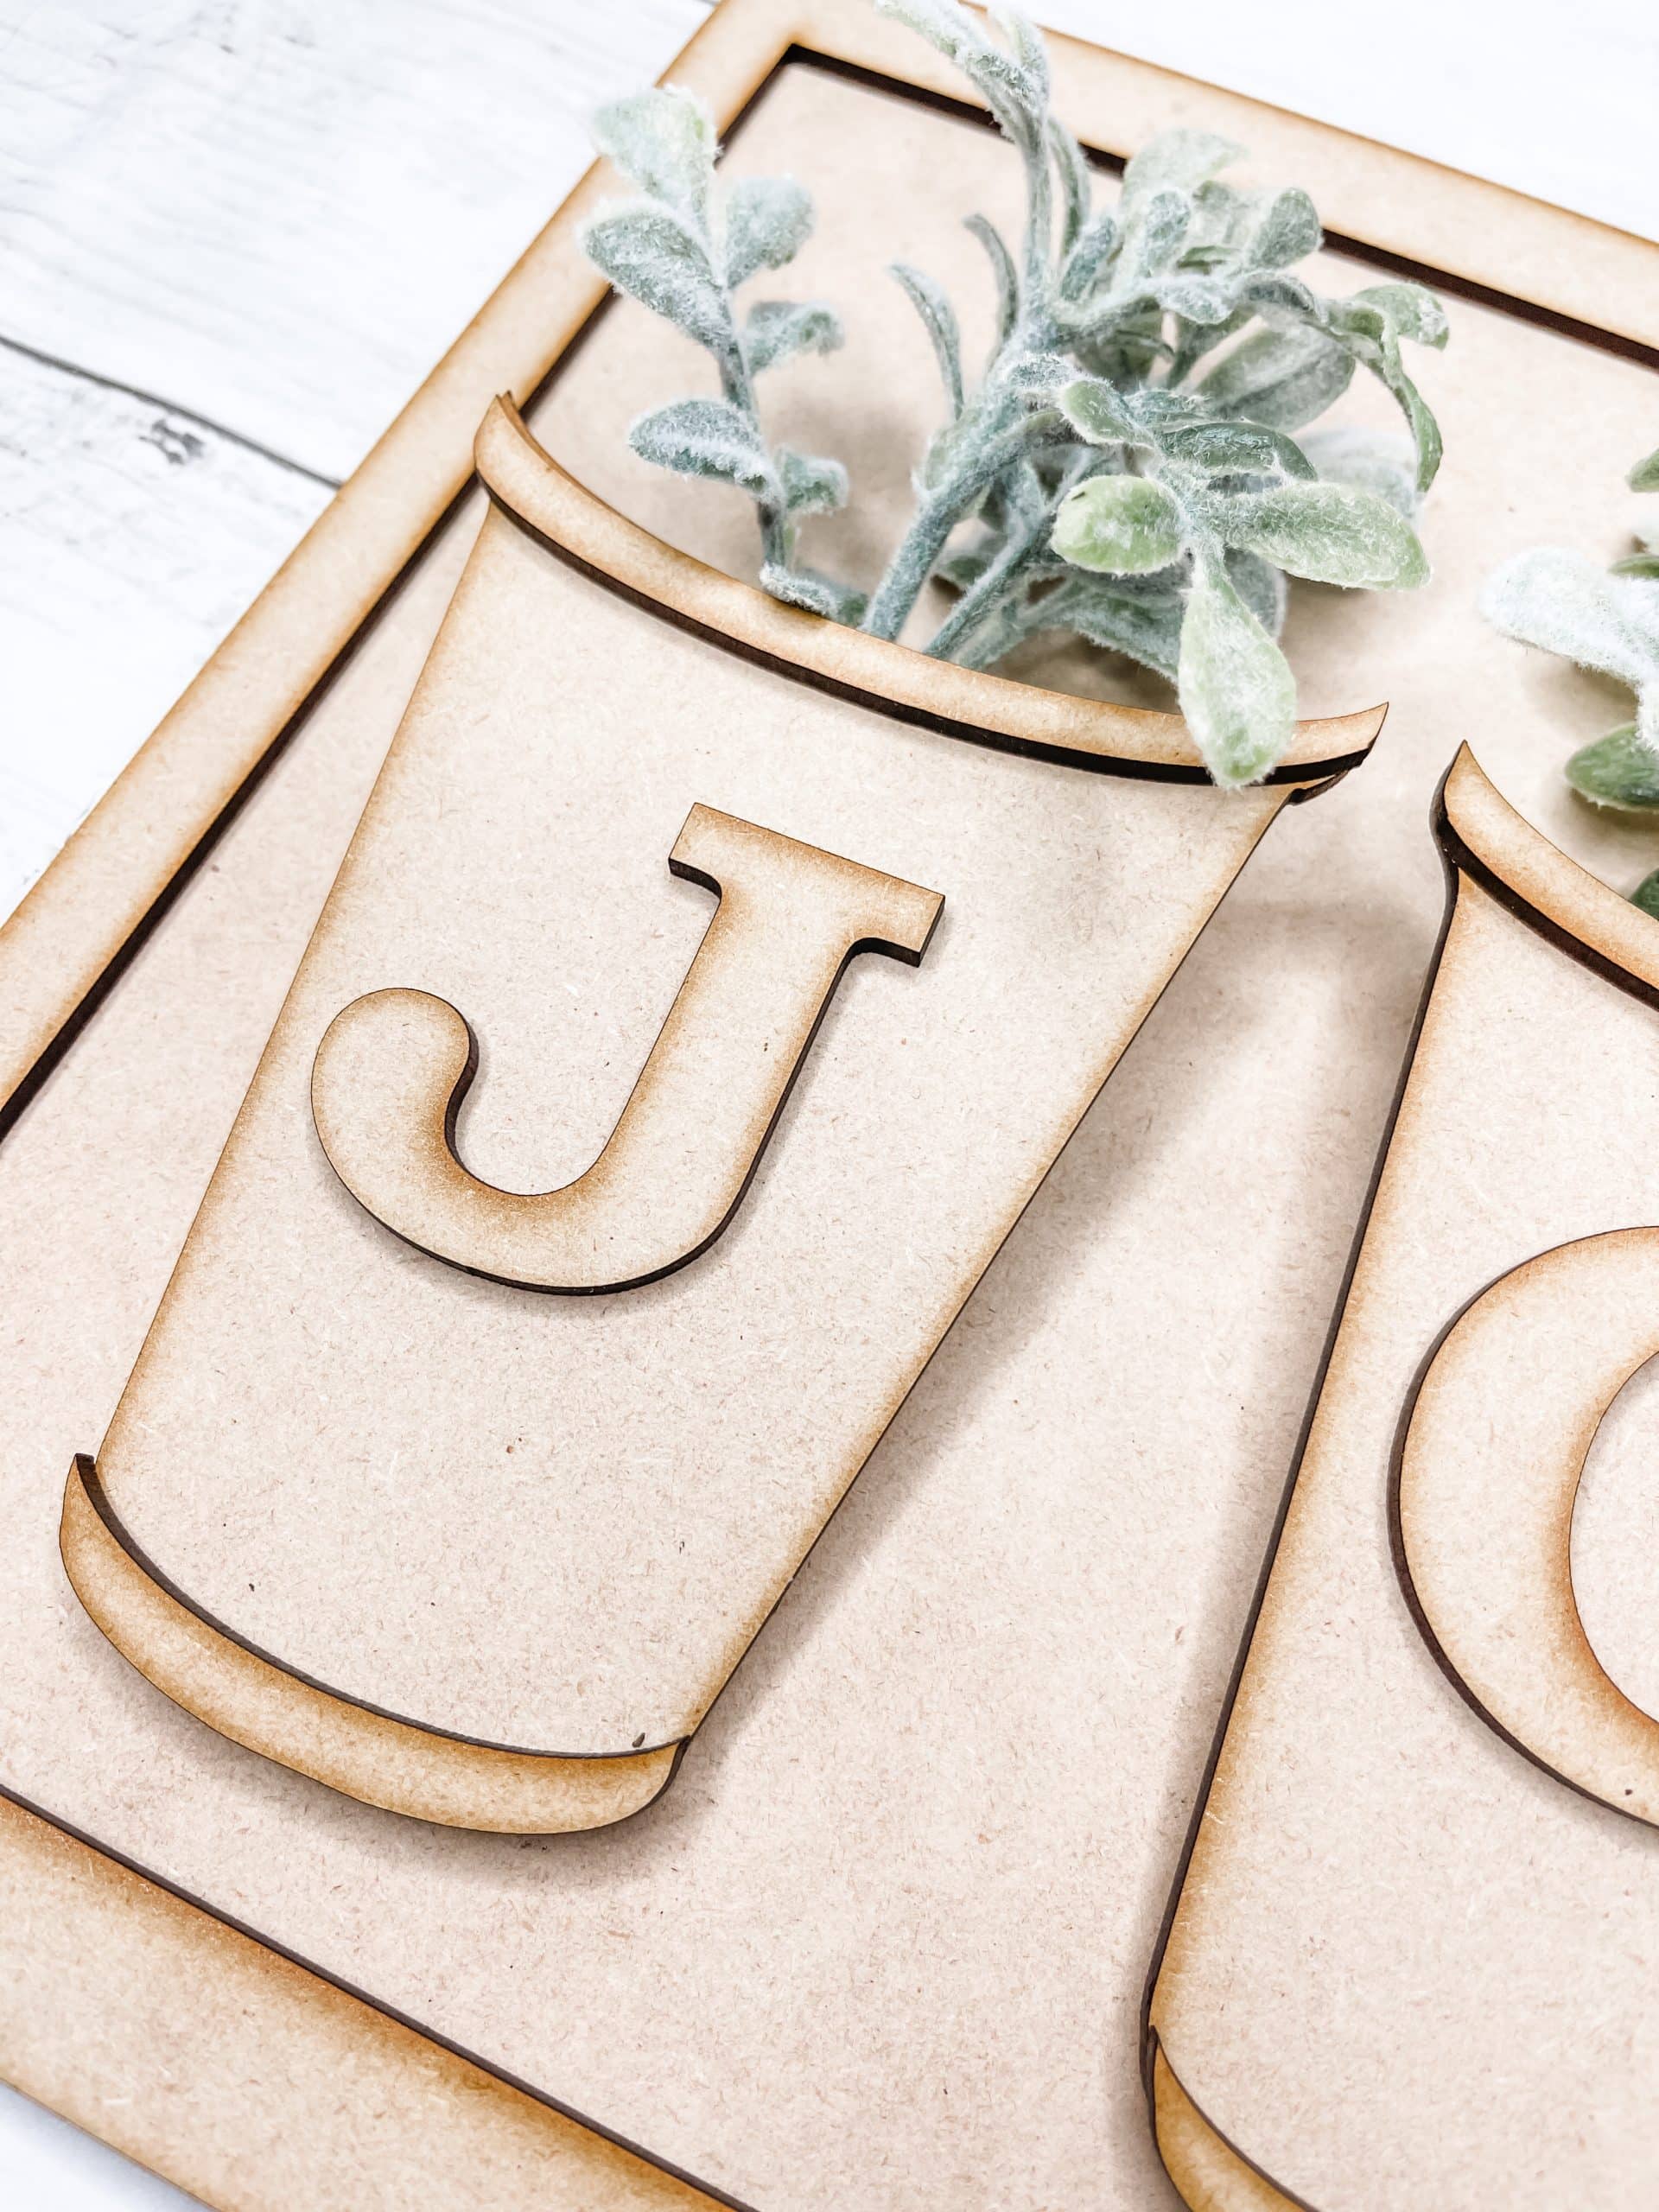
Faux rust the buckets
Next, I worked on the 3D buckets. I painted each one of them with my silver metallic paint and allowed it to dry. Then, I mixed some Mod Podge and cinnamon together in a bowl.
Use a paintbrush to apply the mixture to the buckets where you want them to appear rusted. I Then, poured cinnamon onto the mixture to deepen the color. This gives the rusted texture but also sets the undertone color for the rust.
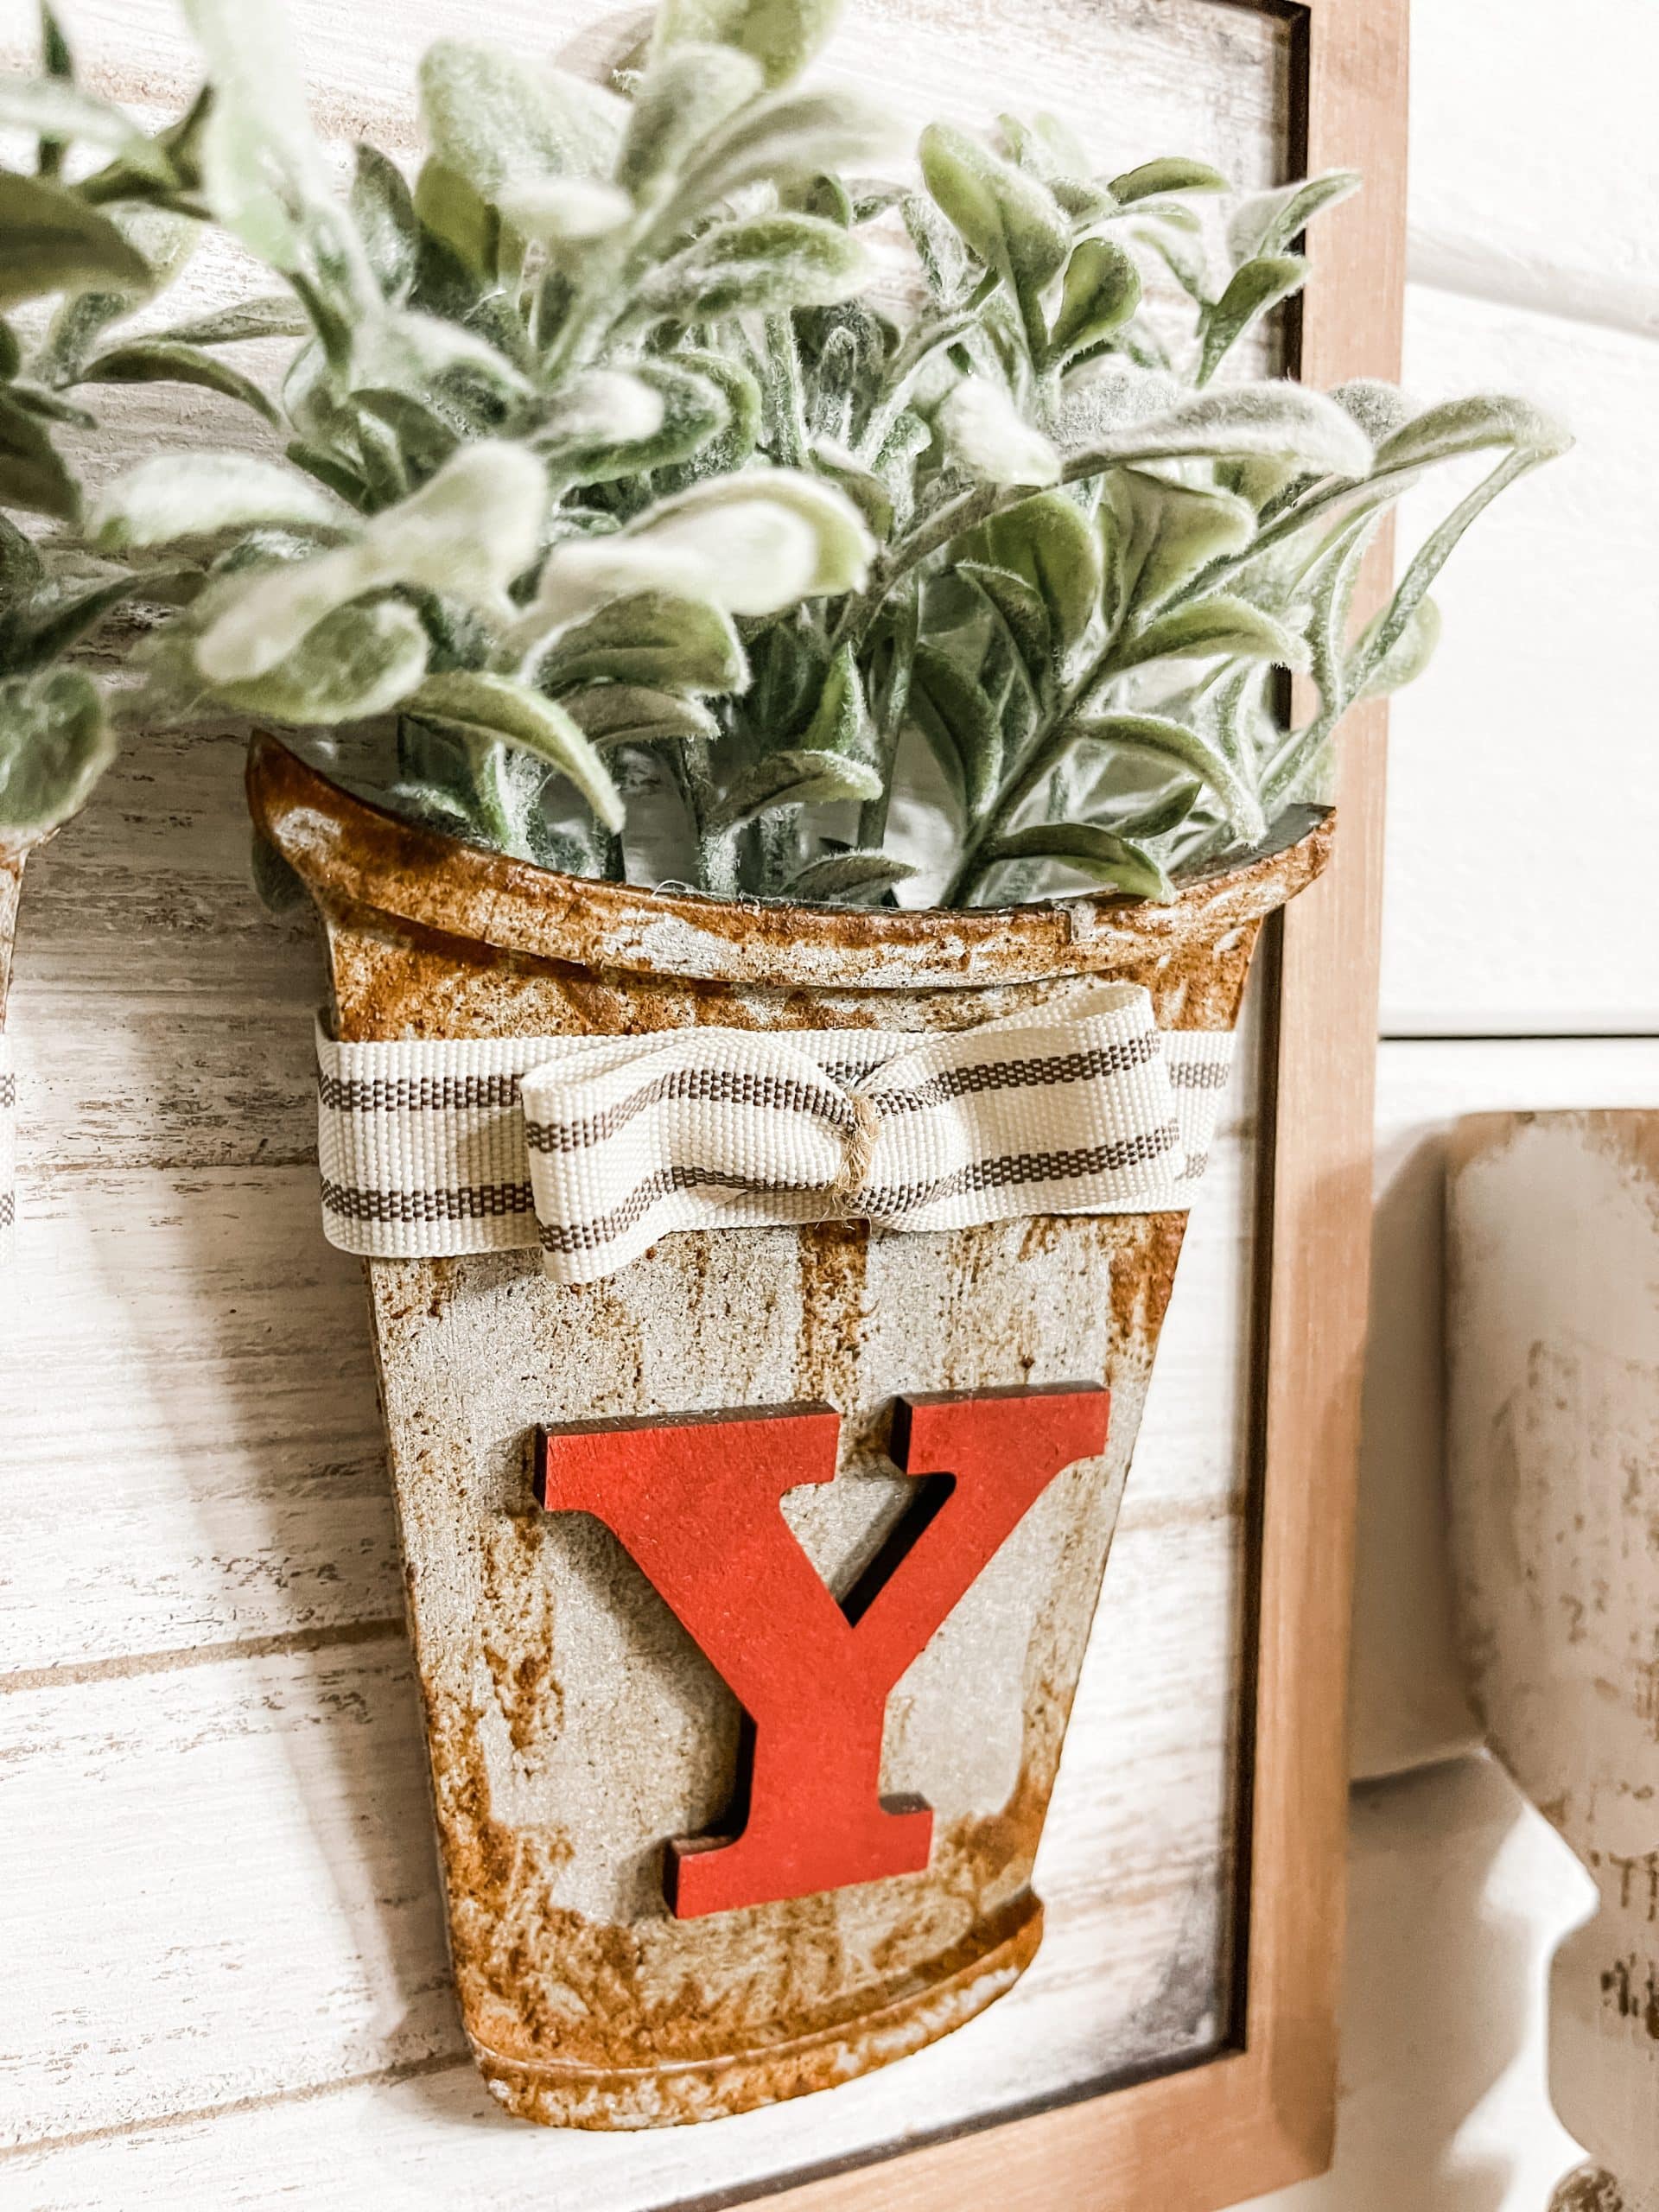
Allow the Mod Podge to dry, then lightly brush your antique wax or gel stain over the Mod Podge/cinnamon areas to add the darker rust color.
Do this to all three of the 3D buckets and edit/alter the process to get your desired faux rust finish on each piece.
JOY
After the 3D buckets were painted and faux rusted, I painted the JOY letters with red paint. I went with red because I had Christmas in mind for this project, but you can use any color as this is a year-round kit as well.
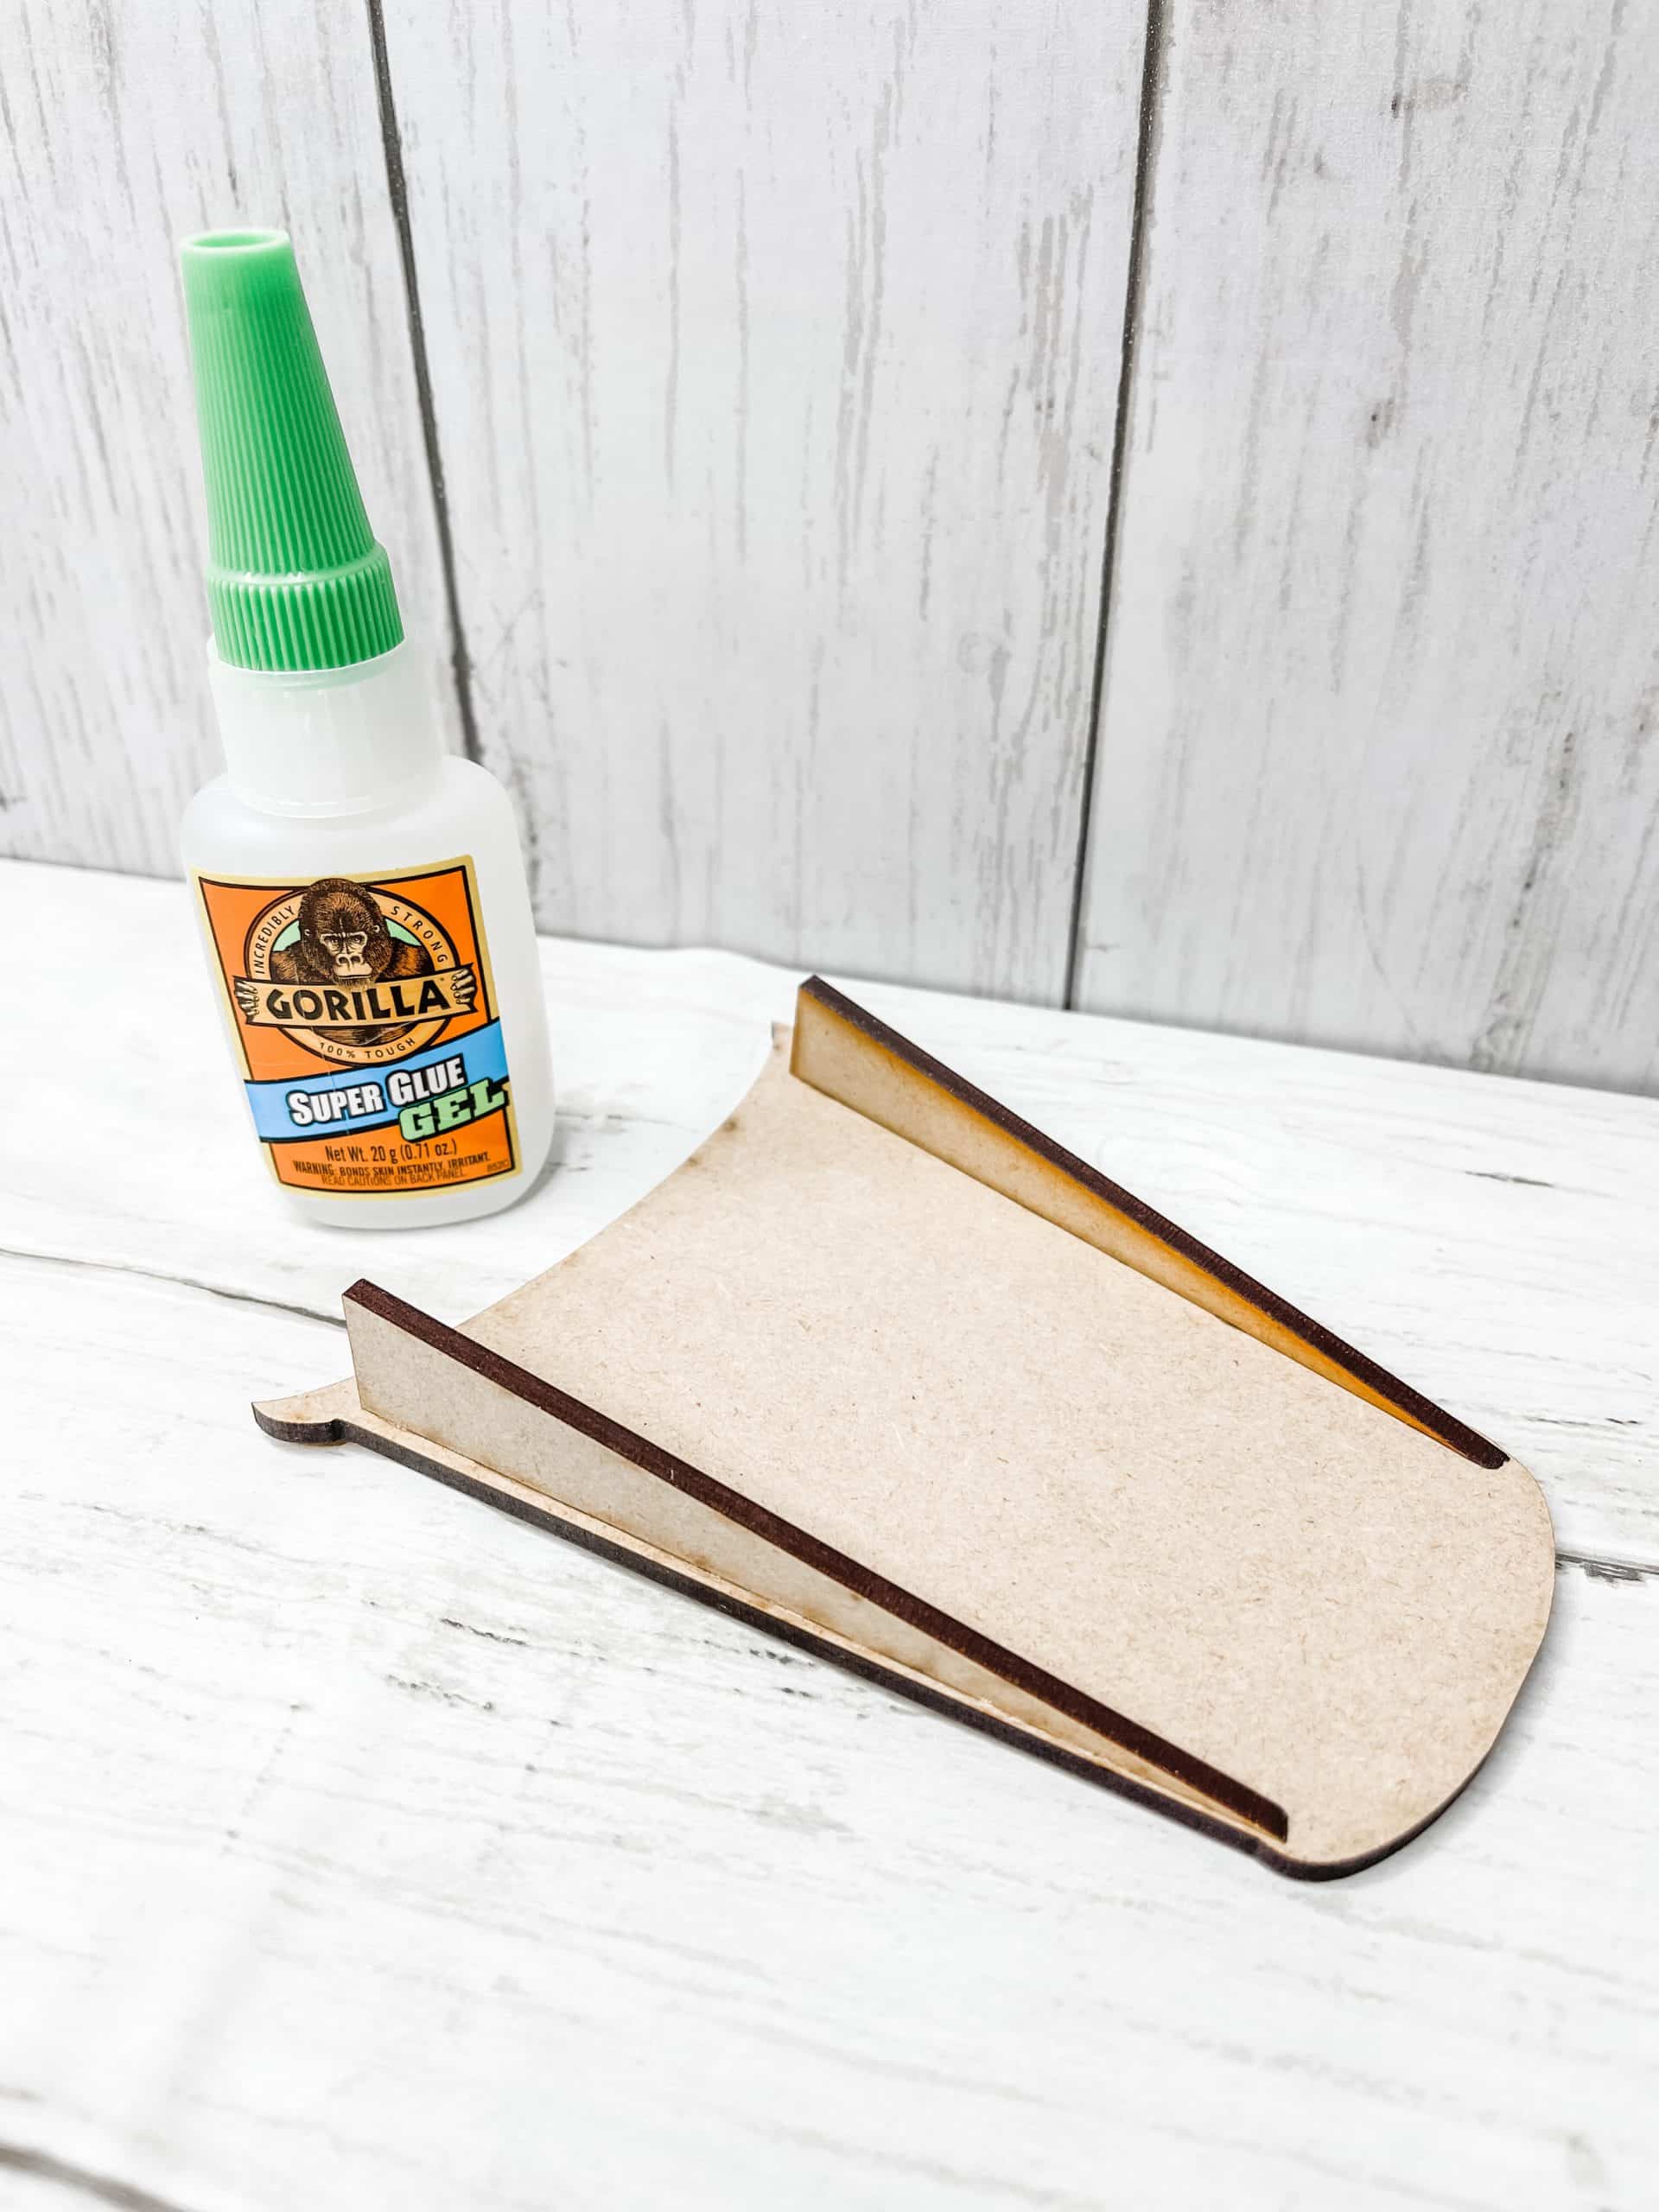
Next, assemble each of the buckets with glue. I recommend using Gorilla super glue, especially if you’re going to display this outside.
Then, wrap your ribbon of choice across the front of each bucket and glue it in place. I tied a little ribbon bow for each bucket and glued them in place. Glue the letters to the fronts of the buckets.
Bring it all together
Now, glue the completely finished 3D Joy buckets to the sign and glue the frame in place as well. I glued a piece of ribbon to the back so that I could easily hang my sign anywhere!
Lastly, slide in your greenery of choice and you’re ready to decorate with your sign!
I hope you enjoyed this 3D Joy Buckets Sign as much as I did and decide to make one for yourself! I would love to see how yours turns out!
You should totally join my FREE Facebook group called On A Budget Crafts! It is a judgment-free community for DIY crafters to show off their projects and ideas.
Watch the DIY tutorial
I shared how to make this super cute 3D Joy Buckets Sign during a LIVE video on my Facebook page.
If you want to see the DIY process, craft along, or just join in on the fun conversations you can watch the DIY tutorial replay on Facebook!
For this project, I will be using these items but you can substitute where you want.
“As an Amazon Associate, I earn from qualifying purchases.”
- 3D Joy Buckets Sign Kit
- Paint of choice
- DecoArt Raw Umber Acrylic Paint
- DecoArt White Acrylic Paint
- Apple Barrel Burnt Umber Acrylic Paint
- Craftsmart Metallic Silver Acrylic Paint
- Waverly Antique Wax (or a Gel Stain)
- Red Paint
- Greenery of choice
- Ribbon of choice
- Twine
- Mod Podge
- Cinnamon
- Hot glue gun and glue sticks
If you loved this DIY you might also like this DIY topiary!
Thanks for stopping by! XOXO Amber
You can also shop my ENTIRE AMAZON Favorites shop just click here! It’s packed full of all the things I use and love. Here is the supply list I highly recommend every creative have on hand!!
Would you also pin my blog for later and get on my newsletter alerts? I would love to have you join my #craftycrew.
Inspired? Leave me a comment below! I love hearing from my readers!

Join my free “ON A BUDGET CRAFTS” Facebook group!