DIY Welcome Porch Post
How to make a DIY Welcome Porch Post
This week in the Creative Haven VIP group we are making this DIY welcome porch post!
This project idea was sparked by a sweet member of the Creative Haven. In fact, I promised her we would make this DIY welcome porch post.
Last month, we did our “we can make that” series. We do that every quarter in the Creative Haven. Her submission was tied in votes after the votes were already tallied up.
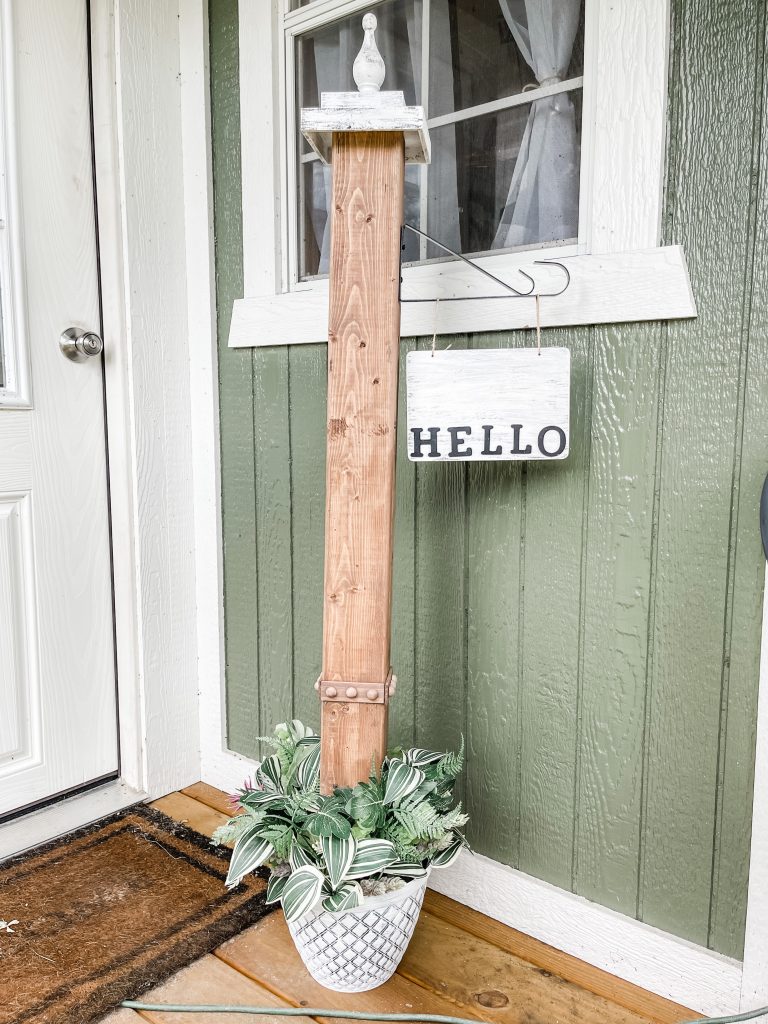
She really wanted to make this and even though there are a ton of tutorials showing how to make this welcome post, but I am going to put my own spin on it using items from Dollar Tree and some scrap lumber.

Join the Creative Haven today!
I know what you are thinking, where is the tutorial? Where’s the step by step? Well, that is a great question. This is a special project only for Creative Haven Members!
There is plenty of FREE DIY Home decor and other projects on my blog but there are also specific exclusive members-only DIY projects that I save just for the Creative Haven VIP members. I hope you consider joining us inside the Creative Haven.
This post may one day be public, but just in case it never does go public, and you want to get in on this creation and make it with me and my creative haven friends, you can get the full how-to tutorial and DIY Welcome Porch Post in the exclusive VIP club!
How to make a DIY welcome porch post
I called this a welcome porch post but you can also call it a decorative welcome sign too. There will be tons of ways you can make one of these and this is just my version. We will learn exactly how to make this DIY welcome porch post in the Creative Haven this week. Don’t miss it!

COMPLETE VIDEO TUTORIAL IS INSIDE THE CREATIVE HAVEN VIP COMMUNITY! JOIN HERE

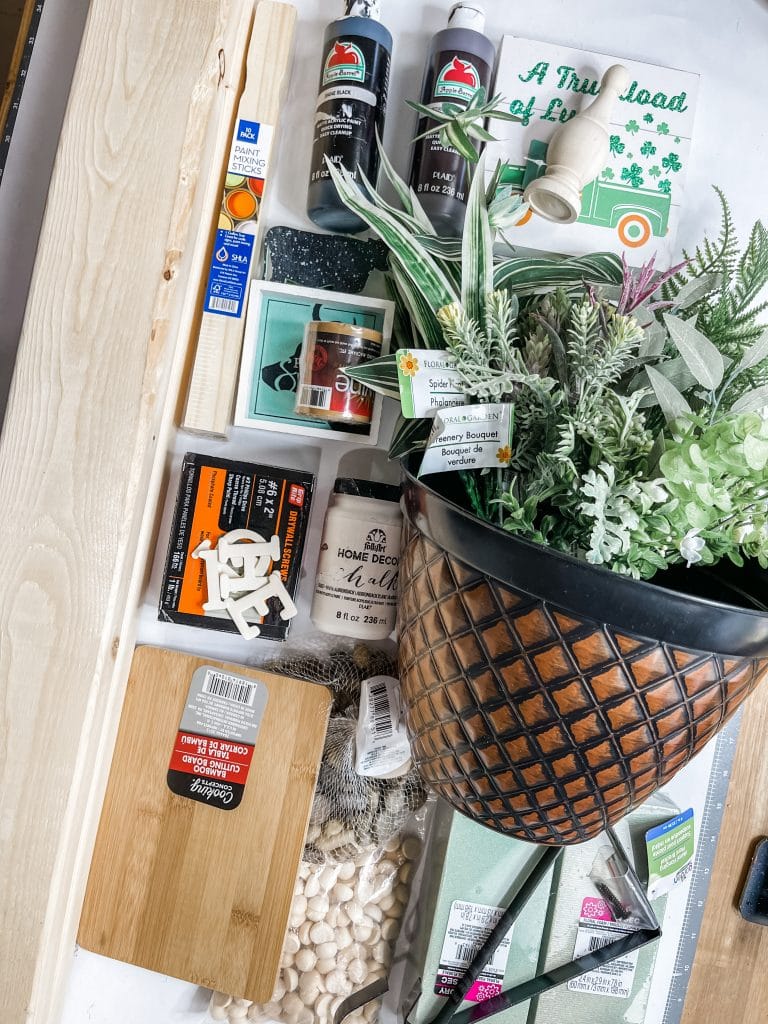
Alright, let’s have a look at the supplies that we will need!
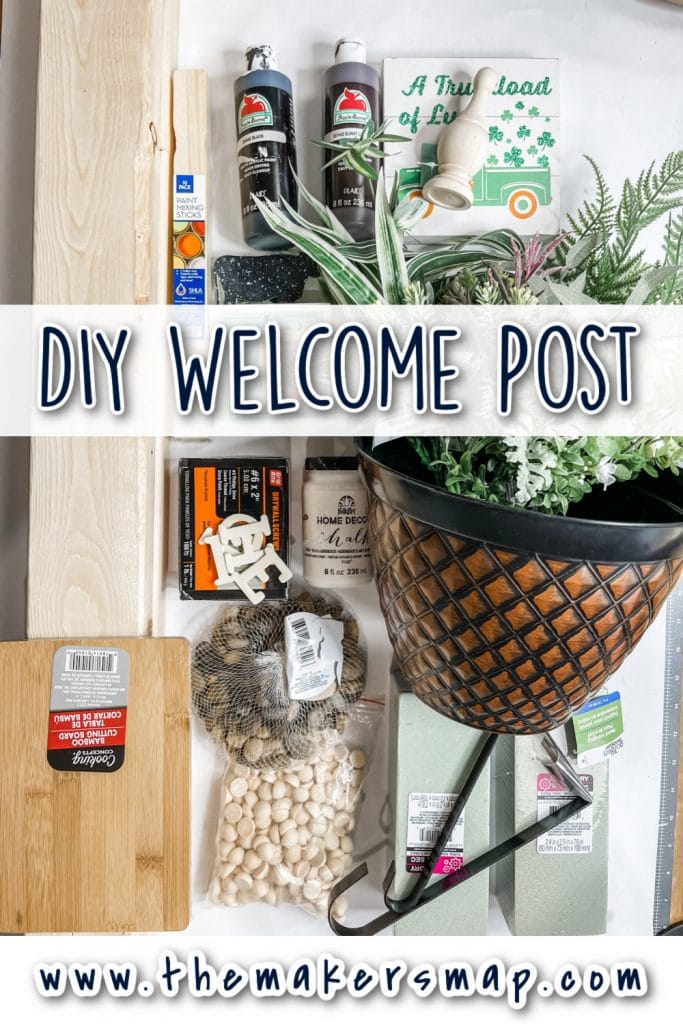
July 12th, 2021 Supply List for DIY Welcome Porch Post:
You will need: (items shown in the photo or any substitution you prefer) Don’t forget, you are not required to use the exact items! “As an Amazon Associate, I earn from qualifying purchases.”
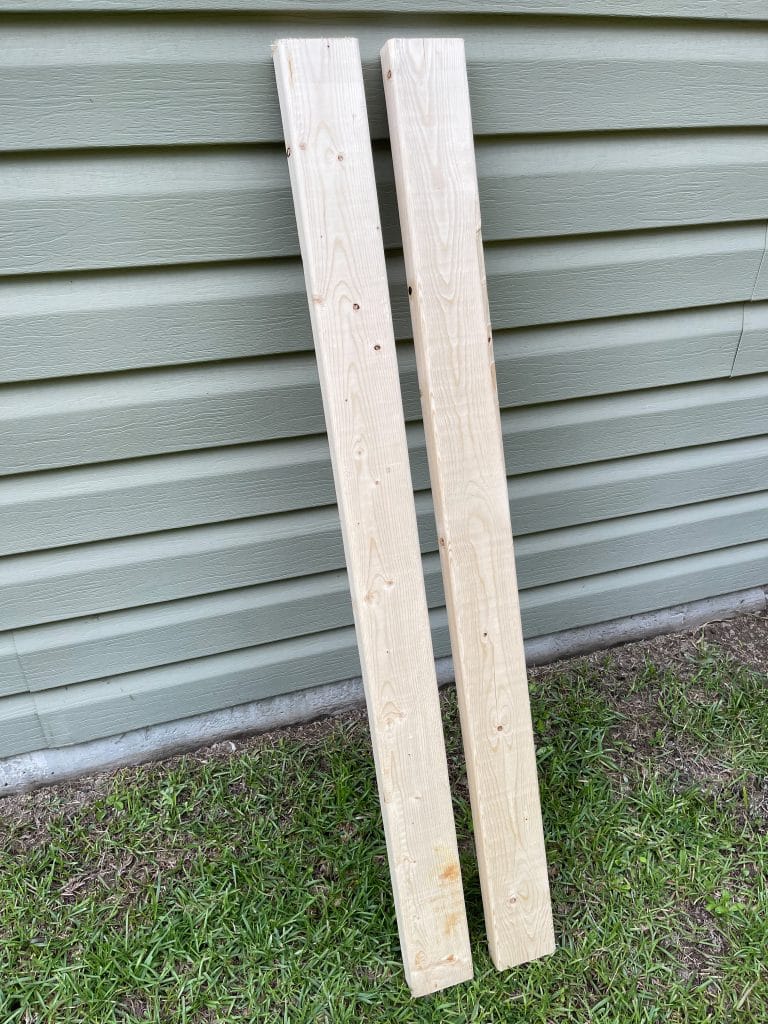
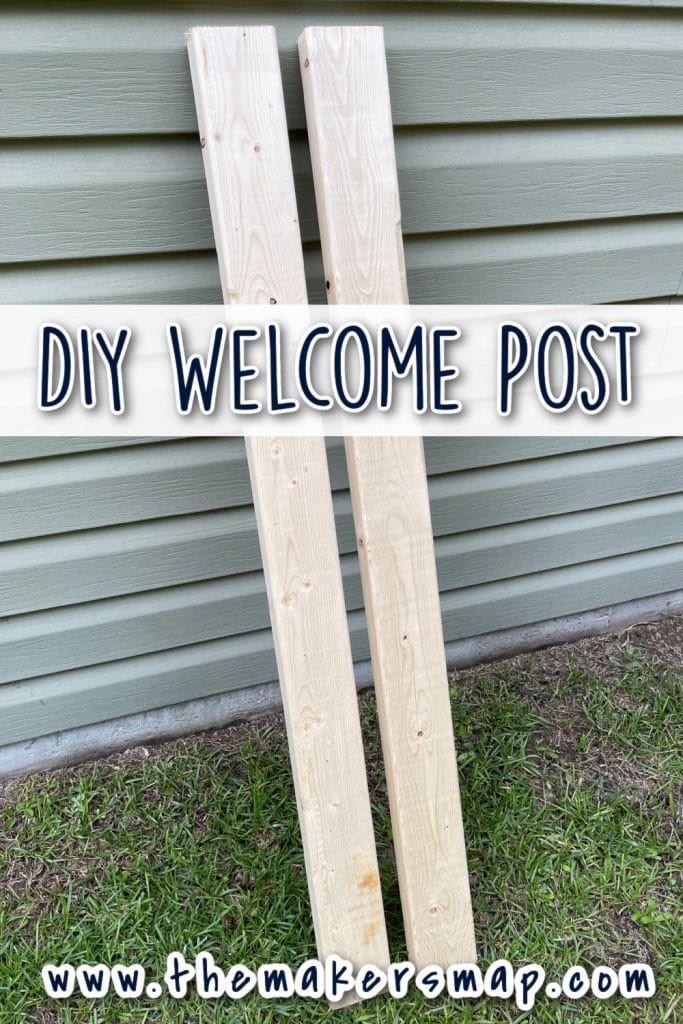
- 2 – 2×4’s or a 4×4 post (you can choose your height) Mine are 4 ft tall
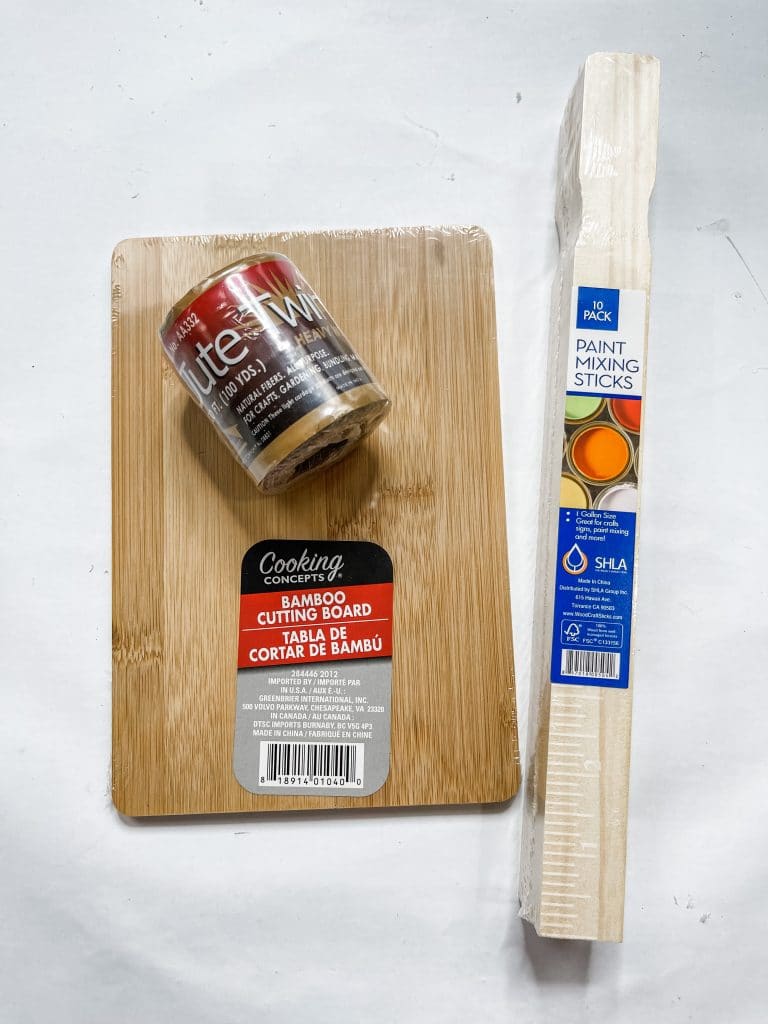
- 1 pack of 1-gallon paint stir sticks (i finally found some at Home Depot)
- 1 square sign box (mine is 6×6) I got mine at Dollar Tree during St. Patricks day
- 1 square sign box (mine is 3×3) I got mine at Dollar Tree
- Paint colors or stain of your choice. (i am using burnt umber, white and black)
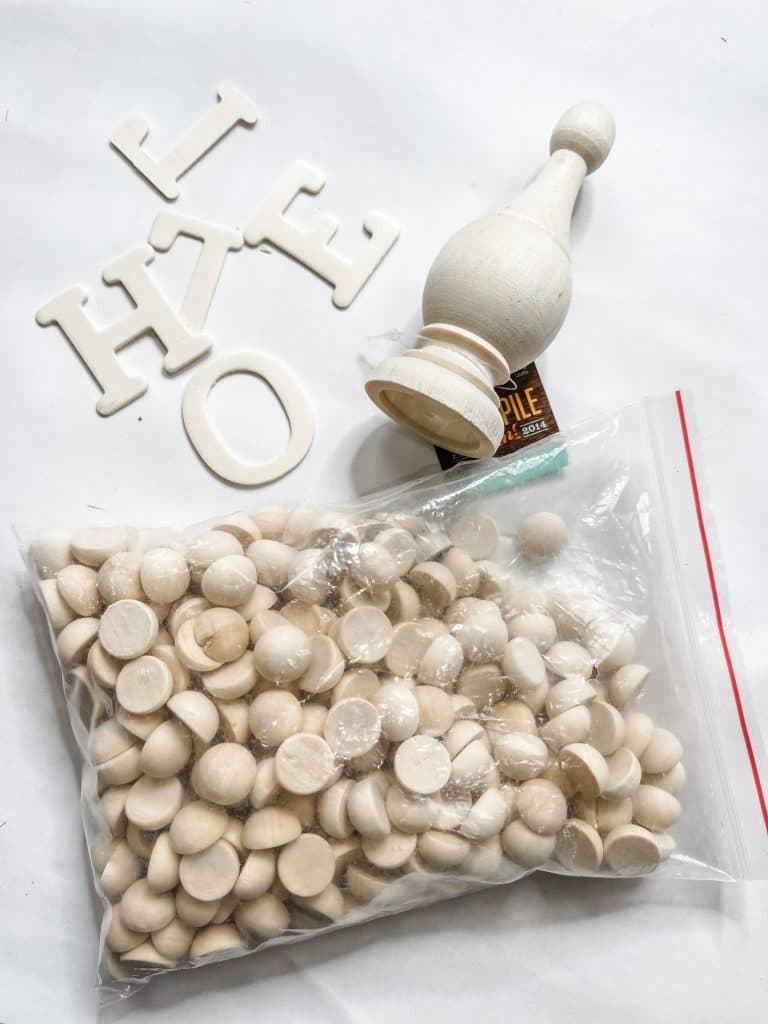
- Half wood beads (mine are 20 mm)
- Dollar Tree Plant hanger
- Dollar Tree rocks or some sort of rock filler to weigh the bottom down
- Florals or greenery of your choice
- Twine or hooks
- Drill and Drill bits
- Dollar Tree Floral Foam
- A finial or topper for the post (i got mine at hobby lobby)
- You will want a few screws
- If you want you can use a brad nailer for this also
- Letters to create your phrase (i am going to use HELLO)
- Bamboo cutting board or something comparable
- Optional ribbon if you want yours to have a bow
- Glue Gun
- Glue Sticks
- E6000
- Heat Gun or Dryer
- Paint Brushes (I use chip brushes like these)
Please substitute where you can! If it is not in your budget to purchase supplies please get creative, think outside the box! What else could you use?! You can still craft with us! BUYING SUPPLIES FOR THE CRAFTS in the Creative Haven is NOT a requirement. I simply want you to craft with us!
I am very excited to make this DIY Welcome Porch Post
Remember, to also shop my ENTIRE AMAZON Favorites shop just click here! I packed it packed full of all the things I use, love, and here is the supply list I highly recommend every creative have on hand!! Would you also pin my blog for later and get on my join my newsletter!

Inspired? Leave me a comment below! I love hearing from my readers!
Join my free “ON A BUDGET CRAFTS” Facebook group!
>> PIN THIS POST FOR LATER! <<
I enjoy your projects