Boho Flower DIY Decor
How adorable is this Boho Flower DIY Decor?? I absolutely LOVE how perfect this DIY project turned out, and I think you will too! Making this boho decor was so easy, and the supplies made it very affordable.
Y’all know me. I’m always looking for ways to decorate my home on a budget, and I am so excited to show you how I made this decor for my bathroom!
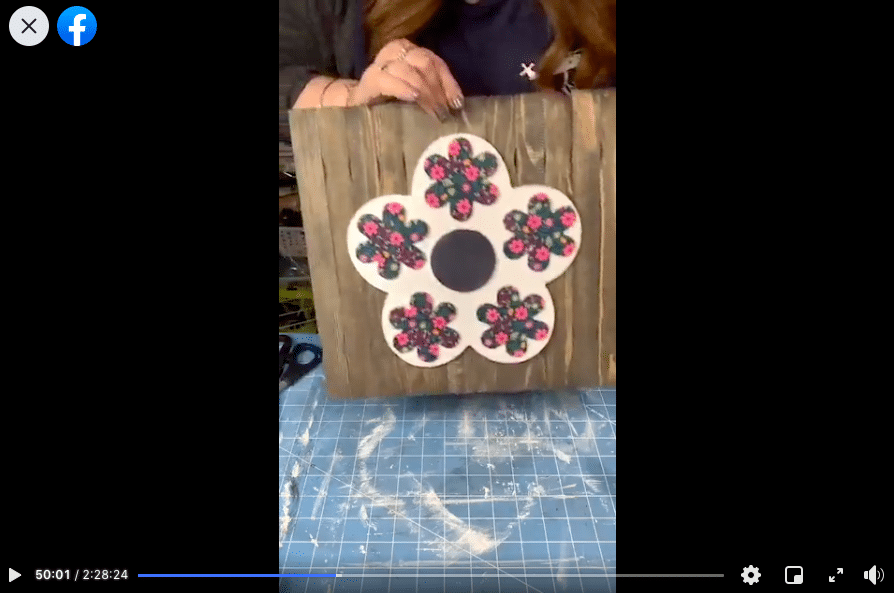
Watch the replay
I made this Boho Flower DIY Decor during a Super Crafting Event with 3 Easy DIYs! The first project is this adorable flower, the second is a vintage-esque pray sign, and the third is a farmhouse wreath and buffalo check decor! Watch the replay to join in on the crafting fun!
For this project, I will be using these items but you can substitute where you want.
“As an Amazon Associate, I earn from qualifying purchases.”
- Dollar Tree Flower
- Small Wood Flowers
- Small Wood Circle
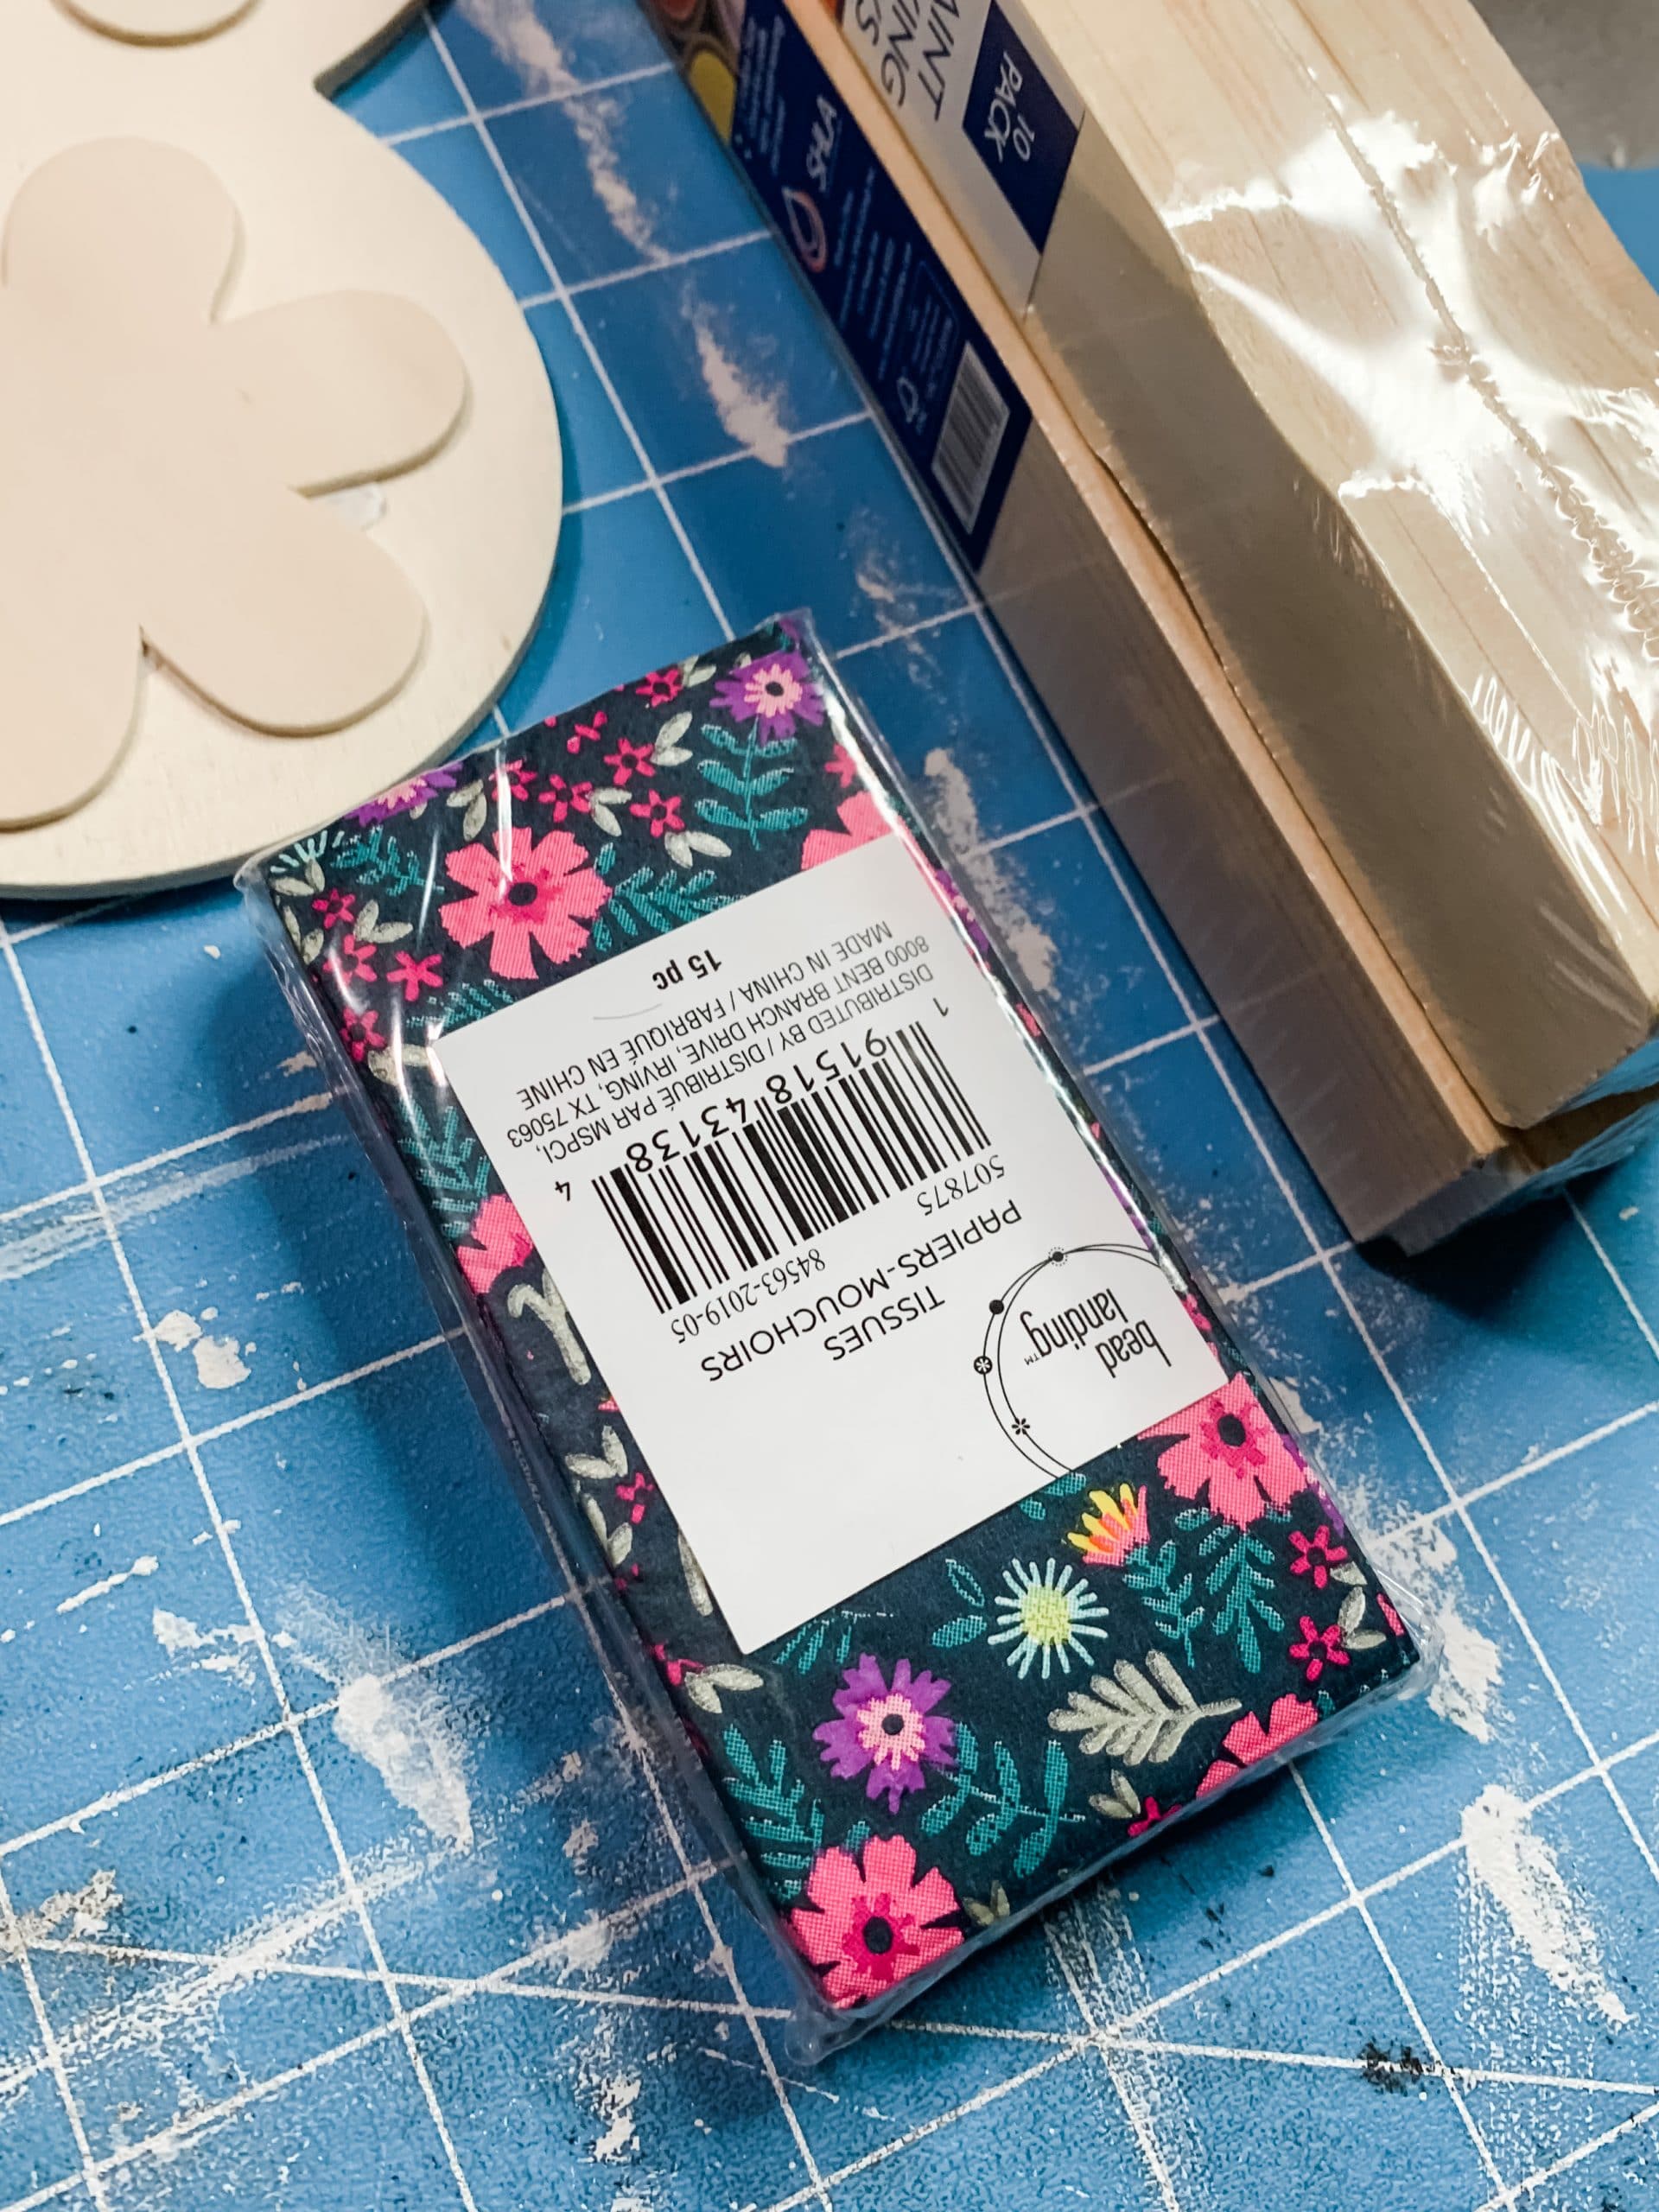
- Tissue Paper
- Paint Sticks
- (White) Dixie Belle Fluff Chalk Paint
- (Brown) Dixie Belle Coffee Bean Chalk Paint
- (Navy) Dixie Belle In The Navy Chalk Paint
- Hot glue gun and glue sticks
Let’s get started
Alright, let’s start this DIY project out by making the backing! I used 14 paint sticks for this backing – 12 side by side and 2 on the back to keep them together.
Lay your 12 paint sticks side by side vertically and use a ruler or a straight edge to keep them lined up perfectly. Then, hot glue 2 paint sticks horizontally across the paint sticks.
Make sure your paint sticks are fully secured together and then get ready to stain them! I used Dixie Belle Coffee Bean Chalk Paint and a wet wipe, but you can use whichever brown paint you prefer.
Dip the wet wipe into the brown paint, then spread it across the surface of your paint stick backing. The water on the wet wipes helps the wood absorb the paint and gives it a stained finish rather than a painted look.
If you apply too much paint to the wood, you can go back over the surface with a clean wet wipe to remove the excess paint. Once you’re finished staining the paint sticks, it is time to paint the wooden flower.
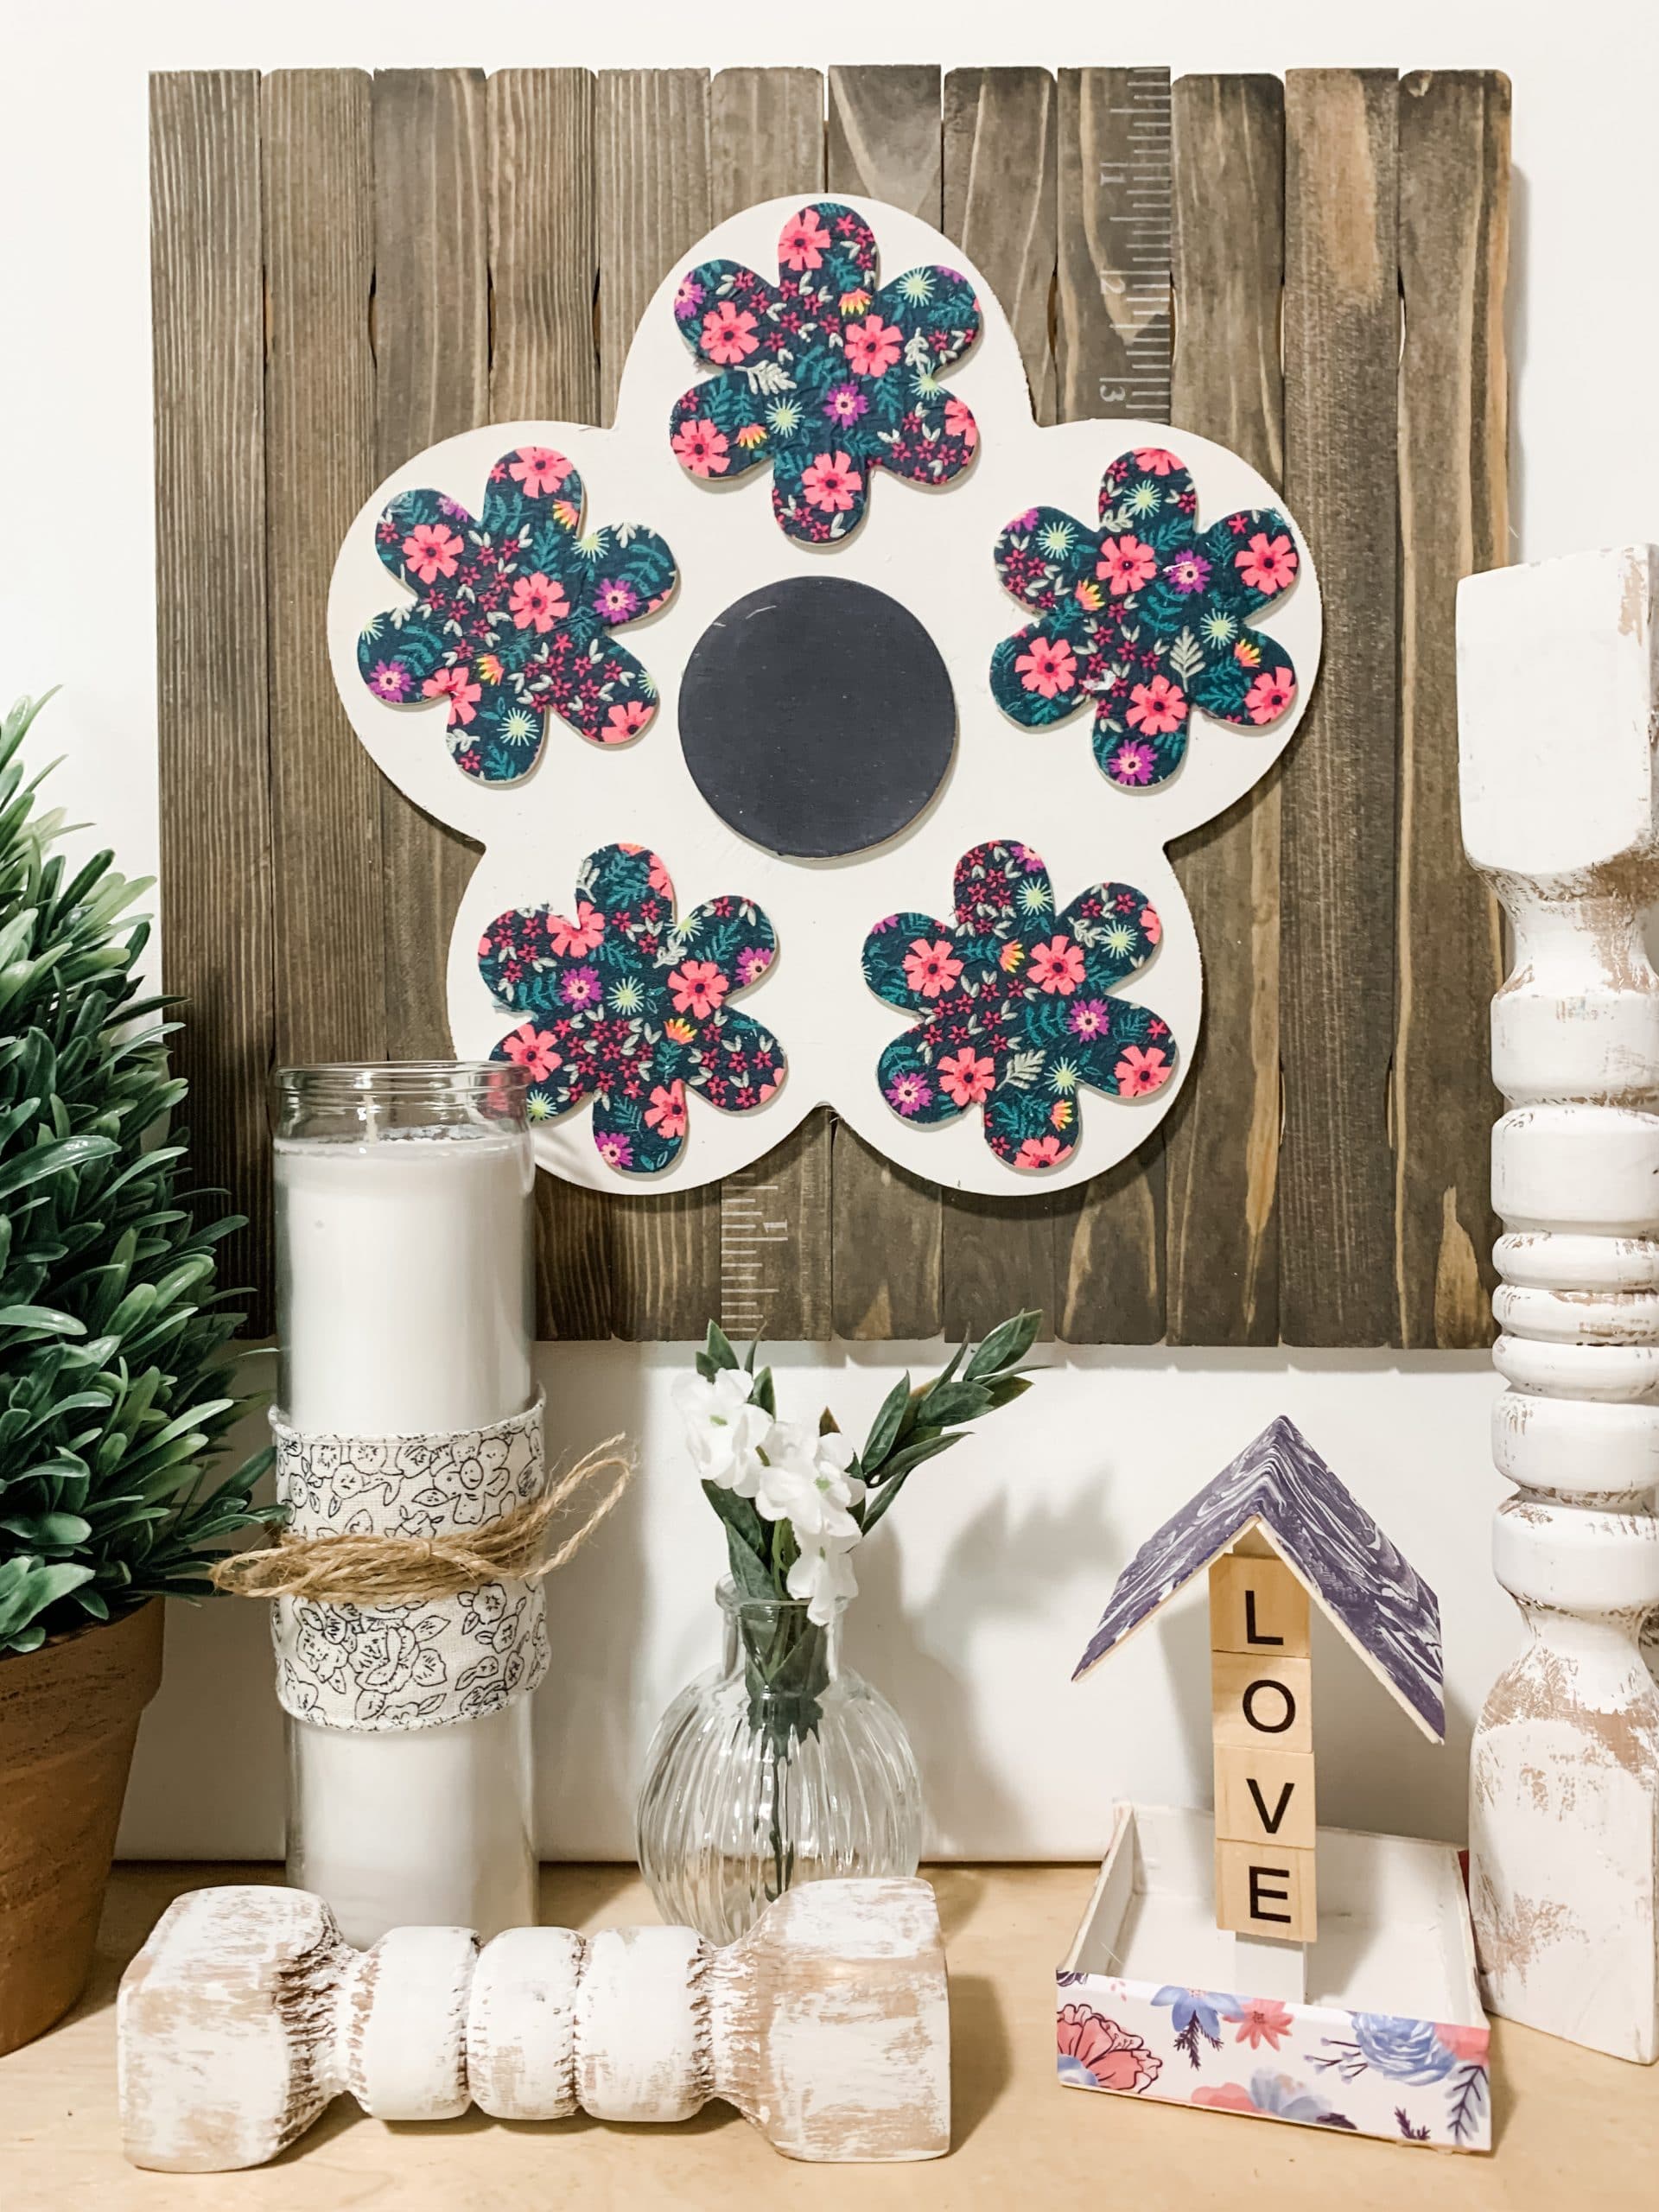
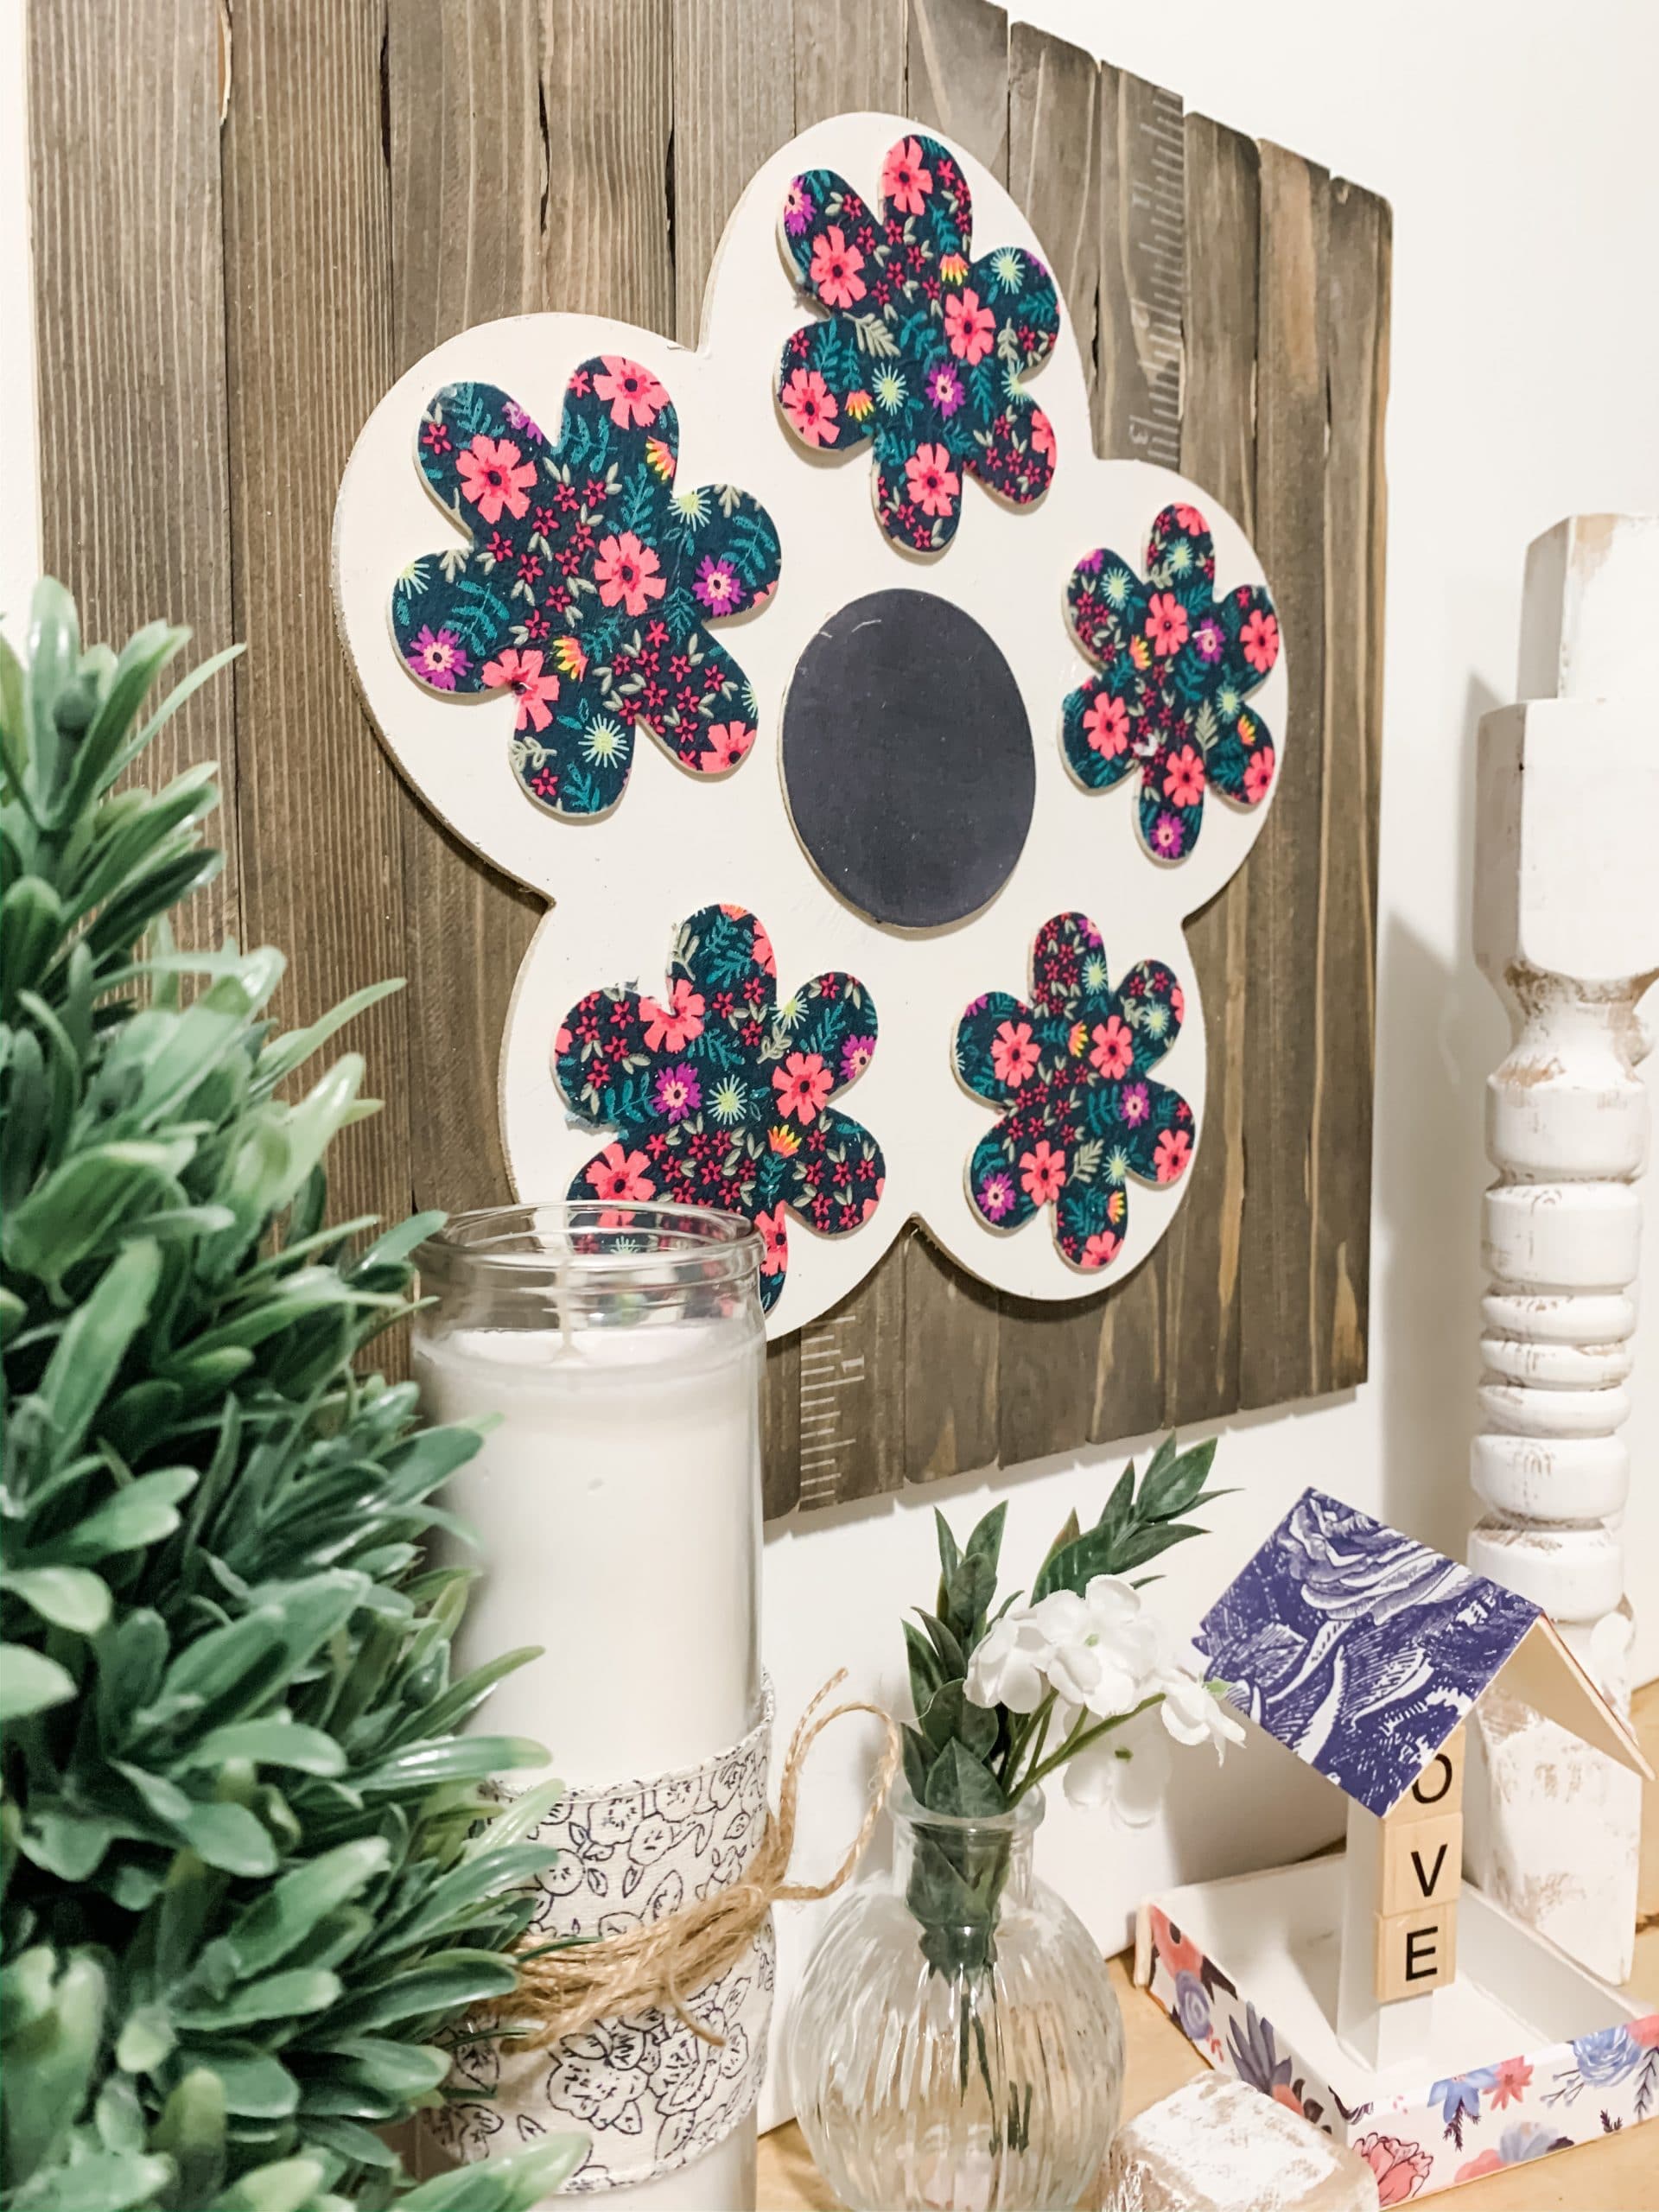
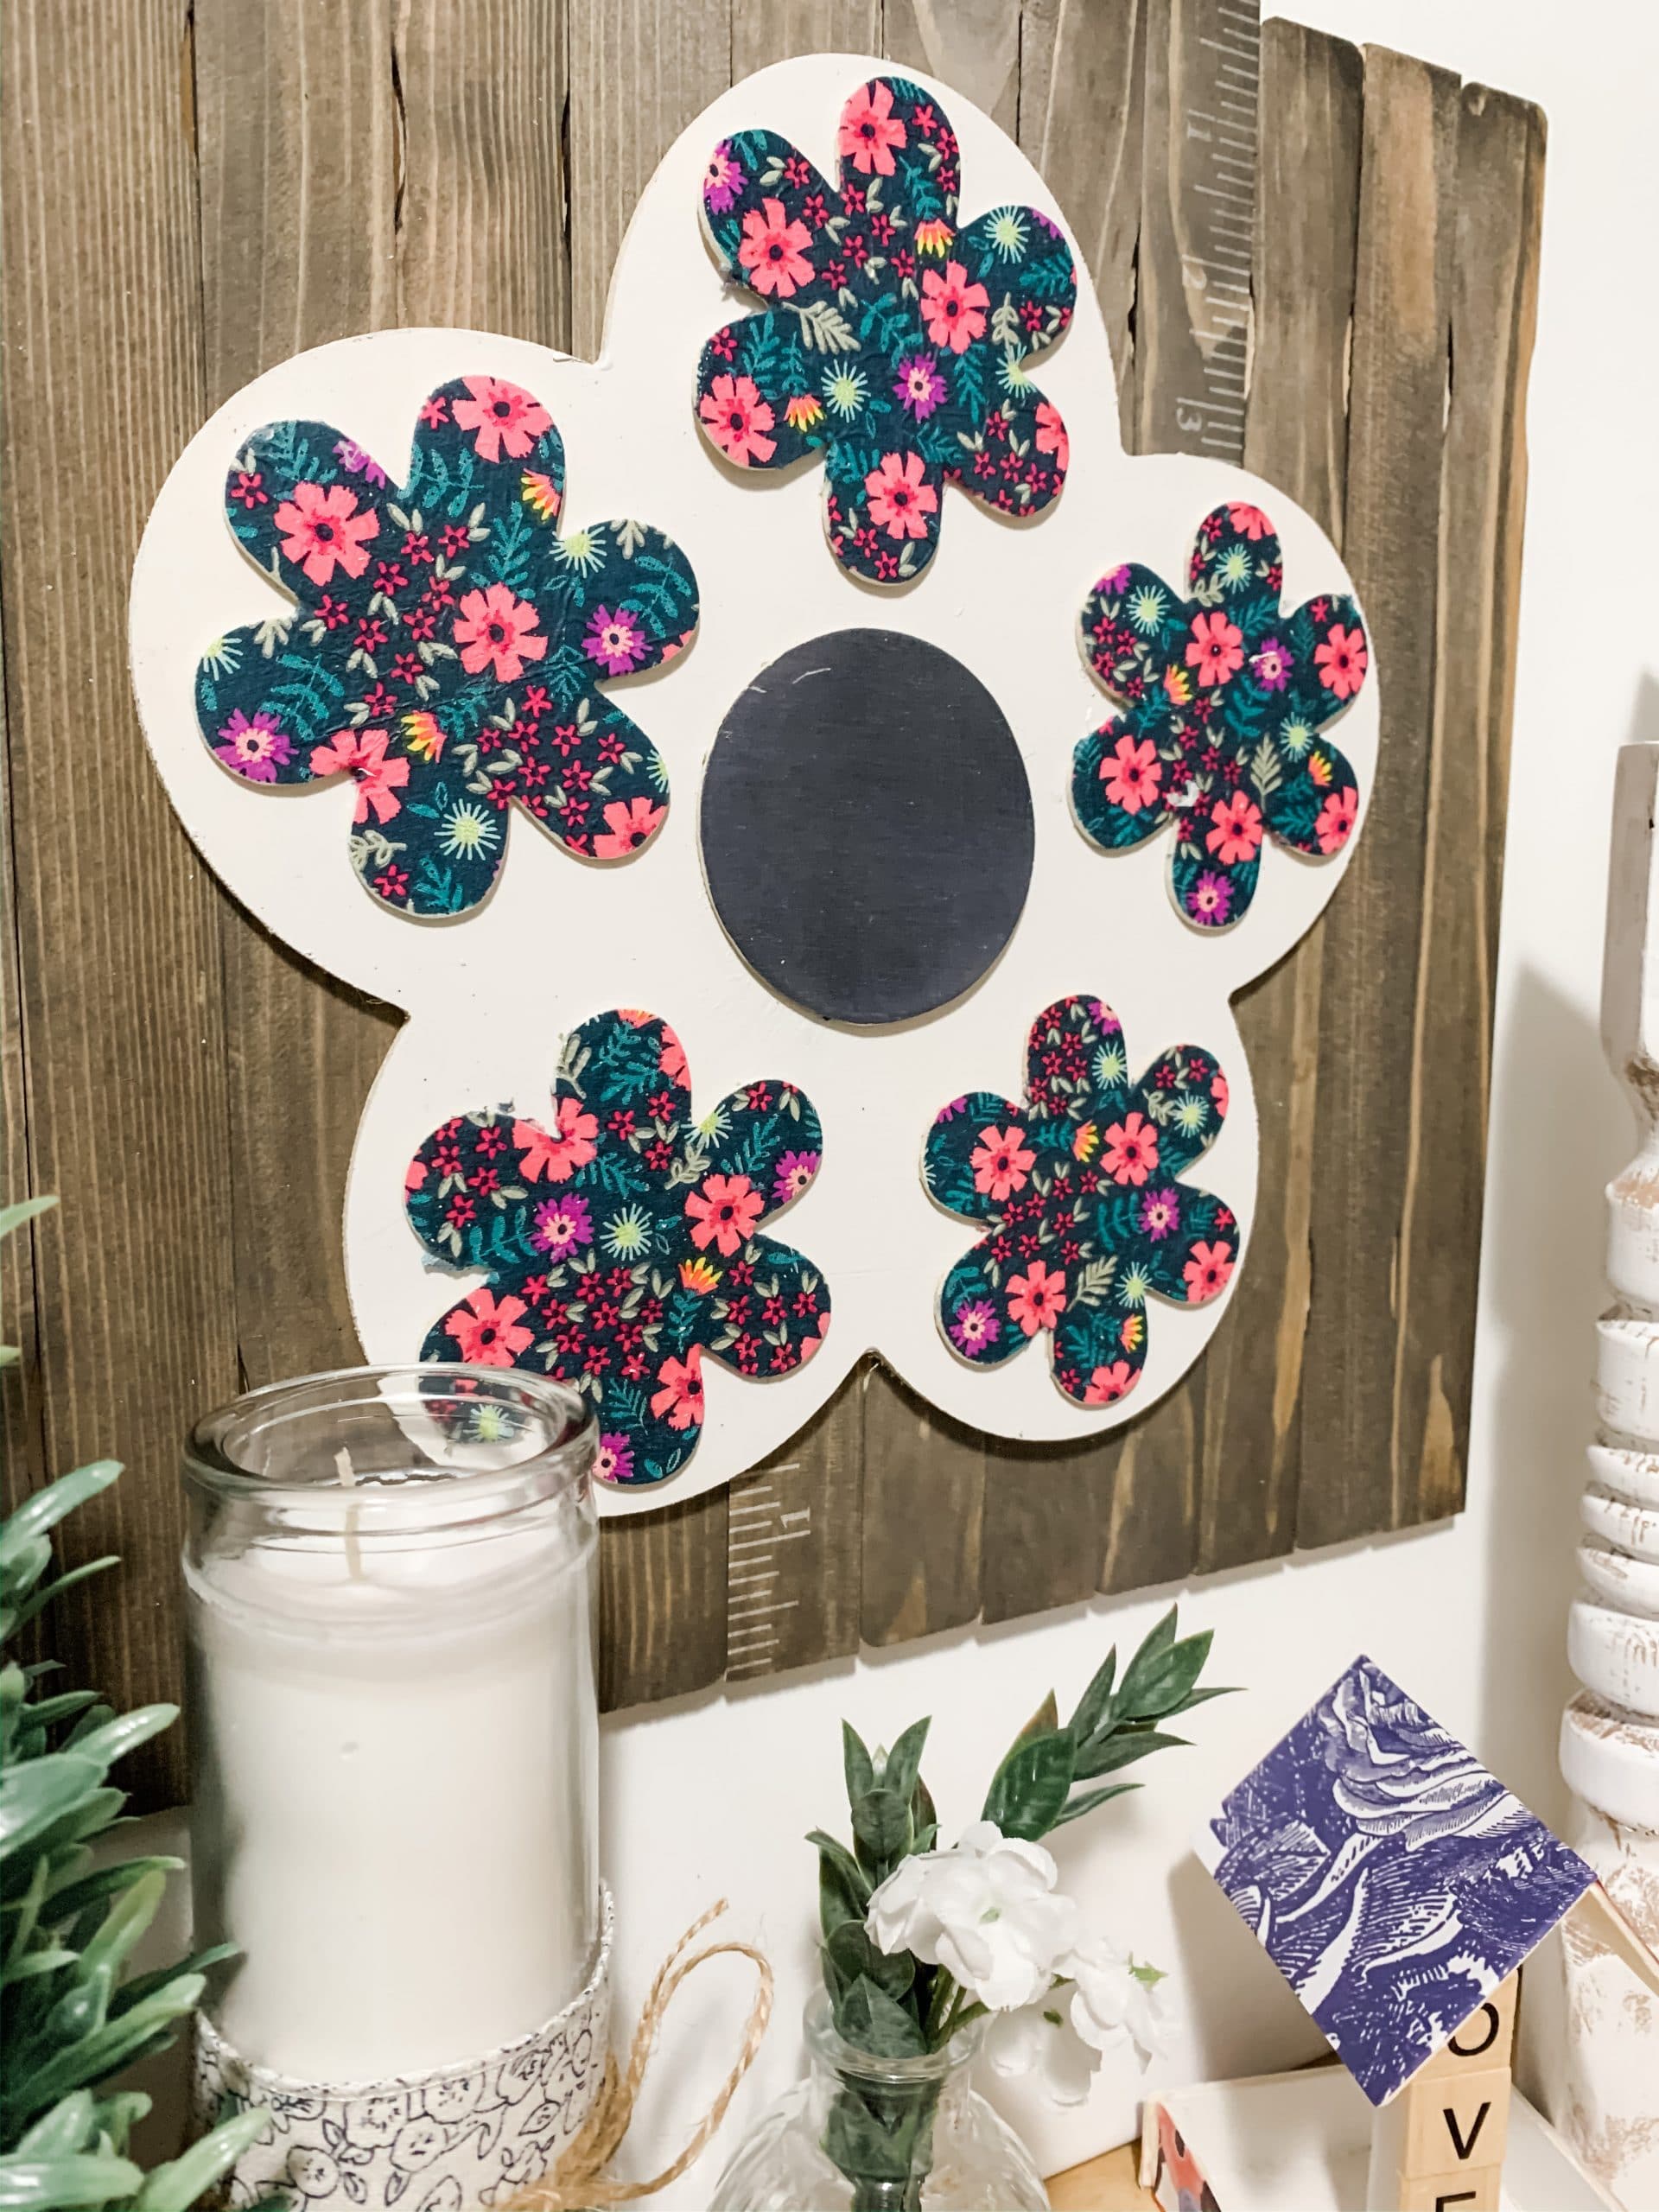
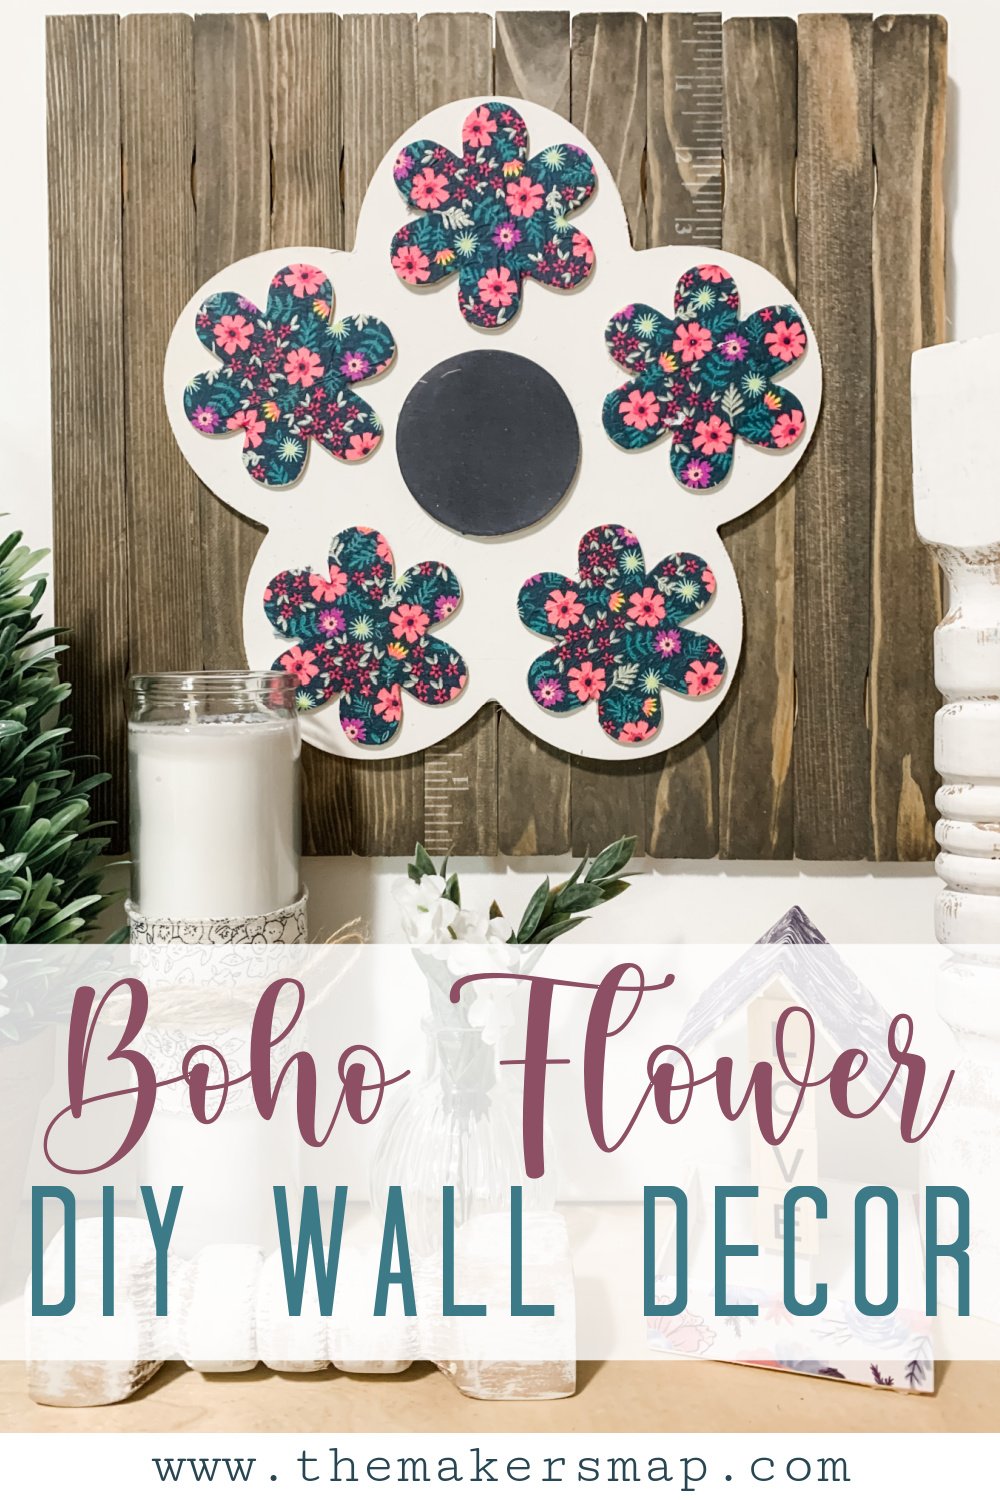
Boho Flower
Next, you’re going to paint your large wooden flower white. I used Dixie Belle Fluff Chalk Paint, but again, you can use whichever white paint you prefer! The white paint is going to allow the decoupaged flowers to POP!
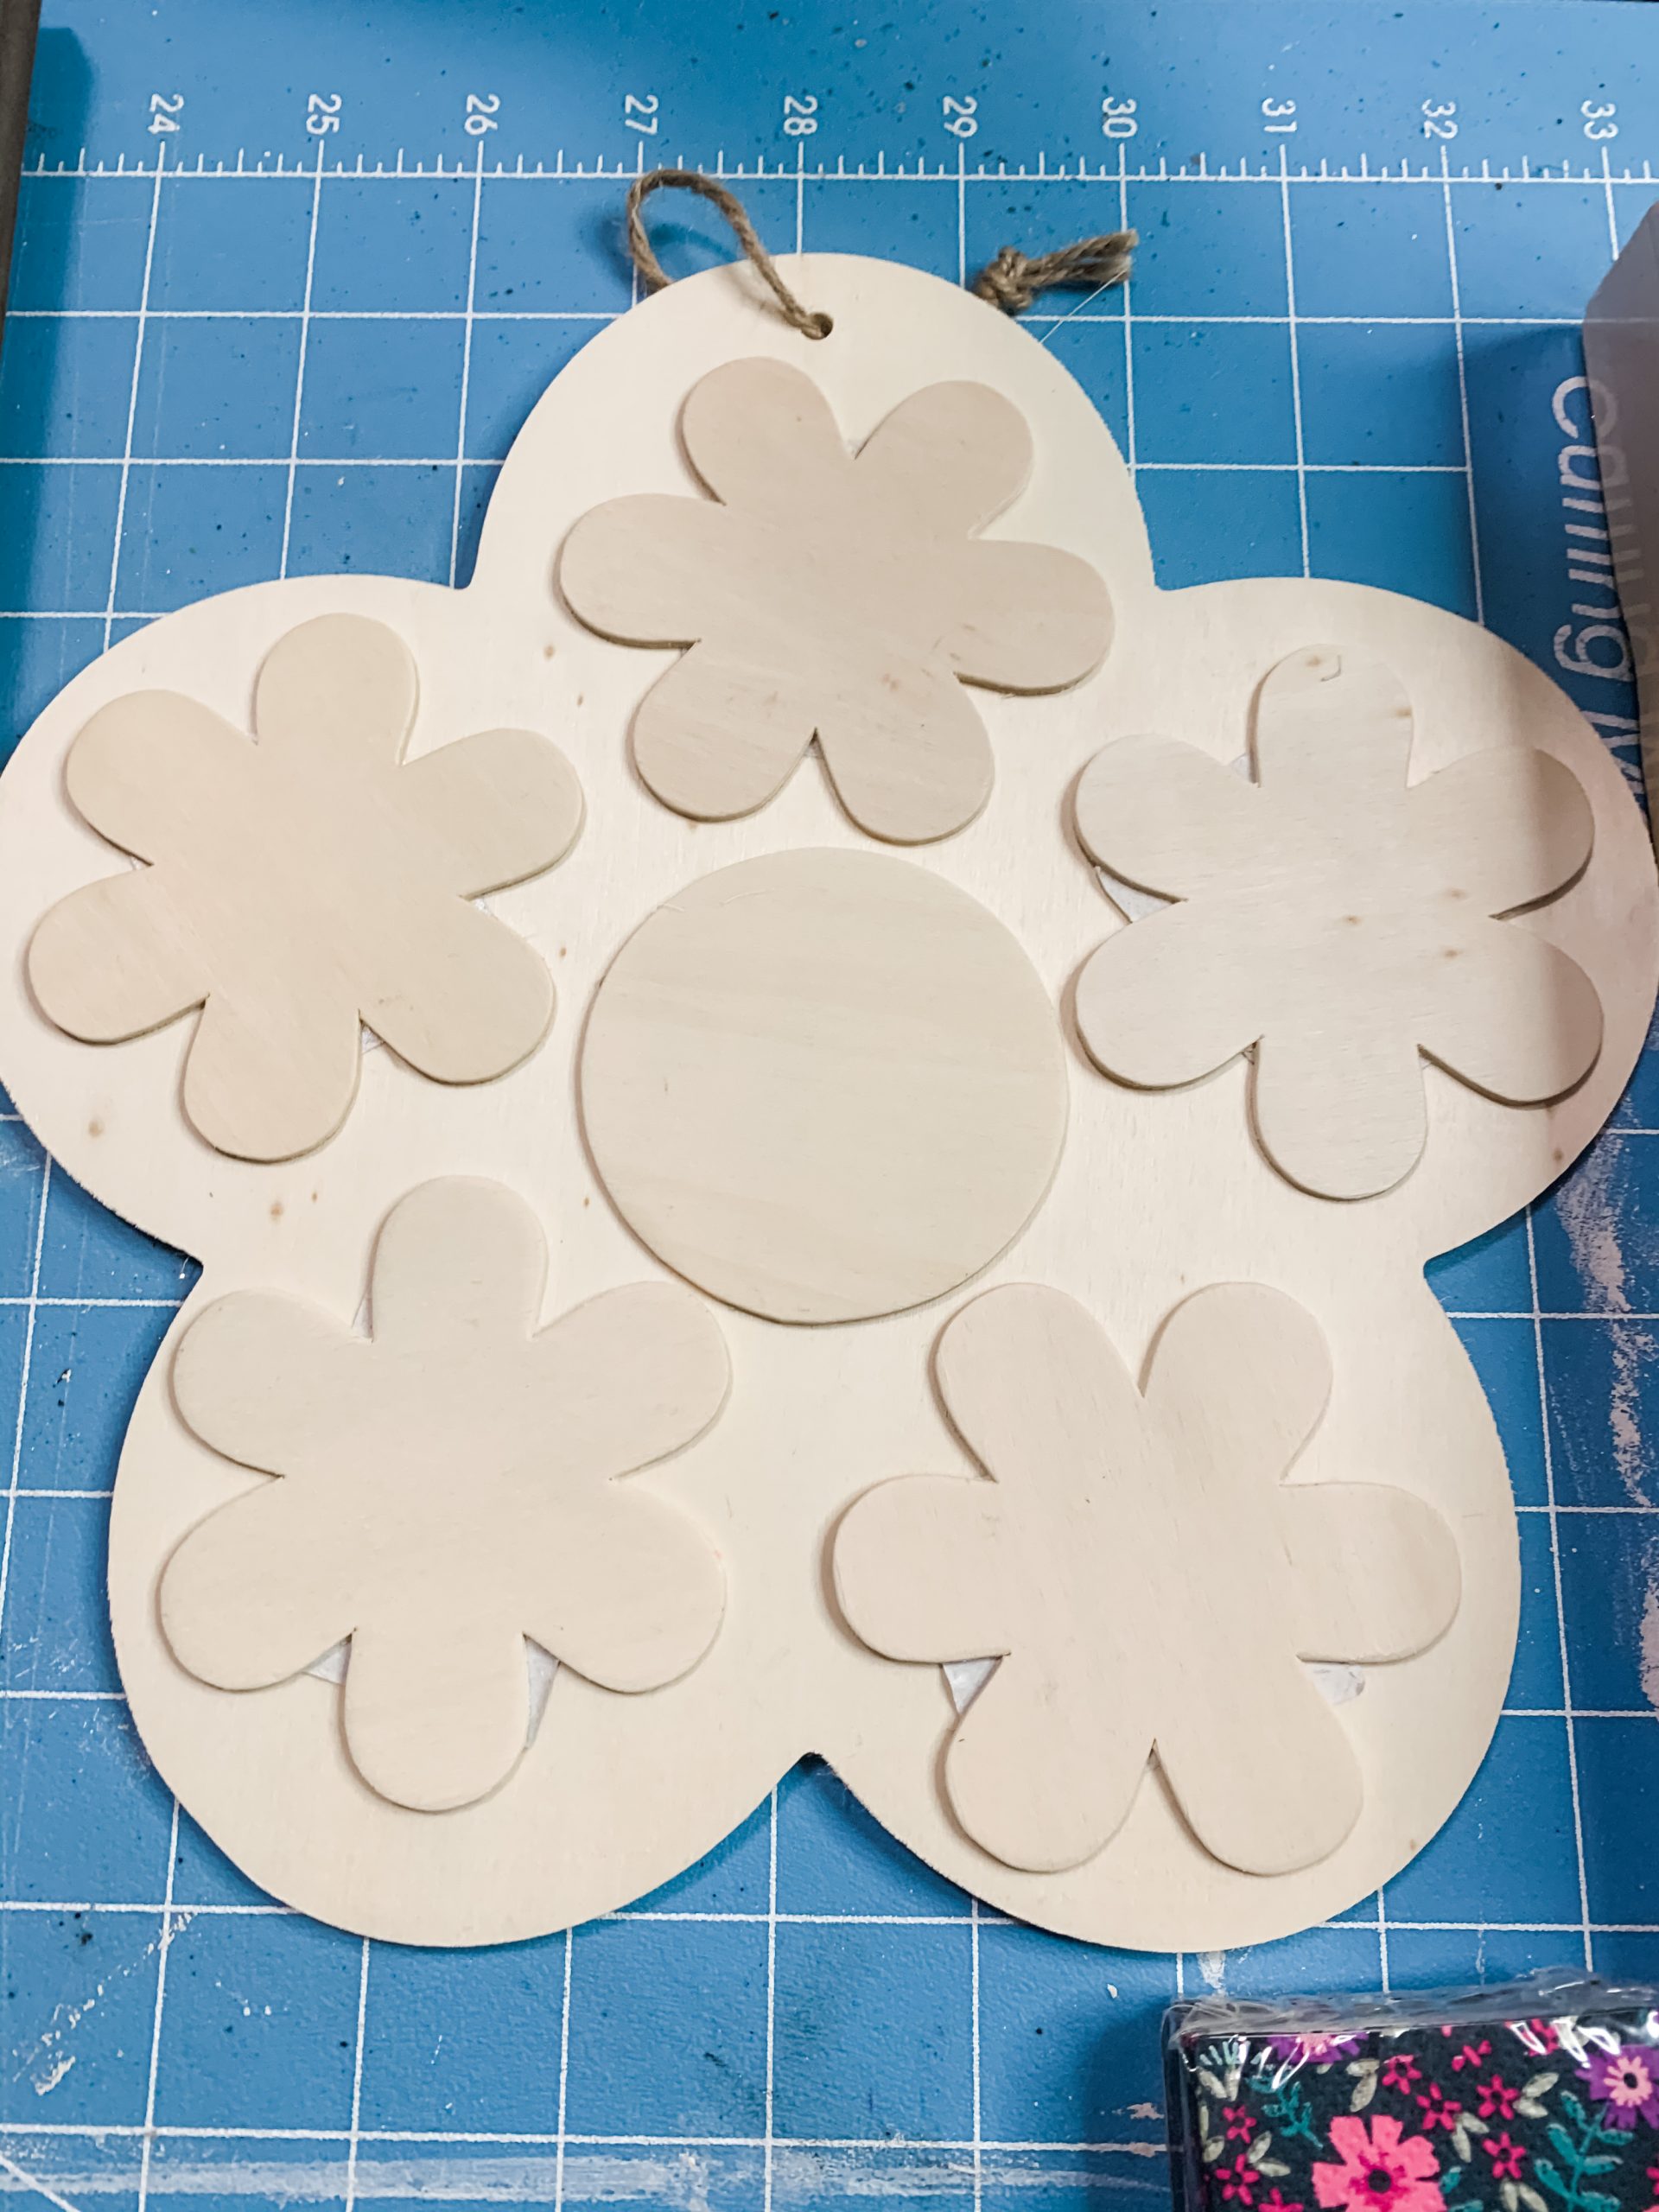
Allow you’re large flower to dry and work on the little flowers next. I used 5 little wooden flowers that I found at Michael’s! Start by separating the tissue paper plies.
If you don’t separate the plies, only the bottom ply will adhere to the wood when we decoupage, and the top ply may start to peel off the wood in the future. We don’t want that!

I laid the patterned tissue paper ply with the design down, then applied a coat of Mod Podge to each flower and pressed them down onto the tissue paper.
Allow the Mod Podge to dry, then trim the excess tissue paper from around each flower. I used scissors first, then went back over the edges with a sanding sponge to get as much excess tissue paper removed as I could.
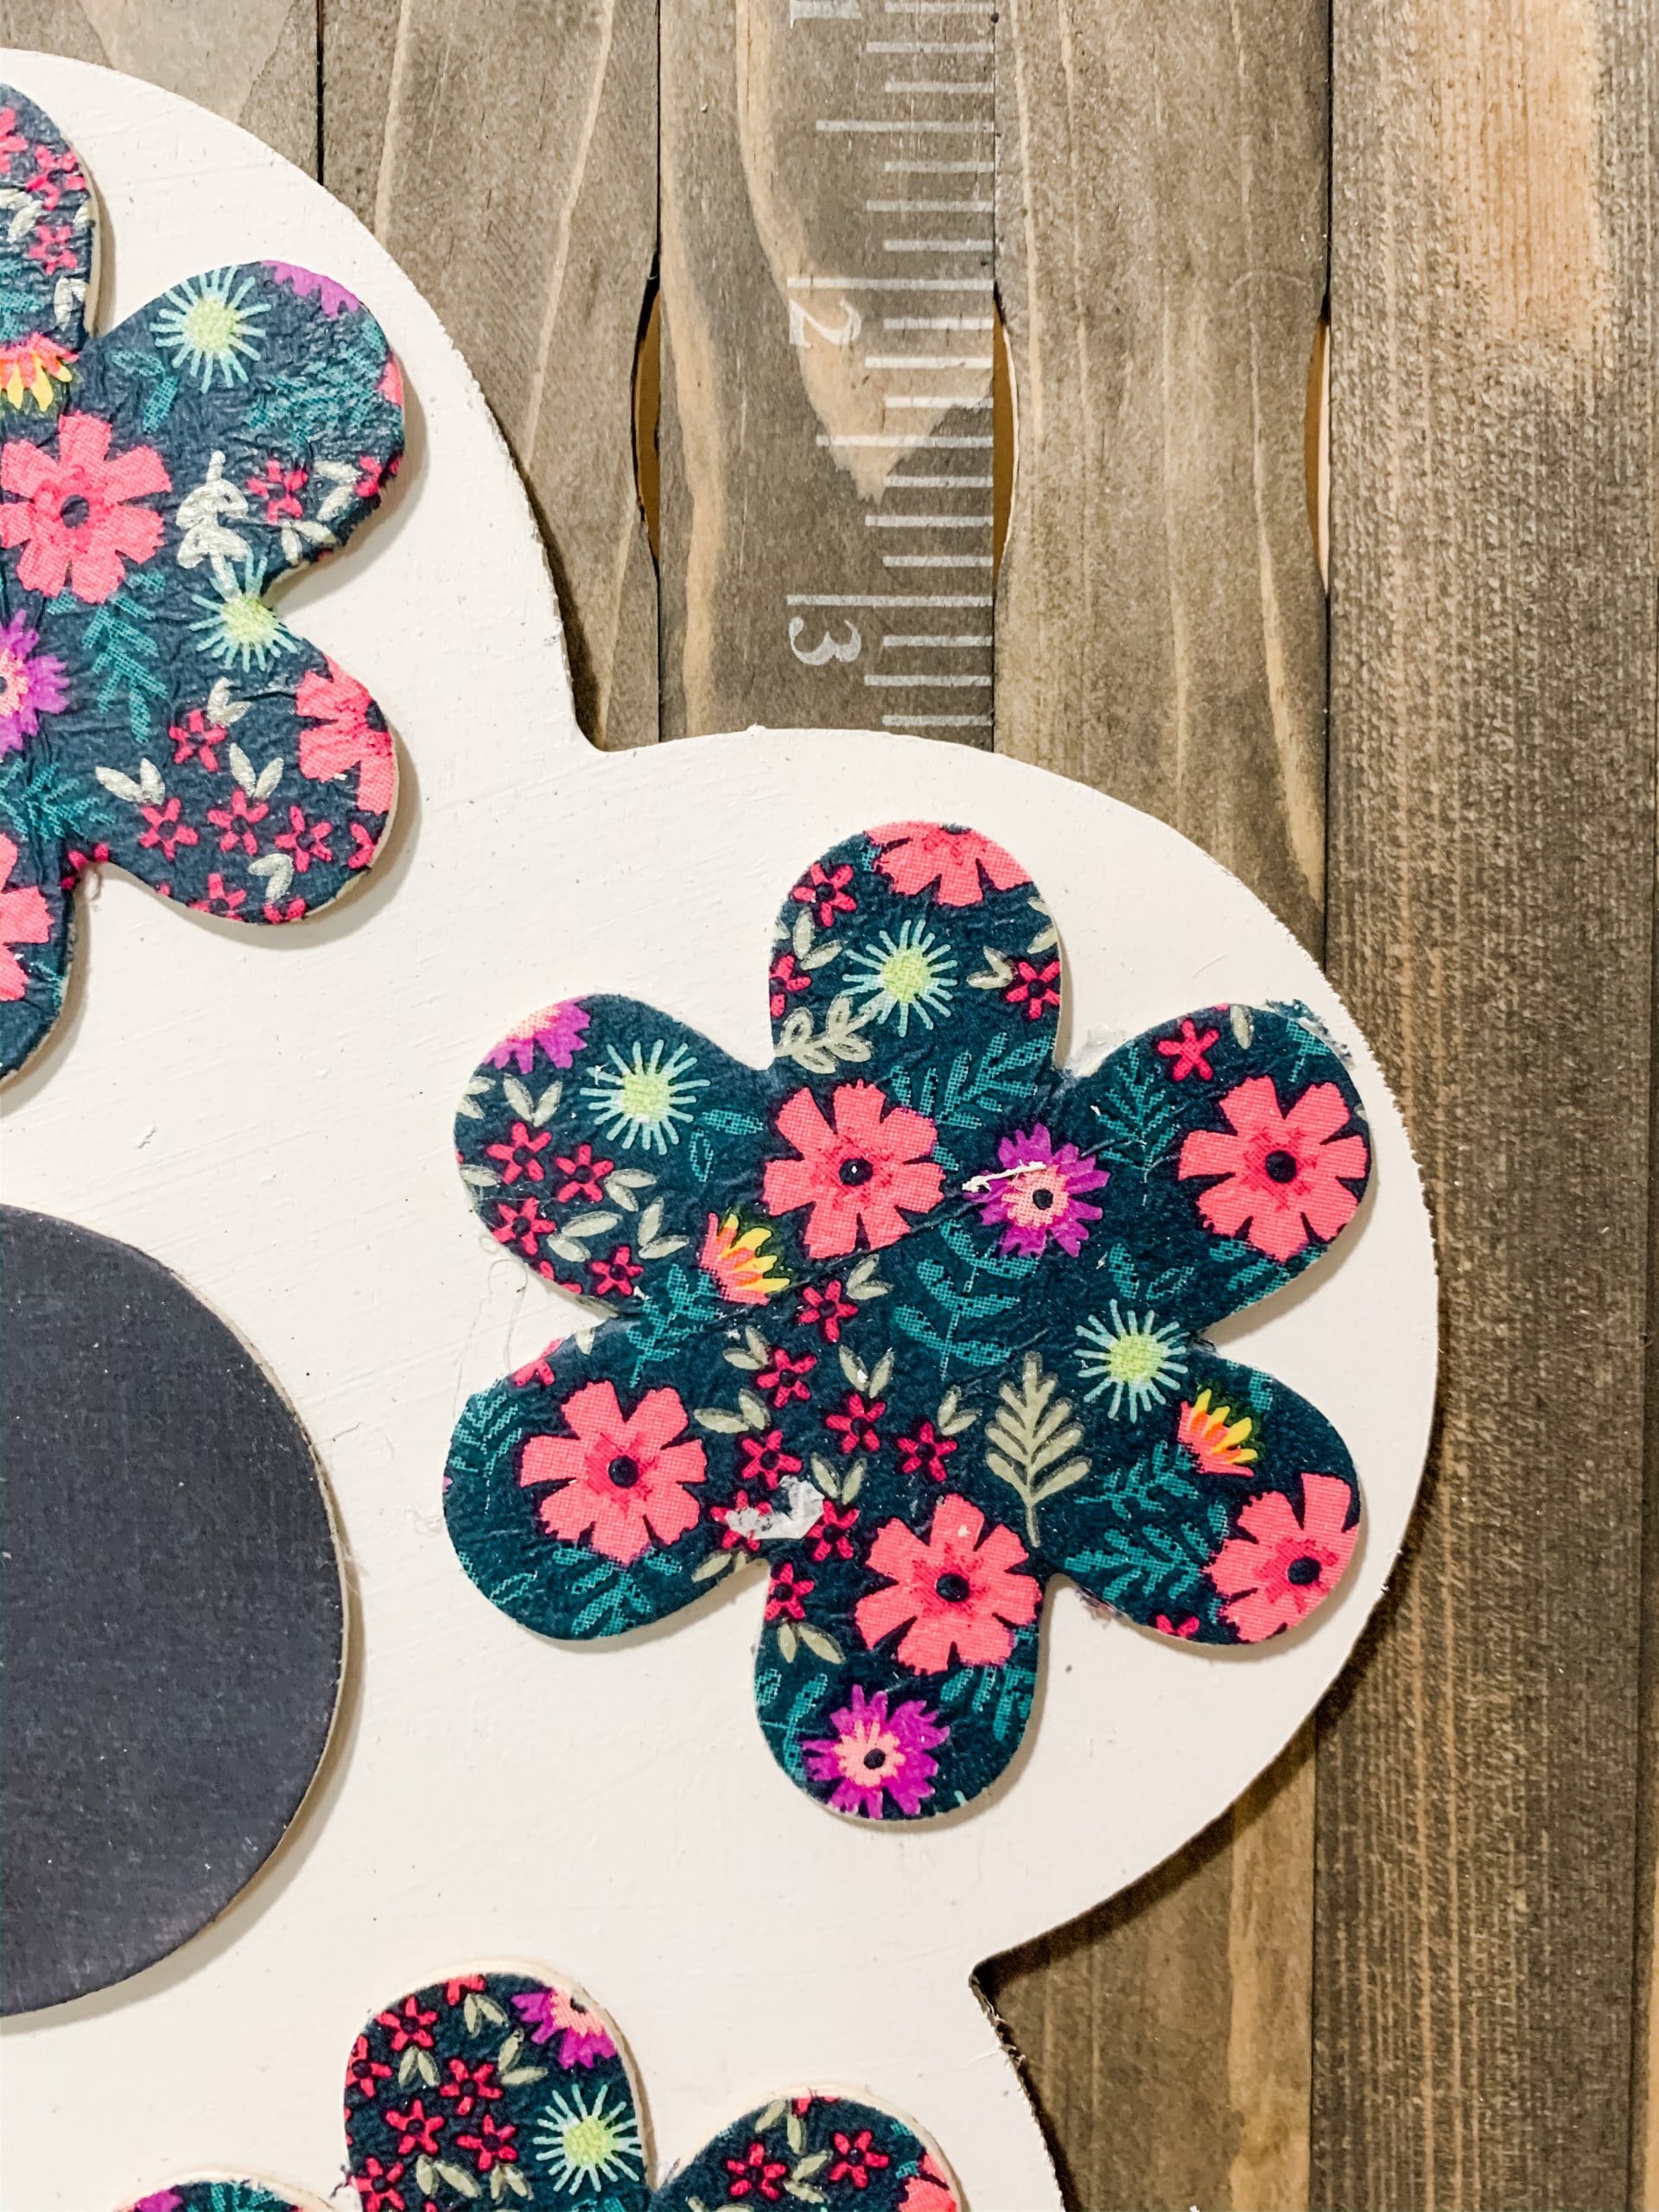
One decoupaged flower will go on each petal of the large white flower. For the center, I painted a small wooden circle with Dixie Belle In The Navy Chalk Paint.
Once the flowers and the painted circle are finished and dry, hot glue them in place on the white flower. Lastly, you’re going to hot glue the large flower onto your stained paint stick backing.
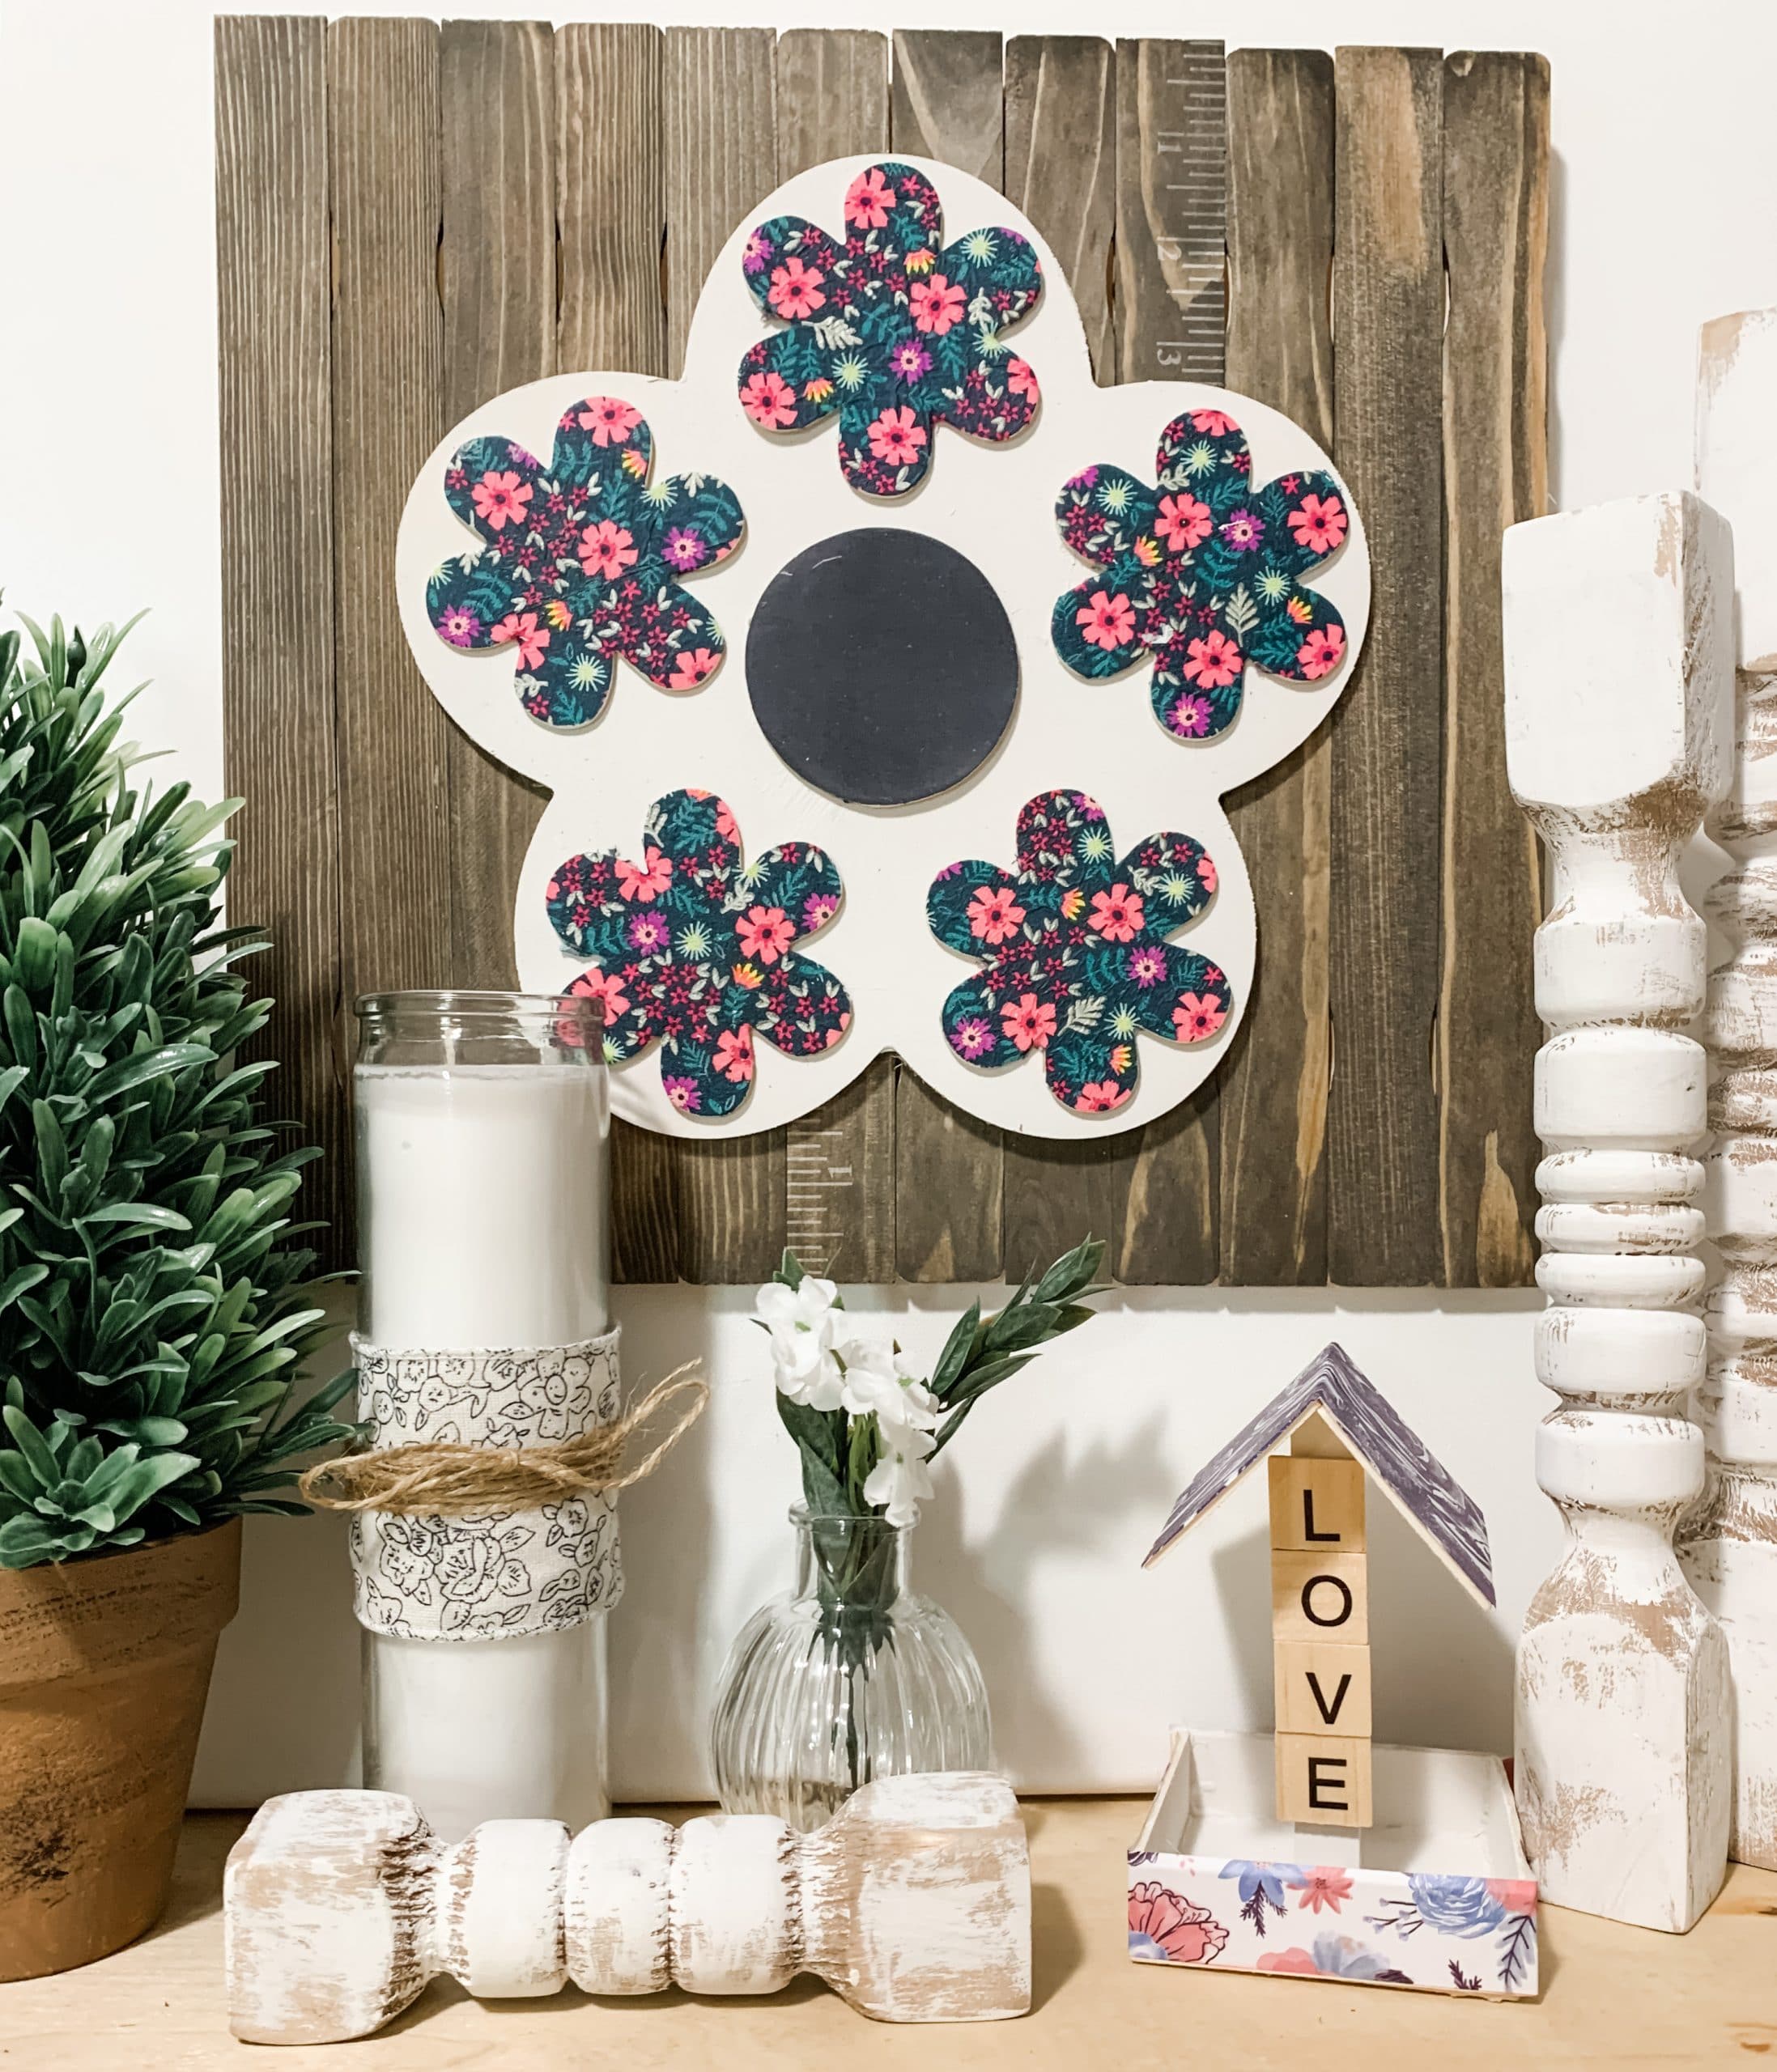
I hope you enjoyed this Boho Flower DIY Decor as much as I did and decide to make one for yourself! I would love to see how yours turns out!
You should totally join my FREE Facebook group called On A Budget Crafts! It is a judgment-free community for DIY crafters to show off their projects and ideas.
If you loved this DIY you might also like this DIY topiary!
Thanks for stopping by! XOXO Amber
You can also shop my ENTIRE AMAZON Favorites shop just click here! It’s packed full of all the things I use and love. Here is the supply list I highly recommend every creative have on hand!!
Would you also pin my blog for later and get on my newsletter alerts? I would love to have you join my #craftycrew.
Inspired? Leave me a comment below! I love hearing from my readers!

Join my free “ON A BUDGET CRAFTS” Facebook group!
I been wanting to make this for ever. Have all the stash. It’s adorable