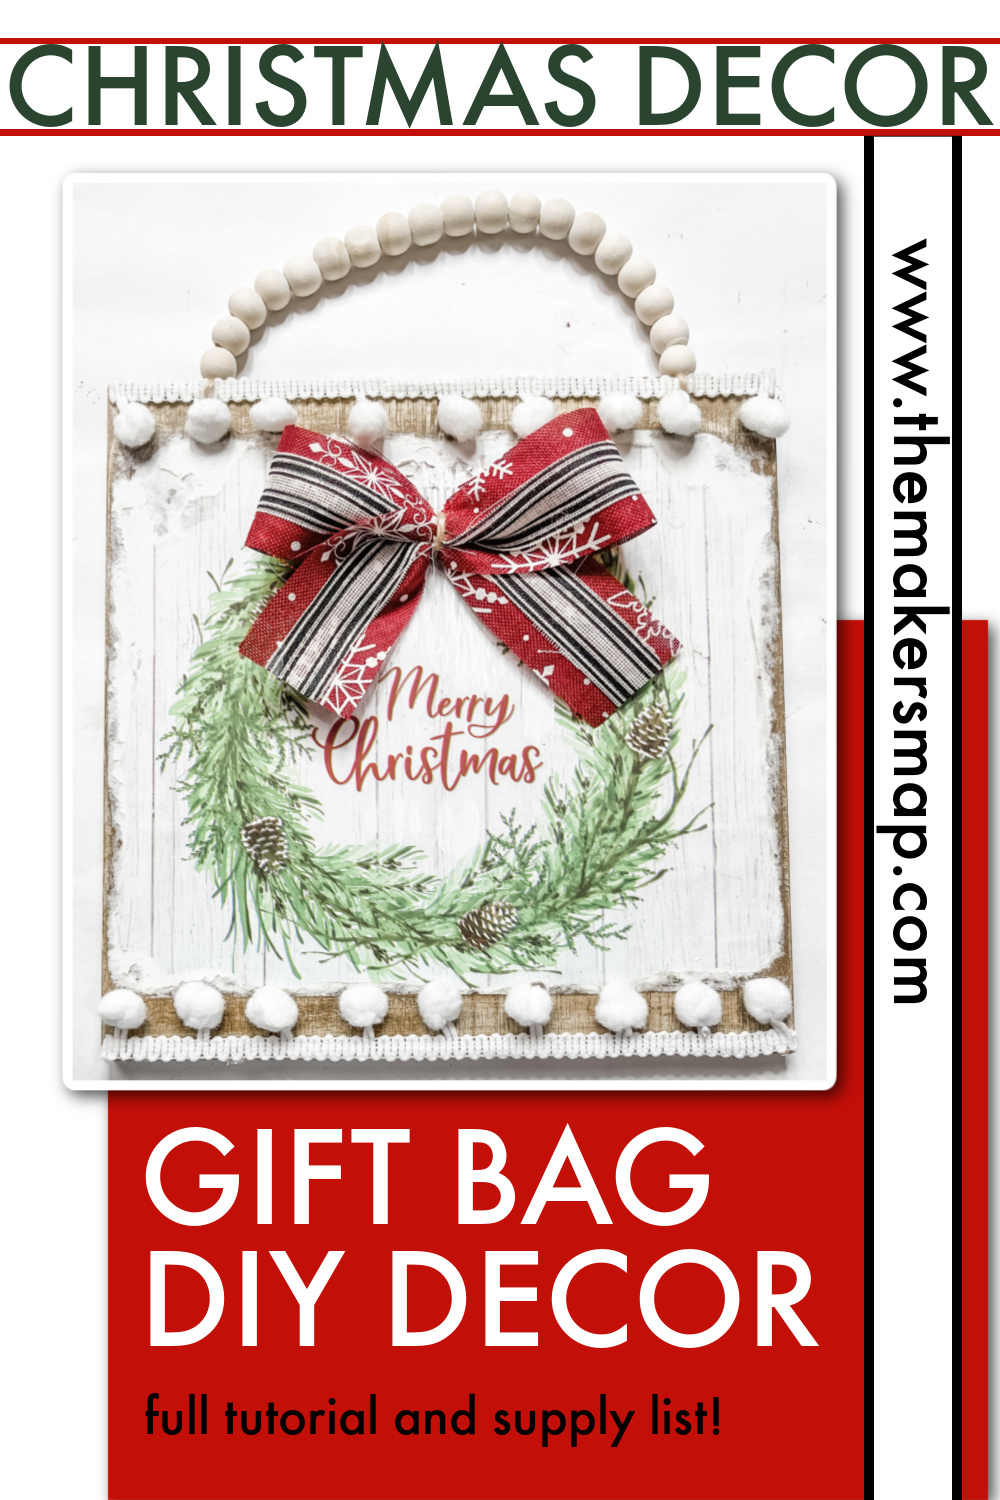
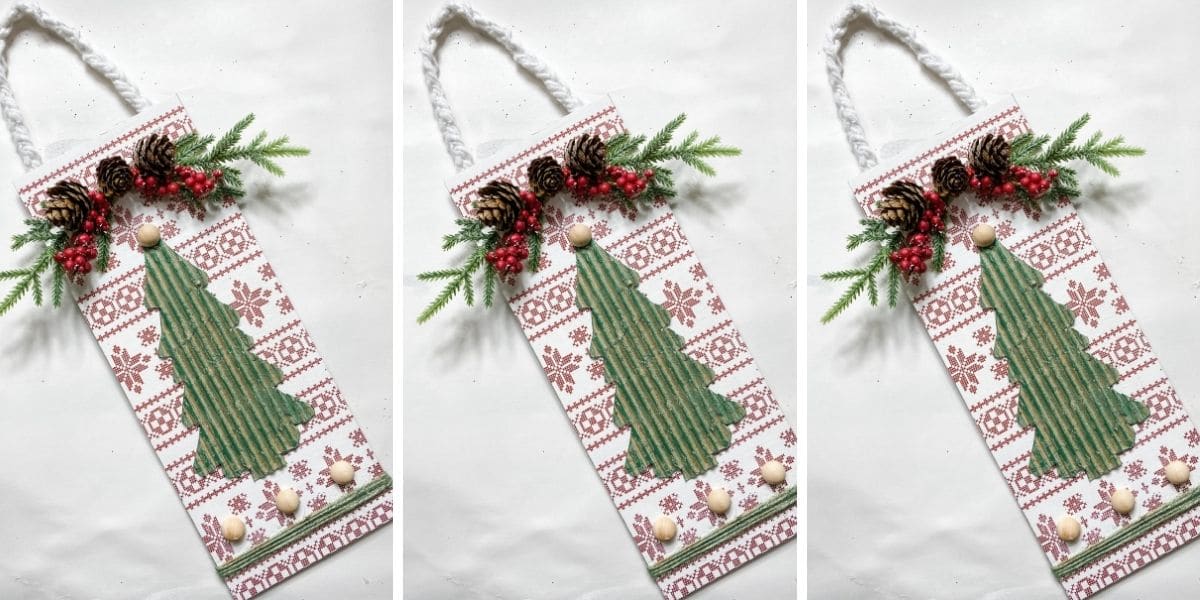
Gift Bag DIY Merry Christmas Sign
I made this Gift Bag DIY Merry Christmas Sign back in 2021, but it is just as cute today as it was back then!
What I love the most about this holiday home decor DIY is how affordable and customizable it is! (I know, that’s two things!)
If you are done with Christmas crafting, or you don’t decorate or celebrate Christmas, you can change out the Merry Christmas design for something that matches your decor style or holiday celebration and just use different ribbons!
Seriously, it’s that easy to change up this decor craft from Christmas to whatever you need!
I used a gift bag from Dollar Tree and just cut out the pattern that I wanted to use, but you could us ANYTHING, including paint, to make your decor based off this idea!
Then, instead of using red ribbon with white snowflakes, you can use something more neutral, like burlap, or something for another holiday like Easter eggs, hearts, shamrocks, etc. to make it perfect!

How to Make a Gift Bag DIY Merry Christmas Sign
The gift bag I used is actually from the Christmas season in 2020. If you can’t find the same gift bag, you can use my Merry Christmas printable instead!
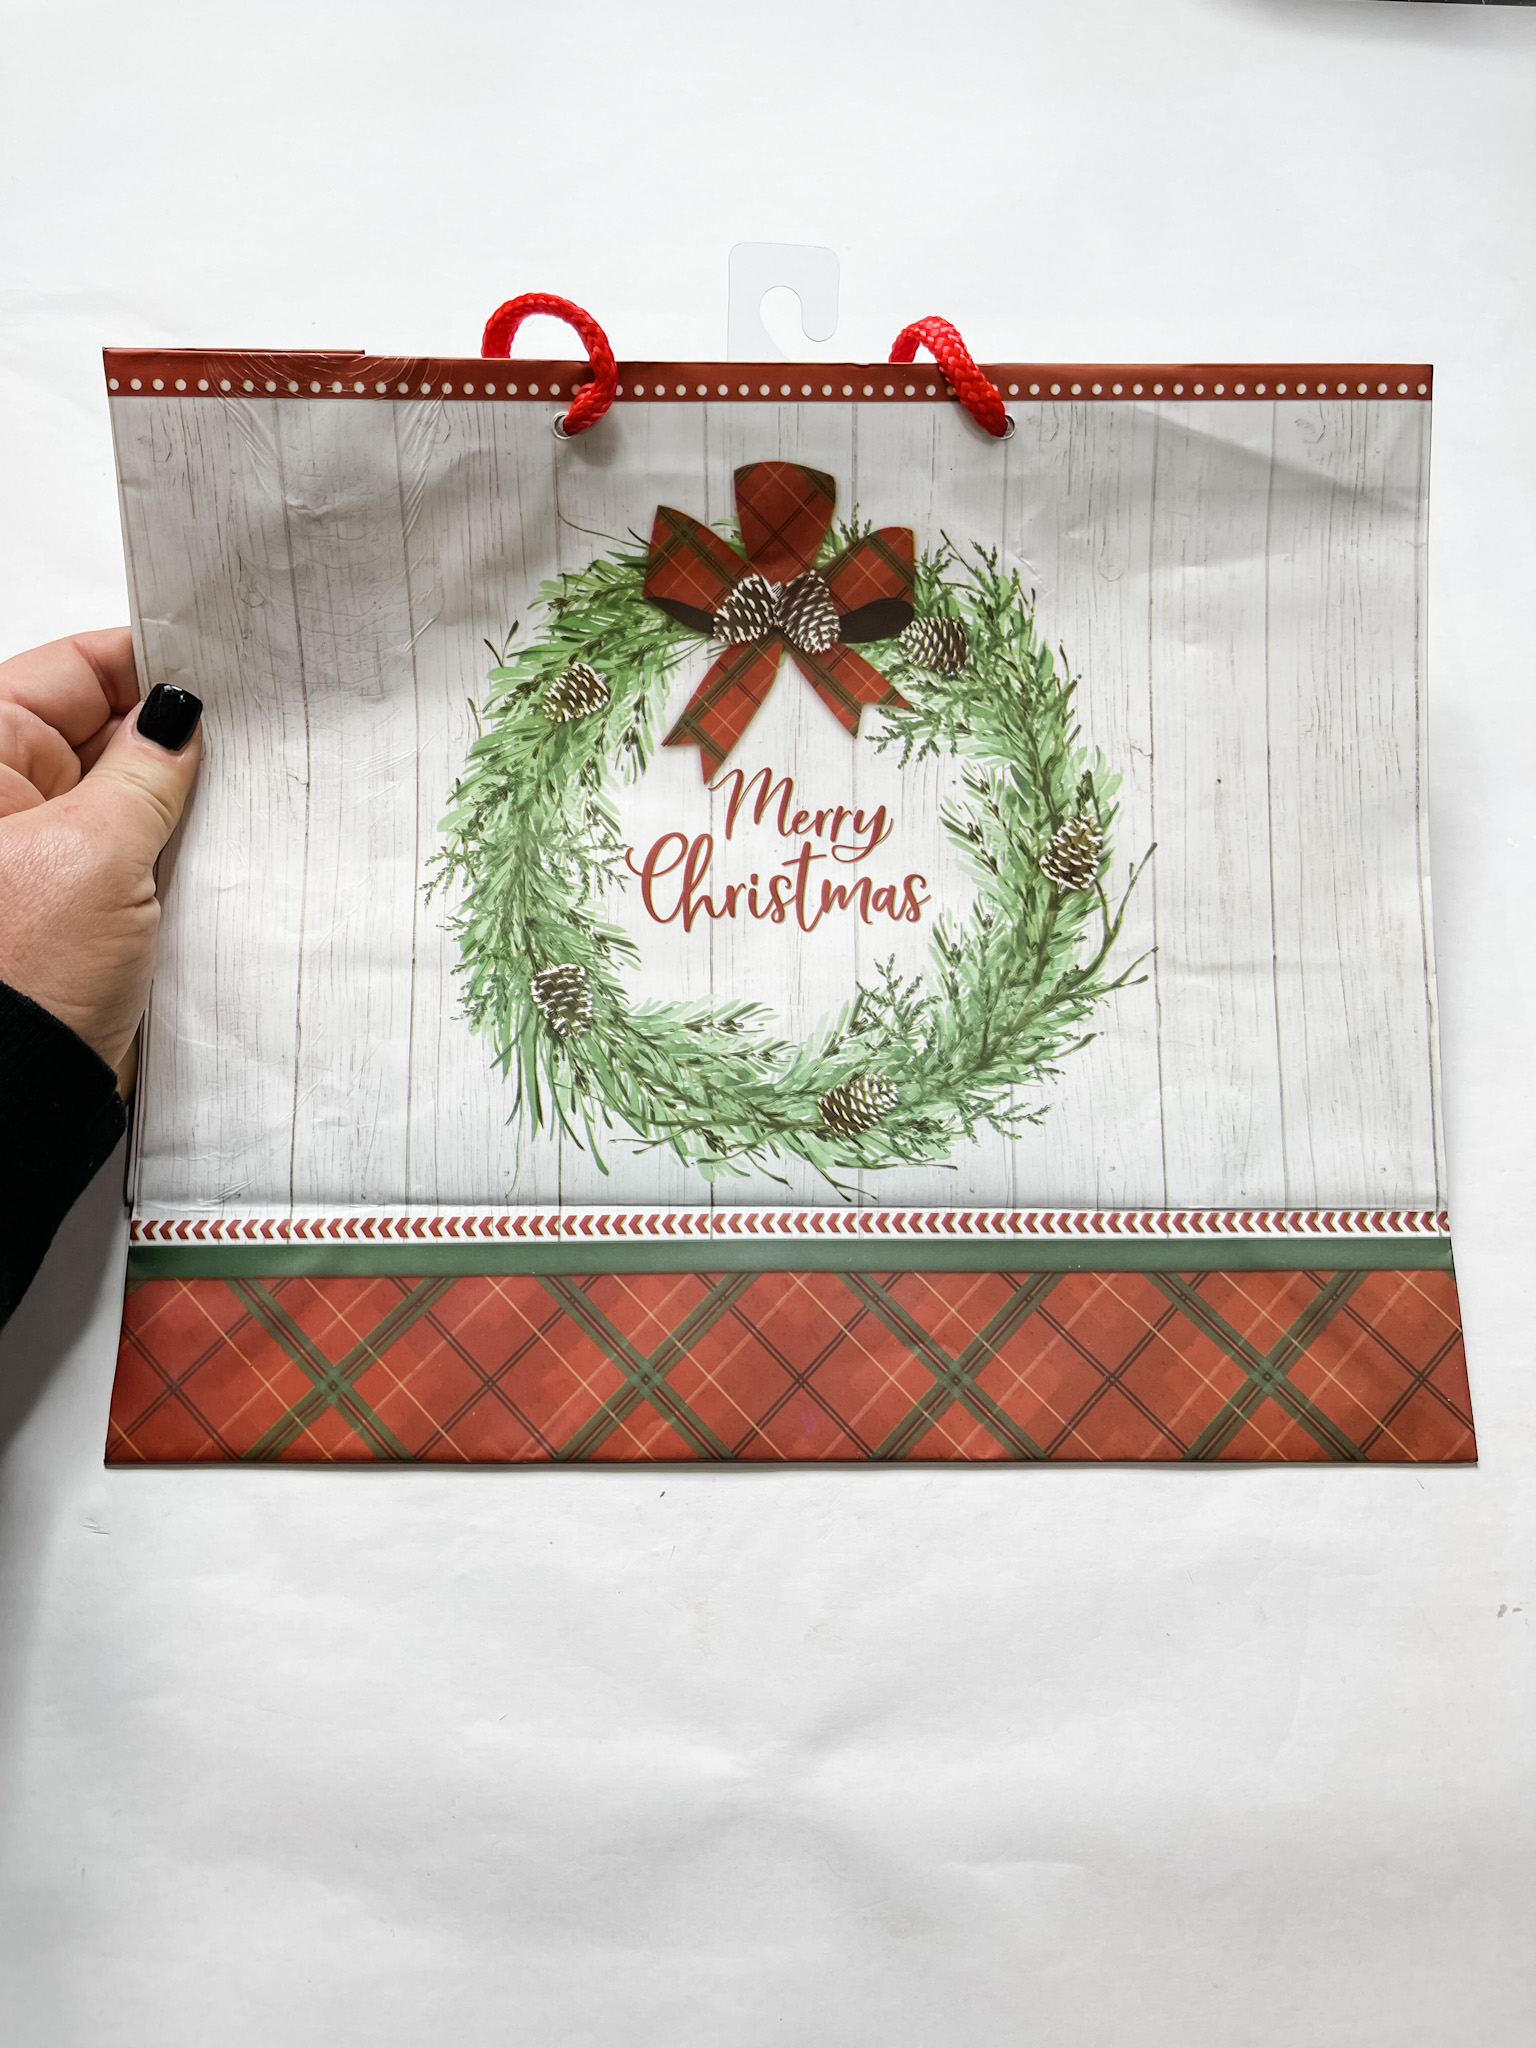
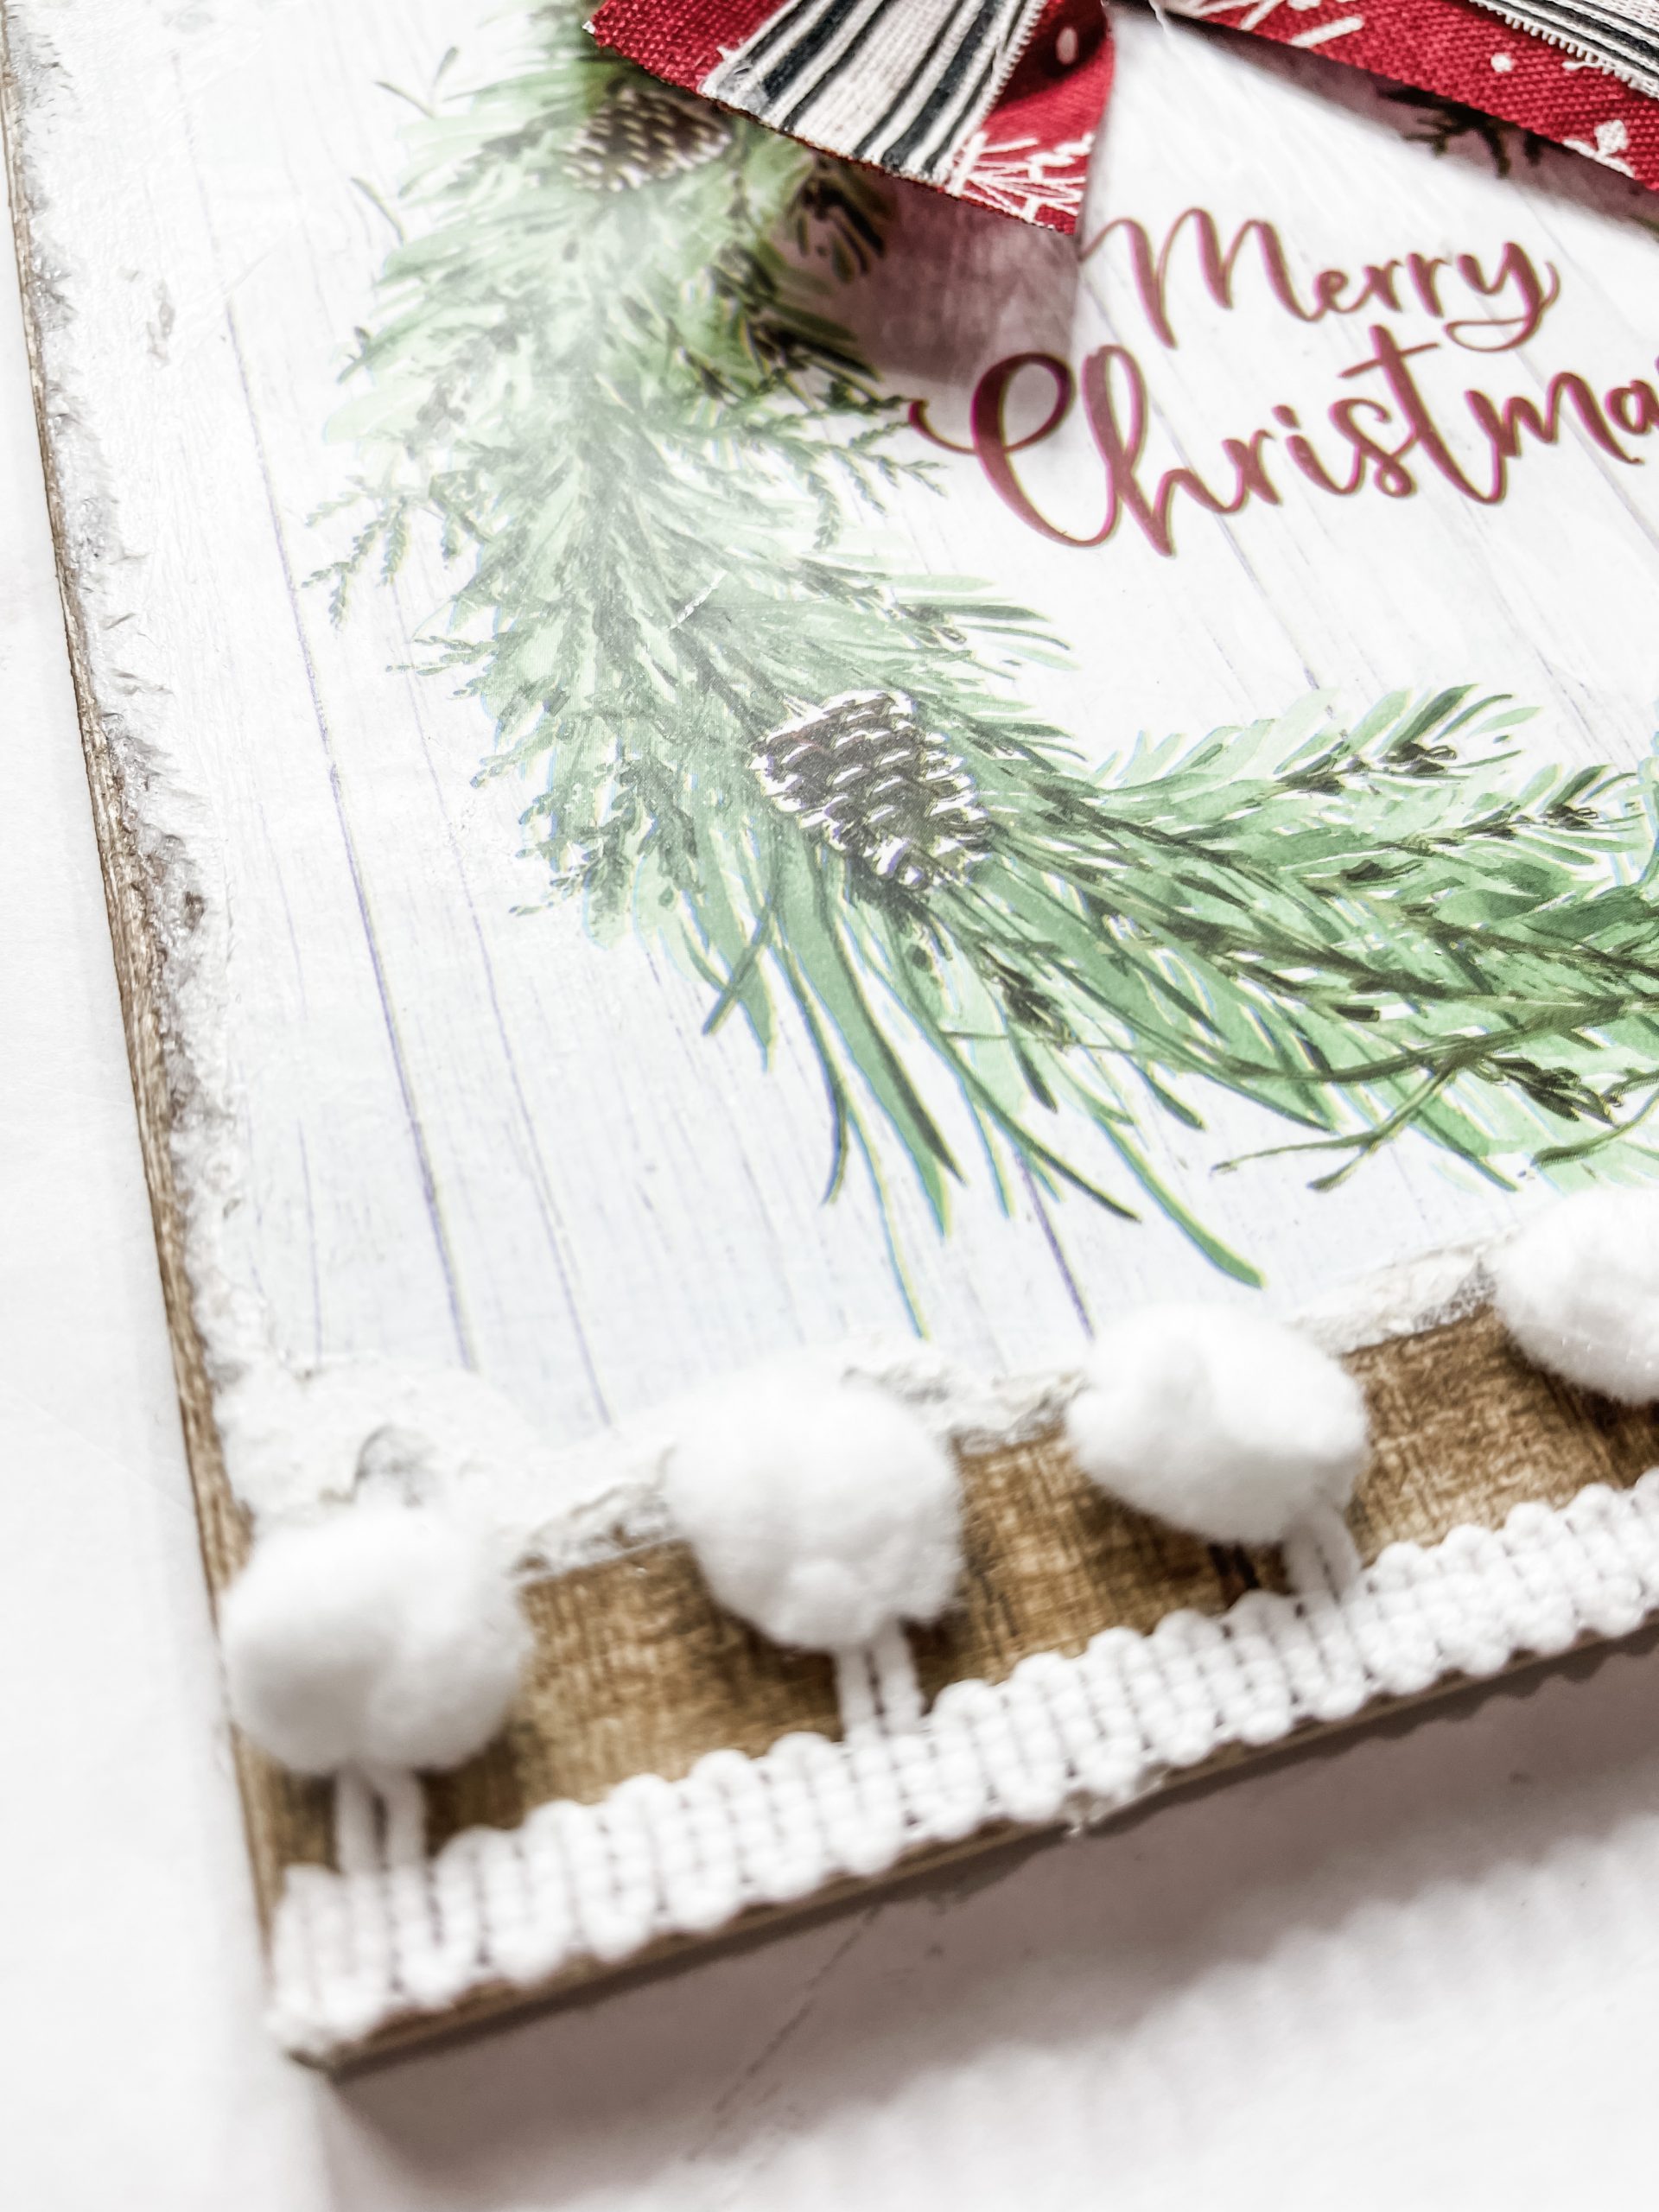
If you’re using a gift bag, go ahead and cut out the design from the bag. Then, apply a coat of Mod Podge to your surface and place the design onto it.
Use a rolling pin to smooth out any wrinkles or bubbles in the paper, and allow the Mod Podge to dry. Once the Mod Podge is dry, lightly distress around the design with a piece of sandpaper.
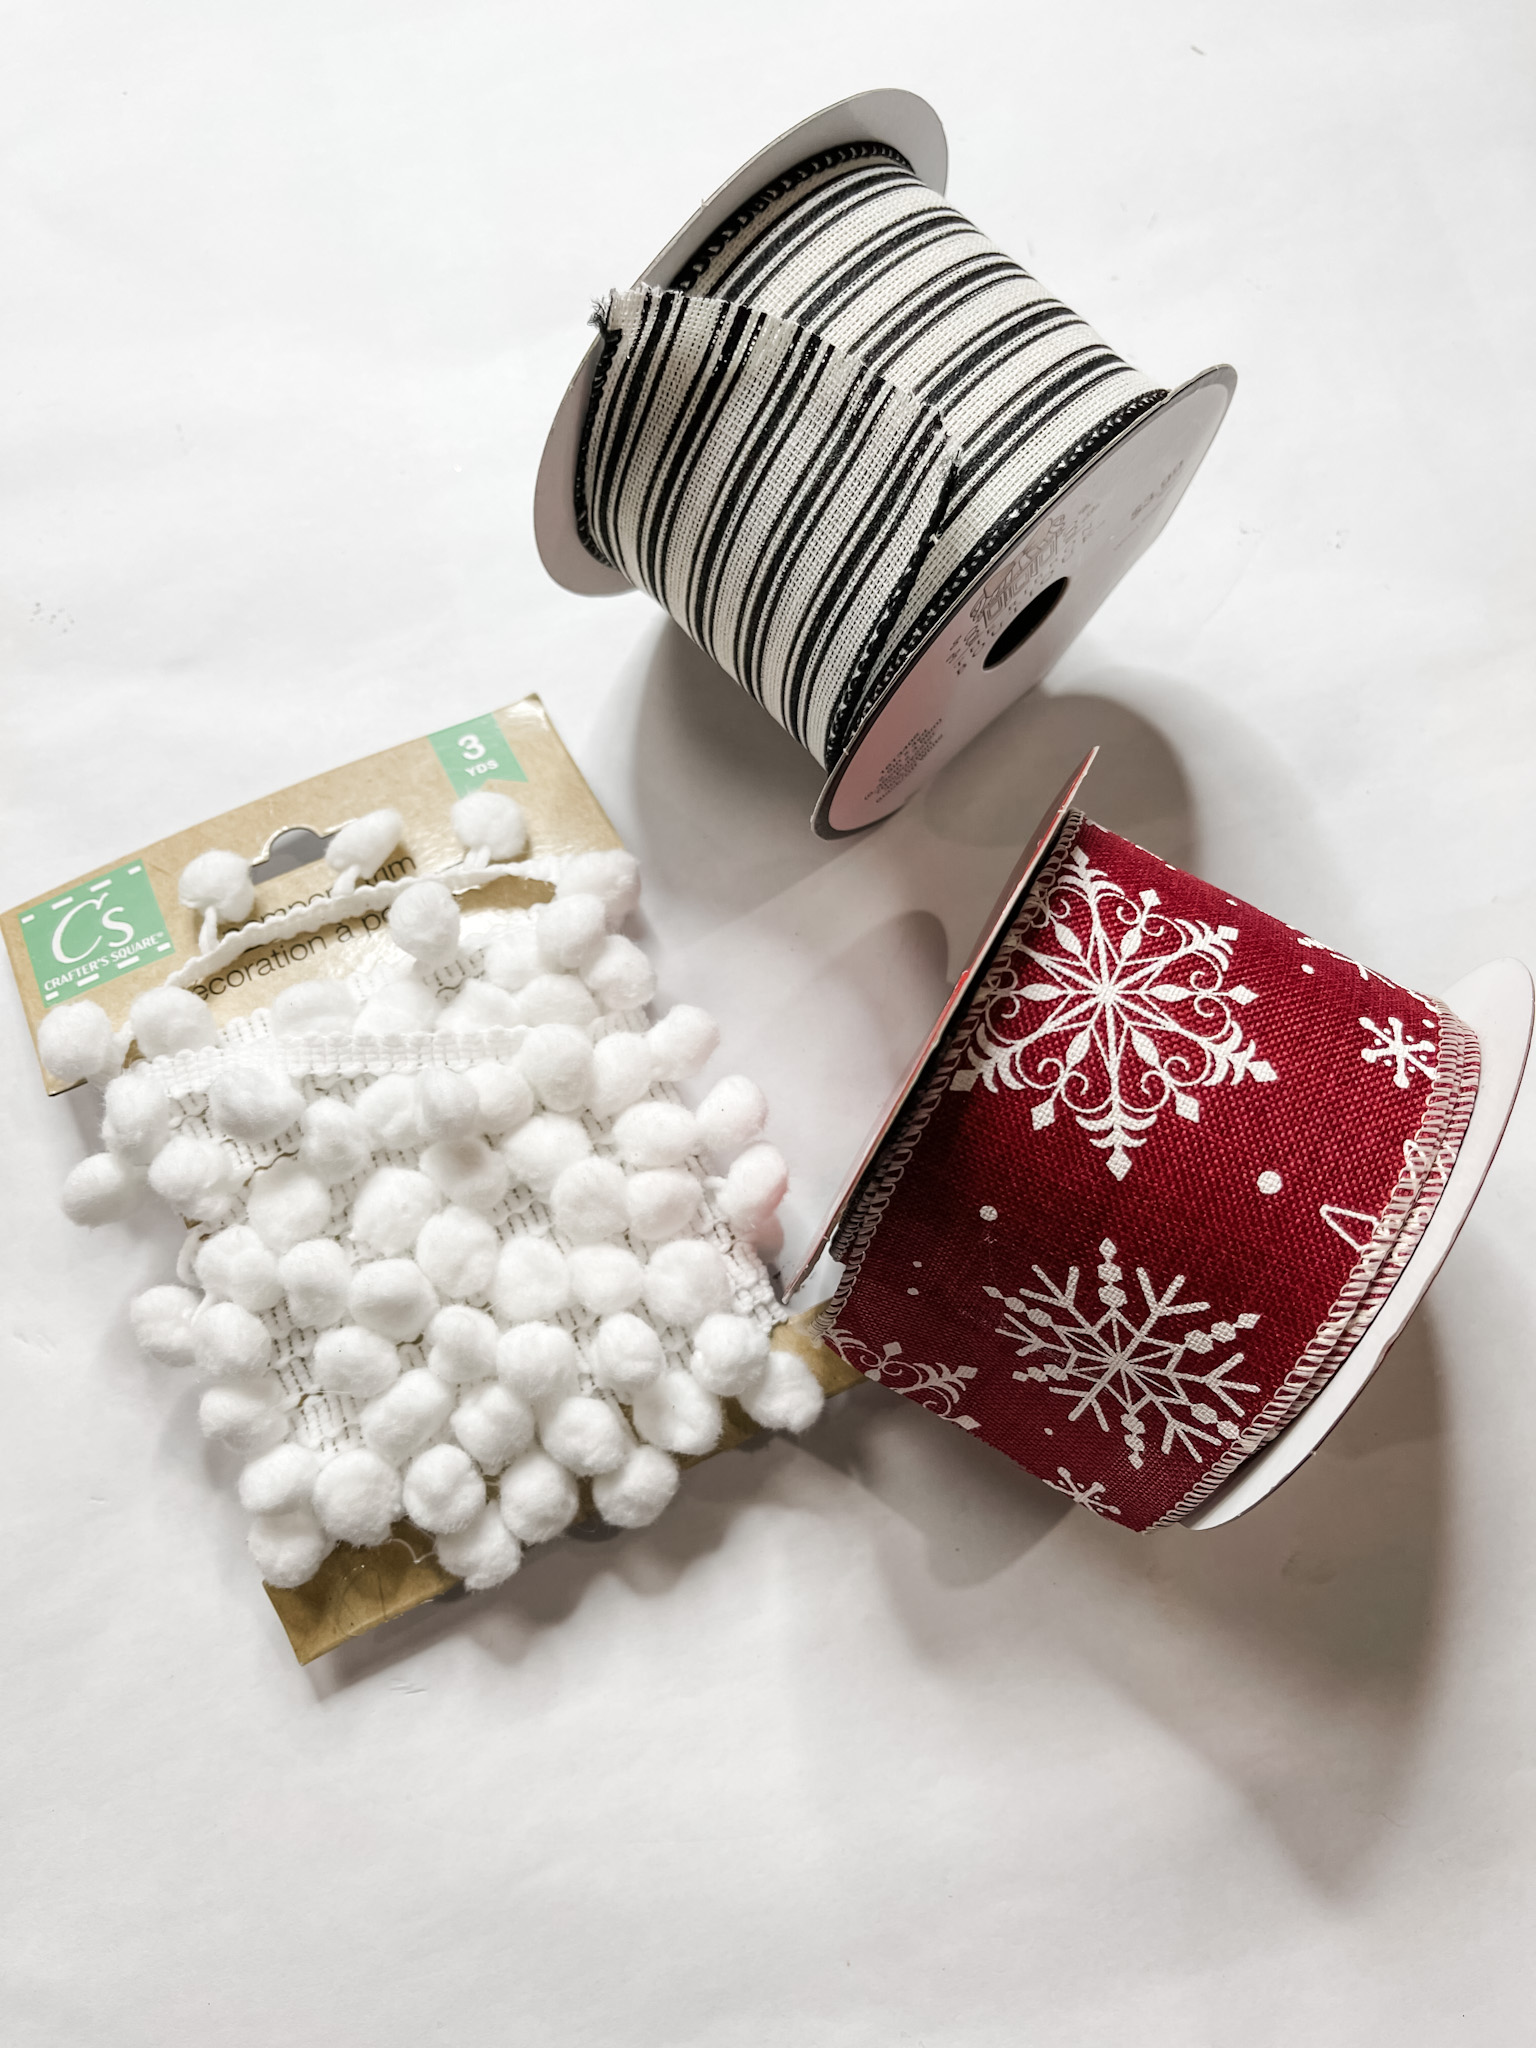
Hot glue the Dollar Tree white pompom trim across the top and bottom of the wood plaque, just above the merry Christmas wreath. Next up is the bow!
Cut a long strip of the red snowflake ribbon. I cut the wired edges off. Then, I cut a thin strip of the striped ribbon and hot glued it onto the red strip.
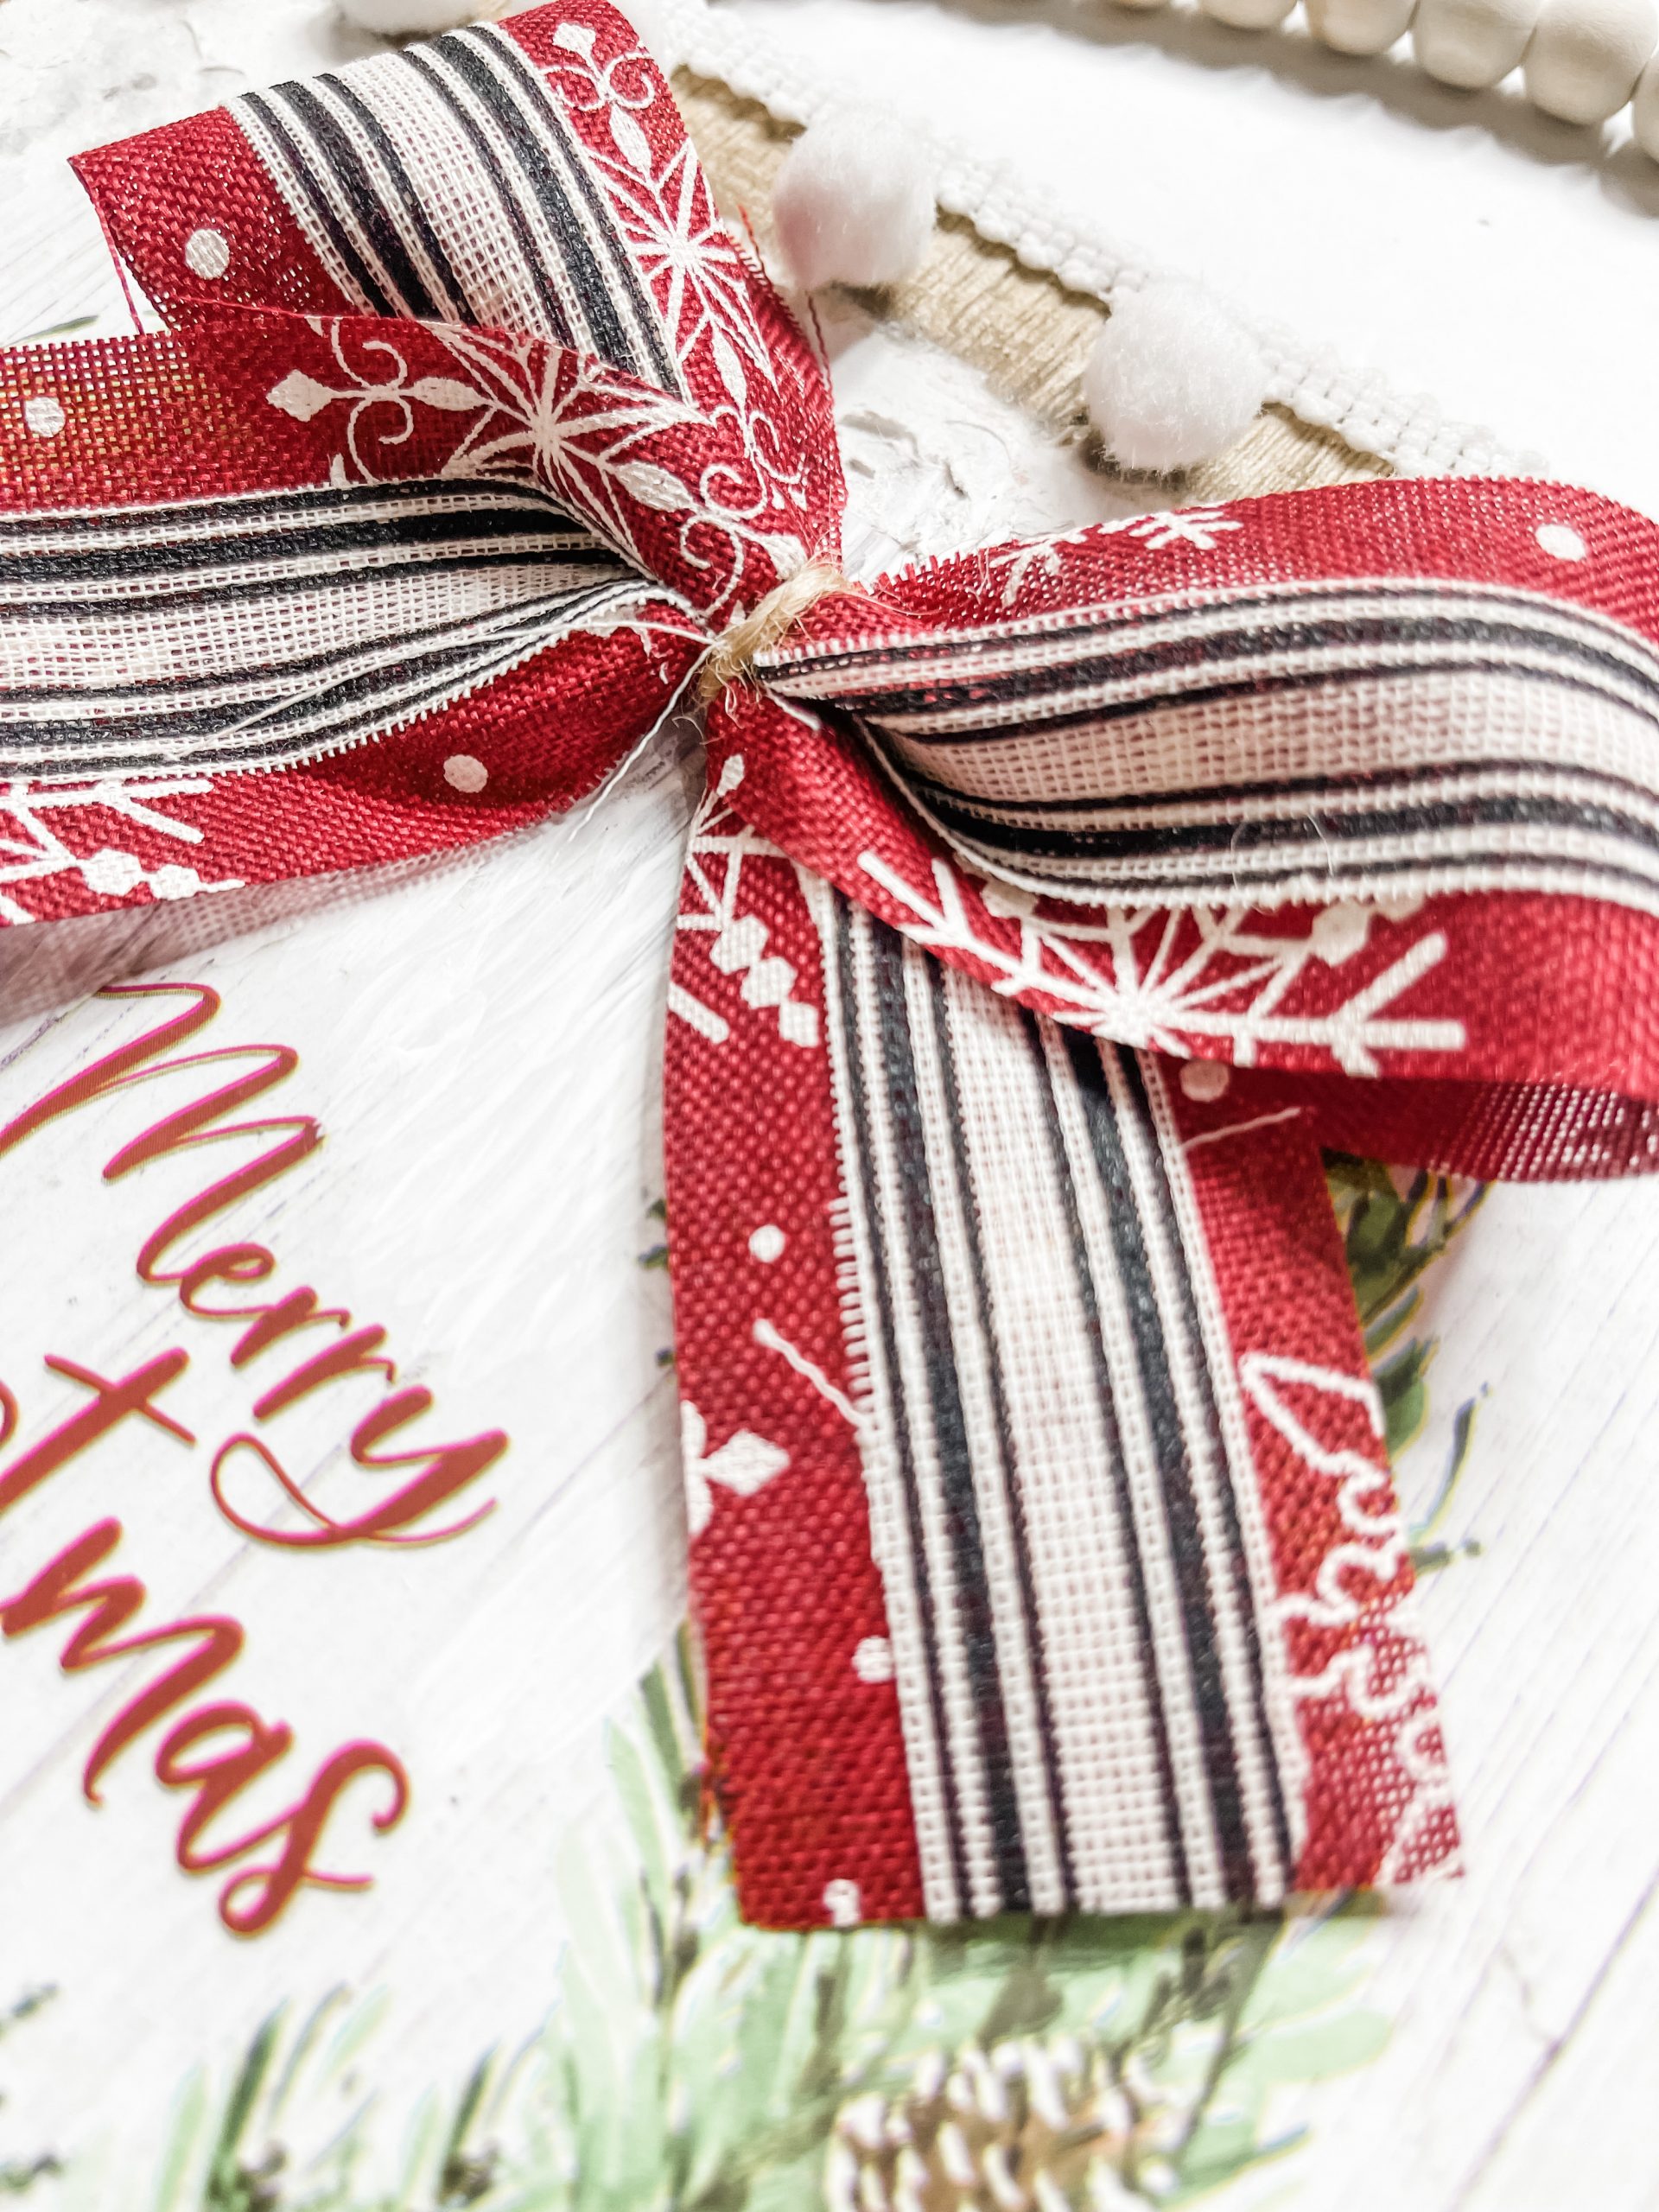
Let the glue dry, fold the ribbon into your bow, and secure the middle with a piece of jute twine. I painted over the bow on the gift bag design with white paint.

Once the white paint was dry, I glued my bow over it! The last thing on the list is the hanger! I trimmed some of the wood bead garland and hot glued it at the top of the sign.

I hope you enjoyed this Gift Bag DIY Merry Christmas Sign as much as I did and decide to make one for yourself! If you do, I would love to see how yours turns out!
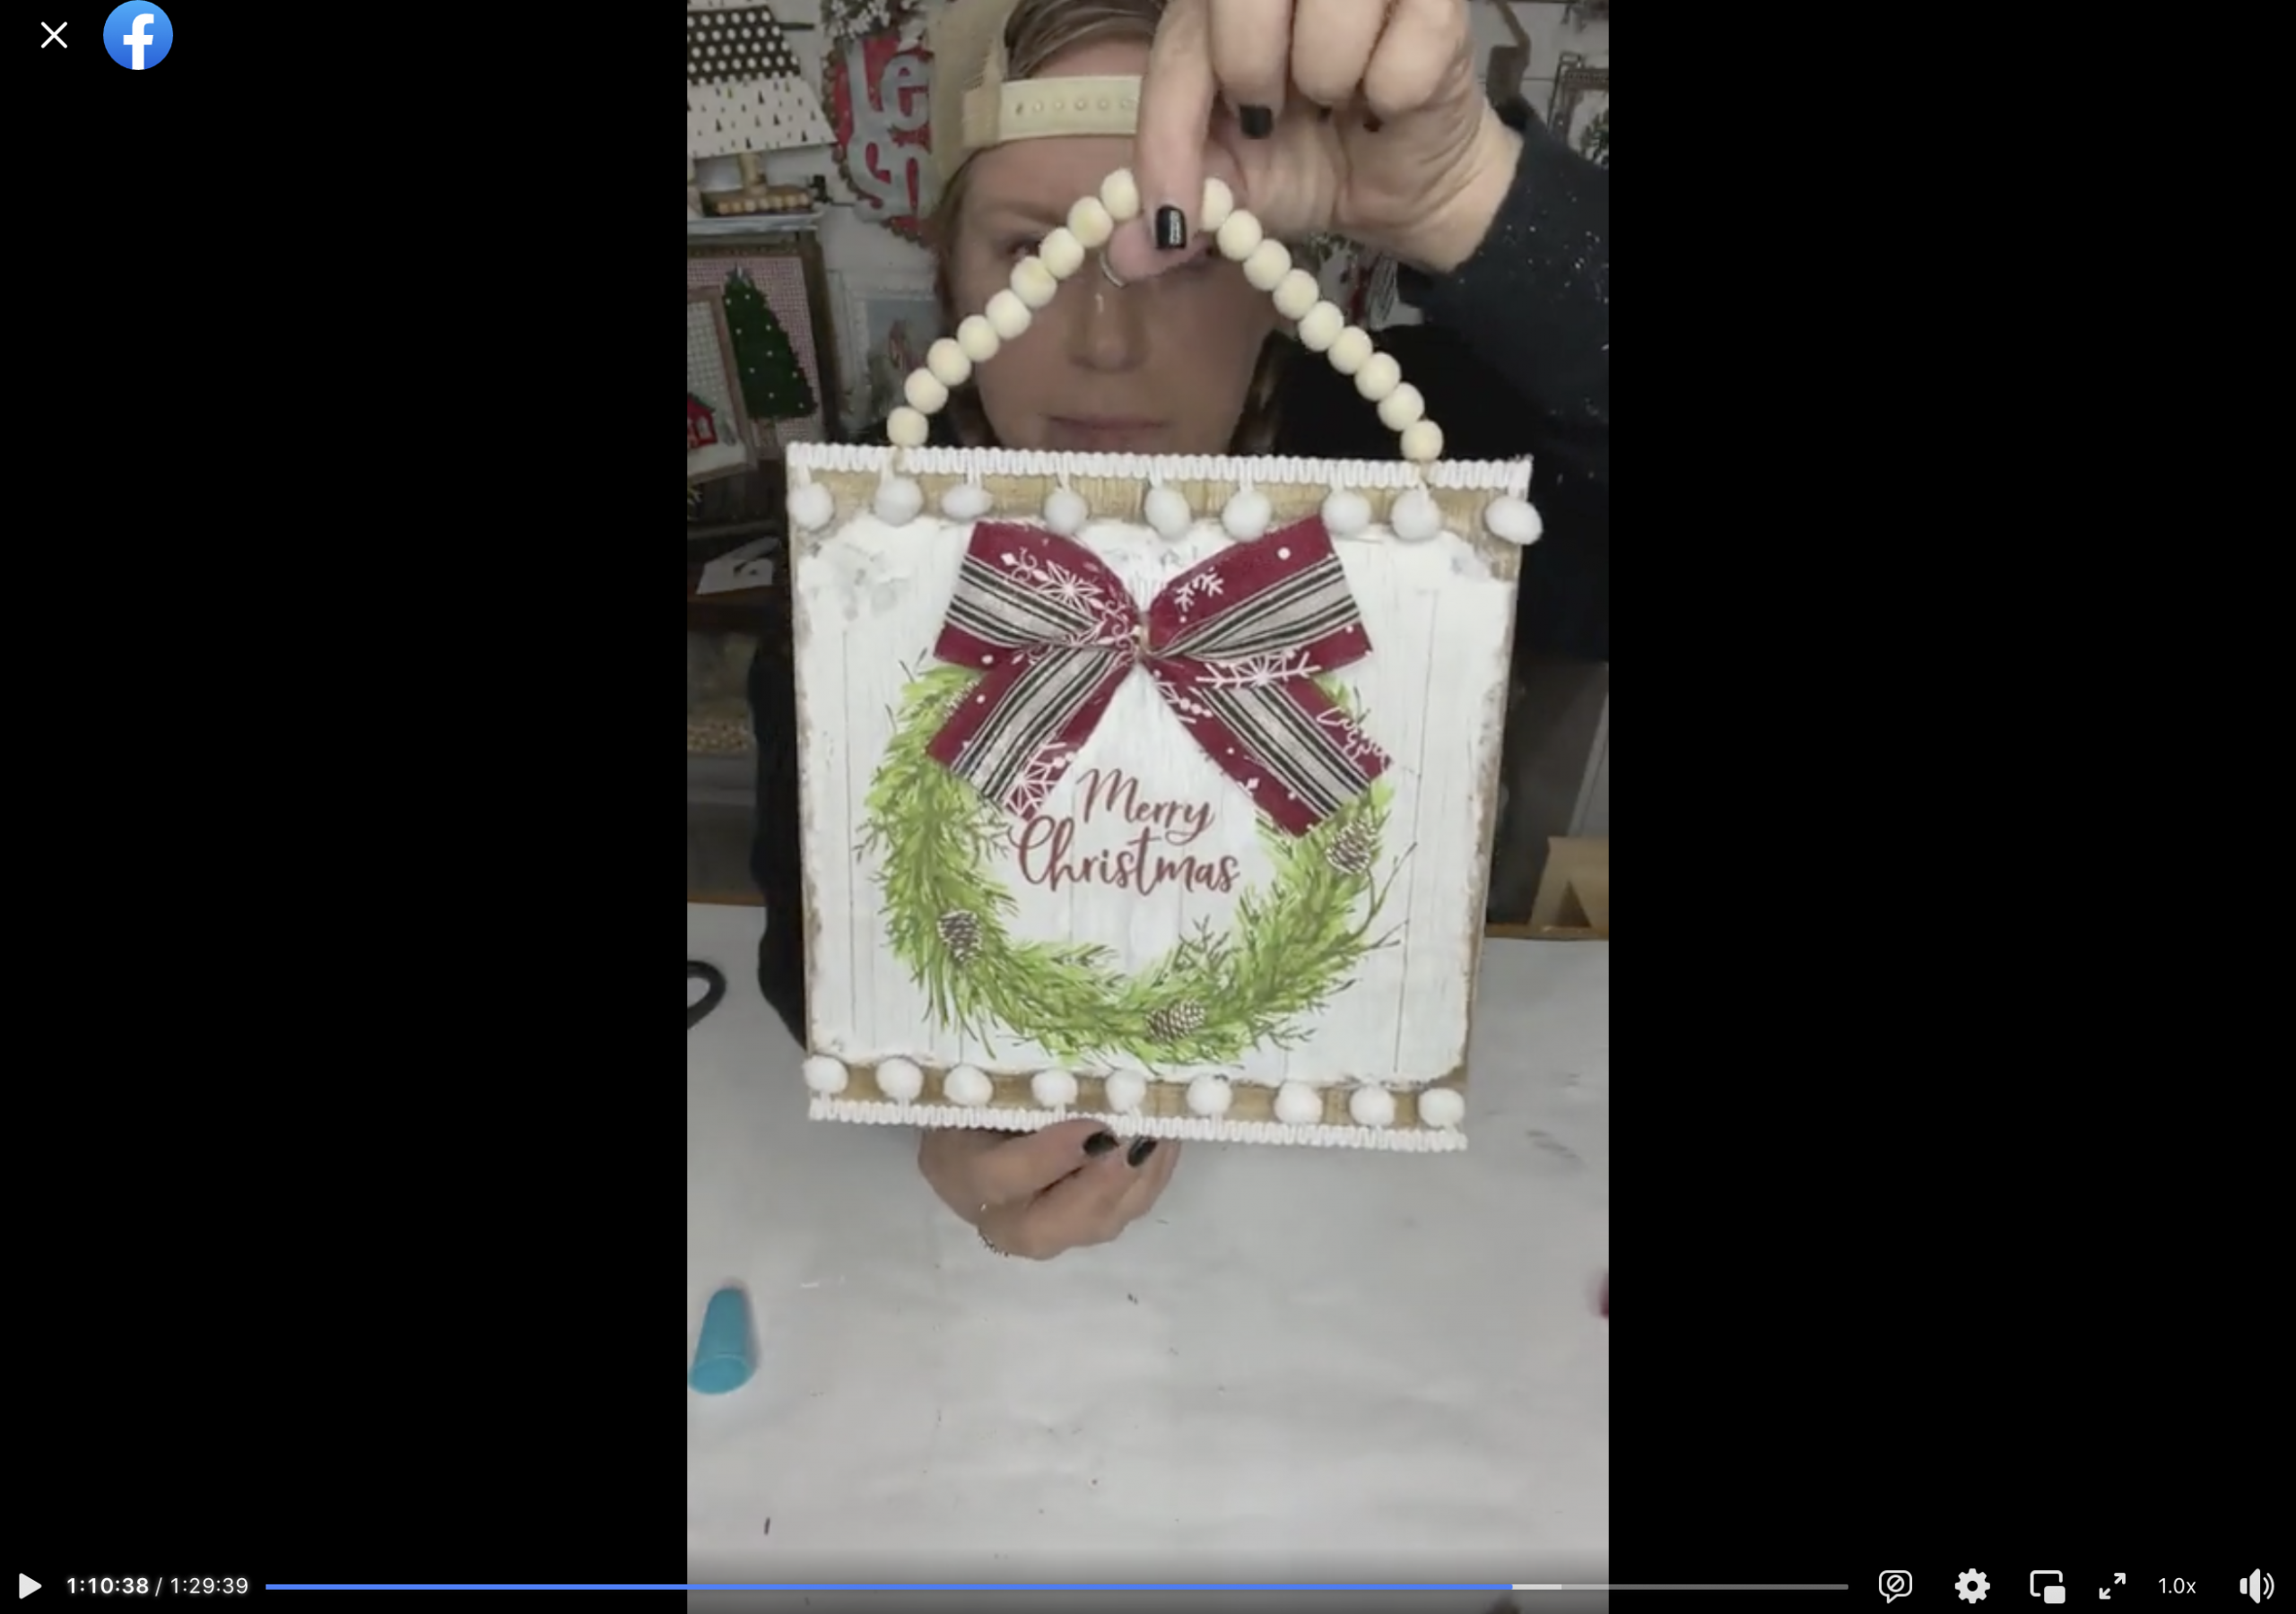
Watch the DIY tutorial
I recorded how to make this affordable Gift Bag DIY Merry Christmas Sign during a LIVE video on my Facebook page.
If you want to see the DIY process, craft along, or just join in on the fun conversations, you can watch the DIY tutorial replay on Facebook!
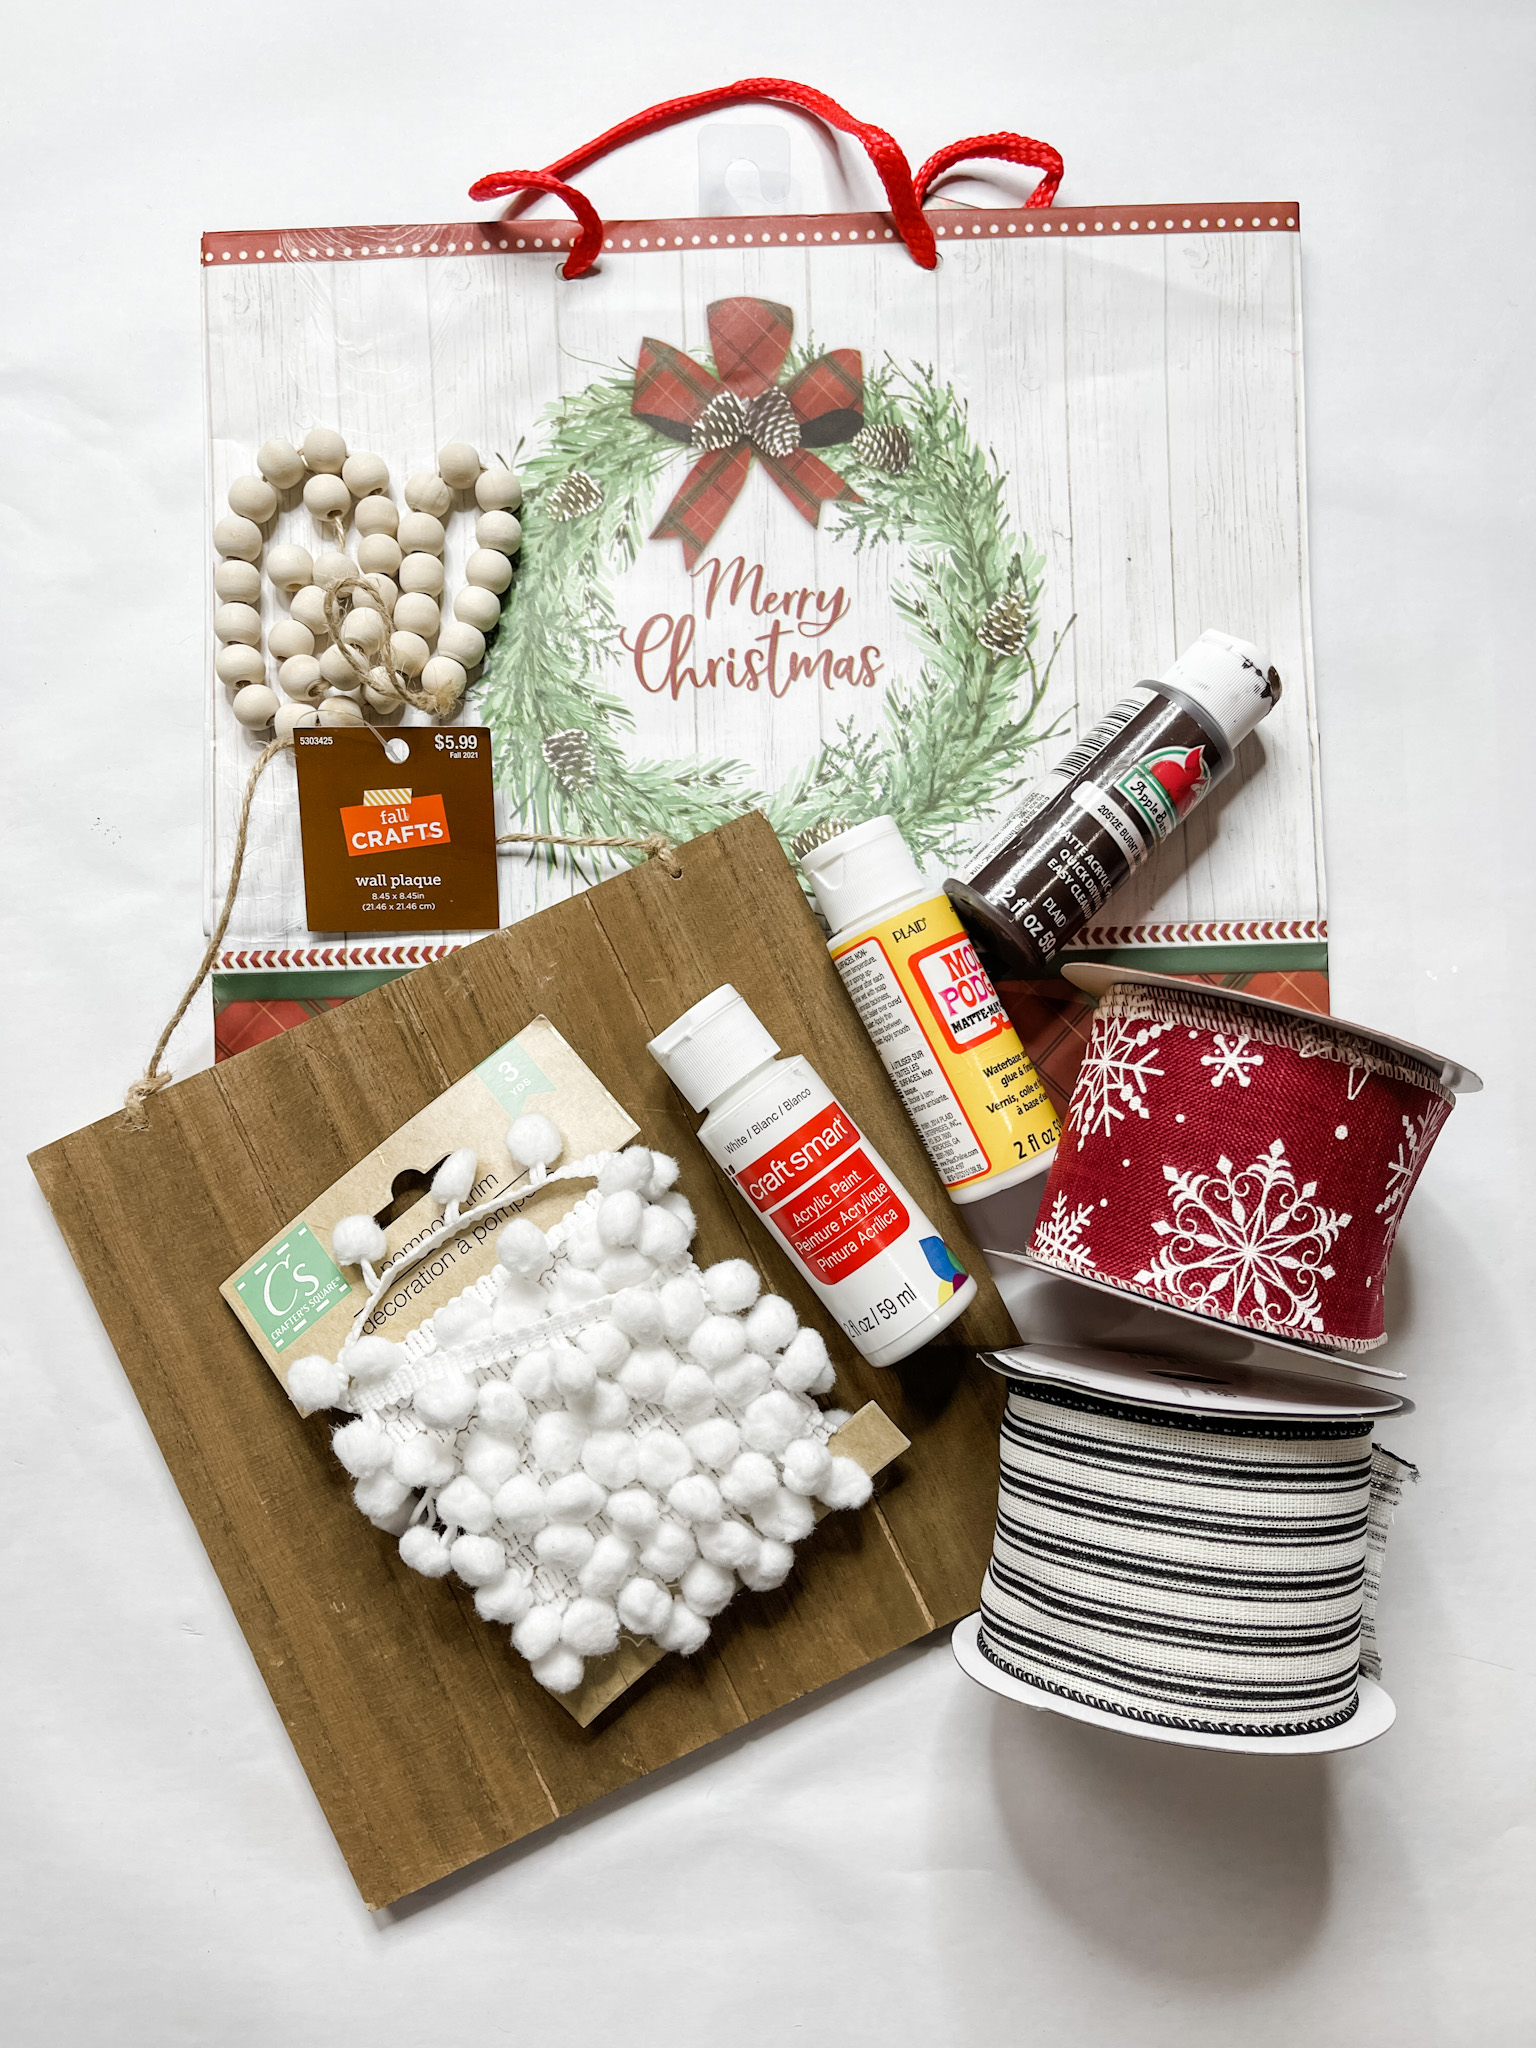
For this project, I will be using these items but you can substitute where you want.
“As an Amazon Associate, I earn from qualifying purchases.”
- Dollar Tree Christmas Gift Bag
- Dollar Tree Wood Bead Garland
- Red with white snowflakes ribbon (Hobby Lobby)
- Dollar Tree Pompom Trim
- Dollar Tree Jute Twine
- Black and White Striped Ribbon (Hobby Lobby)
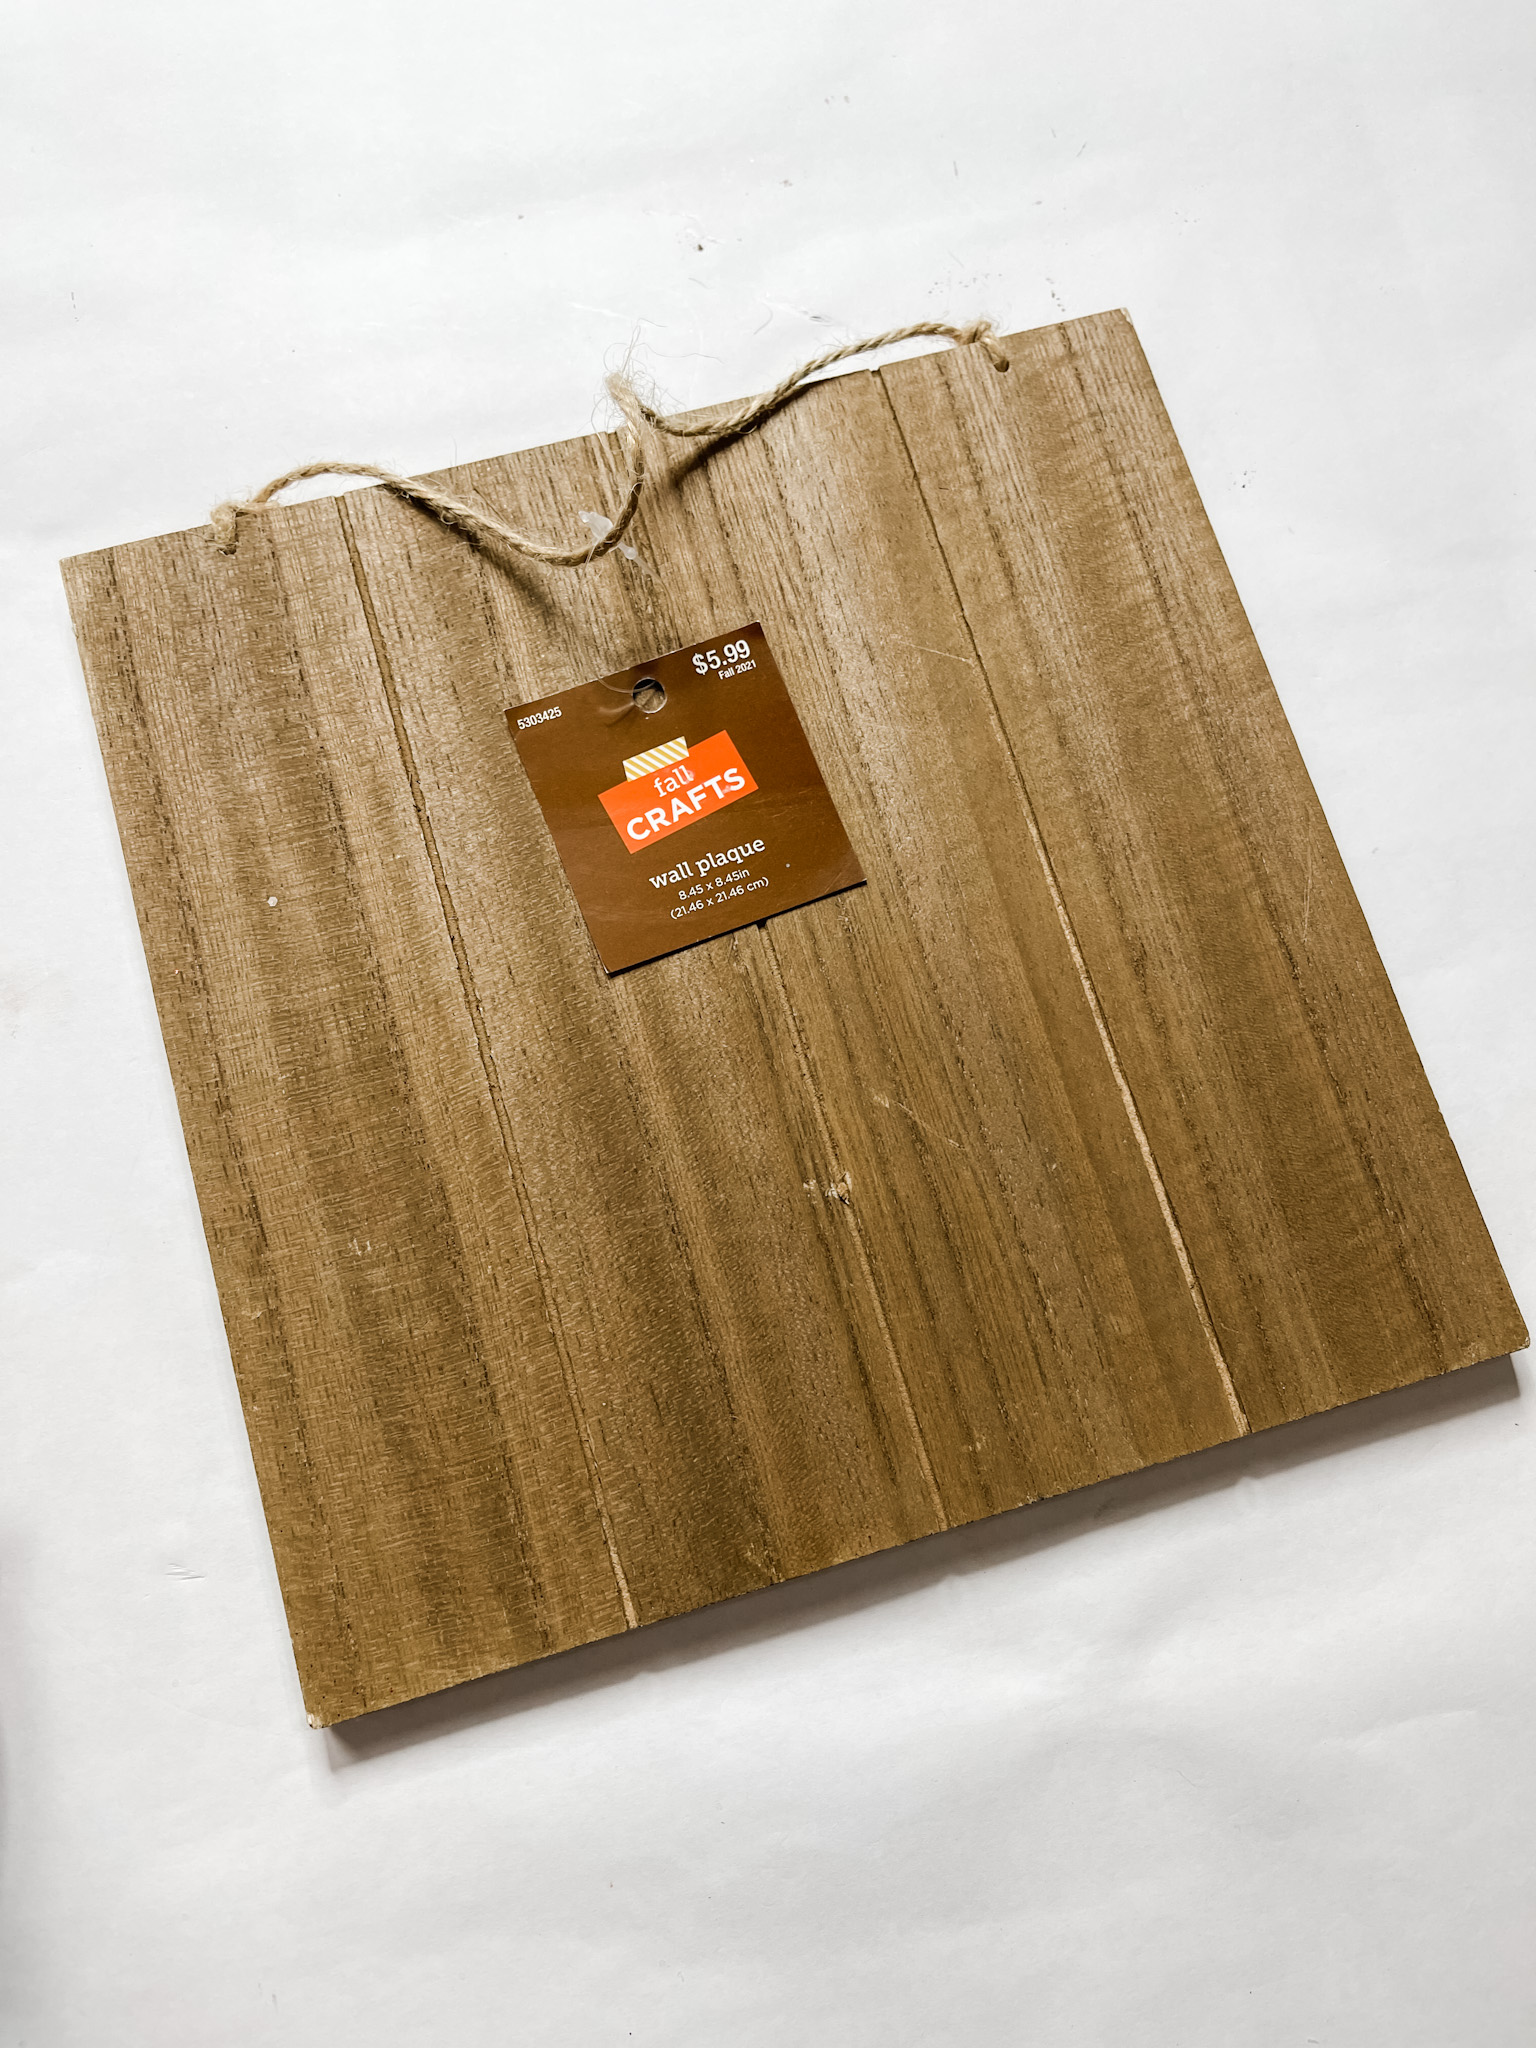
- Hobby Lobby Wall Plaque
- Apple Barrel Burnt Umber
- White Paint
- Mod Podge
- Glue Gun
- Heat gun
You should totally join my FREE Facebook group called On A Budget Crafts! It is a judgment-free community for DIY crafters to show off their projects and ideas.
If you loved this DIY you might also like this DIY Christmas Tree Shelf Decor!
Thanks for stopping by! XOXO Amber
You can also shop my ENTIRE AMAZON Favorites shop just click here! It’s packed full of all the things I use and love.
Here is the supply list I highly recommend every creative have on hand!! Would you also pin my blog for later and get on my newsletter alerts? I would love to have you join my #craftycrew.

Join my free “ON A BUDGET CRAFTS” Facebook group!
Amazing! how a gift bag makes a beautiful decoration