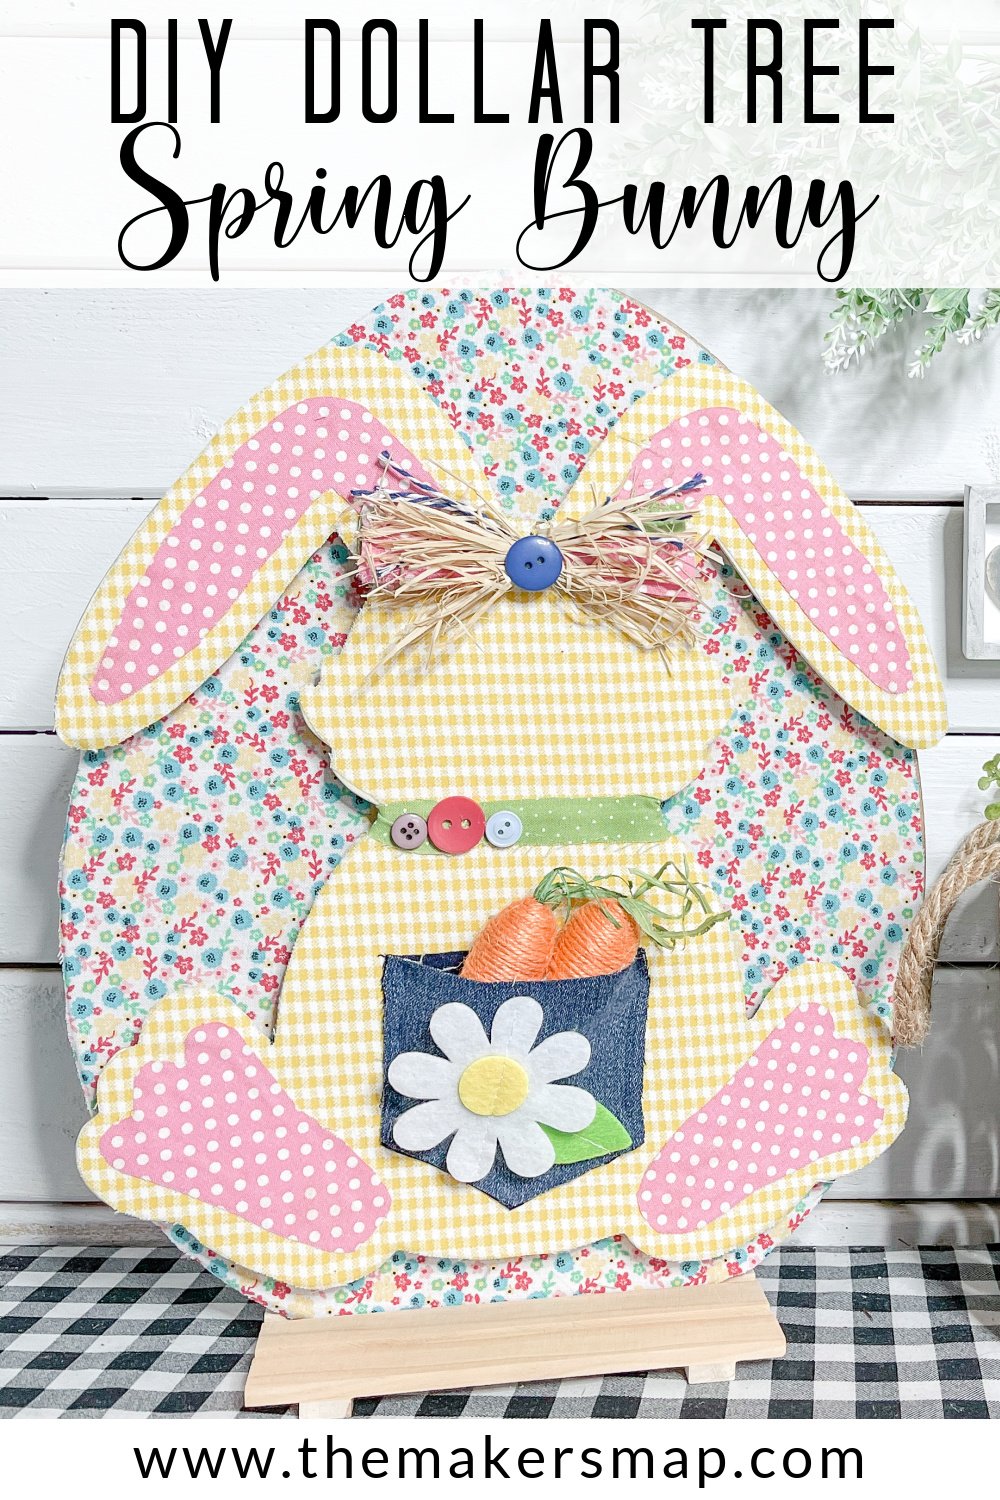
Easy DIY Dollar Tree Spring Bunny
I am so excited to show you how to make an Easy DIY Dollar Tree Spring Bunny! This project was so fun to make and really got my creative juices flowing!
Made from almost all Dollar Tree supplies, this is a project that definitely won’t hurt your budget, and it would be so much fun to include your children or grandchildren in the making!
Instead of using your jean pocket for the bunny’s belly, you could use a pocket from the child’s old jeans and make it more personal!
Watch the replay
I recorded the how-to steps of making this adorable DIY spring or Easter bunny during a LIVE video on my Facebook page. If you want to see the process, craft along, or join in on the fun conversations, you can watch the replay!
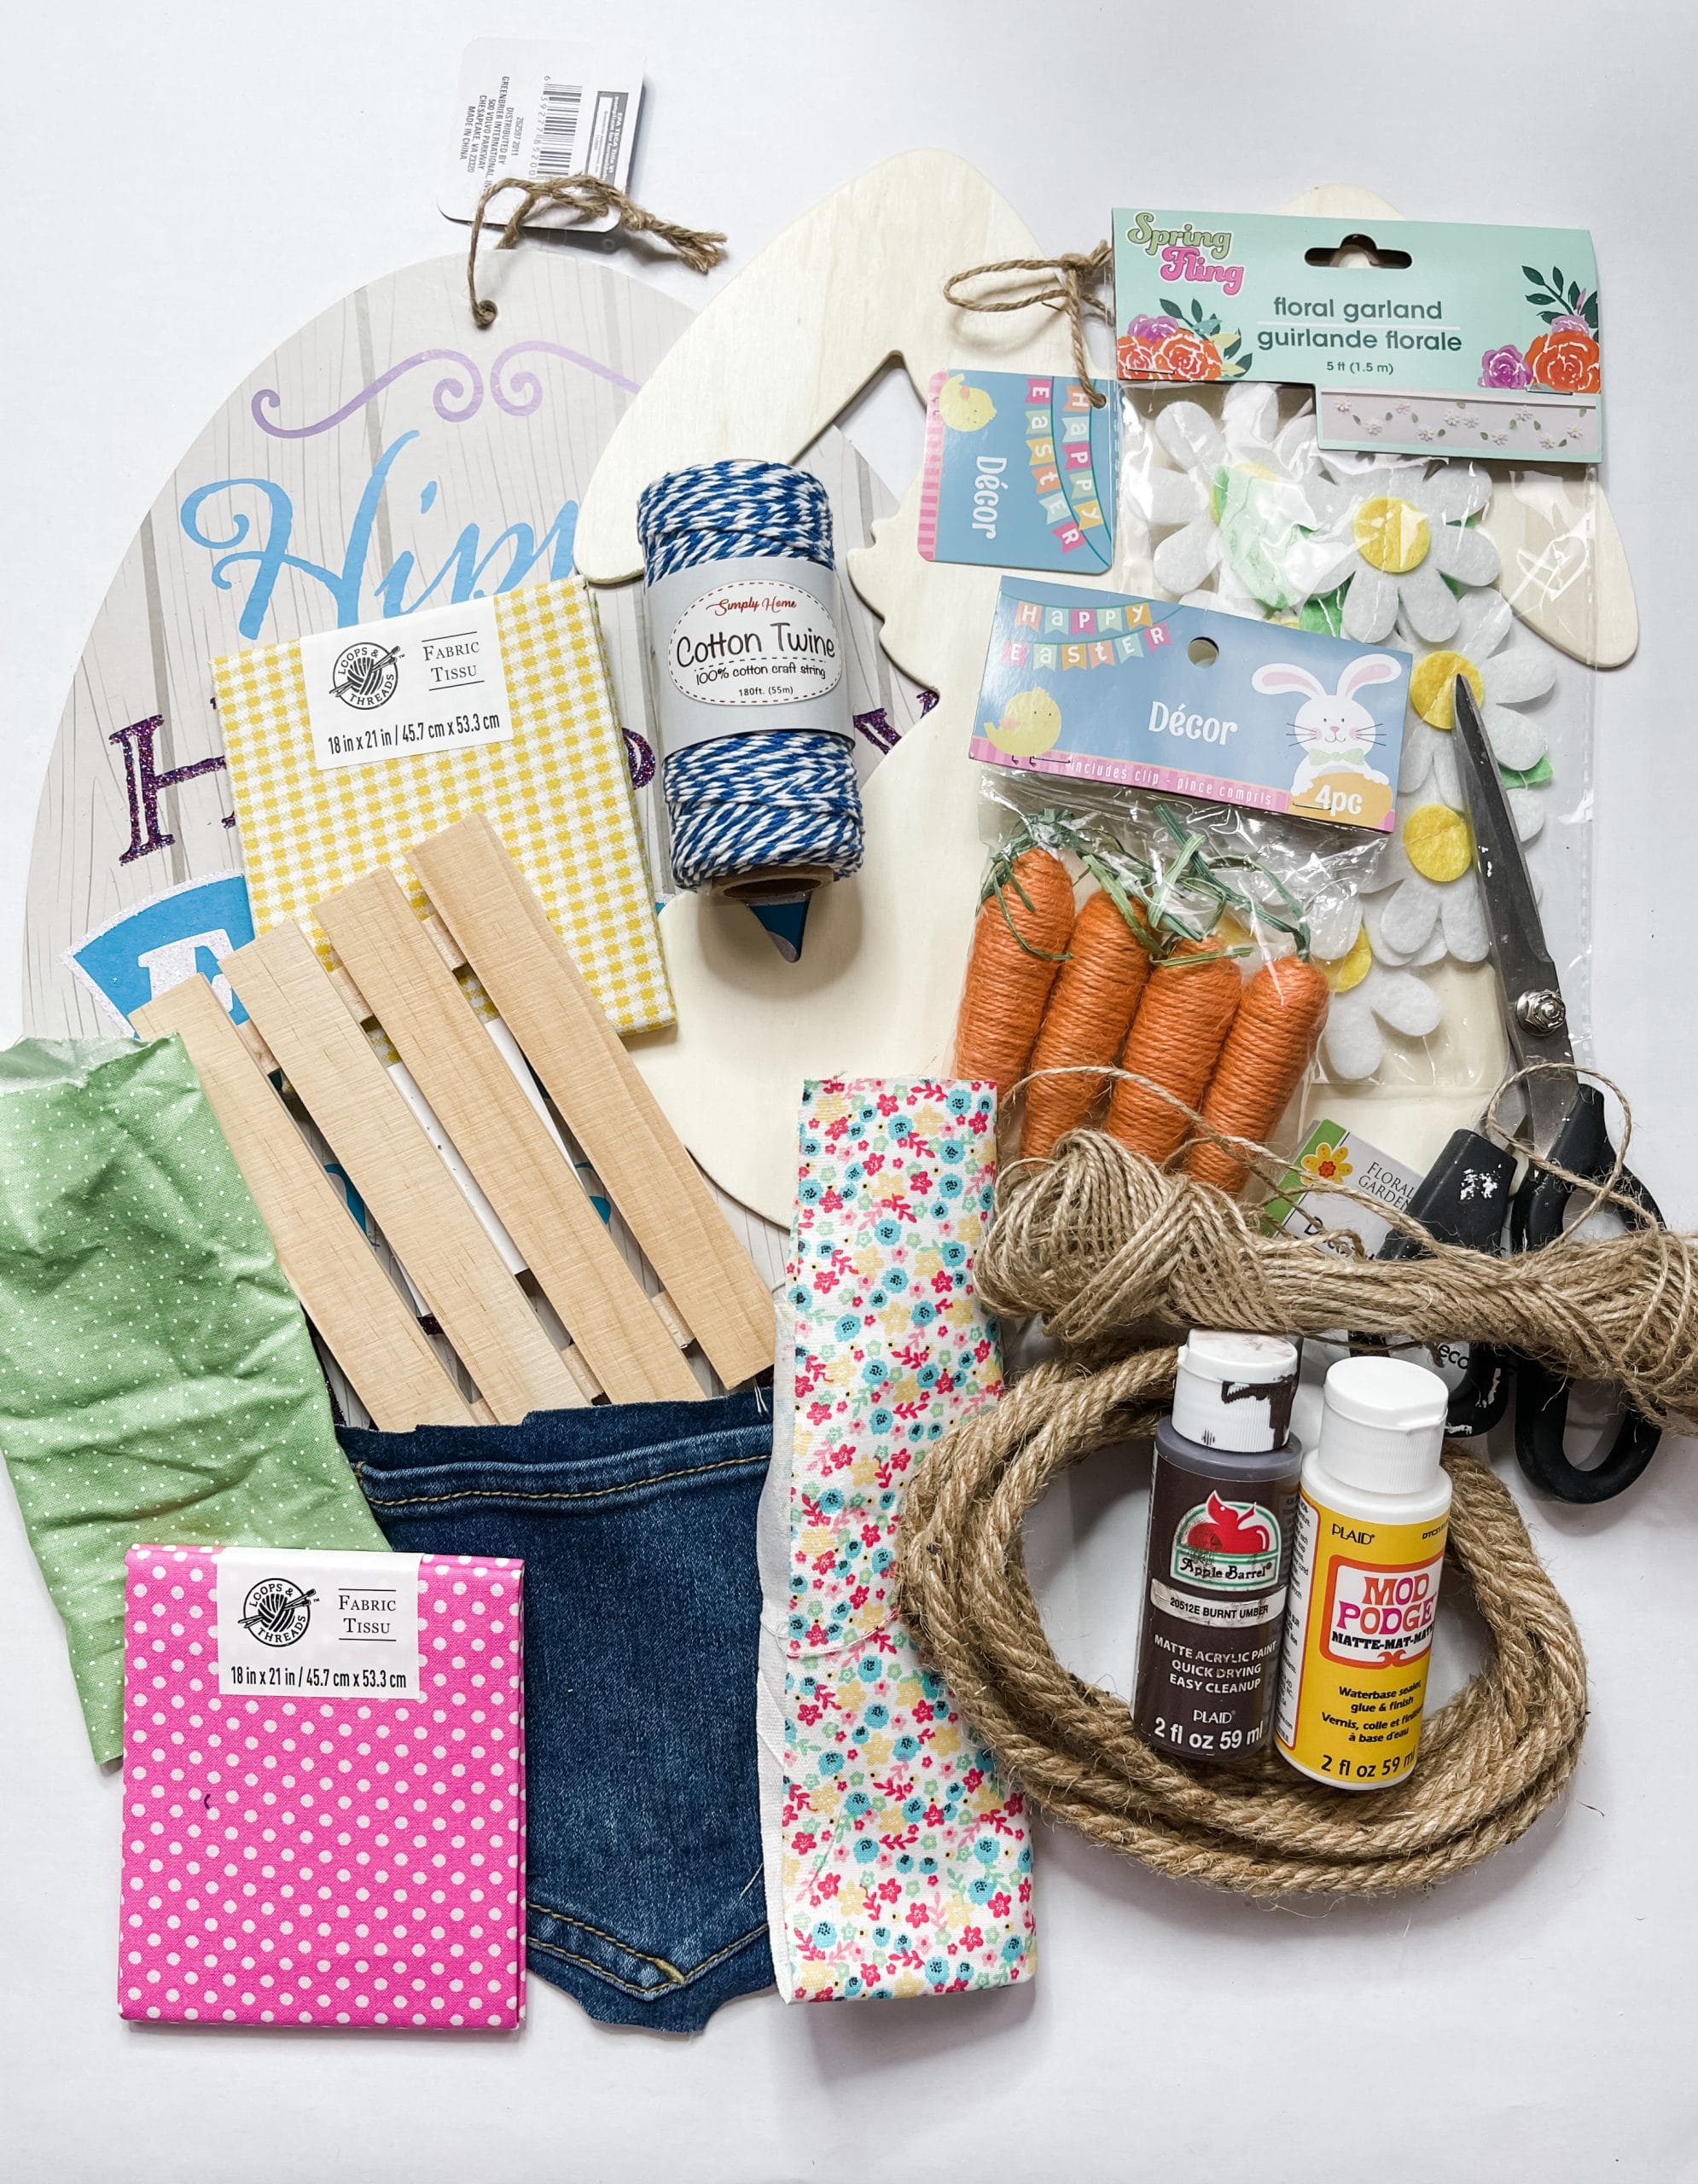
For this project, I will be using these items but you can substitute where you want.
“As an Amazon Associate, I earn from qualifying purchases.”
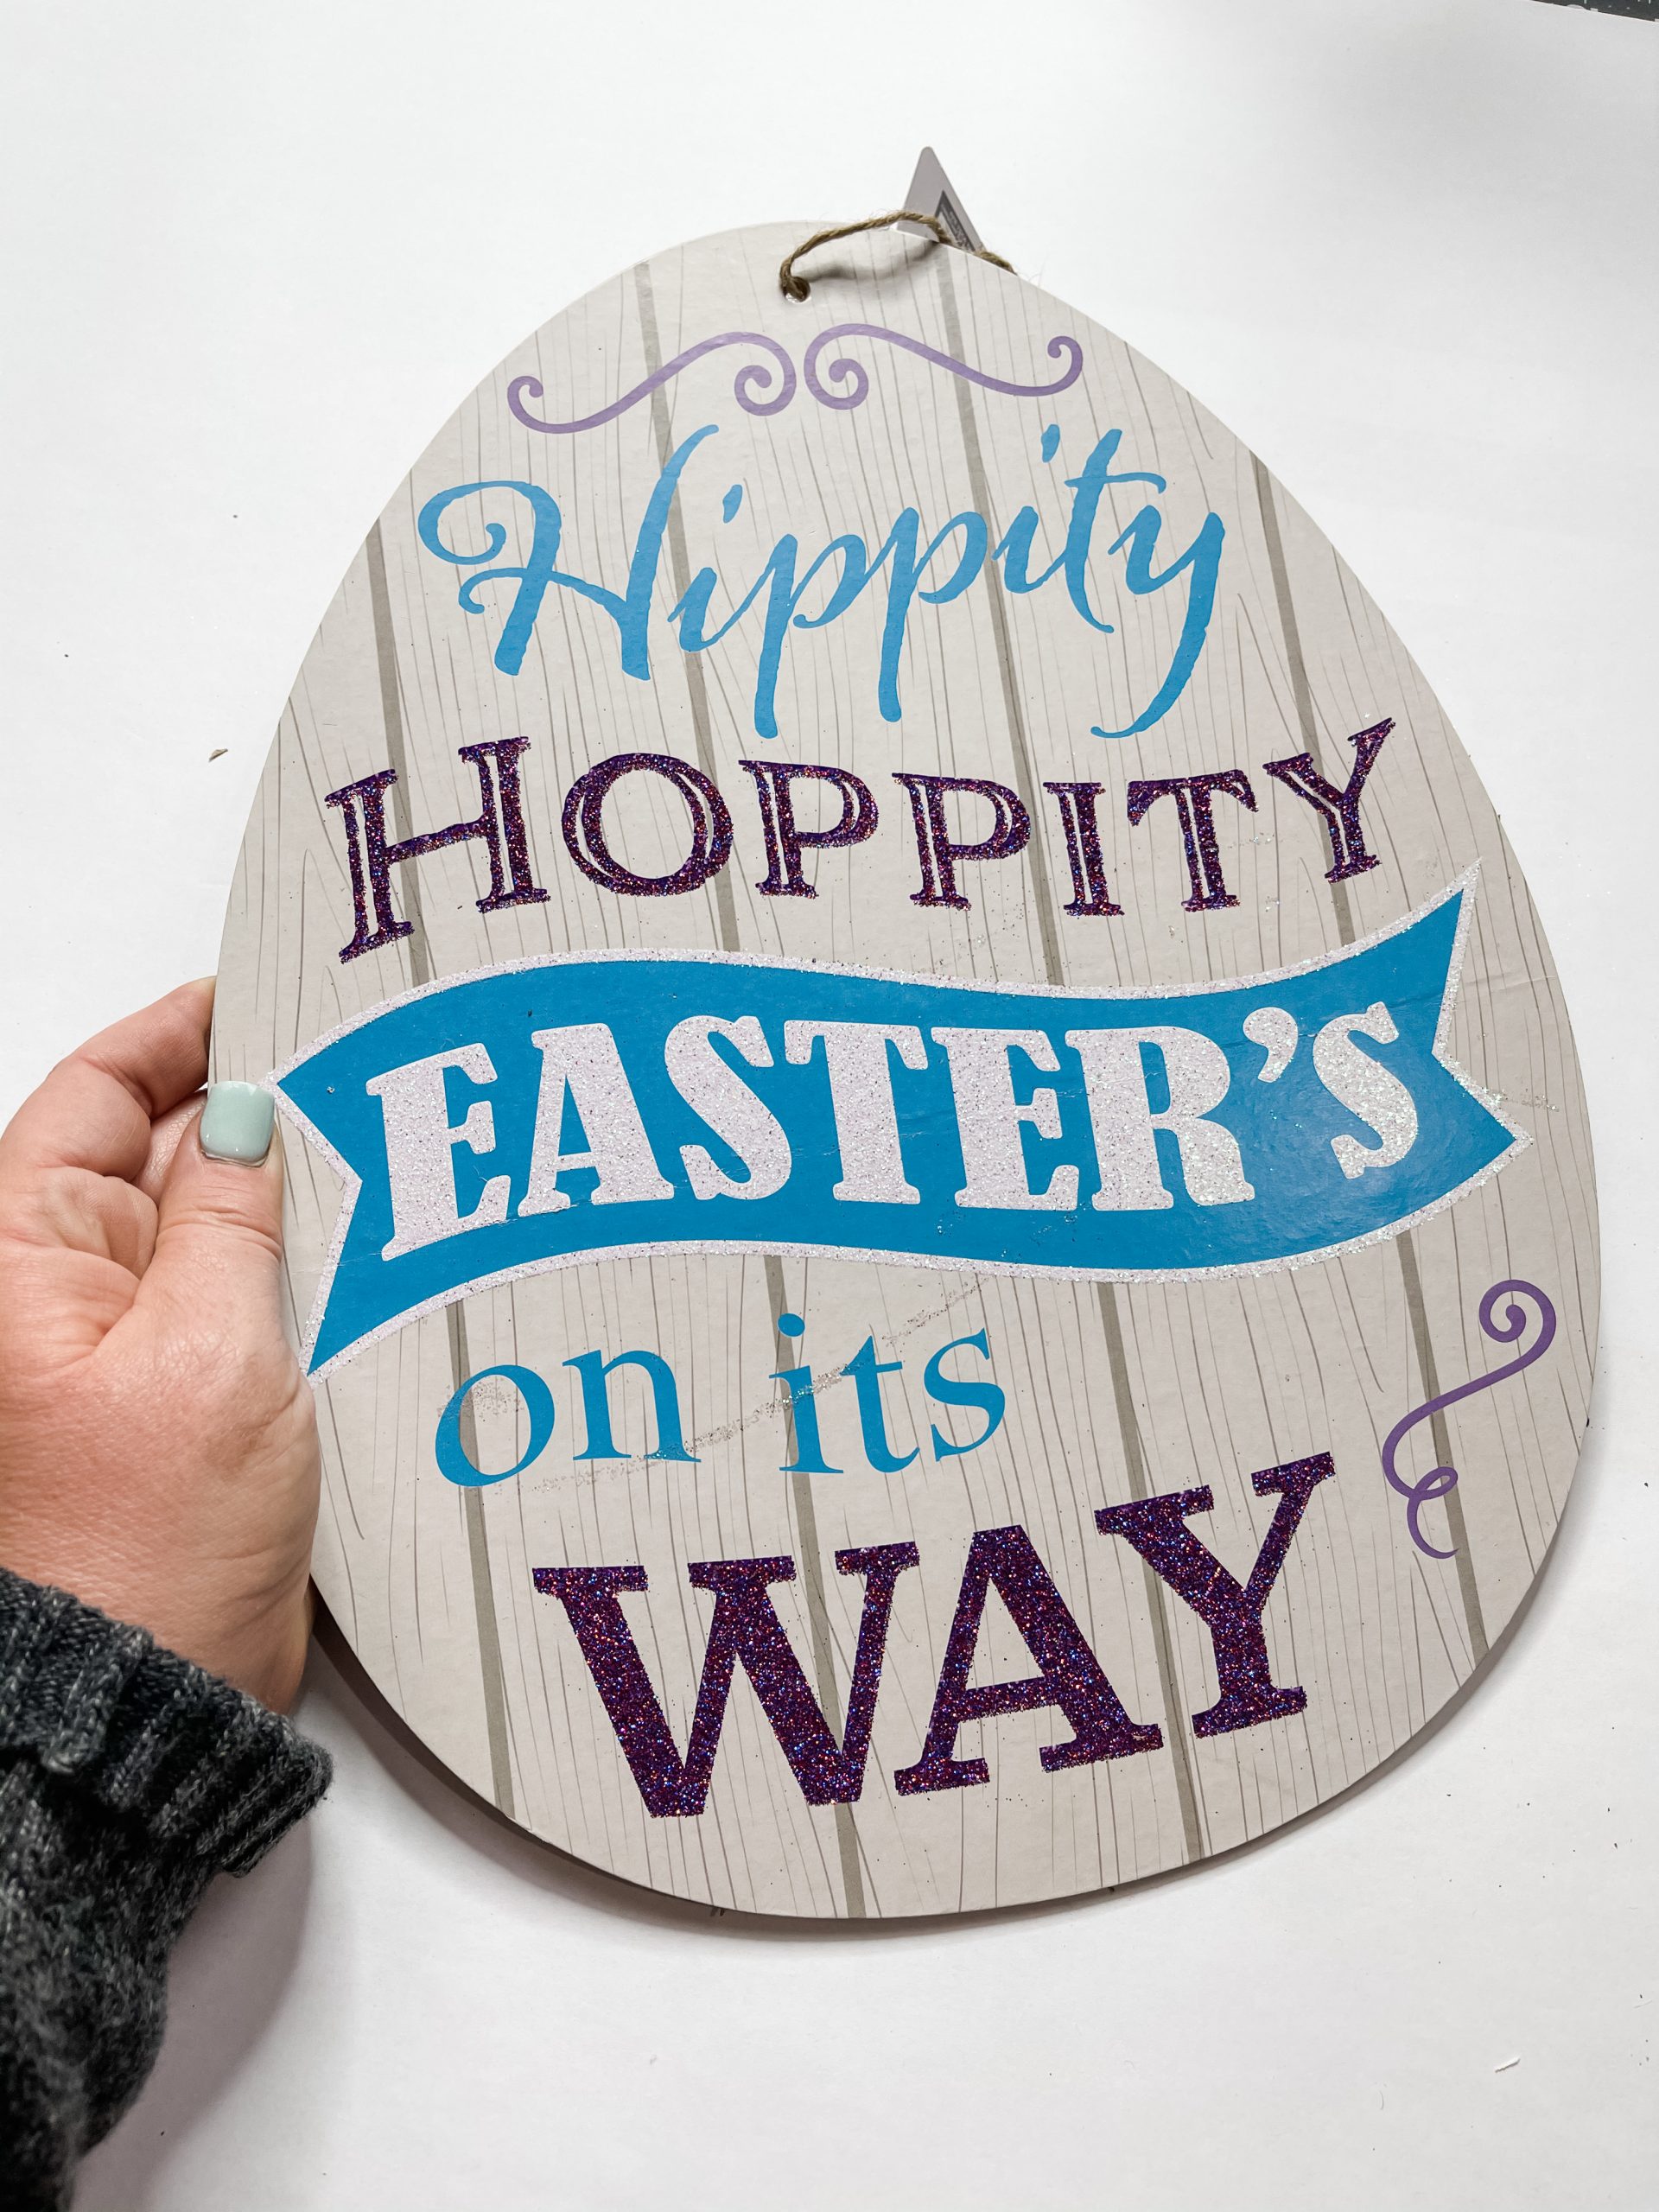
- Dollar Tree Egg Sign
- Dollar Tree Wooden Bunny
- Blue Baker’s Twine
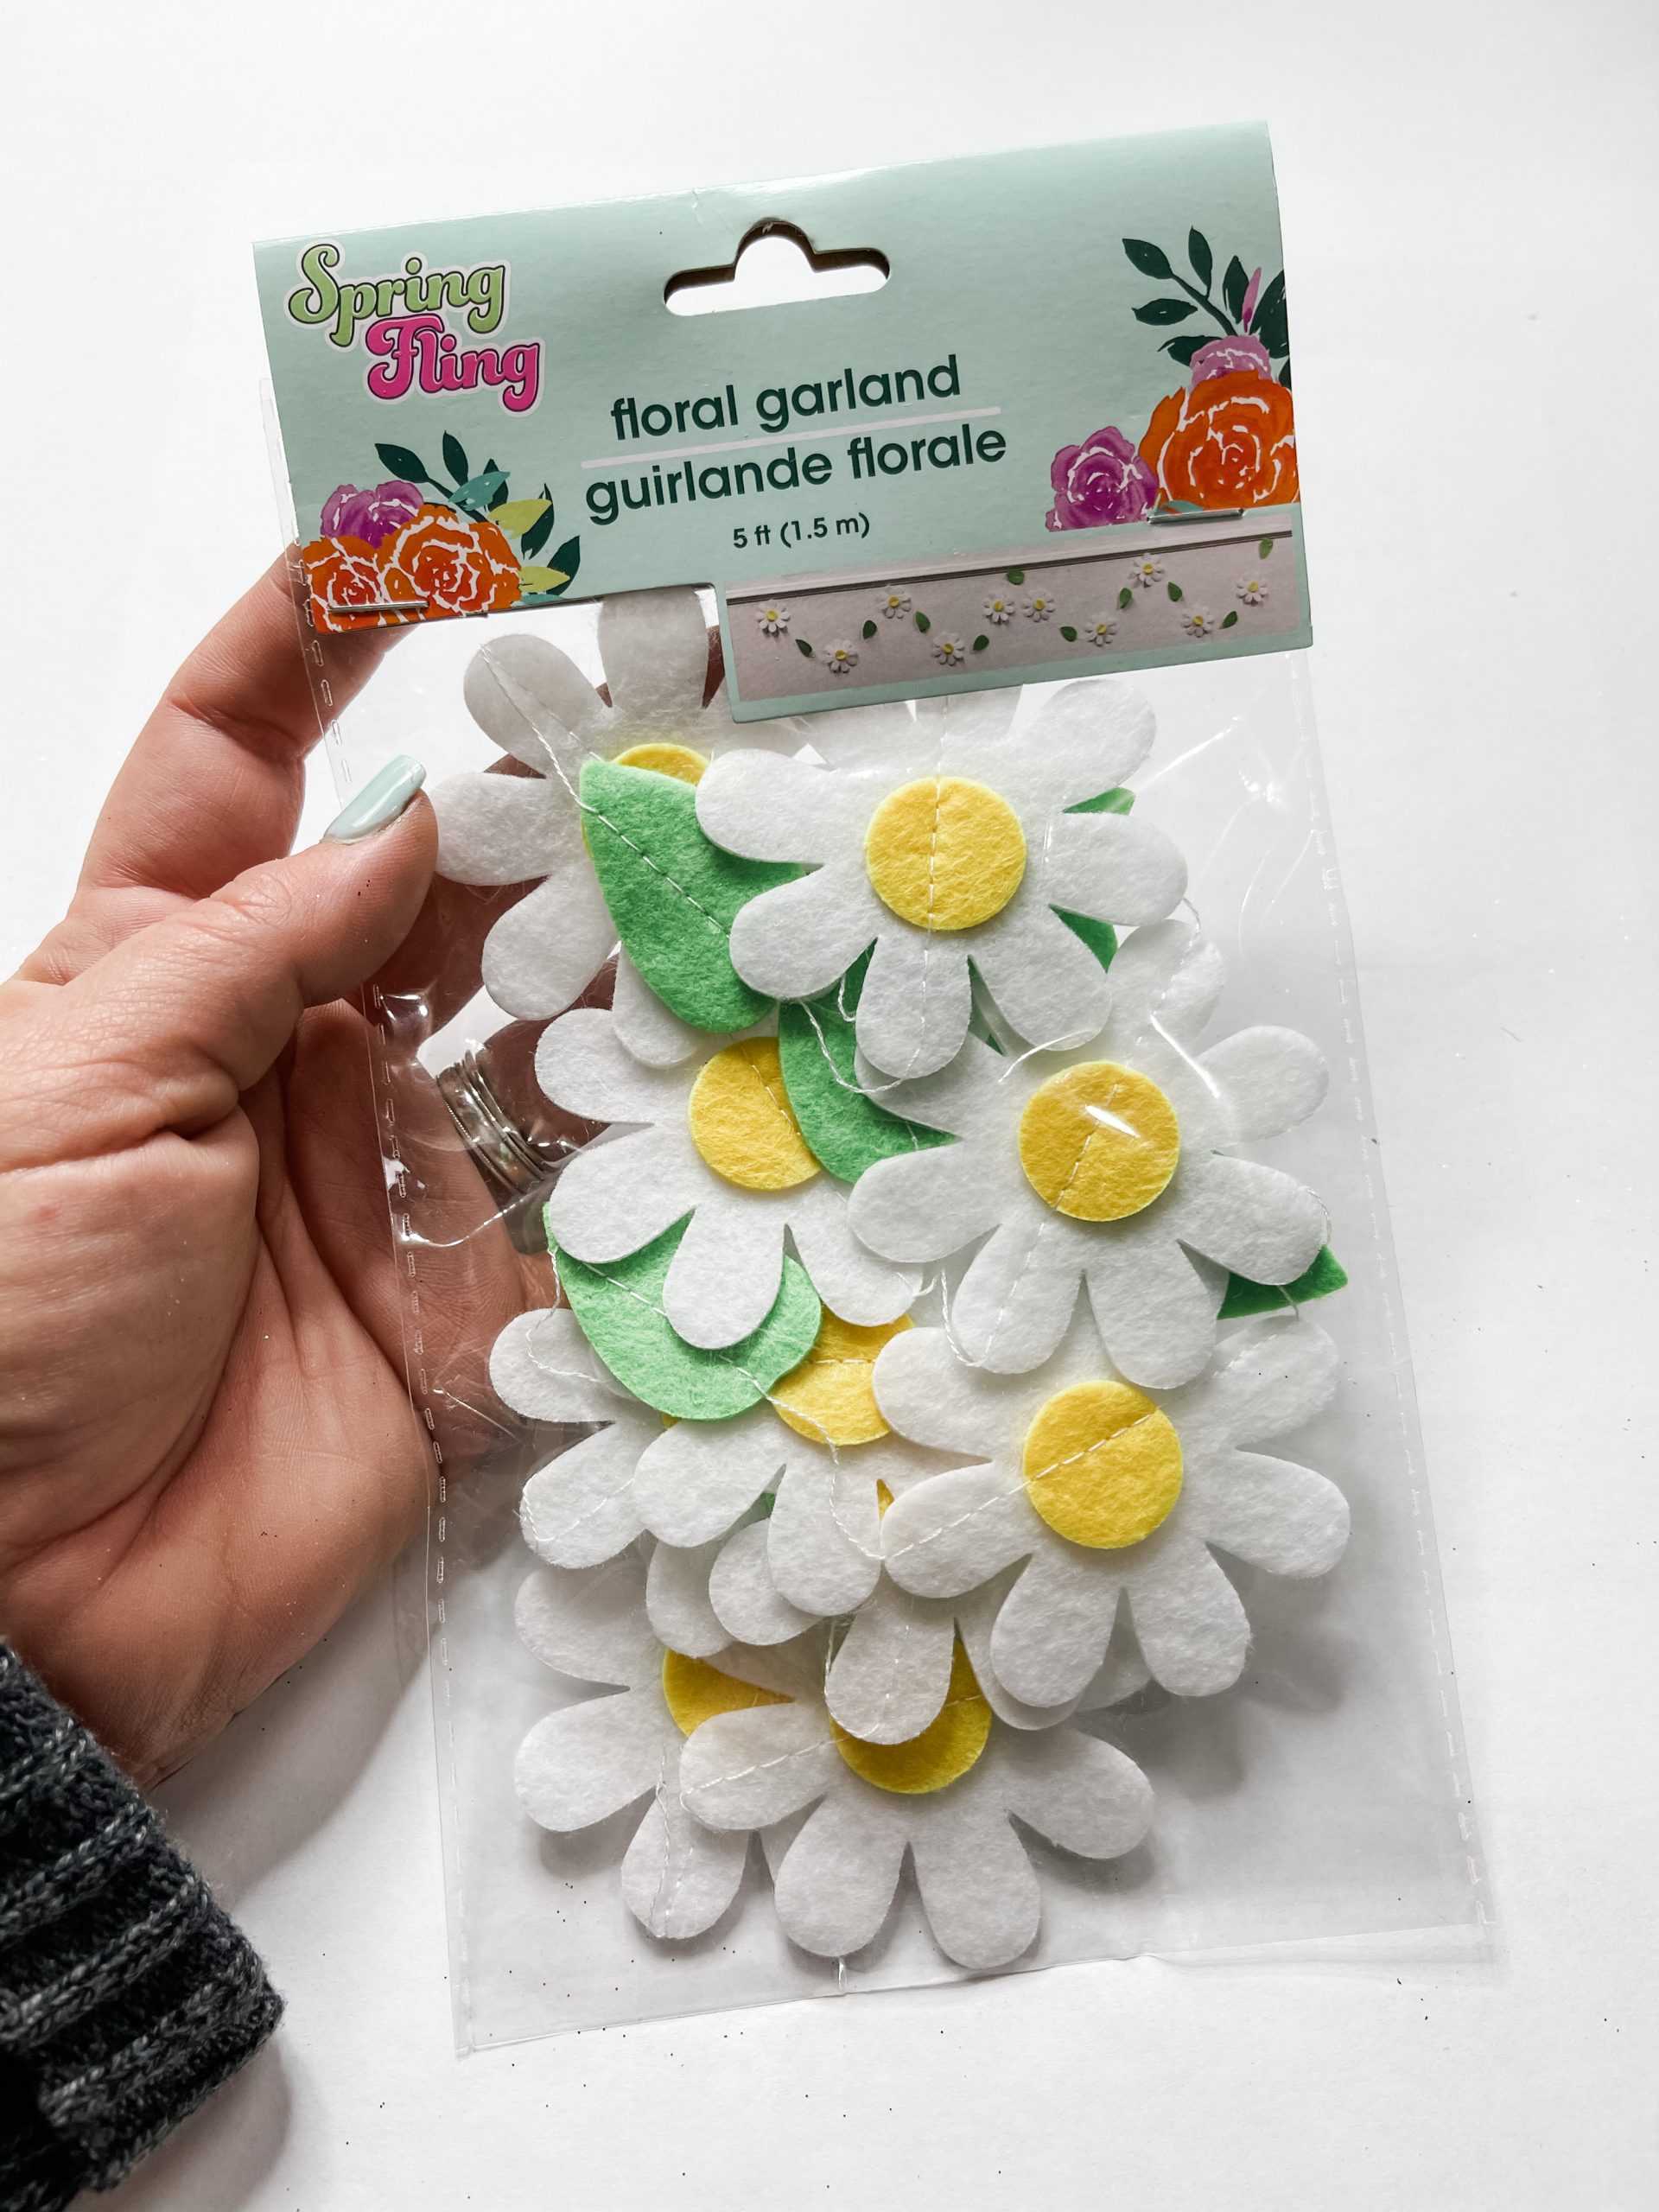
- Dollar Tree Floral Garland
- Dollar Tree Mini pallet
- Multi-color buttons (x4)
- Dollar Tree Raffia
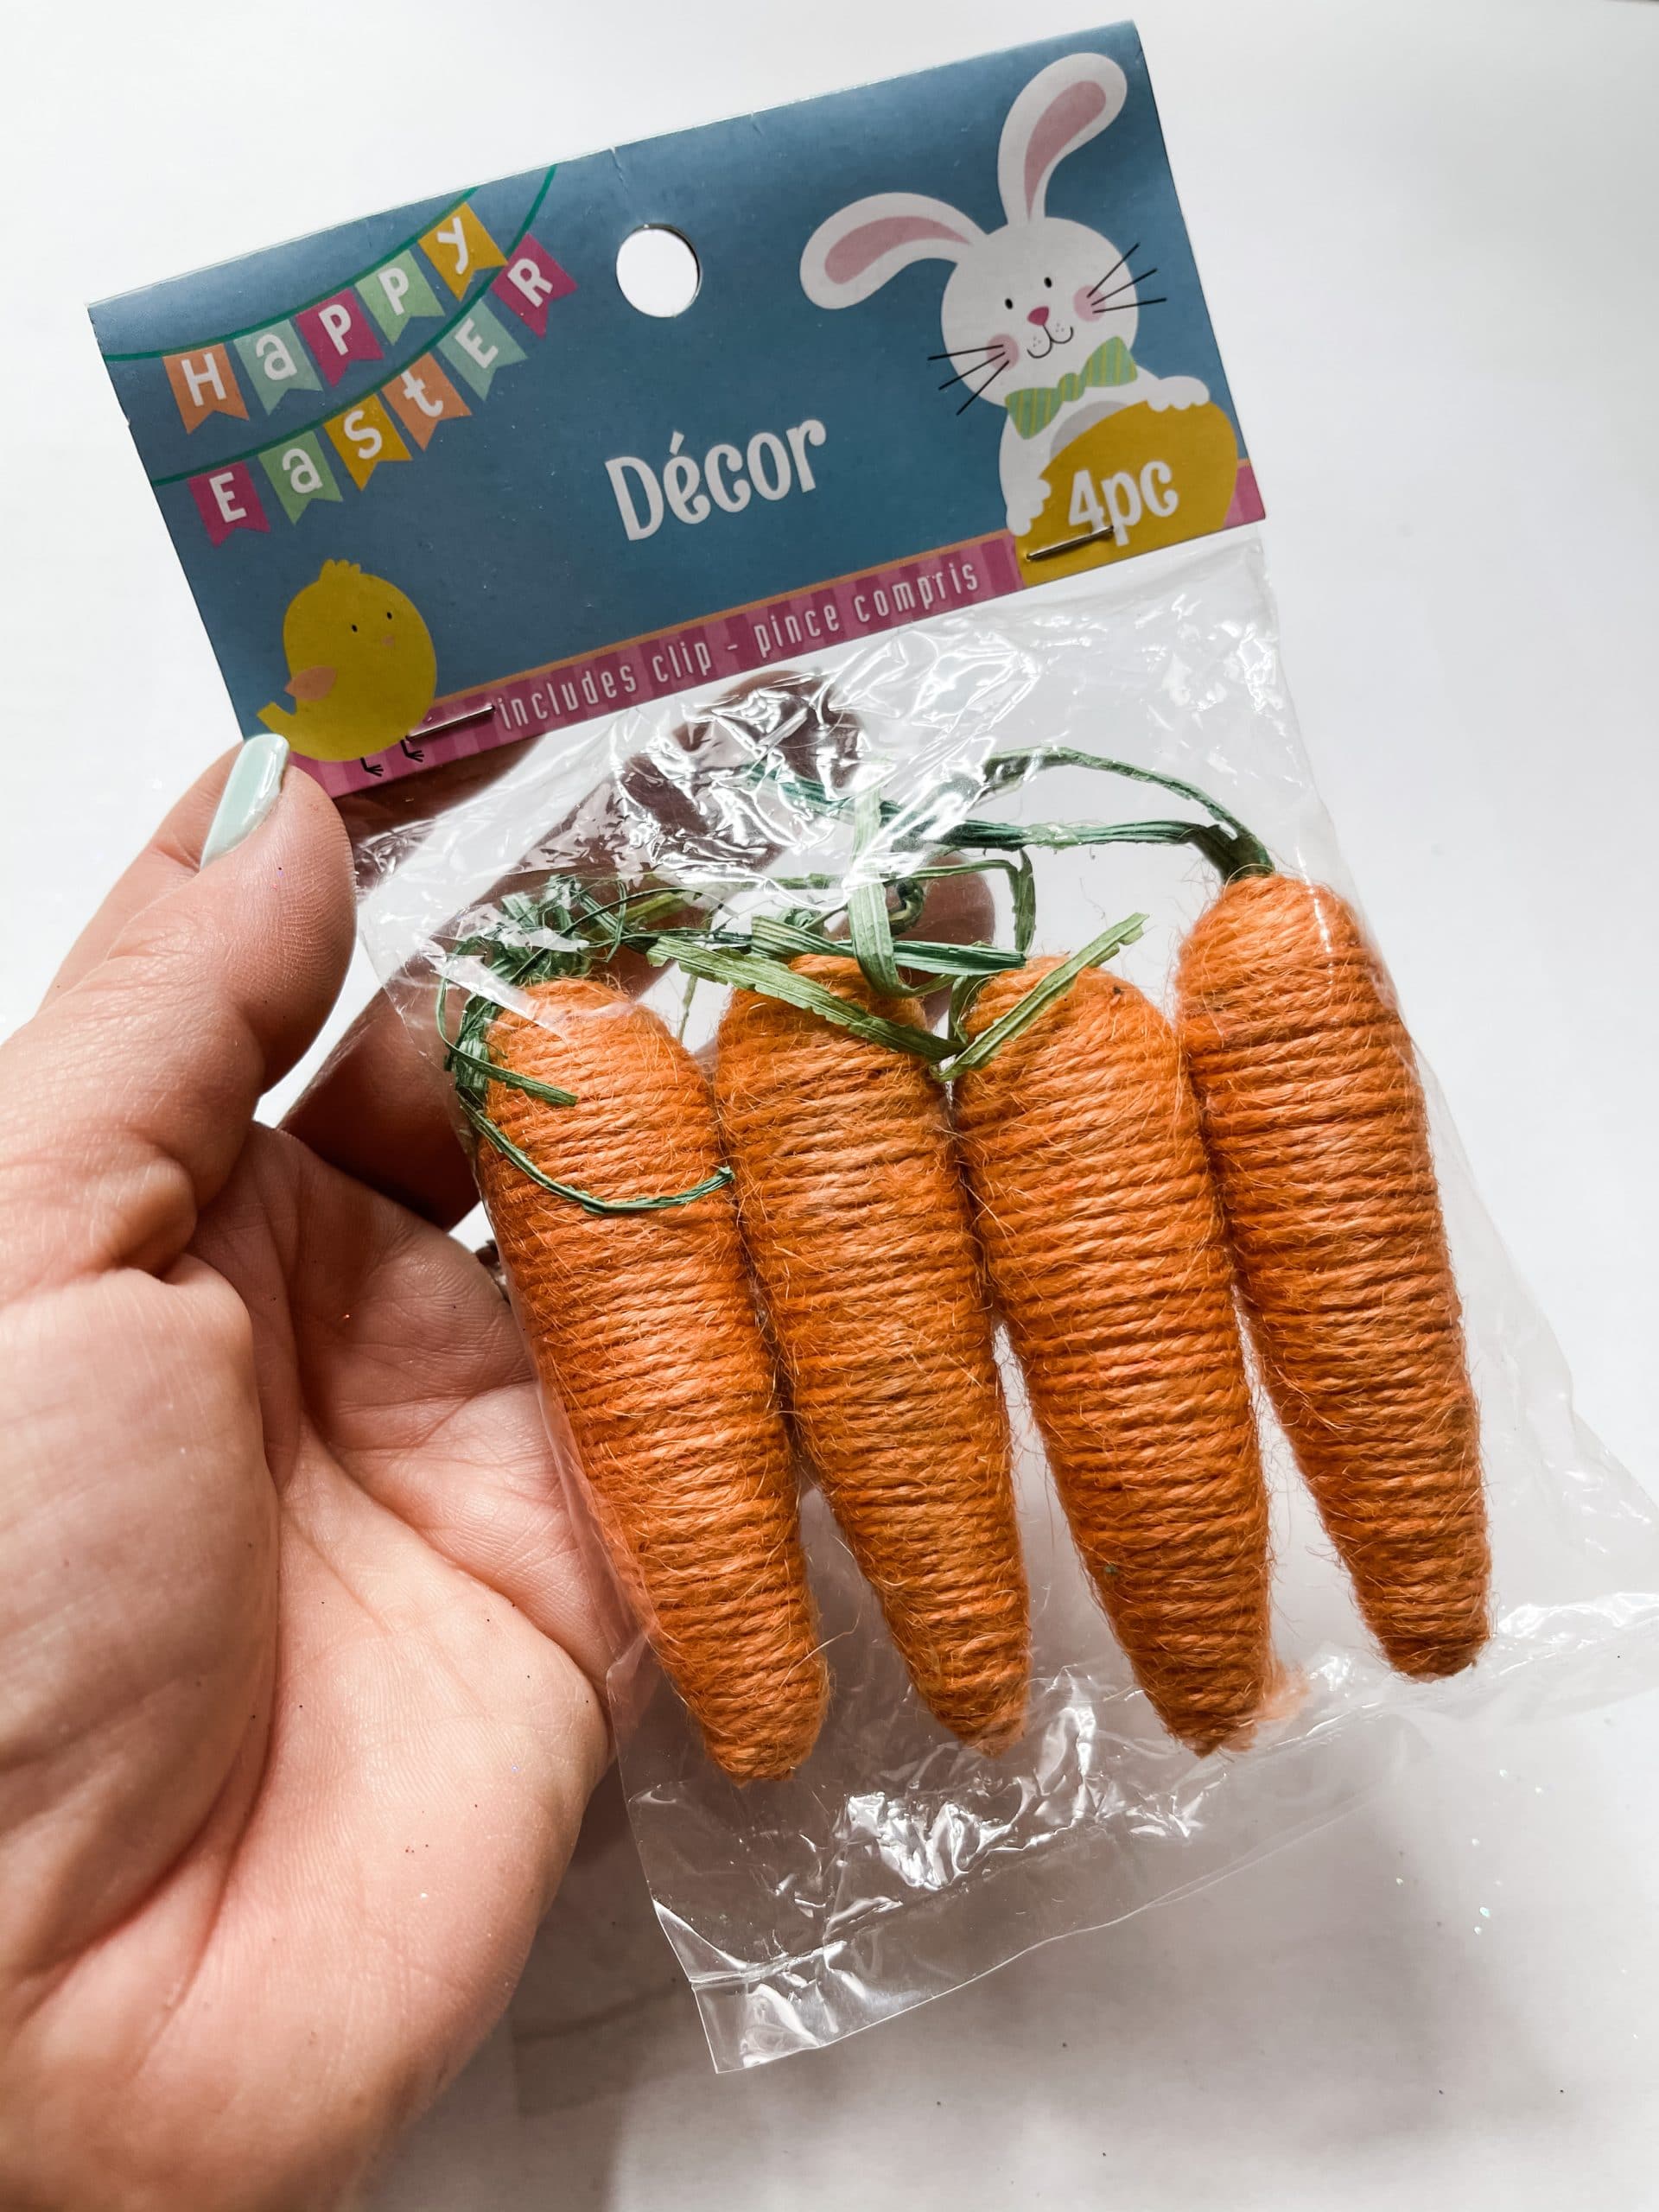
- Dollar Tree Yarn Carrots
- Yellow Buffalo Check fabric
- Dollar Tree Spring floral fabric
- Pink/White polka dot fabric
- Green pin-dot fabric
- Dollar Tree Tumbling Tower Blocks (x4)
- Jean pocket
- Blue Baker’s Twine
- Mod Podge
- Hot Glue gun
- Glue Sticks
How to Make an Easy DIY Dollar Tree Spring Bunny
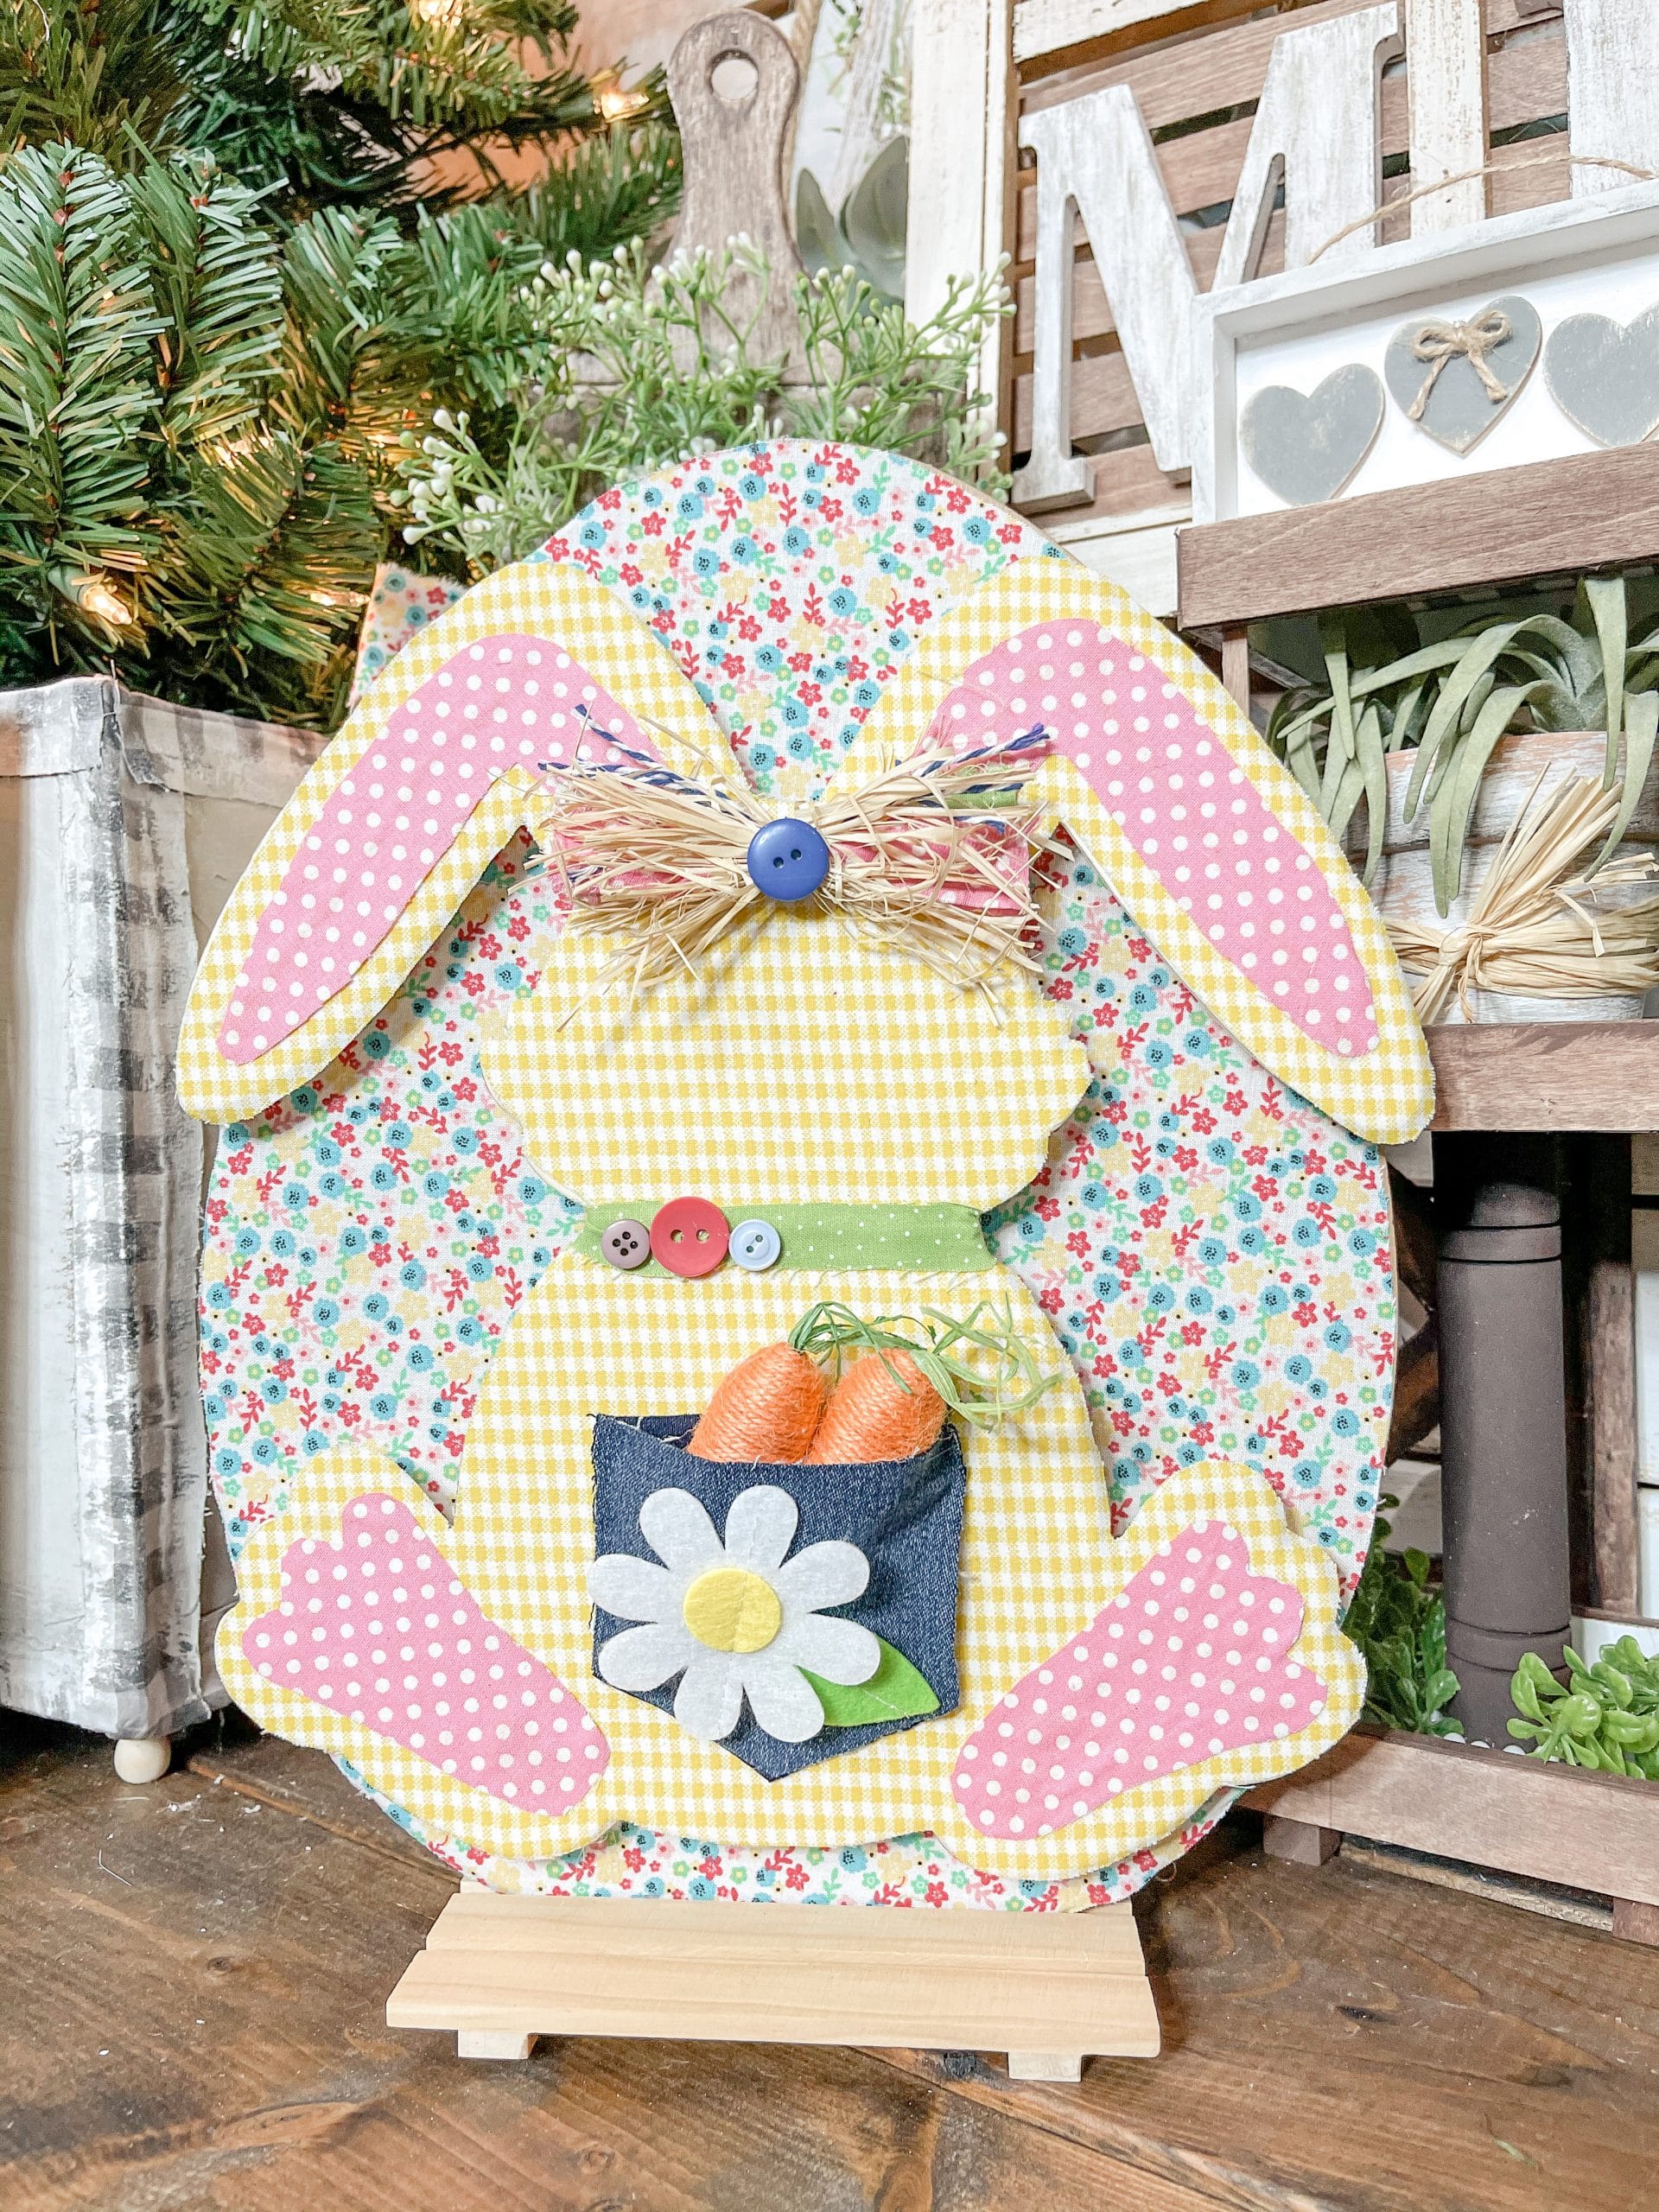
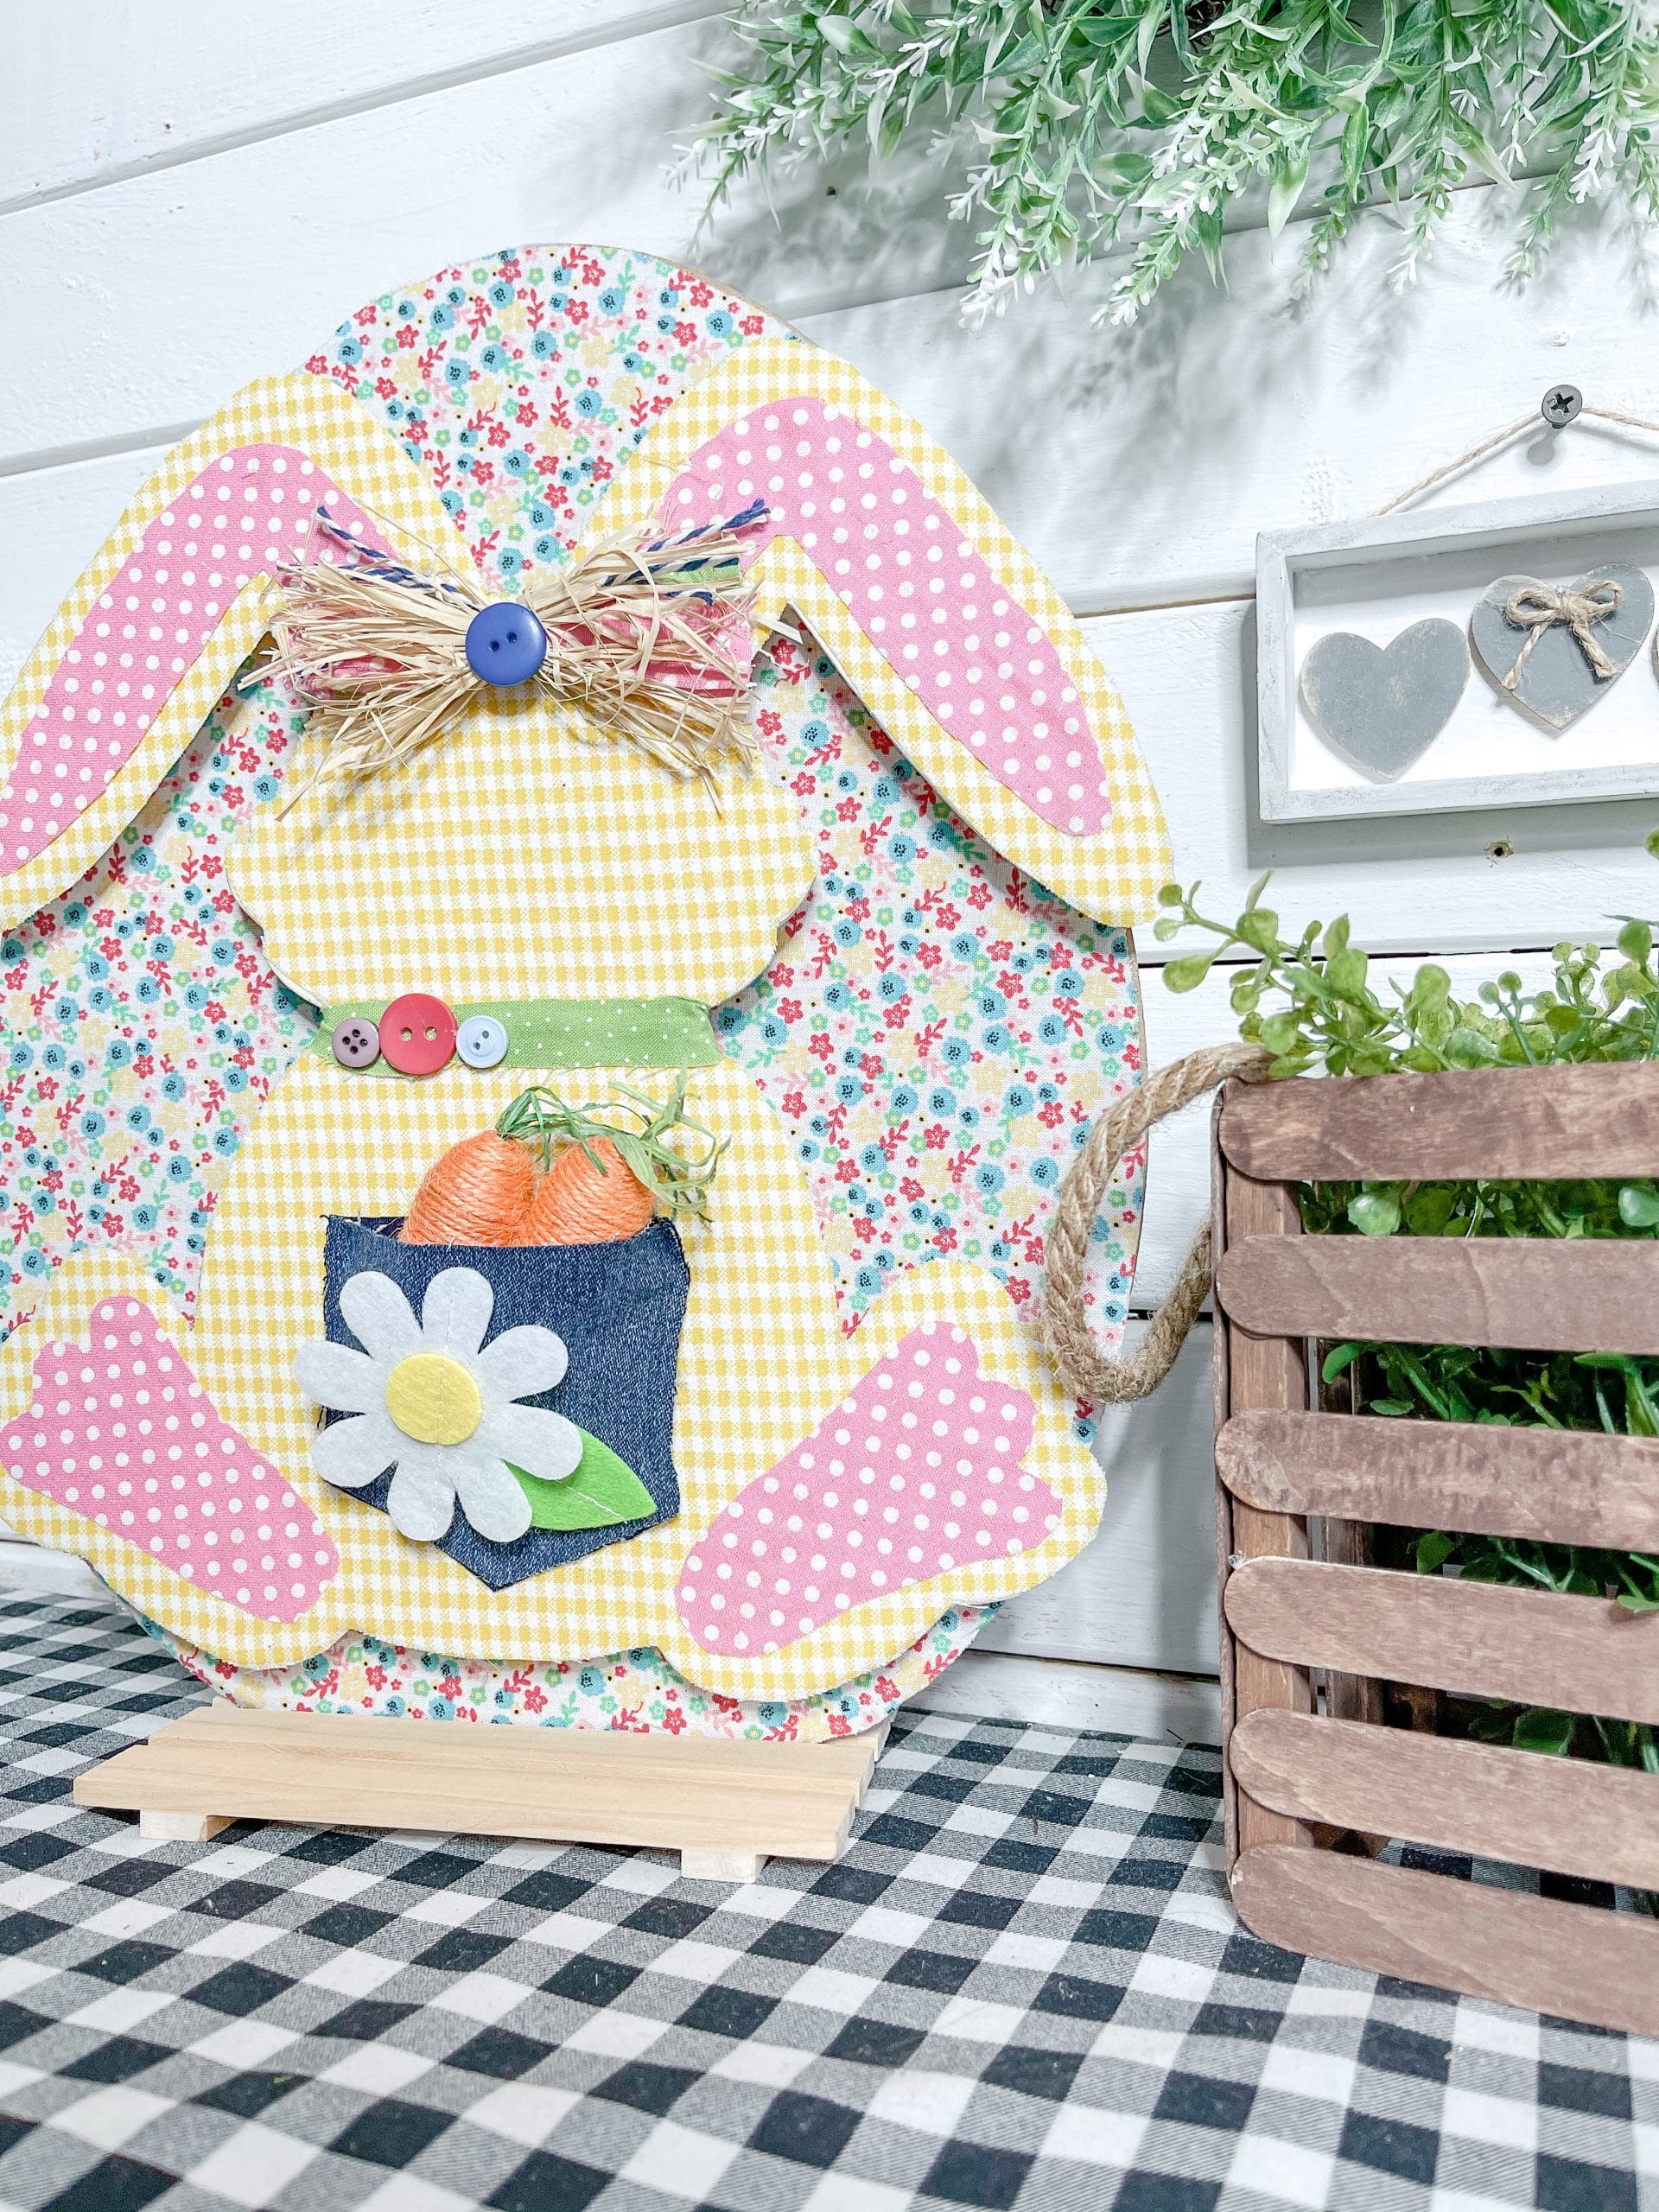
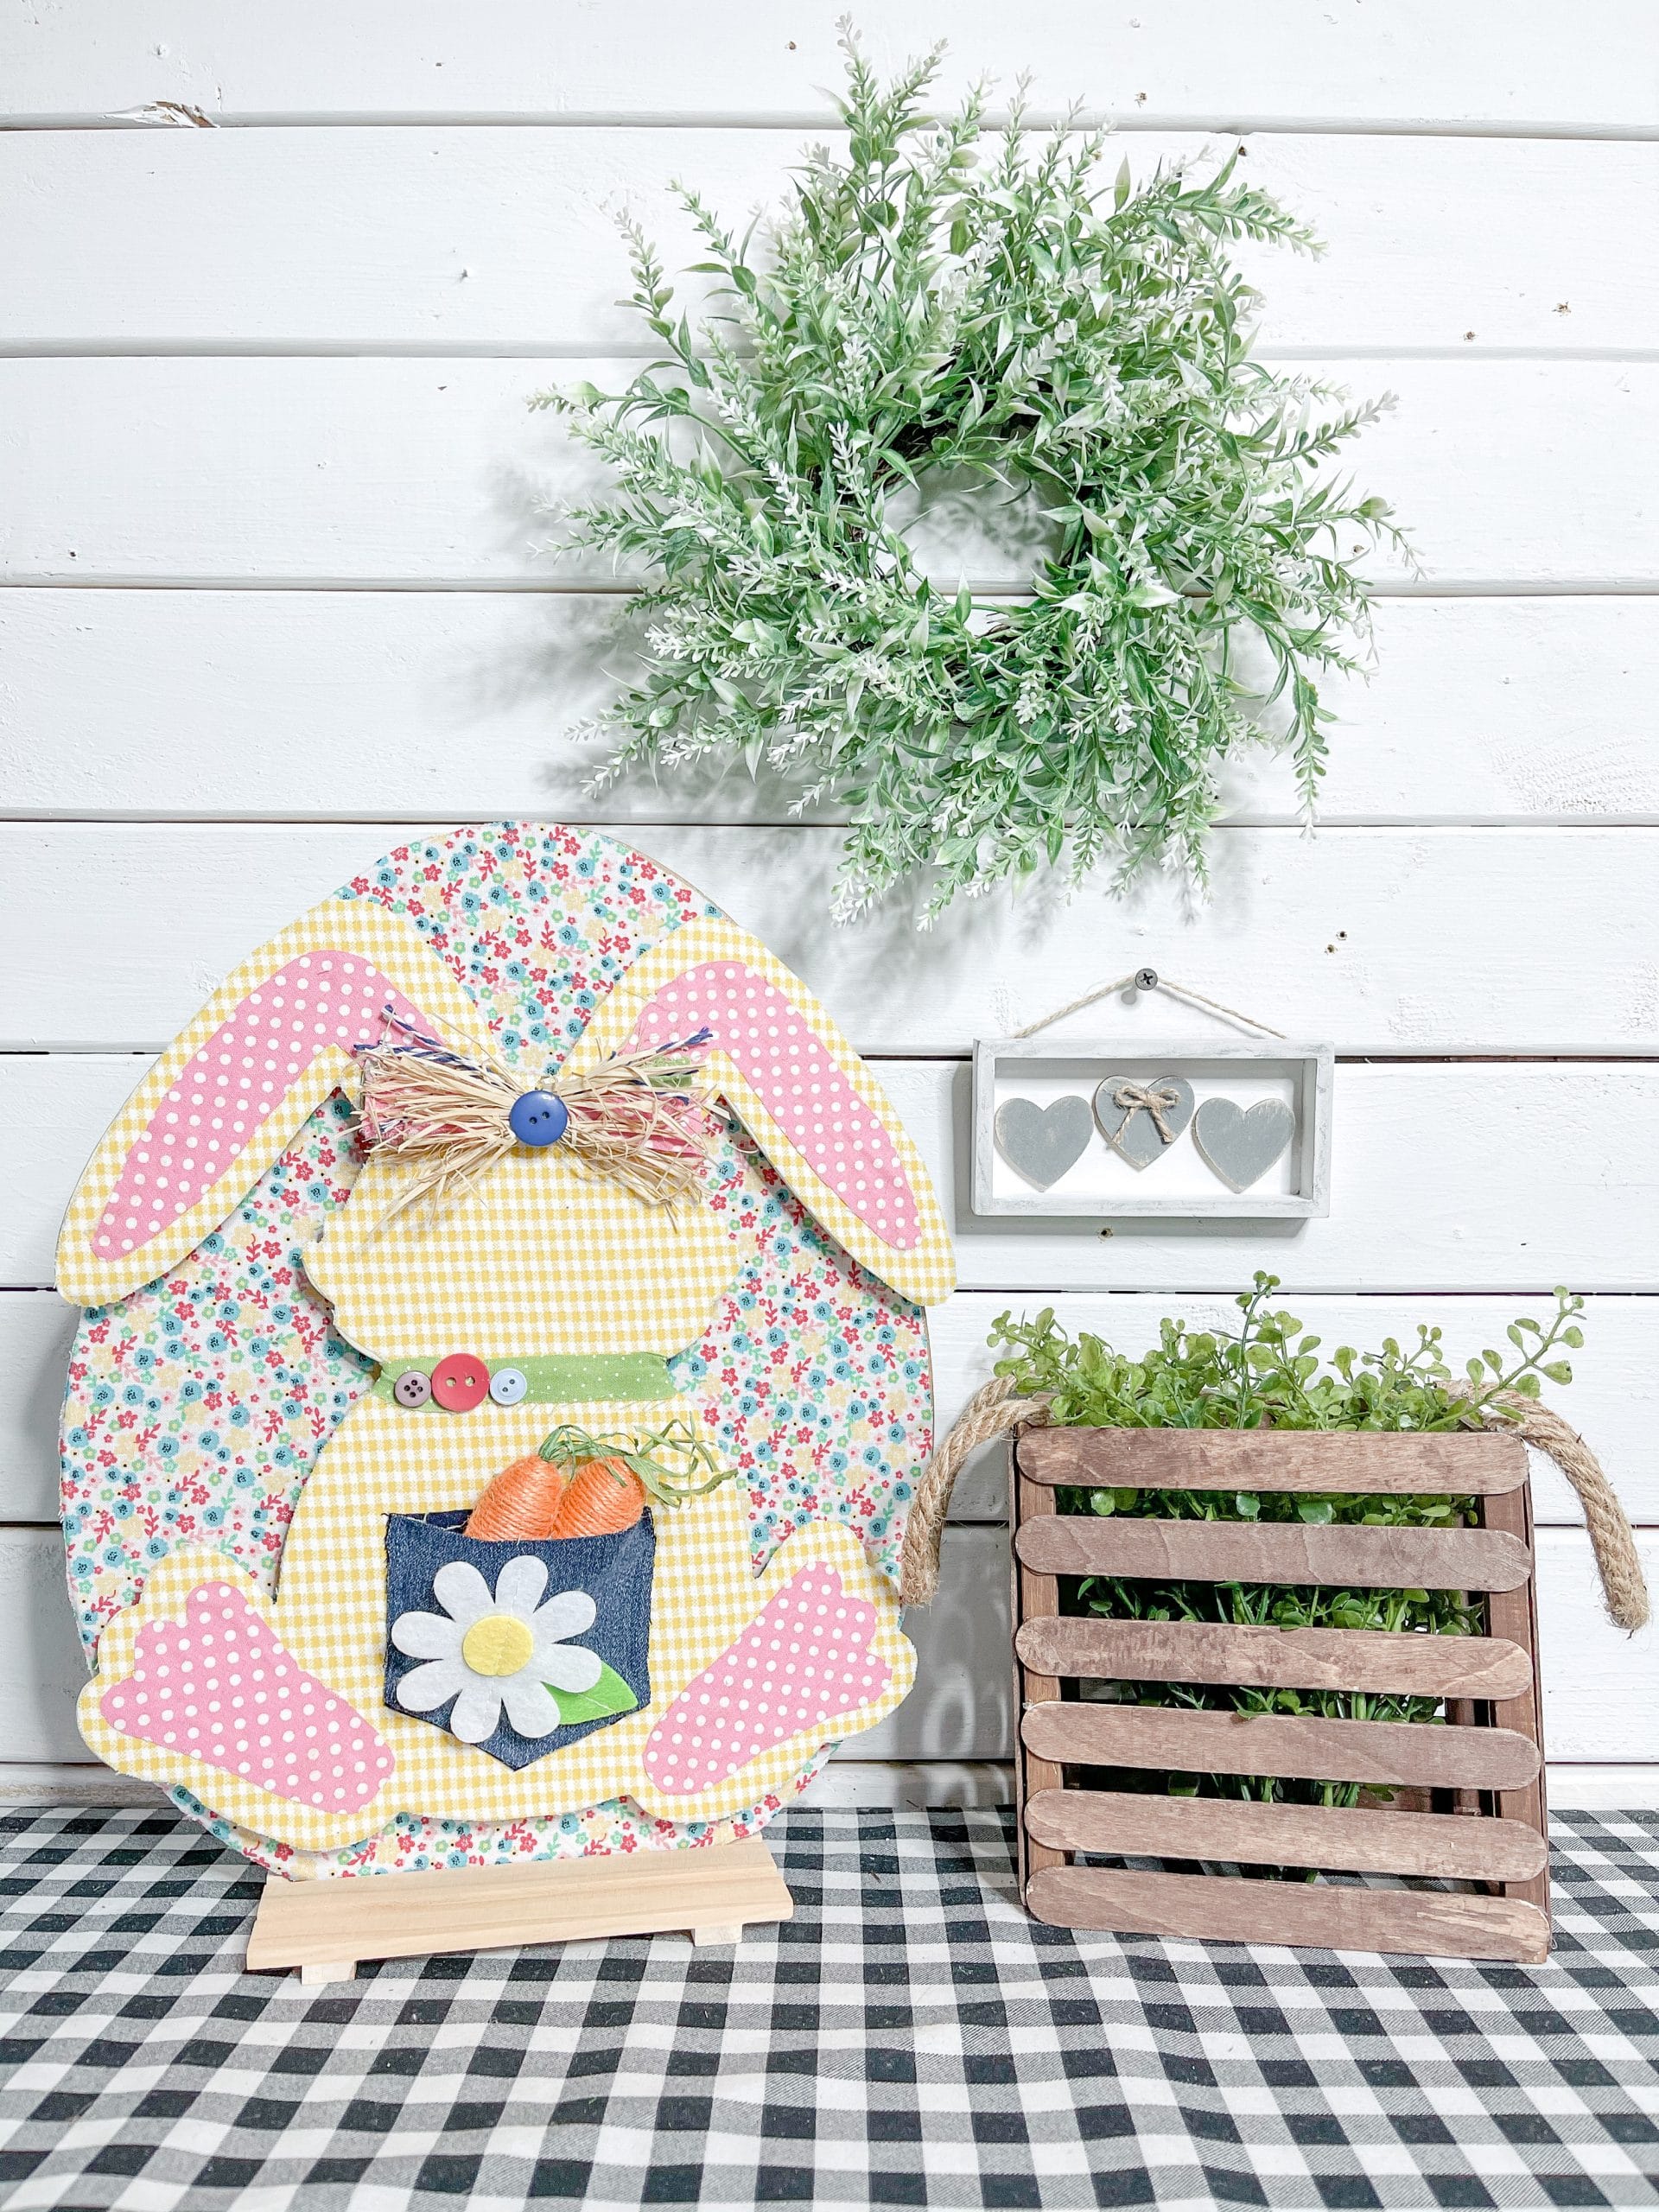
Trace your large Dollar Tree egg onto the spring floral fabric and cut out the egg shape. Apply a coat of Mod Podge to the back of the Dollar Tree wooden egg and place the fabric onto the egg.
Use a rolling pin to smooth out any wrinkles or bubbles in the fabric. Next, you’re going to decoupage the Dollar Tree bunny cutout. So, trace the bunny onto the fabric you’re going to use and cut the shape out.
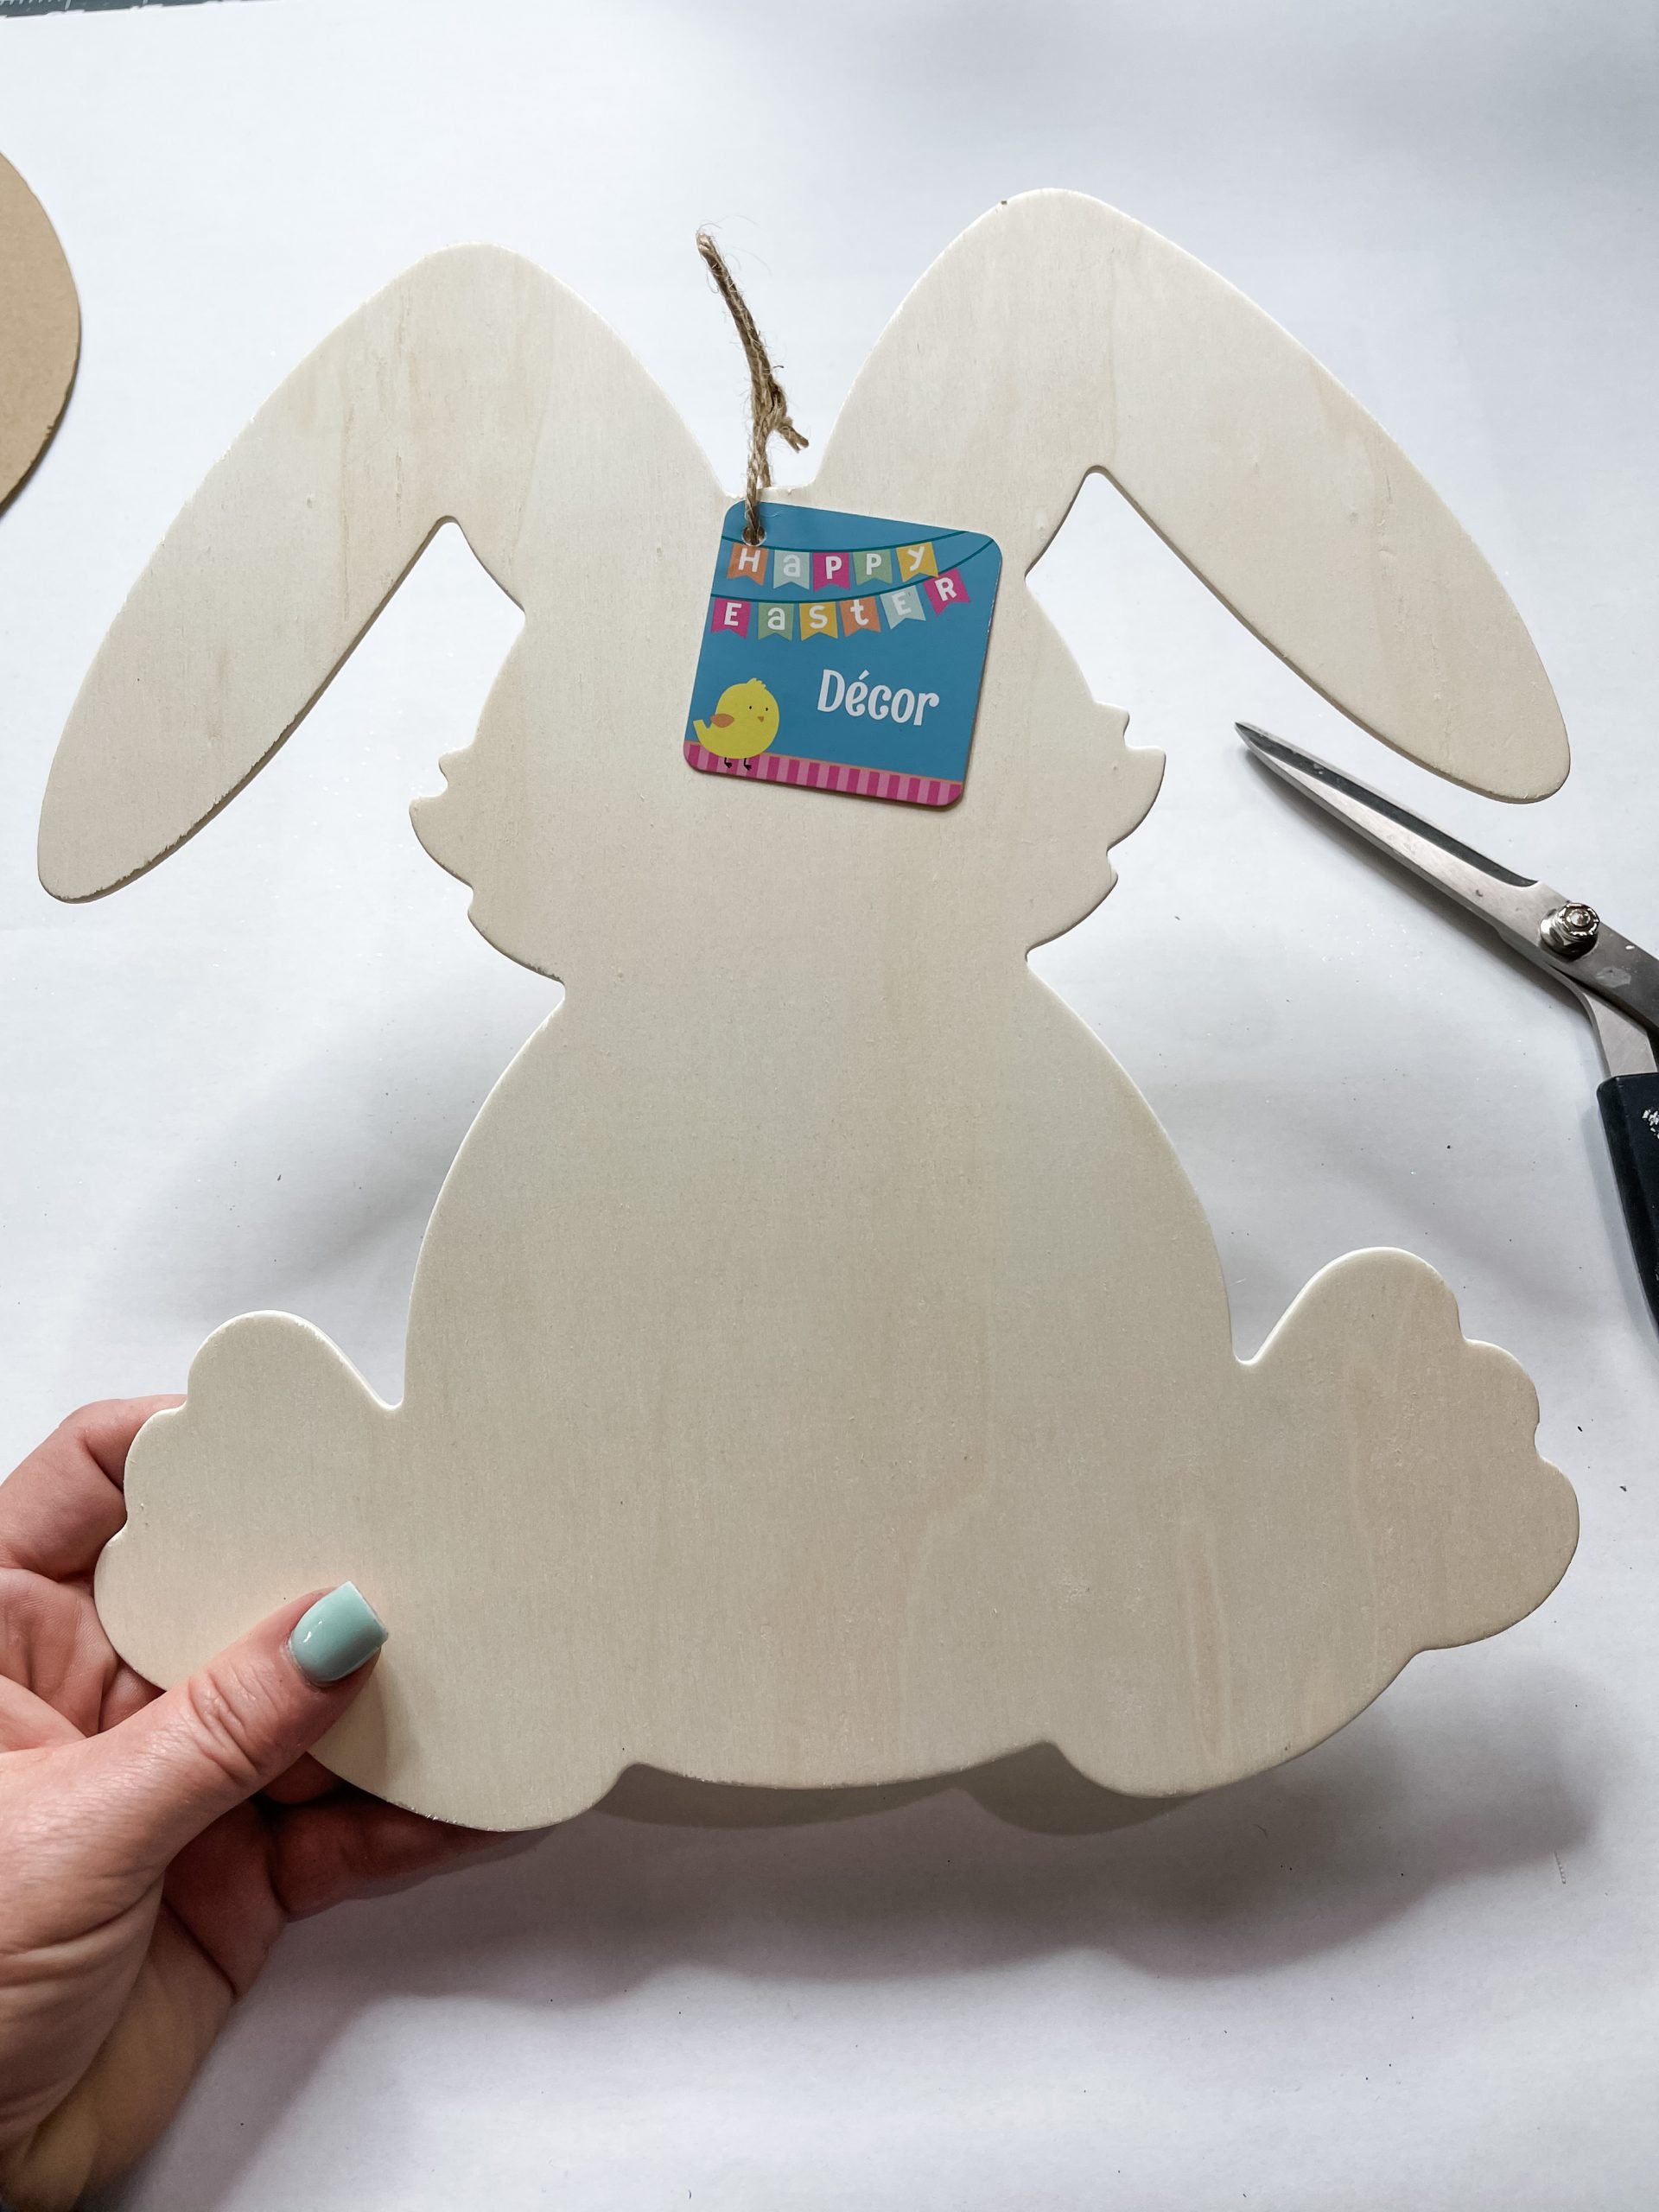
Apply a coat of Mod Podge to the wooden bunny and place the fabric onto the bunny. Again, use a rolling pin to smooth out any wrinkles or bubbles in the fabric.
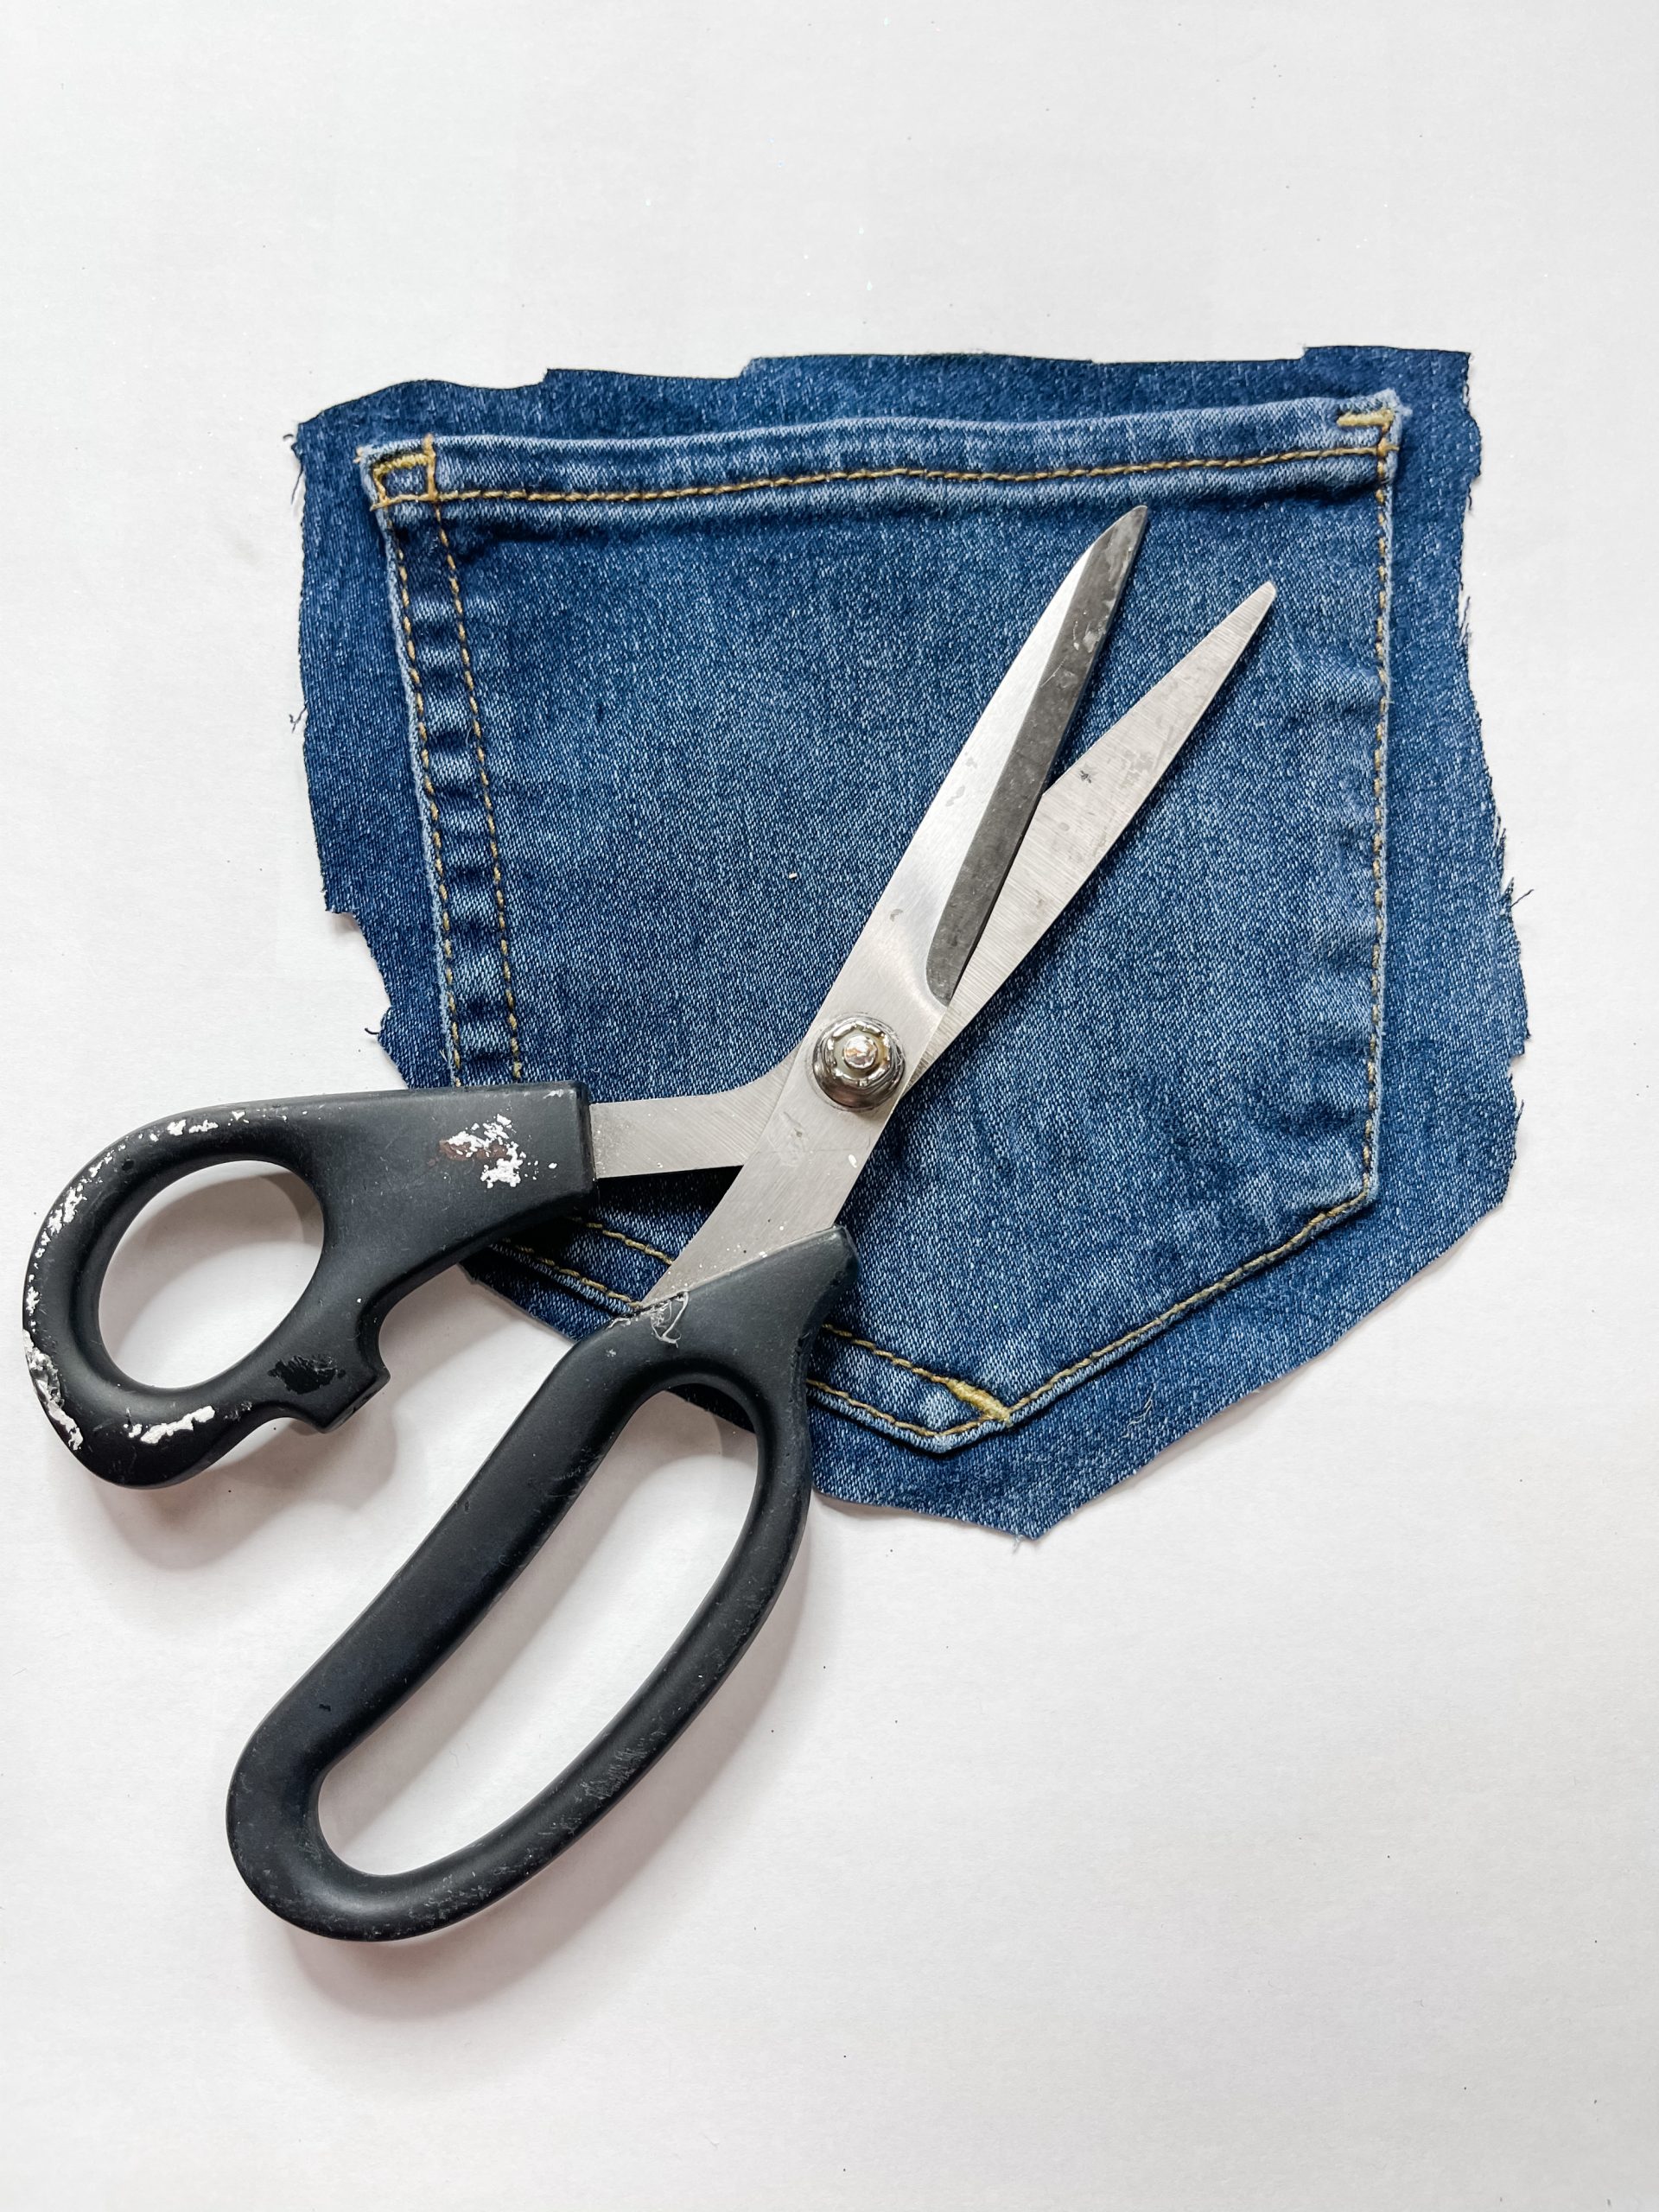
Next, you need a jean pocket. You can take a pair of old jeans that you were just going to throw away and cut the pocket off! Take your Dollar Tree floral garland and cut one of the flowers and leaves off. Hot glue the leaf and flower onto the front of your jean pocket.
You’re going to need a third fabric pattern for this next part. I used a piece of wax paper to create a template for the inside of my bunny’s ears (you’re going to cut it out of the third fabric pattern).

Put the wax paper on your bunny’s ears and draw the size you need the fabric to be slightly smaller than the bunny’s ears. Then, cut the wax paper shape out and trace it onto the fabric.
Start putting it together
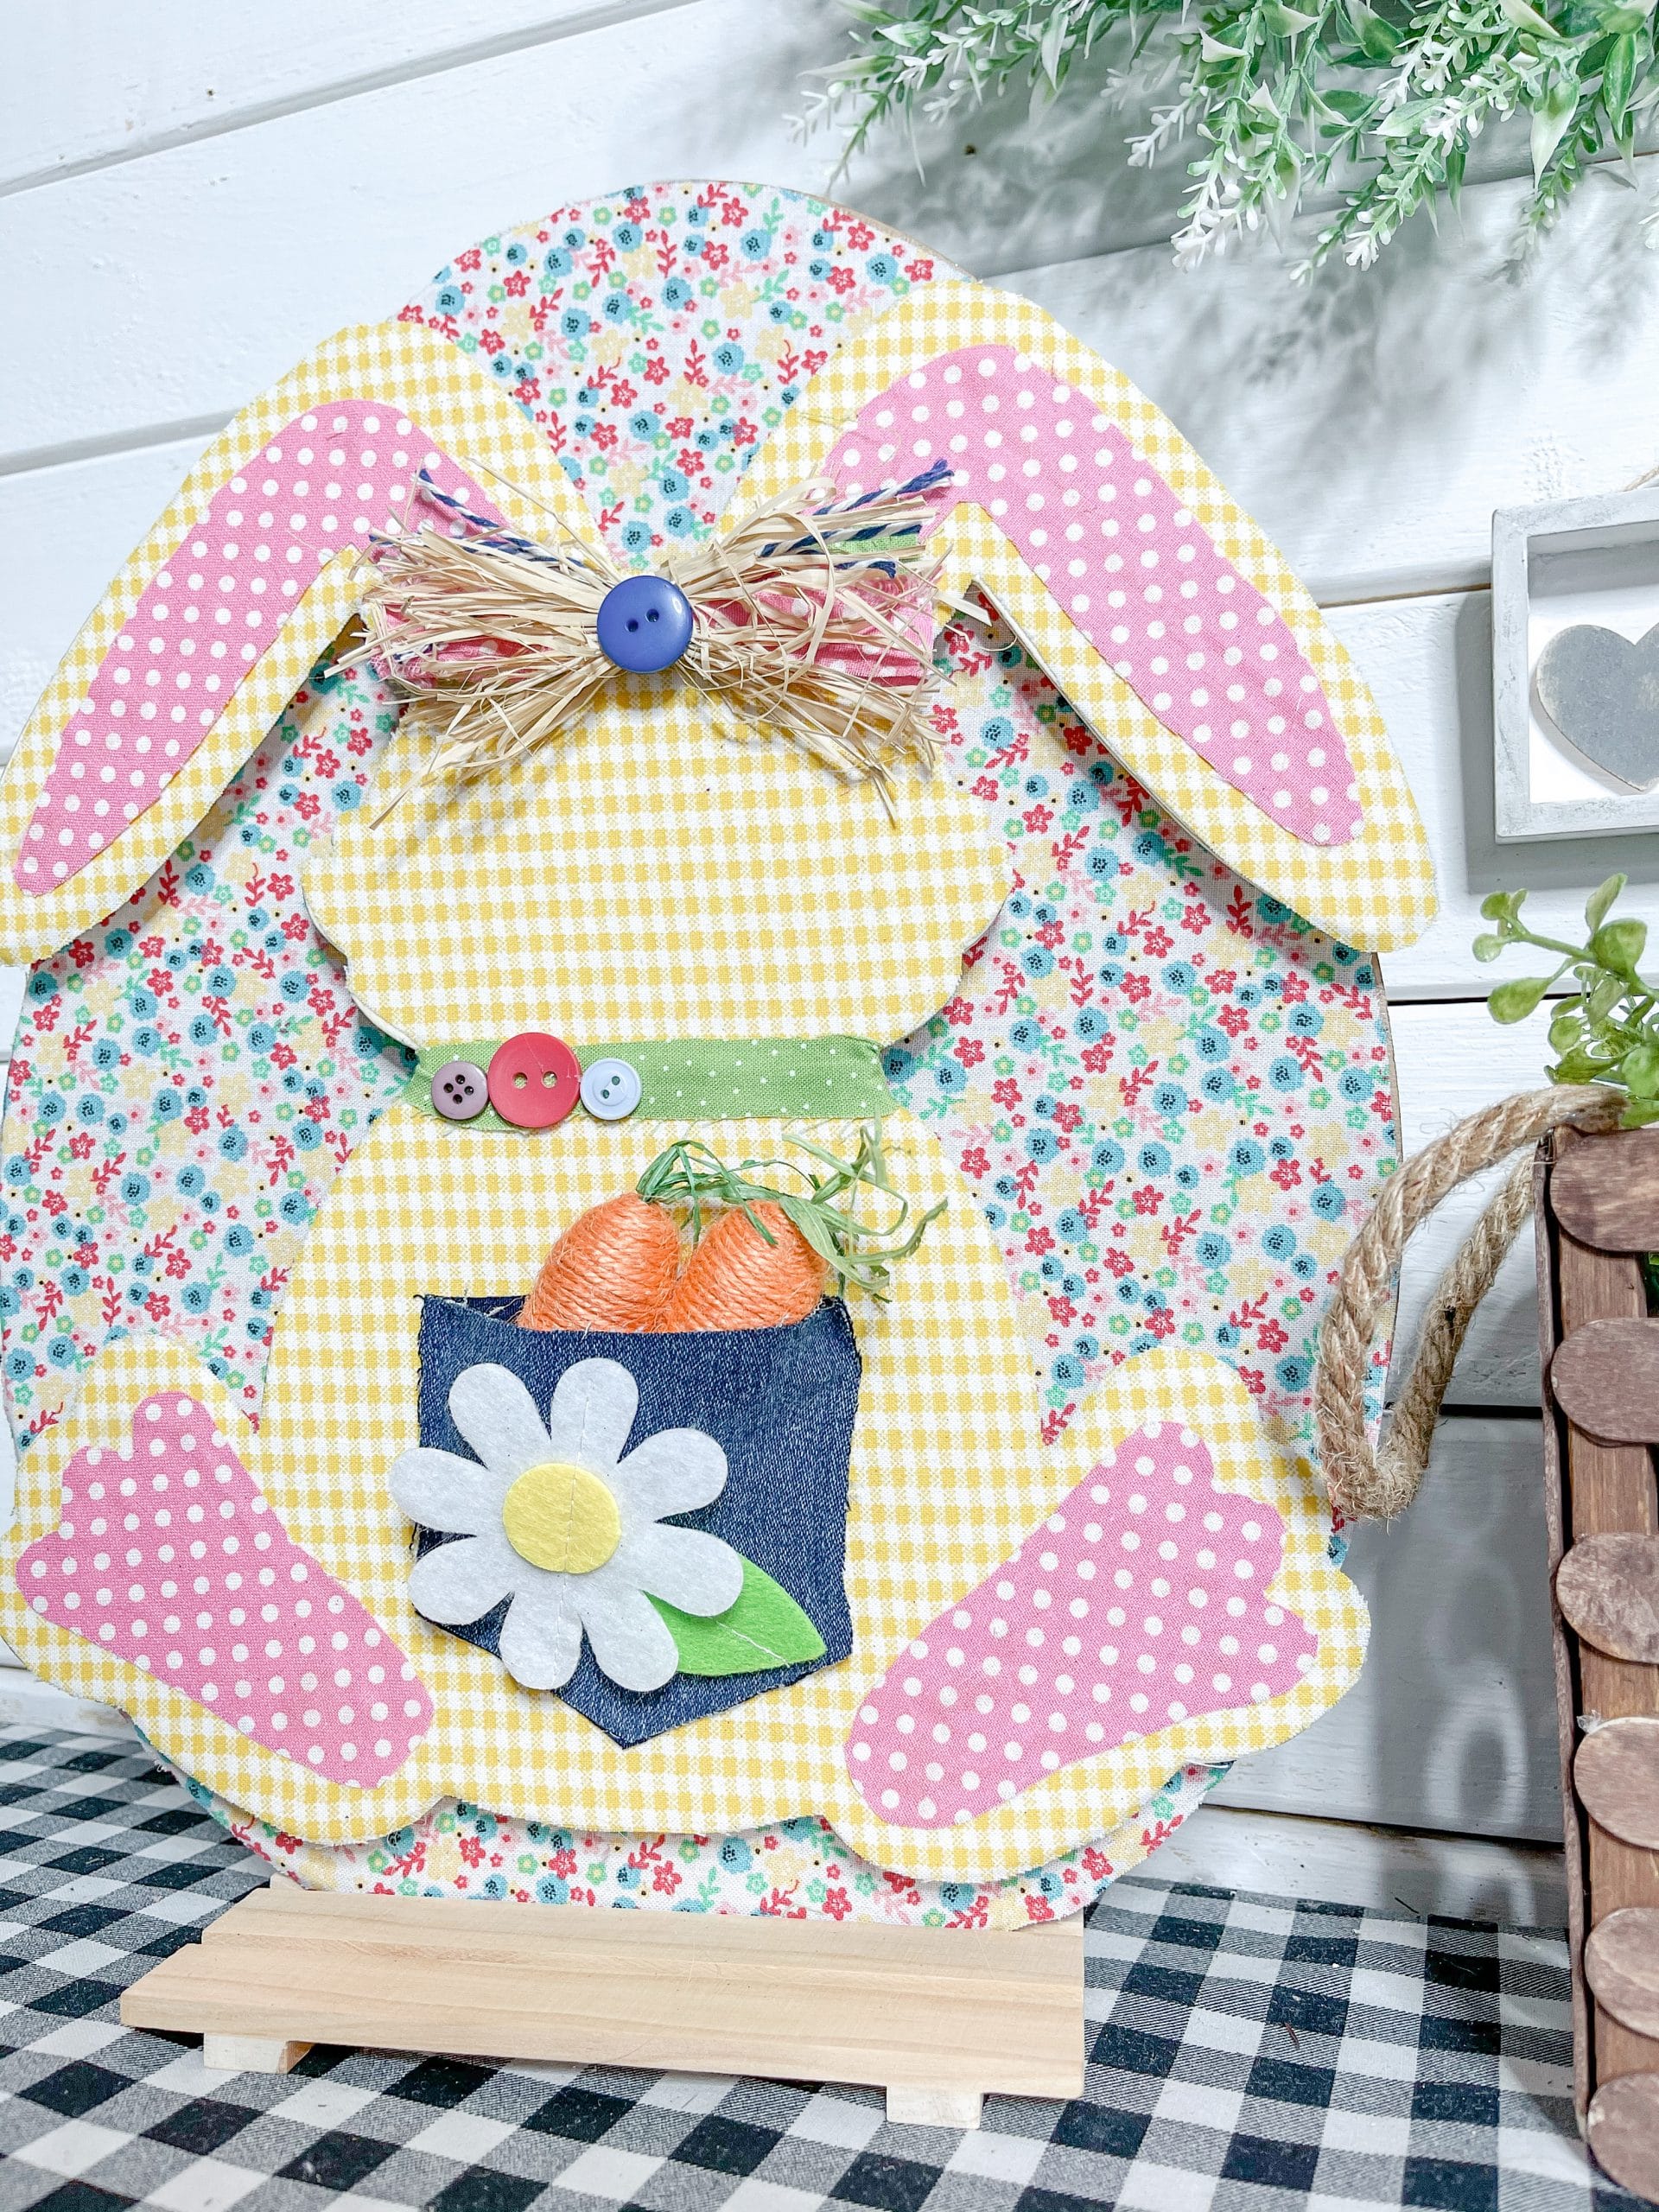
The fourth fabric pattern is going to go across your bunny’s neck like a cute little collar, so cut a small strip that fits across your bunny’s neck. Wrap the ends of the strip around the sides of the bunny’s neck and hot glue it in place.
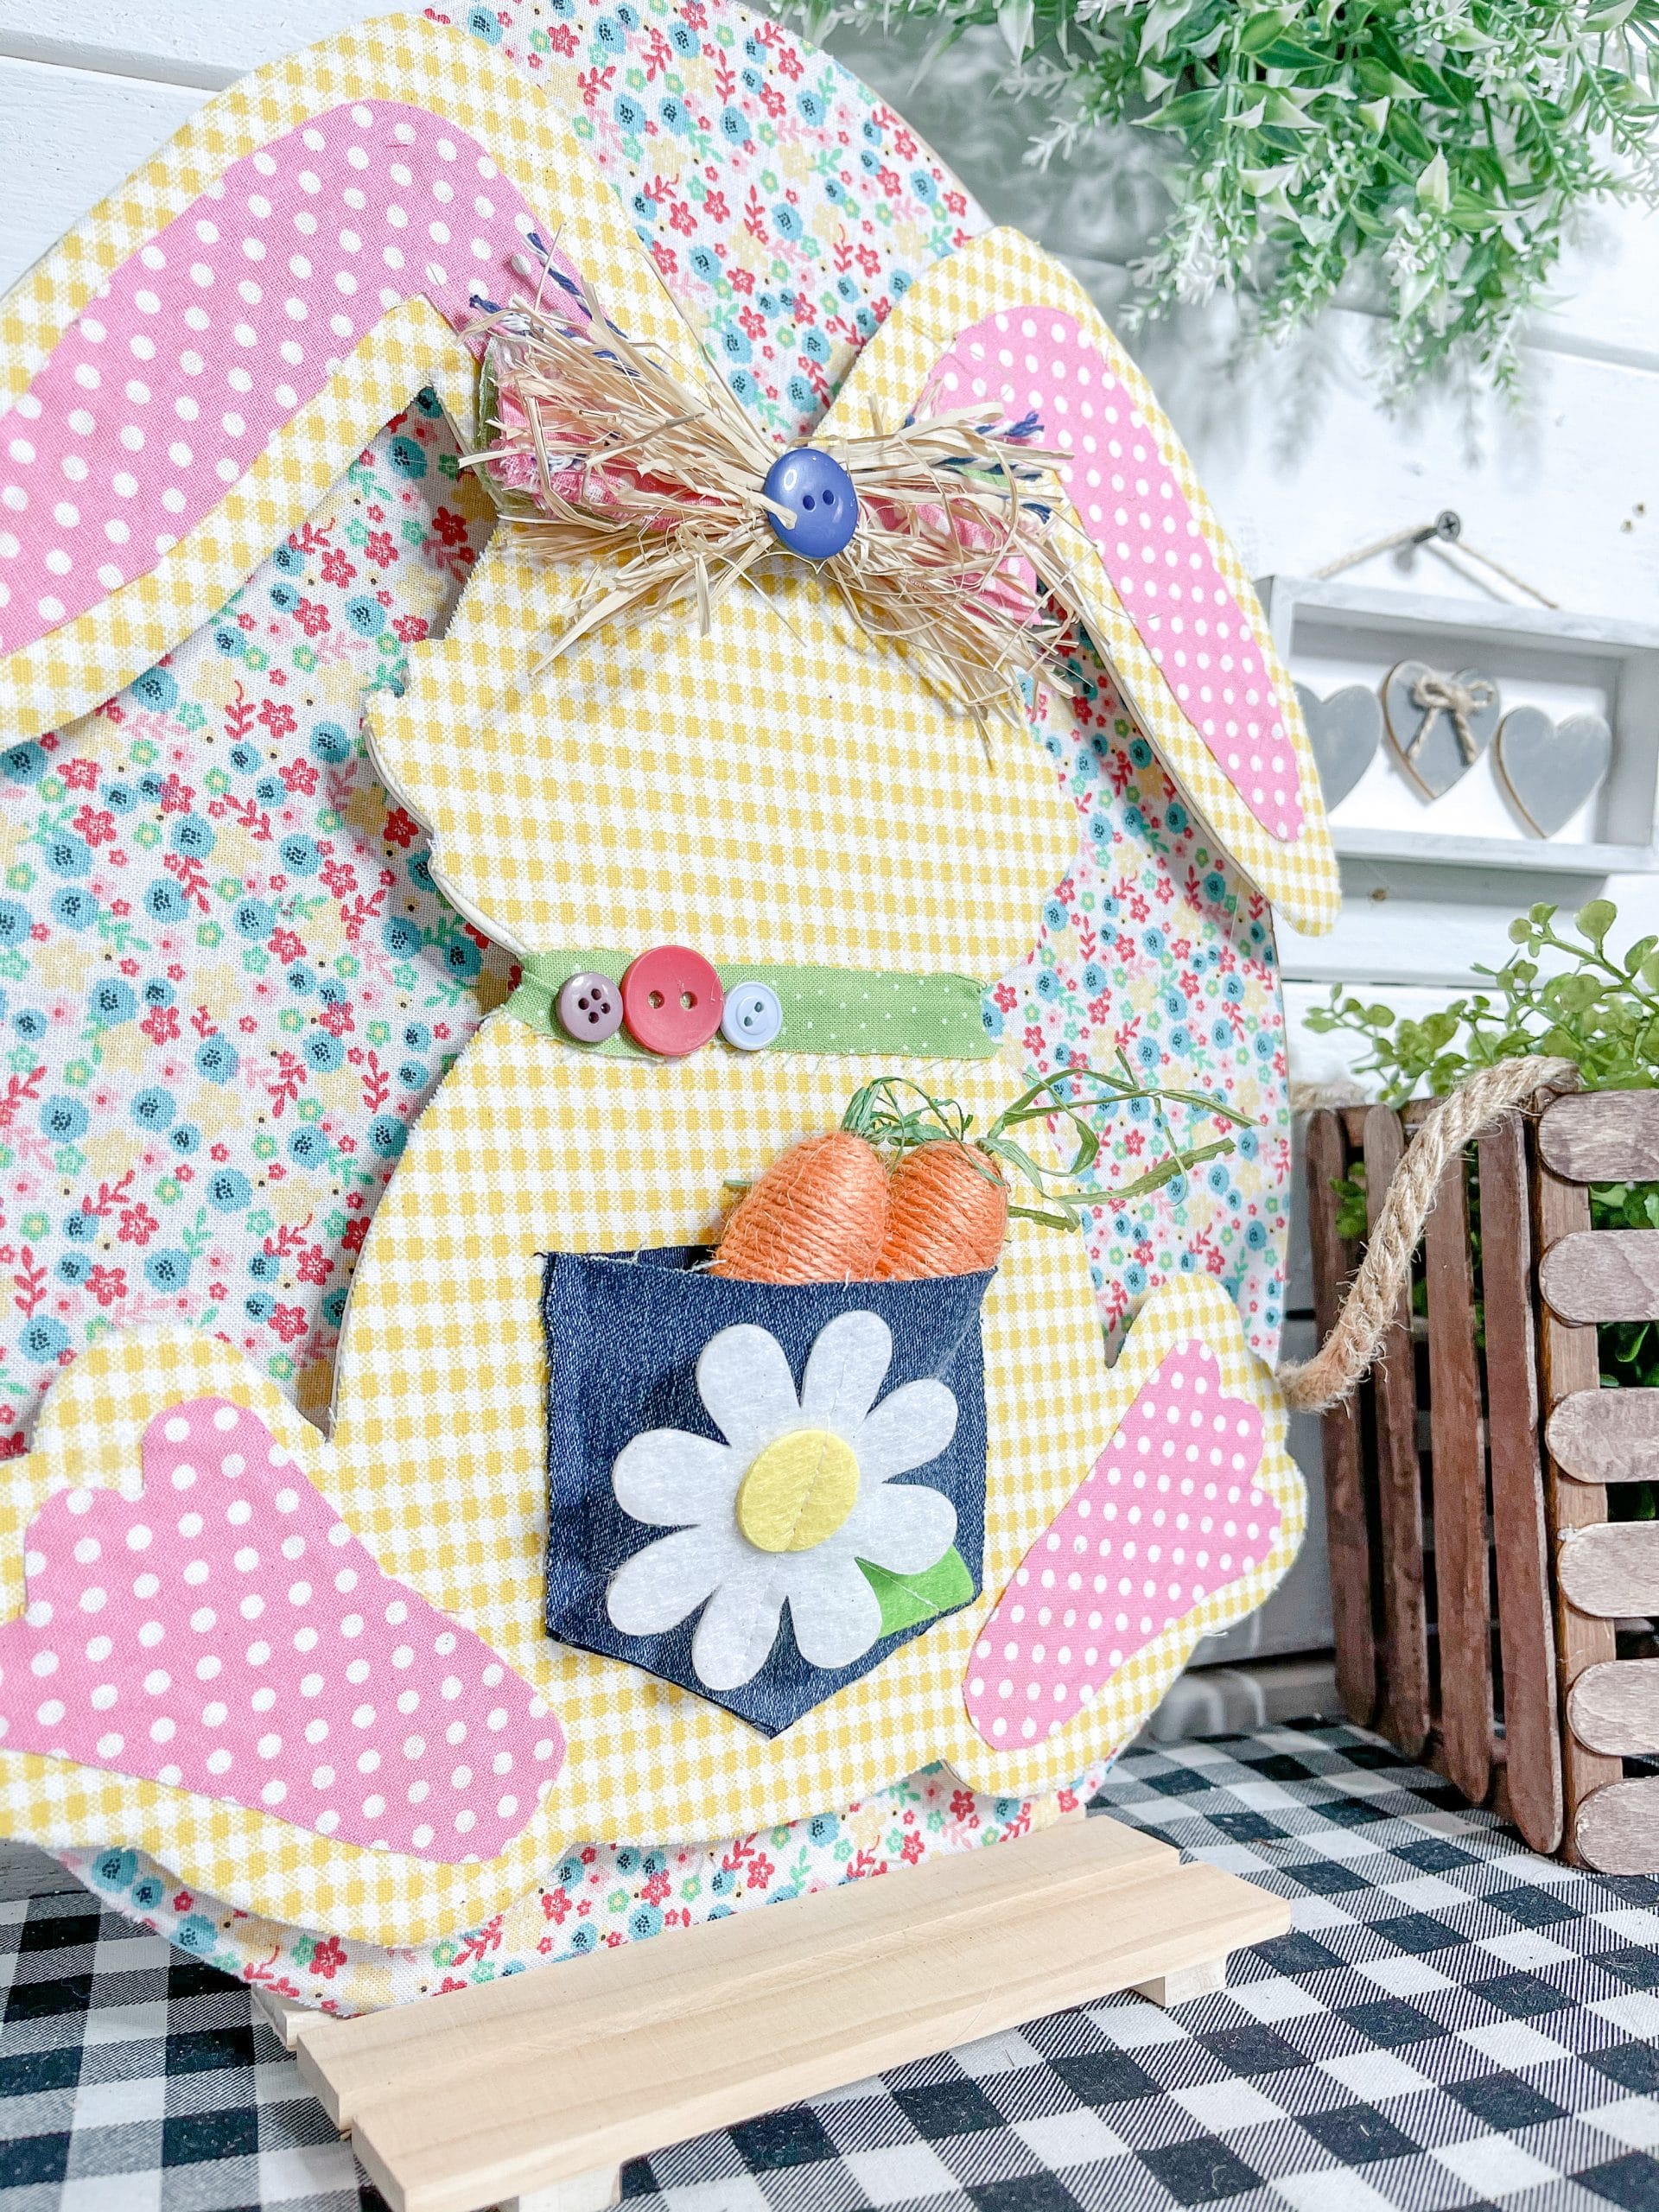
Then, hot glue the fabric onto each of the bunny’s ears, and hot glue the jean pocket onto the bunny’s belly. You want to still be able to open the pocket so you can put the yarn carrots into the pocket.
DIY Bow
Next, you’re going to make a little bow to go between your DIY bunny’s ears out of your fabric patterns, baker’s twine, and raffia! Cut a couple of strips of each fabric pattern and the baker’s twine, and get several strands of raffia.
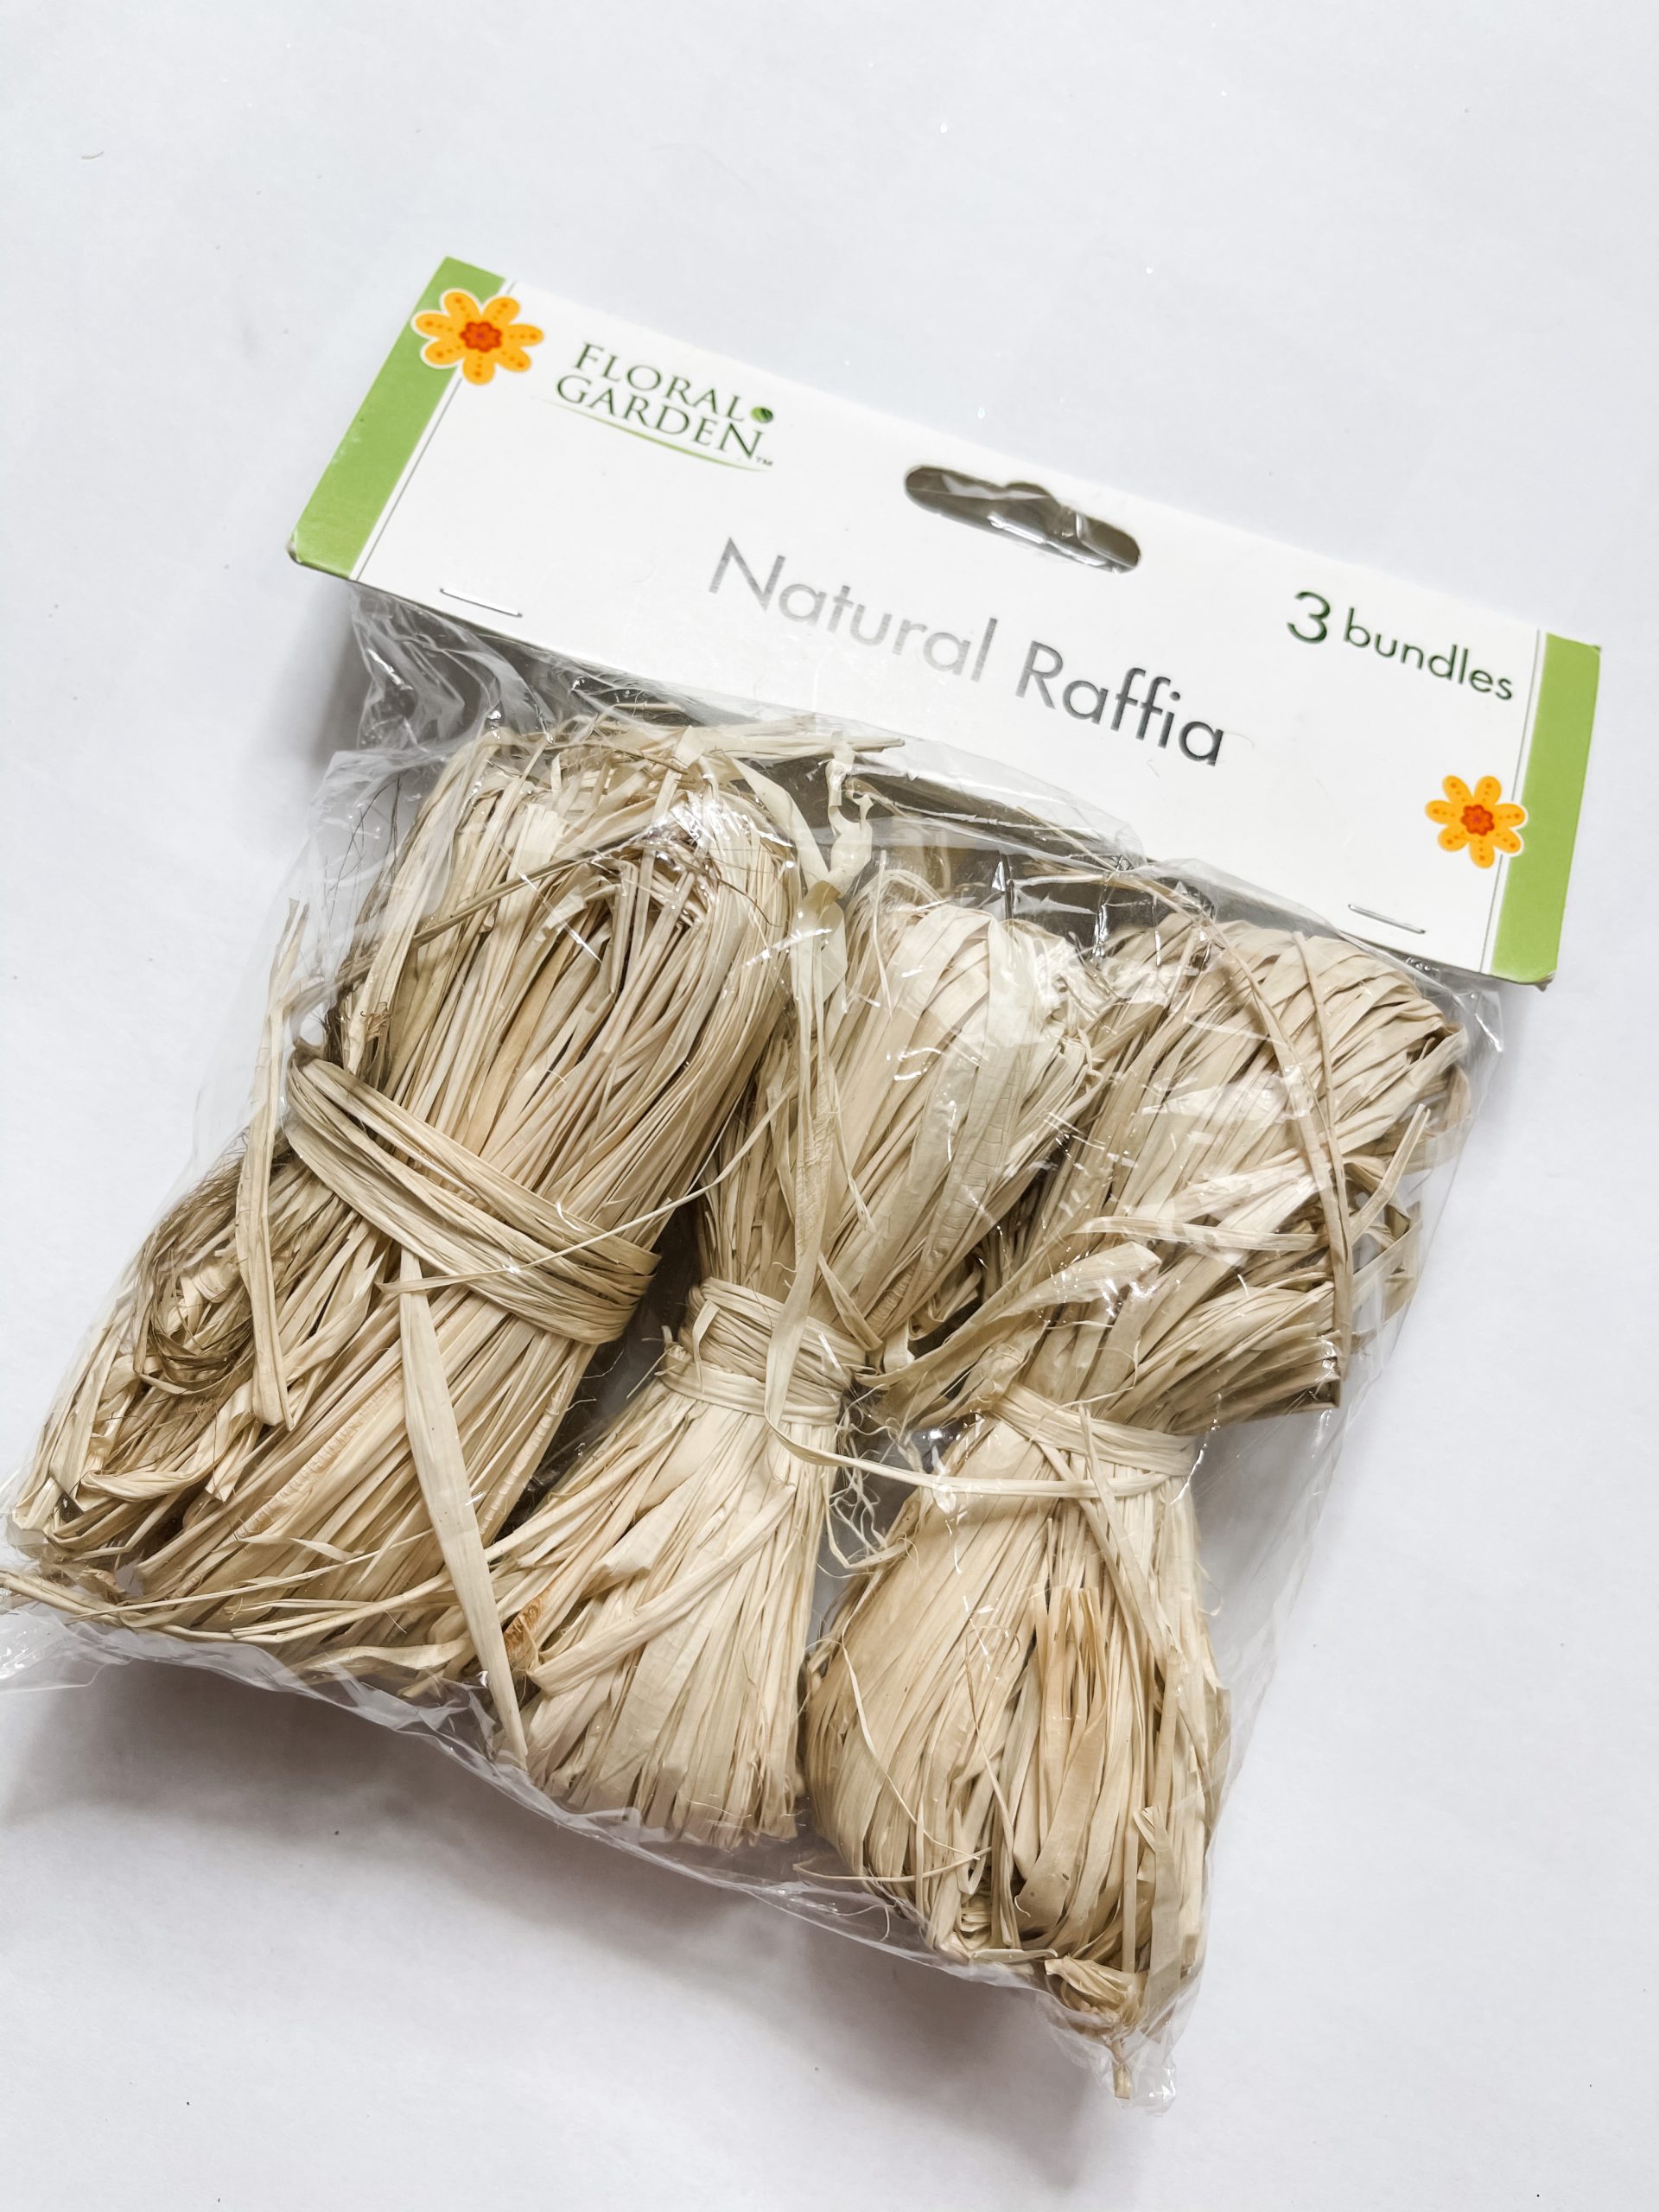
Lay the fabric in a pile, place the raffia on top of the fabric, and secure the center with a piece of the blue baker’s twine. Then, spread out the strips and trim the ends.
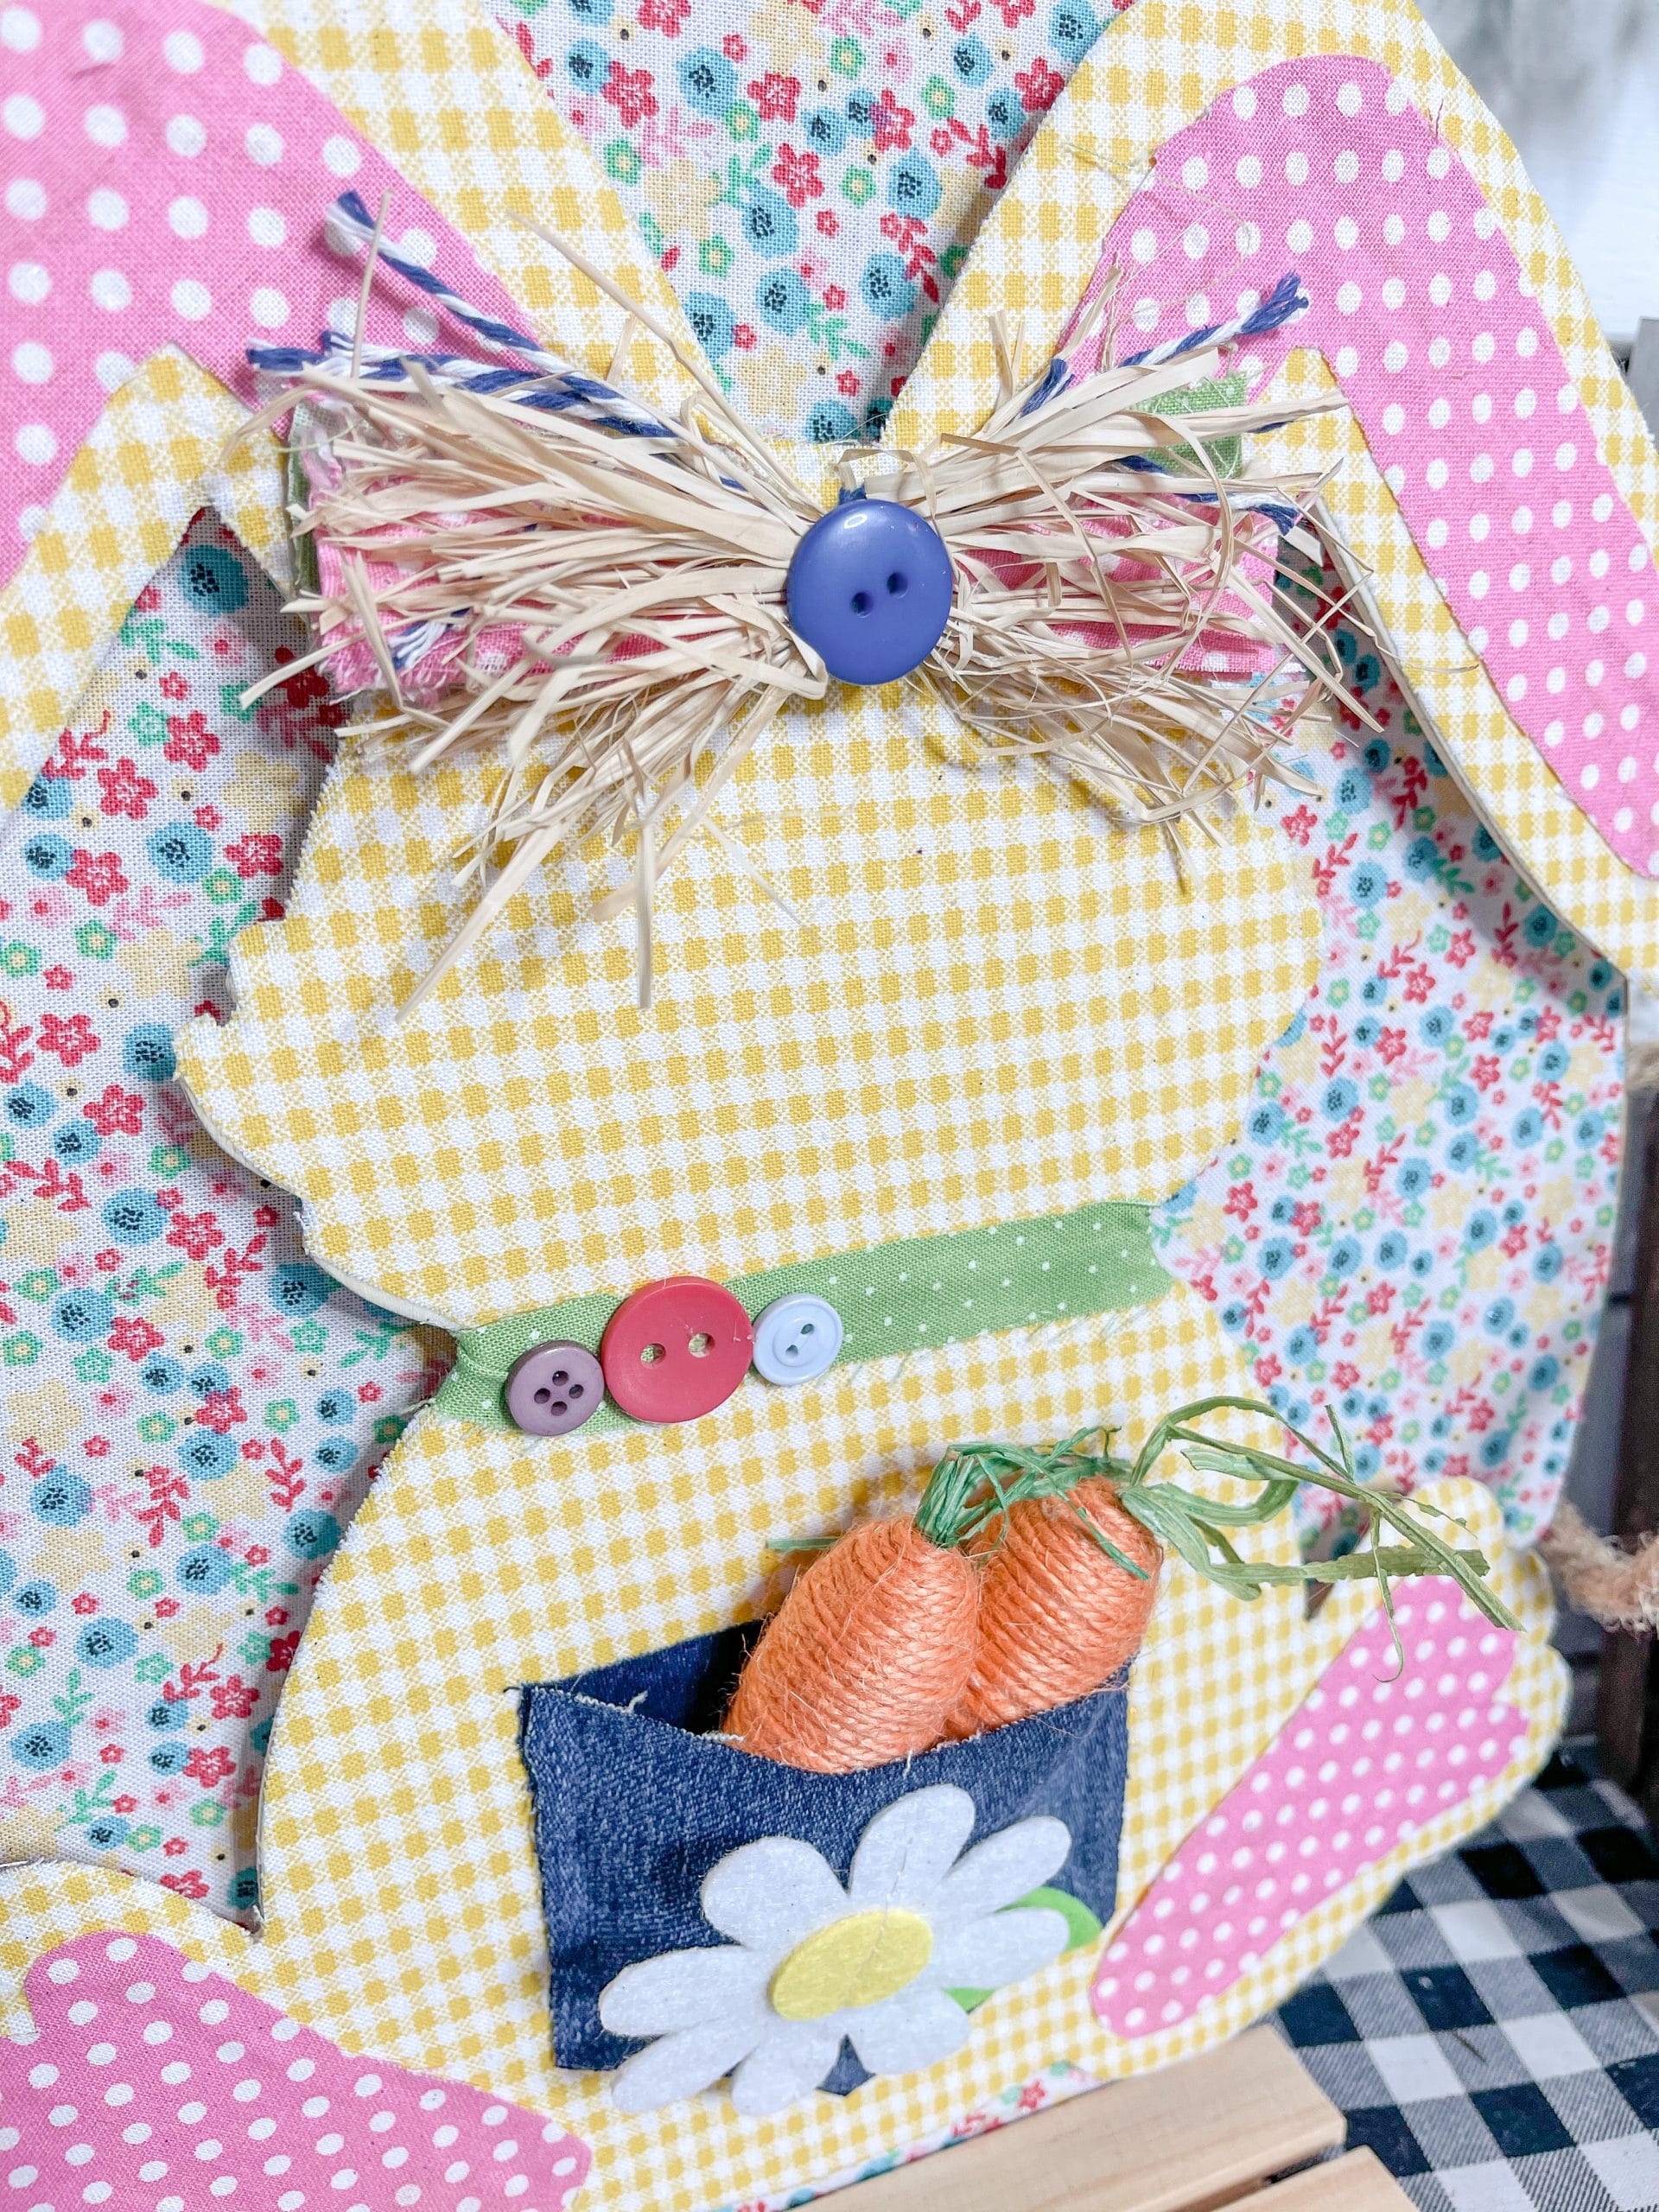
Hot glue the DIY at the top of your bunny’s head, between its ears. I used four buttons to add detail to my bunny. I hot glued one over the center of my bow and hot glued the other three onto my bunny’s collar.
The finishing touches
To raise the bunny a little from the egg and add some dimension to this project, I hot glued four Dollar Tree Tumbling Tower blocks to the back of the decorated Dollar Tree wooden bunny.
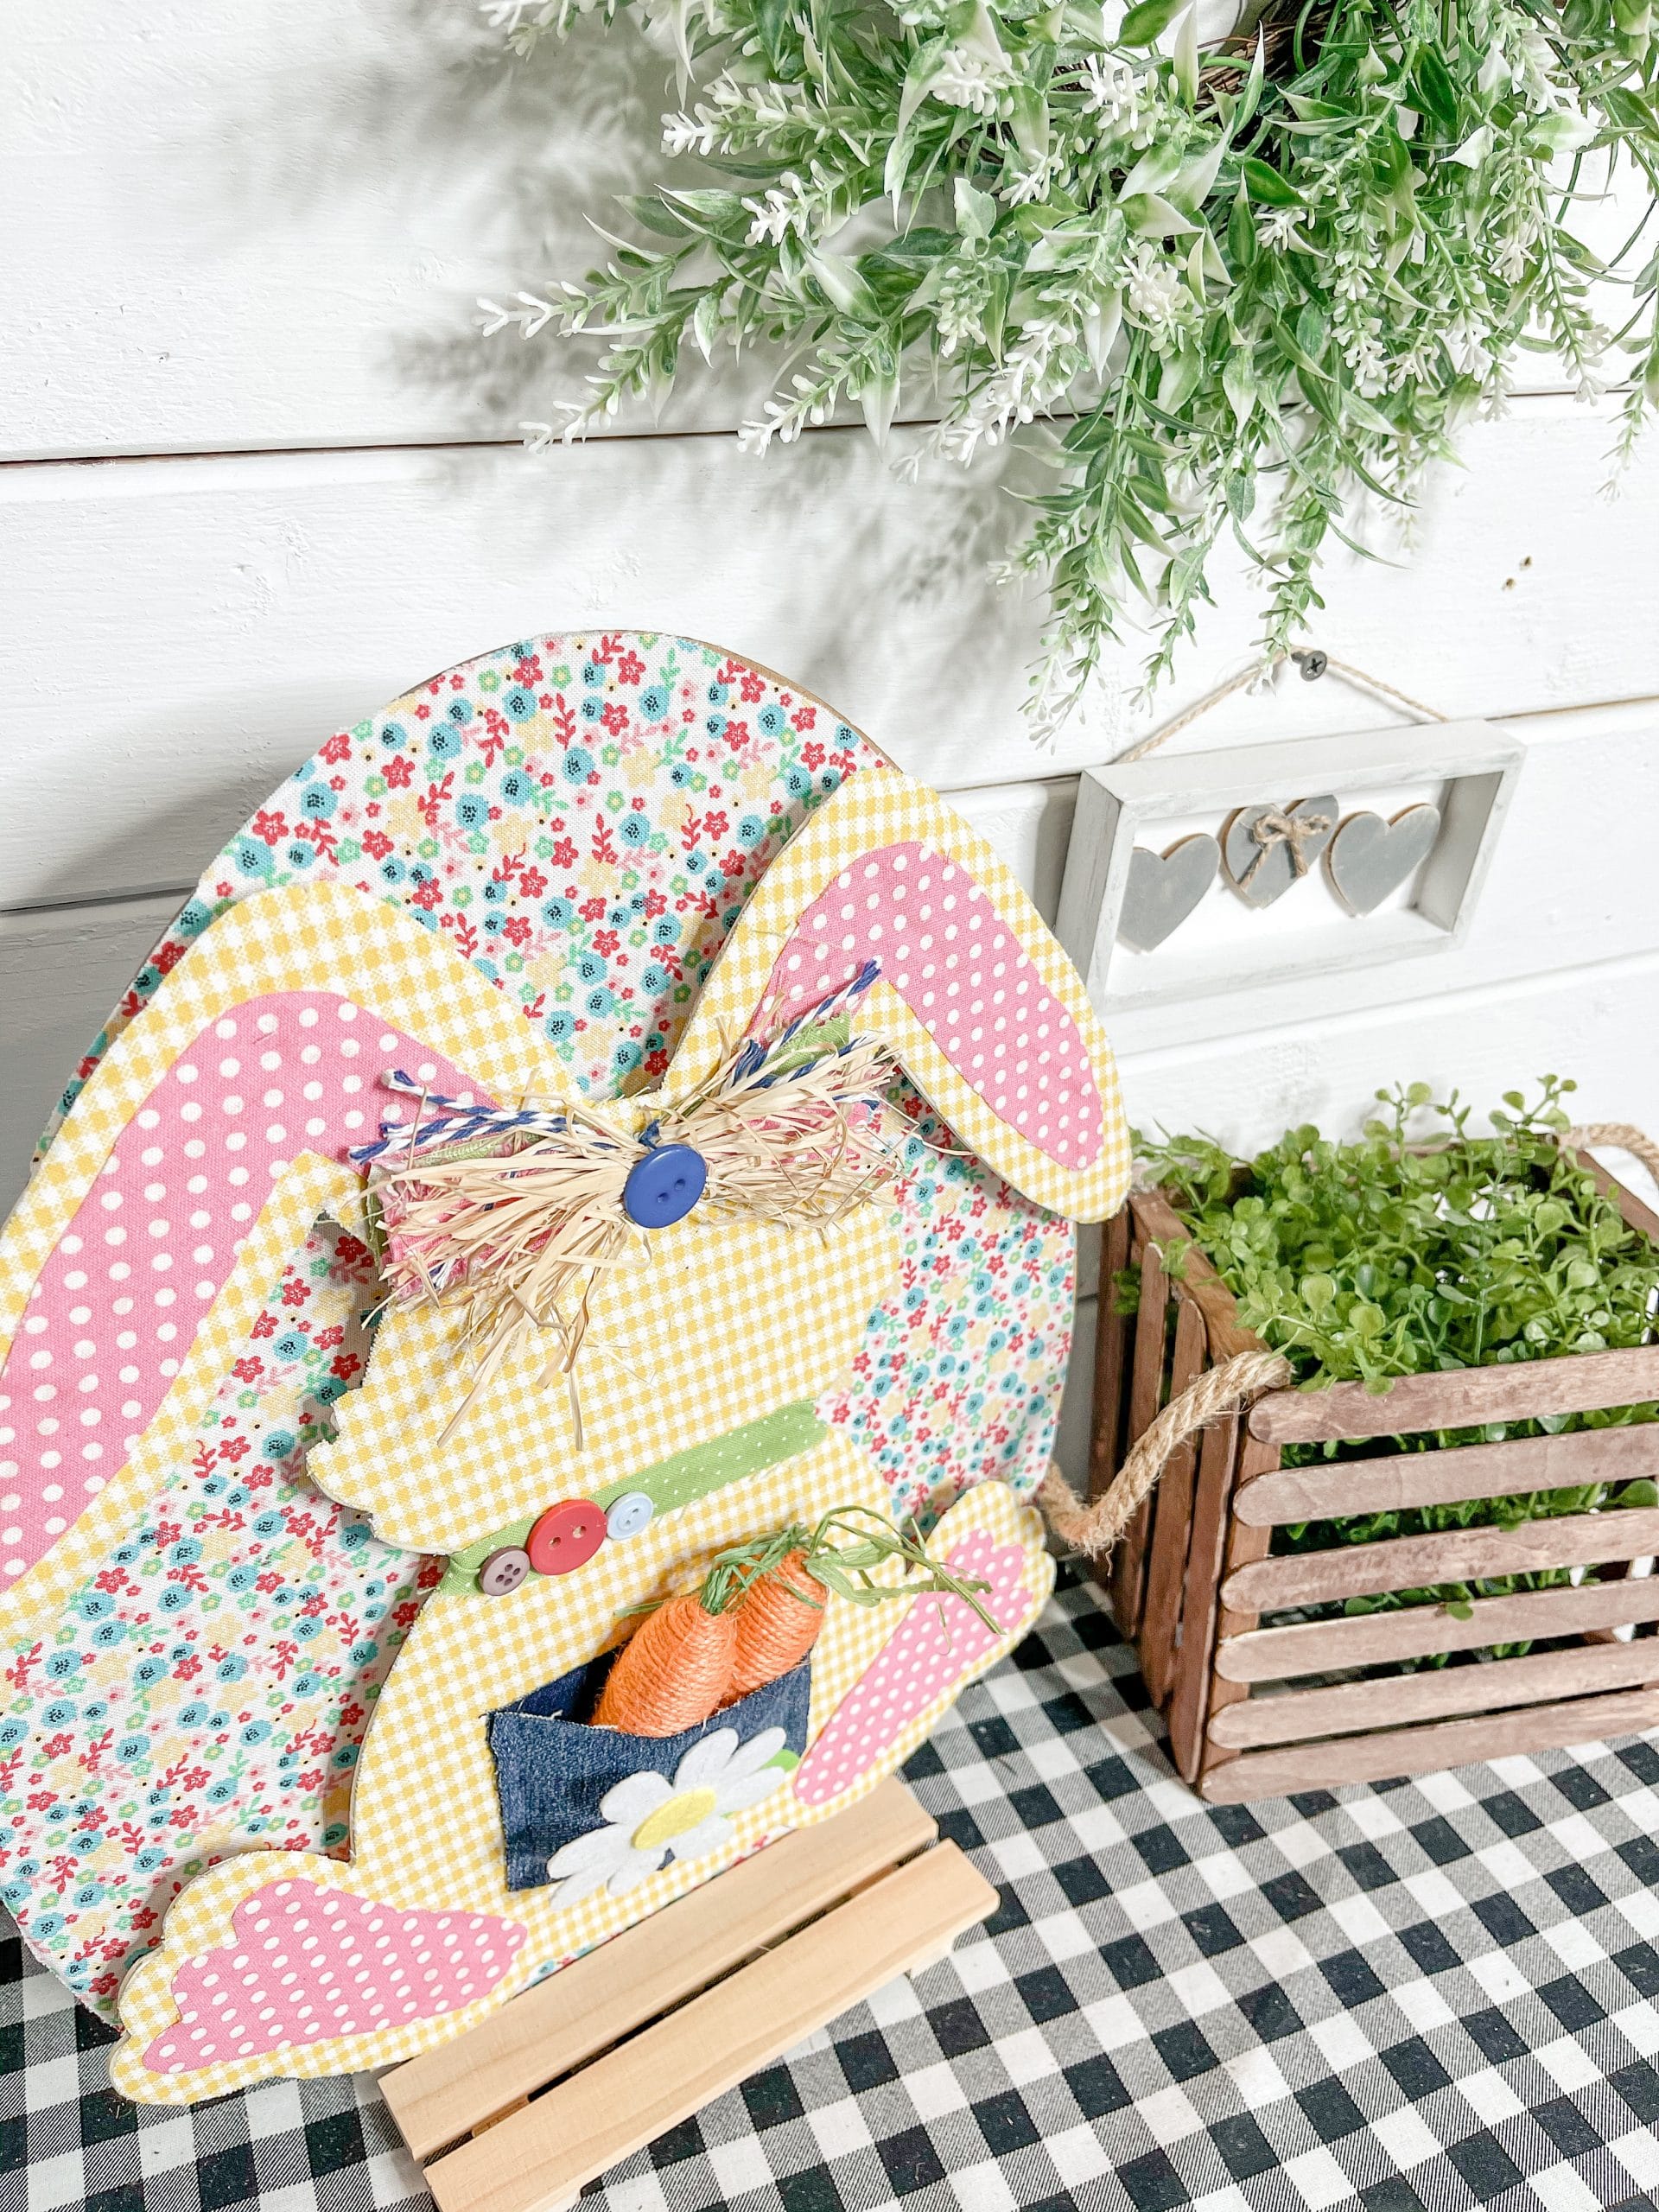
Once the blocks are secured to the bunny, hot glue them to the front of your decoupaged Dollar Tree egg sign. Hot glue three Tumbling Tower blocks onto the Dollar Tree mini pallet just behind the middle opening.
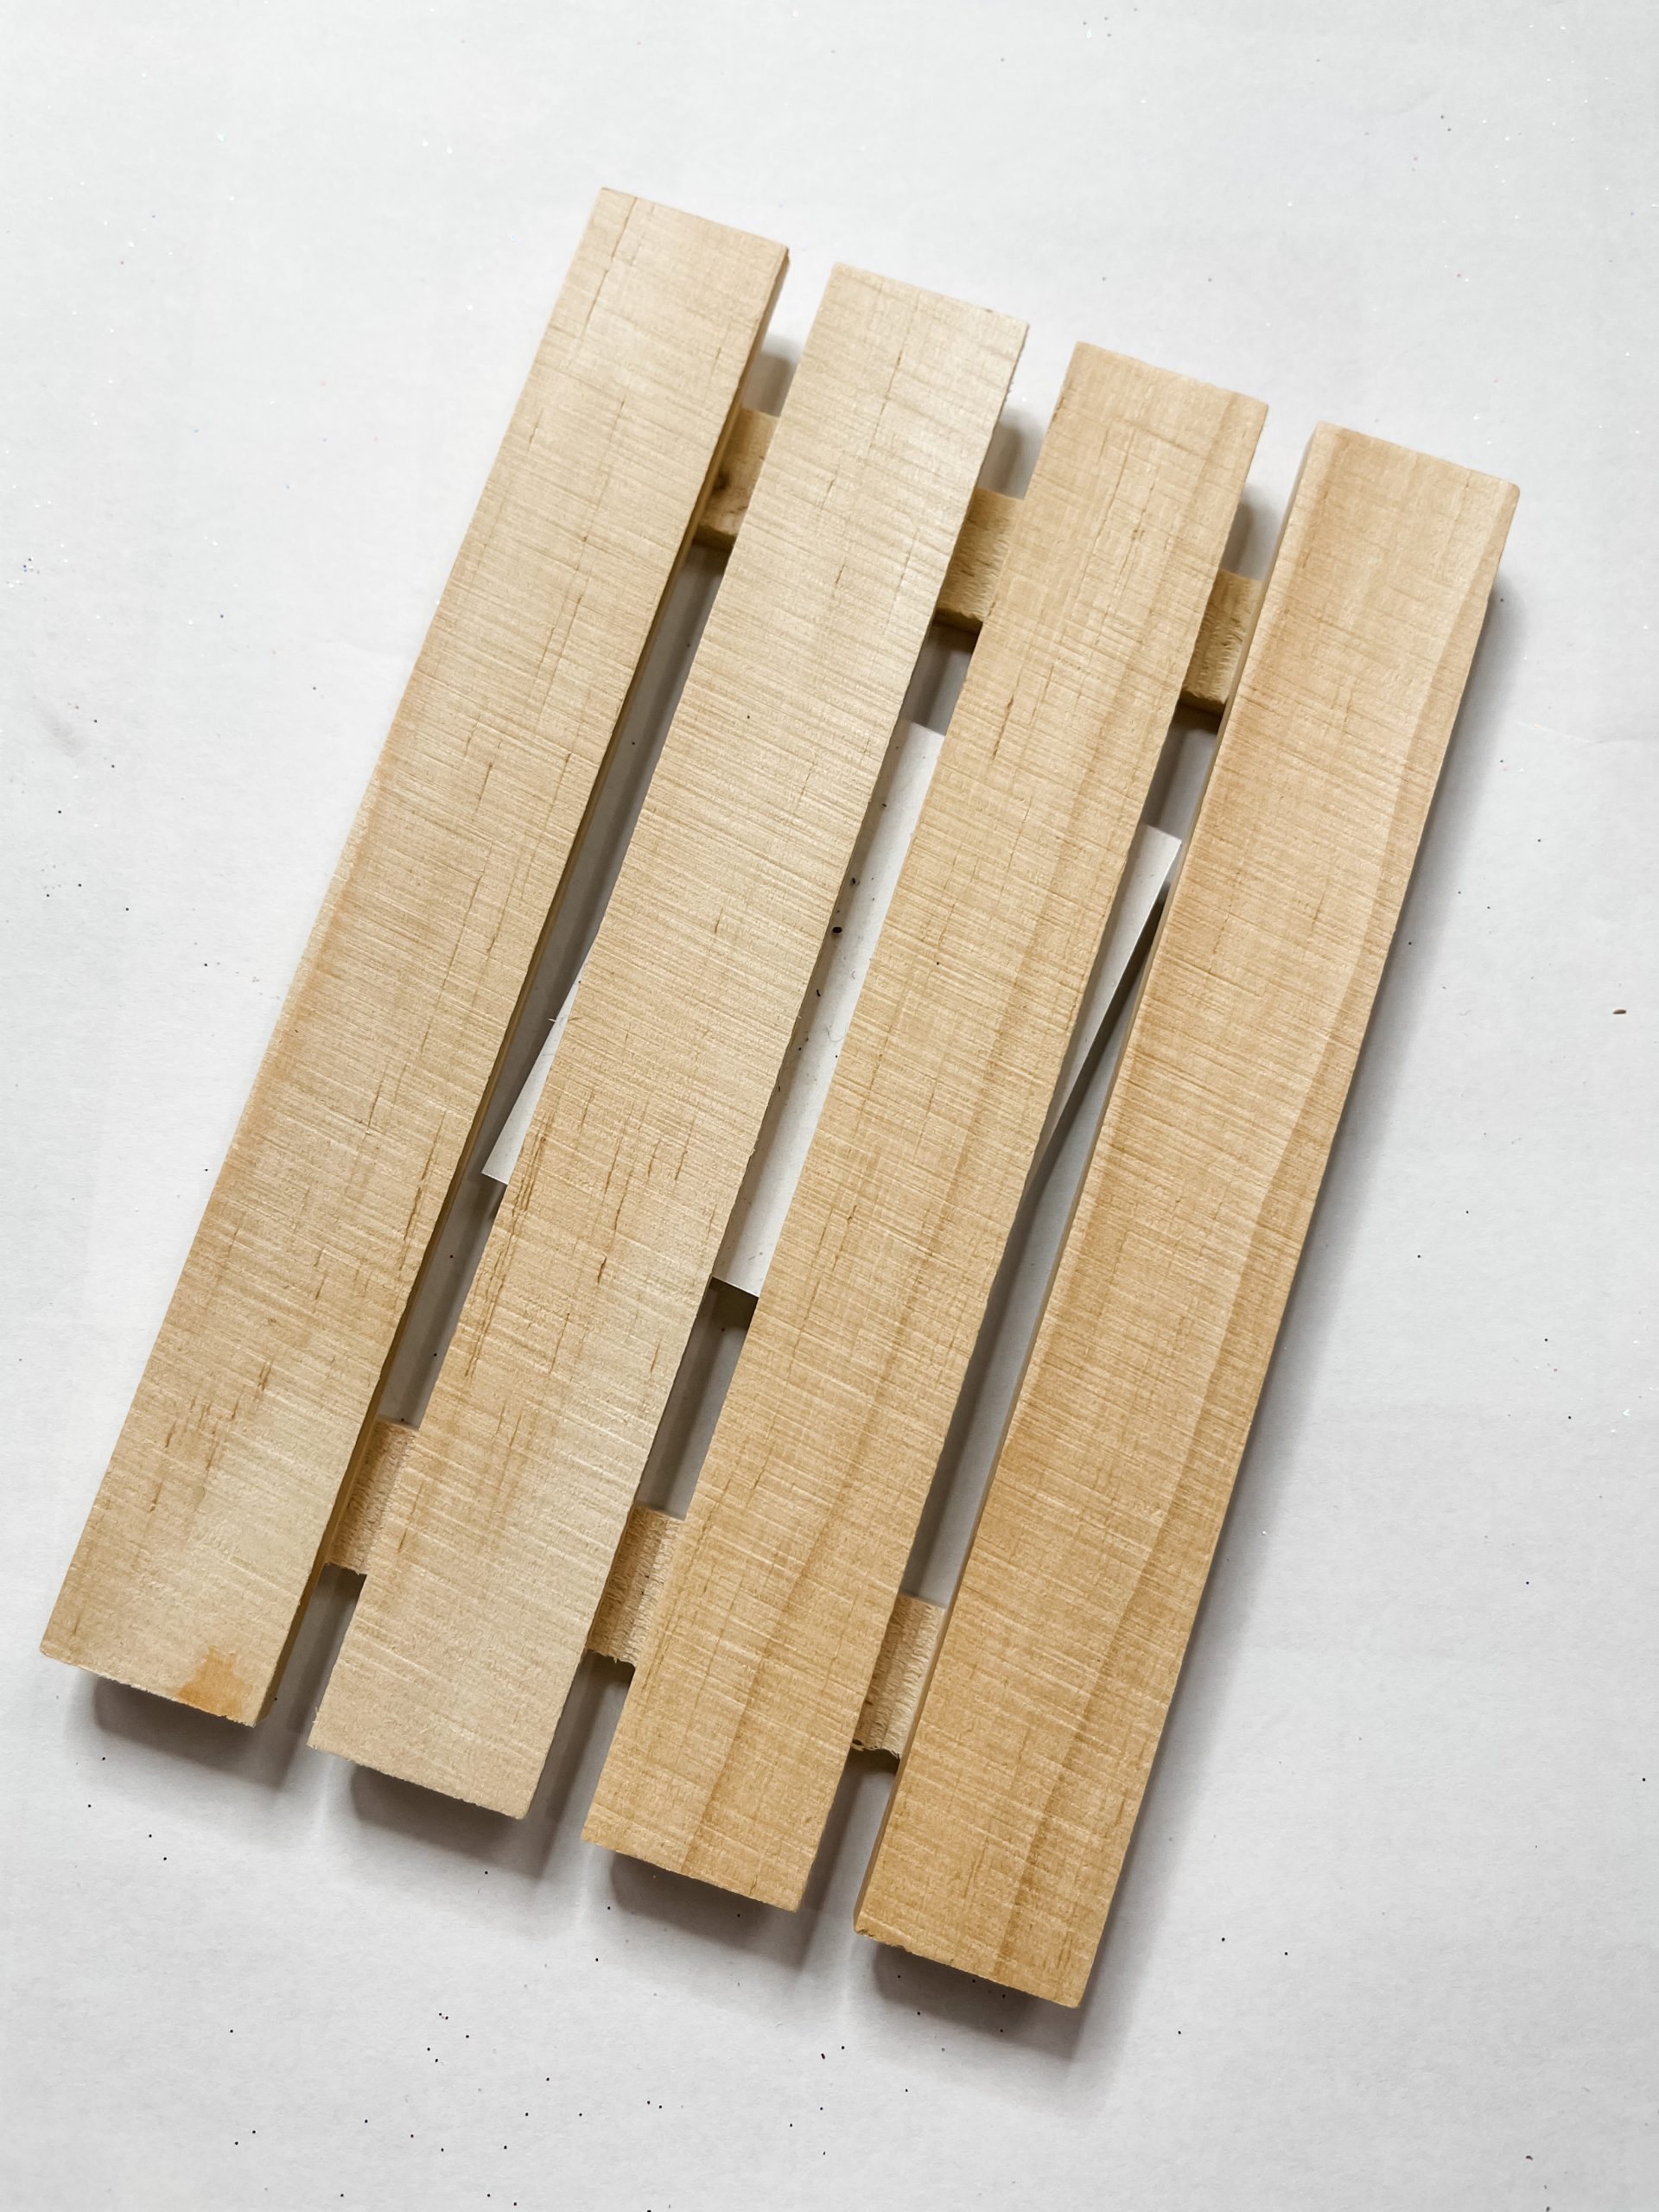
The blocks will help stabilize the wooden bunny and egg and keep them from falling down backward. Once the blocks are secured to the pallet, simply place your egg and bunny onto the mini pallet (it will sit right in the middle opening of the pallet so you’ll be able to remove it and switch it out)!
I hope you enjoyed this Easy DIY Dollar Tree Spring Bunny as much as I did and decide to make one for yourself! If you do, I would love to see how yours turns out!
You should totally join my FREE Facebook group called On A Budget Crafts! It is a judgment-free community for DIY crafters to show off their projects and ideas.
If you loved this DIY you might also like this one too!
Thanks for stopping by! XOXO Amber
You can also shop my ENTIRE AMAZON Favorites shop just click here! It’s packed full of all the things I use and love. Here is the supply list I highly recommend every creative have on hand!!
Would you also pin my blog for later and get on my newsletter alerts? I would love to have you join my #craftycrew.
Inspired? Leave me a comment below! I love hearing from my readers!

Join my free “ON A BUDGET CRAFTS” Facebook group!
This bunny is so adorable! ❤🐇
This bunny is the sweetest bunny I have ever seen! I watched you make it and it’s adorable!
So ADORABLE