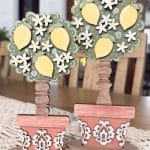
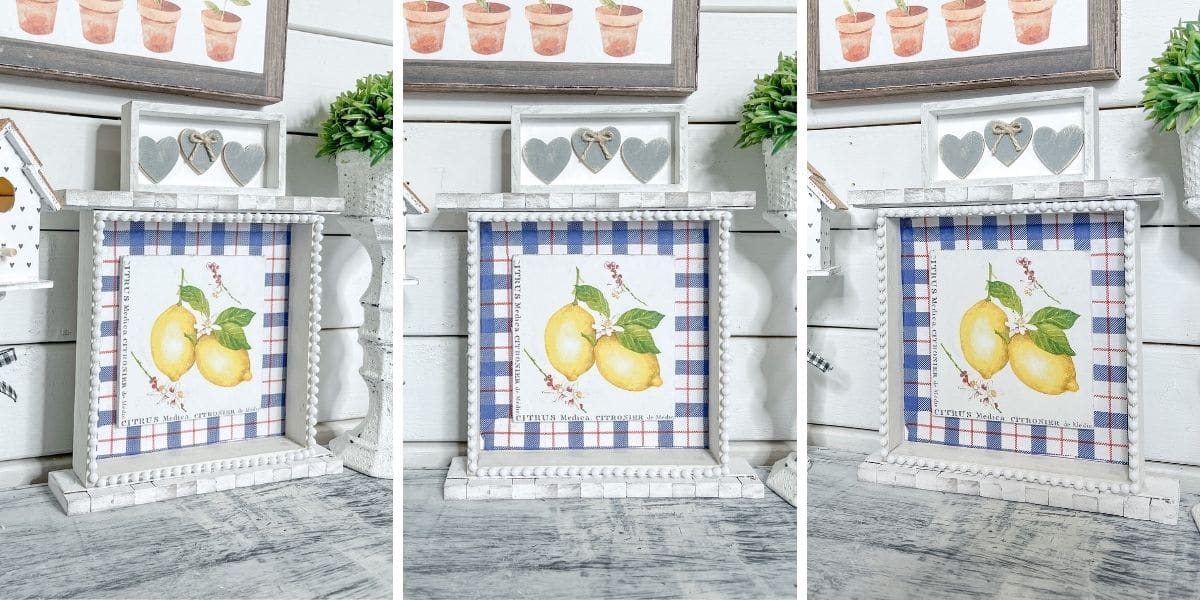
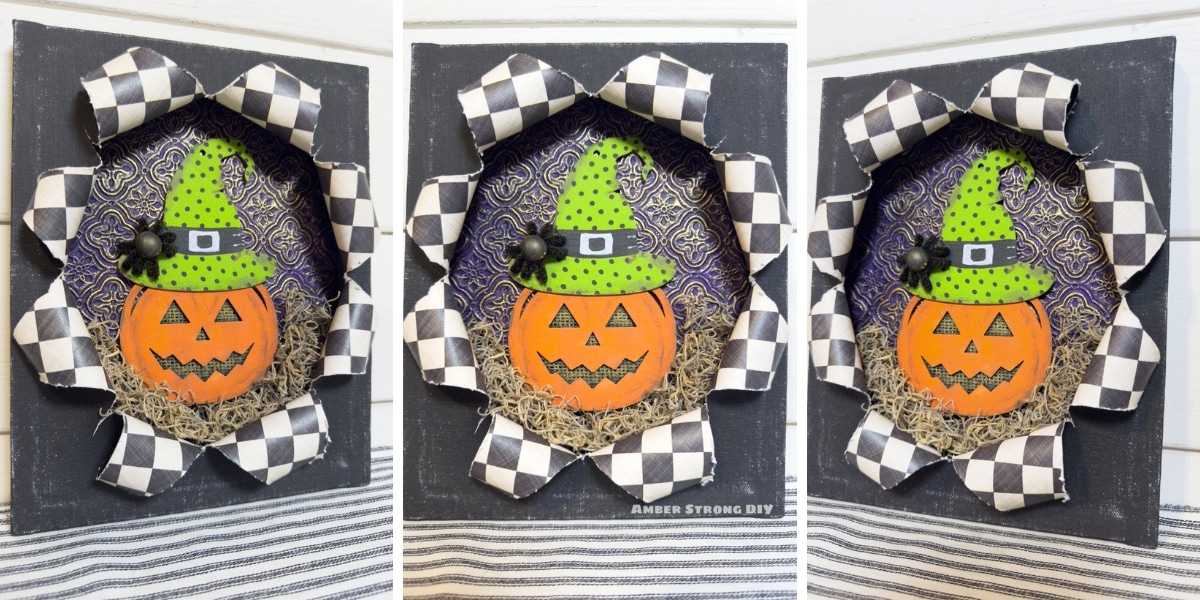
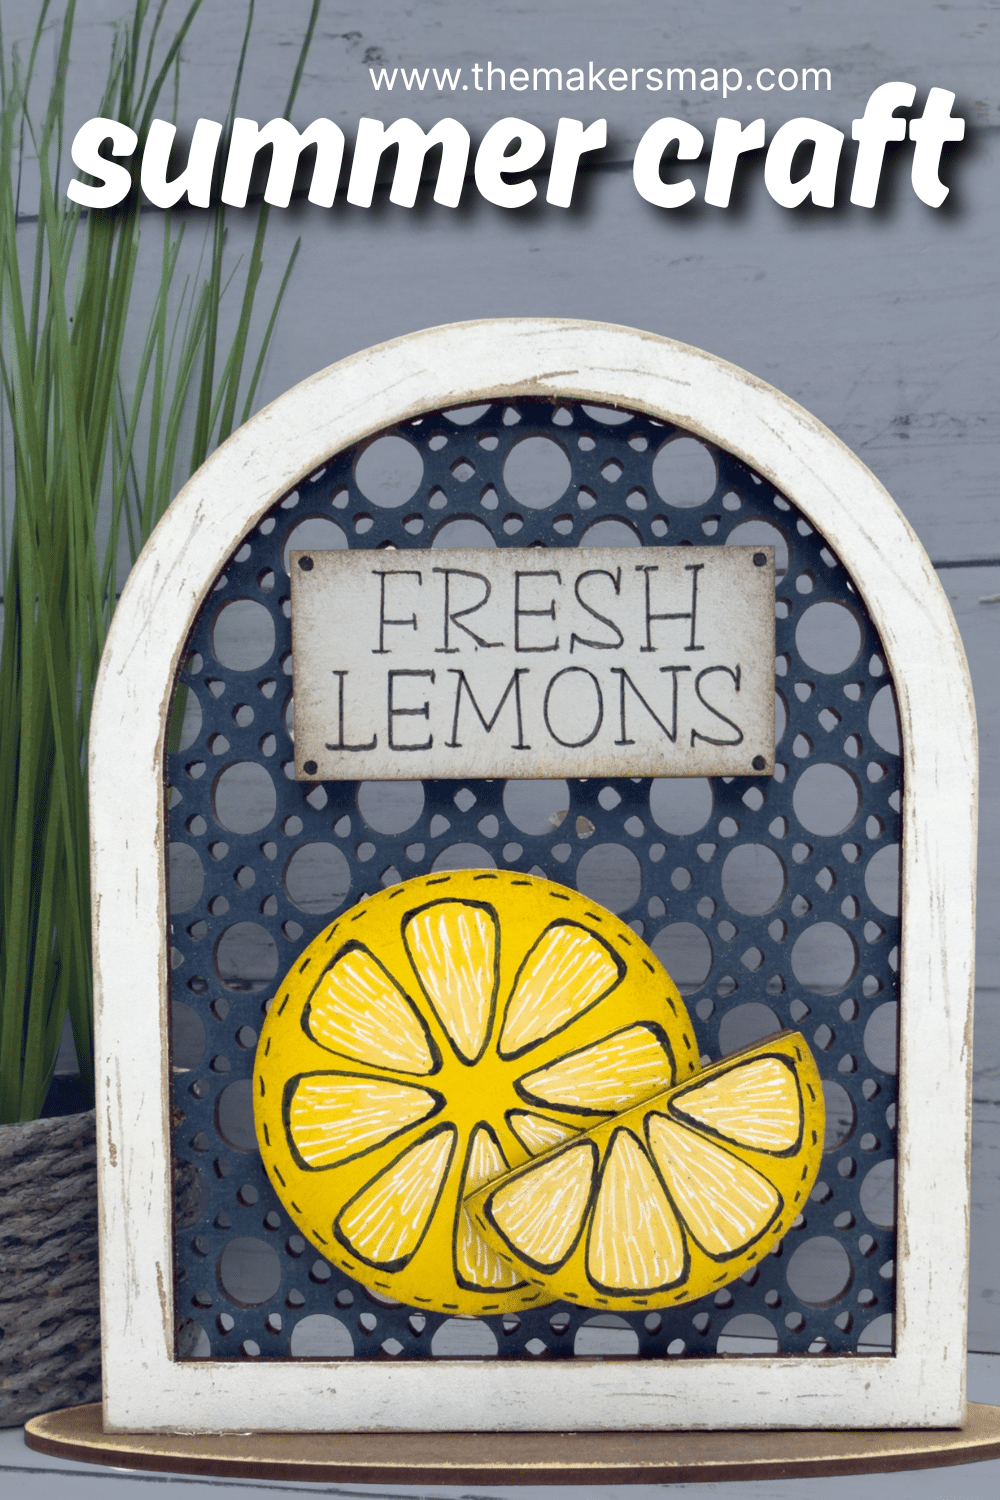
Fresh Lemon Lover Decor
There’s no need to spend days or weeks, even months, searching storeroom shelves for summer decor that matches your vision when you can create your own fresh lemon lover decor on a budget!
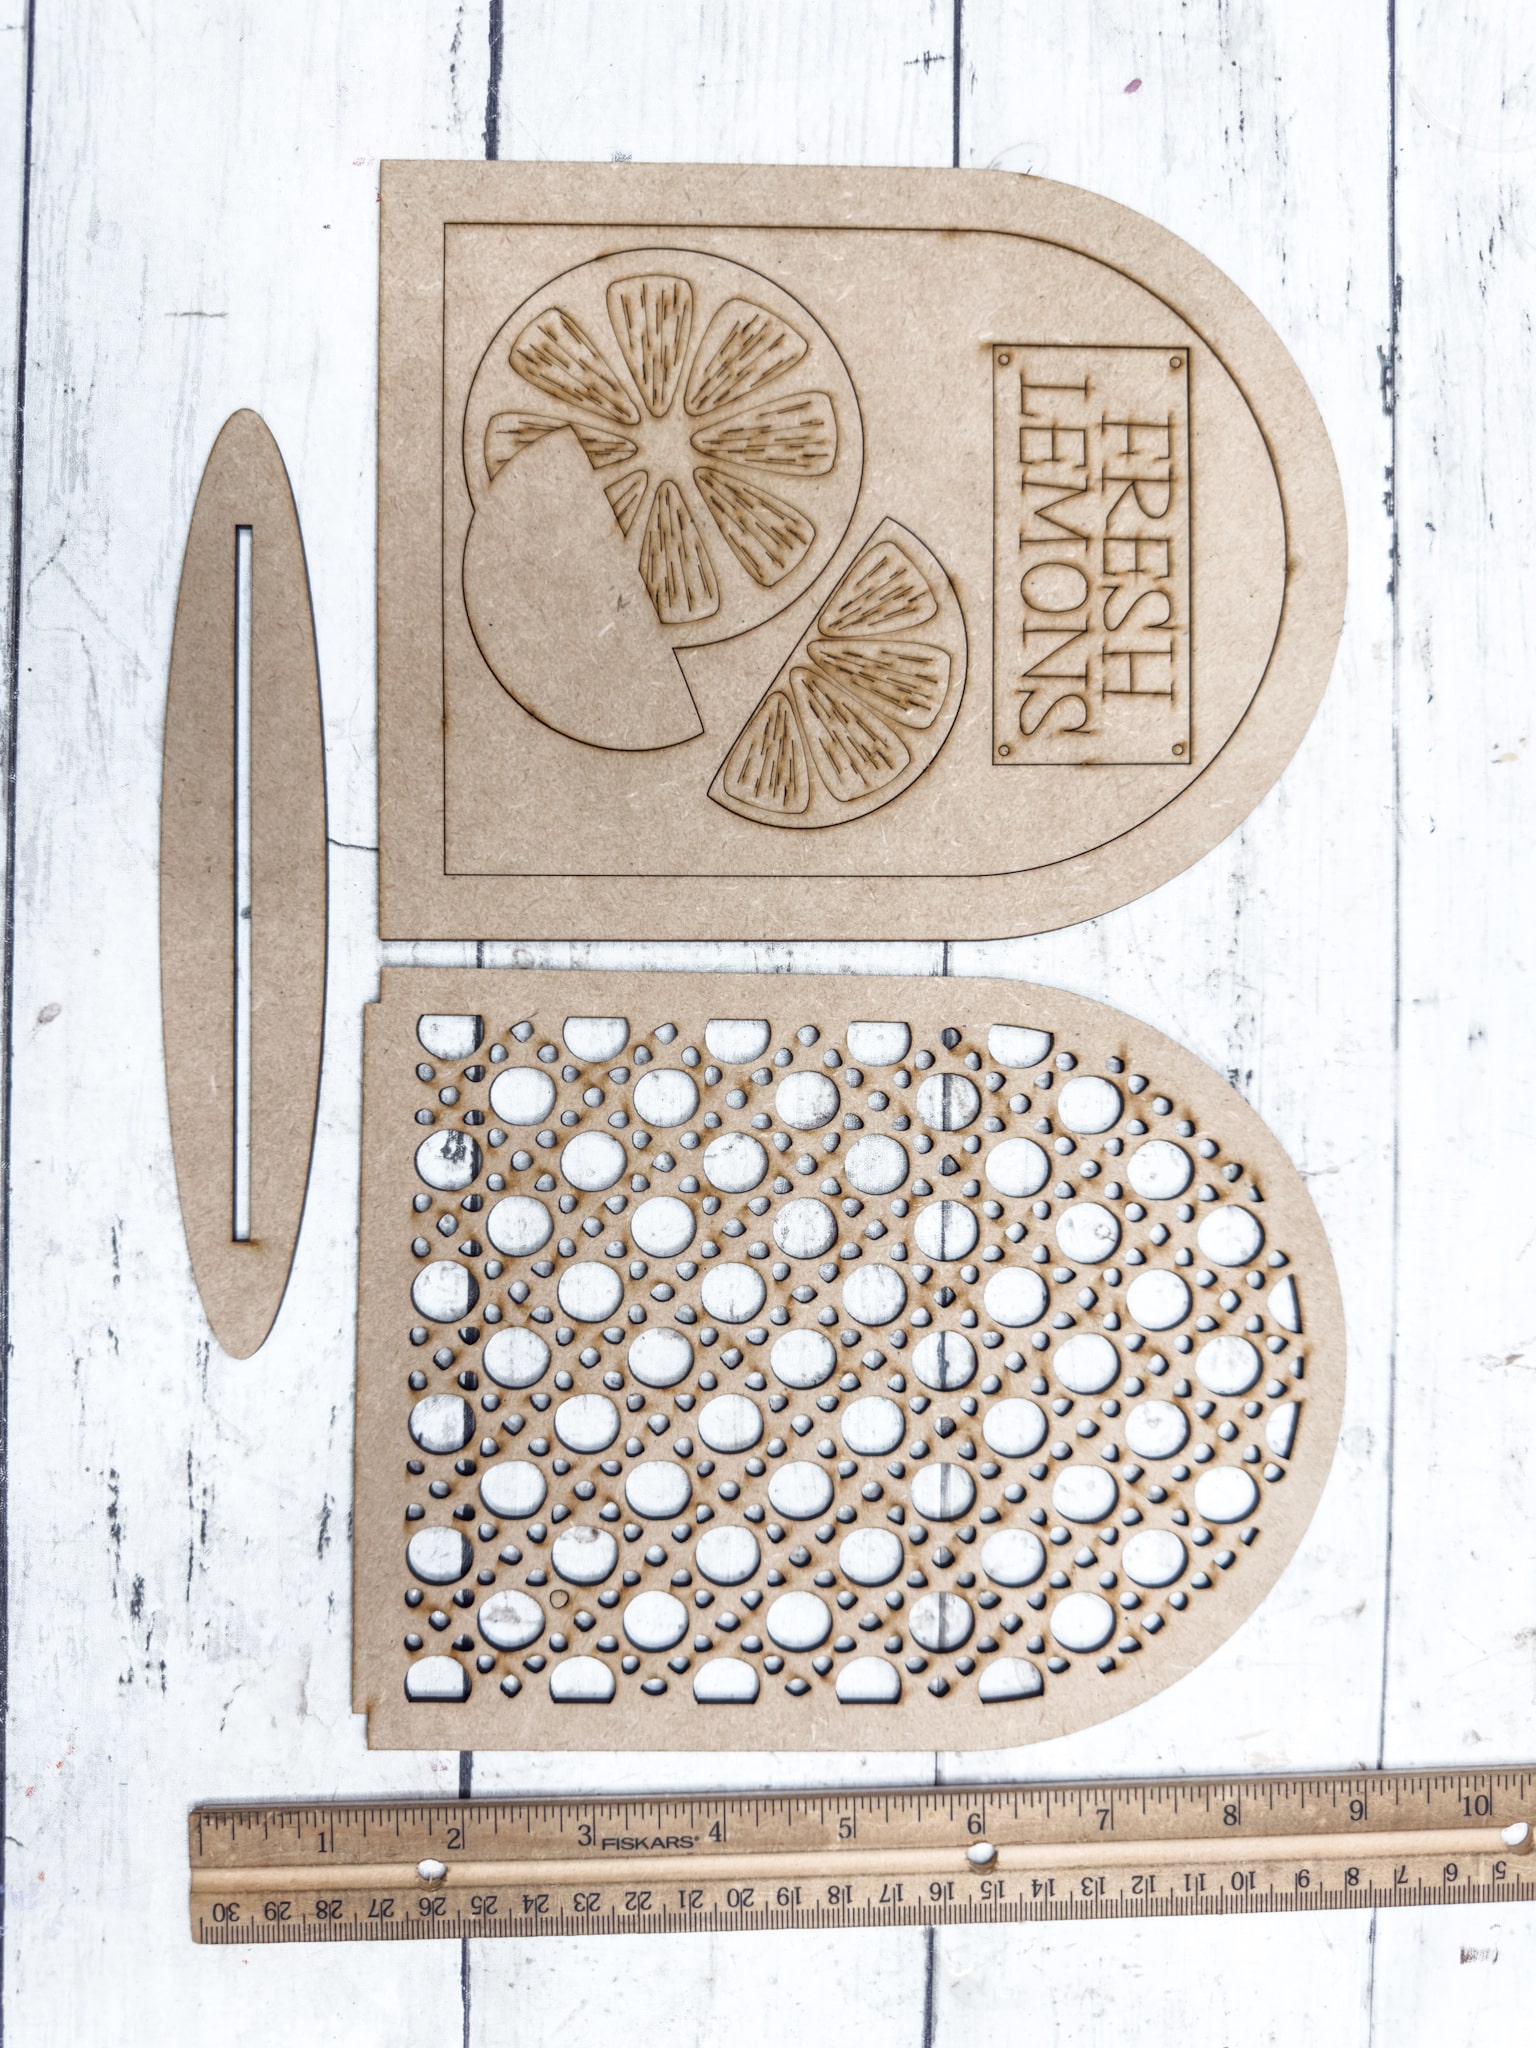
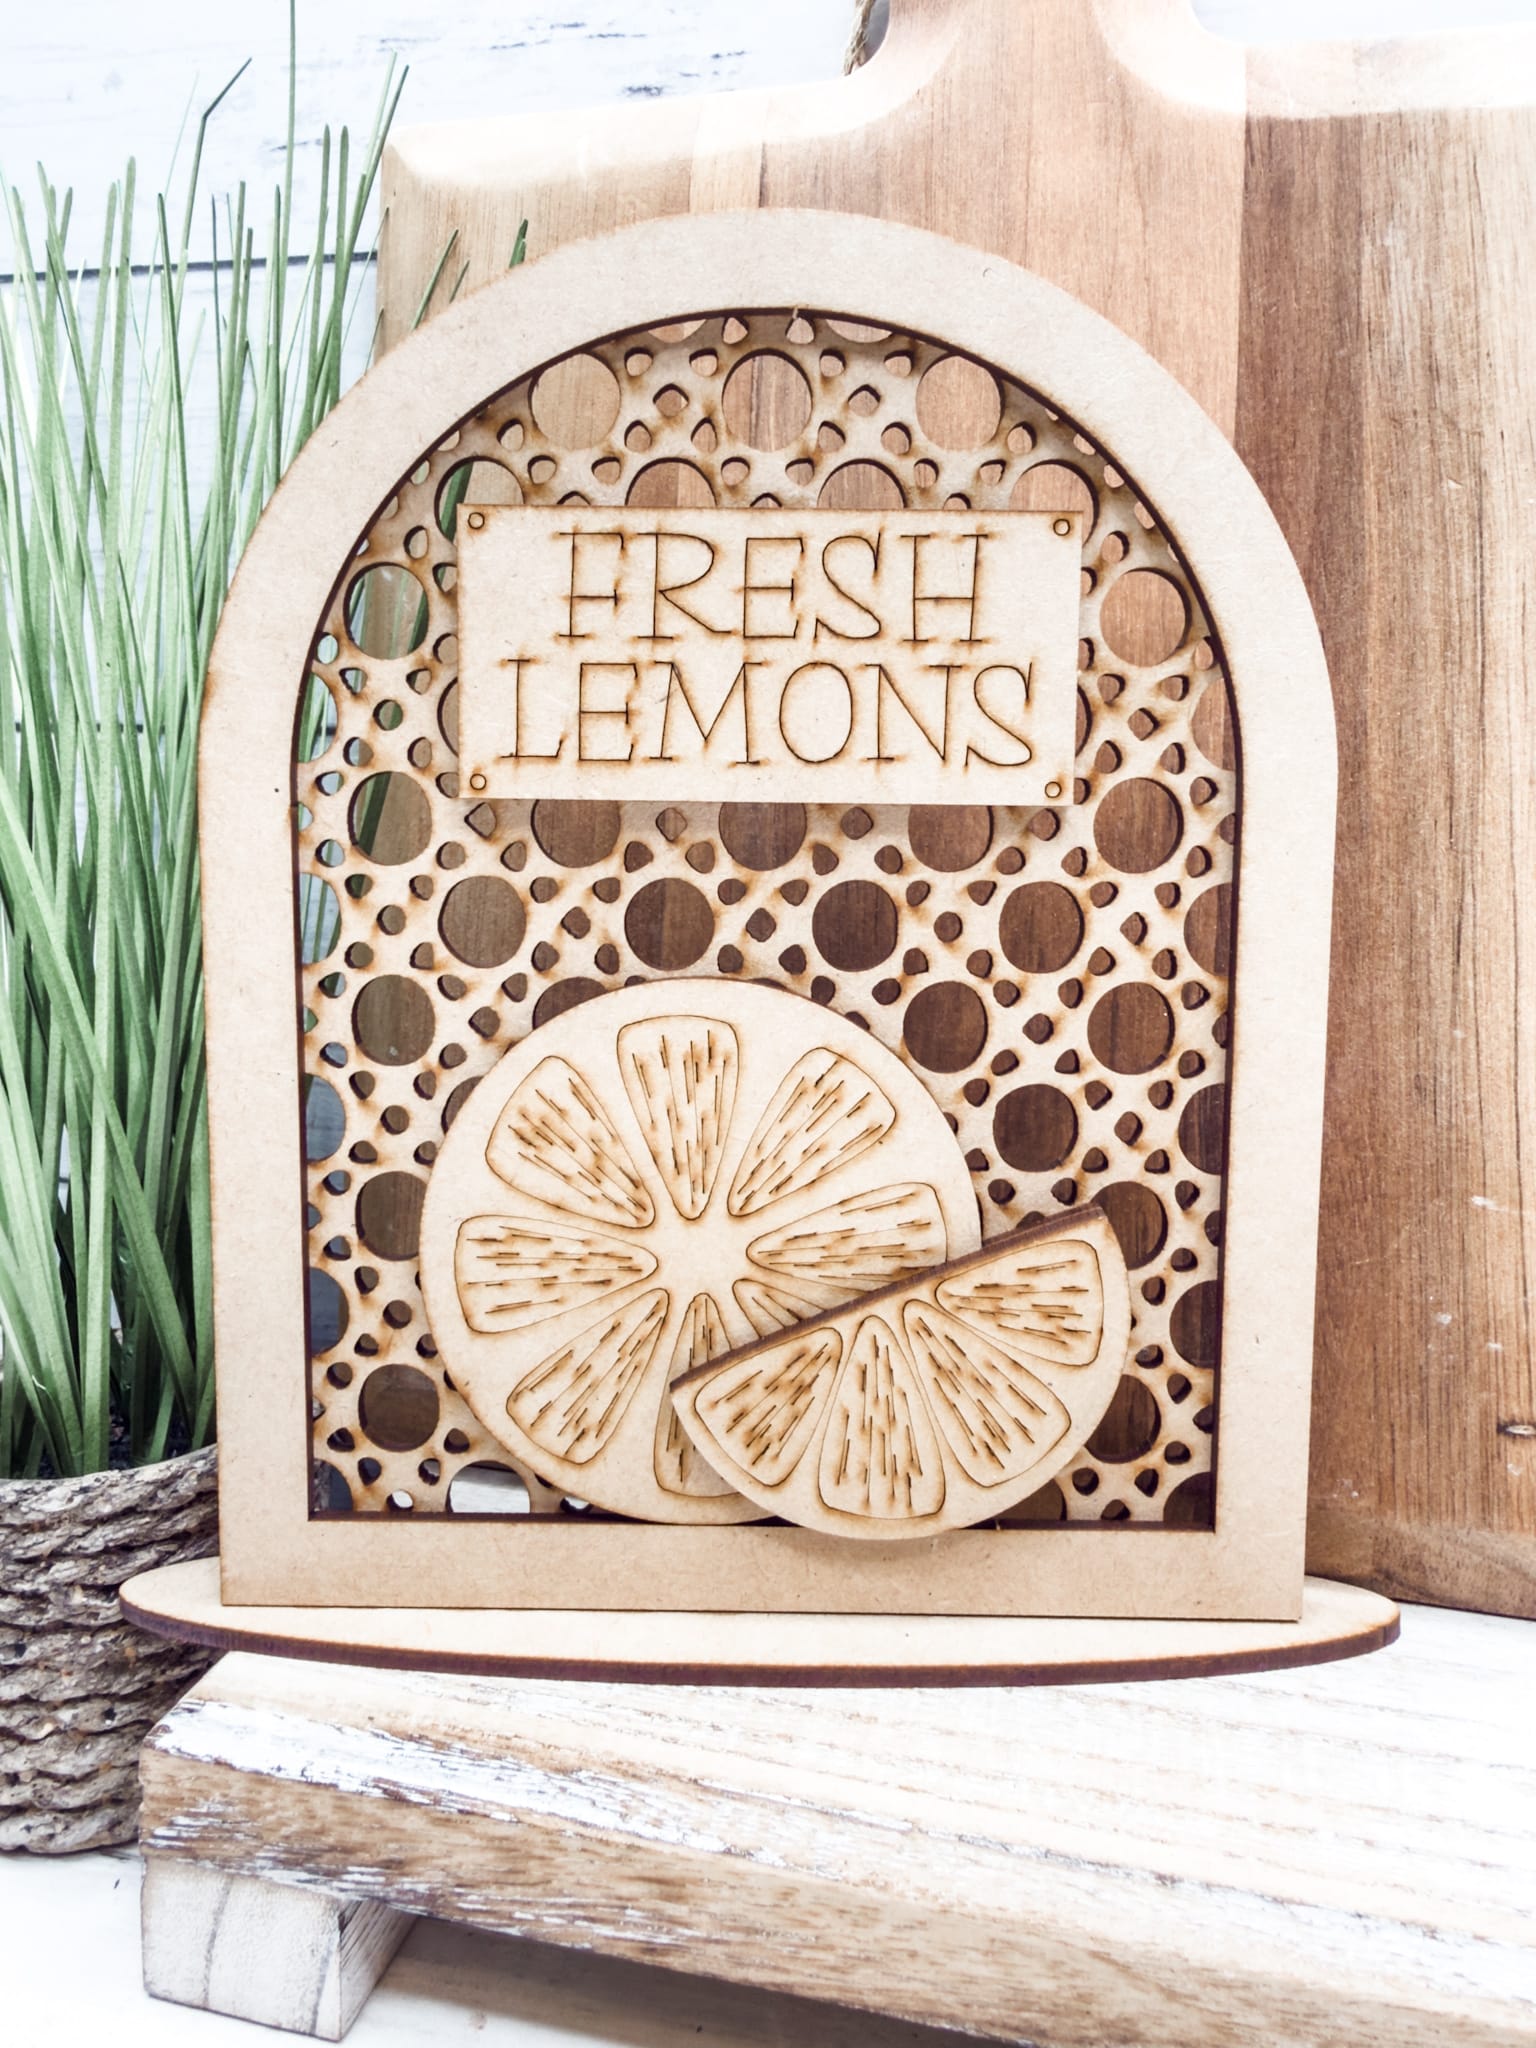
Created from laser cut wood blanks, you can transform this simple summer craft kit into a piece of stunning and unique home decor.
Watch the tutorial
Be inspired to upgrade your space in your own way by watching the example tutorial video on Youtube. Previously recorded live on Facebook, this tutorial replay is still a great resource for information and inspiration!

What you’ll need
- Fresh Lemons Craft Kit
- Paint
- Sanding Sponge
- Stickfast Super Glue
- Paint brushes/sponges
- Baby wipes/water
Get started crafting your fresh lemon lover decor
The first step of crafting any of our craft kits is to prep the surfaces. You can do this one of two ways. The first option is to lightly sand the front of each piece.
This removes the thin layer of laser residue (“splashback”) and ensures more even and clean coverage if you choose to paint, stain, decoupage, or adhere anything to the front of the craft kit.

Your other option is to use a baby wipe to clean the residue off. If you choose to do this method, please allow the front of the kit to dry before painting unless you’re wanting to achieve a stained look for the first layer of paint.
Staining the wood pieces
This step is optional, but I love to do it when I know I’m going for a distressed or rustic/farmhouse feel. Use a baby wipe to spread a bit of paint (I typically use brown, but you can use any color) across each piece.
Wipe the excess and allow the pieces to dry completely. Then, you can start painting!
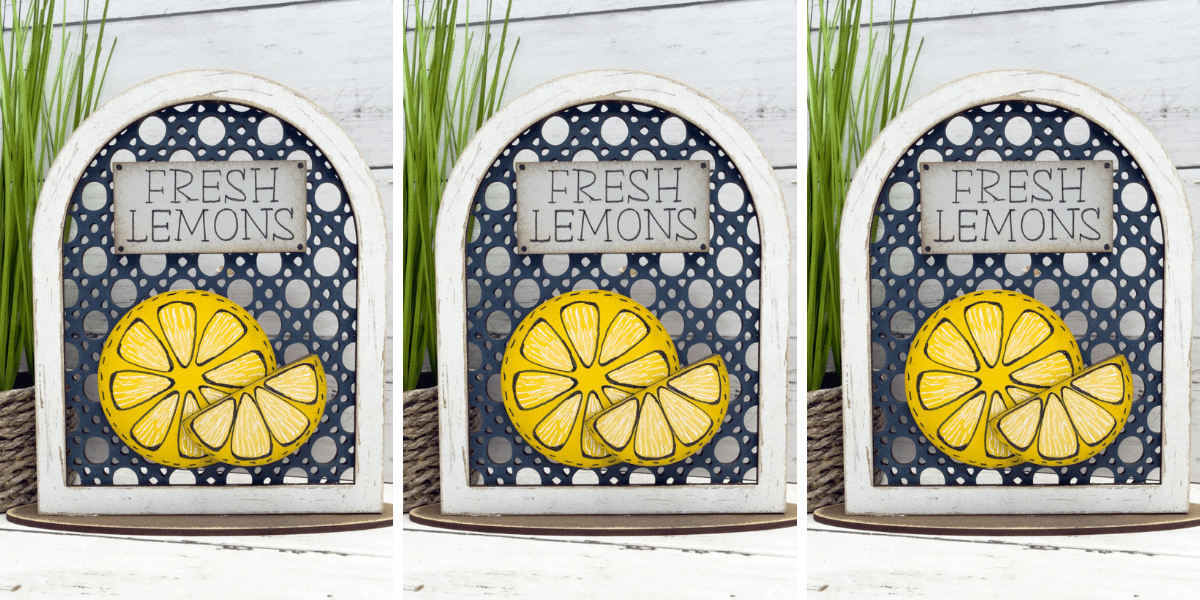
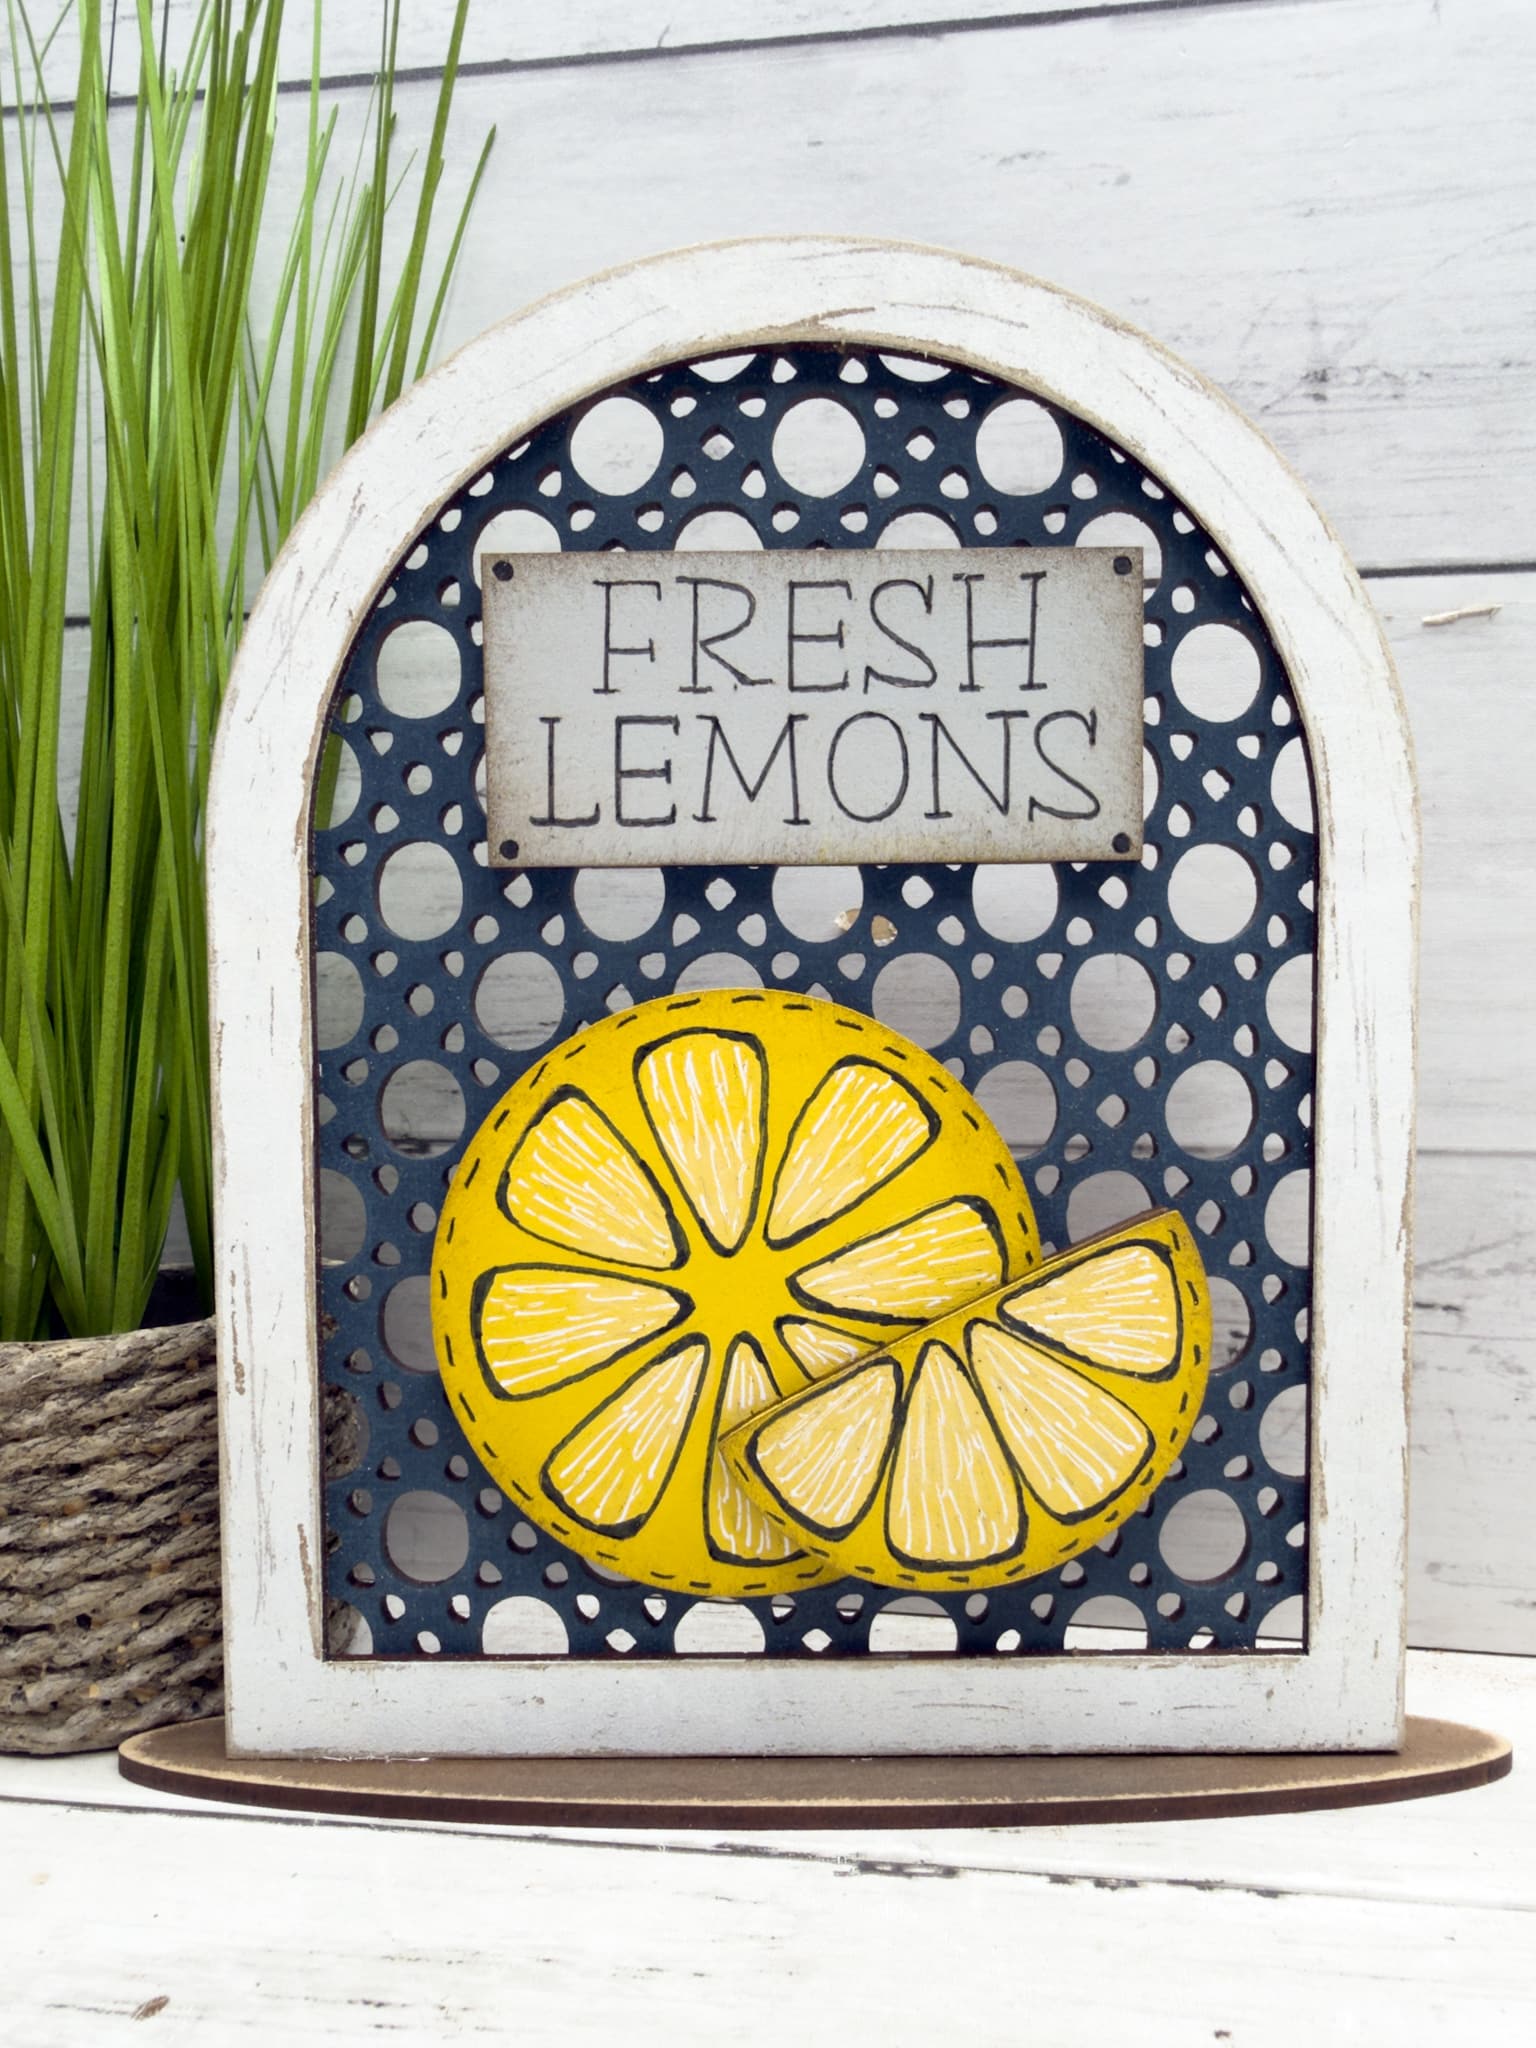
Pick your colors
This is where the fun really happens. You have to pick your paint colors. Obviously, you can see the colors I chose and I tell you each paint color specifically in the video, but you have full control over the style and aesthetic of your fresh lemons shelf sitter!
Once you choose your colors, apply them where you want and be sure to allow each layer to dry before adding the next layer.
Sanding technique
I like to use the Gator sanders to lightly distress each piece and bring out the darker brown stain underneath. This is the key to creating the distressed feature of a farmhouse or rustic finish.
Once you’re happy with each piece, you can start gluing them. I do recommend you watch the tutorial video if you have any confusion assembling your craft before you start gluing them together.
PLEASE email info@themakersmap.com if you have ANY questions about assembling your kit. We are so happy to help you figure it out so you will LOVE your finished craft!
Thanks for stopping by! XOXO Amber
You can also shop my ENTIRE AMAZON Favorites shop just click here! It’s packed full of all the things I use and love. Here is the supply list I highly recommend every creative have on hand!!
Would you also pin my blog for later and get on my newsletter alerts? I would love to have you join my #craftycrew.
Inspired? Leave me a comment below! I love hearing from my readers!

Join my free “Crafting and Sharing” Facebook group!